This is part two of an ongoing series of building a makeup vanity that later got changed to a dartboard cabinet. Be sure to check out part one for an explanation as to why the project got changed as well as to see the full grain selection and lumber milling process.
At this point in the build we have all of the legs and rail and stile pieces milled one time. It’s best to break up the milling process over a few days if possible to allow the lumber the opportunity to move after the first milling. Then you can use the remaining extra thickness to mill out any cup bow or twist that might have been introduced to the lumber as you get down to the final thickness. This process generally results in more stable lumber to work with.
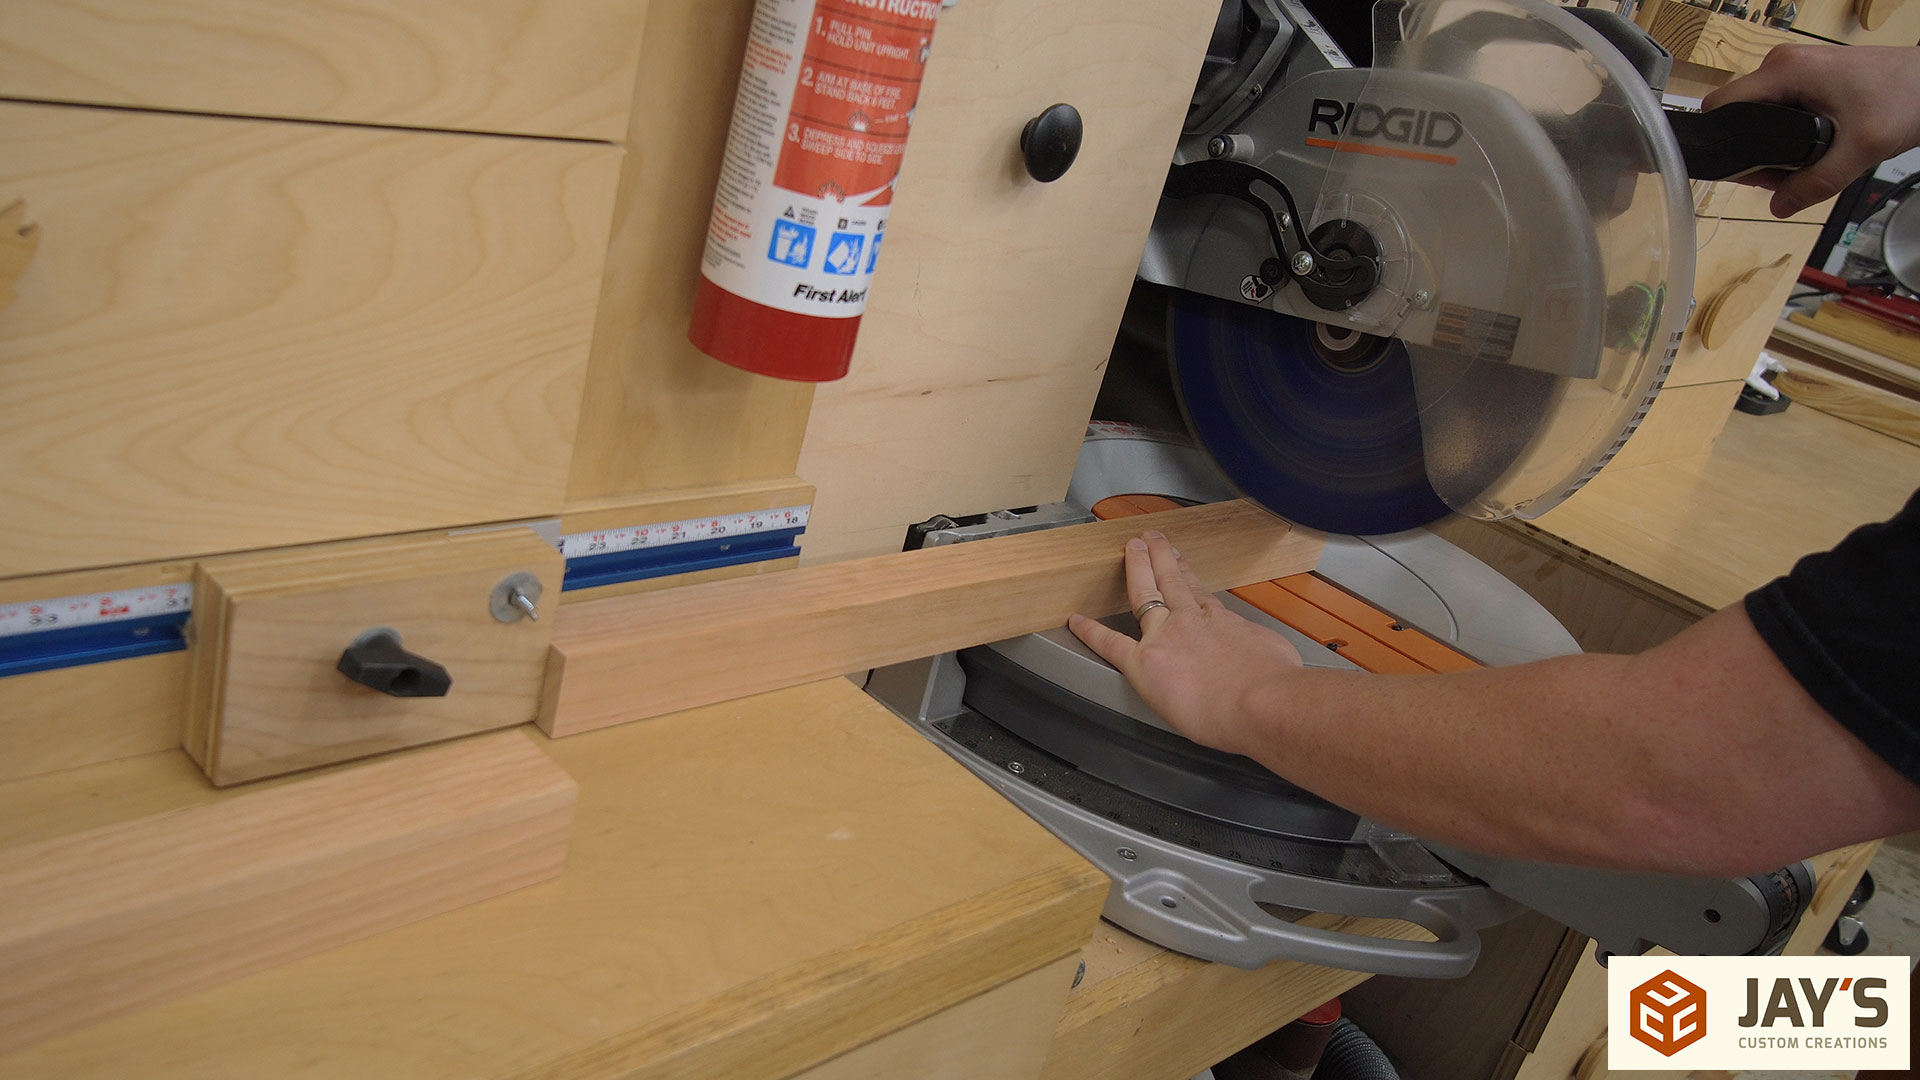
We picked up the build by completing the final milling of the legs and cutting them to their final length at my miter saw station.
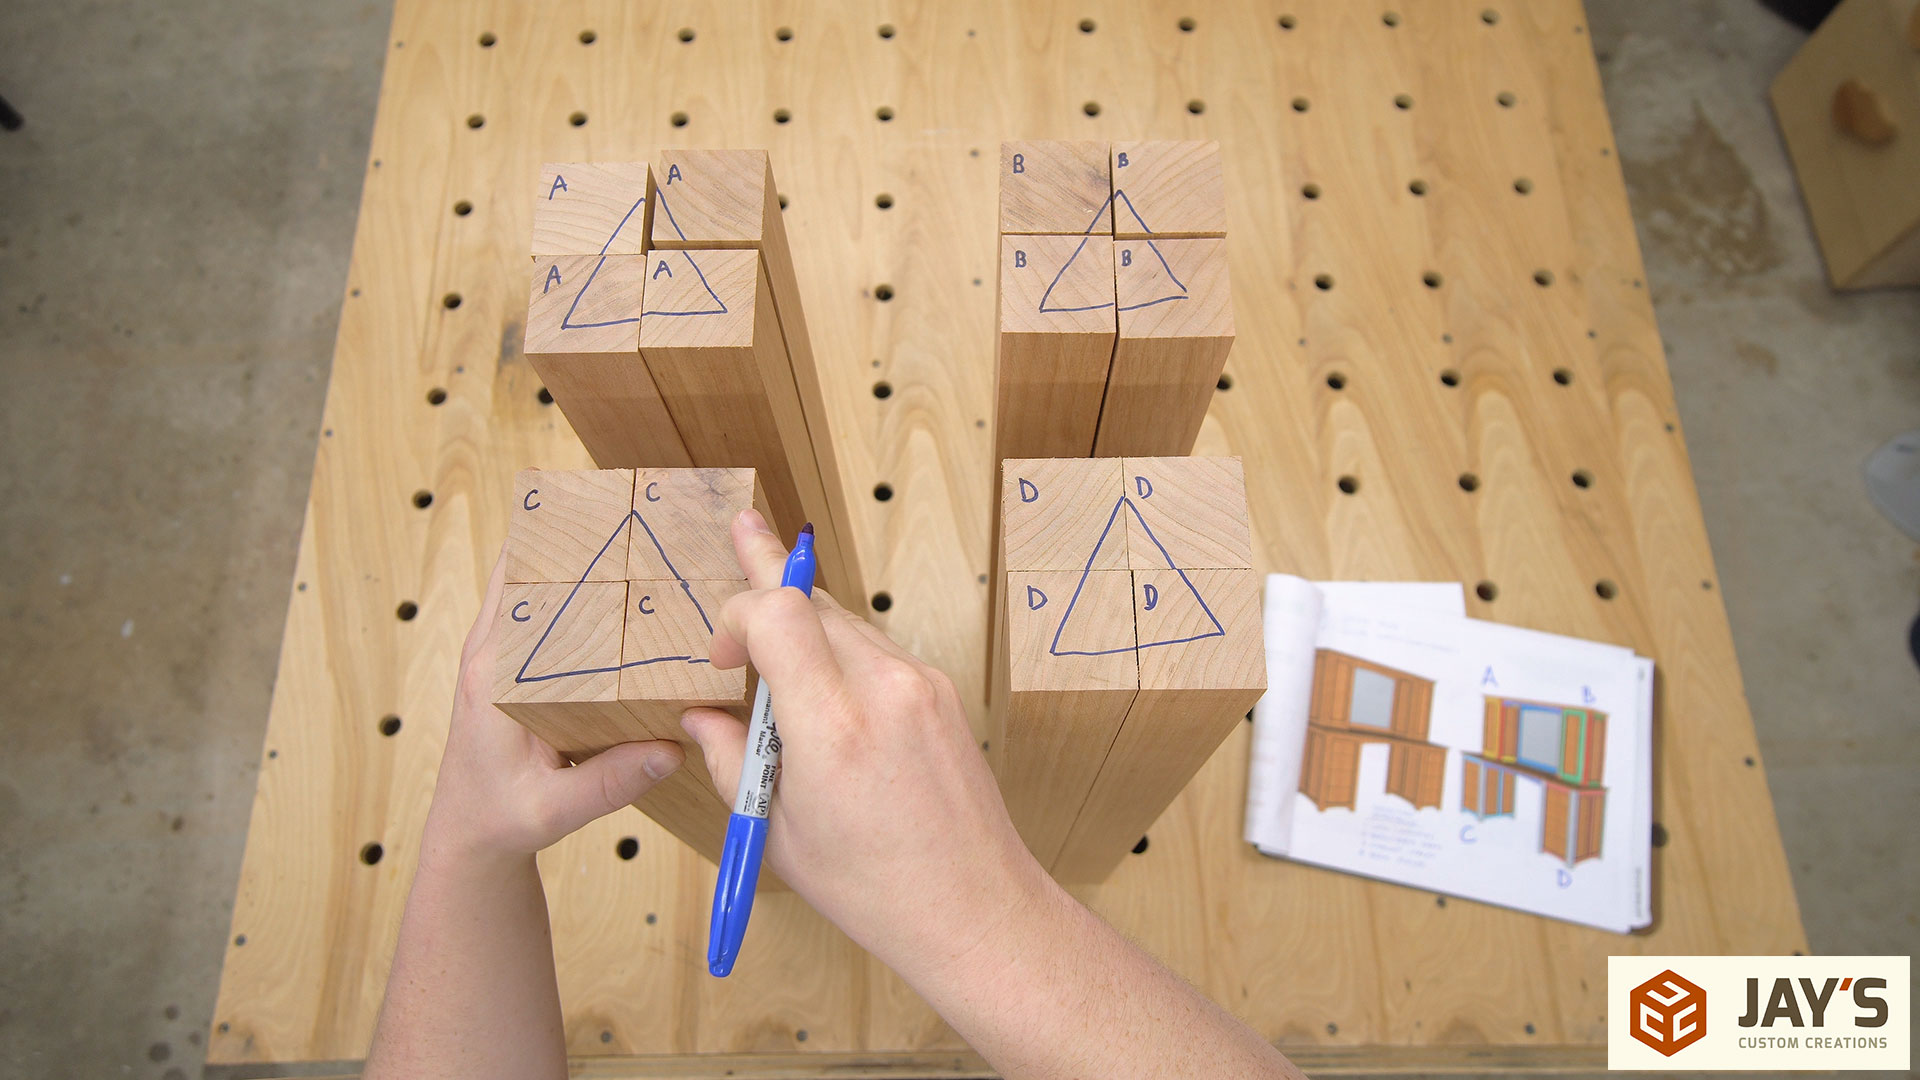
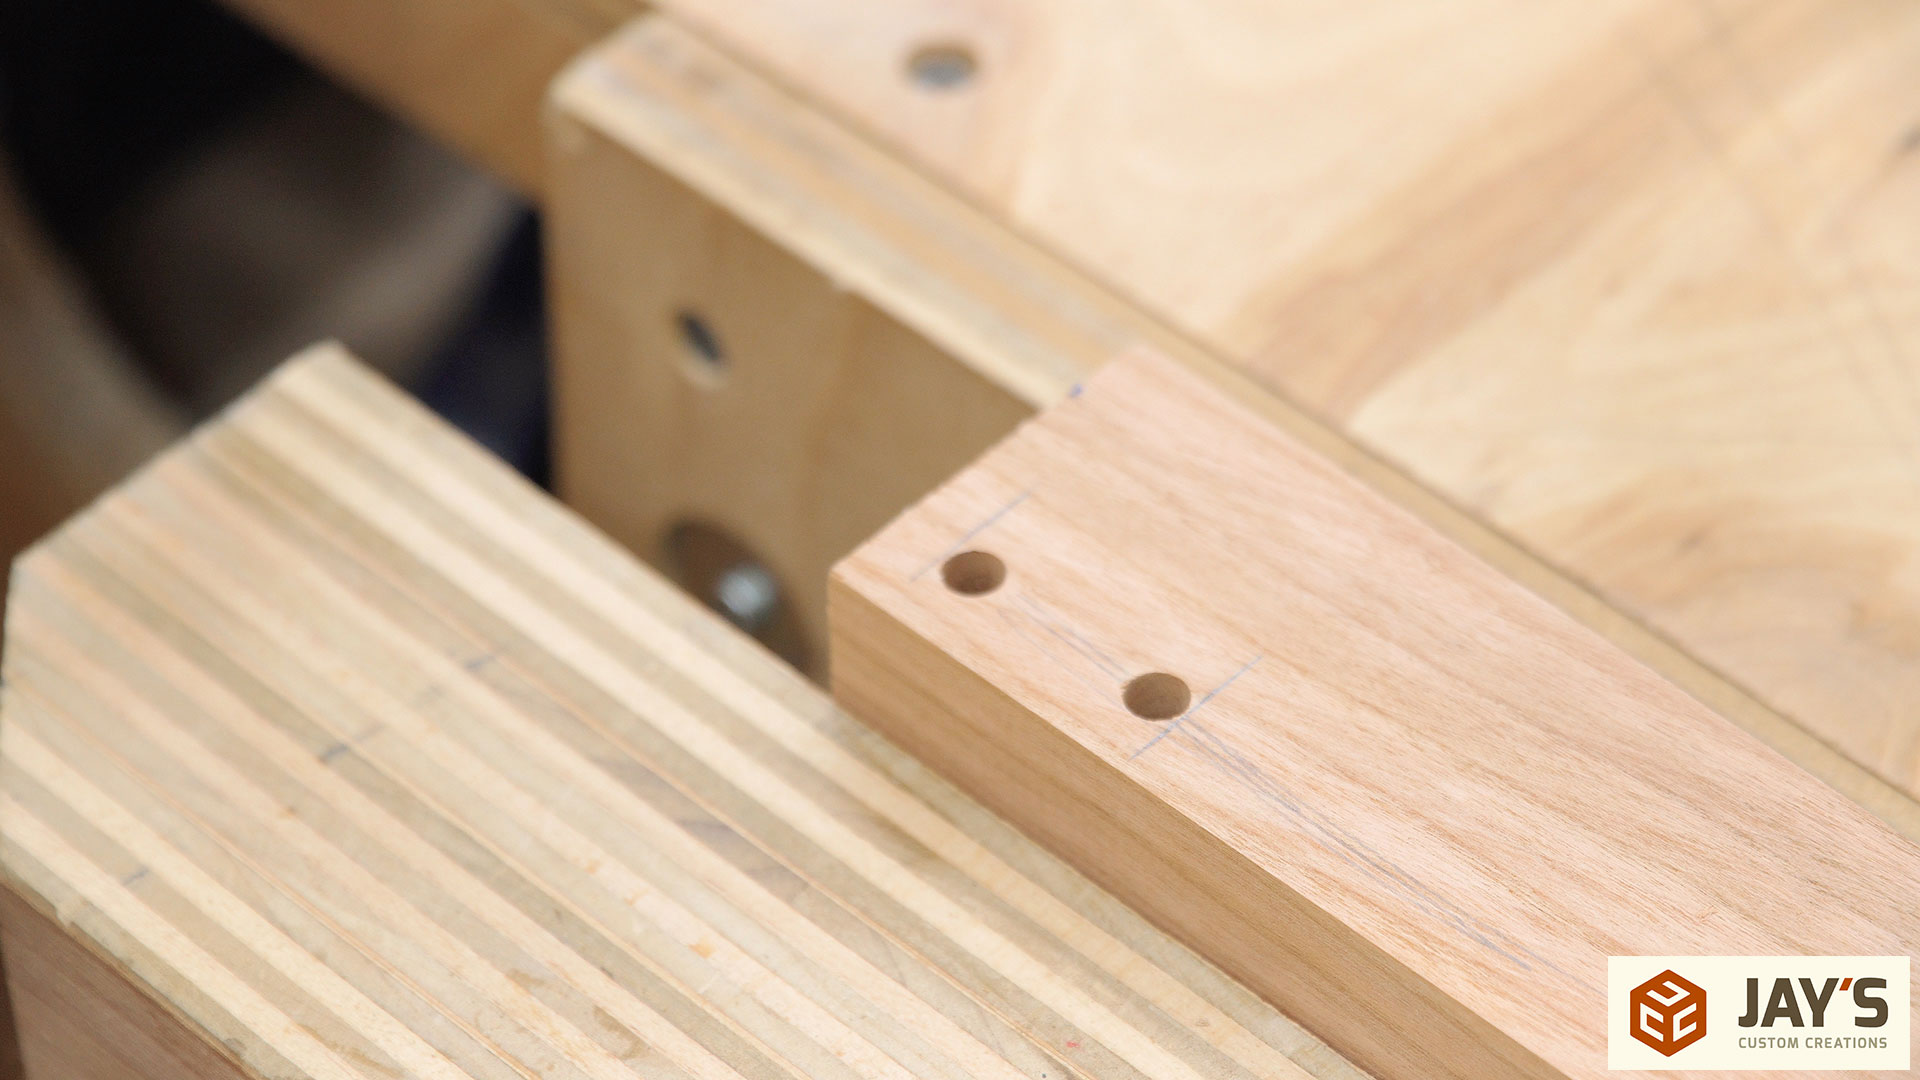
The final show faces can now be determined. Take a minute to think about what faces will be shown on what locations in the build and orient all of the legs as they will be going forward. It’s easy to get them mixed up if you don’t label them in some way. The easiest thing for me to do is to label each cabinet with a letter and draw something on the tops of the legs to identify the orientation. In this case a regular triangle will do the job quite well. Going forward we can glance at the end of the board that was marked and instantly identify what cabinet it belongs to and where on the cabinet it goes based upon the part of the triangle that is shown.
Once the piece location was determined I made a crude reference line in the approximate location of where each mortise would be. Then the mortise start and stop locations were marked on every board. The start and stop locations are all that is necessary because the width and distance from the front face will be locked into the router setup. Having two combination squares is handy here because there are so many mortises to mark.

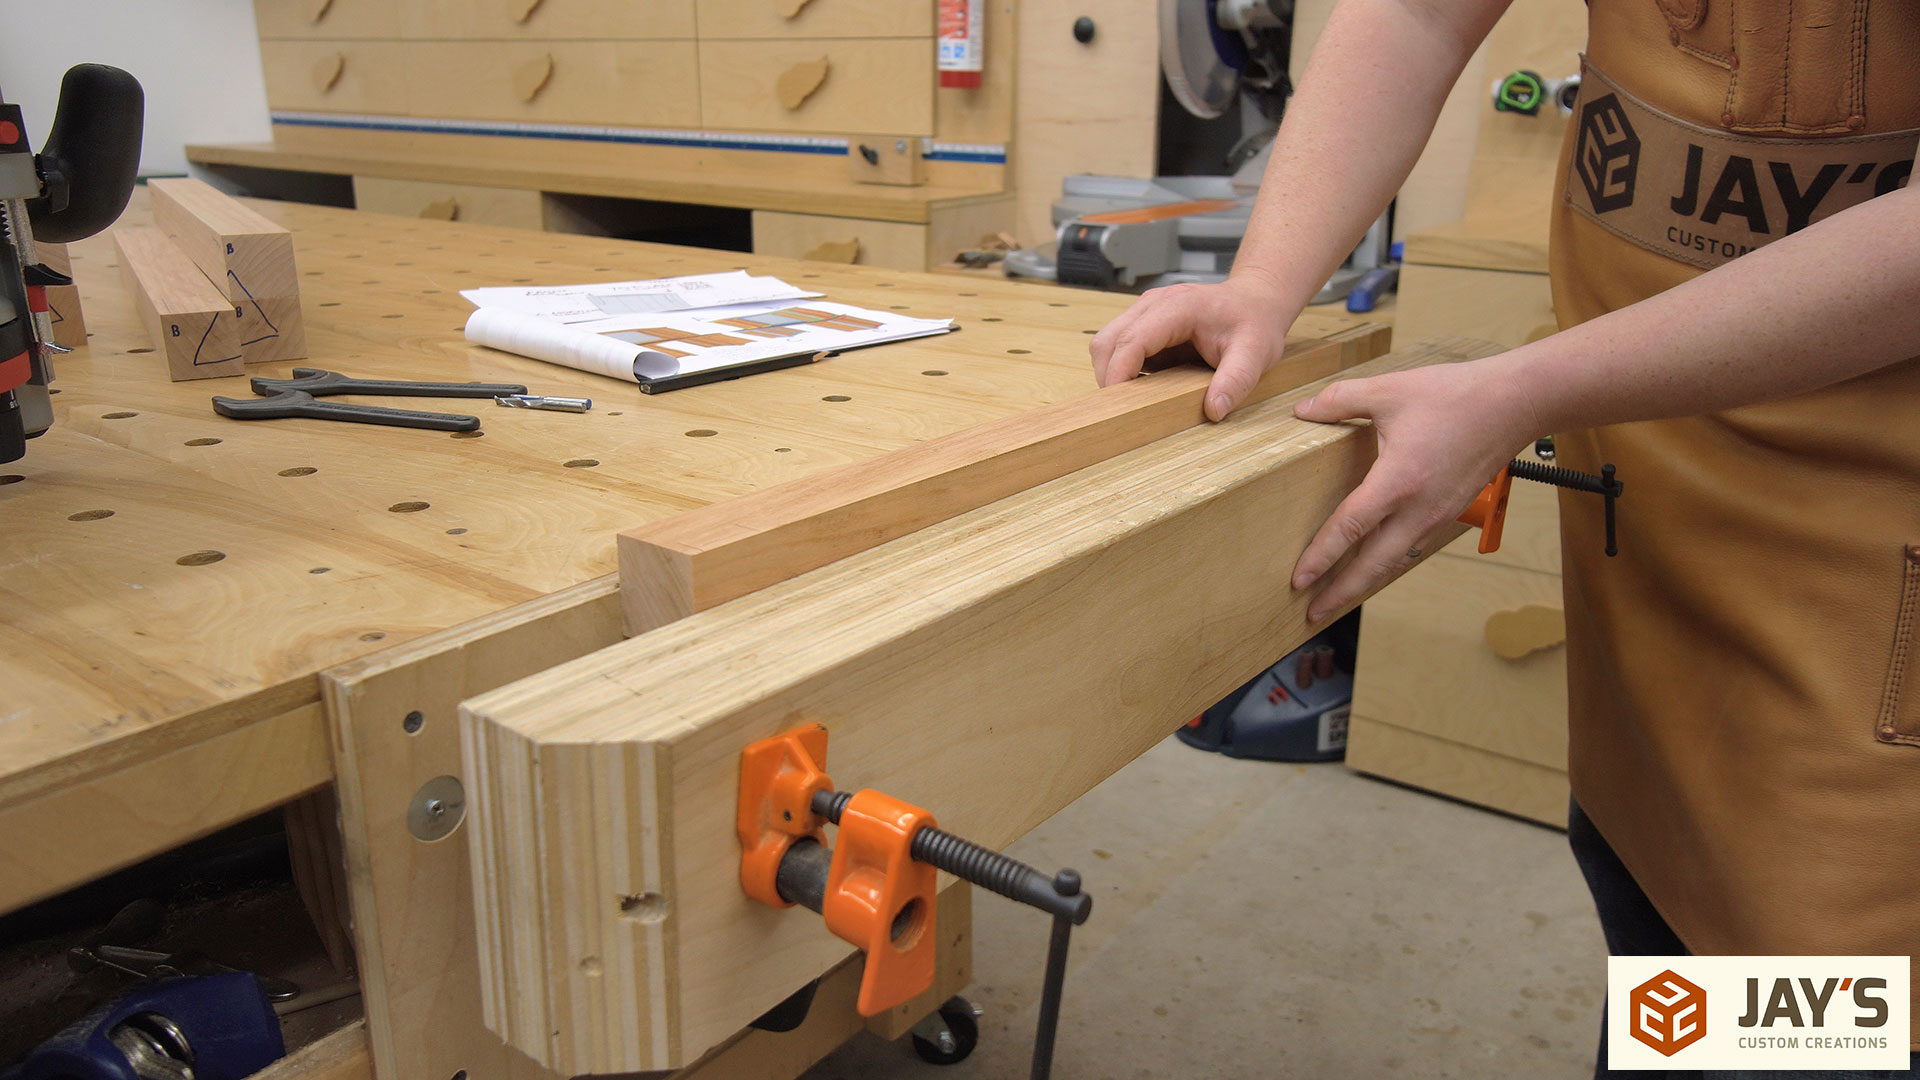
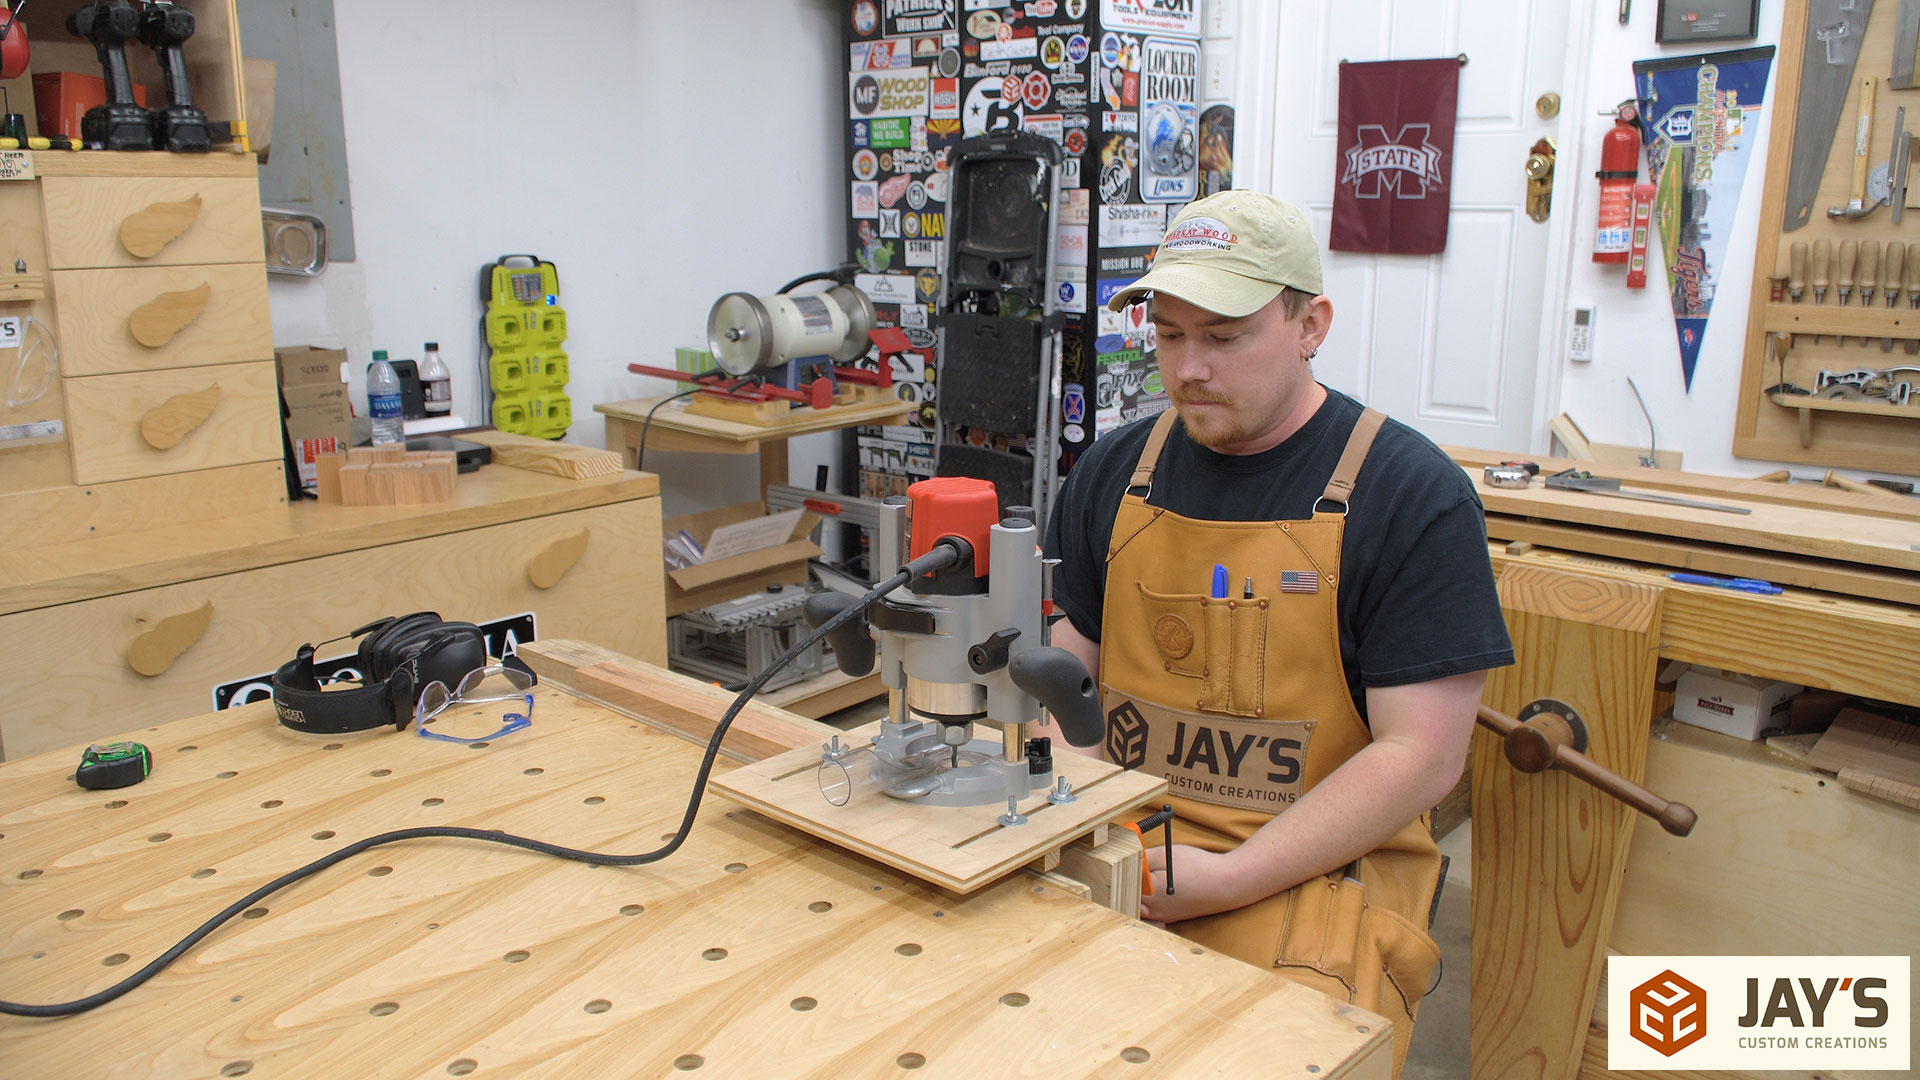
There are a lot of ways to hold the legs in place while the mortises are cut but the easiest and most convenient method will be in a vise. I put a vise on my assembly table a long time ago and it’s really handy for situations like this. The vise is a twin screw pipe clamp vise. Easy to make and works really, really well.
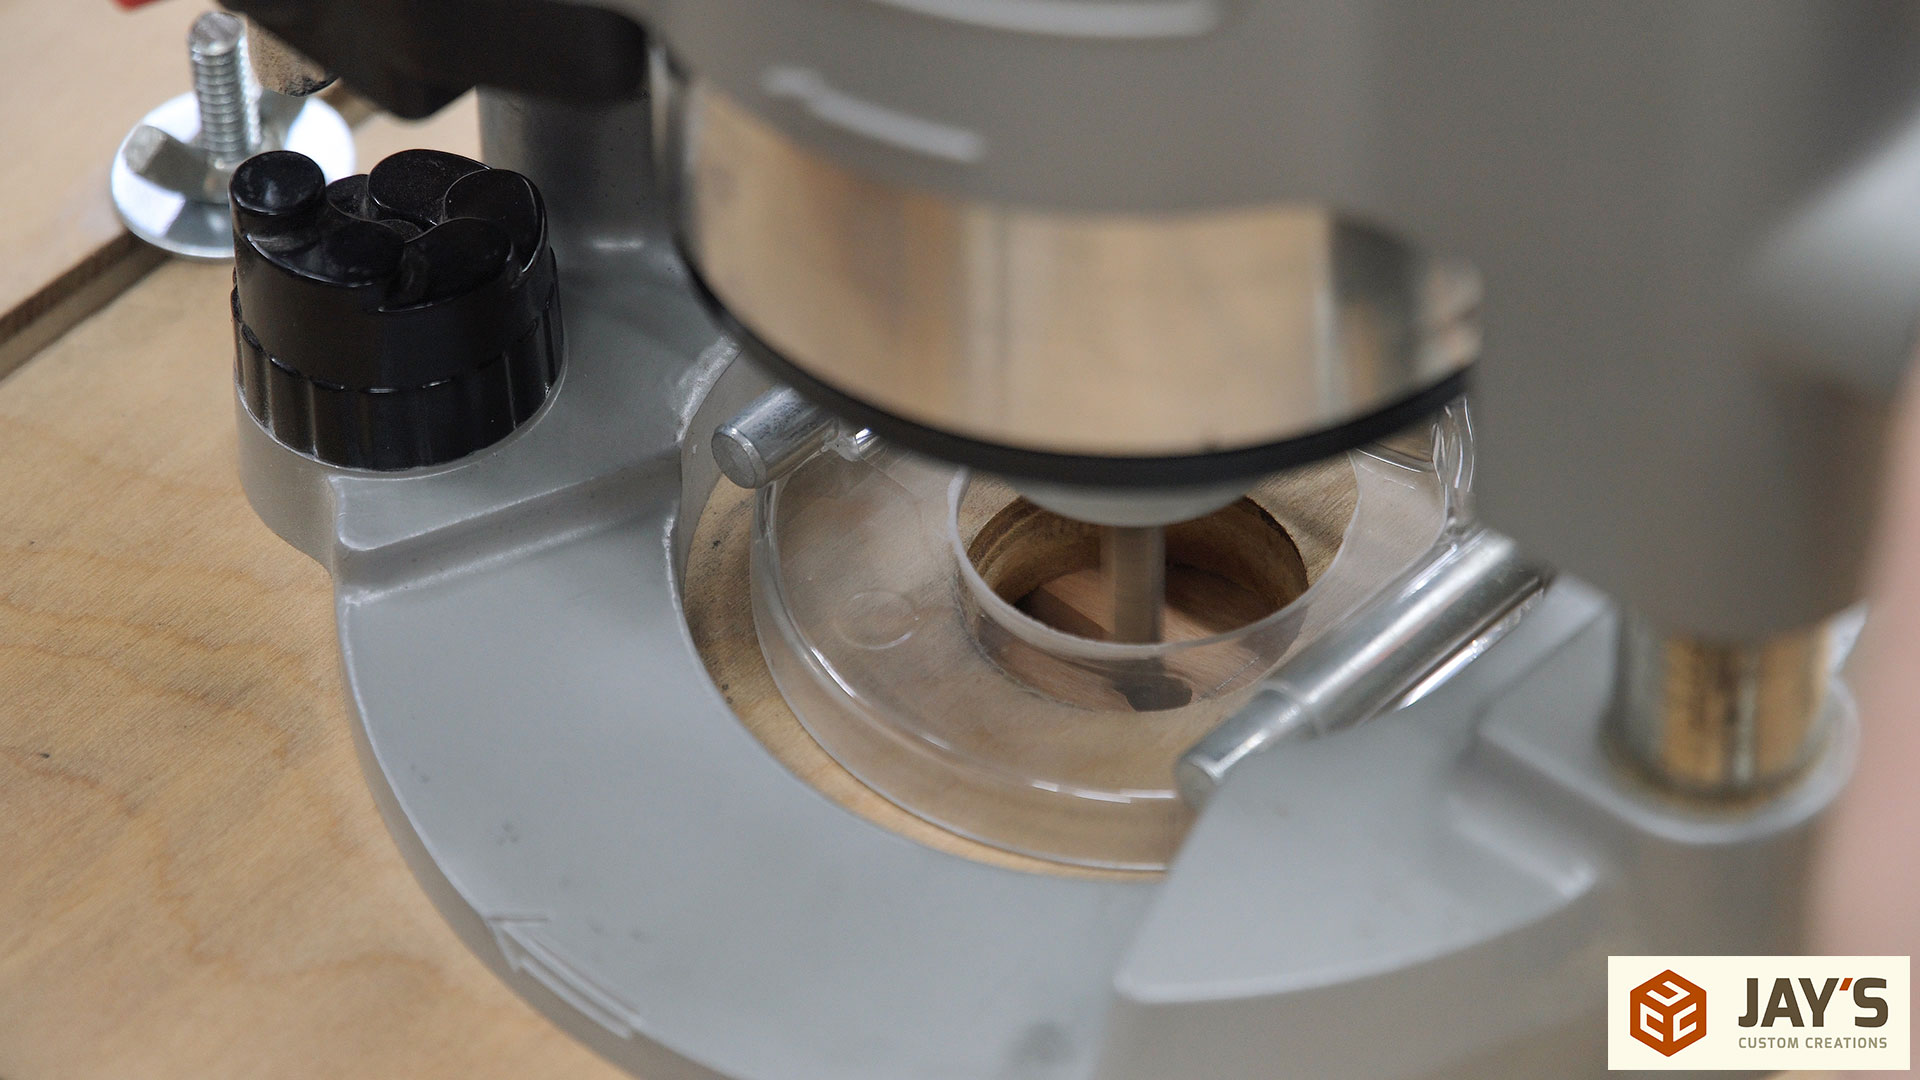
To make the mortises I’m using a plunge router with my universal homemade edge guide attachment. The router I have is a great router but unfortunately there are no aftermarket fence solutions so I just made my own. It will work on any plunge router and if you don’t have an edge guide at all I highly recommend making one. It’s a very simple build.
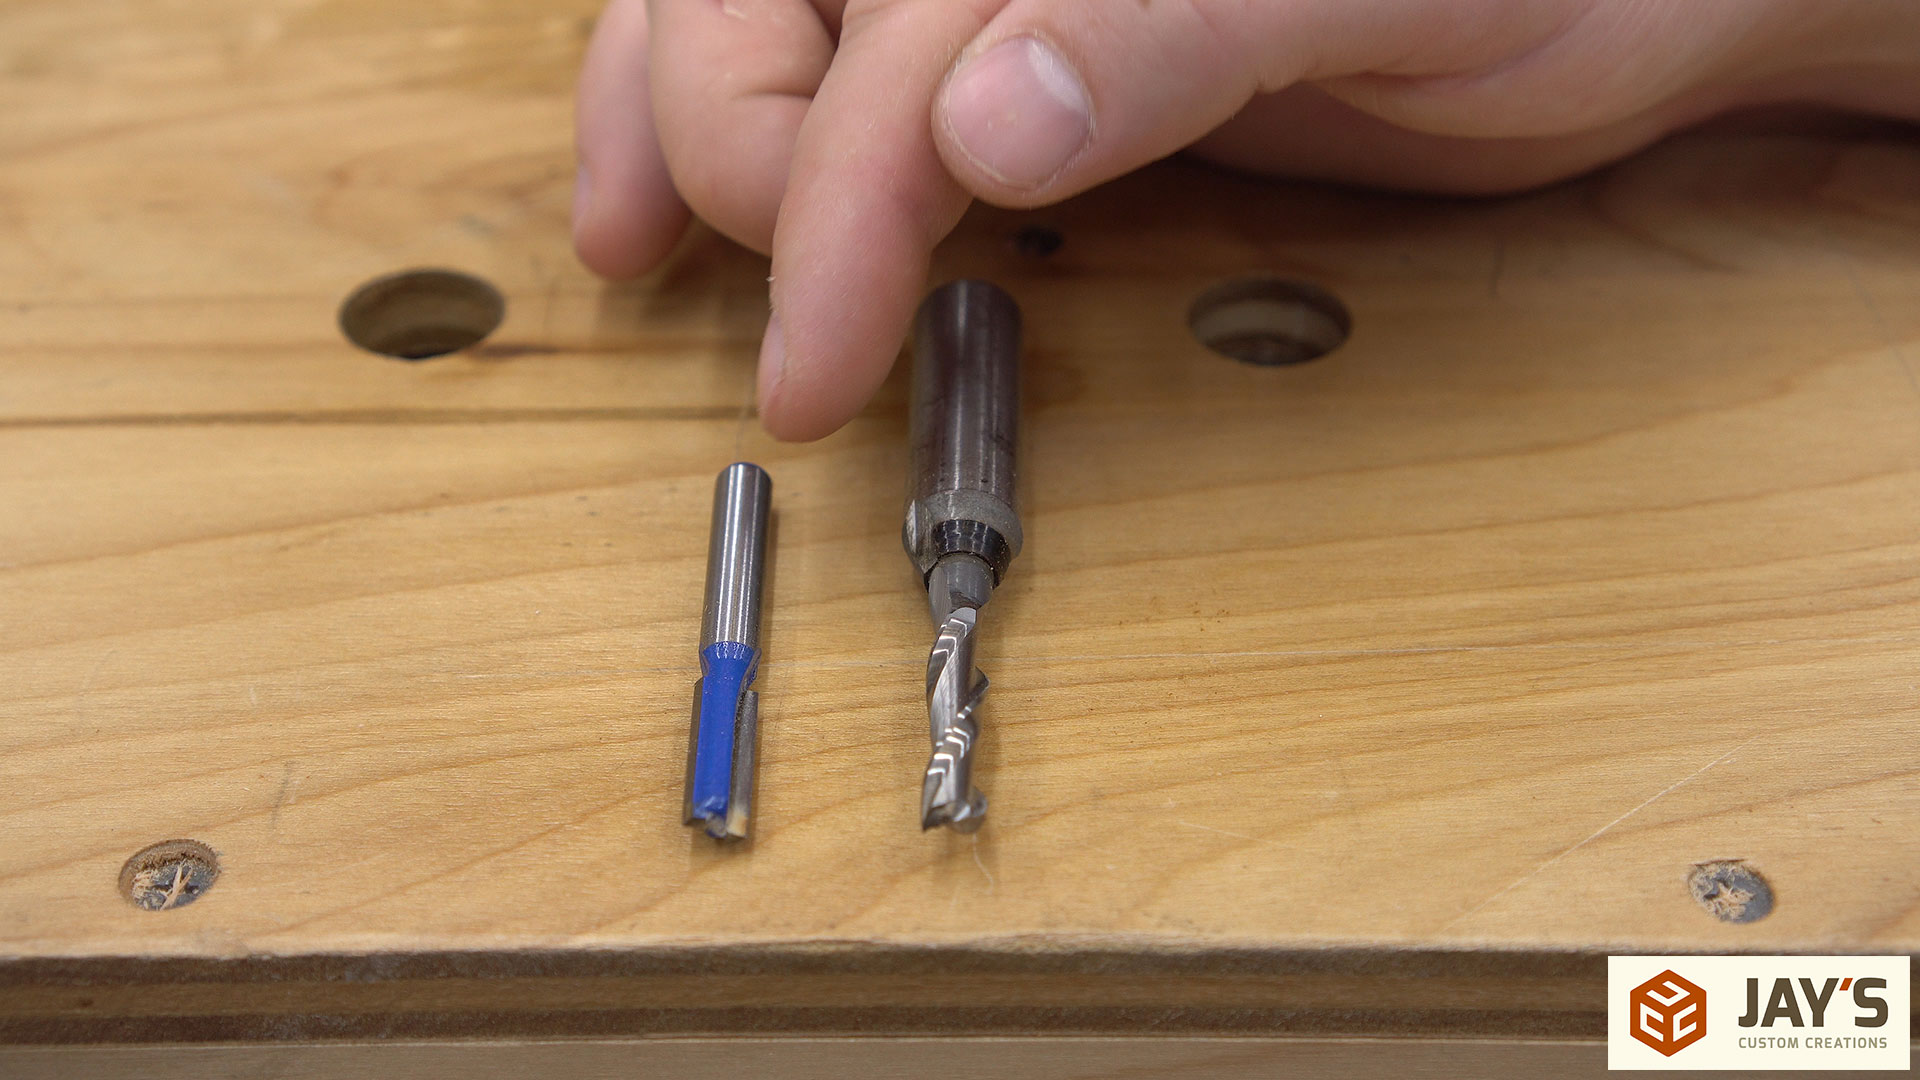
Lets talk router bits for a minute. The left bit in the following image is a two flute straight cutting router bit. This style router bit is great for cutting grooves that start at the end of a work piece. It’s not so great for grooves that start inside the work piece. The reason it’s not good for that is because the cutting edge does not extend to the center axis of the router bit. Plunging with it is about as effective as using a 1/4” drill that doesn’t have a center point. It’s just not going to work that well. The bit on the right is a two flute spiral upcut router bit. The spiral design naturally extends the cutting edge to the center axis. That combined with the direction of the twist (upcut) allows this bit to be plunged into work piece and easily remove material. These spiral bits also come in a downcut variation that forces the material down as it cuts. The downcut bits are good for applications where you want reduced tearout on the surface. Downcut bits are not as good in the waste removal department so dust extraction is almost a necessity with them. I picked up a set of spiral bits a couple years ago and have used them quite a bit since.
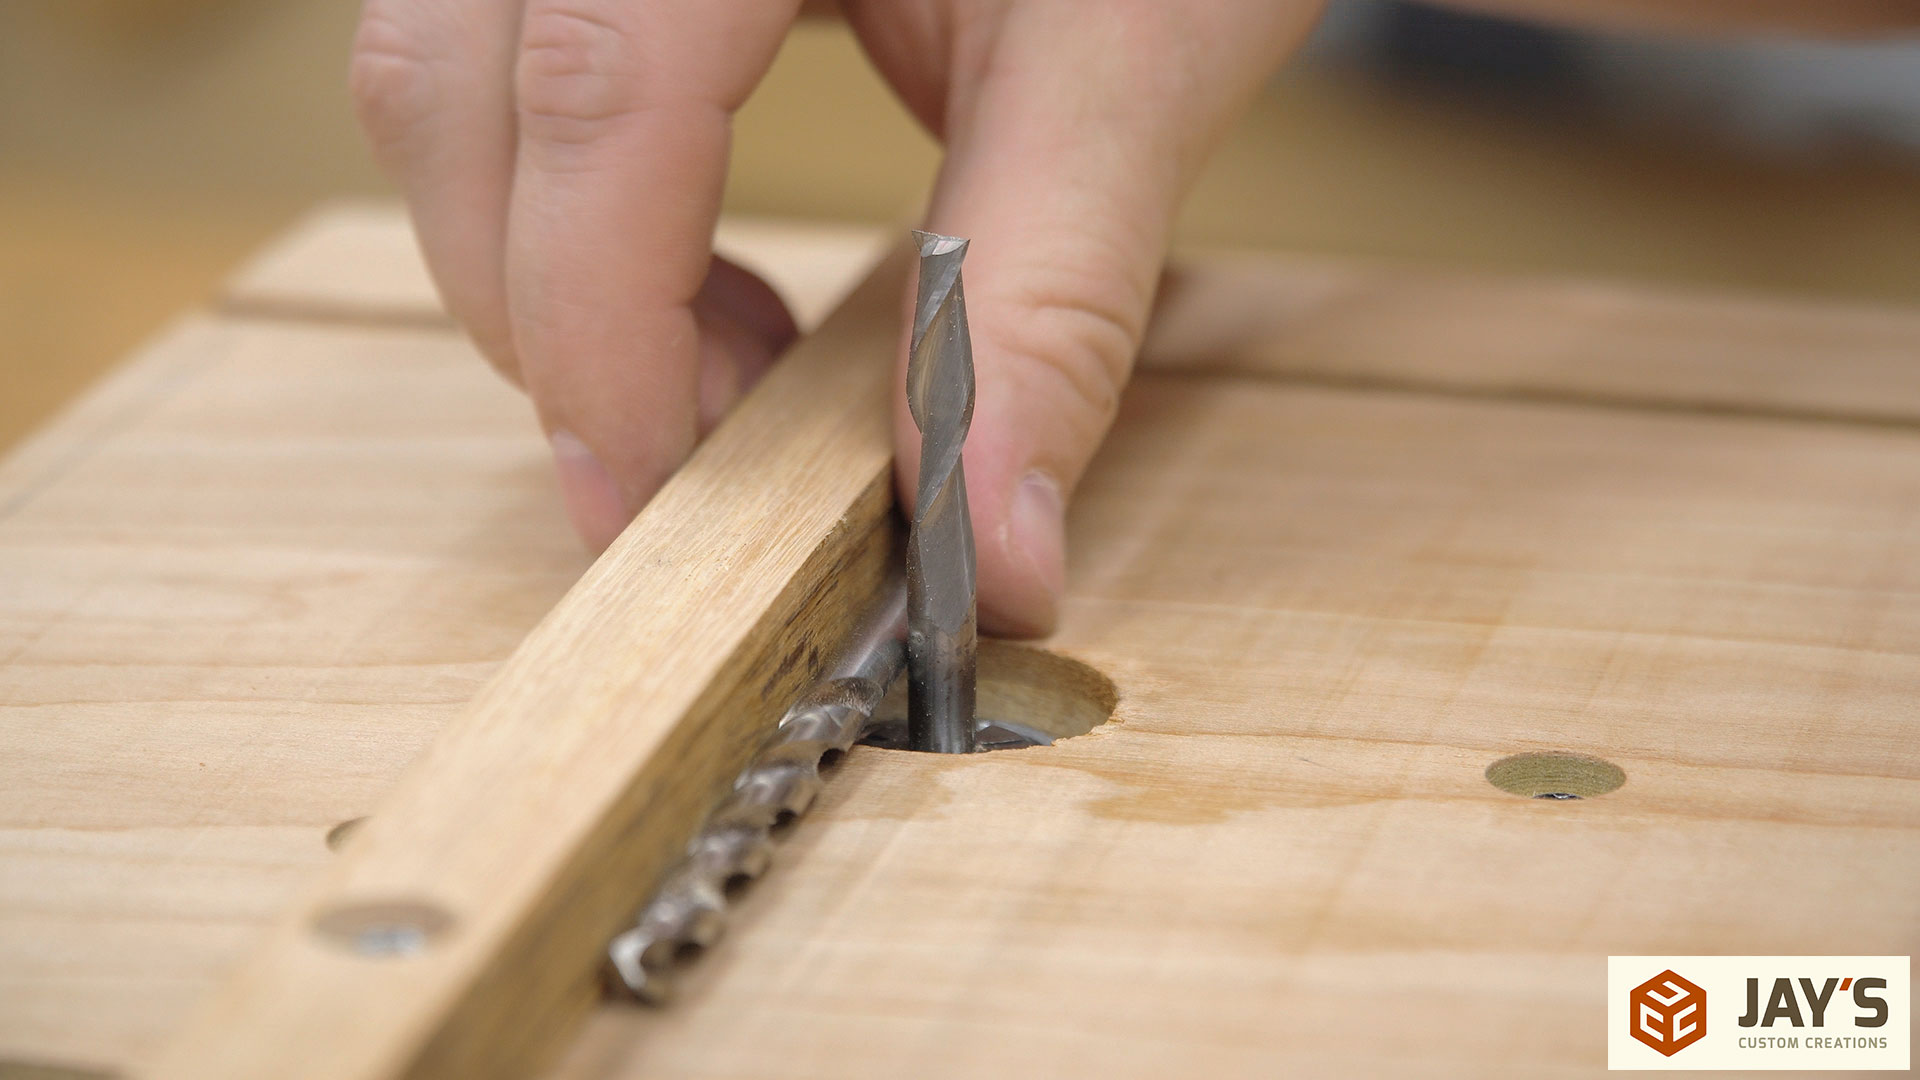
The easiest way to dial in a common distance from the fence to the router bit is to use an appropriate sized drill bit. Just be sure to reference off of the solid area of each bit.
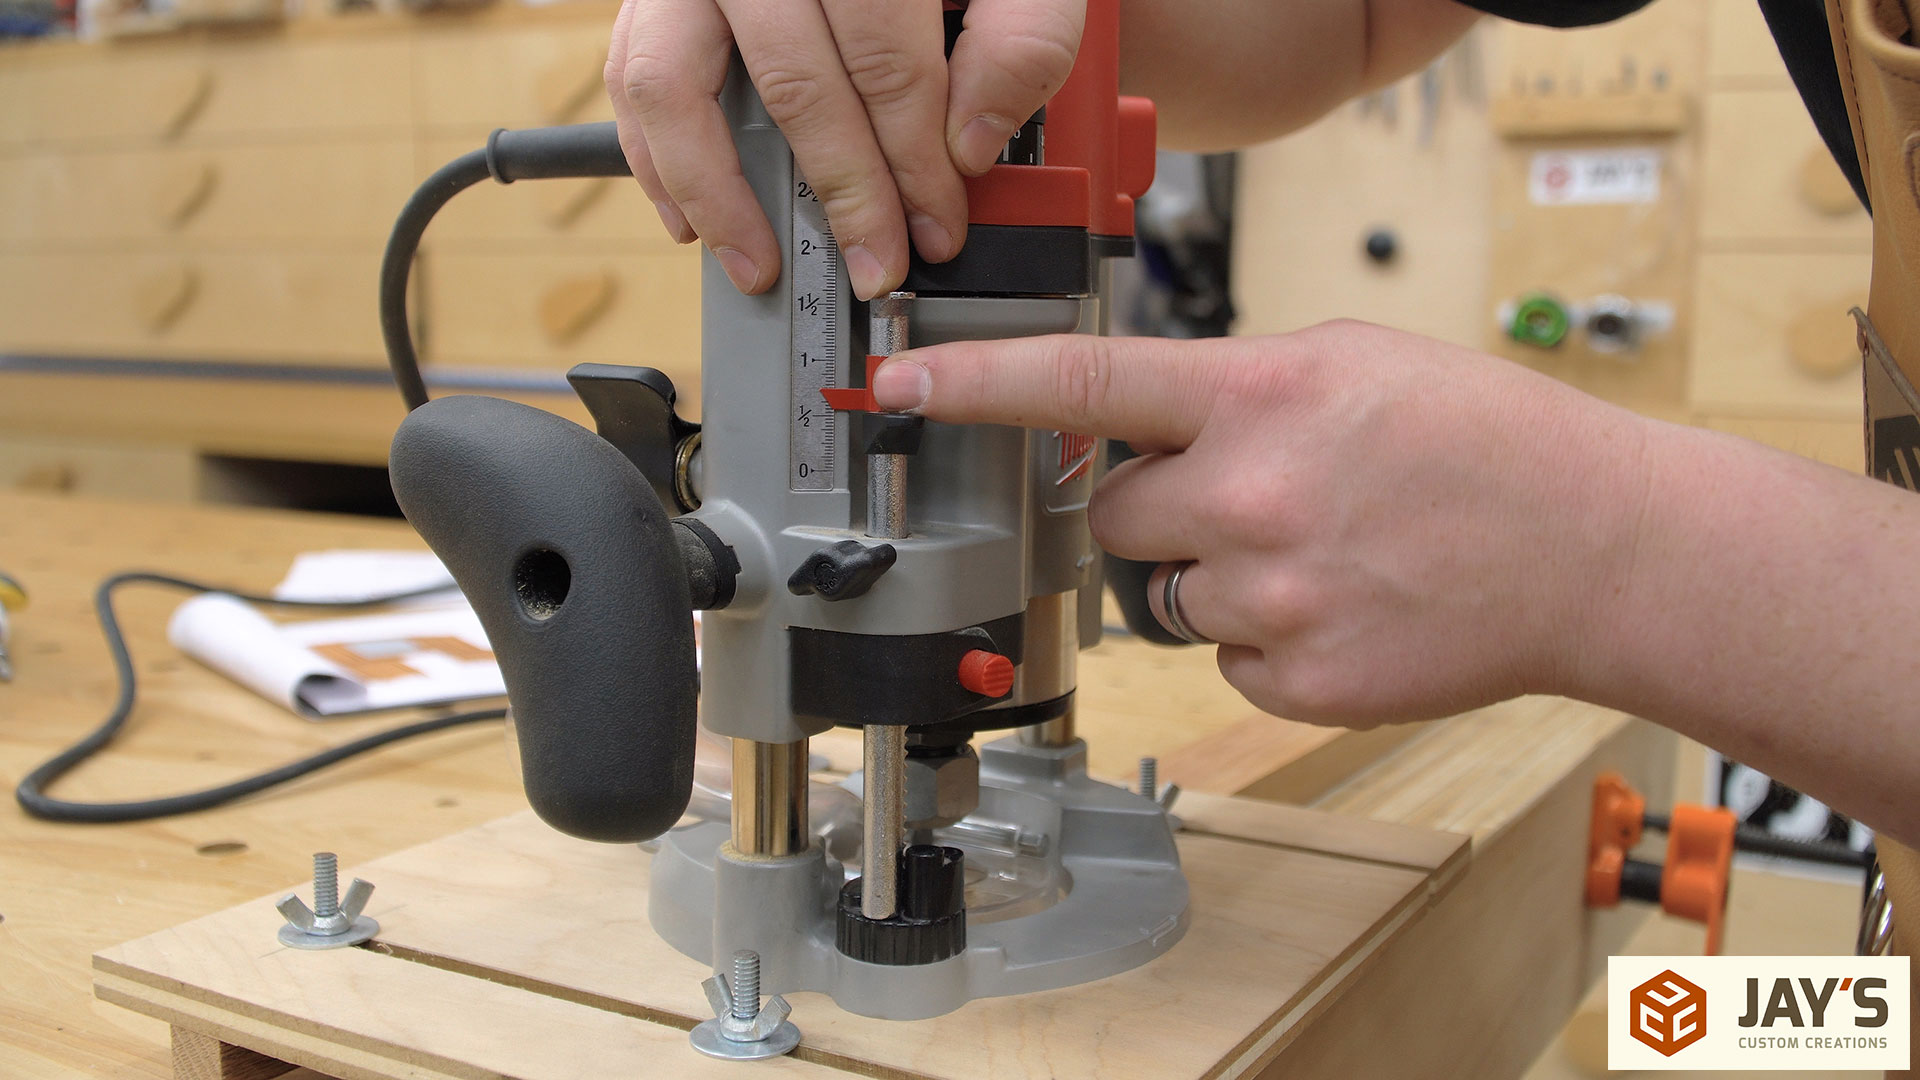
Most all plunge routers have a depth stop system. They are all slightly different but the concept is the same (my router: http://amzn.to/2gSr5Ci). To set the depth stop first bottom out the bit onto the top surface of the material you are using. Then drop the plunge rod to the bottom turret stop on the router base. Reset the scale to zero and then lift the plunge rod so the scale reads the depth number that you need and lock it in place. Now the router is set so that the plunge rod will bottom out onto the bottom turret stop when the final depth is reached in the material. There are intermediate turret stops that you can use to drop down at an even distance for each pass but I never use them. I would much rather keep my hands on the router at all times and just eyeball the intermediate depth for each pass.
For this setup we have 64 mortises to cut which means it’s going to take some time to get them all cut. Any time I have a lot of vise work I try to make the process as comfortable as I can for me. In this case I don’t want to be standing and bending down to get my eyes closer to the work. Instead, I have a rolling shop stool that allows me to have my eyes at a more appropriate level to see what’s going on without bending over and because it rolls I can easy position my body as needed.
When making mortises plunge to full depth at the start and stop locations first. When removing the rest of the material you can hear a noticeable audio pitch change as you complete the cut and the router enters the end of the mortise. You can also feel the resistance decrease as you push to the end of the mortise. Those two pieces of feedback will allow you to know exactly when to stop pushing. If instead you didn’t make a full depth plunge first you must rely on visual feedback to determine if you are at the end of the mortise or not. Sometimes when the bit is near full depth you won’t be able to see the end of the mortise which is why it is better to rely on a previous full depth plunge to help you determine the end location.
After the first full depth plunges are made the rest of the material is removed in multiple passes making sure to not remove too much material with each pass. The more material per pass that is removed the more you risk the bit deflecting slighting as it cuts. Removing too much in one pass can also result in the router being more difficult to control.
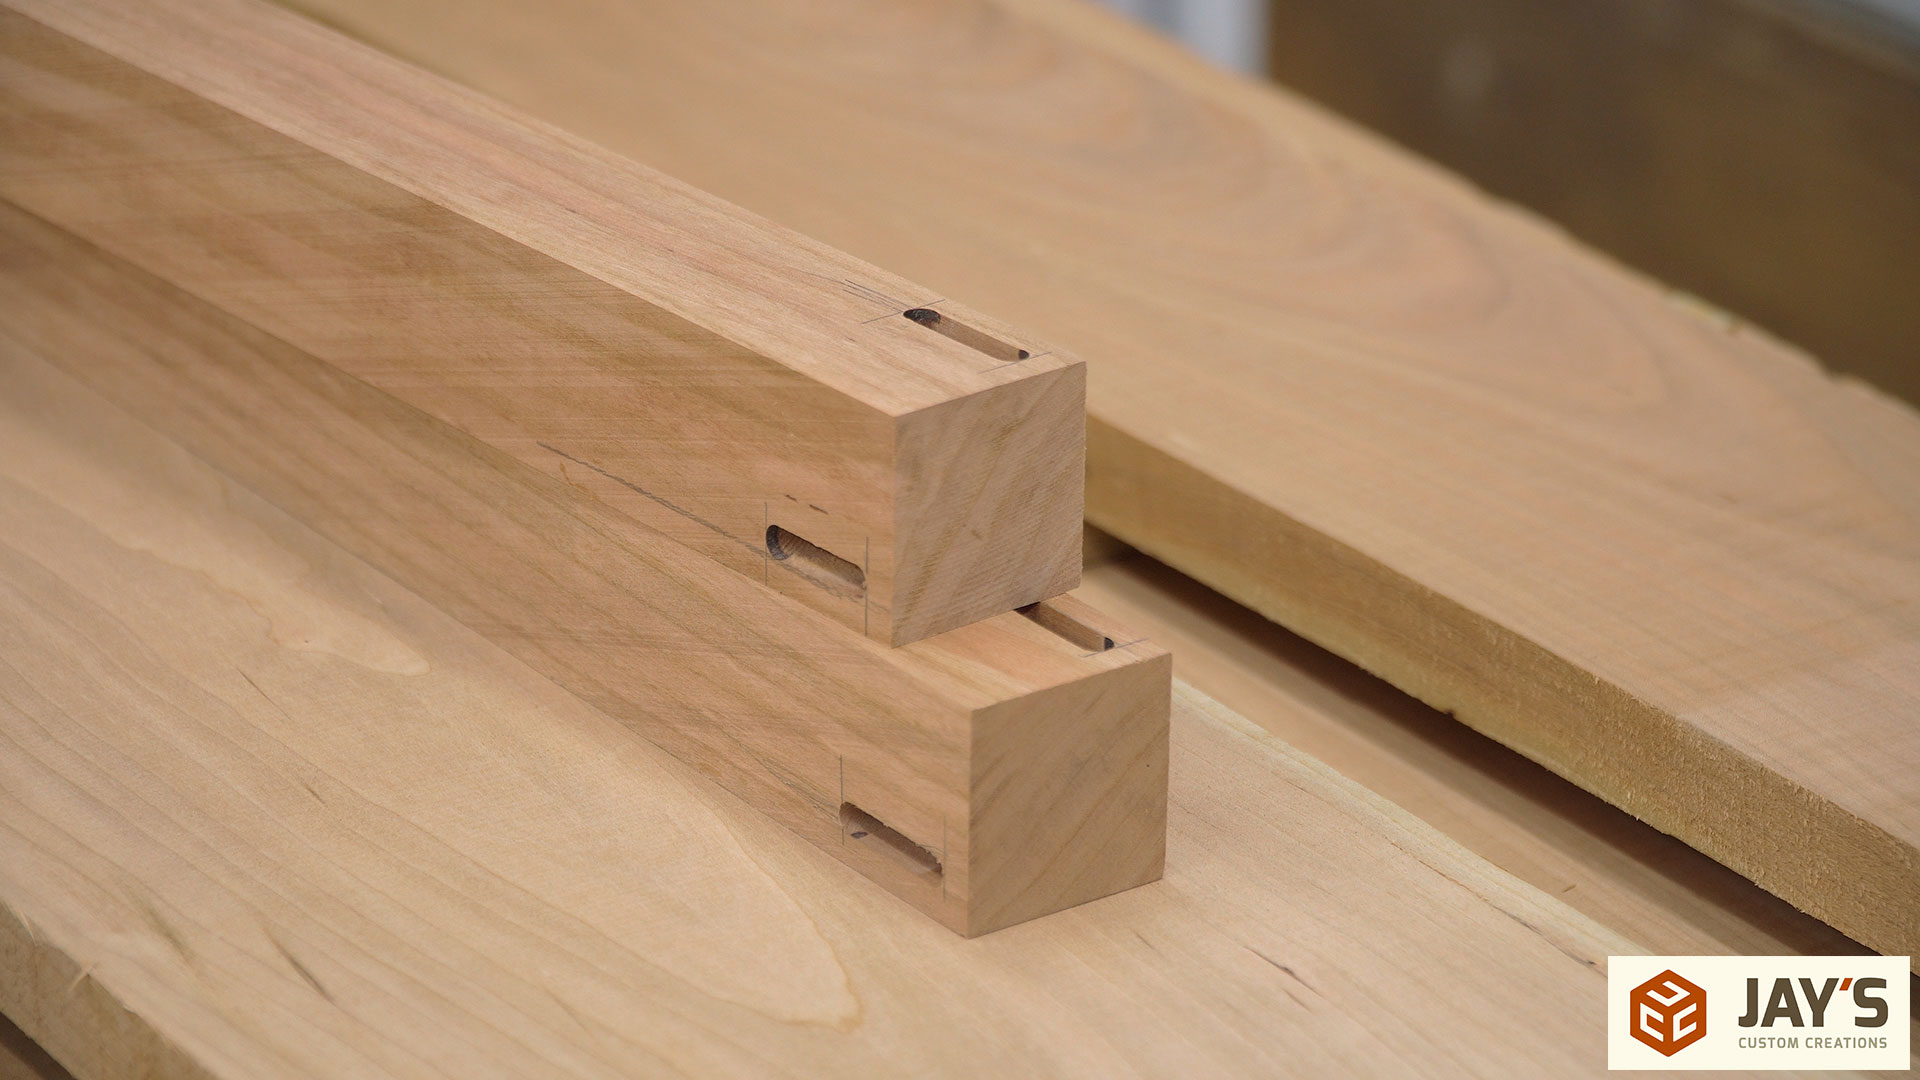
The completed mortises should look like this. Four down sixty to go…
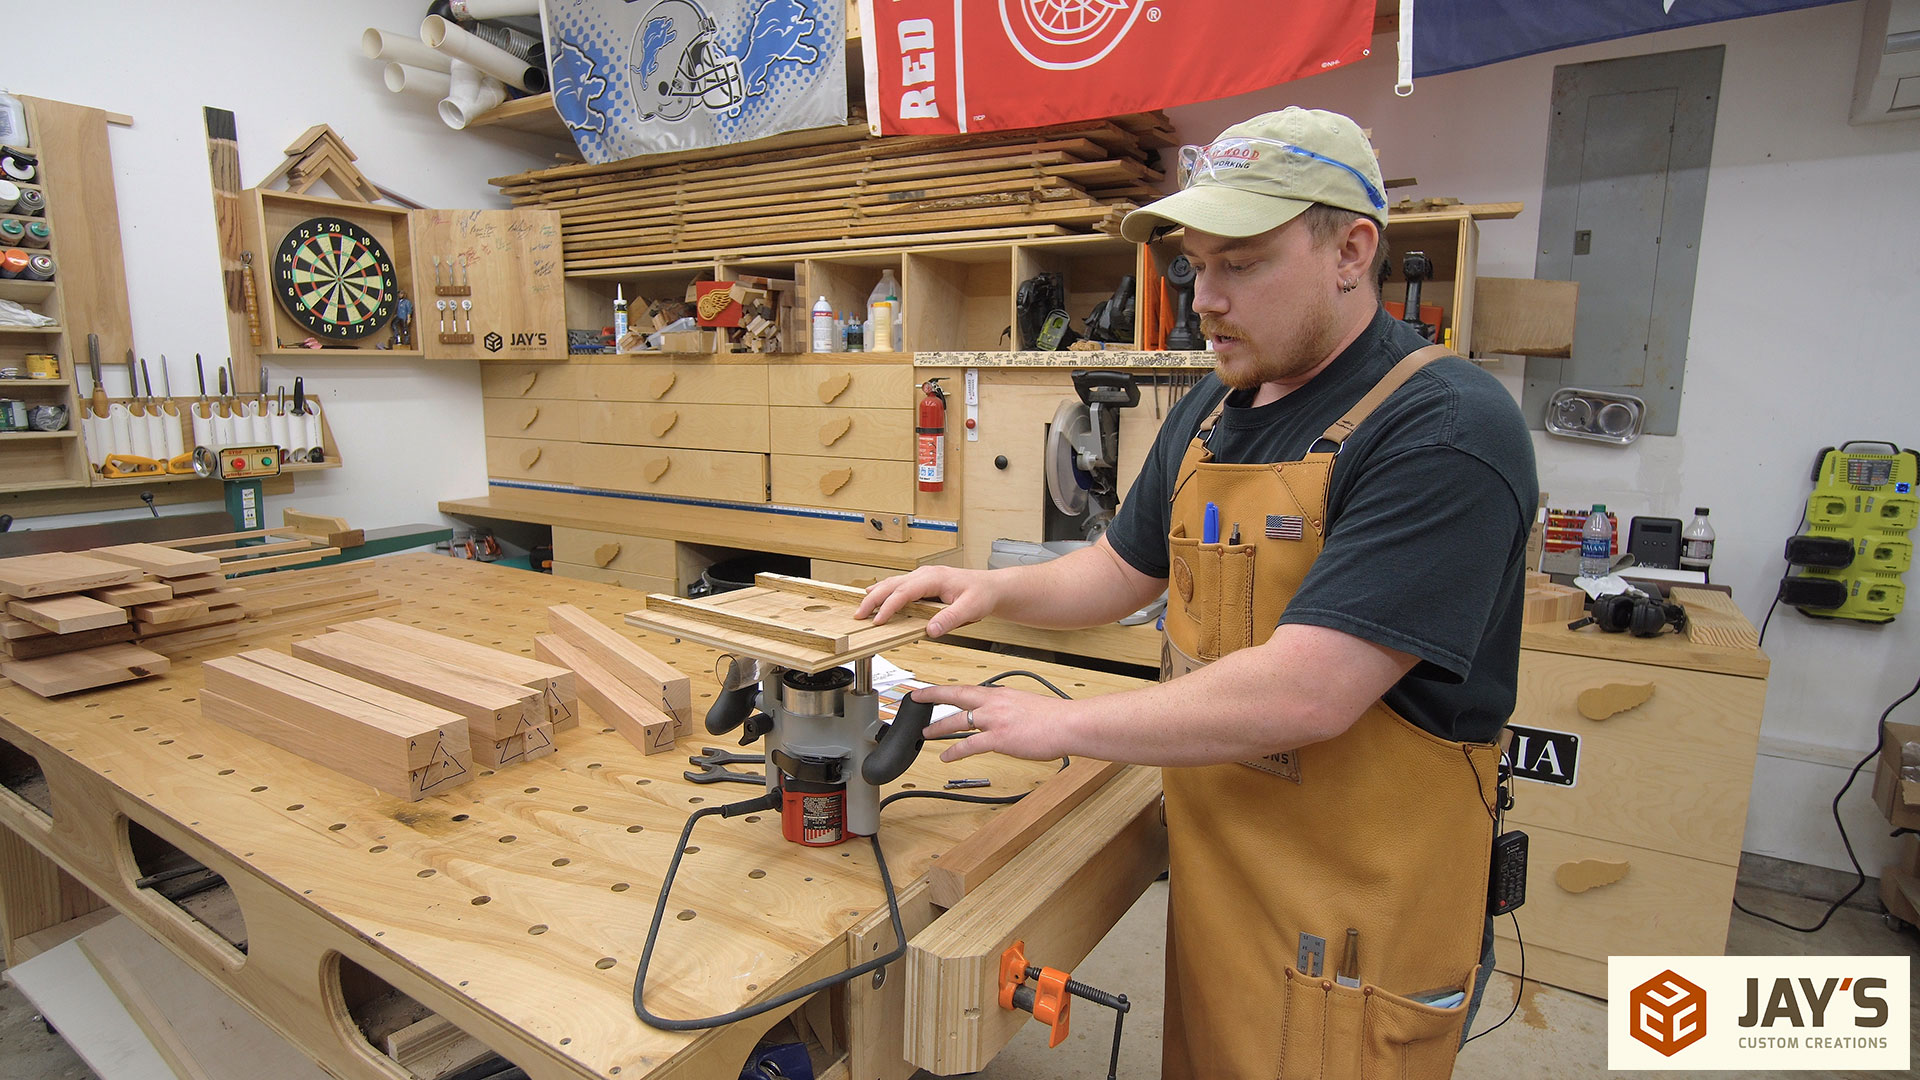
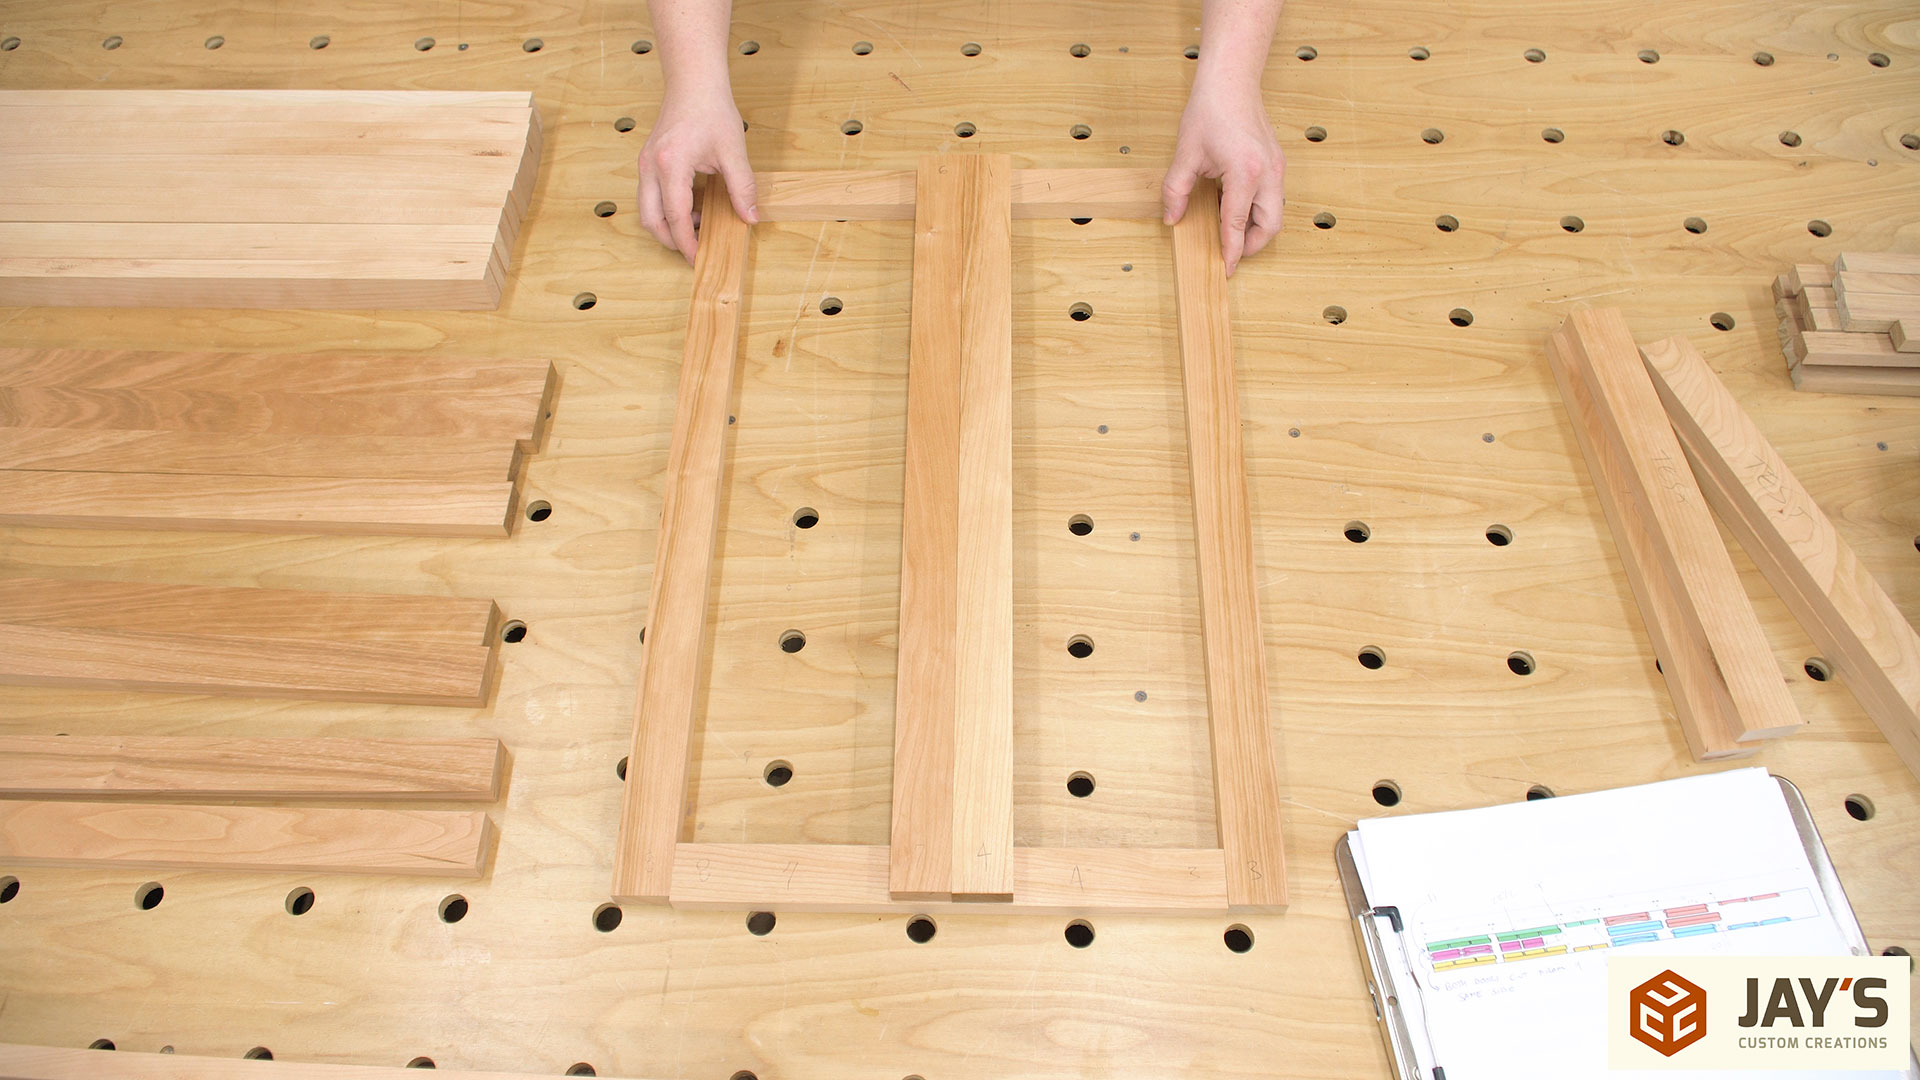
With the leg mortises completed we shifted focus back to the cabinet and door rail and stile pieces by first milling them to their final thickness and then ripping the board to their final width. In this image we are laying out the final boards for the doors to determine the best grain direction.
Then everything is cut to the final length. I really need to get around to making a nice crosscut sled…
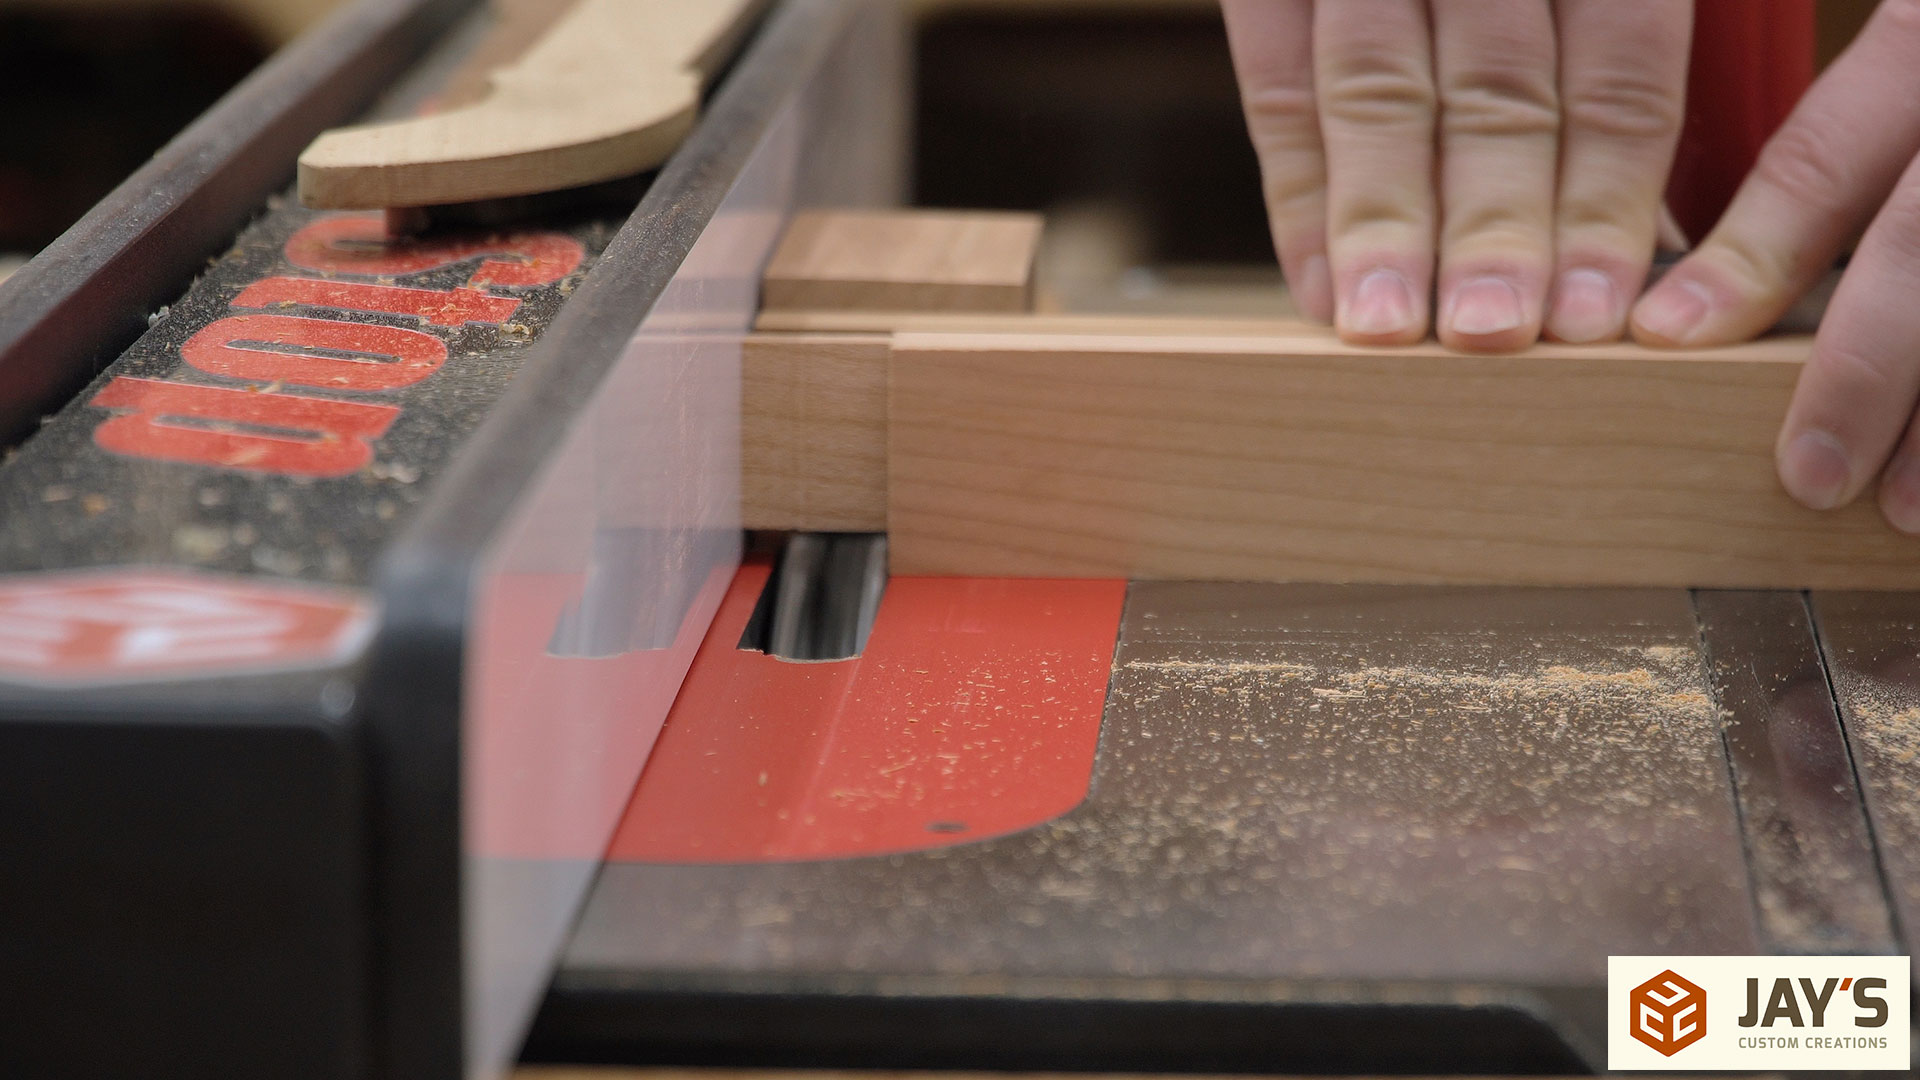
My go-to method for creating simple tenons is to use a dado stack in the table saw. My miter gauge is set up with a sacrificial fence that also has a block screwed to it in line with the dado stack. I’ve been adding a block like this for years and recommend everyone else to do the same when crosscutting with the dado stack. The block acts as a dust shroud to keep the dust below the table where it belongs and also covers the blade as you make the cut.

Use a few offcuts from the material you are using as test blocks to dial in the height of the blade and the position of the fence. A perfect fit for me is a fit that holds a small block up against gravity but is easily inserted and removed by hand. I do not want a fit that requires a mallet or clamps to close the joint. The reason being is that modern PVA glues contain water that will swell the joint as the glue is applied. If the joint is already really tight before the glue is applied it will be even more tight when the glue hits the wood which can cause a really frustrating glue up.
When the setup is dialed in all of the tenons can be cut.

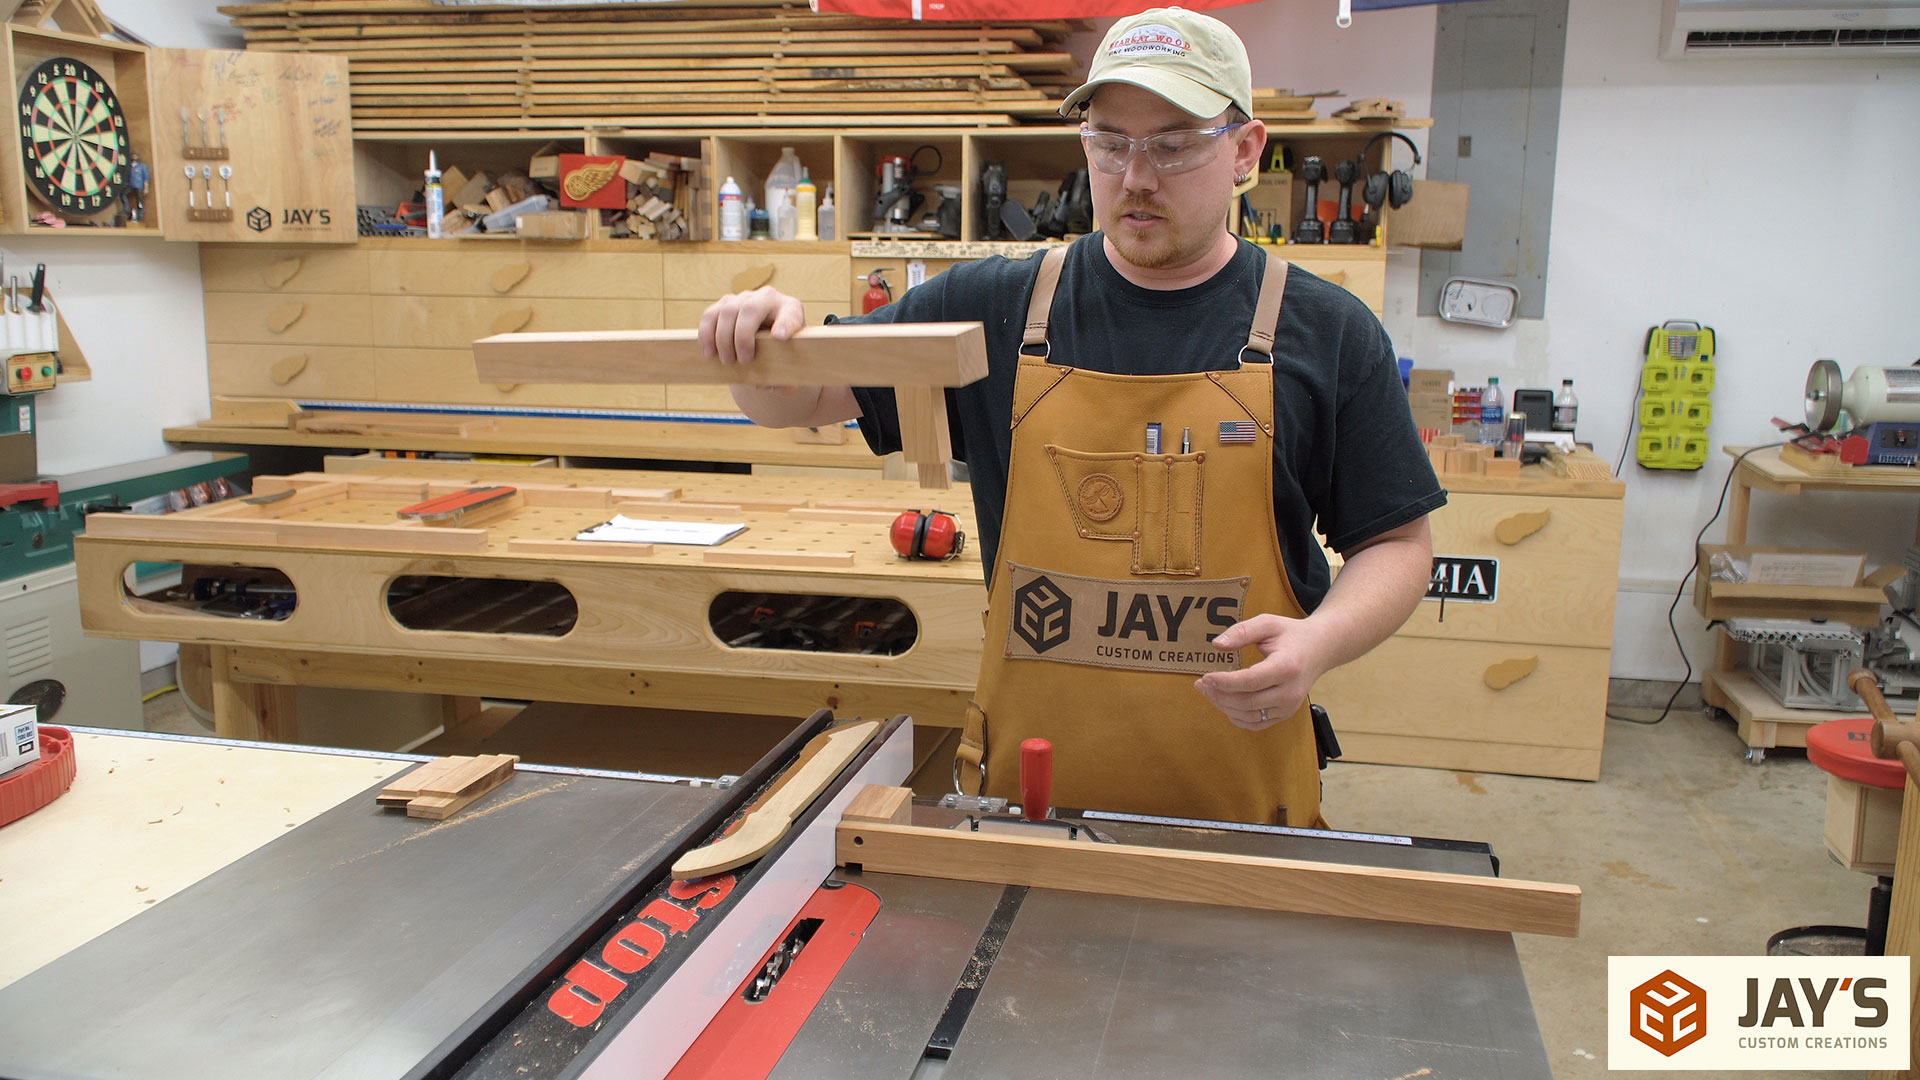
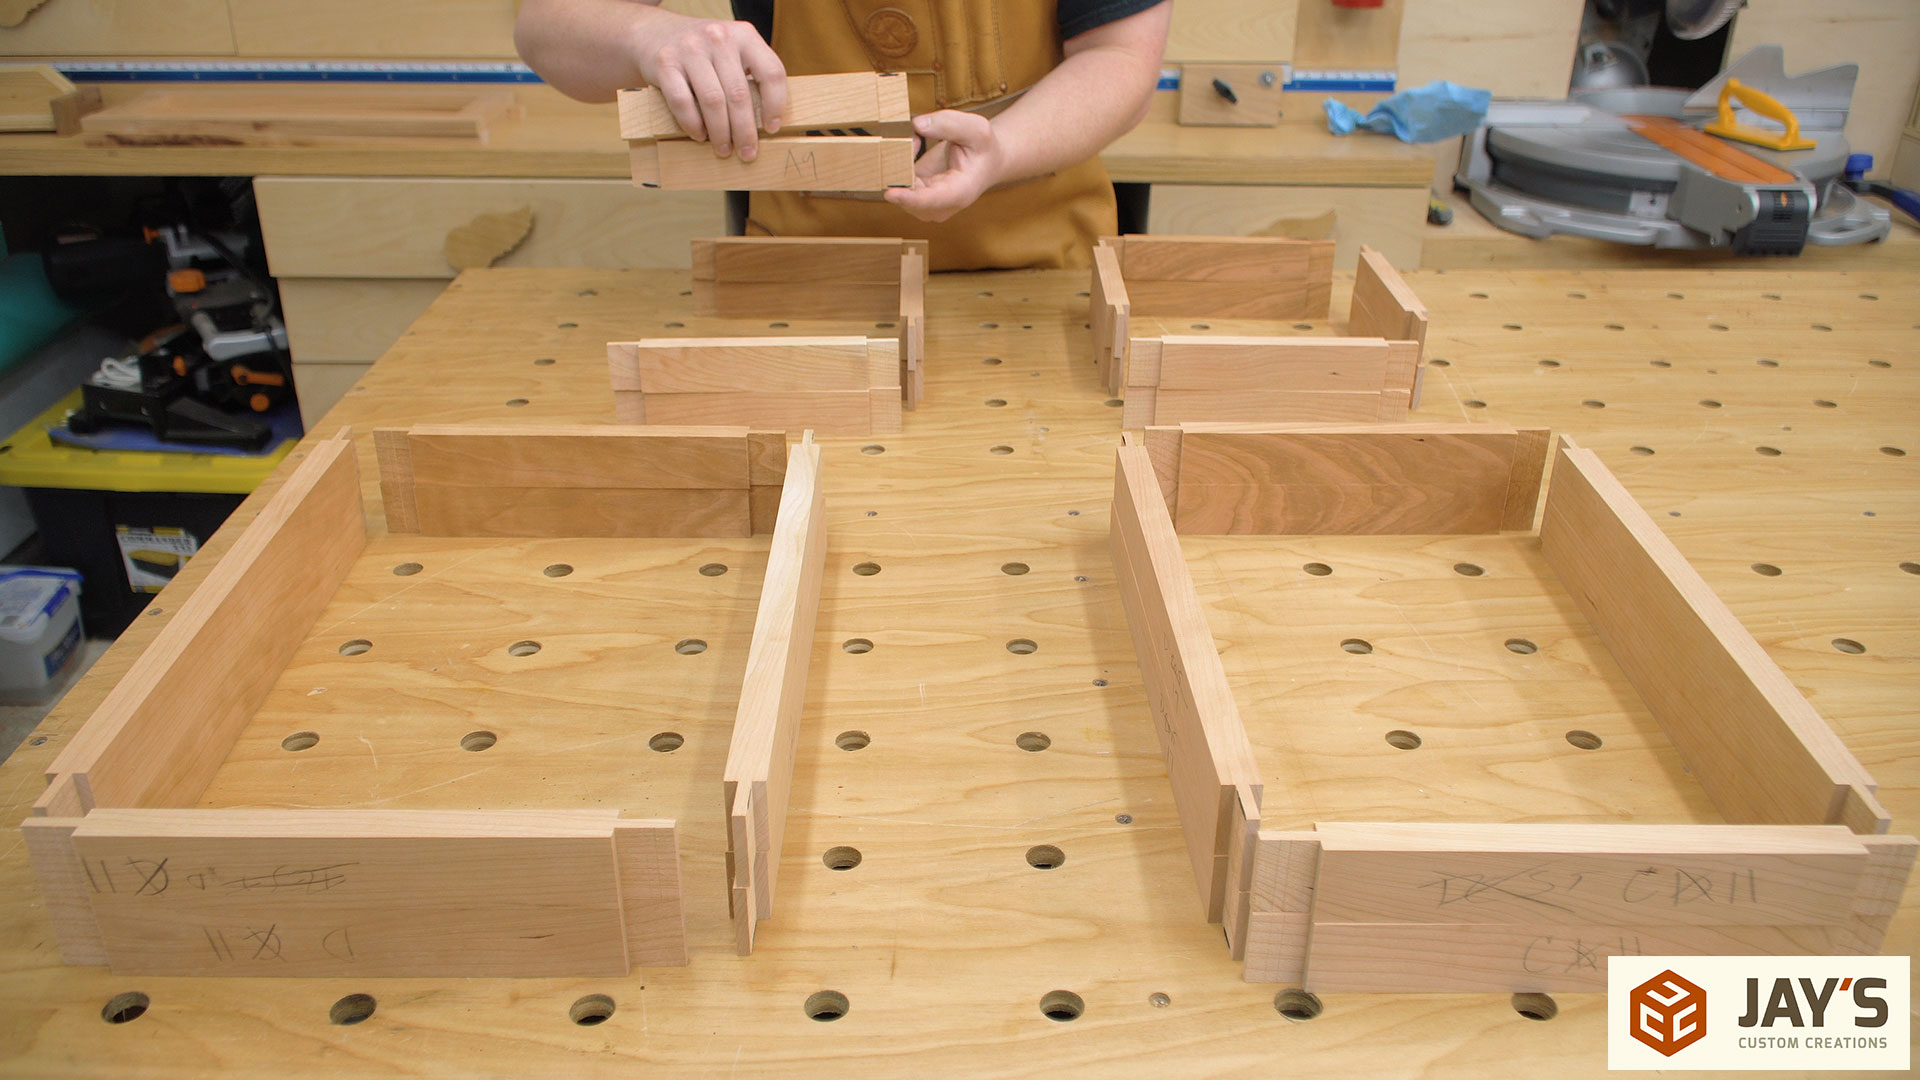
Label all of your parts as you go and keep them stacked in the orientation that they will be in if possible. This will save a lot of confusion and instantly give you more visual feedback as to the progress as well as what side of each board gets specific cuts.
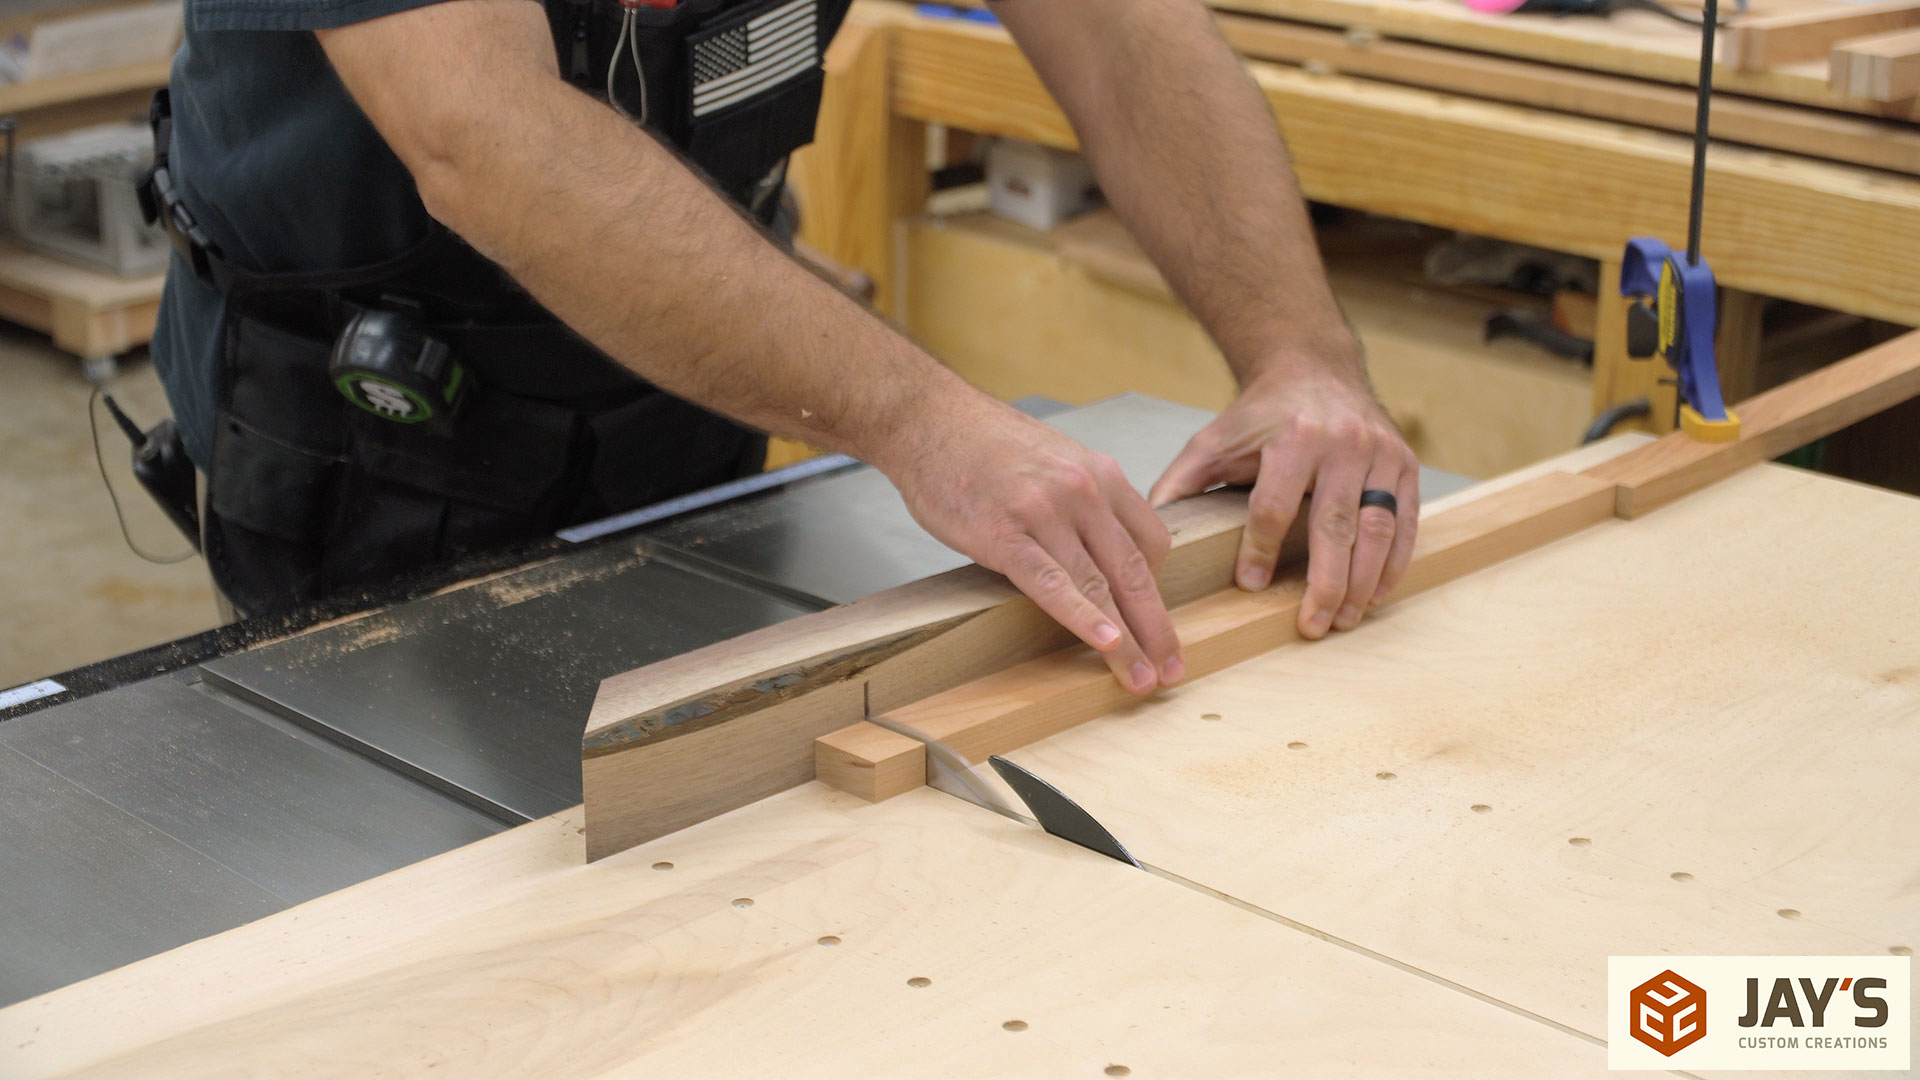
In this case we needed to cut another shoulder on one end of almost all of our parts. The table saw setup was the same for these.
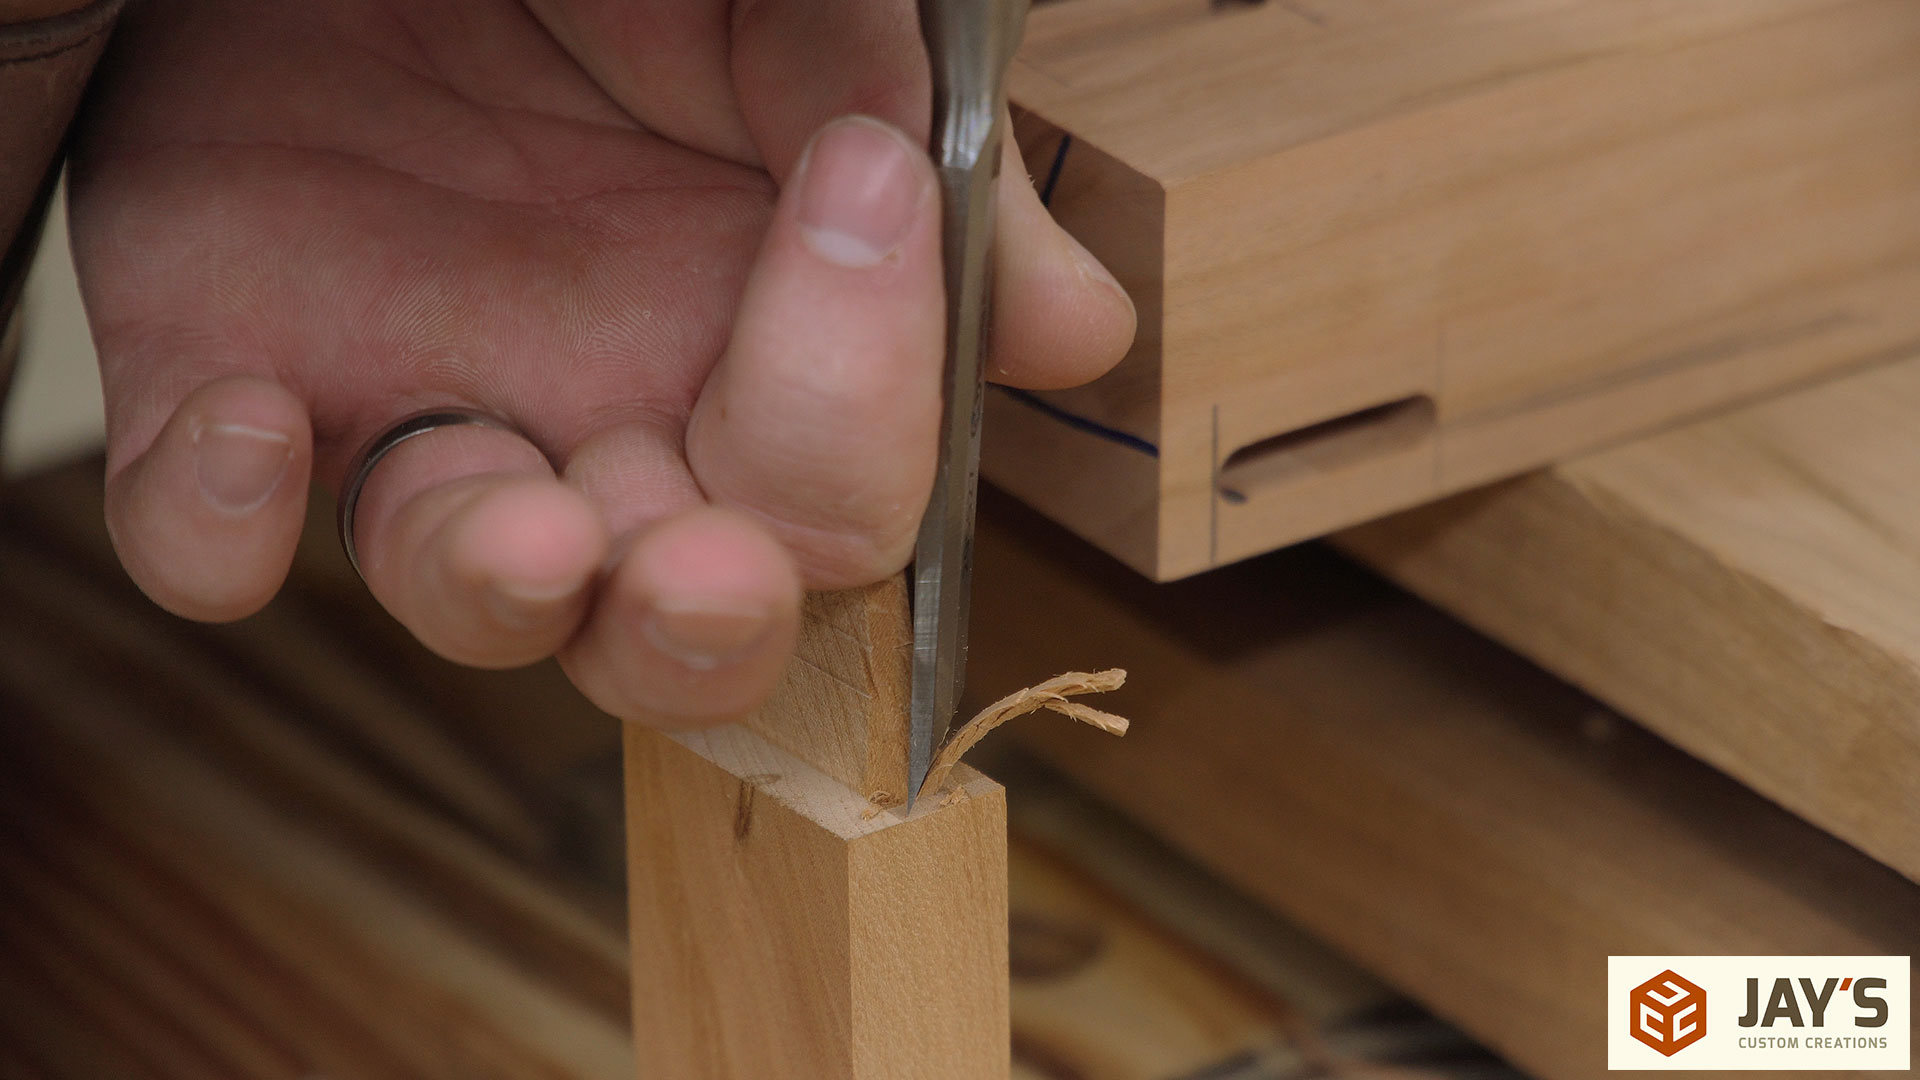
The final step is to either square the ends of the mortise to fit the tenons or to knock off the corners of the tenons to fit the mortise. Modifying the tenons is a lot easier so that’s the route we went. 64 tenons with four corners each means we needed to chop off 256 tenon corners. That took a few minutes…
That’s all for this part of the series. At this point all of the mortise and tenon joints are cut and fitting as they should. We will start the next video with a dry assembly of all of the cabinets. Be sure to sign up for my email newsletter to be notified of when it publishes. Have a great day!


well done videos , really enjoy watching them. what camera do you use ,
dj
Sony a6500. Links on my resources page: https://jayscustomcreations.com/home/tools-resources/
Well done. You have a natural film presence much like Norm Abrams did on New Yankee Workshop. But your videos are different and very enjoyable/
Nice