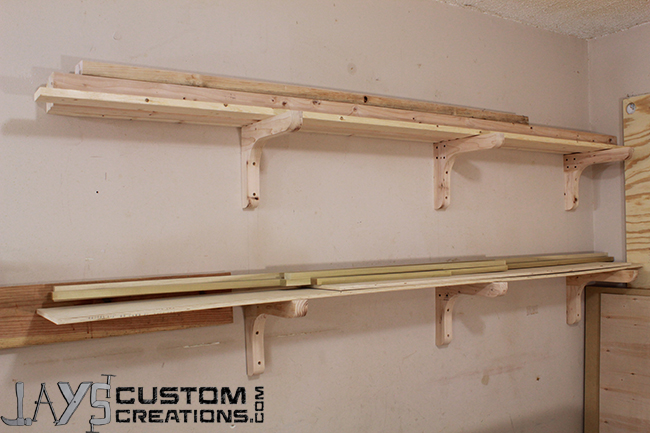
I am in a constant battle for space in my shop. You’re probably in the same shoes as me with this one. You have two or three projects going at once and begin to waste time moving stuff back and forth to try and get some room. This week I had enough with moving my lumber on and off of my sawhorses that I decided to make a much needed lumber rack. I should have done this a long time ago.
I contemplated using pallet wood to make this but in the end I chose the easy route, which was to use 2×4’s. The vertical pieces are 10″ long and the horizontal pieces are 13″ long. Because I chose to make 6 brackets I decided it would be quicker to use screws to clamp the joints together. Waiting around for the glue to dry in clamps just didn’t seem too fun. With the brackets glued up you could technically hang them as is but I wanted to make them a little less ugly. I trimmed the pieces down to 2″ thick and added some curves at the corners. I made sure to leave the full 3×3 half lap joint.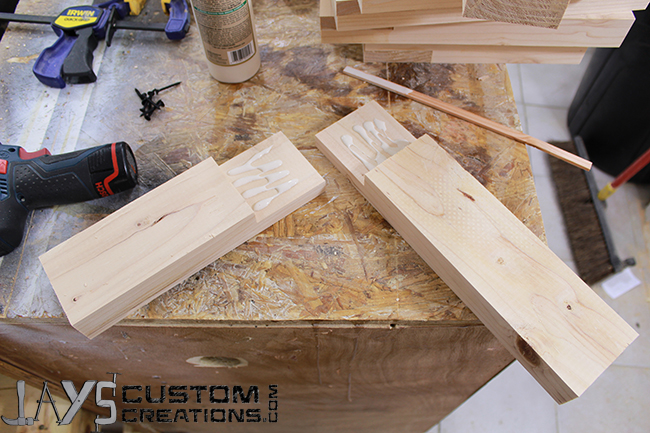
To attach the brackets to the wall I used a pocket hole along the top horizontal surface and pre drilled two holes in the vertical piece for 3″ screws. The longest pocket hole screw that I have is 2-1/2″. To give a little extra depth to the pocket hole I used a regular 3″ screw with a flat washer. This will stop the screw from going through the bracket. I spaced the brackets 32″ apart and screwed them directly into the studs. Before loading the rack I hung from one of top brackets without any movement. I weigh 180lbs so this system should hold dimensional lumber without any problems. 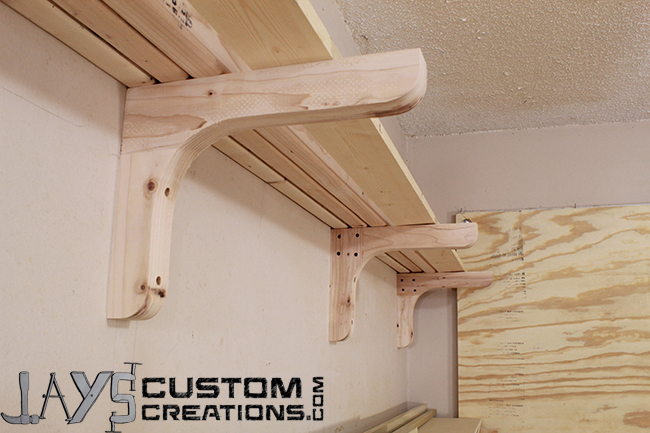


Nice job,Jay. I have the same problem with the lumber and when I saw your problem solver , it answered the question. What a simple solution, Thanks and continue your projects as I really enjoy!
That’s a neat way to do it. Right now, all my stock is laying on the floor with cross pieces every 4′ to allow air space. My biggest problem is that the piece I need is usually on the bottom! Wall space in my shop is very limited, but I may need to rethink the entire setup to make floor space. Keep up the good work – I really enjoy your site and your videos!
Nicely do Jay. Looks like you’ve gotten a bigger shop from when I first found on Lumber Jocks.
I made these with a 1 degree angle on each half joint, which gave a 2 degree angle on the horizontal portion and would also account for any vertical variation on the wall. Helps to shift the weight to the back leg, screws, and wall. Things won’t roll off this way, light poles for lamps, etc.
Thanks for your idea on this, else I might have spent big money for a rack. I appreciate your sharing all the details.
That’s great news. I was going to do the exact same thing with the 1* angle but ended up being lazy. Glad it worked out!
How much do your racks wobble? I made a couple and even after jointing the edges, I still can’t get them to sit flush on the wall. I think my screws are kicking the bracket off the wall. What kind of screws are you using?
I have one that wobbles slightly. I think the problem you might be having is when the screw initially goes into the drywall or whatever material you have on the wall it pulls some out and forms a small mushroom on the surface. This will prevent the bracket from sitting flat. If you remove the bracket and use a chisel or something similar to pear away the bump that is formed on the wall you should be good. While you have the bracket off you could also use a countersink bit on the back of the bracket where the screws come out to help alleviate this as well. Hope that helps.
Thanks for all the info on the brackets Jay. I will be making these to get my supply of lumber up off the floor. As like you and other’s… There’s never enough floor space. Once the lumber is placed on the wall it will be easier to inventory what I have before going and buying more of what I already have… Does this ever happen to anyone else?
Or just to me?.. lol
I’ve watched this before but I’m thinking of using this design for supports for a “floating” workbench/miter saw station. My garage has a 2 1/2-3 foot deep curb in the back of the garage and it’s an extremely difficult space to utilize for my woodshop. I’m planning on putting my miter saw station or stand against that wall underneath my lumber rack.