Through the moving process I have taken the notion that less is definitely more in the house. And while that doesn’t mean I’ve thrown anything away it does mean that I’m not going to be cluttering the house with this and that and this and that. That’s the plan anyway. I do however know that life happens quicker than we realize and everyone does tend to gather more belongings than what is necessary so this is my attempt to prepare for the future. Adding shelves above the garage door is a great way to utilize some otherwise wasted space. And adding this much storage will postpone the need for a typical outdoor storage shed.
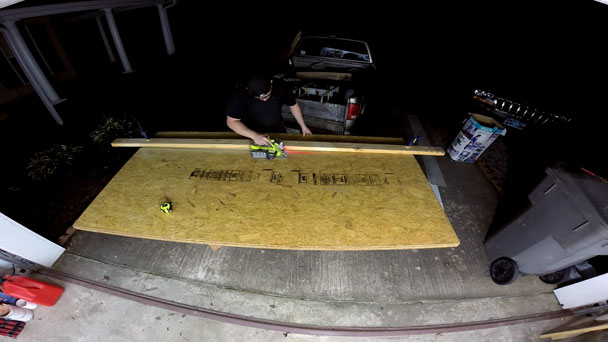
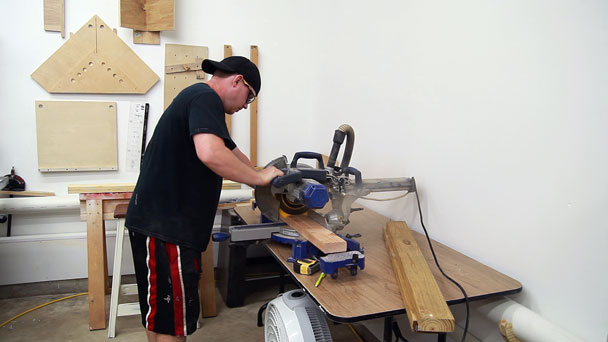
To start I found the appropriate distance from the front wall in the garage to the ceiling joist I wanted to secure to. And cut two sheets of 3/4” Adventech flooring to the depth of my shelf. The span ended up being 36” deep. This flooring material is nearly bulletproof (figuratively speaking) and it will end up only having a 29” unsupported span so I doubt it will sag much. Even if it does I can always brace it at a later date.
What I used in the video:
[one_third]
[/one_third]
[one_third]
[/one_third]
[one_third_last]
[/one_third_last]
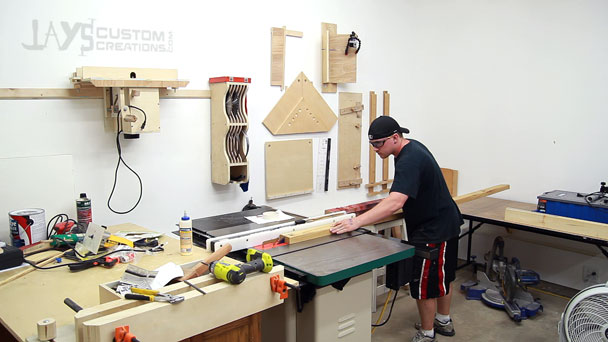
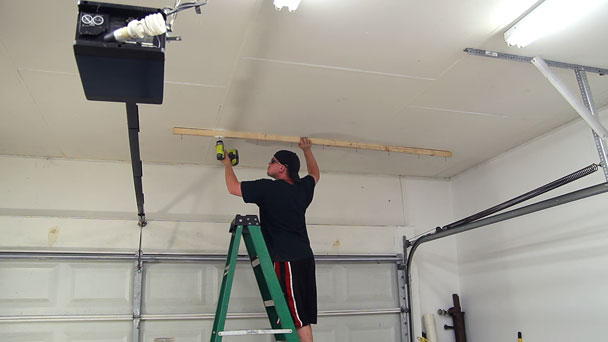
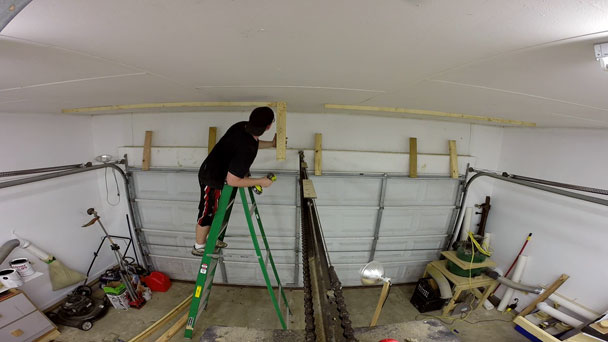
The first thing to do is secure a cleat to the ceiling. The easiest way to make a cleat was to rip a 2×4 right down the middle. This gave me two cleats to use. One for each side of the garage.
I used 3” decking screws to secure all of the 2x wood. To prevent splitting every screw went into a pre-drilled hole.
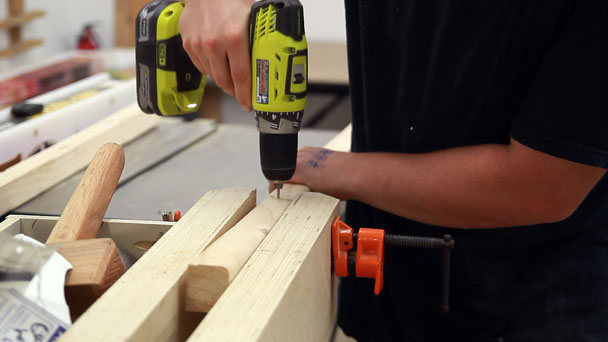
I didn’t bother to cut notches for the H-bar used in the ceiling as it’s only 1/16” or so and I was using nine 3” screws in this 8′ 2×4. The screws will hold everything just fine.
Each 8′ shelf will need three vertical ties to connect the shelf to the cleat in the ceiling. Again, 2×4’s were used here.
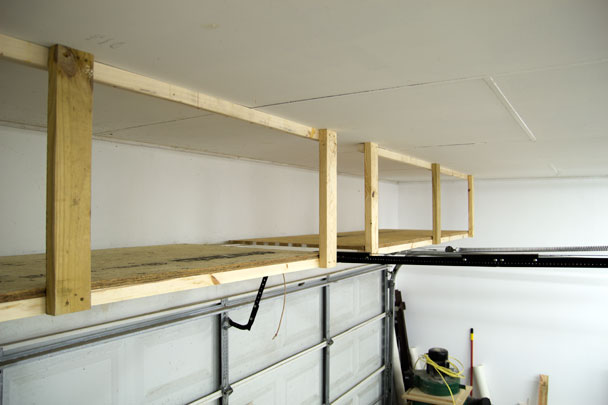
These were then glued and screwed into the cleat. Here you can see why I went with two 8′ shelves instead of a solid shelf the length of the garage or garage door. The garage door opener beam is higher than the garage door rails and ultimately higher than the shelf height. I could have also extended each shelf to the side wall but I’m not gaining that much storage area and it’s so much easier to use a full length of plywood.
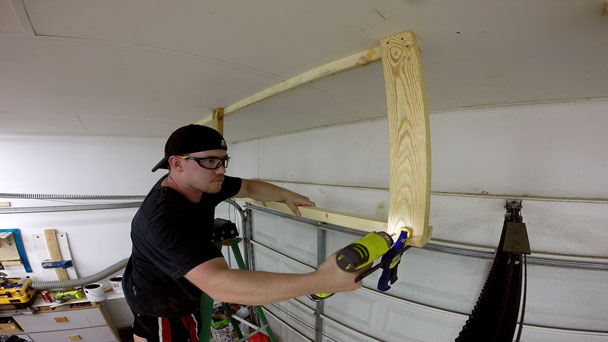
It’s always good to check for square.

Another 2×4 ripped down the middle is needed for the bottom of the vertical ties to support the front side of the shelf.
And that piece is glued and screwed on as well. This will give a roughly 1-3/4” platform to secure the front of the shelf to.
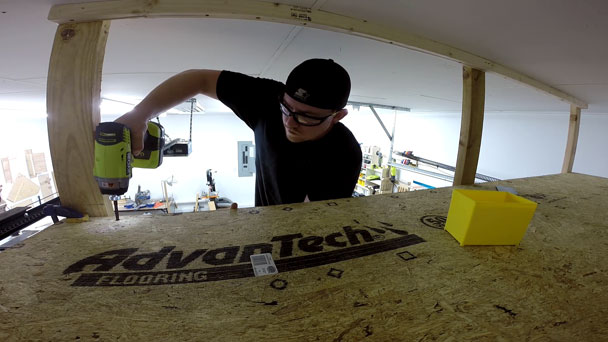
The hardest part was getting the shelf material in place. ¾ of a sheet of 3/4” Adventech flooring is HEAVY! Much heavier than I anticipated anyway.

A few screws in the front side to secure it. And no, as much as this next picture may indicate this project is not sponsored by Adventech. This was an inadvertent perfect brand placement.
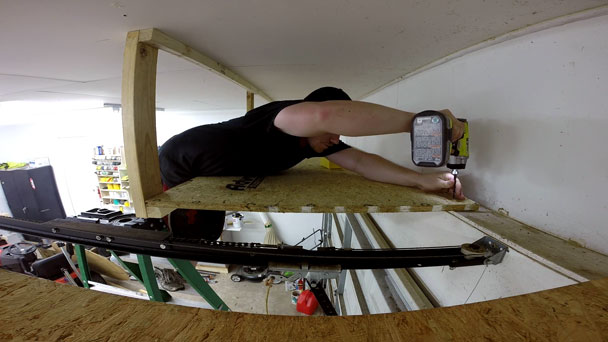
And lastly just two screws in the back side to prevent the shelf from sliding front to back. Here you can get an idea for the span that resulted. I doubt I’ll have any major sagging problems out of the OSB. Advantech is crammed full of resins making it nearly water proof so I doubt humidity will be an accelerating factor in warpage. Even if it does develop a slight sag I could easily brace the shelf from below.
In the end I’m glad I got this one off the to-do list. I have no immediate need for it now but I’d rather be prepared for the future on this one. I sure don’t want household junk to be stored in the main working area of my shop. Thanks for reading and I hope you’re able to at least get an idea for some storage options in your own home or shop from this. Have a good week and take care folks.


Jay,
can you give some details about the wall edge support for the shelves? how are they attached to the wall?
Look at the second to last picture. On my particular garage the door header is about 6″ wider than the wall so there is a little shelf. I just screwed through the shelf into the header.
I see…. I don’t have that external header like you do. I guess a 2×4 bolted to the wall will suffice as an attachment point.
Wow! That’s cool. Going to take a look in my garage right now to see if I can do the same. Thanks for the great videos.
You’re very welcome William. I’m glad they can be of some use to you.
Hi Jay
I have been wanting to do this same thing in my garage. But I only have 15” from the ceiling to the track for the garage door so I was thinking of only putting scrap wood on these shelfs. Do you think this would work if I turned the shelves so they were going length wise one on each side of the garage so I could slide wood on or off.
That would be a great use of space Vince. I believe Izzy Swan and Steve Ramsey both use the space above their garage door for wood storage.
Nice will give it a try
Very cool Robert. Let us know how it turns out.
Your timing for this project is perfect for me. I have wanted to do the same exact project since a have a two bay garage door and a one bay garage door. That is a TON of unused storage potential. Is there an average weight rating I can calculate for shelves that I produce?
Well done jay – Love the fish eye lens!
Do you have a materials list? Thanks!
Sorry Lisa. I do not. Not all garages have the exposed header like mine does so your application may be different. This was intended to be an overall guide.
Ok, yes it’s a great guide! We’re tackling it this weekend!
Awesome! Good luck!! I’ve already filled mine up.
Hello Jay,
I have seen some of your YouTube videos. Well done! I am curious, for these shelves, did you screw the clets into studs above your garage ceiling?
Thanks,
Scott
Hello Scott. Yes, I secured it to the studs in the ceiling.
wow man! strong work! that’s an awesome idea. I’m def going to put that in my garage. by the way, you have one clean workshop!
I watched your video and was inspired to build my own. Thanks for sharing your work. The videos are great!
Thanks Matt. I appreciate it.
That is really nice as long as you have the springs like what is on your garage door, but if you have the torsion springs and one breaks, the guy that has to change the springs might want you to take it down so he can do his job. I know what your thinking, their is always some guy who can find a problem to a cool storage area.
It’s all about the situation at hand. I built it with the consideration of my actual garage.
This is exactly what I was looking for……Thanks for doing the heavy lifting……And I get to go buy some new tools……Great Stuff!!!
I used your suggested method and it came out great. Thanks for the video.
Great video and it got my hubby motivated and ready to get this done! Cant wait to have the garage clean and useable!! Thanks!
Very cool. Hope it works out for ya.
We did this for our garage as well, after finding this on Pinterest. I used lag bolts for fastening the cleats to wall/ceiling and 3-in drywall screws for everything else. Could know or guesstimate what kind of weight this would support? Thanks for inspiring.
I honestly have no clue. There are a lot of variables that would come into play. I know I’ve got about 500 pounds on mine with no problems.
Why didn’t you use the whole 4×8 sheet, or did I miss something?
Hey Jay great ideas, in the video with the conduit lumber rack, …….Who is the guy pictured in the plywood at about 2:37 seconds
This is a Very useful project with simple explanatory steps
Thank you
Very good idea EXCEPT if your garage door springs/ torsion bar run between the rails and not along the rails. Your garage door installer / repair man will have a few choice words as he goes to repair the door or replace the door springs
Thank you very much for the tips – replicated and it works great!
I only wish I had all your tools
Great idea!!
Can you come to my house?
I’m looking for ideas
Love your videos, Jay. Tons of great ideas for my garage/workspace. Are there any special considerations for having the ceiling cleat only attached into one ceiling joist? Mine will only be for Rubbermaid totes of holiday stuff so nothing too heavy. Just curious if yours is holding up with a good amount of weight from one joist?
Hey Jay going to do this. Very soon my only question I would like to use the entire sheet on each side I know that might create sagging can I attach studs on bottom from side to side to then slide ply wood over or do I thing that might be too much weight? Instead of 2x4s for the studds under plywood maybe 1x4s to reduce weight?