")
The goal of this shop tour series is to get a better look at how other people setup and use their shop space as well as to promote other creators. If you like what you see be sure to leave them a comment here and subscribe to any or all of their content links to see more. If you would like to be featured in this series along with your shop send an email with the subject FEATURE MY SHOP to jay@jayscustomcreations.com. Enjoy!
Hey all, my name is Josh Thomas and welcome to my shop tour. I live about an hour south of Nashville, and am married with three kids. This is my side-hustle. My shop Is not pretty, or one filled with the best tools as I consider myself still learning. I started woodworking about 3-4 years ago, and making my own videos about 1 year ago. I have a small video library of 10 videos, but I feel each one is better than the last, and is unique. I would love for you to check out some of my content, and get to know me and my art.
http://www.youtube.com/studiojlt
This is a working shop and garage. I need to store household items in here as well as my tools. It is 19’ by 19’. I compartmentalized the right side of my shop as fixed, and the left side as mobile. These are all tools that I can roll out as I need them, such as my planer and drum sander.
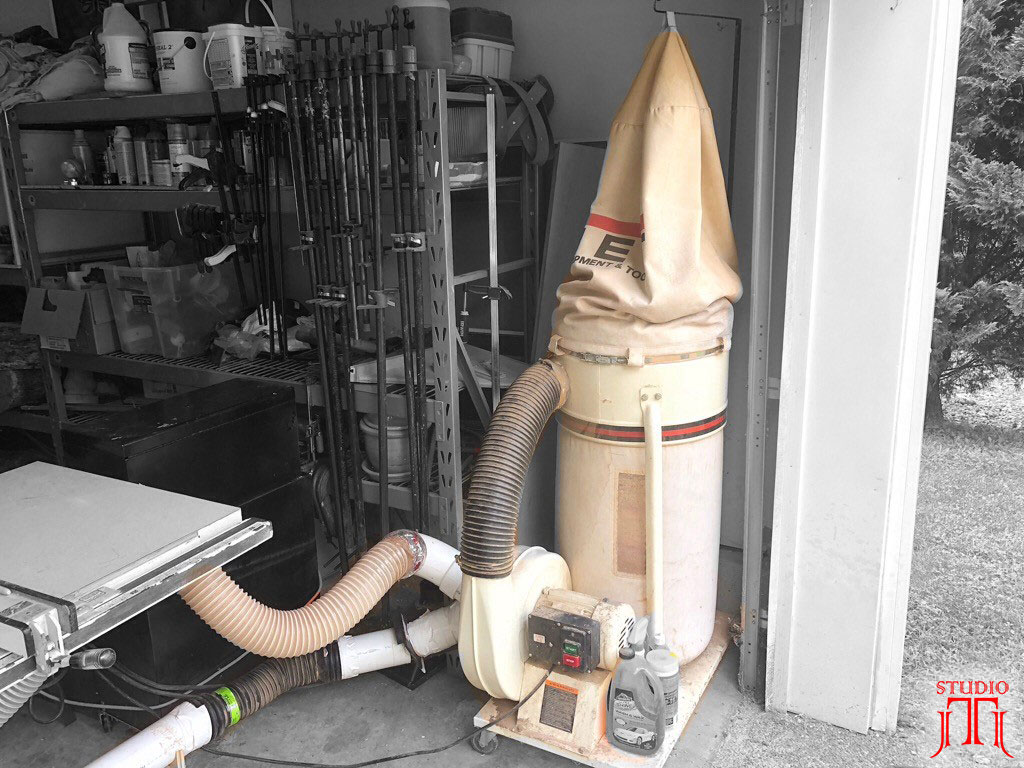
I’ll start with my dust collection. I have three tools hooked up to it – my table saw, my bandsaw, and my lathe. I have a flex hose that I can remove from the bandsaw tube and hook up to the planer or drum sander when I wheel them out to the driveway. And yes, it badly needs to be emptied :)
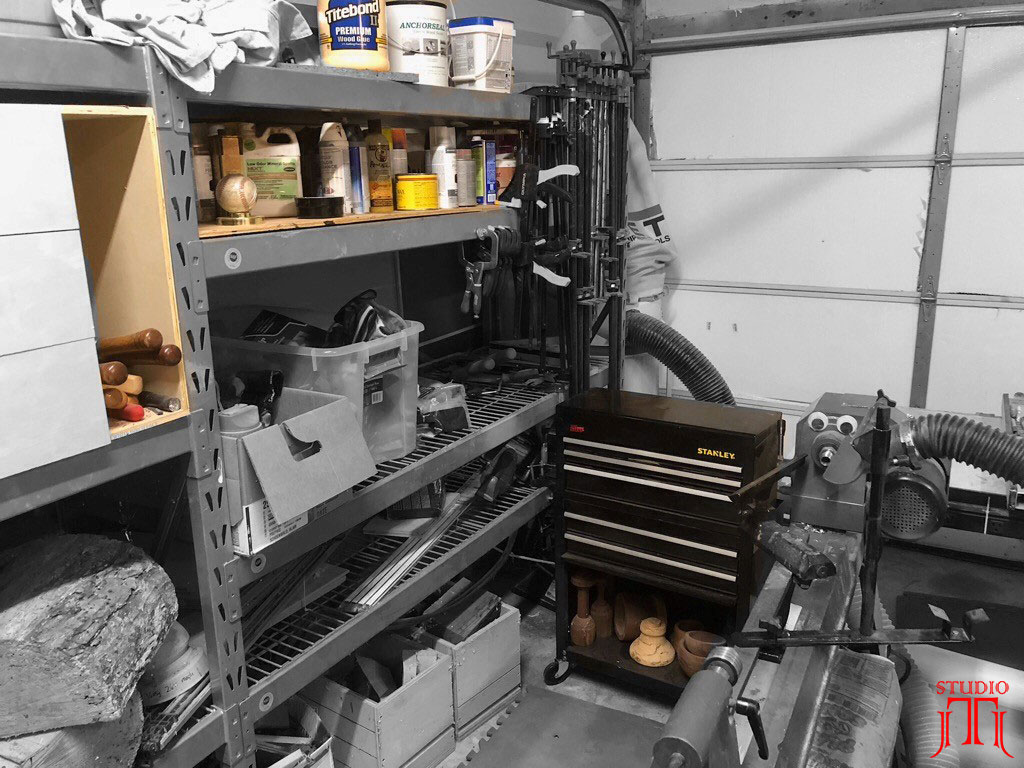
Next to my dust collection, I have the smallest collection of clamps.

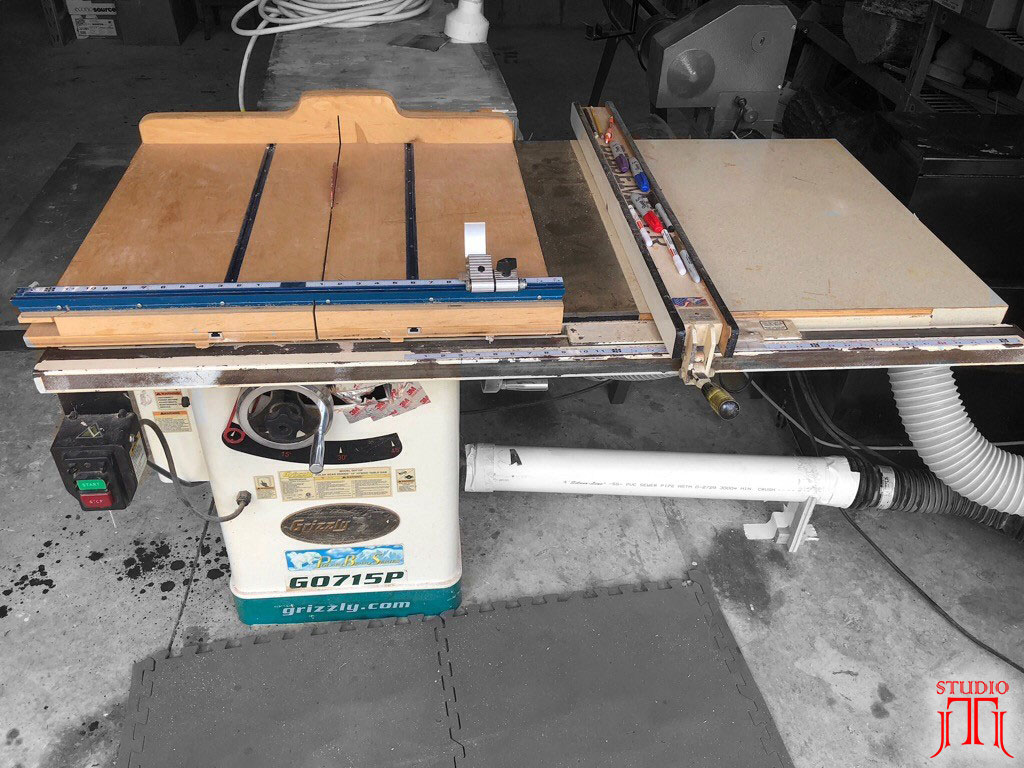
This Grizzly is an outstanding table saw. I bought it off Craigslist, along with my dust collector and a whole box of drawer slides for $500. I have self-funded the entire shop through selling my artwork, which keeps the wife happy since she insists I use my 9-5 money on things like food, diapers, and a house. I like having the table saw in this location, as I can get a full sheet of plywood on it when I open the garage door. The sled is a Nick Ferry design. I LOVE this sled. I use it all the time – having a solid cross-cut sled is a game changer.
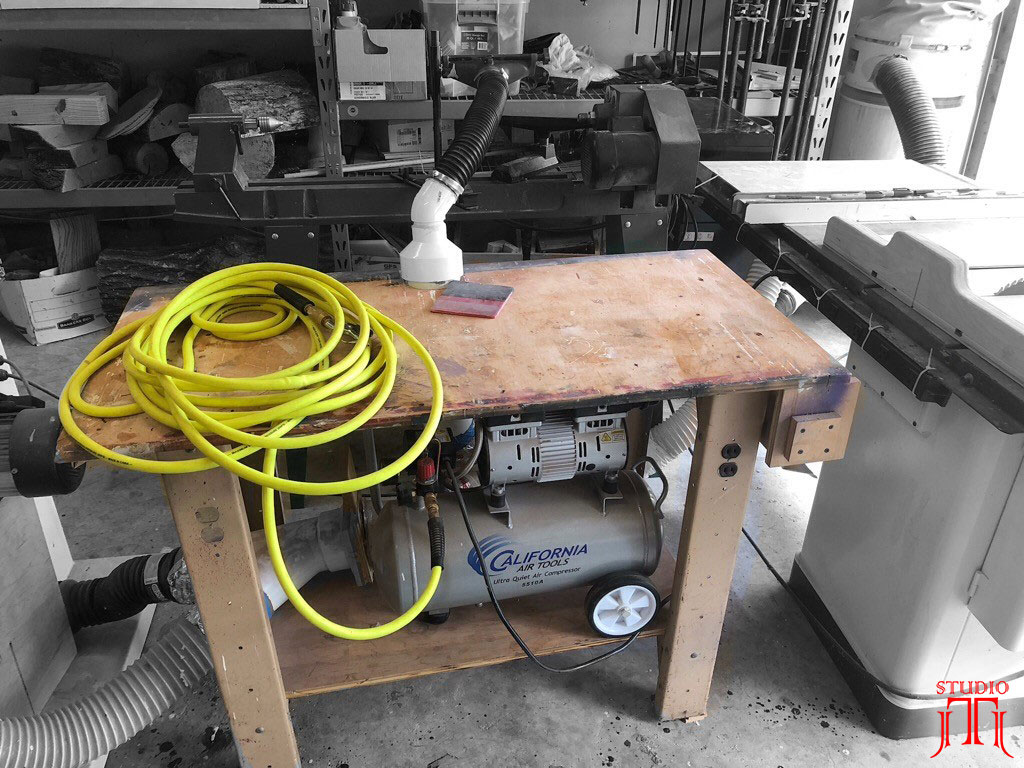
Behind the table saw is the world’s worst outfeed/assembly table. I keep my small air compressor (which I LOVE) on it, and I have a paper roll installed on the right. I need to get an air hose reel, I am always tripping over the hose! Lastly, I cut a 4” hole to run dust collection up to my lathe. I can raise/lower the lathe dust collection tube by 2” to make it flush with the table. Then I install that red/black square as a blast gate. I also installed a 4’ power strip on the backside of the table saw. Having electrical access near the front of the shop helps a ton!
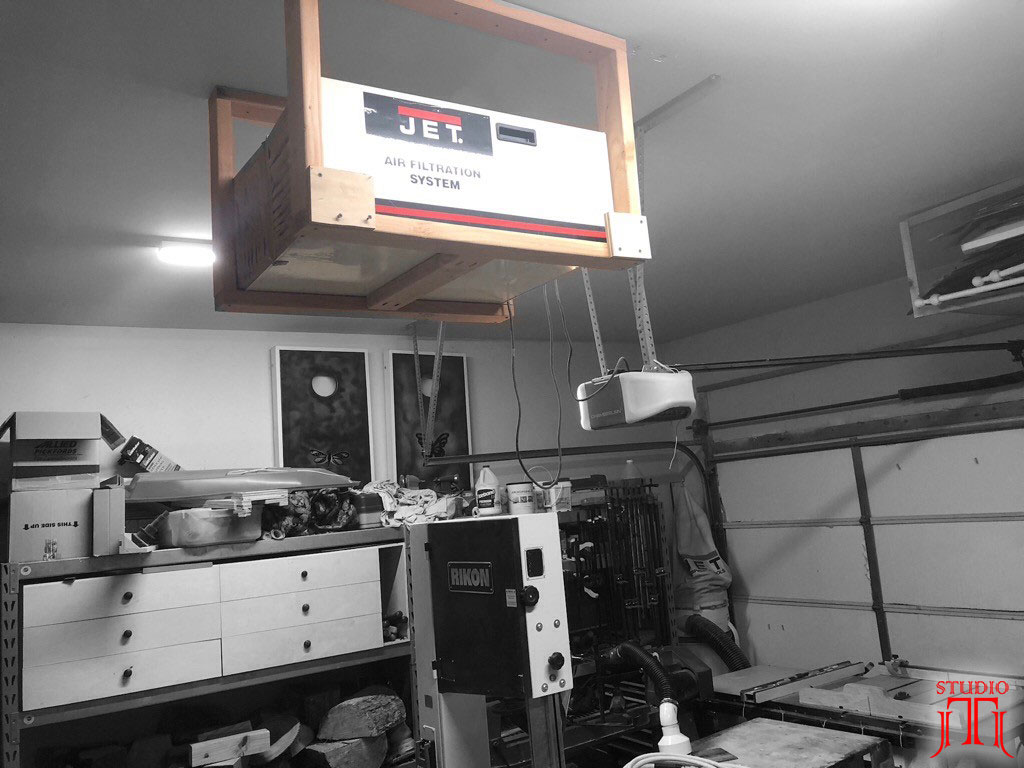
Continuing to the left is my bandsaw. It’s an 18” saw that I find invaluable for making bowl blanks for my turning. Being in the center of my shop is nice, as I can get long pieces through it, and it being behind the outfeed/assembly table allows me to get double use out of that space. I got this from a going-out-of-business sale for $700. It’s been worth every penny.
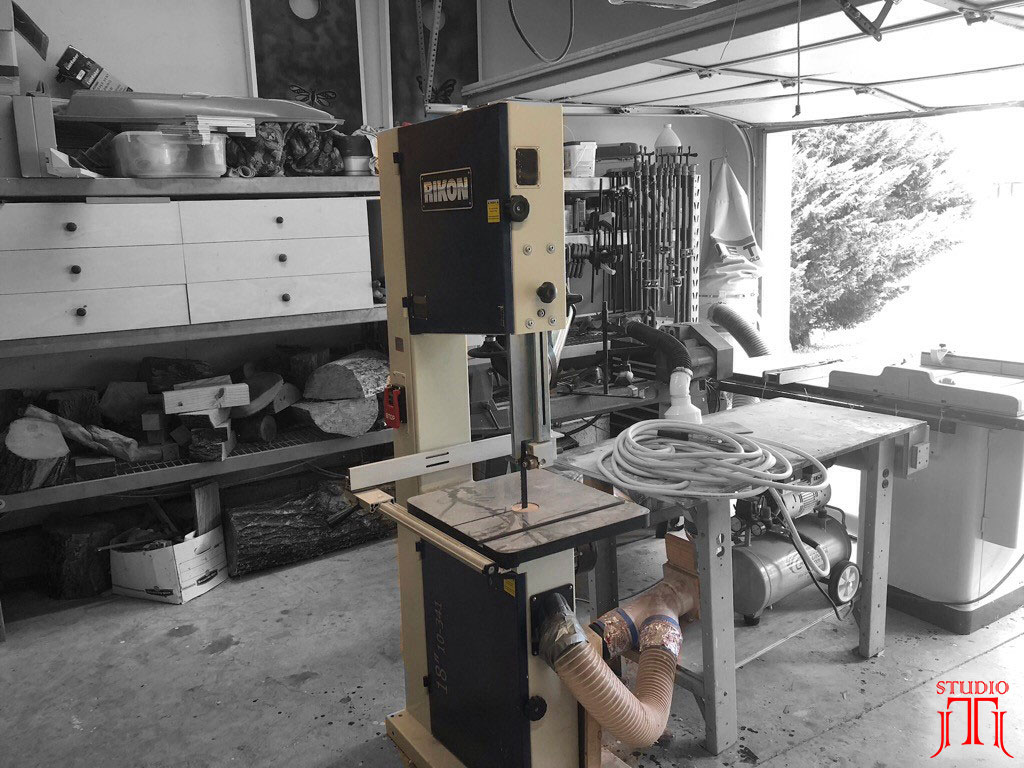
Directly above the bandsaw is my air filtration unit. It’s another Craigslist find, but works great. I always have it running.
Continuing to circle around my “island” is my favorite tool, my Harbor Freight lathe. I have beat this thing up, and it still does a great job. The sandbags add stability, and honestly, the biggest safety feature on it is the under-powered motor. When I first started, I had improper approaches with the tools, which would normally cause a catch. That can ruin your piece and/or hurt you. This lathe stalls out if a cut is too aggressive or with bad technique. I would highly suggest this unit for anyone wanting to learn to turn.

I keep this tool chest nearby to hold my lathe accessories and sandpaper. The bottom shelf holds items I’ve wet-turned and are air drying. The shelf behind me has all my finishing supplies (and an autographed baseball by the 1984 World Series champions Detroit Tigers). My lathe scrapers, skews, and gouges are in the box to the left of my finishing shelf. I plan to build a lattice-shelf thingy in that box so each tool has its own compartment. One day…
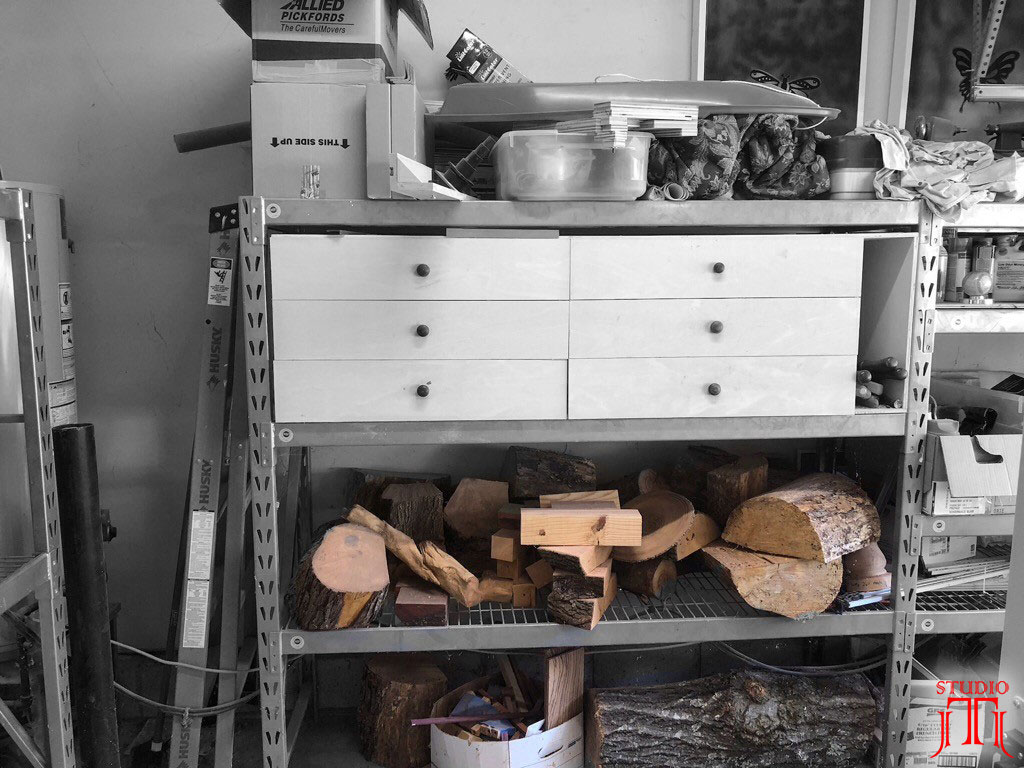
Following the side wall, I built some drawers for shop storage – I prefer everything to be tucked away in a drawer rather than having every tool visible. I keep my turning stock in the shelf below my storage drawers to aid in the drying process. I prefer to turn green wood, but I can’t always get to it before it dries out.
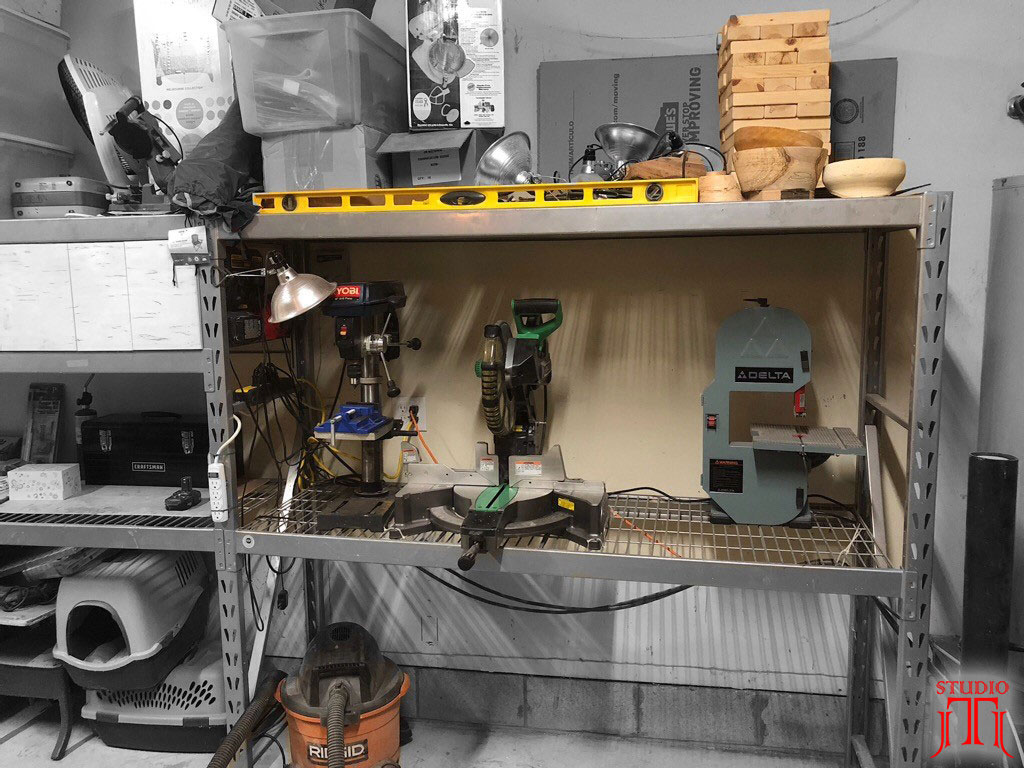
Turning to face the back wall is my miter saw, drill press, and mini bandsaw. All Craigslist finds. I keep a ¼”, 8 tpi blade on the bandsaw that helps with tight turns. The drill press is terrible. I have all of battery chargers on the wall to the left of my drill press. I keep my other turned items that are drying on the top shelf (and a giant Jenga!). The miter saw is a Hitachi and has been a great tool. It was also my first tool purchase and what got me hooked into woodworking. I wanted to add crown molding to my house, and I didn’t know how. Enter: YouTube and I found this great community!
To the left of my miter saw is my vertical drawers (inspired by Paul Jackman). You can see how the drawers work in the next picture. I still need to add drawer pulls. Below those drawers is my catch-all/current project holding place. I like having one junk area, it keeps the junk from piling up on my other horizontal surfaces.
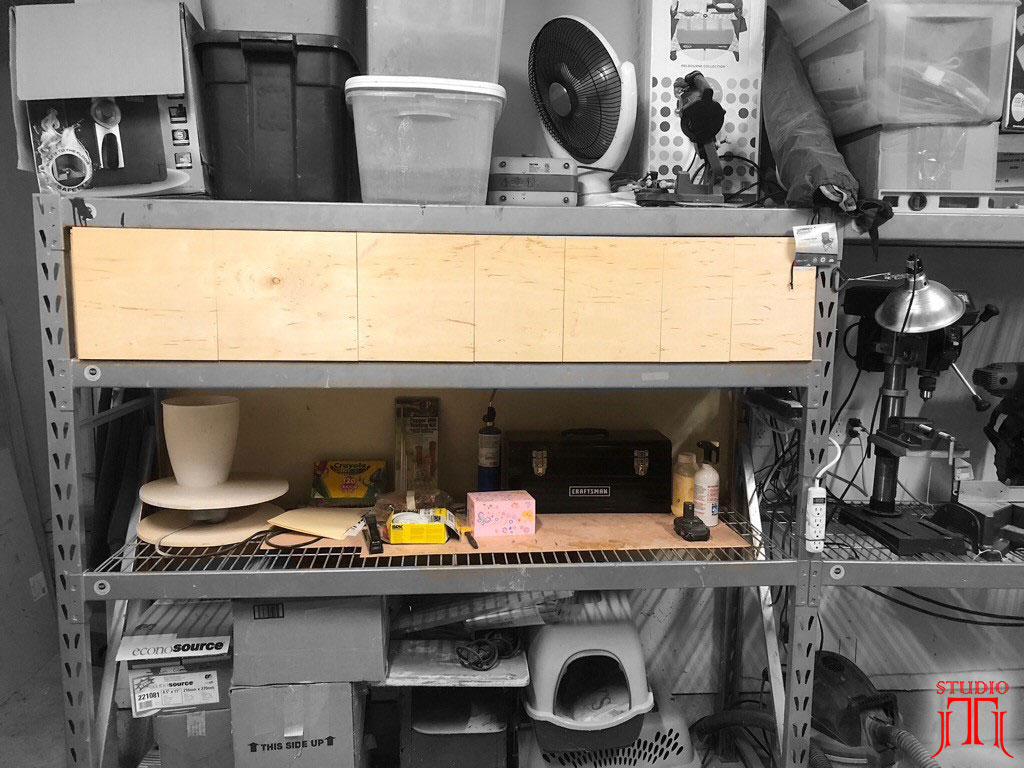
As you can see, I store my tools in here vertically since the shelf is too tall for drawers. I need to add some labels on each drawer though. I spend a lot of time trying to remember where I put each tool :/

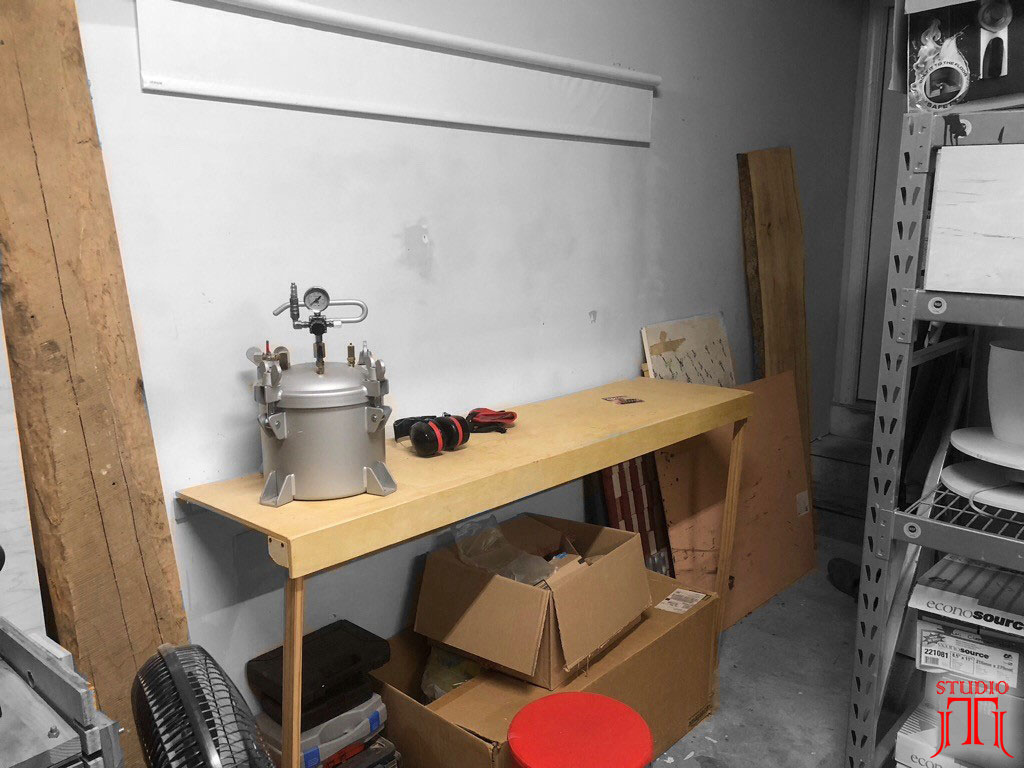
Next is my casting area and vertical wood storage. This is the entrance to my house, and a great place to keep my large sheet goods/slabs that won’t fit on my lumber rack. The table folds up if needed, and the screen on the wall rolls down for when I need to take finishing shots of my artwork. I keep my hearing protection and dust mask here so I can grab them as I enter the shop. When I cast with resin, I remove the vertical drawer with my supplies, and mix my resin on this table. Below the table is excess packing supplies for when I need to ship my art. Recycling baby!
Here is the first cabinet I made. I keep my hand tool collection in here, which is a card scraper and a plane. I think I might have a rasp somewhere in there. Not a big hand tool guy. In front of my cabinet is a flip-top sander/grinder inspired by Brad Rodriguez of the “Fix This Build That” YouTube channel, and a fellow Nashvillian. In front of that is my “Camera-on-a-pole-in-a-bucket” setup based on Jay’s plan. On top of the cabinet I have my Soundgarden album art. It’s one of my favorite videos (and the first video I ever shot). I put my tiny sticker collection here, and my anarchy “A” is from my Punk Rock Vase video.
BadMotorFinger album art: https://youtu.be/lKs8X0RmJLw
Punk Rock Vase video: https://youtu.be/y6VeNbnyZZg
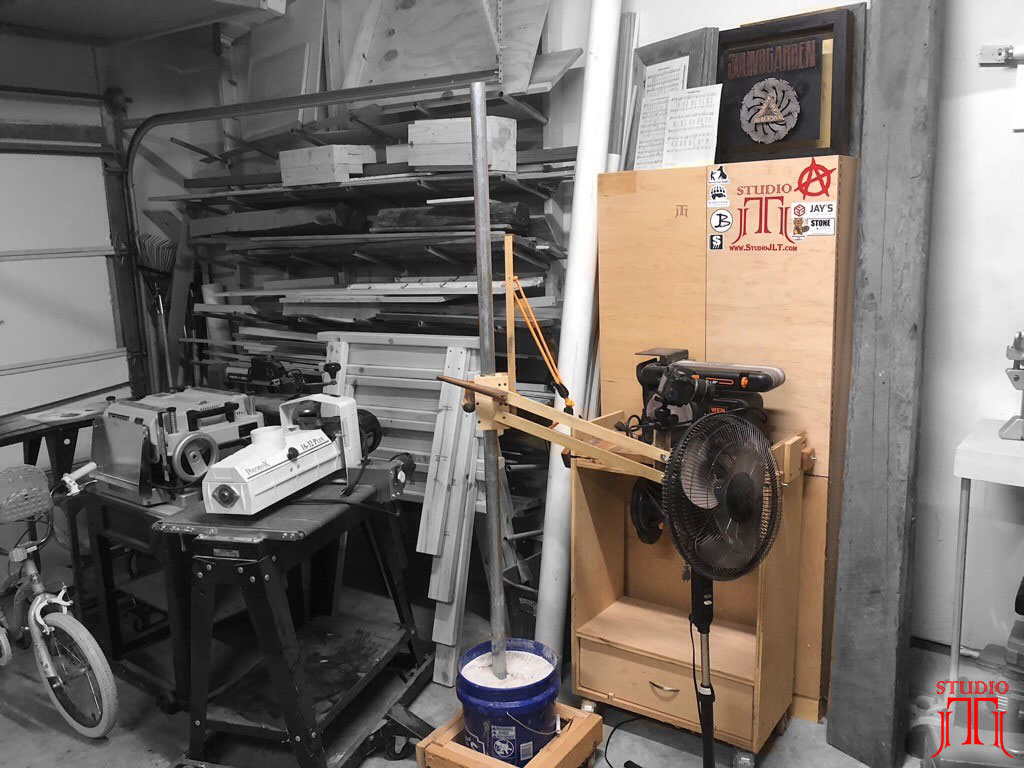
This is my lumber rack based on Jay’s design. It’s served me well, but I think I need to remove about half of it. I’m storing wood here that I’ll never use. In front of it are some sawhorses, again built on Jay’s design. They are great, and the nesting feature is fantastic for my small shop.
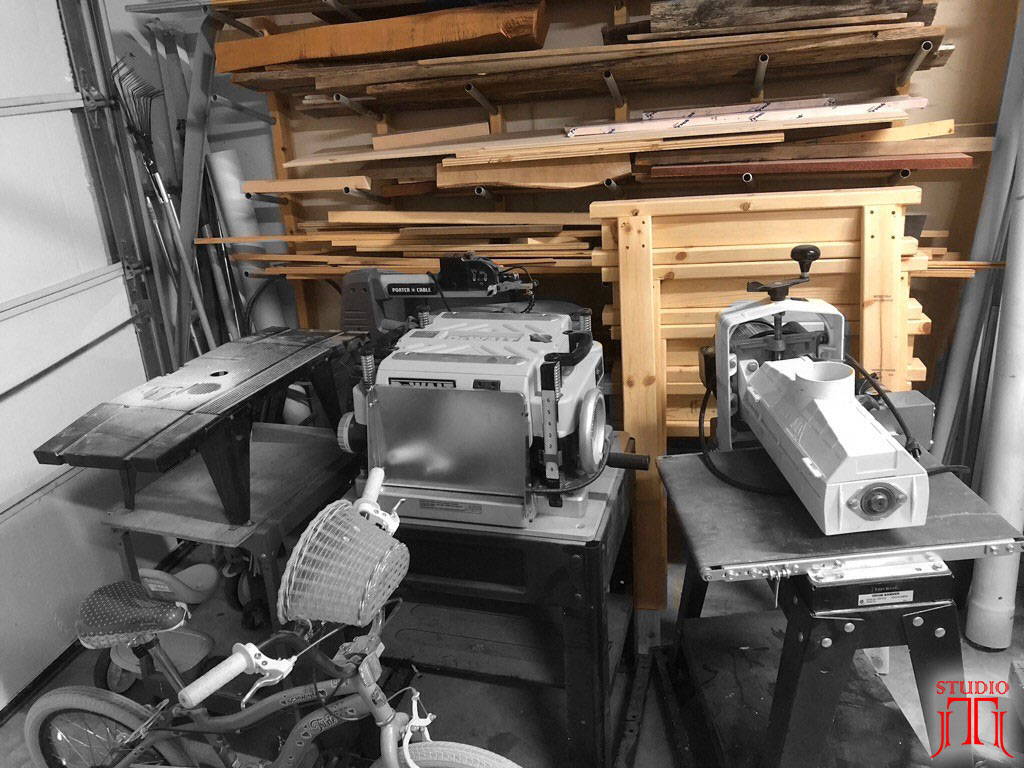
In front of the lumber rack are my mobile tools. I wheel them out to the driveway when I need to use them. The drum sander is such a luxury for my segmented turning.

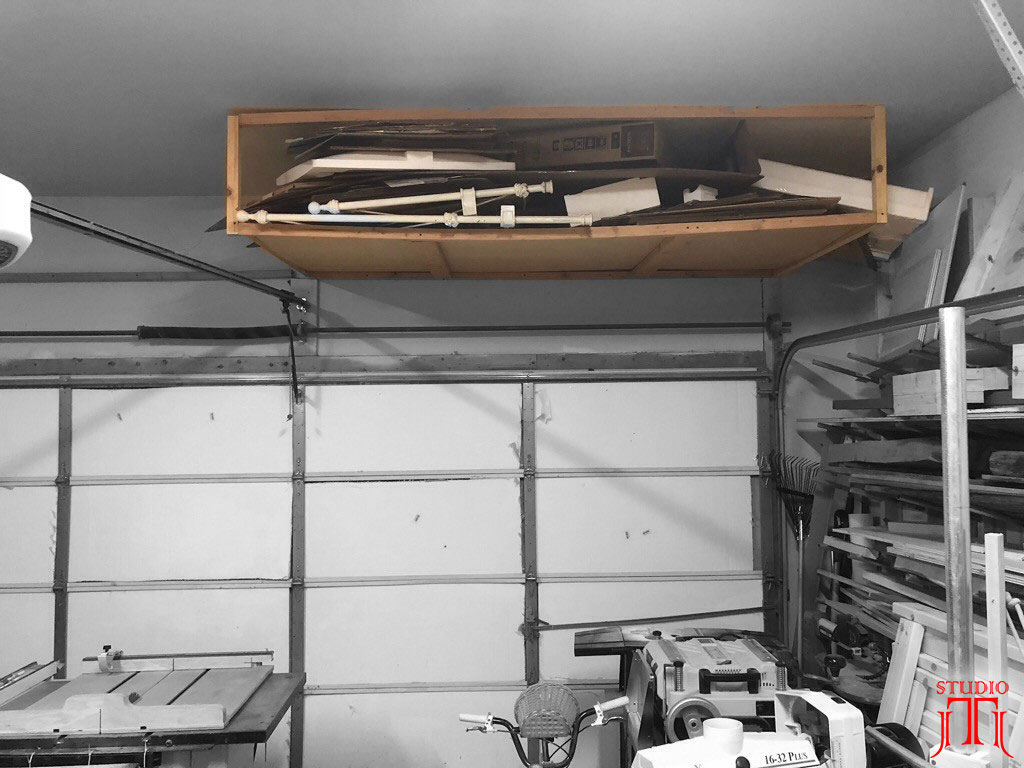
And lastly, above my garage door is another idea I got from Jay. I keep large cardboard, Styrofoam, and other packing supplies up here (and an old bed frame). Recycling these packaging materials saves me a ton on shipping costs.
And that wraps up my shop tour. It’s a work in progress, but it serves me well. You can follow me socially at the links below, and check out some of my artwork I have for sale on my website. I try to release content monthly on YouTube, and daily on Instagram. I’d love to have you on board!
http://www.youtube.com/studiojlt
http://www.instagram.com/studiojlt
http://www.facebook.com/studiojlt
http://www.studiojlt.com

")

Thanks for featuring my shop Jay! I caught it on the one day it was clean ????
About your comment: ” I need to get an air hose reel, I am always tripping over the hose! ”
Not really. Those retractable hose reels are expensive and take up a ton of valuable shop space. It is much cheaper and more functional to simply get one of those coiled, plastic air lines that self-retract to their original compact size. Screw one on your air compressor and install some type of hook on your bench. Done!
https://amzn.to/2q5gB94
This shop tour idea is a really good one. If you didn’t learn something useful from visiting another shop; you weren’t paying attention!
Josh has done a lot with a small space and limited budget. Good on you, Josh!
Thanks for sharing, Josh! I like the idea of the bags of sand on the lathe cart. Good thinking!
Love this shop tour, mainly because I have a similar sized space and collection of tools. Love seeing the storage ideas and layout, definitely gave me some ideas.
Cool Sean! I never really considered it organized :)