Related history content:
– Sweetgum Mortar video 1
– Sweetgum Mortar video 2
– Rolling Forge
– Howitzer Ammunition Chest
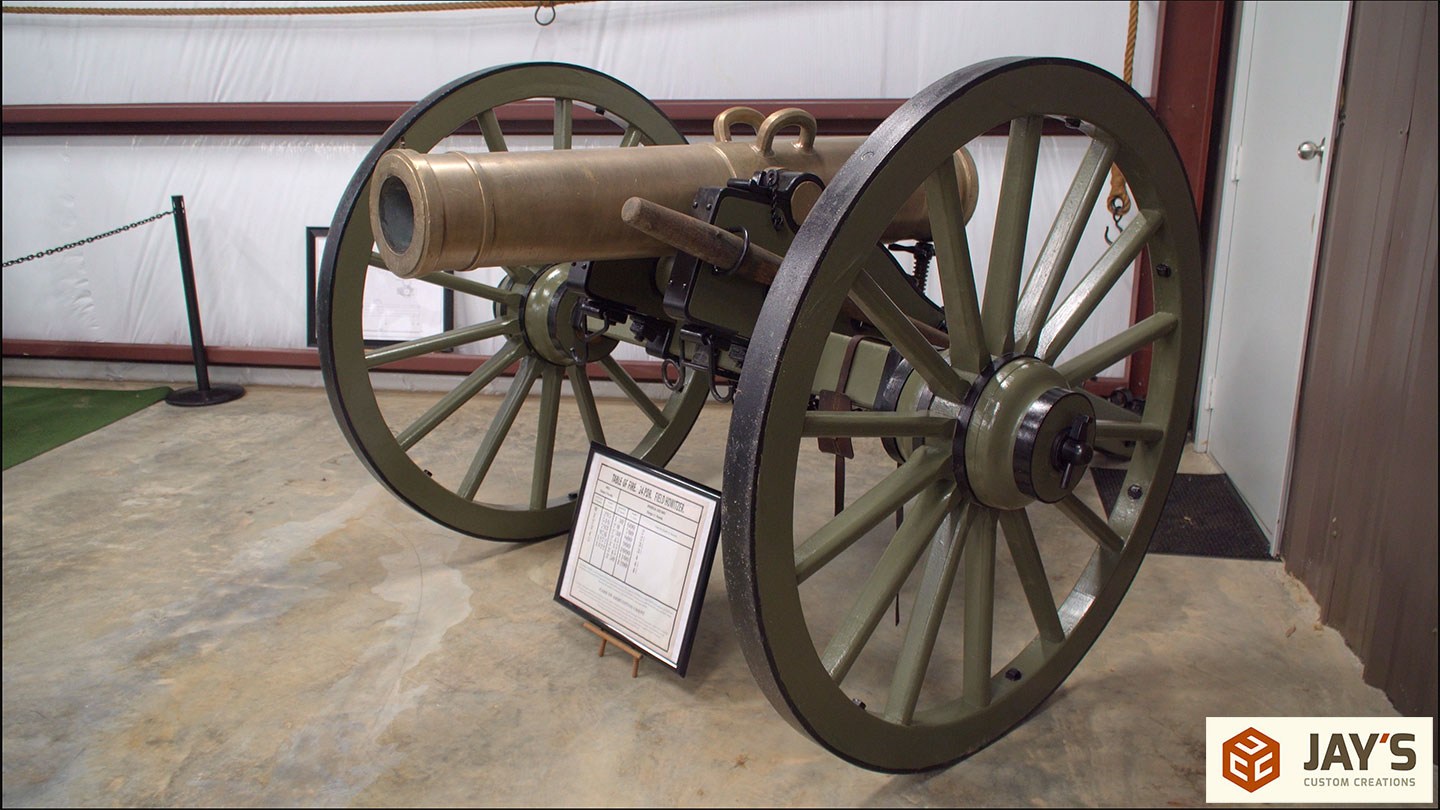
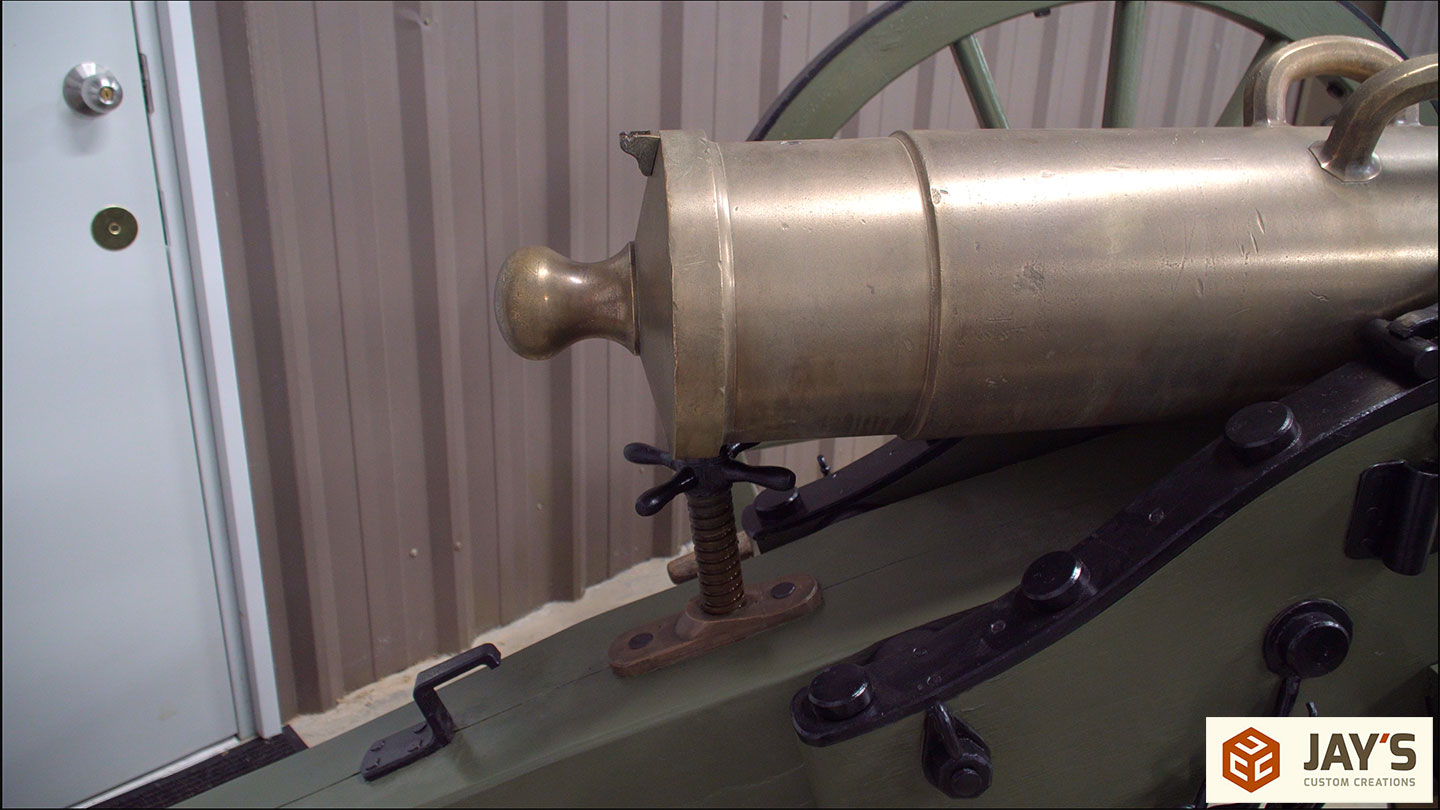
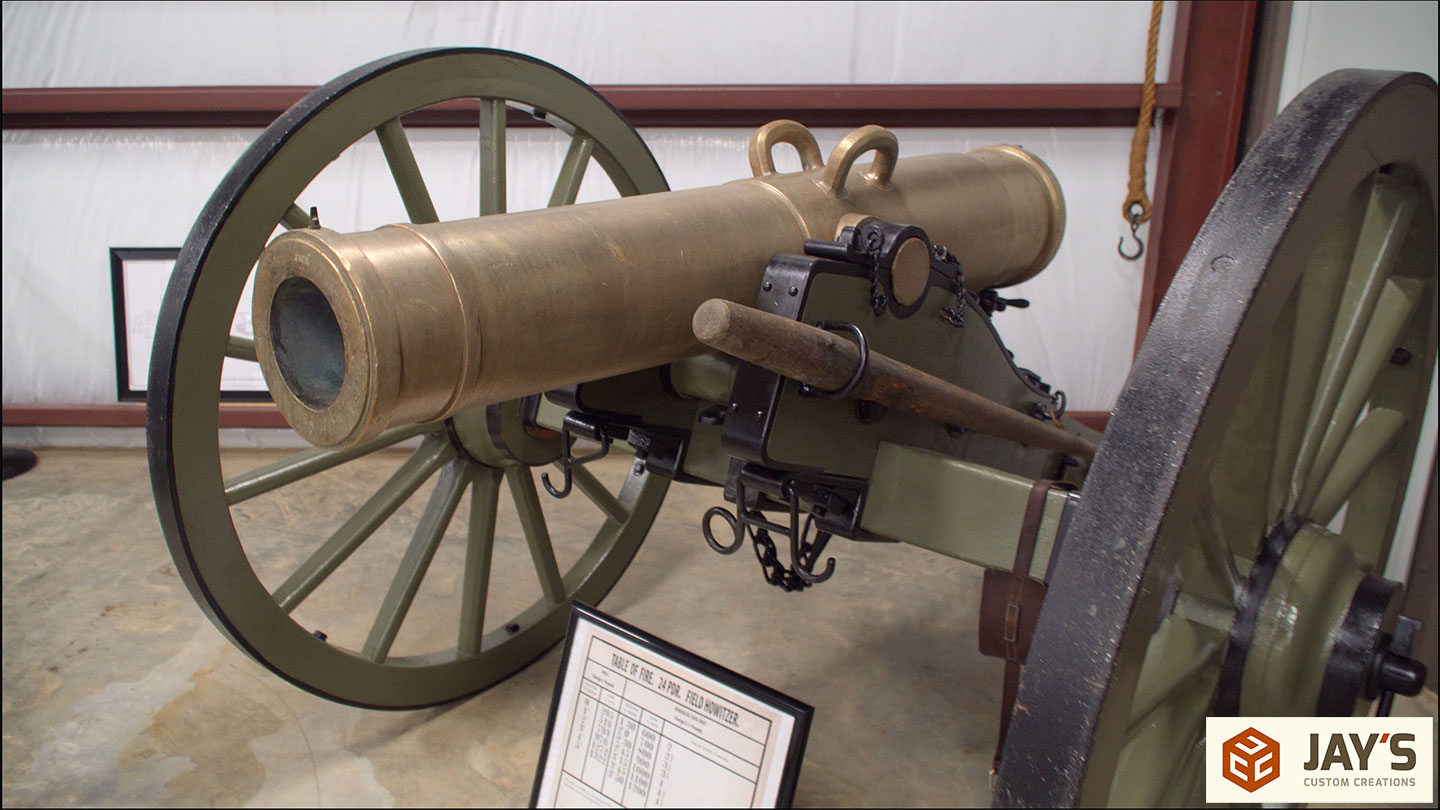
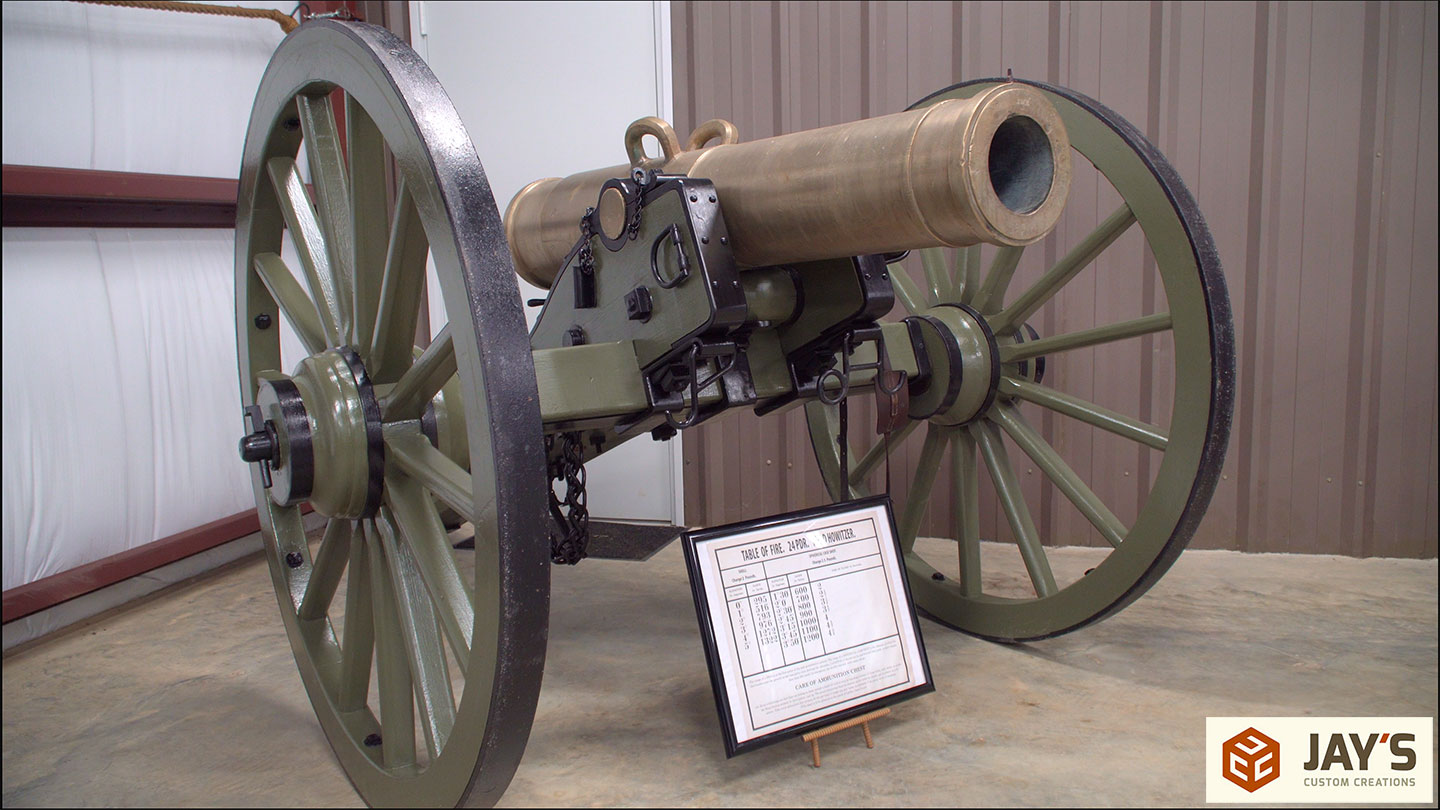
My friend Duffy started a history museum and every now and then I get the opportunity to contribute with some kind of woodworking task. In this case, Duffy acquired an original 24pdr Howitzer cannon made in 1847. Of the original 69 produced in the mid-1800s 36 of them are known to have survived with only three of them being in personal collections. The cannon itself, or the tube, is original. The carriage it is sitting on is not. The previous owner said he had it for 30 years and doesn’t remember the history before him. There are a few original items, like the axle and a double link chain, but all of the woodworking and some of the metal are reproductions.
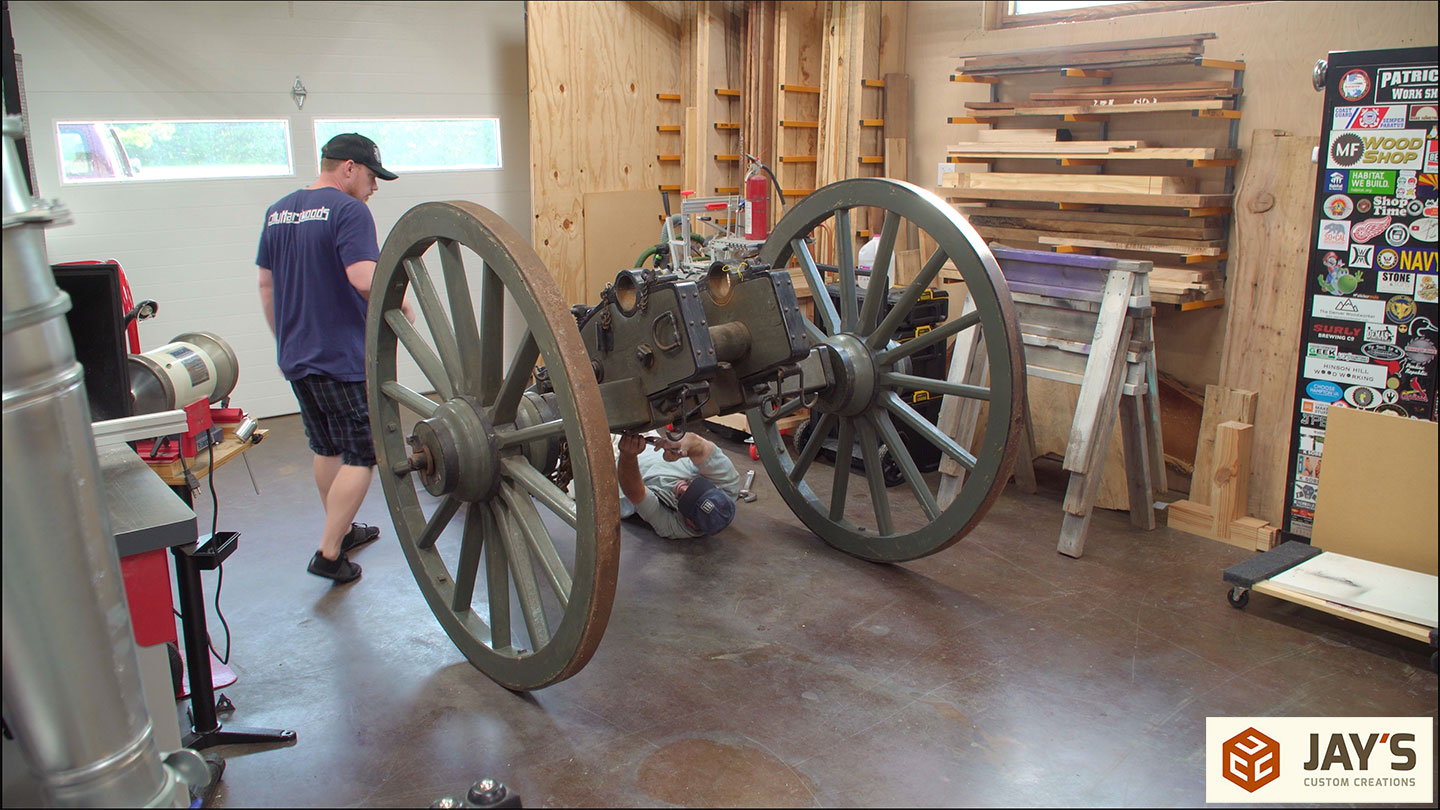
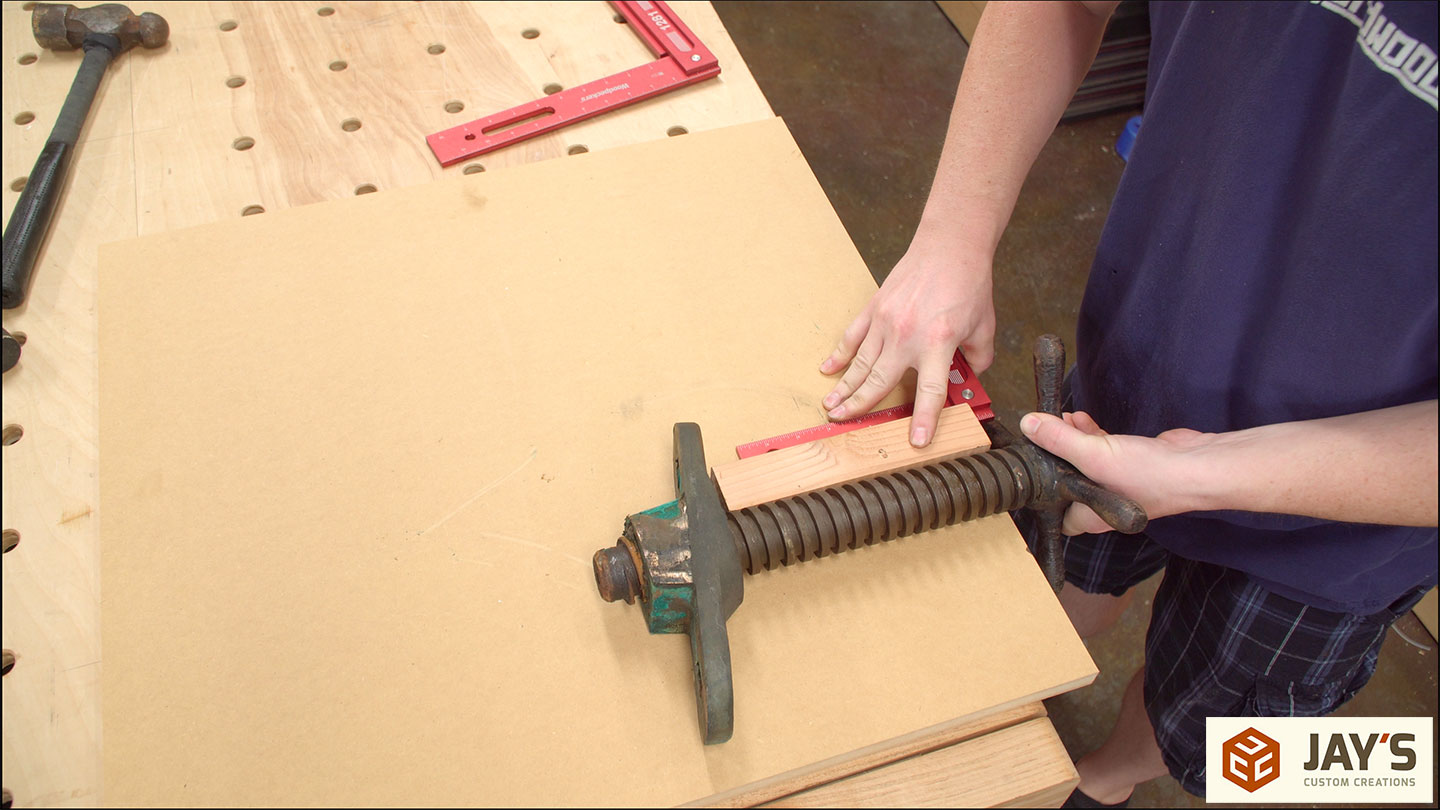
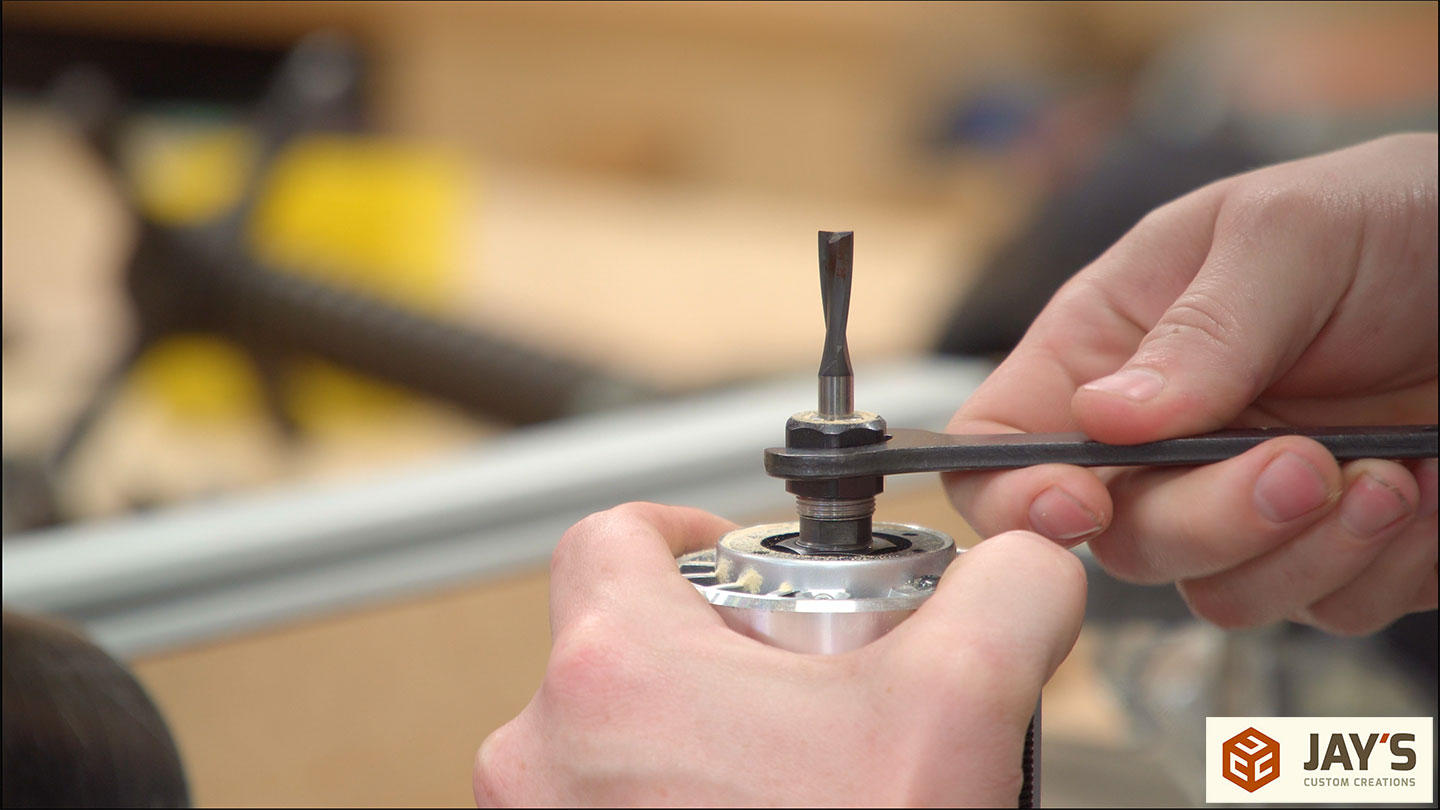
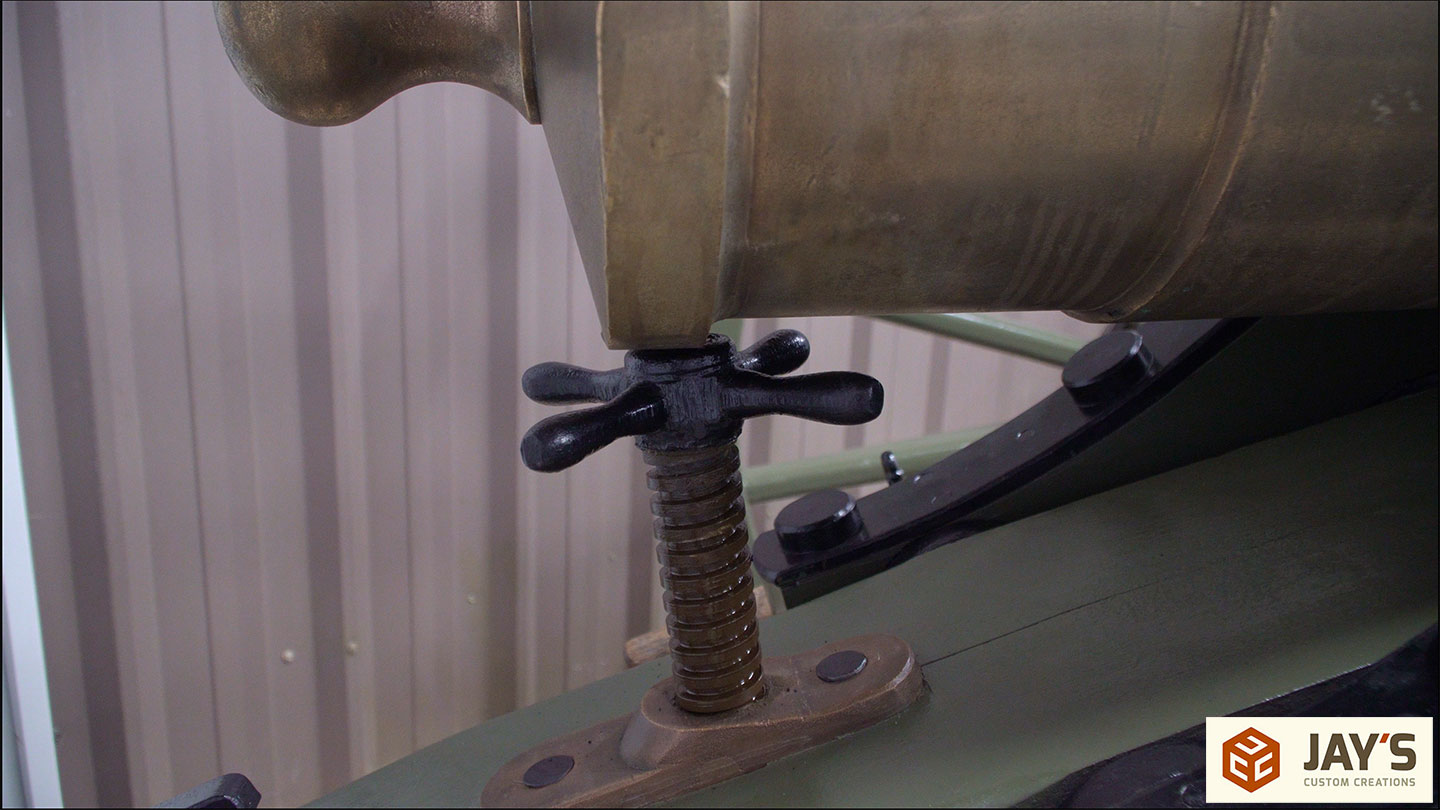
My task was to relocate the elevating gear, or screw. Rotating this screw changes the elevation of the rear of the cannon tube and therefore changes the firing angle. This carriage was originally made for a Napoleon 12pdr and the only difference between this carriage made for the Napoleon vs a carriage made for the Howitzer is about 1-3/4” in length of the cheek plates and 2-3/8” difference in the location of the elevating screw.

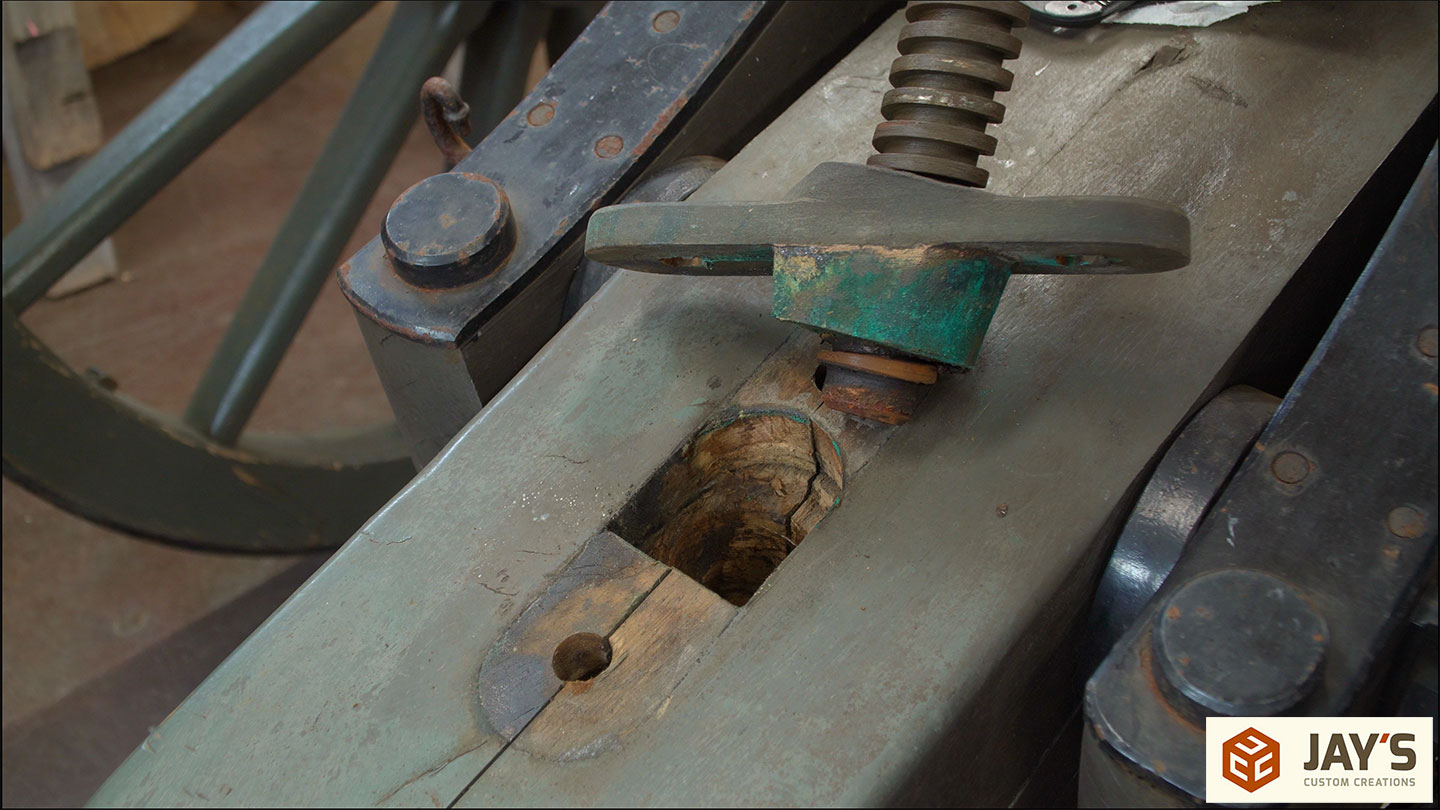
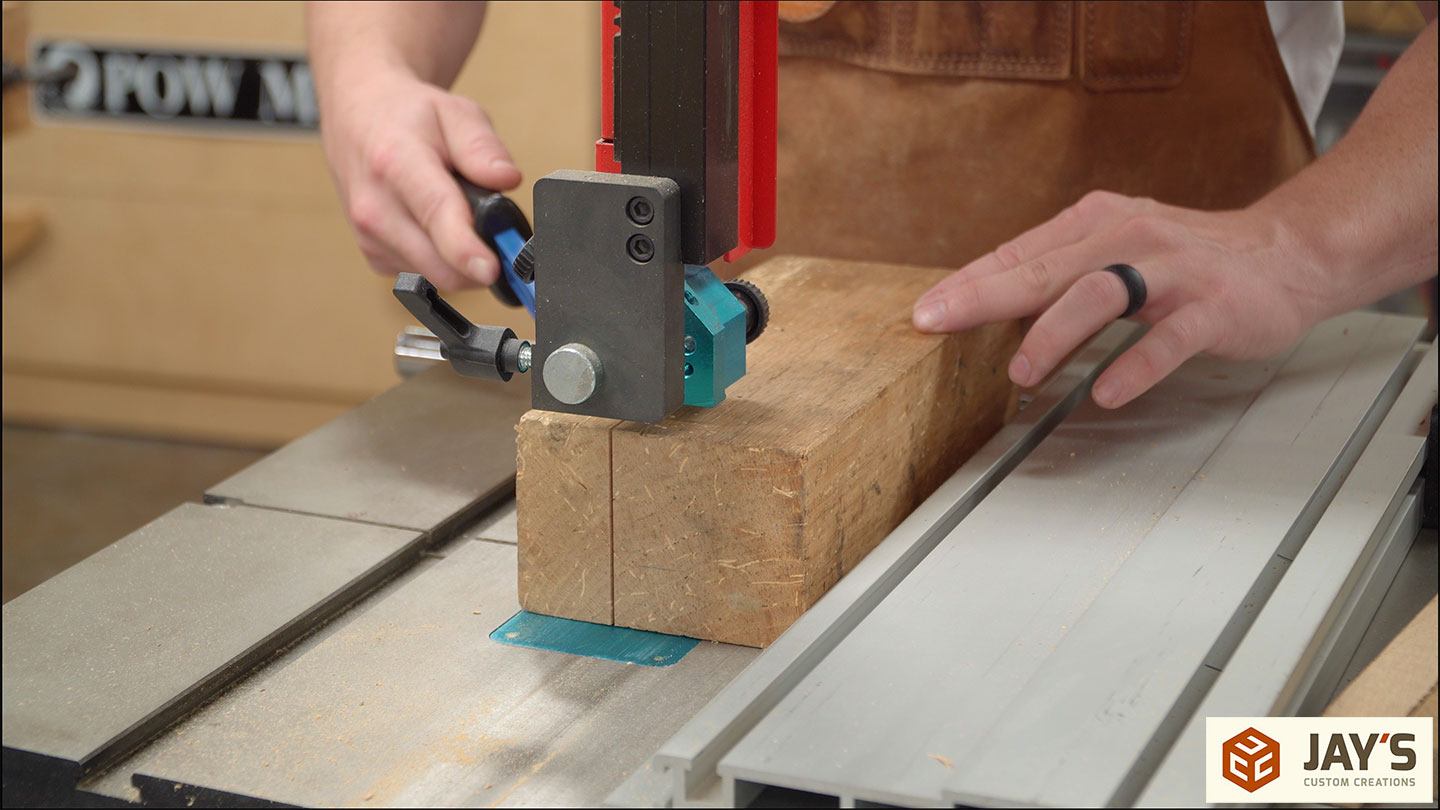
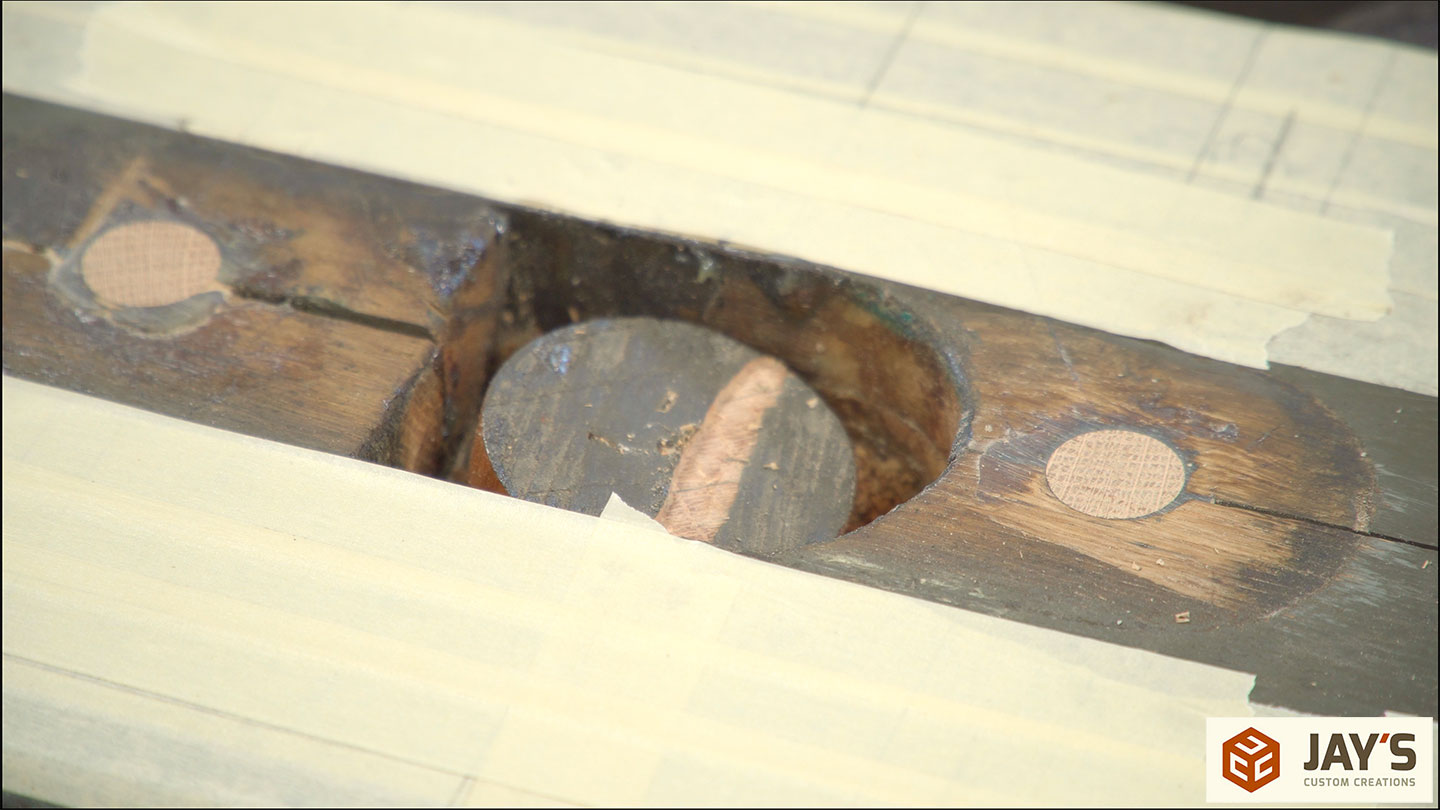
With the screw removed you can see the size of the holes that need to be plugged.

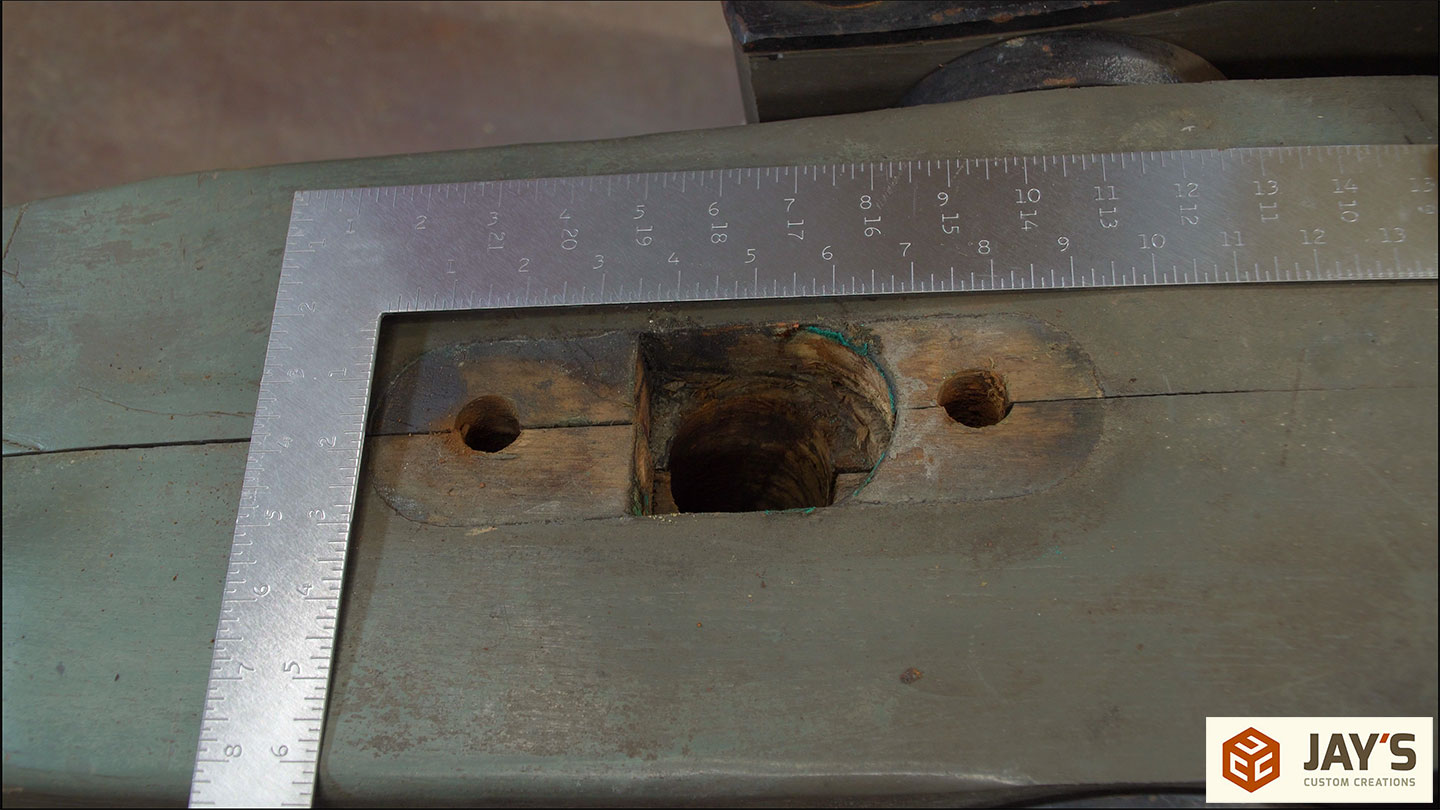
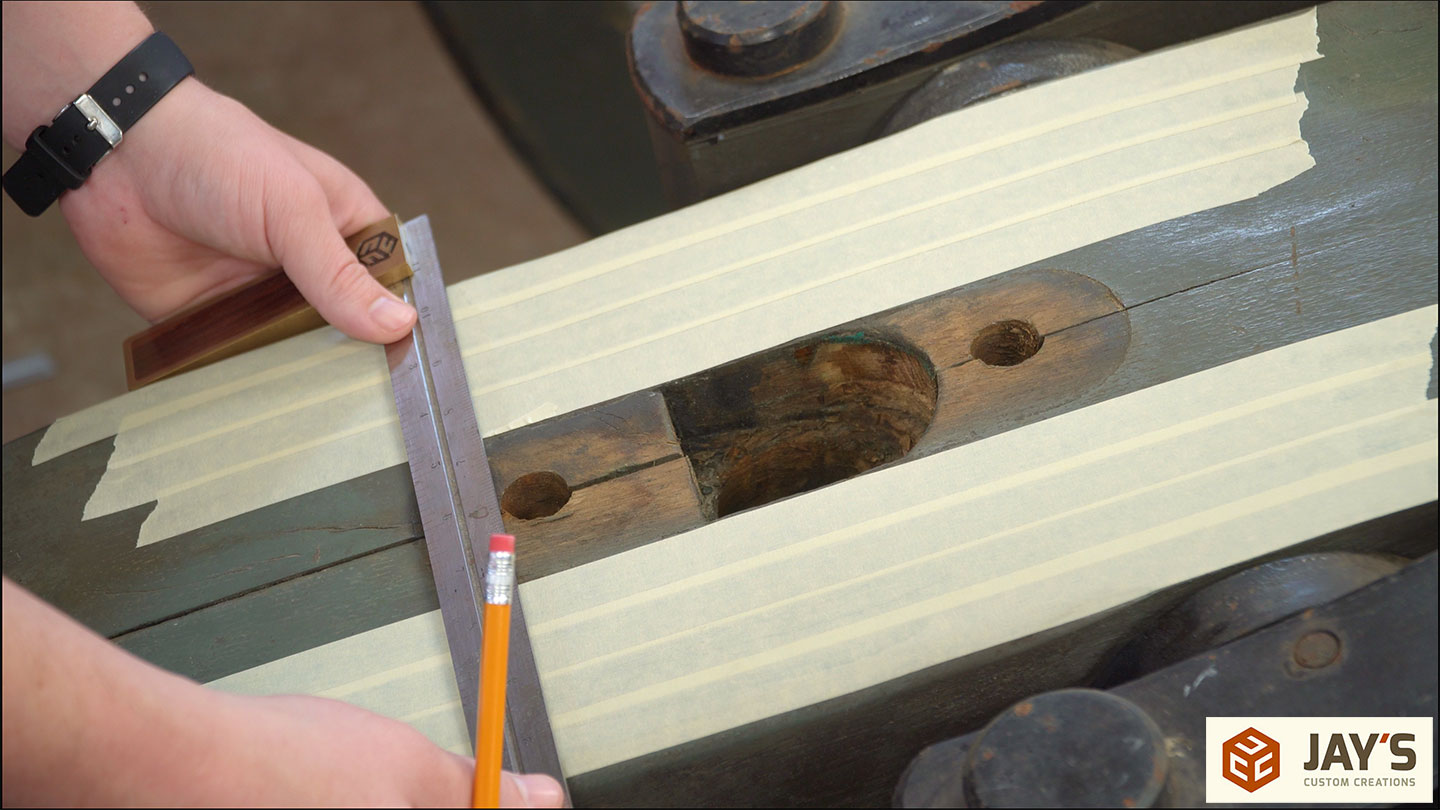
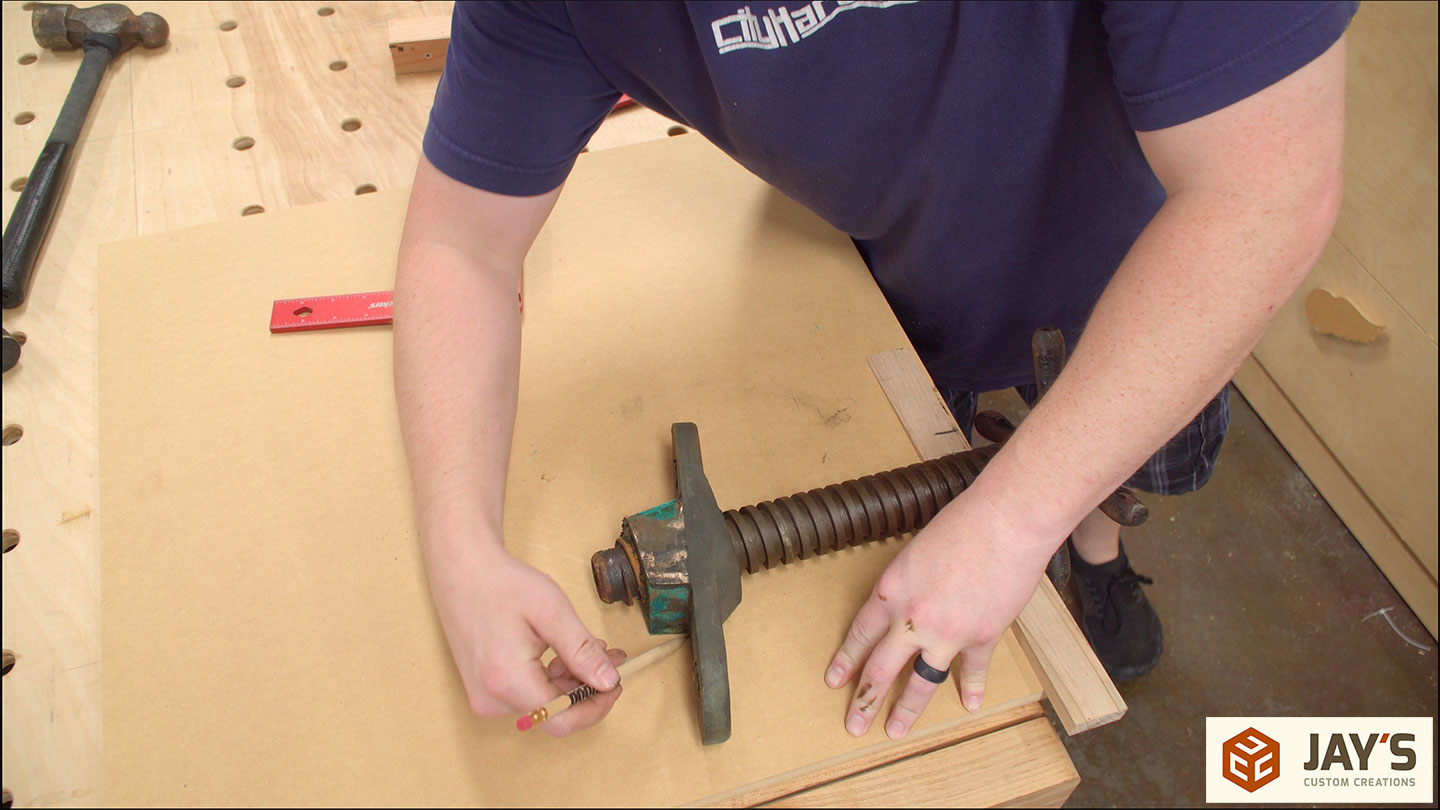
Before making any adjustments I wanted to make sure the original location was well documented. Some masking tape was applied to both sides of the holes and their locations were transferred to the tape with a pencil.
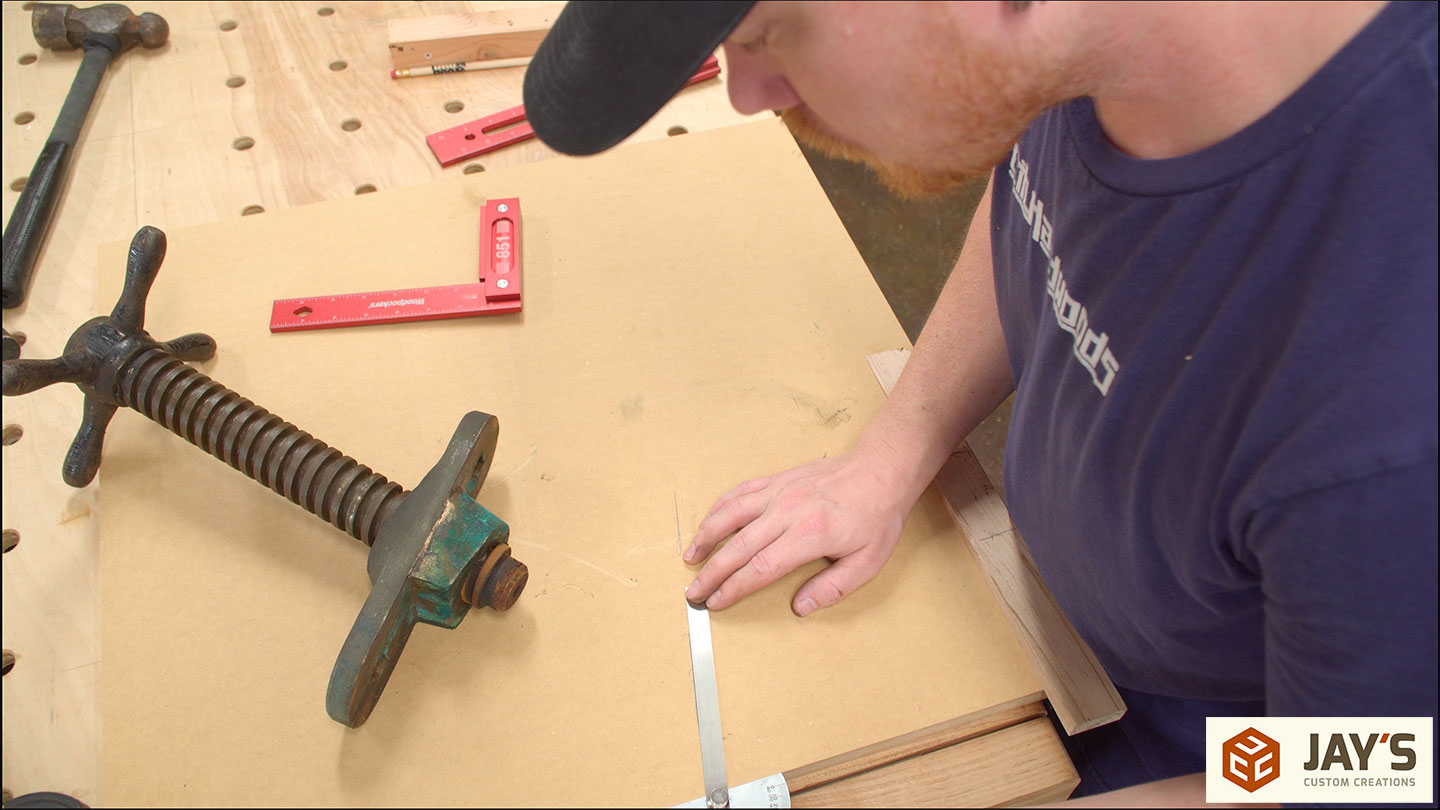
The screw is threaded into a bronze nut at a specific angle. After measuring it a few different ways I determined that 12-1/2 degrees was the angle. This angle will be used later to cut a guide block for starting the new holes.
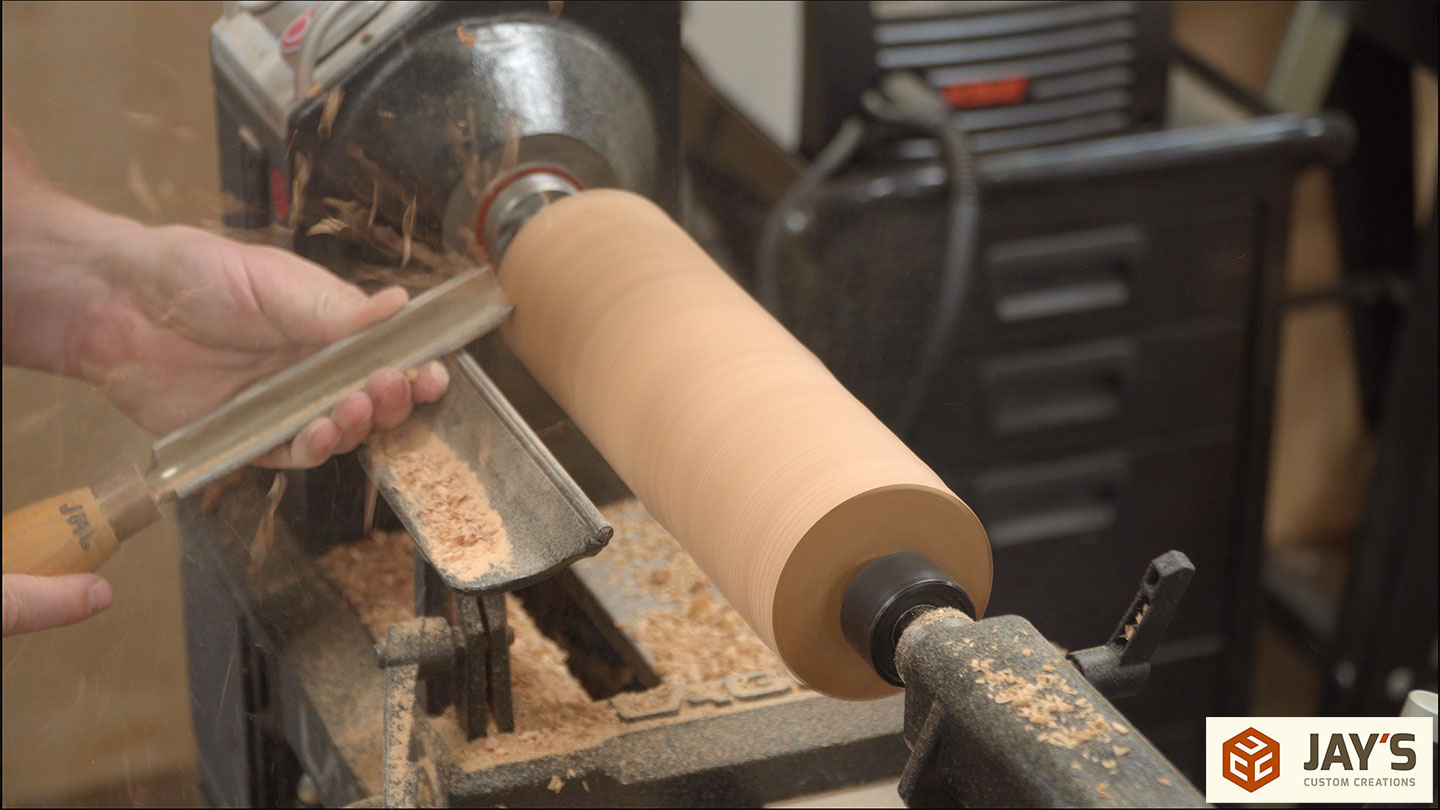
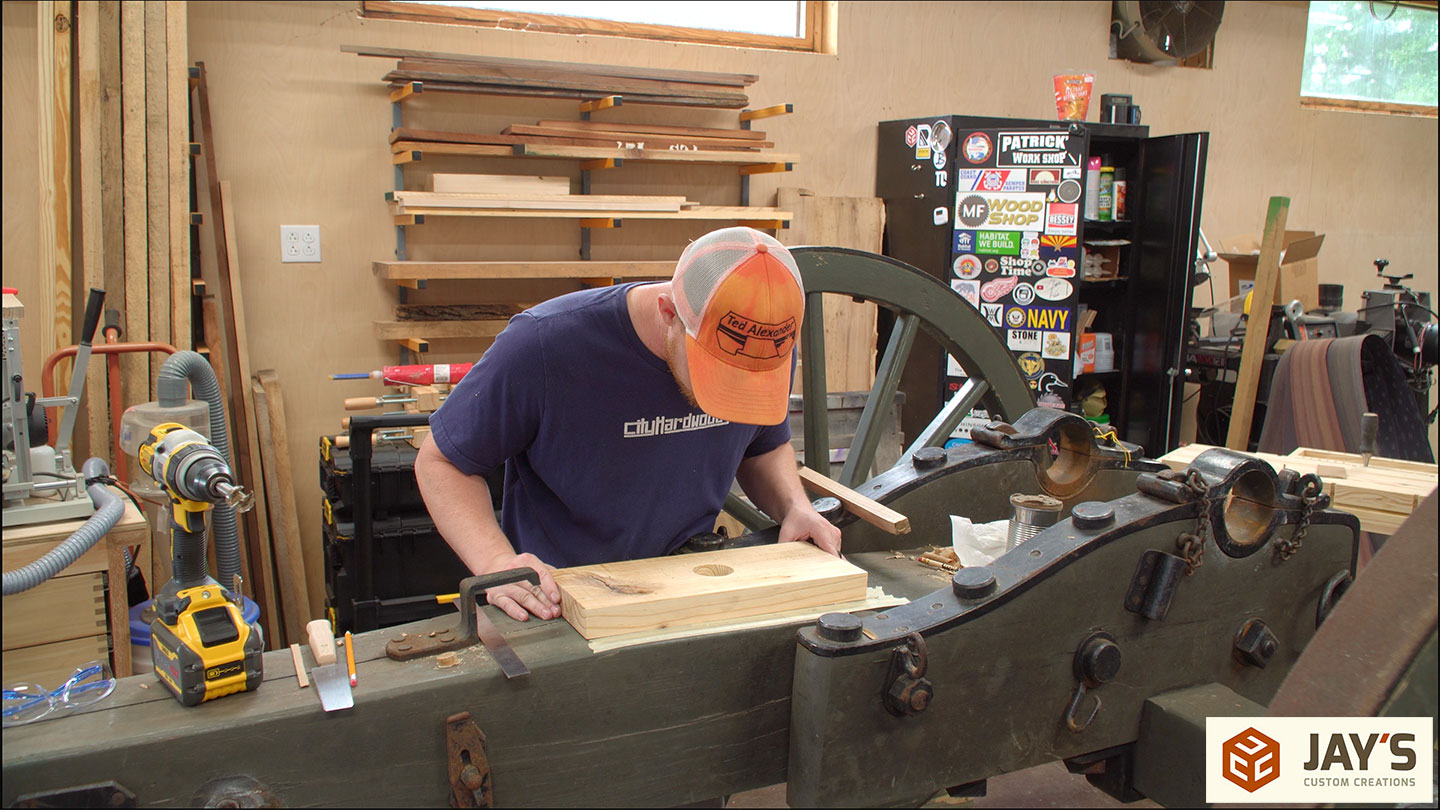
The main building wood for all of these carriages was white oak so that’s what I’m using to plug the holes. First up is to cut some turning blanks.

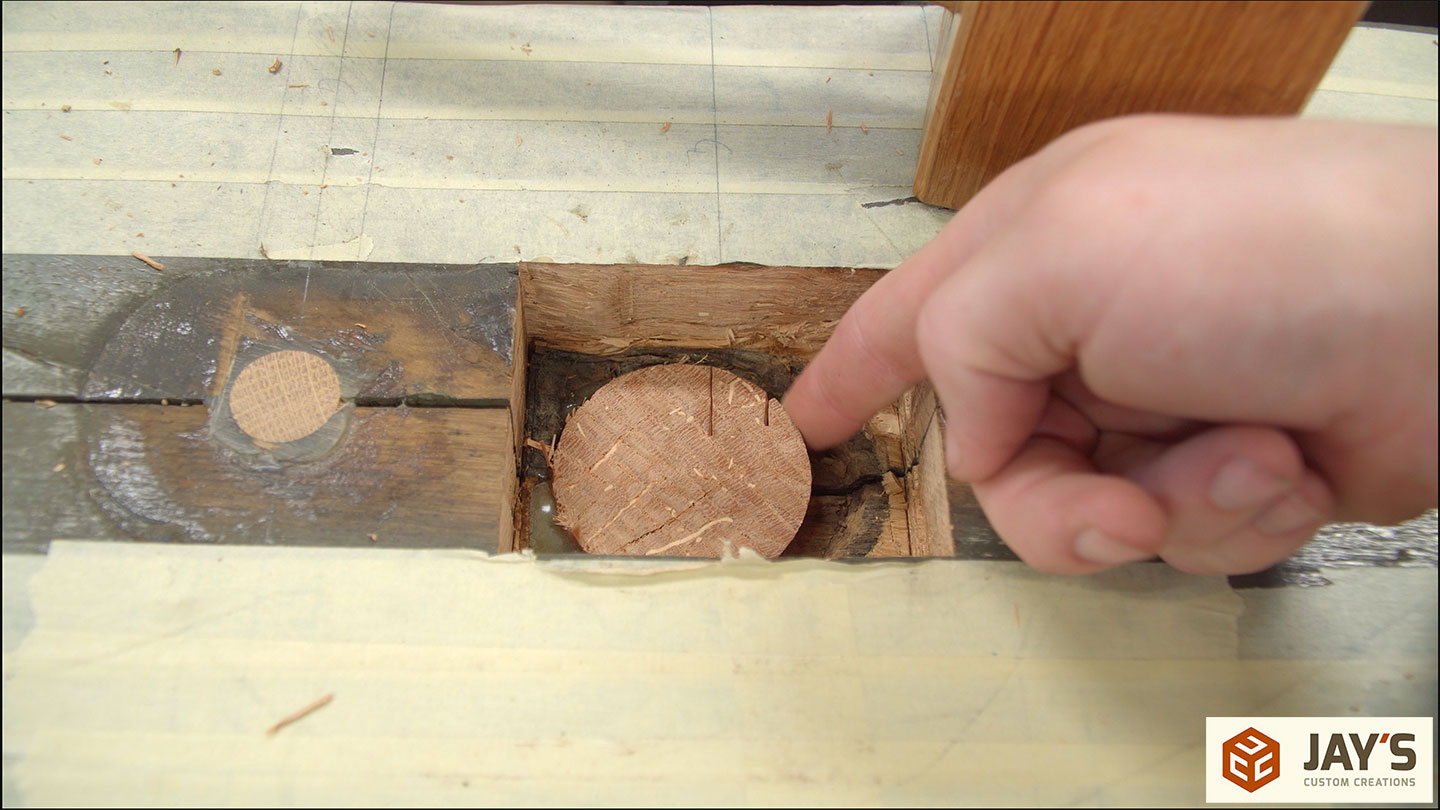
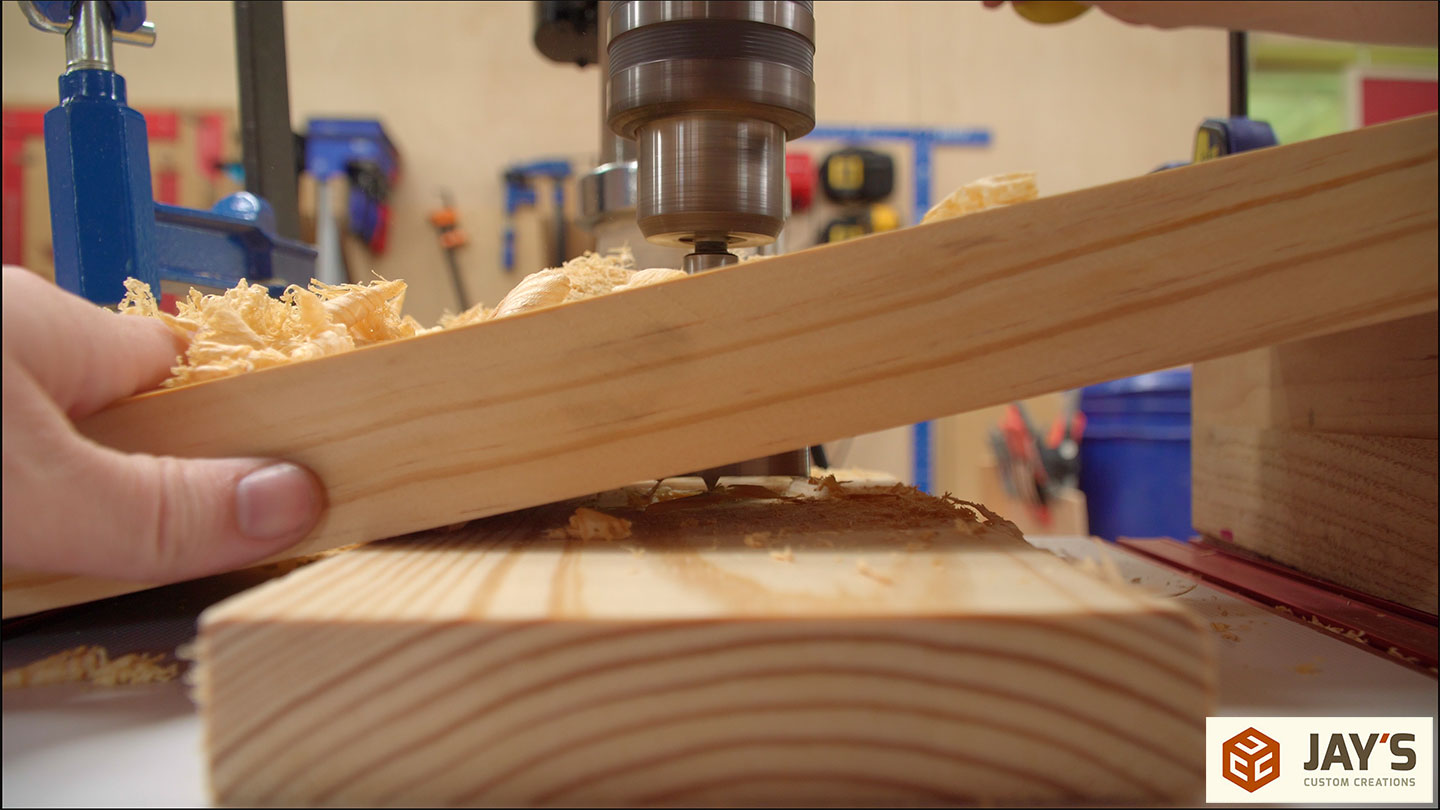
Then the dowels can be turned, starting with the smaller dowels. I used an open-ended wrench as a guide to get the dowel to a uniform size. After that, I reduced the diameter little by little to sneak up on a snug fit, checking it between each reduction.
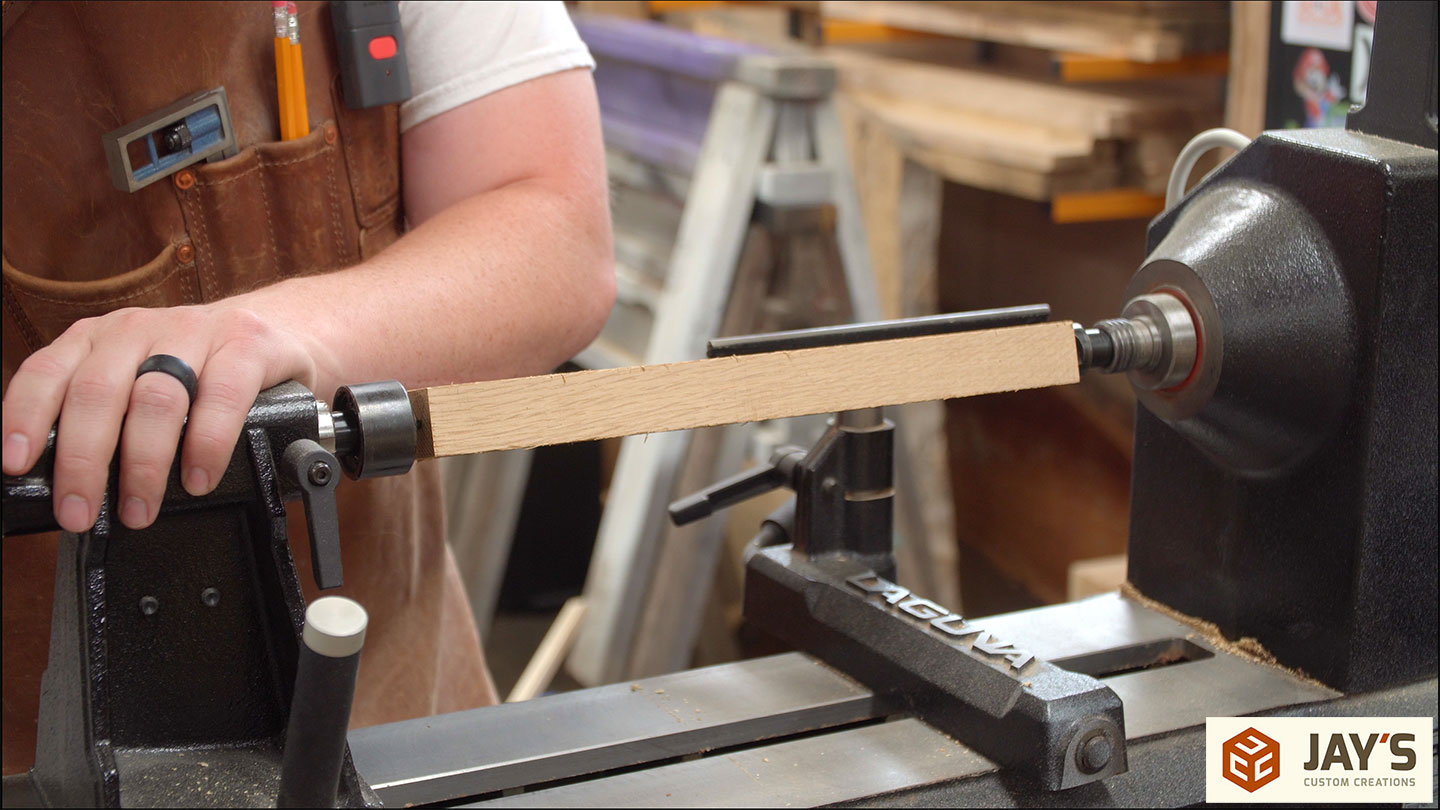

After the small dowels, the larger dowel is turned. For this one, I turned it round and then reduced only one end for testing.
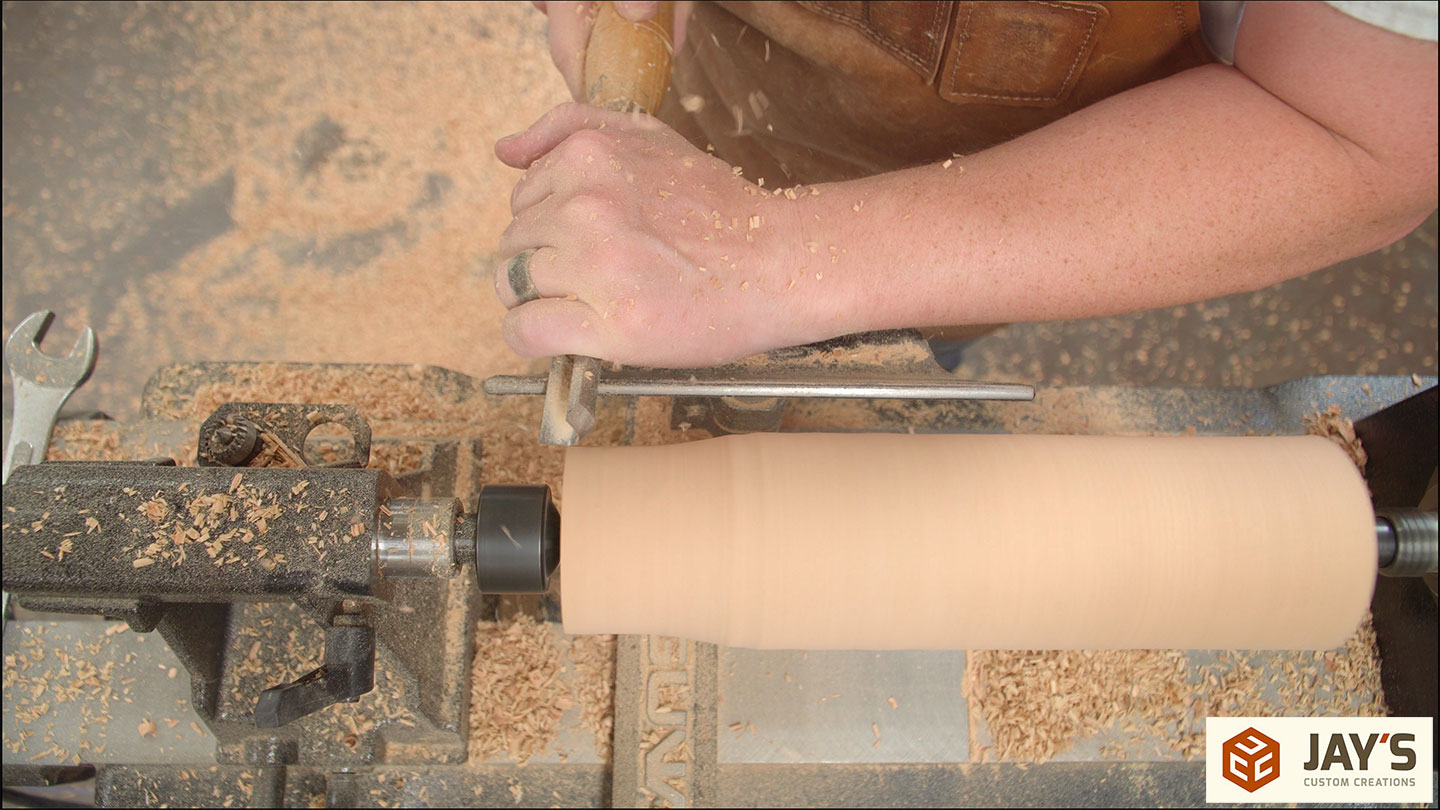
With a test fit confirmed on the smaller end the rest of the dowel was turned to that diameter.
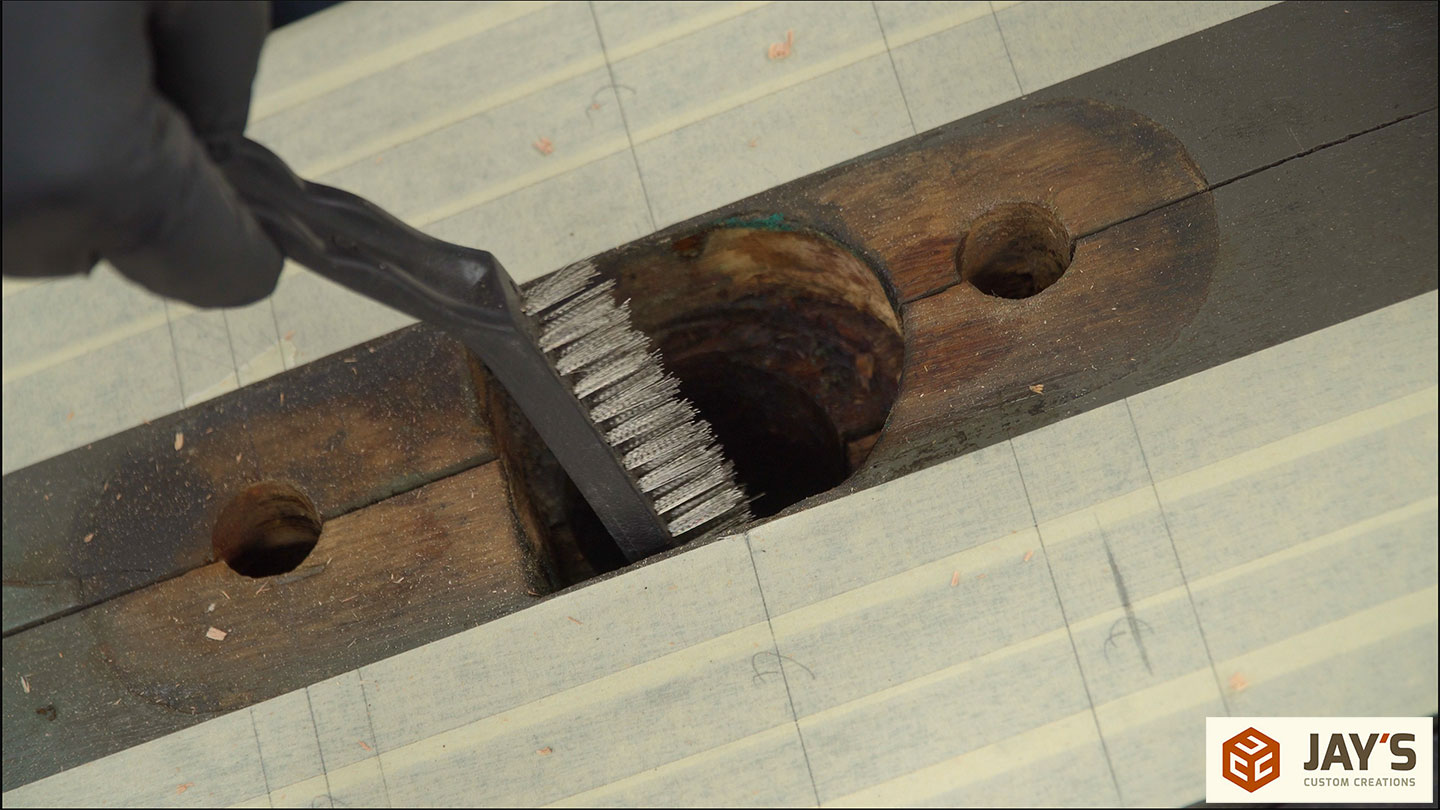
A little prep work was needed for the large hole. The screw was lubricated with grease so some residual grease was on the inside of the hole. I used mineral spirits and a wire brush to give the inside of the hole a quick scrub and remove any loose debris.
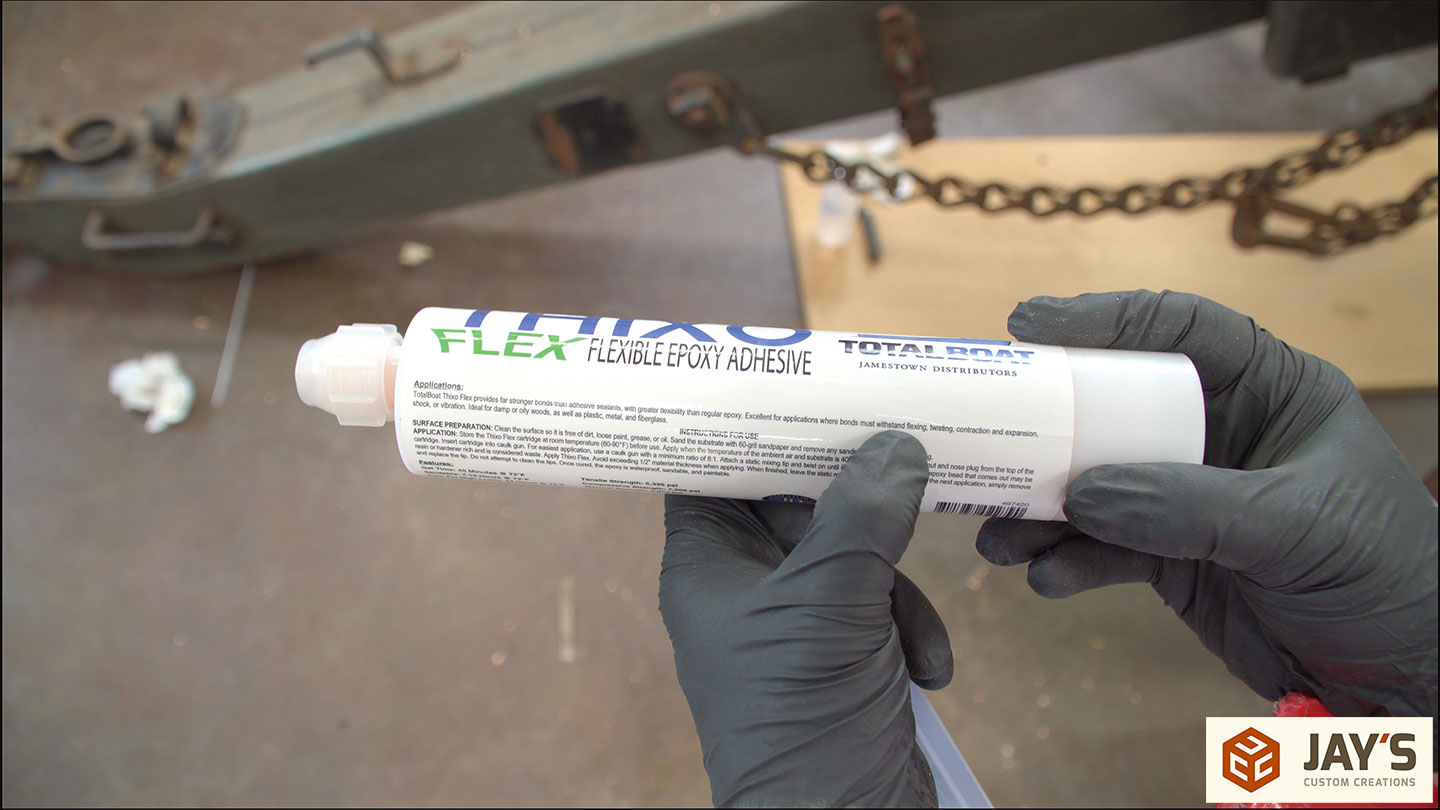
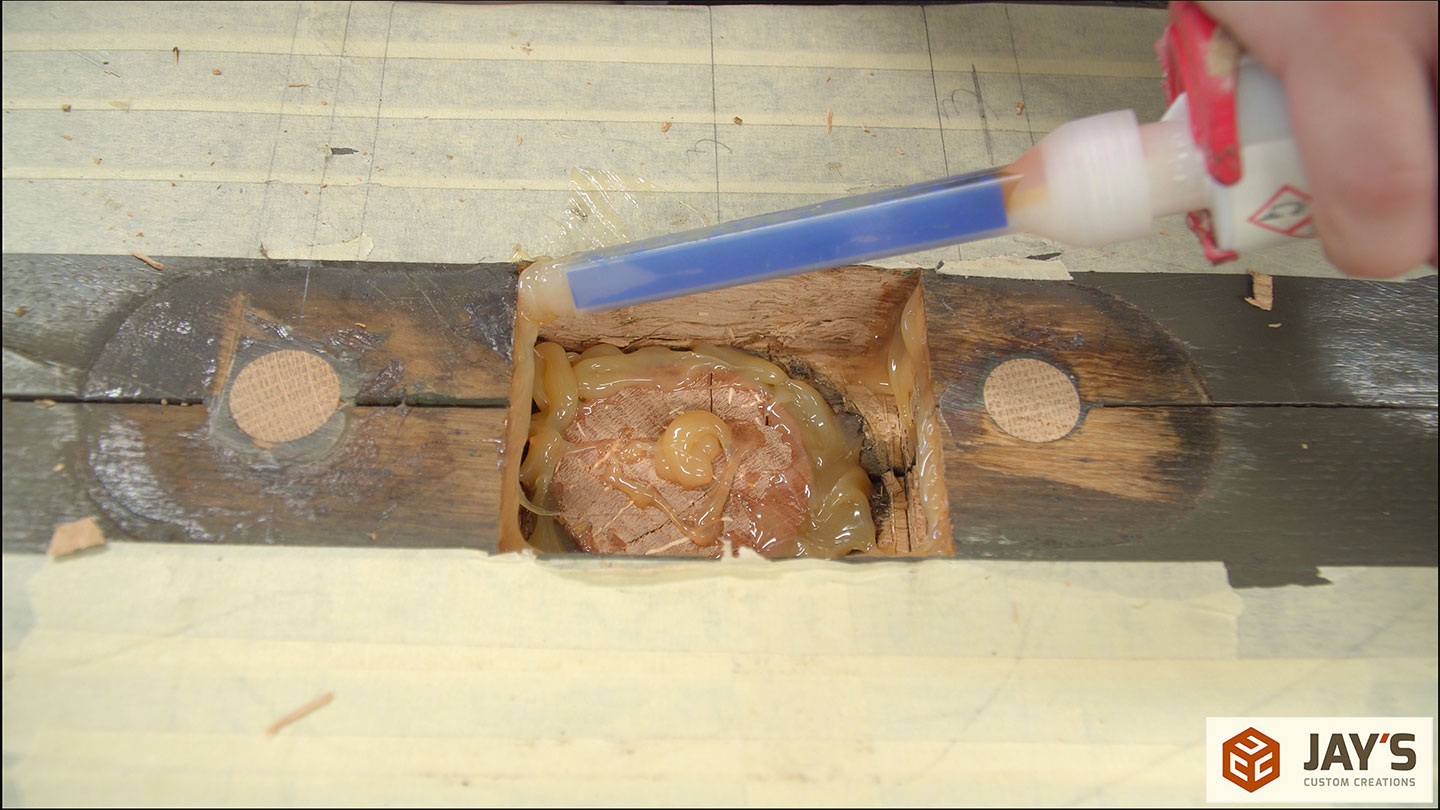
Thixo Flex, Flexible Epoxy Adhesive by TotalBoat is what I’m using to secure the dowels. As the tube says, TotalBoat Thixo Flex provides for stronger bonds than adhesive sealants, with greater flexibility than regular epoxy. Excellent for applications where bonds must withstand flexing, twisting, contraction and expansion, shock, or vibration. This carriage will experience literally every one of those forces. The tube also says it is ideal for damp or oily woods which gives me better peace of mind regarding the large screw hole.

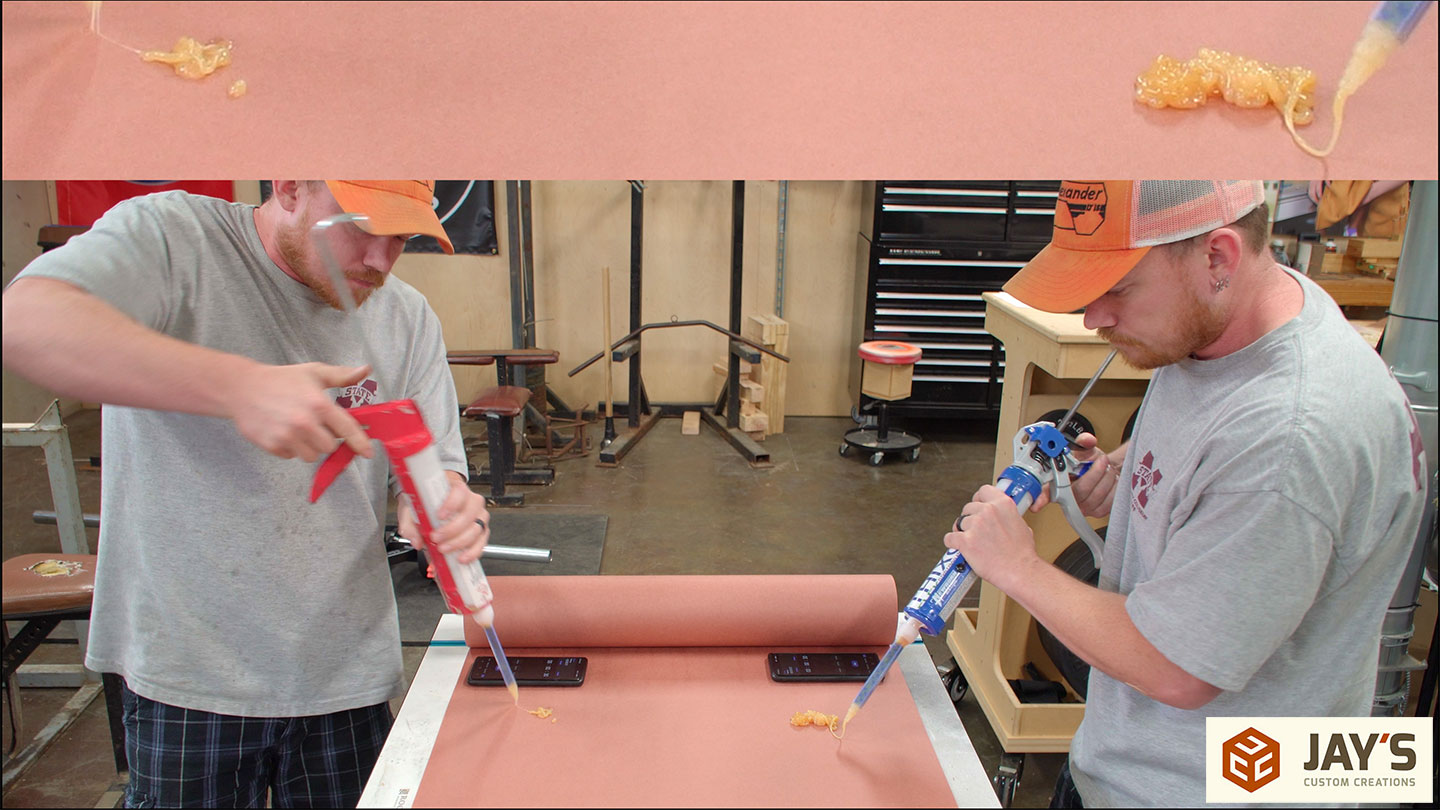
Before I show myself struggling with a cheap caulking gun, let’s jump into the future to show a test with a much more appropriate caulking gun. The blue gun I’m using in this test is a Newborn Duracore 18:1 Thrust ratio. The red gun is a generic medium-duty caulking gun. The test is to squeeze out as much as possible in 30 seconds with the same tube and the same nozzle opening. As you can see, the red generic medium-duty doesn’t provide much pushing force. I have to struggle with it just to get a tiny amount to come out. The blue gun with a much higher thrust ratio pushes more material out with a fraction of the effort. This is a perfect example of using the right tool for the task.

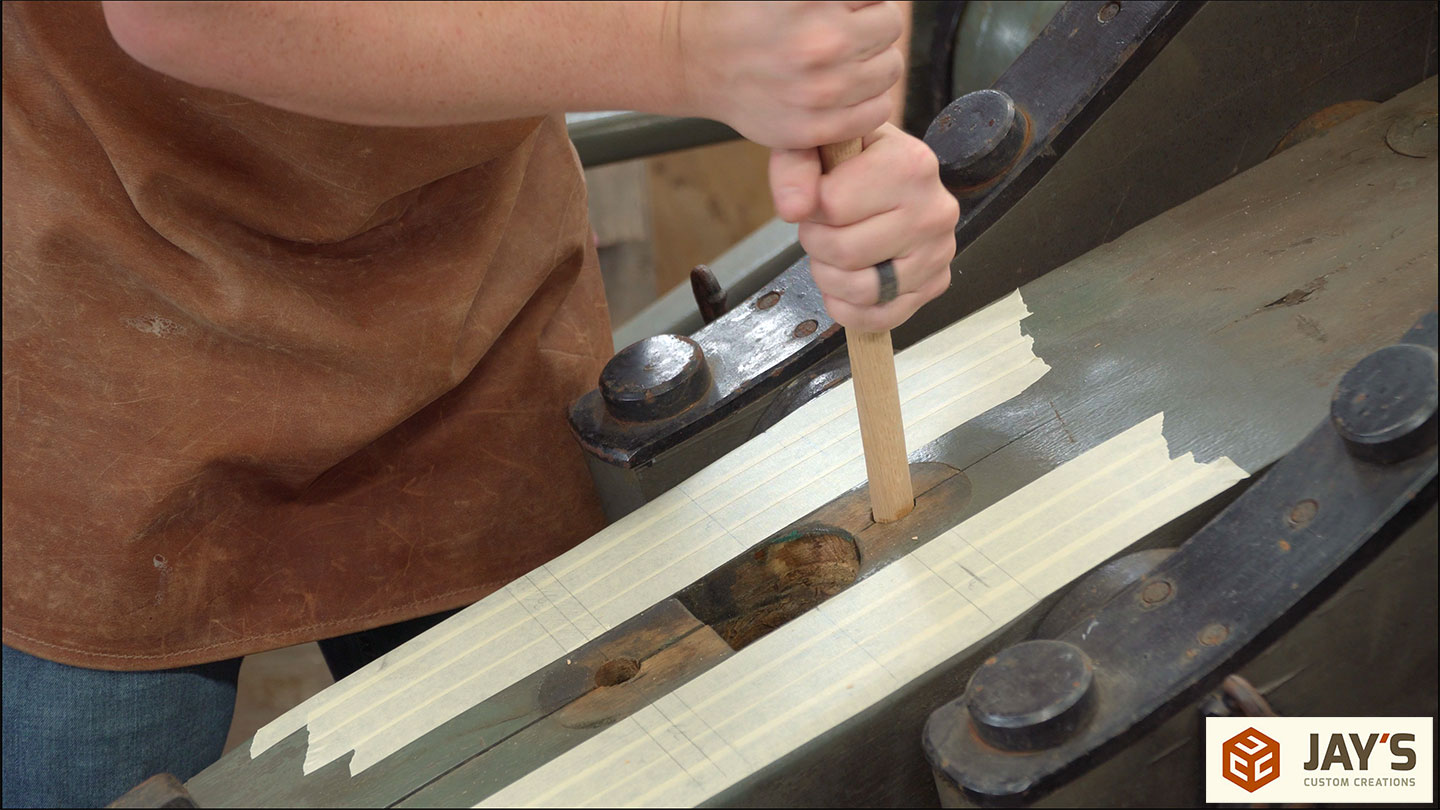
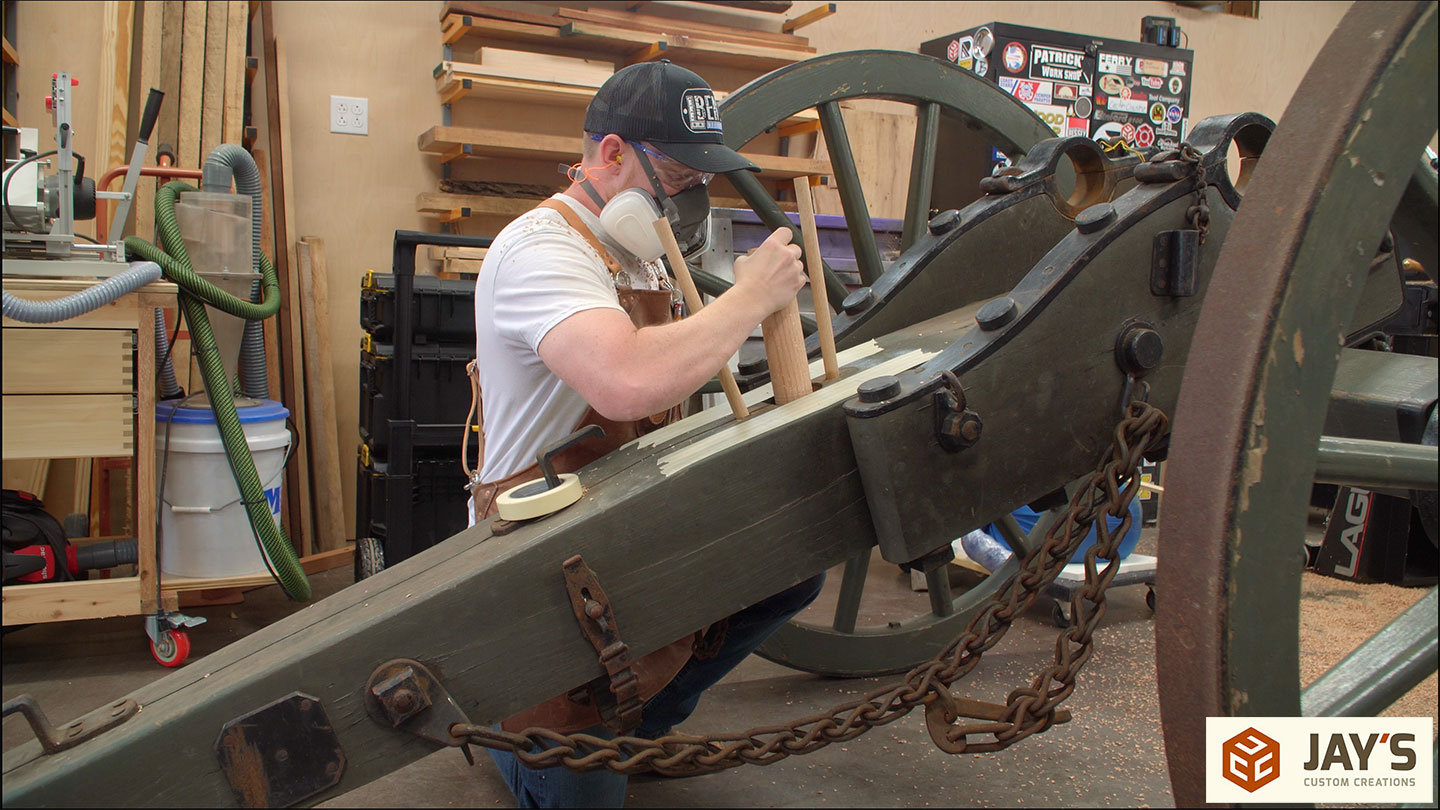
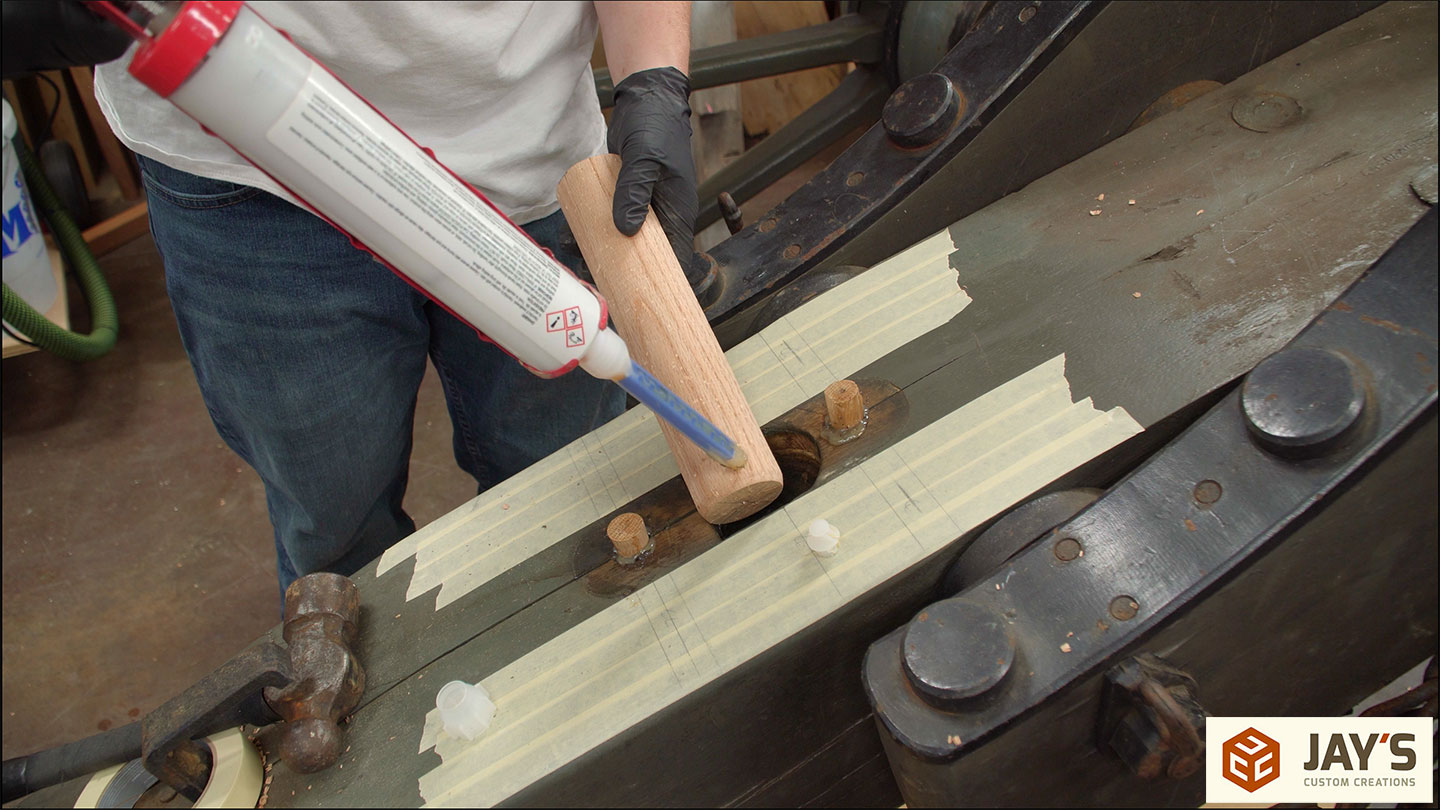
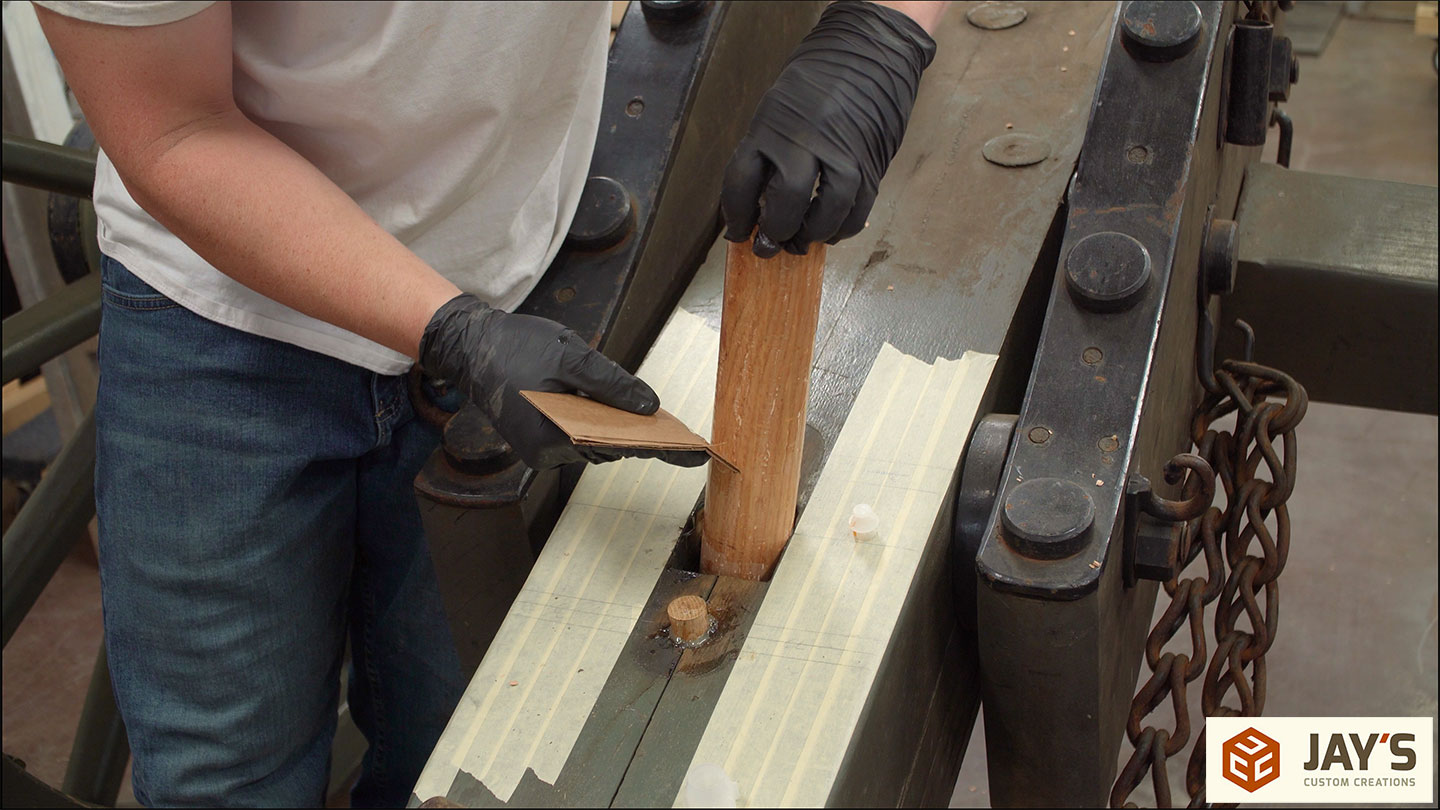
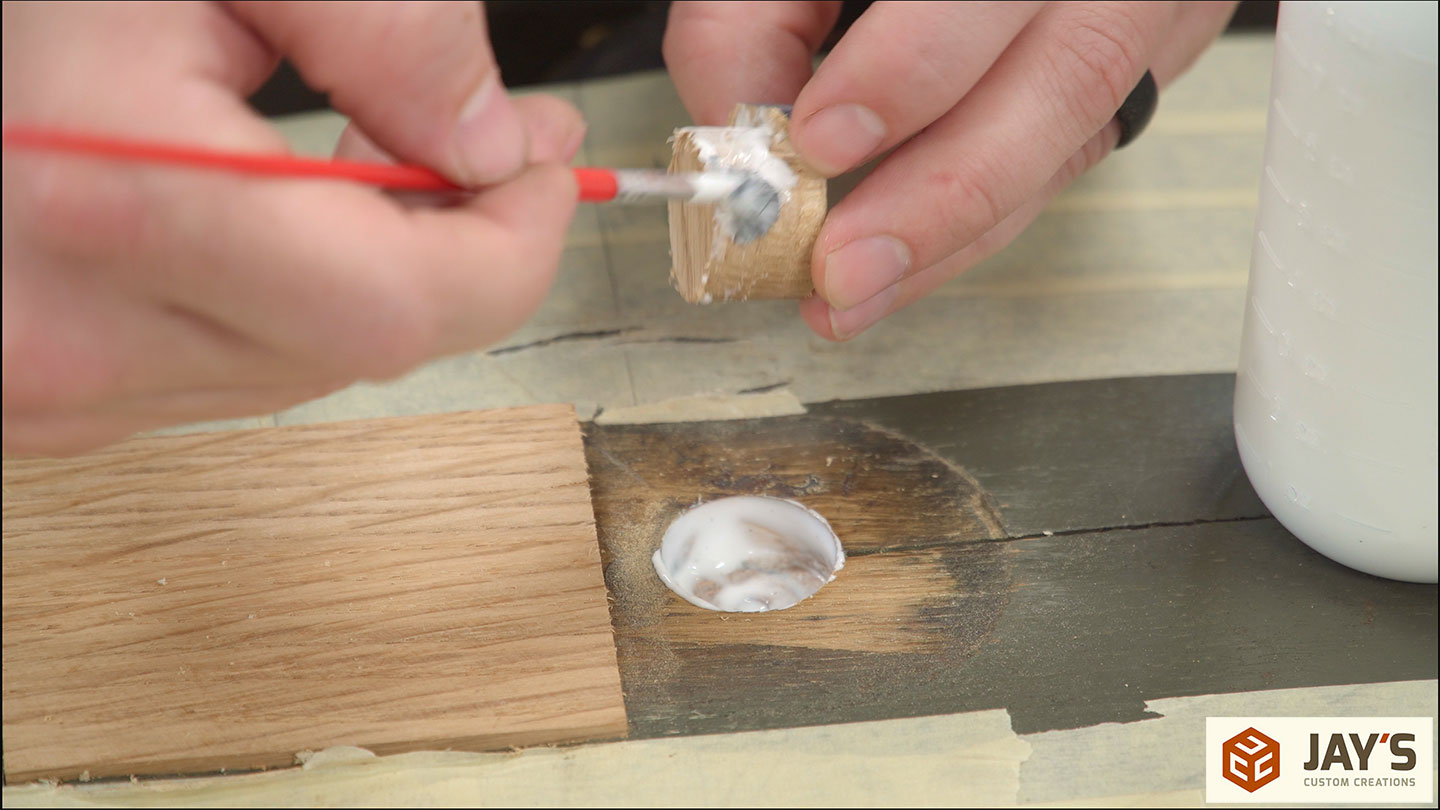
Back to the project. At this time all I had was the medium-duty gun so the struggle was definitely real with this one. After getting a bunch of Thixo into the hole I applied a liberal amount to the side of the dowel and then spread it around with a piece of cardboard.


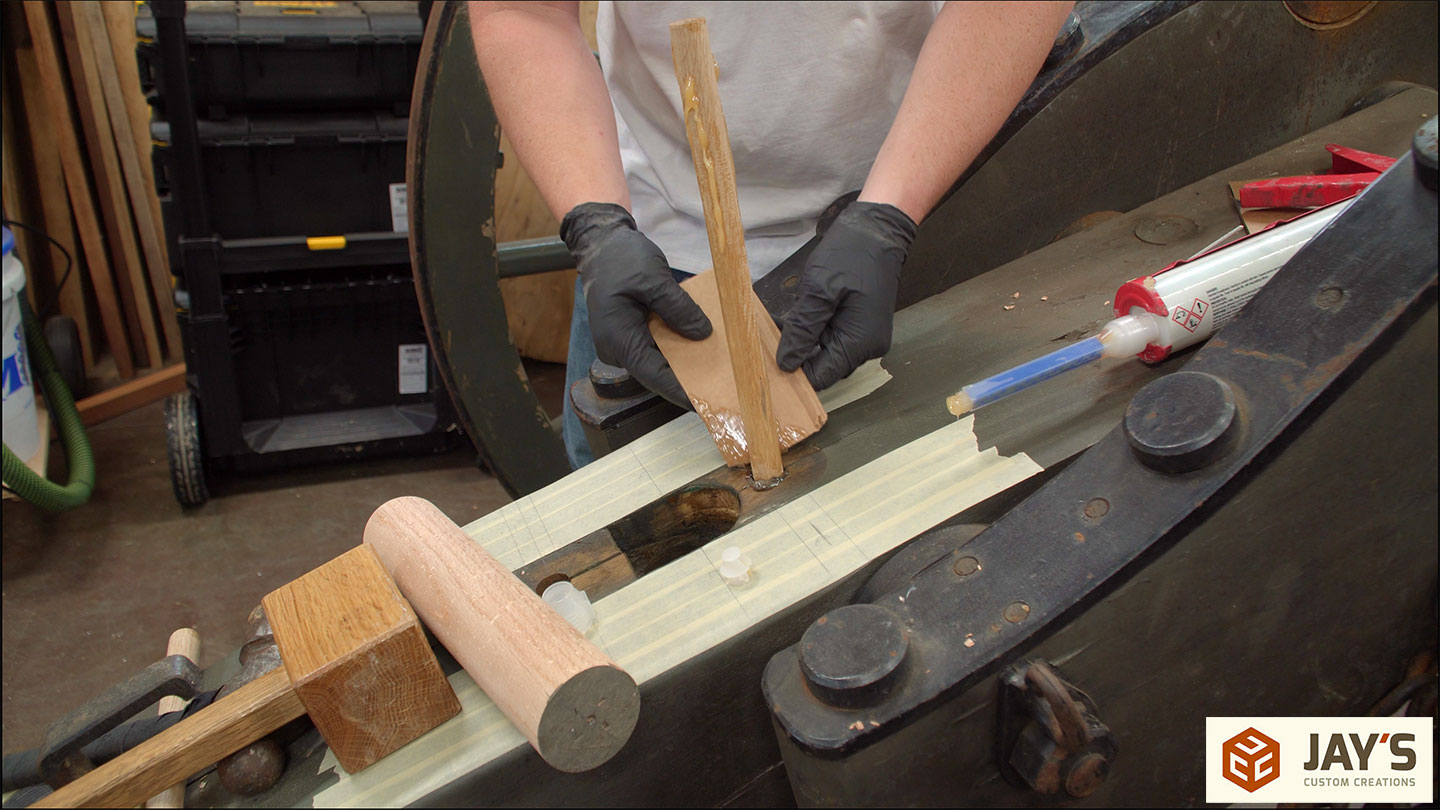
And then drove it home with a mallet.

The same process for the other two dowels. One thing to note here is the grain direction on the dowels. I’m gluing them perpendicular to the grain on the carriage. Typically, you wouldn’t want to do this because they will expand and contract in a different direction than the rest of the carriage. However, the center section of the carriage is two large white oak beams that have been pinned together with bolts in various directions anyway. I don’t see an issue with these wooden pins in this exact situation.

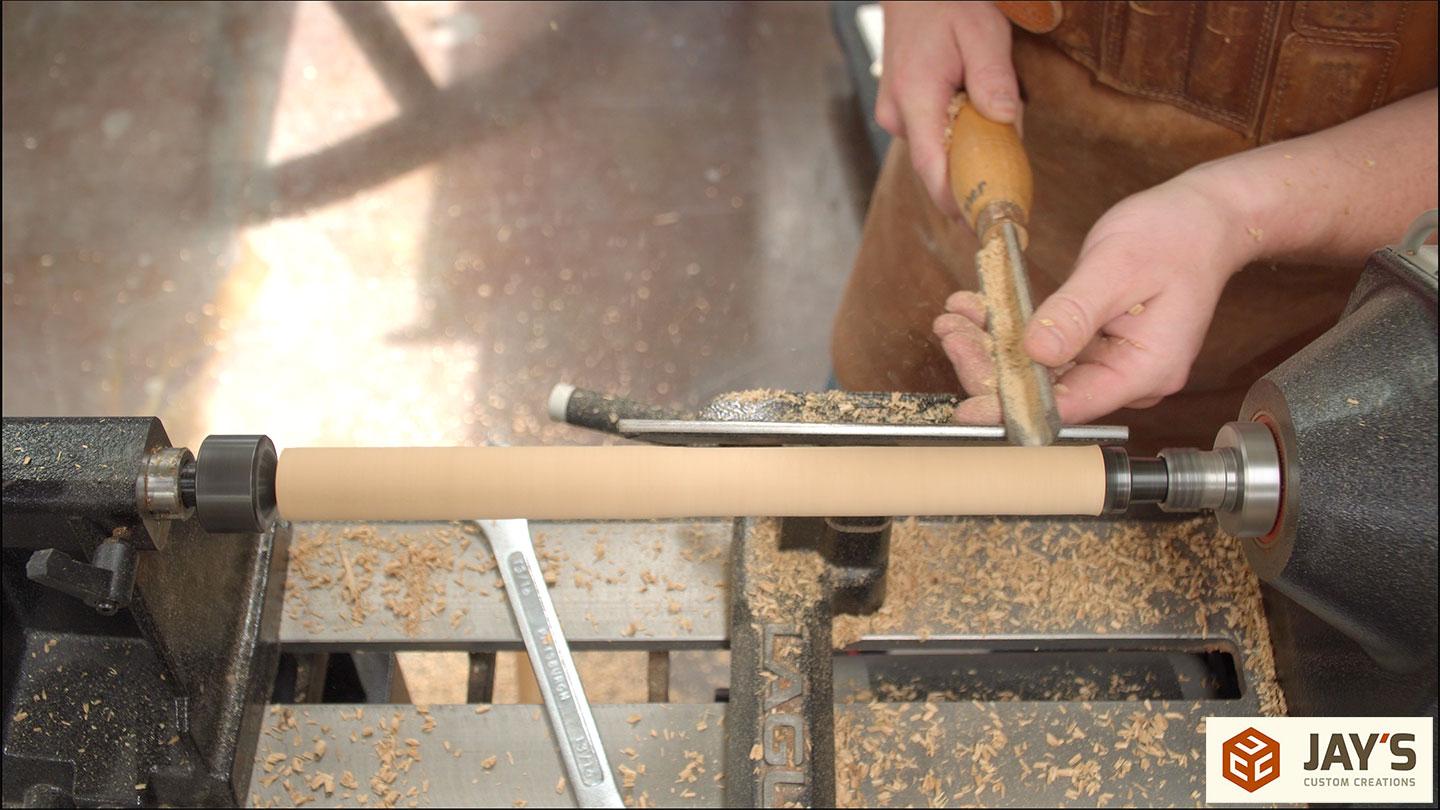
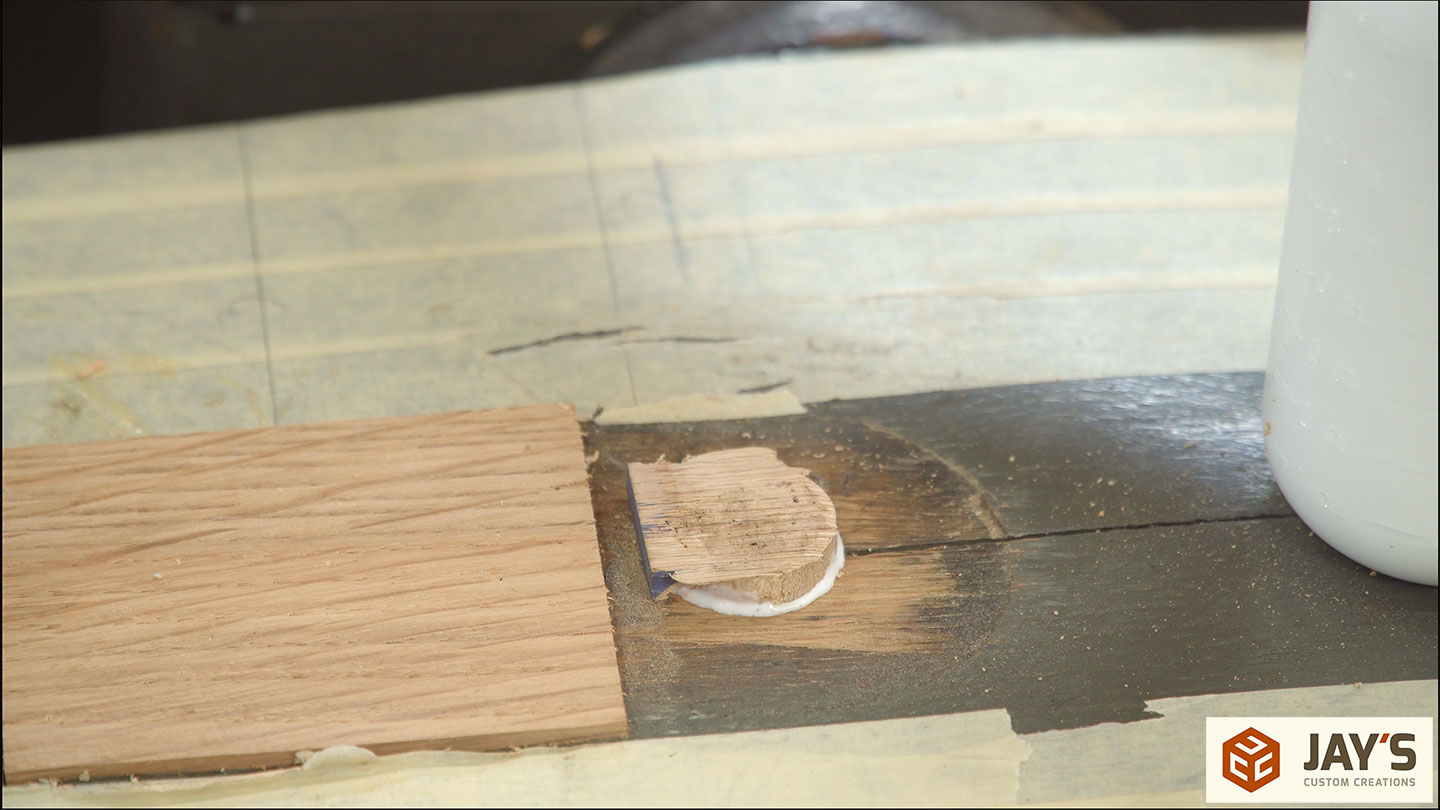
I let the Thixo epoxy cure overnight and then flush trimmed the dowels on top and bottom.
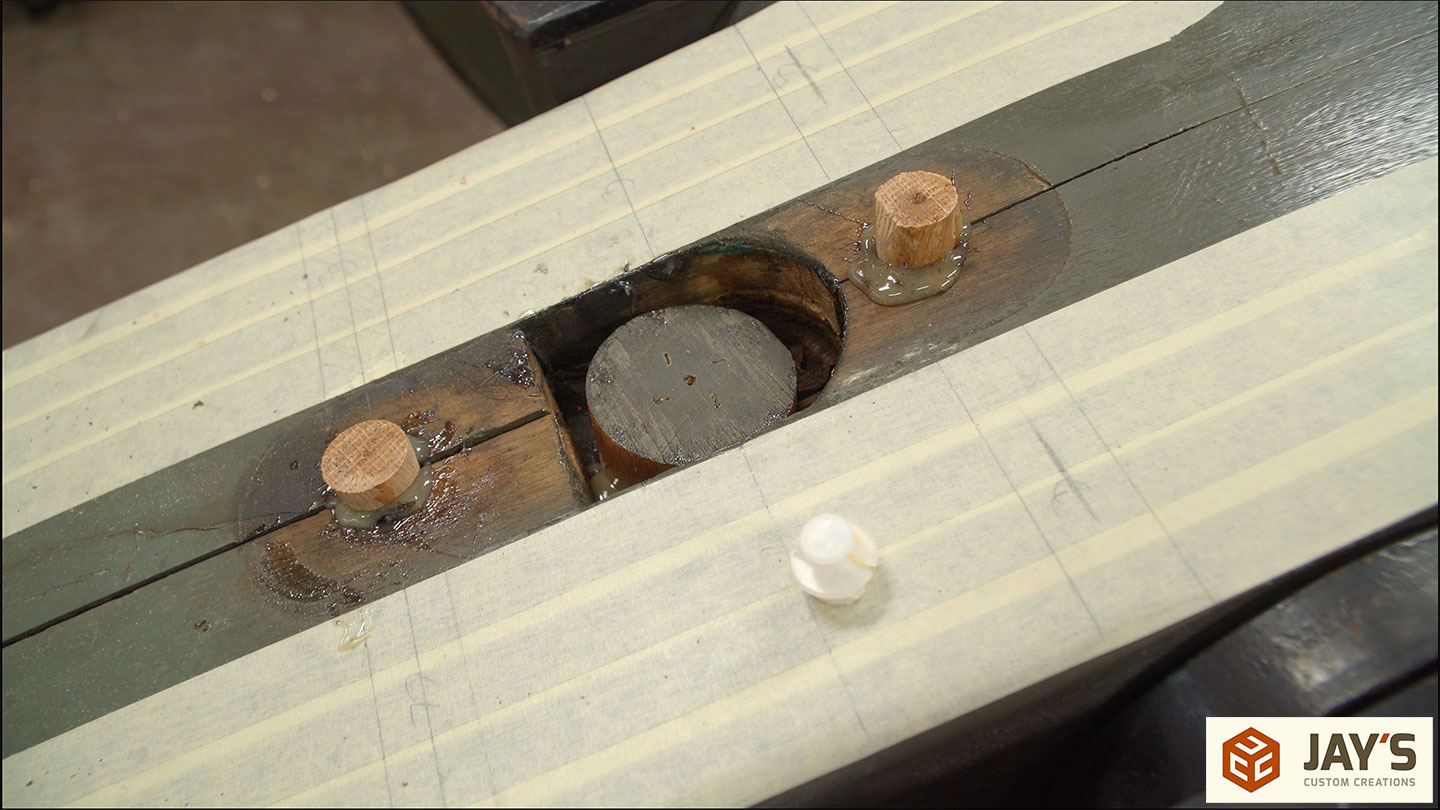
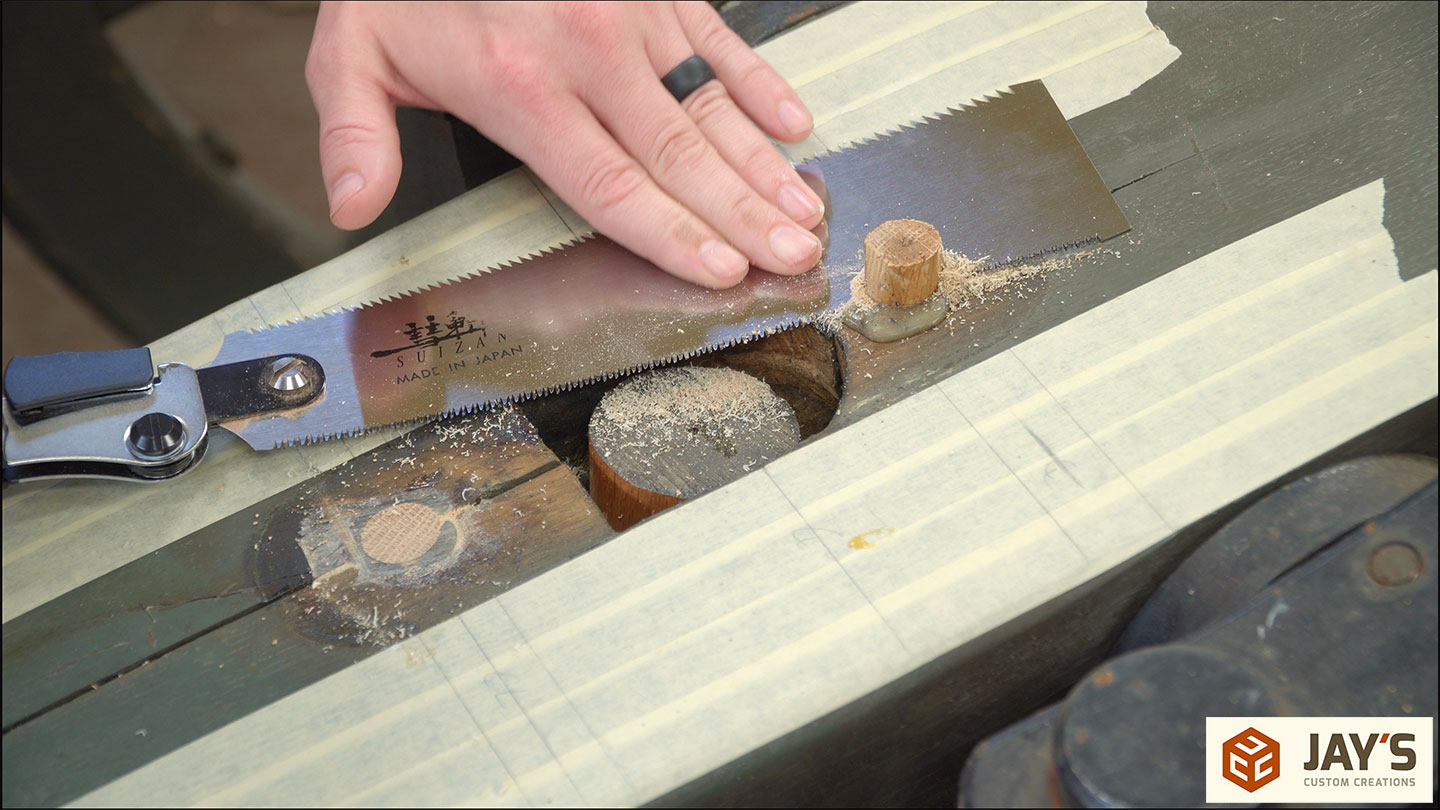


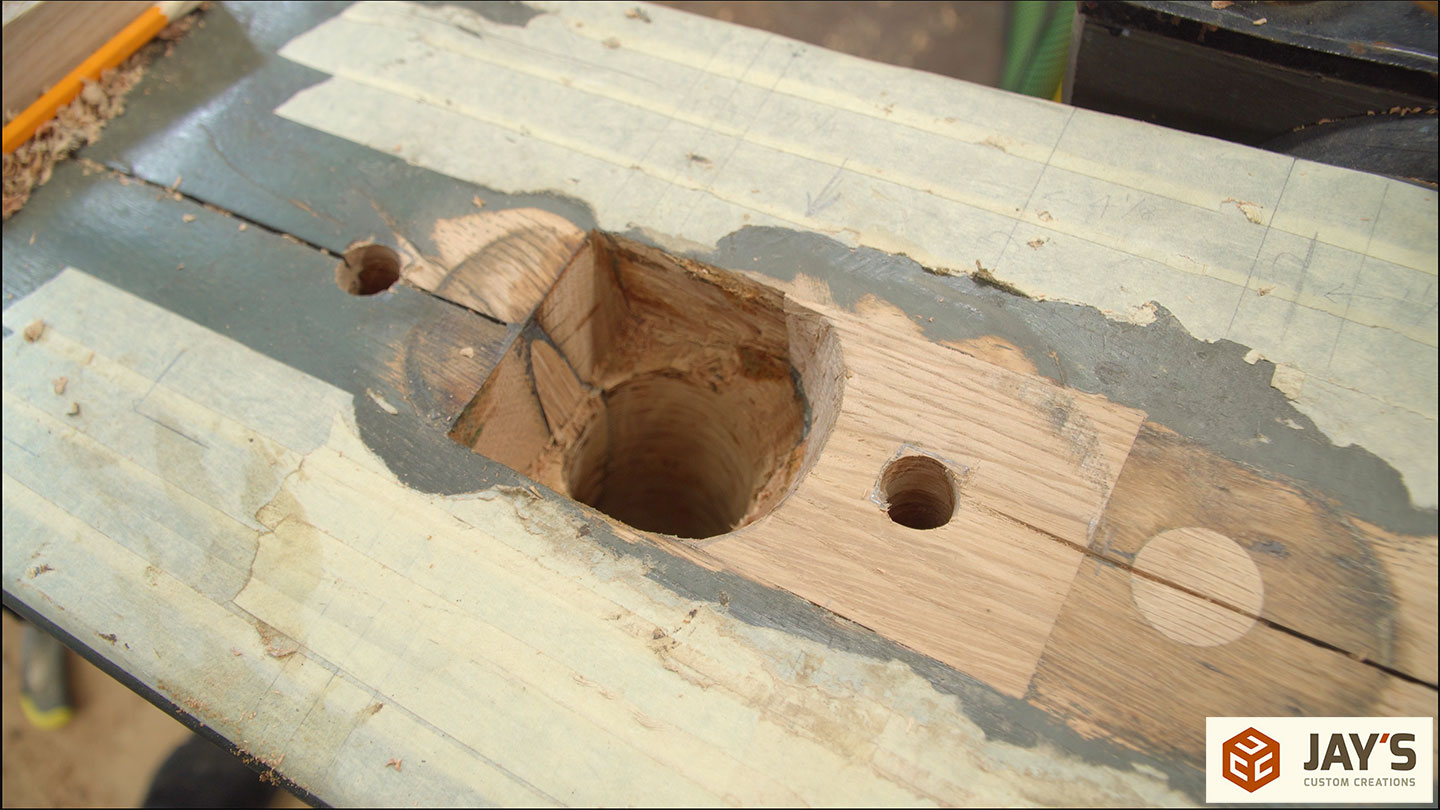
The large hole still needs a square plug to cover the bronze bushing mortise but before that can be installed I needed the top of the dowel to be parallel with the top surface of the carriage. To do that I used a small trim router and a low-angle spiral bit. (use code JAYBATES for 10% off at bitsbits.com)
All of this was done freehand to just nibble away the center dowel only.


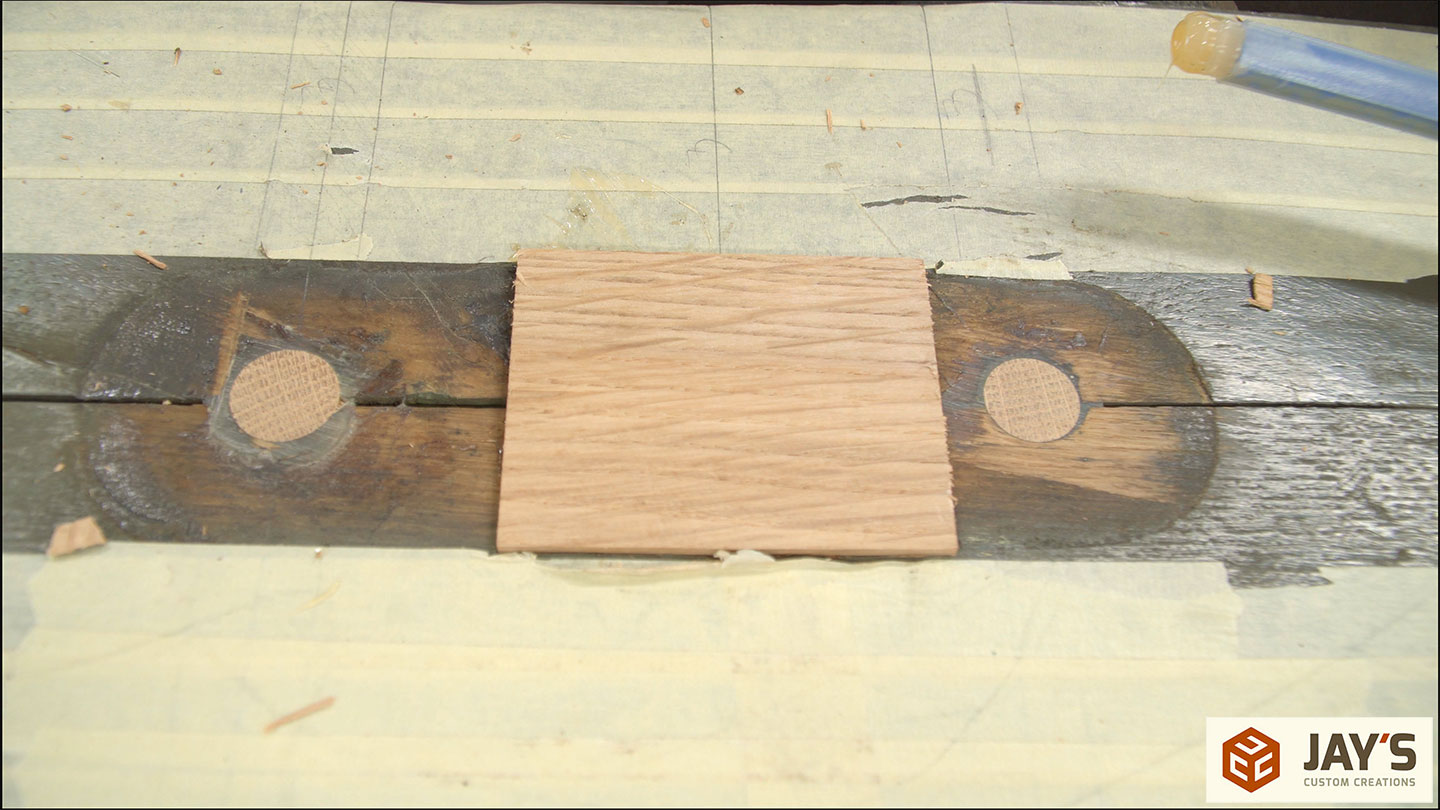
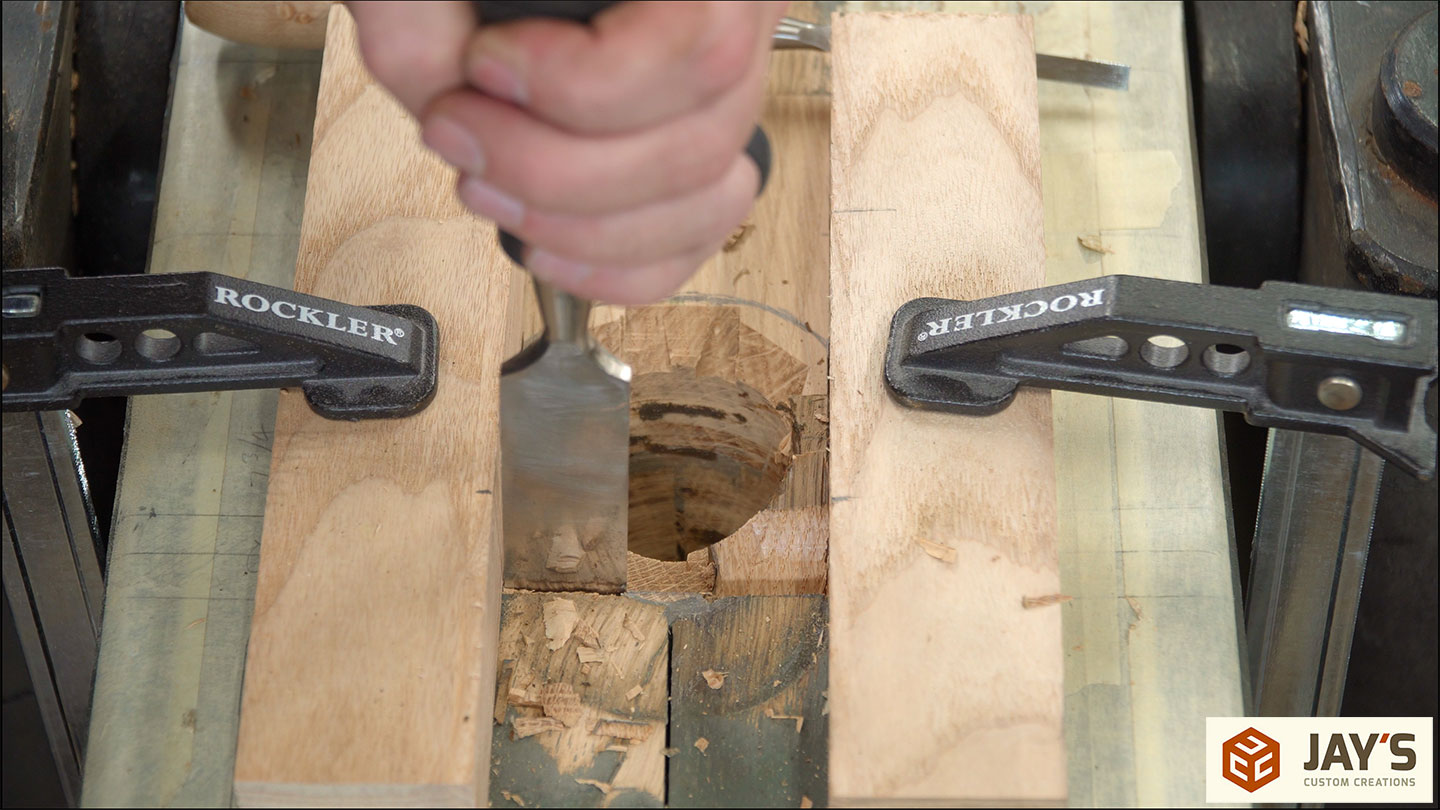
Next, I cut a rectangular block of oak slightly larger than the original mortise and traced its location with a marking knife.
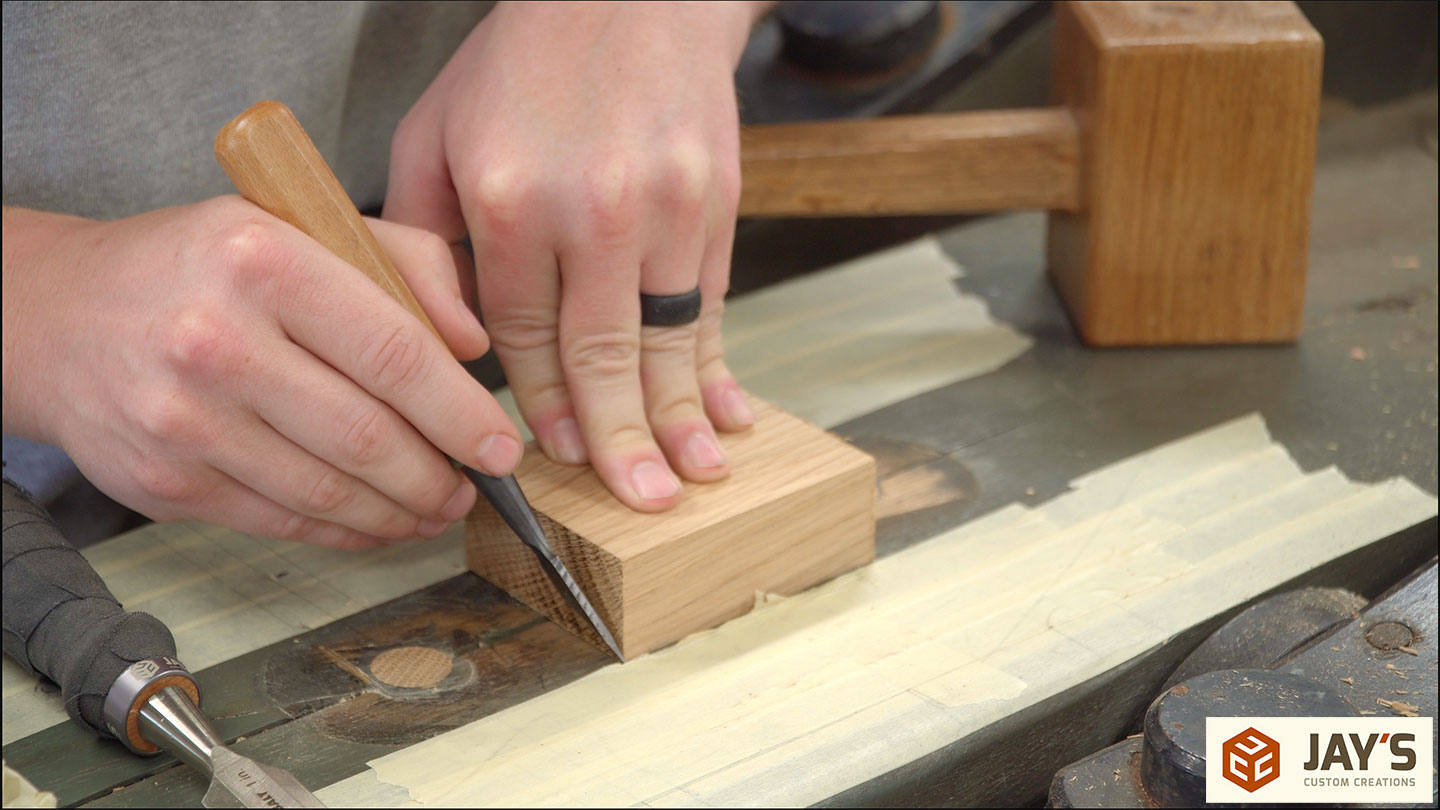
Then the rounded mortise is chiseled to a more patch-friendly rectangle down to the same depth as the top of the dowel.
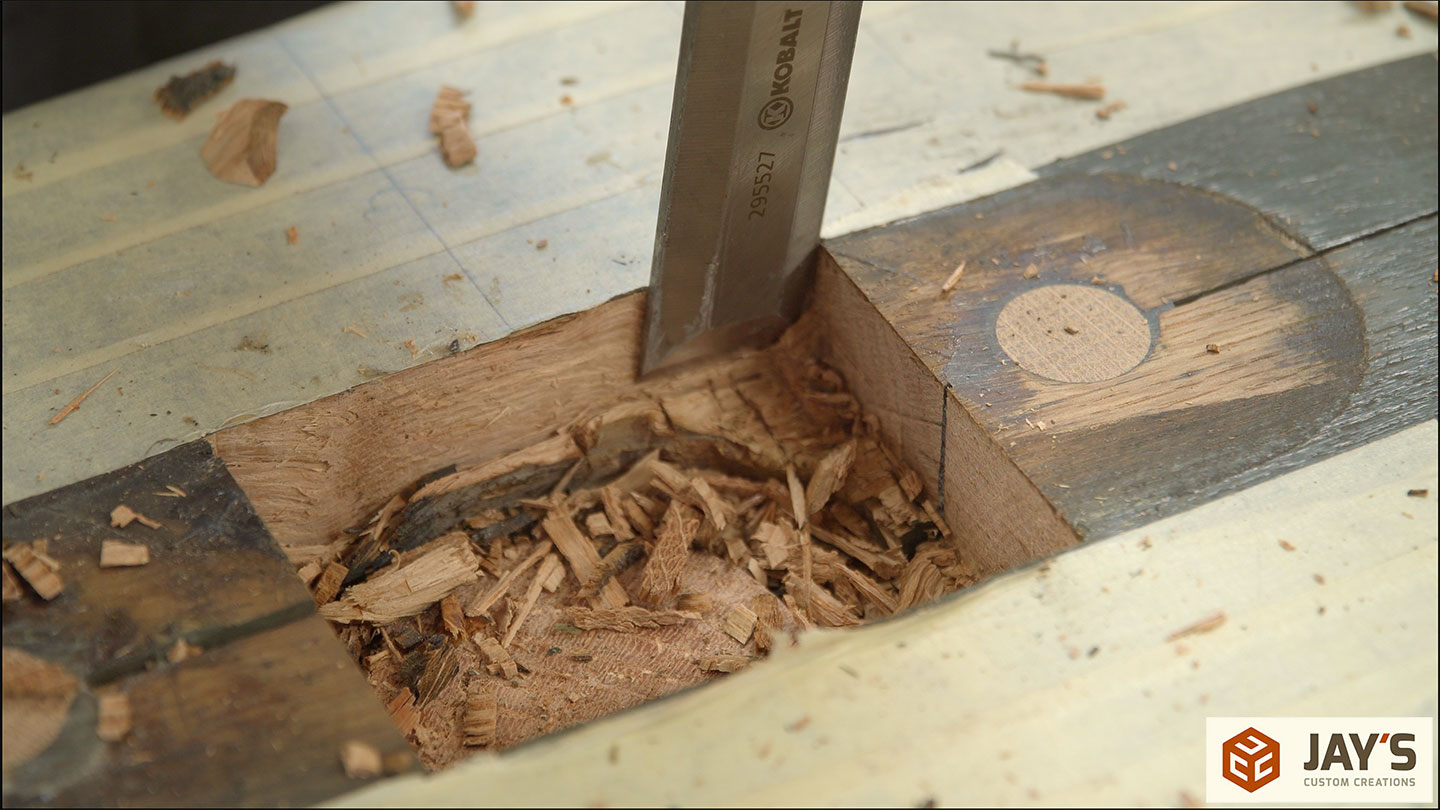
You can see here that there is still a little bit of tapered mortise around the front side of the dowel. The options are to trim the dowel and mortise deeper to eliminate it or to just fill it with epoxy. Because it wasn’t much space, I chose to fill it with epoxy before seating the patch. I also let this sit overnight for the epoxy to set up before trimming it flush.

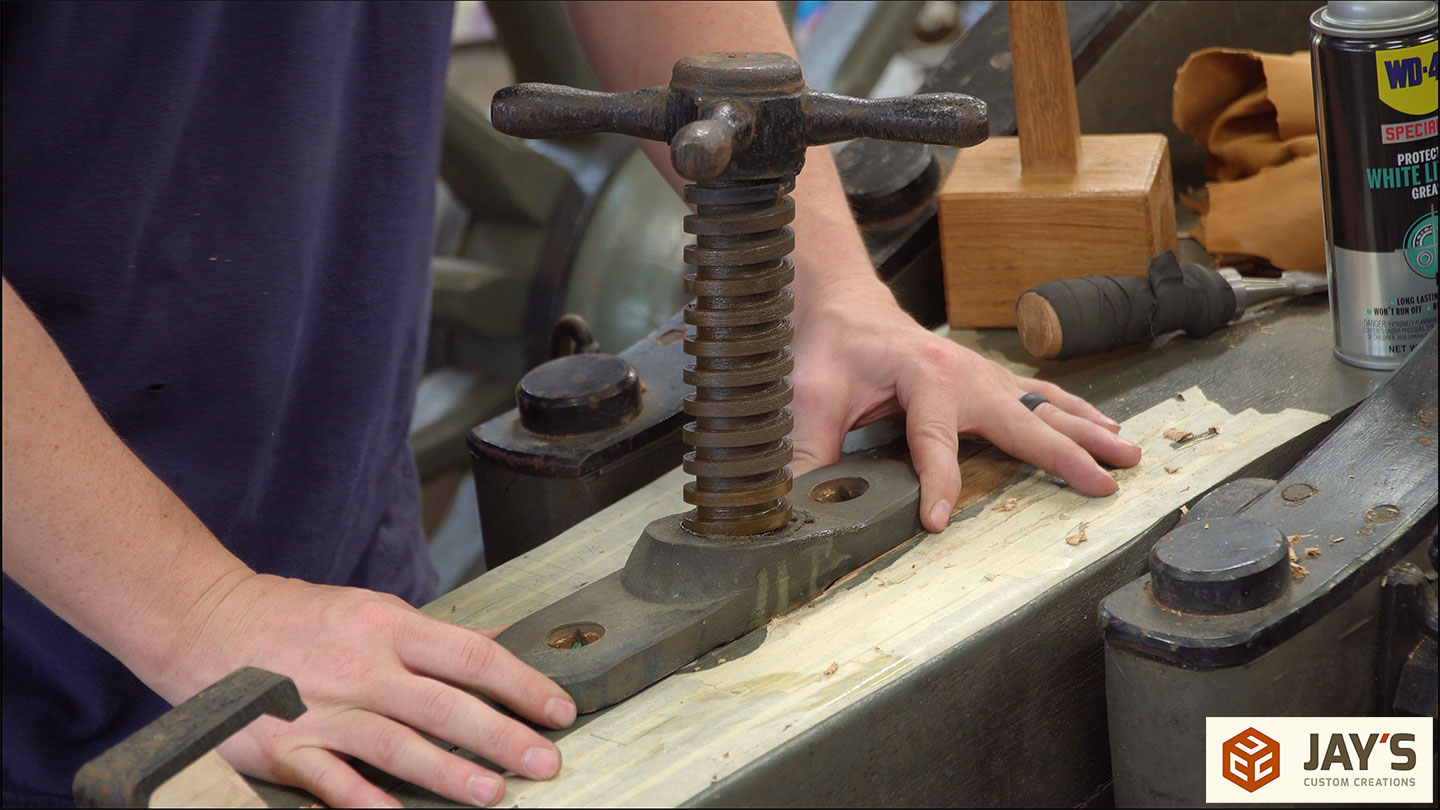
Remember that 12-1/2 degree measurement I took earlier? I used a few blocks on my drill press table to establish that angle in a guide block.
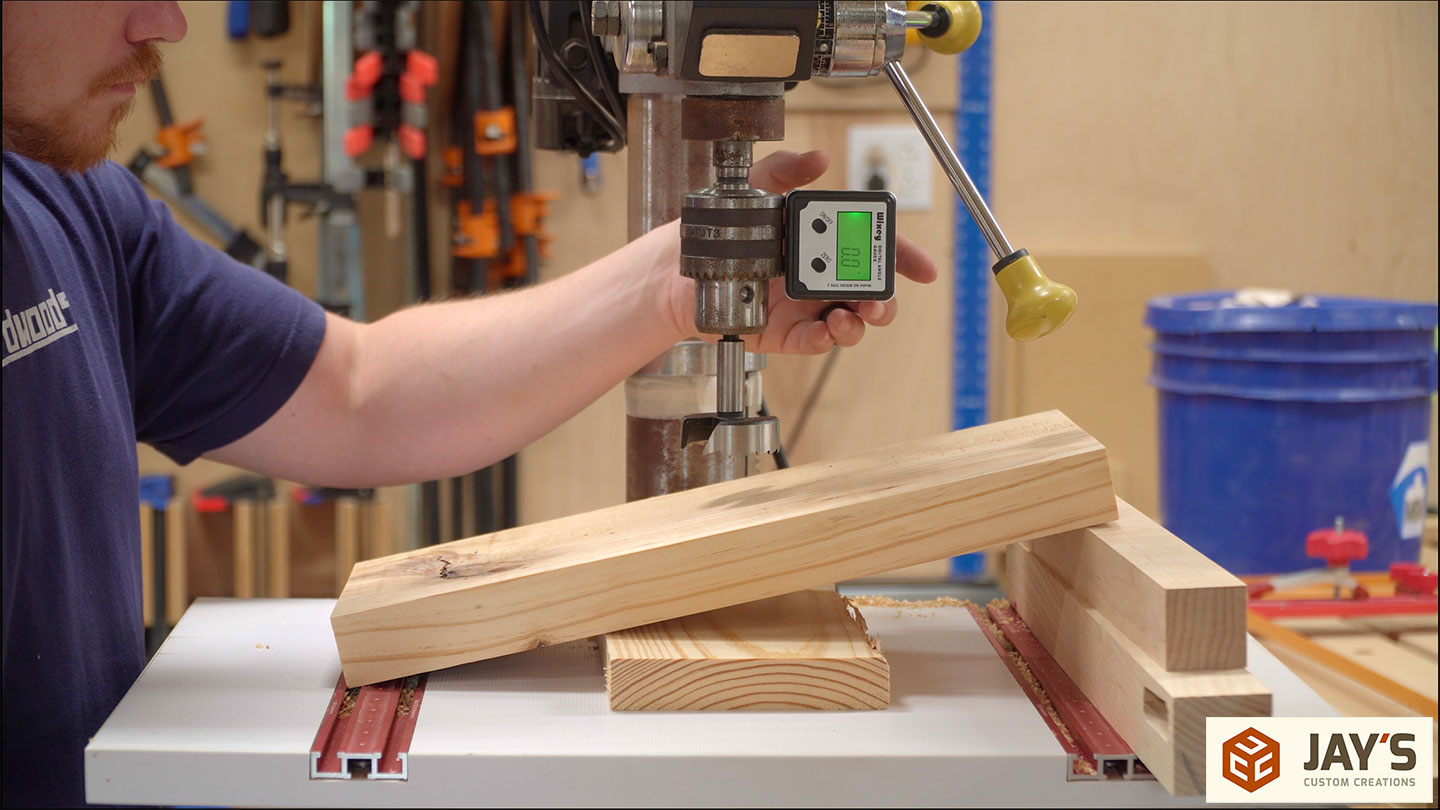
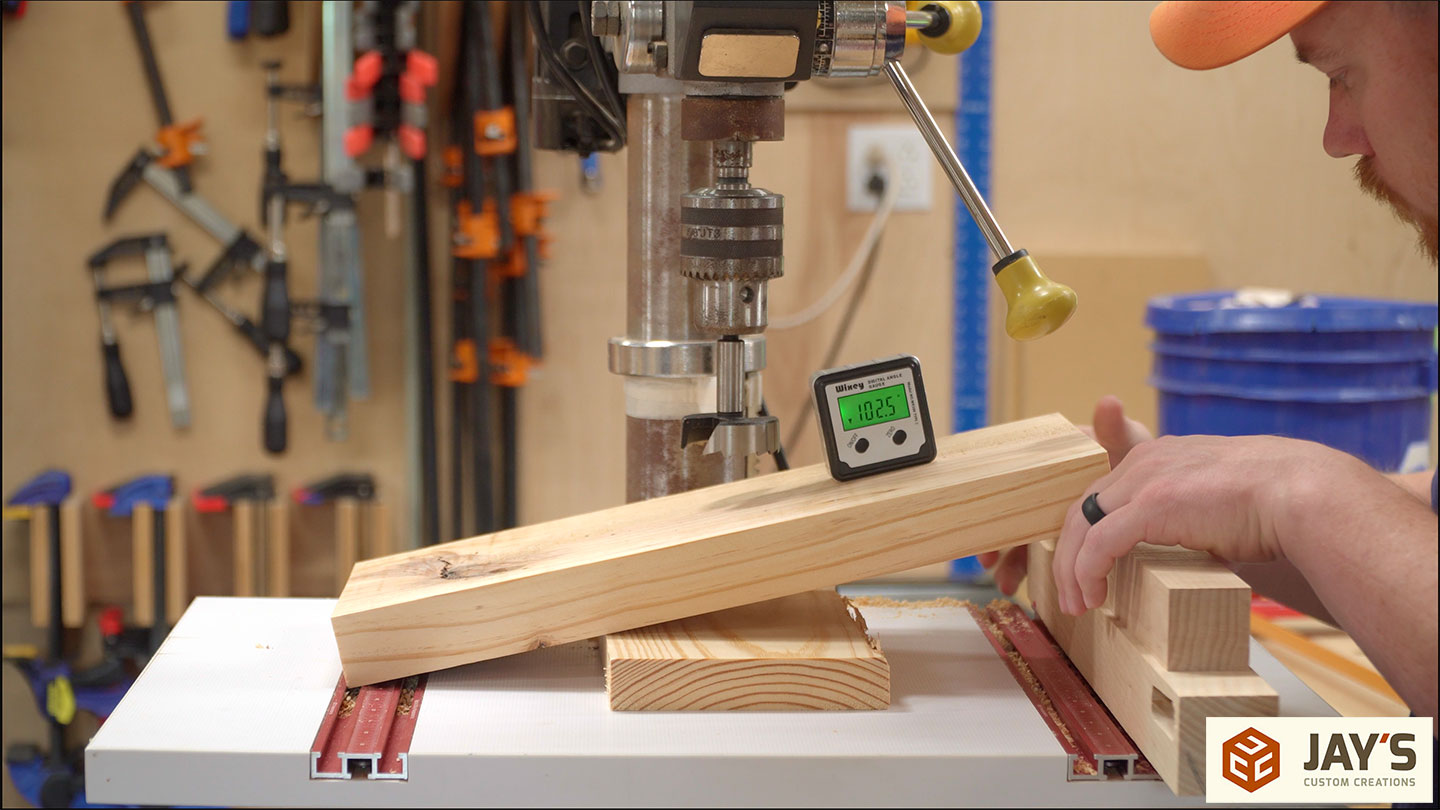
With the elevation blocks on the right clamped in place, just one clamp is needed to keep the left edge of the block stuck in the T-track with downward pressure onto the adjacent blocks. This locked the angle while the hole is slowly and carefully drilled. I know…just tilt the table! This setup was pretty easy and afterward, I don’t have to worry about calibrating the table back to 90 degrees again.

Back to the carriage for another quick fix. It dawned on me that the front dowel is the only one that will be exposed in the new position. I was worried about the end grain of the dowel telegraphing through the paint so I drilled a shallow hole with a Forstner bit for another plug. This time, the grain will be parallel with the rest of the wood and hopefully not telegraph through the paint.
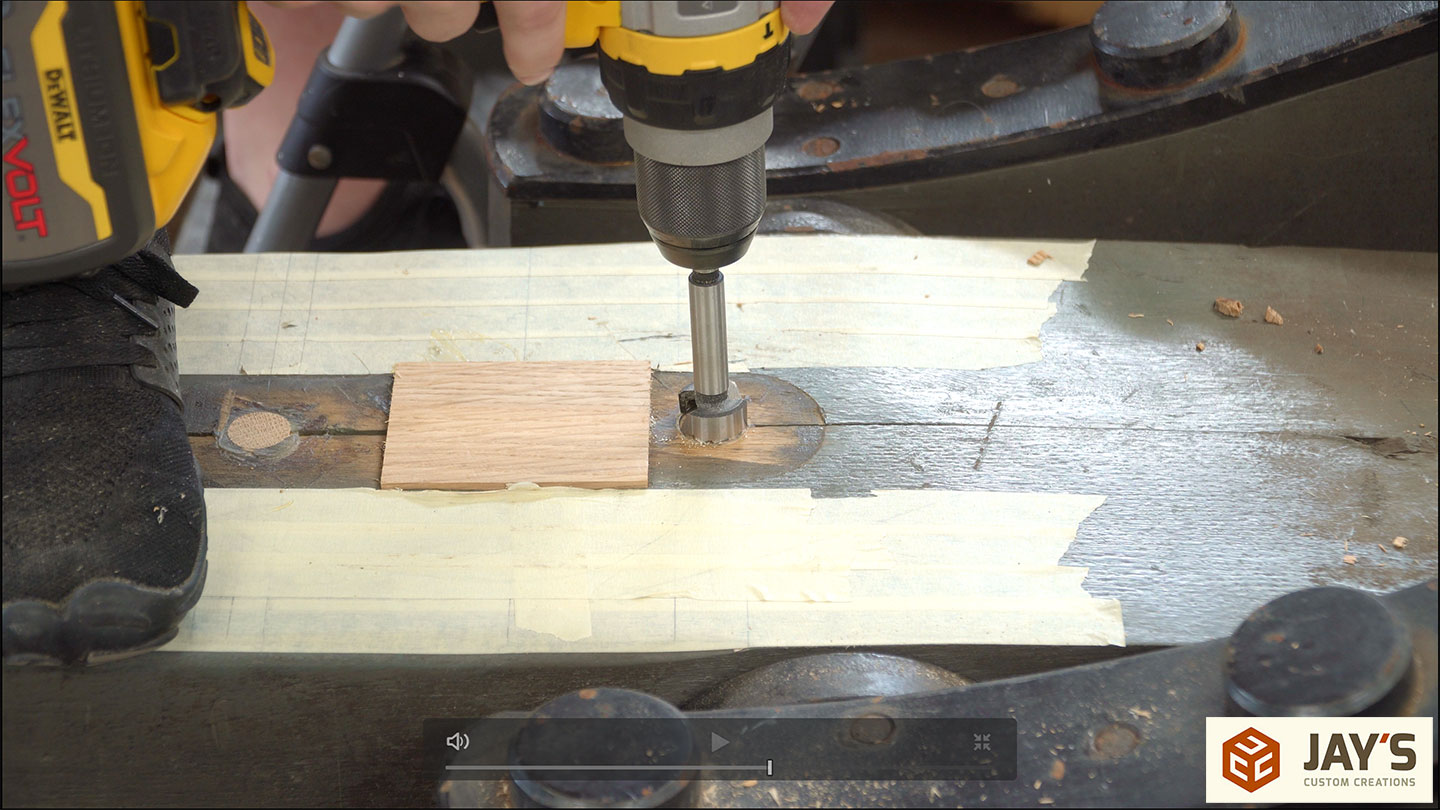

I didn’t have a 1” plug cutter so I used the CNC machine to cut the plug.

Because I wasn’t worried about the glue dripping through and I needed to get back to work on this area immediately I used a fast-setting PVA glue.
A hand plane was used to remove the bulk of the patch waste.
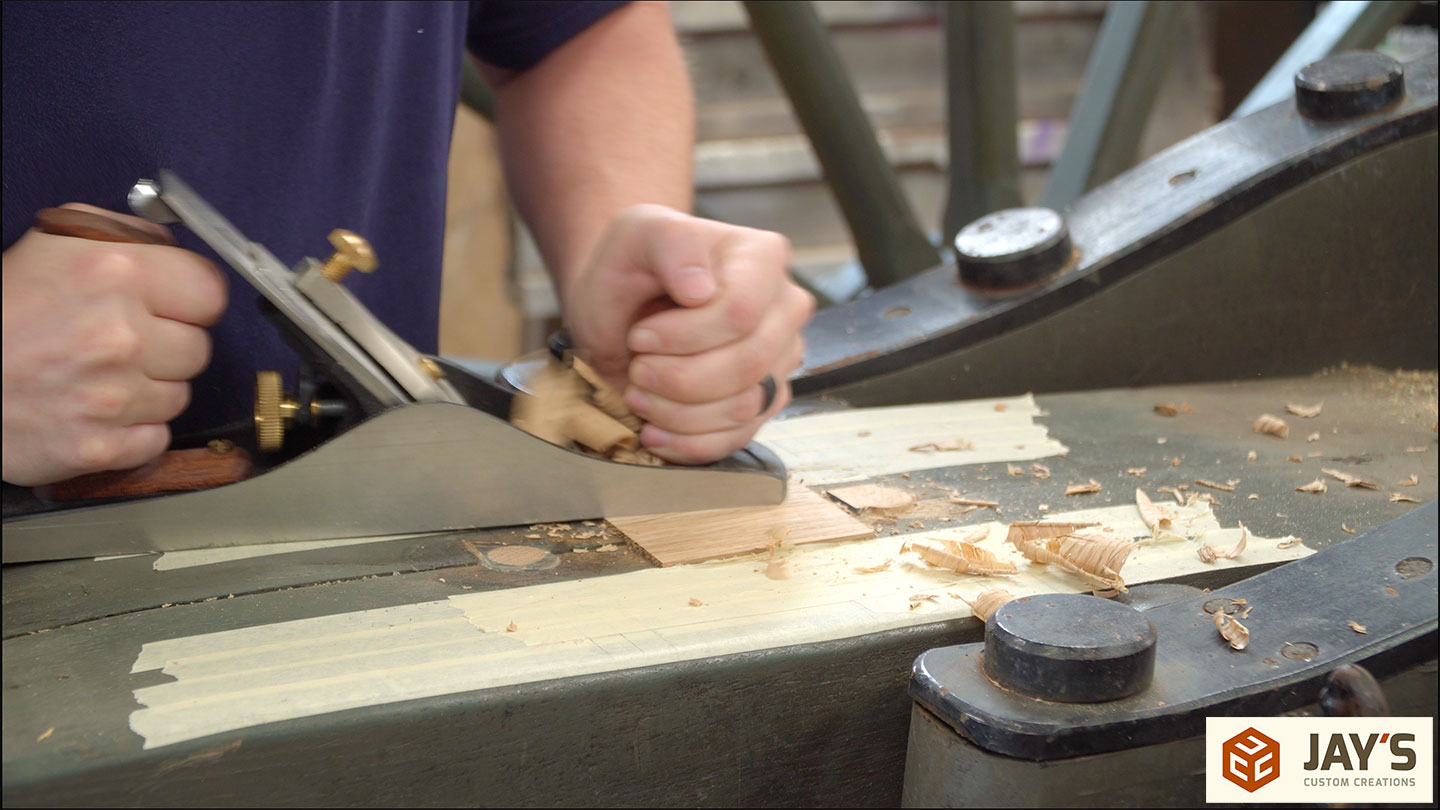
And then a few quick passes with a sander to make sure everything was flush. I couldn’t complete the work with the hand plane due to too many bumps and irregularities in the surrounding wood.

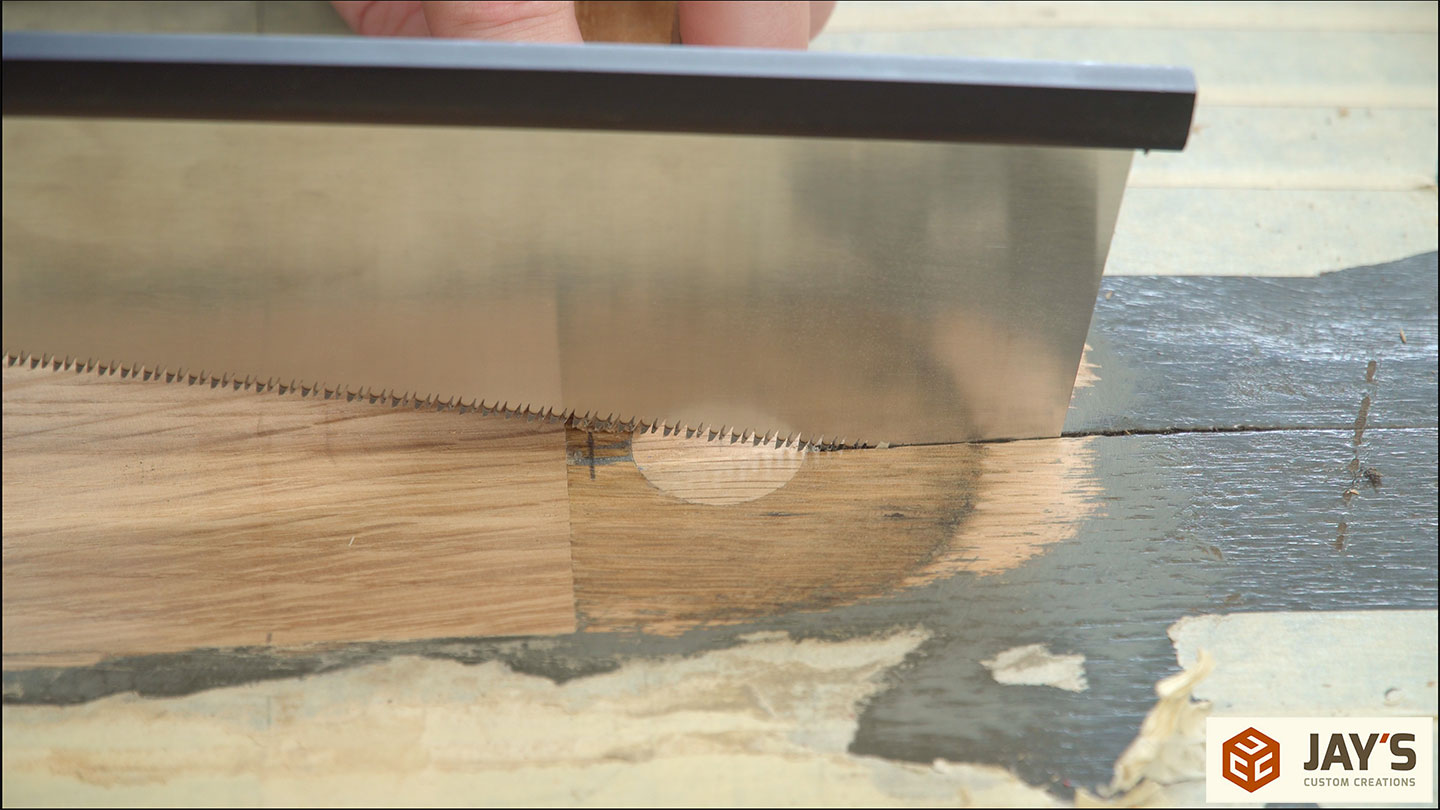
The cosmetic patch in the front was right in the middle of the two main beams. The crack you see isn’t a crack. It’s the seam from the two beams shrinking slightly over time so I used a thin saw to cut a kerf into the new patch to make the seam look continuous. Once covered in paint there shouldn’t be any visual indications of a patch being there.


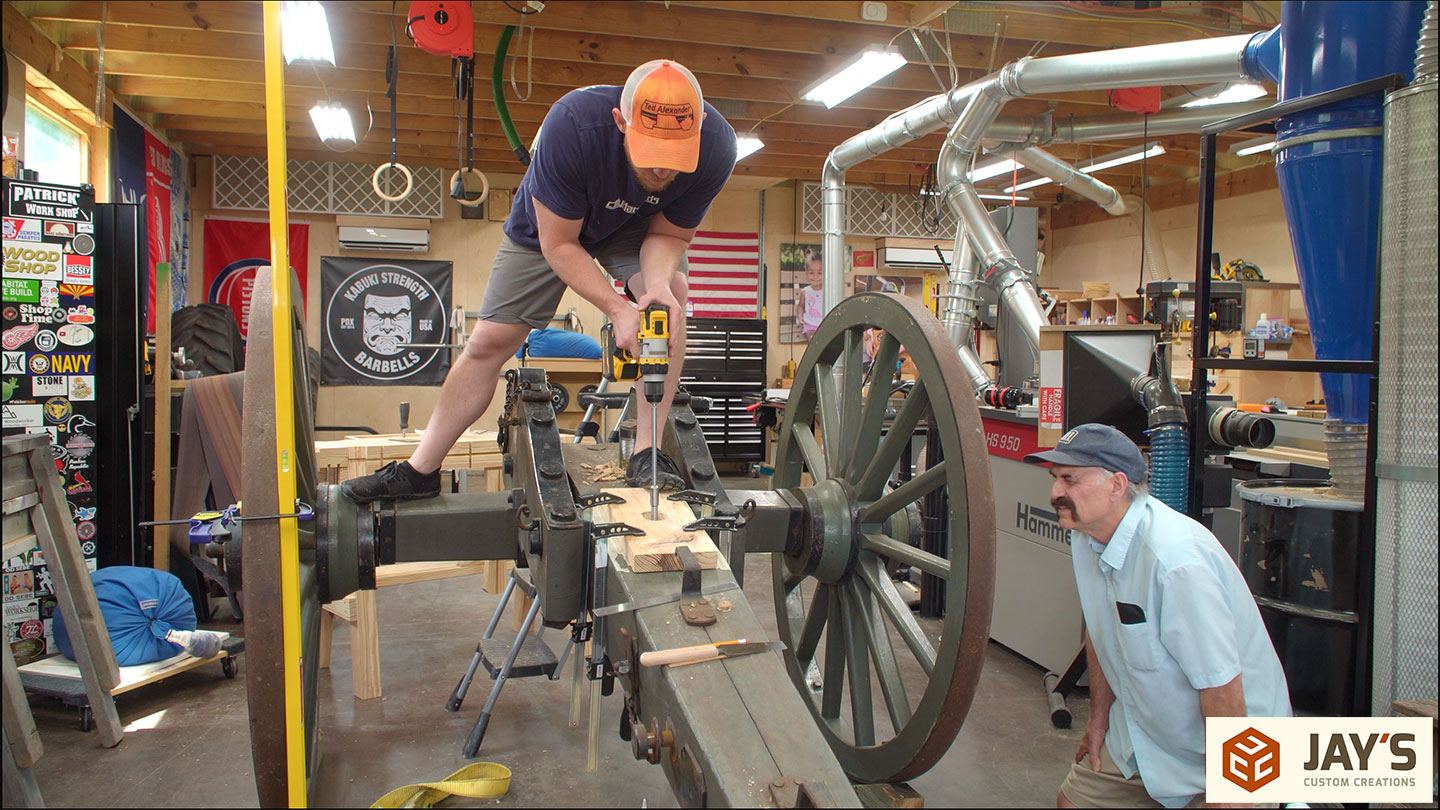
Here’s where the 12-1/2 degree guide block comes into play. After carefully positioning it for the new holes it was clamped securely to the carriage.
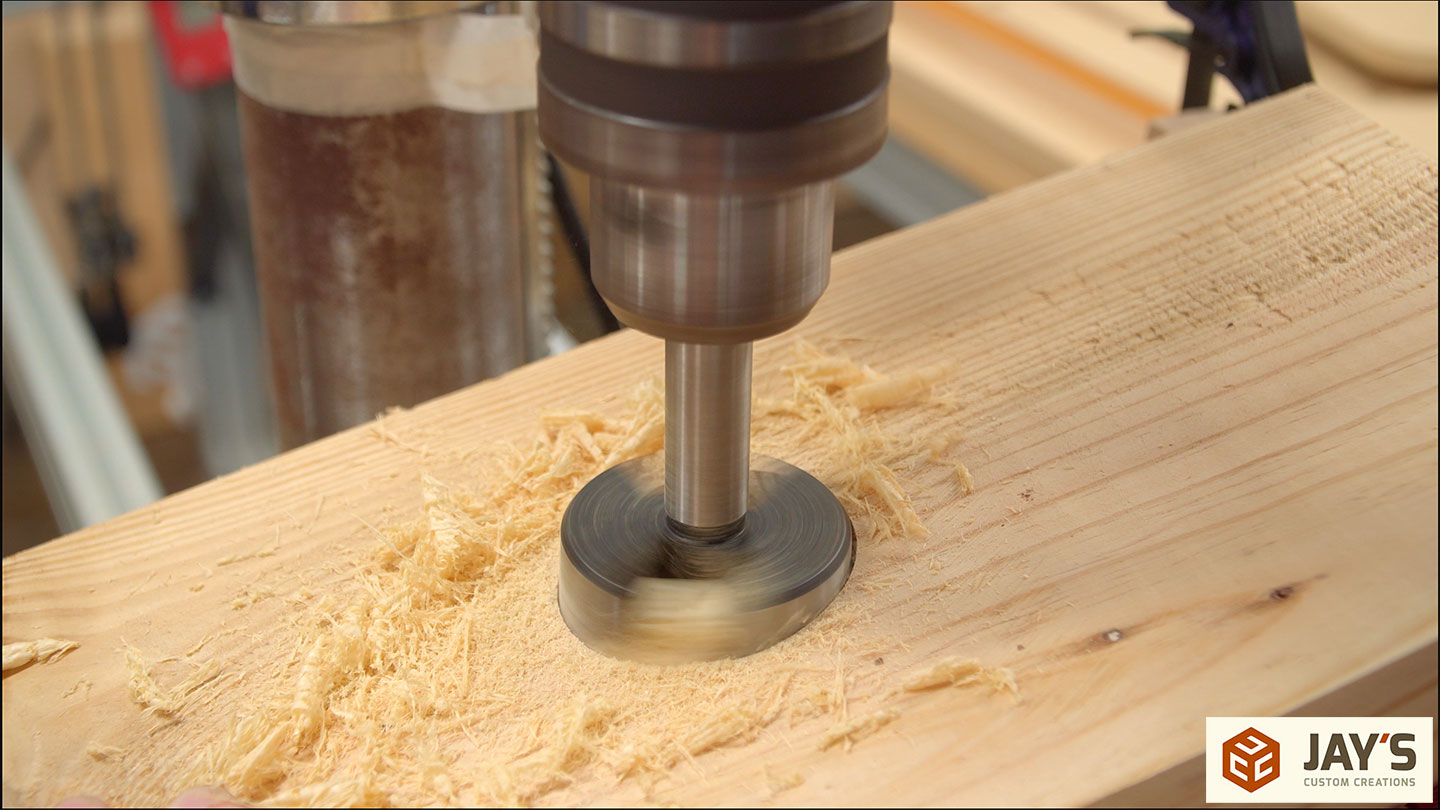
Then we used the same digital angle gauge and some shims to get the top face to 12-1/2 degrees from the floor. With the carriage at the correct angle, we can focus on keeping the drill vertical. And to do that I had some help from Duffy. When looking down at a drill I find it easy to keep the drill tracking vertical left to right but not front to back. I clamped a level vertically to one of the wheels for Duffy to use as a visual reference. He could tell me to lean forward or back to keep the drill tracking vertically while I was able to stay vertical left and right. The 2-1/8” hole was drilled deep enough into the surface to remove the guide block.

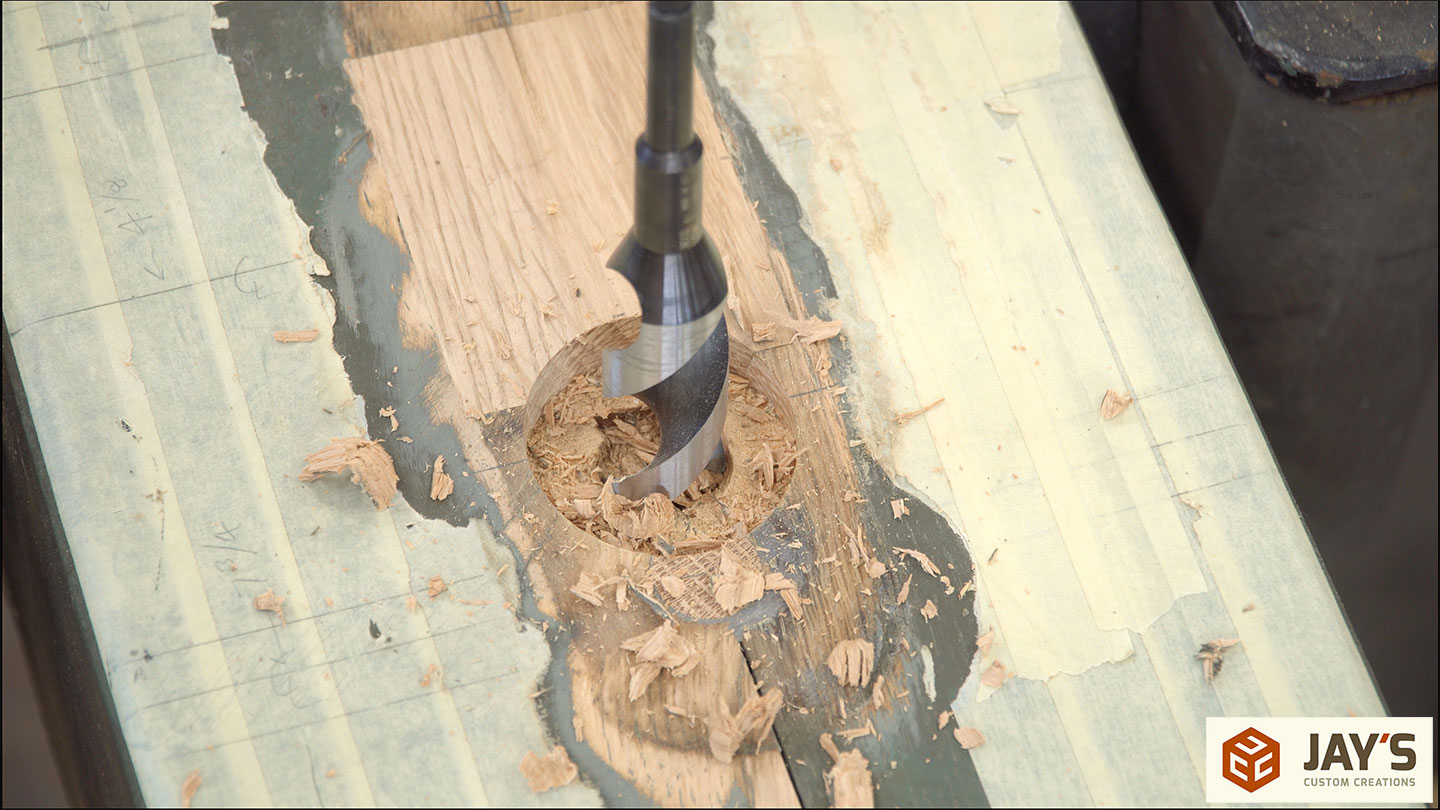
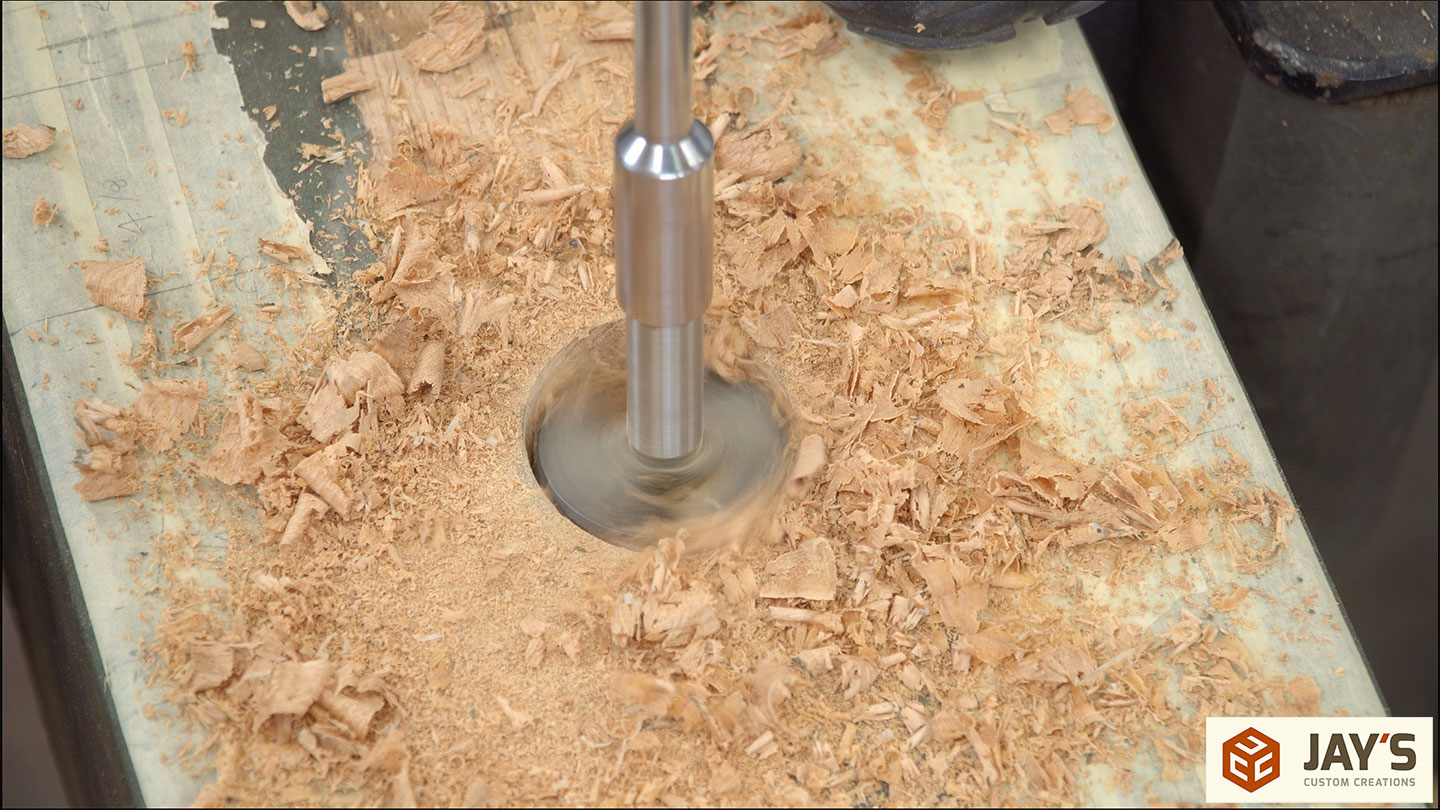
Then we used an Overdrive bit to quickly hog out the center section. Removing the center makes the Forstner bit much easier to drill with. Back and forth between the Overdrive bit and the Forstner bit until we were all the way through.
With the main hole drilled the mortise for the bronze nut need to be cut. Nothing fancy here. Just some guide blocks for the sides and lots of chisel chopping. One thing to note is the front of the mortise is rounded so that part did take a bunch of back and forth testing the fit to get it right.
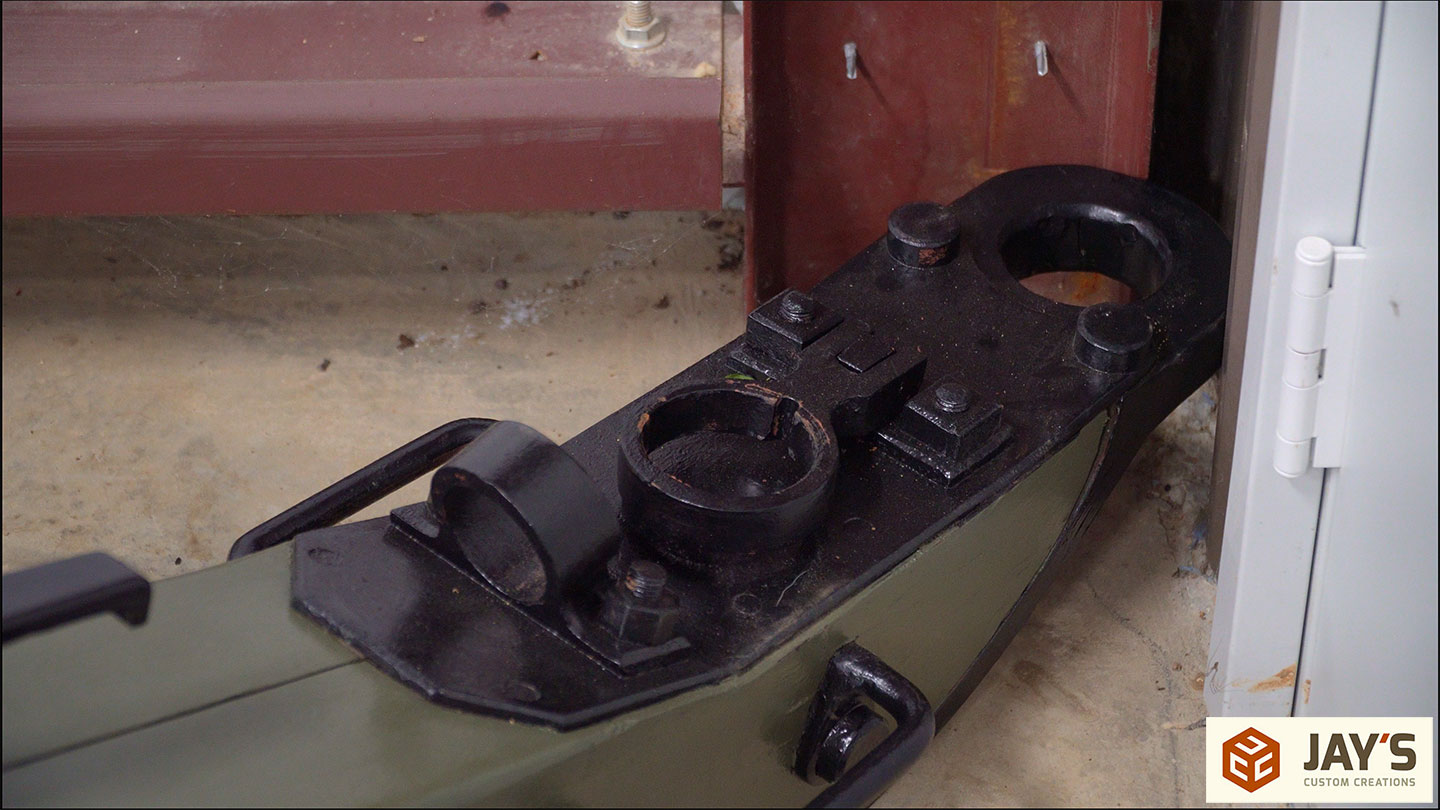
Once the screw was fit we knew the location of the two bolt holes. They were drilled as deep as possible with Overdrive bits and then drilled all the way through with a long reach electricians auger spade bit that I happened to have. I only have one of these and it just so happened to be the side I needed.


At this point, the work in my shop is done. Time for Duffy to take it home for the last minor repairs and a fresh paint job.

I did send Duffy home with some penetrating epoxy to fill all of the tiny cracks and checks that were in the wood. If you need epoxy to get deep into tiny cracks, this is definitely the stuff to get. It has an incredibly low viscosity.

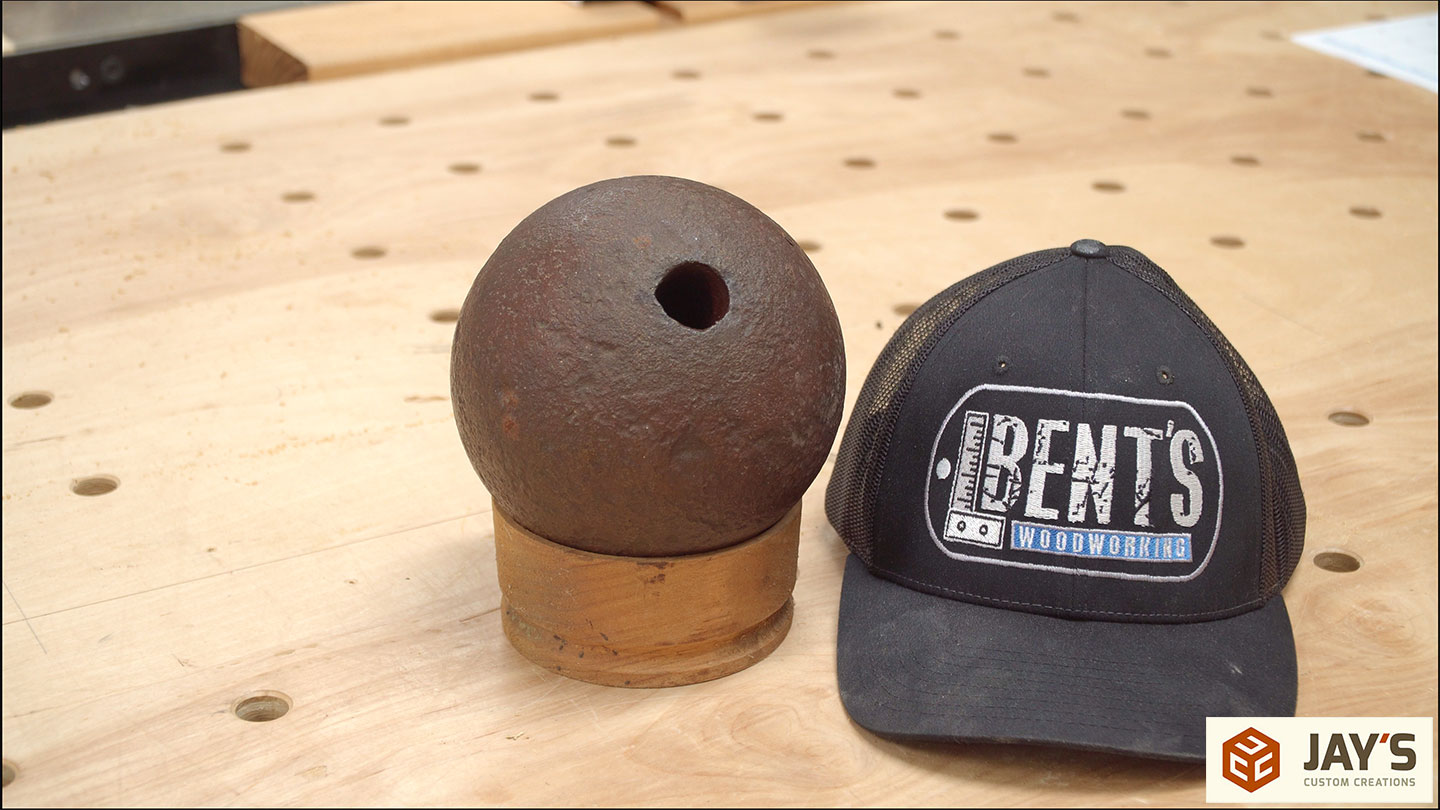
Also, note that we will be firing this cannon in a later video. This is the size projectile used. The hat is for a size reference.
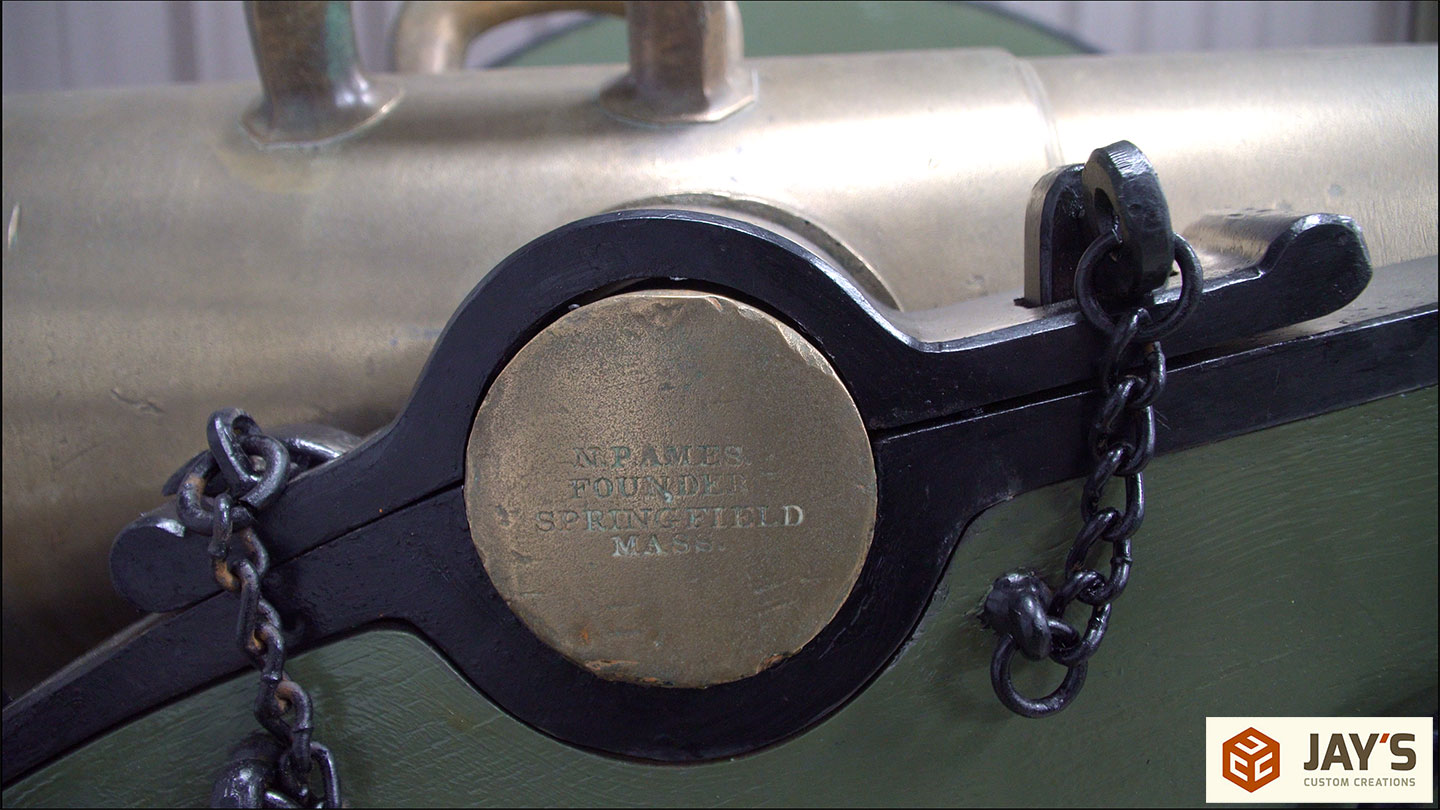
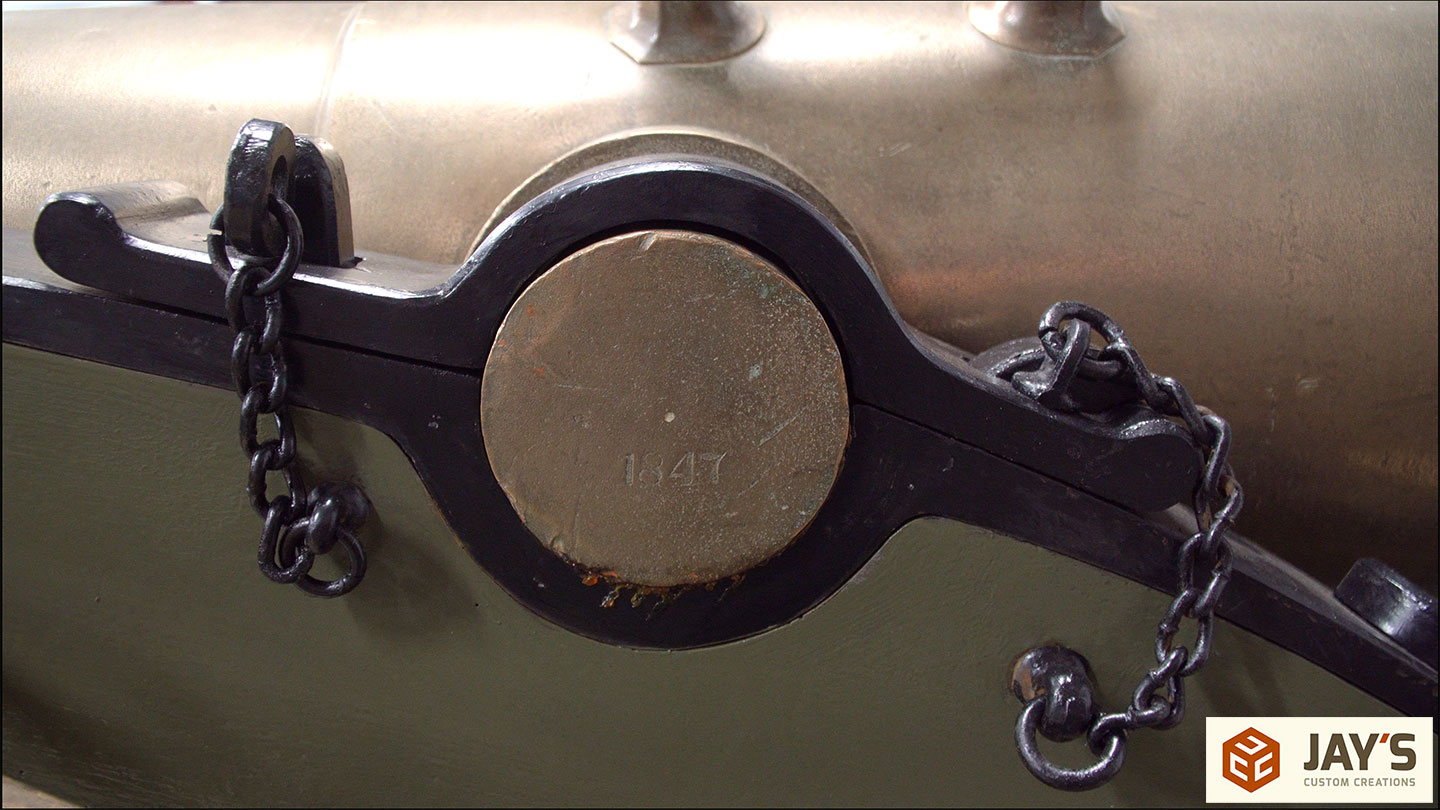
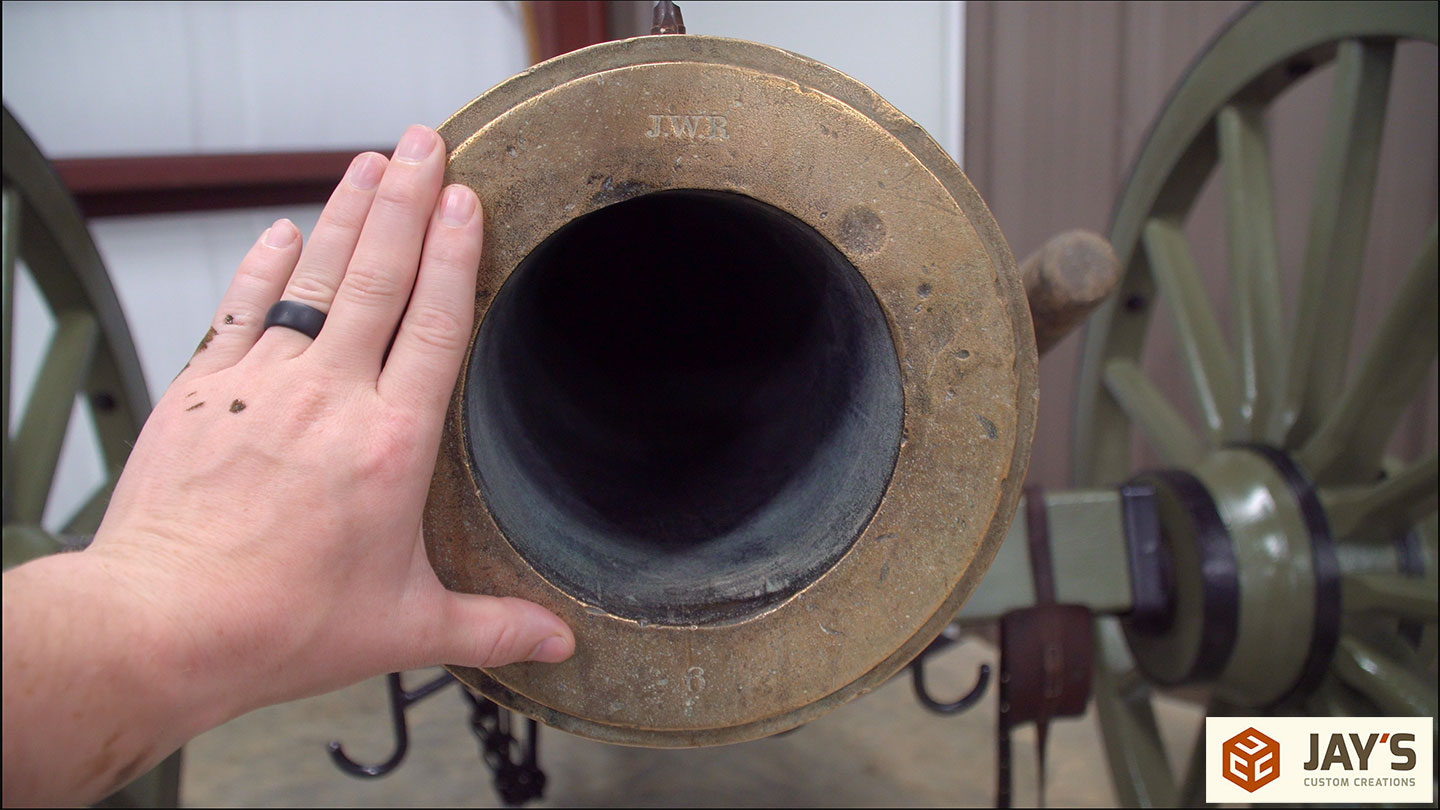
And here it is on display in Duffy’s museum with the original 24pdr Howitzer cannon in place. The tube is stamped from Springfield Mass and made in 1847

And here you can see the correct location of the elevating screw. Before it was contacting the tube 2-3/8” forward, not contacting the back ring like it should have.
Here’s another look at the diameter of the tube and the size of the projectile.

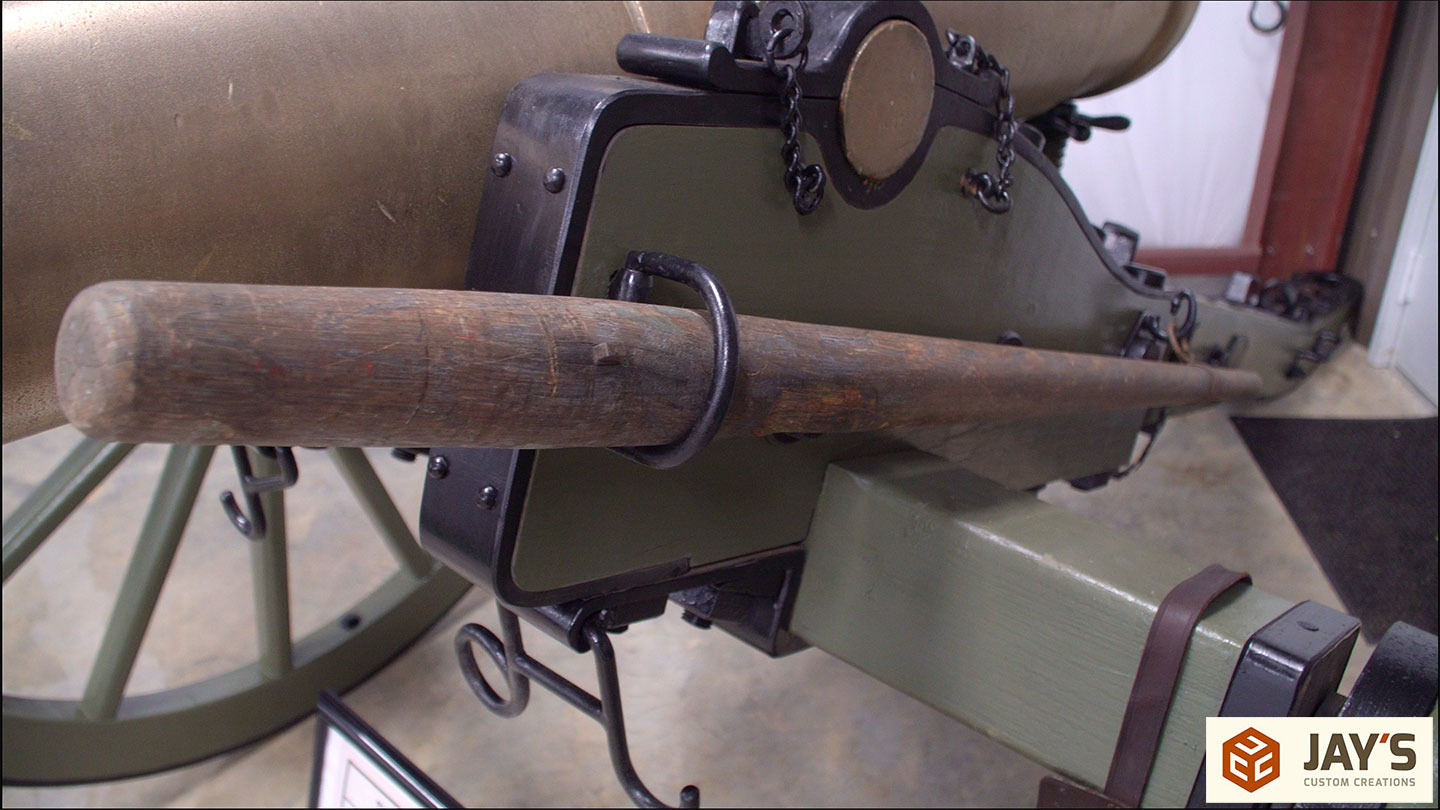
Duffy also has one original spike, which is used with a pair of rings on the end of the carriage to more easily move and position the carriage.
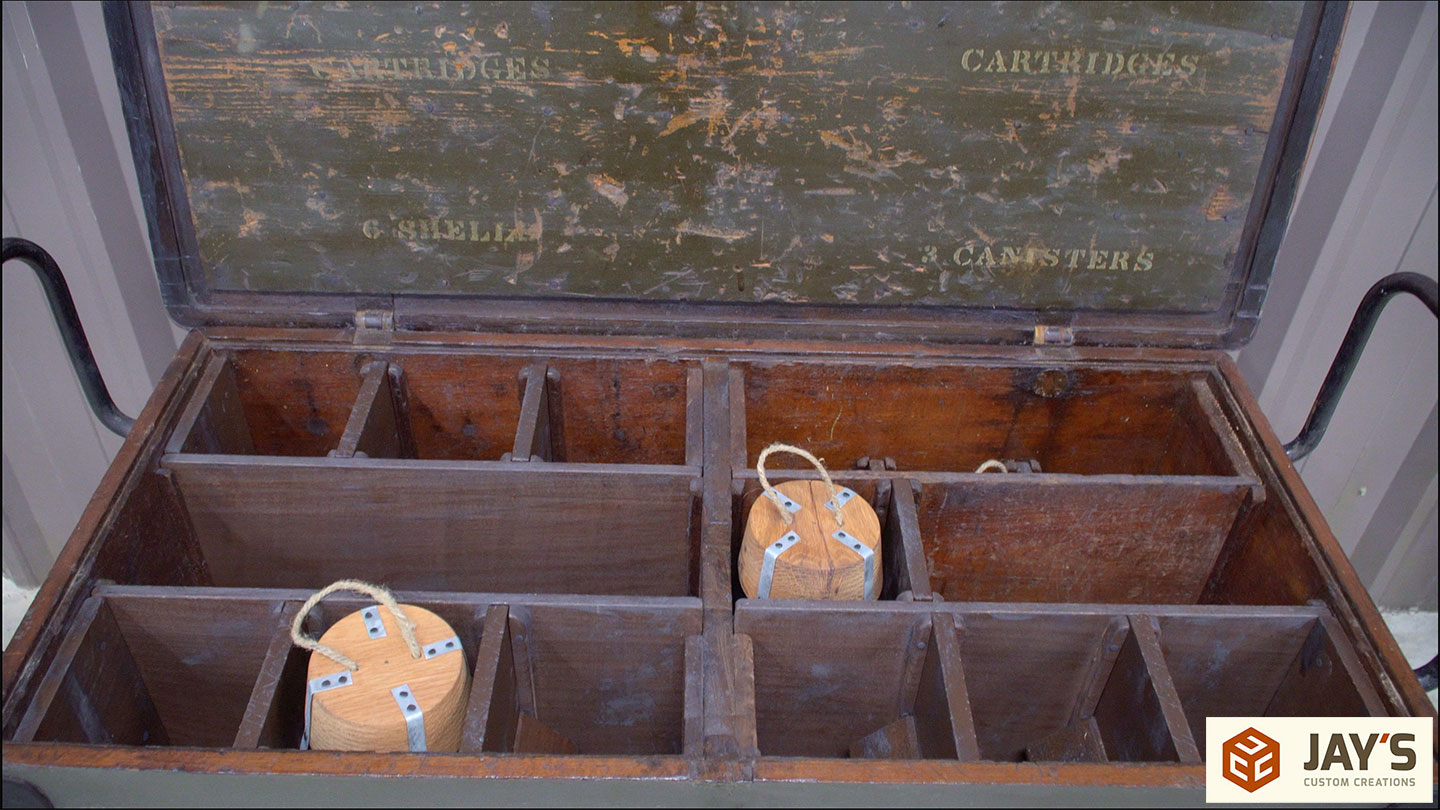
And finally, the rare Howitzer cannon is displayed with an even more rare 24pdr Howitzer ammunition chest.
If you’d like more information or would like to see Duffy’s museum check out his website, starkvillecivilwararsenal.com.


Thanks Jay for your excellent restoration work in keeping these Civil War artefacts in good shape.
Thank you Jay for once again providing a “ labor of love “ repair to preserve our nation’s history. Great stuff from you as usual. Please keep it coming.
That is pretty cool. When my friends ask me to repair things for them, I want to do a good job, so its always kind of stressful. Combine that with working on a rare piece of history, and I would have been sweating bullets. Maybe that feeling goes away the more experienced you are with that type of work? Nice job man.
Awesome job Jay! Thanks for sharing it!
Just wanted to say job well done!!!! I always enjoy your excellent content. Nice to see these artifacts up close.
G’day Jay. That was a lot of work to move a hole, so too speak, but turned out great, well done.
I must try and visit the collection when next over there.