My first work table was made by securing 2×4’s to the side of wall cabinets, placing casters on bottom, and adding a 59” x 40” piece of plywood to the top. It wasn’t anything special looking but it was crazy easy to make, repurposed old cabinets, and gave me my largest work surface to date. When we bought our house in 2014 I brought that table along and used it in my new-to-me shop space until I replaced it with my most recent table that had more working ability.
I made a modified version of the Paulk Workbench next. The Paulk Workbench is great for people on the move or for people who need the ability to break down the station and store it out of the way. I never utilized the main Paulk features though. It was more like working on a modified MFT table than the Paulk Workbench. The work surface on top is a full sheet of plywood measuring 48” x 96”. It’s perfect for power tool work. Have to biscuit a bunch of boards for a panel? Drop pegs in a few holes and set up a two direction stop system to prevent the work from sliding around without any clamps. After using this table for 3 years I’ve really enjoyed the large work surface, which has been really handy for a few large projects, but I often find myself just staging junk on top. I have also disliked how much space it takes up in regards to moving around in the shop and how much it bounces, flexes, and wobbles when trying to use hand tools on it. For those reasons I feel more confident calling it an assembly table and not a workbench.
In either December, 2015, or January, 2016, I completed my first traditional woodworking workbench out of southern yellow pine. I don’t know the exact date but it was sometime close to where those to months collide. My first “real” workbench was a game changer for me. For the first time I had something that was solid and didn’t move at all when interacting with it, had plenty of work holding options, and was large enough to work on but small enough to not cause mobility issues in the shop.
With experience from the three distinct tables I’ve previously worked on I can definitely say that I’d prefer to have two workbenches rather than one workbench and one assembly table. I mentioned on social media that I would probably build a workbench sometime in 2018 to replace my assembly table…which got me to thinking about workbenches a little more….which made me decide to make another workbench as a fun project to sell and raise funds for hand tools…which only made me realize I should keep this second workbench instead of selling it and see how I like the size as a secondary work surface. So yeah, this workbench isn’t for sale…but it might be in a few months if I decide to build another one just a little bit larger.
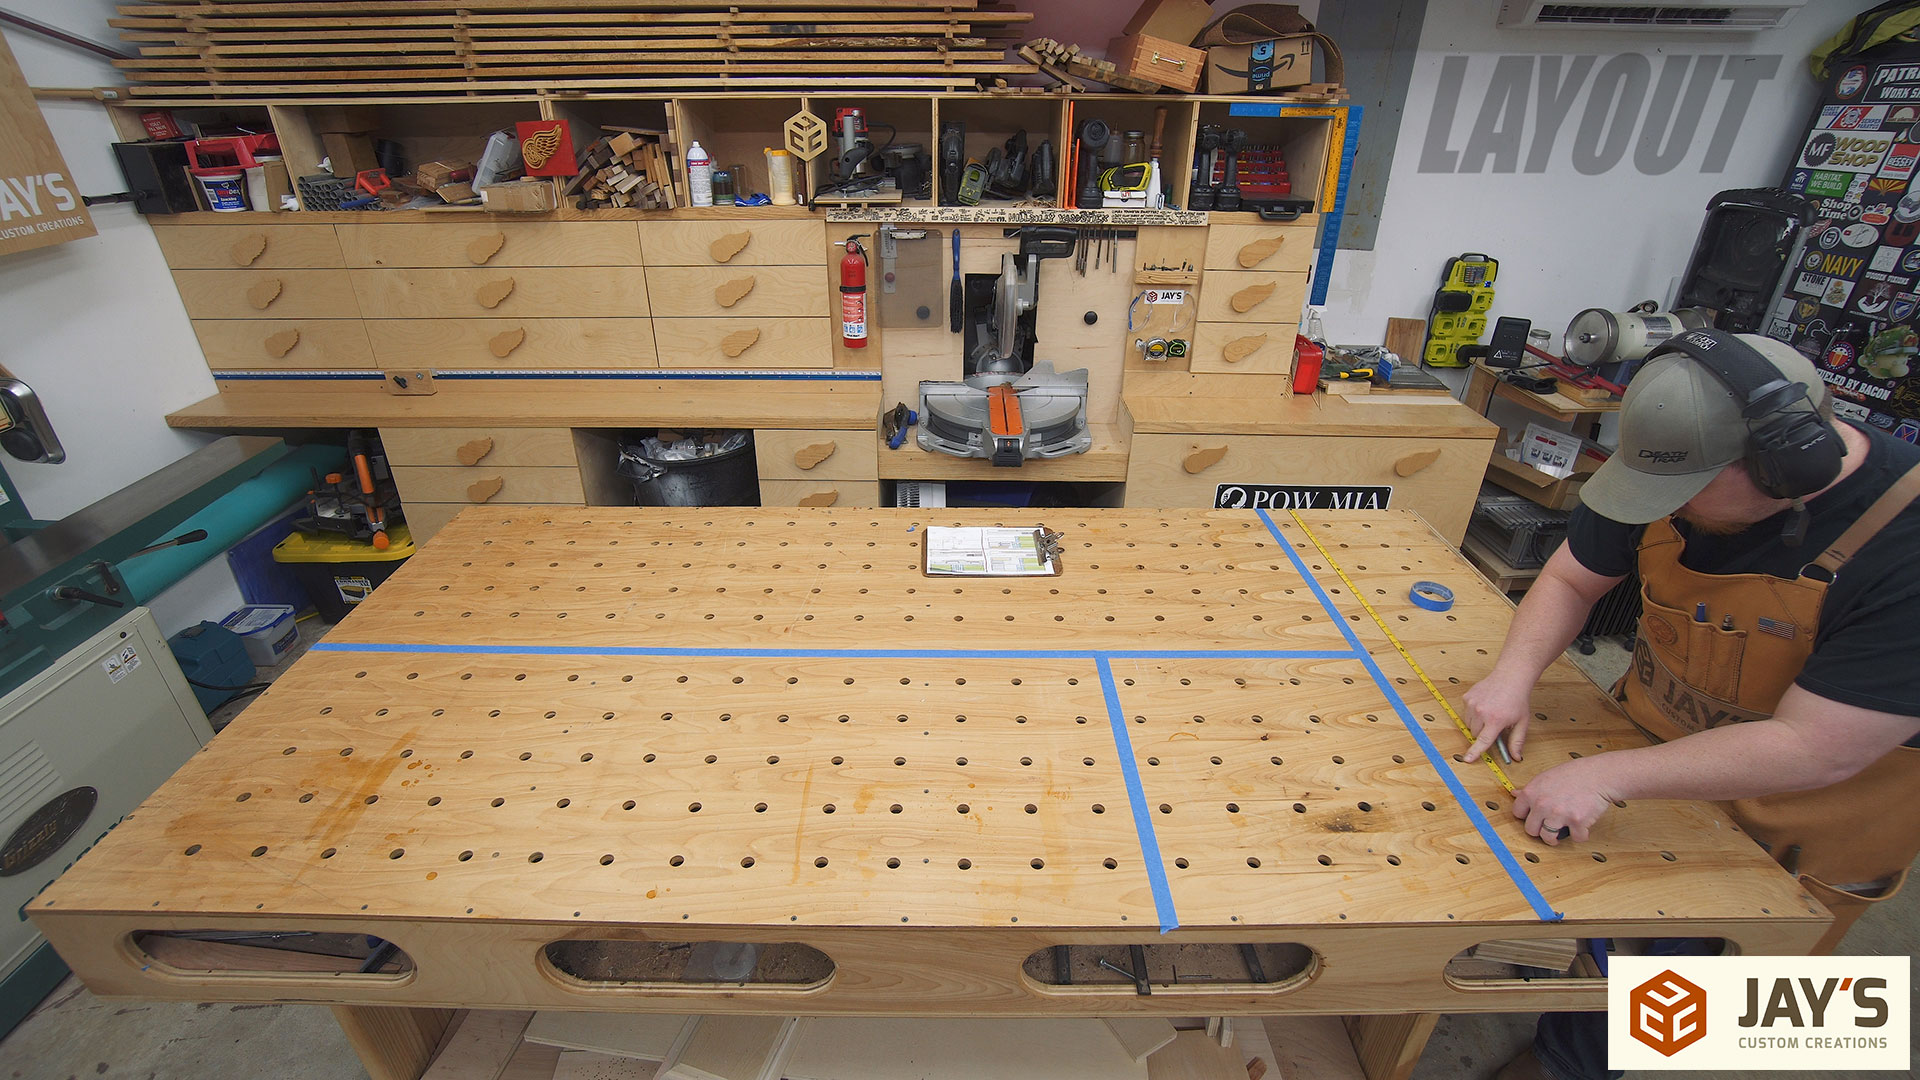
To play it safe I decided to make this workbench using the plans for my first workbench. This design will be a lot faster to make if slabs and beams are used. Unfortunately, like most everyone else, I don’t have slabs or beams so I need to make my own by gluing a bunch of pieces together. Because the exact dimensions aren’t critical when rough cutting and because I don’t know how many pieces I’ll need to glue together I thought it would be convenient to lay down some tape on the assembly table to mark off a few dimensions that I could use for quick glance and reference when rough cutting. It ended up being a waste of time because sliding the wood all over the table pulled up the tape. Oh well. The concept sounded good.
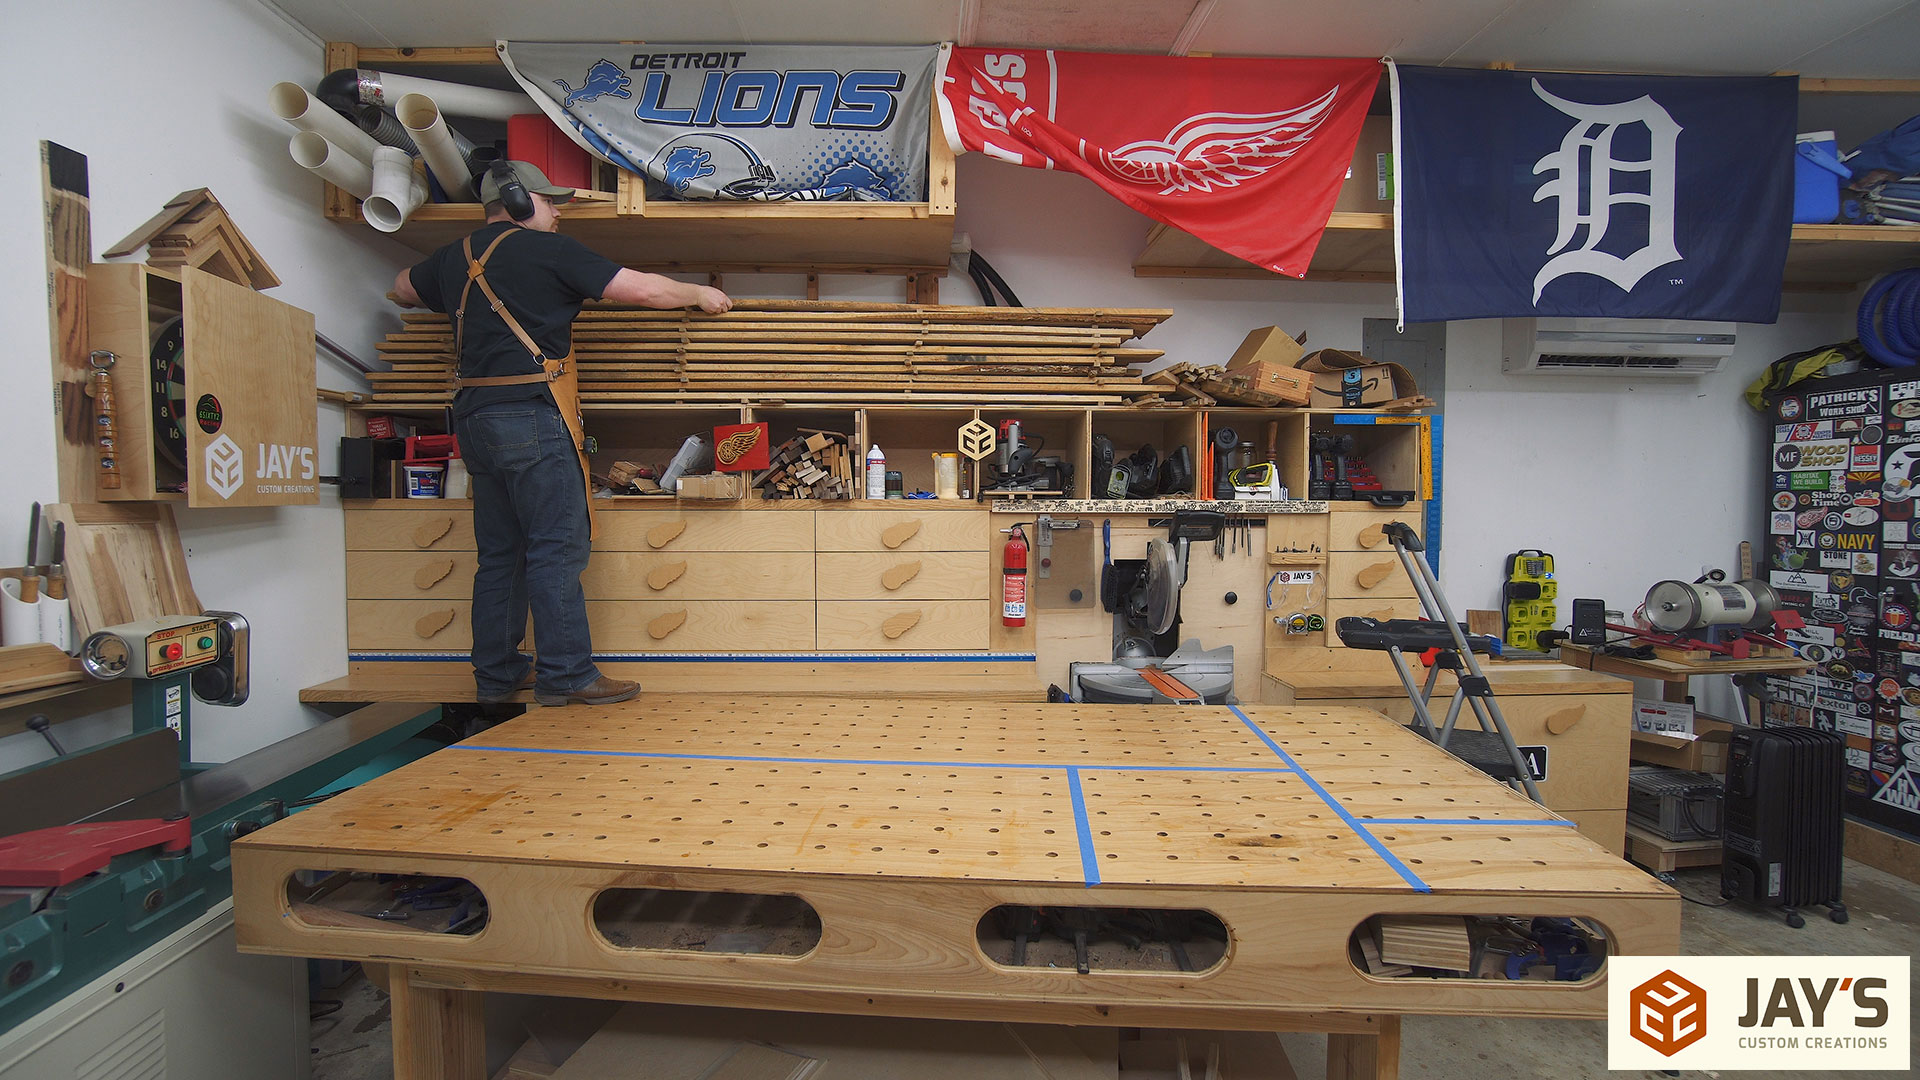
One thing I know I will miss about not having this assembly table in the shop is how convenient it is to push against my miter saw station and use it as a walking platform to access stuff on top and on my high shelves. The wood I am using for the workbench is hickory. I prefer to use pine for a workbench as I’m fond of the notion of having a work surface that is softer than the material you are working with. That way the workbench takes the dings, dents, and abuse rather than your project. However, the best wood to use is the wood you have access to or the wood you have a lot of. Last year I bought 1000+ board feet of hickory at 35 cents per board foot. Price for pine at my local home center was 88 cents per board foot when I made my first workbench a couple of years ago. So in the interest of not spending money and saving money overall I chose to use up a bunch of hickory instead.
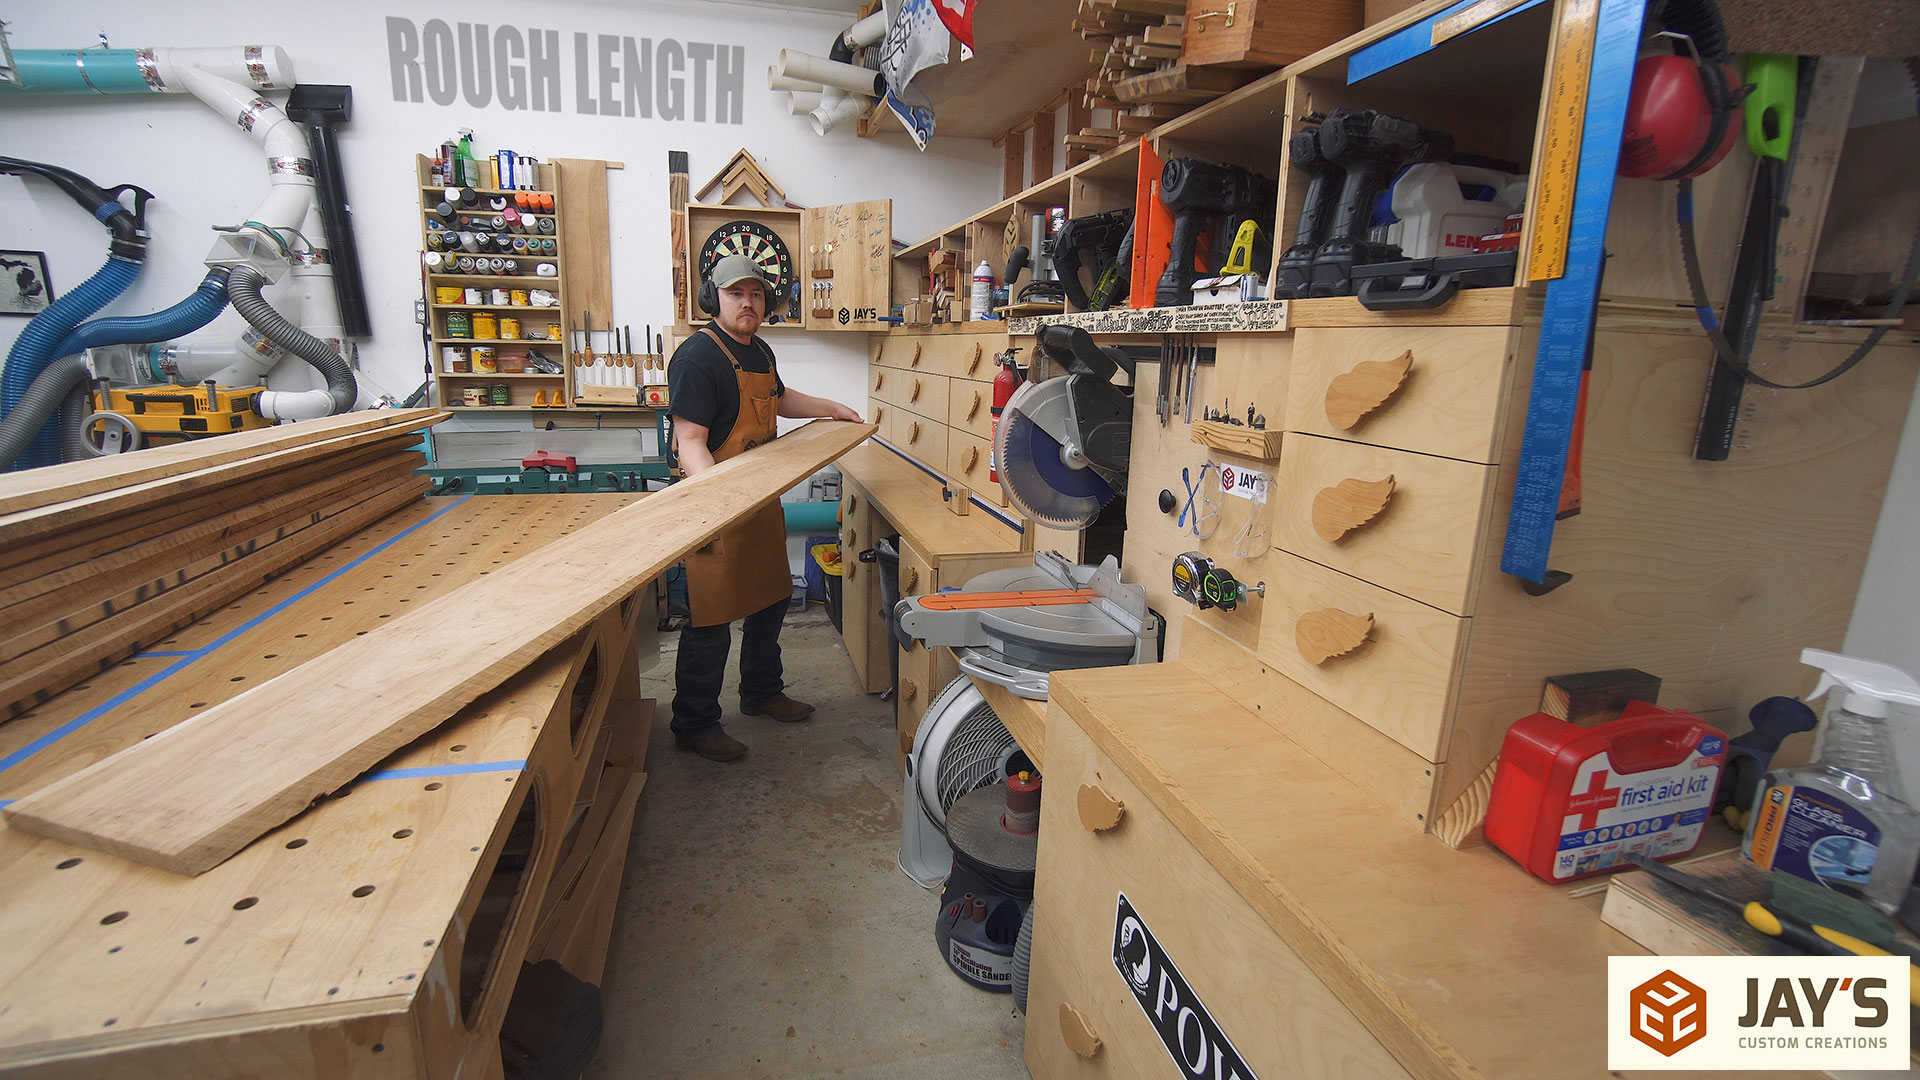
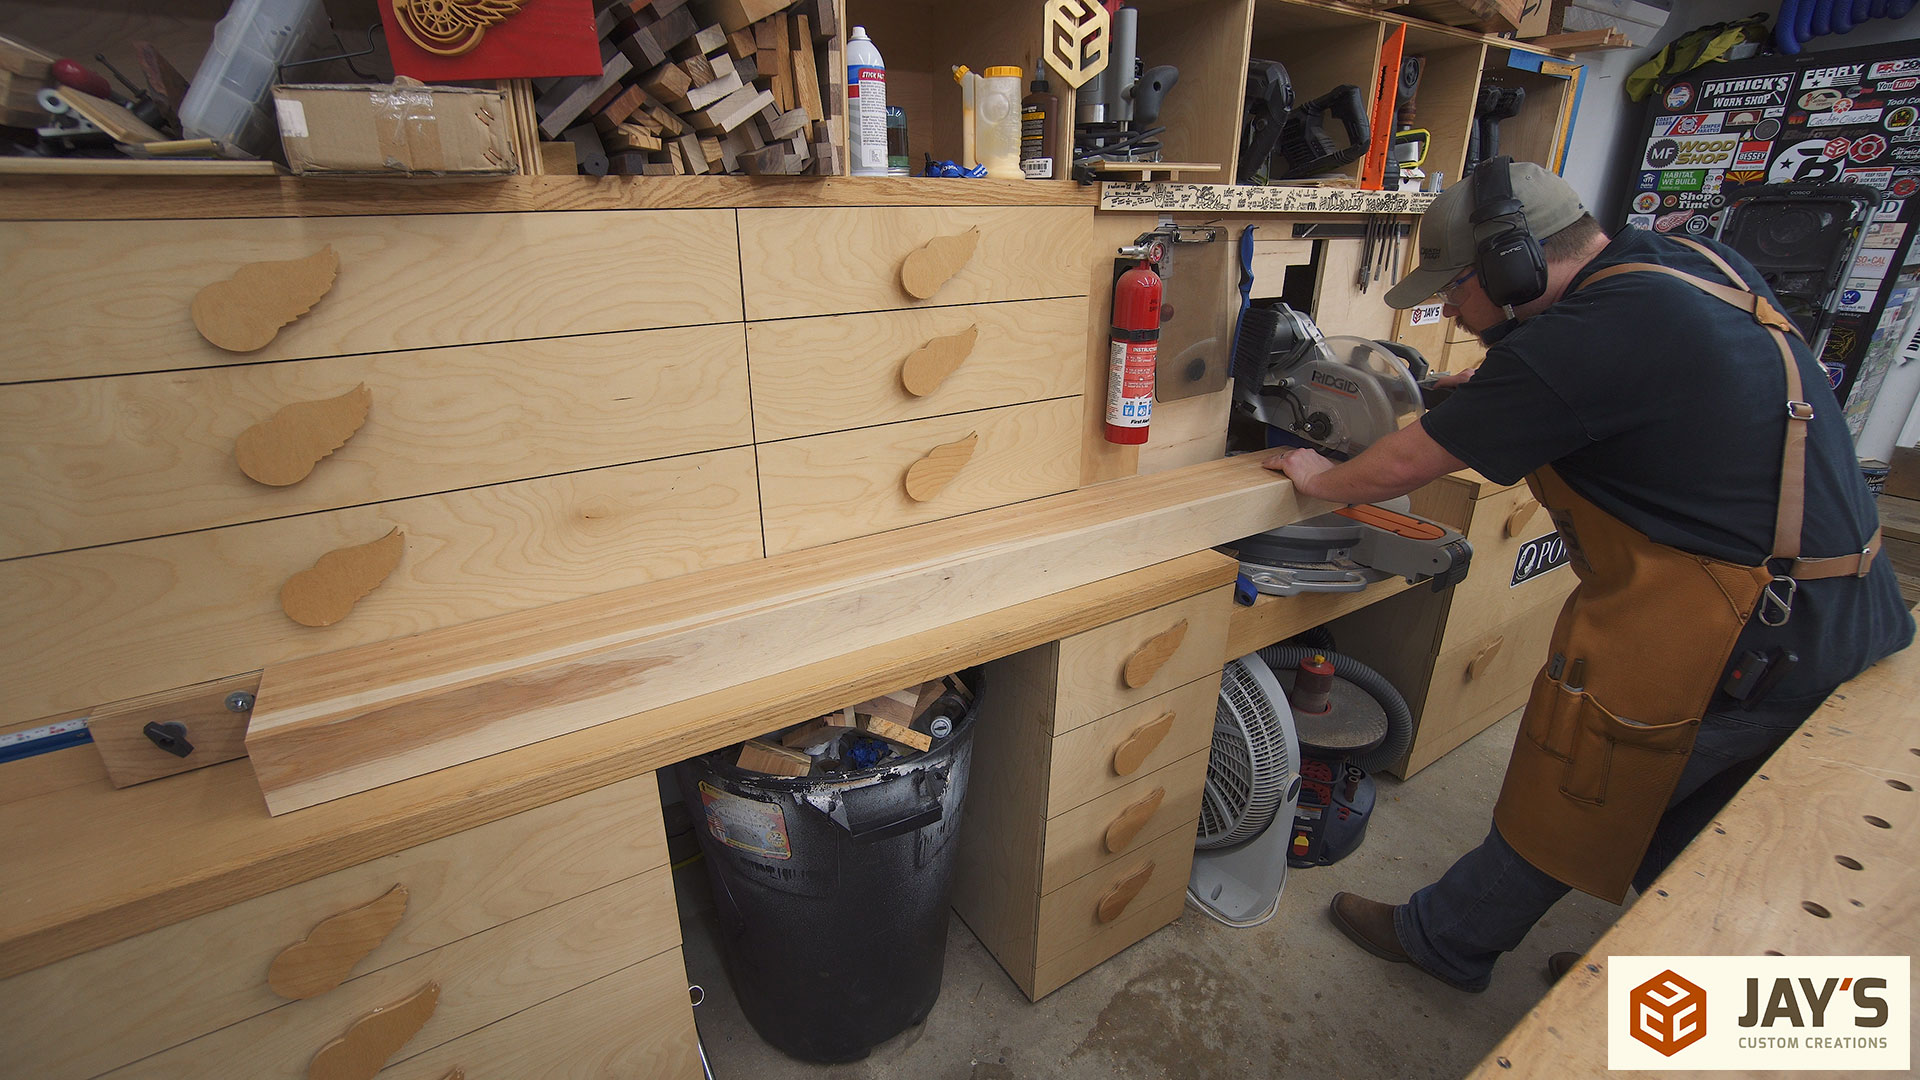
The first step in my milling process is to break down the lumber to rough lengths with a miter saw. My miter saw station gets used on every project mainly because having something always setup to handle large boards like this with ease is so handy. Oh, here’s a tip for you; make all of the work surfaces in your shop the same height to allow for much easier transitions from station to station that require less lifting.
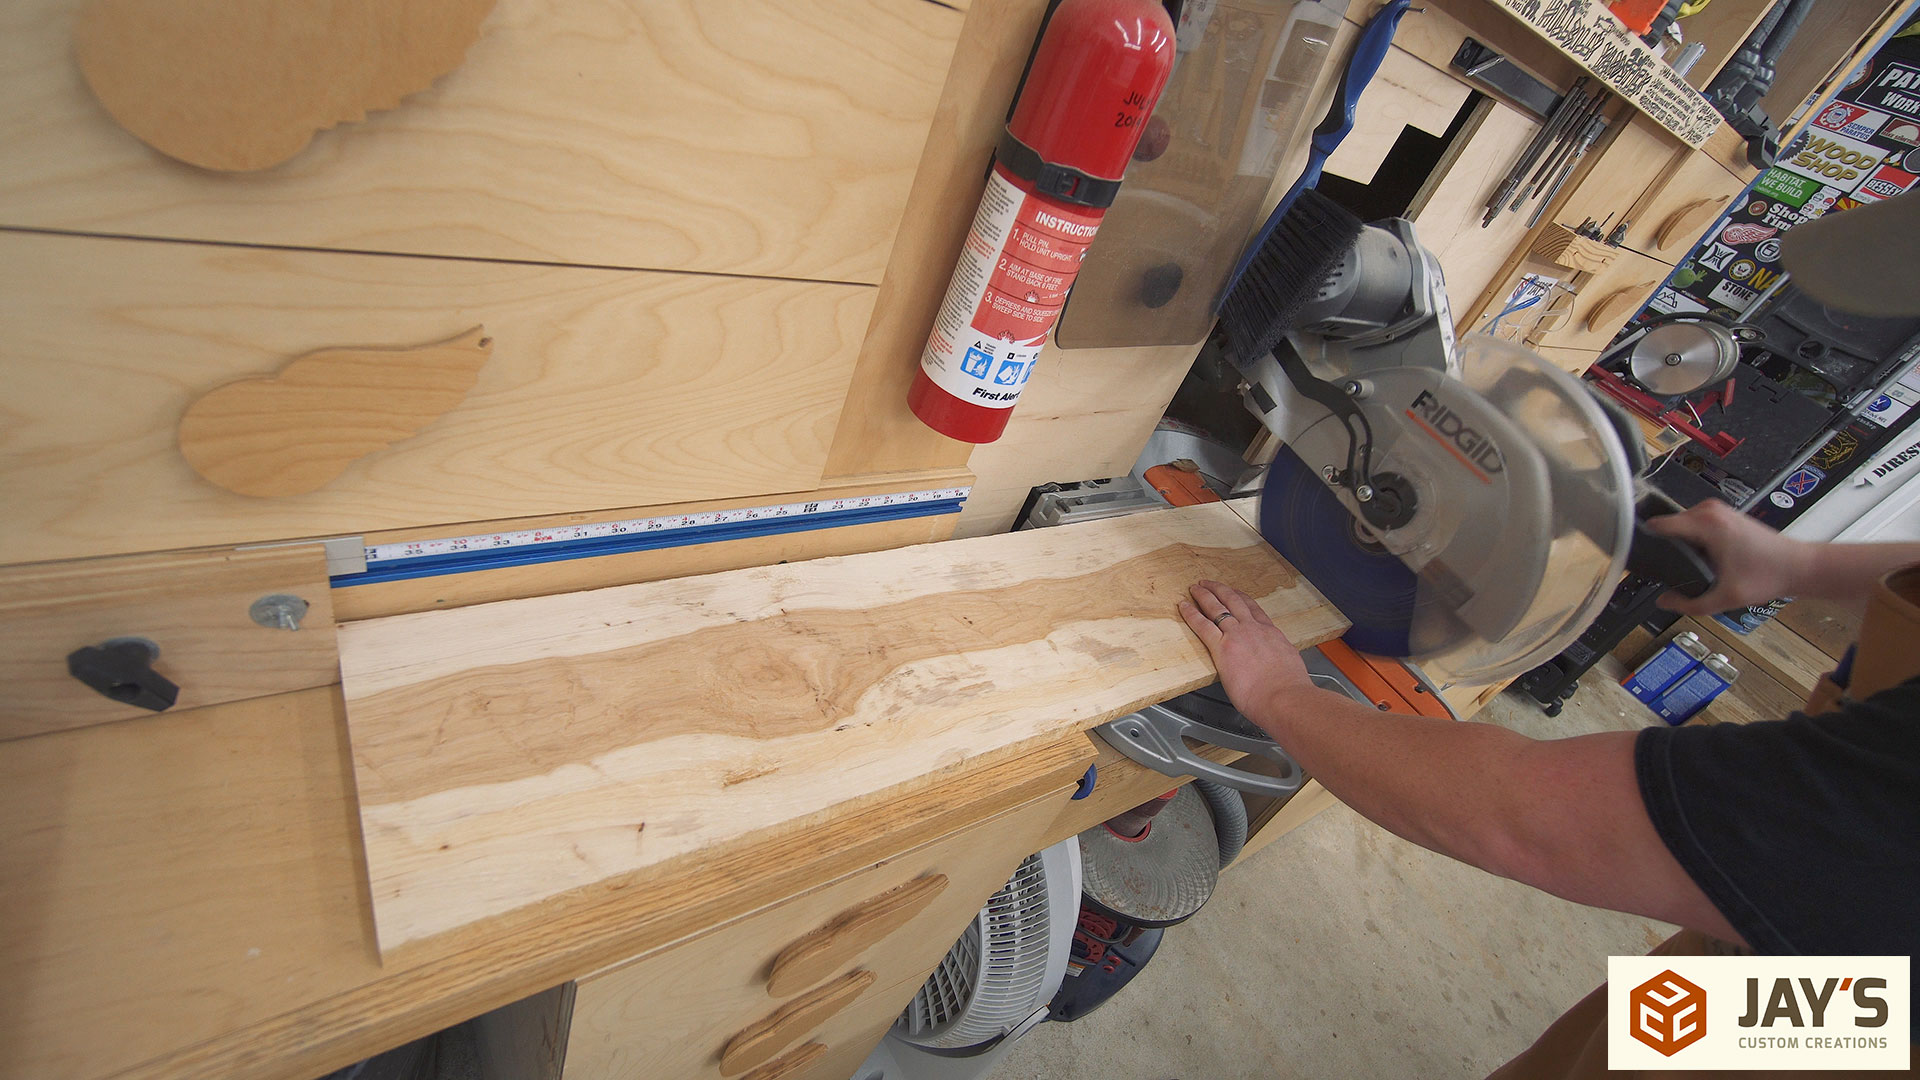
A stop block for oversized parts makes batch cutting a little faster. No need to mark out lengths on each board. I just had to make sure what I was cutting didn’t have any major defects like massive knots.
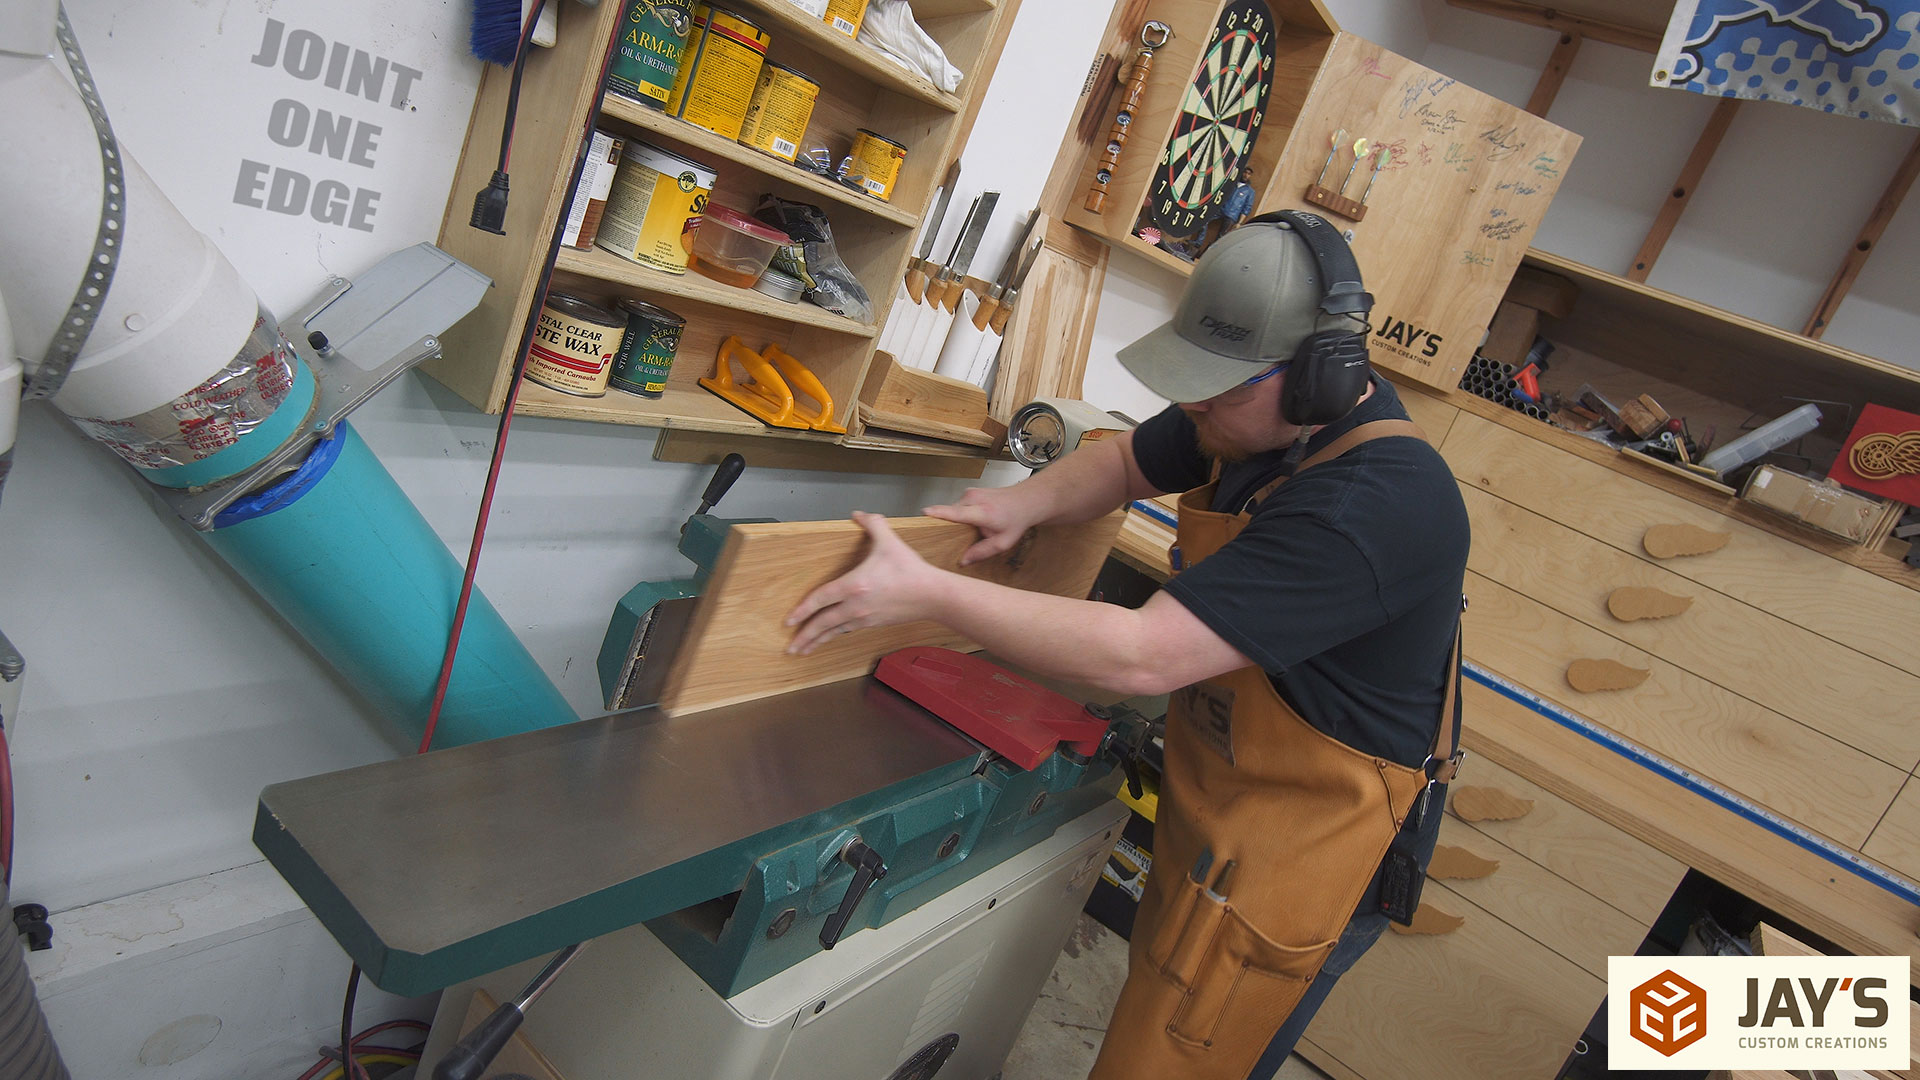
At the jointer I only straightened one edge. Not to get a perfect glue edge on the board but rather to get an edge that was safe enough to run against the table saw fence.
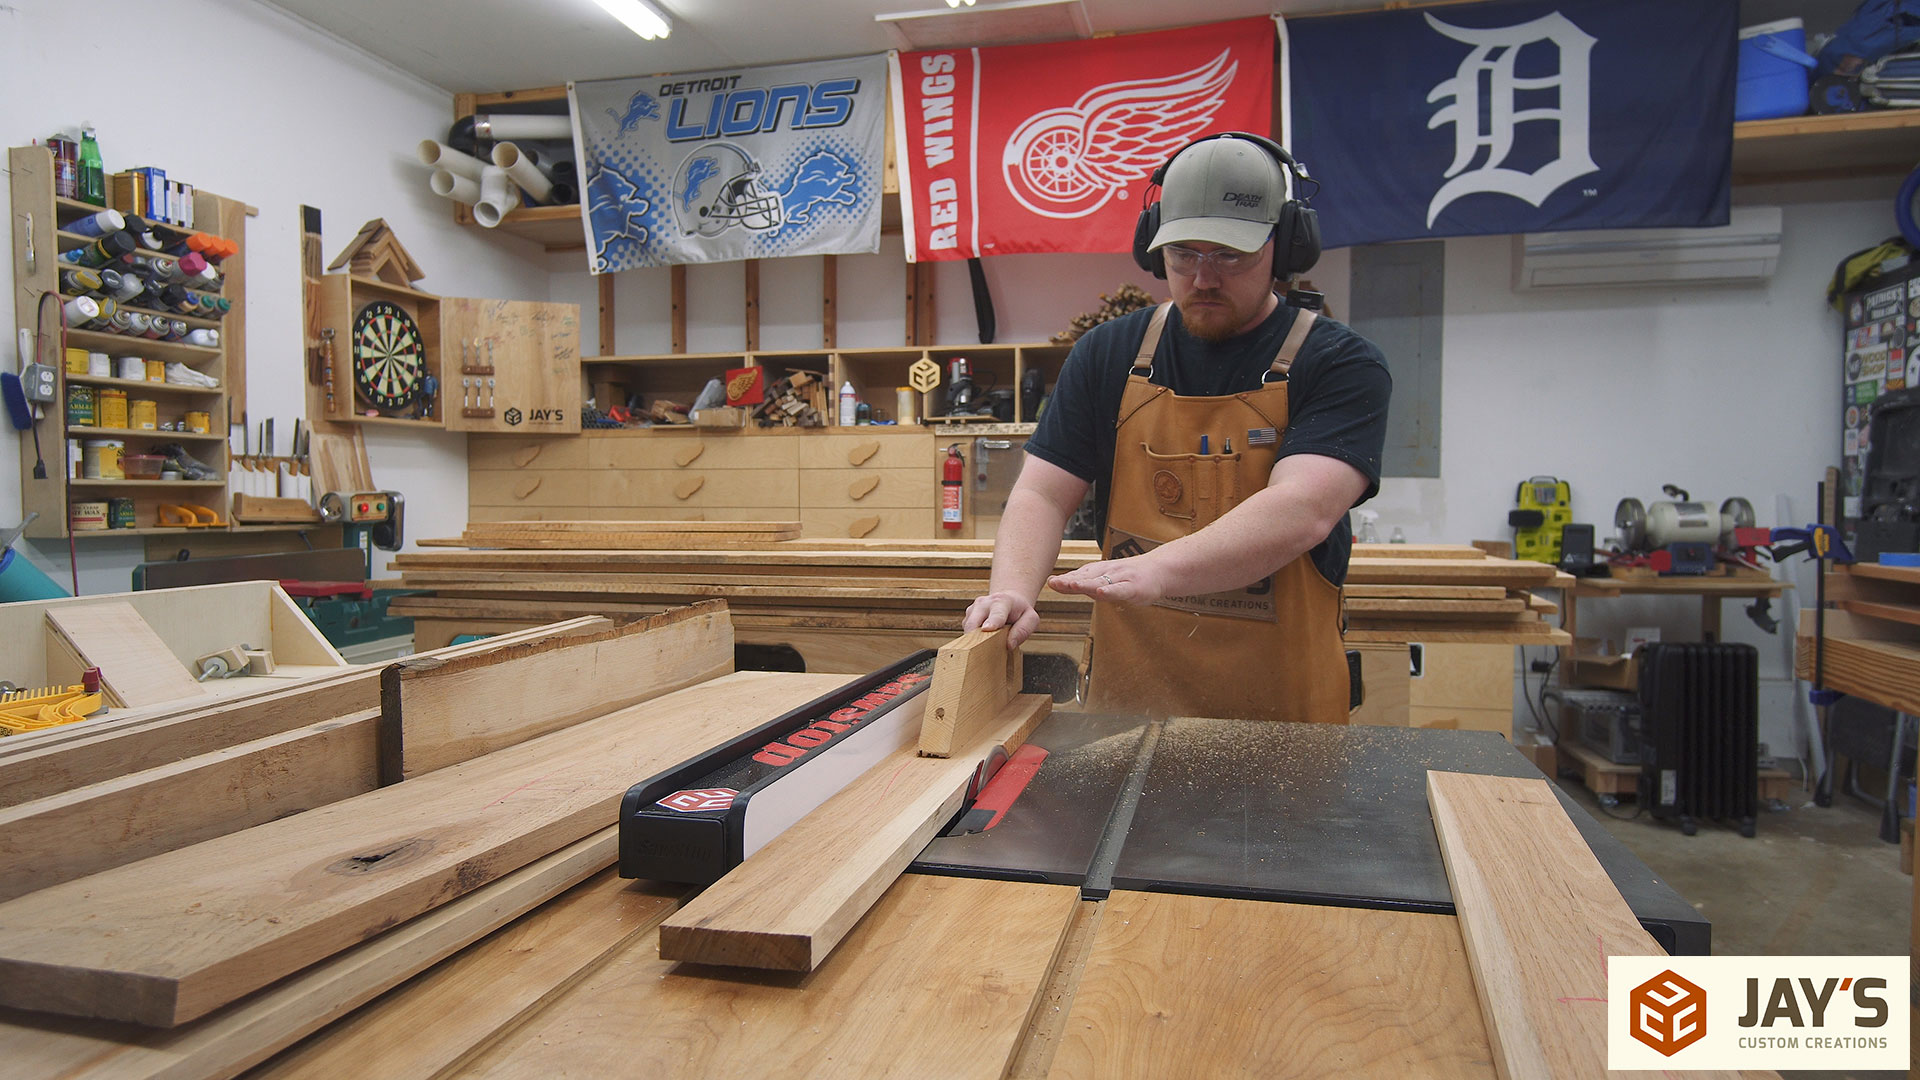
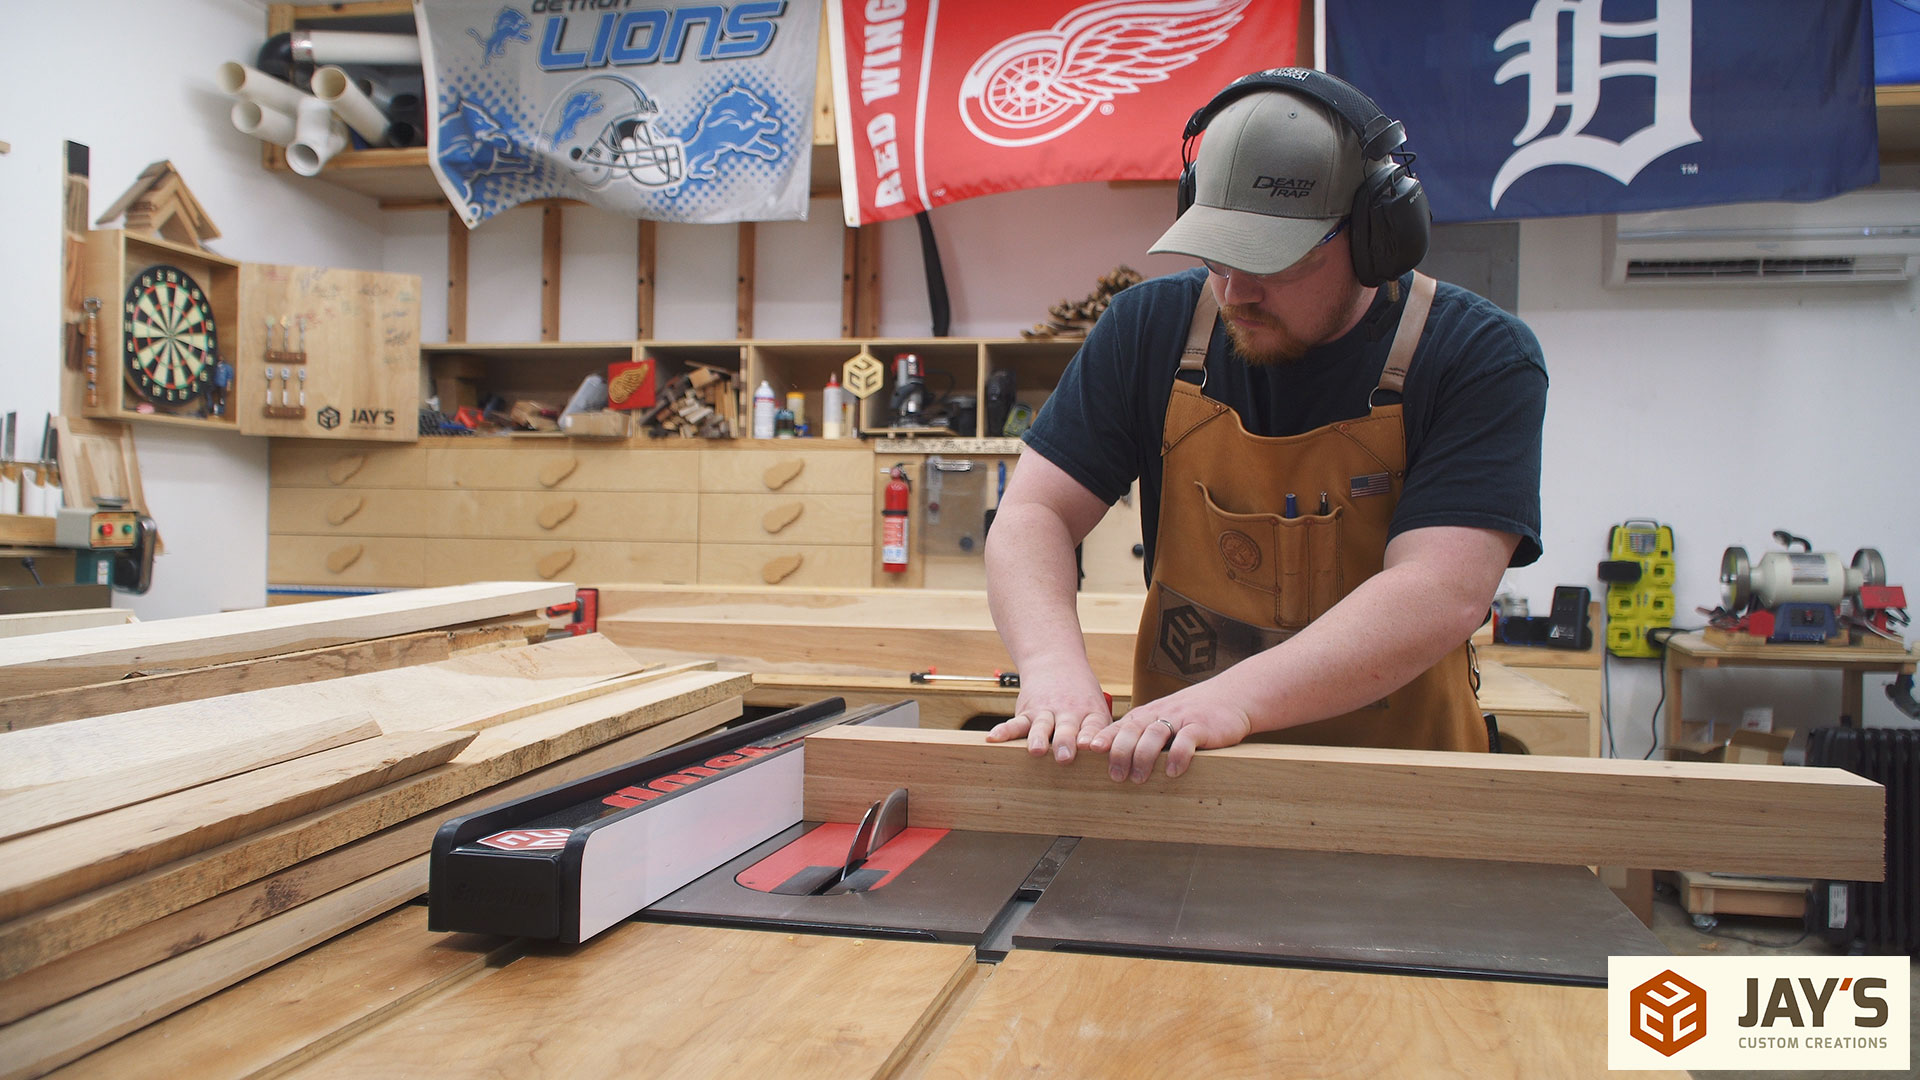
Then all of the boards ripped to 4” in width. I normally recommend using the bandsaw to rip rough sawn lumber but these didn’t have any defects like twist or significant cupping to cause problems. If the board doesn’t lay flat and rocks back and forth you are much better off using a bandsaw to reduce the risk of the board shifting into the table saw blade as it is cut. In the following image the board was just a tiny bit wider than 4” which causes dust to spray everywhere. I should have been using my over-arm blade guard and dust shroud but that thing is in the way more often than not.
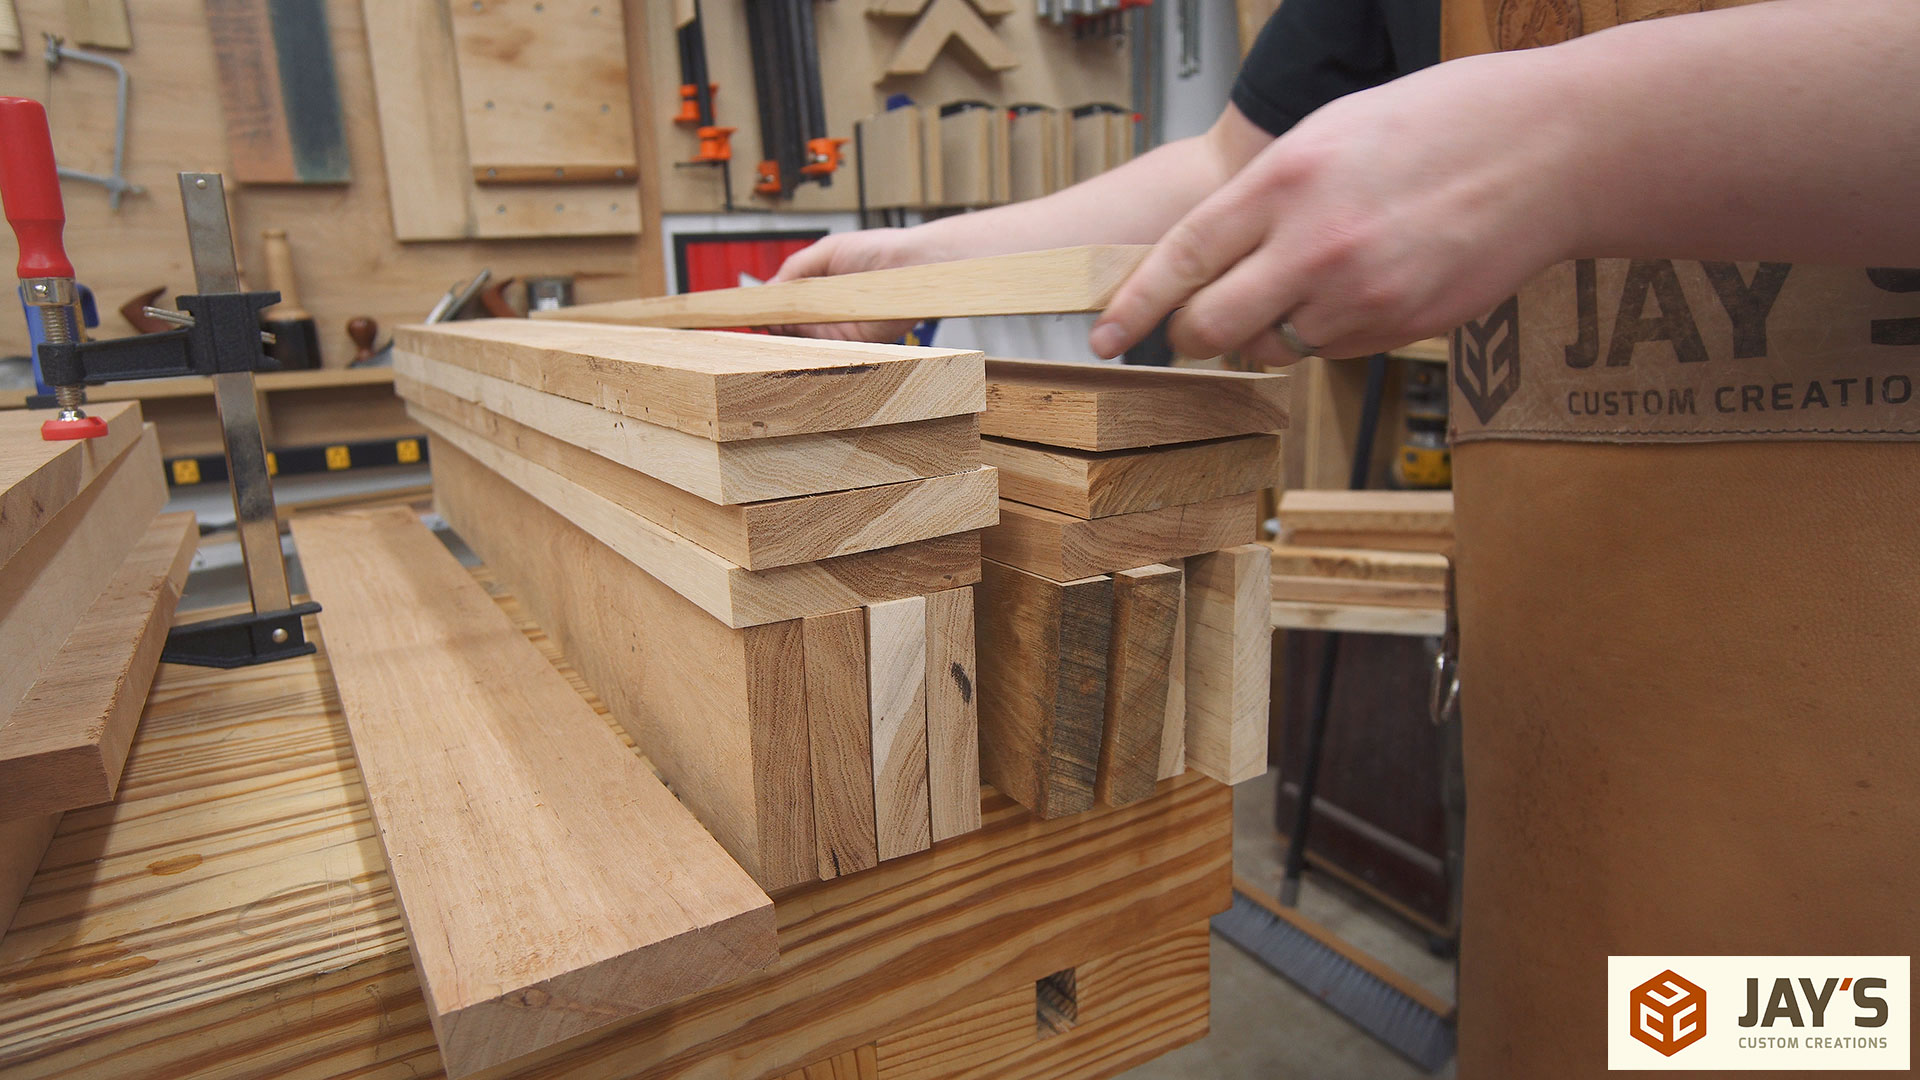
There is a LOT of repetition in this build. Here are the four groups that will make up the leg blanks.
I didn’t worry about jointing any of these boards. Skip planing each wide face at the planer is all that is needed before gluing.
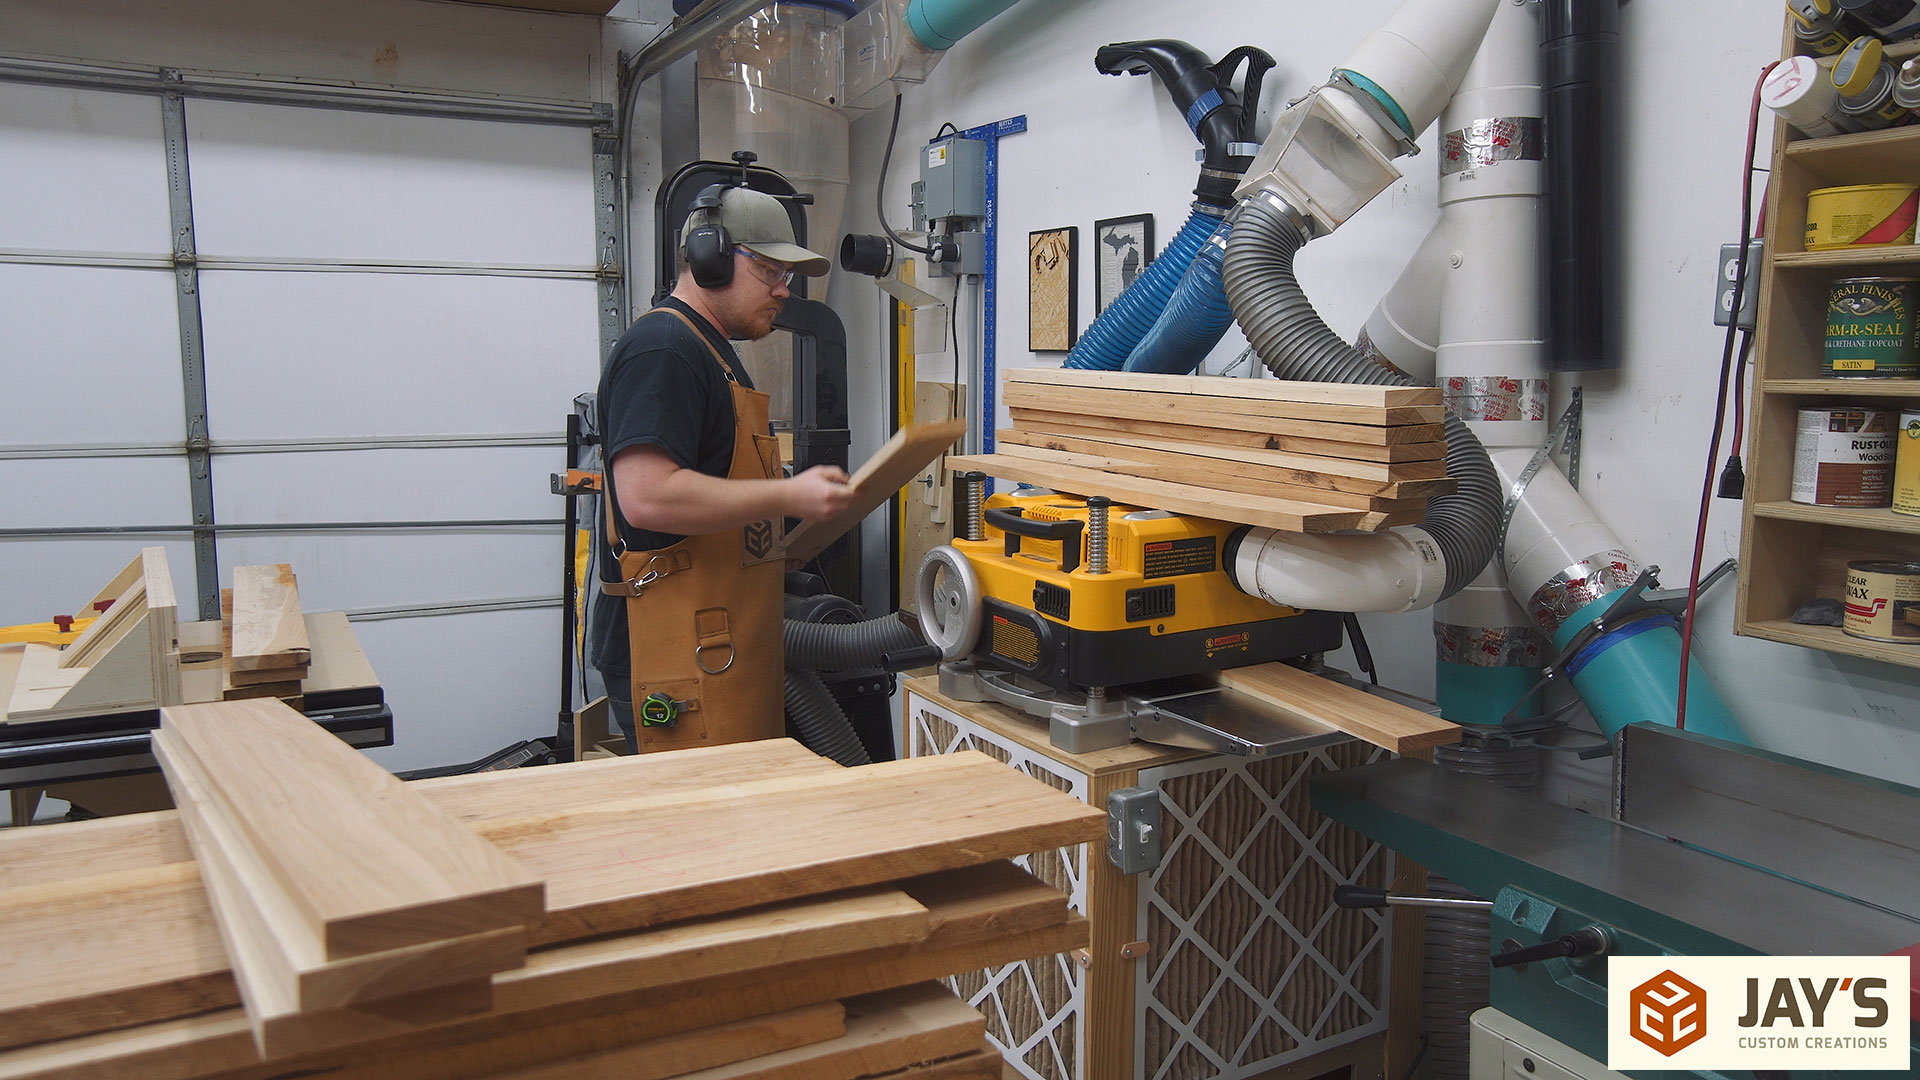
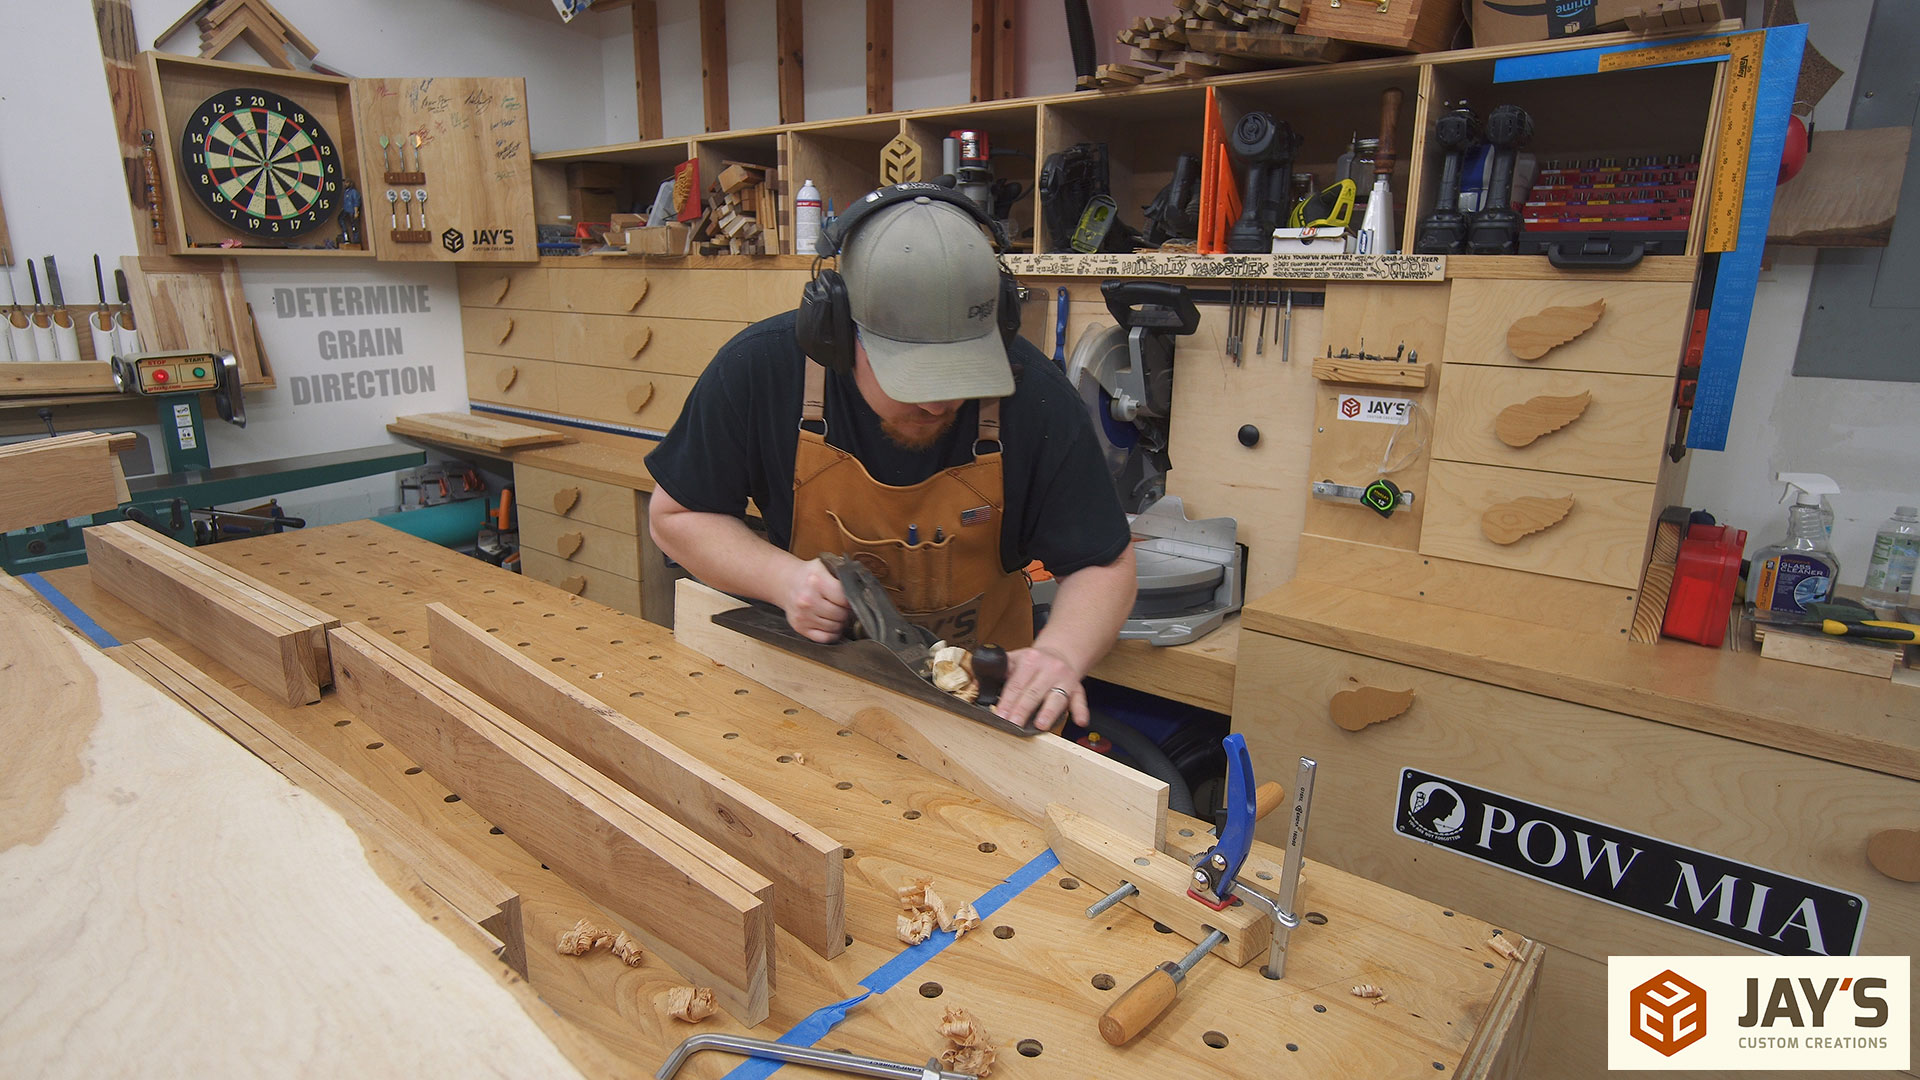
Hickory is tough to work with. Not only because it’s physically a dense and tough wood but more so because the grain goes in crazy directions which makes it prone to tearout. Before gluing anything I took every board and planed one narrow face to determine the grain direction that produced the least amount of tearout. For work holding I clamped a wooden screw clamp to the surface of the table. You can see in the video how much wiggle and top flex this table has with this process.
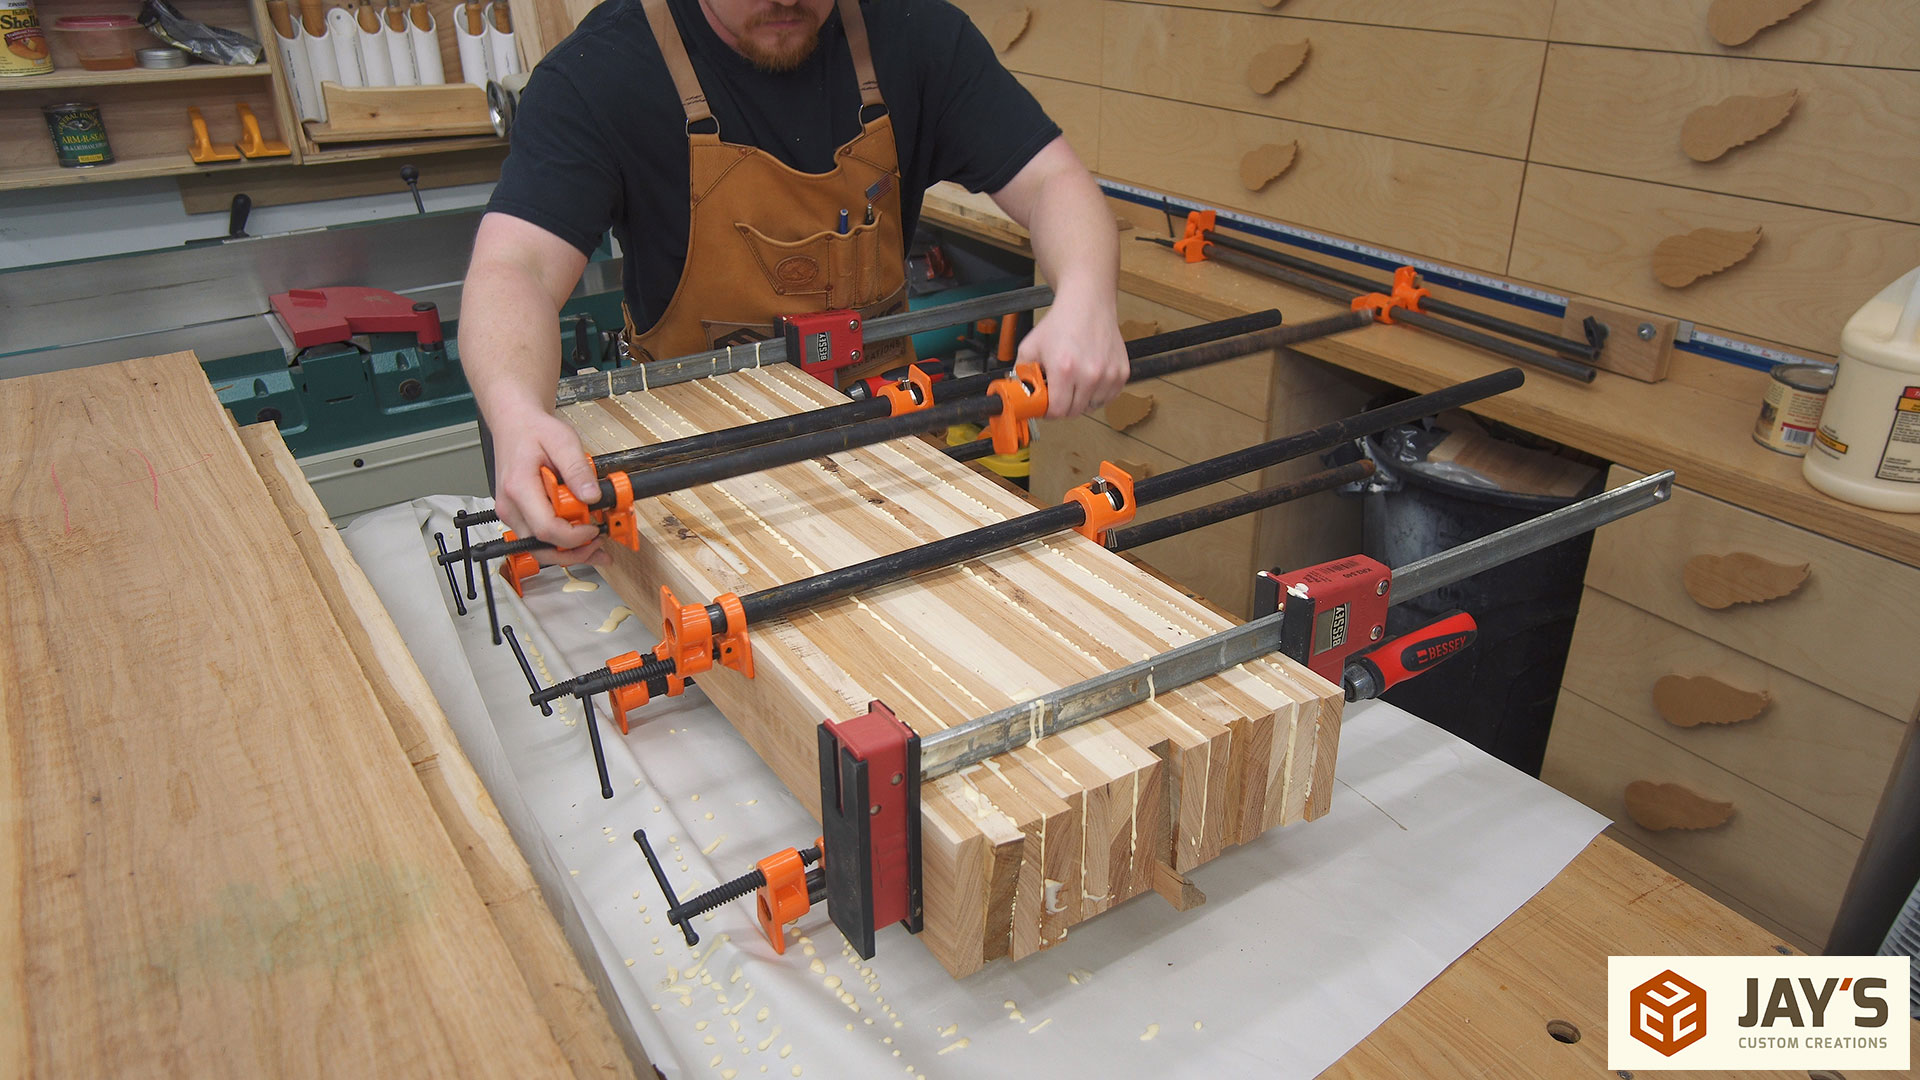
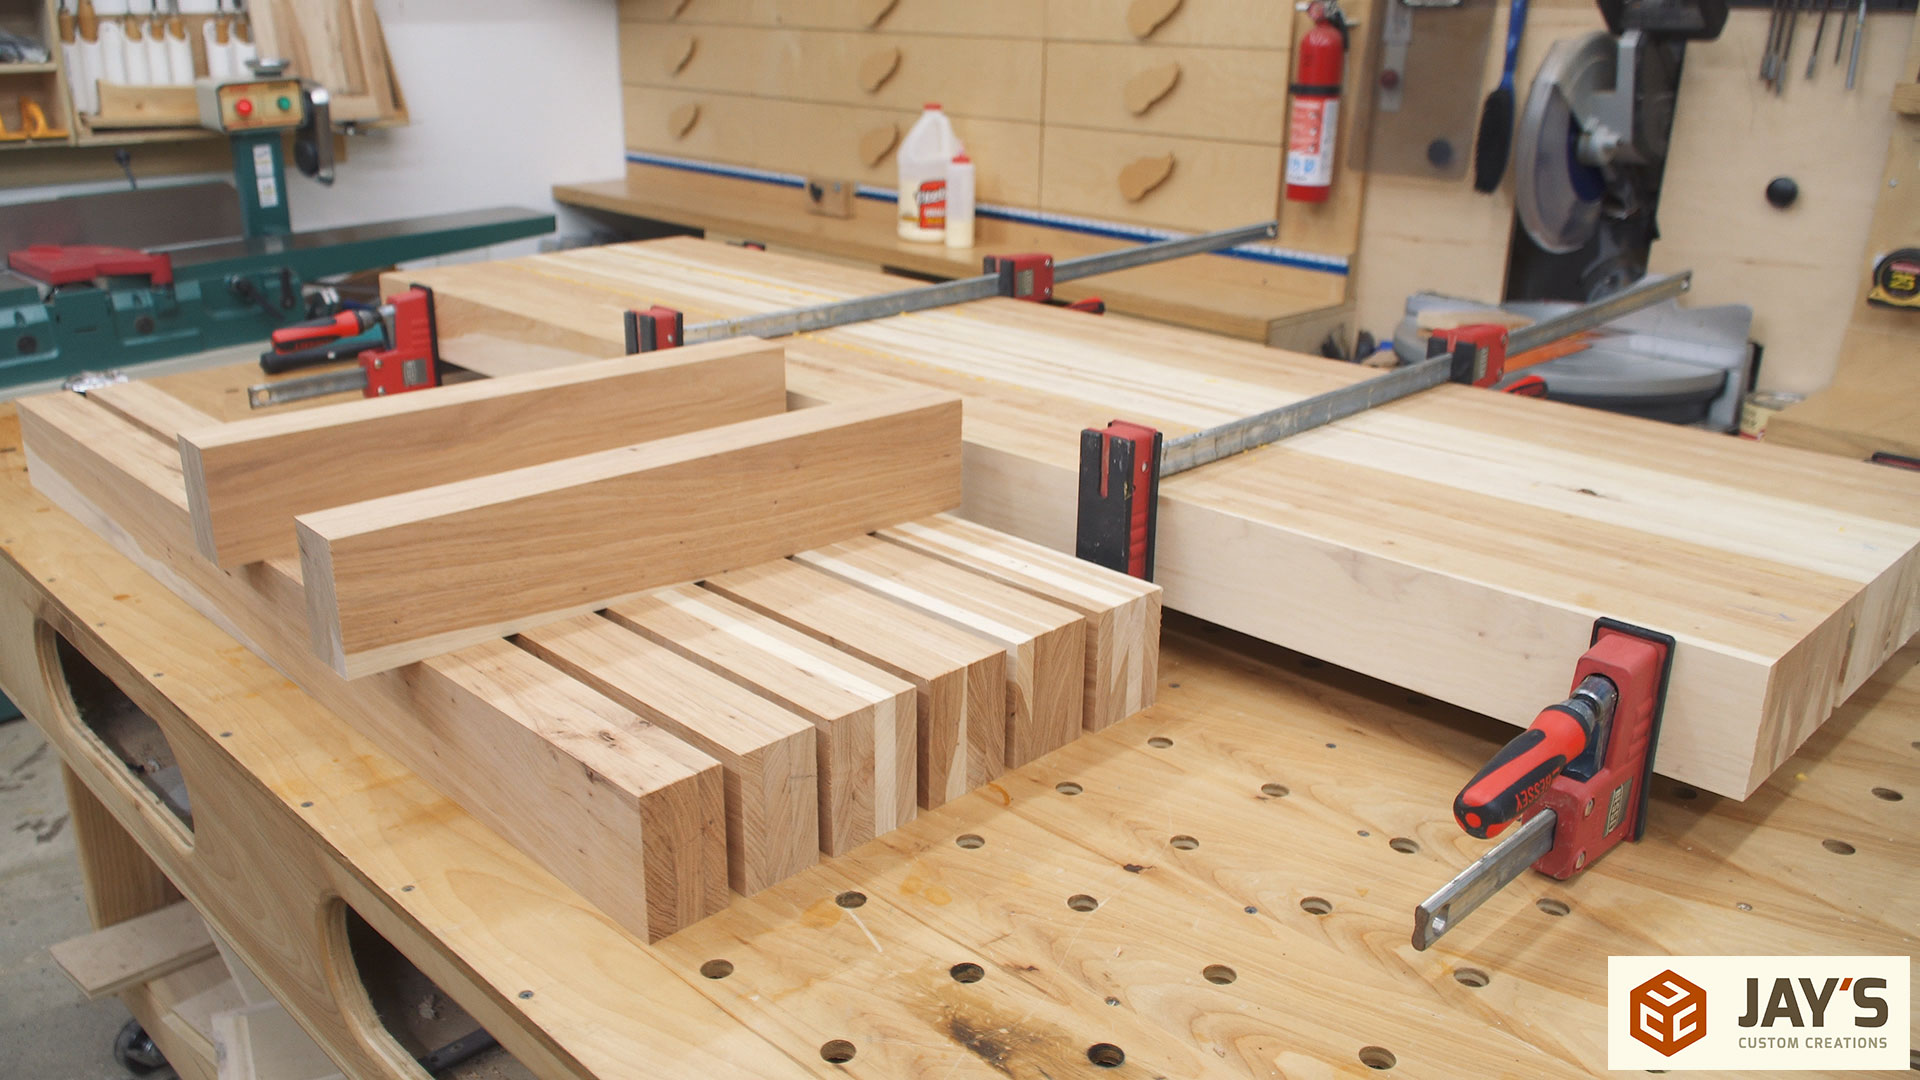
And with the boards aligned with the same grain direction I arranged everything to get as visually appealing results as possible. This glue up contains the four leg blanks.
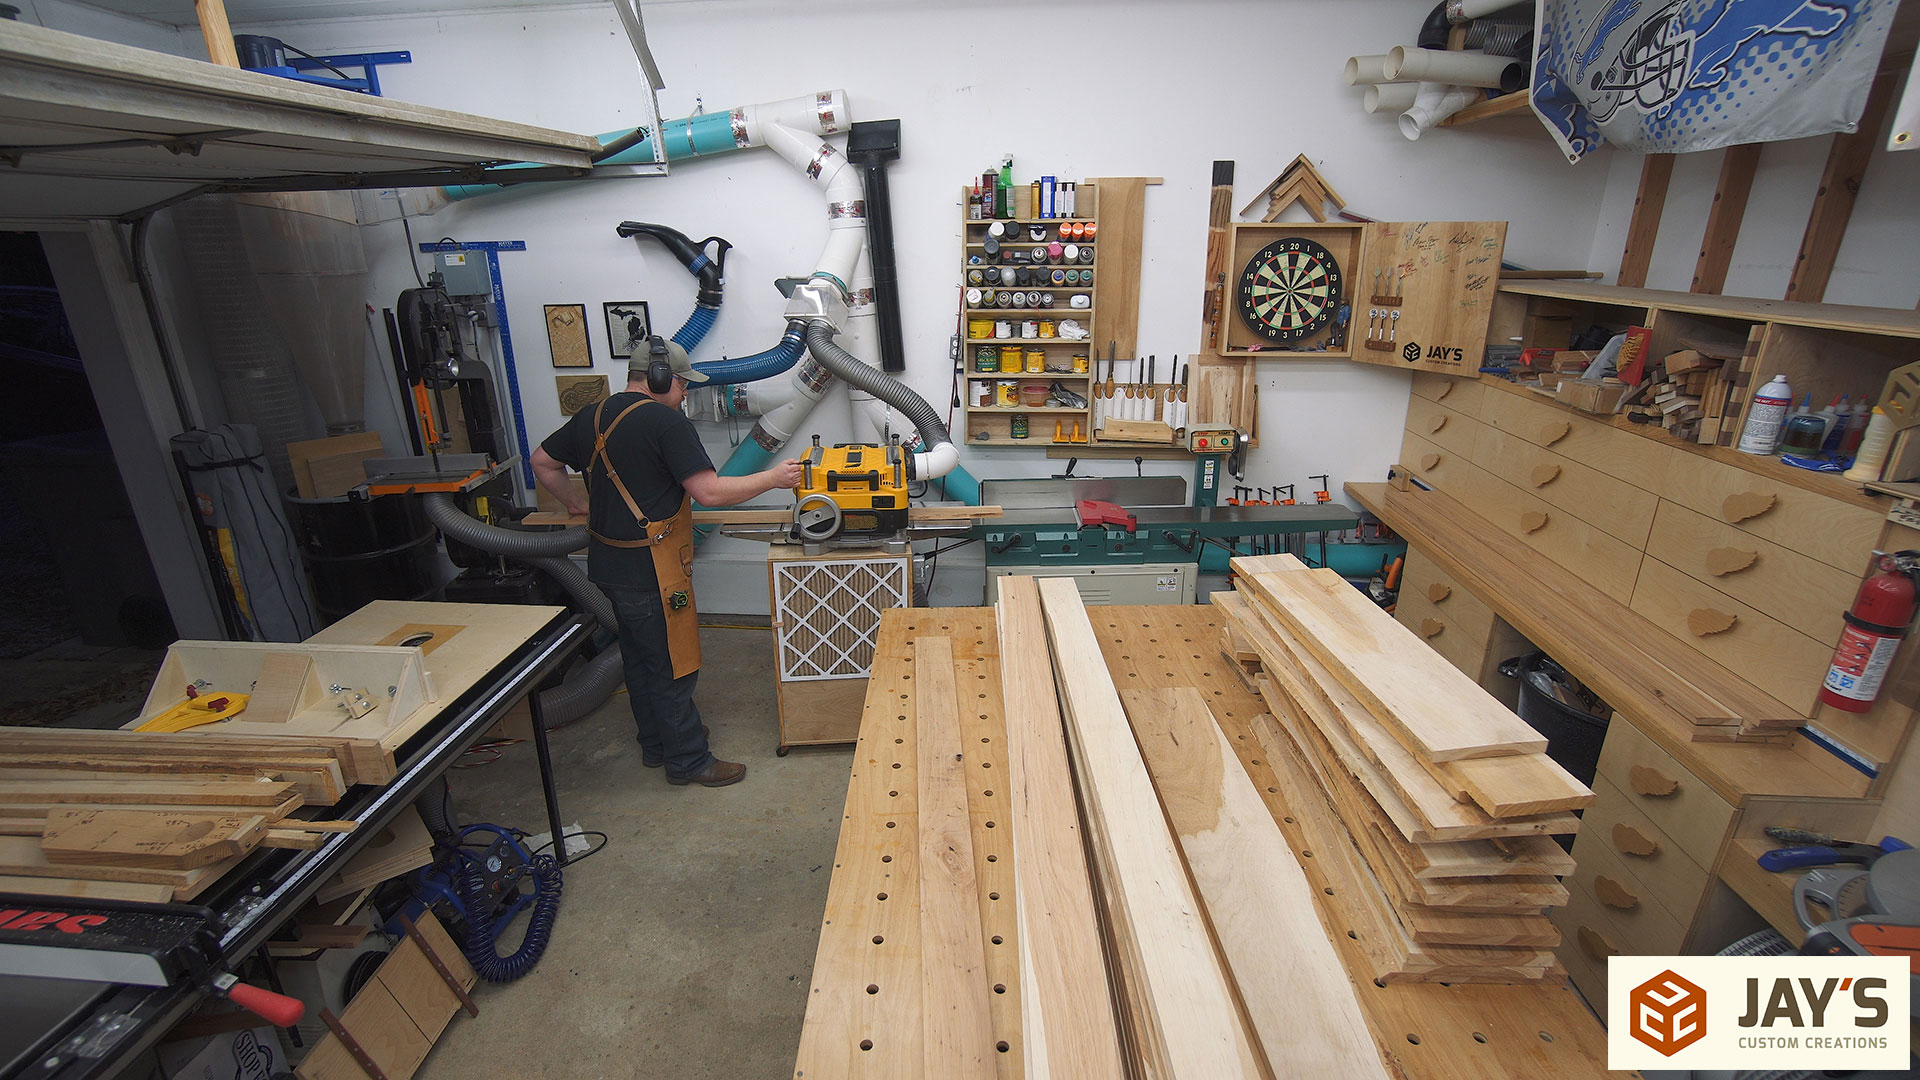
With the leg blanks in clamps I switched gears to milling the lumber for the top and stretcher pieces. It’s a lot of the same thing over and over again. Crosscut at the miter saw, joint one edge at the jointer, rip to width at the table saw, skip plane at the planer, hand plane for grain direction, glue into larger assembly. Over, and over, and over, and over.
Fast forward to where all of the glued assemblies are done. Now everything is in a rough beam state. My jointer is an 8” wide jointer so I decided to make three beams for the top assembly. After the beams were established my friend Shawn helped me mill one wide side and two narrow sides flat and square at the jointer. Typically you wouldn’t mill three sides at a jointer because you can end up with a wedge shape. A planer is used to ensure the milled faces are parallel and not wedge-shaped but in this case the beam was already pretty darn straight and my planer doesn’t have the capacity required to mill the opposite narrow face parallel. So we went ahead and squared up the other narrow face.
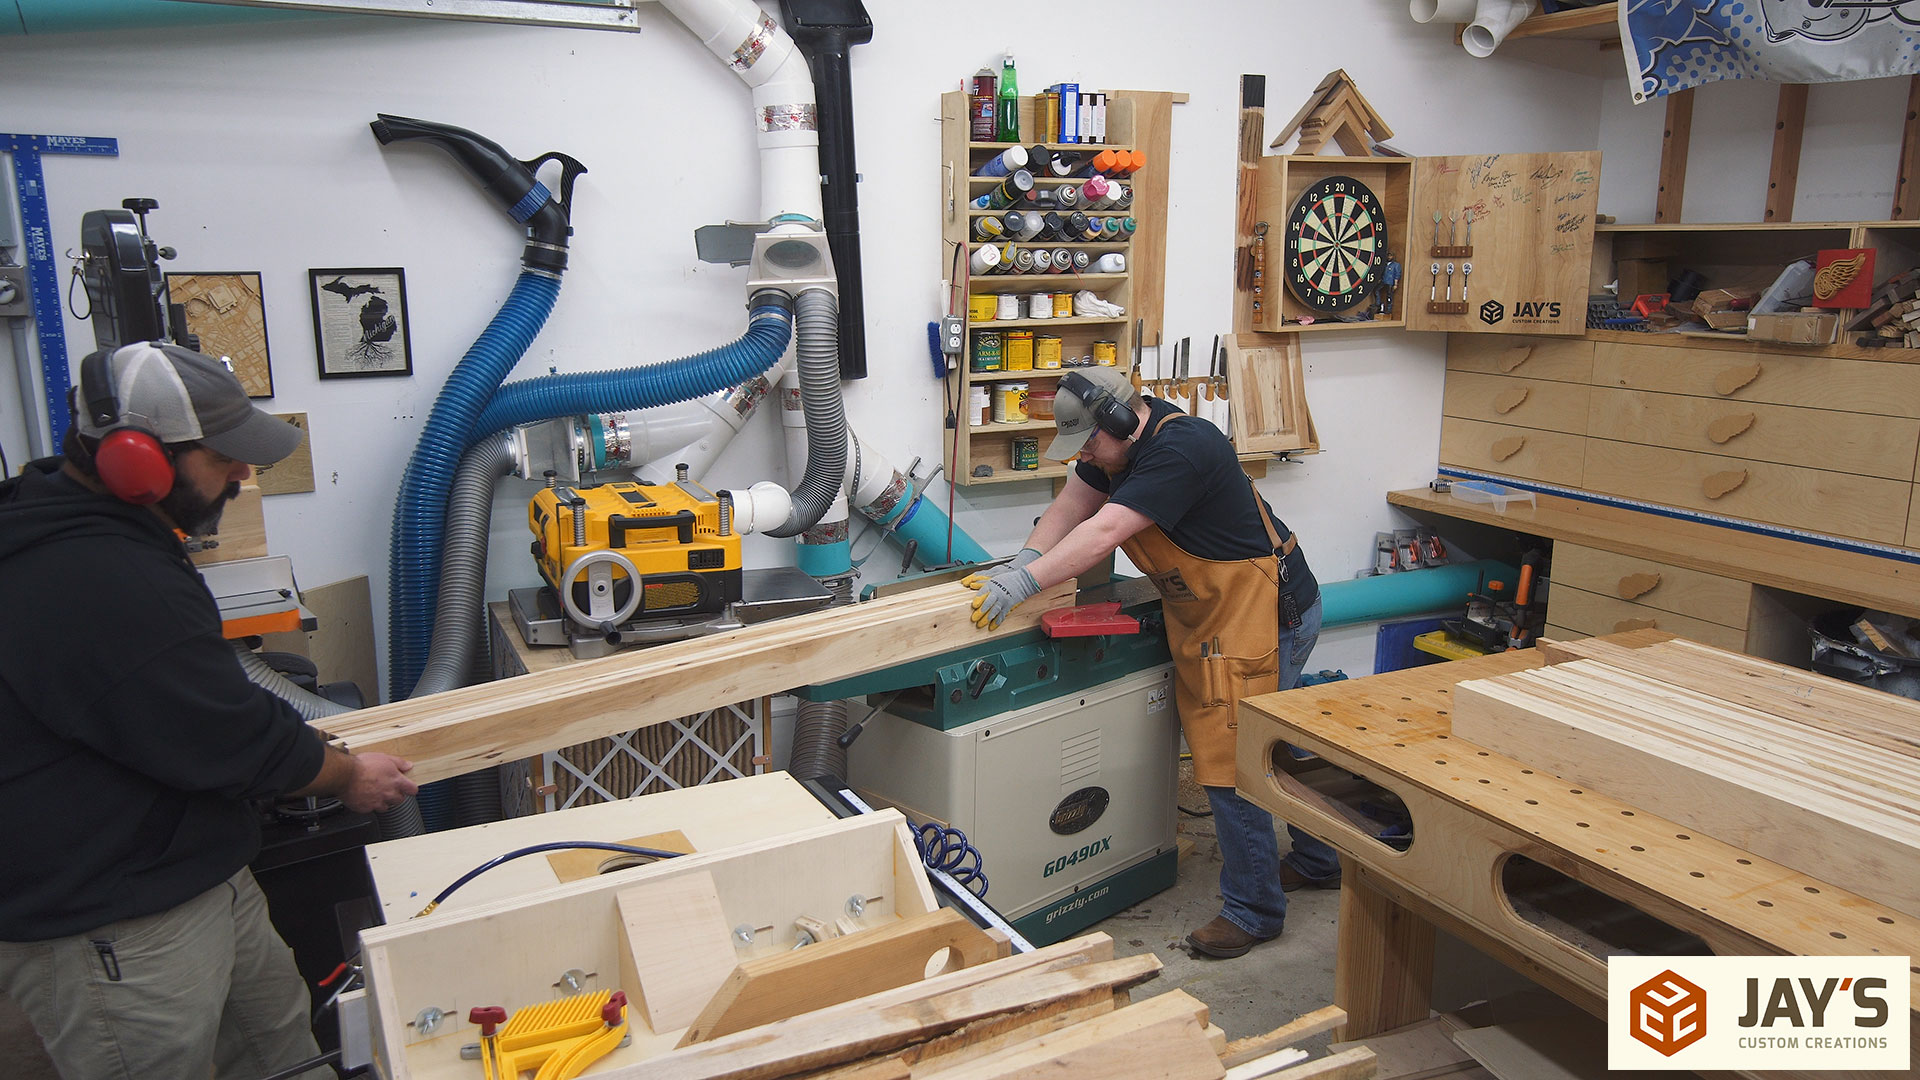
Then the final wide face of each top beam was milled with the planer. To get more room to move around and feed these boards through I placed the planer on the edge of the table and used my drill press to hold the dust collection hose as needed. This worked but the planer still walked around quite a bit on the table. We were having trouble with the planer feeding the hickory after the rough sawn texture was removed from the wood. Hickory gets pretty slick and the rollers just didn’t have enough grip so we had to push and pull to help out.

Finally the top beams can be cut to the exact same length using a stop block on my miter saw station. It’s much easier to make them all the same length now rather than cutting them all after assembly.
Then the three top beams were glued together and the same milling process was repeated to get the legs and stretchers to their final width and thickness but left a little long intentionally.
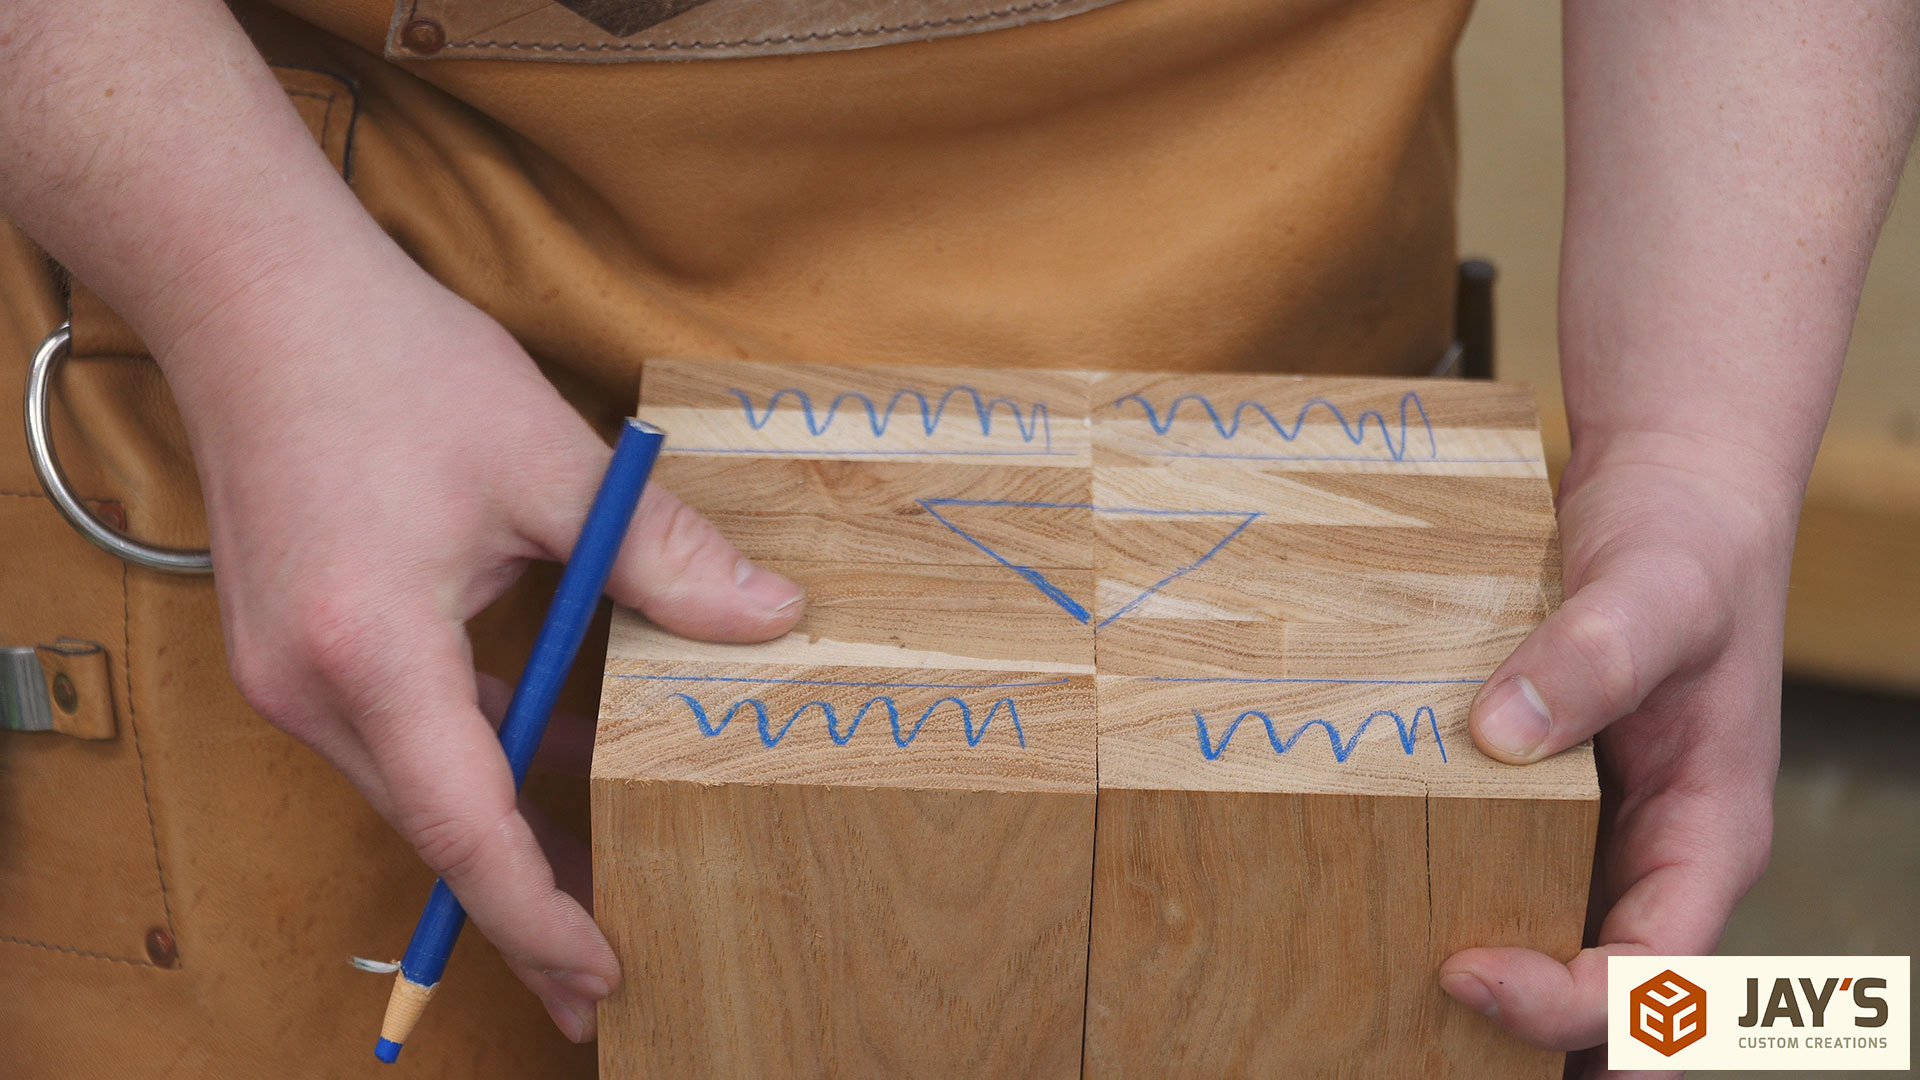
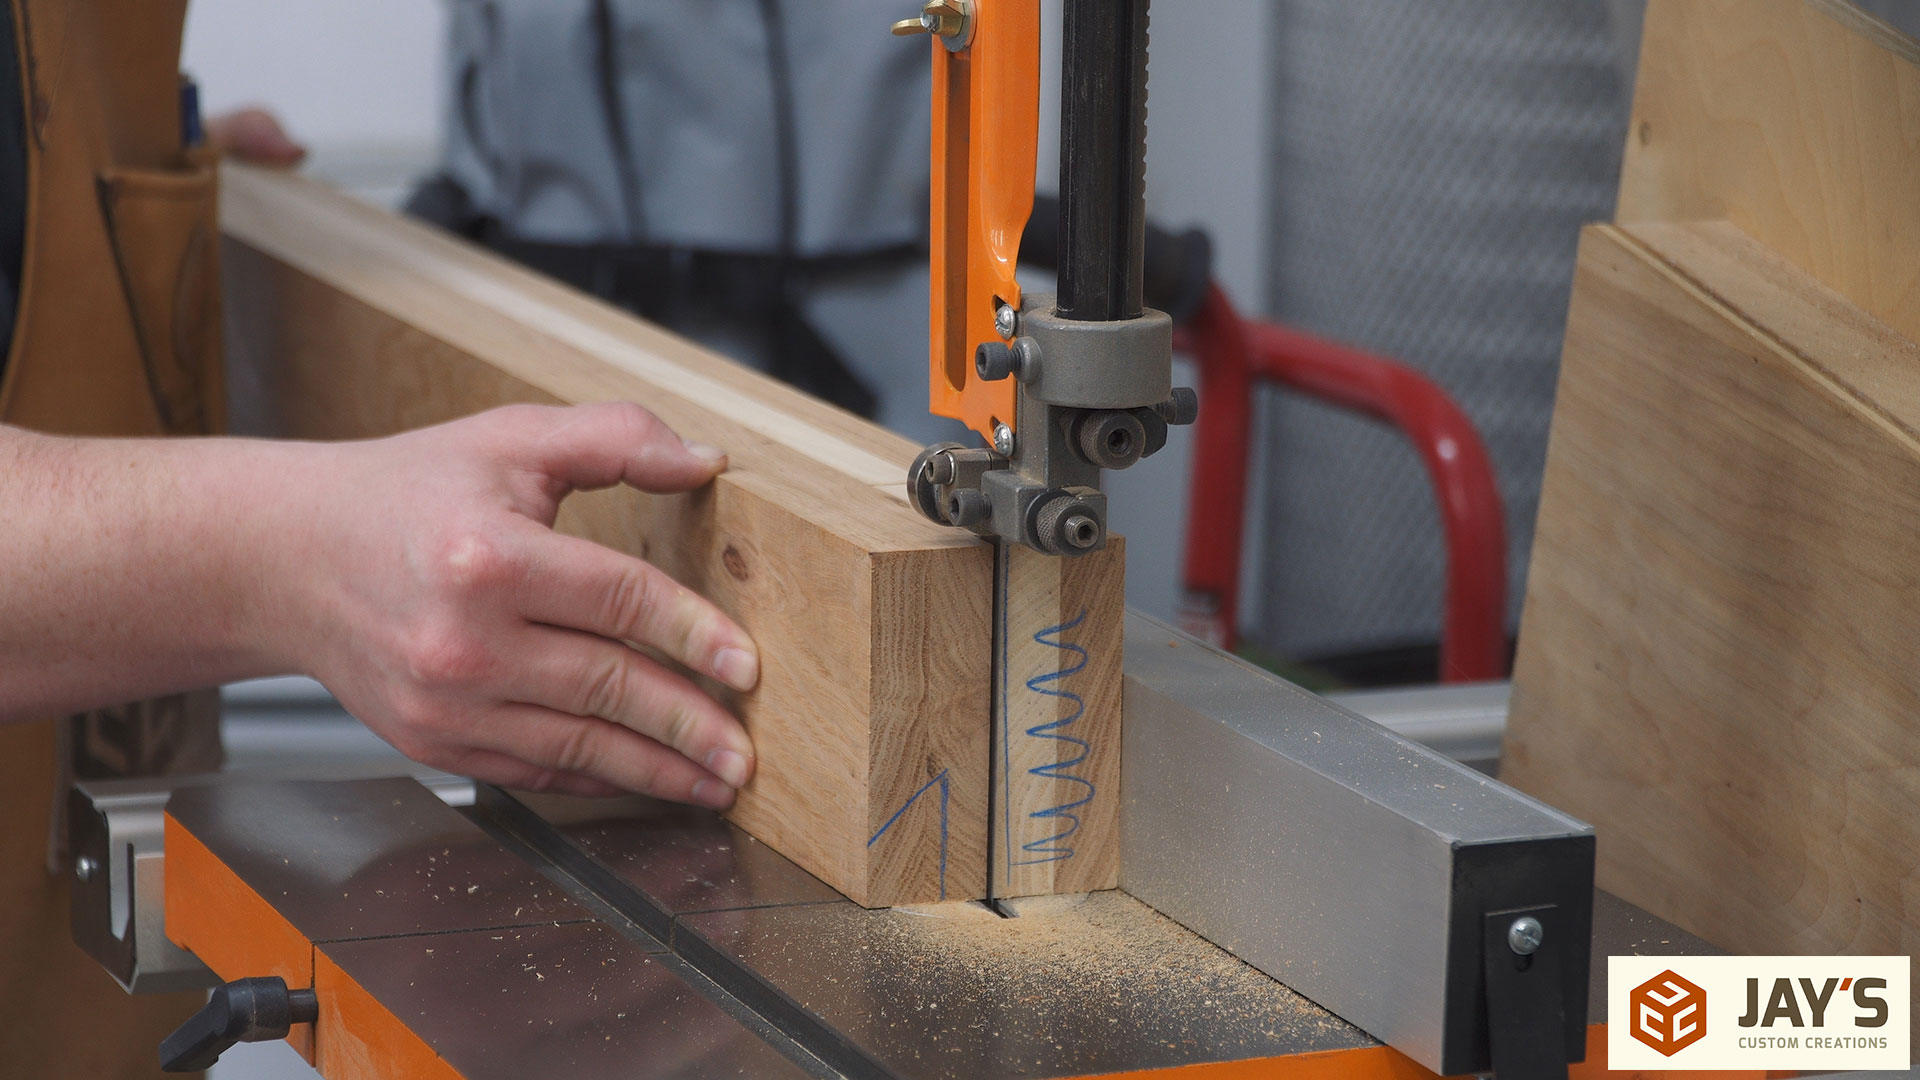
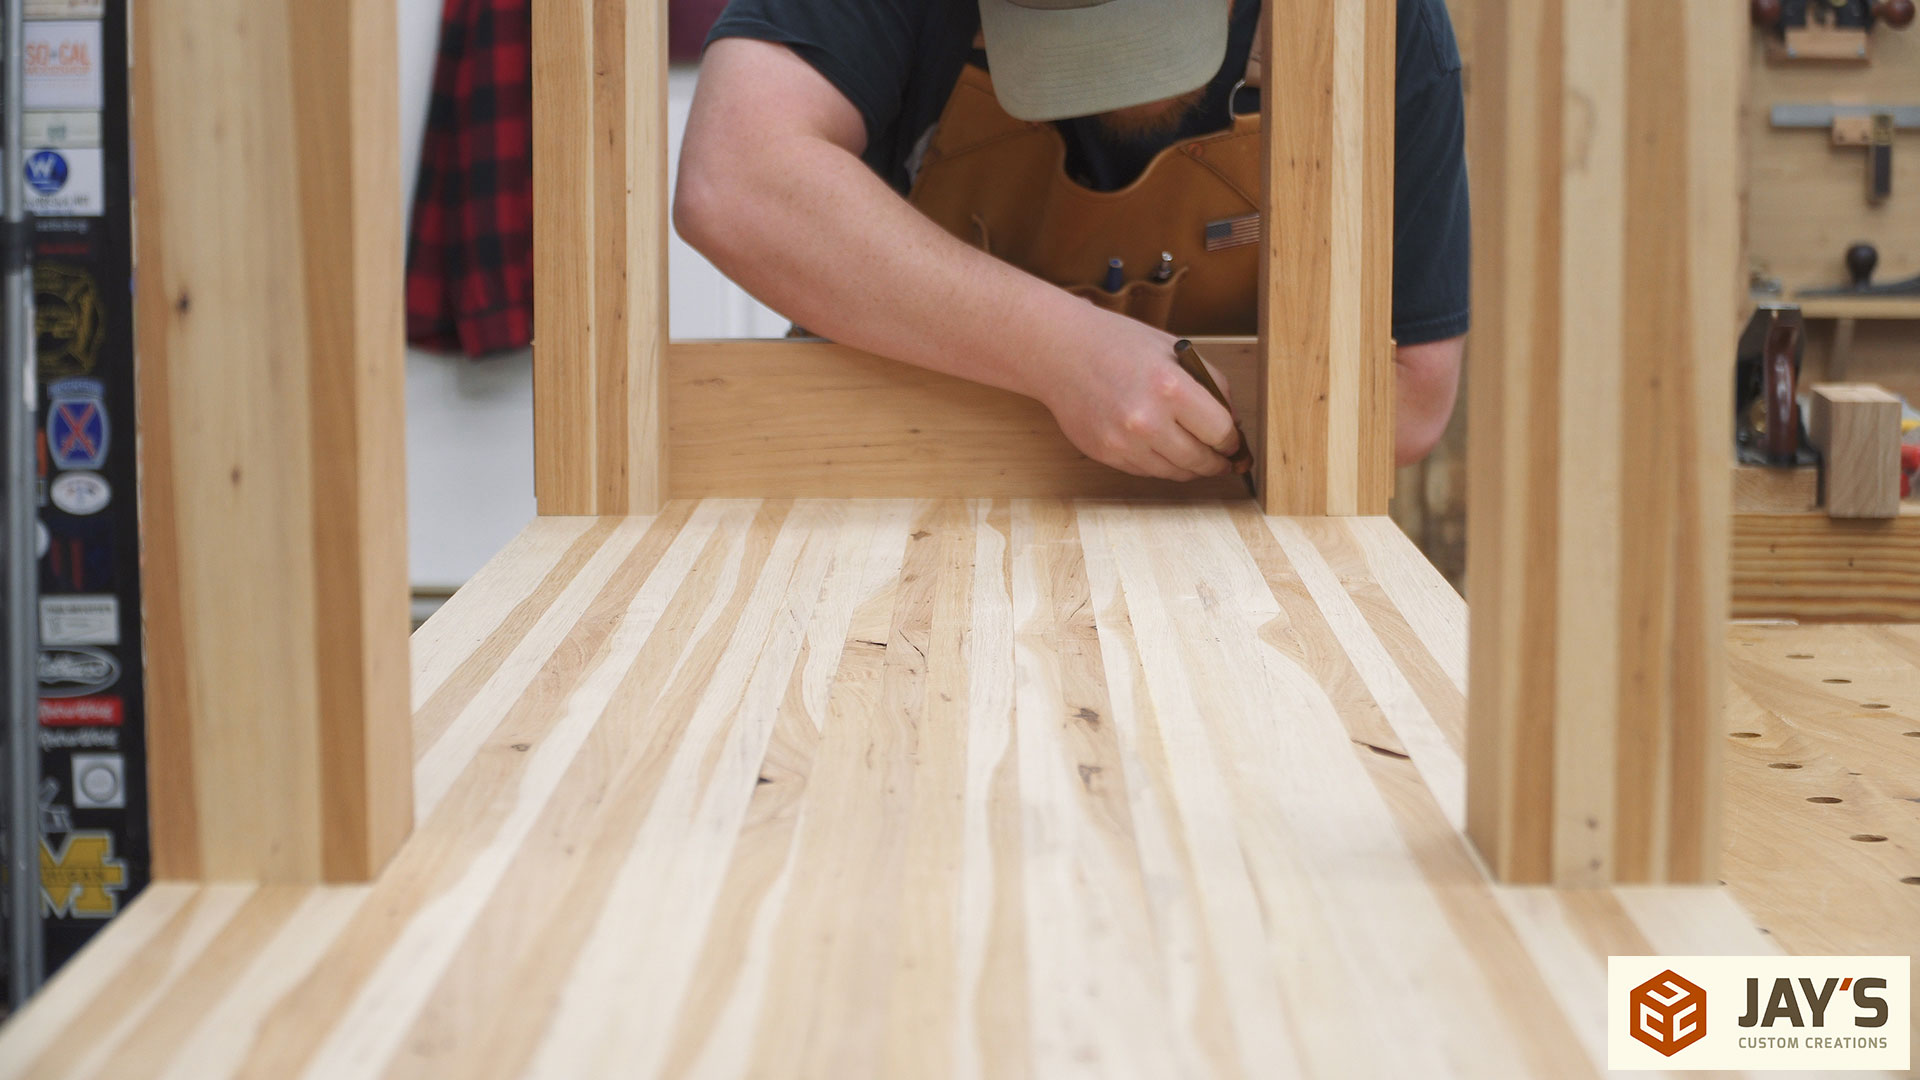
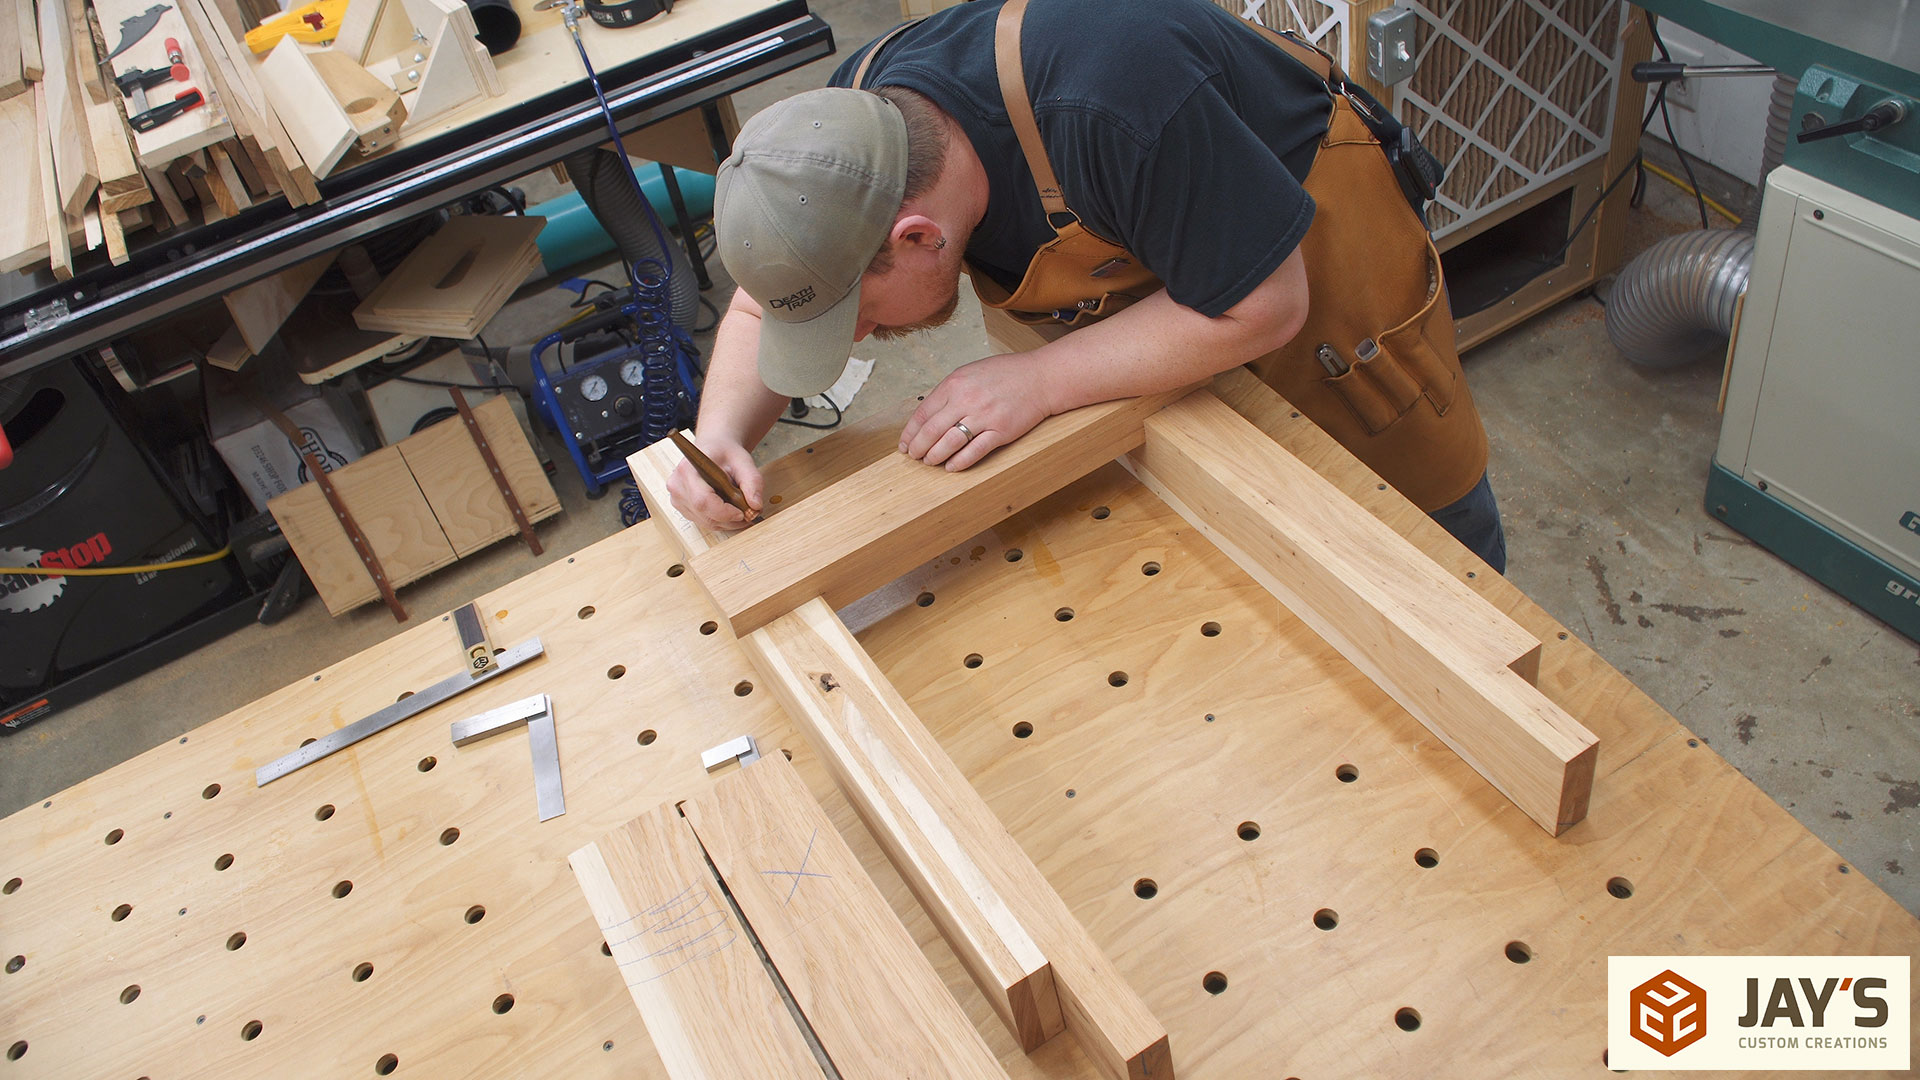
I try to mark waste areas as much as possible to reduce the chance of cutting the wrong spot. Once I determined the best visual orientation for the legs the waste side of the tenon and a carpenters triangle was marked on top. This allows me to visually glance at the top of any one of the legs and know exactly where it belongs on the workbench.
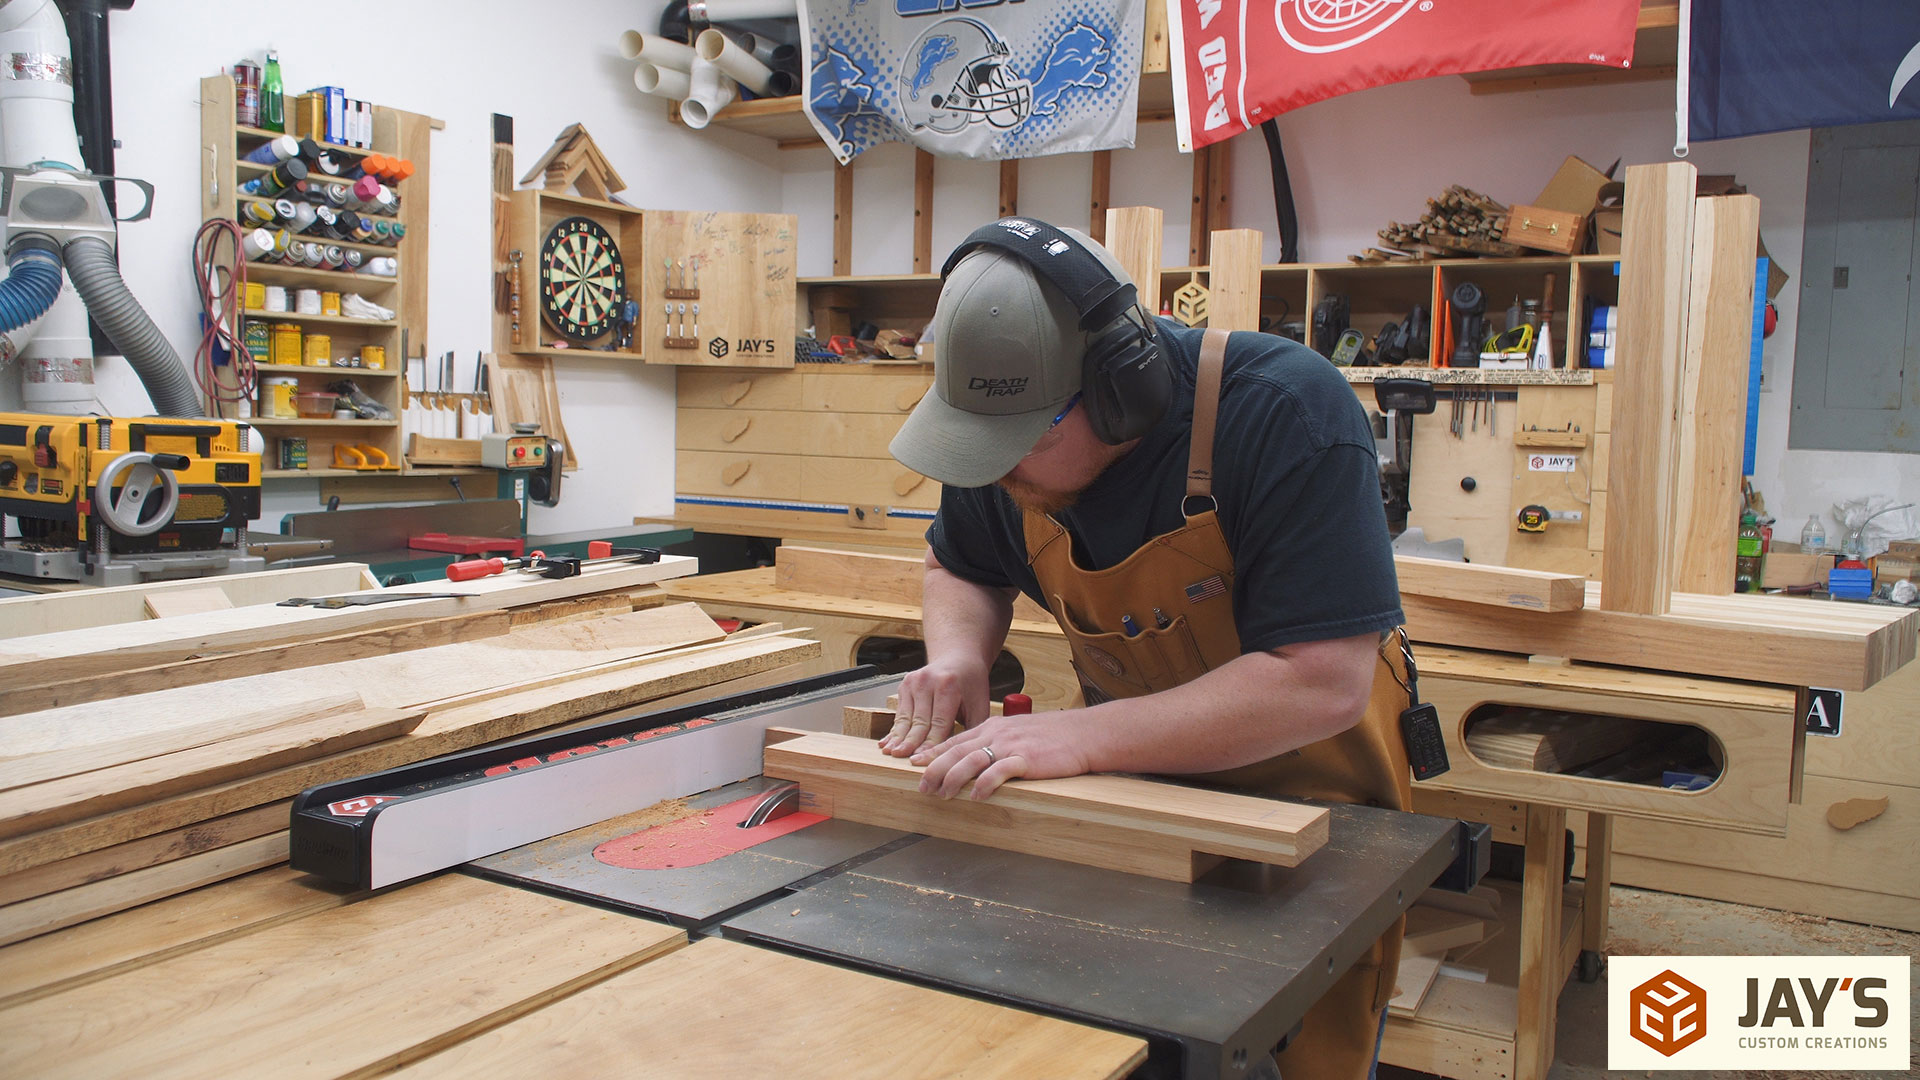
To make the tenon cuts on the top of each leg I would normally use a dado stack on the table saw but I figured there would be less dusty waste and it would be faster to first make a shoulder cut with the table saw…
And then make the cheek cut with the bandsaw. This worked OK but it wasn’t really a time saver because of bandsaw setup time. I need to use the dado stack next anyway so I should have just made these tenons with the dado stack.
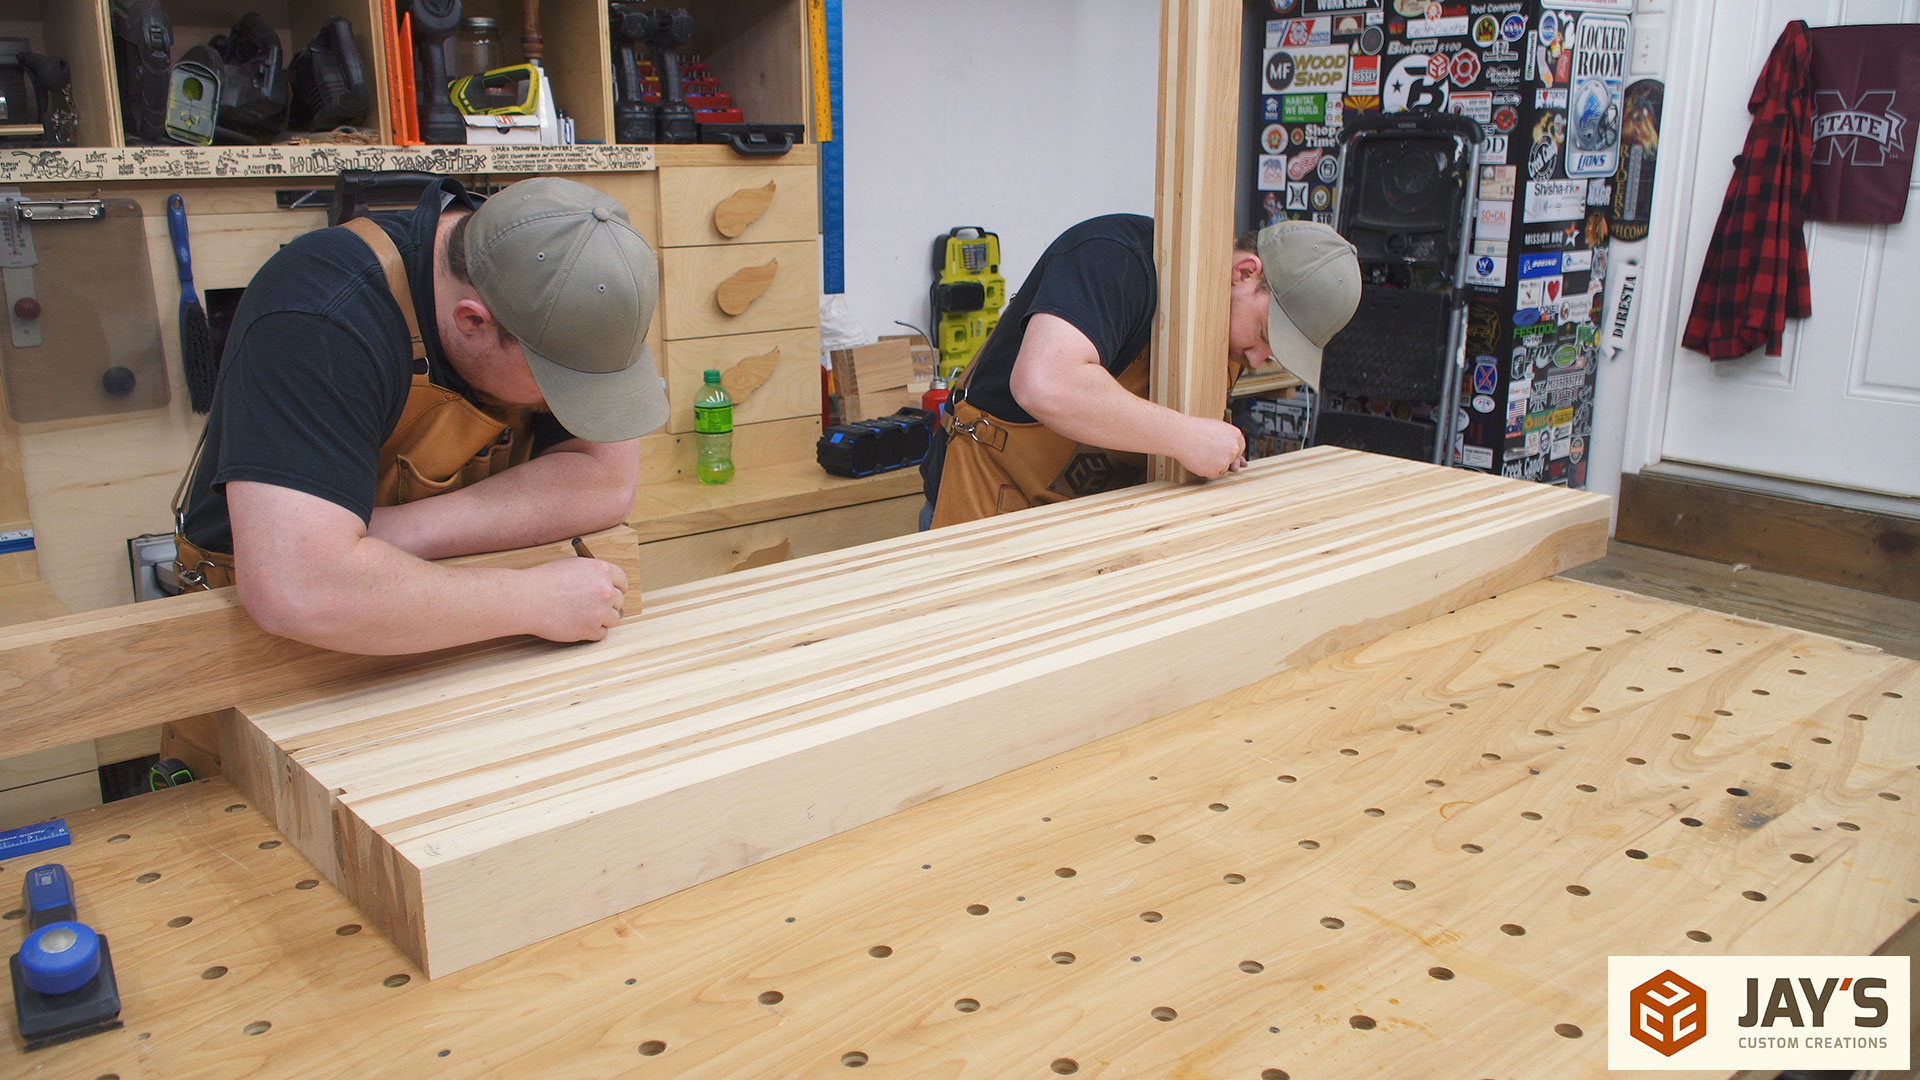
With the leg tenons cut I started layout for the mortises in the top. These are marked on top…

As well as on bottom because they are through mortises. When cutting a through mortise you will generally get much better results by cutting the mortise half way in from each side.
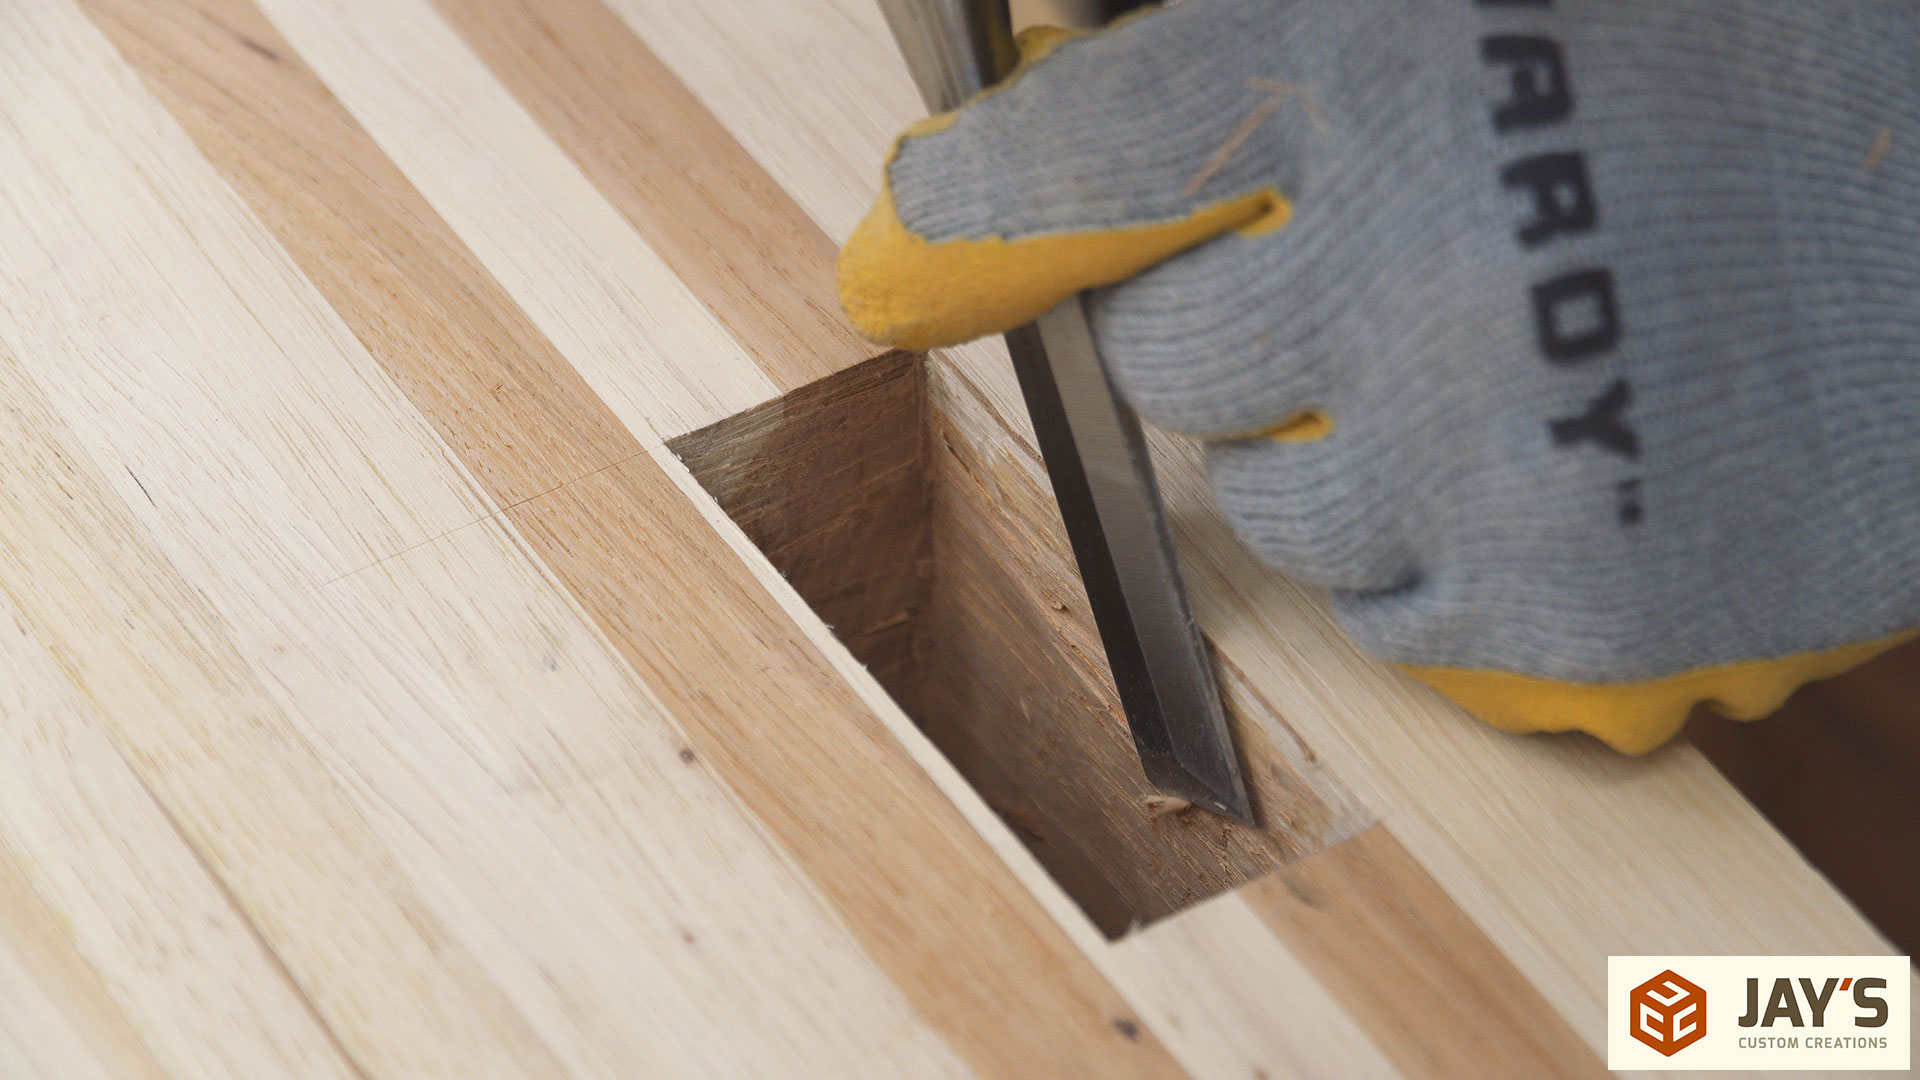
In my last workbench I used a plunge router with an edge guide attachment to clear out the majority of the mortise. For some unknown reason I wanted to show a different method and drill out most of the waste. Using a drill produces larger chips than a router, is quieter, and much less dusty. However, the cleanup afterwards wasn’t fun. I left too much work for myself by only using a 3/4” auger bit. I should have followed that up with a smaller brad point drill bit to continue removing waste. Live and learn.

Instead, I chopped for what seemed like forever to finish the mortise.

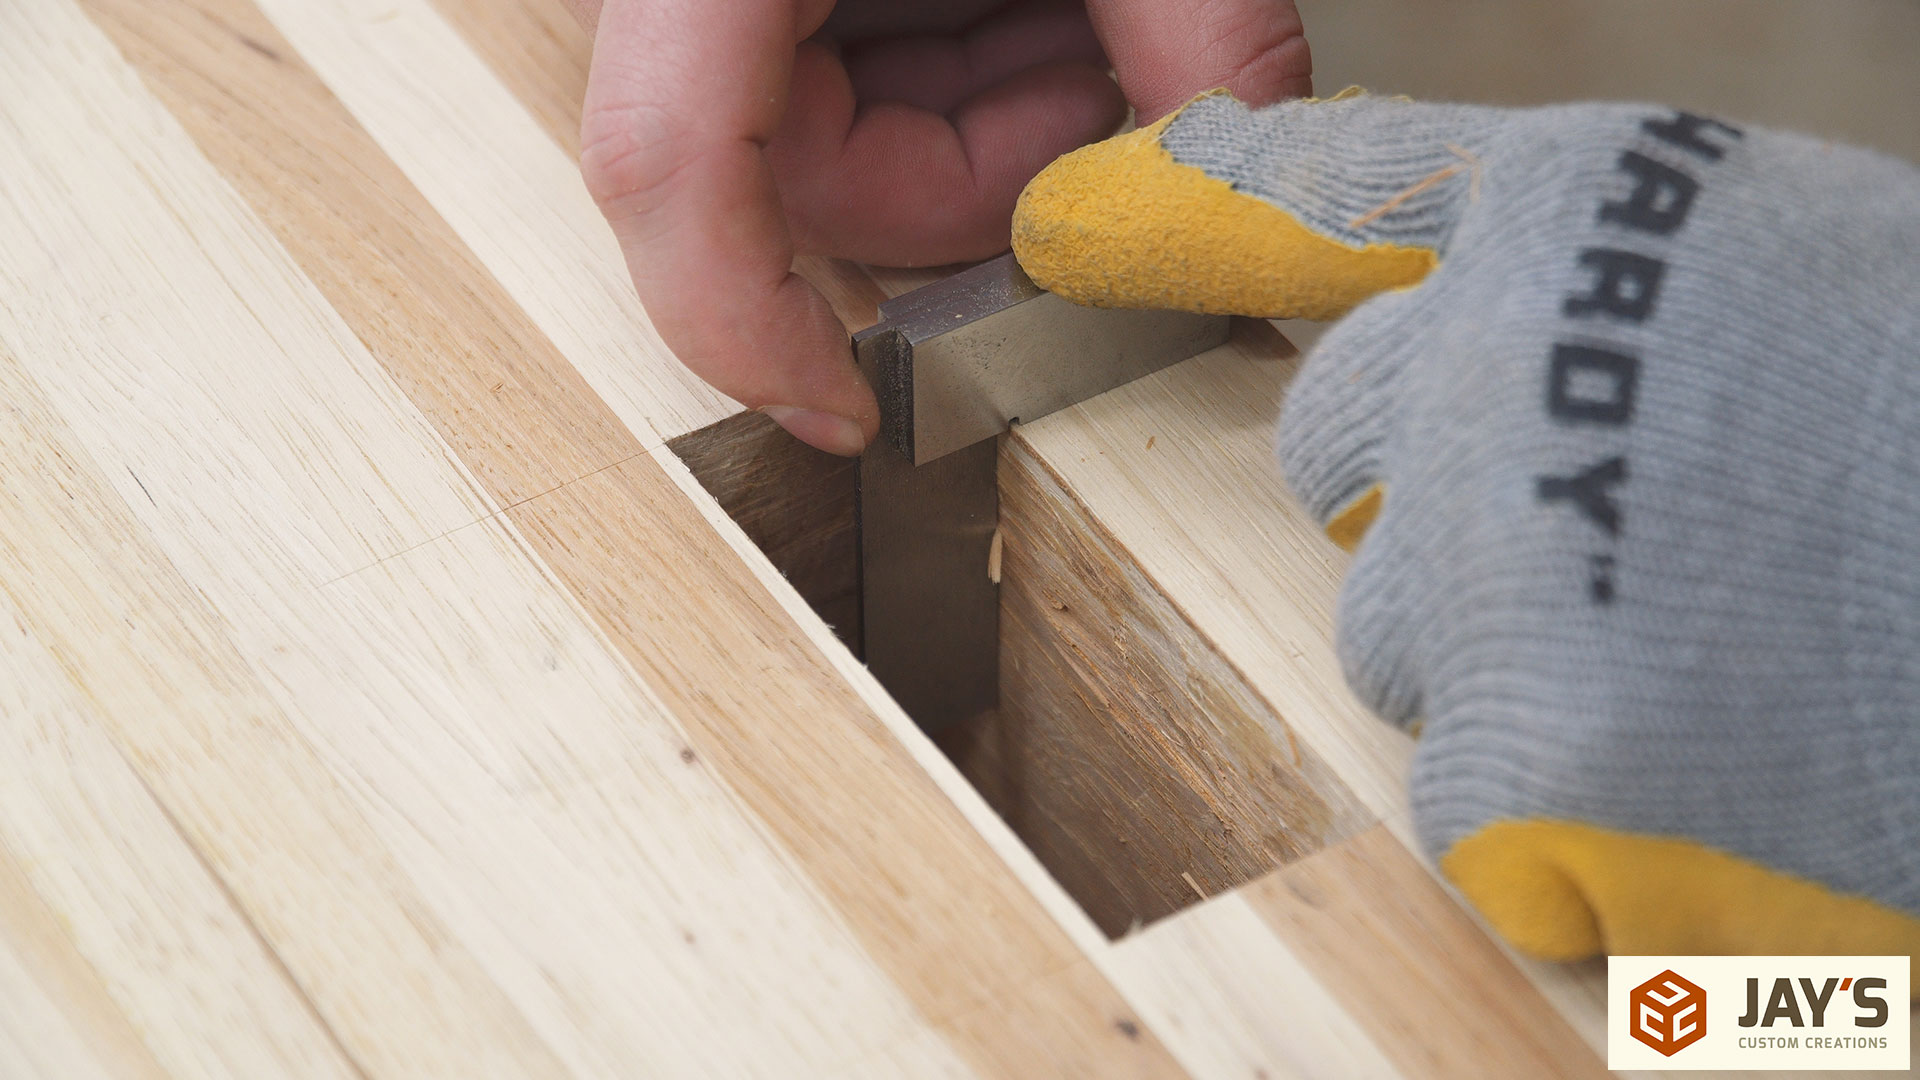
The round holes finally transformed to a single square hole.
And the final thing to do before moving on is to use a square and make sure all of the mortise faces are perpendicular to the work surface and that there aren’t any bumps that will prevent the tenons from properly seating.
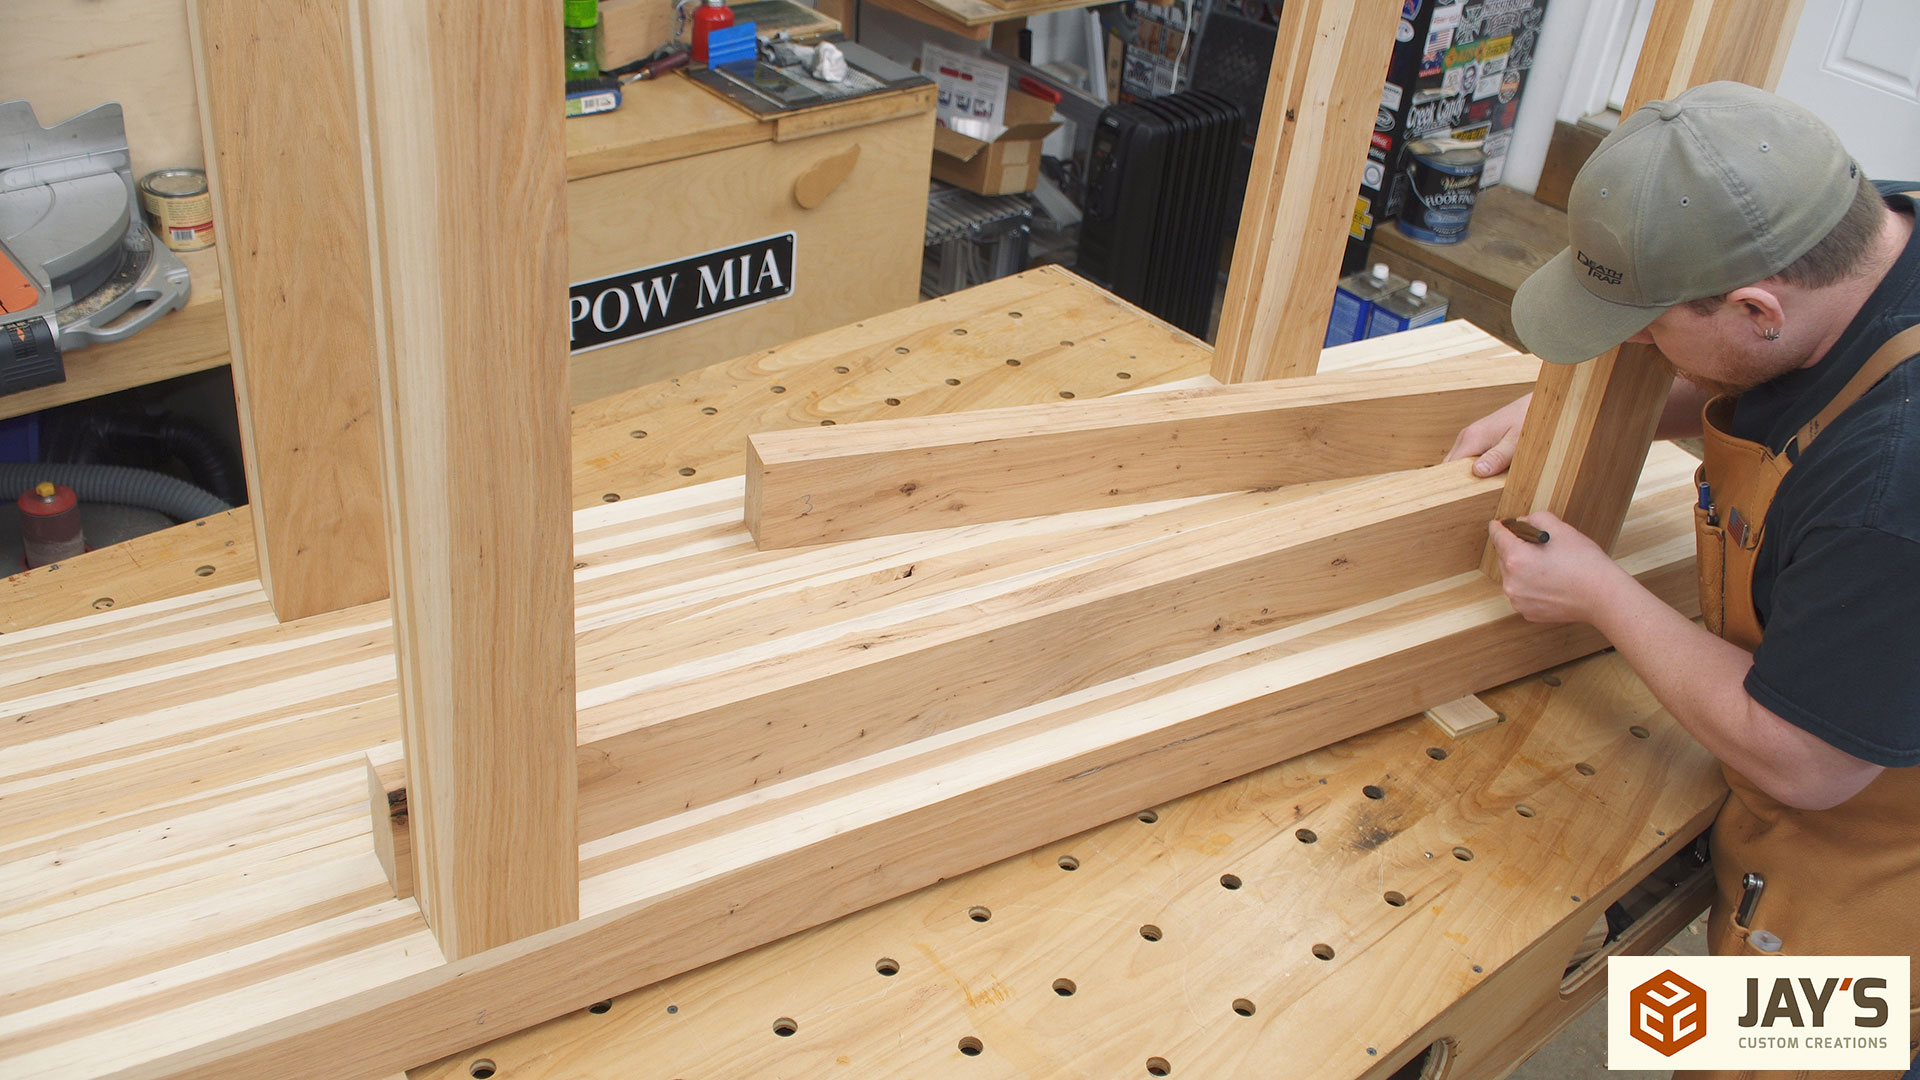
With the leg tenons inserted into the top the half lap location on the stretchers can be marked. This is a good example of when you should ignore nominal dimensions and instead rely on relative dimensioning. Simply place the stretcher against the leg and mark the interior space for the joinery.
Same thing for the long stretchers.
I used the dado stack to remove the waste here. Much faster once the stop locations are marked.

To confirm the stretchers were cut appropriately they are nested inside between the legs. If all is well with the stretchers the starting point for the matching joinery on the legs is laid out.
Again, there was no need to use nominal dimensions to lay out the cuts. I determined where the joint would start, placed the stretcher over each leg, made sure everything was square, and marked each side of the joint. The interior waste was removed at the table saw with the dado stack once again.
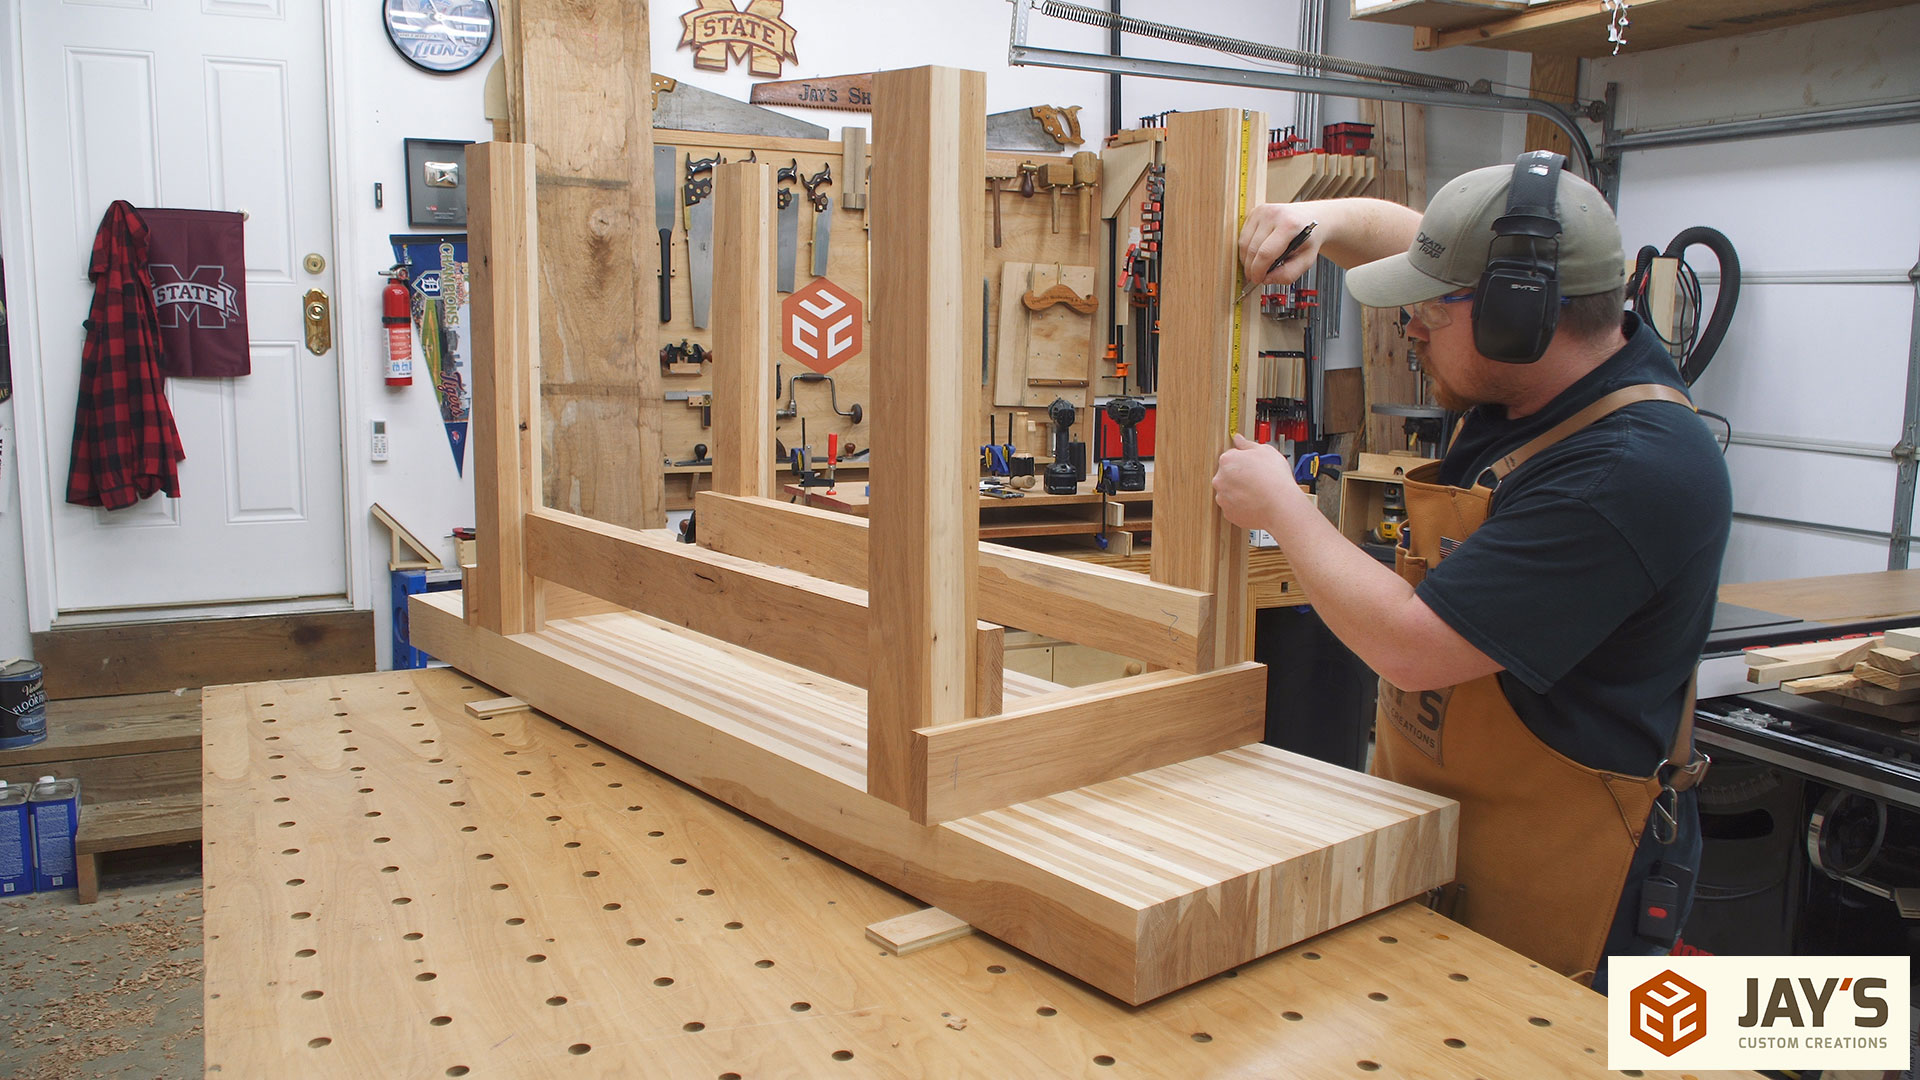
It’s MUCH easier to drill the hole for a leg vise screw before assembly.

And because I don’t know if this workbench will eventually be sold I drilled a hole on each of the legs. This doesn’t harm anything but it does give options for the next owner to move the leg vise to another leg if desired (left hand vs right hand user).

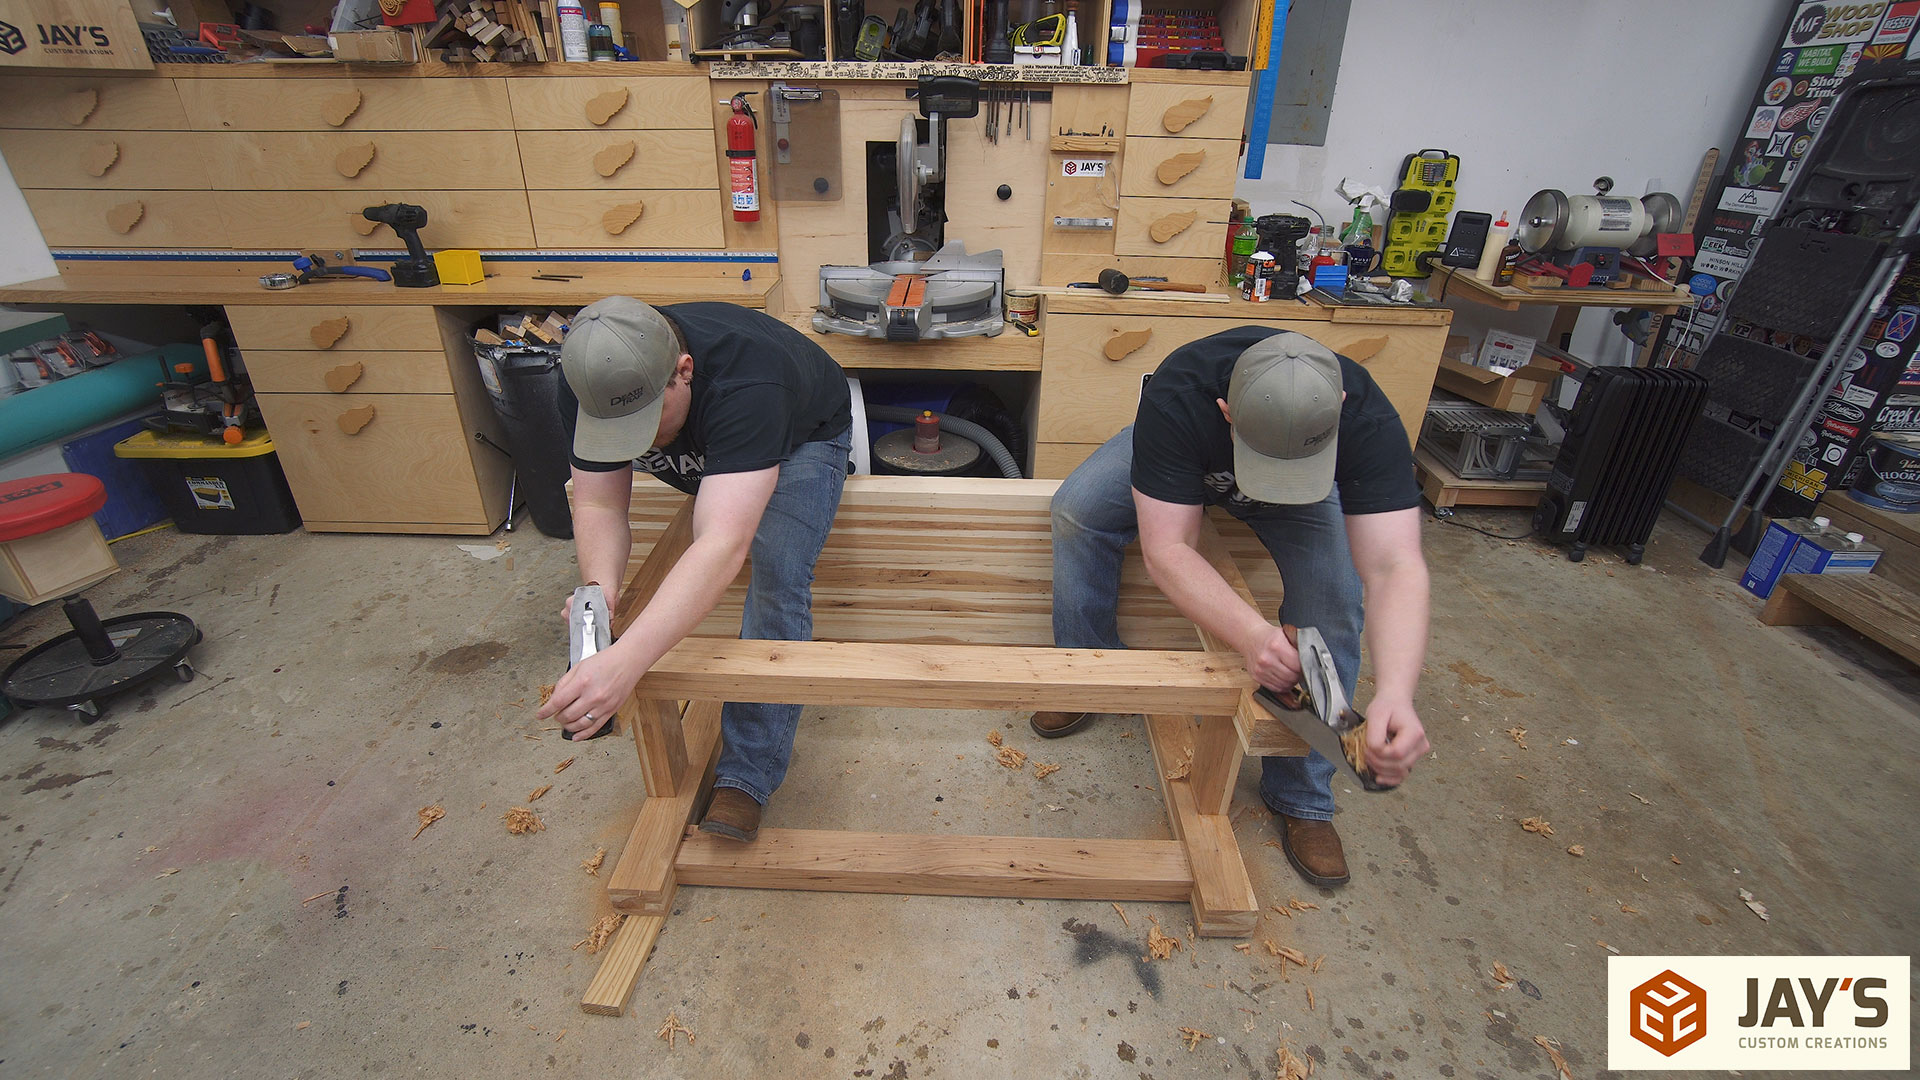
Final assembly can begin without glue. Just clamps at first.
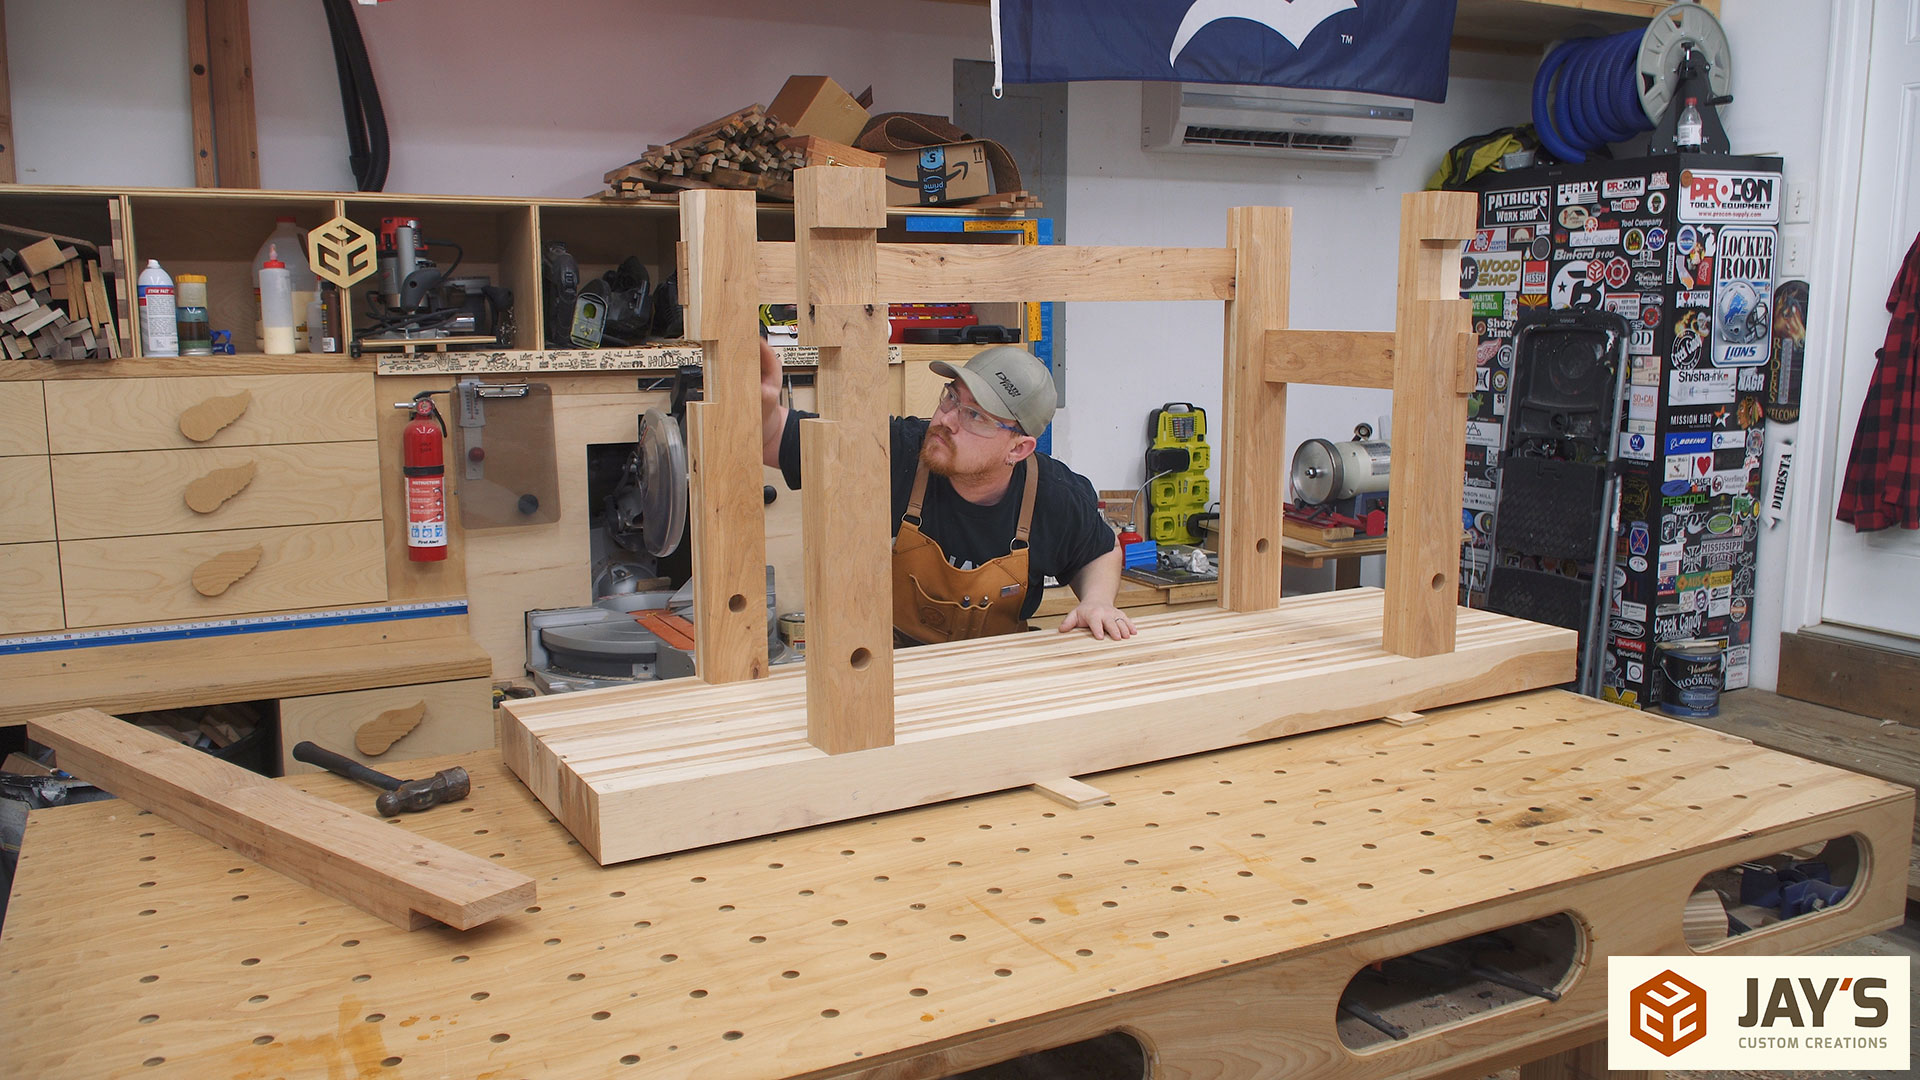
With four clamps pulling all of the joints tight in both directions I drilled three holes in each half lap joint to pin everything tight with screws. The main holding strength will not be the screws. The screws will be used to pull the joints closed and act as clamps after glue is added though. I used decking screws and wax on the threads to prevent splitting or braking of the screws.

After rotating the workbench to the floor I started the mortise glue up. I used my workbench and assembly table to lift the ends while I hit the tenons down with a hammer and block of wood. Two sawhorses and shim blocks can be used for this step as well.
These through mortise and tenon joints turned out much tighter than the ones on my pine bench and because of that I didn’t want to use PVA glue for these joints. PVA glue has water in it which will swell the joints. If they are tight without glue they will be really tight with PVA added. Instead of PVA I tried hide glue for the first time as it’s not supposed to swell the joint.
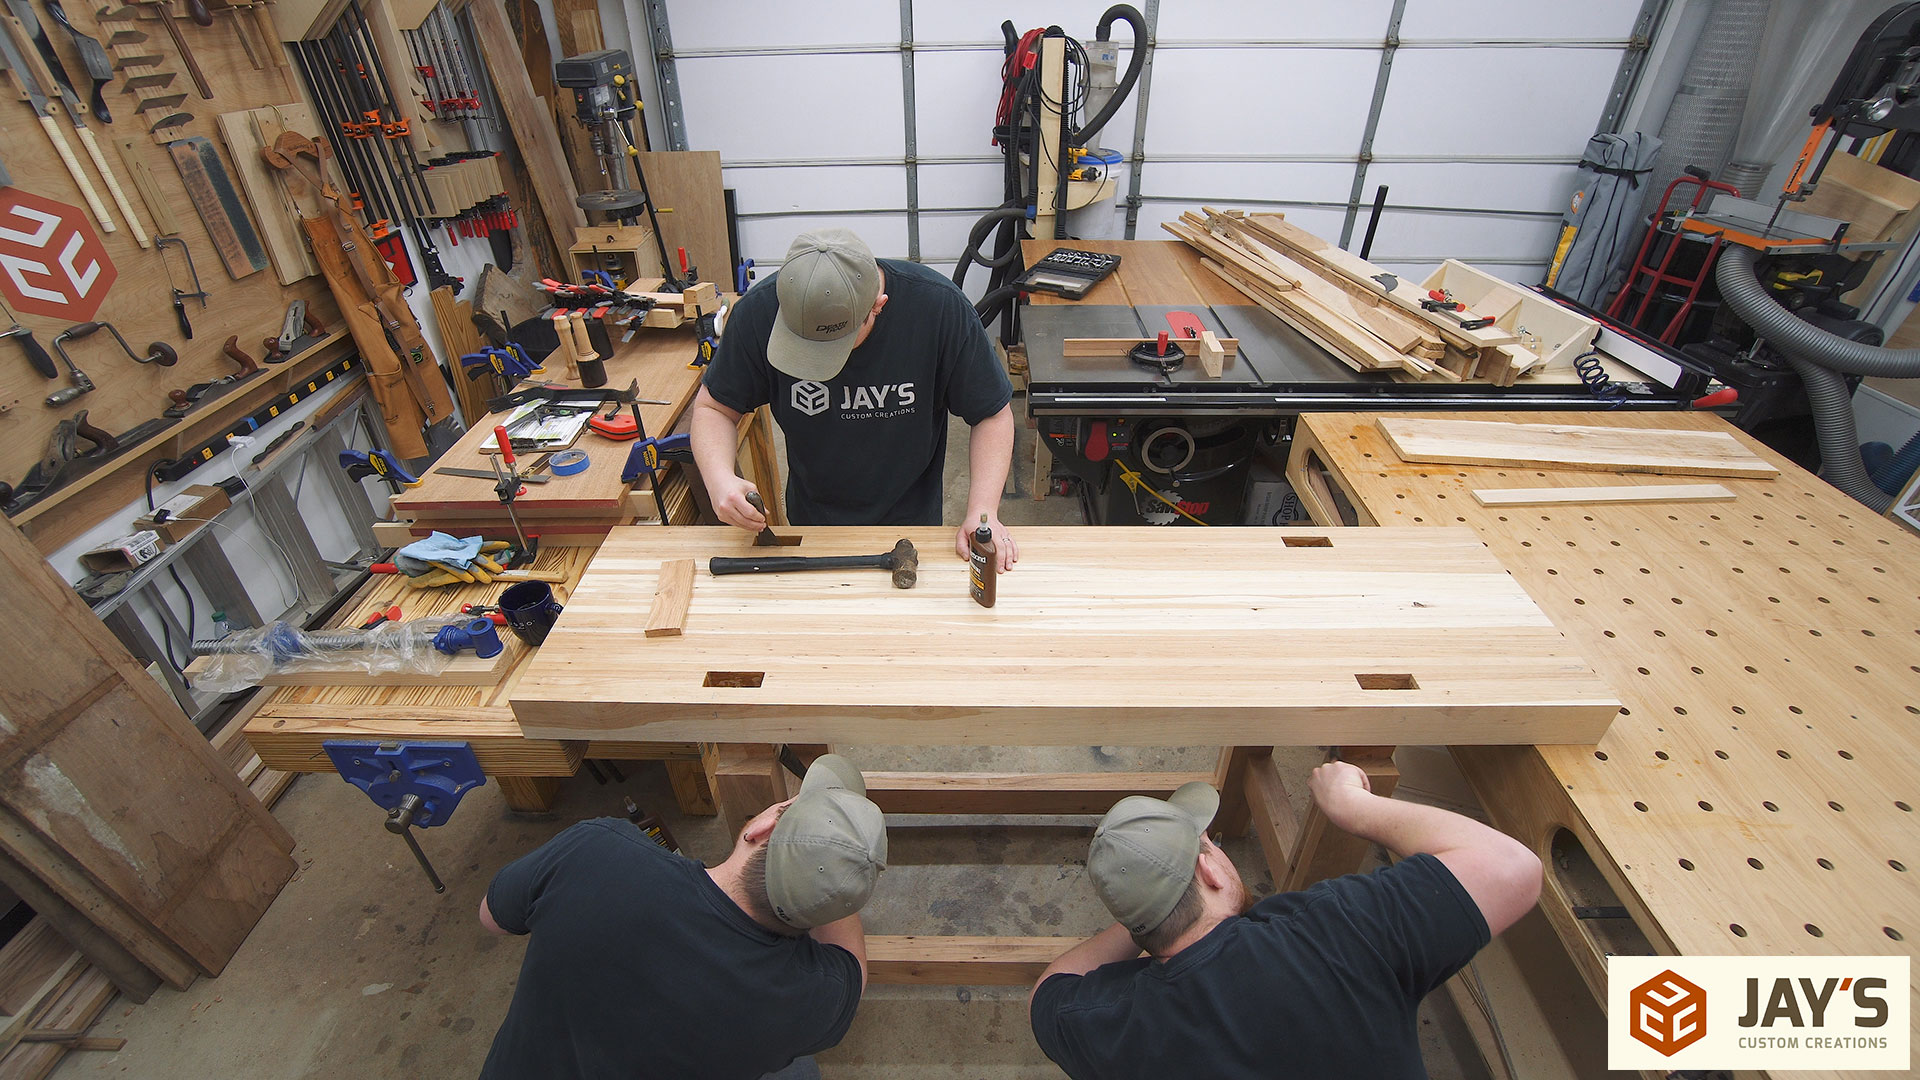
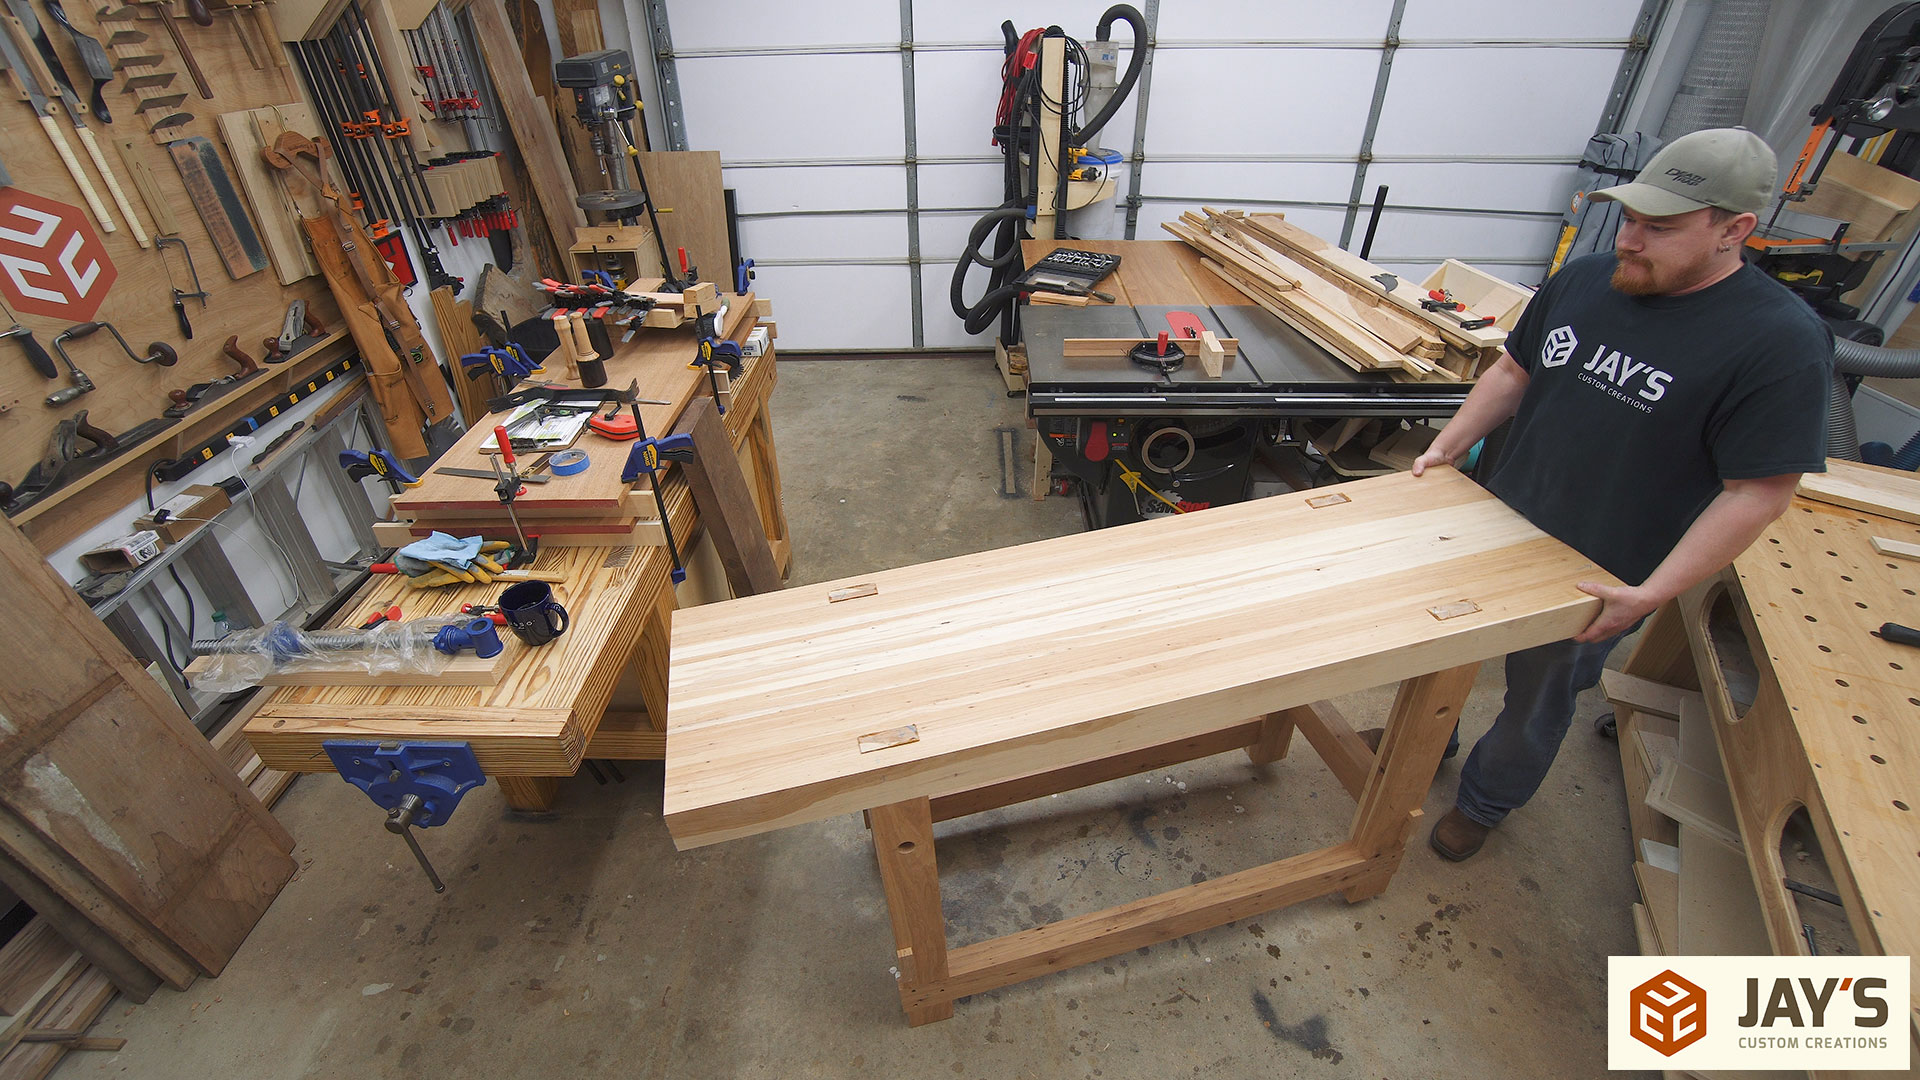
After glue is applied I pulled the workbench off of my old workbench and the assembly table. Instantly the top dropped almost all the way on to the tenons. The hide glue lubricated the joint and made this process much less nerve-racking. To seat the joints all the way I picked up each end and slammed it down until everything was tight. I’m very pleased with how tight these joints ended up and how well the assembly process went with using hide glue.
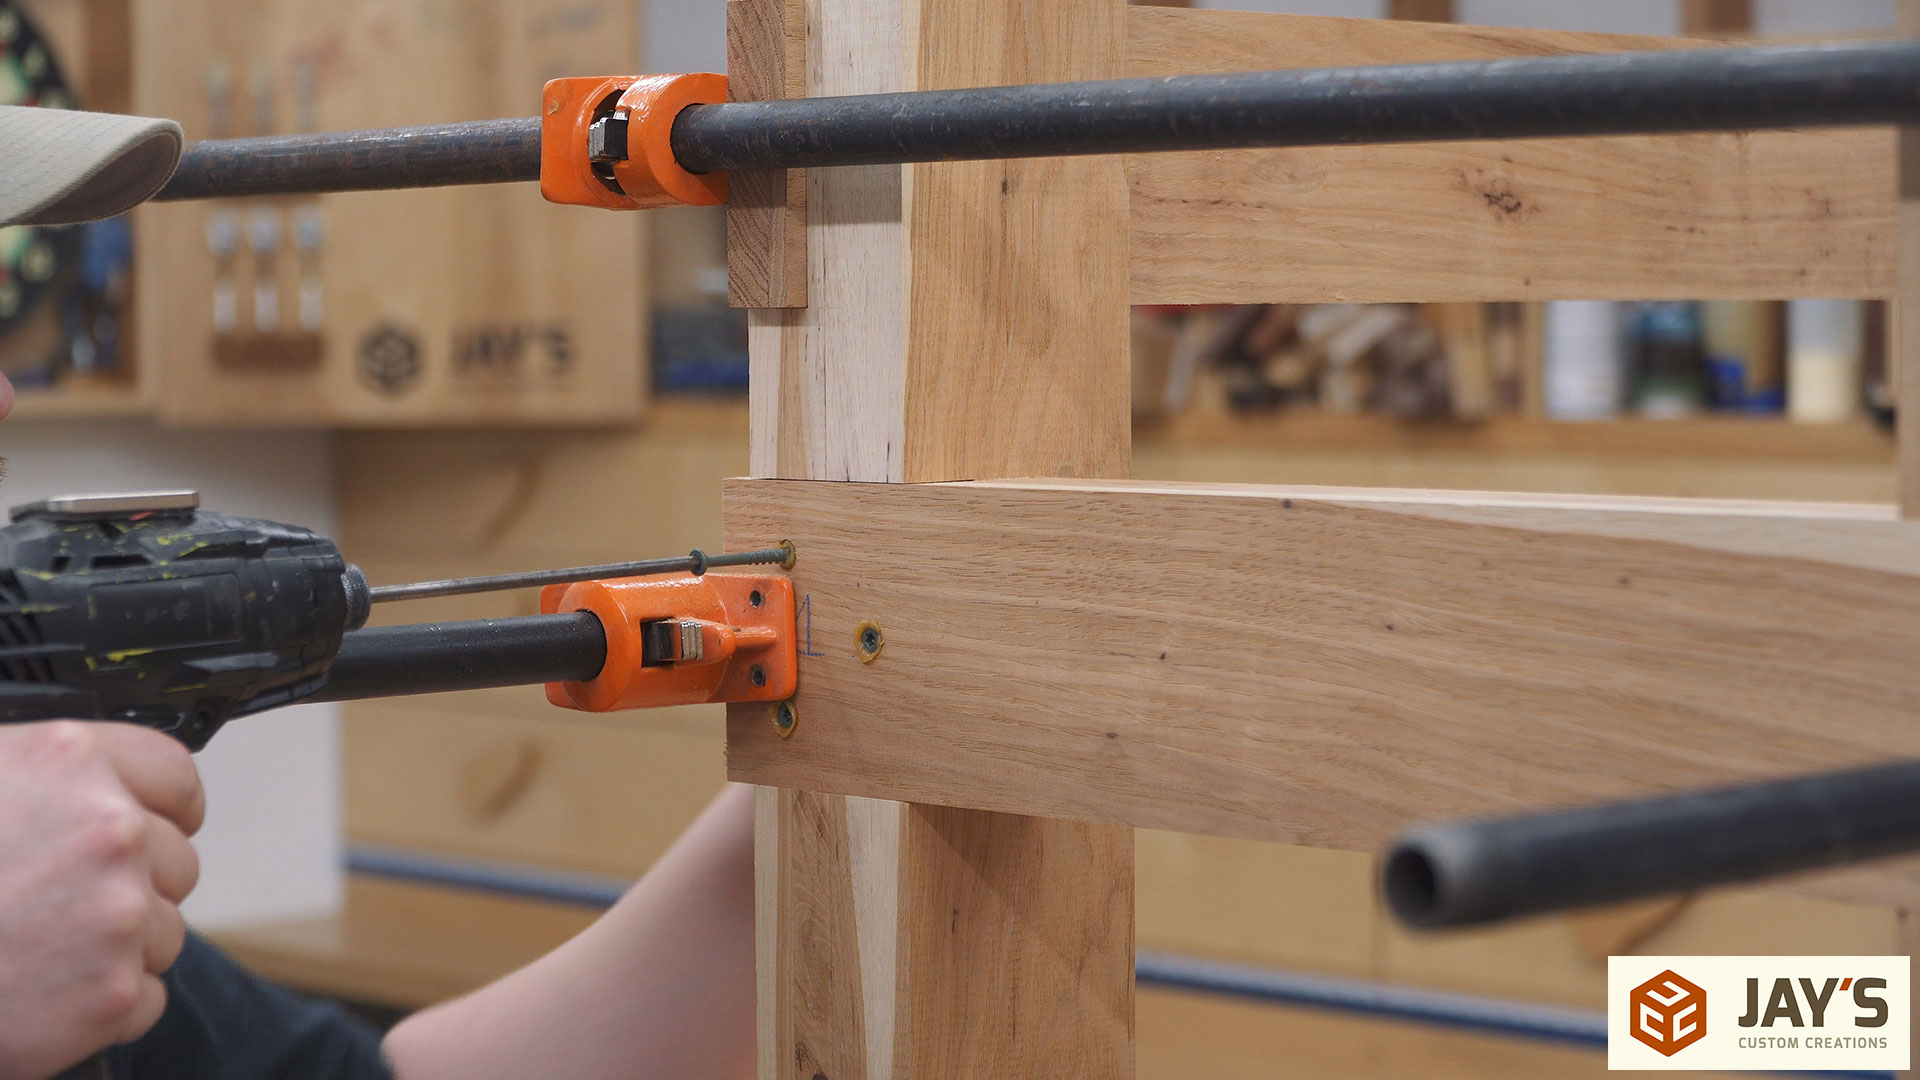
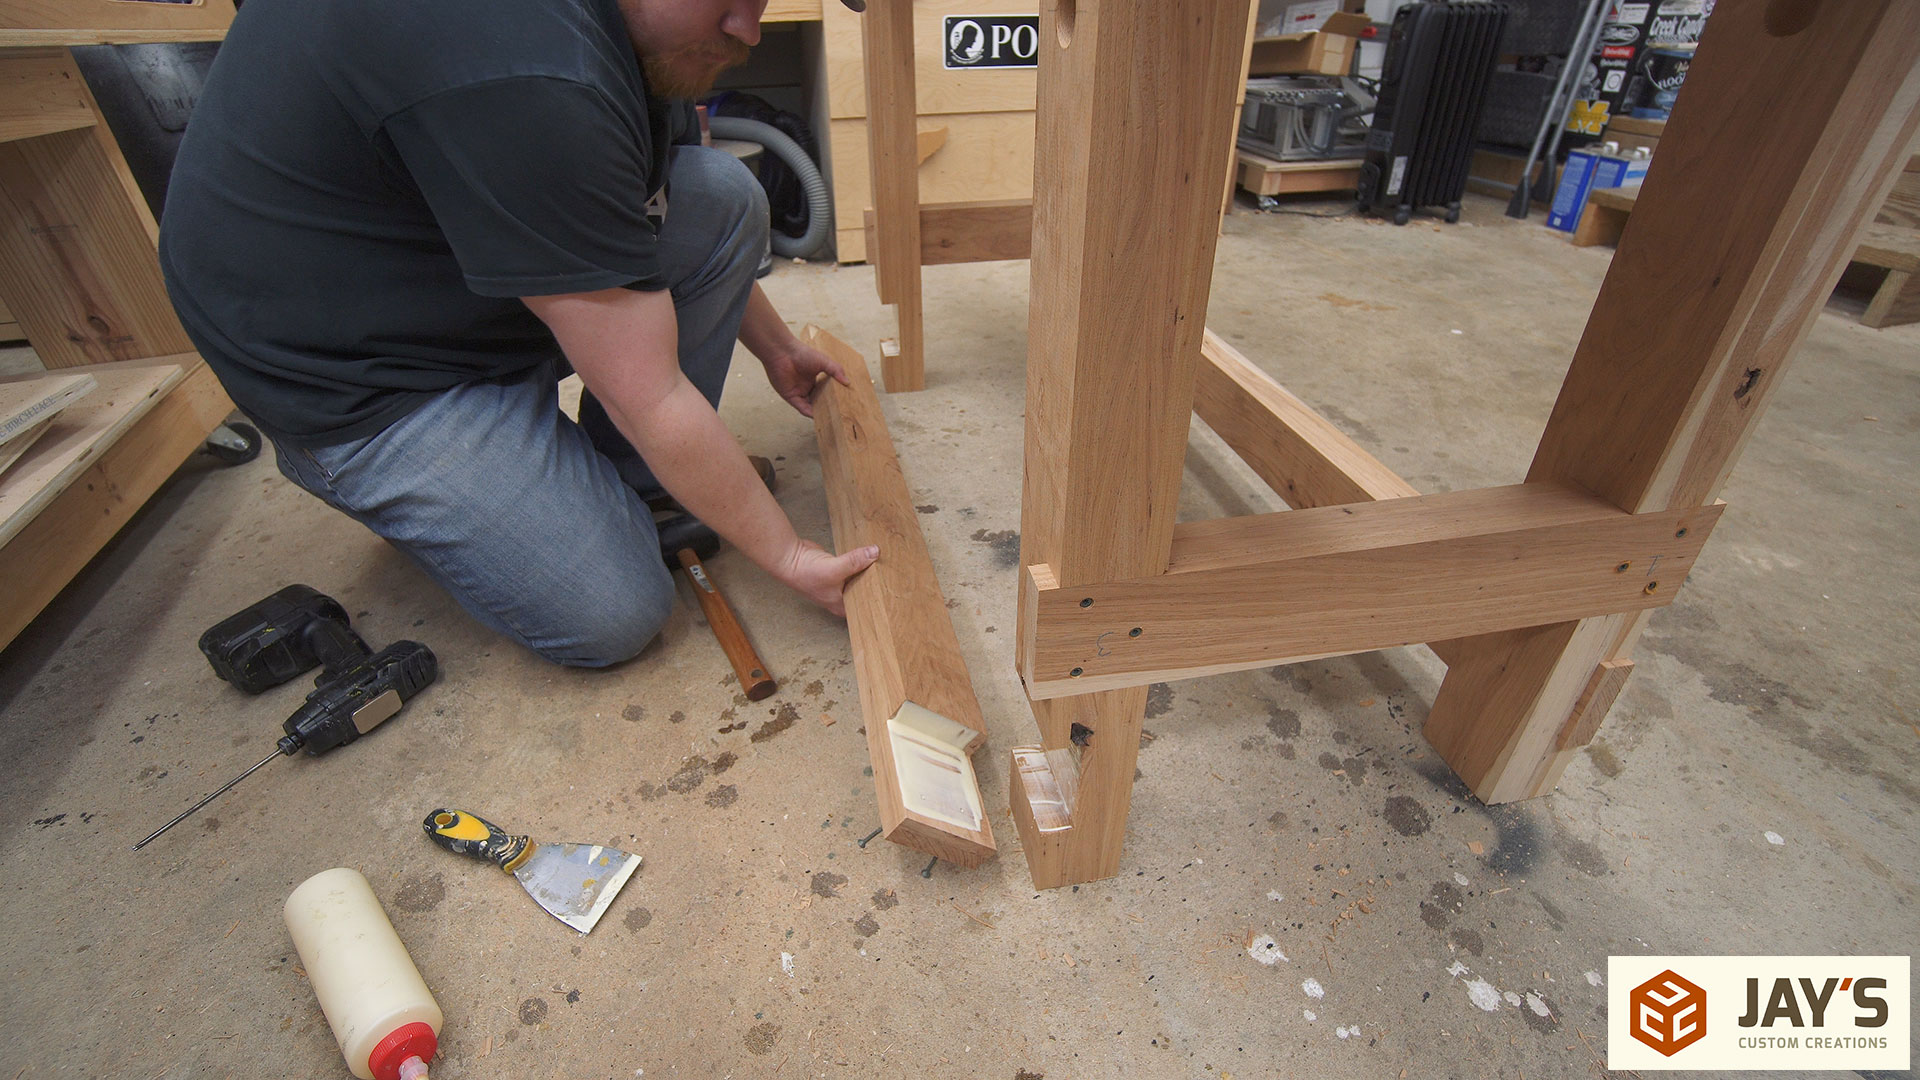
One of the benefits of using screws is that the base was already assembled. All I needed to do was remove each stretcher one at a time and add glue to the joint. Replace the stretcher and secure it with screws. Super easy and the screws act as clamps while the glue dries.
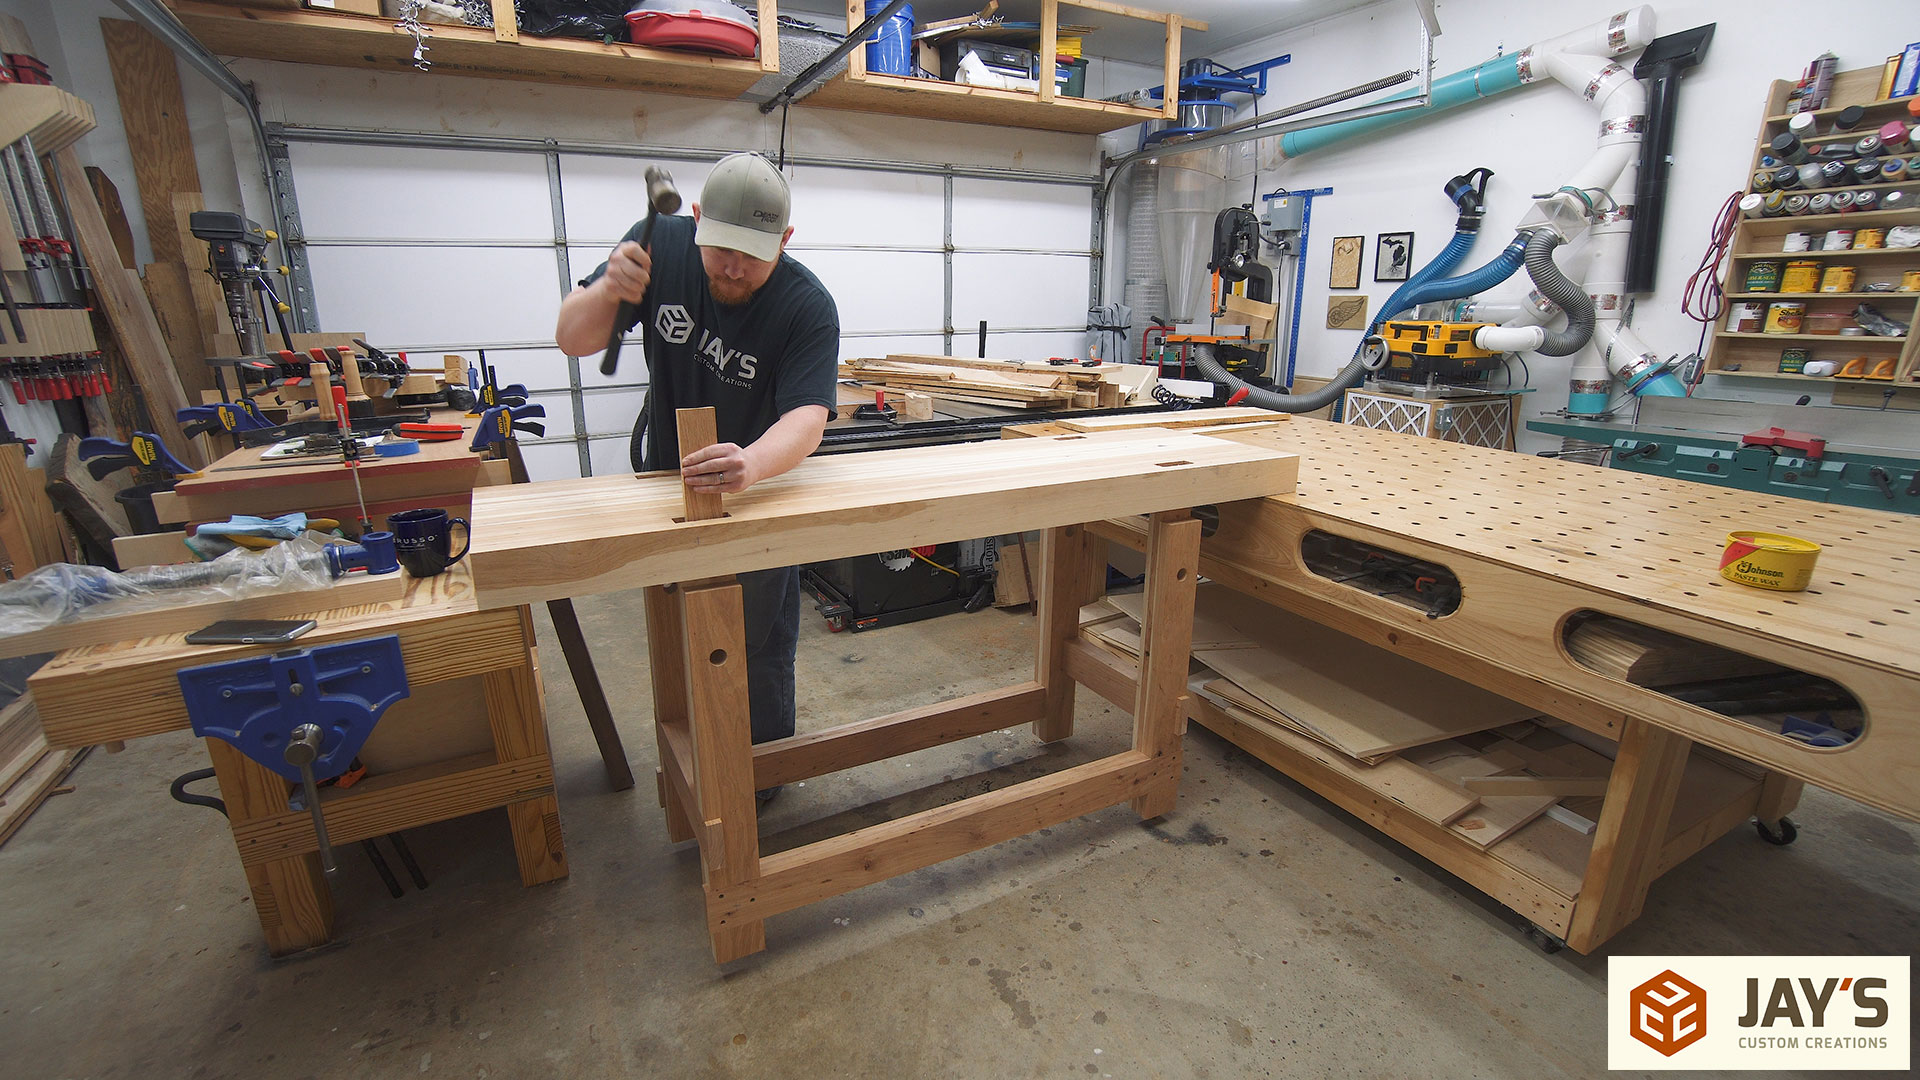
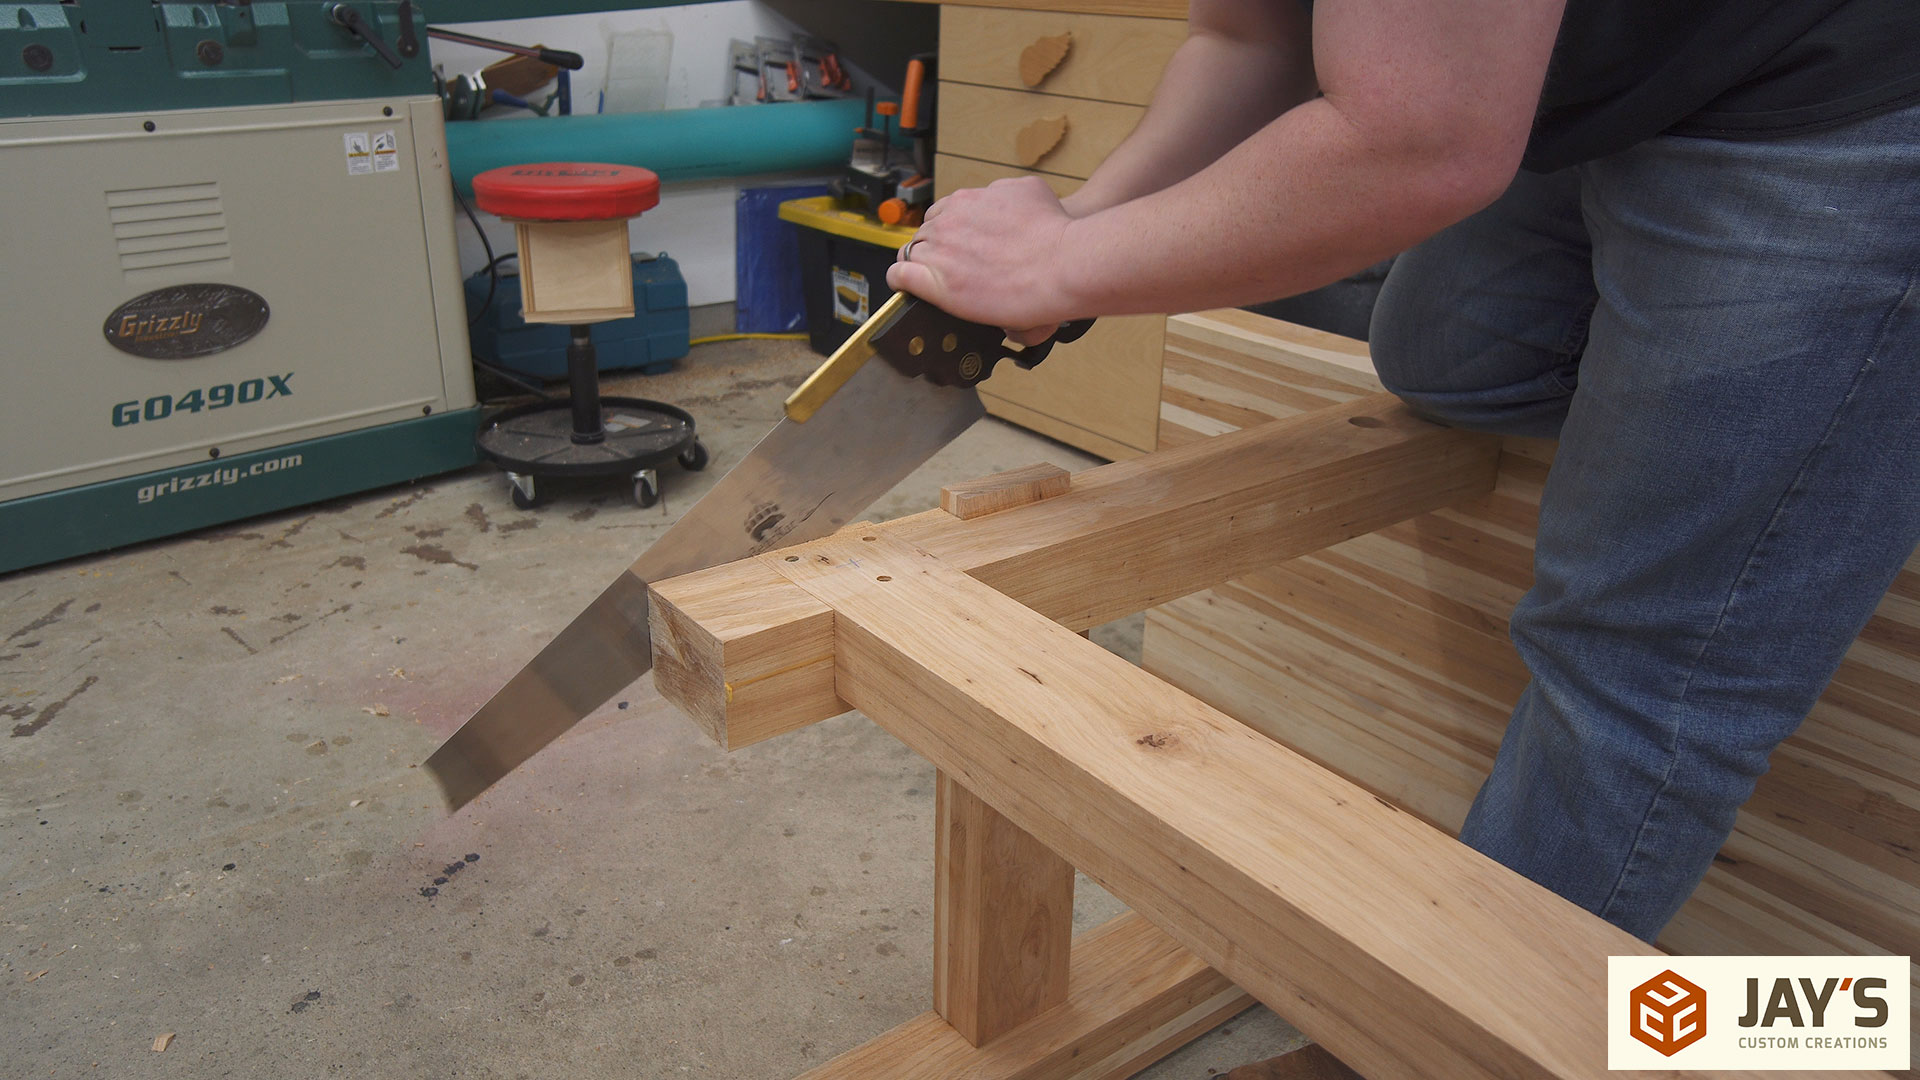
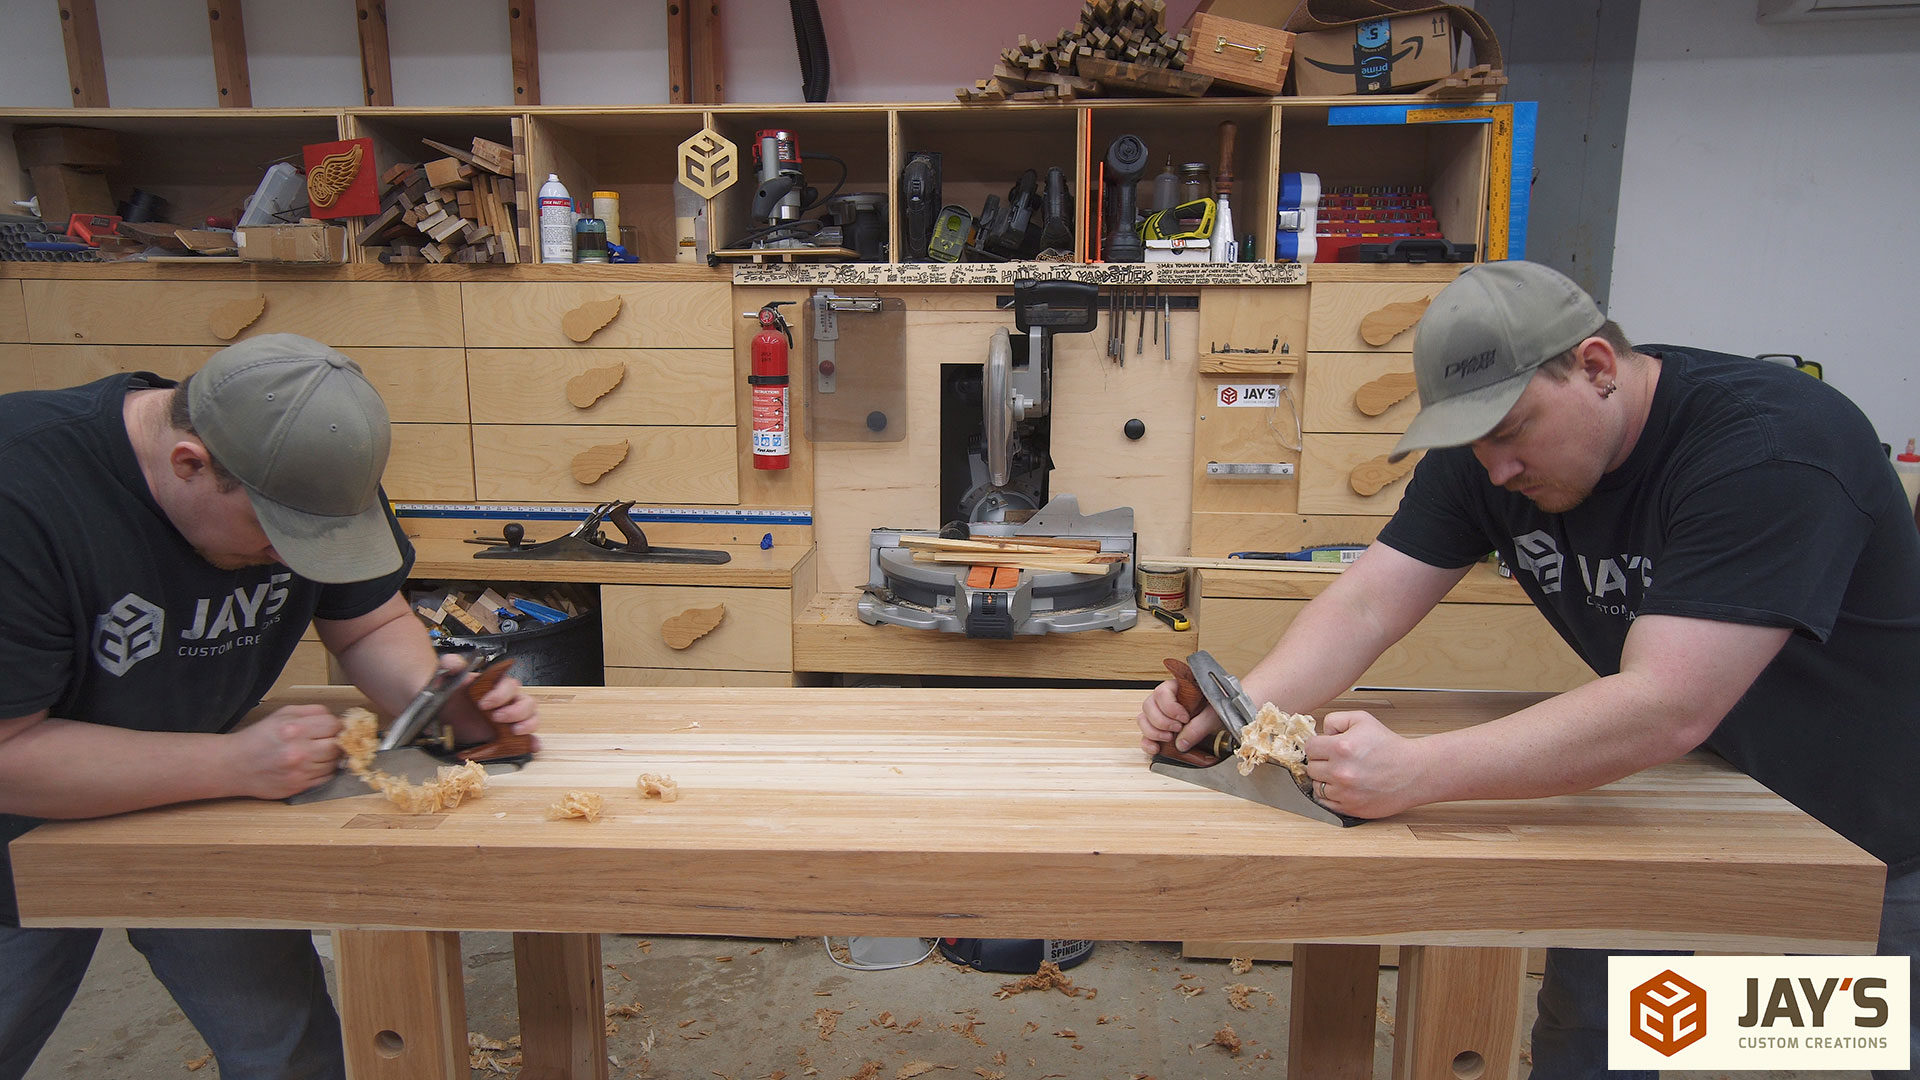
I let the bench sit overnight to let the glue fully cure. The next day I carefully flipped the workbench on its side and cut the half laps flush with the legs.
And flushed up everything with a hand plane.
Finally, the top of each leg tenon was trimmed and the top got a once over with my smoothing plane to make sure everything was flat. Taking the time to mill the three top beams flat and square before assembly really pays off here as there wasn’t much work that needed to be done to the top.
I’ll probably add a couple of coats of Danish oil in a few weeks but just to make the grain pop a little bit I added mineral oil.
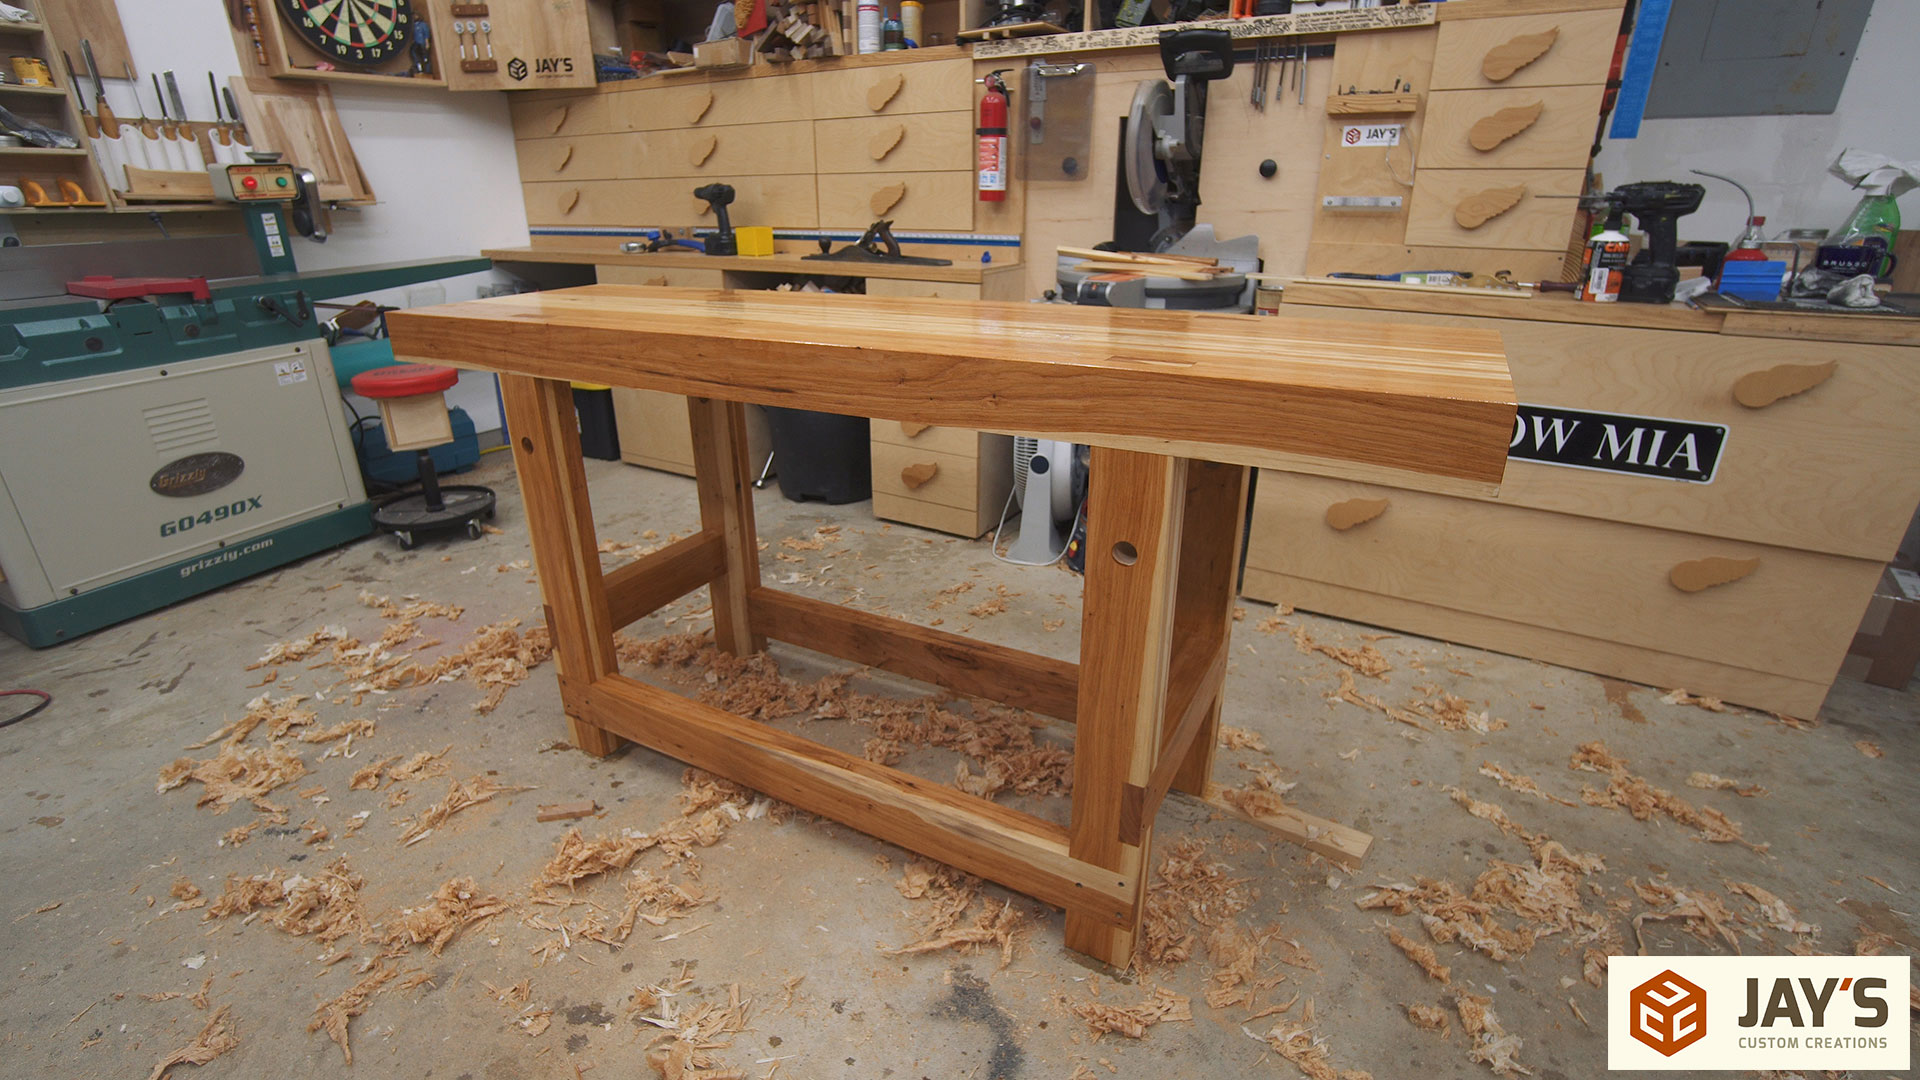
In the next video for this workbench I’ll cover installing a leg vise and adding dog holes. Now that it is complete, what do I think of working on a hardwood workbench instead of my pine workbench? It’s about the same really. There’s not much to say in that regard as there are two sides to the coin and no wrong answer. A hardwood workbench will be able to take more abuse over the life of the bench simply because it’s harder and more dense whereas a softer wood workbench will absorb more abuse than your project and should protect the project more as it is worked on the workbench. That being said, a solid workbench built with quality joinery to prevent racking matters much more than the species chosen to build the workbench.


Jay, great work as always. Do you have a ballpark estimate for how many board feet of hickory that it took for the entire build? I know you’re a careful planner and minimize waste, so I’m curious how much wood you think it took if you include all waste and scrap. Thanks.
The completed bench has a volume of about 70 board feet according to SketchUp. I’d say I had about 30% waste cutting around big knots and cracks.
Well done.
Thank you.
Great job on your new workbench
Your joinery work is superb !!
Thanks for your video
Thanks!
Terrific effort on showing how to approach this workbench. Nicely done, and thank you.
Thank you Cam.
Pine vs Hardwood: I find that a softwood top will pick up metal shavings and grains of dirt etc. No matter how careful you are to sweep or vacuum, it seems these then get embedded in the soft material and can scratch a project, especially in the finish stage. so I’d love a hardwood bench for assembly and just put a piece of sacrificial plywood down for cutting. Actually, the best assembly/finishing bench I ever had used a FORMICA top. Easy to slide wood around on it without scratching. Easy to just scrape off glue, paint and varnish. Water proof for wet sanding. Easy to wipe up wet spills and spatters. Best bench top ever!
I respectfully disagree. I cut metal on my bench and have had no problems with embedding or scratching work pieces. Formica is a good choice for an assembly table but a poor choice for a workbench because pieces slide around too much making it more difficult to hold material.
Not only was the bench really well done, but the video was first rate as well. Great work!
Thank you for the feedback :)
Great build Jay! It turned out beautifully. I love how you have fun duplicating your images…makes me smile every time.
Thank you!
Well done, both the video and the bench. I envy you with your too-much-hickory problem!
Two thoughts/questions. You mention adding a couple coats of Danish oil in a couple of weeks. Wonder if the laxative you smeared all over the bench will interfere with the Danish oil curing?
I noted the through-mortises on both bench tops you’ve made. I would think that this would create an opportunity for an uneven surface as the long grain of the top and the end grain of the legs expand/contract at different rates. Although you couldn’t easily do your dissembly trick during construction, why not use blind mortises for the top?
Hey Don. I applied mineral oil to the bench. It can be used as a laxative but it is mineral oil. It will soak into the wood. Danish oil is an oil based finish and will have no problems adhering to the already oiled material. Through mortises have been used, and preferred, on workbenches for hundreds of years. A through mortise provides more joint surface area and glue surface area and therefore should be stronger. Expansion or contraction of the wood will have no major effects on the mortise and tenon joints. Through the life of a workbench the top surface will be planed a few times as needed. This will keep the tenons flush with the top. If the top shrinks and causes the tenons to stick up simply plane those individually.
Nice looking bench, Jay. That hickory is beautiful. And solid, no doubt!
Your SYP bench video came out just as I’d started mine. I had glued up the top… but that’s how it has stayed for about two years. (!) It is used all the time, sat on sturdy saw horses and with a woodworker’s (metal) vice attached “temporarily” at one end. The leg vice hardware remains in the box it was shipped in. The reason I stalled… I’m concerned about the joinery on the end leg assemblies; the top will expand/contract more than the end rails. (I’m in Houston TX and the changes between hot, humid summers and cool, dry winters seems fairly significant). Whether half-laps (like yours) or mortice-and-tenons, I’ve never seen any Roubo-style (non-split top) design that paid any attention to that potential differential in movement. I got to the point where I’ve been thinking to rip down the top and switch it to a split design, such that no stresses can be put on the leg assemblies.
Given that you used the same undercarriage design for the new bench, would I be correct in thinking that my concerns are nothing to worry about in practice..?
Hey Dave. Your concerns are nothing to worry about in this situation. The short stretchers are too far from the top to affect anything. As the top expands and contracts at a different rate than the short stretcher the legs will flex to compensate for this. The amount of movement for this situation is very little and you will never notice it. This is why you don’t see any solid top workbenches like this with a short stretcher/apron rail directly below the work surface.
Thanks for that.
Although I plan to use mortice and tenons throughout, yours is still the closest design to my bench-to-be. Thanks for the work in putting those videos out there; they’ve helped a lot.
Great build! I’m sorry to ask a repetitive question, but if you where going to choose what would be the easiest way to cut the mortises in a pine top like your original ?
Plunge router with an edge guide.
Thank you!
Great job Jay!!! You are truly a craftsman!
My first look at your website. I’m impressed. Look forward to checking out lots of your work.
Every time I see do stuff you get better and better. You have come a long ways on your own what you have made and thought others we all needs are own style I hope you get on the books thanks again showing me what I forgot I take my hat off to Akuta
Thanks for the kind words, Mark. I appreciate it.
Thanks for explaining in the article why you used hickory. Please, keep us informed about the pro’s and cons of it. Like you, I think SYP is fine for a bench. I have some 30 year old 12/4 SYP for a similar project, if I can just find the time. Thanks again.
Another quality video documenting, in a fun and fast fashion, a quality product. Nicely done Sir. What is your plan for vises?
Read the last paragraph :)
I am a relative new woodworker and I have learned a lot from watching your videos. I am in the process of building my first real workbench. I want to use through mortise on the top for the legs and am a little nervous about getting everything to line up right any advise?
Jay, I am afraid this table cannot be used for any kind of a work bench. It is just to nice looking to become a wood working bench. Your work is great and the explanations are superb. I am not sure exactly what you can use the table for, but you need to reconsider it as a work table. Maybe it could be converted to a computer table. This way you could begin writing a book for all of us dummies to learn from.
Thanks, Jay,
Great video Jay…I might have to upgrade my workbench/assembly table to something like this.
Time to ad onto the garage!
This is at the top of my build list this spring when it warms up enough for the glue. I bought your plans Saturday and was doh! when I saw this Sunday morning. Glad you’re using the same plans. :)
Thoughts on using a Benchcrafted leg vice? That’s basically 3x the cost of the YSP for the bench, but I’m thinking that vice will follow me in any future benches.
Thanks for sharing what you do.
The Benchcrafted vise hardware is top notch. Quality stuff, there’s no arguing that. But a cheap regular leg vise screw and a wedge on the floor have served me quite well over the past 2 years. I don’t see myself using their hardware unless it was sent to me. I’d rather put my money into other tools but that’s just my opinion.
I love Hickory, One day the desk in my office will be made out of it. I’ve been out of your loop for a while, do to two new foster babies. Are you going strictly hand tools now? Or doing the Hybrid, Whatever does the job best?
I’ve been setting up my shop. It has to be completely mobile so I have a couple of the Paulk designs. Do you miss the big table?
Great build, nice video! I always love your videos and explanations. You are always easy to follow and straight to the point.
Jay,
You certainly raised the bar on this one. It would interest me to know how many man hours it took to complete.
I don’t recall. But this can be built in a solid weekend of shop time.
Are you keeping the Paulk?
I already gave it to a cabinet shop.
Jay, this was a great build~! You made it look sooo easy. Glad to see that Shawn stopped in to provide some supervision. ;-)
Looks really nice. Too nice to work on lol.
Jay,
No floating tenons/biscuits this time around on gluing up the top?
I don’t have a biscuit/domino gizmo, so I was thinking once flat, I could just clamp the top/bottom of joints at the ends. Maybe run a caul or two in the middle if they don’t want to cooperate over a long span and can’t be encouraged by a mallet. Curious about your experience if you skipped them this time.
I realized they were unnecessary. Looking back, there was no need to include them last time. The surface I was working on was flat enough for a glue up, the clamps were referencing off that surface, and the beams that were just squared up were referencing off the clamps. The pieces were too heavy to shift vertically during glue up.
As usual you have impressed me again. I love the look of hickory and your bench turned out awesome. I have watched you from your first few videos and have learned and enjoyed them all. One thing in my bucket list is to meet you shake your hand, or get to spend the day making something with you. That would be the best time. Thanks again. Great job.
Hi Jay. I just picked up 150 board feet of 5/4 red oak. Most boards are 10″w x10’L .Do you think that would be enough material do build your particular bench? Sorry if you already covered this question. Awesome bench, man
I’d say you can make it with that much. This bench is about 70 board feet completed and I had about 30% waste.
Hey, Jay on your SY pine bench, did you do anything with drying the wood? I got my wood this weekend and it’s pretty damp. I have a cheap-o moisture meter and it seems to be reading 17-20%. The pine carts that have been in my shop for a while are around 11-12%.
I rough cut the 10×12 boards in half with rip and cross cut, then stacked them on stickers. I thinking of waiting 3-4 weeks and hopefully they dry out. Plus it should be warmer for the glue.
Christopher Swartz addressed this in his book and suggested building the top first so that the mortises shrink. It will likely take me a few weeks to build this, so I’ll start there and then hopefully everything will be dry by time to get to the aprons and stuff with tenons.
Anyway, just wondering if you dealt with it in your SYP build?
Fantastic.Beautiful.Well done As usual great video.Thank you
I LOVE THIS WORKBENCH! This is a workbench, I believe, I could model mine after. I don’t have the hickory, but I could use what I do have. I also love the tool well you added. I like the Roubo style because a tool well can be added in the bench, but you added the well to your bench. A good idea! Thank you sir for your work; you’re making a difference by helping people out. Thanks again. Keep it up!