
This is going to be a long picture and video filled post. Hopefully a one stop shop for those who want to do the same thing for their woodshop dust collection.
Shop Dust Collection
I didn’t want to spend any more money on a nice can filter for the unit so I decided to vent outside. This creates a negative pressure inside which is not a problem for me. I didn’t want to just dump my trash outside so I decided to change the design up a bit. After asking a few questions on the LumberJocks forum and reading a handy little DIY approach to the same thing, I decided to use the bag ring to make a Thien baffle and mount the motor directly on top. I used two layers of MDF to create the bottom baffle and 2 layers for the motor mount on the top of the ring. Hopefully these pictures can better describe whats going on. Videos at the end.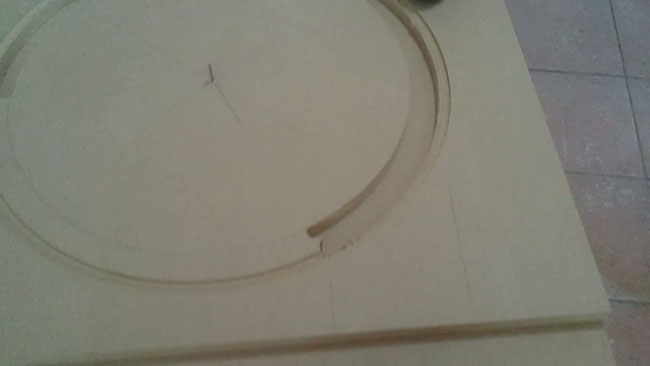
Here is the bottom baffle being cut. I originally messed up right here. I had the air intake lined up with the two lines below where the slot starts. That was wrong. Where the air intake starts is where the platform should start. The slot cutout should end right before the air intake. Luckily all I had to do was rotate the MDF 90 degrees counter clockwise.I went with two layers of MDF on bottom because I felt that the groove for the can and ring were too close and would result in a very weak piece of MDF. On the bottom layer seen here I removed a large section of the baffle area and left a pie shape to help support the weight on the piece above.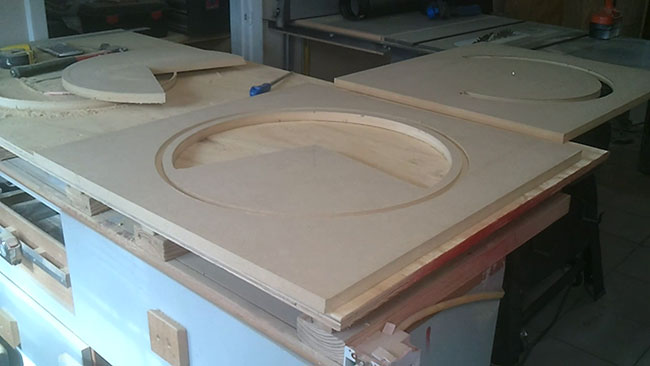
The two bottom pieces are stacked together. In relation to the slot, the air will be coming in from where my left hand is, not my right hand as I originally had it. It was clogging before I made the change. I should have read Thien’s writeup better before the build.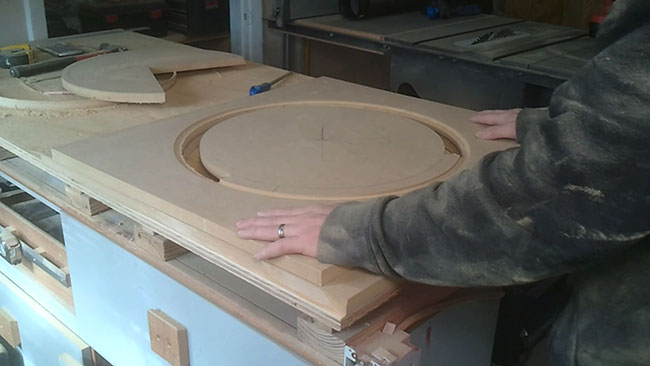
Test fit. I was a little skeptic about leaving the cone shaped inner ring. The author of the writeup I read said he left it. So thats what I did.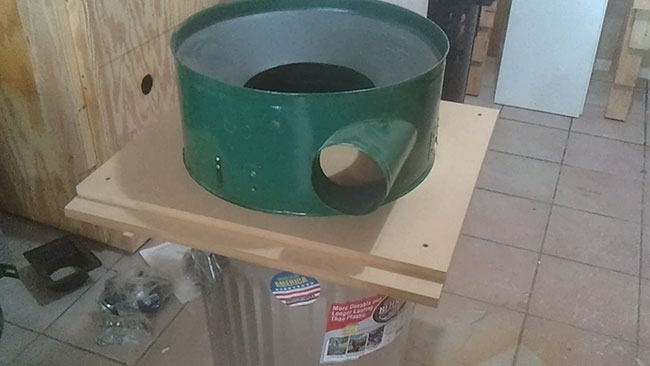
Time to cut some more MDF. Boy did I wish I already had this dust collector working when I was making all the MDF dust.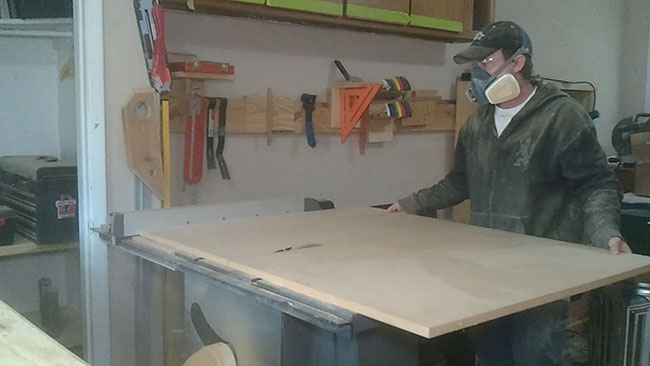
The top has to have 2 layers as well. This is the top-most layer. Where my hand is located is the exhaust for the blower. An elevated mounting platform is needed to clear this rectangular flange. A 5” hole was cut in the center to accept the impeller air intake.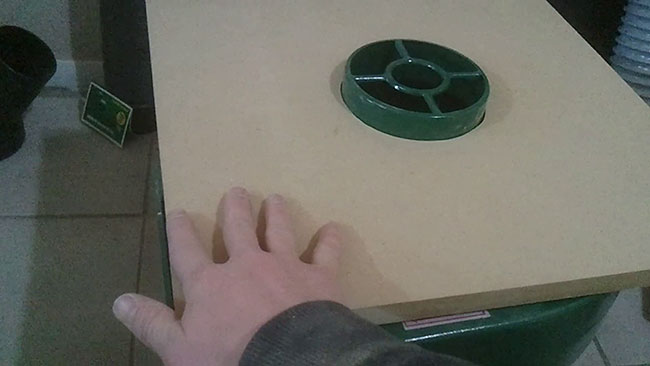
The layer directly above the ring is pretty straight forward. Just a groove to accept the ring and a 5” hole in the center to accept the blower intake. This is a rough assembly. Time to put it in location.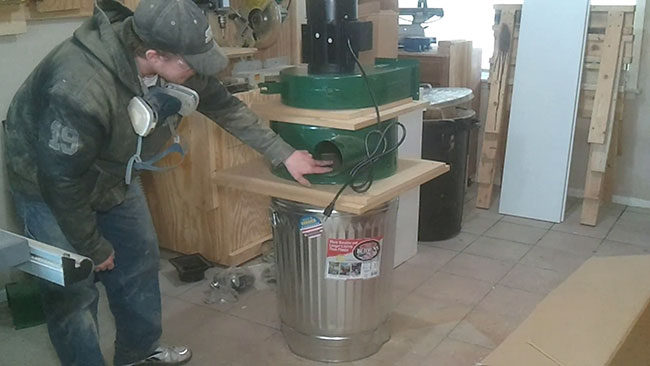
Initial install. I did not have any DC hose so I tested it with some flexible drain hose. This is when I realized the improper position of the air intake relative to the baffle slot. Easy fix like I said, just rotate the bottom two pieces.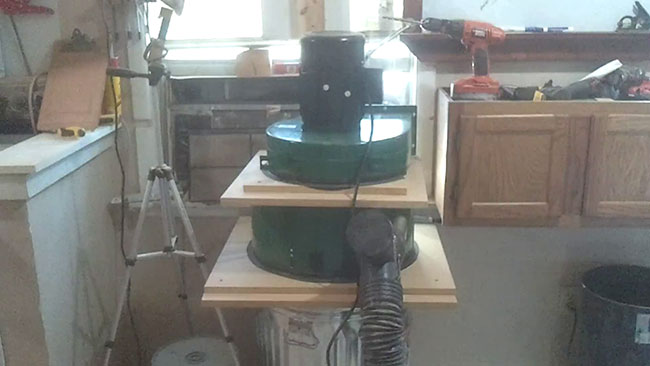
I had to think of a way to easily elevate the whole unit and remove the can for emptying. This is what I came up with. Just a scrap wood frame to straddle the can on 3 sides. It is sized so that the height of the rails are slightly shorter than the bottom baffle.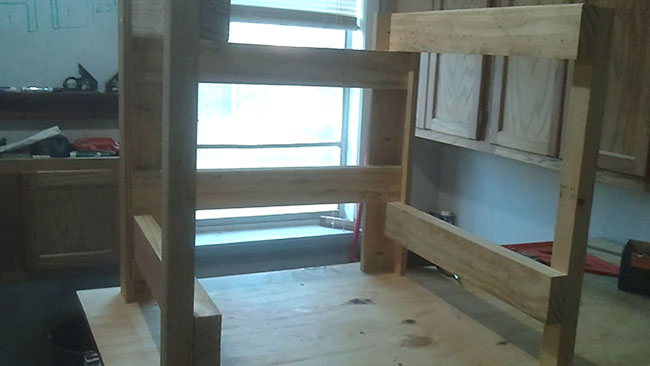
Testing out how easy it is to remove the can. It was a little cumbersome at first but after adding handles it is super easy to remove the can.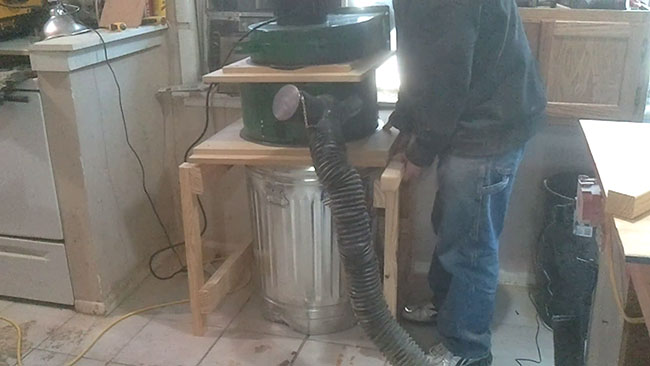
Because I purchased the unit with the intentions of building this setup I had a lot of extra parts that I will never use.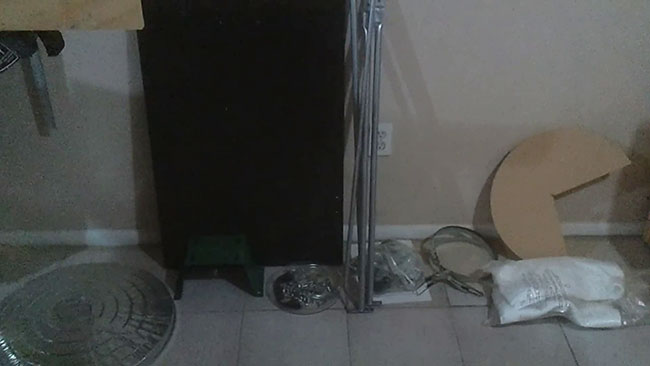
This is a budget conscious project. I didn’t want to spend a lot on a relay or remote system so I went with just running a corded switch. I wont get too much into this. I ended up removing the switch I made in video 5 and replaced it with two switches that I will show later.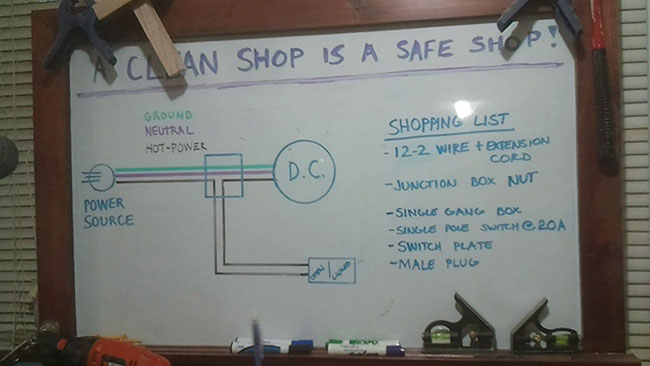
The original idea. Using 12-2 extension cord to make a corded remote switch. I changed this to 2 dedicated 12-2 hardwire corded remote switches.
With the unit done I started on plumbing the shop. First thing was to come up with some blast gates. I ended up making them with half of a coupling on one side and a piece of pipe on the other. This gave me a male and female end for the blast gate which will allow me to place it into any junction with a connection for running pipe on the other end. The wood is 1/4” ply sized at 6×6 with a 4-1/2” gate. Super simple, super easy, they work great. This picture shows each piece before assembly. I glued the appropriate pipe piece to the center of each piece of ply. Drilled a hole in the middle after the glue cured and used a flush trim bit in my router table to clean up the inside.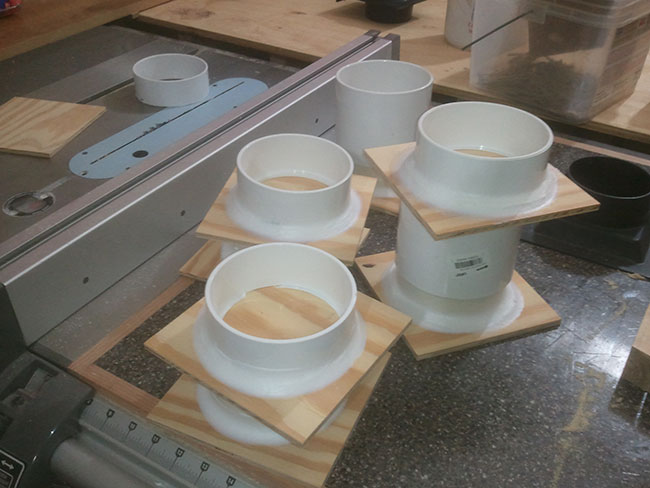
This is what it looks like today. I’ll start the piping tour here.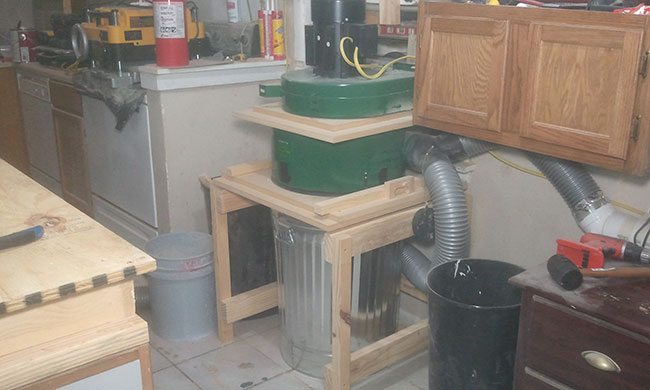
I rotated both the base and ring this time so that the Y fitting is close to the wall. Lets start with the top side of the Y.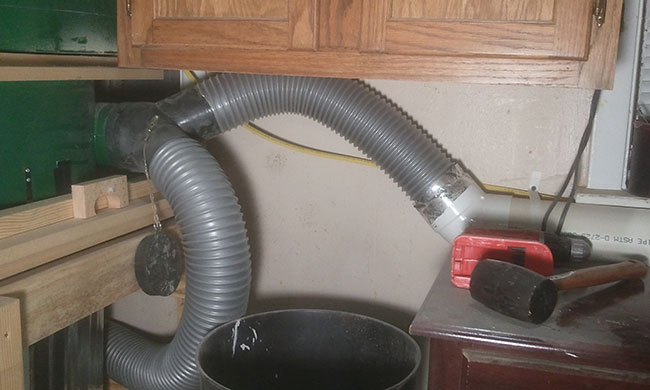
I have the pipe running right below the window sill going into the corner. My original plan was to have 2 45 degree fittings to make a gradual turn around the corner. I decided to go with another Y and 45. This allowed me to add a pipe and blast gate going to the floor. The pipe going to the right goes to the new miter saw station.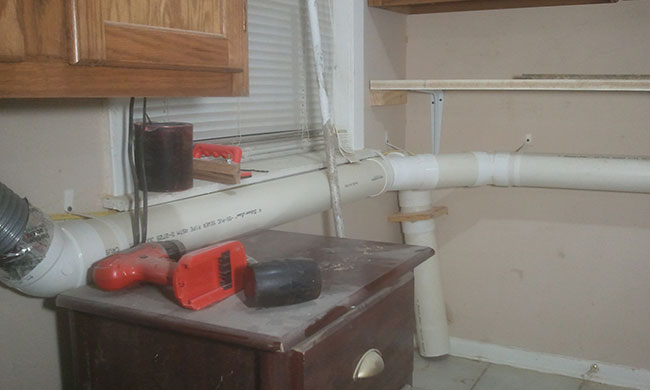
I am SOOOOO glad I added this. Just sweep the floor into the corner and watch the magic happen :) Here is also a good look at the completed blast gates. They work great.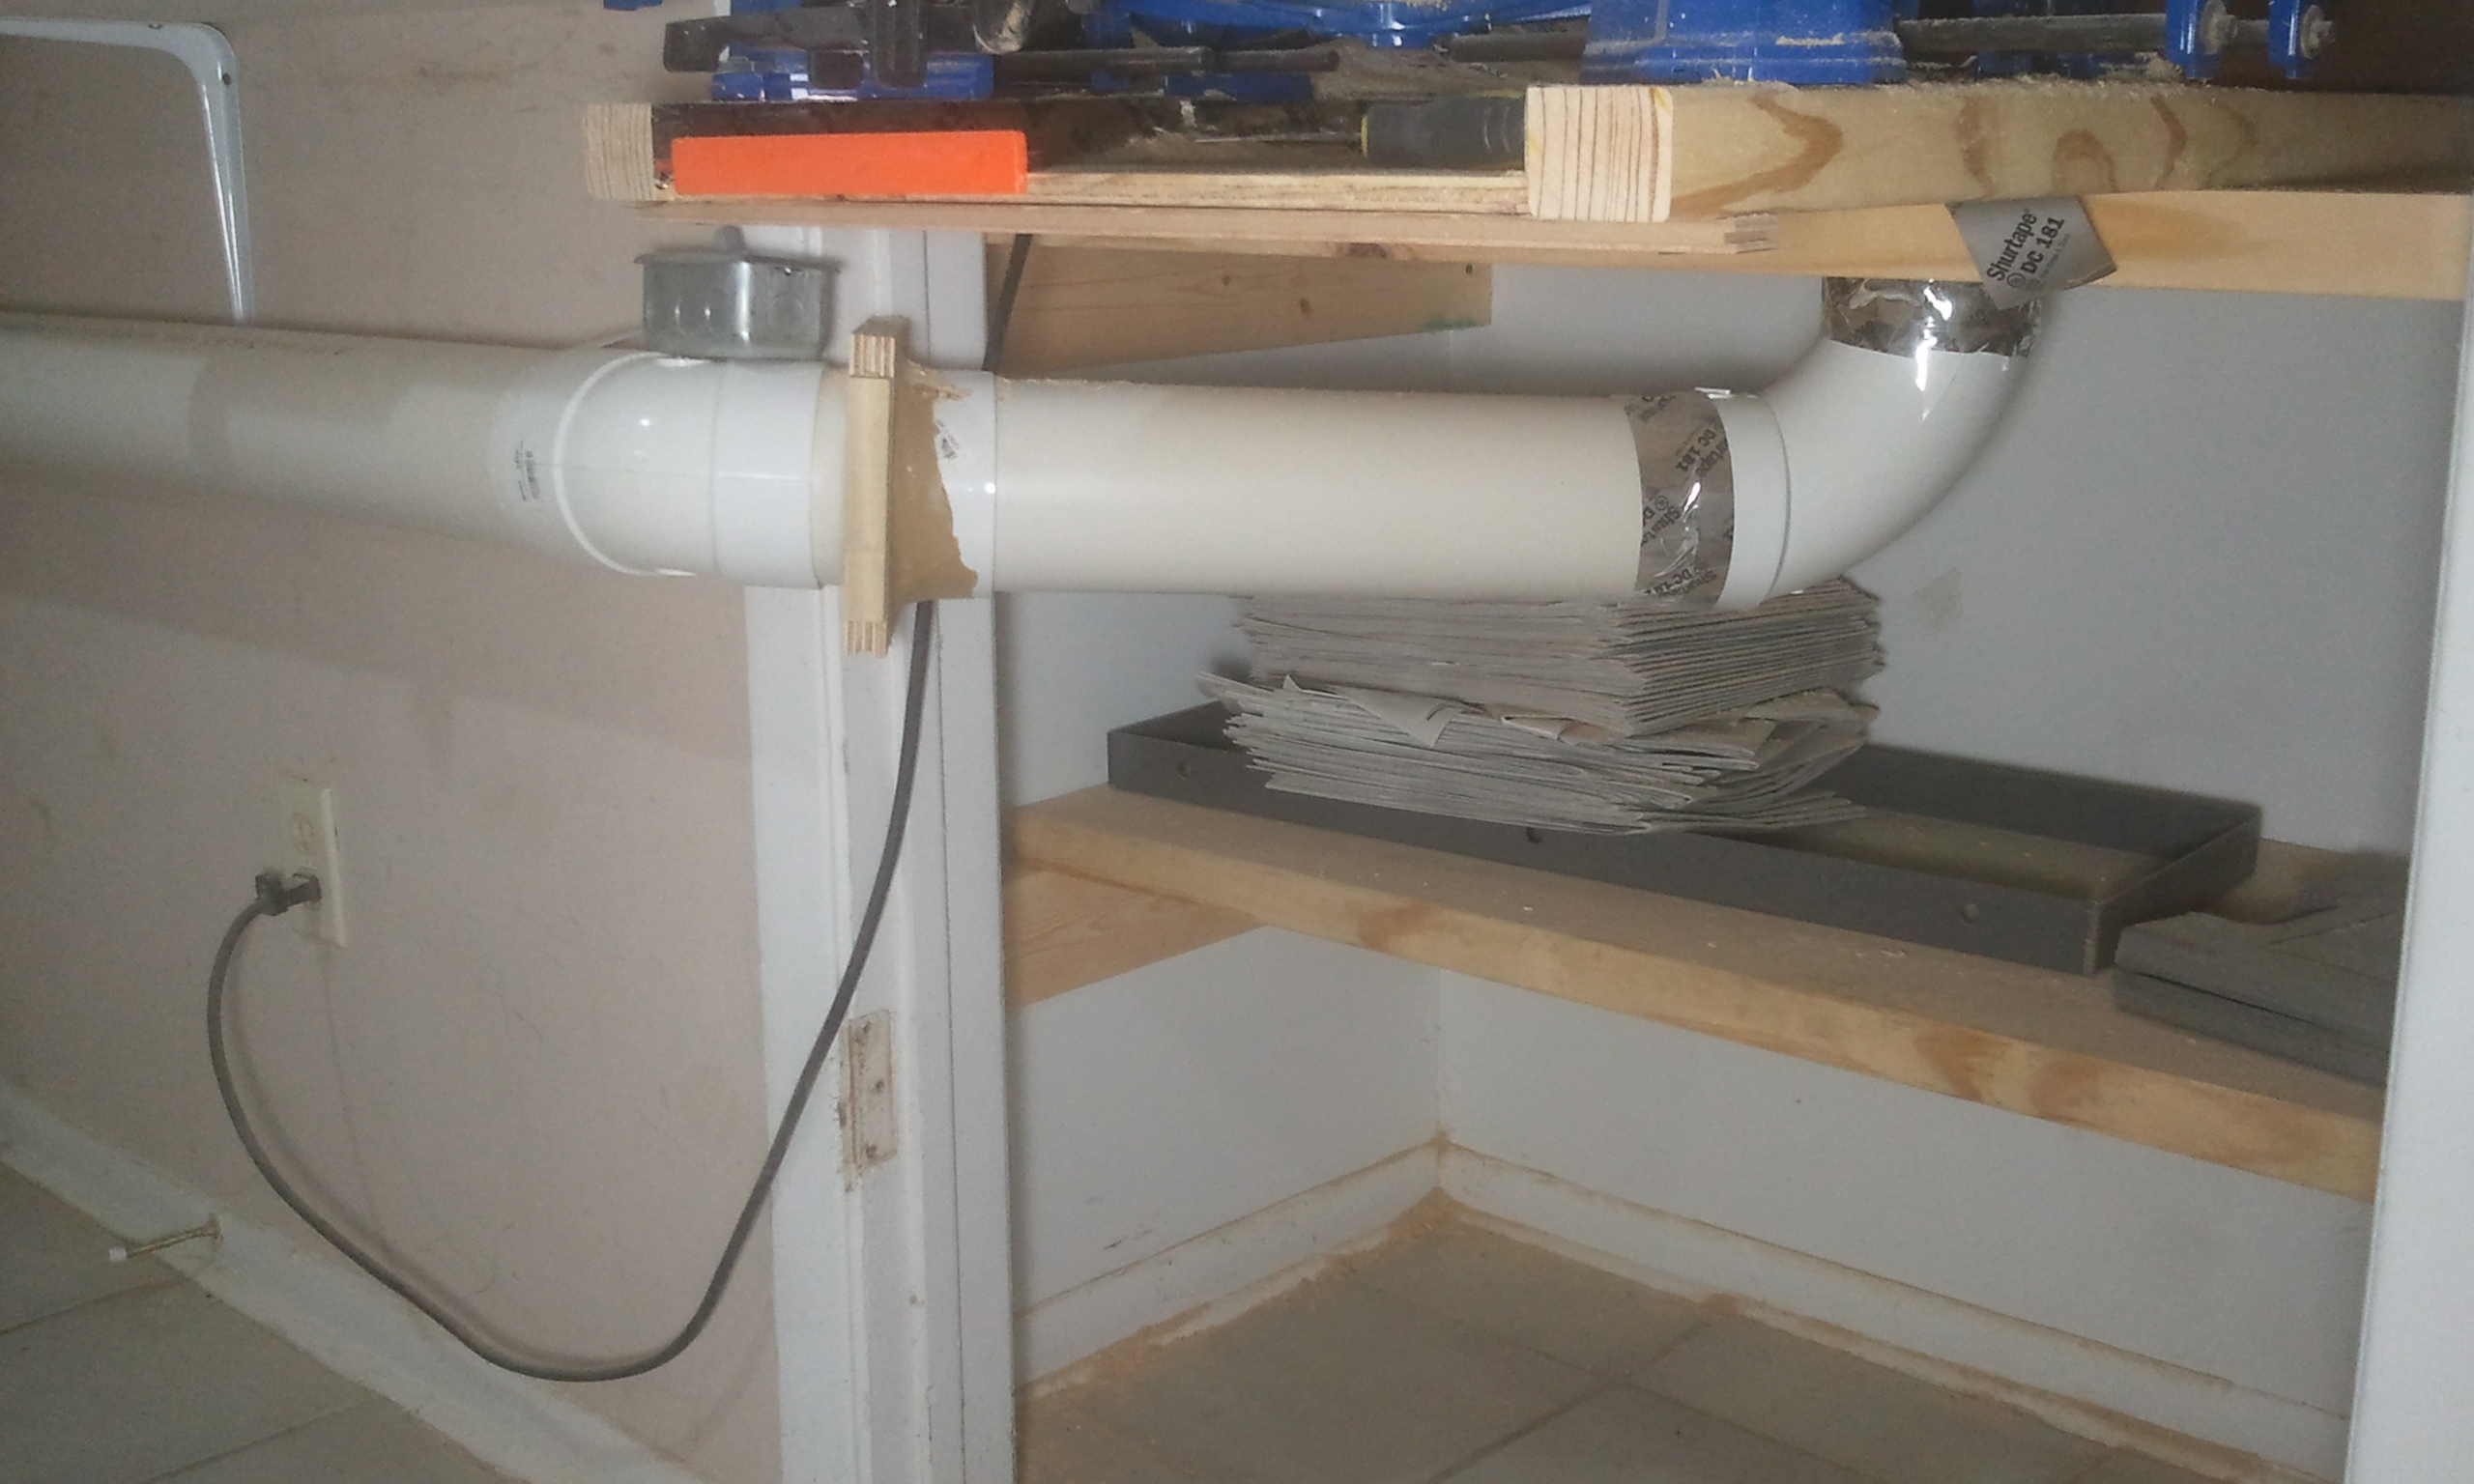 From the corner we come into a 45 fitting, blast gate, and then back to a cardboard enclosure that collects the miter saw dust. It works great as well.
 Heres a good shot of the miter saw blast gate and where the first wired remote switch is located.
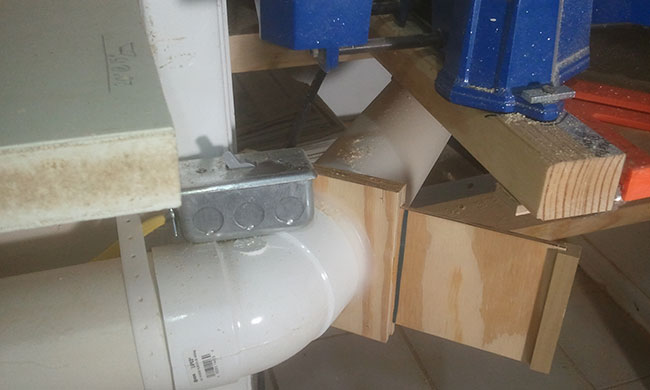
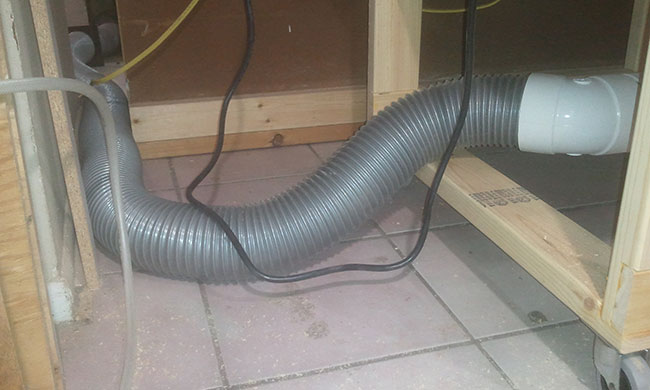
Back at the DC we can follow the bottom side of the initial Y. The hose runs behind the can. I didn’t have a long enough piece of hose for a single run so I used a HF blast gate as a coupling for the two hoses. I can easily remove the first hose and place it on my DW735 planer that is sitting above. After the blast gate it goes behind my workbench to the table saw.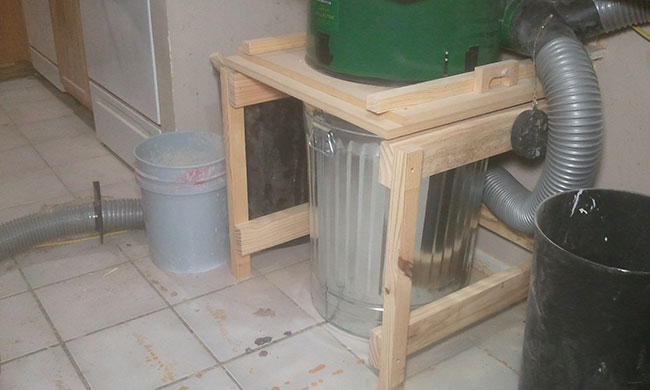
Coming around the work bench and connecting to a 45 to my table saw station.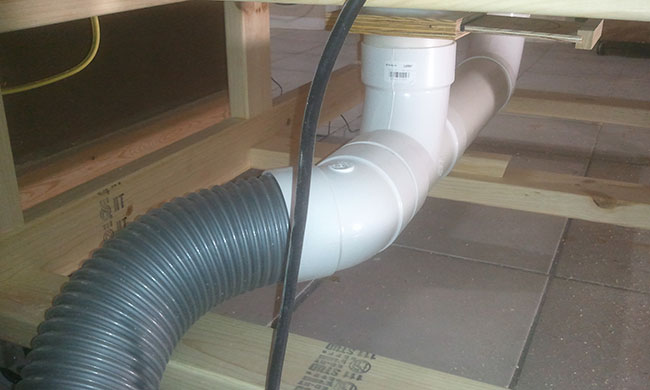
Here is the lower part of my table saw station. A blast gate for the table saw and one for the future router upgrade. I am thrilled with this setup :)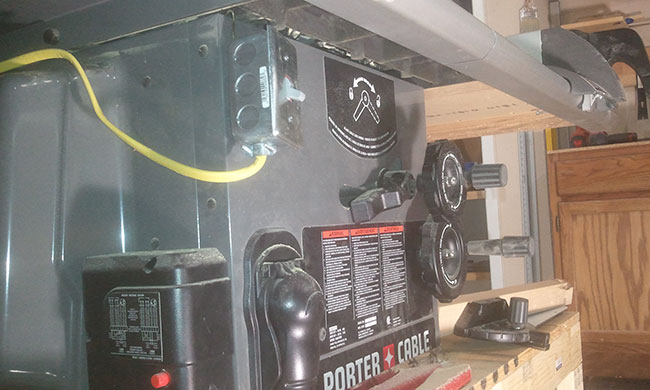
Here is the second corded remote switch for the DC. They are wired direct, not via a 3 way switch. I left about 4’ of slack with this run of the wire so I will have enough when I pull the saw back for longer cuts.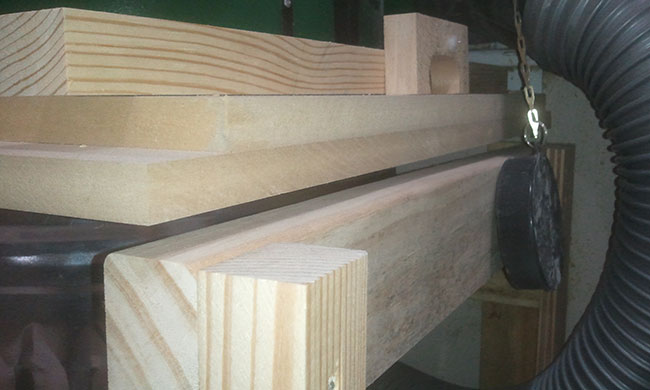
Back at the DC we can see the added handles as well as the gap between the MDF and base. Simply lift the assembly up about a half inch and slide the pine spacer in to support it. One on each side.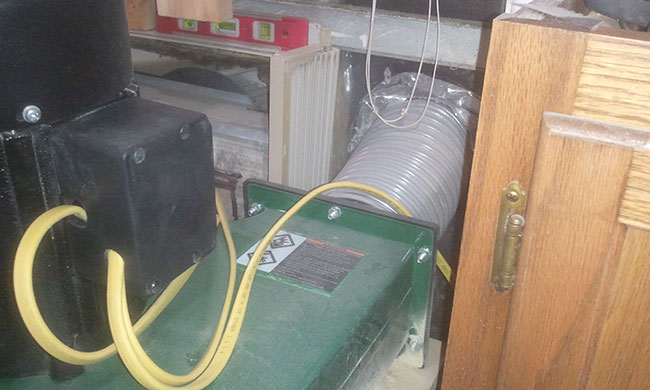
And here is the exhaust hose. I cut a hole in my Plexiglas window filler. Its not perfect. Nothing a little HVAC tape cant handle.


You need to run a piece of bare copper wire through that pvc dust collection pipe.
Just let it lay on the bottom of the pipe. But put it through every bit of the pipe. Then ground the ends of it.
The reason being, sawdust running through that pipe builds up static electricity. And suspended fine sawdust makes a fine explosive! There HAVE been explosions and fires caused by shops running pvc for dust collection and not putting the grounded copper wire in there.
I’m glad to see that you put the handles on your spacers, I was going to suggest that you put some simple drawer pulls on them as handles, but you found your own solution.
A simple 2 dollar plastic clothesline pulley screwed to the ceiling, with a piece of clothesline run through it, would make a fine lift system to pick the collector up while you place/remove the spacers.
Yes it can create static. But all the research concludes that it is not dangerous in a home shop. Uncomfortable maybe, but not dangerous.
http://home.comcast.net/~rodec/woodworking/articles/DC_myths.html
More great and helpful stuff here Jay!
Yep that’s true (static) and FWW did a similar article about this non-hazard, but I do find the static does charge up on the outside of the flex duct and perhaps the dust bin if it’s plastic, which makes for a PIA with all the clingy dust. If we use quality flex duct, w/ the metal coil wire, I’ve read that all we have to do to control the built up static is to expose enough of it at the DC end in order to connect a bonding wire between the flex and an exposed metal part on the DC itself. I bet a metal clamp ring would do the trick too.
I just built a very similar setup, but I used a Jet clamp-on bag (kinda spendy) inside a sealed bin box in order to overcome the rig lifting exercise — this was a combination of the ideas shown in an old ShopNotes article and that online spread w/ the blue barrel, which I suspect you may have seen.
The extra HF mobile base parts I did build out so that my unit is mobile. That’s because I work outside (hey, we’ve got awesome weather here in the SF Bay Area :-) ), and that means for the time being I am just direct-venting the unit. Another mod I put in place was to make the Thien into a “top hat” version by inserting an 11″ length of 18″ Sonotube between the baffle and the HF inlet ring. After watching some online videos of these things in action, I guess-timated an angle for the debris swirl inside the top hat, and therefore the placement of the solid part of the baffle.
Who knows if I got the placement correct, but I did notice that on my first test, where I sucked up the contents of my swirly-top Fein Vac separator, there was a pretty short, initial puff of noticeable superfine dust that was freely exhausted. As I used it for other routine work, where I cleaned up the accumulated dust from my RAS, I saw no exhausted dust. How did yours work out? Any noticeable superfines?
Once I built it, because I am necessarily in a mobile situation for the “super sucker” and all of my tools, and because I see no way for me as a solo operator to be making dust at 2 tools simultaneously, it dawned on me that I can save a bundle of headache and $$ on piping by keeping this a mobile system even after my shop is built; it also implies that I won’t need to soup its power or efficiency up because the duct/pipe runs will be all of about 6′ total. What are your observations on this account? Does your piped system have enough power to keep a planer clear?
After I have a sealed and permanent shop, I expect to have to add some custom, 1 micron singed polyester filter bags in order to catch the dangerous particulates. Because of that, I extended my frame higher in order to accept an exhaust manifold that will direct the exhaust and hold the filter bags. The one concerning part of this setup is that the considerable weight of the motor sits completely on the sheet metal fan housing and I can see it flexing away. What are your thoughts about that?
One final question Jay, I see you use a lot of pocket screws to put your projects together. Have you ever used a biscuit joiner to accomplish the same things? Can you compare the different systems?
Thanks a heap for what you’re doing and sharing!
— Bradley
Oh, by the way, put a garbage can, outside, under the hose that you have sticking through the window.
It’ll catch more than it won’t, and you’ll have less of a mess out there.
There isn’t a mess outside. A garbage can will catch more rain water than anything else.
i’m sure if static electricity was a real problem, you’d have felt it by now. ;)
Are you planning on modifying it in anyway? I’ve seen others that have the trashcan as a separate stage so larger pieces (or even nails and screws) won’t hit the impeller. I’m planning on getting an HF DC and doing just that.
I’ve seen some dust stick to the sides of the pipe from static but I still haven’t been shocked. There’s no need to relocate the can. The impeller is in its own housing above. Larger trash never makes it up that high. I highly recommend going with a setup like mine. Works great.
Hey Jay, I was wondering what diameter your used for groove that harbor freight rings sits in? I am getting ready to cut this groove, but i want to make sure i have it correct.
I just traced my HF ring and used a 3/8″ straight bit set to a 1/4″ depth on mine. There was some leakage so I used painter’s caulk to seal it (NO silicone!!).
Jay, thanks for the inspiration. I reconfigured my HF dust collector this weekend and it works great. I had always planned on doing something similar, but hadn’t thought of using the bag ring as the separator. I had a plastic barrel that i used on bottom. It had the same diameter as the bag ring so I could attach the baffle inside the bag ring and set the whole unit on top separated by a rope gasket. I attached casters to the bottom of the barrel and the filter bag to the output hose with a elastic cord and I now have giant shopvac that can be rolled across the shop for the occasional clean up job out of reach of my hose.
Jay, thanks posting your solution! I also want to place my HF dust collector above my trash can. Mounting yours on a frame to easily remove your container solves my problem as well! But I still have a question: Do you think it matters whether I use 3/4″ ply instead of MDF? Perhaps the grooves won’t route as cleanly on ply?
I used 3/4″ plywd scraps, and it worked great, especially after the parts got all caulked together. I didn’t have to suffer all that gnarly MDF dust. I used a trim router w/ an 1/8″ roundover bit to break the exposed edges on mine.
I am about to modify our Harbor Freight collector. I see you made both rings of the Thein baffle. Isn’t the only cutout you need the 1 1/4 slot? At least for your set up.
Yes, just one cutout for the slot. However, I used two layers for the bottom because if I cut a grove for the ring on the bottom side for the can and a grove on the top for the ring from the same single piece of MDF that wouldn’t leave much material to support the center area. Hope that makes sense.
Makes sense. Thanks. Have a new CNC table so I need to do this project to keep my garage decent. Thanks for the info.
Jay…Have you had any issues with your HF motor since it has been rotated to an upright position? Are the bearings holding up?
Thanks for your info!
Not one problem Mike. I have since moved shops and upgraded to a larger unit but this one is still working fine regardless of orientation. I’ve actually walked around outside a little bit using it as a leaf blower :)
Just got my HF dust collector over the holidays, thanks for putting this guide together as it’s definitely something I’ll be mimicking. I think the only difference for me will be the use of a wireless switch.
You’ll love it. It’s a great value. I’ actually ended up using a cheap outdoor wireless receptacle from Lowes that was $10. Works great.
Great post Jay, I was looking to pick one of the little HF collectors up and mount it to the wall in my shop. Any idea how the collector would work in a similar arrangement without the Thein Baffle setup? I expect I generate a lot less debris than you do so I presume I’d just be empyting a bag more often vs a trash can with no appreciable loss of performance. Thanks!
Hi Jay. I’ve watched your build several times now and really got some good ideas from it and others. I’m going to be mimicking your design with a slightly different build – I’m going to build a Thein Top Hat Separator with the motor and blower slightly above w/ flex hose. My idea is to build (2) cams w/ handles to lift the top hat about 1-1/2″ to remove the can. The impeller outlet will be in line next to the filter ring w/ a Wynn 35A conversion and about 1/4 – 1/2 the bag length to save space (extra small workshop).
Any recommendations? Thanks, Brian
I would try to open up the inlet of the impeller housing for more air flow. See the dust collector setup by Steve in one of the videos here: https://jayscustomcreations.com/2015/01/interesting-stuff-from-around-the-web-64-january-24-2015/
Jay, As others have said, thanks! My HF DC was delivered today. I intend to build as you did. But, my preferred location will require me to have a 20′ exhaust duct. Do you see any problems with that?
Make the exhaust duct as large as you can. Remember that the machine has to PULL the air into the blower and as long as your pipe is for the exhaust it has to PUSH that air as well.
Great post. I too have a HF DC. Do you have the host connecting to the *inside* of the PVC pipes? I searched Home Depot, Lowes, and two specialized pipe stores and I couldn’t find one that sold PVC with an outer diameter of 4″.
host = hose….sorry about that?
I use 4″ DWV PVC pipe. You need an adapter or make your own adapter to go from hose to pipe. I normally push the hose inside a DWV fitting such as a coupling or a Y piece.
That makes sense. I tried to follow your tutorial on making your own blast gates and gave up on PVC pipe because I couldn’t get it to fit on the outside. I ended up using dryer vents to do it–much more flimsy but they fit fairly well. (I guess I wasn’t ‘thinking outside the pipe’ on this one :))
I use 4″ DWV PVC pipe. You need an adapter or make your own adapter to go from hose to pipe. I normally push the hose inside a DWV fitting such as a coupling or a Y piece.
Hey I have been looking into doing something like this. I am currently using a very week shop smith 3300 with a 30gallon presorting can. How well would the harbor freight dust collector work just using the motor only with a presorting can to catch the chips and just running the exit hose outside for the fine dust? So not using the baffle at all. any input is greatly appreciated
It should work quite well. Exhausting outside is a great benefit for air flow as there is no filter or bag on the exhaust side to restrict air flow.
What is the sound like on the outside? Where it exhausts? I’m concerned about neighbors complaining …
Jay,
This design is great! I am modifying it a bit by mounting the motor/blower to the wall and attaching a flexible hose to the cylcone unit directly below (chip separator and 2-3/4 MDF pieces clamped together with 2×4’s and screws, as I don’t have the motor weight working for me), and using the weight of the cyclone (and suction) to couple the trash can, silicone gasket, and cyclone. This is working pretty well, especially after sealing a number of holes I found in the body of the separator.
The problem I have, which seems like it should be simple to solve, is that I can’t make a number of parts fit together.
For example, fitting the HF “Y” piece into the inlet of the separator ring. They seem to be the exact same size. How did you make that work? I tried using a piece of the 5″ exhaust hose, and can’t get it to slip over the Y, even with bike tire levers.
Thanks!