
My Name is Chris, I’m a degreed mechanical engineer and a hobby woodworker. I’m originally from Pennsylvania (USA), but move around frequently due to my job as an Army Infantry Officer. I post woodworking and shop videos on my YouTube channel, share my work on Instagram and maintain a Woodworking Blog and Website. I have been creating and working with wood and other materials my entire memorable life. My father retired as a Shop teacher and Carpenter and taught my siblings and I basic construction and woodworking skills. I have many fond memories apprenticing under him in his shop over the past 30 years. I consider myself an intermediate and mostly power-tool woodworker and cabinetmaker. I have a passion for leading and teaching others. I have a great deal more to learn about fine wood working, joinery and more refined hand tool skills. I have been slowly piecing my own shop together over the last 10-12 years keeping it mobile and mover-friendly along the way.
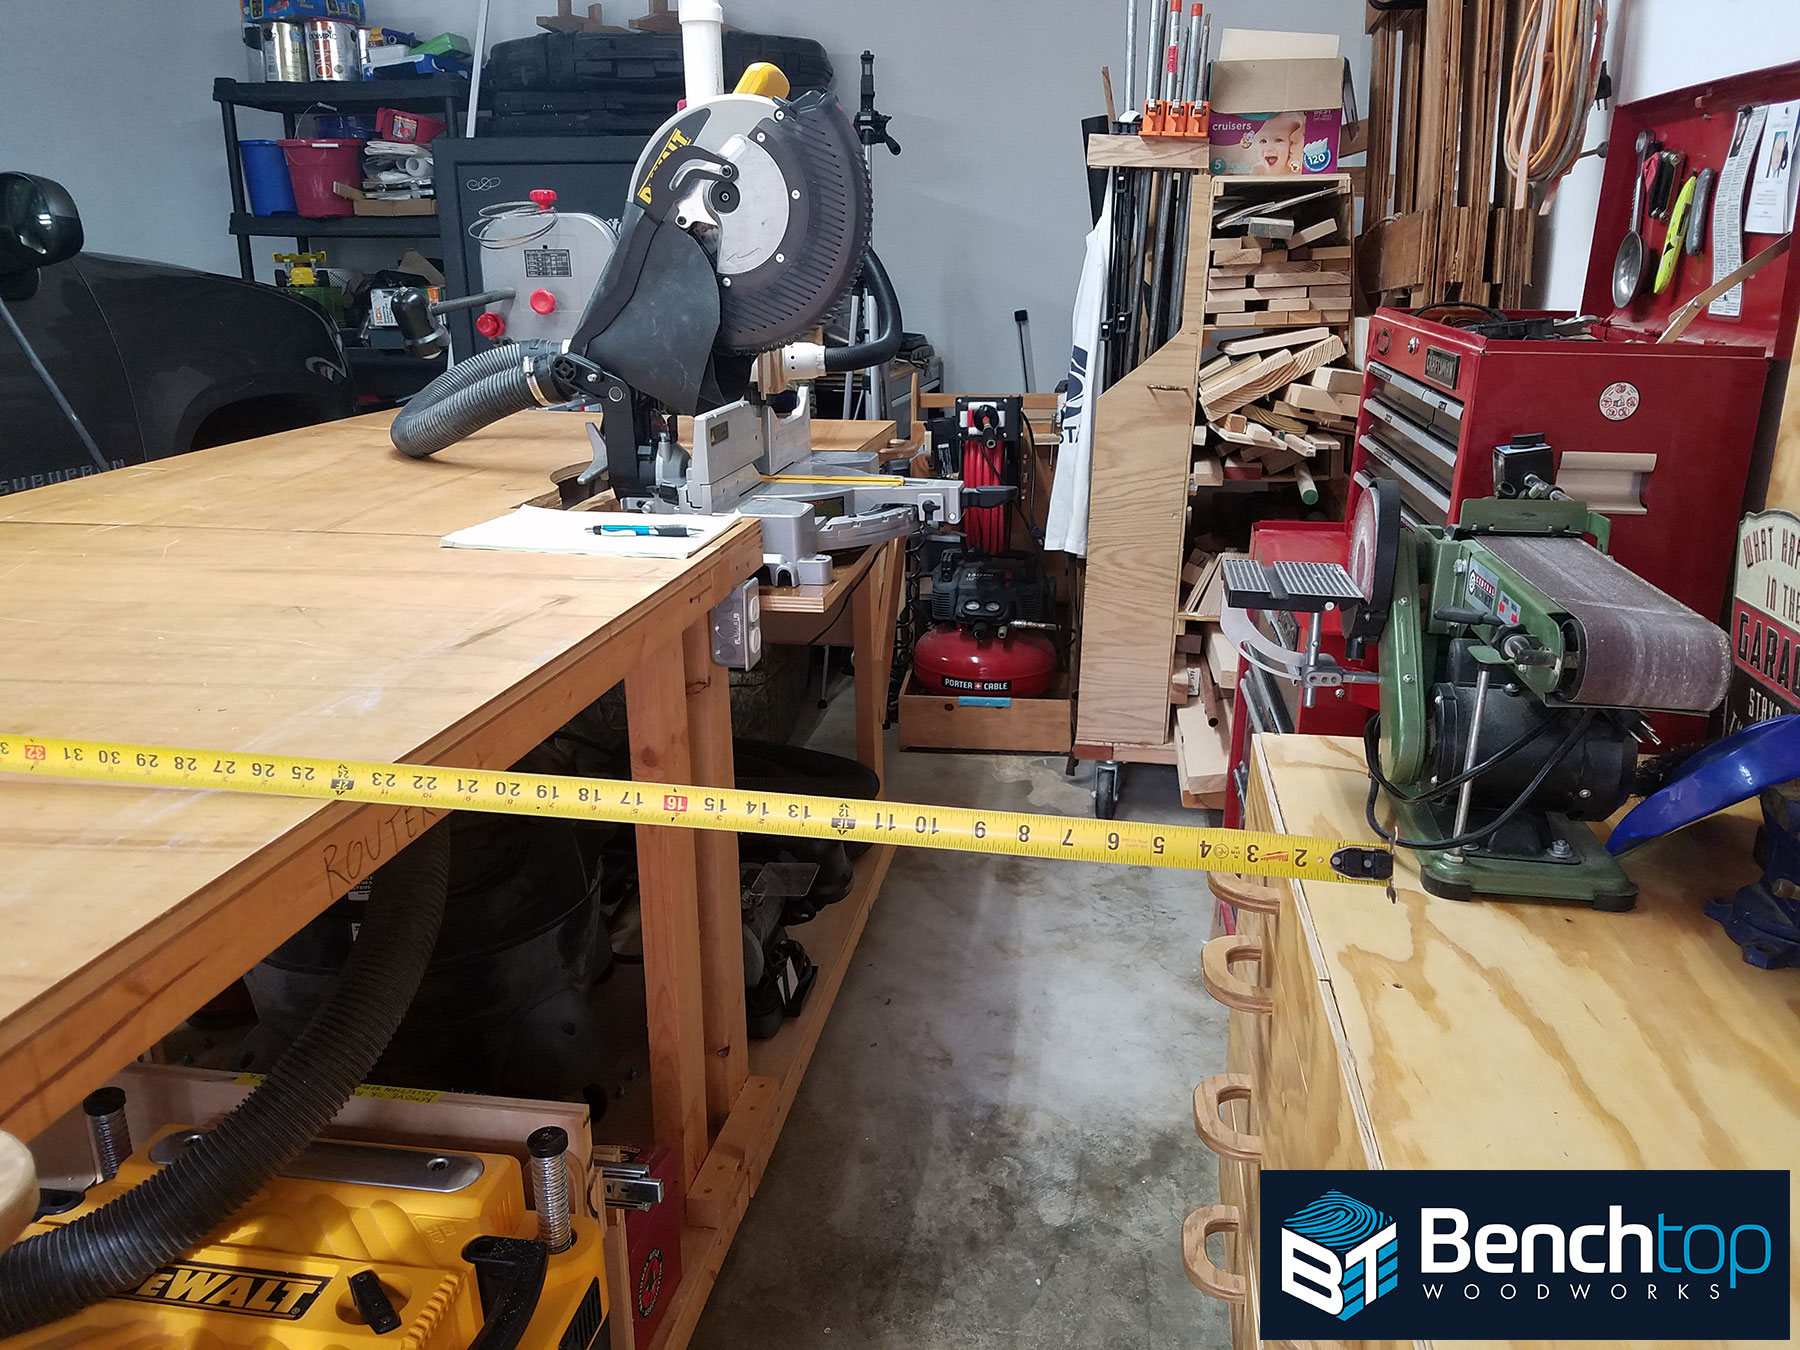
This (photo 1) is an overview of my current shop space. In total, all of my tools, storage, and indoor work area occupies half of a two car garage; the space is 21’ x 9’. My shop is centered around a central assembly table island that is 40”x 96” with machines integrated into the perimeter of the table. I have a full walkway/work area that varies from 18-40” on all sides of the bench when in the garage.
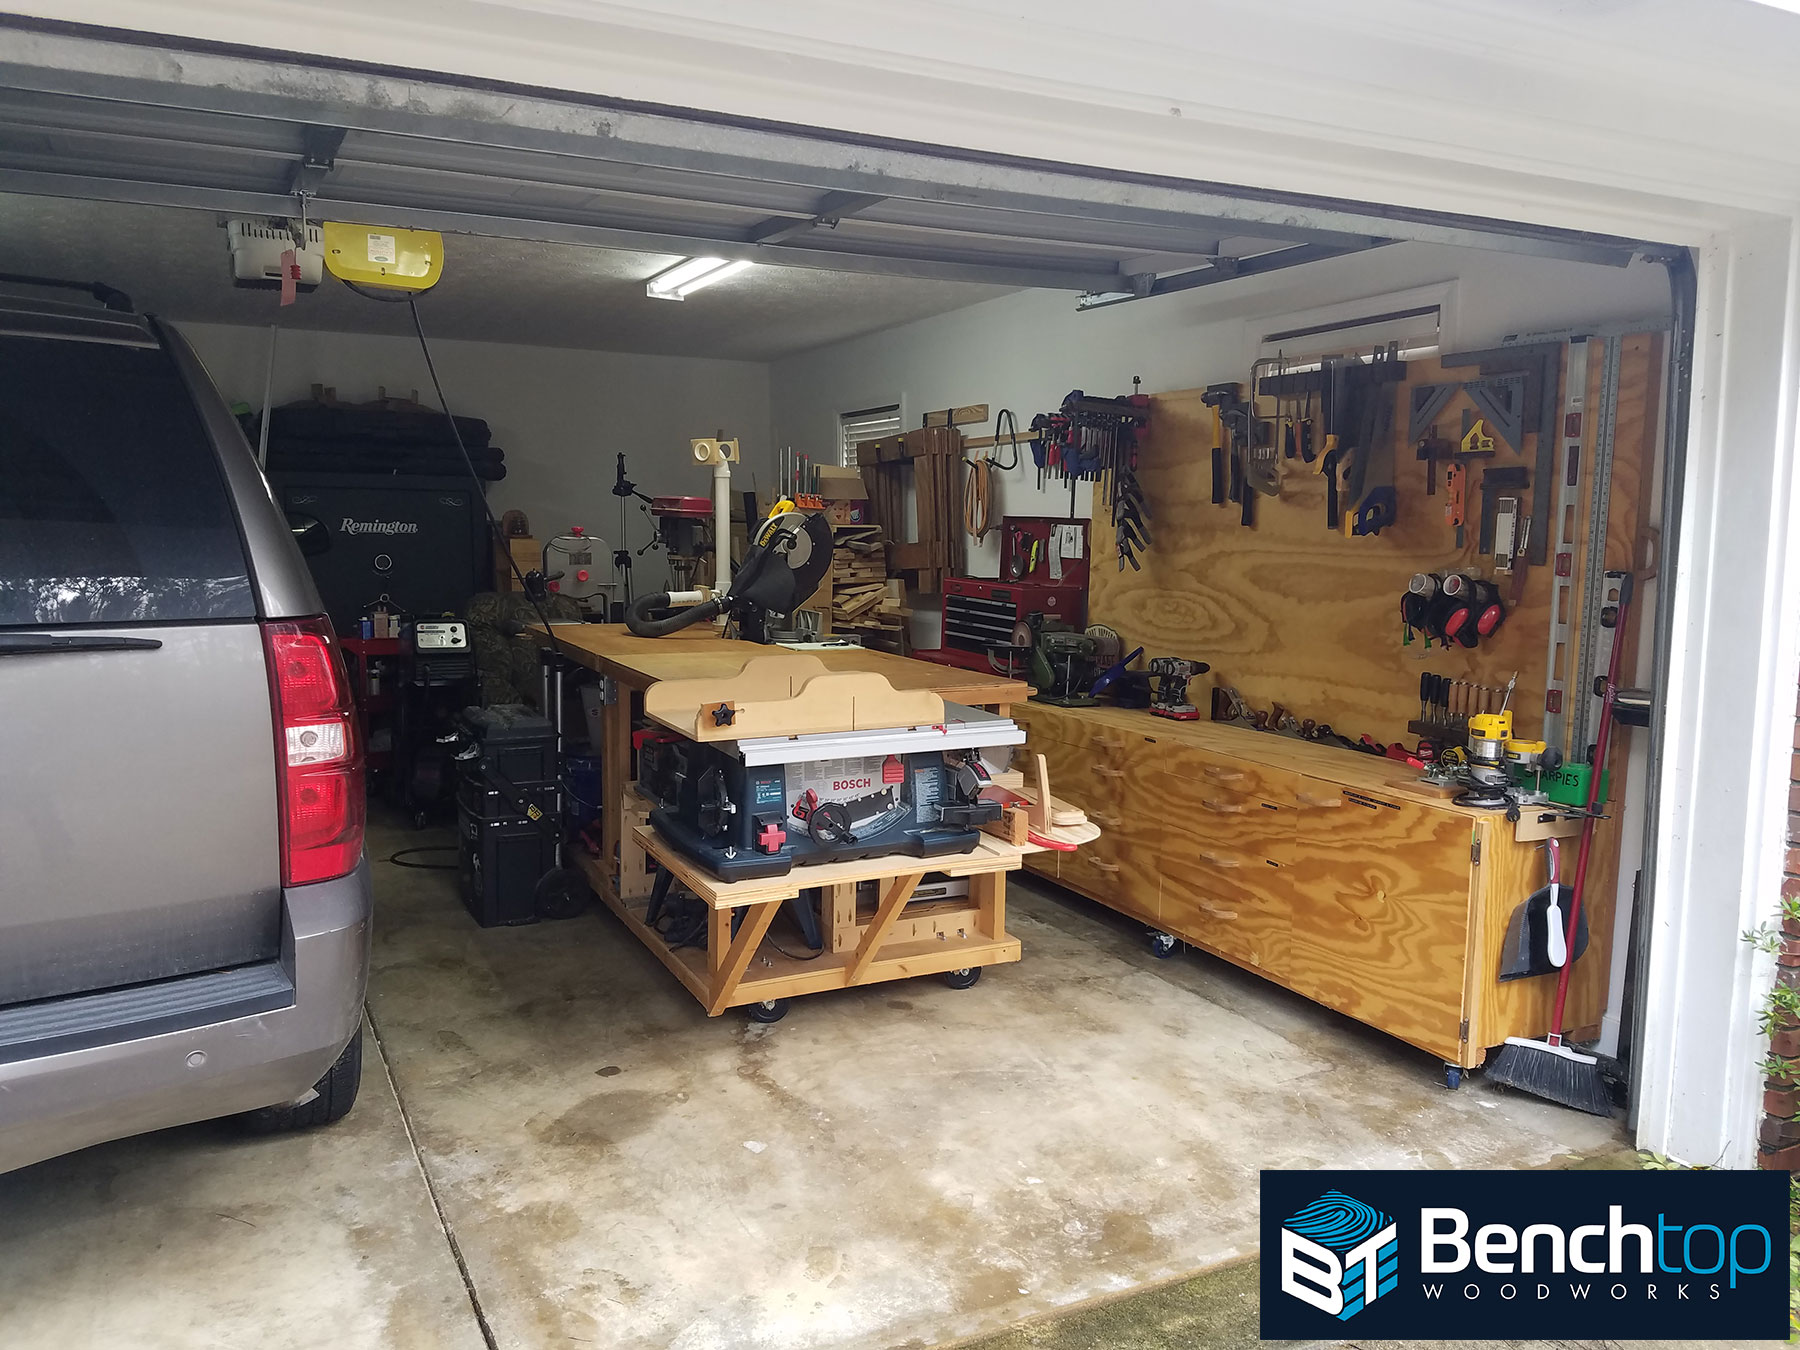
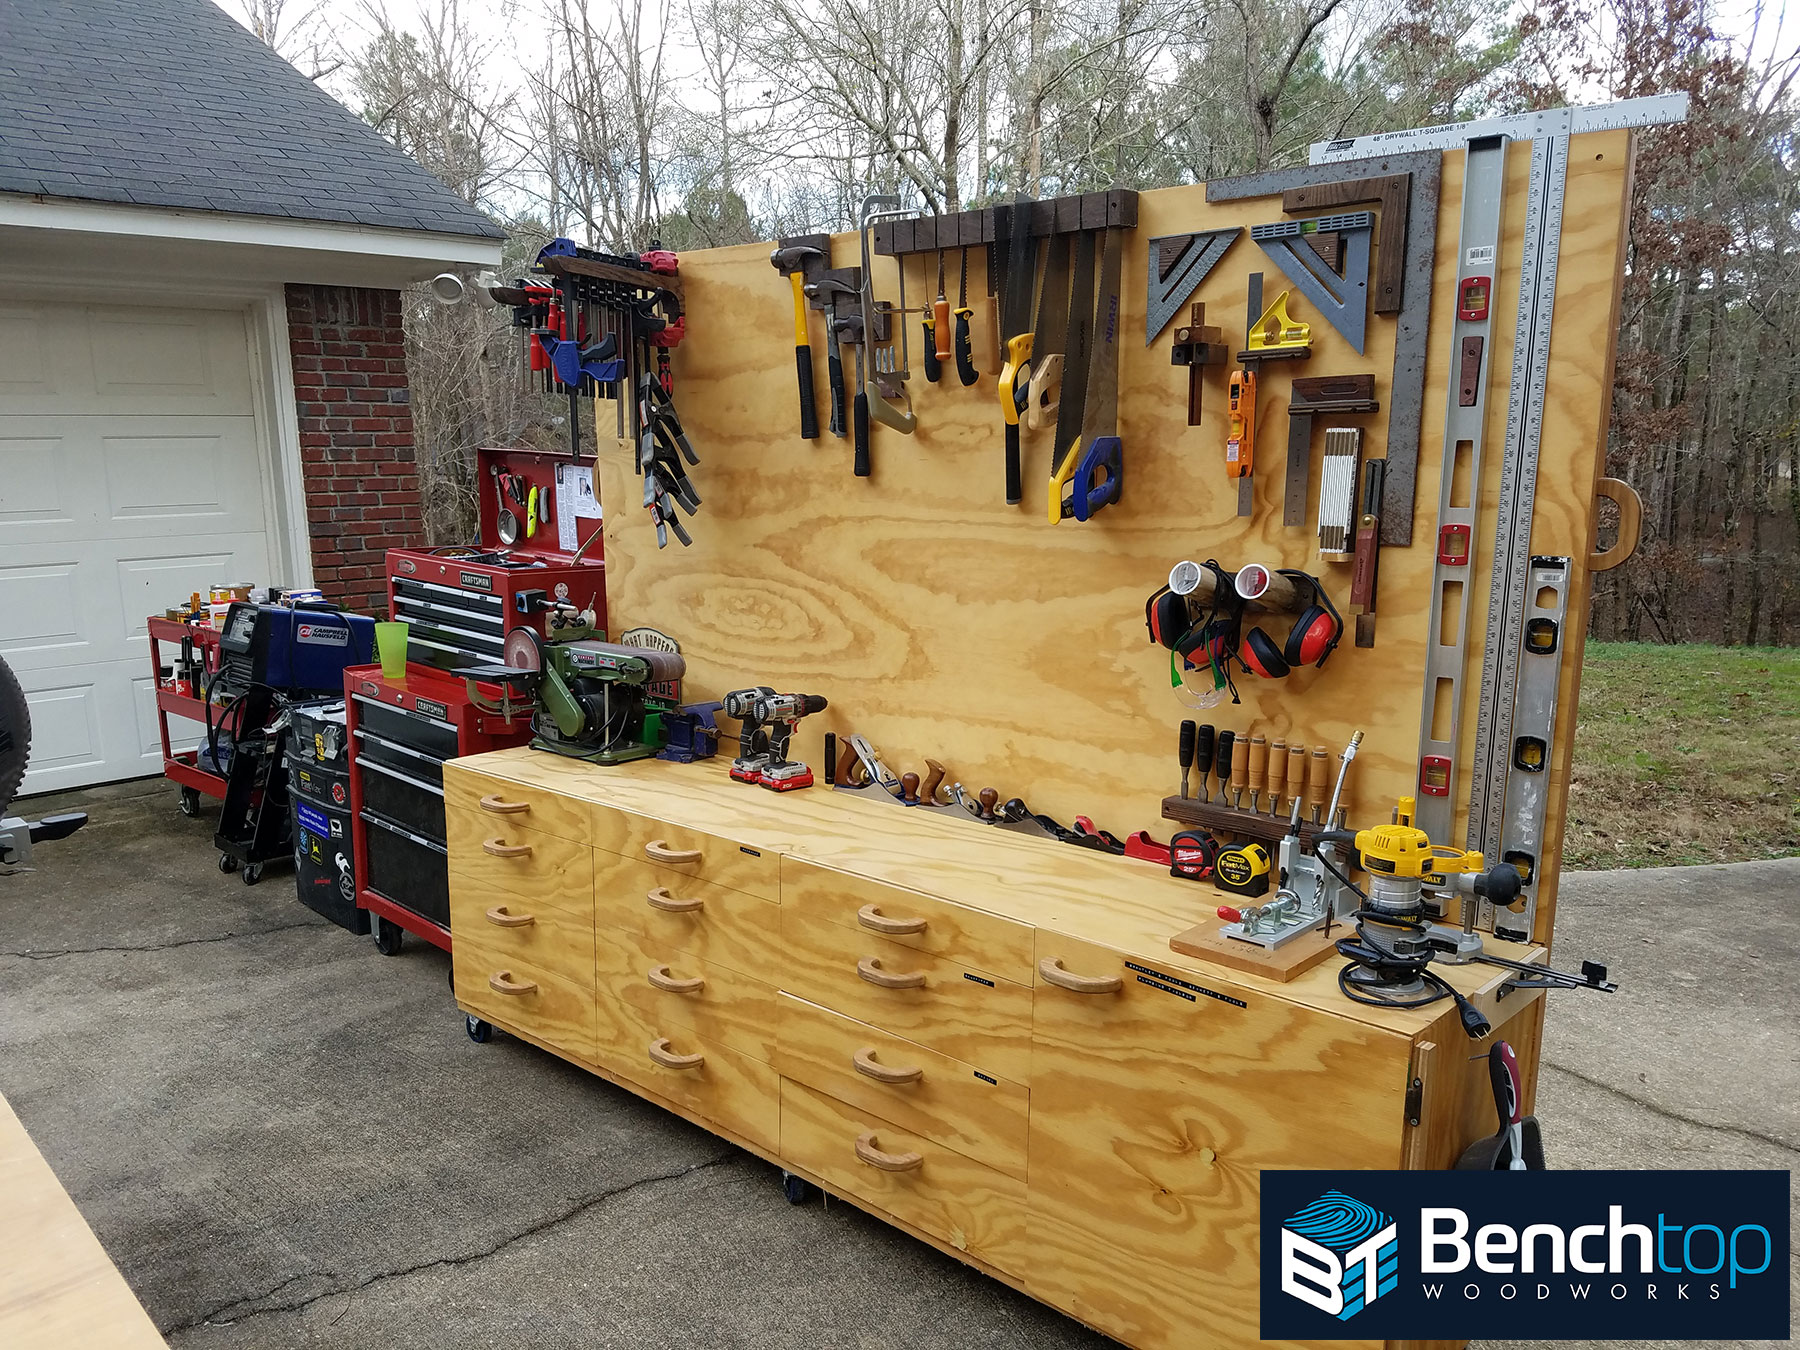
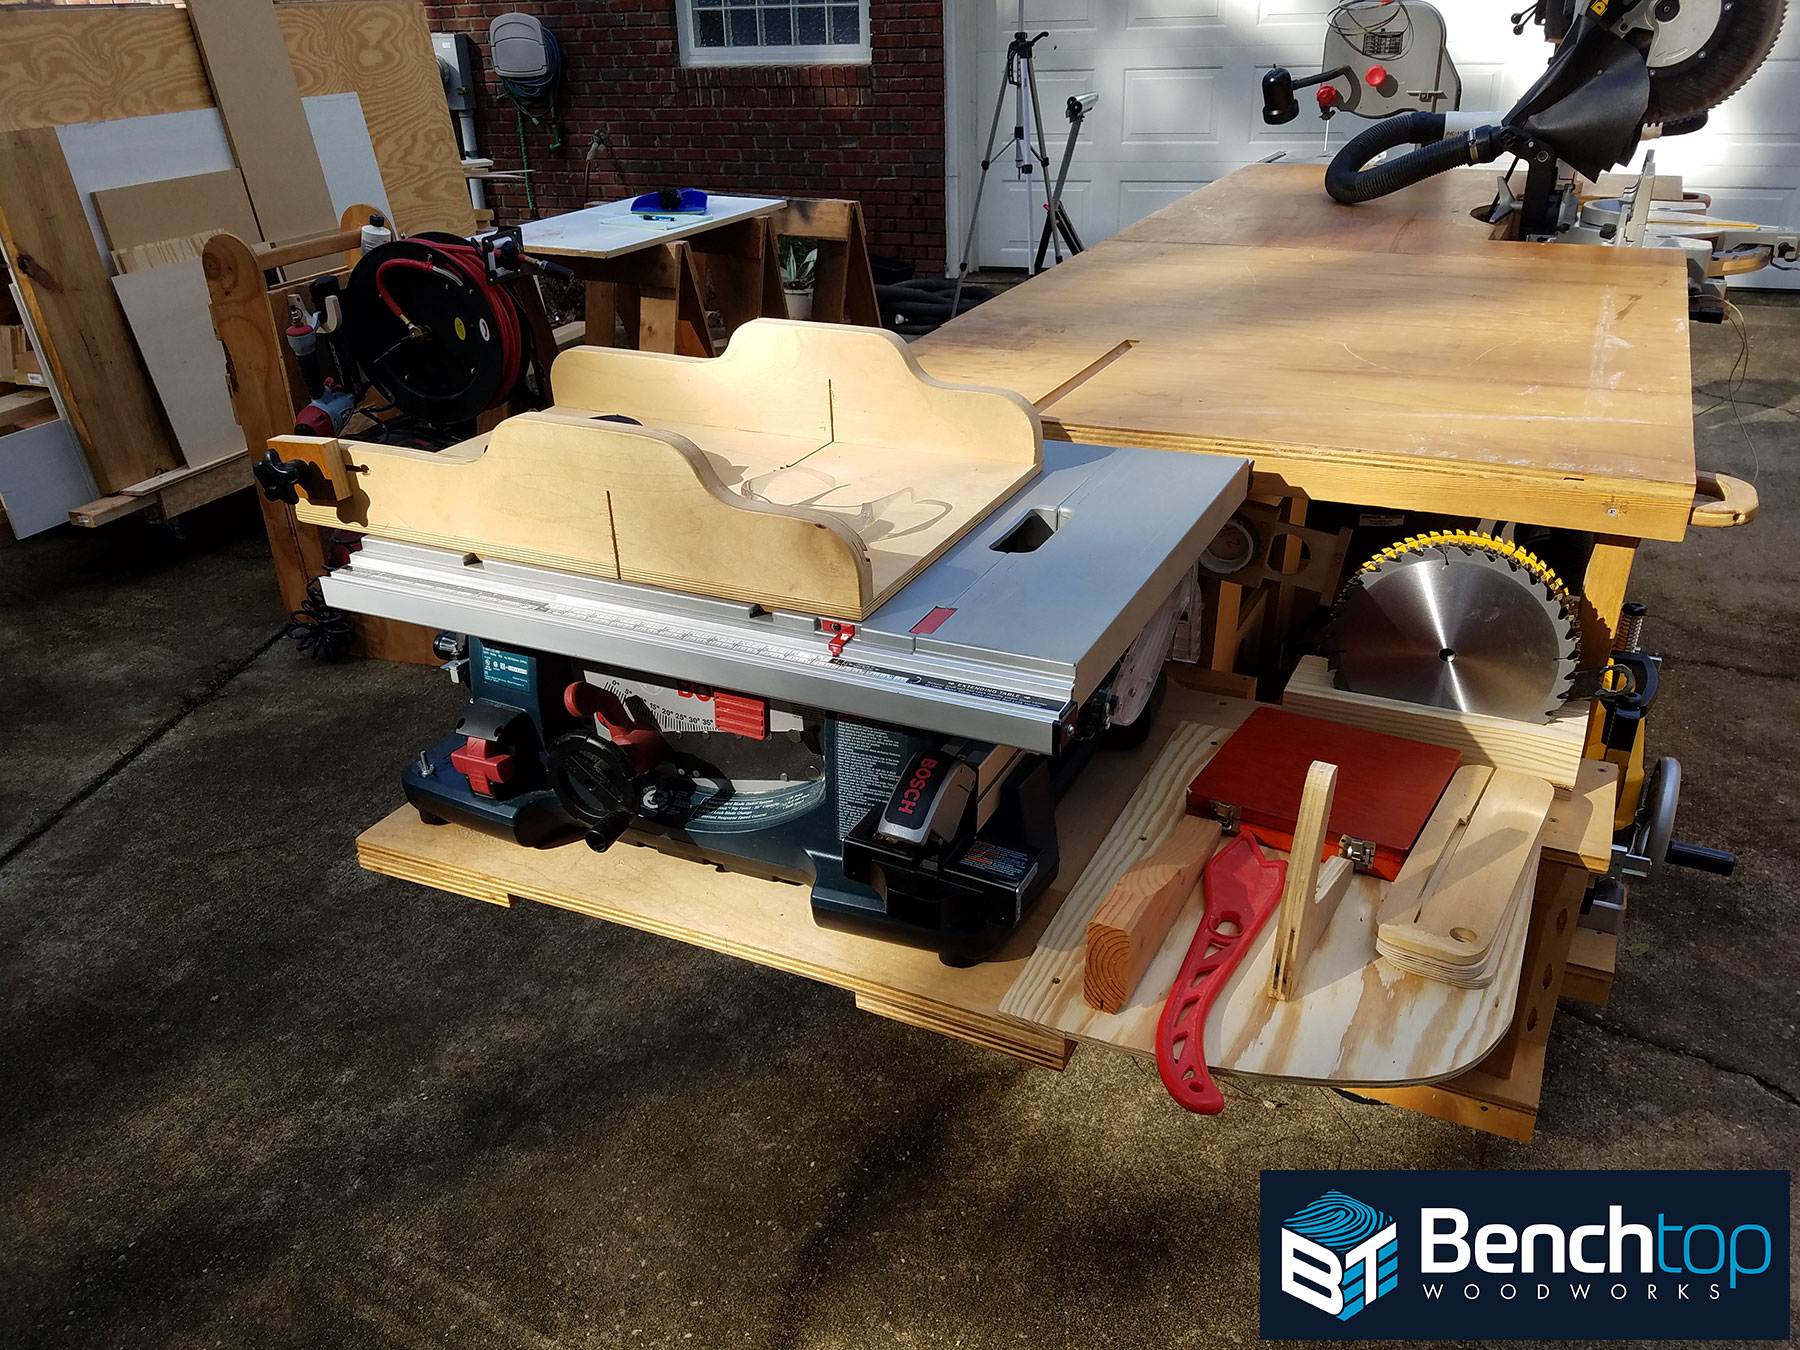
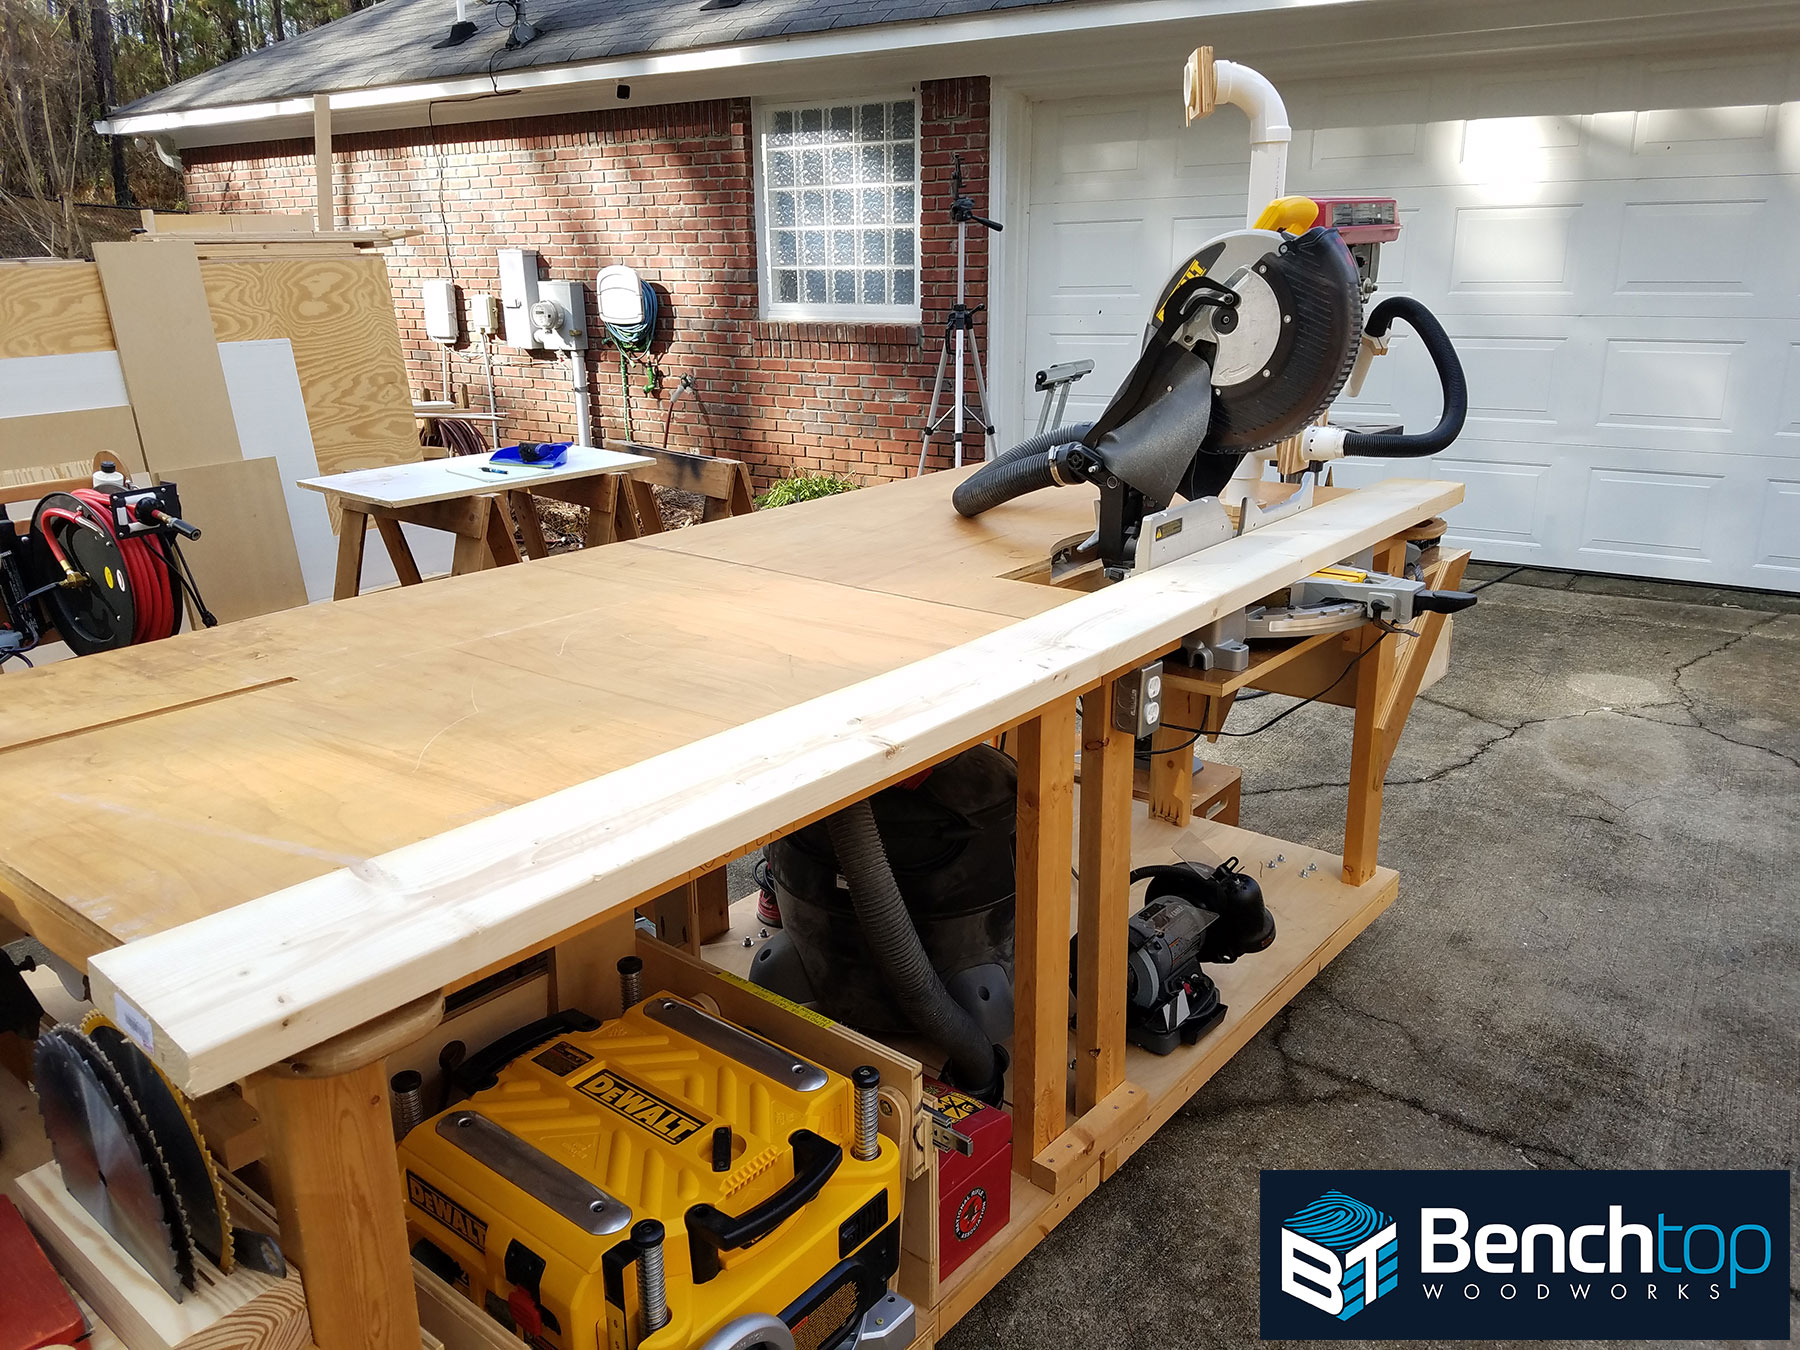
In this photo (2) you can see the way I prefer to work when the weather cooperates, outdoors! You can also get a better understanding of my overall layout. All of my machines have parallel runs and shared out-feed in order to optimize work flow in the smallest possible space. I’ve been building this current arrangement since Fall 2015. My goals for this layout are to keep the shop as ready to work as possible. Each machine can be accessed and set-up almost immediately with minimal interferences similar to a larger shop with dedicated work-spaces. Each machine is energized and dust-collection is at the ready.
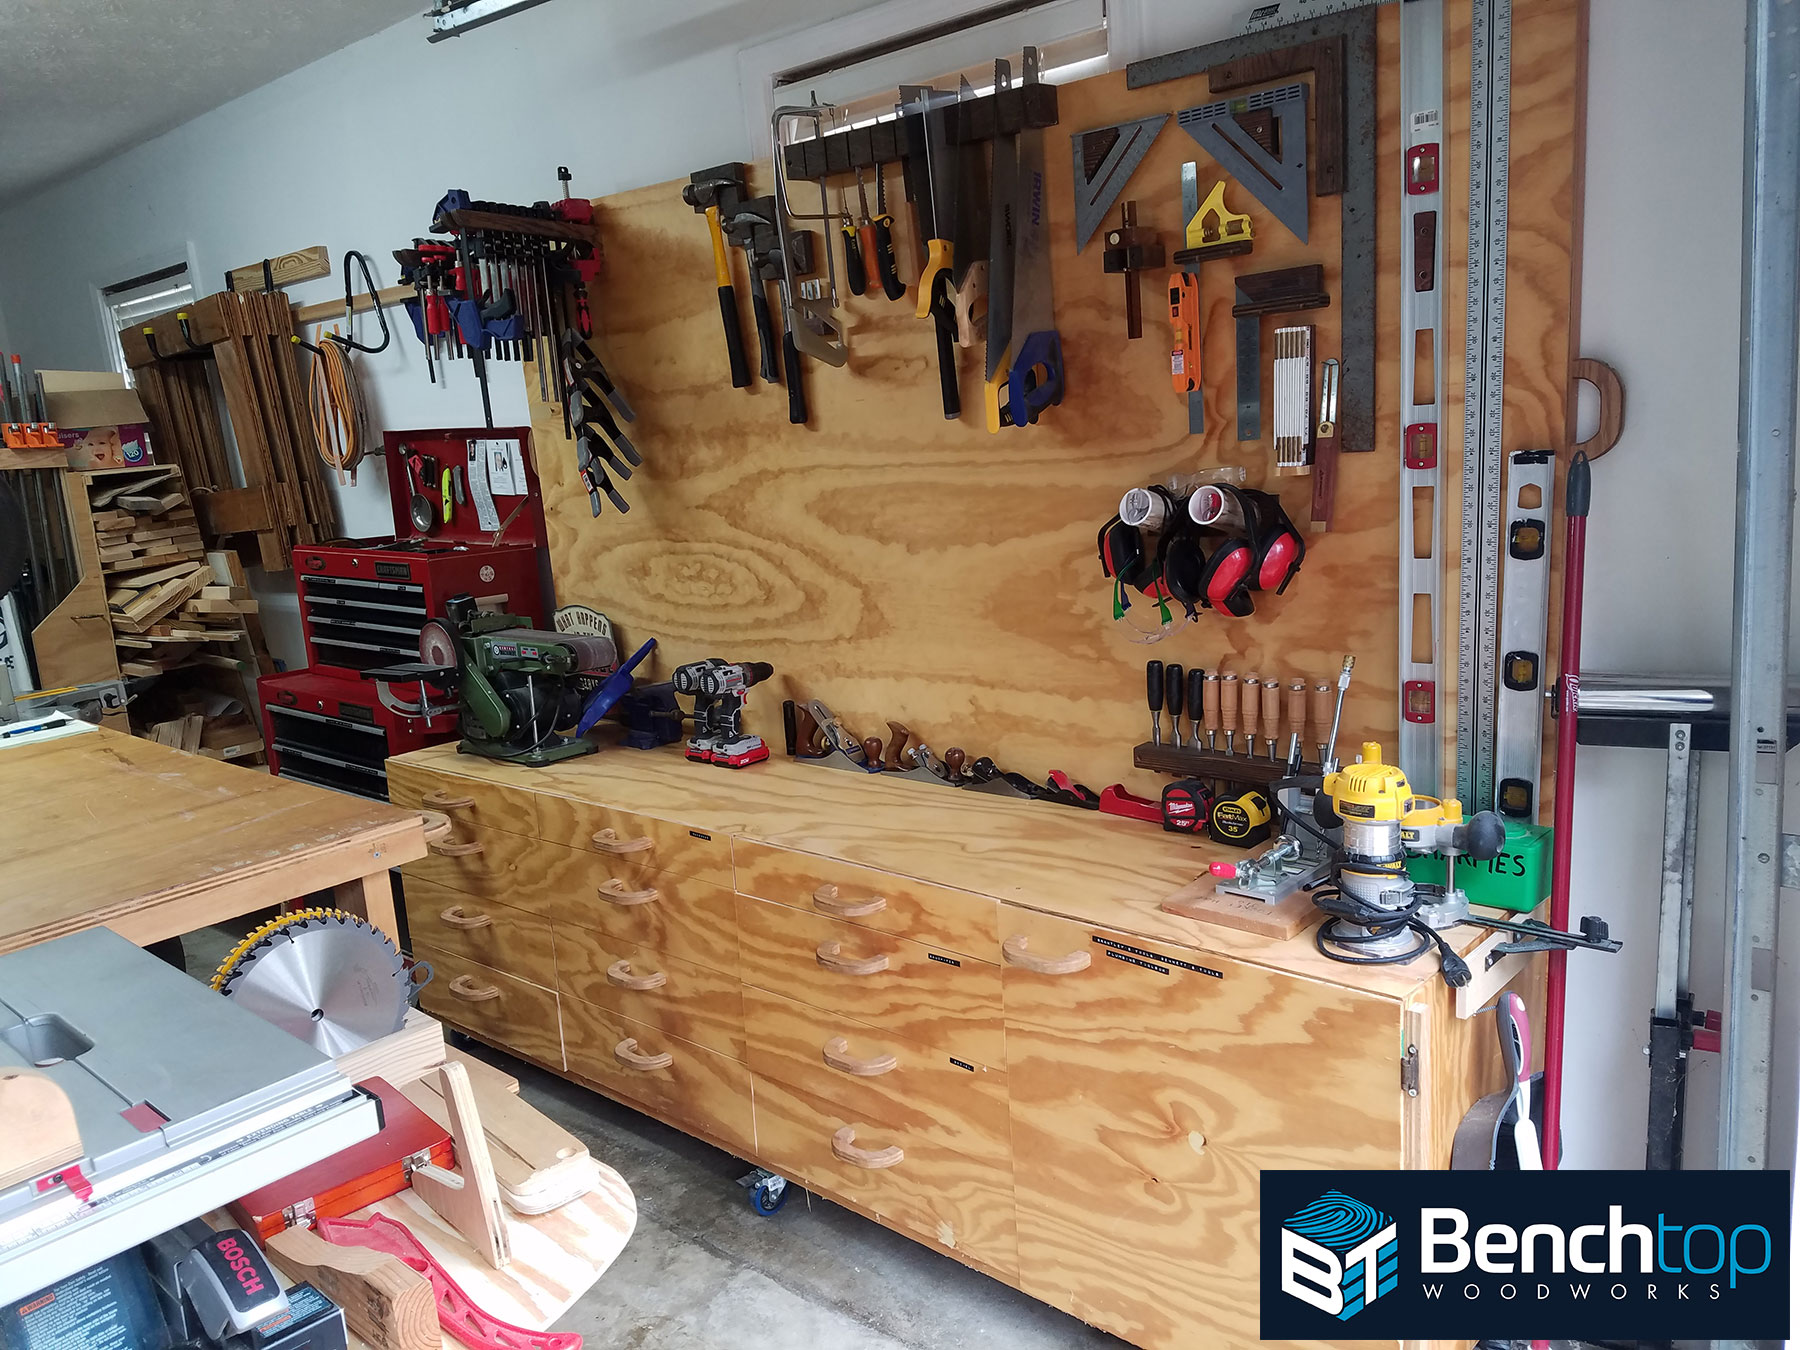
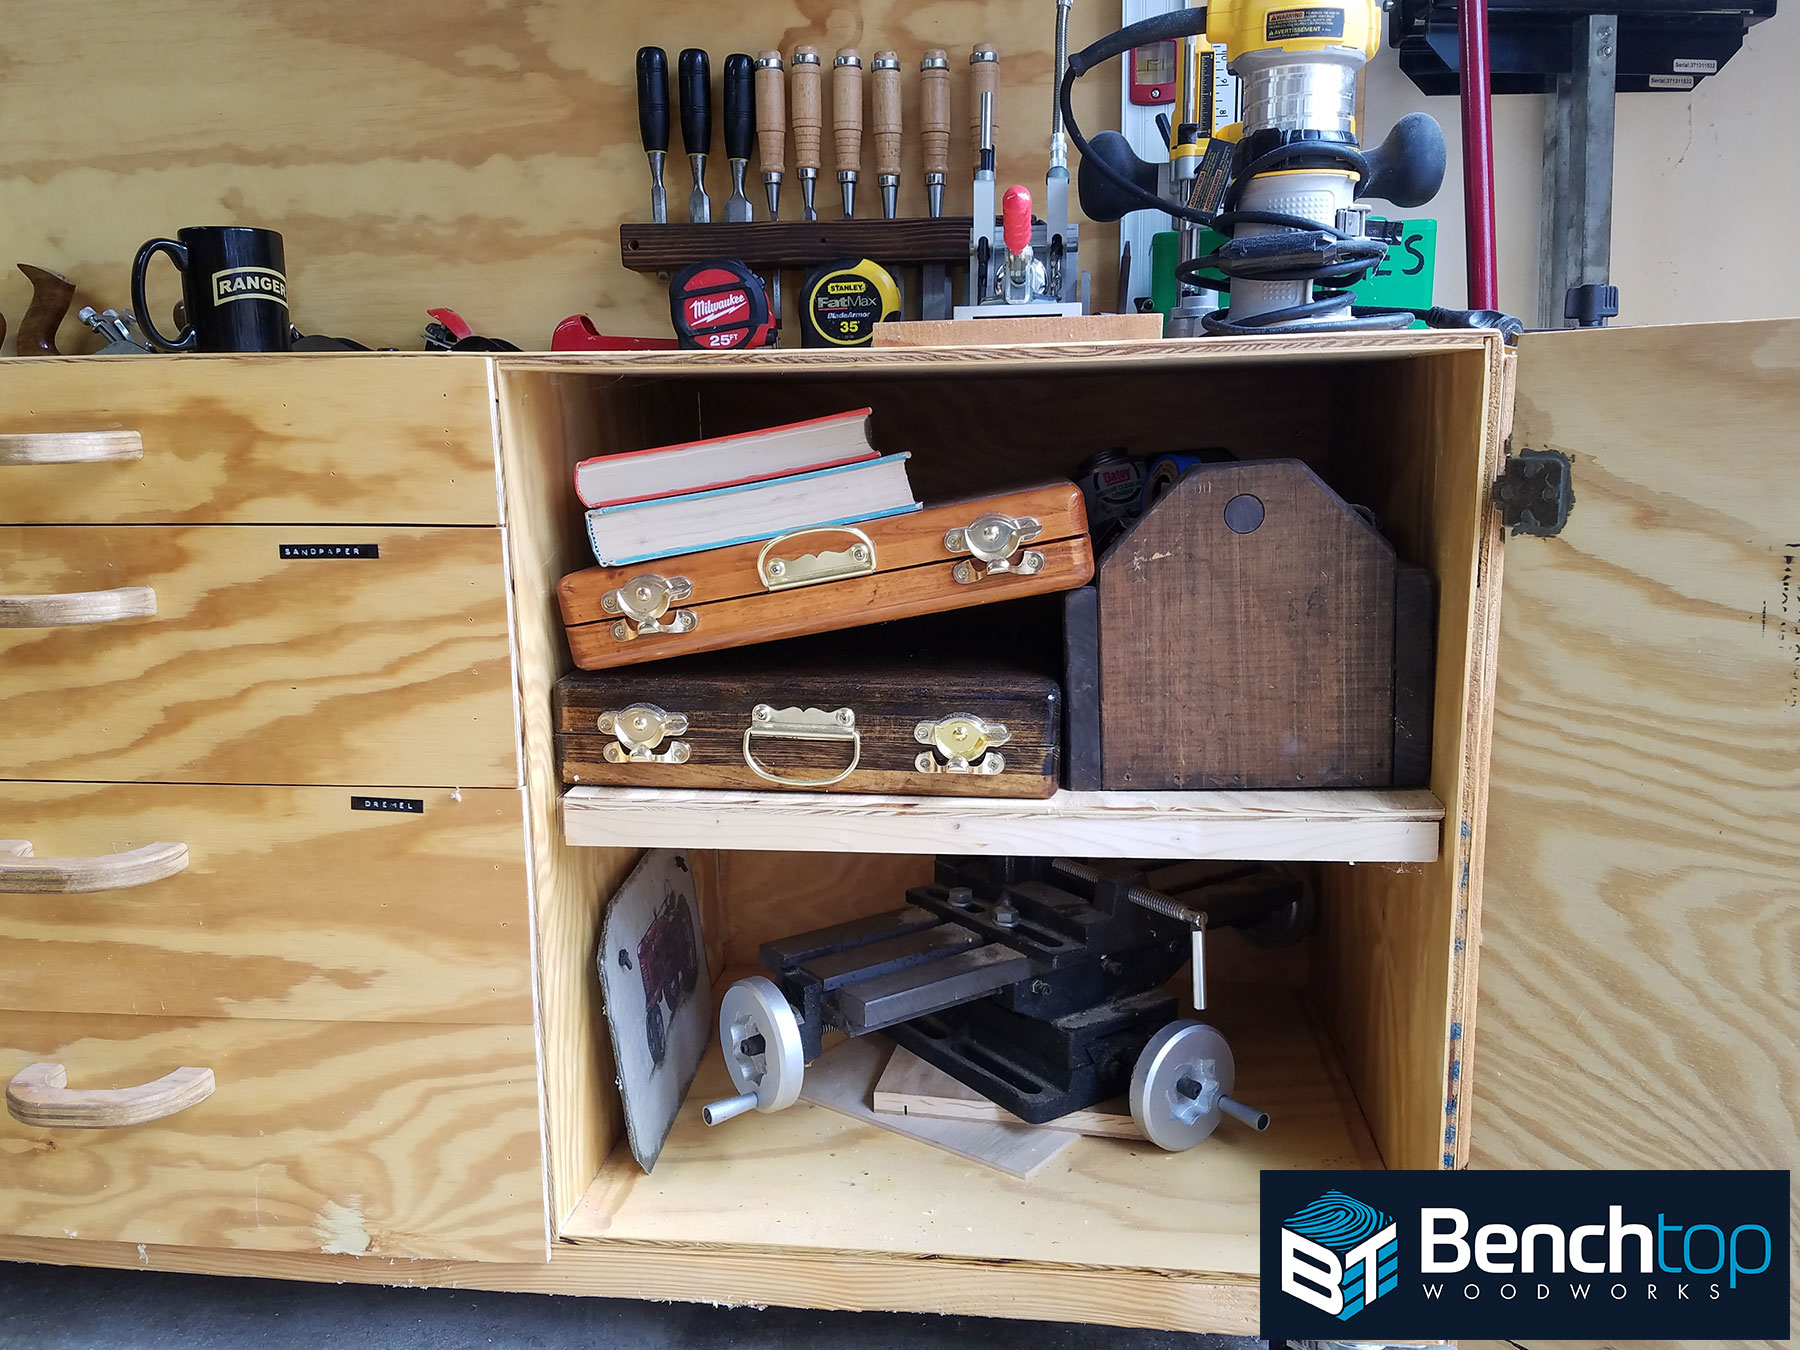
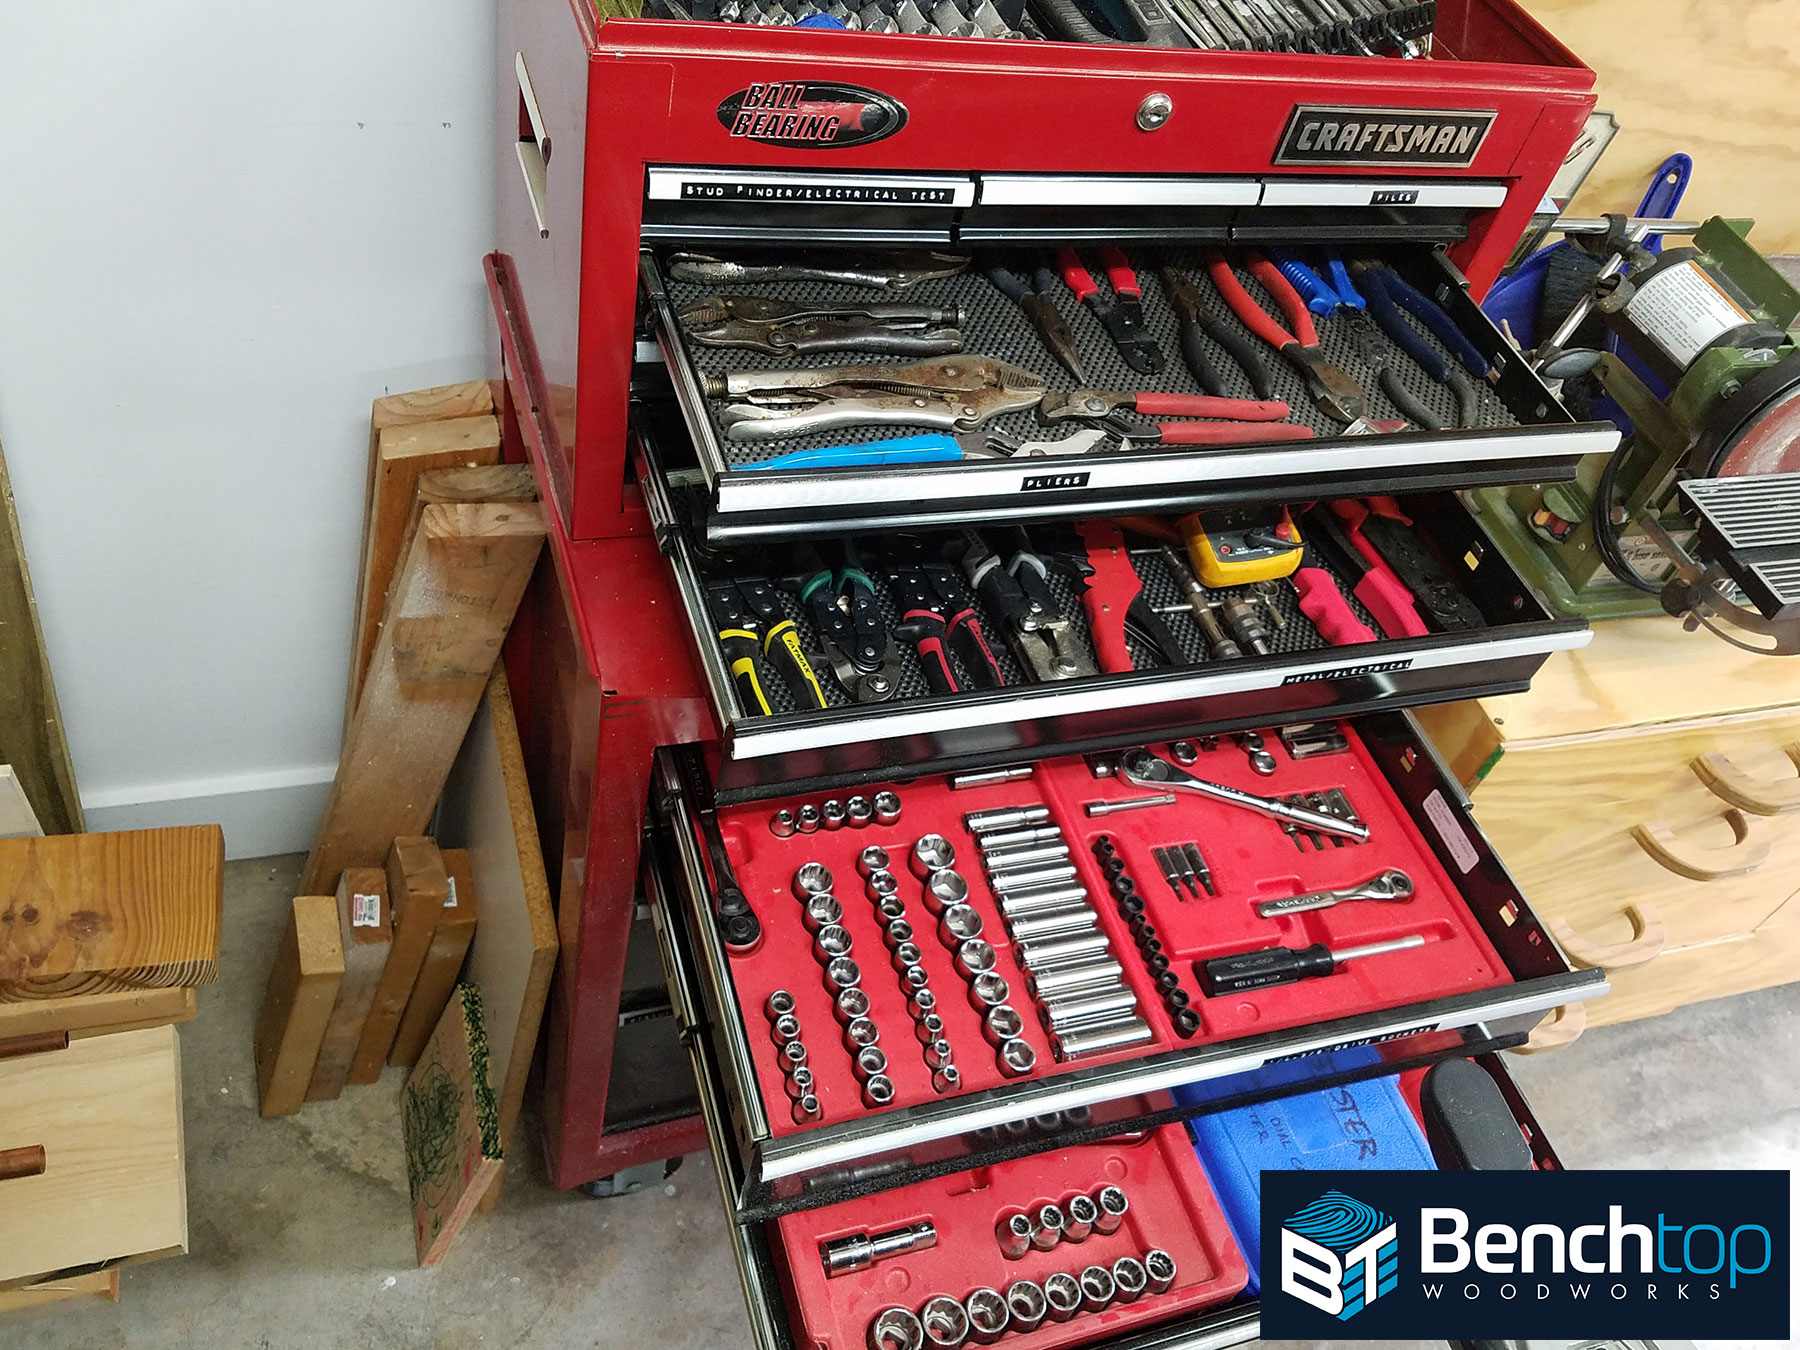
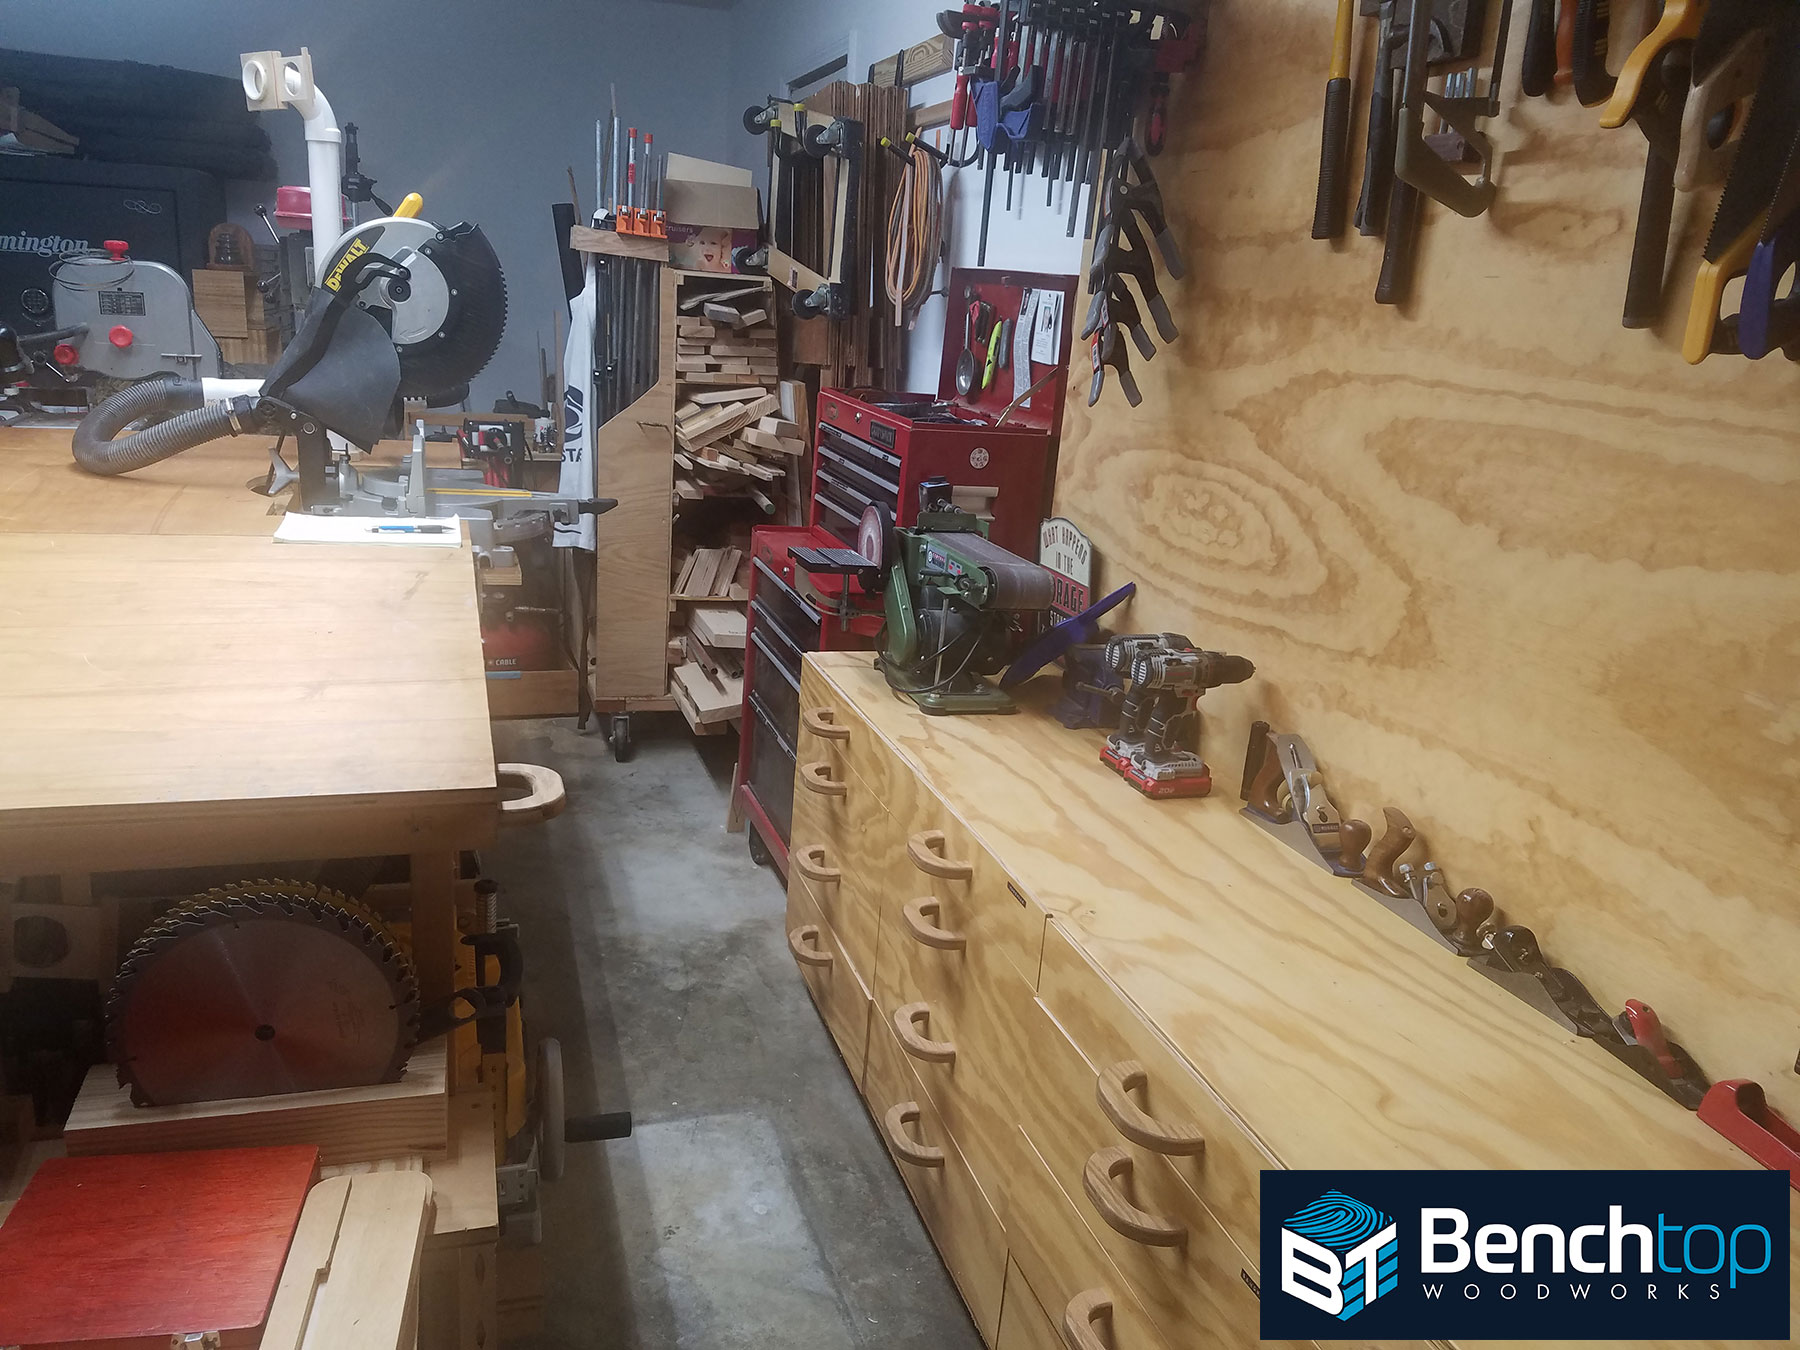
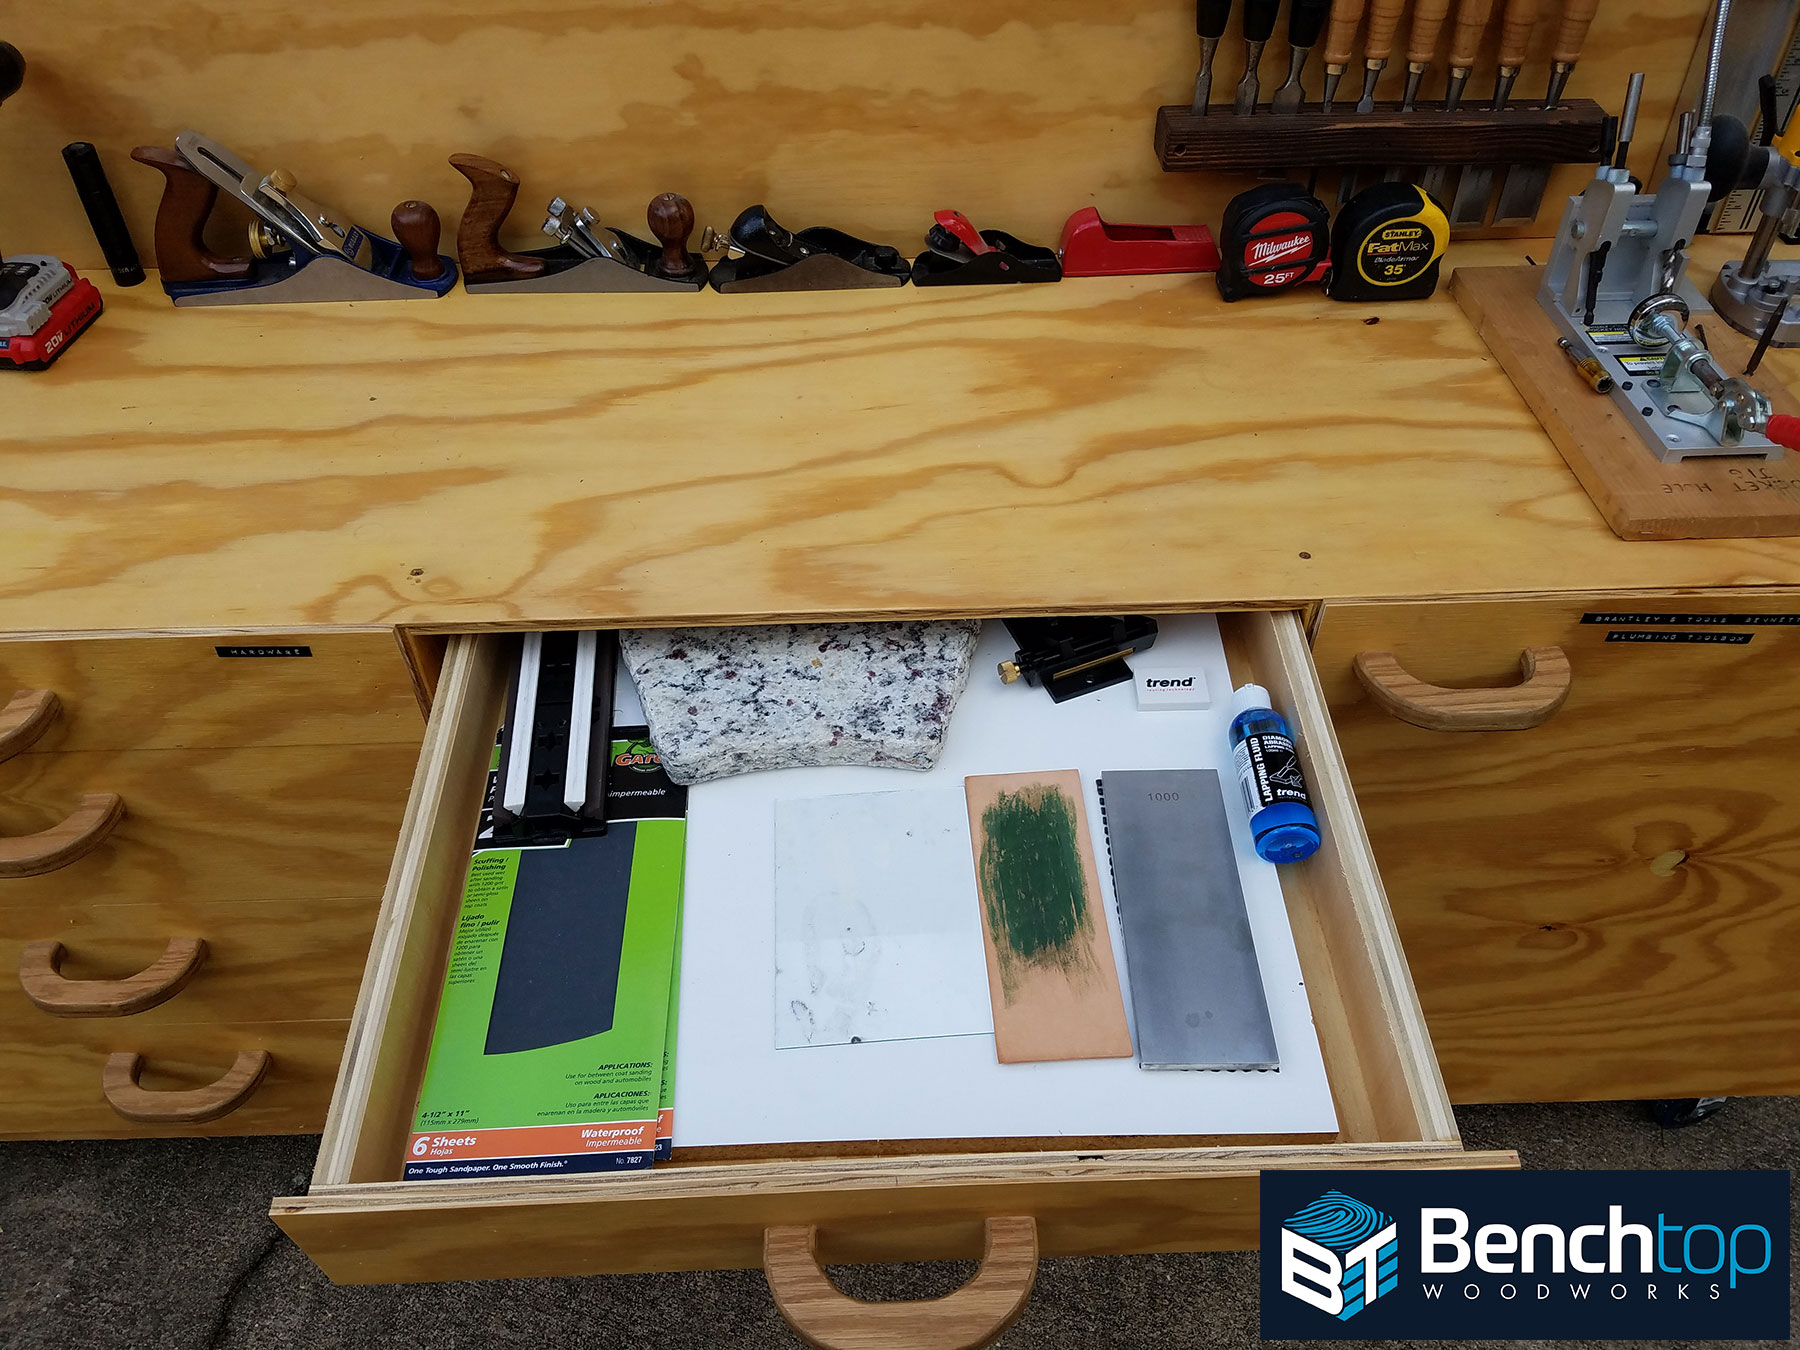
In this next series of photos (3-7) I’ll show you my main tool and material storage cabinets along the exterior wall of my shop space. My pride and joy of shop storage is the mobile tool wall and storage cabinet. This fulfills the requirements of having many tools visible and at the ready on the wall and covered storage for less-frequently used tools and materials. Having a tool wall that is also mobile simplifies the process when I relocate and reestablish the shop. The upper wall portion disassembles for ease of transportation.
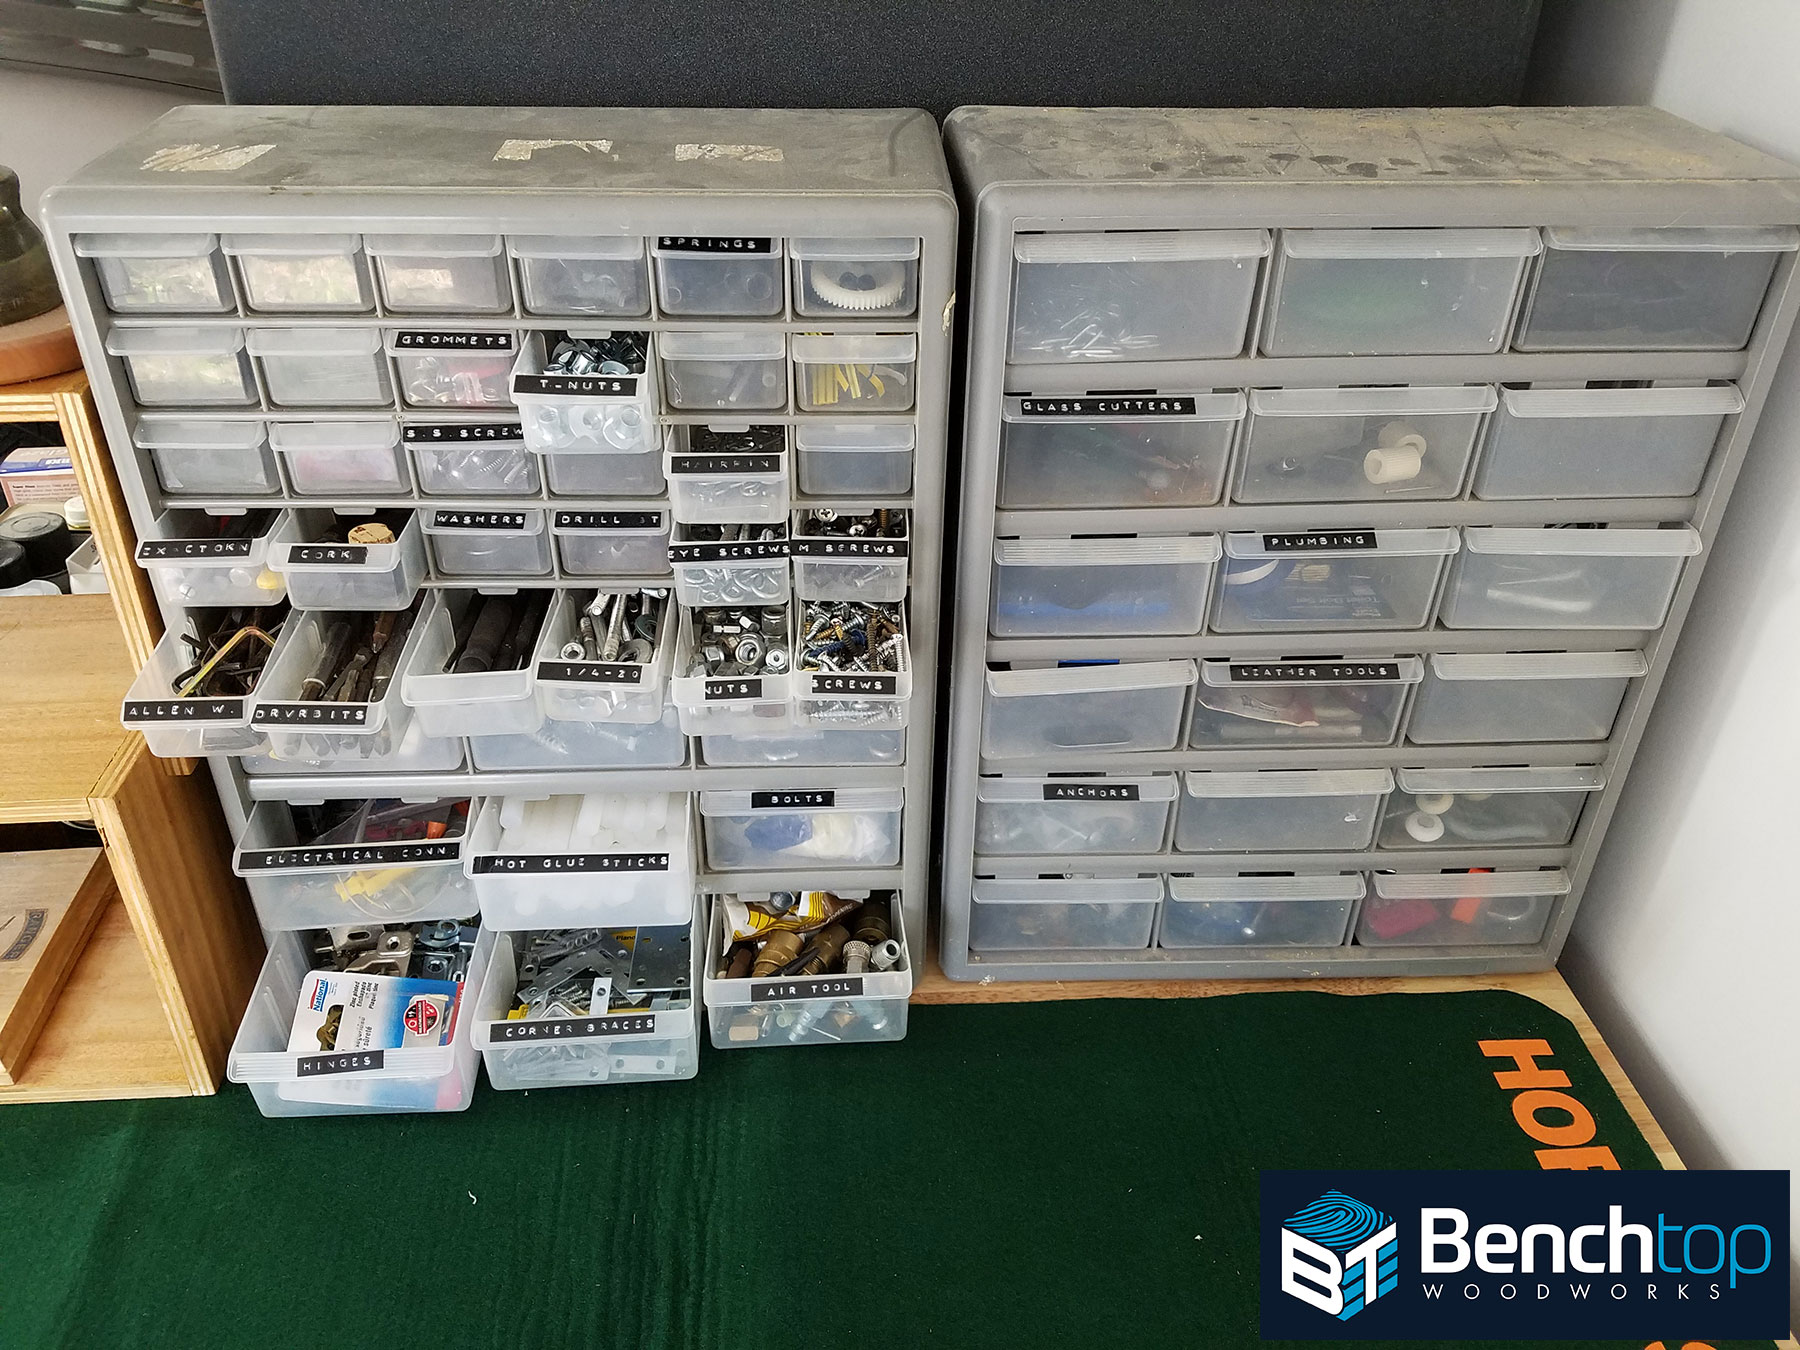
The next two (8-9) photos show a less-used area of the shop along the back wall that I use for small assembly, firearm-smithing and reloading. I splurged on the Harbor Freight metal cabinet to keep my reloading accessories organized, mobile, and contained away from the dust. I also keep my small parts bins on that bench/cart which I often dig-through before going to the store to purchase new or hard to find hardware.

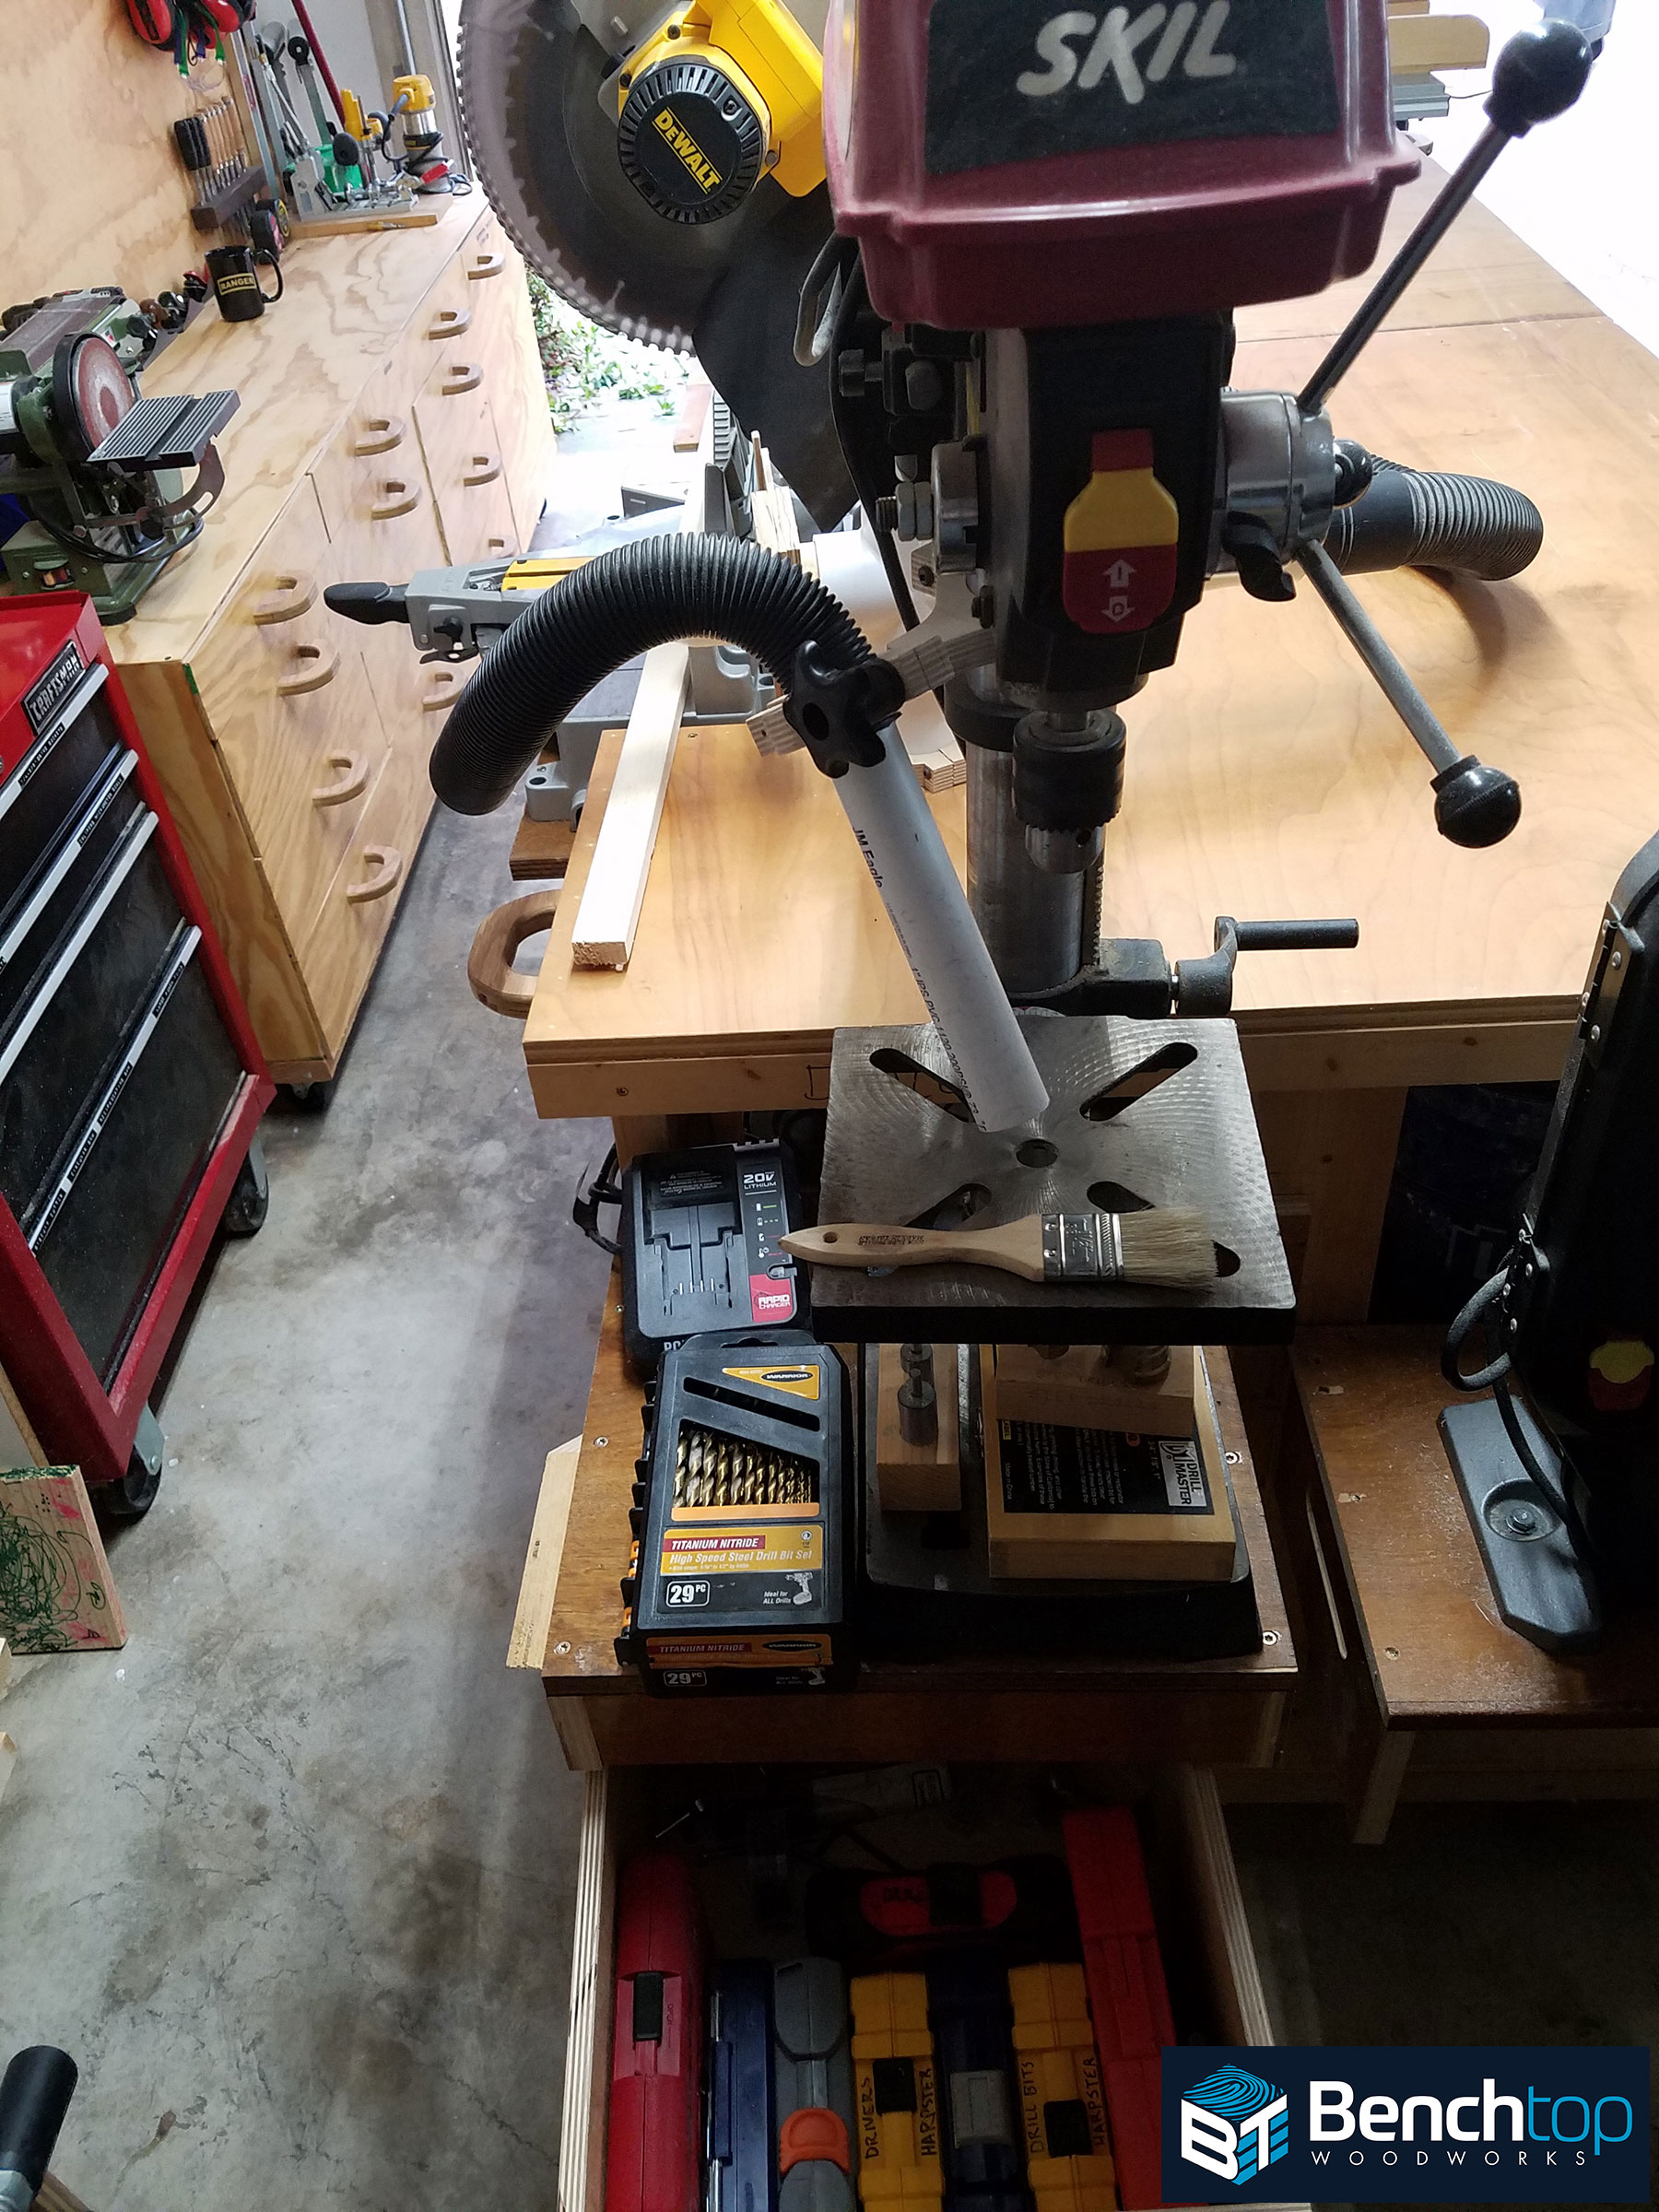
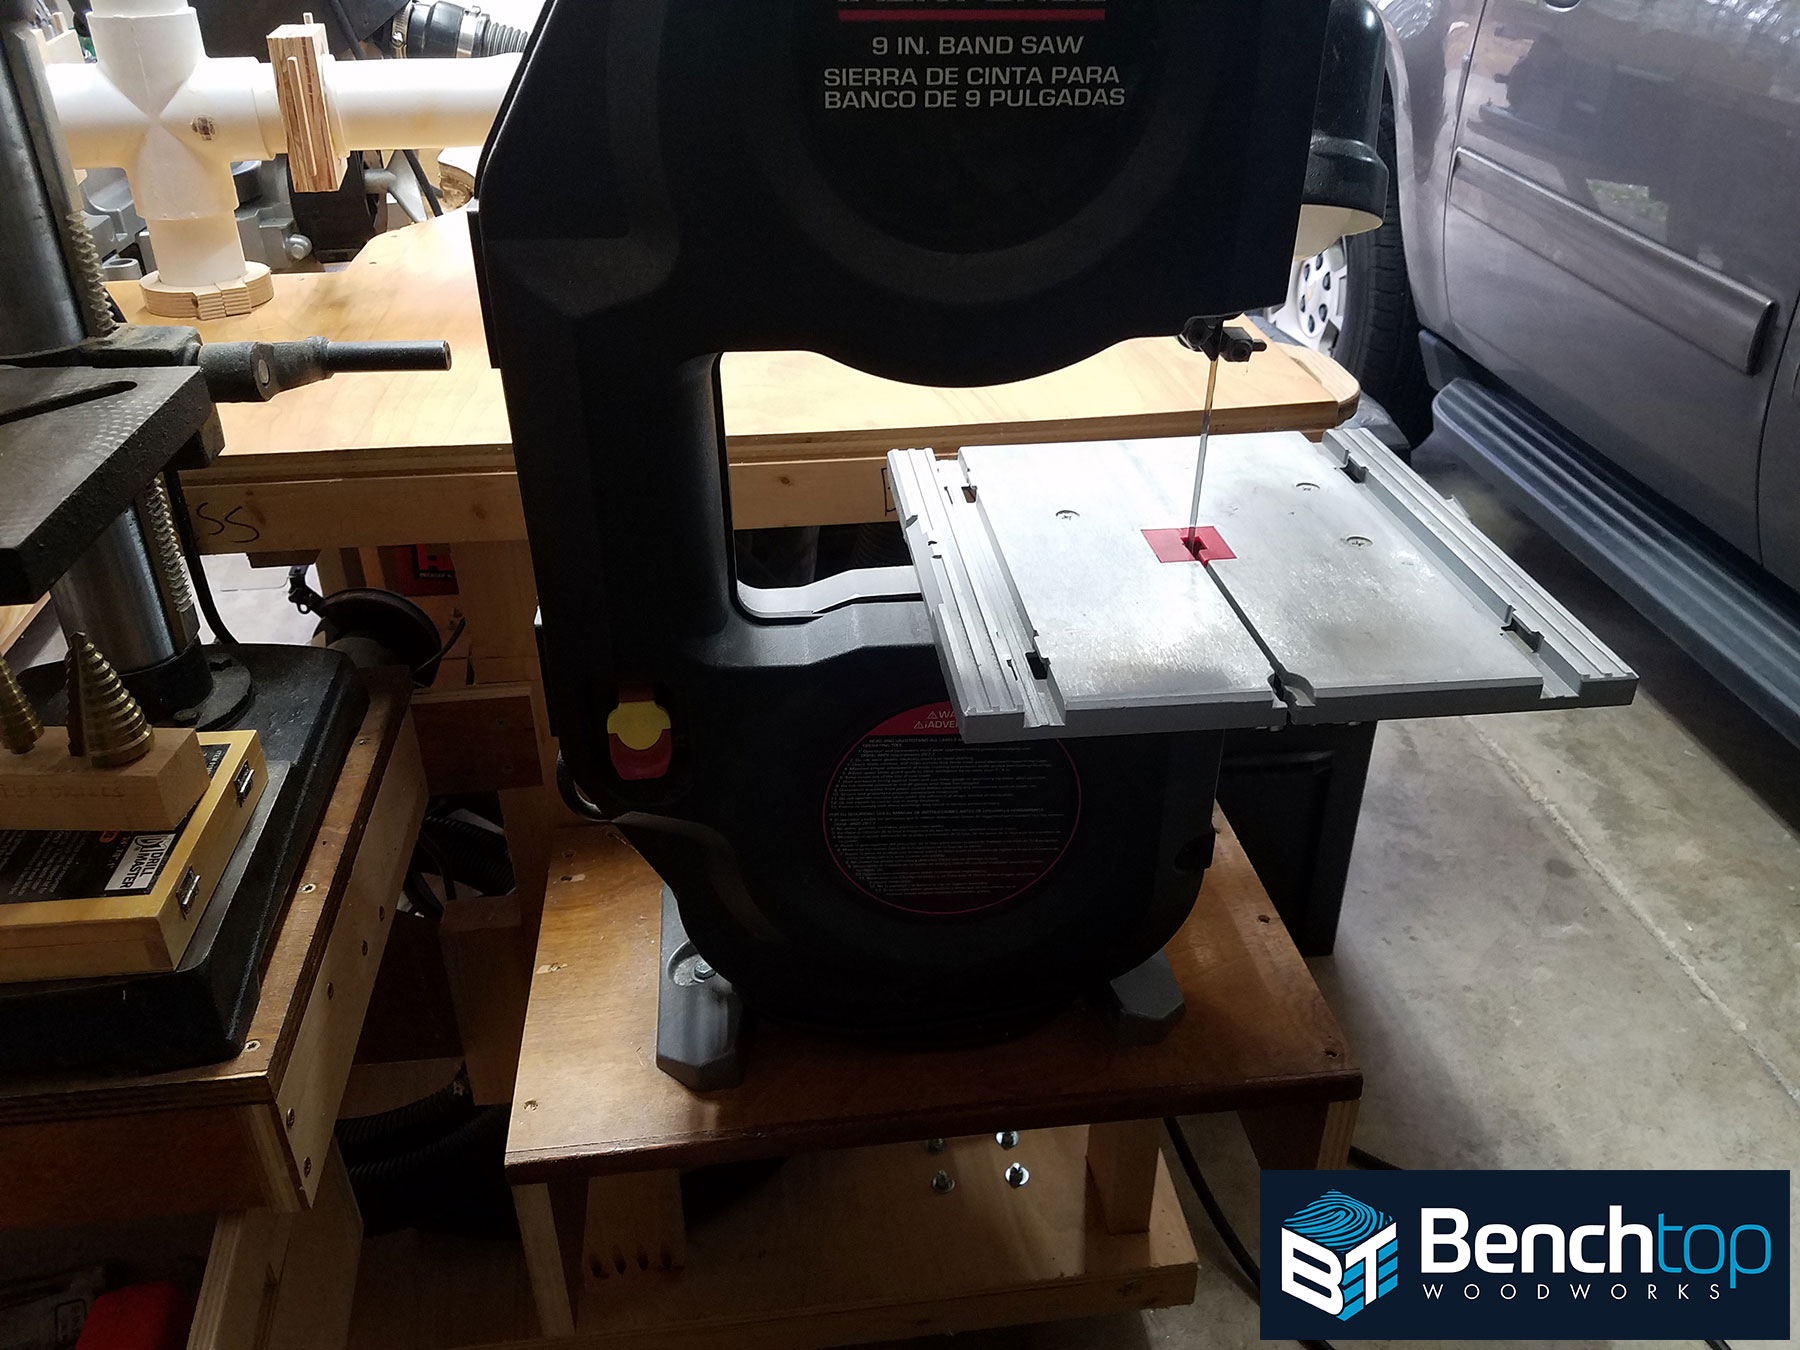
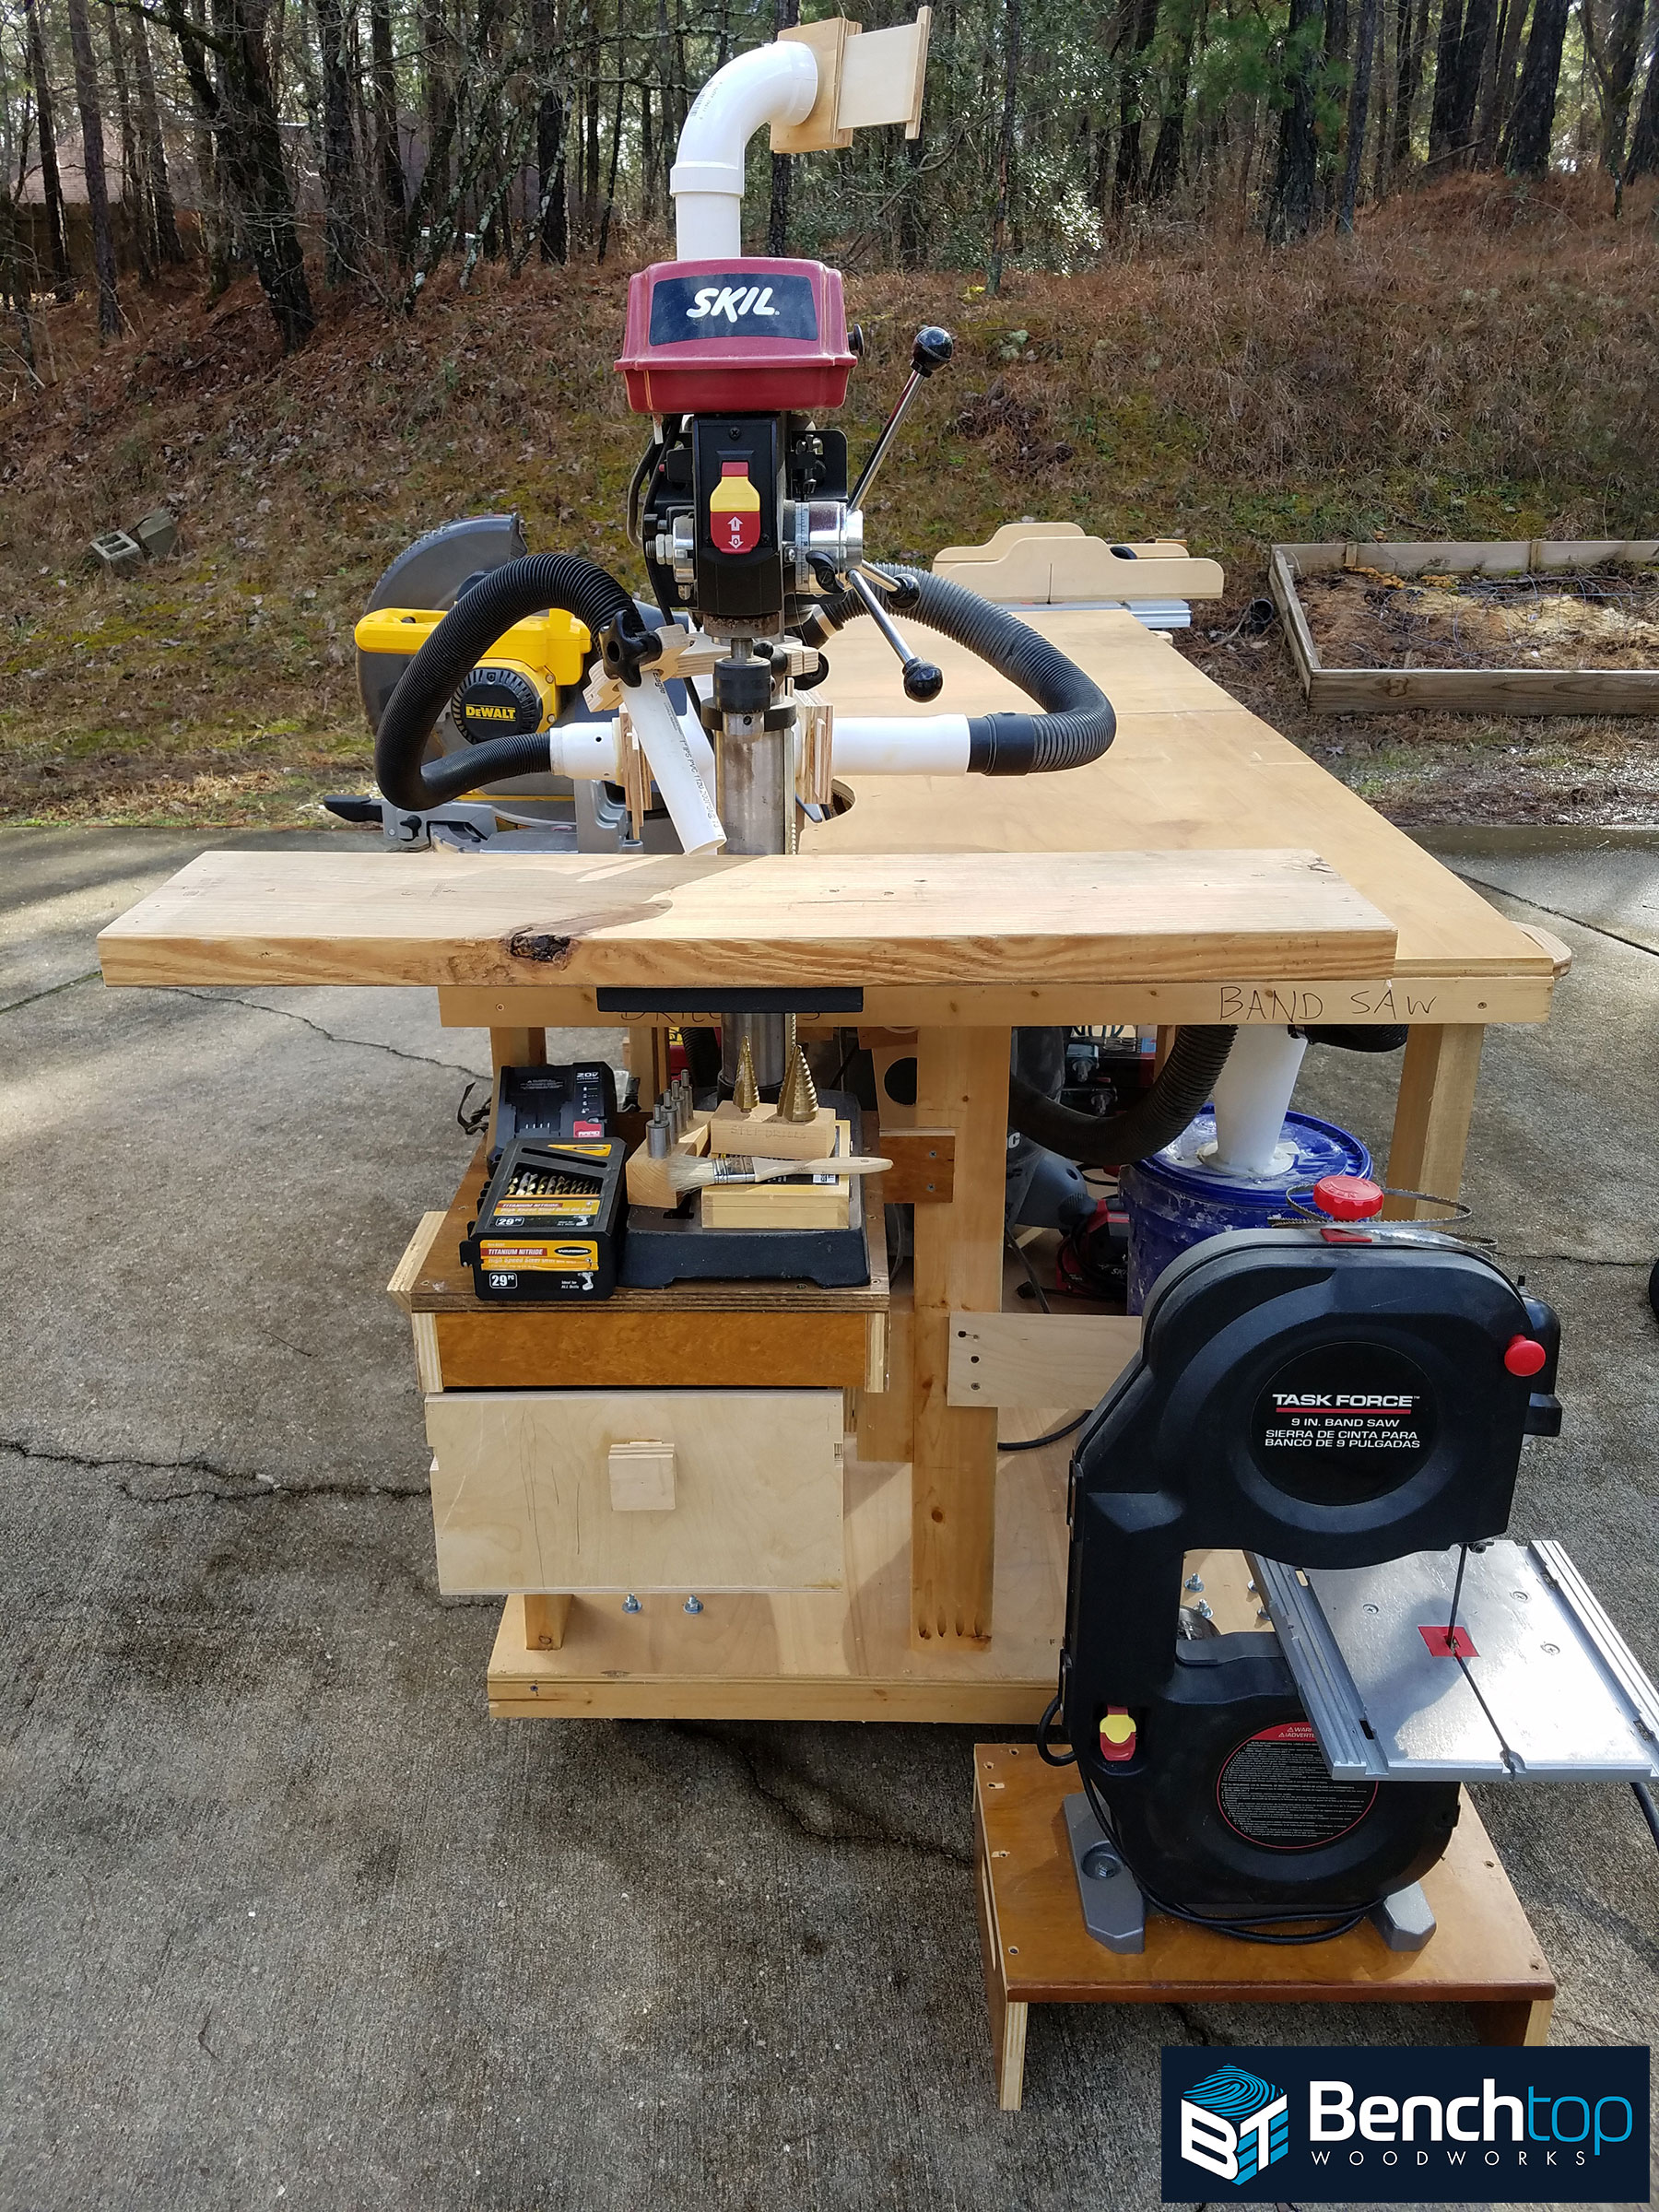
Here you can see the most-confined work areas (10-11) around the drill-press and band-saw. I think my set-up allows for just the right amount of work space indoors without being too limiting.
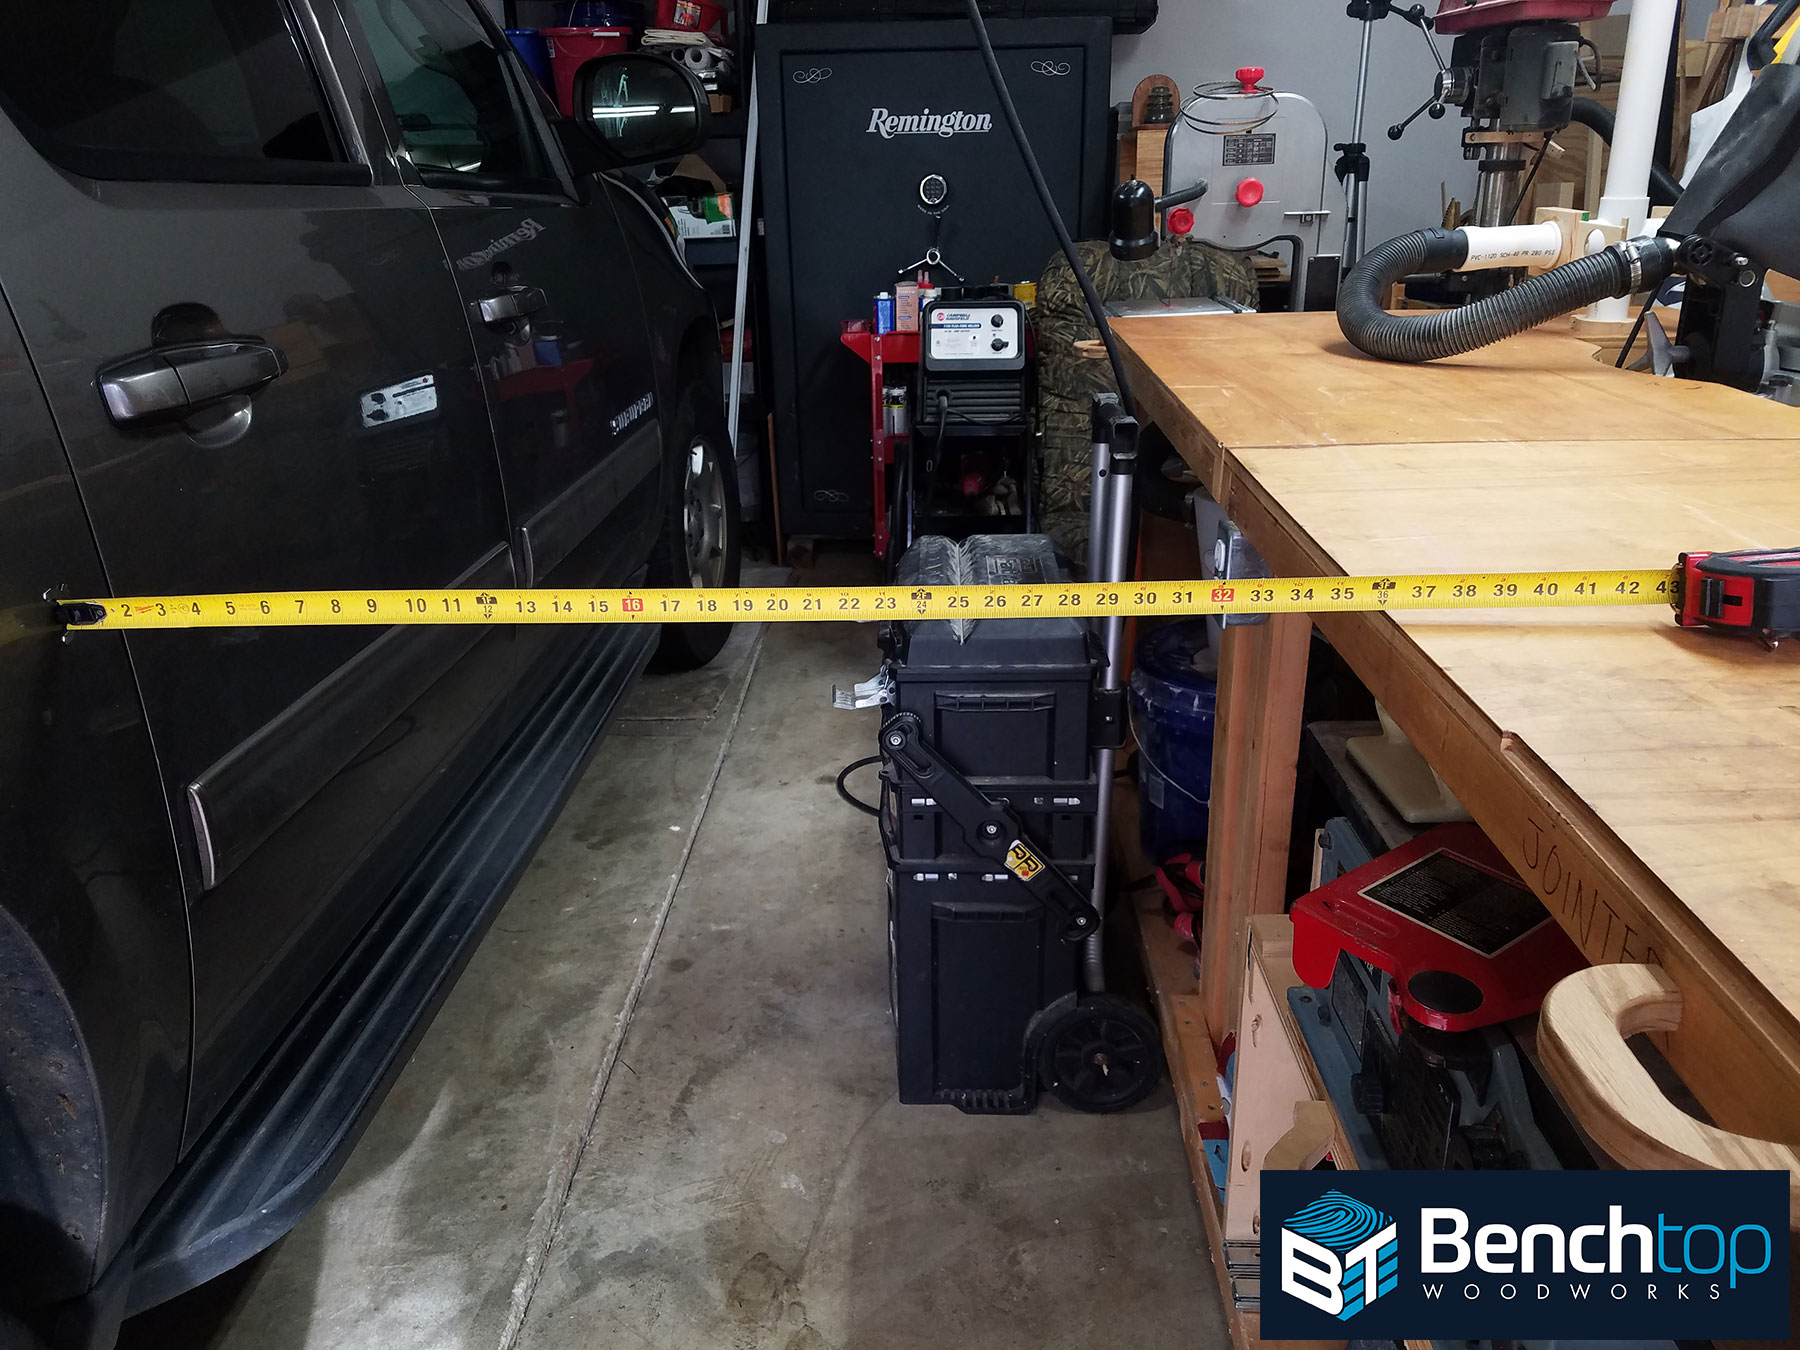
My intent in the next four photos (12-15) is to give you an idea of the amount of work-space in and around the bench while it is indoors. Nearly any operation can be completed with the exception of planing without moving the bench or restricting my movement within the work area.
For the next section I’ll take everything outdoors to show you everything expanded under better lighting and let you get up close with each of my machine mounts and storage areas. My goal is for every tool and machine to have a dedicated home which helps me to return my shop to order once a project or workday is complete.
The next three photos (16-18) detail my mobile tool wall and storage cart. Prior to building this fixture, my shop was nearly always a mess! This allows me to customize, organize and store nearly everything with room to grow. Some of my favorite simple projects on the wall are my hand-saw till (a borrowed design from Alan’s Woodworking), f-style clamp racks, and chisel holder.

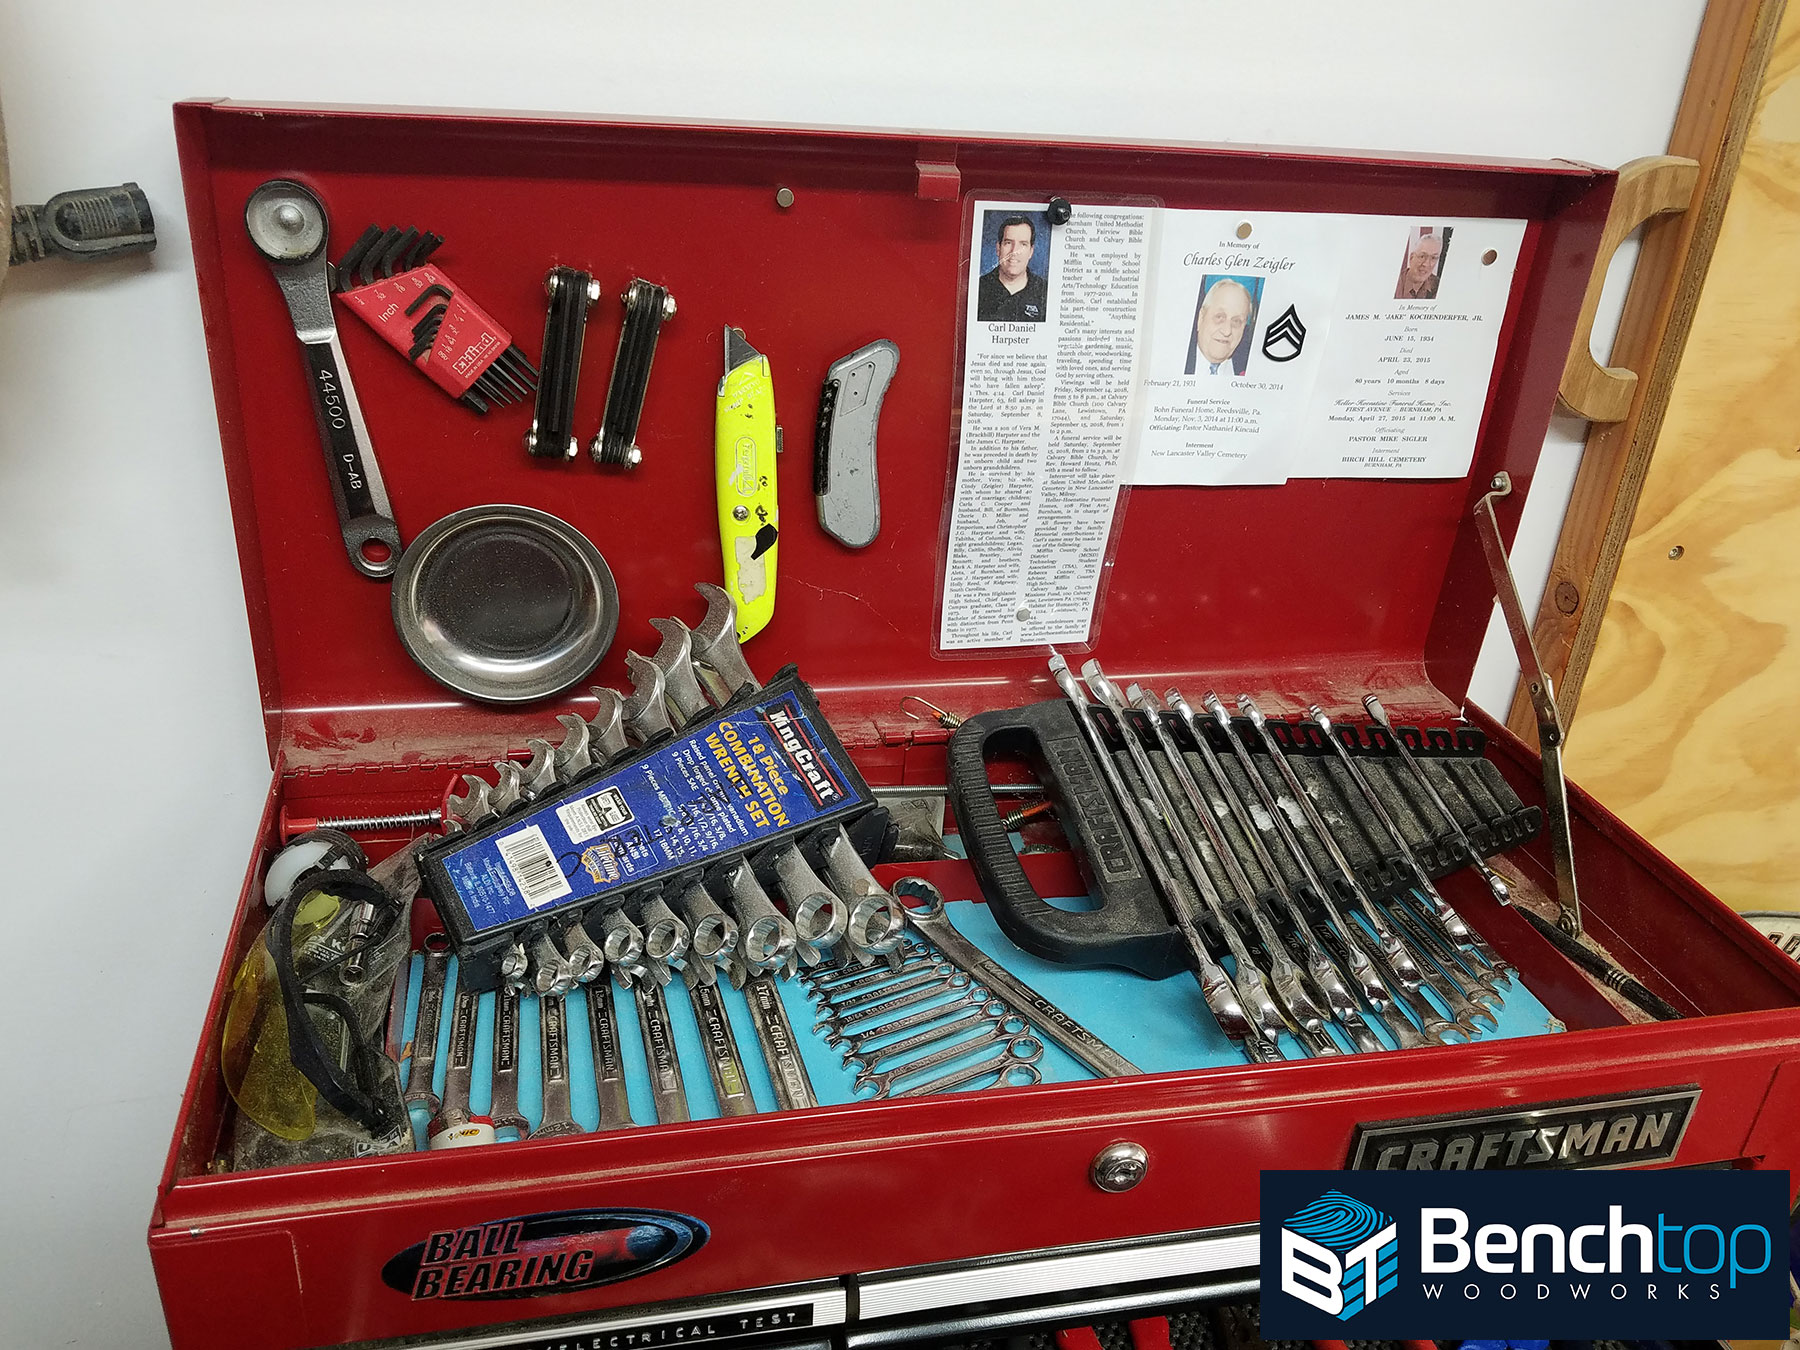
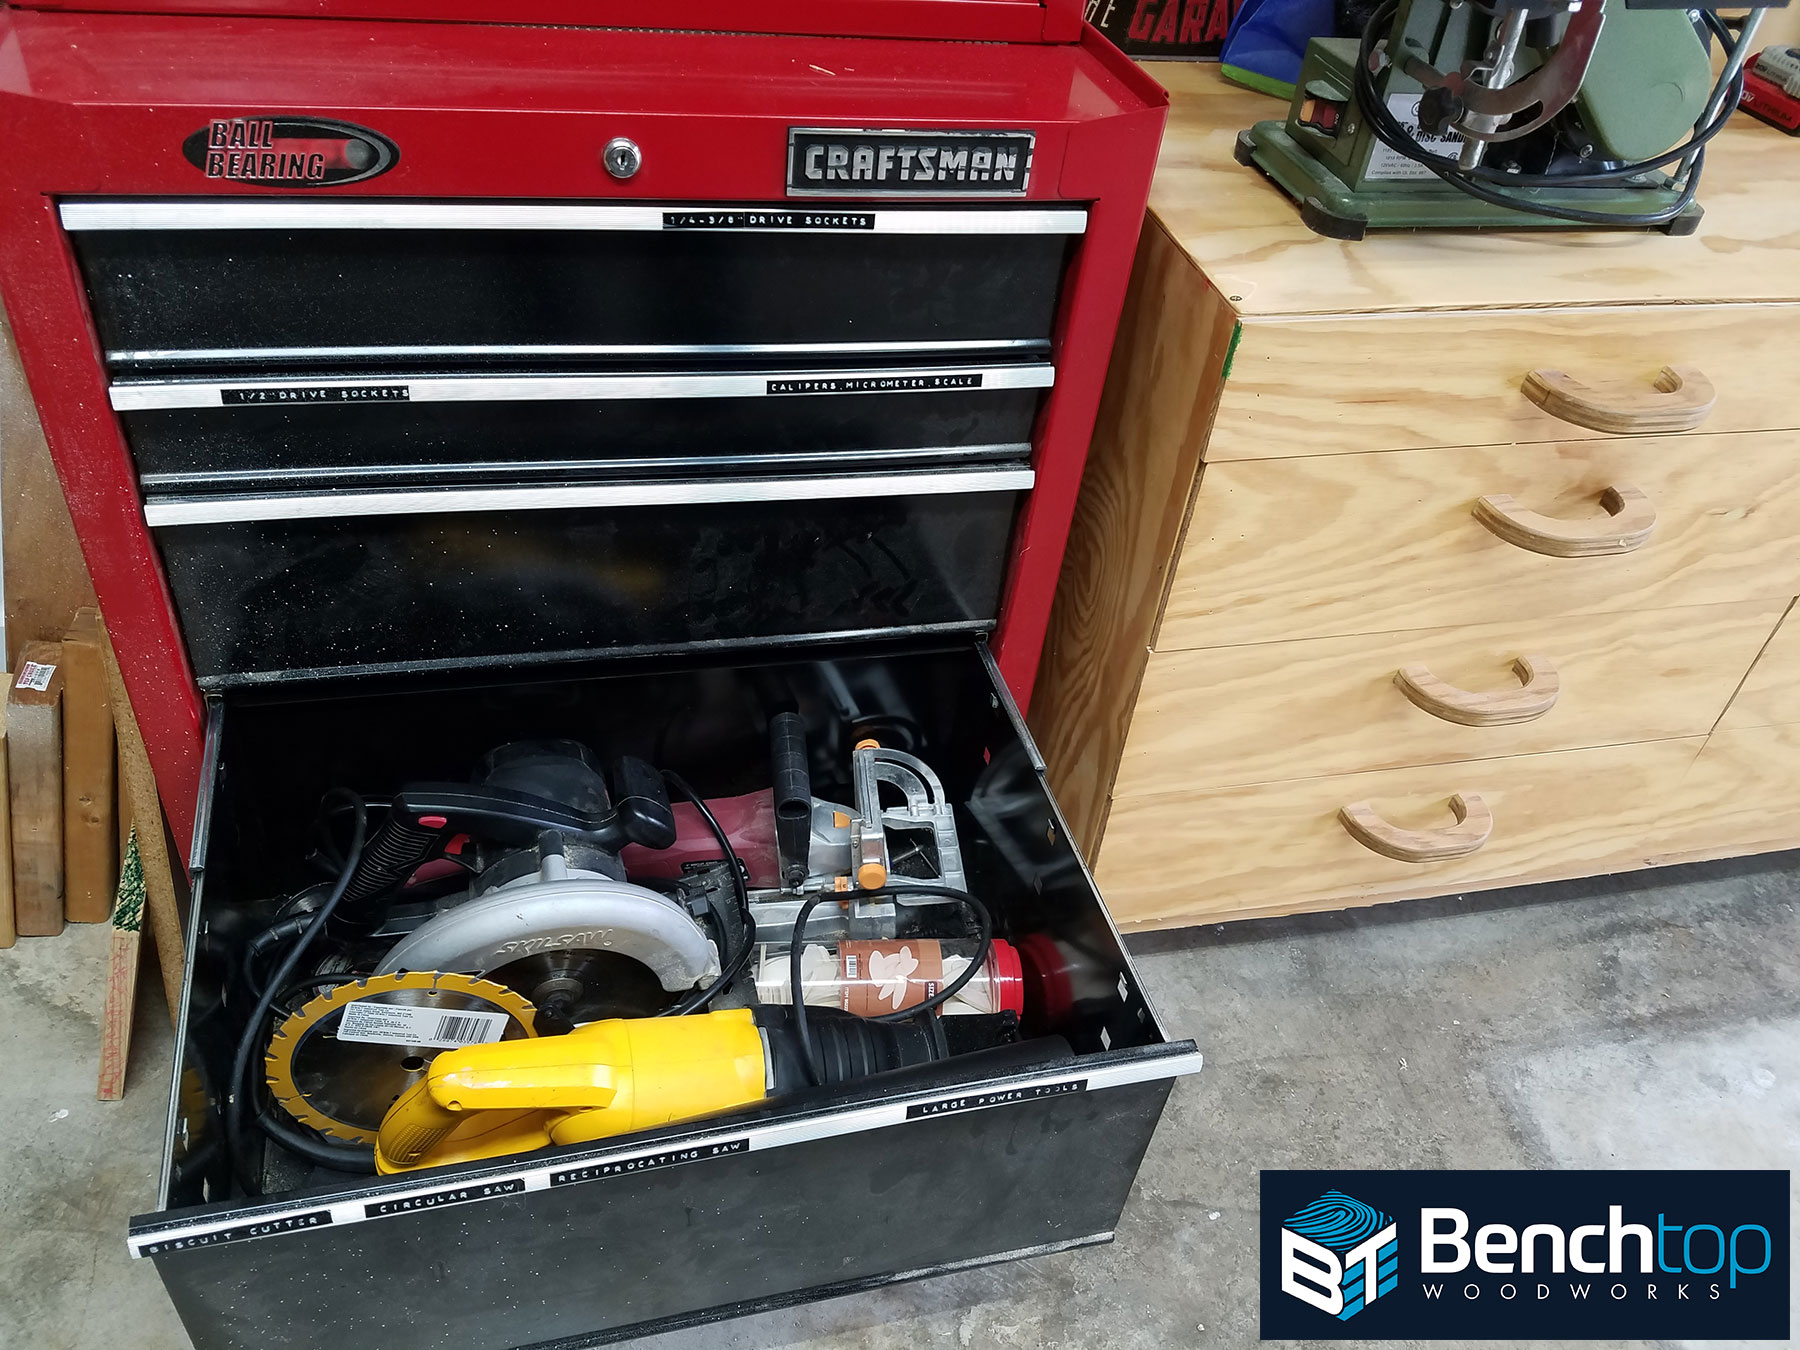
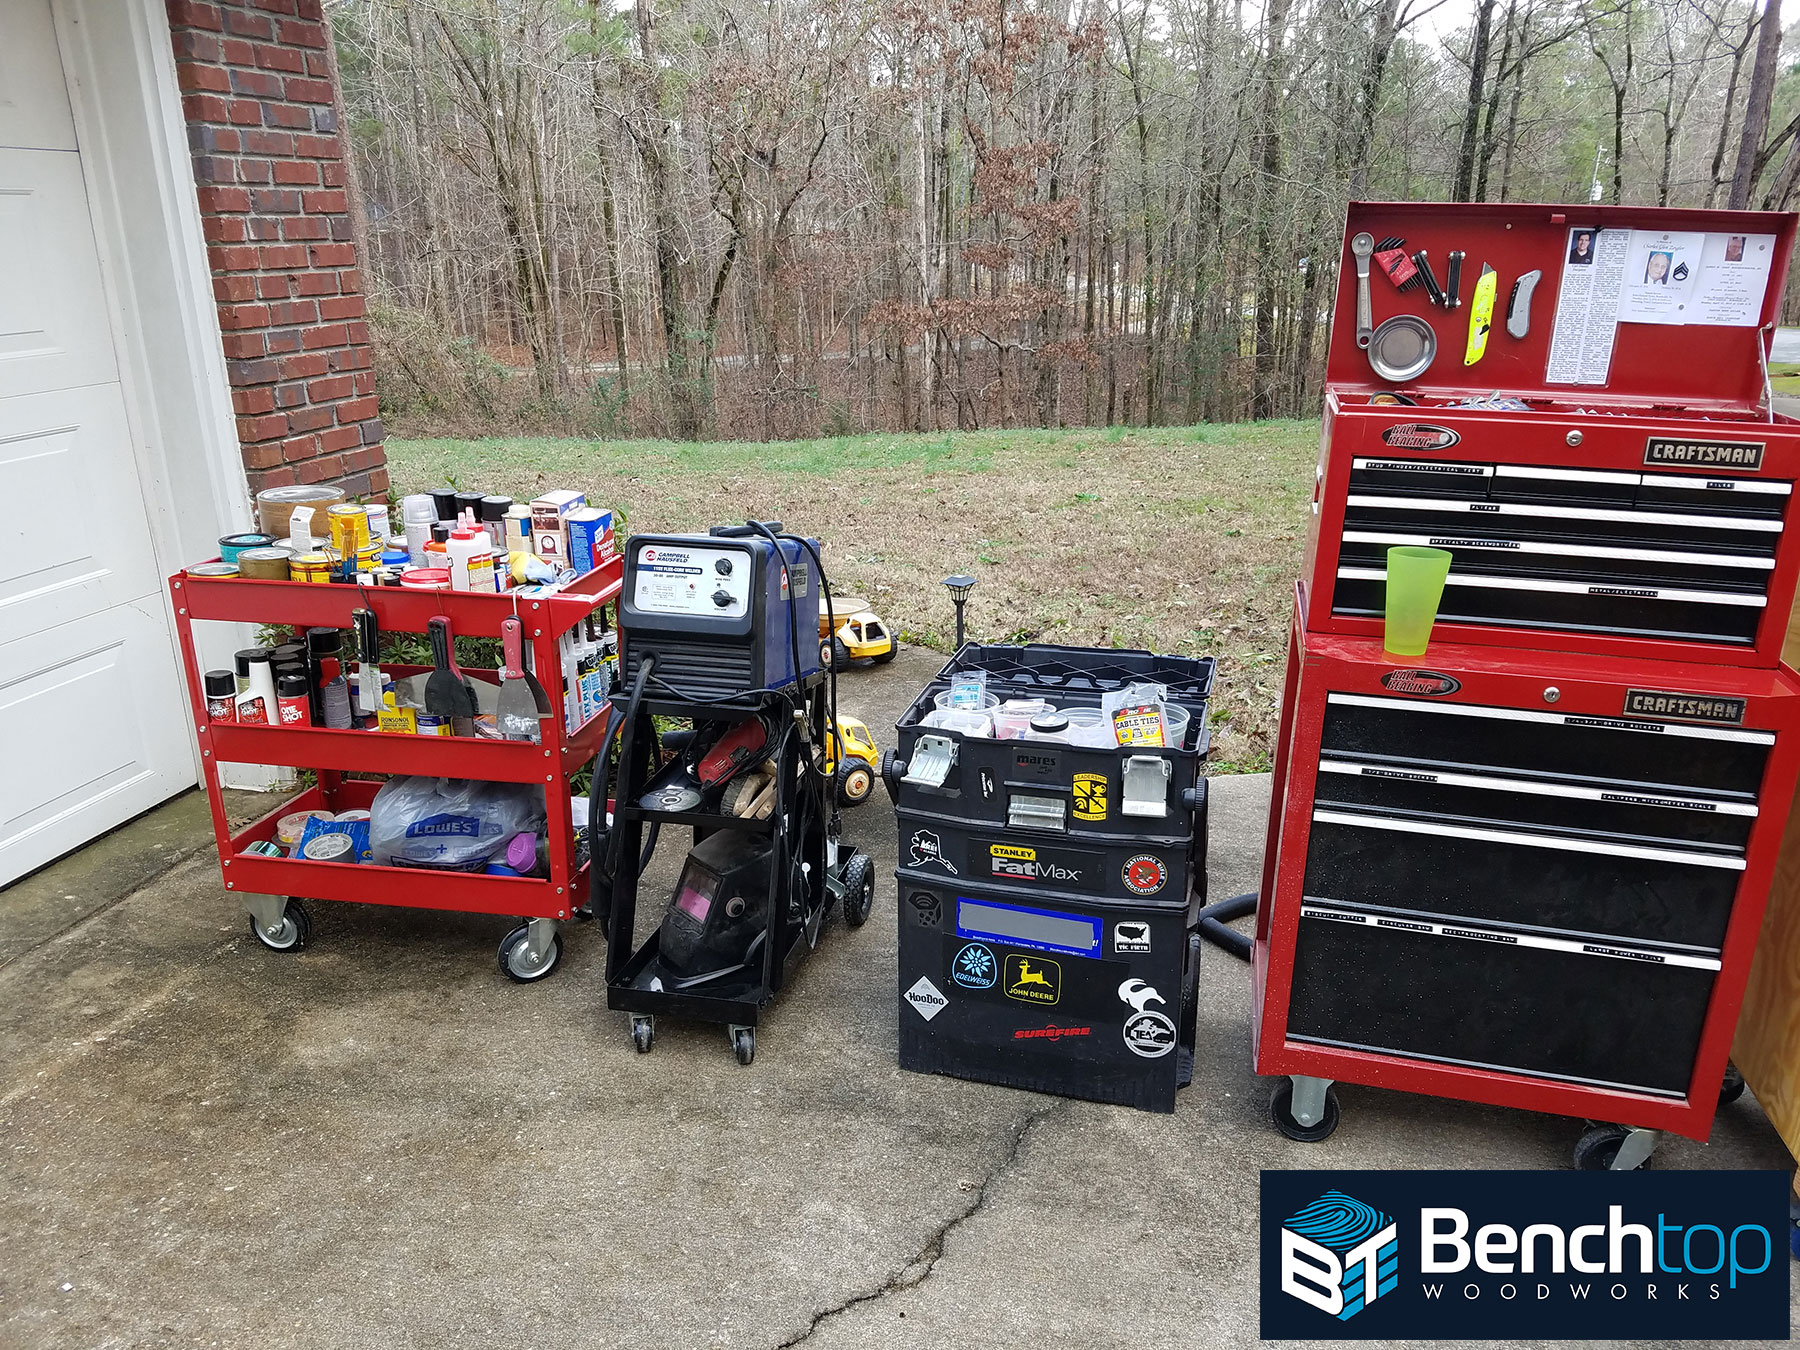
I store other mechanics tools, large power tools hardware and finishes on several carts and rolling toolboxes. (19)
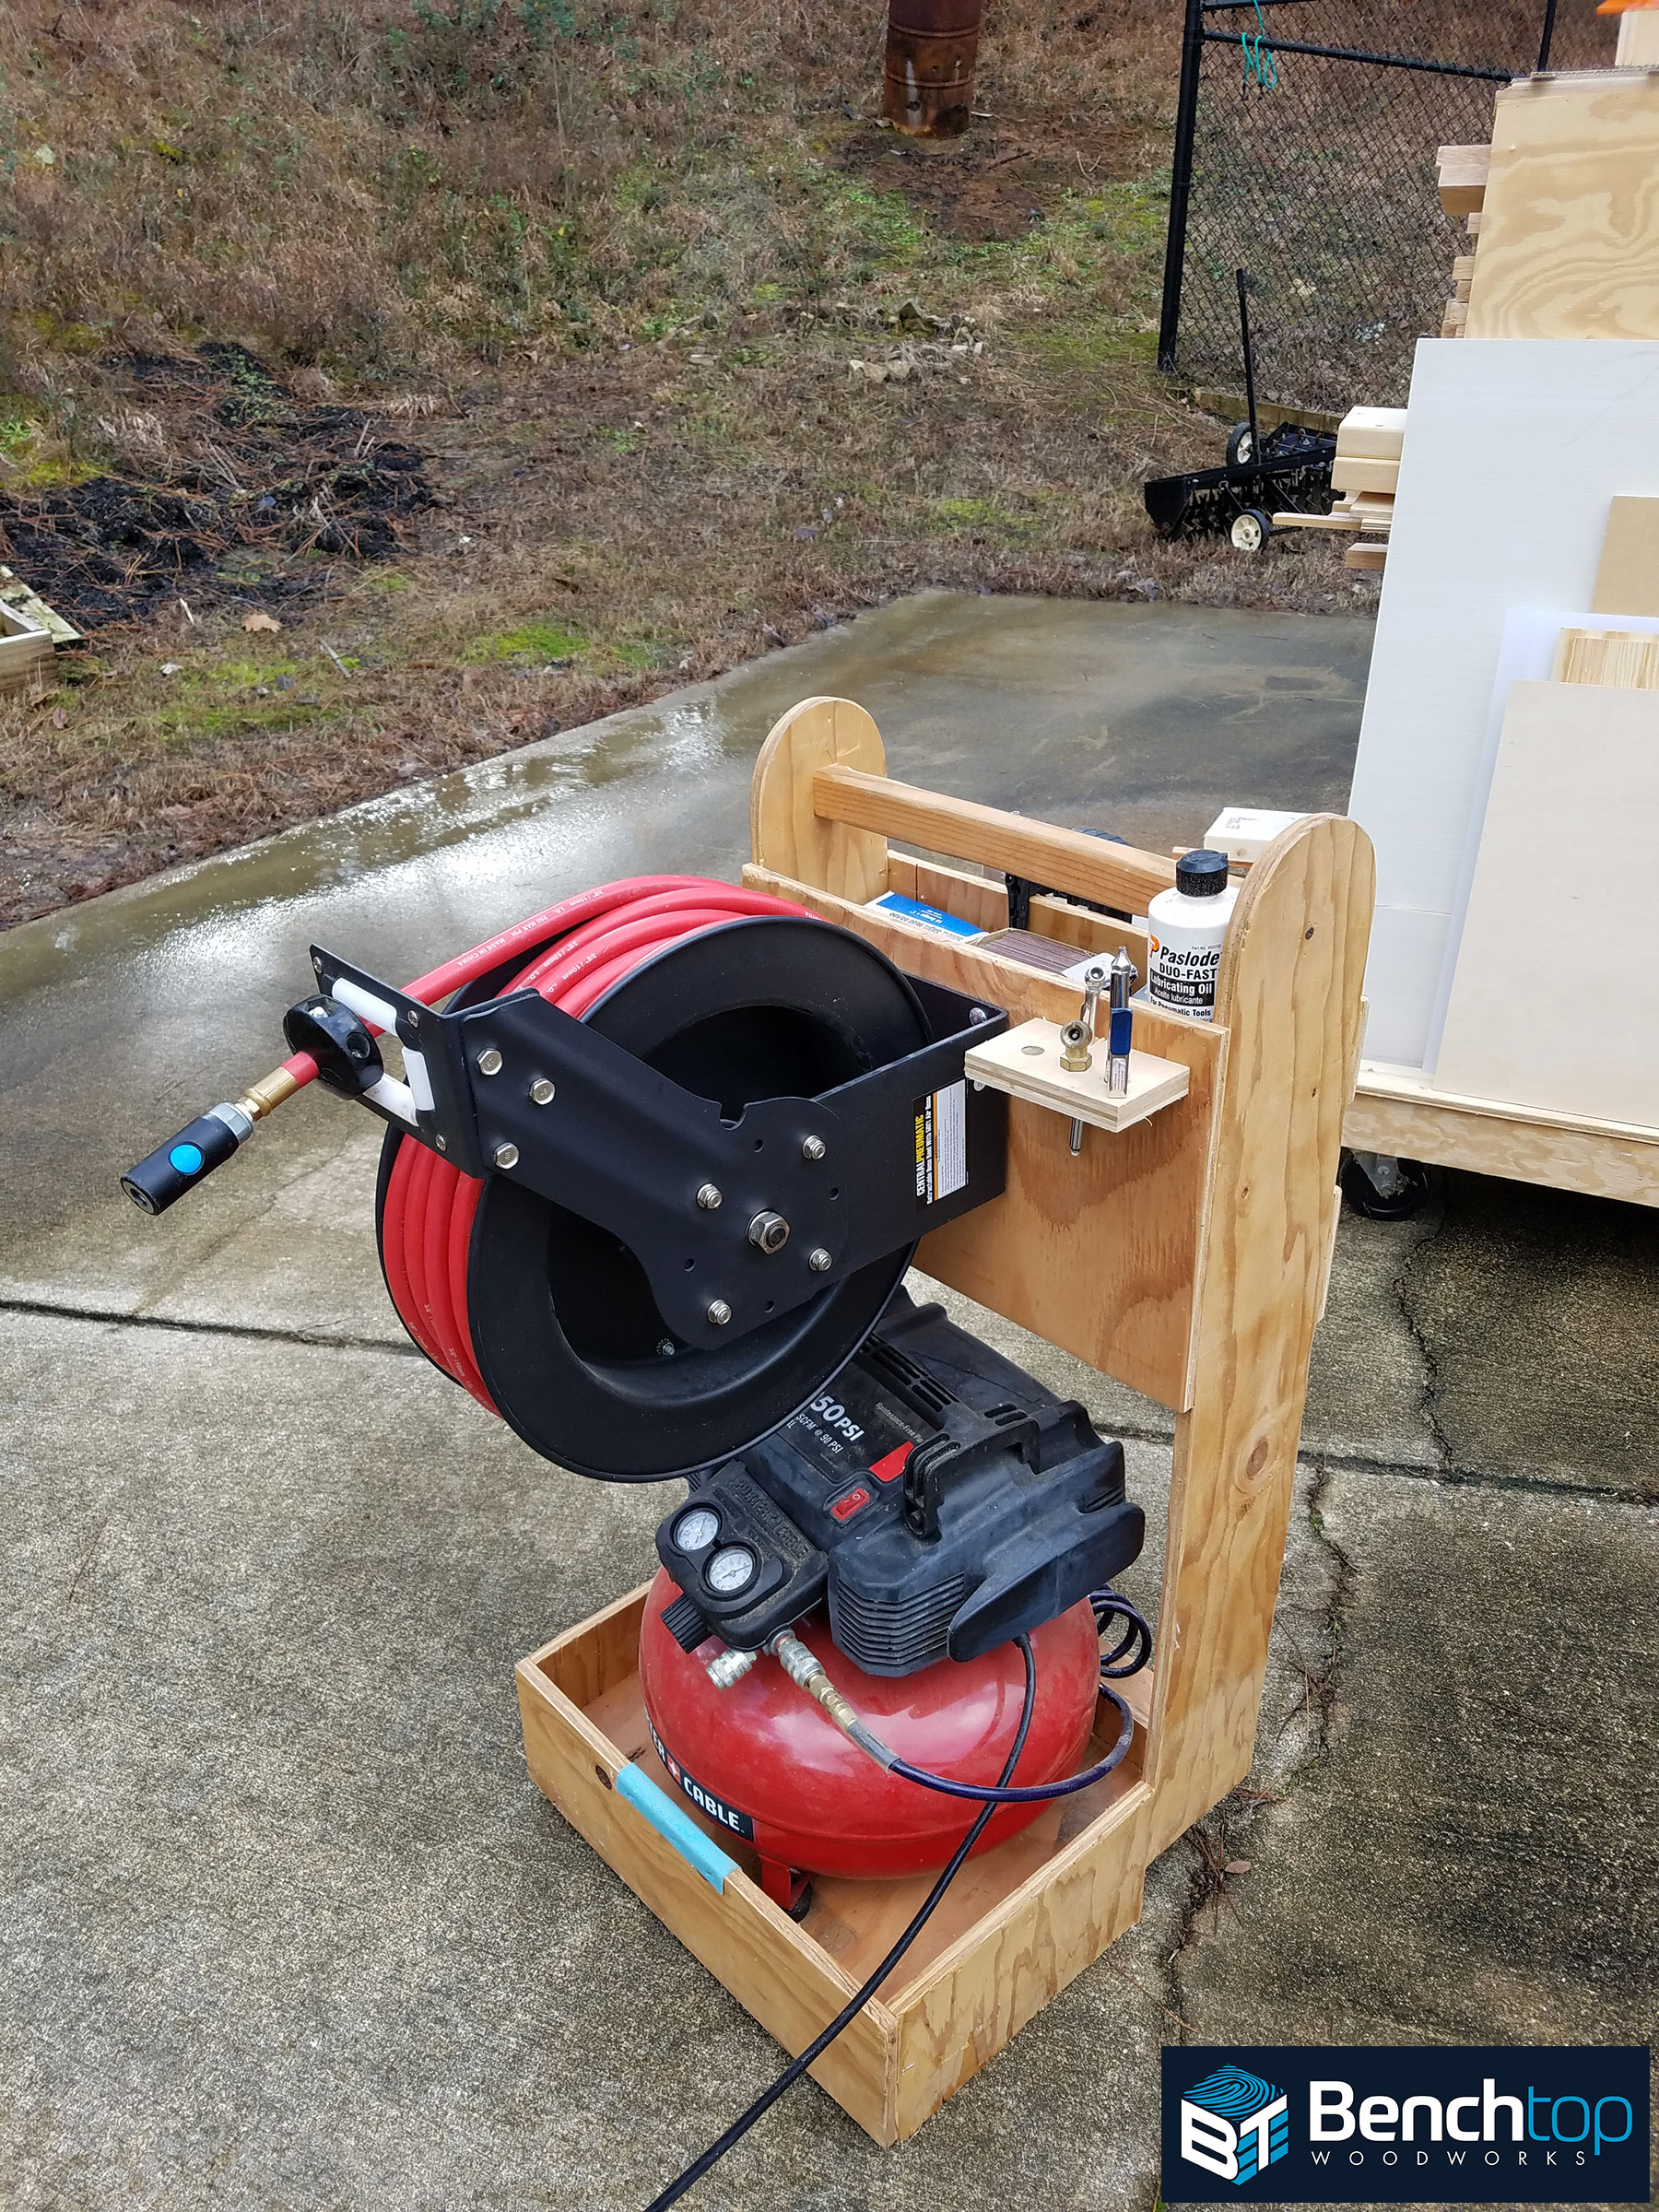
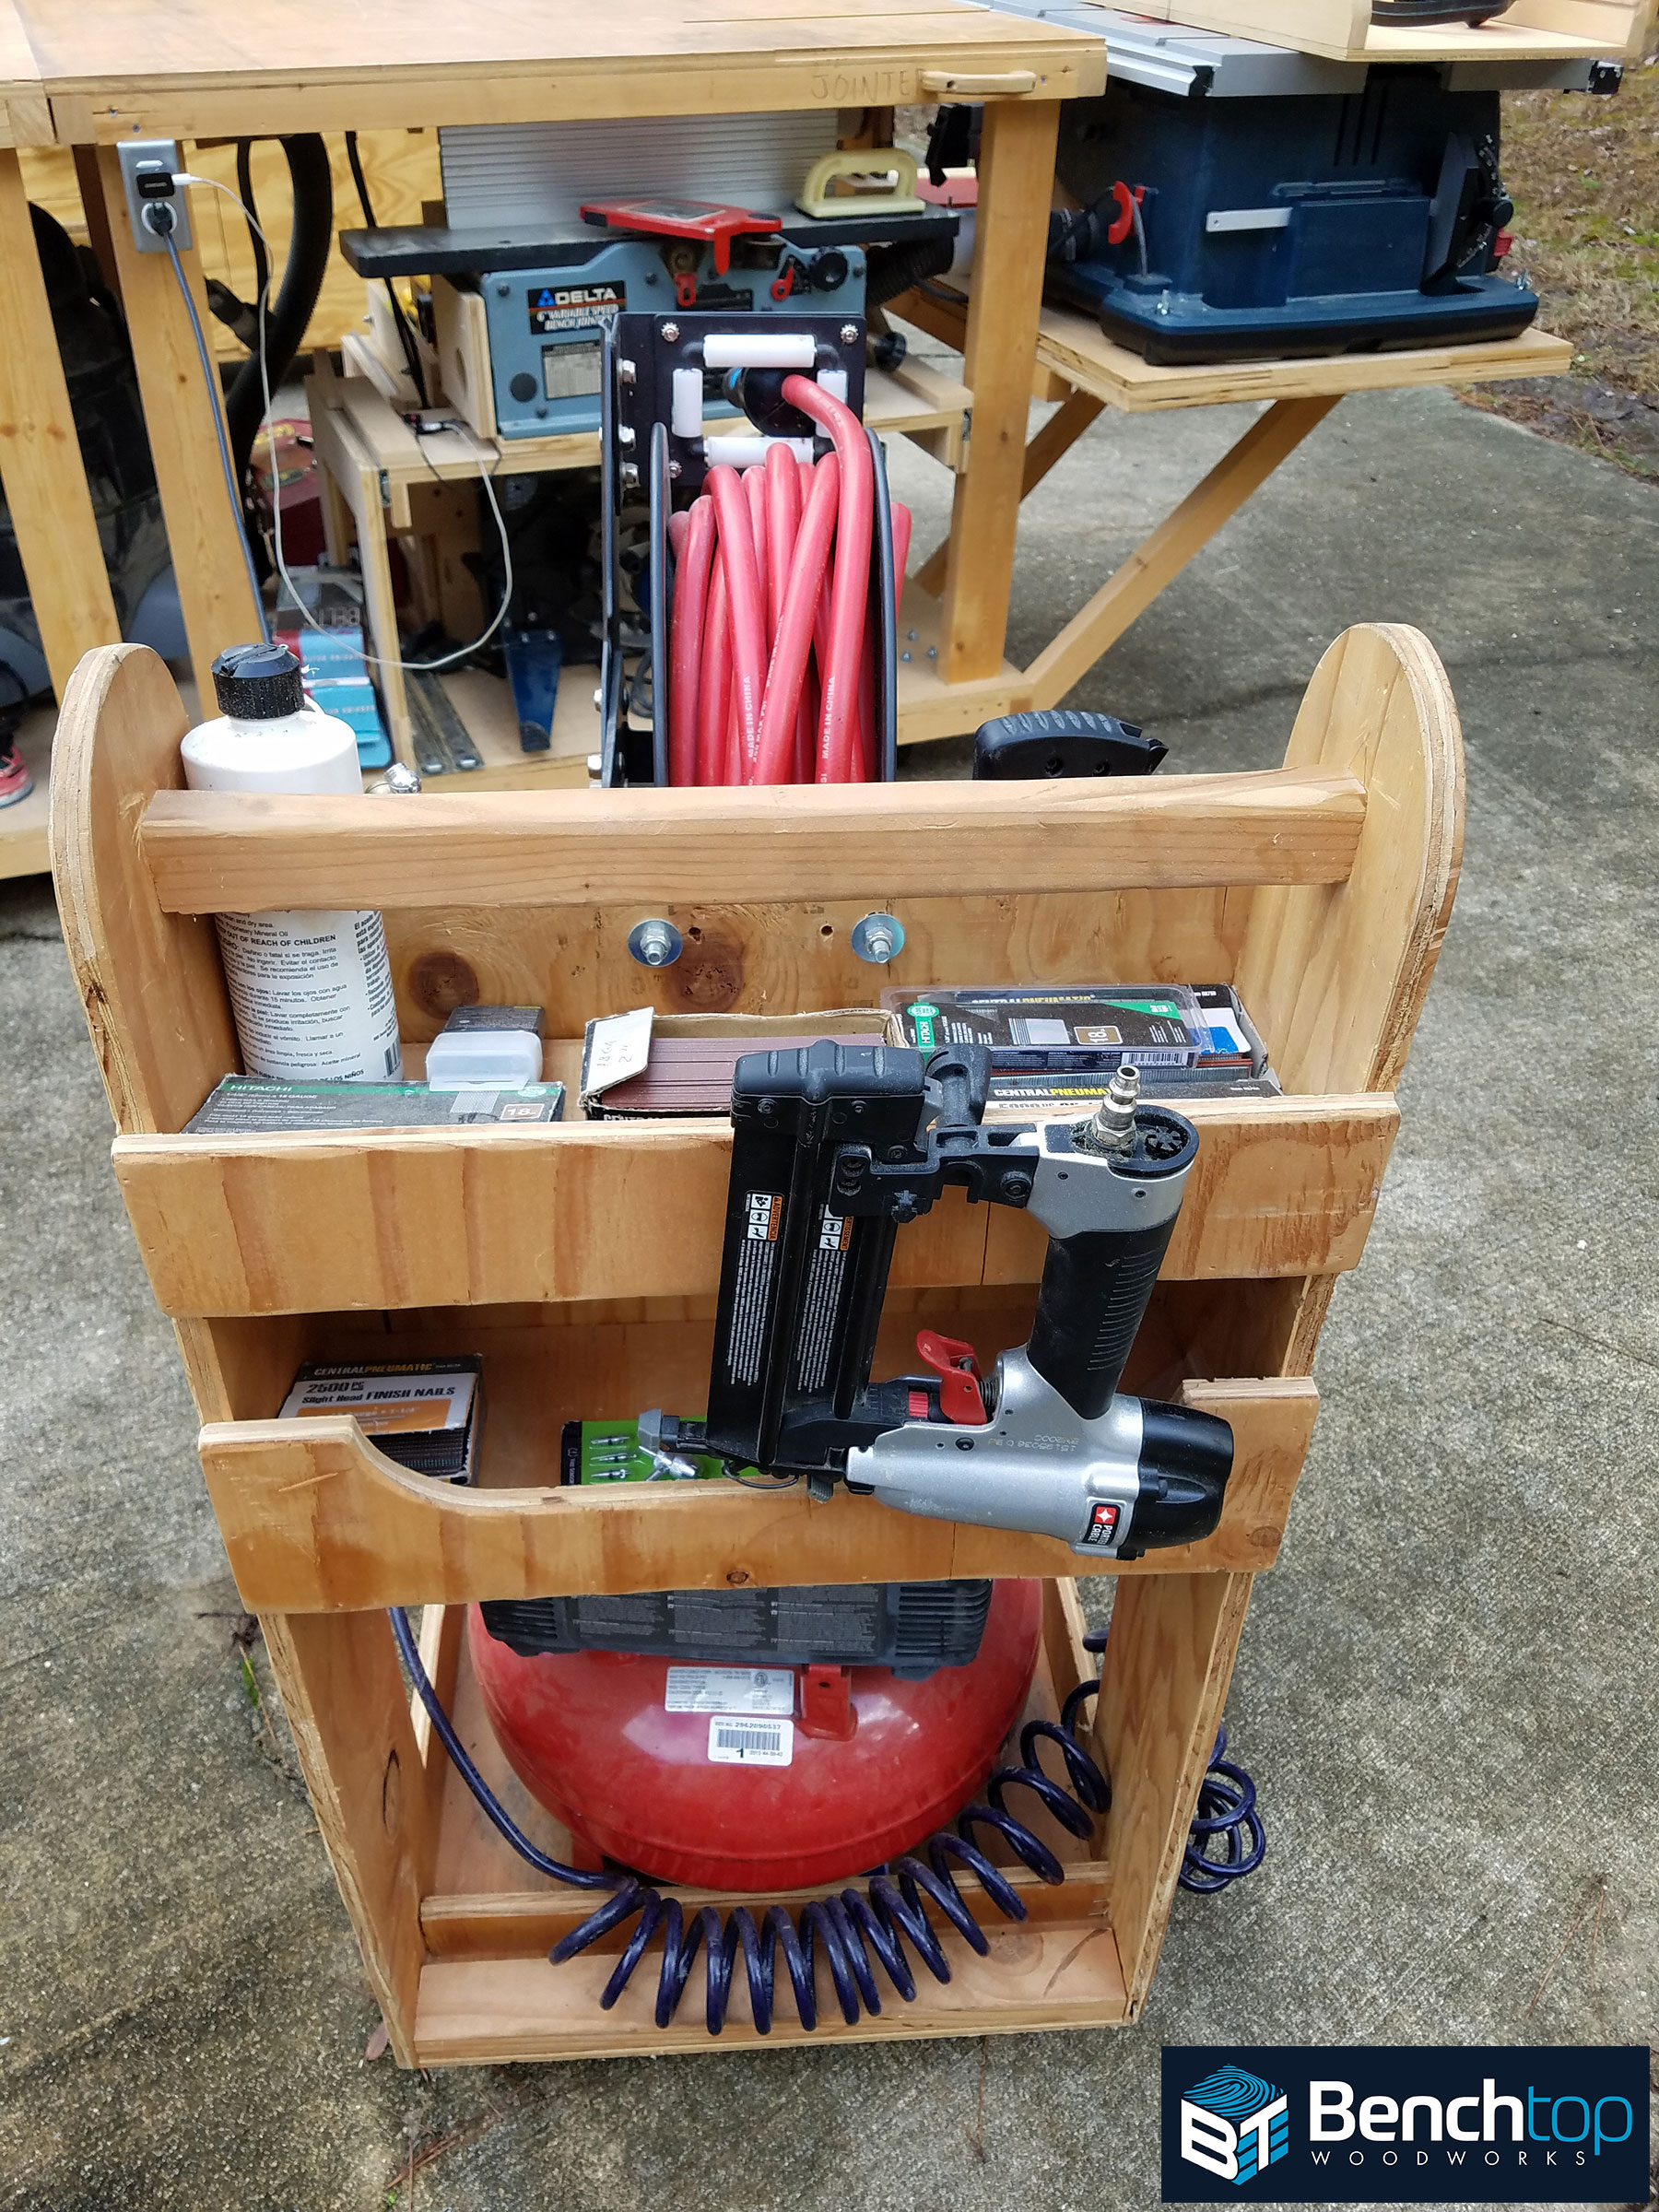
Here is my air-compressor cart (20-21), one of my first personal shop projects inspired by a design featured in The Family Handyman. The cart keeps all of my air nailers, brads, and commonly used tools together and mobile. I added an auto-retracting air-hose reel several years later which makes compressed air an absolute dream to use in and outside of the shop.
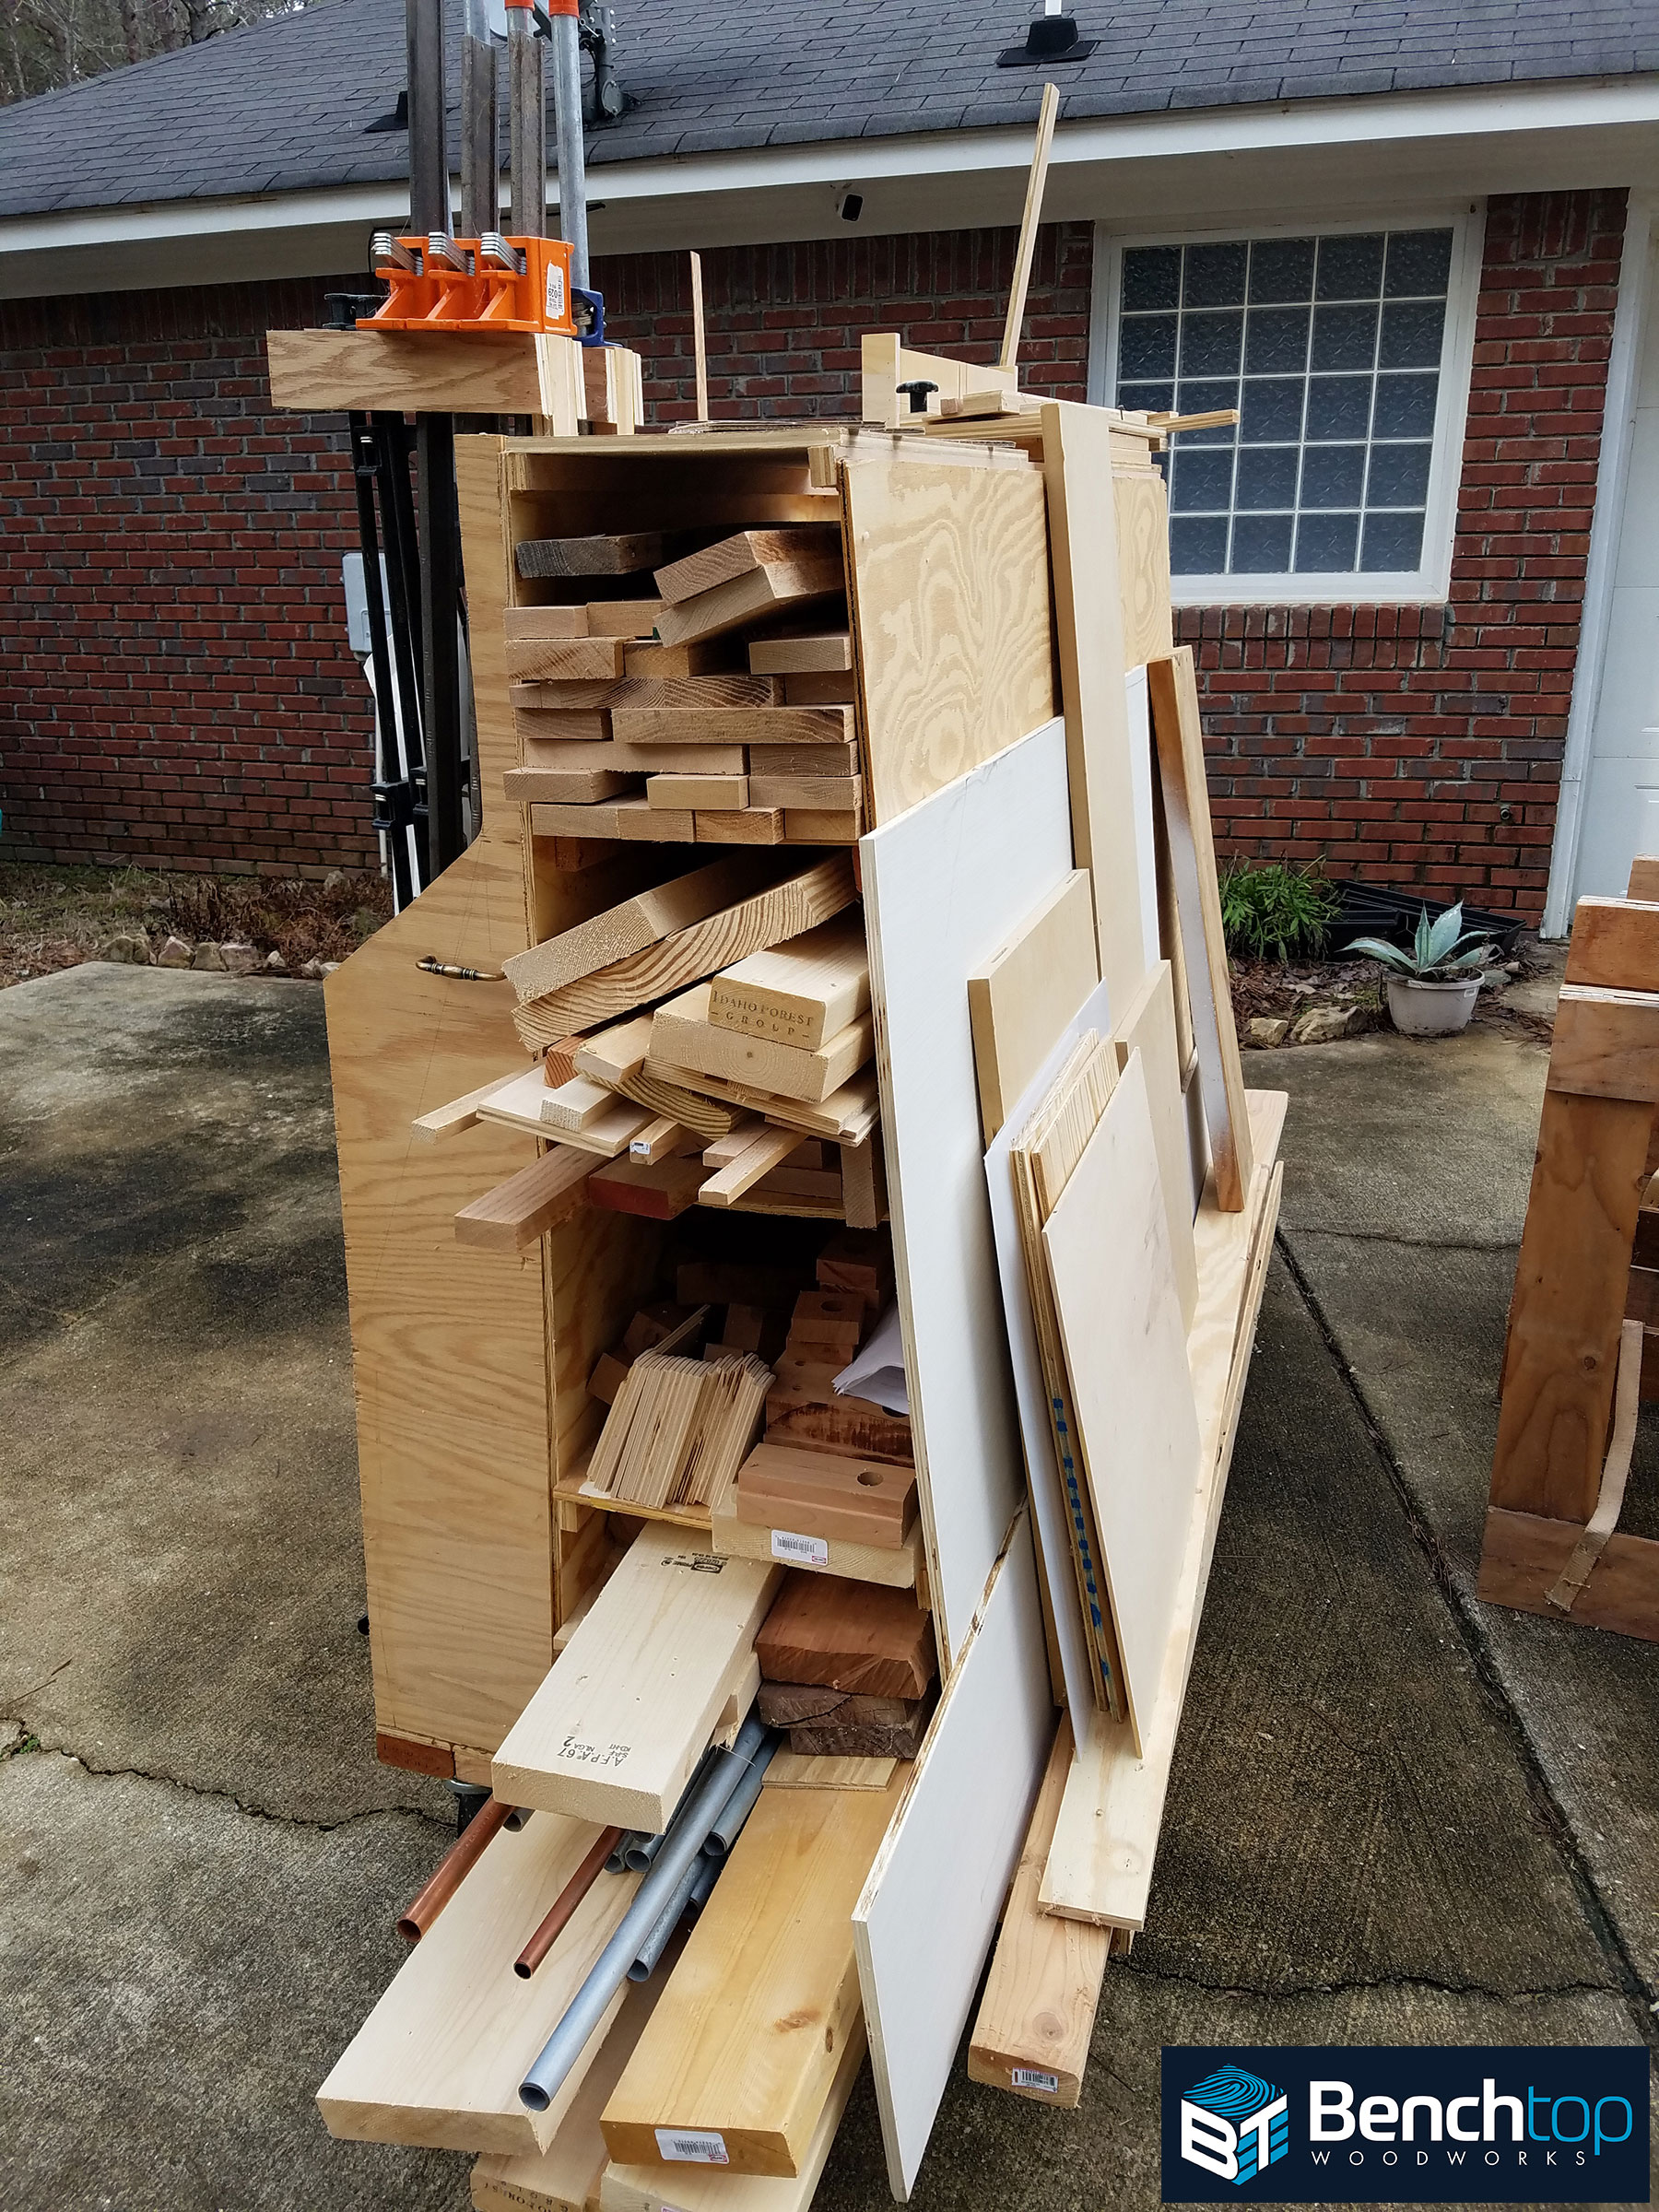
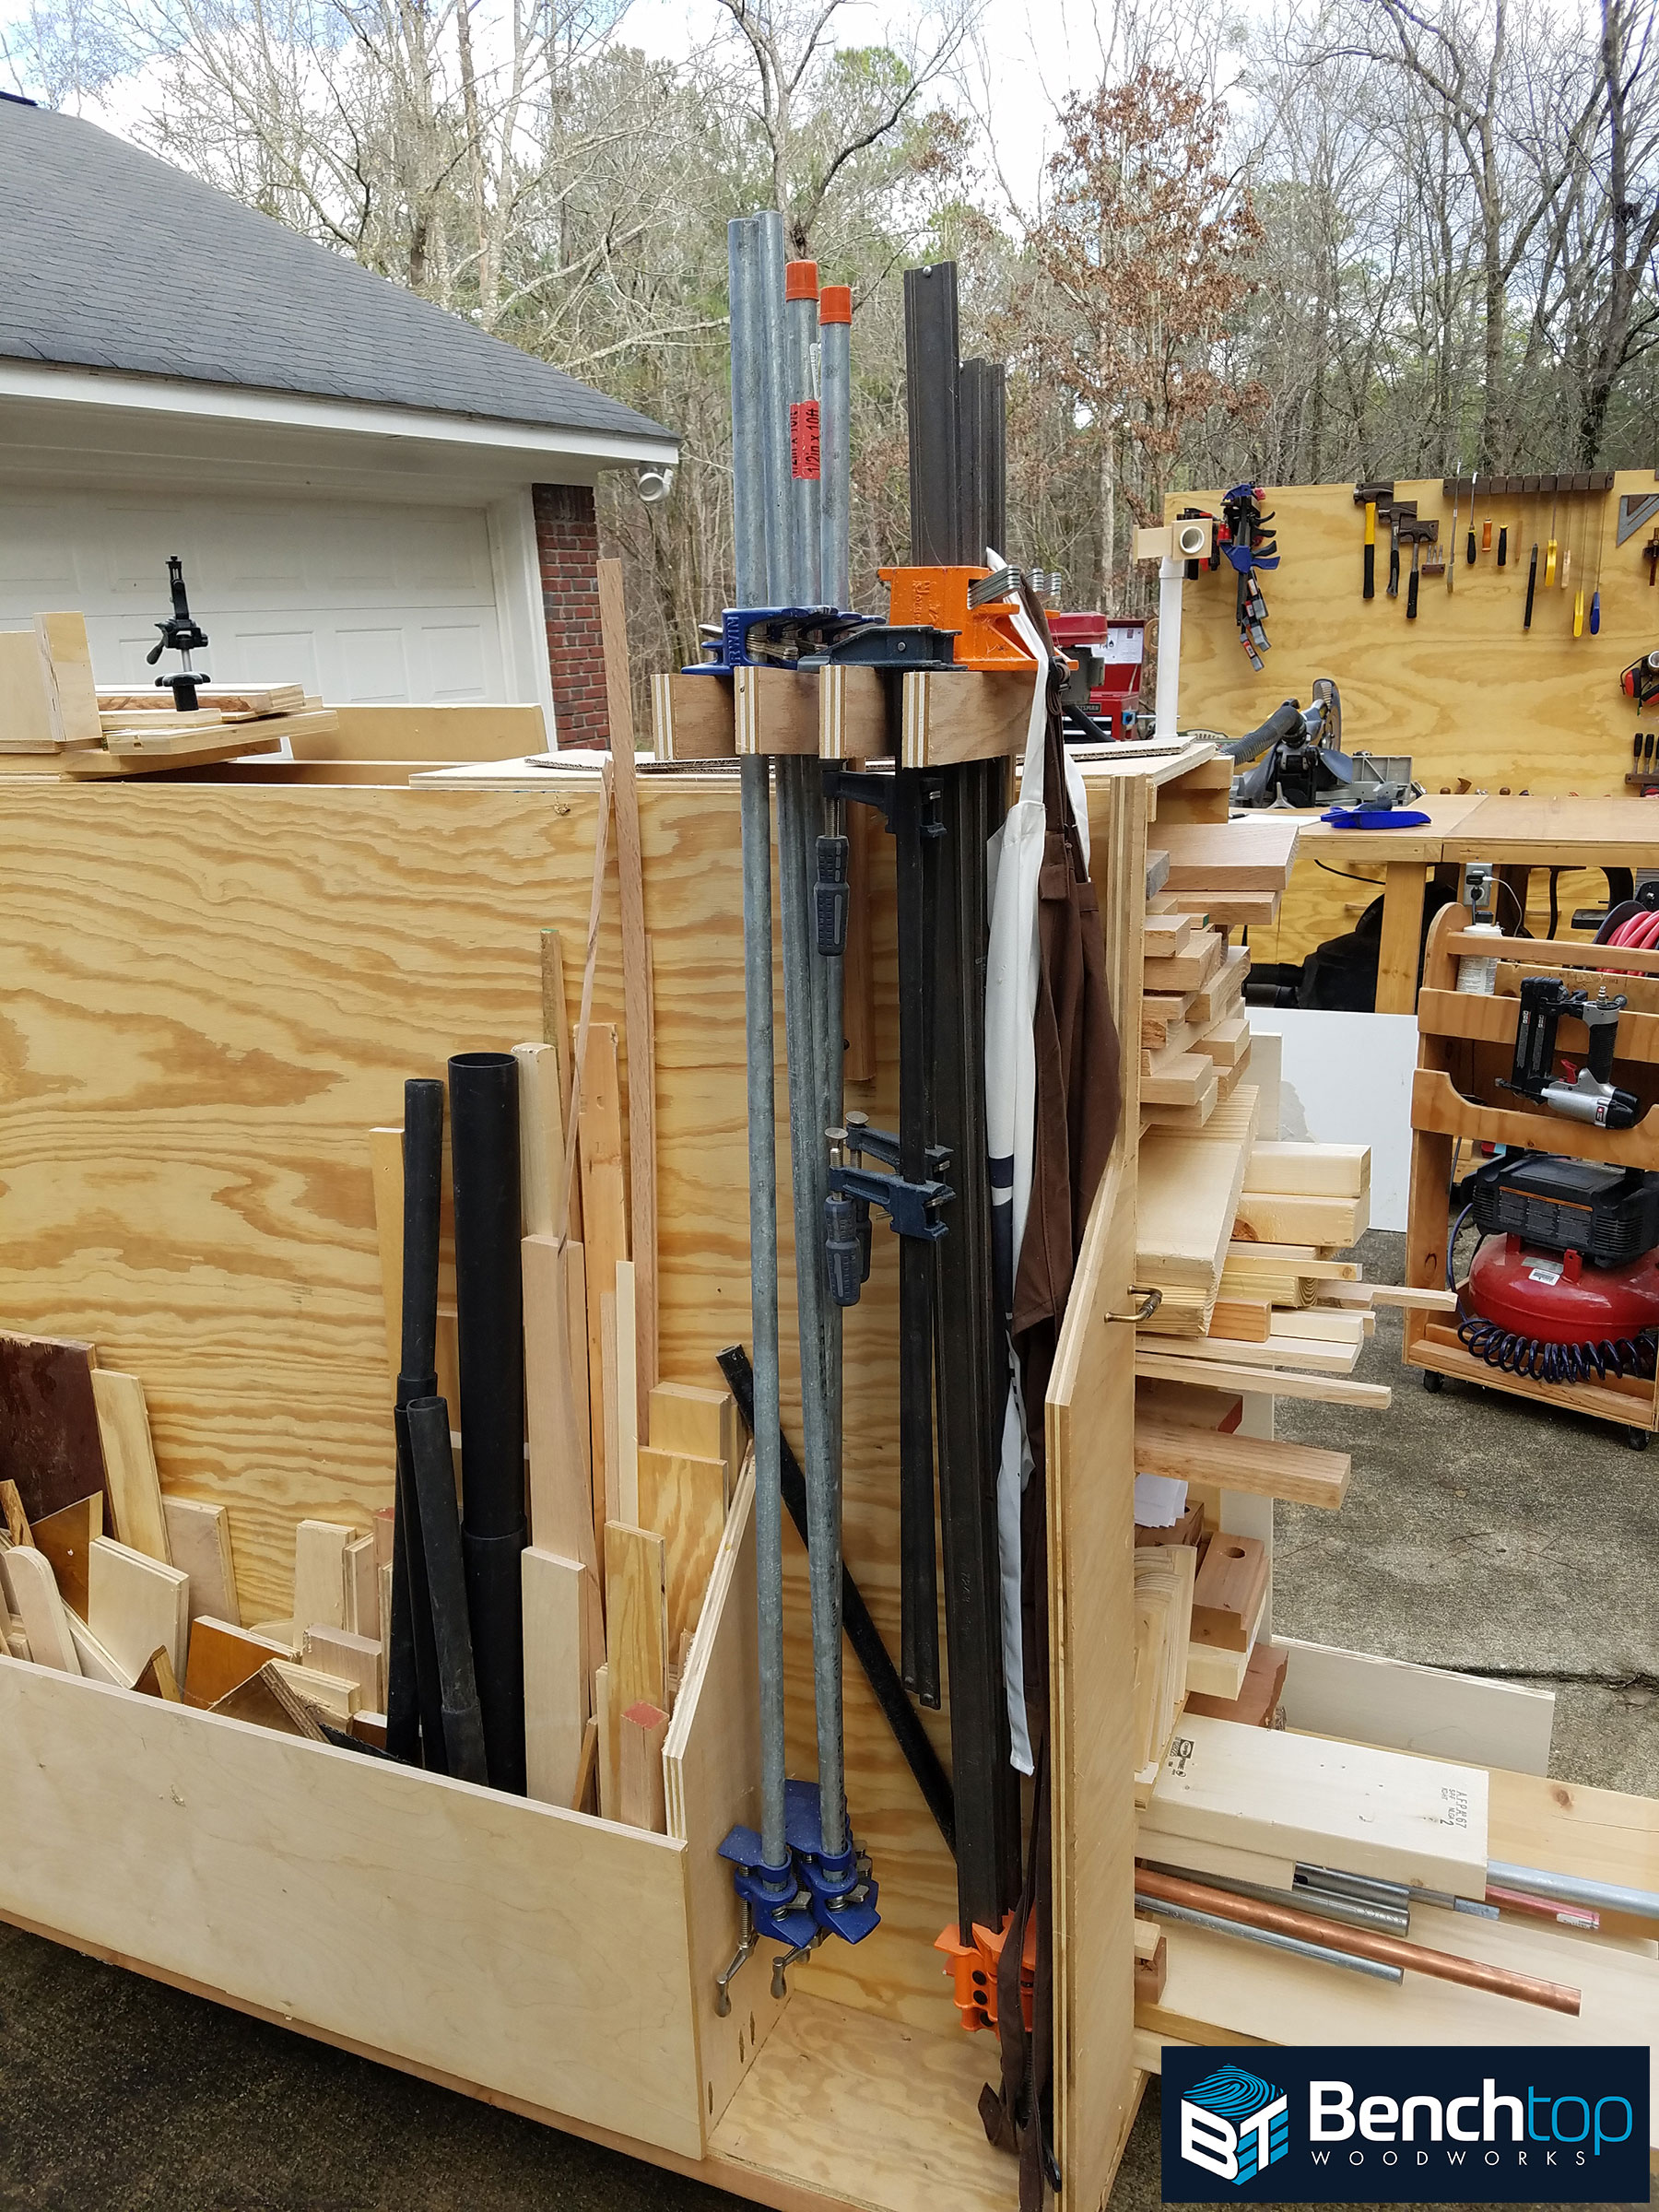
Material storage can be a headache in any shop space if you allow it to be disorganized. My dad always had multiple to nearly a dozen lumber racks full of curing and aging woods. I don’t have the luxury of space or ready access to a sawyer so I store my dried lumber and sheet-goods on a mobile cart. My design is a mash-up of several features likely found on Pinterest. As one of the three largest fixtures in my shop, its my best solution so far to keeping materials and project parts and those ever-useful scraps somewhat organized and mobile. I kept the length to 6ft so that it isn’t too obnoxiously large when I’m not storing full-sized sheet goods or lumber on it. (22-23)
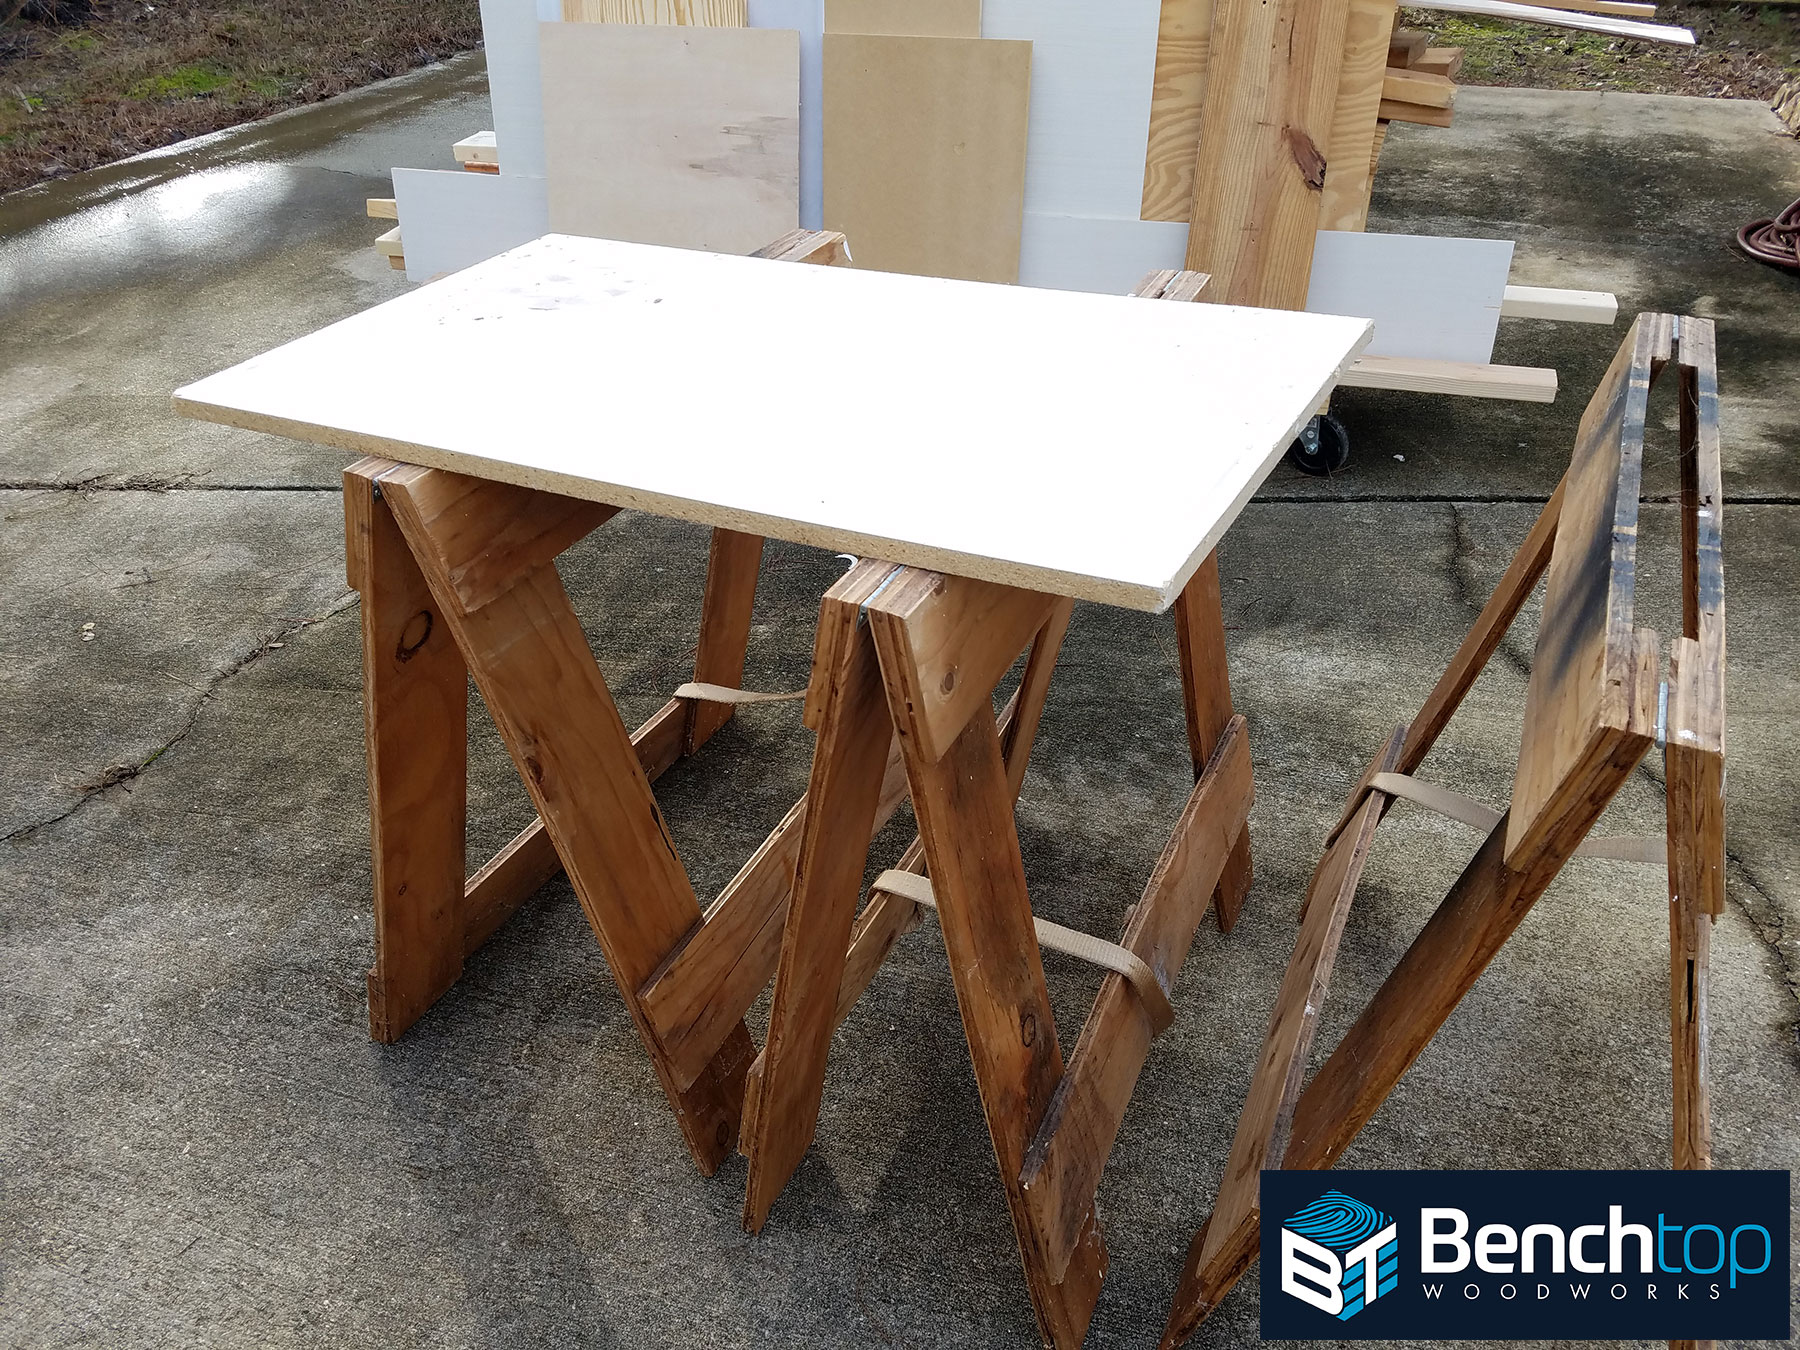
From time to time I’ll set-up auxiliary benches outdoors or stack materials on several folding saw-horses. (24) I built them approximately 8 years ago in my first personal garage shop and still find them getting used from time to time.
In the next series of twelve photos (25-36) I detail the main work-bench and each machine fixture set-up. Please note my goal of not limiting the capacity or set-up time for each machine.
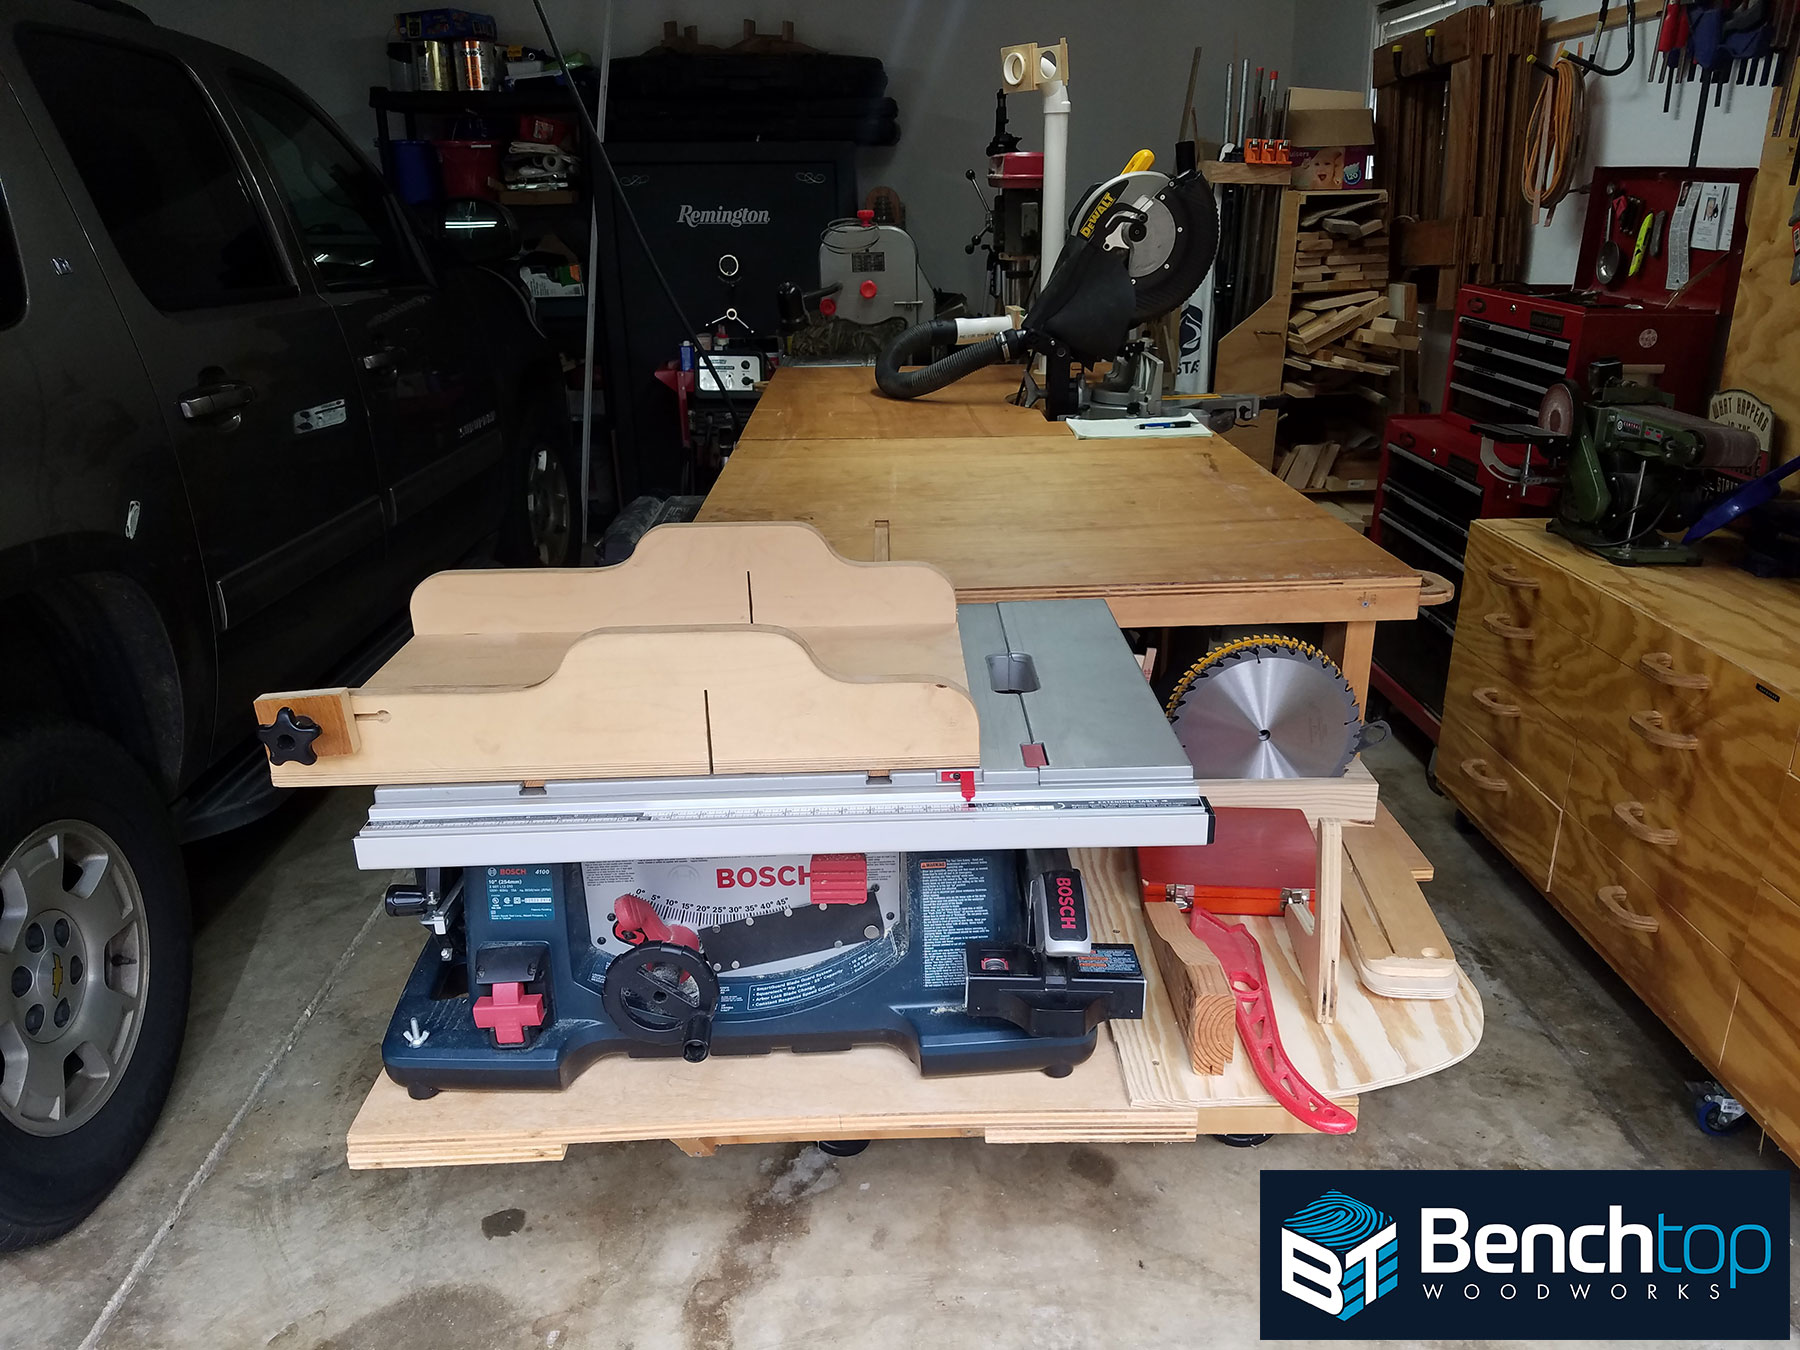
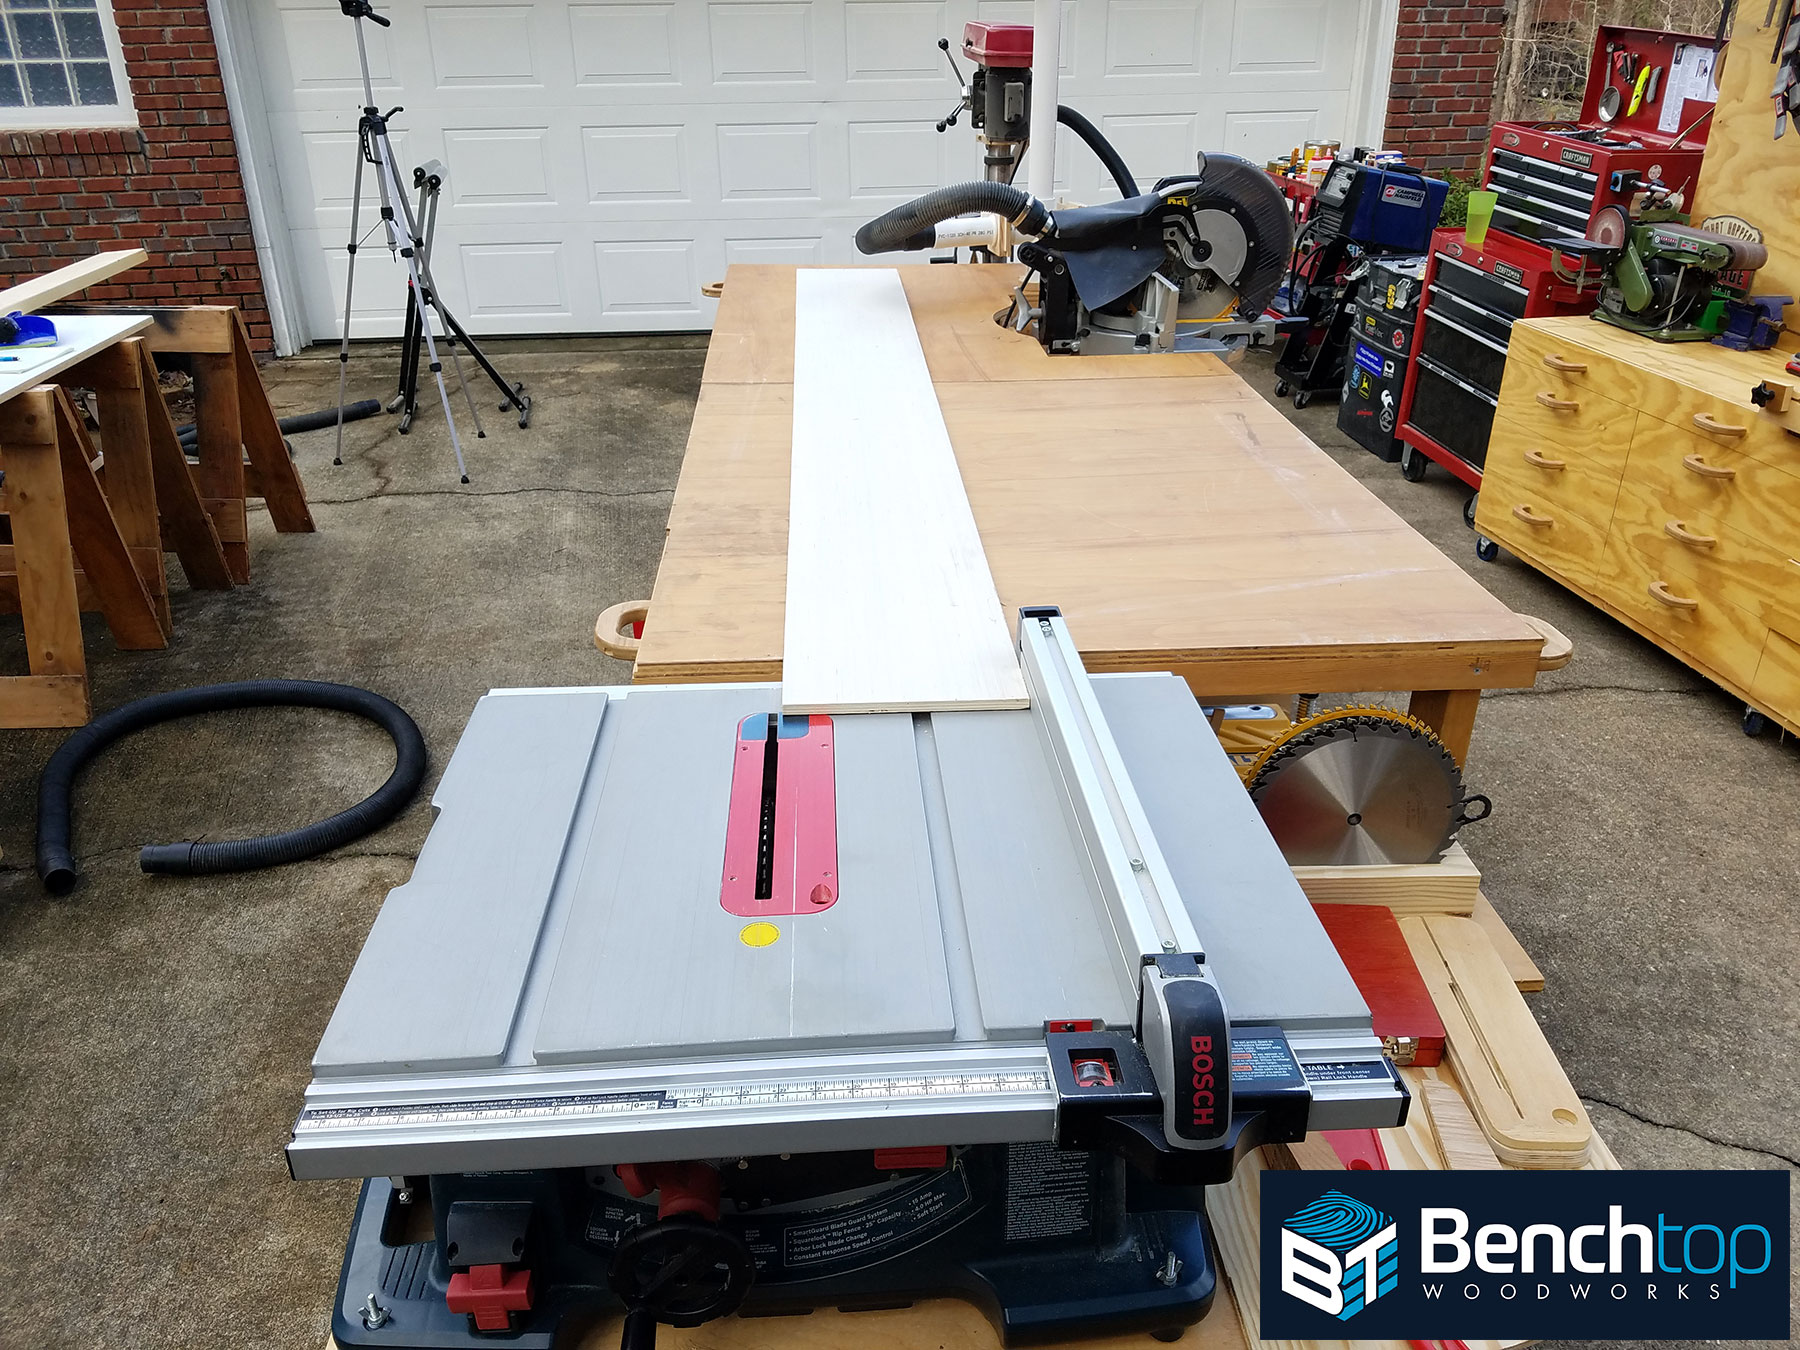
The table saw is always ready to go for both cross-cutting and ripping operations. Building the large out-feed table was the best safety upgrade that I’ve ever given my shop. I will never go back to a saw with no out-feed support.
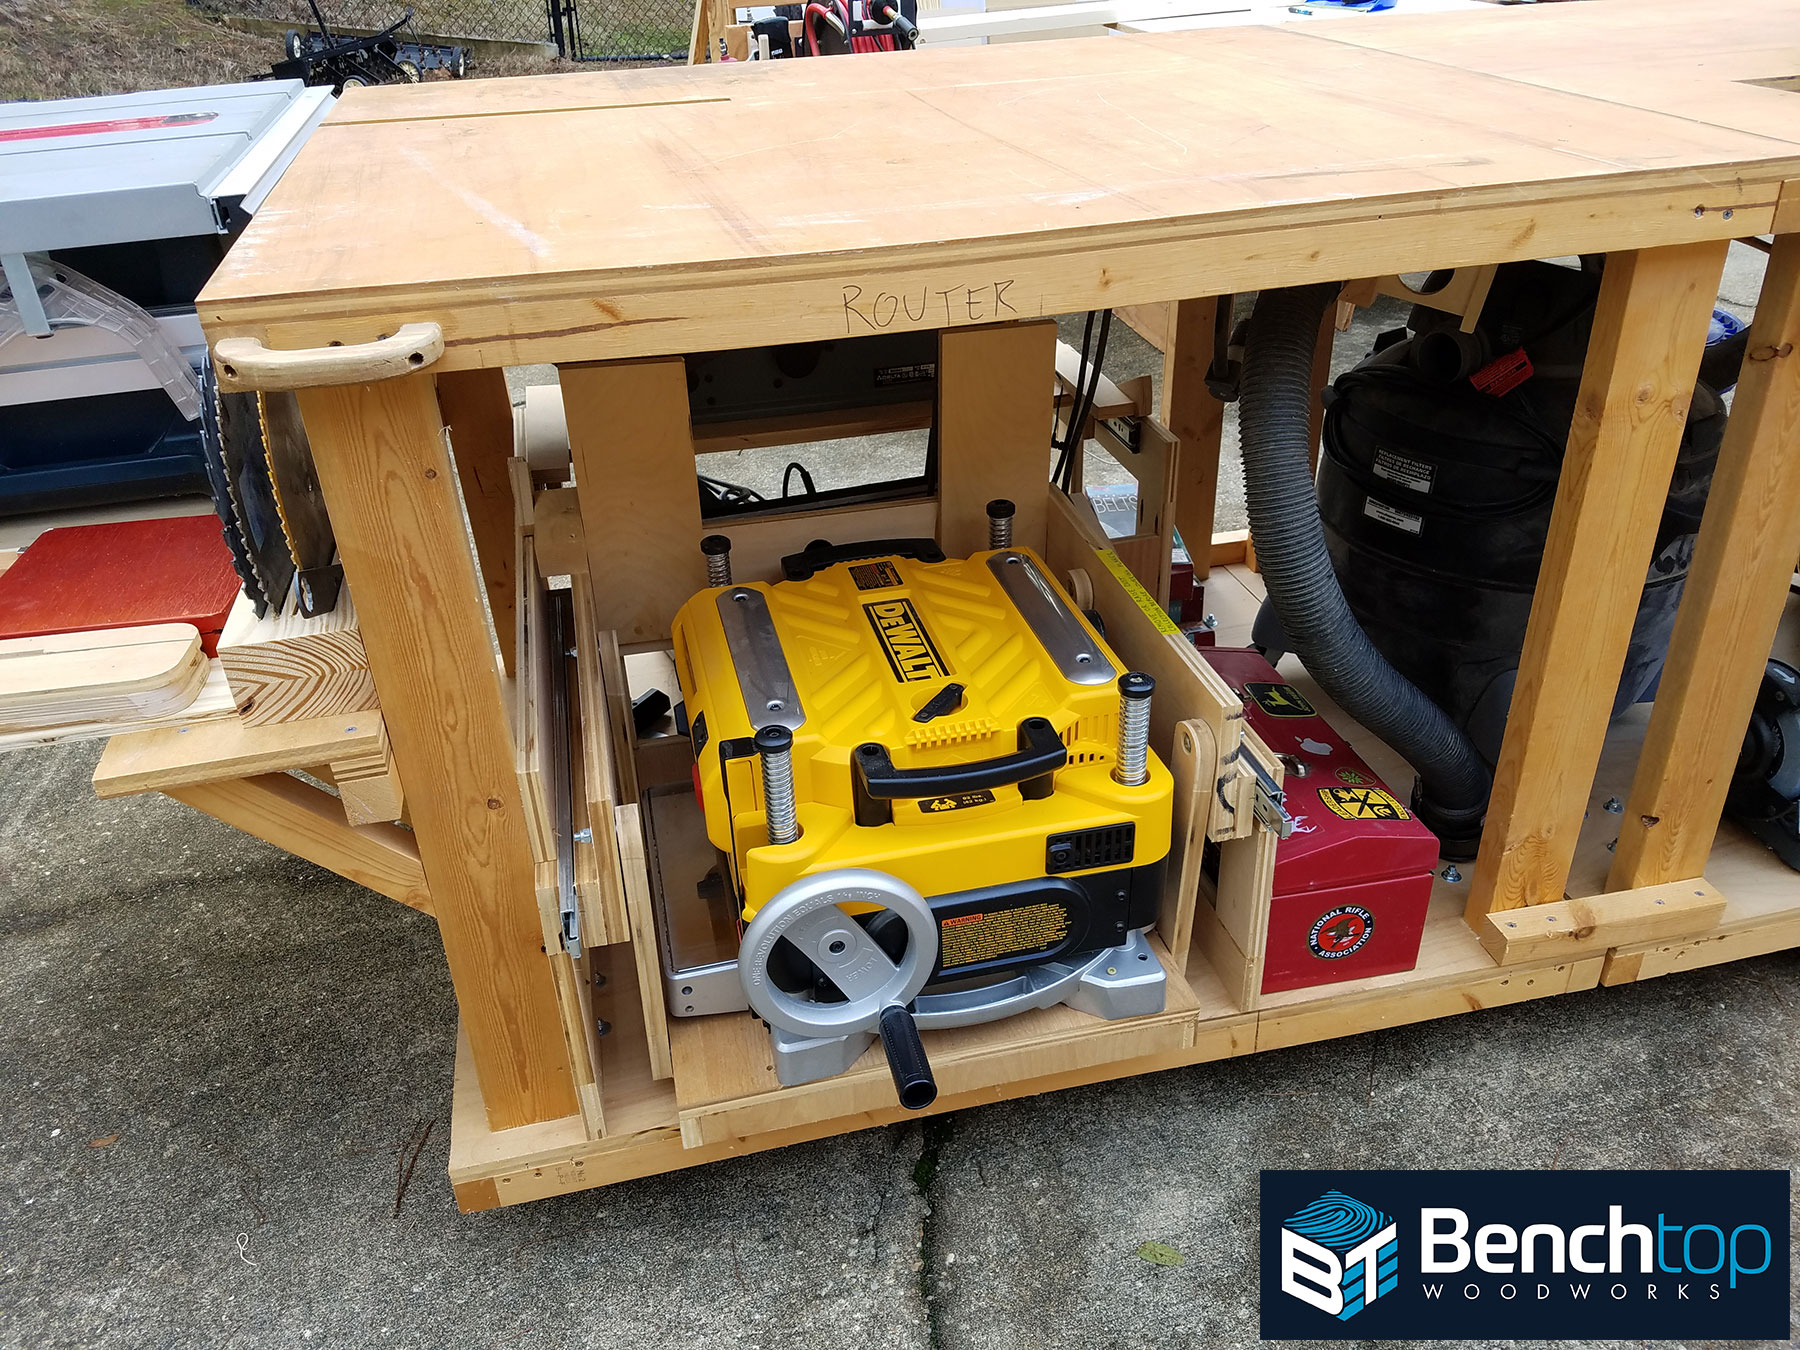
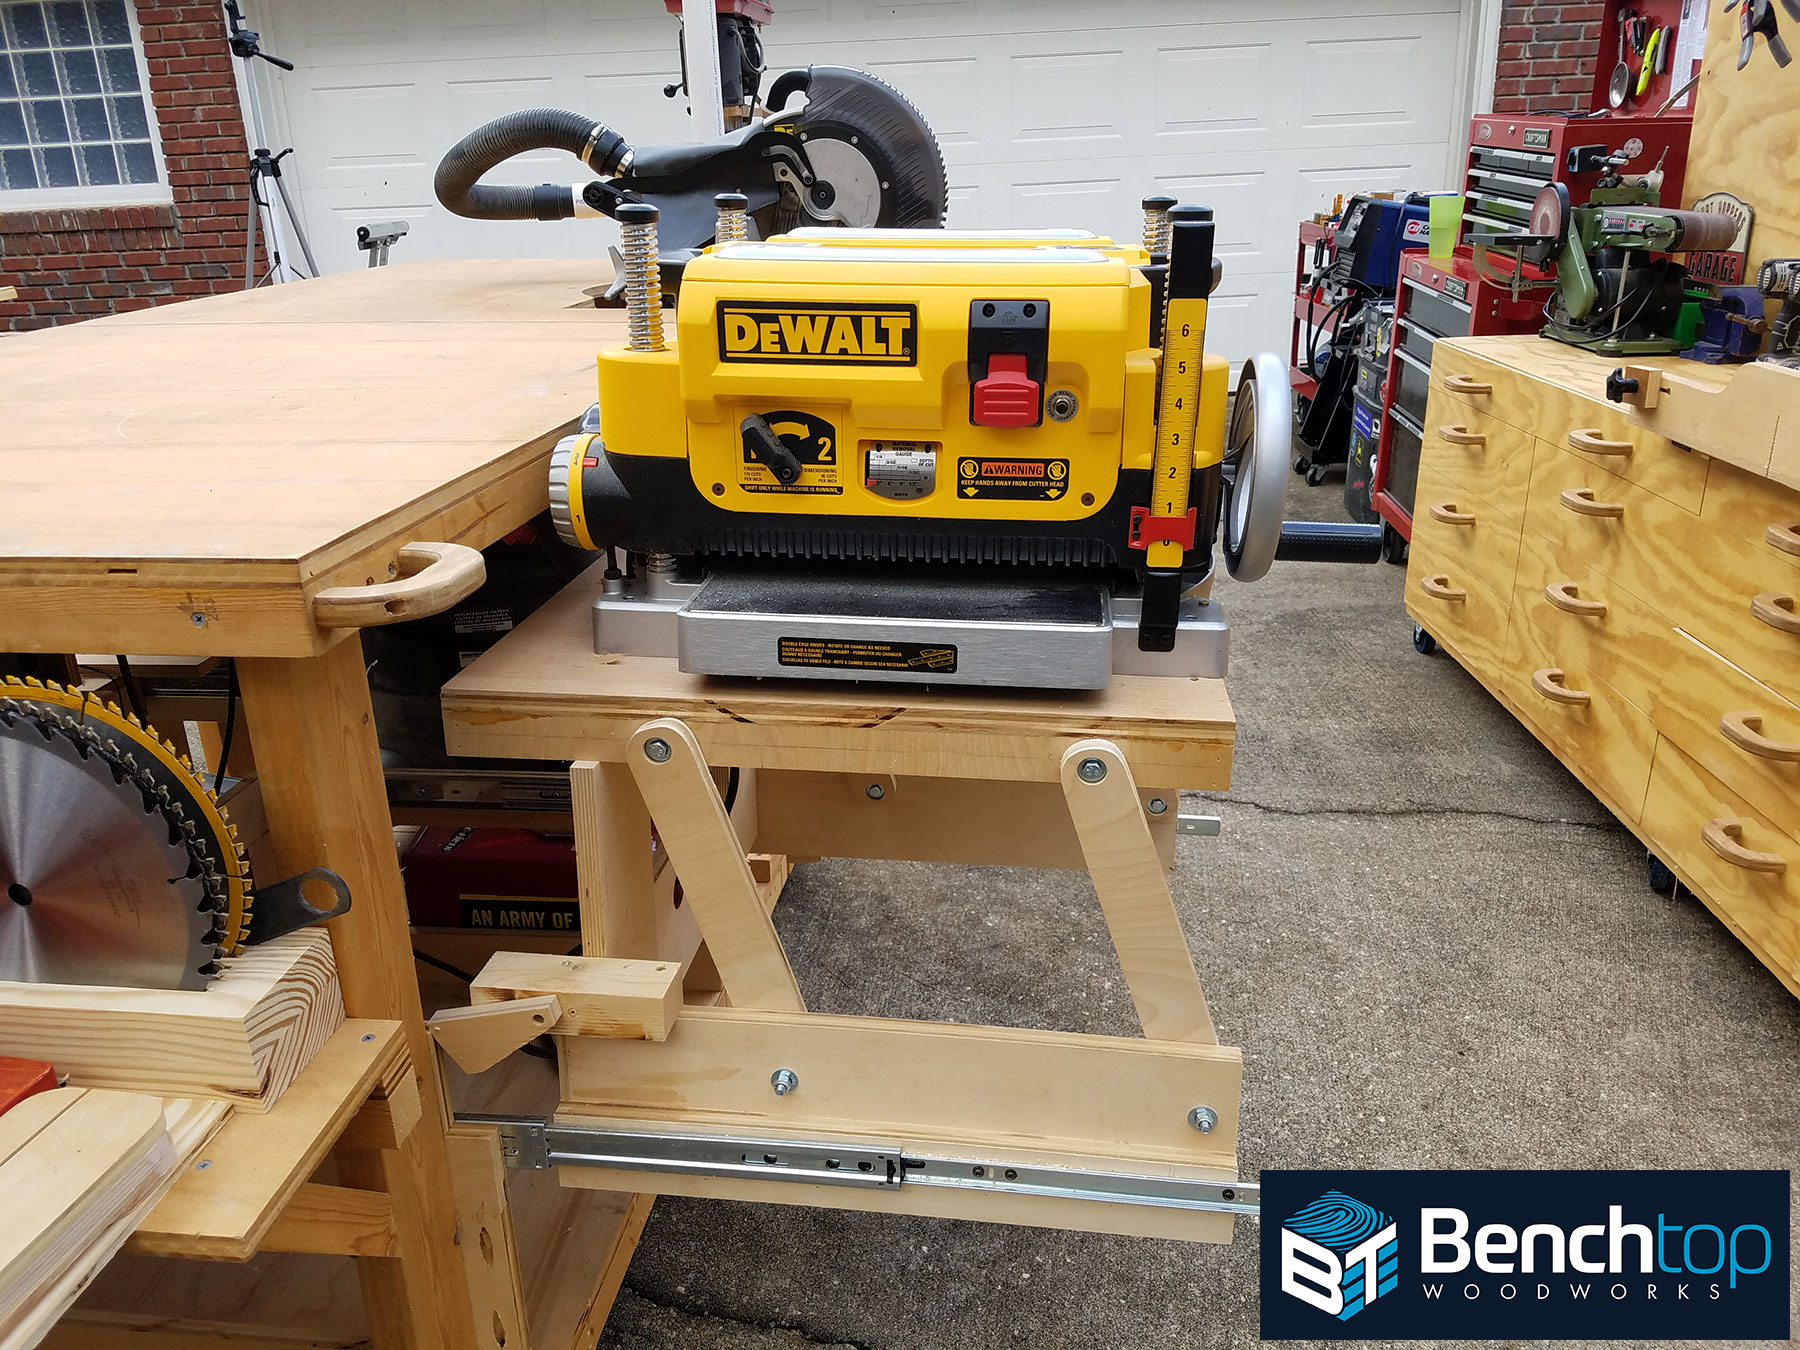
My planer, which is generally only used for milling at the beginning of a project has a specially designed drawer mount. The design is my own, but several key elements were borrowed from the American Woodworker, Power Tool-Friendly Bench.
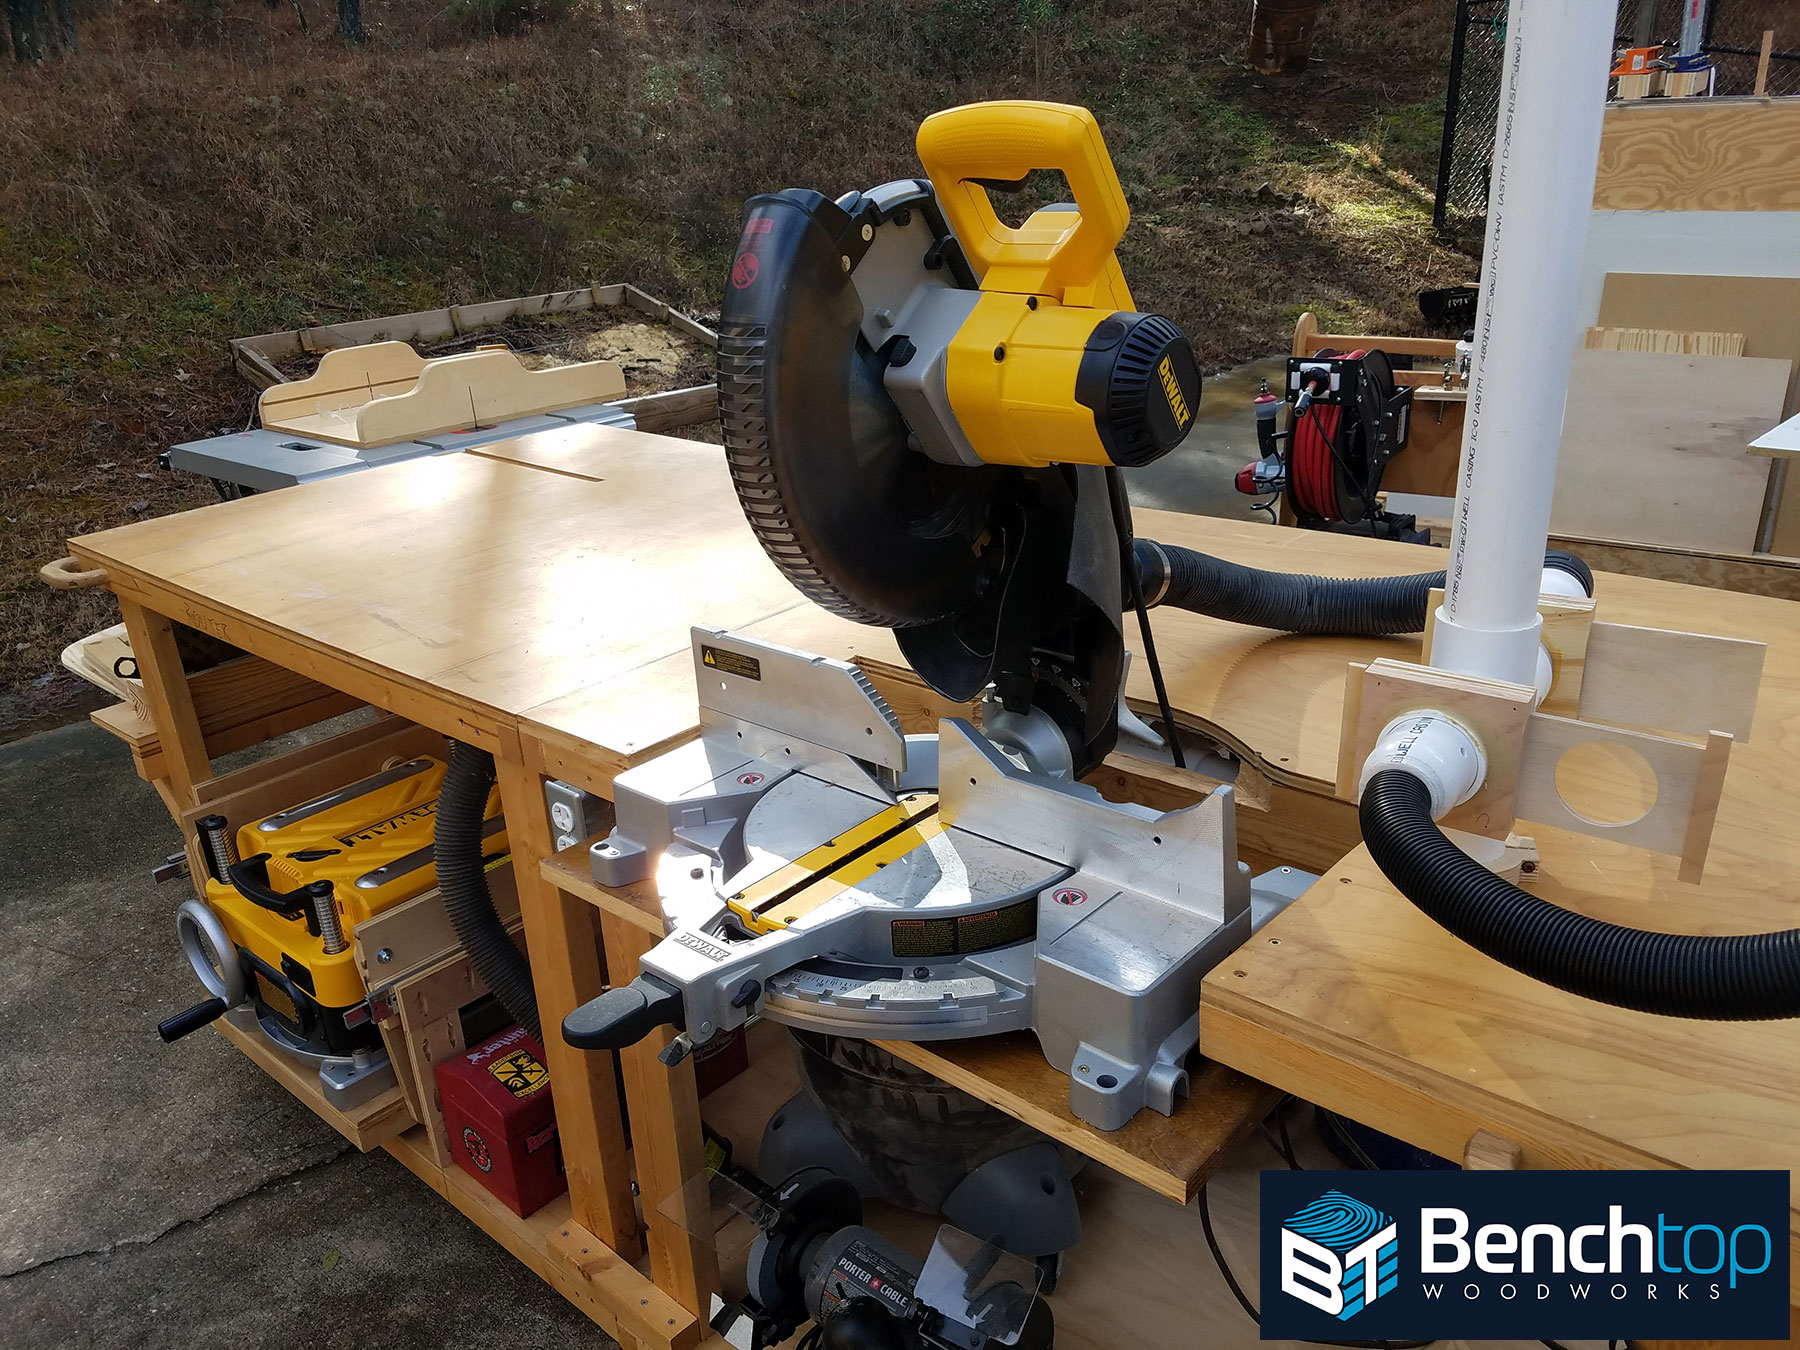
My miter saw is recessed into the table to allow for full 96” of cut-support and allows unlimited length material over-hanging the bench. I may enhance this with an auxiliary fence or stops in the future.
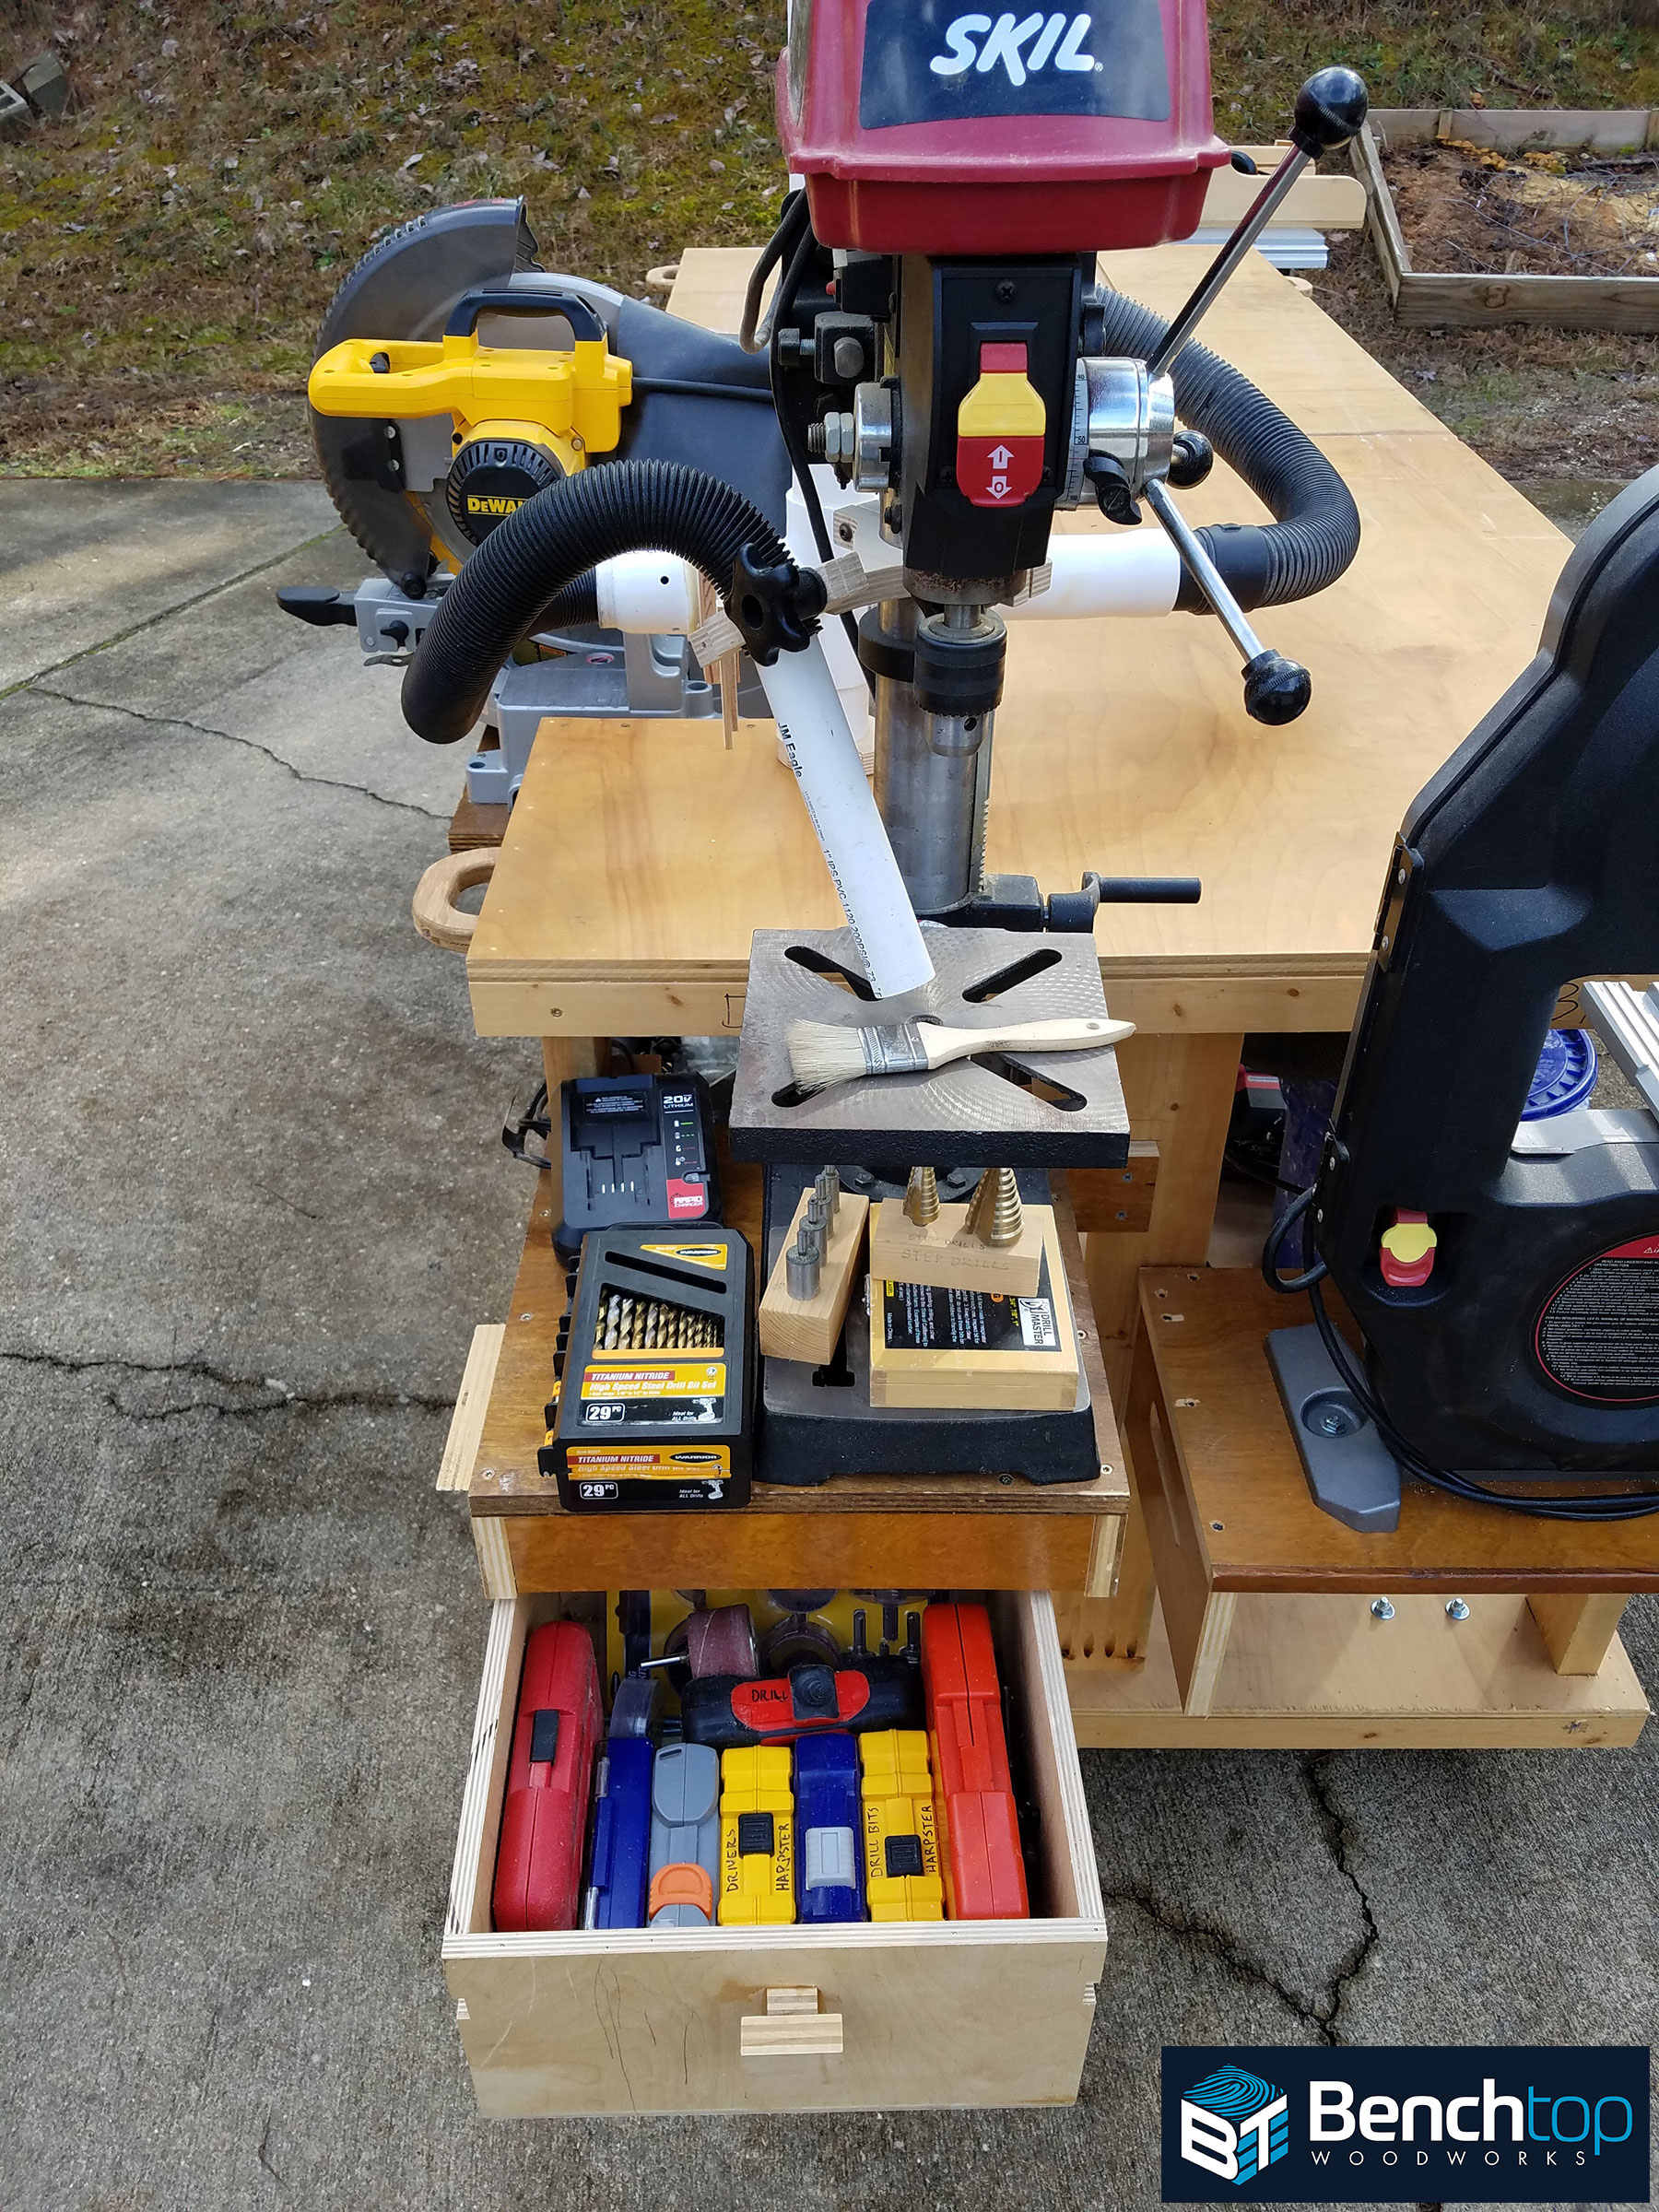
My drill press mount (31) with drawer is such a simple but user-friendly consolidation of things I routinely use that I’m not sure why it wasn’t one of my first ever projects. Tracking down drivers, bits and drills used to be an organizational nightmare.
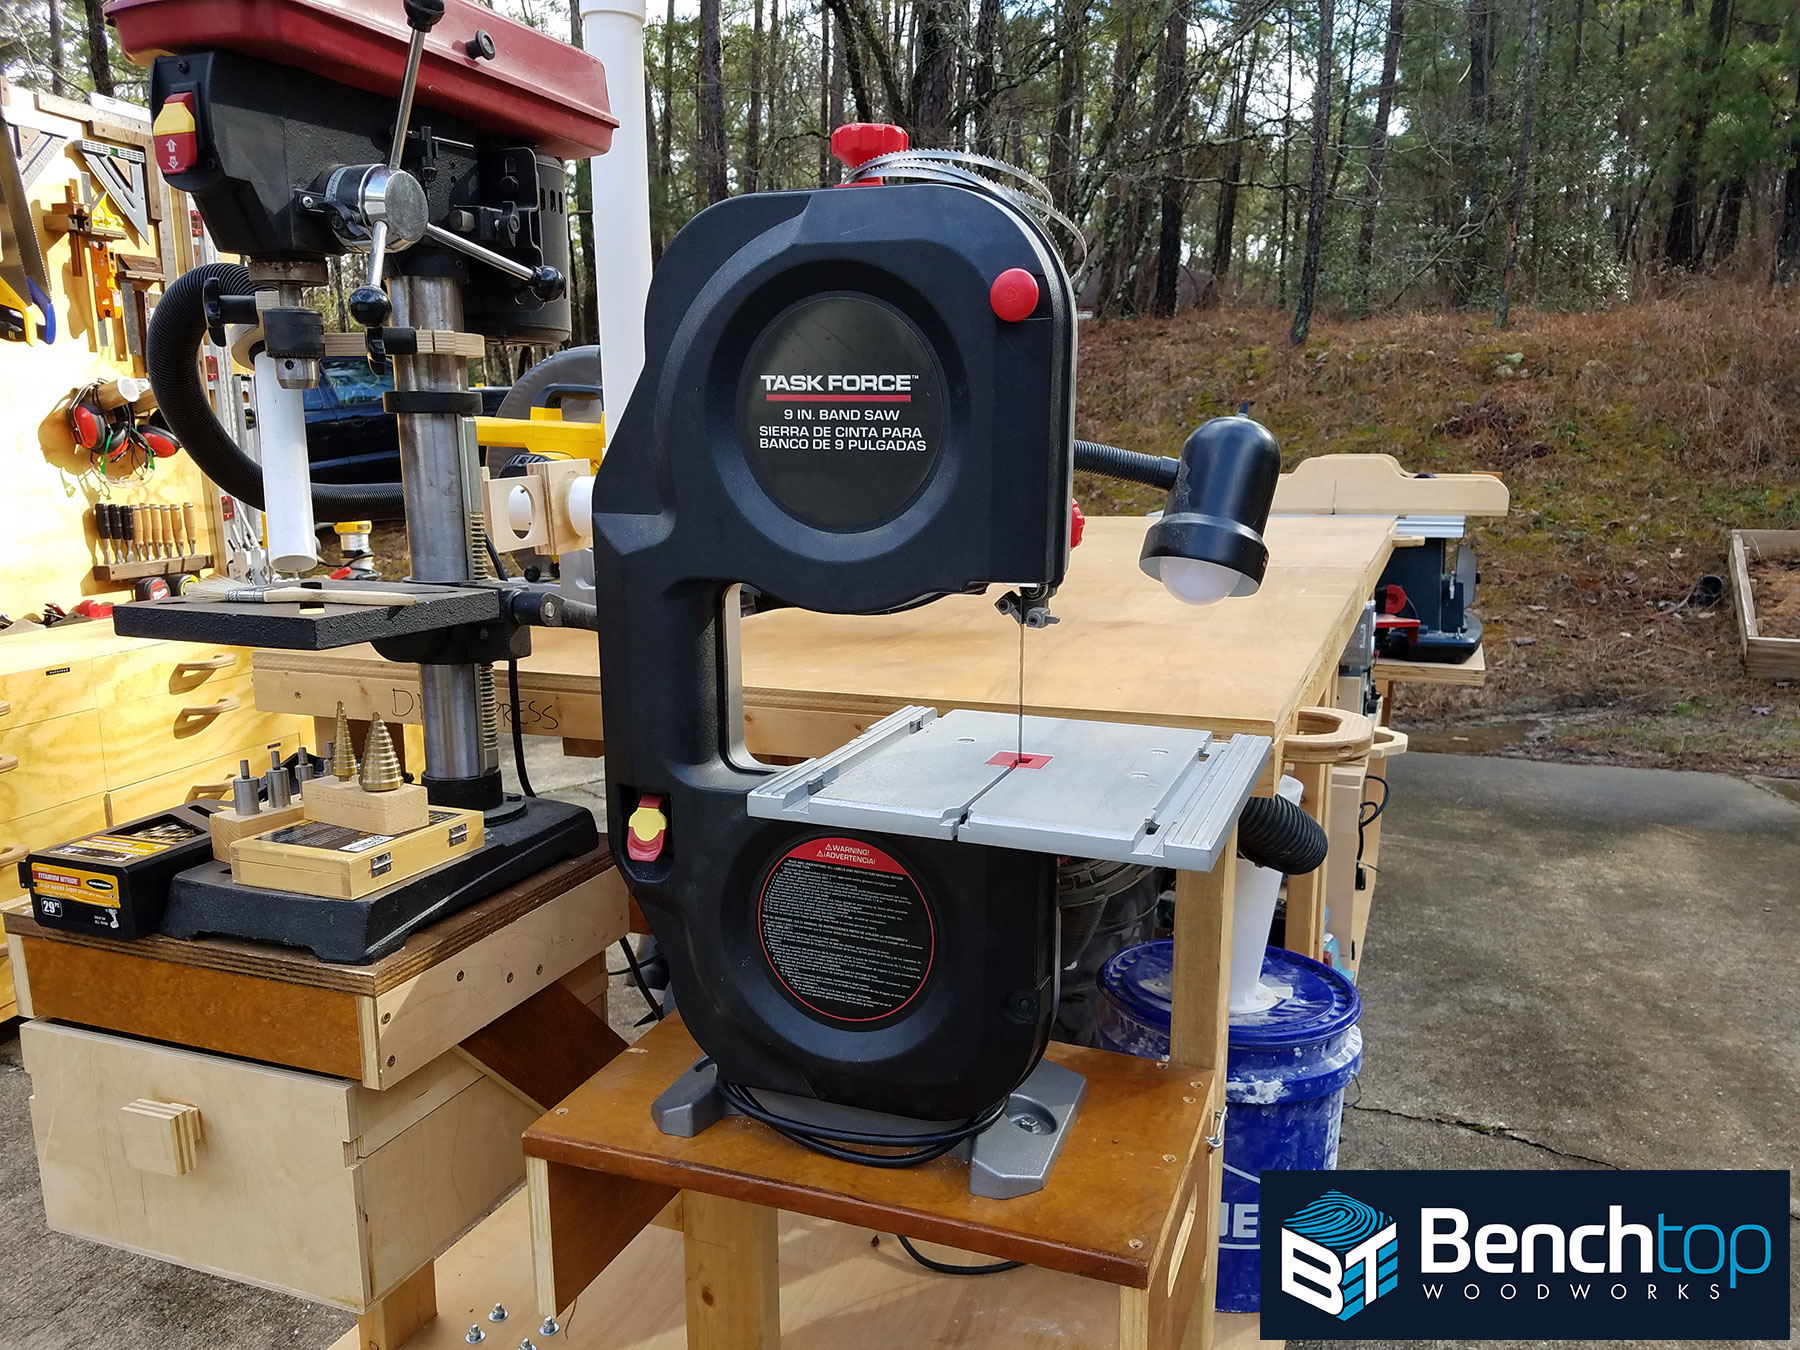
My small 9” Band-Saw (32-33) is mounted on a simple French-cleat to allow for removal when running 10’ or longer material through the table saw or wide material on the drill press. Although I’ve never found a small band-saw with as much power, I do frequently find myself limited by both the re-saw and cut width capacities of my small saw.
The next few photos (34-36) show my jointer mount, router-table and sander set-ups which I frequently use.
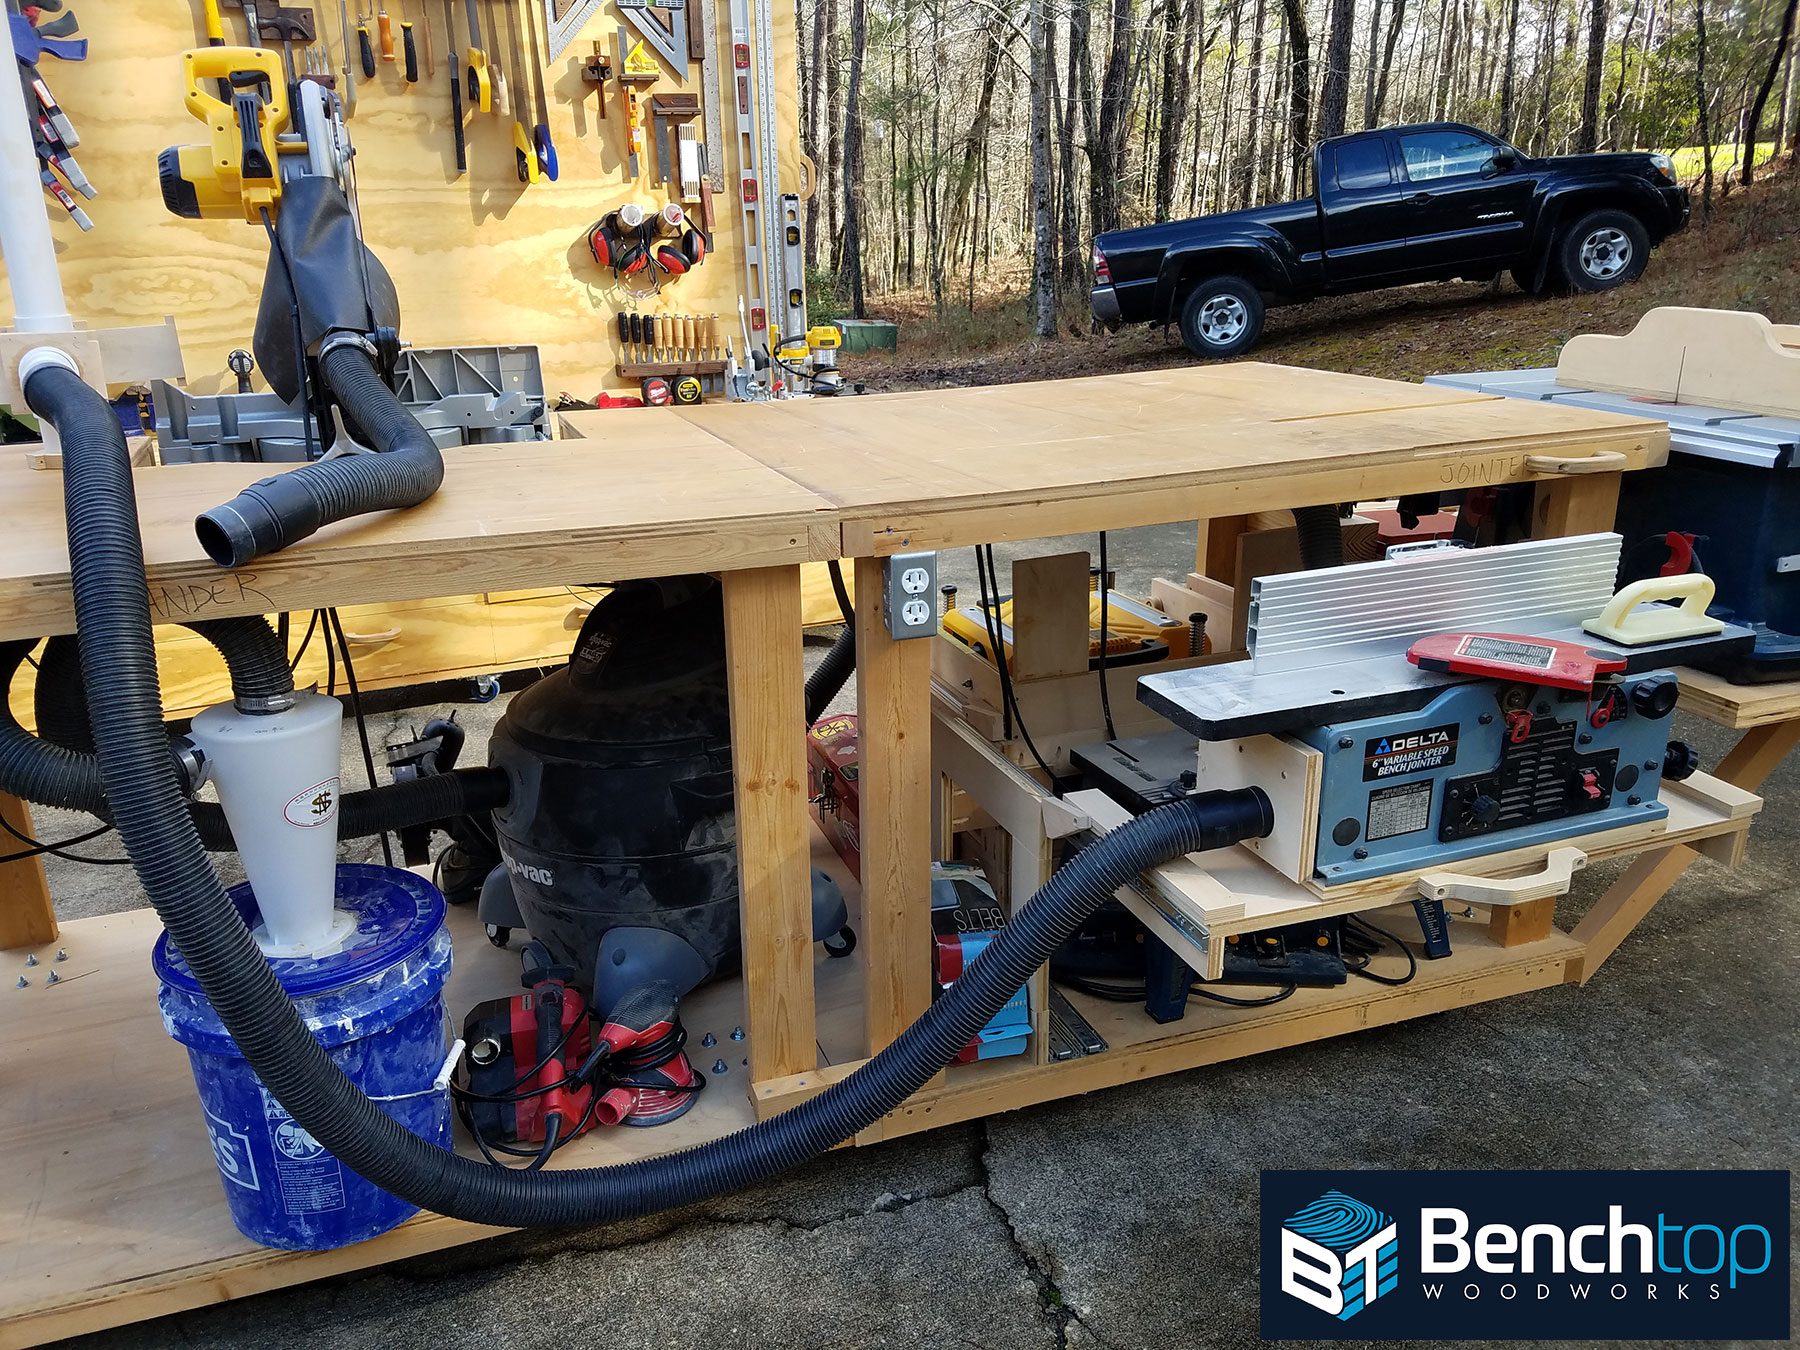
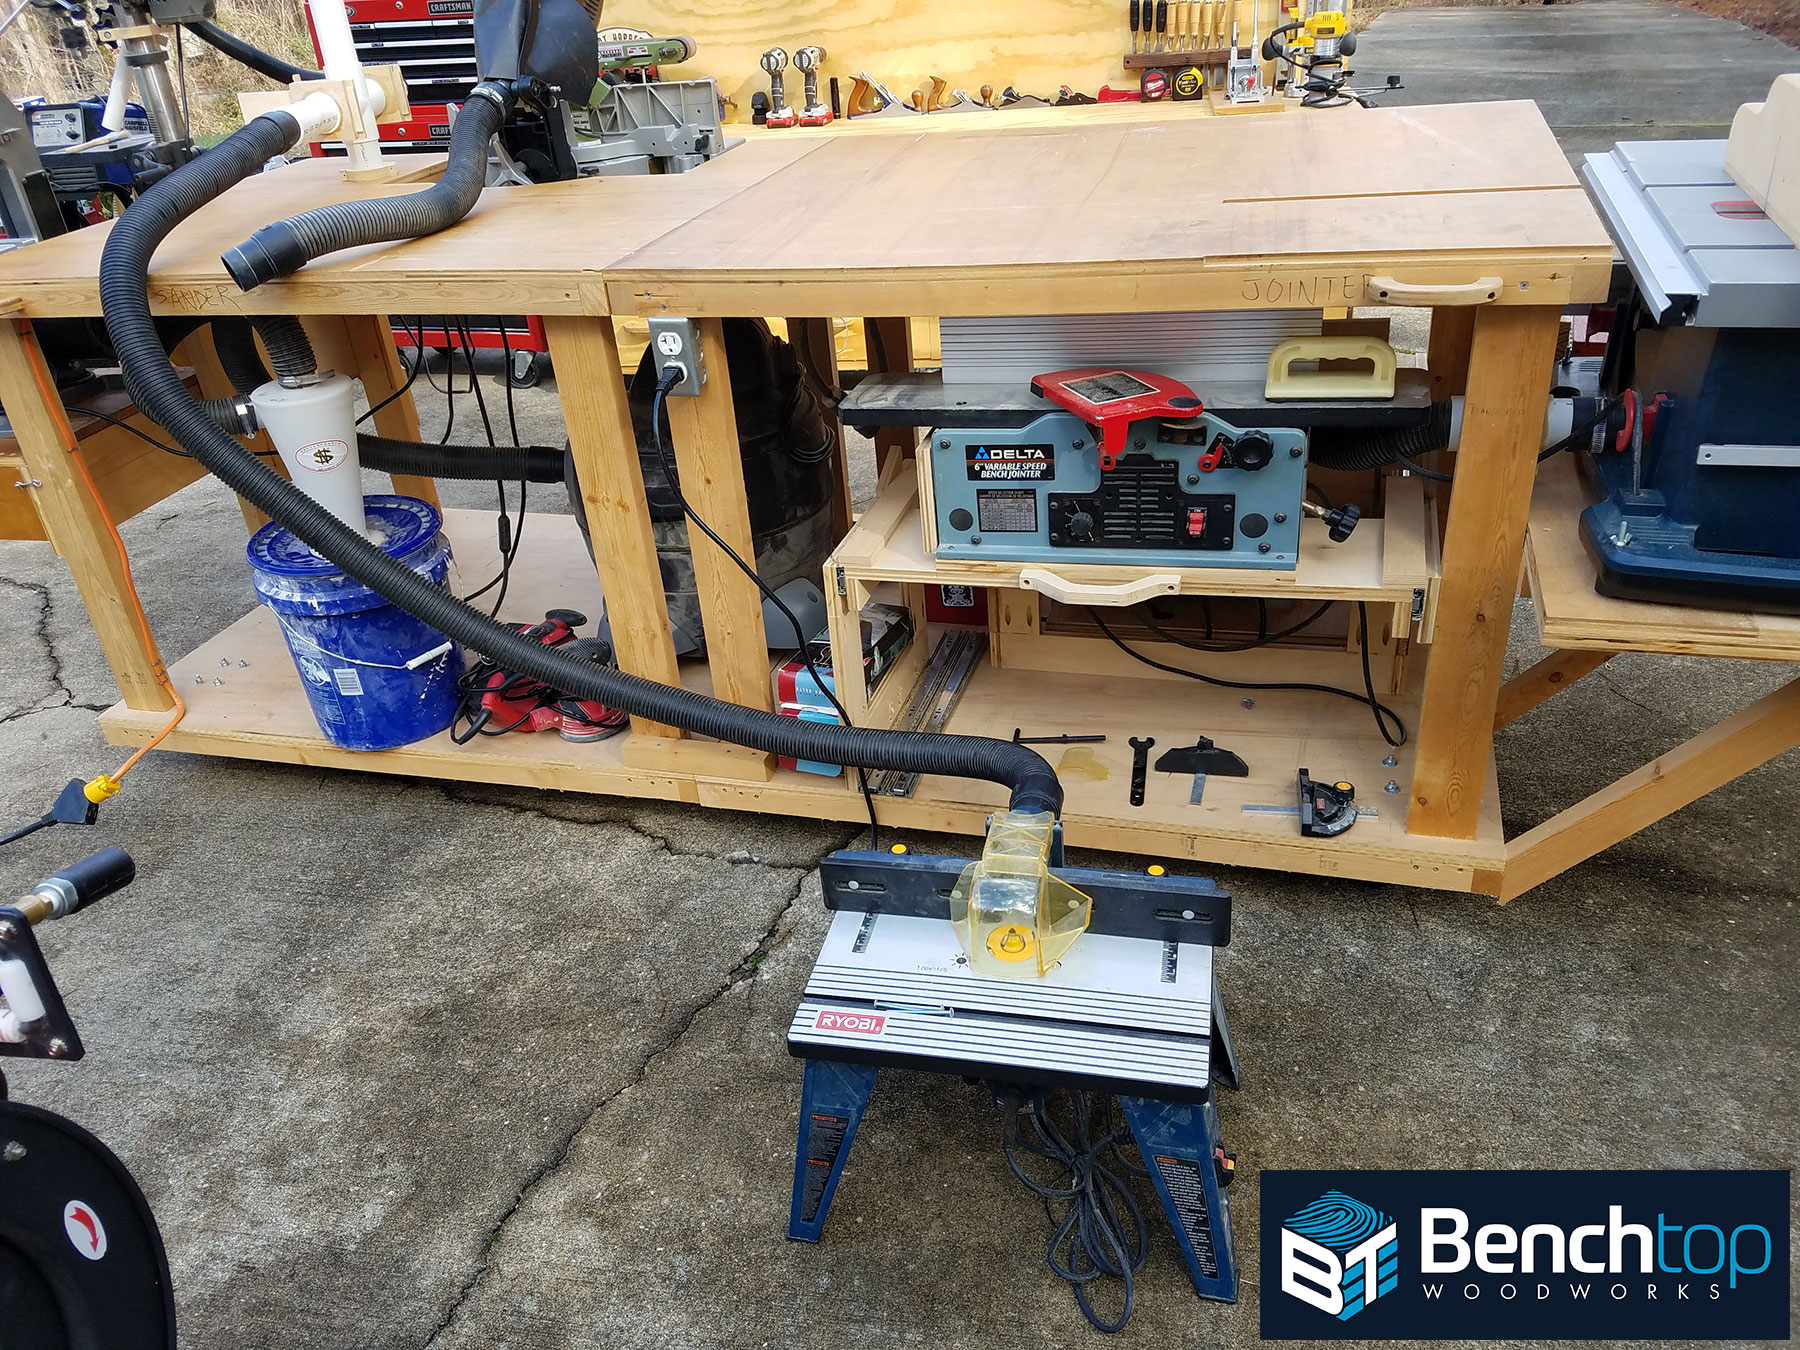

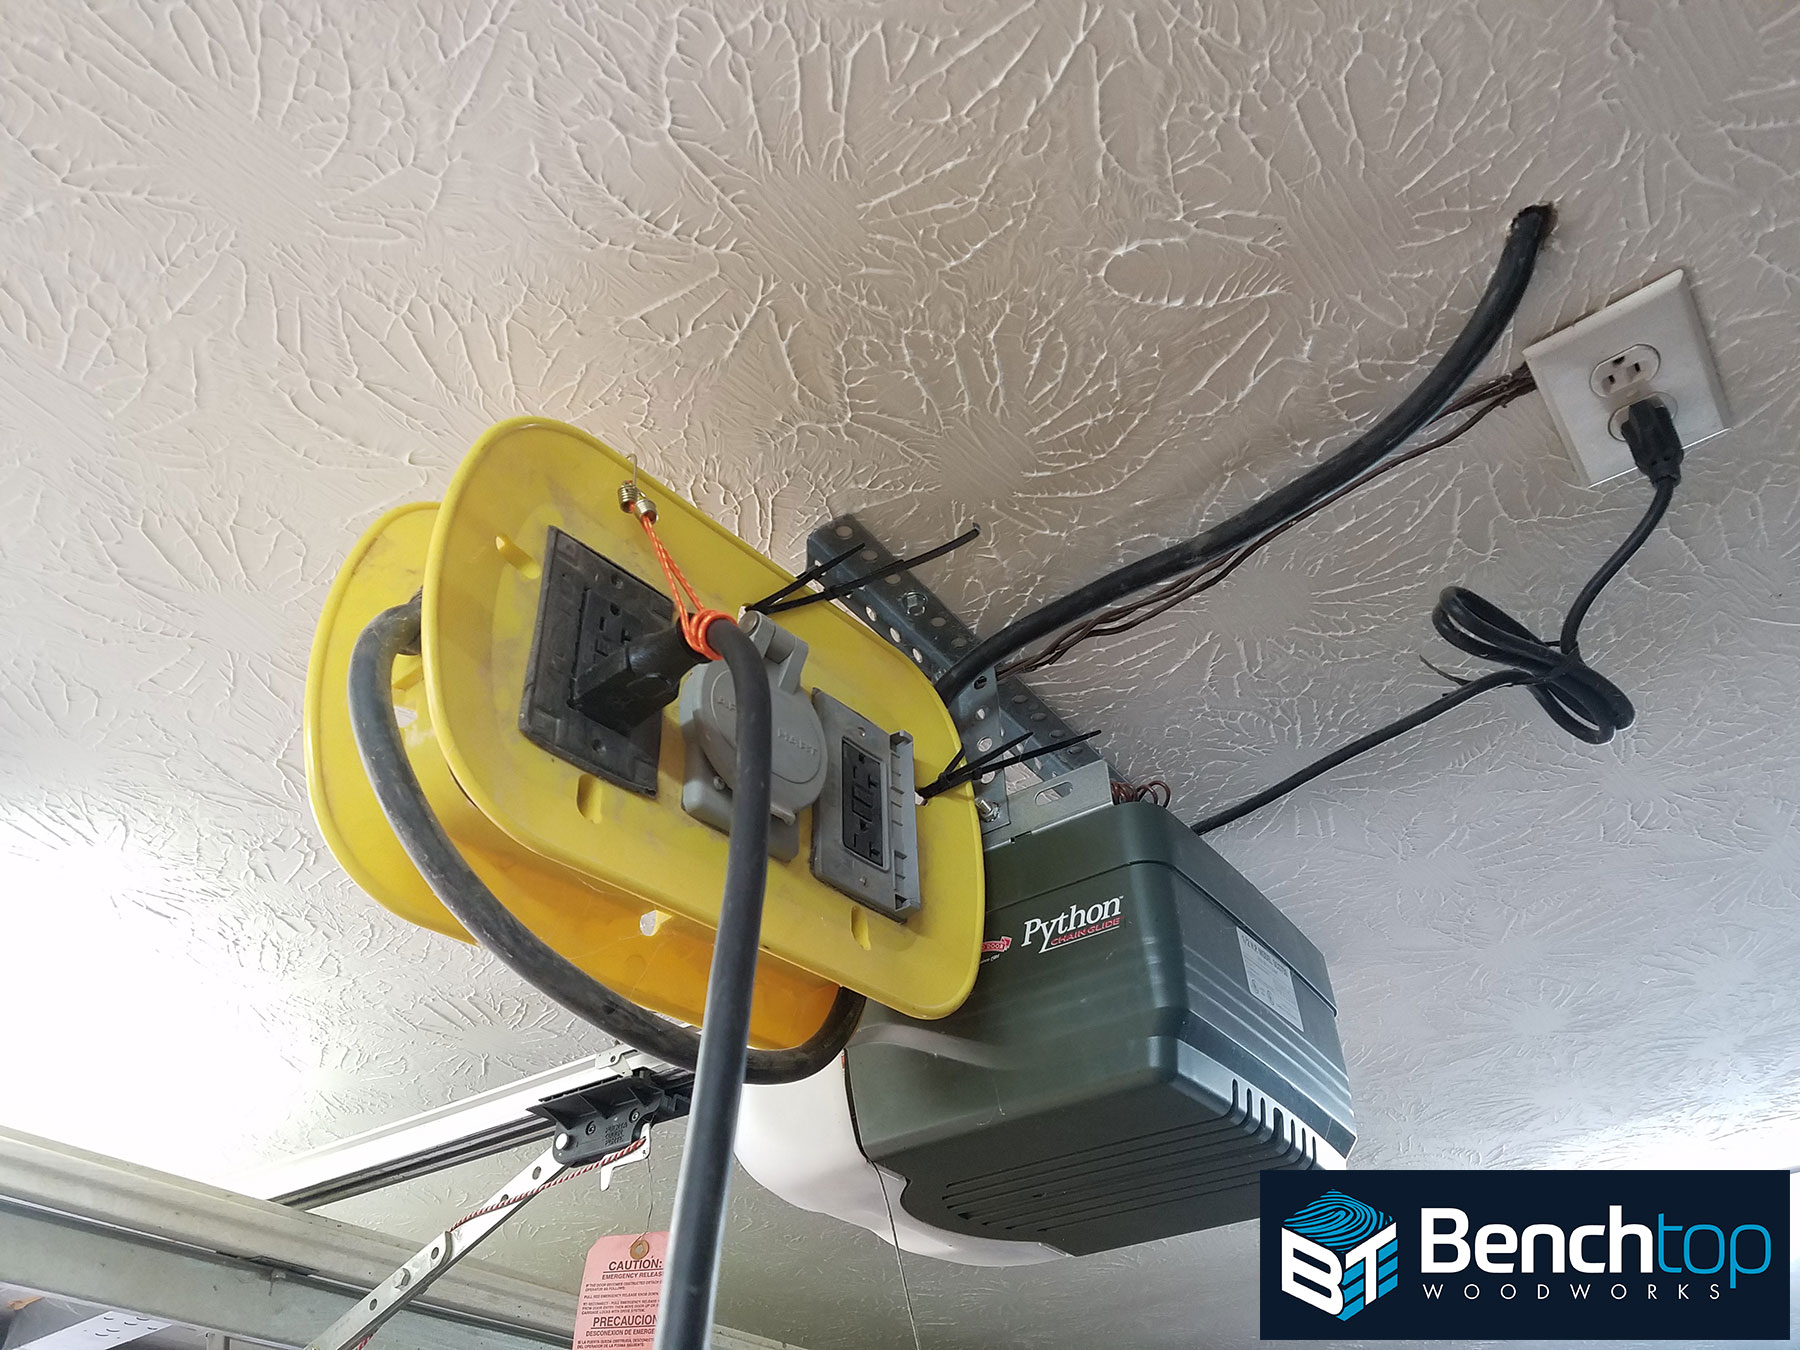
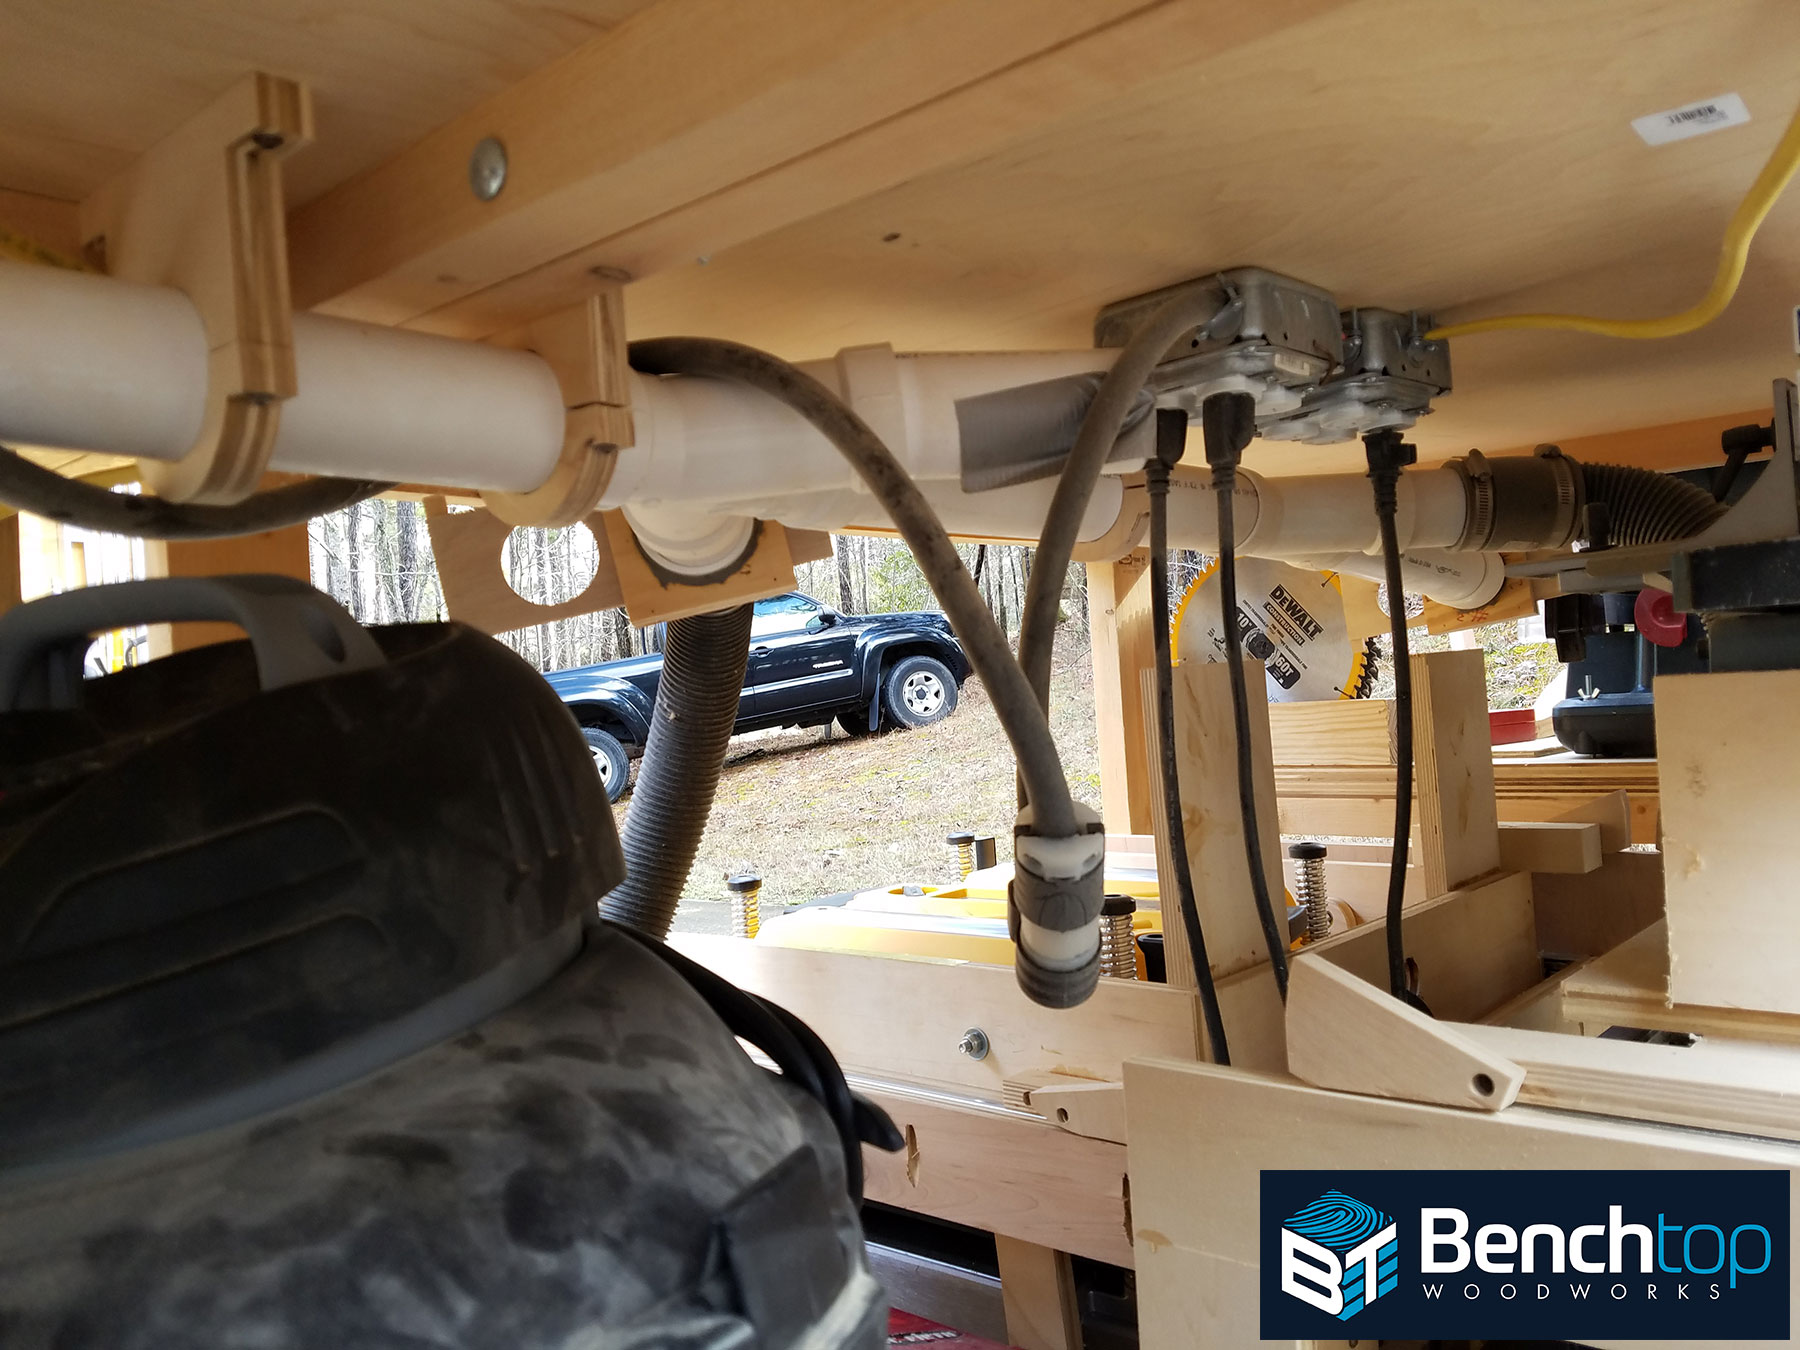
Last but not least I wanted to highlight the power-source for my work-bench and show the under-side with wiring and dust piping. (37-38) I have a 30A sub-panel in my attic which feeds both 120 and 240V to the garage. Having the shop/bench on its own circuit prevents any of the larger machines from tripping a breaker on start-up or high-load cutting operations. I used to routinely have to re-set 15A breakers when running the table saw and shop-vac on the same circuit and highly recommend a similar dedicated sub-panel for those that are able. I was able to capitalize on an unused HVAC circuit already wired to a sub-panel in my attic.
Thank you for taking the time to poke around in my shop! Thank you Jay for giving me the opportunity to share this on your site! I absolutely love having the freedom to create and build in my small space and would encourage anyone considering beginning woodworking to take the plunge. I’ve spent a lot of time planning and researching the optimal layout for small spaces. The layout you saw above existed in dream and sketch form approximately 4 years before I had the chance and funding to start building it! I hope I can save some of you similar time and some mistakes by allowing you to critique my design. For those interested, I also made a video tour to go along with this article. I hope you enjoyed the tour and gleaned a tip or two for your own shop. Happy Building!

")

If Ikea designed a quality woodshop, it would be this. You did a great job. I love how mobile the whole thing is. Thank you so much for sharing!
Thanks David for the kind words! Glad to share!
Respectfully,
Chris Harpster
Hi David,
Thank you for opening up your shop and all the great ideas for utilization of a small space. I’ve been struggling with the same issue (10’5″ x 15’10”) for almost a year and you have inspried me to work a bench idea incorporating some of what you have accomplished. The mobility of everything really makes it work.
Thanks for the kind words Tom, Don’t ever hesitate to reach out if you want to talk shop or layout! I’m glad you liked my design!
Respectfully,
Chris Harpster
This is a awesome way to keep a organized and a small shop guy’s,Good job my brother I love it to bro,I can’t wait to get my shop I hope soon, Much love and Happy New Years to all your Family and Friends :)
Thanks Thomas! Hope you’re having a great 2020!
Respectfully,
Chris Harpster
Hi David,
This is so well thought out! Excellent planning, and use of available space. If I had seen this 4 years ago, I might have saved myself the expenditure of building a large shop. (My original was 20′ x 7′.) Thanks for the showcase!
Tony,
Glad to help, don’t hesitate to reach out if you ever want to talk shop! Hope the shop build goes well!
Respectfully,
Chris Harpster
One thing is missing: Sawdust!
I can’t help but think that sometimes being too organized can be detrimental to the purpose. My son, a friend, & I built an airplane in a 2X garage 12 years ago: It was tight and without organizational discipline, we couldn’t have done it. (The airplane was a Van’s RV7A.) These days I joyfully butcher wood and manufacture sawdust in that same space.
I particularly like the Dewalt Planner arrangement — out of box thinking.
Good job.
I salute you for your service Sir.
Massa,
Thanks for taking the time to comment and the kind words! Its an honor to serve. The airplane project sounds outstanding. I deep cleaned my shop with compressed air before the photos ; )
Respectfully,
Chris Harpster
Awesome work on this entire design. I love he idea of the planet and jointer being on slides and planer being in a system to raise it up. That’s genius. So many great space saving ideas.
Thanks Scott, I really appreciate it! I’ve since added a support leg to the Jointer-drawer that folds down.
-Chris
Thanks for sharing this – it’s full of good ideas and excellent and practical solutions. I’m sure to come back for gleaning more of your solutions!
Hello.
Thank you so much for sharing this with us.
In fact, I was a little impressed with how much you managed to make in such a small space. Thumbs up.
I like! I have a dedicated shop space and it’s nowhere near as organized. Some great ideas and thanks for sharing.
Well designed and executed by a mechanical engineer with a disciplined military mind. I salute you!
WOW, WOW, WOW – Thanks for sharing!! Many great idea that i can use in my shop!
First class all the way…lots of helpful ideas that will show up in many shops.
I have sometimes thought of posting my shop as the key entrant in the most disgusting workshops in the country. I know that work can be done in far less time with organization, so maybe if SWMBO would nag more it would actually happen.
Joe
I imagine that the Assembly Table and Tool Wall units are very heavy when loaded with tools. They look like they would be very difficult to budge, even with heavy duty wheels. What about that? and what sort of wheels are you using?
Nick,
They are pretty heavy for sure, once you get the casters aligned, it rolls pretty easily. I don’t mind rolling it. Here’s a video of one of my moves for reference. I personally don’t mind it because of the rigidity provided by it inertia for working on it.
https://www.youtube.com/watch?v=jc5NW8jY1GQ&t=307s
The main bench and lumber cart have 4″ casters and the tool wall has 3″
-Chris