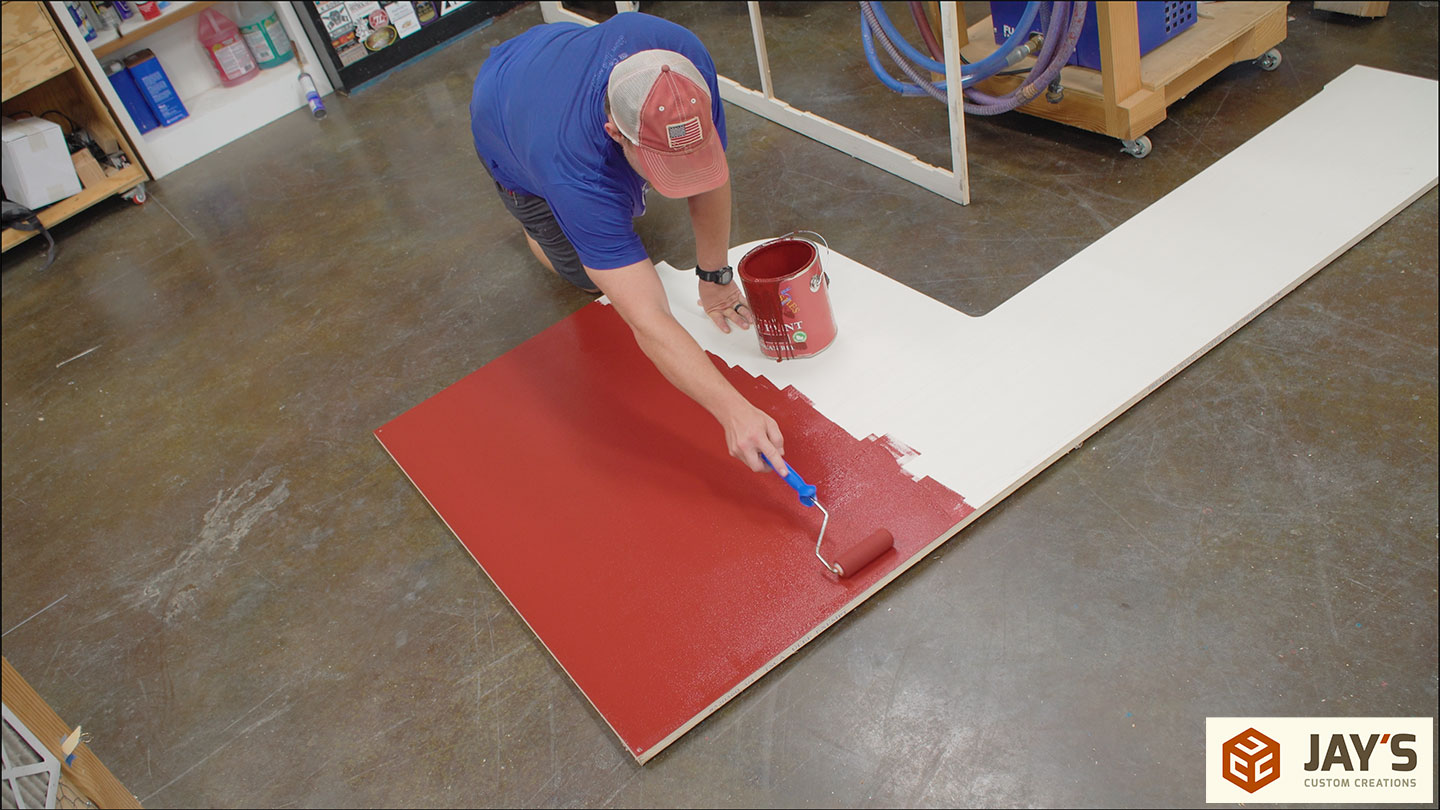
I’d like to start this project by confirming what most of you already think: I am an idiot. Apparently, I couldn’t read a tape measure and did not paint enough of this panel, so I had to come back and paint some more, which didn’t quite blend well with the original paint that I did. So I had to paint the entire thing all over again twice. I didn’t save any time by painting this on the front end. Tuscan Red milk paint by General Finishes is the color of choice. We used this extensively in our outdoor kitchen and want to blend it into the interior of the house here and there.
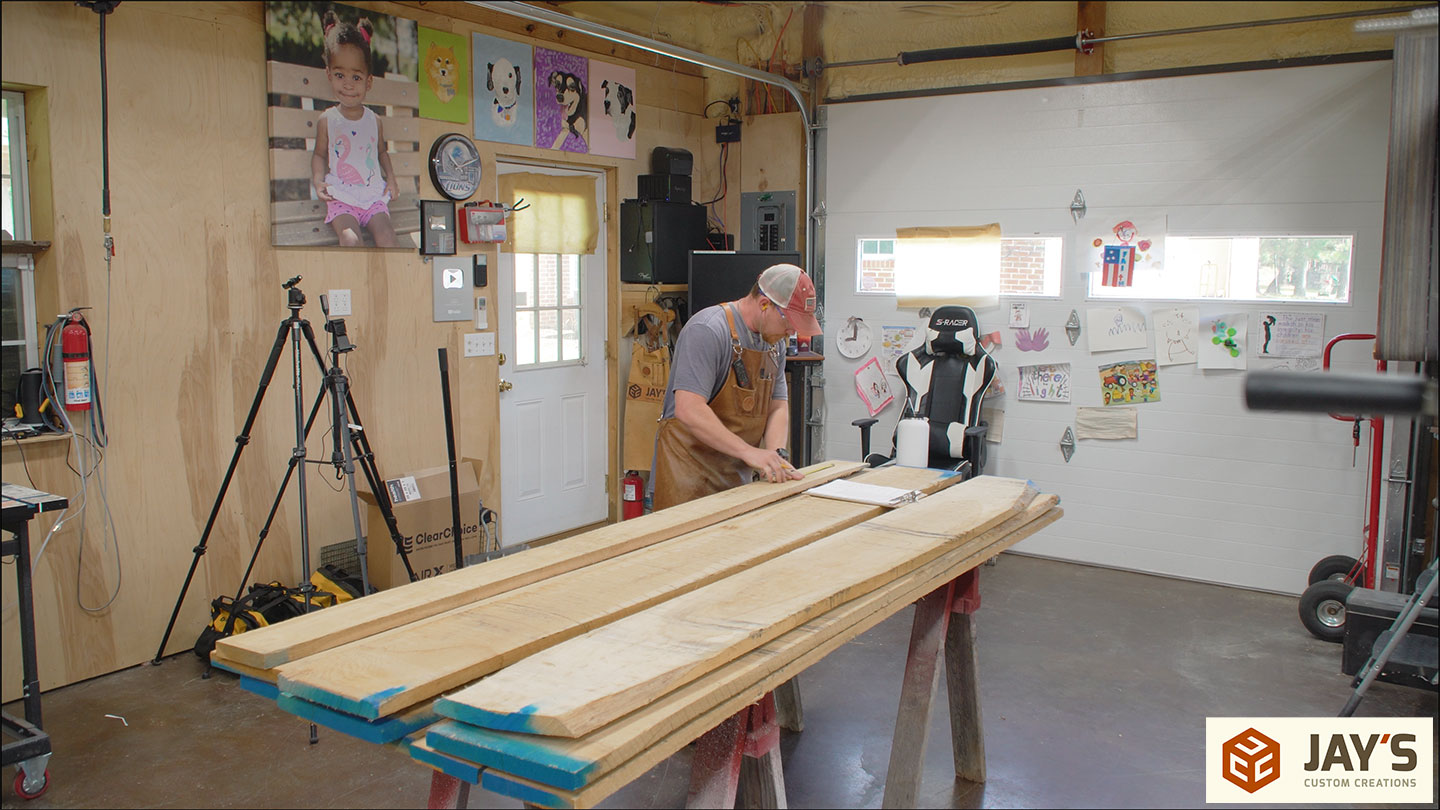
All of the solid wood for this project is white oak, and I used to be allergic to this stuff 2016. I had no surgery, deviated, septum, all kinds of sinus infections, blah, blah, blah. All that’s behind me and problems are pretty much solved with my sinuses. I worked with this whole project and never had a sinus infection, didn’t have any sinus issues at all, so, yay that.
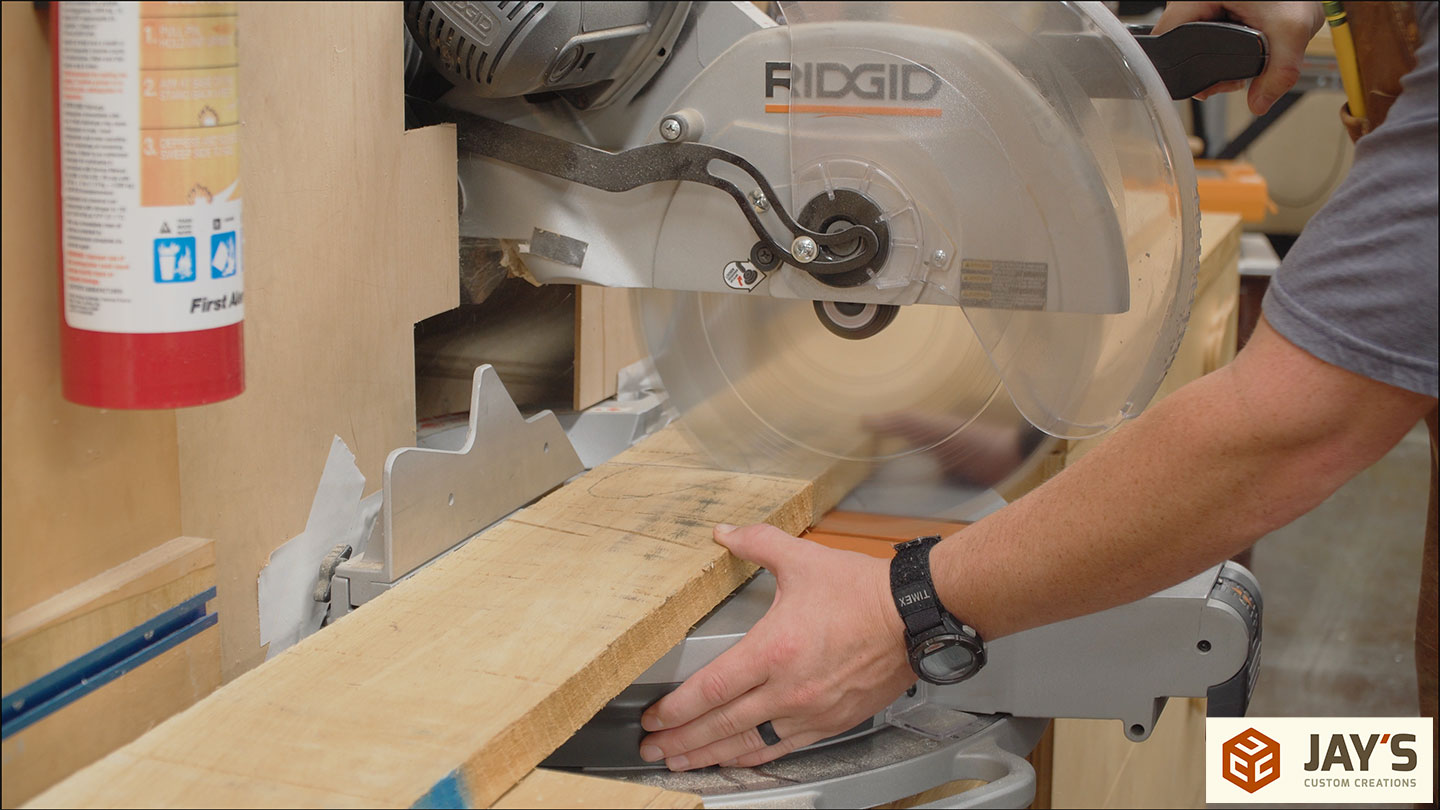
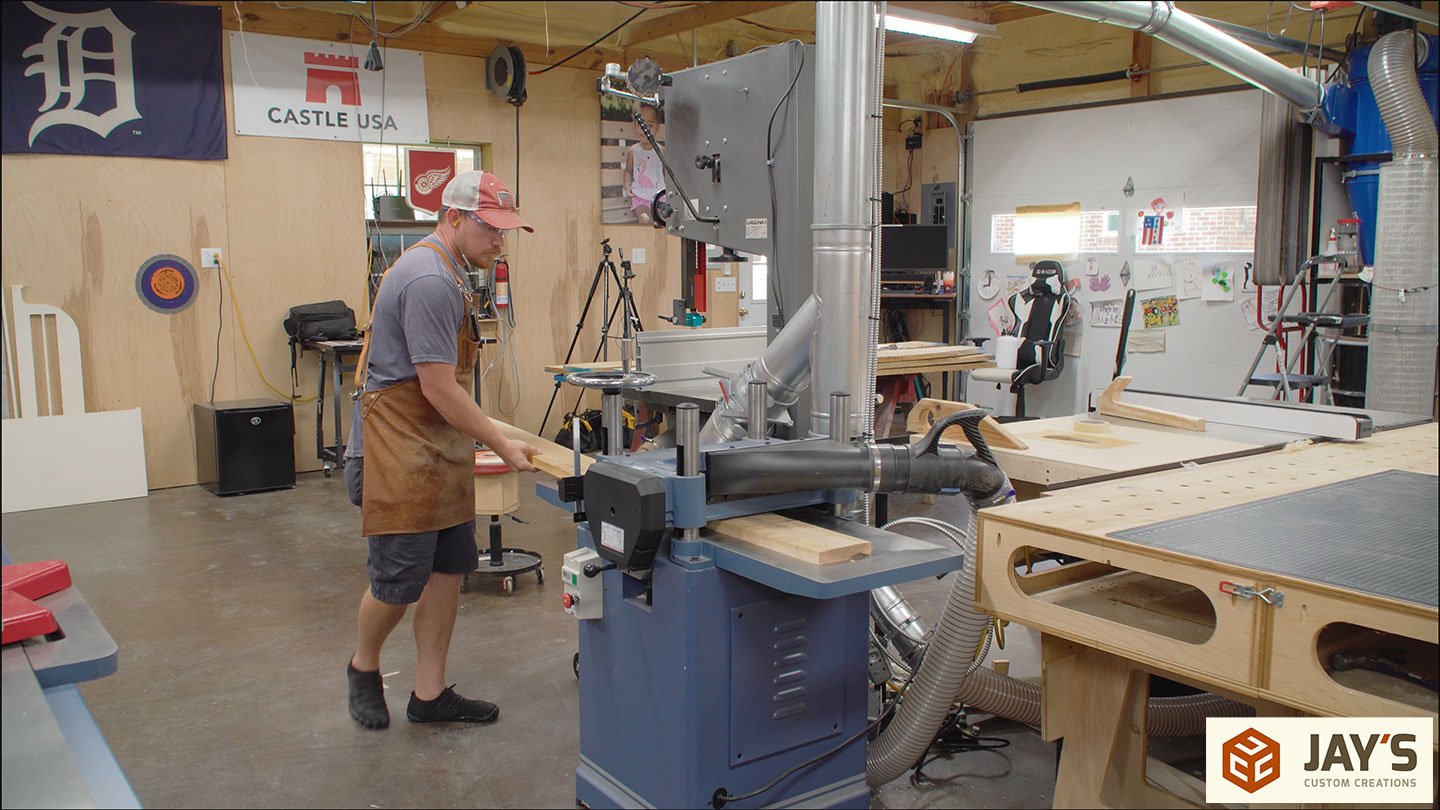
For me, the milling process starts by cross-cutting to a rough length at the miter saw station first.
Followed by jointing, one wide face at the jointer.
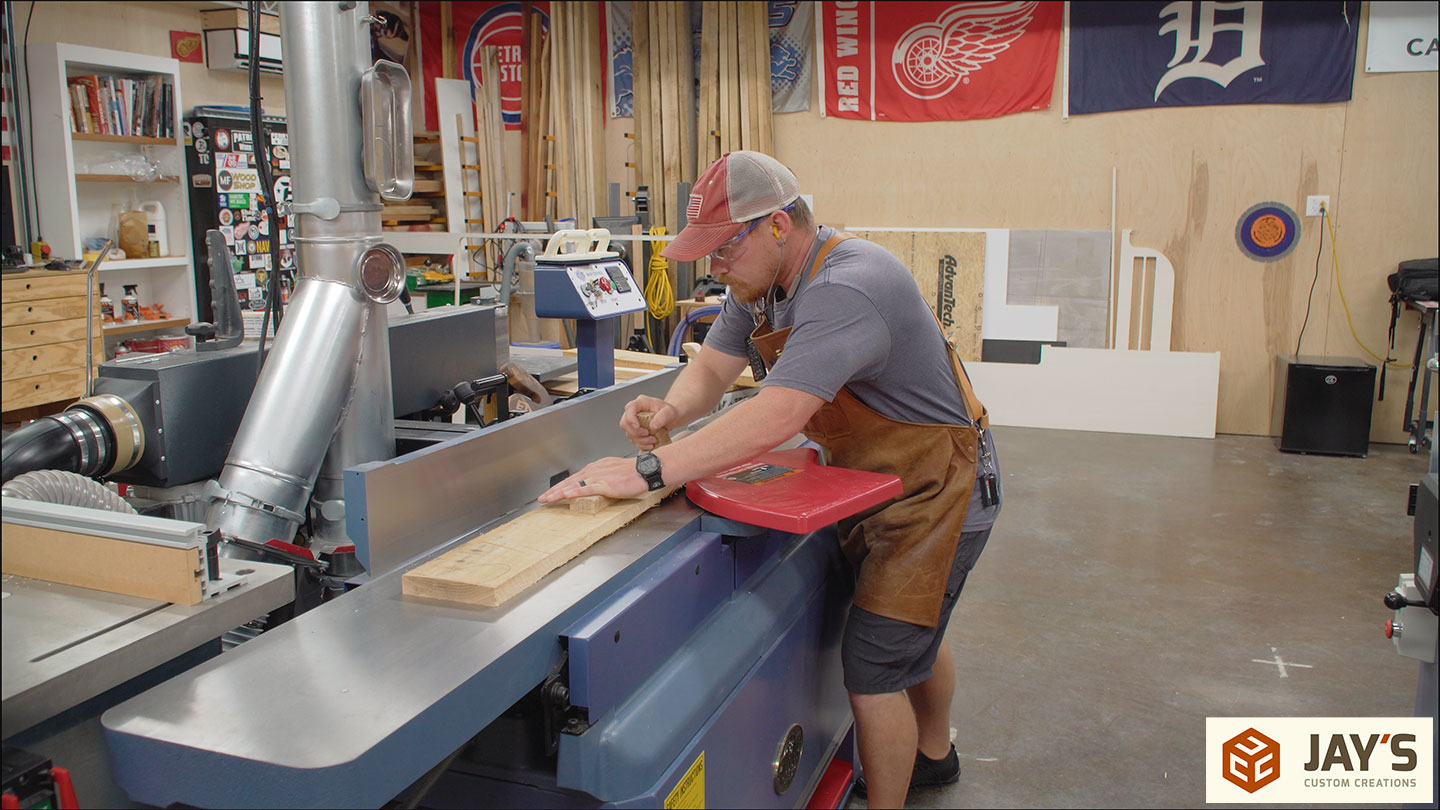
Then going to the planer to plane the opposite wide face, flat and parallel.
And then back to the jointer for one narrow face. I always go jointer, planer, jointer, because this allows you to orient the board with any one of the wide faces up against the fence, ensuring that you’re going to joint downhill. Sometimes if you. If you do a wide face, narrow face immediately at the jointer, you’re forced to joint in the uphill direction, which is just a recipe for tear out.

Then the pieces are ripped to their final width at the table saw, which I believe was one and a half inches in width.
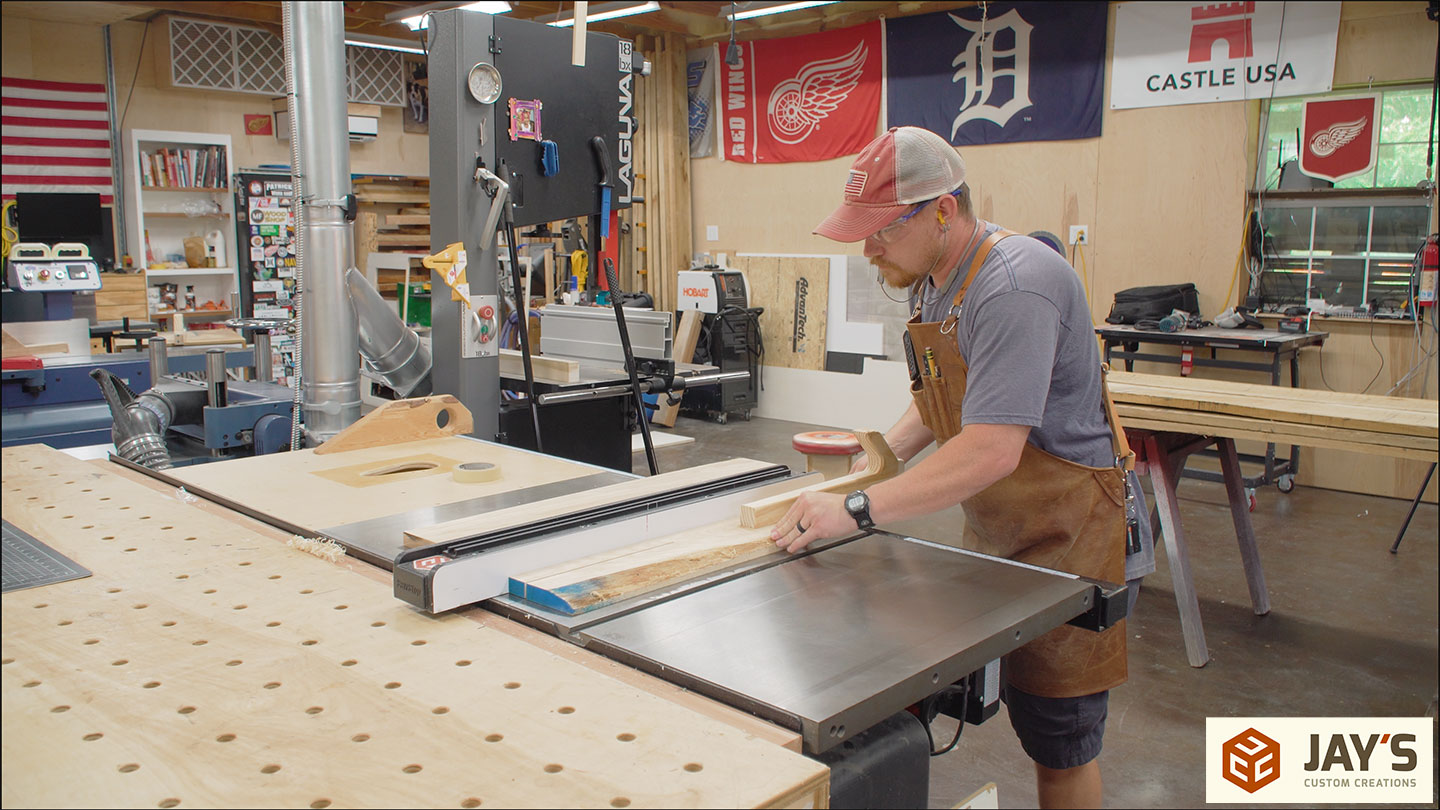
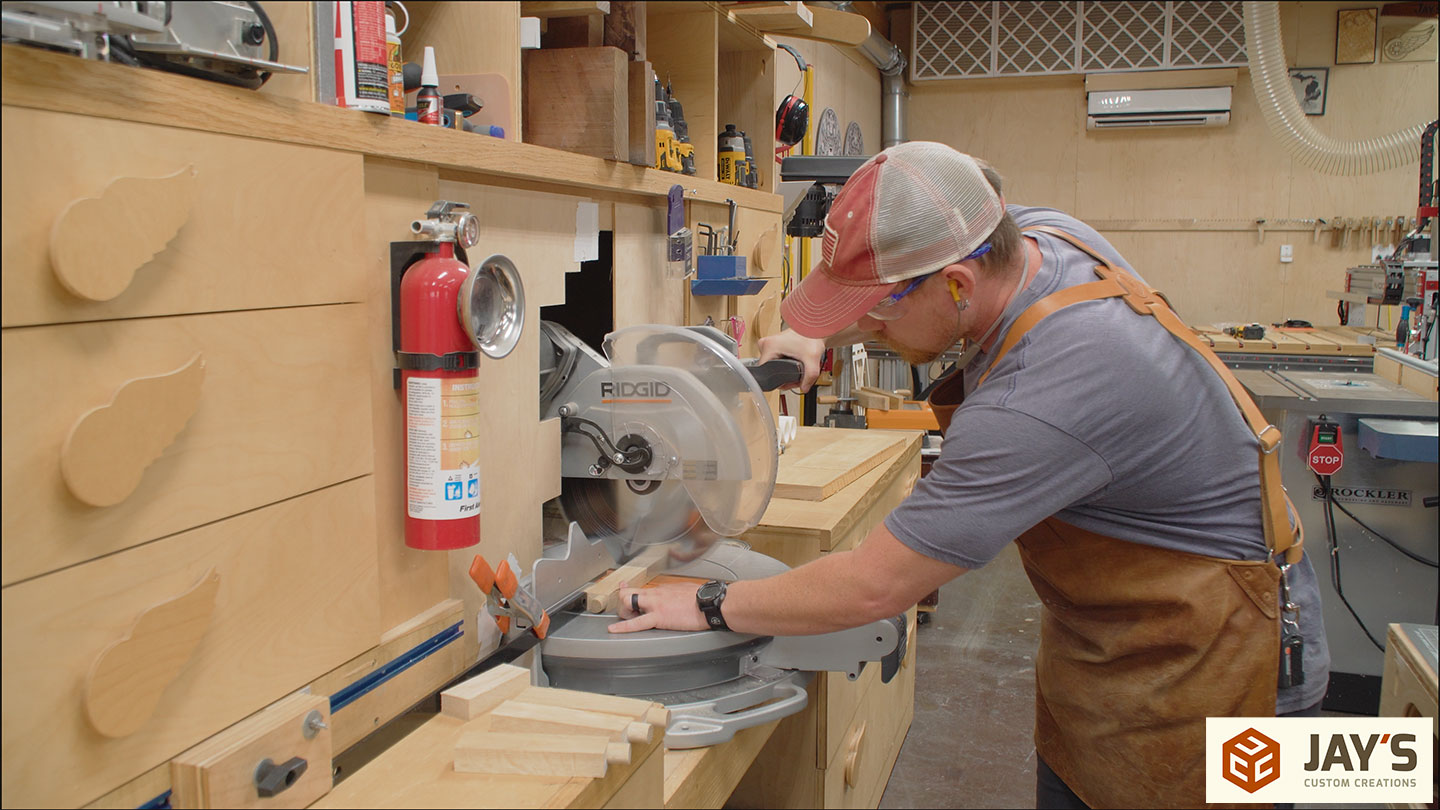
And then cross-cut to another rough length at the miter saw. I thought I was doing myself a favor by gang-cutting all of these. I was an idiot once again and failed to cut these dead center on each one of these boards.
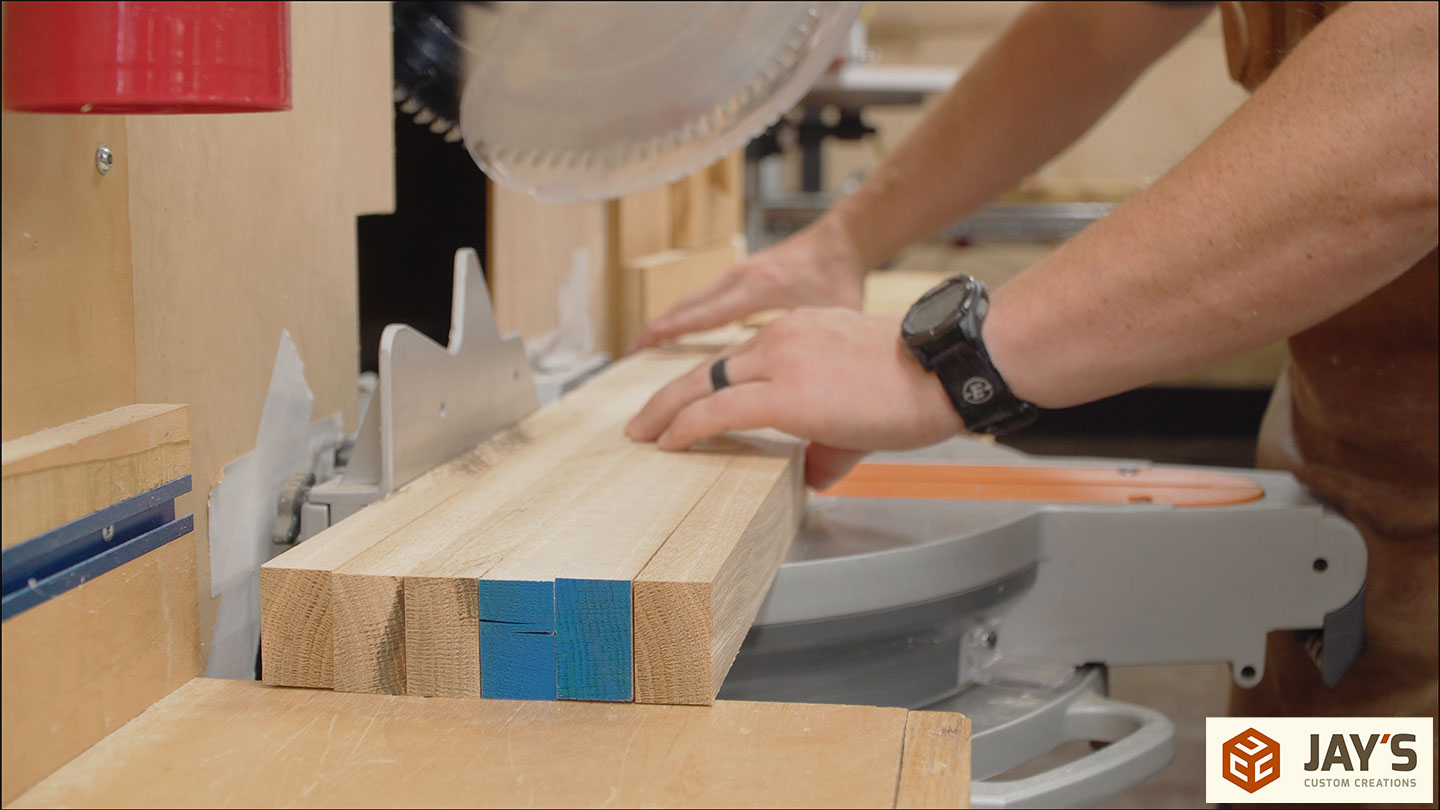
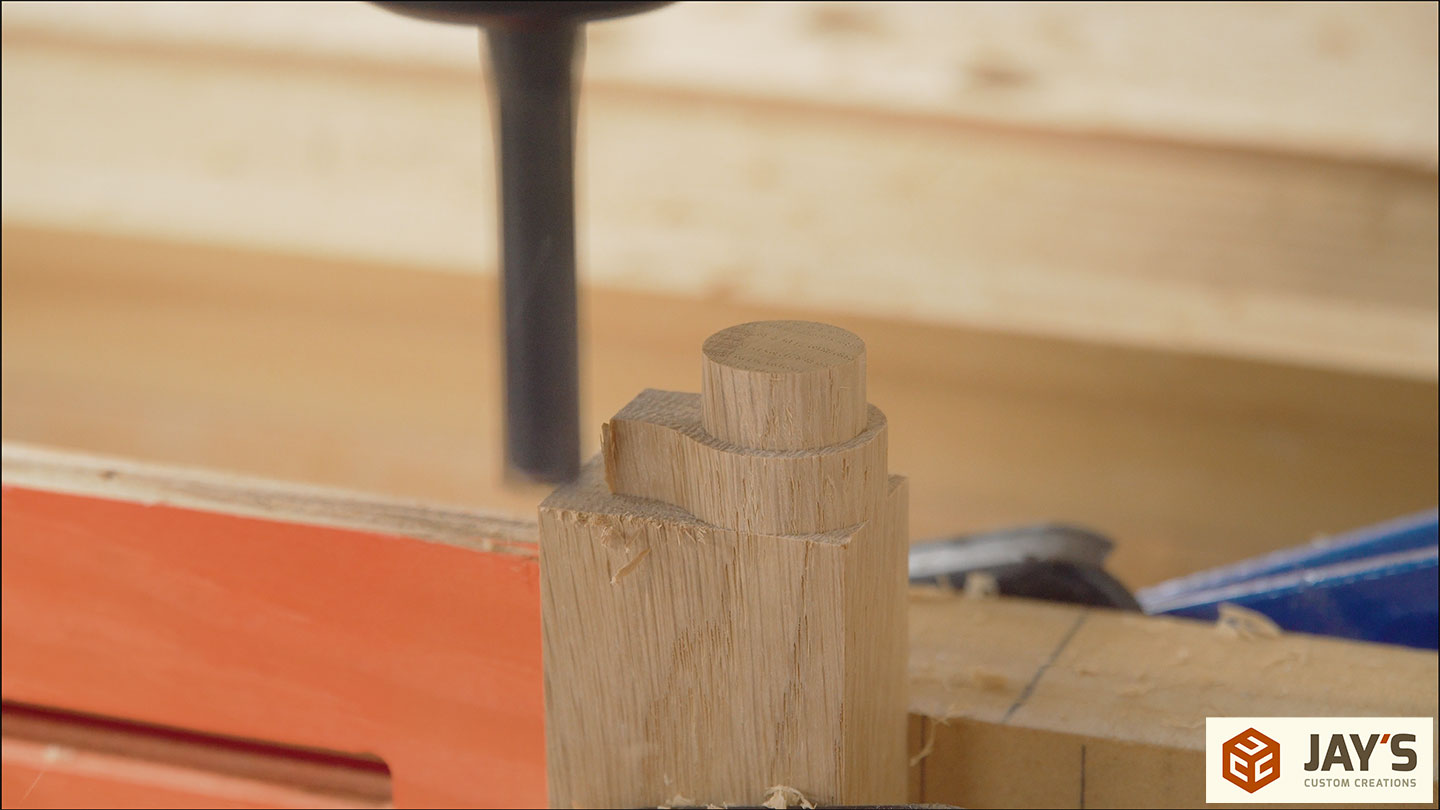
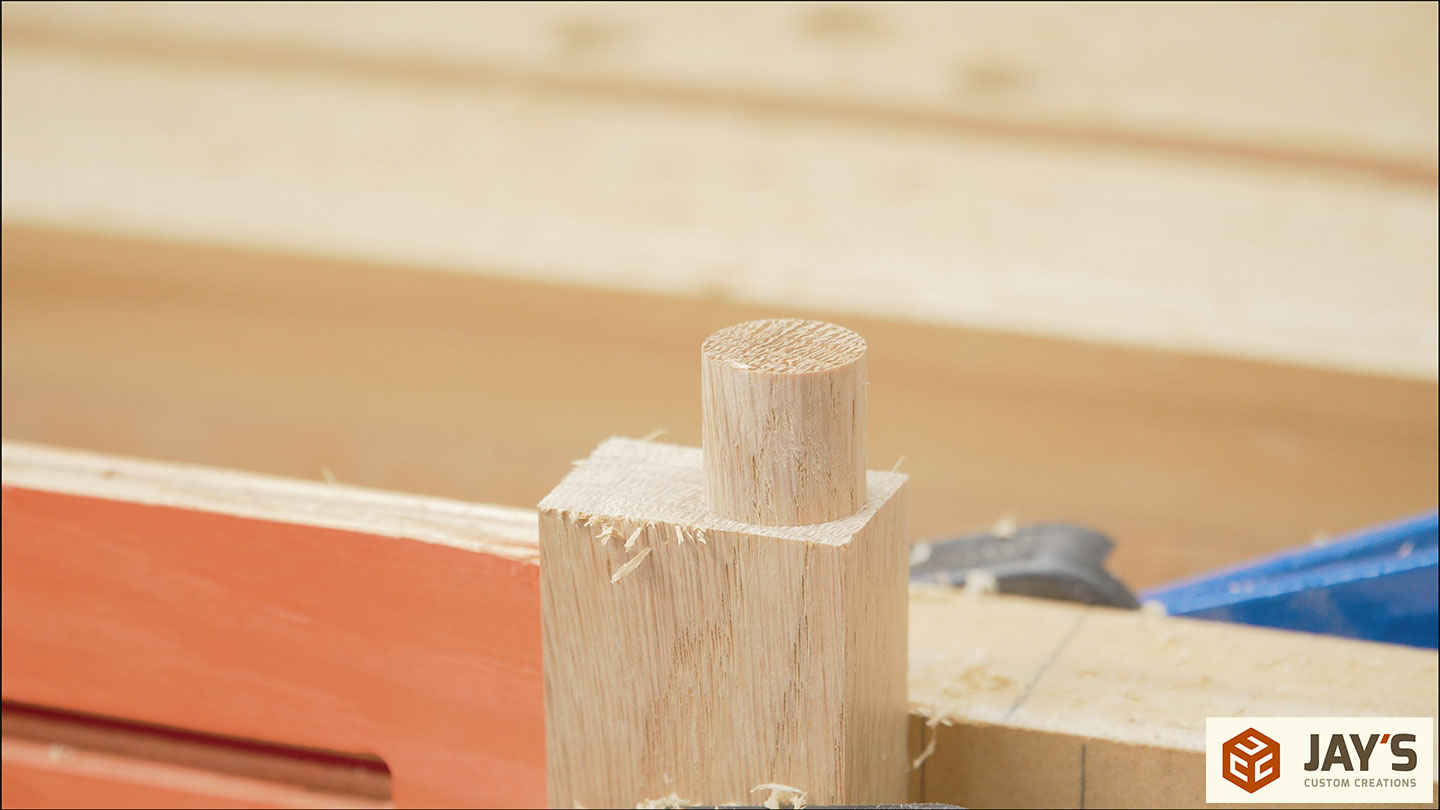
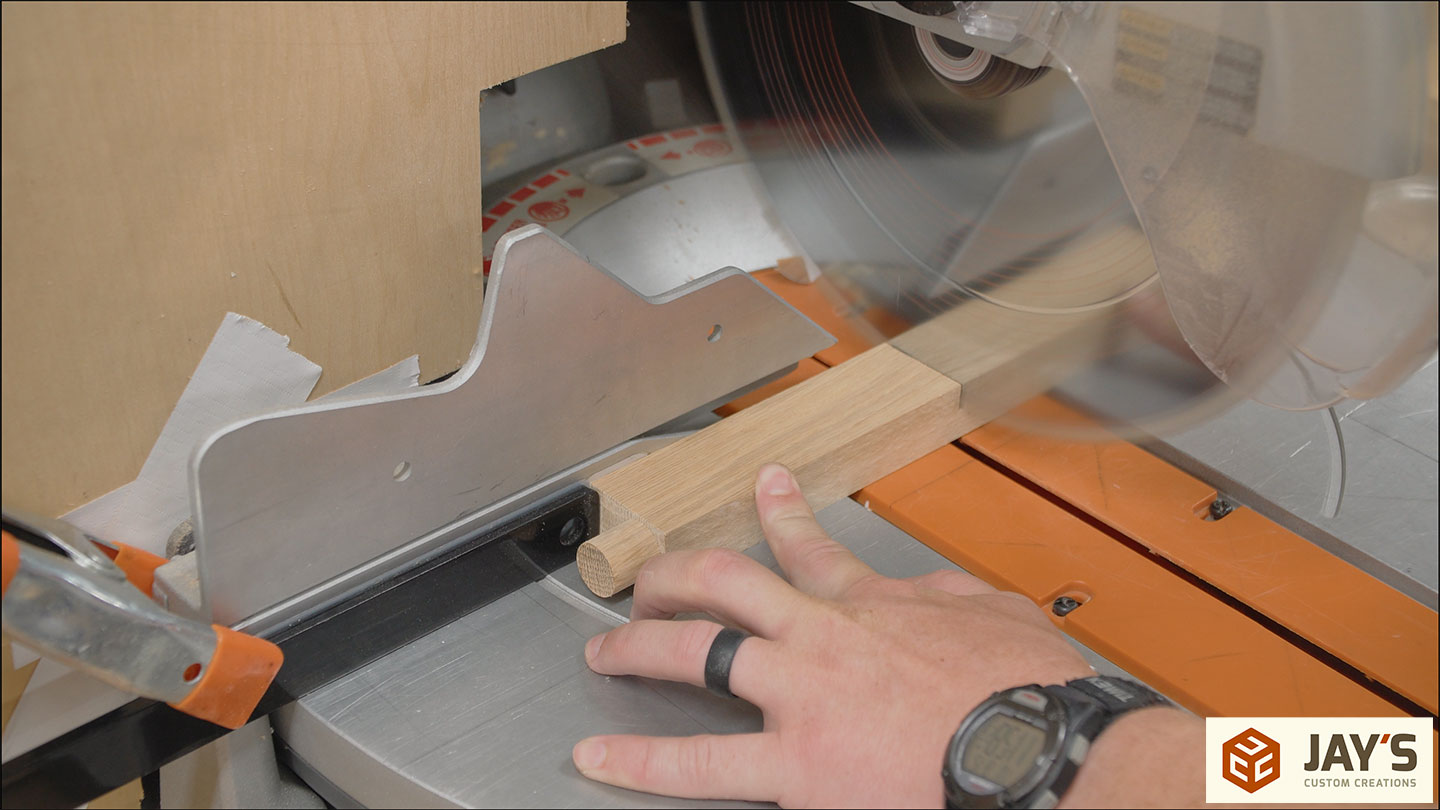
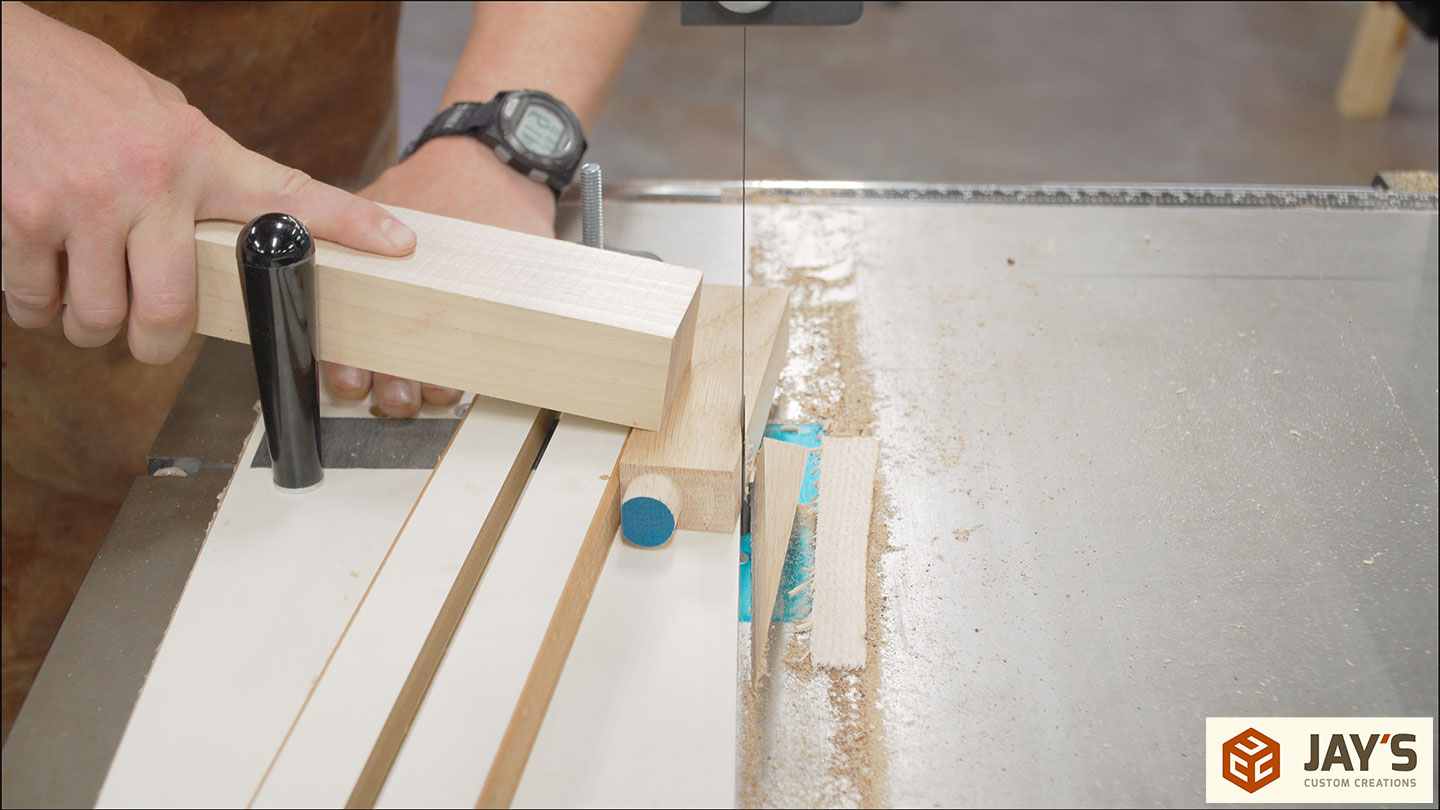
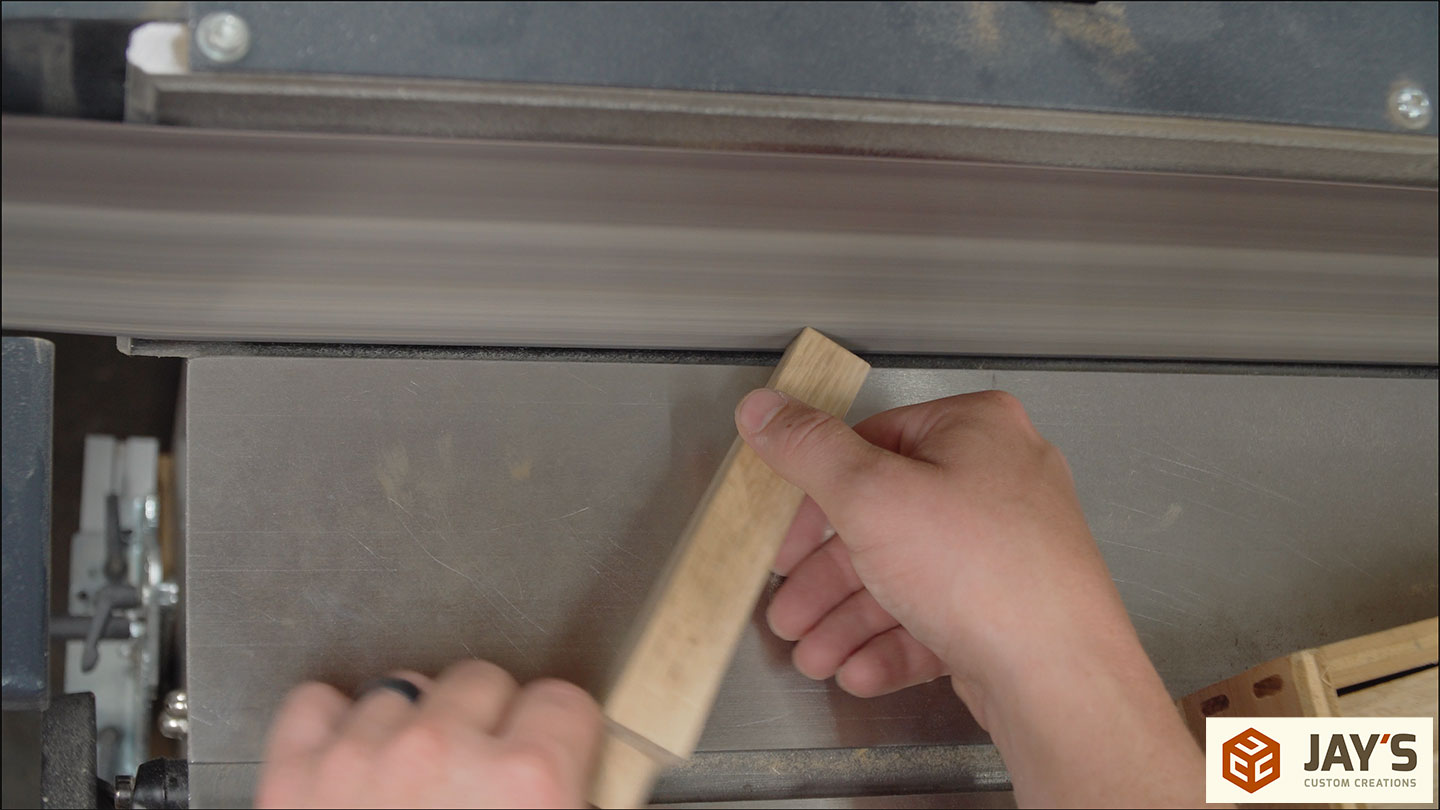
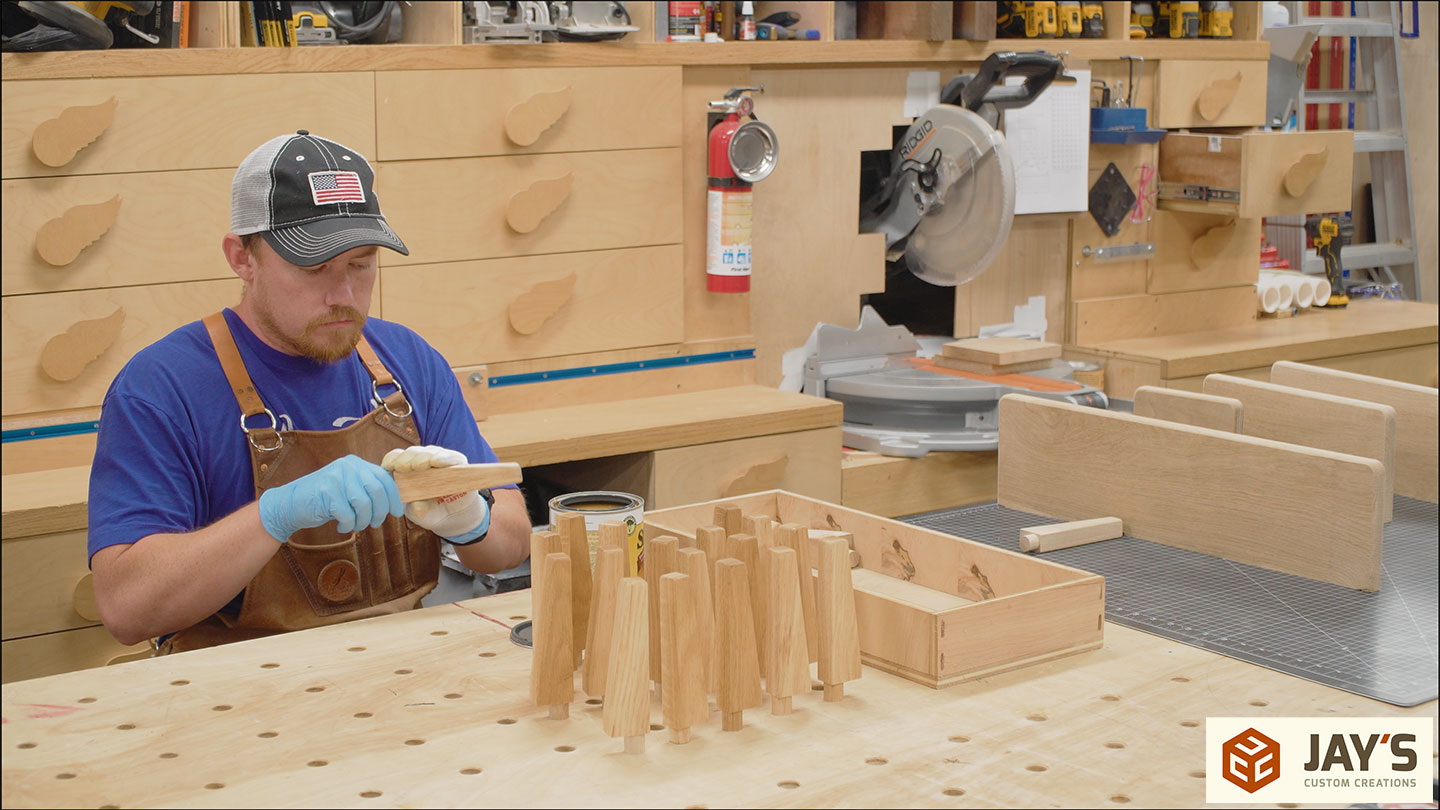
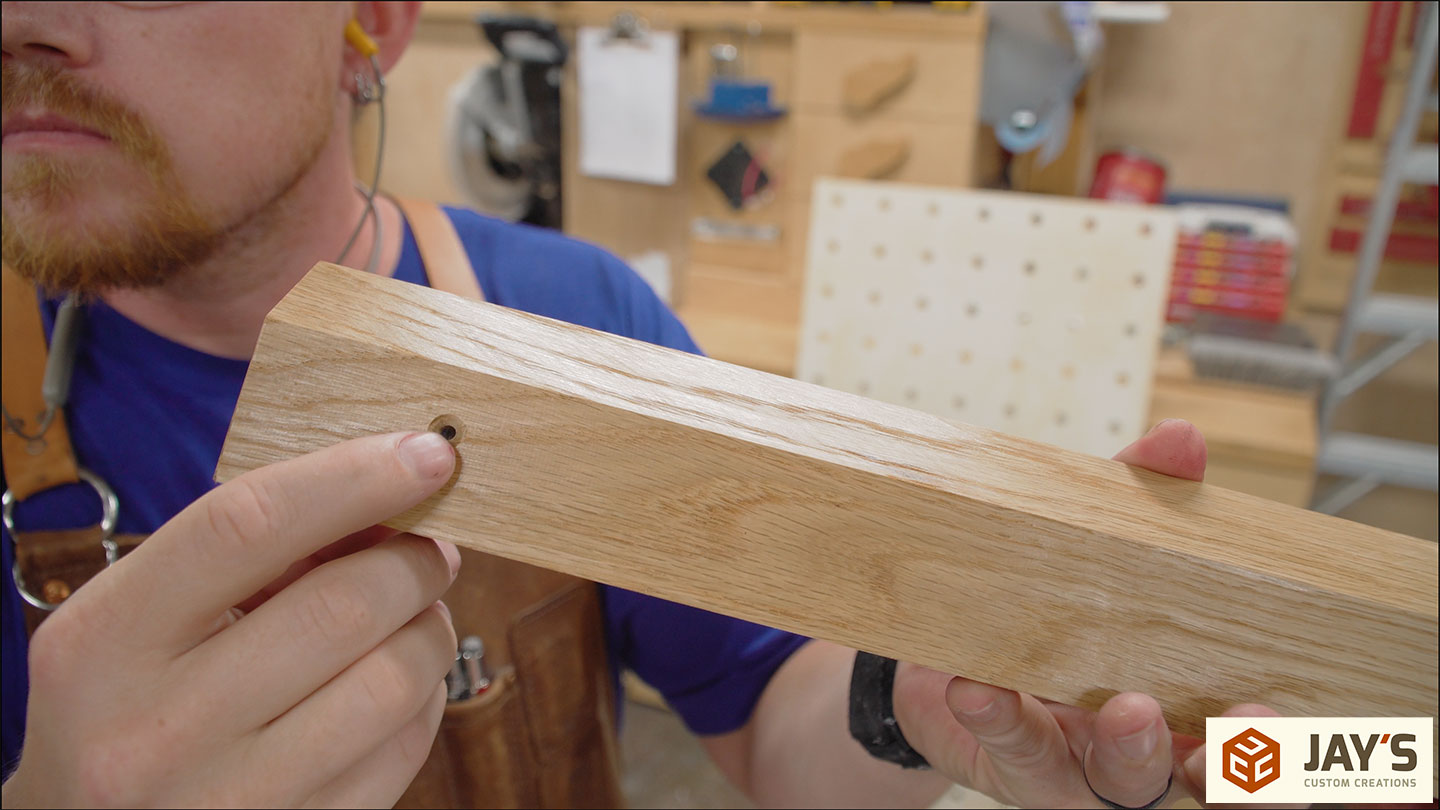
I just eyeballed it thinking it’d be okay. But the next step is cutting integral dowels on the ends of the pieces. And half of these were one length, the other half was another length. Uh, they were pretty darn close. But all that means is that the dowels were two different lengths, not the end of the world on this particular project.
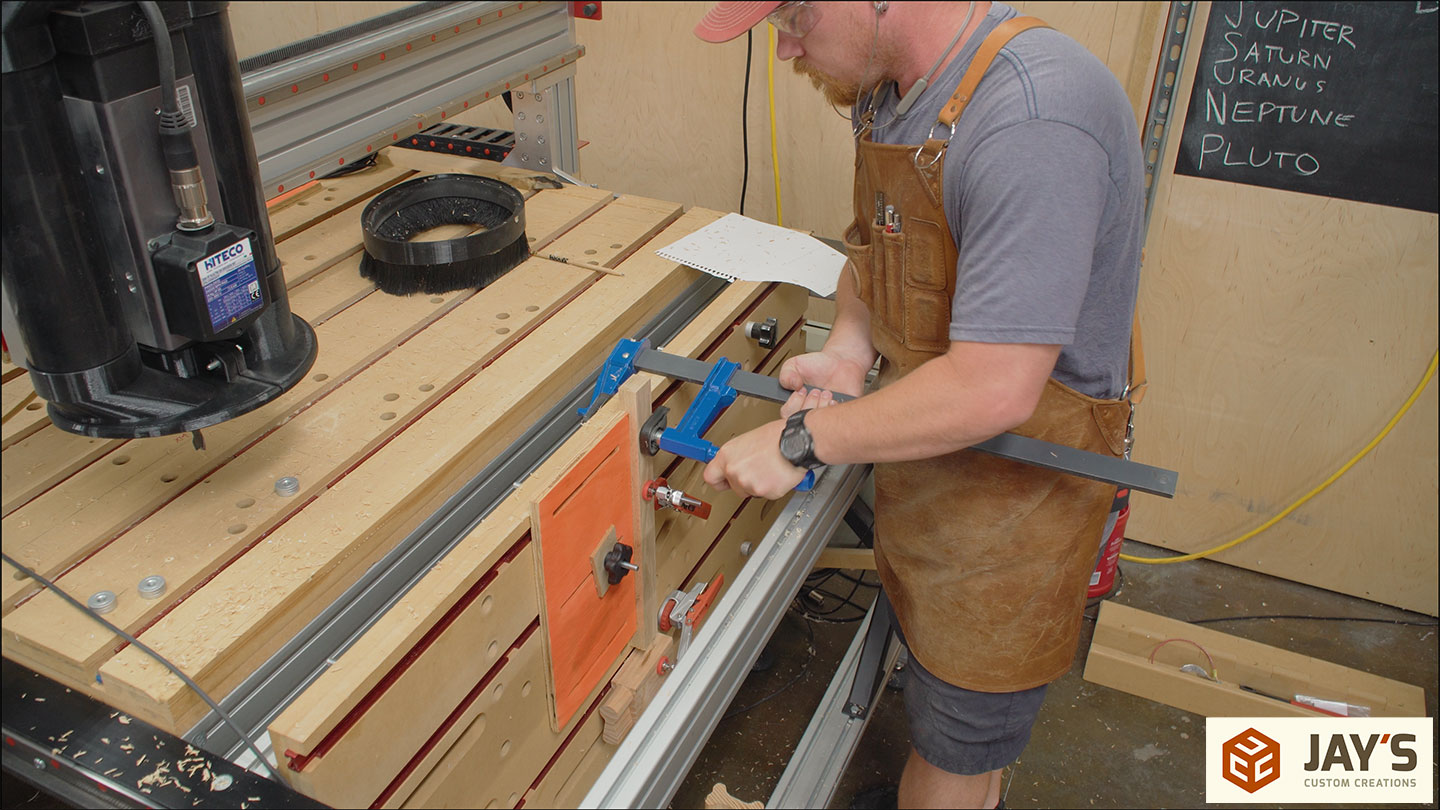
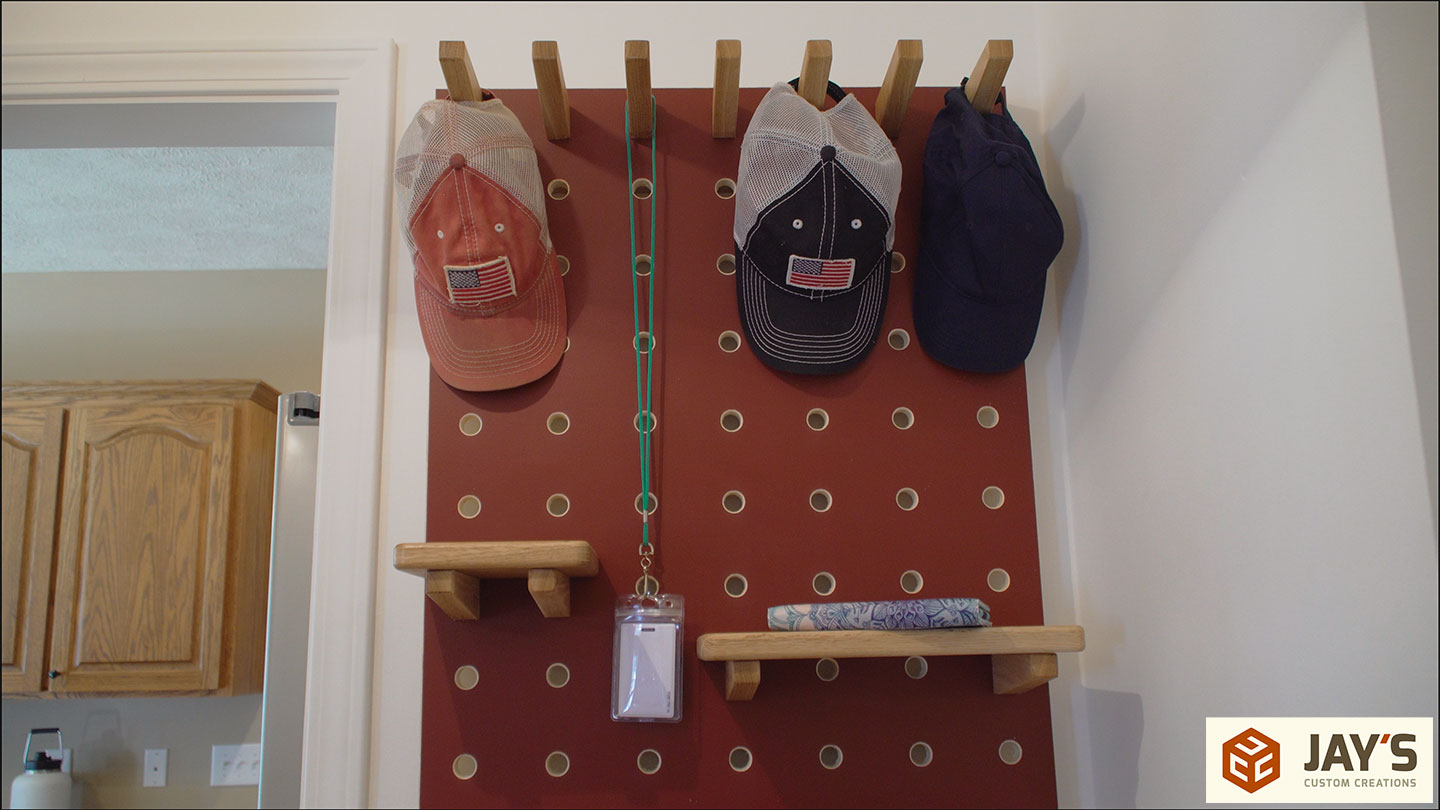
Some of them were a little bit too long to go on the top row where the French cleat will be. You might be able to understand that when the project nears completion. Using the vertical table on a CNC machine to cut joinery is something that I find incredibly fascinating and very rewarding because it’s CNC precise. There’s no guesswork.
It’s just perfect. I love that.
For the third trip back to the miter saw, I’m cutting to the final length here. The final length has to be the actual length of the arm, not the arm plus the dowel. So I set up a little intermediate stop block there to reference off of the correct piece of the material and not the dowel.
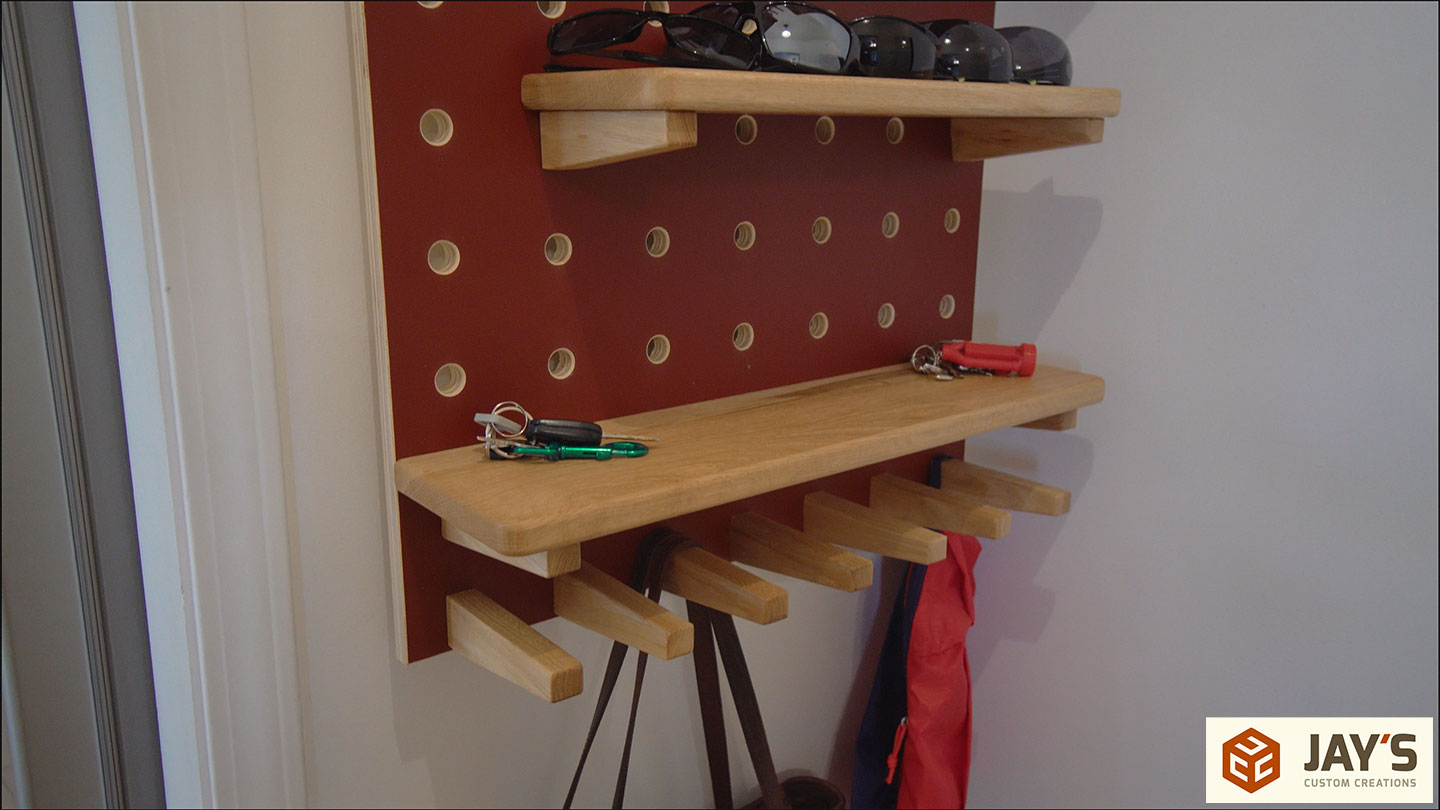
A simple taper is all I’m after here just to make these brackets or shelf pins. I wanted to make them appear a little bit lighter. So just a very simple taper. A tapering jig at the band saw with another block to hold the material down. I do not want to get my fingers that close to that particular blade.
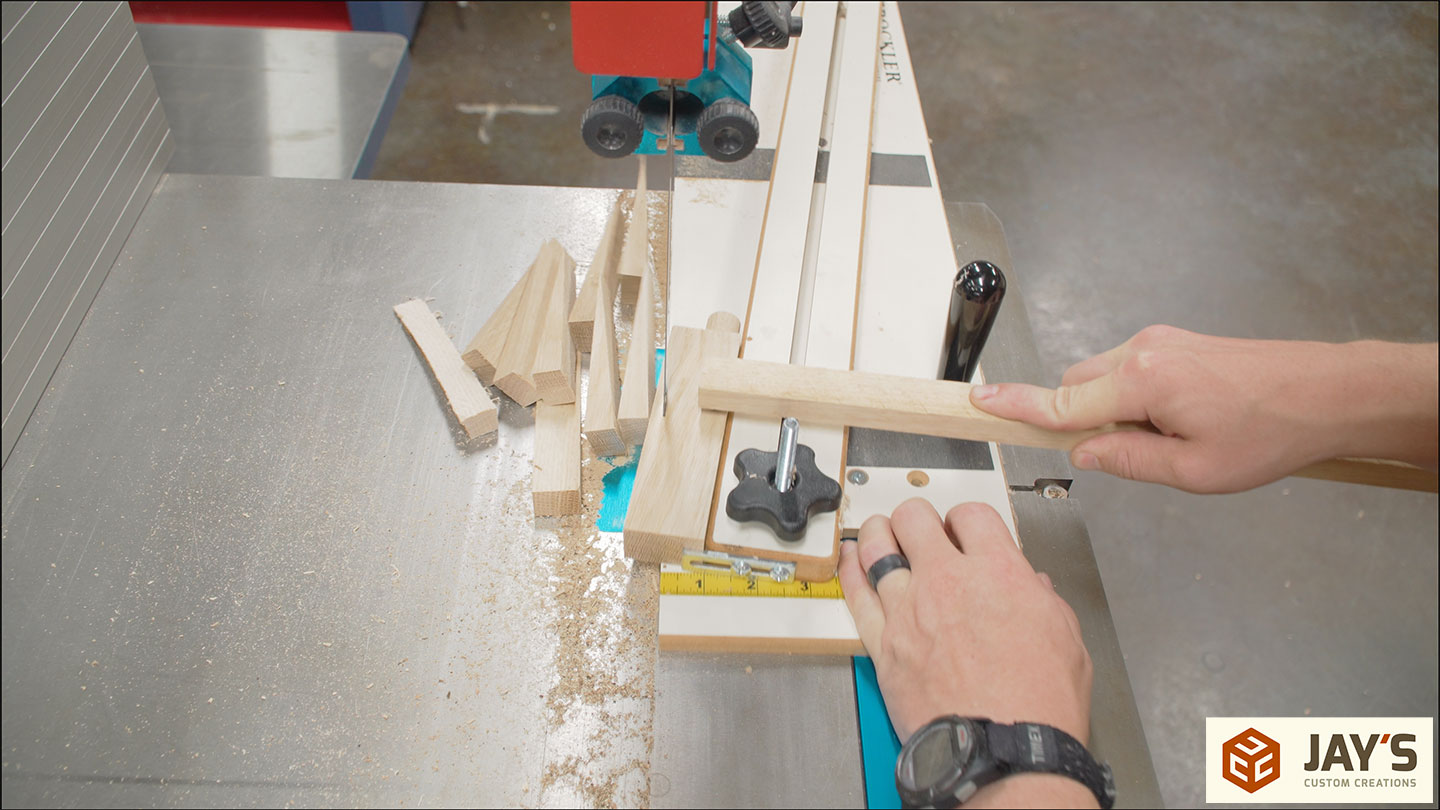
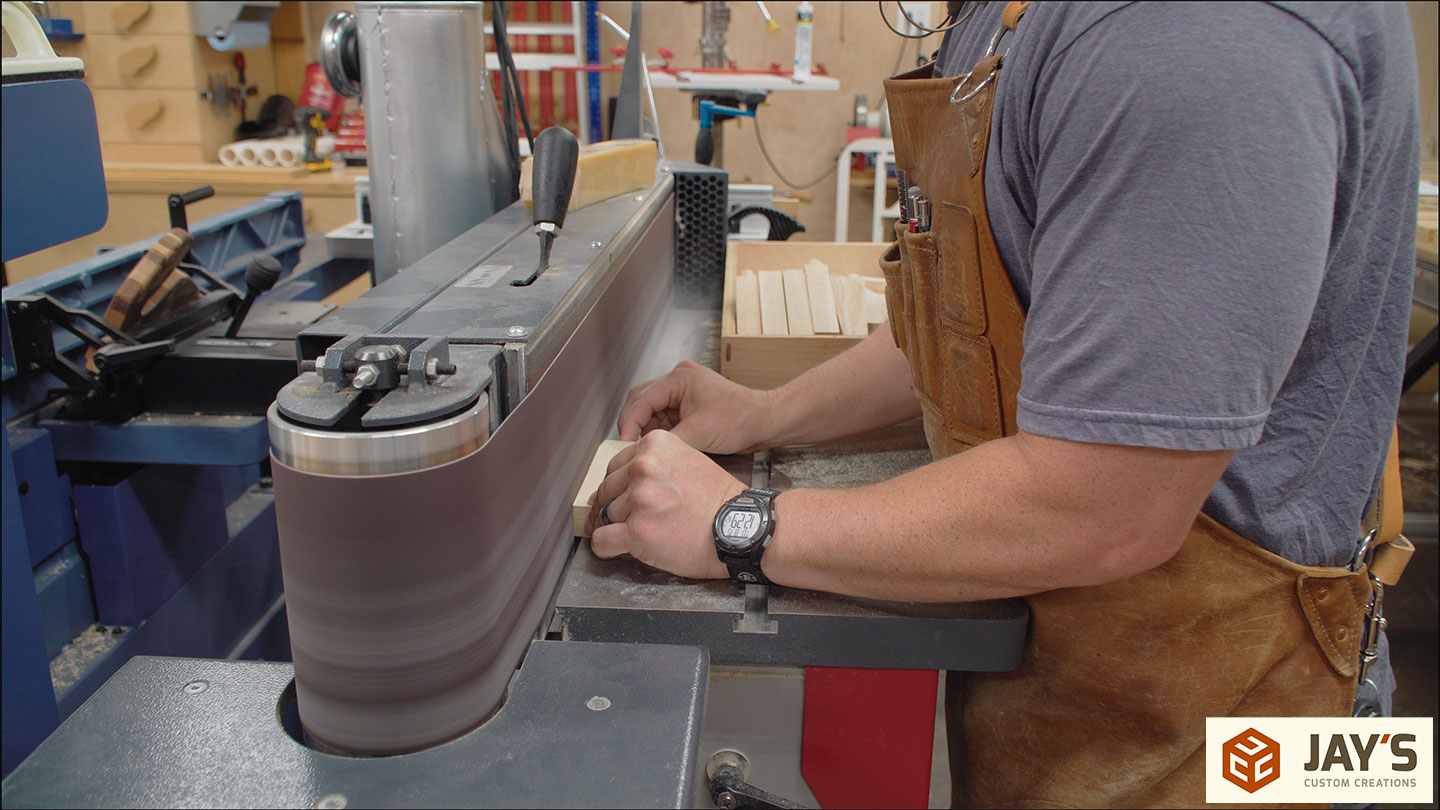
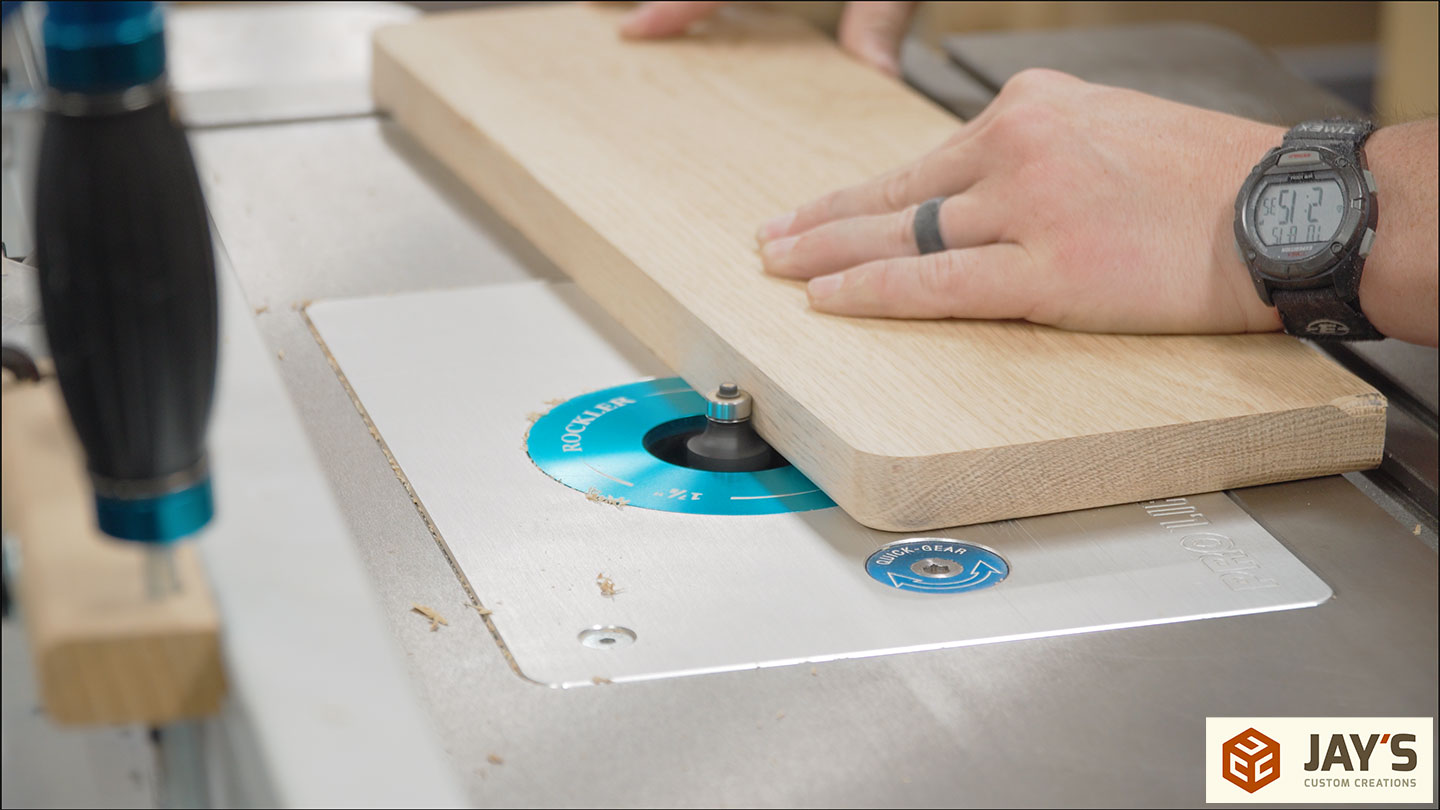
The bandsaw leaves kind of a rough face, so I used a horizontal belt sander to smooth that face. While I was here, I decided just to go ahead and freehand all the round overs on all the exposed edges. Doing this leaves more of a created appearance than a manufactured one if that makes any sense, instead of using a round-over bit where all of the edges will be the same uniform round-over.

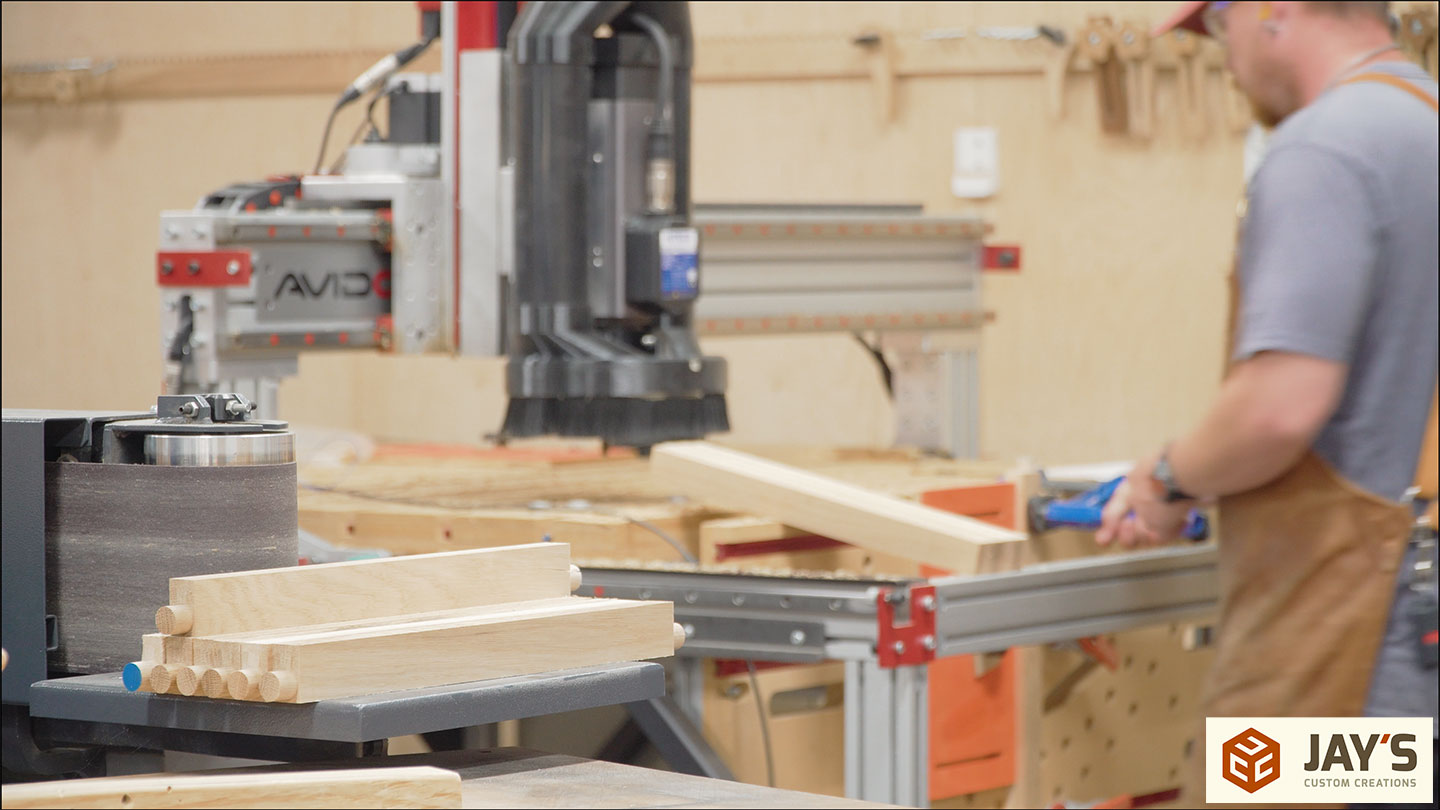
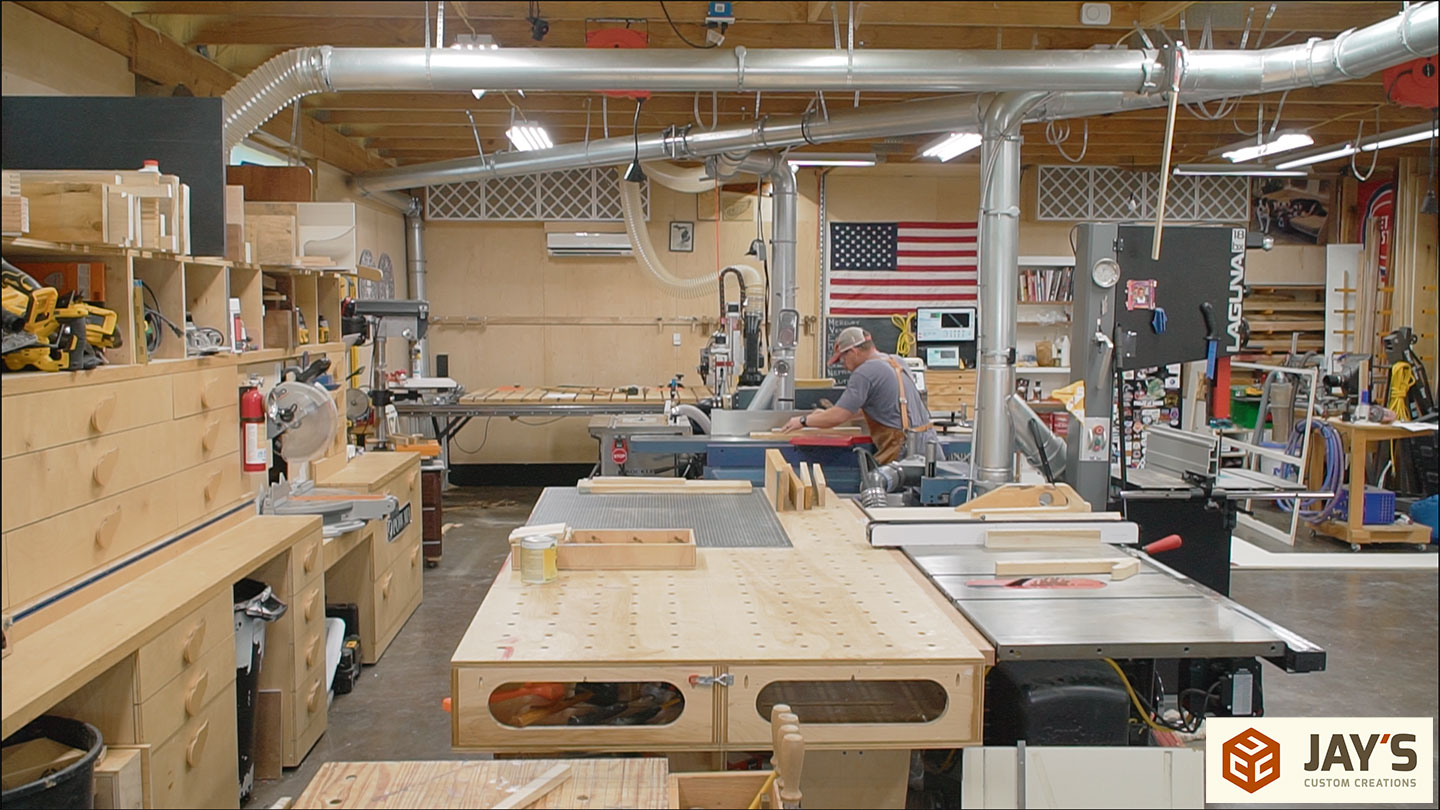
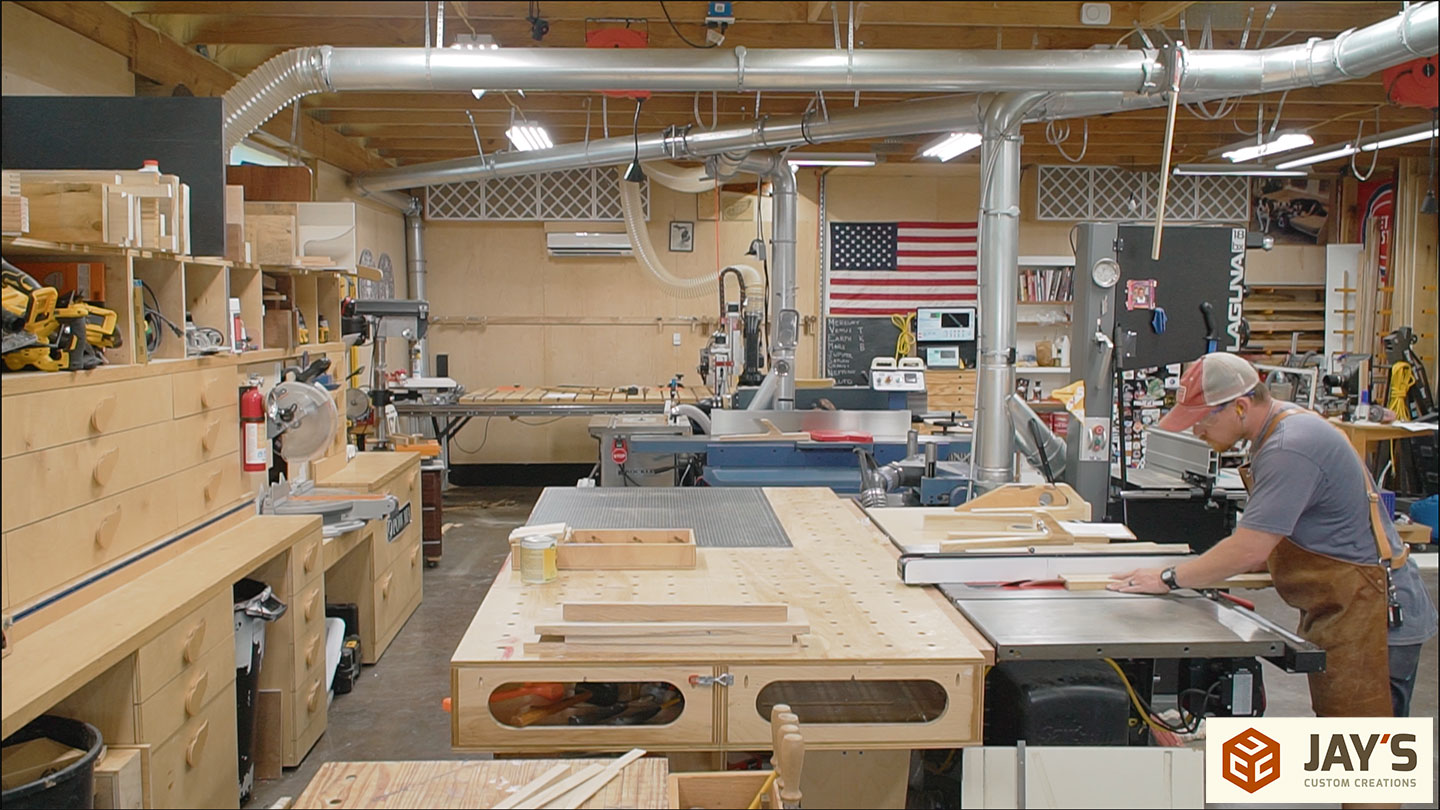
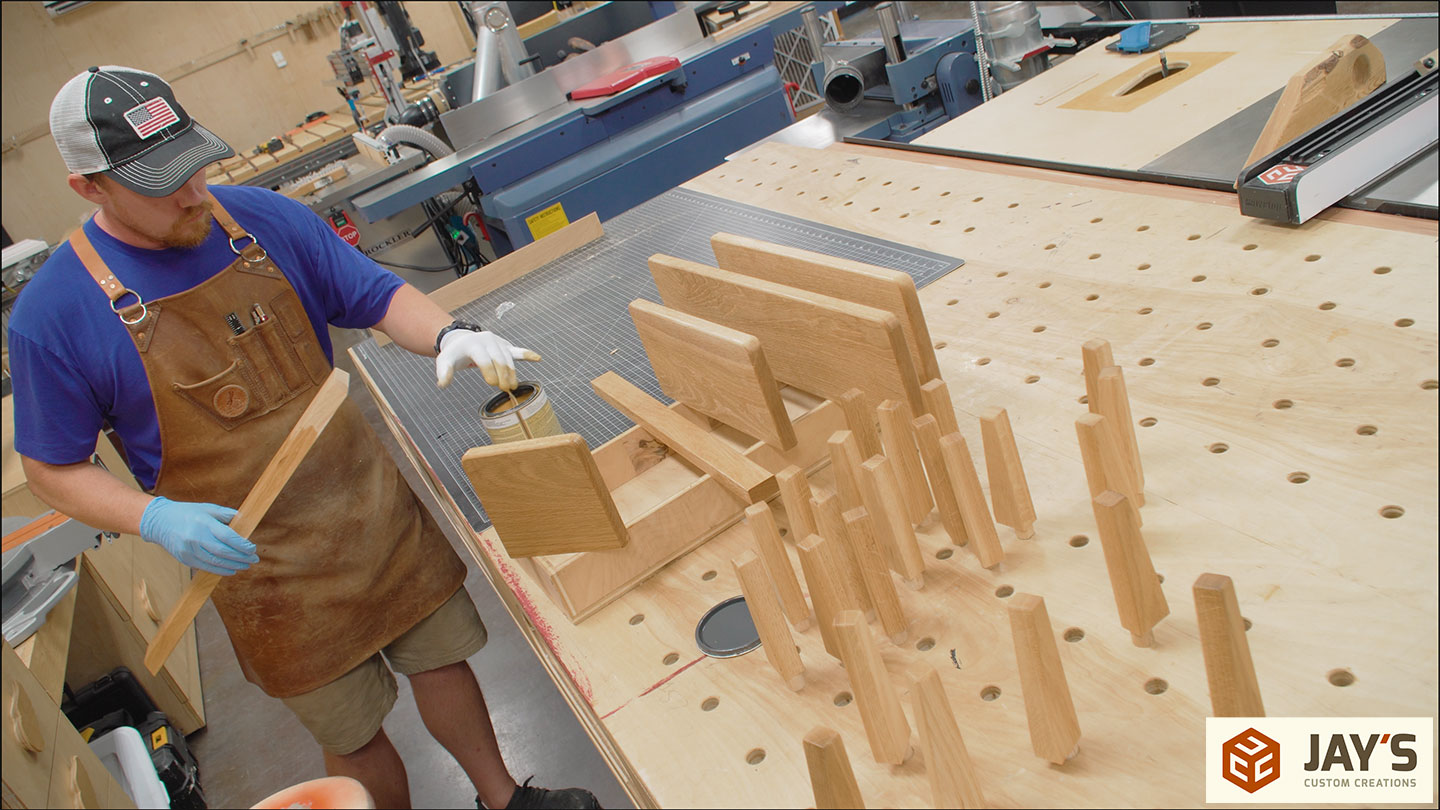
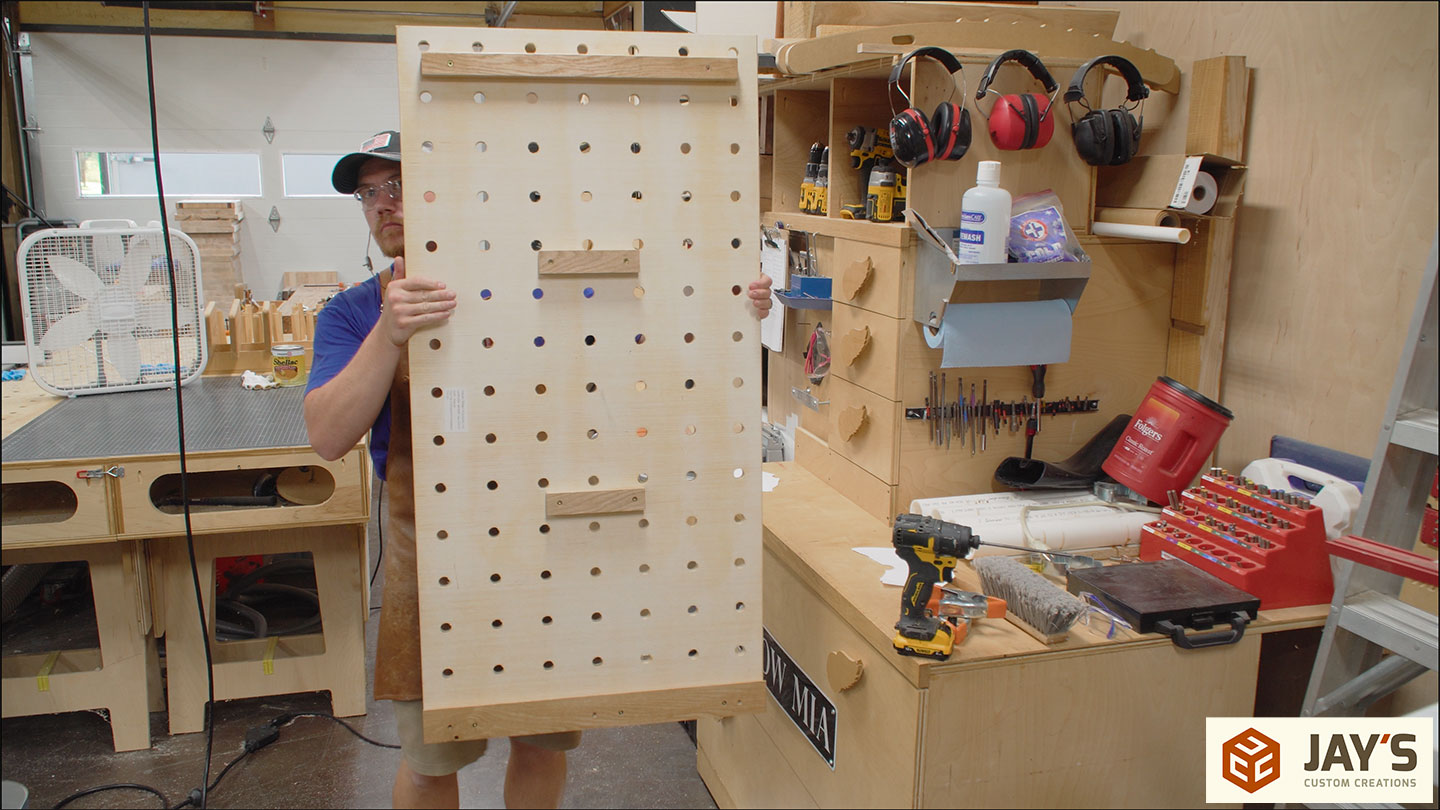
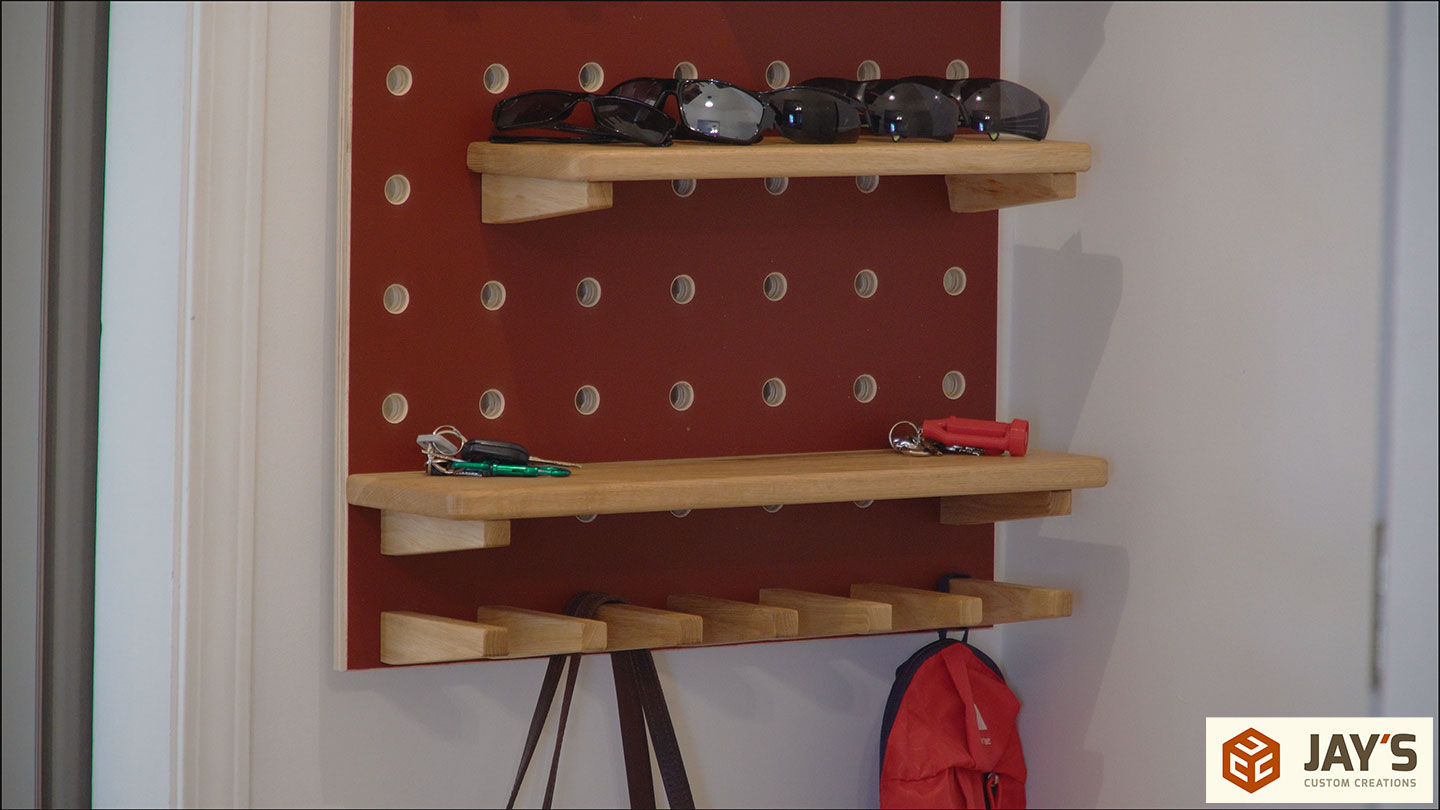
There are four shelves, two pieces for the French cleat system, and then another offset piece or spacer piece to go on the bottom. All of that needed to be cut, so I went ahead and set up a time-lapse to just run through the milling process once again, and I thought it was pretty cool.
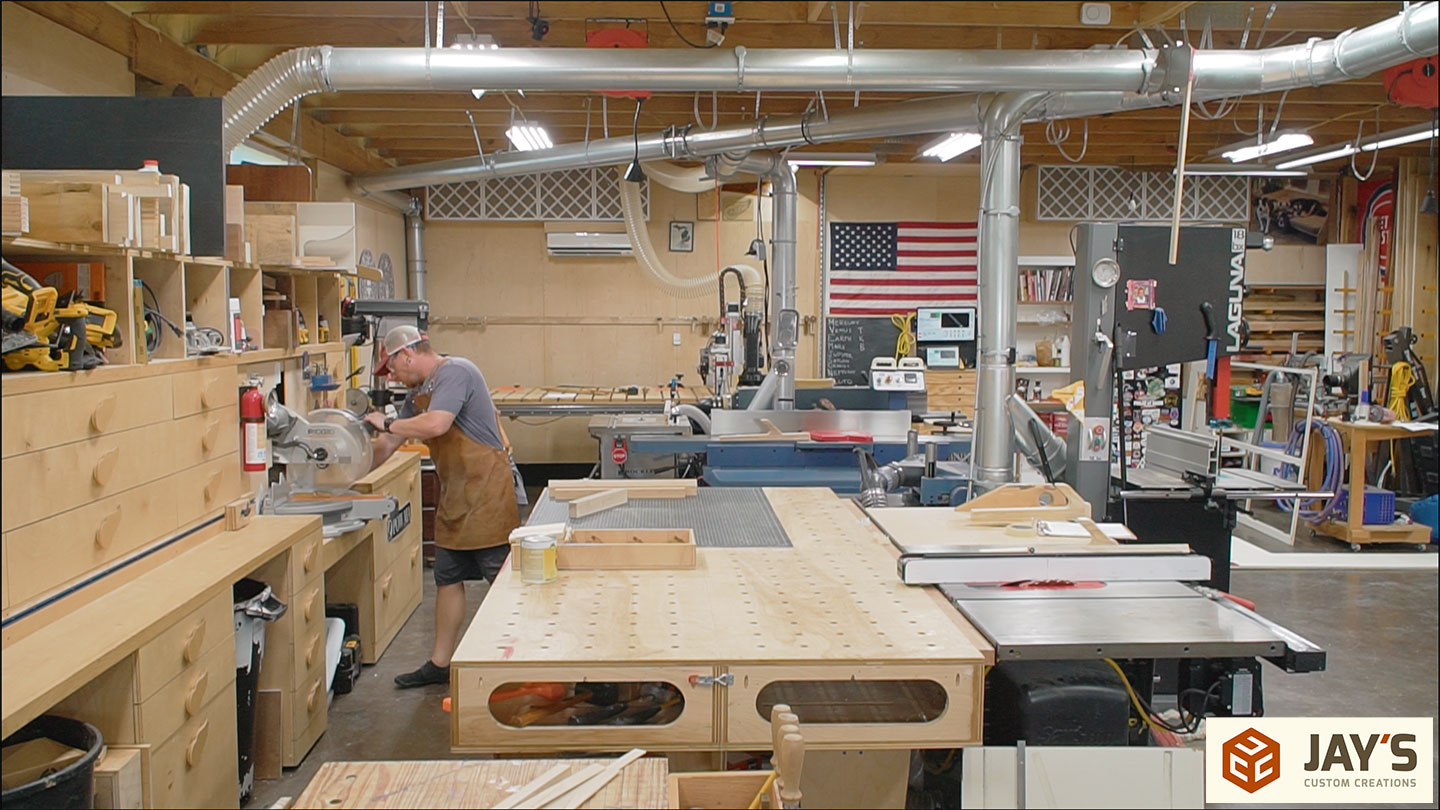
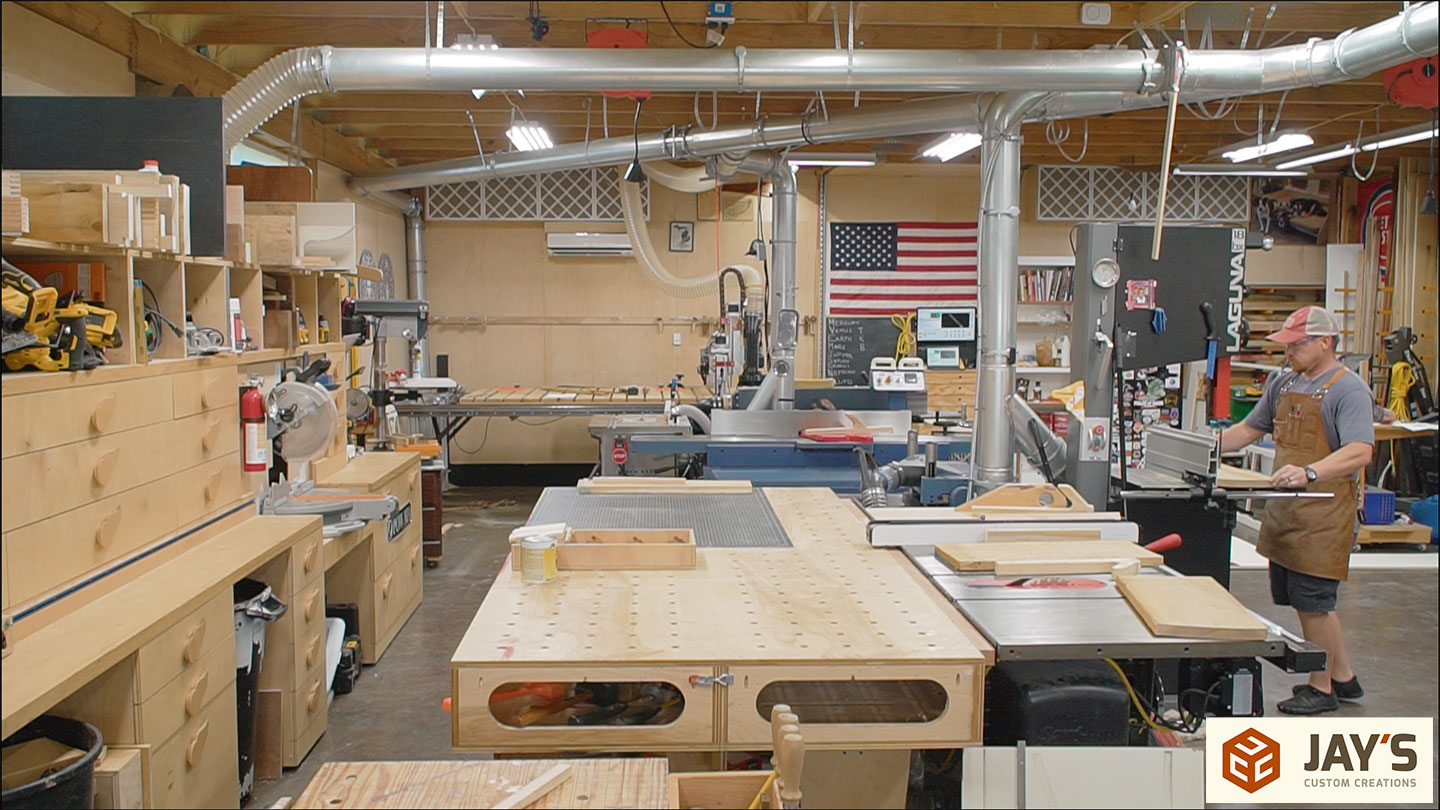
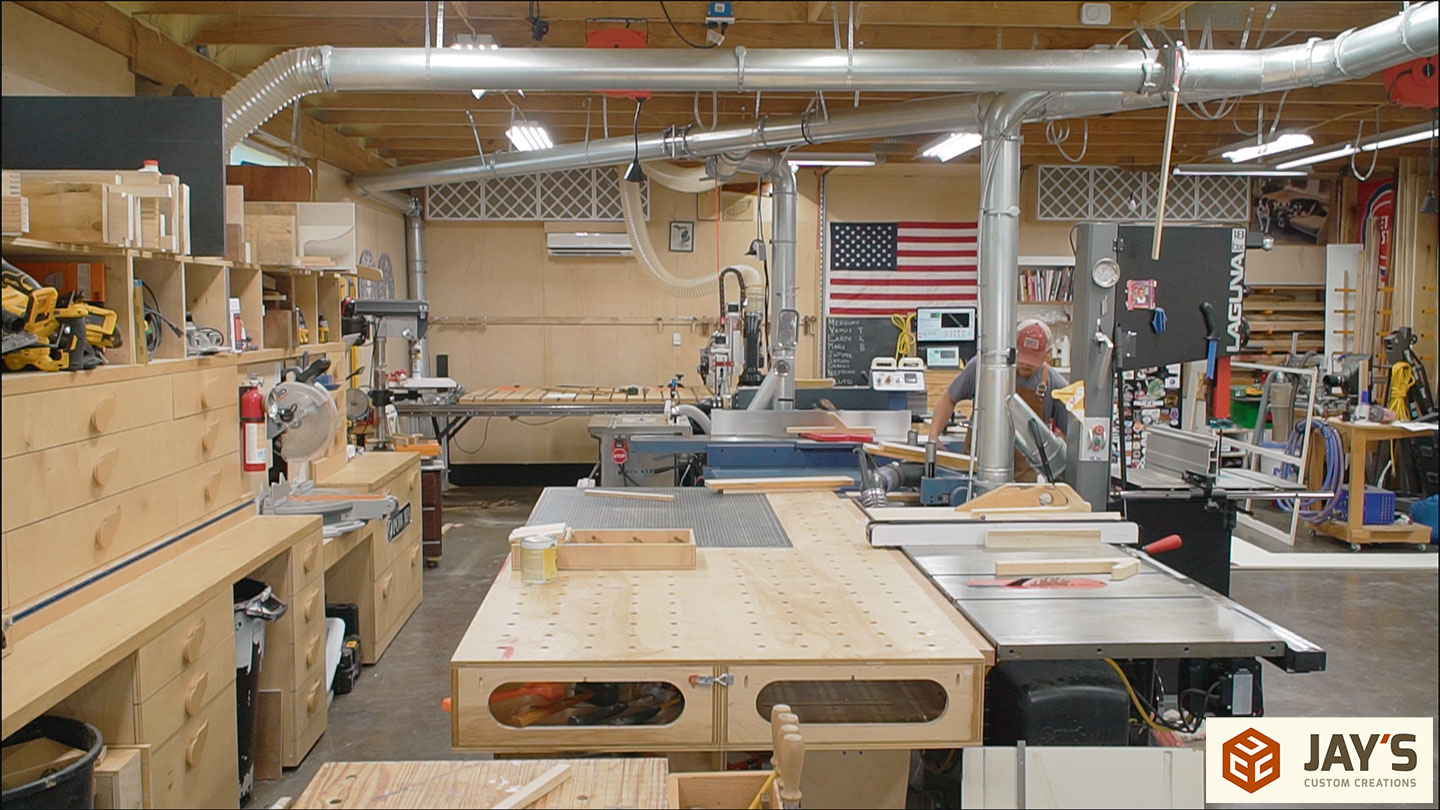
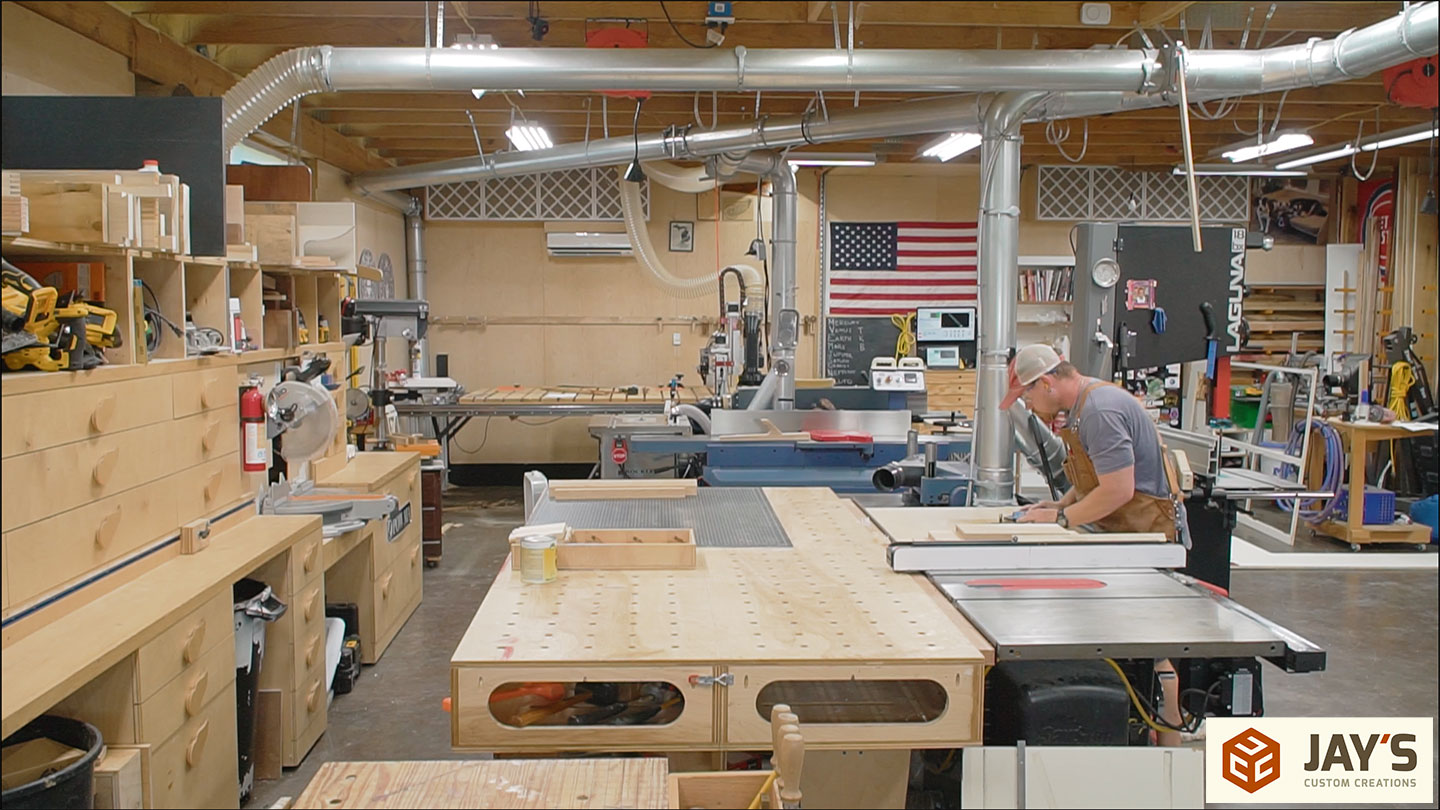
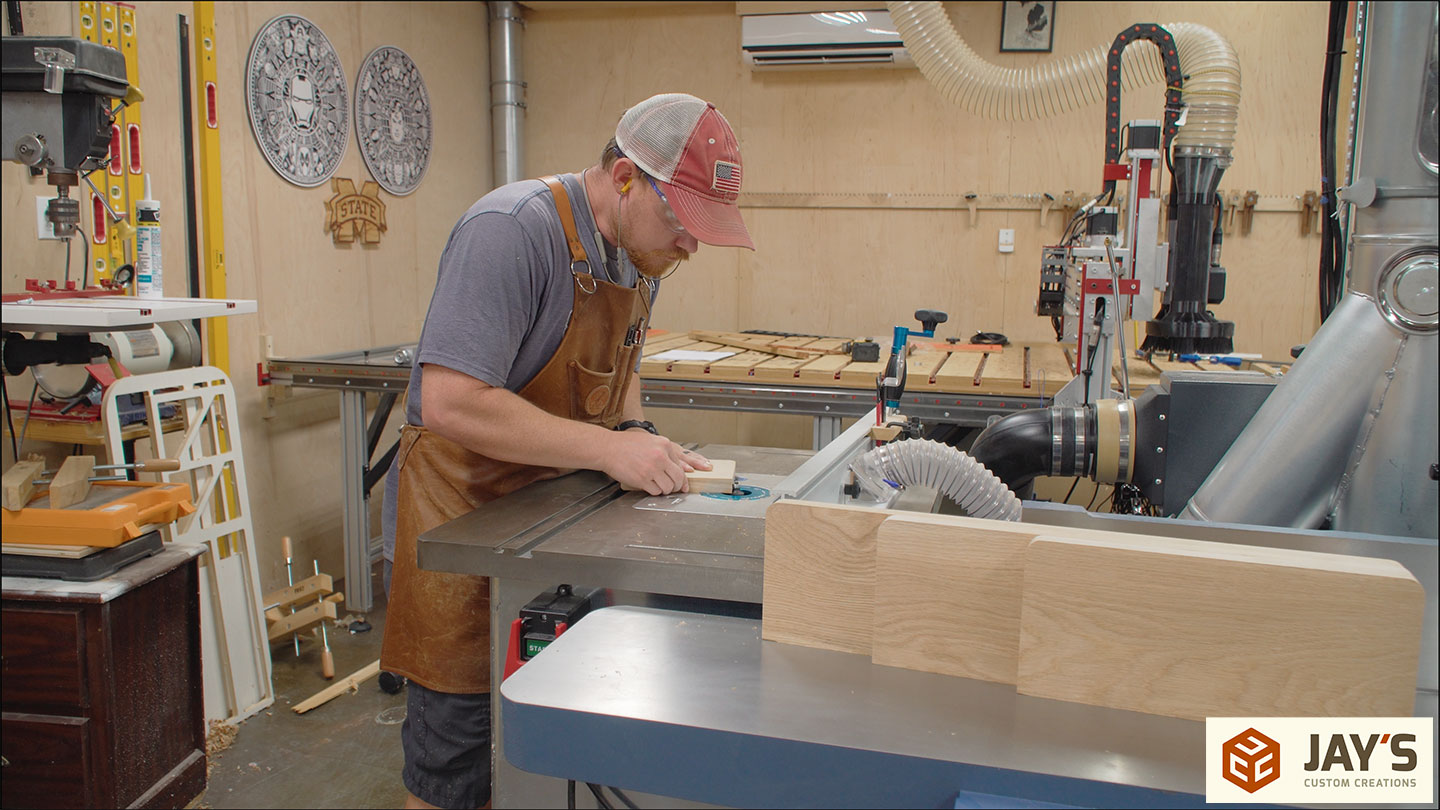
This is a good example of the assembly table being the center hub in the workflow wheel. This assembly table is surrounded by six stationary power tools, and I used all six stationary power tools around it. For this time-lapse, the miter saw station, the jointer, the planer, the bandsaw, the table saw, and the router table that’s in the wing of my table saw were all used.
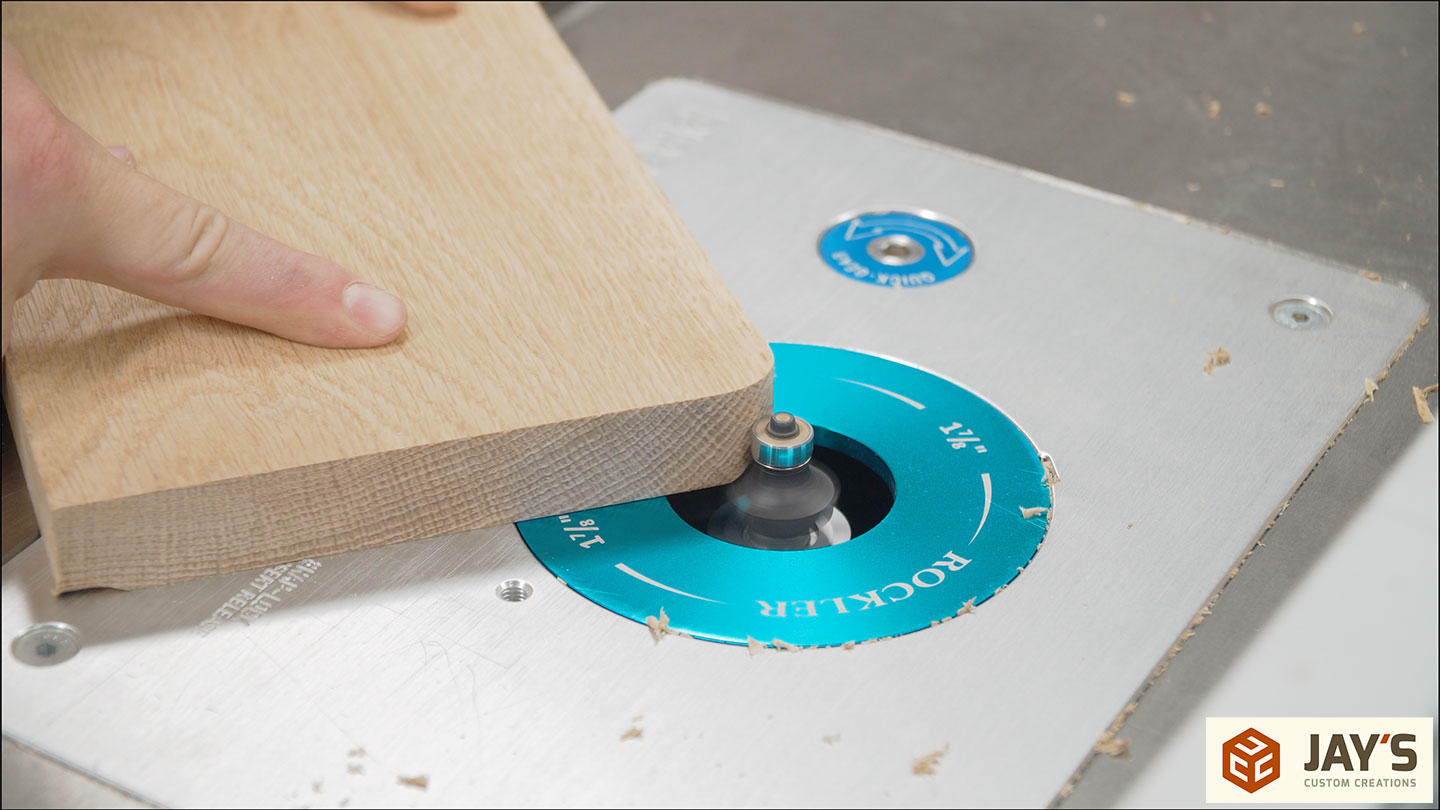
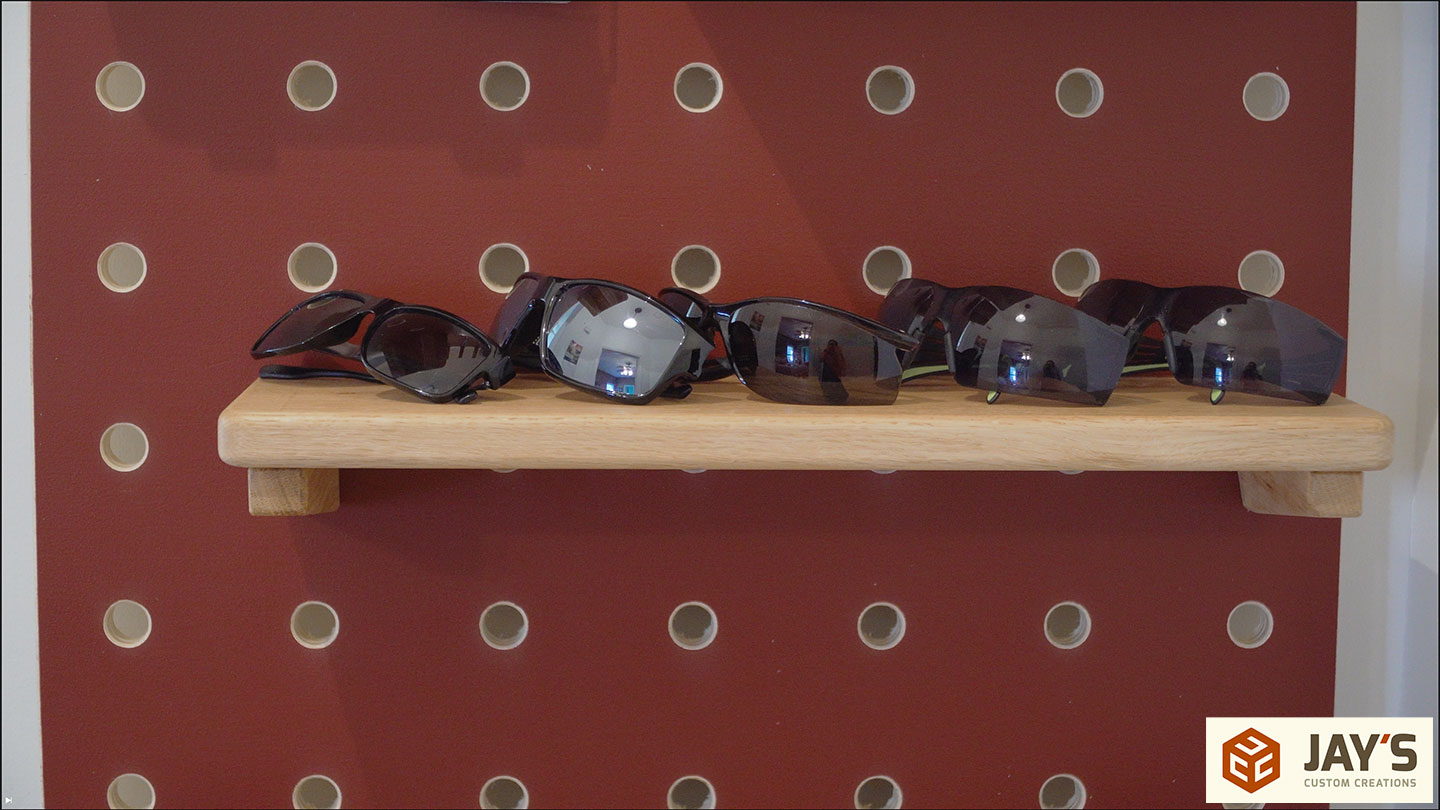
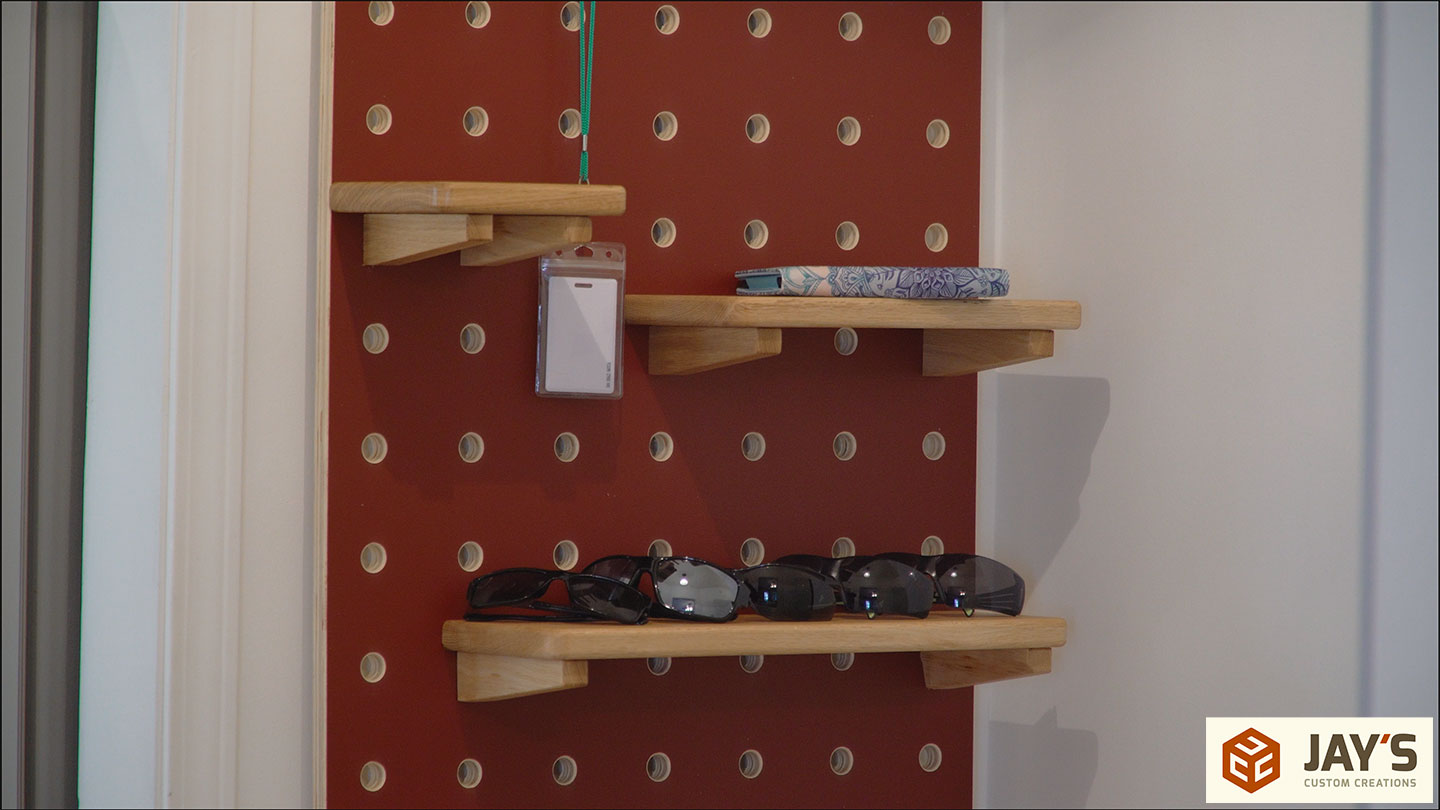
Because this is going to be in a hallway where we constantly walk around it, I don’t want any sharp corners on these shelves. So I used one of these templates and a patterning bit or a flush TriMet in the router table to transfer a, I believe it was a five-eighths of an inch radius to the outside most corners on all of the shelves.
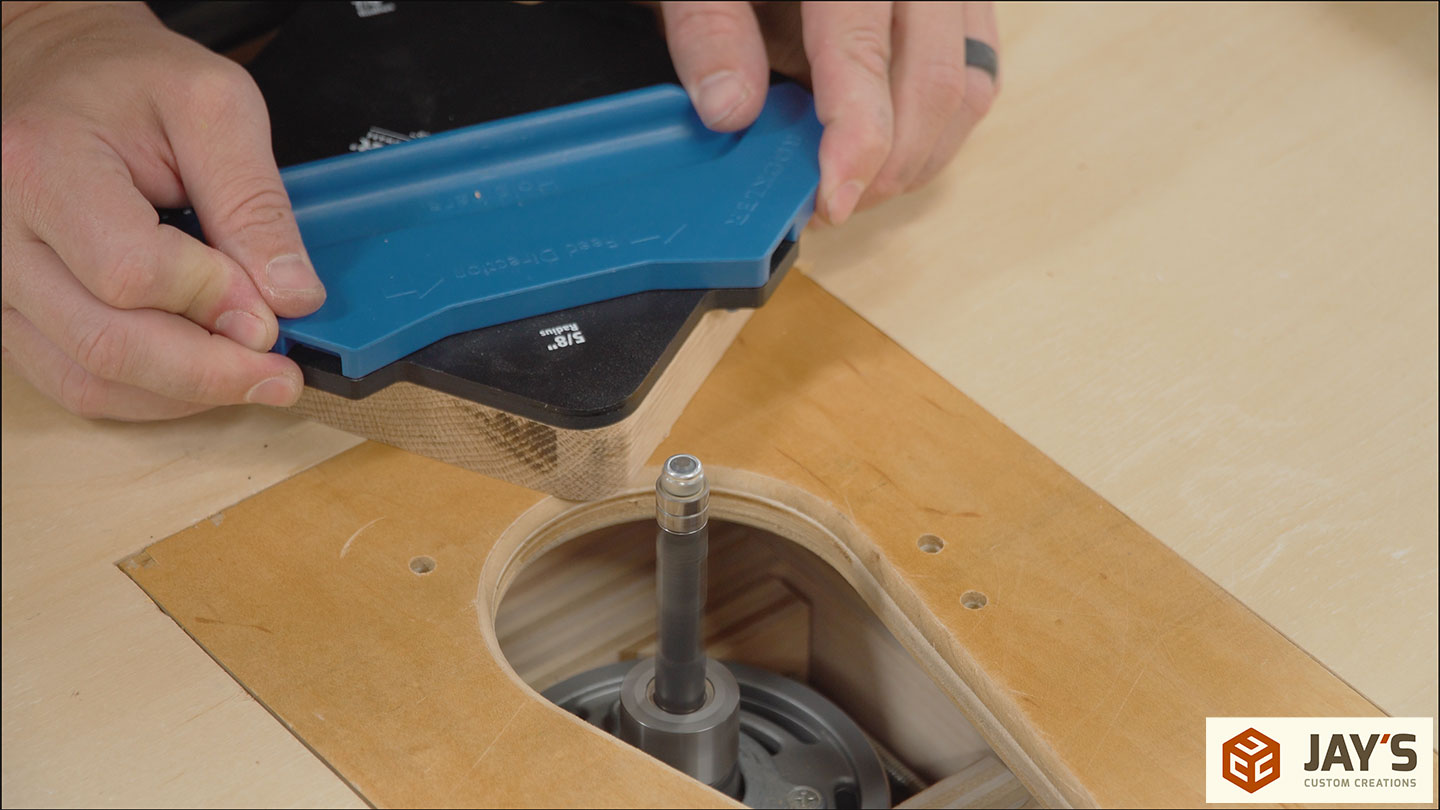
Because of the radius I put on the shelves, I could not freehand the roundover. So for that process, I did set up a round-over bit at the router table.
Shellac is the finish of choice for all of the white oak pieces. Shellac is one of those finishes that it’s an old finish that never gets old, if you know what I’m saying.
It’s just so easy to apply. It’s easy to repair if you ever need to do that. And it dries fast. There’s just so much that I love about shellac. I’m using a pair of those nitrile gloves with a white glove on top of that glove on one of my hands. I get a lot of these white gloves from casters of all things. I buy a pack of casters on Amazon and they come with white gloves so I’ve got a pile of these gloves that I don’t know what to do with. They’re just random white gloves. So I thought, why not use the glove as a rag? Kind of like a very ergonomic approach to applying finish. And while it did work, you just end up wearing out your fingertips on the gloves and have to rub the back of your hand on the pieces after a while, which is kind of awkward. So nice in theory but not that practical in practice.
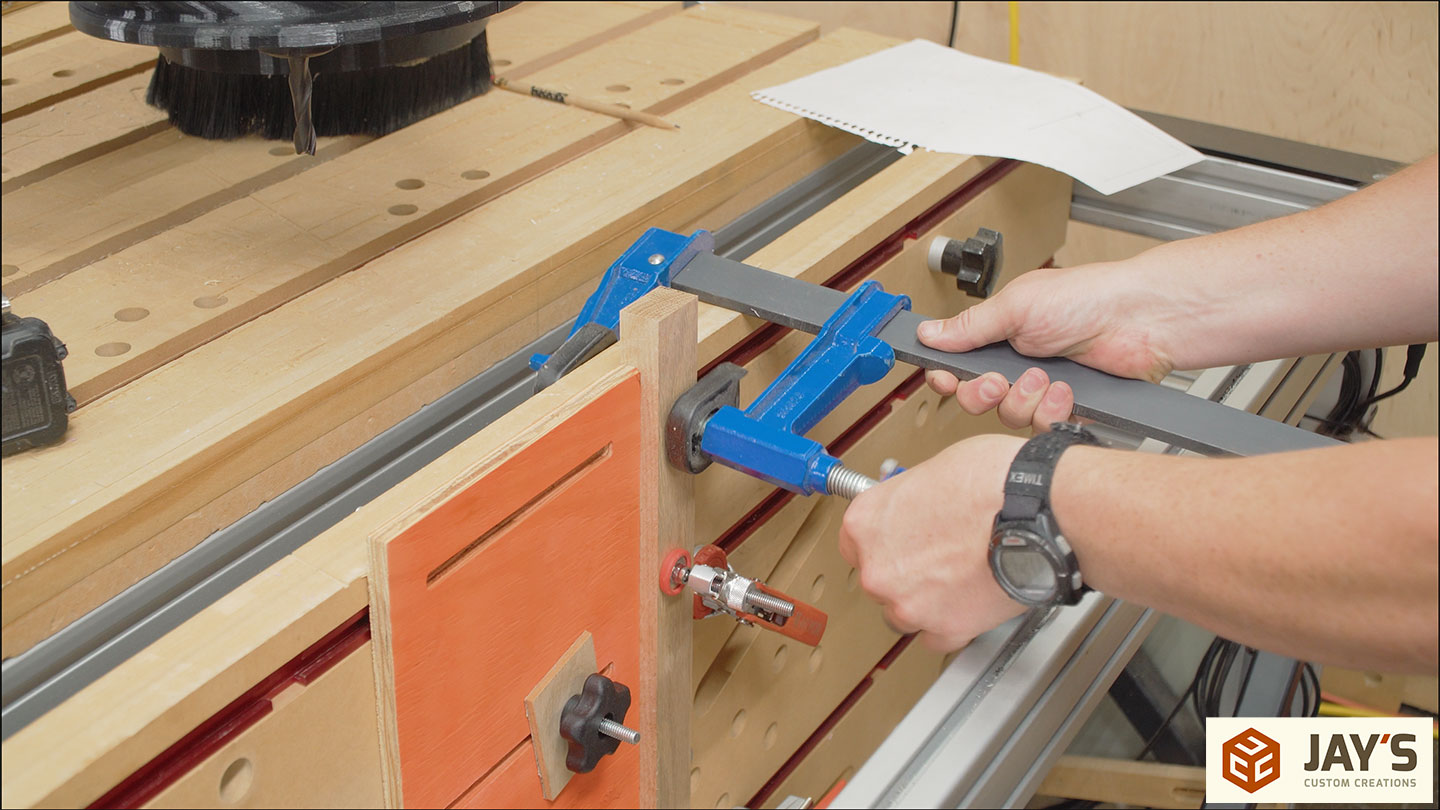
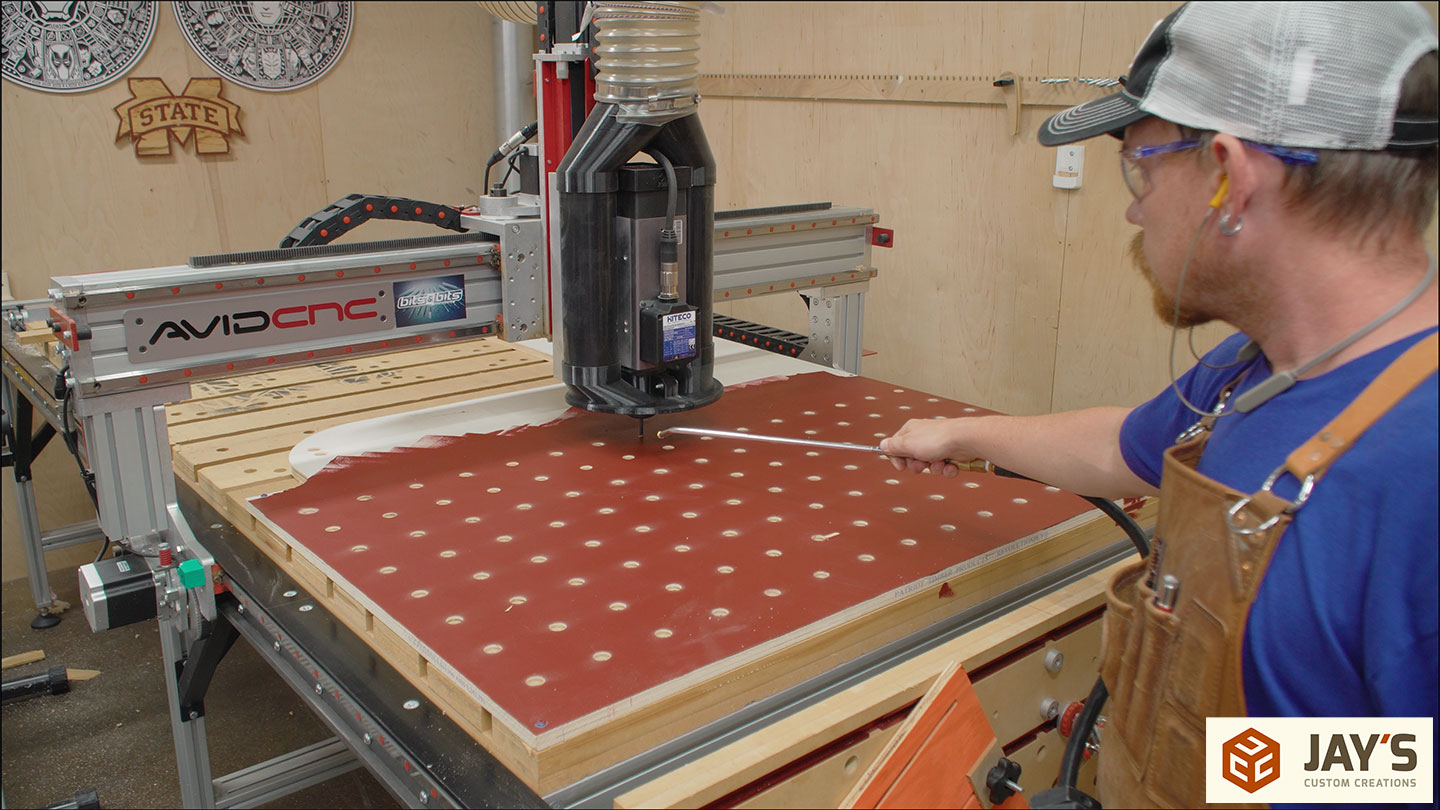
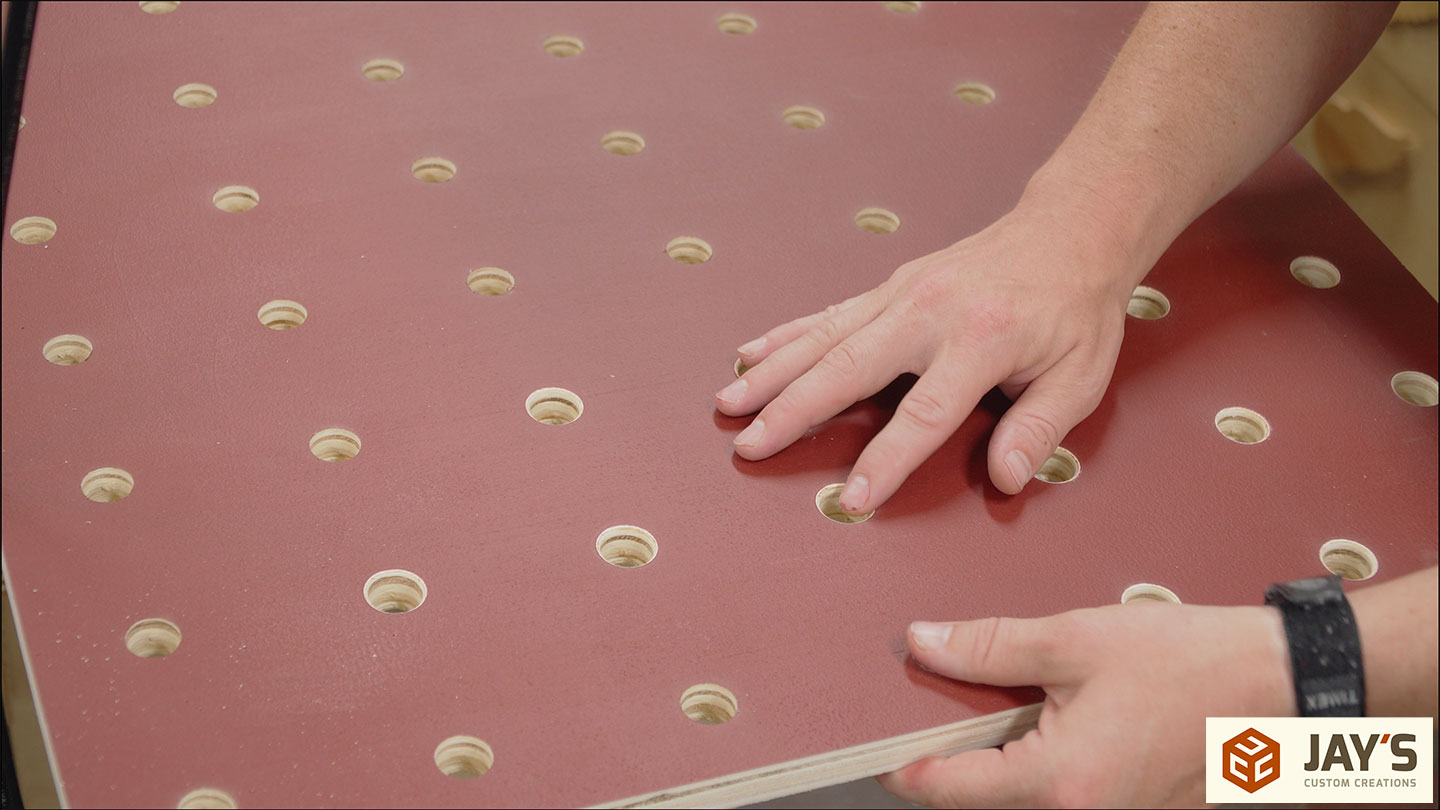
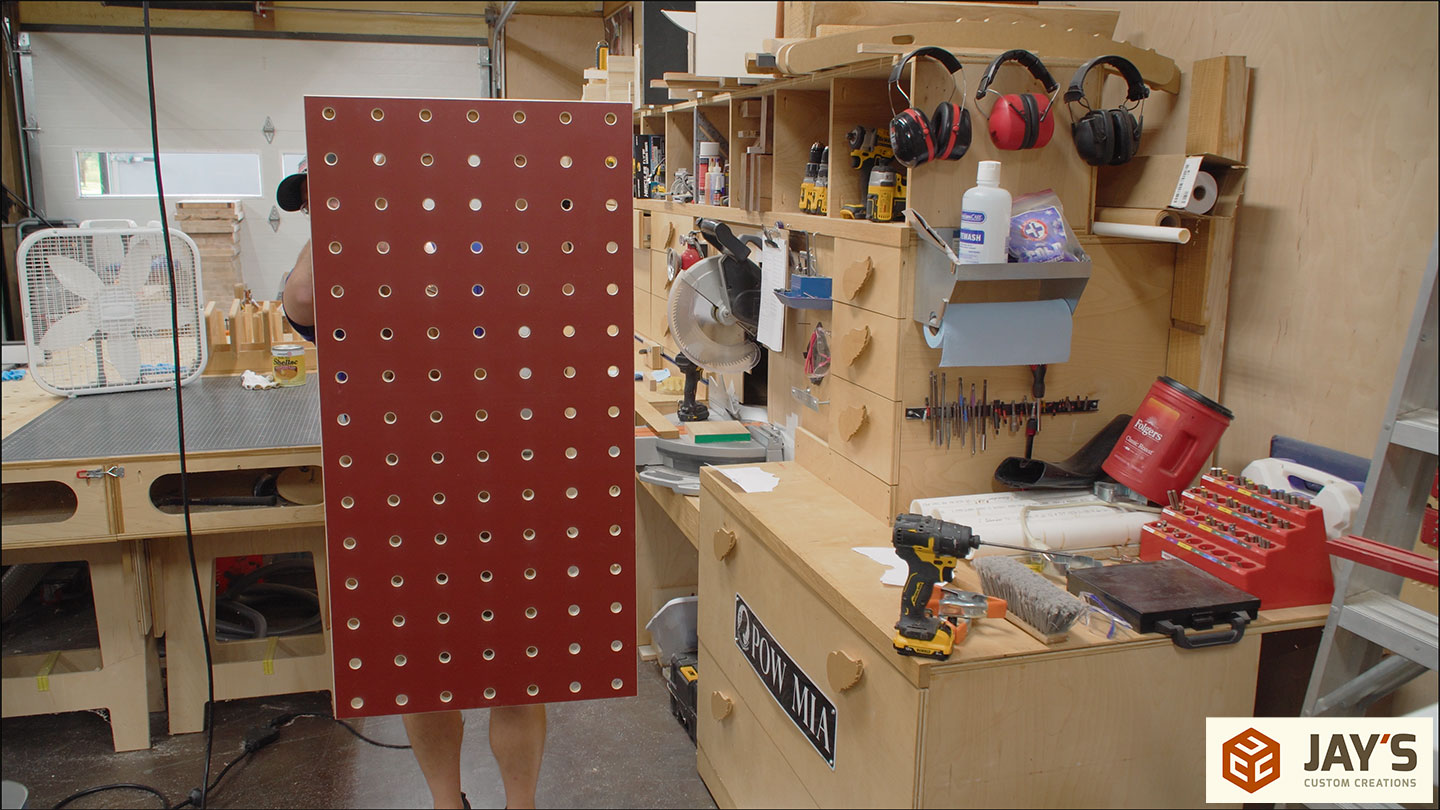
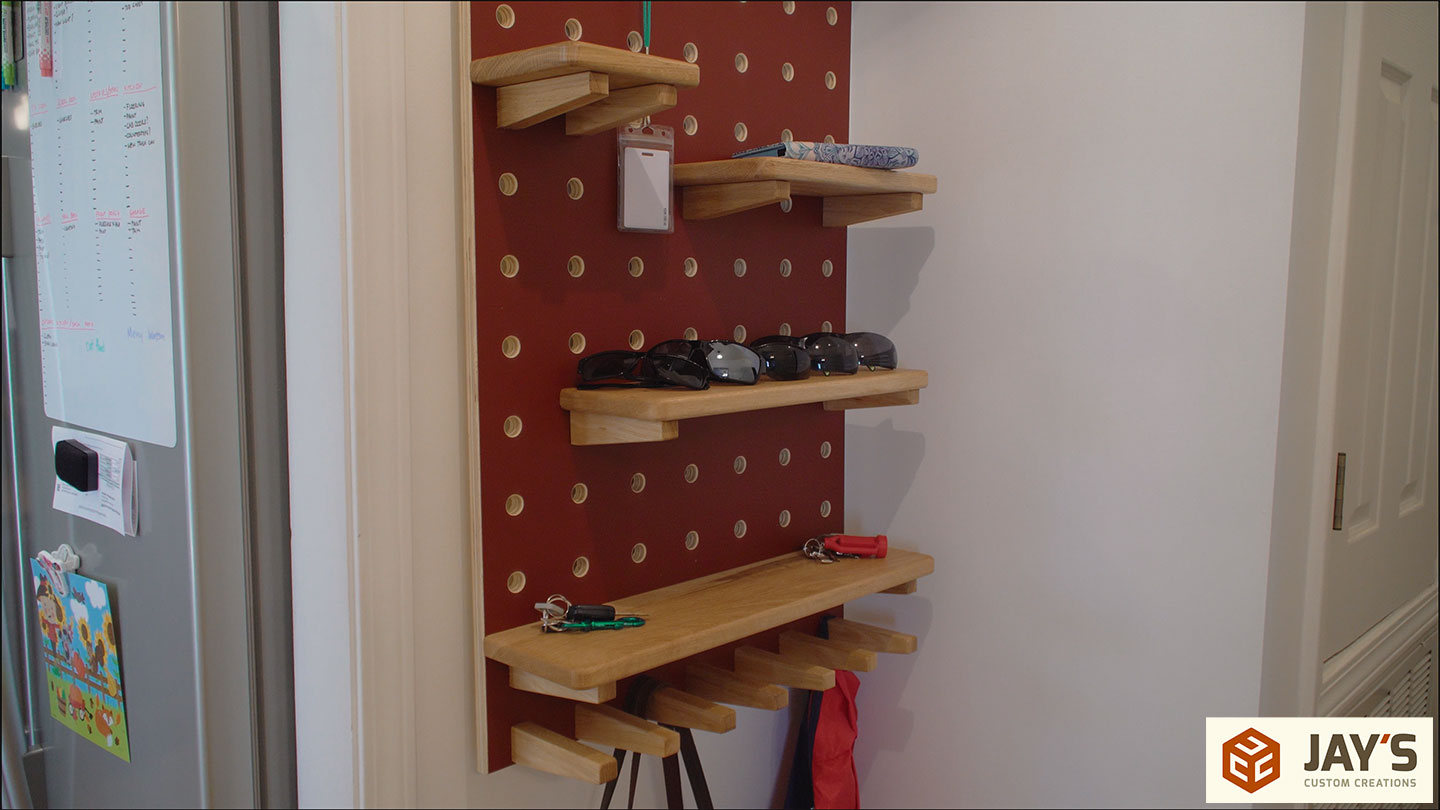
I did want the holes to be perfectly spaced and symmetrical. So rather than setting up a grid pattern with a chalk line and then using a drill bit, which is what I used on my first assembly table, I used the CNC machine. It had a big goof-up in the middle of one of the cuts. It failed to lift the Z axis and then just, it just shot off to the side. I got an error message about my computer setup not having enough allocated memory to send the info to the CNC. I quickly resolved that setting.
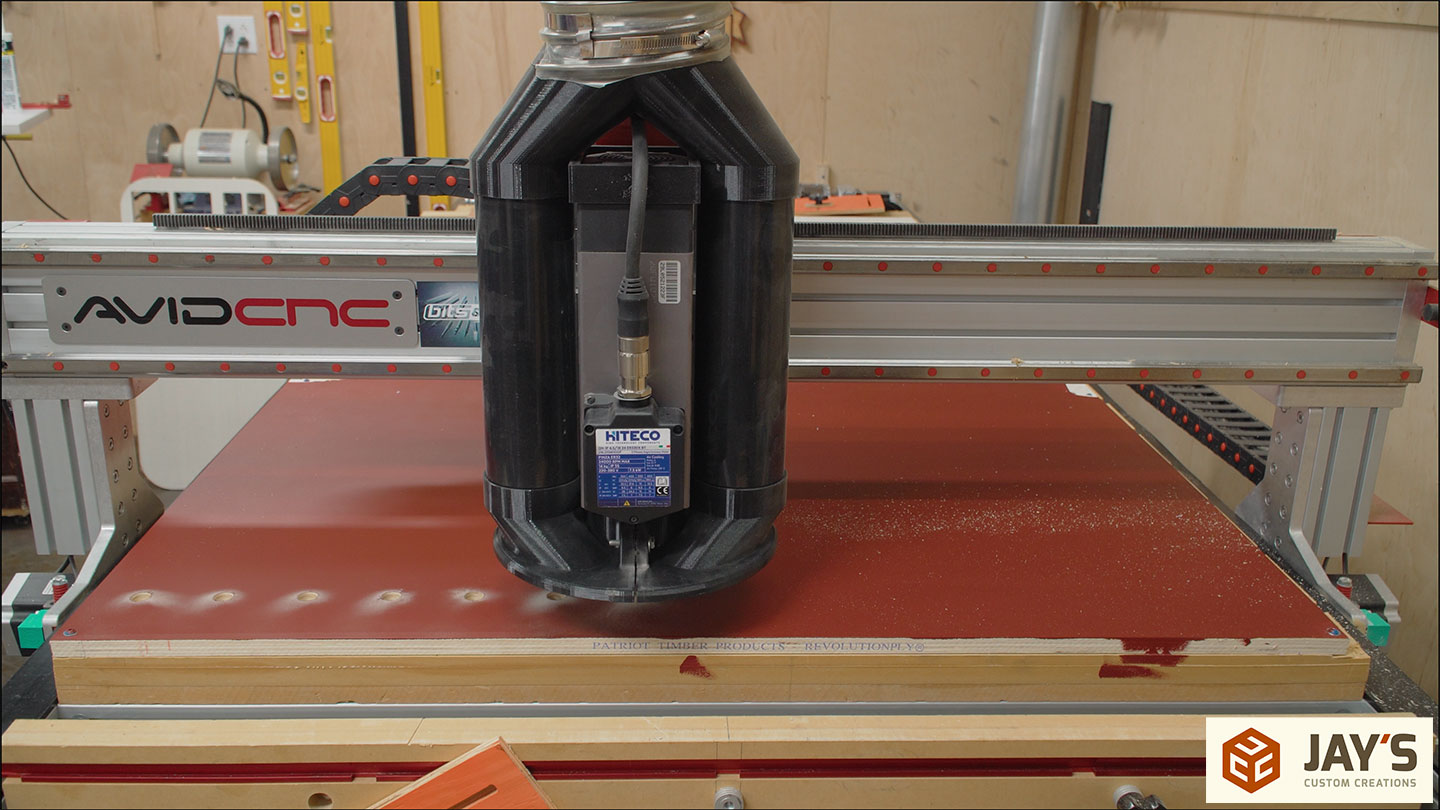
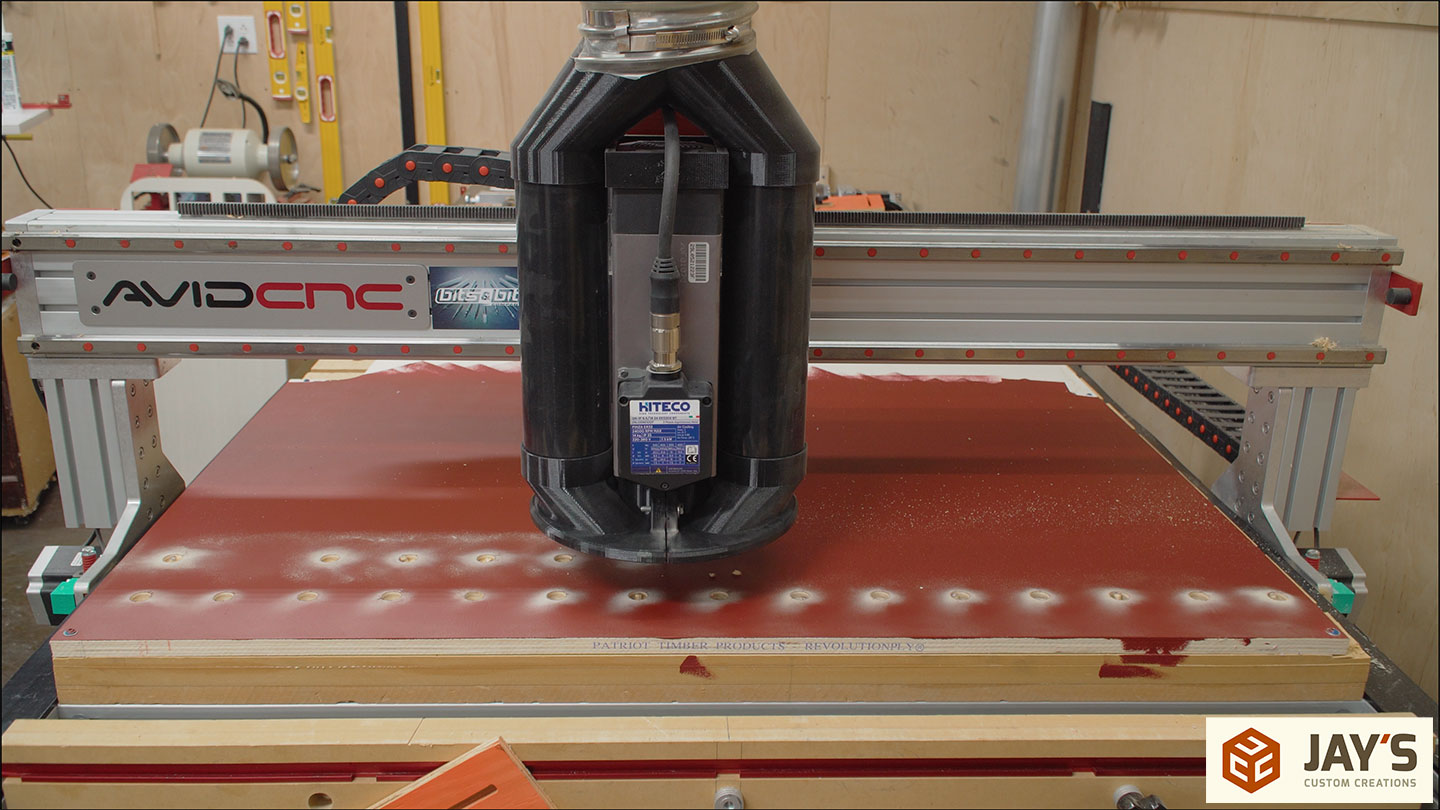
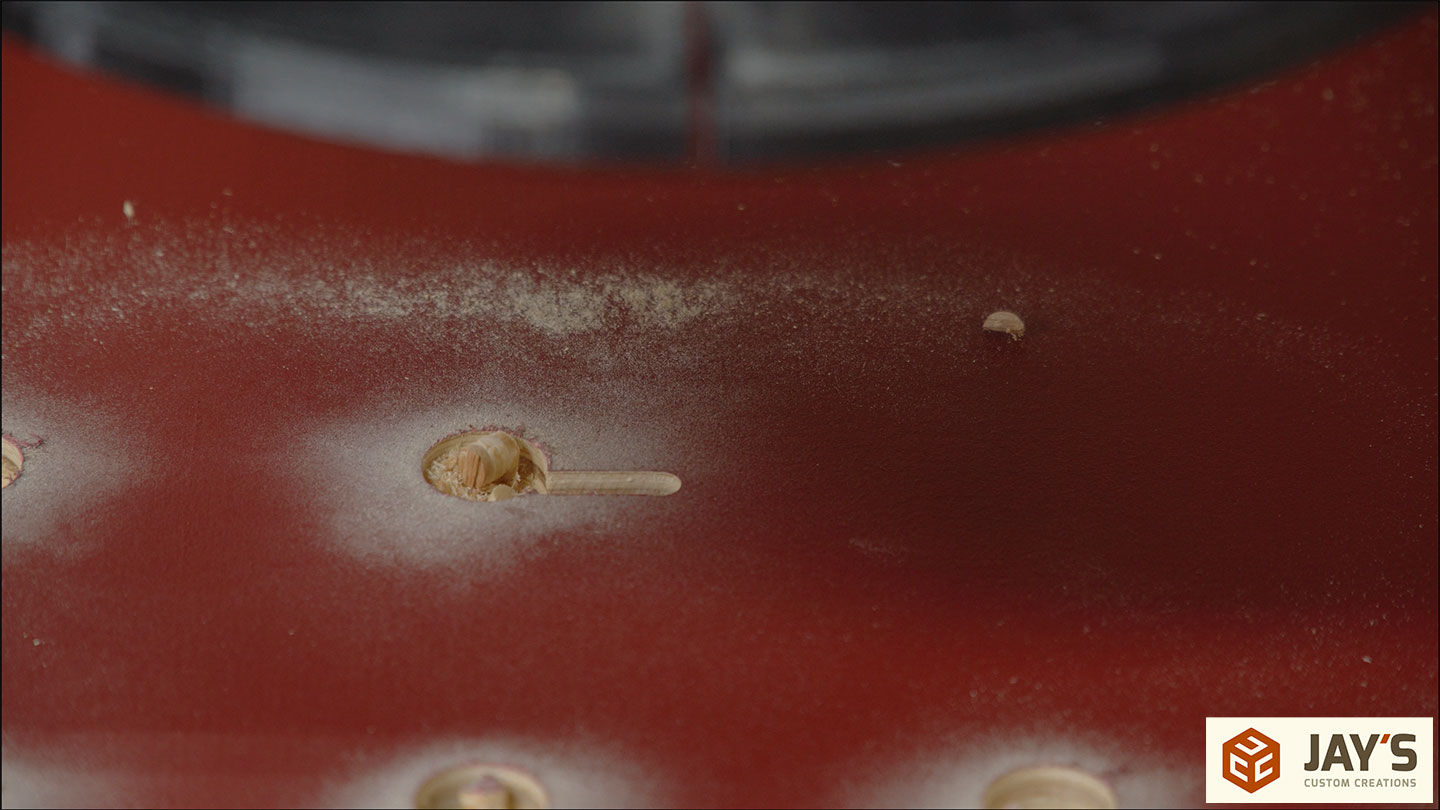
Very frustrating and kind of annoying. I ended up using some blue tape inside the hole to establish the shape of the hole. And then I packed in some wood filler into the spot where the CNC messed up. Well, the CNC didn’t mess up. The computer messed up. A little sanding and touch-up paint and you never knew. I realized about halfway through that compressed air was the way to go to get all this dust and crap off of the surface as I’m cutting. I didn’t want to use the dust shoe because I didn’t want the bristles on the dust shoe to mess up the not cured paint.

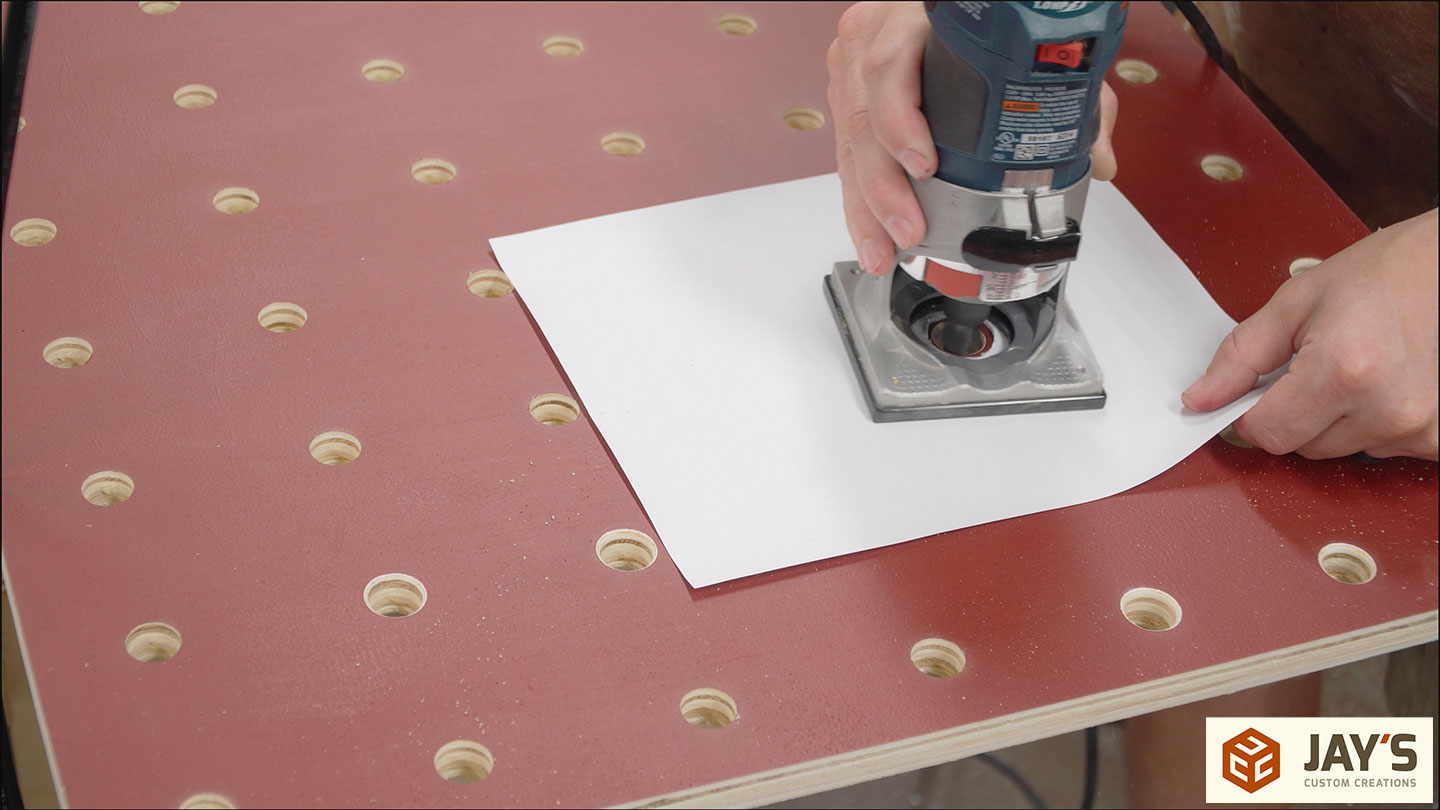
Again, I didn’t wanna mess up the finish, so I’m using a piece of paper with a hole in it to act as kind of a barrier between the router and the fresh paint. So that way I could add a one-eighth of an inch round over to all of the holes.
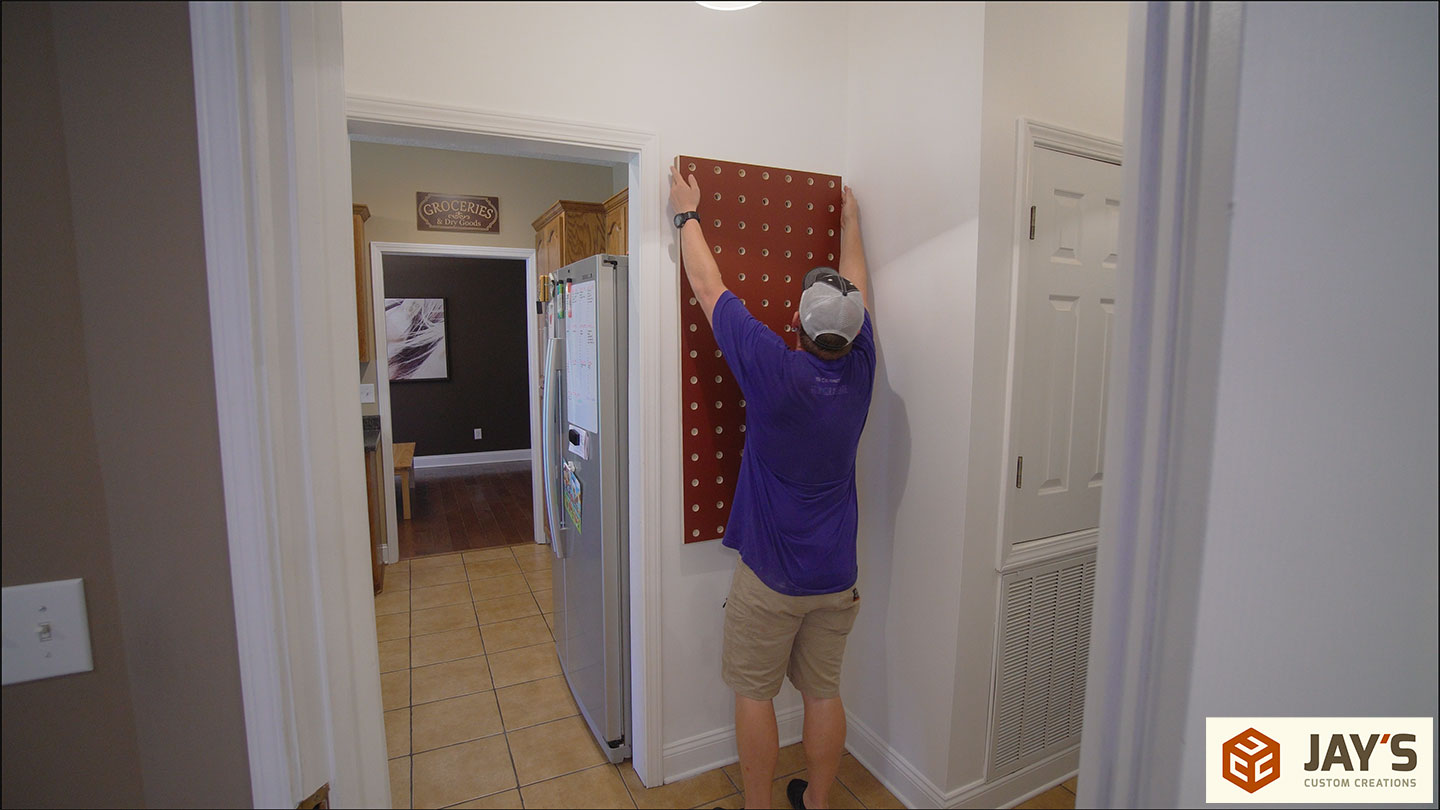
Uh, here’s, here’s another, I’m an idiot moment. I’m showing you these pre-drilled holes. I countersank some holes and I like to put the counter sink on both sides of the piece. That way when you put the screw through this into the second material, that second material will mushroom out a little bit. If you put a counter sink on both sides of the first piece, that gives a little bit of a recess for that mushroom to go to. As soon as I put it up against the plywood, I realized that my eyeballed holes from the beginning or from the first step were just right in the middle of the dowel holes. Oops. I had to drill more holes. Luckily, this is just a French cleat, so it doesn’t really matter.

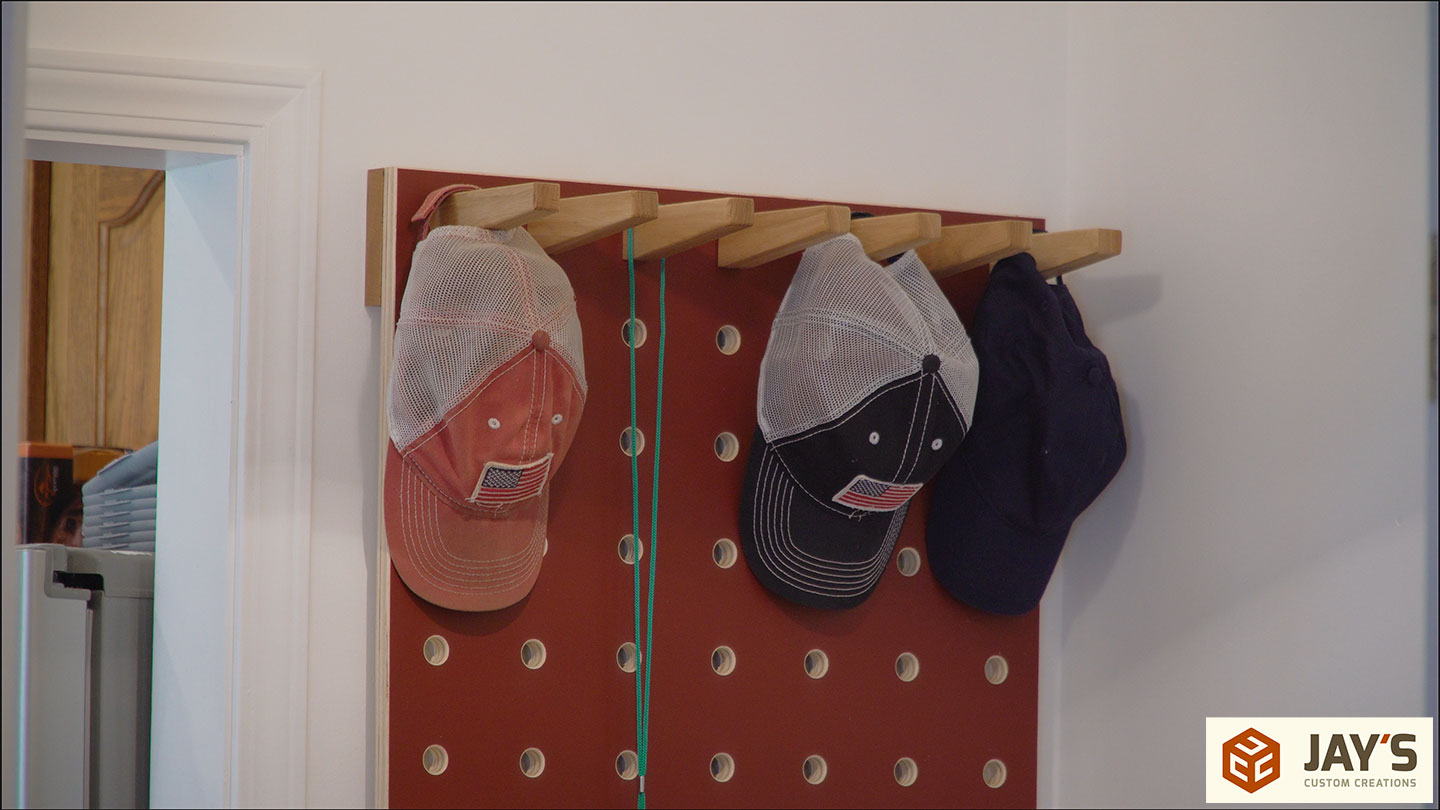
If by chance you’re not familiar with what a French cleat is, it is probably the best way to hang stuff, in my opinion. You make two boards with a matching angle cut on them, mount one to the back of your material, one to the wall, and then simply hook your piece over the cleat that’s mounted on the wall. It’s just a fast, fast, fast, easy, easy, easy way to hang stuff on the wall.
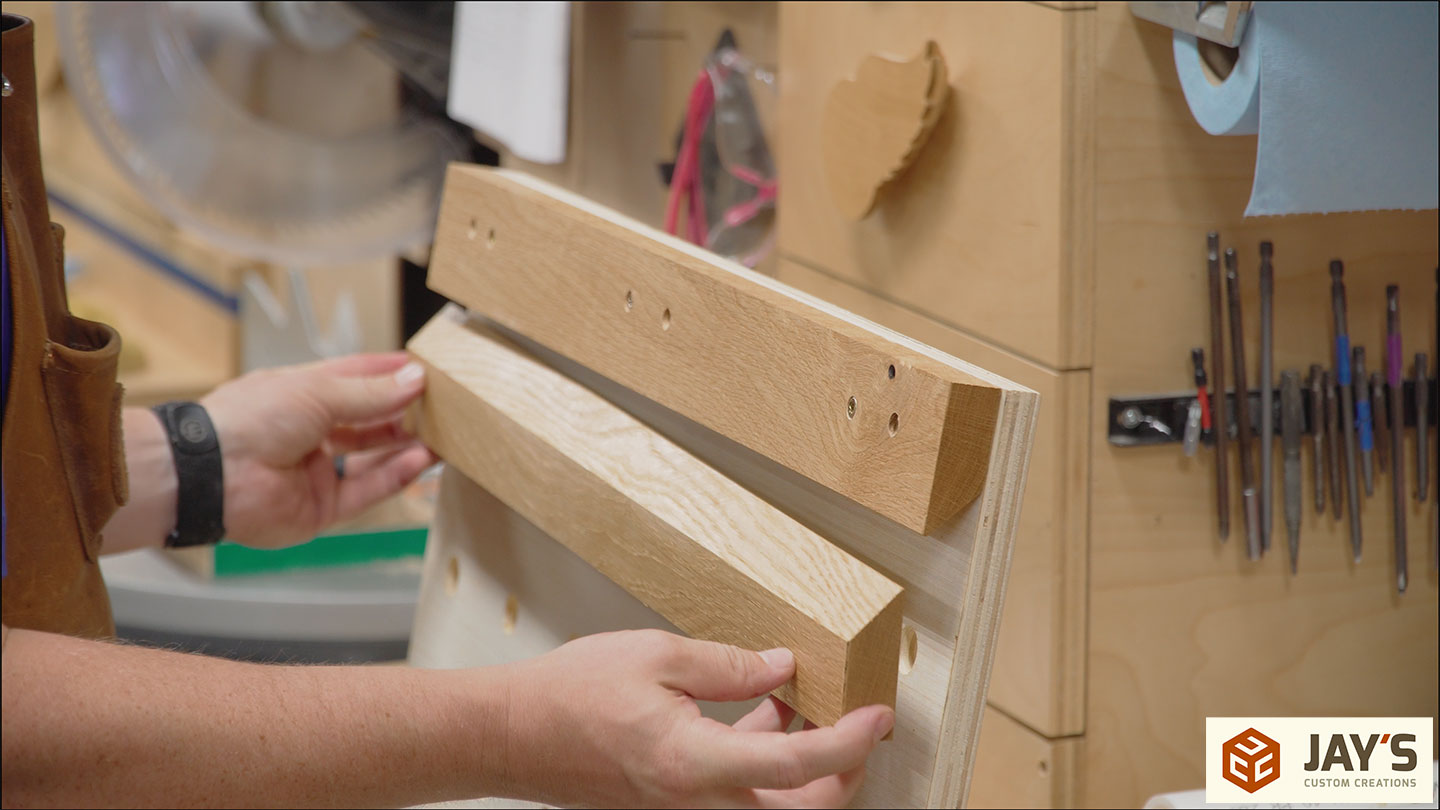
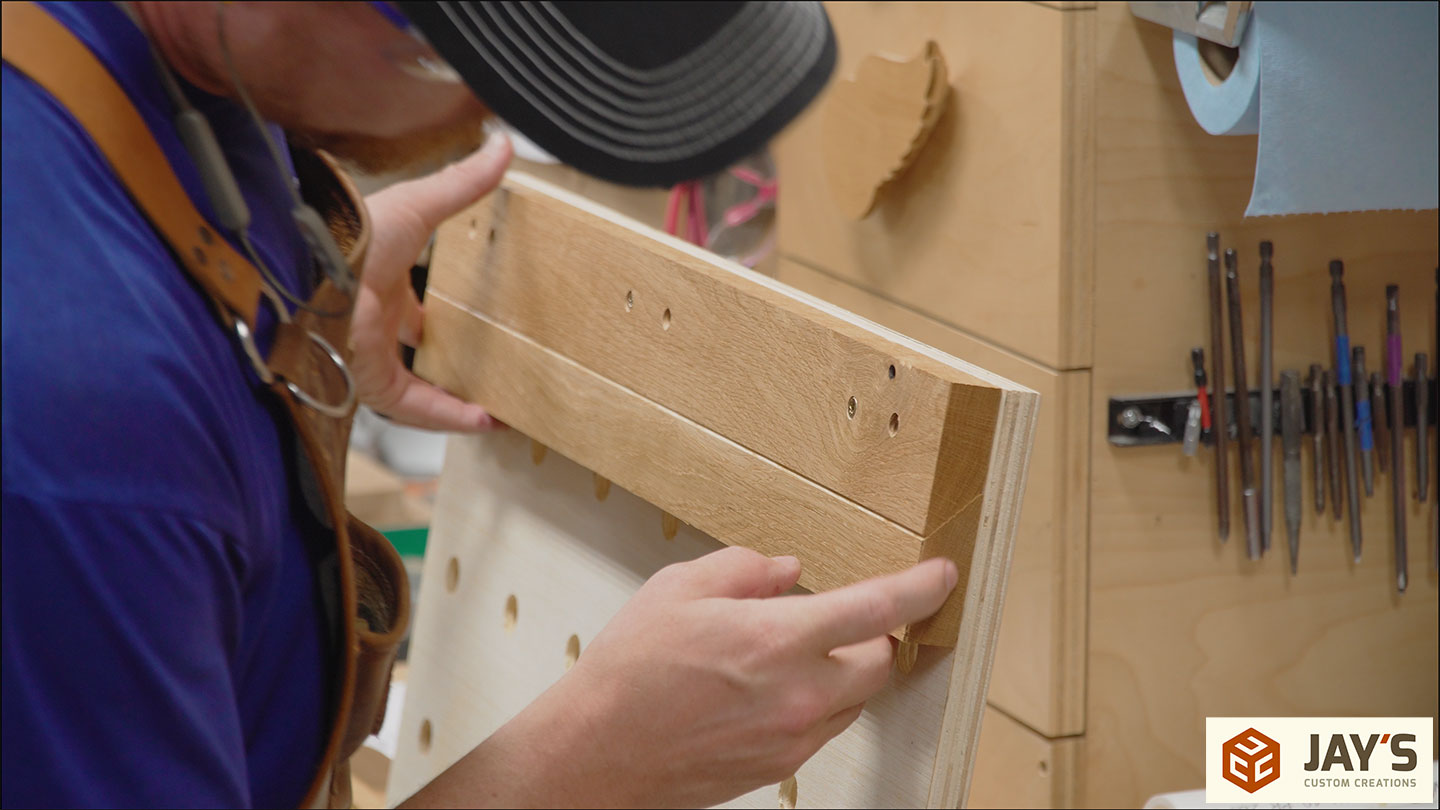
Of course, the thickness of the cleat that you use has to be matched at the bottom side of the panel so that the panel itself remains parallel with the wall. This is just a spacer board going on the bottom side of the panel.

In the middle of the back is a pair of spacer blocks.
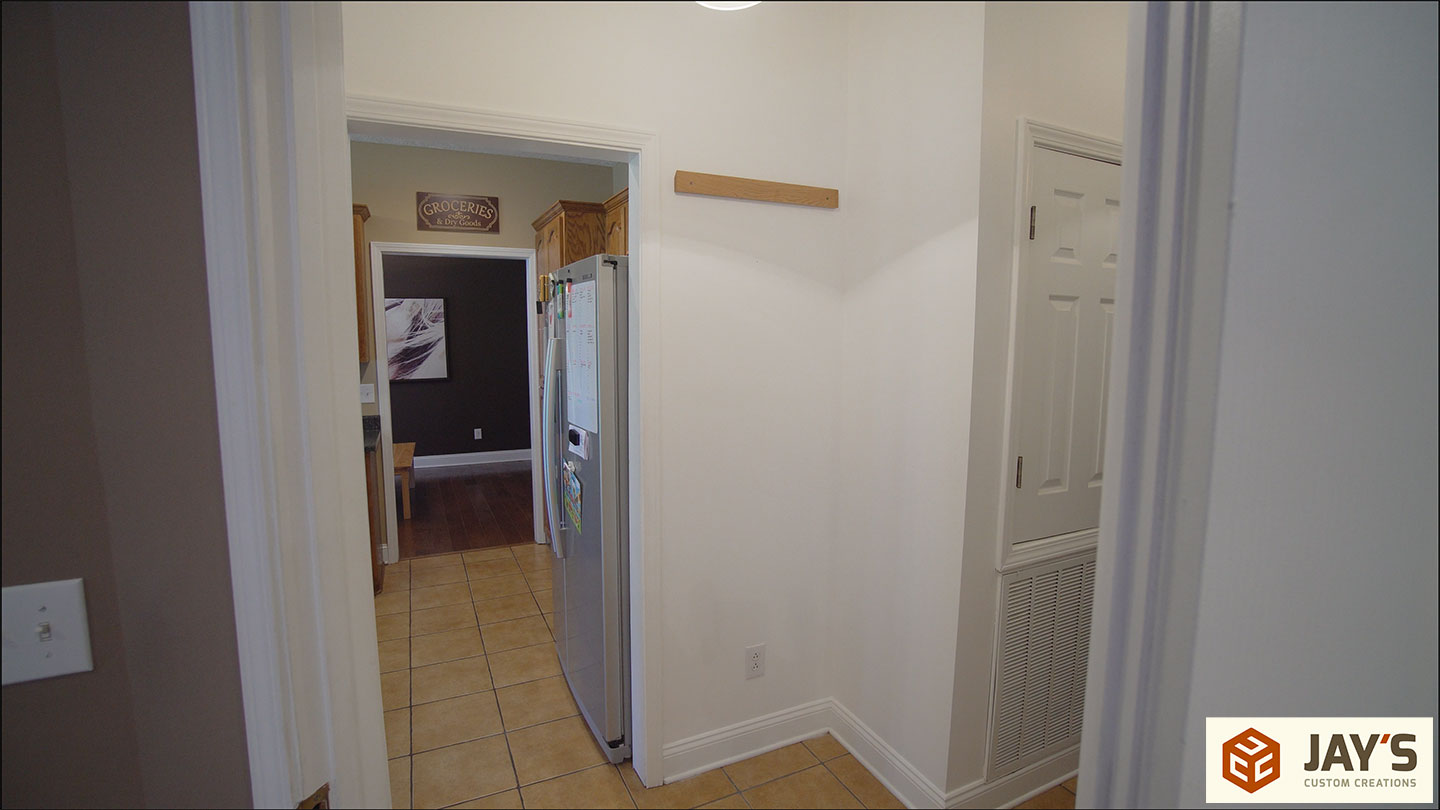
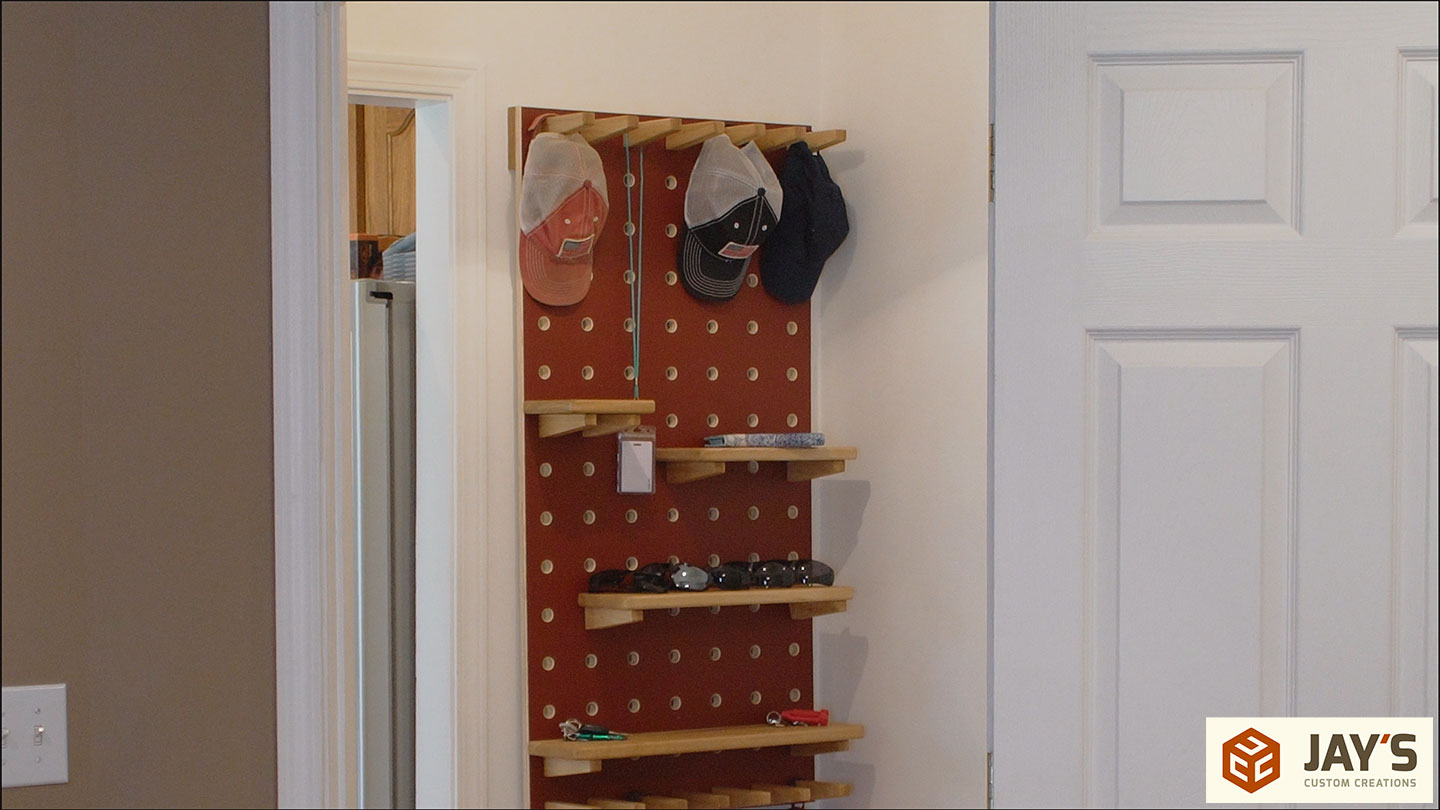
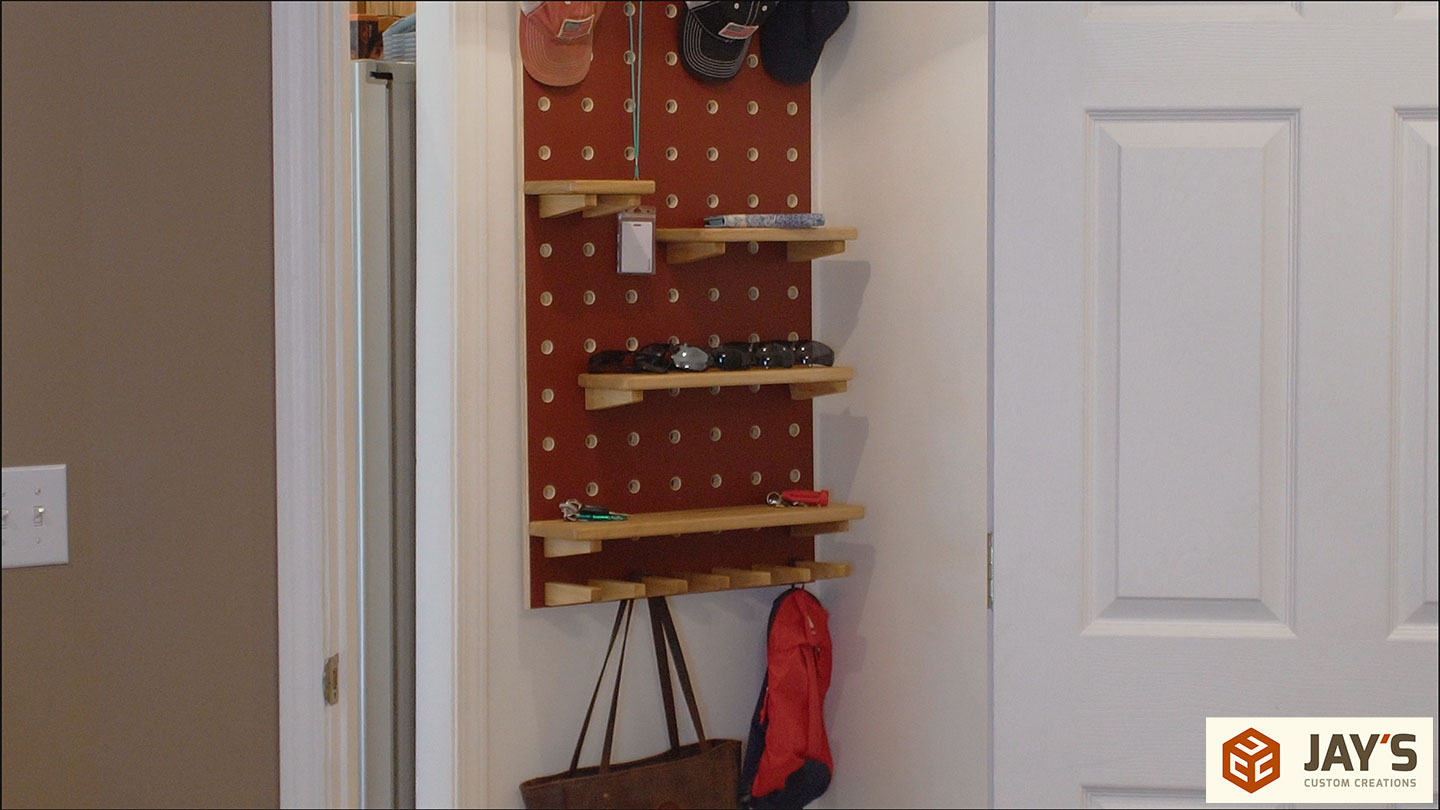
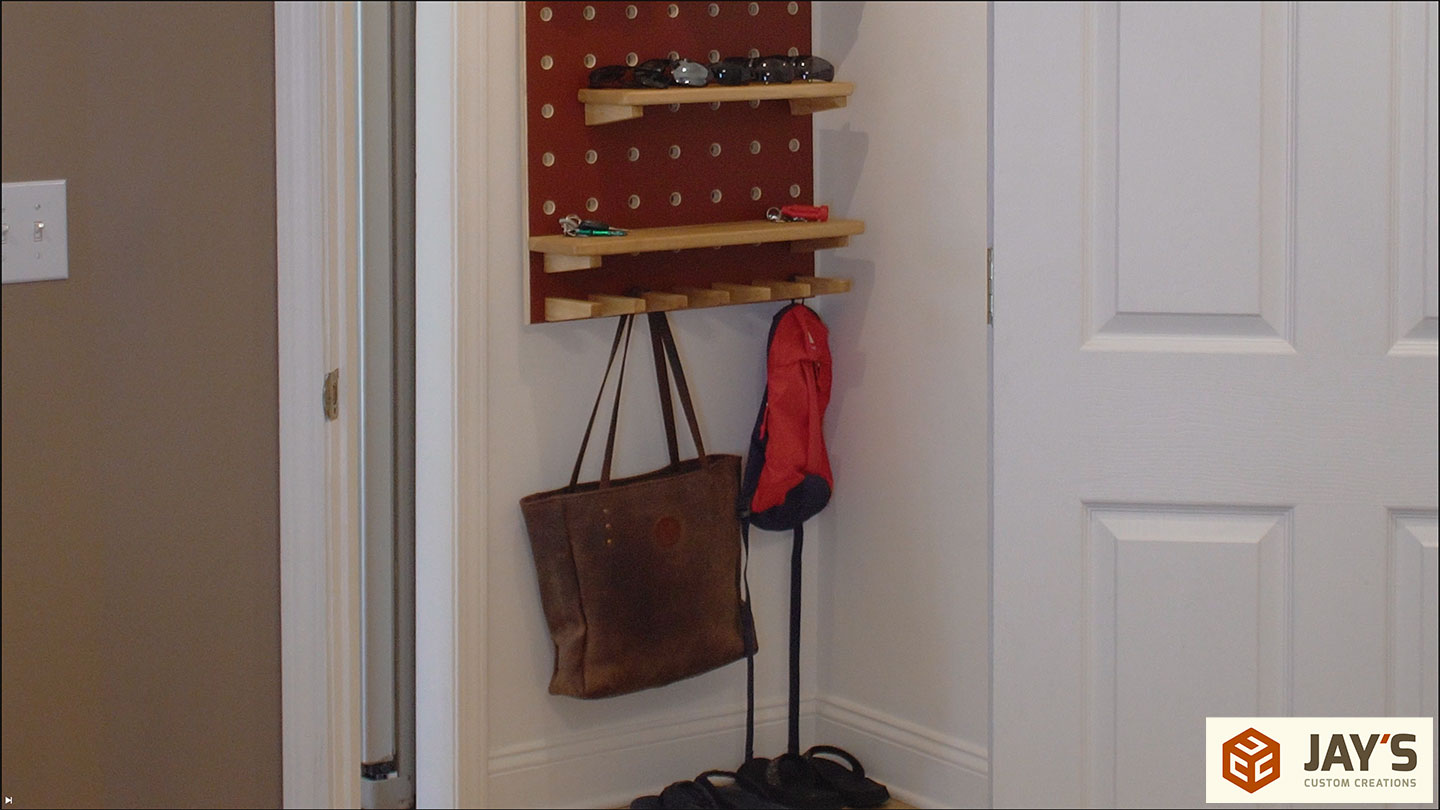
In the house, I hung it in a weird section of our hallway. This cutout just doesn’t really make any sense considering the rest of rest of the rooms around this particular location.
I wanted to experiment with this location. First off, how does the Tuscan red look with white oak? It looks okay. I think it would look better if the wood were a little bit lighter, so maybe maple instead of white oak. I think that would look better.
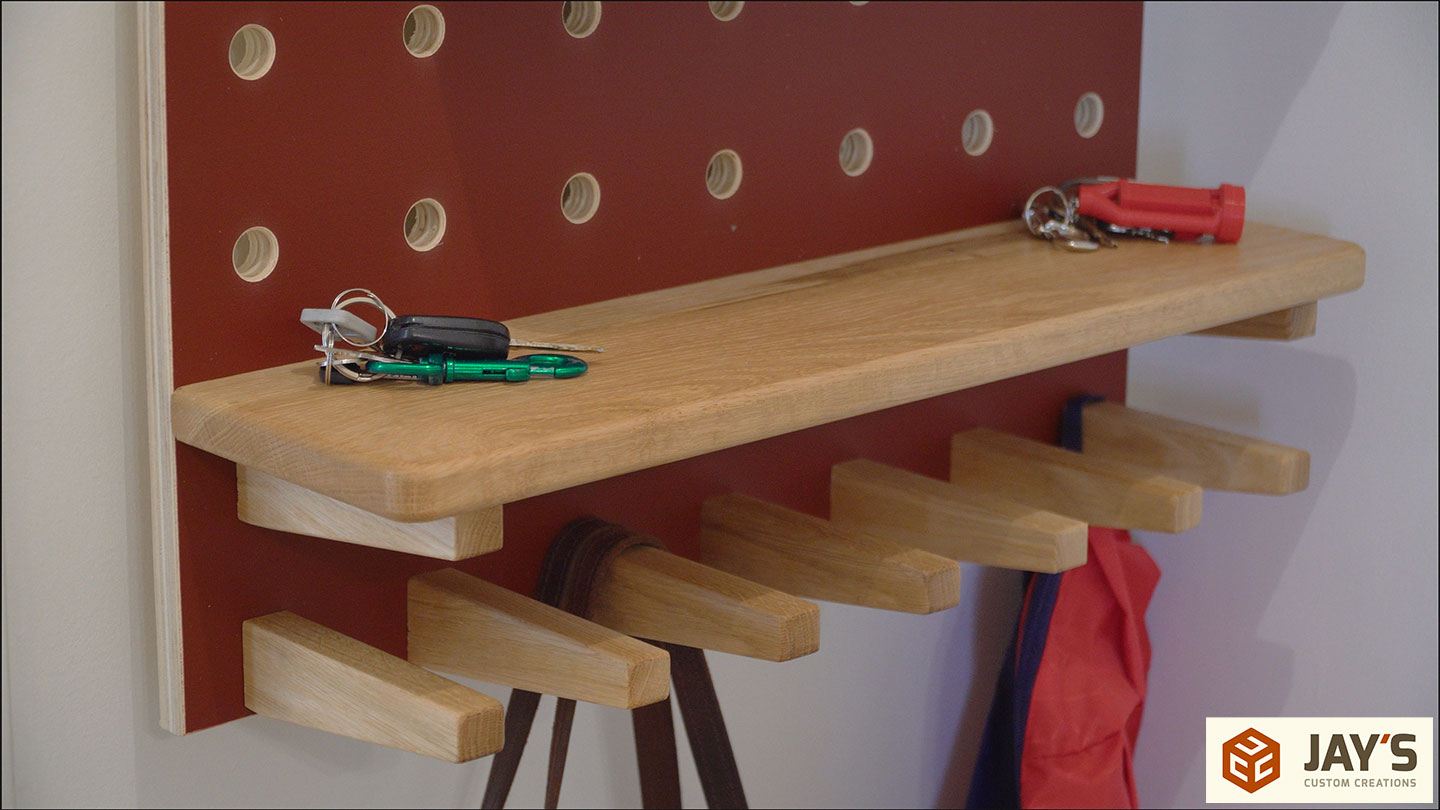
Number experiment Number two: How does this whole project look on a white wall? We’re not really decided if we love it or hate it, to be honest with you. Uh, as far as the color combinations on white.
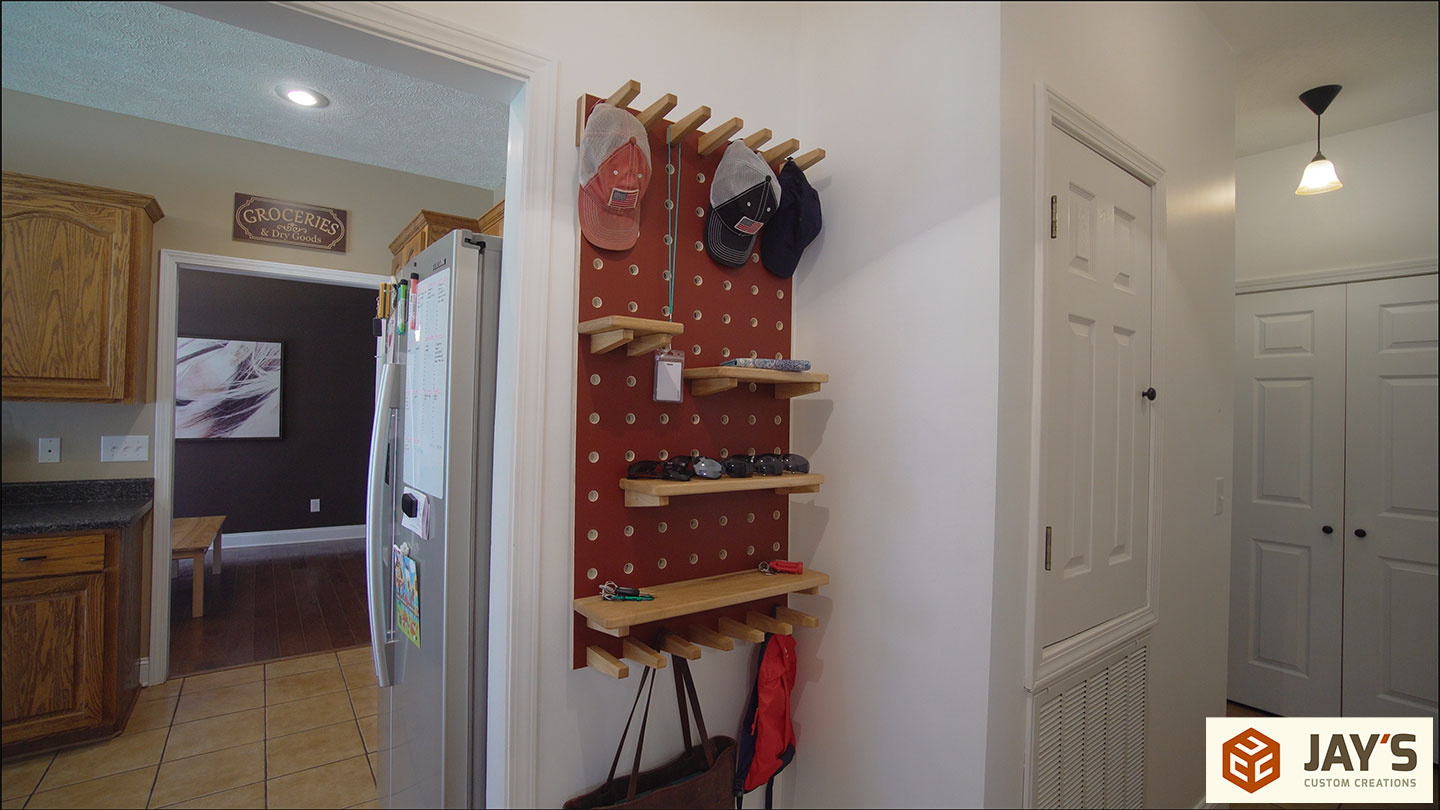
And the third thing was just to get something functional on the wall. I wanted to put a coat rack up here for a long time, but I waited for something that was a bit more functional than just a coat rack.
I do think the function of the project turned out really good though. This is a little bit of organization, not a whole lot, but a little bit of organization that we’ve kind of been needing in this space. So thumbs up to that. If you’d like to download the SketchUp file for this, click here.


Great project!!
Where are the stepped dowels used?
The stepped dowels are just a progress picture of the dowel being cut. They are all regular integral dowels.
Looks good Jay, thanks for posting!
Interesting project.
Well done.
Thank you so much Jay for keeping up the videos. You always have a great presentation on your videos along with a good spirt. At least it comes across that way. Rock on Jay.
Jay, I think the red looks good on the white wall. I might suggest a frame around the panel to hide the french cleat and the plywood. Just a thought.
I like the look of the exposed edges and cleats.
Really cool project, Jay~! Being able to change it up with the pegboard approach is a great angle. Me personally, I like the look of both the red on the white wall and the Oak, but yeah, Maple would look good as well. Nice job~!
Jay – How come you didn’t use a round over I the CNC? … I’m trying to figure out how to do that myself and whether it is better to cut the round over first or the hole first, thought?
The plywood had a bend to it. It wasn’t sitting flat on the machine. This would have caused irregular roundovers.