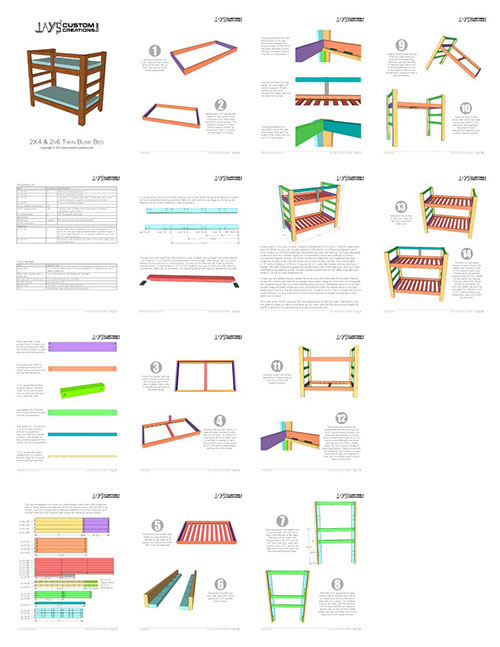
Since buying our house my wife and I have decided to not purchase any more furniture. If a furniture need arises we will (I will) just make what we want instead of buying. Due to the possibility of family visiting for the holidays a bunk bed for our spare bedroom instantly jumped to the front of the line.
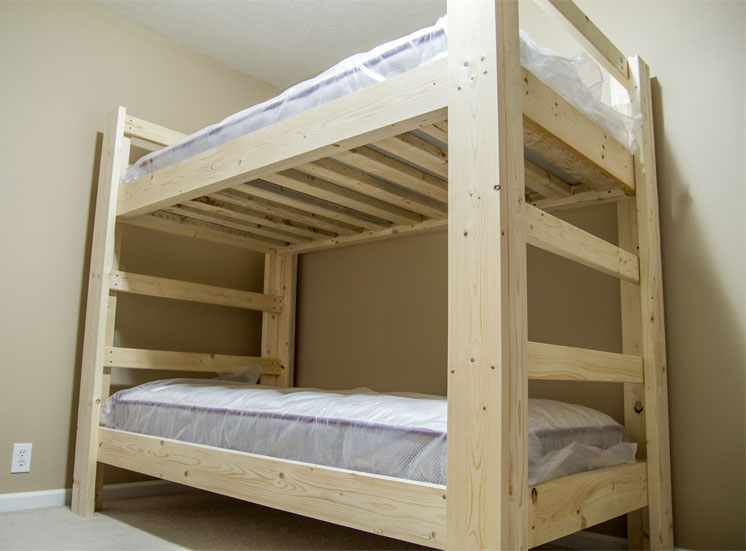
The bunk bed design I went with is one that I’ve previously built before. I’m not 100% sure but this one is either my fourth or fifth of this design. All have turned out great. What I really like about this bunk bed is that 100% of the fasteners are on the inside of the bunk bed. This means no unsightly screw heads or carriage bolts that you traditionally see with bunk beds are visible on the outside. Also, the materials list is nothing but 2x4s and 2x6s which means the vast majority of people out there will have access to the materials. My materials cost was about $135. I do have a detailed plan available for this bunk bed available at the bottom of this article. UPDATE: This is one piece of an entire bedroom set. If you are interested in plans for the entire set CLICK HERE.
The bed frames need to be built first because their overall width determines the length of the ladder rungs. Regular construction grade pine 2x6s are cut for the frames.

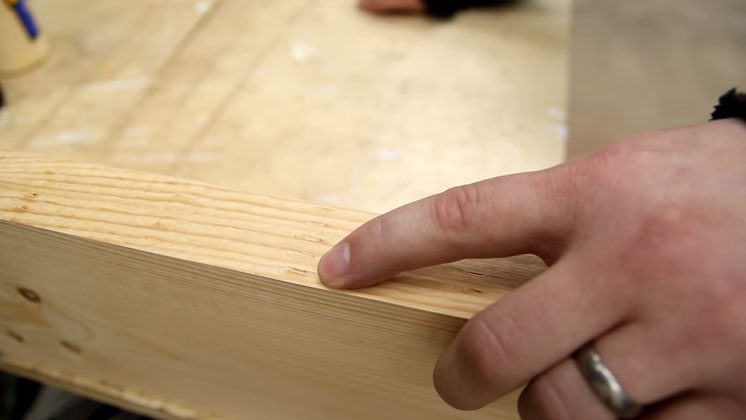
I’m trying to achieve an aged look with the finishing process so I don’t need to be super critical when sanding. I don’t want everything to be super smooth but I do want to remove the manufacture stamp marks.
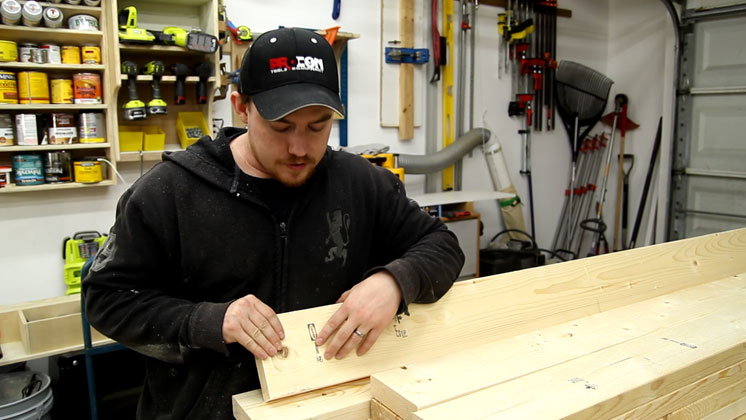
So to make the process much faster I decided to use my thickness planer instead of sanding. Just a few slight passes to remove the stamp marks.
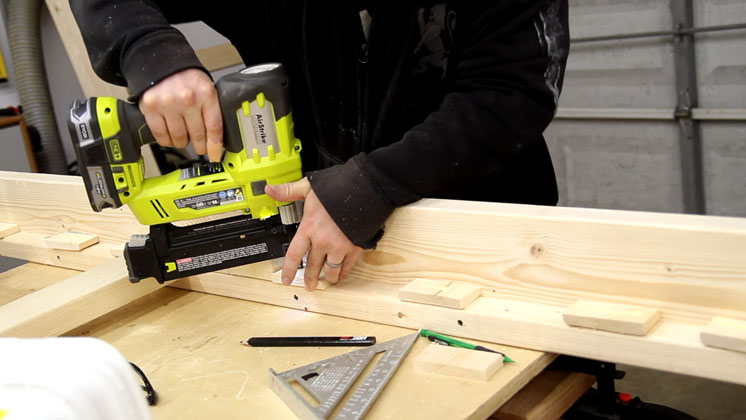
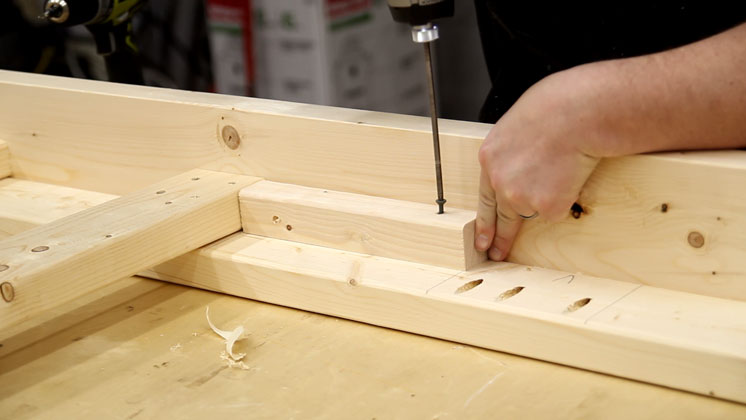
The frames are joined together with wood glue and pocket hole screws. These will be hidden by the mattresses and nobody will ever see them.
2×2 material is needed for the slats to rest on in this bunk bed. For me it’s cheaper to purchase 2×4 stock and make my own 2x2s so that’s the route I went.

These are glued and screwed to the inside of the bed frames.
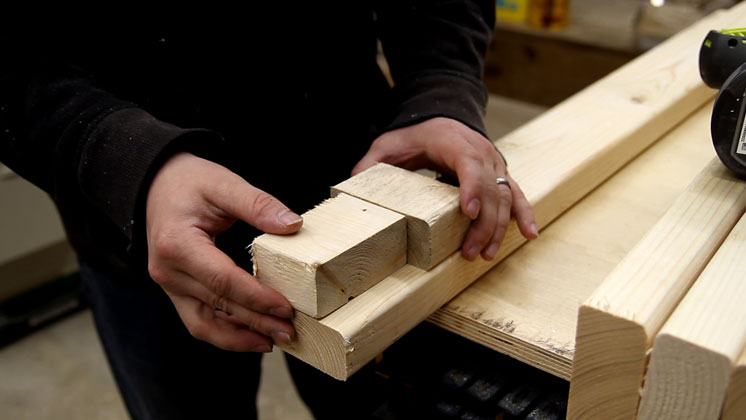
Typically when you see removable bed slats they are either 1×4 or 1×6 material. For a twin size mattress those sizes are definitely acceptable. But again this was an area where purchasing regular 2×4 material was less expensive per linear foot than 1×4 material. To reduce a little thickness and also create a spacer block a rabbet is cut on each end of the slat material. I slapped together a couple jigs to show you how easy it is to make these cuts with a circular saw if that’s the only saw you are using for this project. This first jig will make the 1/2” deep cut.
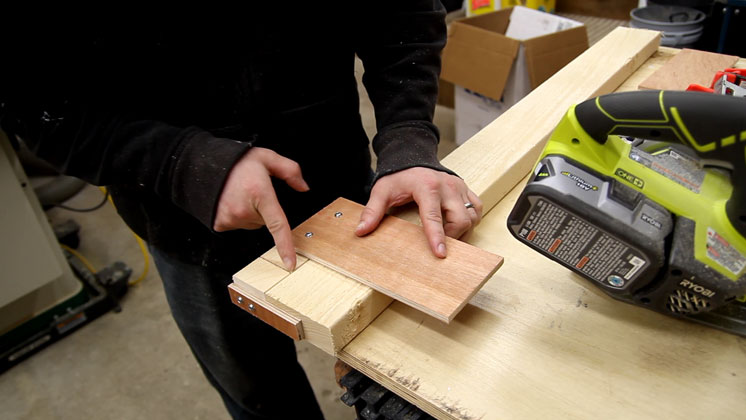
And this second jig will make the second cut of the rabbet. It’s just a piece of plywood with a spacer clamped to the end of the slat to position the circular saw blade 1/2” into the material. The resulting cut creates the rabbet on the slat and the offcut will be used in a later step.
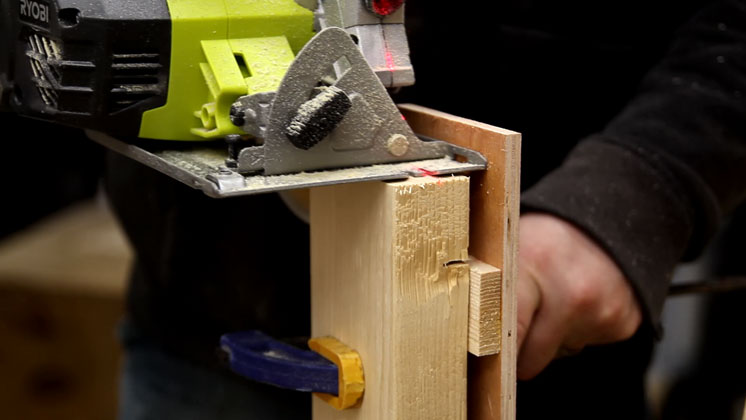
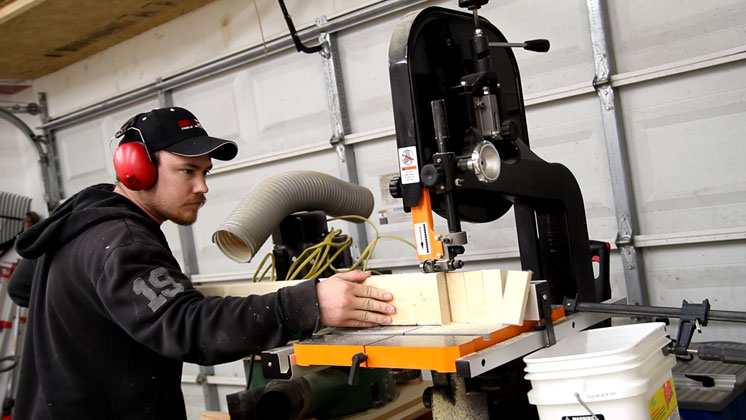
I made those two jigs for the sole purpose of showing you that you don’t need an expensive bandsaw or table saw to complete this project. Technically every cut on this project can be made with a cheap circular saw. However, that was just a demonstration. I used my bandsaw to make the remainder of the rabbet cuts.
The first slat to go in is the center slat. It’s also the only slat that is secured with screws. The rest of the slats will be floating in place.
Next, all of the offcuts were glued and tacked with a couple brad nails. A scrap piece of 2×4 was used as a spacer block. The only purpose these serve is to keep the slats from sliding around over time.
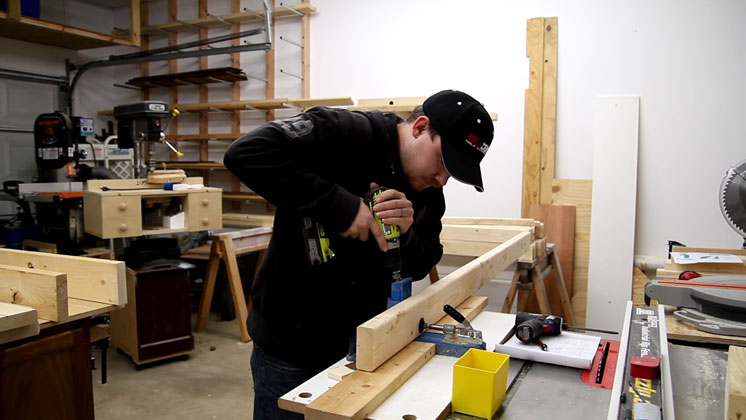
With the frames done I could focus my attention on the legs. Each leg is a L shaped formed by securing a 2×4 to a 2×6. The 2×4 will receive the pocket holes. The spacing of these pocket holes is critical though. Not necessarily for strength but instead for appearance purposes. These needed to be placed so that they would be covered up when installing the ladder rungs.
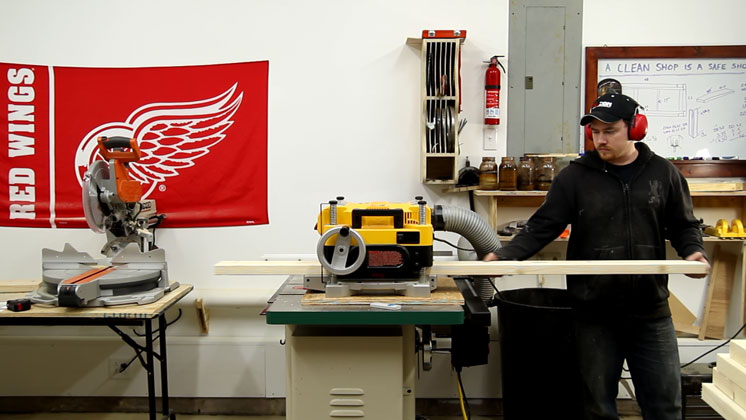
I didn’t realize it until I had already built my legs but the 2×6 stock I purchased was a little less than perfect. Most of it had a bunch of machine roller marks on the ends. To remove them I used my block plane but now that I think of it I should have just ran the assembled leg through the table saw to remove a saw blade width from the bad side.
The ladder rungs were cut next. Because I planed down my frame boards I actually lost 1/8” in width for the ladder rungs. They will be secured to the 2×4 side of the legs to cover up the pocket hole screws. I used a couple spacer blocks to indicate where I could predrill holes.
Glue and screws secures the ladder rungs to a left leg to a right leg. The only thing to be concerned with here is to make sure the ladder rungs stay perpendicular to the legs.
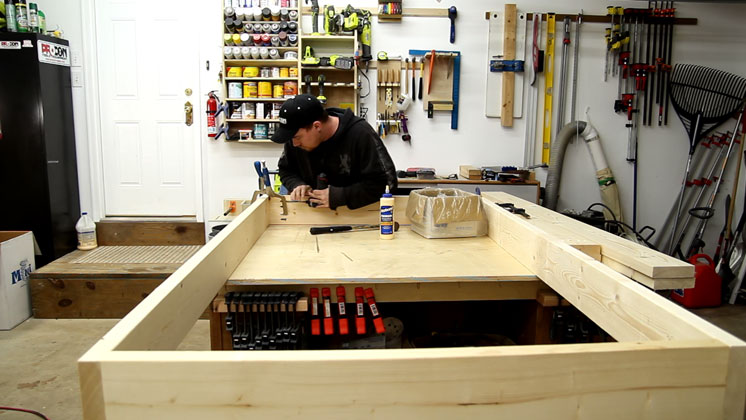
The final pieces were the frame locating blocks. These will support the bed frames at the proper height during assembly. One block was used for every corner of each bed frame.
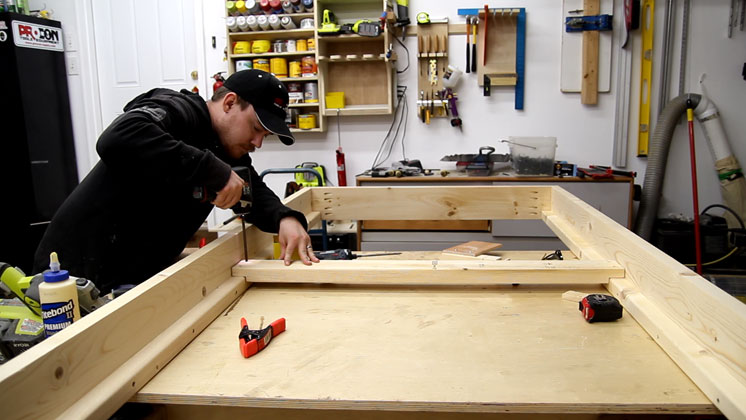
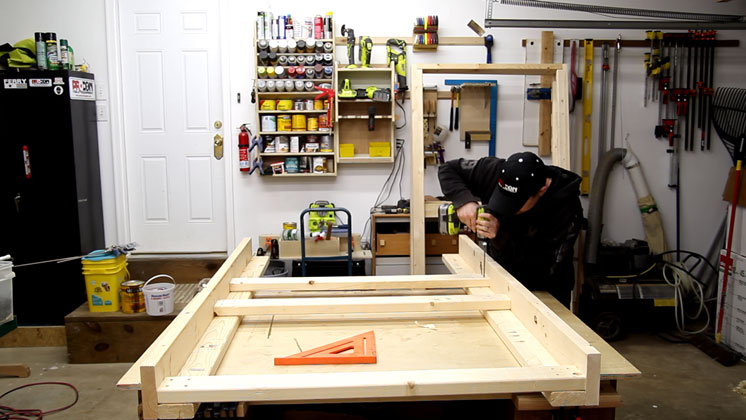
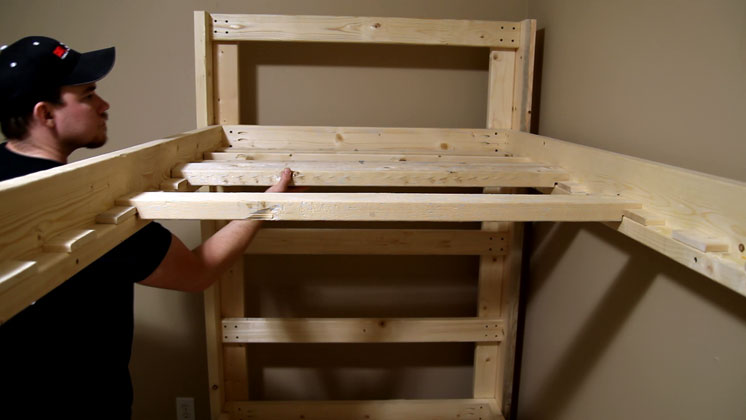
I thought I was going to have my hands full with assembly but it ended up being super easy. To start I slid one side of the lower bed frame into place and used a quick clamp to hold it in place. Then did the same to the other side and held it with a clamp too.
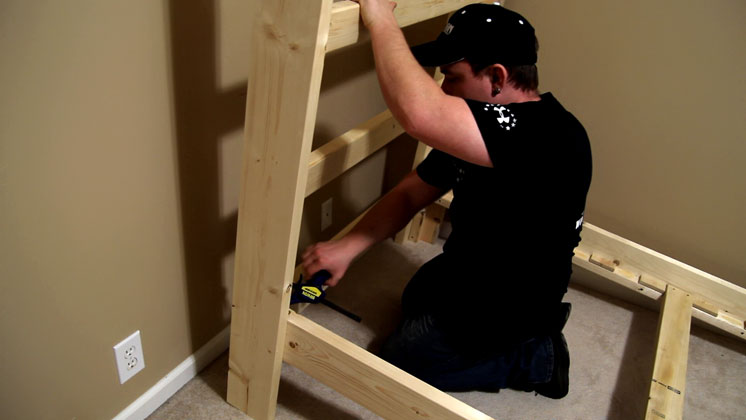
Because the clamps were the only thing holding the lower frame I could set the top bed frame in from above and slightly push out one side to get it in place. Again, a pair of clamps to hold everything in place as I screwed it down.

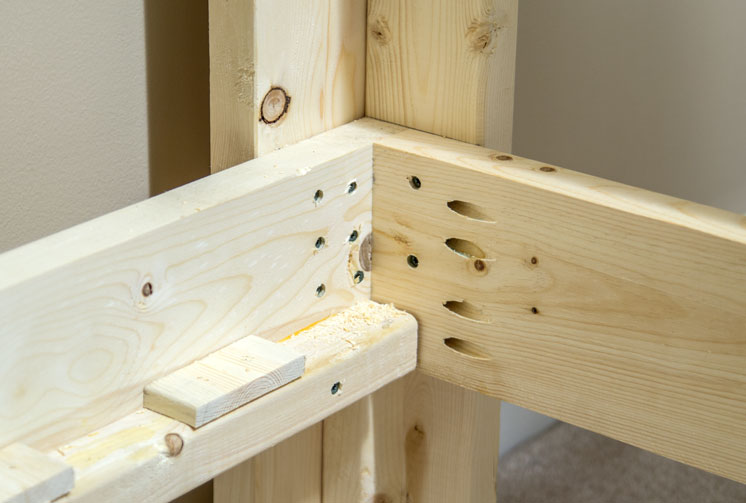
This may seem a little overkill but I don’t think it is. Each inside corner of the bed frame receives 8 screws to mount the frames to the legs. Two into the 2×4 side of the legs and six into the 2×6 side of the leg. This grid of screws creates a lot of conflicting geometry that will prevent racking of the entire bed. This may be a tiny bit cumbersome to remove all of the screws when moving the bed but for a furniture item that will spend 99.99% of it’s life serving a purpose and not in transit I think it’s just fine.
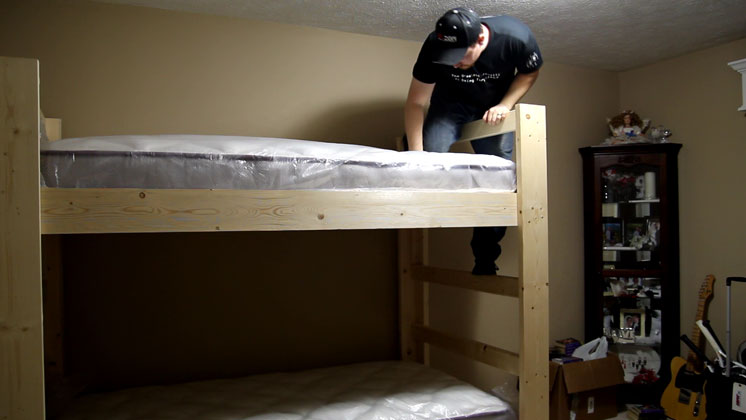
Finally the remainder of the slats can be installed. These slats are really strong. I weigh 190 pounds and put all of my weight on the center of one individual slat with no problems at all. I have no clue what the max capacity of this bunk bed is but it’s got to be a lot considering all of the weight will be distributed amongst all of the slats and then to all four of the legs.
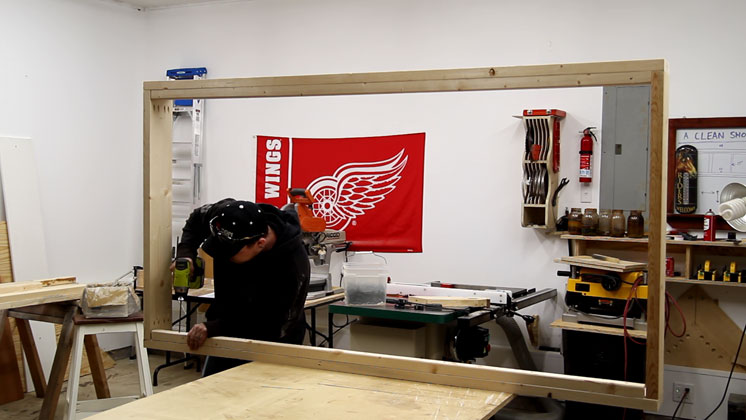
Because both ends are the ladders themselves it doesn’t matter what way you position the bed. You can get on top bunk from both sides. As you can see I didn’t put the guard rail on the top bunk. That’s a personal choice to make but for those who are interested one is included in the plan.
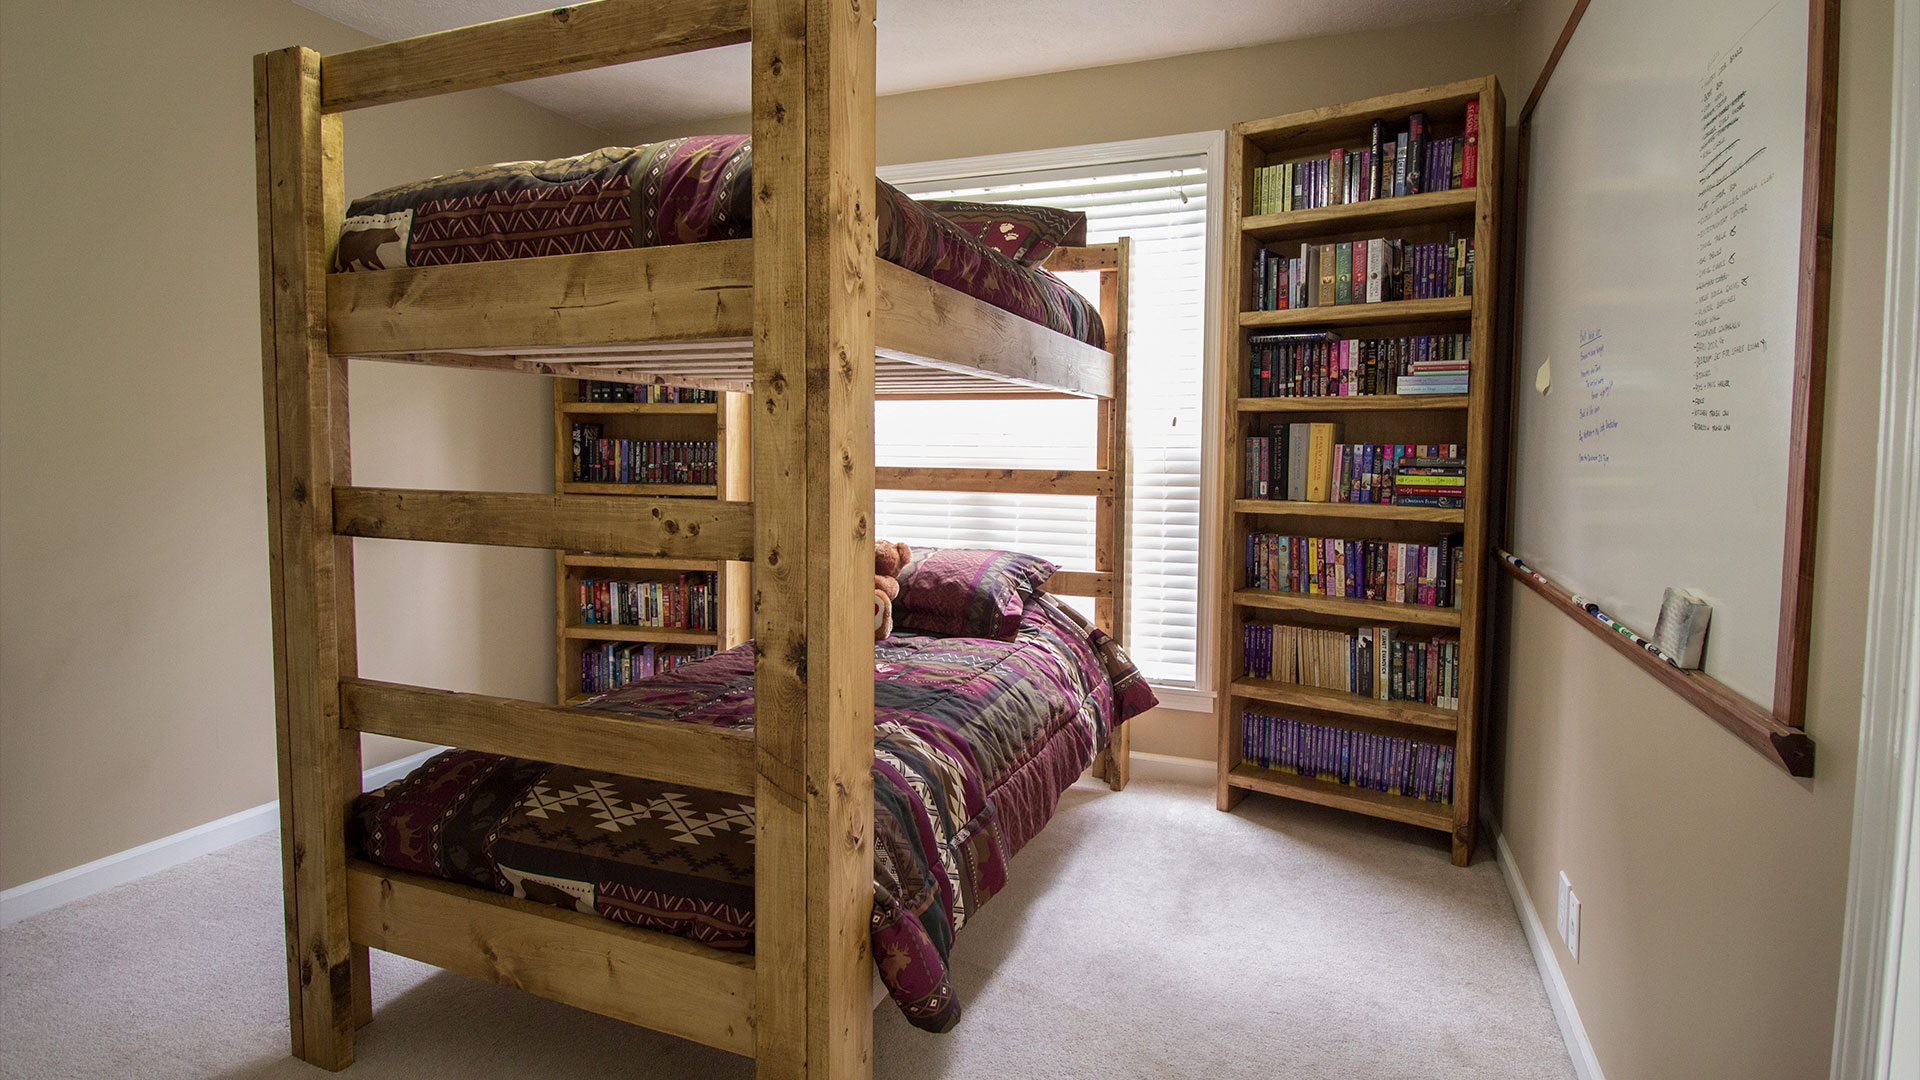
I didn’t apply any finish to the bunk bed just yet. I wan’t to experiment with a steel wool, vinegar, and briwax finish so that will be for another day. I hope you were able to find some inspiration in this project and are able to make one of your own. This is a really inexpensive build and a solid design that will last for years and years. Regardless of if you use my bunk bed plan or someone else’s I wish you luck with the build! Building it yourself is incredibly rewarding, you will get a much better product, and will save you a lot of money. Take care folks.
Bunk Bed Plans

2×4 and 2×6 Twin Bunk Bed PLAN
$9.99
Description
UPDATE: This is one piece of an entire bedroom set. If you are interested in the entire set CLICK HERE. I’ve built a lot of these bunk beds in the past and recently built one for my own home. The materials are all common construction grade pine. Every cut is a 90 degree cut so there are no complicated angles. The construction is with wood screws and pocket hole screws. Because all of the screws are installed from the inside there are no unsightly screw heads or carriage bolts showing on the outside. This gives the bunk bed a nice clean appearance. Both sides double as a ladder. The overall measurements of the bunk bed are 72″ tall with a footprint of 81-1/2″ long by 45-1/2″ wide. The bed frames are sized to accept a standard twin mattress. These plans are in imperial units only. Included in the bunk bed plan:
- 14 detailed pages
- shopping list
- tools list – You will need a pocket hole jig. Every other tool I would consider common garage tools.
- lumber layout diagrams
- reference diagrams for specific part dimensions
- 14 step by step 3D assembly diagrams with written instructions
The entire plan is included in one PDF document. Most everyone will have a PDF reader installed on their computer already but if you do not you can use the free program Adobe Reader to view the plans. You can download Adobe Reader HERE. The checkout process for this plan uses PayPal. You can use major credit or debit cards through PayPal. You do not need a PayPal account. To purchase the plan follow the link below. After you purchase the plan you will receive an email receipt from me containing a link to download your plan. Make sure to check your inbox and spam filter for the receipt. If you do not receive the email within 10-15 minutes or encounter any problems please contact me.
Related products


siempre todo interesante claro y consiso, gracias por ello jorge de argentina
No creo que te haya entendio Jay, mejor escribele en Inglés
Love the beds I’m sure it will come in handy over the holidays.
I noticed you have a new miter saw. I think it is the same one I’m currently looking at. What model is yours and how do you like it?
I don’t know the model number off the top of my head but it’s the 12″ sliding Ridgid. No complaints.
Wish had done mine this way when I built mine for my boys many many years ago. The only thing I would add would be a safety rail on the top bunk.
I mentioned it in the second to last paragraph. The plan includes one but I didn’t put it on mine. Thanks for watching Wayne. I appreciate it.
Just a thought, once the glue has cured could you remove the pocket hole screws for re-use?
Yes, you can. I’ve done that to a lot of 1x material projects.
Great editing on the video.
Thanks Gabe. I very much appreciate the feedback.
Great bunk bed. Very easy and simplified. One question… how would you add safety rails? I need to build a set for my grandsons who are 4 and 6 so I have to have safety rails on the bed.
Hey Grammi. Safety rails are included in the actual plan. I didn’t put them in mine. They are secured to the inside of the legs the same way the bed frames are.
Hey jay nice build as always..
My nine yr old bells want a loft bed in her room
No bed below it as it will serve as a desk or just chill spot
Kicker is it’s a full size bed and frankly I’m lost..I want to build this and am confident I can but do you think your design will work if it’s just larger? Should I mount it to the wall? of course I want bottom side open for space allowing me to have a cross brace on the wall side but do you think that’d be enough,should I go 4×4’s for posts and last question,should post reach all the way to the ceiling and connect with ceiling studs..my brother usually helps me with this type of stuff but he’s too busy with his own kids
I’d sincerely appreciate your advice on this when ya get a chance,and thanks for all your videos and help thus far
I built the pipe shelves in my garage and I absolutely love them..I just don’t know if I like the shelves or the price of them..thanks again and happy holidays
Hey Ted. I’ve made a couple other loft beds previously. This one might be closer to what you are looking for: https://jayscustomcreations.com/2013/03/full-size-loft-bed/
Awesome man thanks!! I’ll send pics once I’ve built it
Happy new year!!
Jay – This is the best bunk bed design and build I have seen. I’ve made a couple myself over the years and would have scrapped my builds and built yours. Thanks for taking the time and posting. Your design would be perfect for replacing the lower bed with a students desk, book shelves and file cabinets.
Thank you very much for the feedback Udie. I appreciate it.
I just purchased the plans (very detailed) and had a question. I am going to modify it just slightly (to fit a trundle bed under it). If the length of the bed is 81 1/2 inches (outside to outside) than that should make the inside measurement 71 inches. Please verify if my math is correct. I will need 73 inches for the trundle. Thanks in advance.
Hey Luther. Thanks for the purchase and feedback. Once assembled, the distance between the legs is 70-1/2″. Just add 3 or 4 inches to the length of the long bed rails and you should be fine.
SketchUp vid!!! (please, with Bacon on top)
mmmmm….bacon….
Do you have a version for a loft bed? I imagine some simple modifications to this plan would be all it could take??
I don’t have a version for a loft bed. But really all you need to do is not build the bottom frame. Then you could put whatever you want on bottom.
I am a female wish for someone to build a bed for me are there any suggested can I pay someone to build one for me in my Area ?
Where are you located?
I live in harperwoods mi.
I have been surching for 2 days for good video to help with building bunk beds and yours is perfect. Awesome tips. Thanks
Very cool. Thanks!
TODO ESTA EXELENTE, EXPLICACIONES, DETALLES, TIPS TE FELICITO GRANDES BENDICIONES PARA TI Y TU FAMILIA POR ESTE WEB. LA CARPINTERIA ES UNO DE MIS HOBBIES FAVORITOS. SALUDOS. DR. ALEJANDRO J. GLEZ. DDS., ALL THIS EXCELLENT, EXPLANATIONS, DETAILS, TIPS CONGRATULATION GREAT BLESSINGS FOR YOU AND YOUR FAMILY FOR THIS WEB. WOODWORKING IS ONE OF MY FAVORITE HOBBIES. Best regards. Alejandro J. Glez. Houston Tx.
Hey Jay, I watched the video on how to build this bunk bed and I really liked it, looks solid and sturdy to me, I was wondering, I want to build sort of the same design bunk bed, but just a triple bed with a loft and computer desk under if you know what I mean, I was wondering do you have other sketches for different bunk/loft beds, thanks!
I’ve got a few different bed designs on this site: https://jayscustomcreations.com/?s=bed
Jay, great video! I’ve been looking at building a bunk bed for my two little boys, but would like to add a staircase versus a ladder design. I’d also like to build it as a full over full (I’m assuming to do that I’d just add length to my boards to accommodate). You wouldn’t happen to have plans for a staircase bed would you?
Sorry but I do not have anything for a staircase bed.
Jay awesome video, looks easy enough to do, but I was just wondering is it possible to turn this bunkbed into a full size version.
Yes, just add the difference in mattress width to all pieces along the width of the bed.
hey jay , great video . i want to build one of these for my cabin . the only problem i could see is Im not sure what legnths you used for the 2×6 and 2×4’s . is that because it depends on what size mattress you decide to use?
ignore that last comment , didn’t realize you had to purchase the plan . my bad
No worries. Thank you for your support.
Great looking bed Jay the kids will love it.
I LIKE THE BUNK BED SETUP. HOW WOULD I MODIFY THE BUNK BED PLANS FOR A QUEEN SIZE BED WITH DRAWERS USING THE MATERIAL YOU USED? i’M 70 YEARS OLD SO I CAN AFFORDED THAT EXPENSES LUMBER. ON SOCIAL SECURITY.
1. Buy the plans
2. Examine which pieces constitute the width
3. determine the difference in width between queen & twin
4. add that number to the length of the needed boards
note that in Jay’s plans, he has very specific layout for all the boards.
Good solid instructions that are reasonably easy to follow. Possibly do-able for me.
What dimensions do you use for height, length etc?(something close to metric please, I’m in Australia). I have minimum size bedrooms (3.2 meter x 3.5 meter) so bunk beds are a necessity. However two teenagers will be occupying the beds so we need good clearance for bottom bunk person while still having good head clearance to ceiling for top bunk person.
Always wondered how they get those angled holes for hiding away screws. Haven’t caught up with the technology of the pocket-hole machine, looks convenient.. Might just screw them straight in from the ends though as visible screws aren’t really an issue for me. How big and chunky do the screws need to be?
Sadly Mate they’re imperial (Inches). The pocket holes can be drilled with a “Pocket Hole Jig”, you don’t need Jay’s big fancy table. I bought one for about $25. I also purchased specific type of screws called “Pocket Screws” that go INTO those holes. They had square heads and so I also bought very long special bits for these screws as well (2 bits, $5.50). The pocket hole screws were 2.5″. The other screws in this project were also 2.5″.
Greetings! I purchased your plans and BUILT this, in 2 days by myself with a few differences. I did not sand AT ALL haha, look out for splinters, kids! (Just kidding I decided to sand later). did not cut divets
I have comments and ideas for you.
1. Using colors in the plans.. I’m colorblind and it was not exactly clear sometimes what piece was what. I had to label them all myself “A”, “B”, etc. Use colors that do not look similar. ask a colorblind person to proofread the plans for you?
2. For some reason my measurements were a bit off and ALL my slats ended up being about 1/2″ too long. I think you should include “idiot proof checks” in the plans, and avoid situations where, for instance, 22 slats need to be cut again or, worse, if the frame is all assembled and then for some reason it’s just a bit too wide to fit in the supports. But, yes, I understand this is sort of the user’s responsibility. Long story short: This project should be assembled in the order of 1. the ladder / support pieces; 2. The frames, including fit confirmation, and 3. the slats, with fit confirmation.
3. an interesting thing that might be cool to include is how much the parts WEIGH and the total weight of the project. Whew! Carrying this stuff up 2 flights of stairs was tiring. but not as tiring as building it. But it was fun.
I did NOT trim the slats nor use the leftover divets or whatever they’re called to space them.. I don’t have a band saw and frankly thought it’d be too much trouble. So I’m just securing each with 1 screw on each end to keep them from moving around. Honestly any mattress is going to stick up higher than the frame, so why not just trim out a smaller thickness from the slats, such as only 1/4″ thick? you keep the majority of the slats’ strength, but still have spacers for between.
Very professionally done, thanks for the plans.
OH and another thing I forgot to mention: MOST NOBODY will have a pocket hole drilling table like you have; most people will buy a jig IF they even pocket screw at all. I imagine most folks buying construction brackets such as I almost considered doing. So it might be nice for you to have a video of going through the various levels of pocket screw options. I had the cheapest: One single jig that I simply held in place while drilling. I had to go slow in the beginning otherwise it would skitter off instead of drilling!
Hey jay,
These bunk beds are awesome.
Wanting to do the same design but a little less chunky do you reckon making it out of 4×4 instead of 6×4 would still be strong enough??
Cheers from New Zealand!!
Regards Adam.
NICE JOB. do you think we could make this bed but make it a loft bunk and leave out the bottom bed? Do you think it will be safe with just the top bunk and frame but basically don’t make the cross bars for the bottom bed?
Built these over the weekend and am happy with how solid this is! I ran all lumber through my planer and surfaced all four sides. This left me with stock that was 1 3/8″ thick, so I used 2″ pocket screws and 2″ wood screws which worked perfectly. I also raised the lower bunk to 13″ above the ground to accommodate storage bins underneath (or possibly future drawers).
Compared to $500+ commercial bunkbeds made of particle board and staples, your version is cheap, solid, and will long outlast the others! I paid $97 for the lumber required and had screws on hand. Thanks for the excellent plans and tutorial!
Very glad to hear that Chad!
Would fir 2×6’s be acceptable? I don’t have access to KD 2x6x10. Either fir or cedar, but the cedar has kerfed edges for decking. What would be the better option between the two? #2&btr fir or cedar?
Fir would be a great alternative. Actually, better than the white pine I used for mine.
These are awesome and look easy enough! I am going to make these for my boys! Do you by chance have a video or plan for a corner dining table and benches? I’m looking for the kind that has storage in the seating. Thanks!
Do you have instructions and material list for a full and queen sized bunk bed? This is my first attempt at building furniture since I am more of a framing and room building gal. I like the way yours in constructed but I need 3 sets -1 in full sized and two in queen sized bunks for when the kids and grandkids are all home to visit. I know it will take just a few changes to make it double or queen sized but I would like some specifics on measurements.
I am looking to do the same. Either a Queen-over-Queen, or a Full-over-Queen. I know it should be as simple as changing the dimensions. Just hoping that the strength will still be there, or if it needs different supports for a queen size.
Far out man! Cant wait to get your plan :) But i guess i might want to know the total lumber tht is needed first, so i can ask my friend to start gather those wood. is it possible ? How long and how many pieces.. Greetings from Malaysia
Hey! I have never built anything before, but I like the look of the bunk beds. I would have to borrow all tools. What is the likelihood that I could actually build this bunk bed?
Jay have you ever built a Twin over a full before in the style that you featured in your video? I like the looks and design of this one and the fact there is no real ladder.