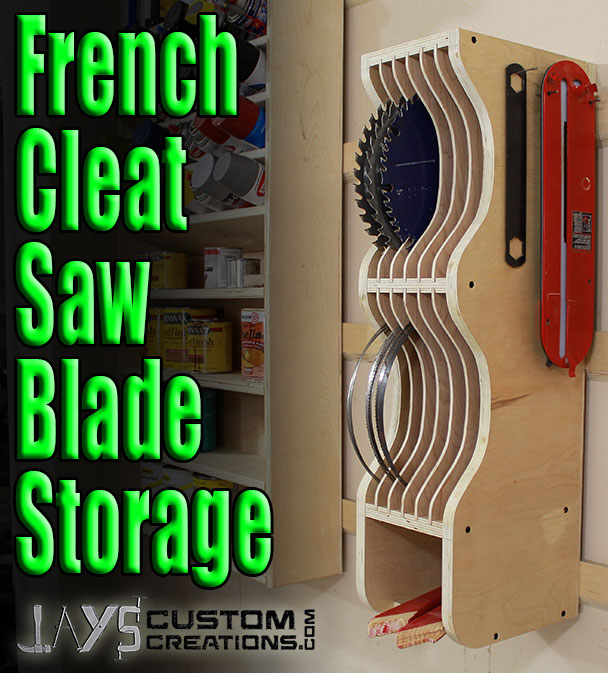
In my ongoing quest for a more organized shop I decided to put together a saw blade storage rack. It is another French cleat rack like my finishing supply rack and square holder. I’m totally sold on the idea of French cleats in the shop. Now, I’m no stranger to French cleats as I have used them in my 2×4 toilet cabinet and in my acoustic guitar display case but having the option to move and position your shop furniture as needed by simply lifting it off the wall is downright awesome.
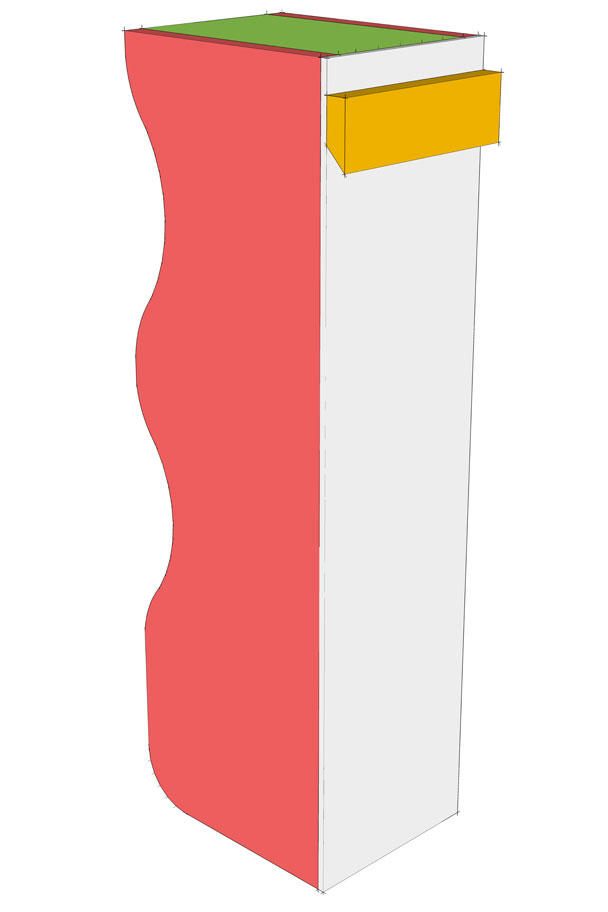
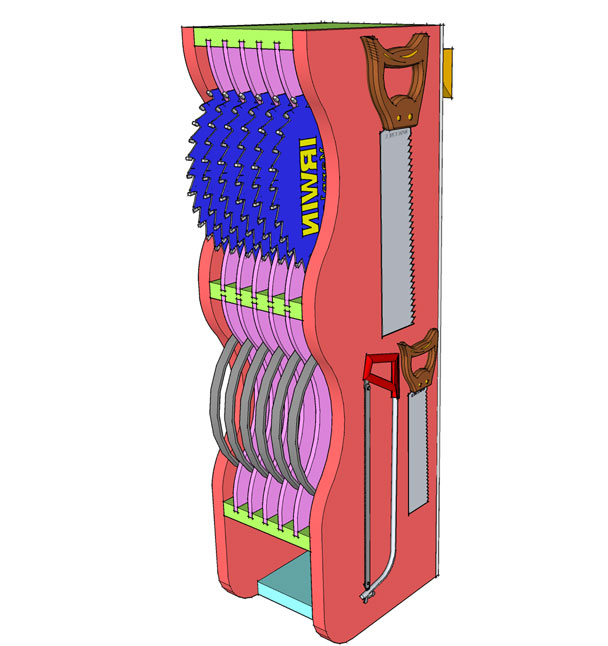
The design that I came up with is pretty flexible. I went with two layers of storage. Each having six vertical partitions. I’m pretty lazy to so to keep things easy I went with a 3/4″ spacing for both storage areas. You can customize this any way you want. I also added a shallow shelf to the bottom of the rack that was originally intended for both of my hand planes but apparently I can’t read either a tape measure or my own hand writing because I did not allow enough height in the design. Oh well, I’ll find something to put on it. I also added a few nails to the side to store my table saw insert plates and the wrench that is used to change the blades. If you would like to build this saw blade storage rack I have a free PDF plan at the end of this article.
Materials
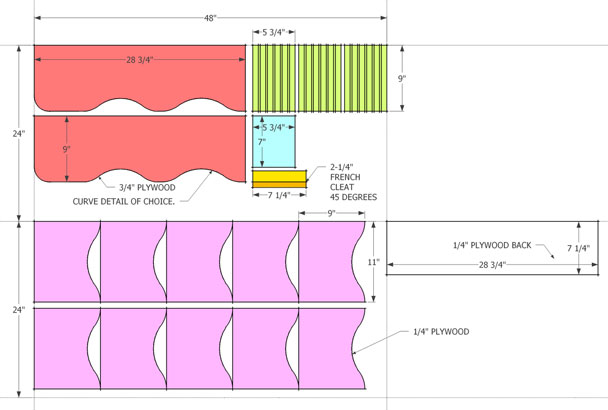
- 24″ x 48″ of 3/4″ plywood for the sides, shelves, and french cleat.
- 48″ x 48″ of 1/4″ plywood for the back panel and dividers.
- 18 1-1/4″ screws for attaching the shelves to the sides and the french cleat to the back
- wood glue (optional)
- brad nails for attaching the back panel
Cut
Cut all of your pieces according to the layout diagram minus the curves. The curves are optional and will be cut later. (larger images in the download at the end)
Dados
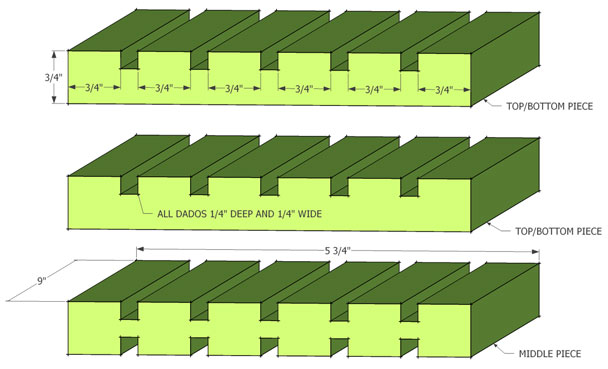
Cut dados in the top bottom and middle pieces for the blade storage dividers. Feel free to modify the dimensions and spacing with these. I just went with an easy 3/4” opening.
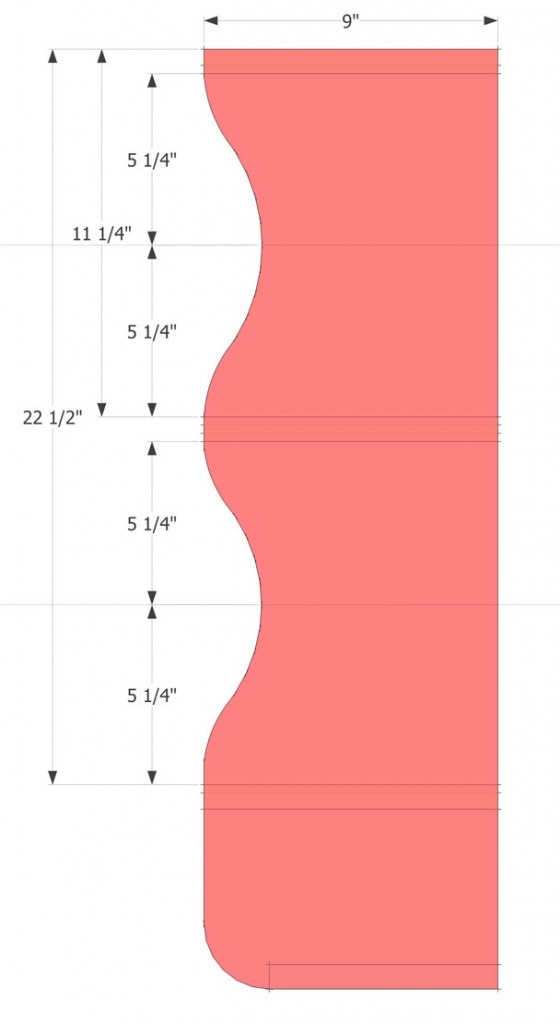
Curves
Now is the time to cut all of the curves in the sides and divider panels if you want. I recommend using some of the scrap 1/4” plywood to make a template. When making templates such as this I find it easier to reference everything off of the center line. The exact dimensions of the curve is not important. When making mine I just wanted both sides of the curve to be symmetrical and the top and bottom storage area curves to match. Once a template is made you can use it and a flush trim bit in a router to match all of the curves in the blade storage area very easily.
Assembly
Attach the horizontal pieces to the sides with glue and screws. Use two screws per piece at each side. It may be beneficial to pre-drill these holes to prevent splitting.
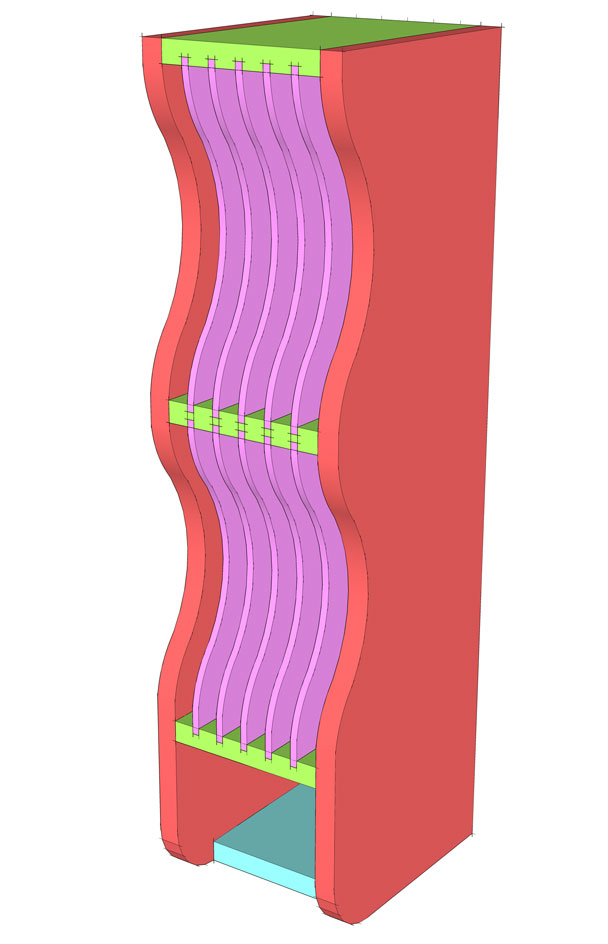
Add the back with glue and nails. Attach the cleat with glue and two screws. One screw on each end to go into the side pieces. Pre-drill these holes to prevent splitting.
Final touches
Hang it on the wall and fill it up. You can very easily add dowels or screws to the outside for additional saw blade or other miscellaneous tool storage.
Download
Although this plan is free to you remember that it isn’t free to produce. If you would like to show your thanks please consider using the donate button at the bottom of this page. If you liked this project and found it useful please share it so others can do so as well. Thanks for stopping by folks and have a great day!


I SEE YOU TOOK THE PANELS OFF THE WINDOWS. LOOKS MUCH BETTER. STILL GETTING THE ON-LOOKERS?
Jay,
Love your show. You explain everything much like a talk show host. So of the wood shows I watch to instructor is obnoxious and I want watch. Your show I like because you show it in a drawing and step by step don’t stop. Do more simple but tasteful shows. I like the ones where your building stuff for the shop and or jigs. These are the tips which are helpful to me.
Chris
Love the design, but aren’t you worried that the blades will accidentally role out if the shelf is knocked?
This is a concern of mine also. One Solution is to add a removable stop attached across the dados. This way you can still make adjustments to the width of the openings. Over all a very nice design.
No concern. Watch this.
https://www.youtube.com/watch?v=B5OA-YrIfxc