
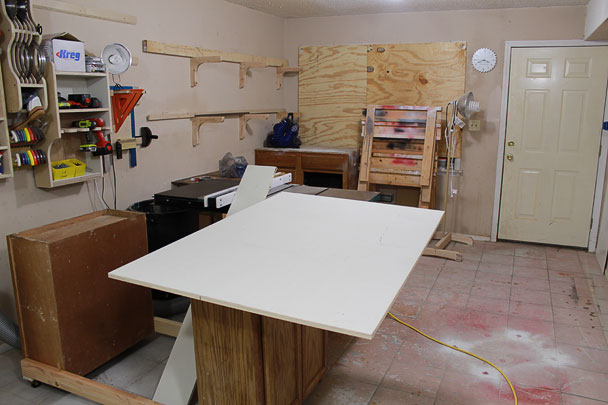
So a few months ago I sold my large table saw station because it was just too big. And here I’m showing you how I’ve made my biggest table saw outfeed table to date. Hypocritical? Well, not really. This new shop layout has opened up a lot of doors for what can and can’t be done in the shop. Because all of the tools are on one side of the shop (long direction) I have pretty much half of the shop to dedicate to egress, cords, and light/camera stands. There is no way this table saw outfeed table would have worked with the old layout.
The main reason I’m making this outfeed table is not necessarily for the table saw. Yes it will serve as an outfeed support but I’m more motivated by the fact that I really don’t have a work bench or a decent place to work on anything. I’ve done a lot of research on different outfeed/assembly table designs and was really close to buying materials to make a nice 48” x 48” assembly table until it dawned on me to reuse some wall cabinets I just took off the wall.
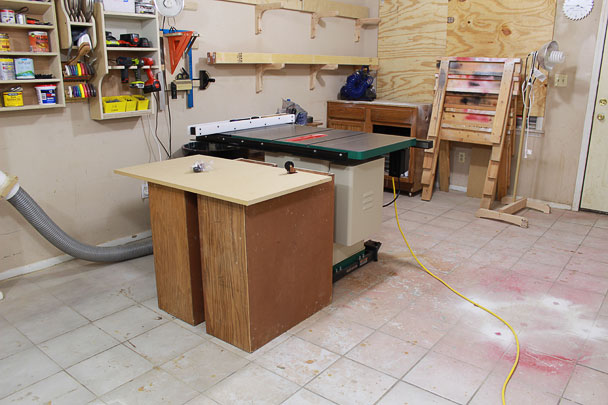
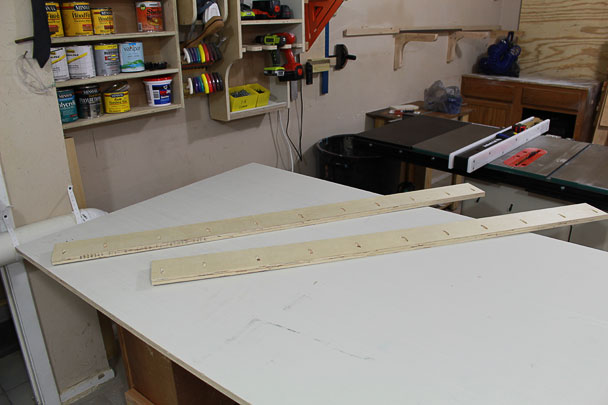
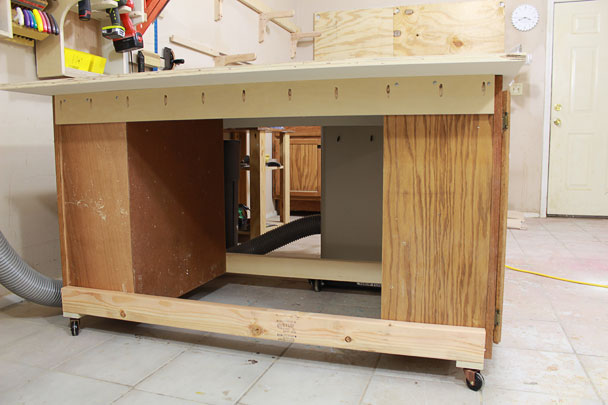
These cabinets are 27” wide and 30” tall. I’m not a big fan of cabinets at all but I figured they would be a good starting structure to build upon for this table. I’m building it upside down as it will be easier to figure out what materials I will need to make this work. The goal of this is to get a useable shop project and spend as little money as possible. In the background you can see a piece of primed plywood that is 48” x 59”. I’m going to use this as the top so I made my lower stretchers 4” less than the 59” length of the top. To make sure the stretchers were perfectly flush with the bottom of the cabinets I clamped some scrap 2x4s to them as a reference surface. Several screws through the cabinet wall into the 2×4 secured them.

The face frame of the cabinets sticks out by about 3/16” from the sides. This gives a consistent reference surface for the construction. Both lower stretchers are attached the same way.

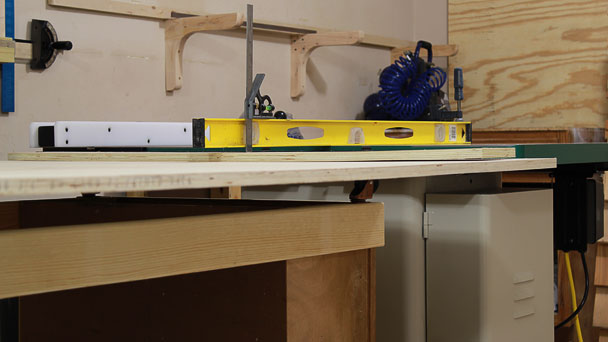
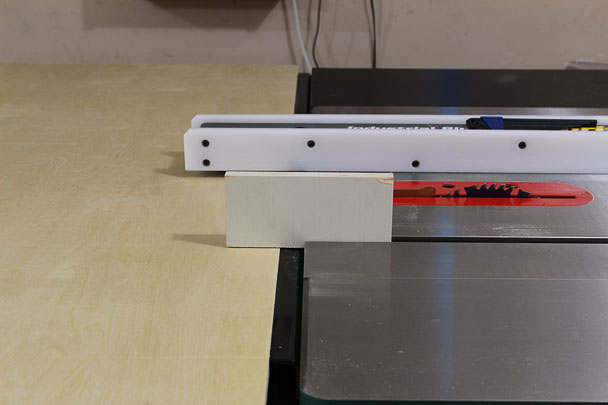
Before I attached the casters I wanted to stack up my materials and see what combination would work. Here you can see that the height of the casters plus the 3/4” plywood top and another 3/4” plywood piece makes it the perfect height that I’m looking for. I used my box beam level on top of the saw and a ruler to make sure I was 3/8” below the surface of the saw.
With the material combination solved I ripped that extra piece of 3/4” plywood and used it on bottom. This seemed like the easiest place to add 3/4” in height. For the casters I’m using a cheap $4 per pair set from Lowes. They don’t lock and they all swivel. I have the same casters on both of my other mobile carts. With them screwed down I can flip the table over.
Here’s the “scrap” piece of plywood for the top. It was left over from my French Cleat Drill Charging Station and I really had no use for it so in the name of not spending much money I used it.
I wanted to use the full 59” but the 48” width was a bit too much for the 27” width of the cabinets. So, I ripped 8” off to bring it to 40” wide and was instantly reminded of why I want an outfeed table.
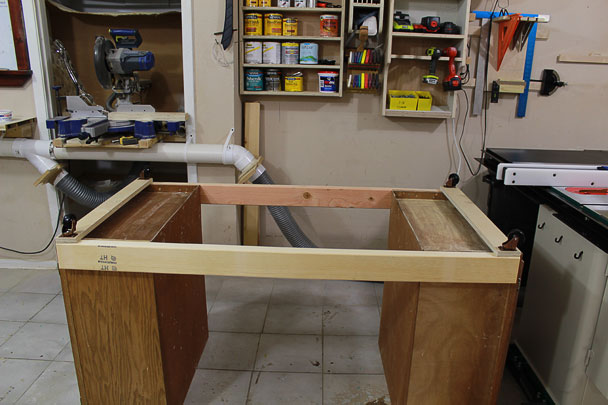
The 8” that was ripped off will be ripped in half to make the top stretchers. I still had the stop block setup on my miter saw from cutting the lower stretchers so I was able to cut the top stretchers to the same exact length.
To make the rip cut I set the top piece on the base. That was much better!

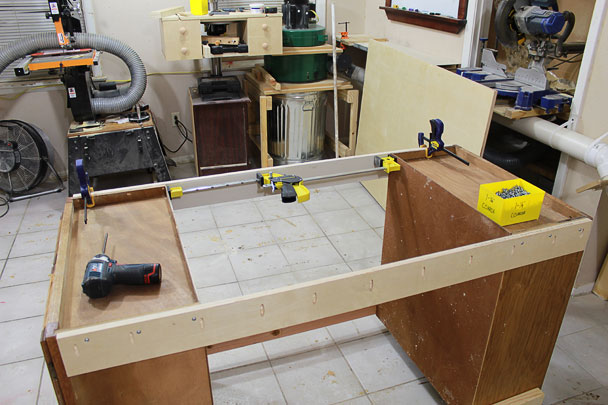
I didn’t want screw heads through the top of the table so I drilled a bunch of pocket holes on the upper stretchers to attach the top later.
And these are screwed on the same way as the bottom stretchers. One of the cabinets has a bad twist to it so I had to spread the cabinets apart to get one of the top stretchers in place referencing off of the face frames. I’m using my Jack Clamp to easily spread the cabinets apart.
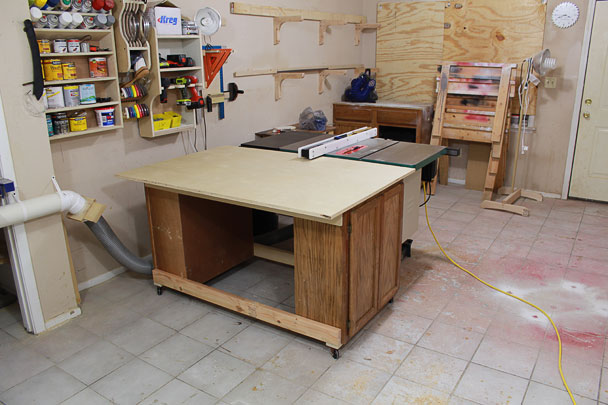
Here’s the the top screwed down. My only cost was buying two 2x4s and two caster sets. Everything else was stuff I already had. I really like how simple this design is. You can salvage junk wall cabinets from various locations or get them pretty cheap on Craigslist and do the same thing. And the middle space can be customized in many ways. I think I’ll eventually make a bank of long, wide, shallow drawers for hand tools but you could easily make this space whatever you want. Maybe an inclosed area for an air compressor?! Either way you can build this project to your needs.
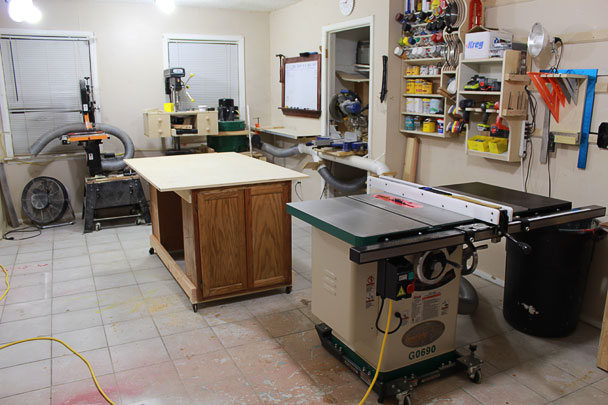
Here’s a shot of it in place. This article was actually posted a week after completing it so for those who are concerned with access to my French cleat wall I actually keep the table turned 90 degrees from the way it is in this picture which allows access to the wall from the miter saw area. I can also keep it a foot or two away from the table saw and access that area that way.
And a view from the other end of the shop. Even with the large outfeed table I still have plenty of room on the left side of the shop.
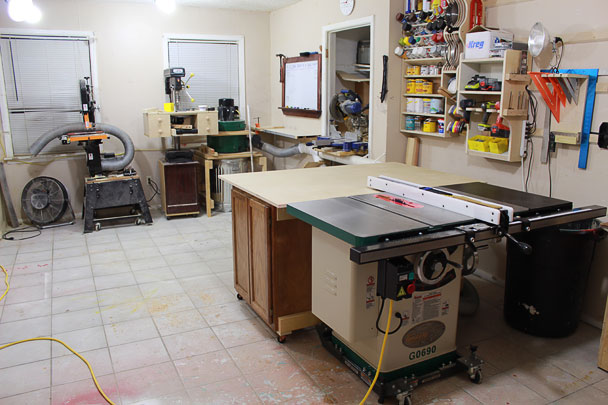
And of course its light weight and on wheels so it’s easy to move.
And lastly, this is the reason why I made it 3/8” lower than the table saw top. When using table saw sleds it will be at the perfect height to provide support to the runners without having to make dedicated slots in the outfeed top. The height doesn’t affect ripping stock on the saw either.


I don’t know if it is just me or not but your Tweet and Google plus links at the bottom of the article are not working for me
Thanks for pointing that out. It’s not just your computer. I’ll have to check it out after work today. Sorry for the inconvenience.
Great use of the cabinets Jay. Simple design and I like that you are able to move it around. I don’t use face book (only youtube) and enjoy every project. Keep up the great work!
Hello Jay. At first I was thinking “how is this saving him space over the other table saw?” From my perspective your space savings is minimal and your cost is exponentially higher, but then again it is hard to judge reality from pictures and youtube video too. But I love the principle of the idea here. The table is 3/8″ lower, genius. It is on wheels so you can have it sideway or long ways as an out feel table plus you can use it s a stand along assembly table. That is a great idea, versatile too. That has really inspired an idea for my table saw. It just came to me.
I am thinking a flip table of sorts, one that pivots to the vertical so that you can do all of that plus make it pivot vertical for storage against the wall. Plus I could put my vertical router underneath maybe… maybe not. But getting it out of the way would be perfect all on its own.
Another idea popped into my head just now. I could put some T track underneath for jigging and assembly fixtures. Out feed table side smooth and then flip and you have the T track side. Then when you want it out of the way flip to vertical and it is out of the way.
You sir are an inspiration.:-)
Karl
Very cool Karl. Thanks. This isn’t necessarily saving floor space but rather making much better use of the space that I have available. Moving everything to the side of the shop has eliminated a lot of wasted space.
Great way to recycle. One question. How do you stop the thing rolling out from the ts when cutting large sheets?
I put a few coats of lacquer on the top of it and everything slides easily. I ripped a sheet of plywood for the router lift build without the table moving at all. I also ripped a 10′ treated 2×6 for work without any sliding either. The table moves easily when pushed but I guess the friction on the floor is greater than something sliding on top.
Another great project and inspiration. Thanks for your efforts!
If you ever feel that the 3/8 drop is a problem…it’s easy to put some 3/8 plywood on top. Very nice Jay. I have old “throwaway” cabinets in my shop. They are useful and free. Great videos and great website.
Thanks for the kind words Tom. I appreciate it. Yeah raising it would be easy with the ply as you said. This system is working out really well. I’ve made two projects with this table and absolutely love the work surface in my shop.
As a fairly new subscriber, I’d like to go back and see the table saw station that was larger than what you have now. Could you include a link to an old post that will display the old setup, please?
That will help me to understand the gains that you achieved, and to apply the concepts to find ways to improve my layout. Thank you!
https://jayscustomcreations.com/2013/03/table-saw-and-future-router-station/
Hi Jay this design is just the thing I needed,as I have two set’s of desk drawers and with your idea I can make a very useful project table and the out feed table,and some where to put my small compressor, great you tube show Many Thanks
Very cool Alan. I originally thought about making a spot for my air compressor in the middle but never got around to it. Let me know how yours turns out.
Hey Jay, Been watching your videos on youtube and really like your work. Being on a low budget I like that you incorporate stuff that you already have in ways others don’t that do videos. I would have never thought of having this out feed table 3/8″ lower yet your reason for doing so makes perfect sense! Keep up the good work and look forward to your next project! Thanks!
Thanks Eric. I would much rather have the bottom of the runners slide on the table surface than have to worry about lining up miter slots. Have a good one!
Any chance you could give your ideas for the all-new one you planned to the rest of us who don’t have old cabinets lying around? Great idea to reuse the cabinets; I’m just curious as to what you originally had planned.
Hey Jensen. I didn’t get far enough to make plans for it but it was going to be based upon this design: http://lumberjocks.com/projects/79655
Hey Jay, Great project. In adding the 3/4 to your highth, i might have doubled the 3/4 inch top to give the work/assembly top a firmer surface, also, as the top begins to get scratched up, and the accidental drill bit puncture, other damage occurs you can very easily flip the top for a brand new surface. Something i wish I had done on my outfeed/assembly table. BTW the 3/8″ clearance is a great idea. I may just have to raise my table saw a bit to get that.
Jay,
I’m in the process of setting up my shop and have a Grizzly table saw too. What kind of material did you use for the extension wing? Thanks.
This wing came with my saw. But I have made one previously. You can read about it here: https://jayscustomcreations.com/2013/03/adding-a-table-saw-extension-wing/
Hi Jay, it’s so cool stuff, but if you have a video for that I think it’s really amazing…
Thanks for your post
Hello Huu. I don’t have a video on this. Sorry.
Jay, thanks for this post. I have been look at quite a few different t designs for an outfield table. I was ready to build one when I sWear your post. I have 2 cabinets along with an extra sheet of 3/4 ply that have been sitting in my basement and wondering what I was going to do with them. Like you stated a few bucks for casters and voila a perfect outfield table !
Sorry about the typos above, proof it pays to proof read.