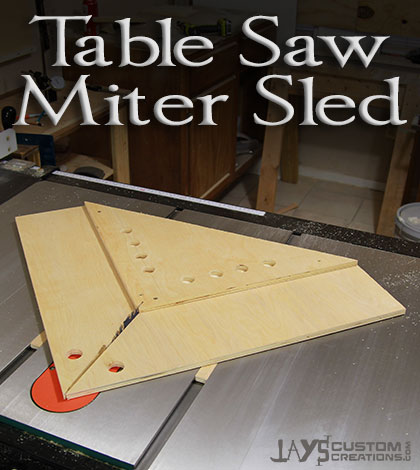
One of the most annoying things to me in the world of woodworking is getting perfect miters on a miter saw. Sounds silly, right? I mean, a miter saw is supposed to cut miters. Most miter saws even come with stops to repeatedly stop at 45 degrees so cutting 45 degree miters should be a breeze, right? The problem is that most miter saws are not really precision instruments. Which is OK if you’re just working with 2×4 lumber and doing general carpentry work.
In my experience I have found getting perfect 45 degree miters on a miter saw a huge pain in the butt. It is especially noticeable when trying to make a nice tight fitting picture frame. That’s where a table saw miter sled comes in. The two main benefits of a miter sled are speed and accuracy. Once this jig is made there isn’t any setup time. Simply set the jig on the table saw and start cutting. When making the sled you are utilizing a perfect 90 degree corner to reference your cuts off of. This will ensure that your left and right cuts will add up to that same 90 degree corner.
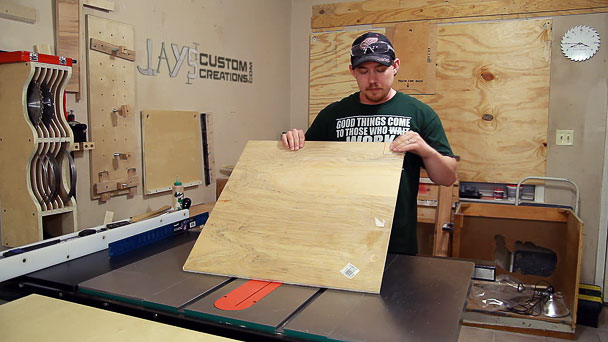
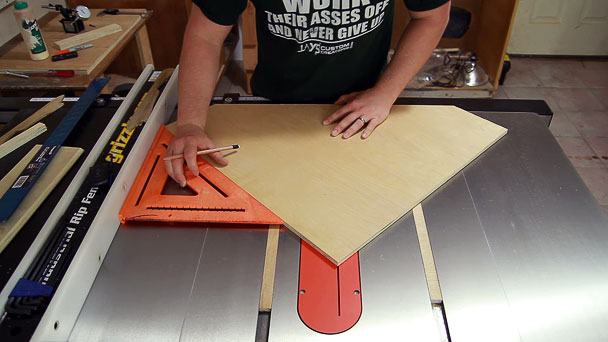
To start I purchased a 24” x 24” piece of half inch plywood. The main concern here is that one corner should be perfectly 90 degrees. To ensure I was purchasing a piece with a square corner I first grabbed a carpenters square off of the store shelf in the tool section and took it back to the plywood area with me. After sifting through the pieces I found one I was happy with that had a nice square corner. After putting the square back on the shelf I paid $7.99 for the piece of plywood.
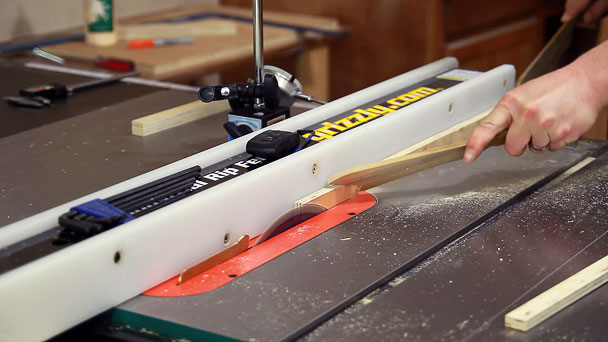
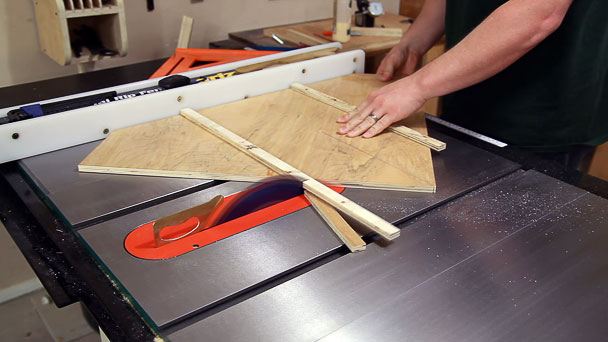
100% of this jig can be easily made from the same 24” square of plywood. To make the runners I ripped off 7/8” from the sides that did not touch the perfect corner. From there I used a cheap digital caliper to measure the exact with I was at, subtracted the exact width of the miter slot, and I was left with the exact width that I needed to move the fence. To measure how much I moved the fence I used a magnetic mobile base and a dial indicator. These precision measuring devices are relatively inexpensive and can be used in a variety of places in a woodworking shop. While this method is an extremely quick way to get precise runners they aren’t 100% necessary. I’ve made many runners by simply taping the fence over until I got a great fit.
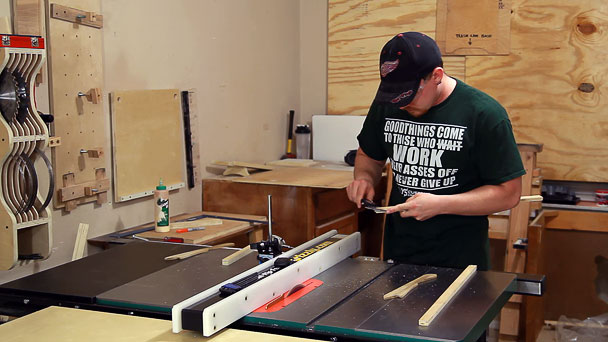
Once the runners were sized to width I trimmed them to a hair less than 3/8” which is the depth of my miter slots. A lot of people say to cut these at around 1/4” thin so that dust in the miter slot doesn’t affect the overall height of the sled but I’ve never had that problem. I figure that if I’m sliding the jig onto the saw from the front the runners will do a good job of plowing forward the dust that may be in the way.
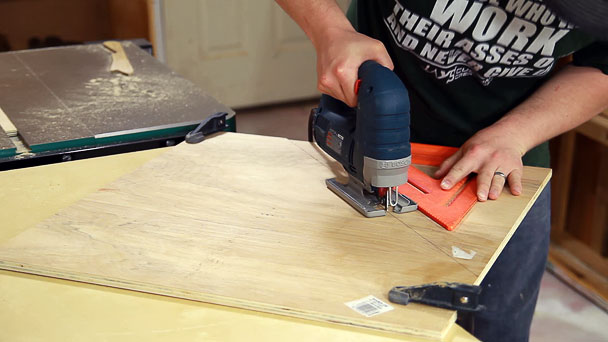
Now it’s time to cut off the perfect corner. I figured six inches would be plenty of room for the cutting surface so starting at the corners adjacent to the perfect square corner I came in six inches, struck a line, and cut the corner off.
Now to position it the base on the runners and glue it down. At this stage accuracy isn’t too critical. I used my large speed square to align the sled so that it’s front two edges were 45 degrees from the fence and the front point was over the saw kerf and glued it down. You can add screws to your runners if you want but I rarely do and have never had any break off.
Once the glue is dry cut the excess off of the runners and cut the saw kerf halfway through the sled.
Here’s where the precision of this sled comes from. We can now position the perfect corner triangle so that the front point is on the saw kerf and the edges are 45 degrees off of the fence. I use speed sqaures all the time and that 12” speed square is my favorite. Sooooooo many good uses for it in a woodshop. With it positioned the way I want I pre-drilled and screwed it down with four screws. No glue is needed.
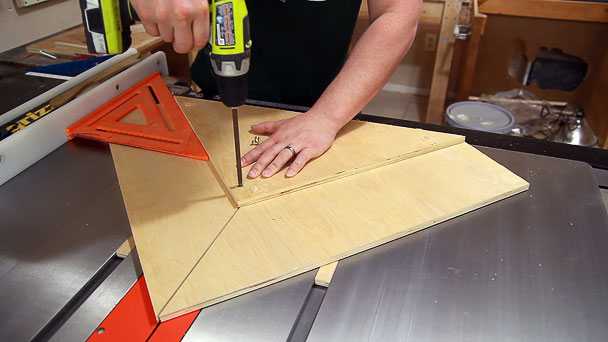
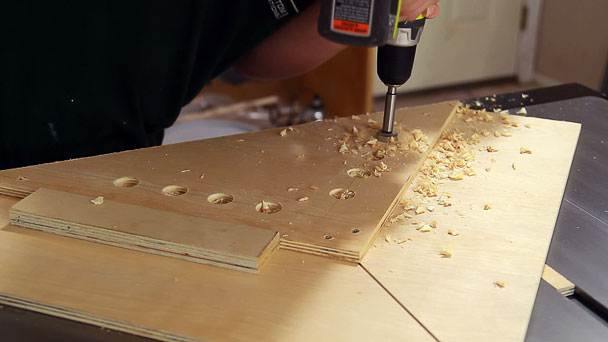
To aid in using my hand as a clamp I drilled four thumb holes through the top triangle on either side. This will give my thumb a good place to grab a hold of when holding the work pieces down.
Using the sled is simple. Make your right side cut and slide the work over to the other side to make the other side of the cut. As you can see in the picture below I used my left hand to hold down a stop block to make a perfect square frame. If your pieces are too long to use a stop block as I did you can mark the exact location of your cut and align that mark to the saw kerf in the sled. This will tell you exactly where the saw blade will cut.

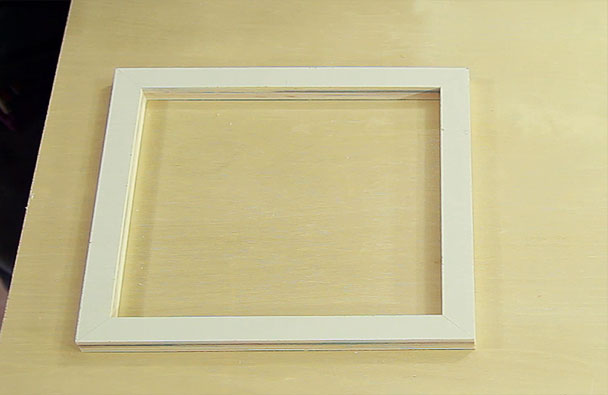
And the results of the first frame cut with this sled.
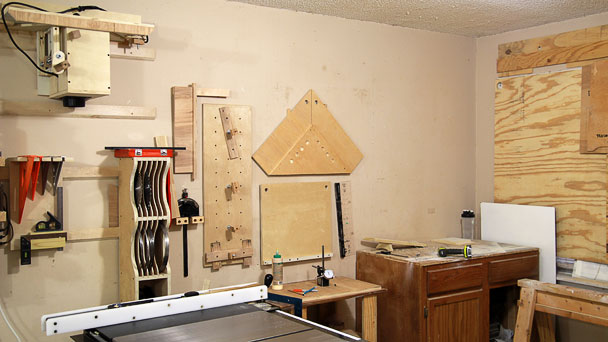
I also drilled a few holes near the front of the sled to easily hang it on my jig wall. Remember that I only used a 24” square piece of half inch plywood for this entire sled. It’s an easy to make sled that will save you a lot of time and headache when making mitered frames. Give it a try. I promise you will love it!


Thanks
You’re very welcome Robert.
Another great idea, Jay. I need this.
Thanks Jim. It will come in handy, that’s for sure.
were do you get the plans i cant find them for the miter sled
Hey Dan. There are no plans for this sled as it’s pretty much straight forward. I referenced free plans for other projects in the video and the “FREE PLANS” link in the video points to the free plans page on this site. Sorry for the confusion!
Your Saw Blade Clock you made stopped! (The second hand isn’t moving)
The batteries died and I stopped replacing them. The tick of the second hand picks up in the audio when recording. You probably wouldn’t notice it but I can and it drives me nuts. They are just for looks now :)
Hello Jay, I appreciate your contributions, supports much like us who work in wood, greetings from Pucallpa, Peru …… land of good carpenters and the best Peruvian wood.
Very cool Mario. Thank you for stopping by!
hi. i love your miter jig. i can’t figure out how to post a like.
Jay – what do you use as a “stop” system when you want to insure opposite sides have the exact same length
I don’t use a stop system. Just mark carefully and line it up with the kerf line on the jig. It’s pretty darn accurate.
Thanks Jay for everything you are doing.
Knothead
You’re welcome Doug. Thanks for the acknowledgement!
Jay, how would you attach stop blocks to a sled like this? I’m used to the flip down stops on my Incra miter gauge, but a clamped block of wood would do… it just seems like it’d be hard to clamp on to a triangle.
Because there is 6″ of width to work with on the sled you could screw down a 1″ wide strip that is a couple feet long or however long you need to the reference face of the triangle and that will give you added area to use a stop block.
I’m picturing a toggle clamp screwed near the thumb holes. Or a removable one of some kind (for when you don’t need it). Then the toggle clamp can hold your stop block.
That would be a good option.
Jay
Wish I had seen this video earlier today. I have been trying to make 45 mitres on some feather board on my Mitre saw and as you say “pain in the butt” So went to your site and found this. I will be making one tomorrow. So simple yet so effective. Thanks for sharing this very useful jig.
Where would us amateur enthusiasts be without you and Izzy and all the other experts. Although I have been woodworking for 40 odd years only started serious since I retired from work. Have to say I have learned so much and gained such enthusiasm and confidence after watching these videos.
That’s awesome to hear Barry. I’m glad I could contribute in such a way. Thanks!
Jay you are a great wood artist. I saw you in YouTube greats projects. I see you from Puerto Rico and I wish make a coffe bar table but I can’t know how start it’s possible you show me start.,thanks
Would it help your ‘sleds’ if you were to wax the bottoms??
Thanks also Jay will need one soon.
You’re very welcome. Thanks for watching, John.
I am very happy to learn about your sled. I think it’s great. Very simple and easy. It’s the best one yet. DON’T STOP NOW when you’re on a roll.
Hey Jay love the video made mine today. Buy a battery for ur saw blade clock on the wall behind you the second hand is not moving. Lol