I started creating online media near the end of 2012. Nearly every week since then I’ve averaged one or two videos per week (some more, some less) and most of those videos include a website article with various pictures. Beyond that, I also have a lot of personal media files from pictures and family videos that I’ve created along the way. I’ve got a lot of digital data.
Up until the end of 2016 I haven’t been keeping any of my raw video files. It’s not necessary to keep all raw video but I’ve found situations here and there where I wished I had the footage to reference back to or to edit a certain way for social media and such. So for that reason I started to keep more of the files I used to delete. It all adds up. Keeping EVERYTHING isn’t a sustainable option but going forward I want to keep a lot more.
A few months ago I was pushing the limits of the internal storage capacity for my computer so I looked into alternate storage solutions for my home network. Something that would have a better long term solution instead of just replacing my internal storage drive with a larger drive. That lead me to purchasing a NAS system. I bought the Synology DS216J and two Seagate 3 TB IronWolf NAS drives. Plugged it in, set it up, and started filling it up. I quickly realized that I underestimated the amount of storage I would be using going forward. At this point I was already familiar with how easy the Synology software is to navigate and was pleased with the performance of the hardware so I contacted Synology to see if they would provide me with a larger unit in exchange for sharing with all of you how setting up one of their home network NAS systems has helped my workflow. In this article I will walk you through the steps that I took in upgrading from a Synology DS216J to a Synology DS1515+.
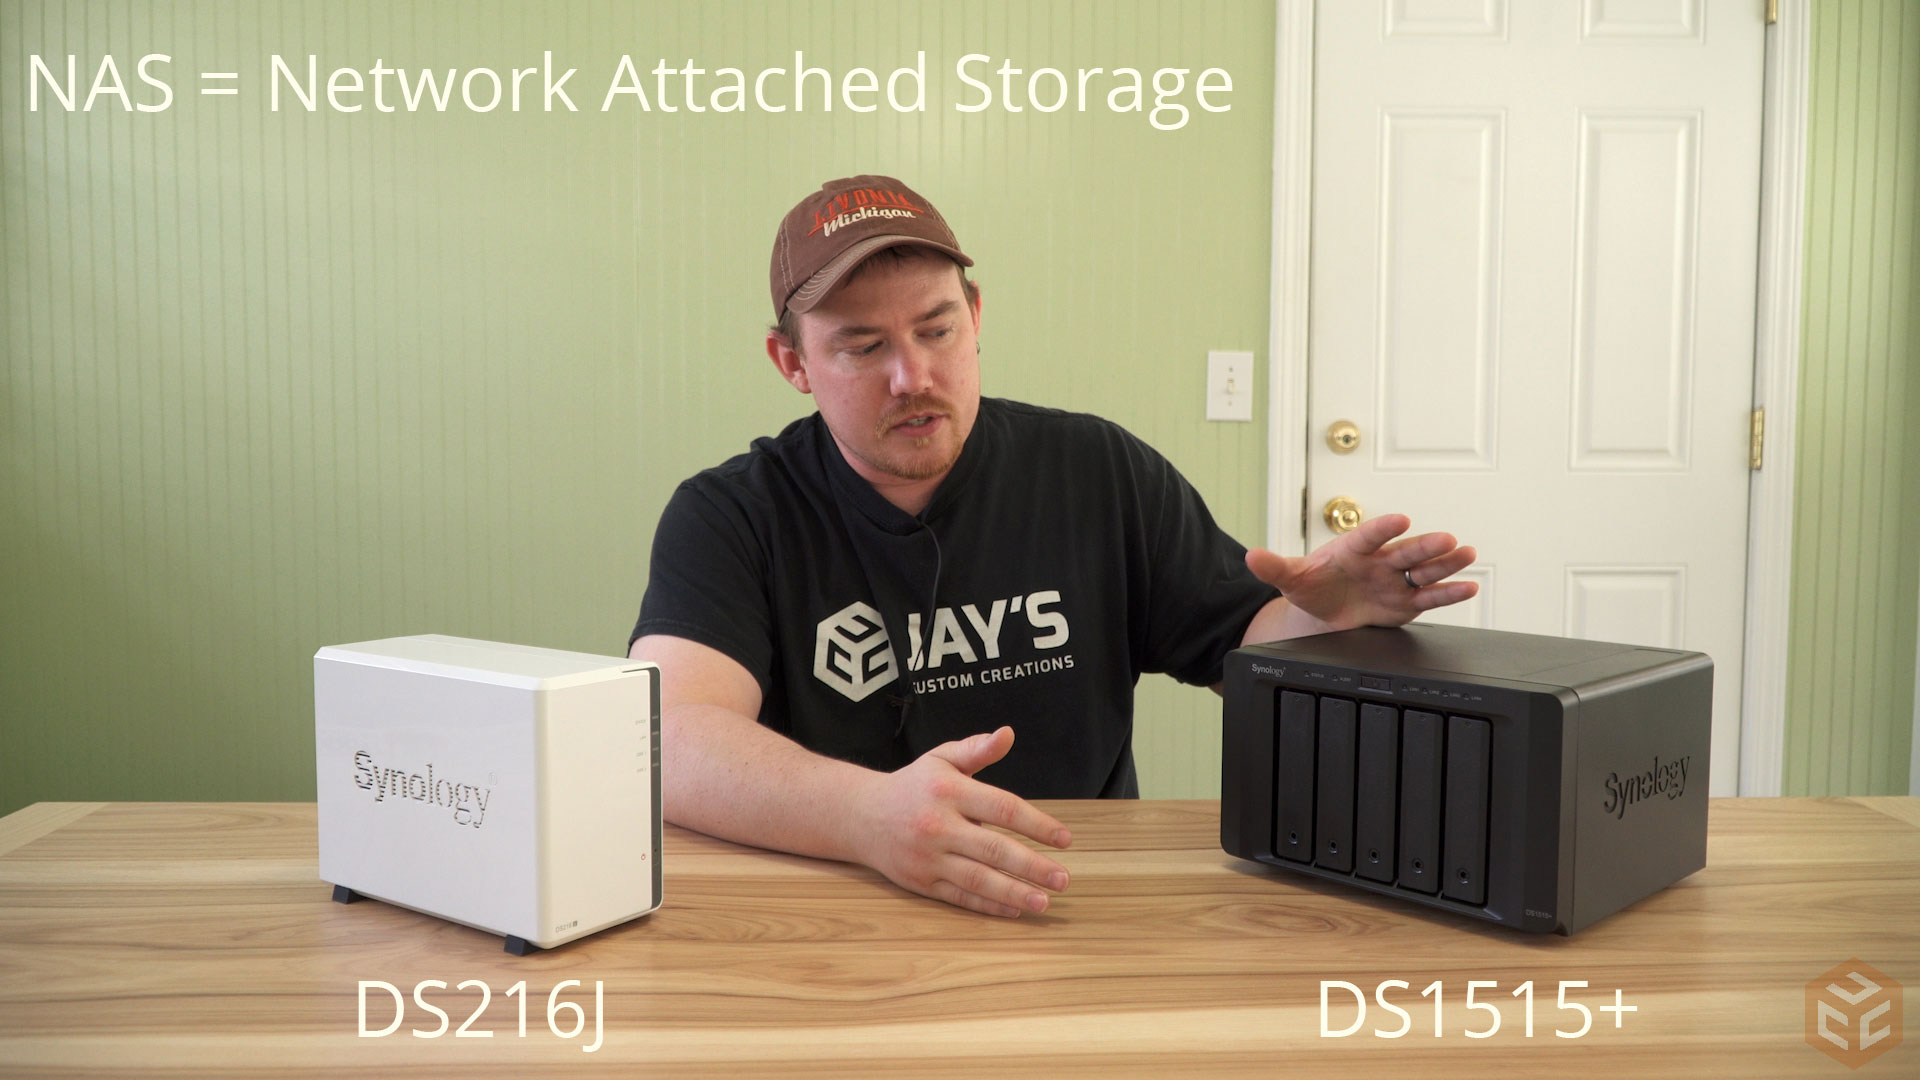
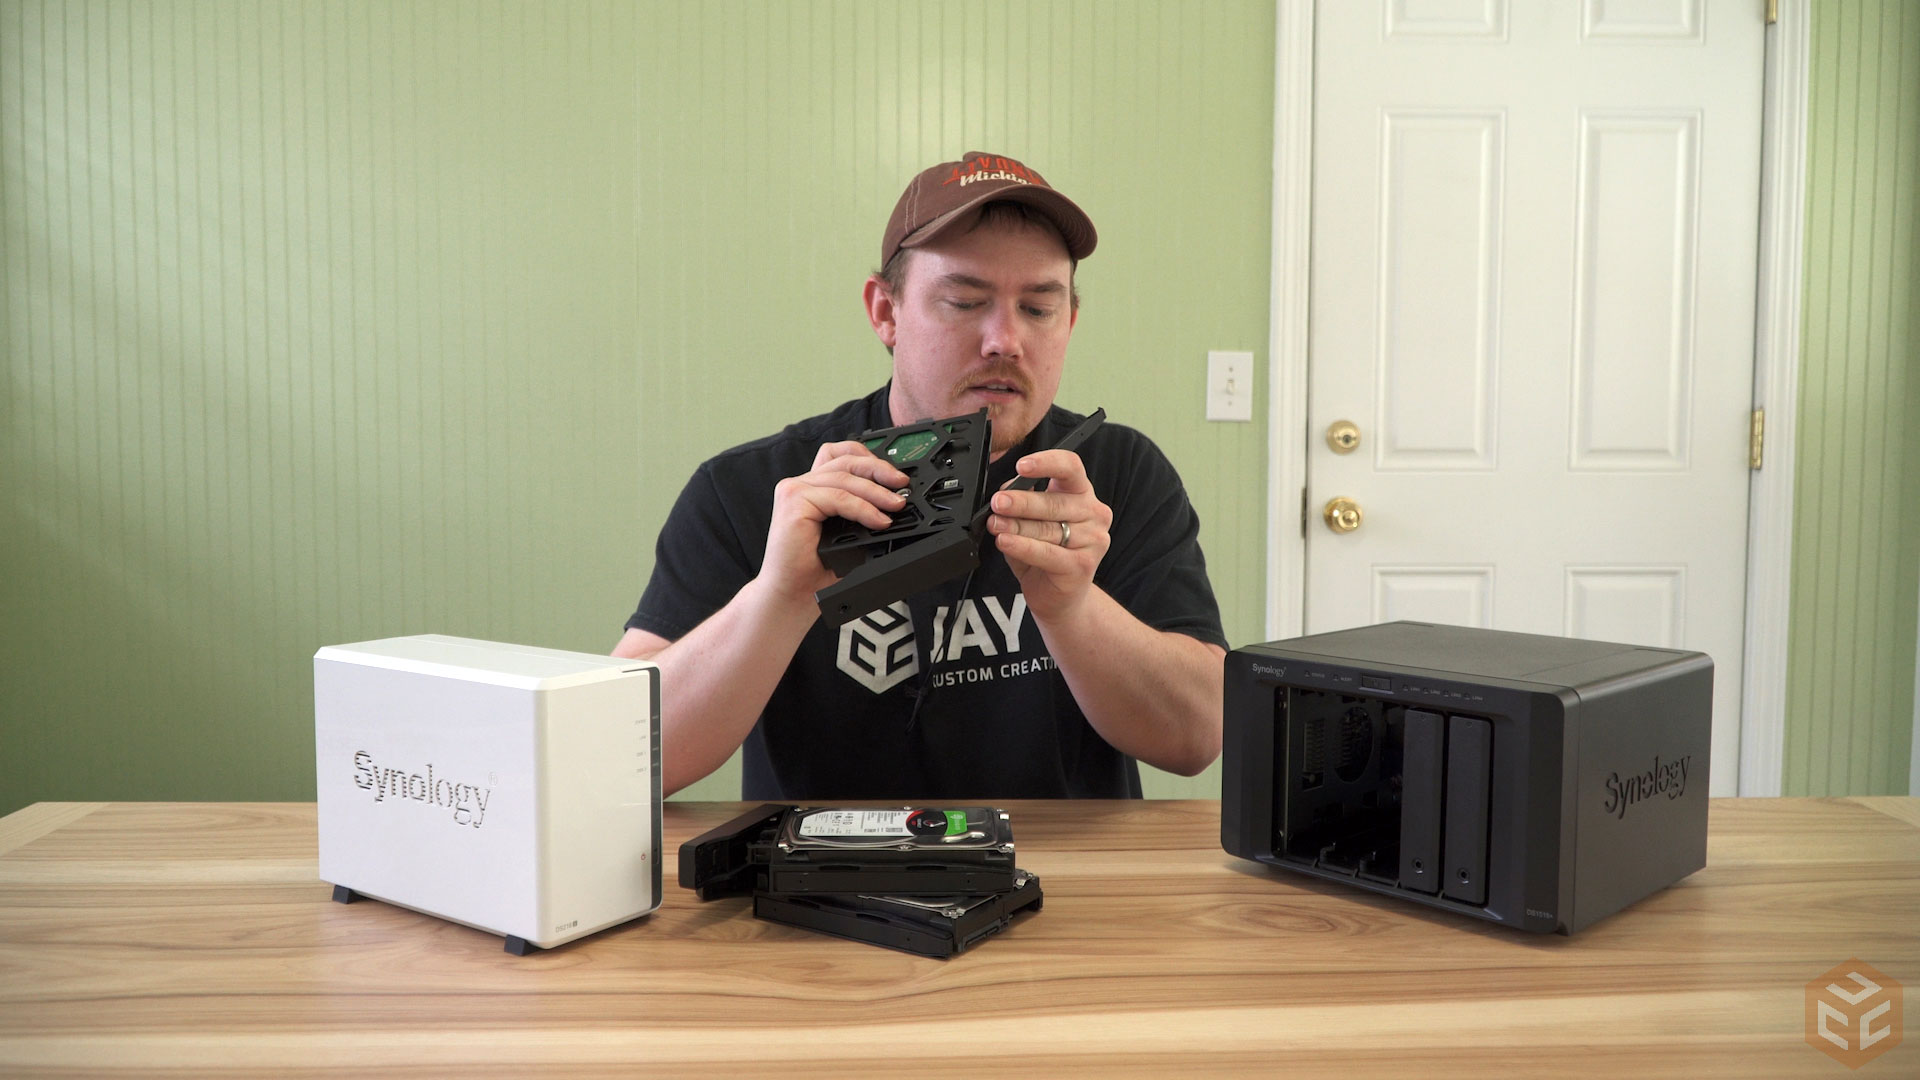
The DS216J is a two bay unit. You can increase the storage by increasing the size of the hard drives but you are still limited by the two physical drive bays. The DS1515+ is not only a faster spec unit but has a total of five bays. Each of these bays has a locking feature that can protect from curious fingers or maybe malicious activities to sabotage your file system (at which point they could probably just take the entire NAS). I chose to not lock the drive bays though because I just picture myself losing the key. Installing the drives into the drive trays is pretty easy. It’s really easy actually. No tools are necessary as the drives are held in place with pins where the screws would normally be used. For drives in the larger unit I’m using three 4 TB Seagate IronWolf NAS drives. This gives me two more drive bays to expand the system in the future as my storage needs grow.
The NAS will be setup with the Synology Hybrid Raid (SHR) which is a N minus 1 array. Basically, the number of drives you have – 1 = the total storage space you will have access to. The extra drive space that doesn’t count to the total space is used for redundancy with the SHR. This allows for one disk to completely fail and you don’t lose any data. Simply replace the failed drive and you’re back in business. This redundancy is something you don’t get with a single drive in a computer. If a single drive in a computer fails you may or may not be able to retrieve that data.
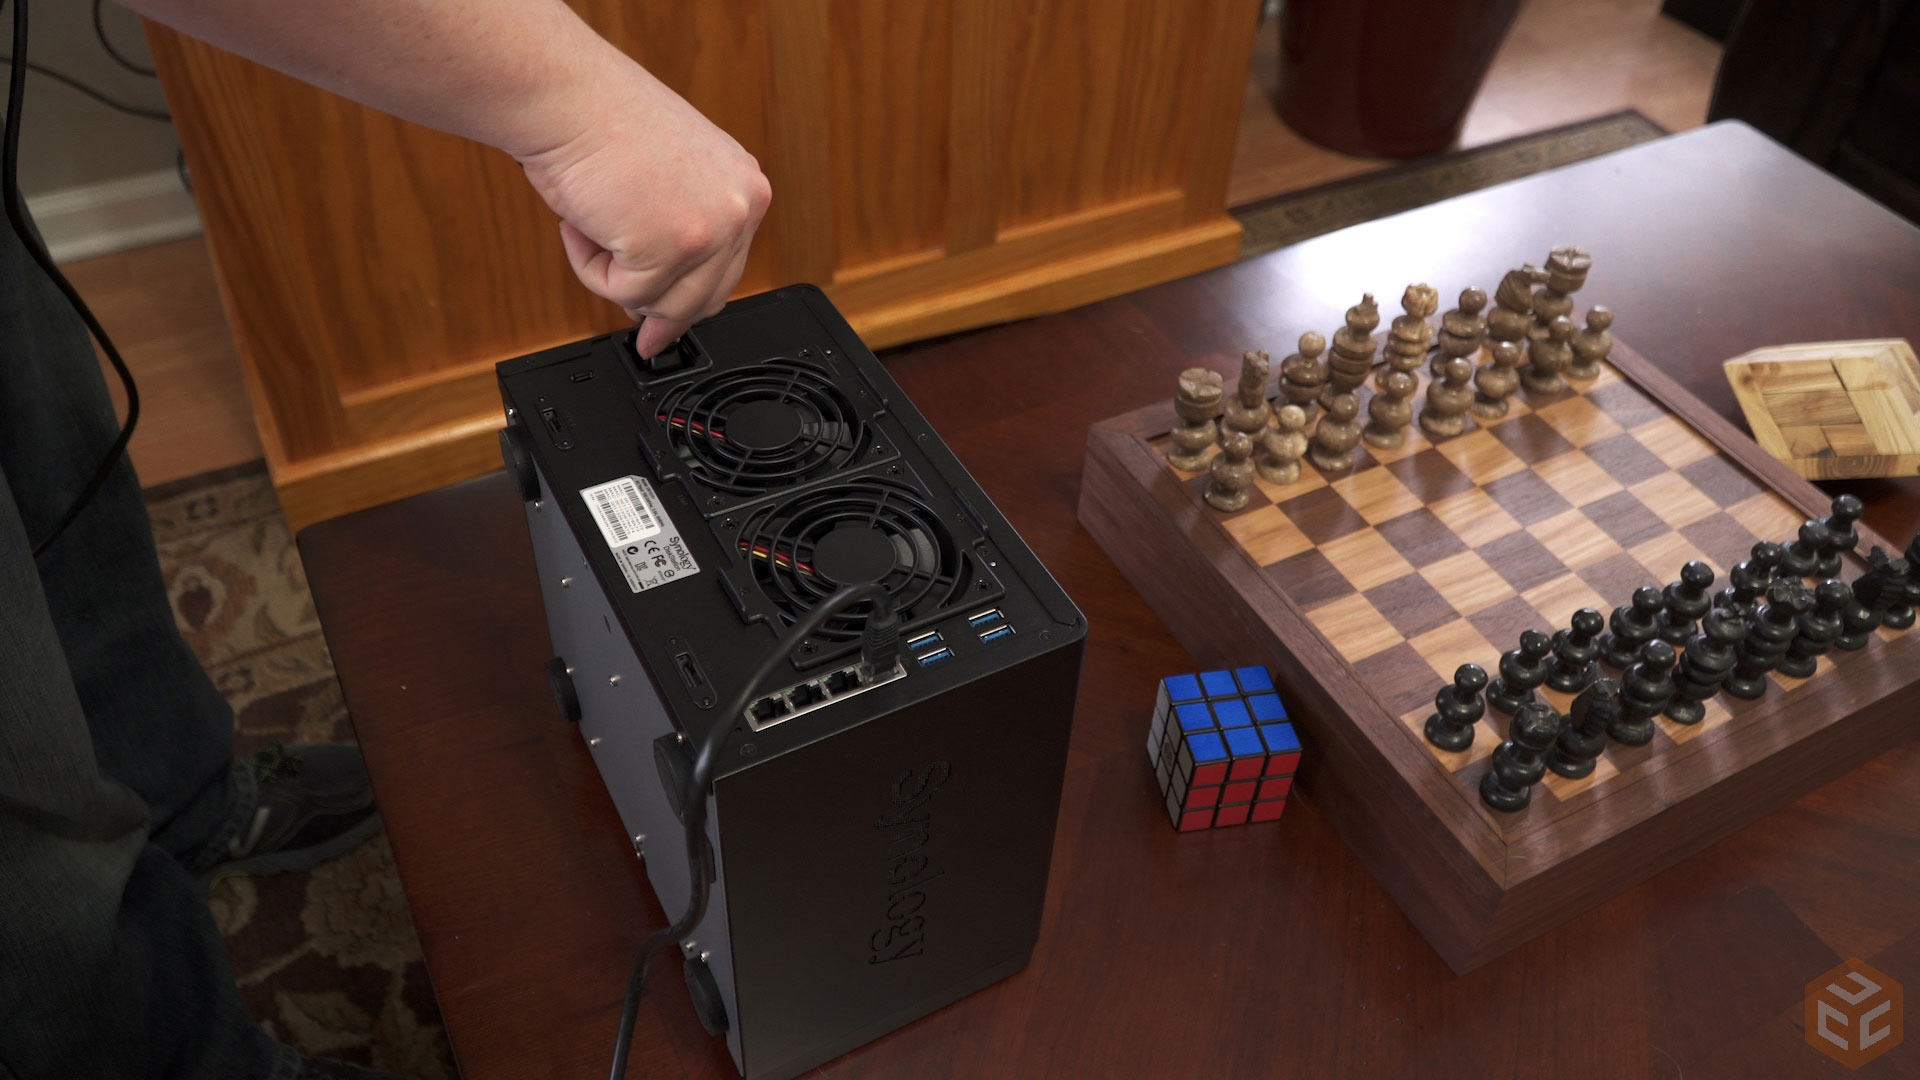
Physical installation on the DS1515+ is really easy. Simply insert the drives, connect the network cable, connect the power, and power it on.
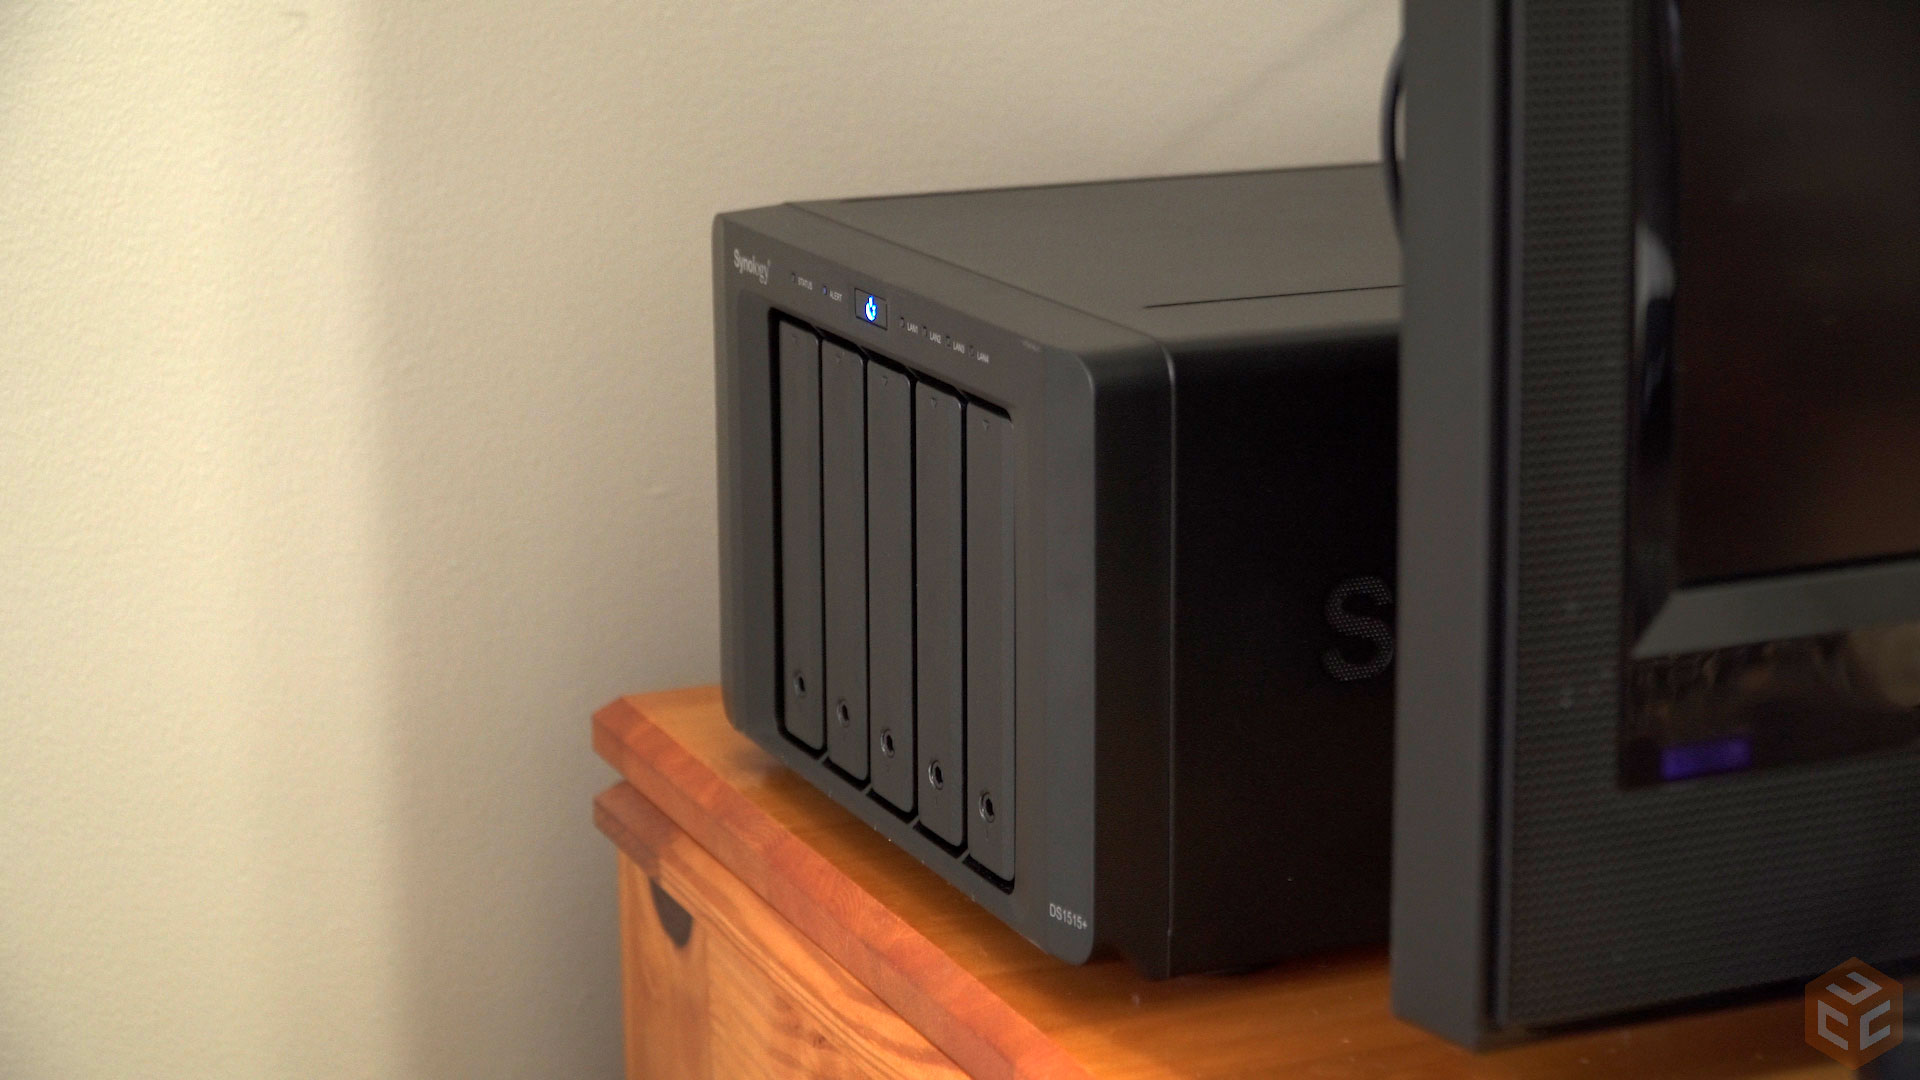
My particular setup will store the NAS behind my television. Not the most ideal location but we have all of our network devices back there…..I really need to do something about that situation.
Once plugged in and powered on go to find.synology.com. From there you just complete the setup wizard. Once completed you will be taken to the DiskStation Manager (DSM). This is the control center for the NAS. It’s basically an operating system for you to interact with the NAS and set it up exactly how you want to. There are sooooooo many uses for a NAS so what I’m doing here may or may not apply to you but I’ll walk you through the basic setup for me.
The top left button is the main menu.

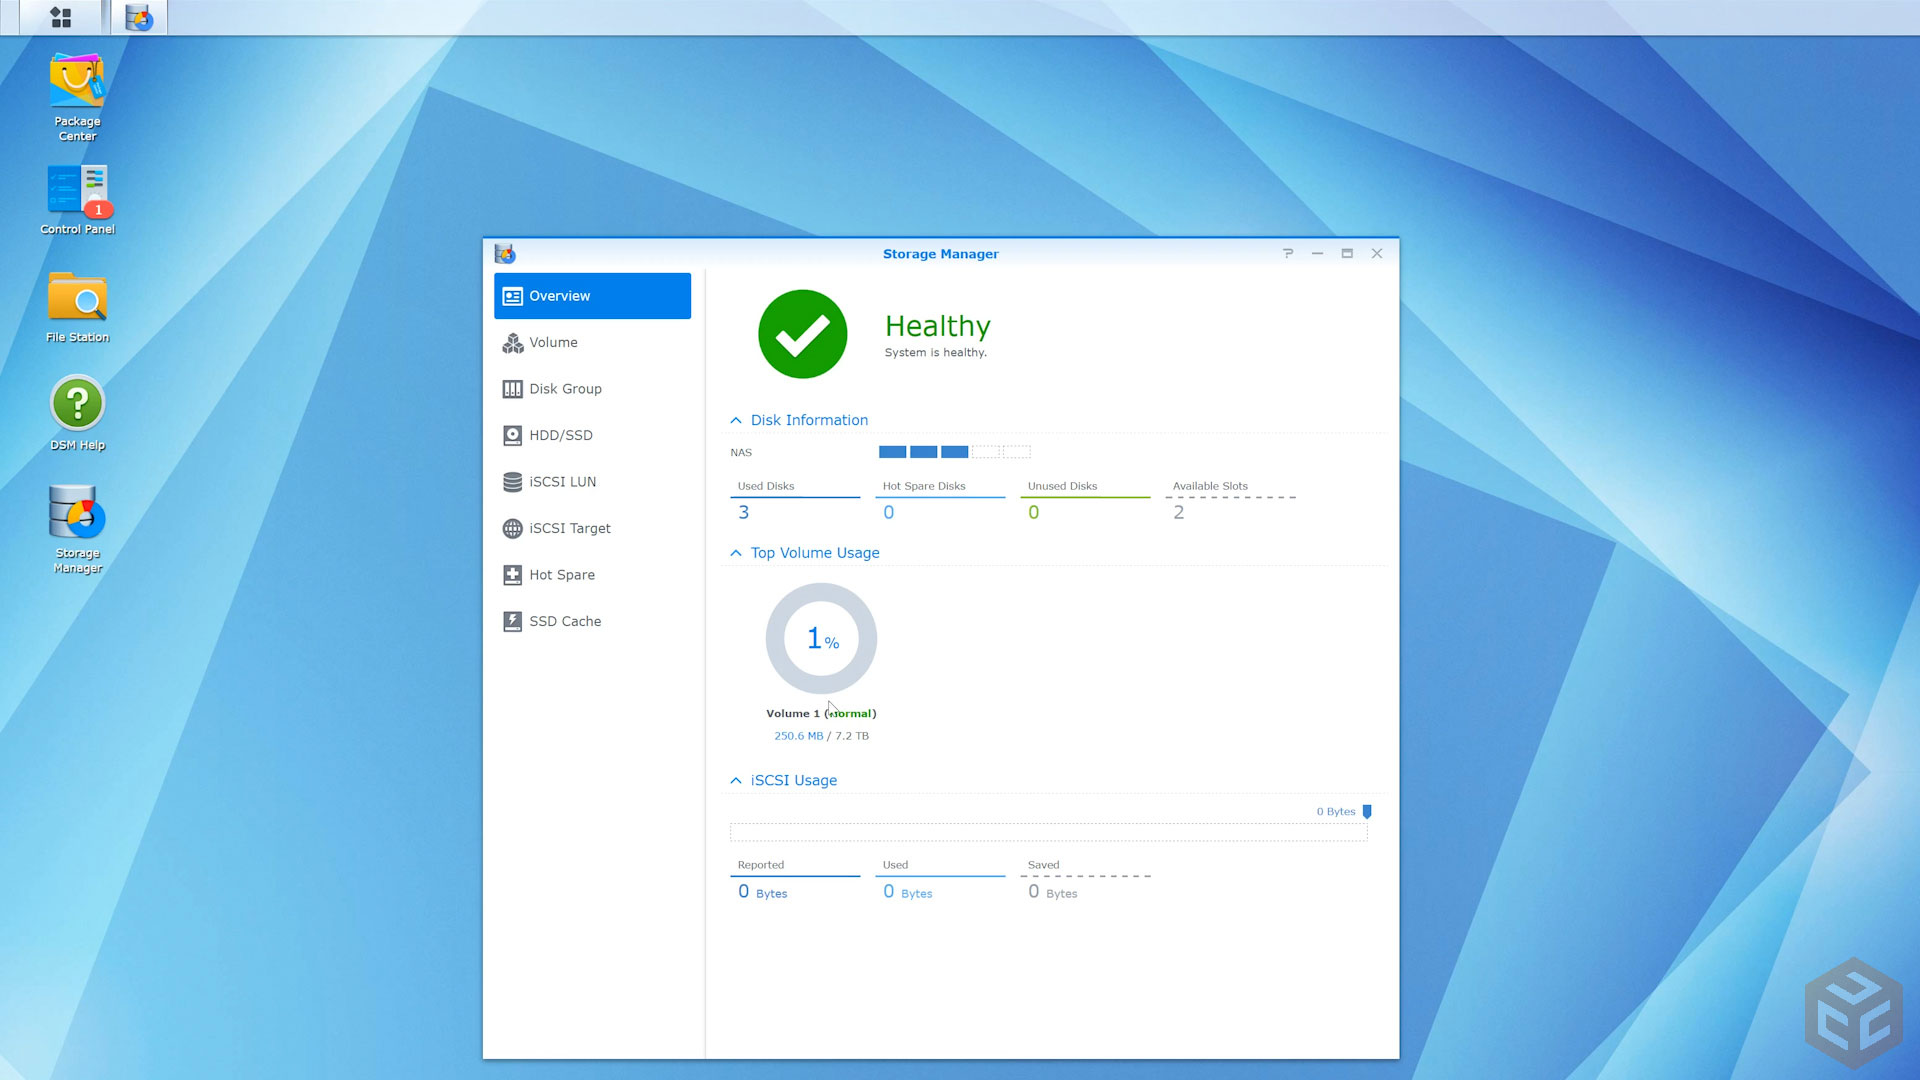
I’m going to start with the Storage Manager app. From here You can setup a volume to use and check on the status of your drives. You can see here that I have three of the five bays used with a total storage space of 7.2 TB.
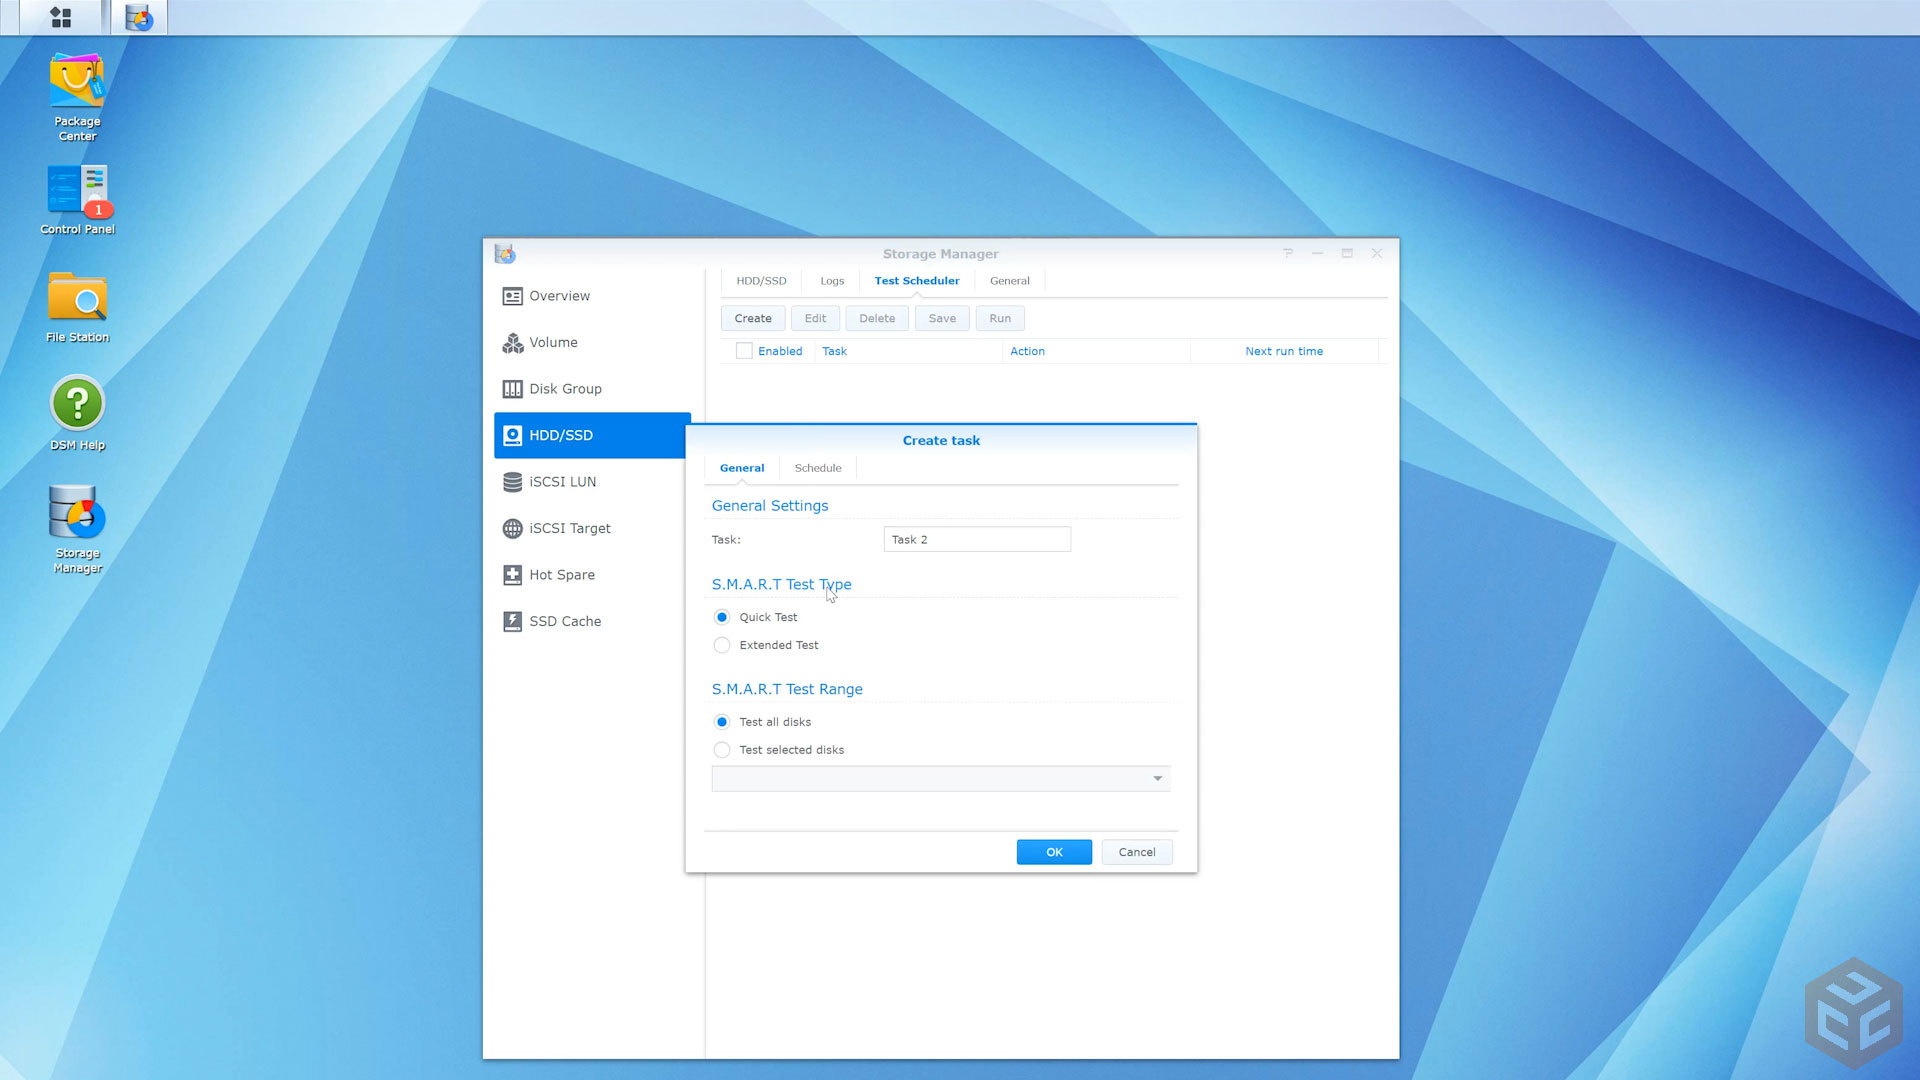
After clicking on the HDD/SSD tab on the left I’ll use the Task Scheduler to setup a S.M.A.R.T. Quick Test and schedule it for every day at 7am. This is a quick test to check the status of my drives and make sure everything is working as it should. I set it for 7am because I will later change the drive hibernation and don’t want the test to wake up the system for a long time at midnight and then stay away until 4am or so.
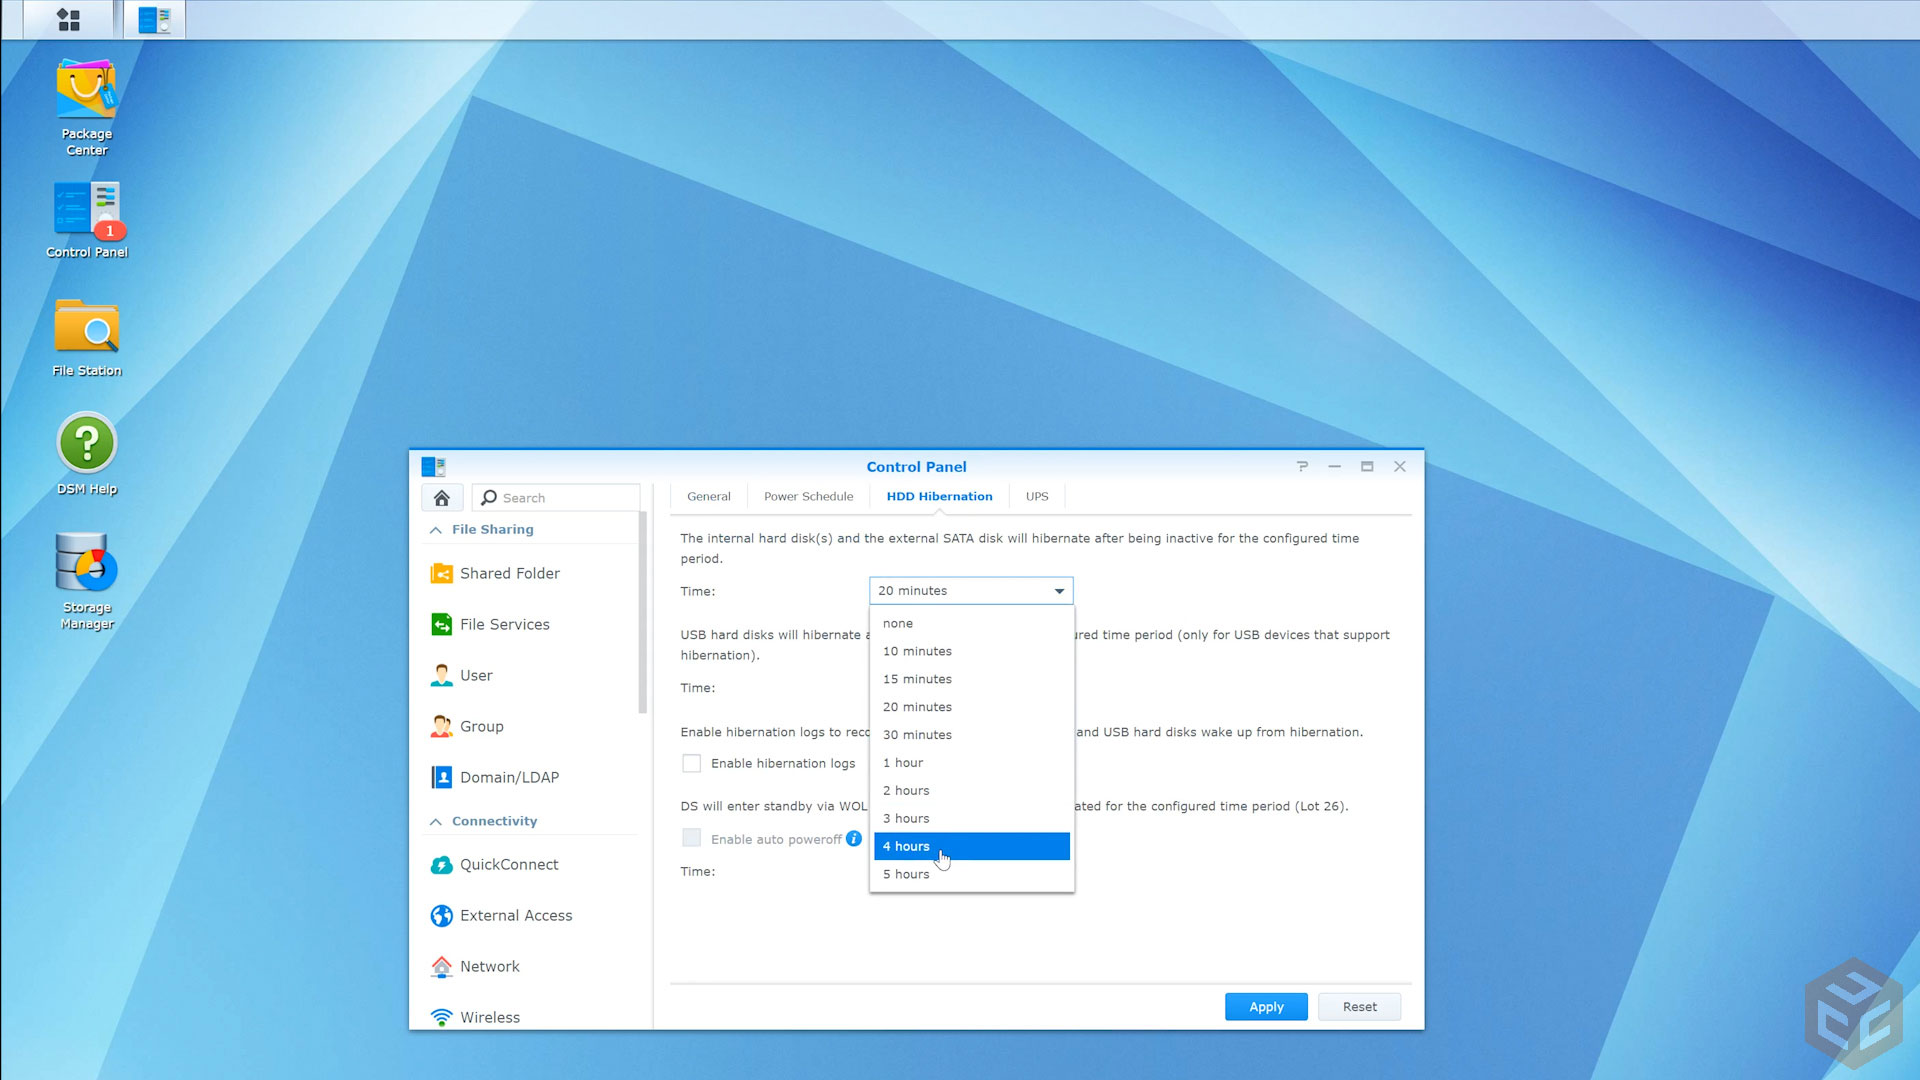
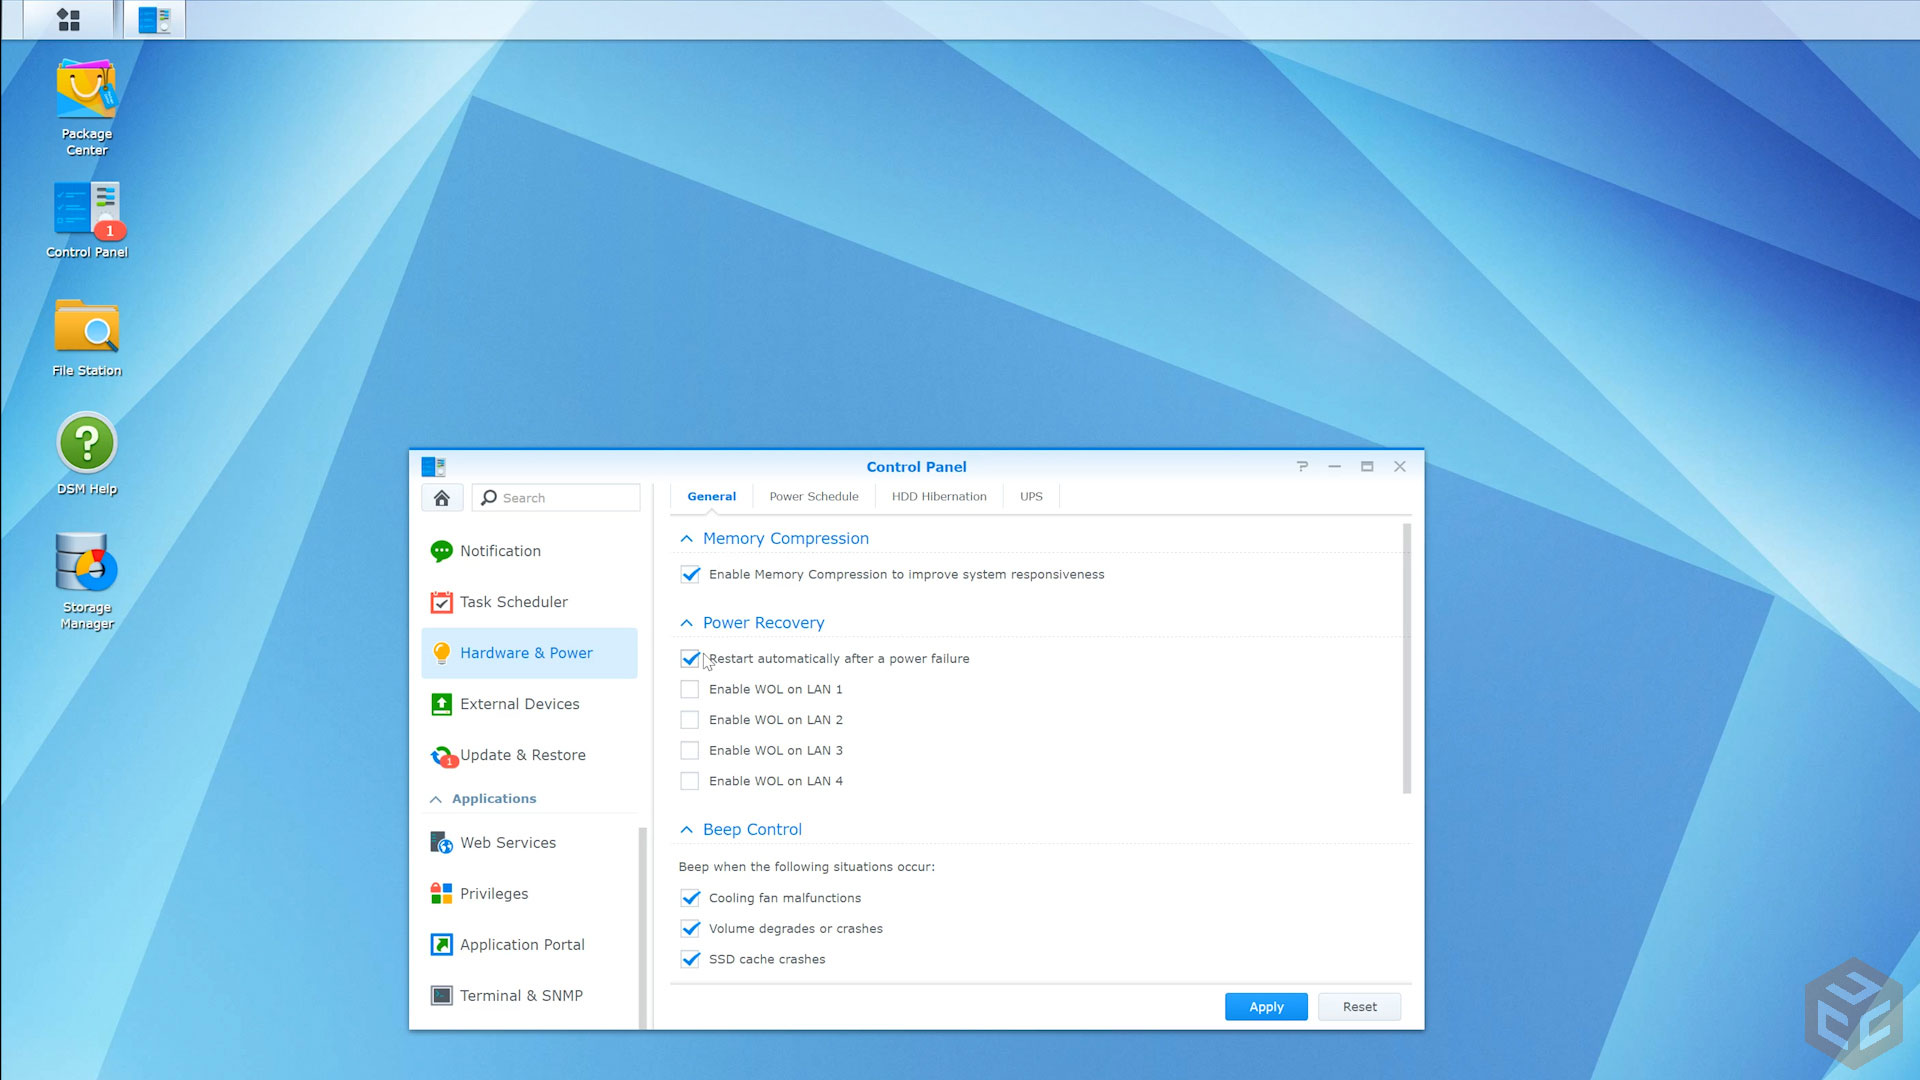
Next I’ll go to the Control Panel. Change the view to the Advanced view and select Hardware & Power. Then choose the HDD Hibernation tab and change it from 20 minutes to 4 hours. The lower this number is the less amount of time the hard drives will be running but the more frequently you will possibly run into having to wait for them to wake up. I access my files several times per day and found that the default hibernation time was just too short. Your mileage may vary.
While still in the Hardware & Power menu I’ll select the General tab at the top and enable Restart automatically after a power failure. This way if I’m away and the power goes out I don’t have to have someone manually press the power button when power comes back on. As long as my house has power this NAS should be up and running.
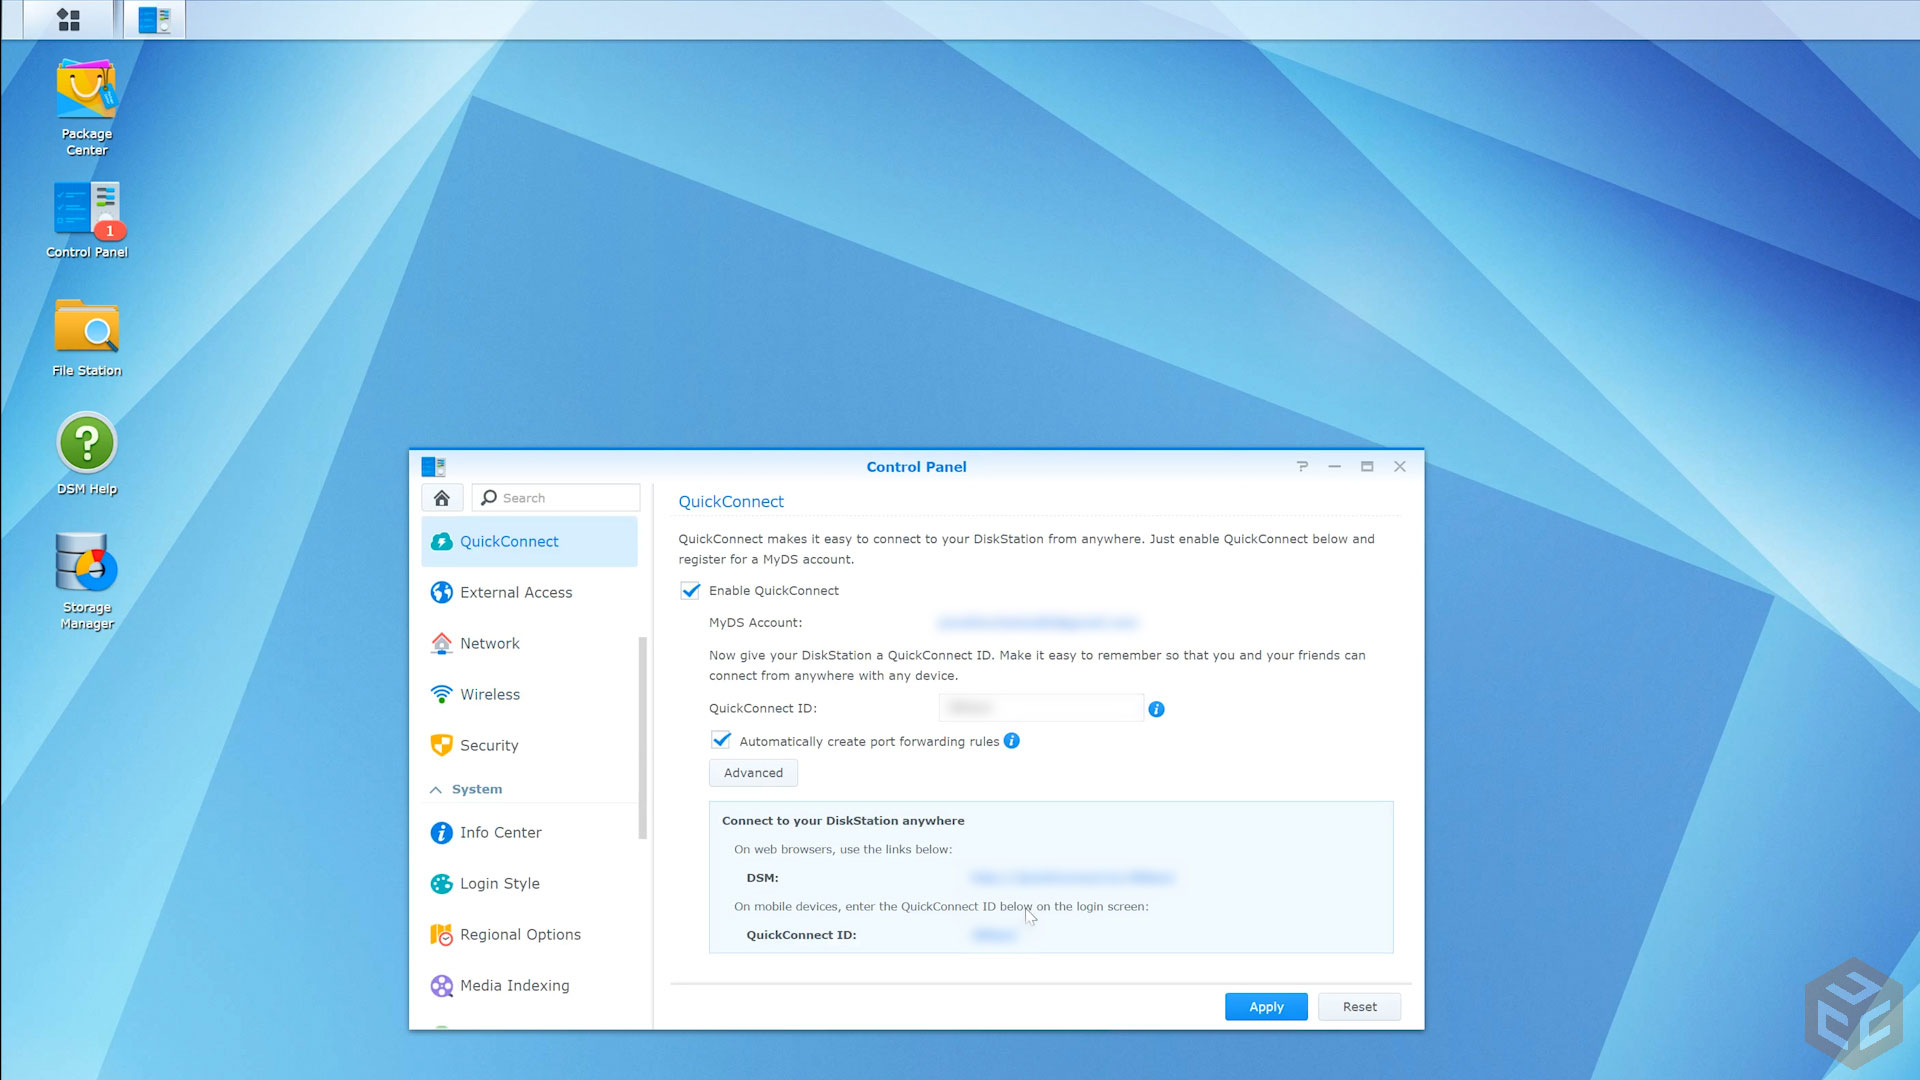
In the left column I’ll select QuickConnect and see that it is enabled. This is Synology’s built in way for you to access your files when on the go and not in your local network. If you choose to not use this feature there are other ways to access your files with different security implications. That is beyond the scope of this article and video though.
In the left column I’ll select Notifications and enable email notifications. This will alert me of any status changes or errors on the system.

In the left column I’ll select File Services. I’m a windows user and I do not have any Mac devices on my network so I’ll make sure Windows file service is enabled and I’ll deselect all other options.

In the left column I’ll select Shared folder and create a new shared folder that I’ll use as the base point for my network storage. To keep things easy I named it NAS storage. Don’t worry about permissions just yet. I’ll set those in a minute.

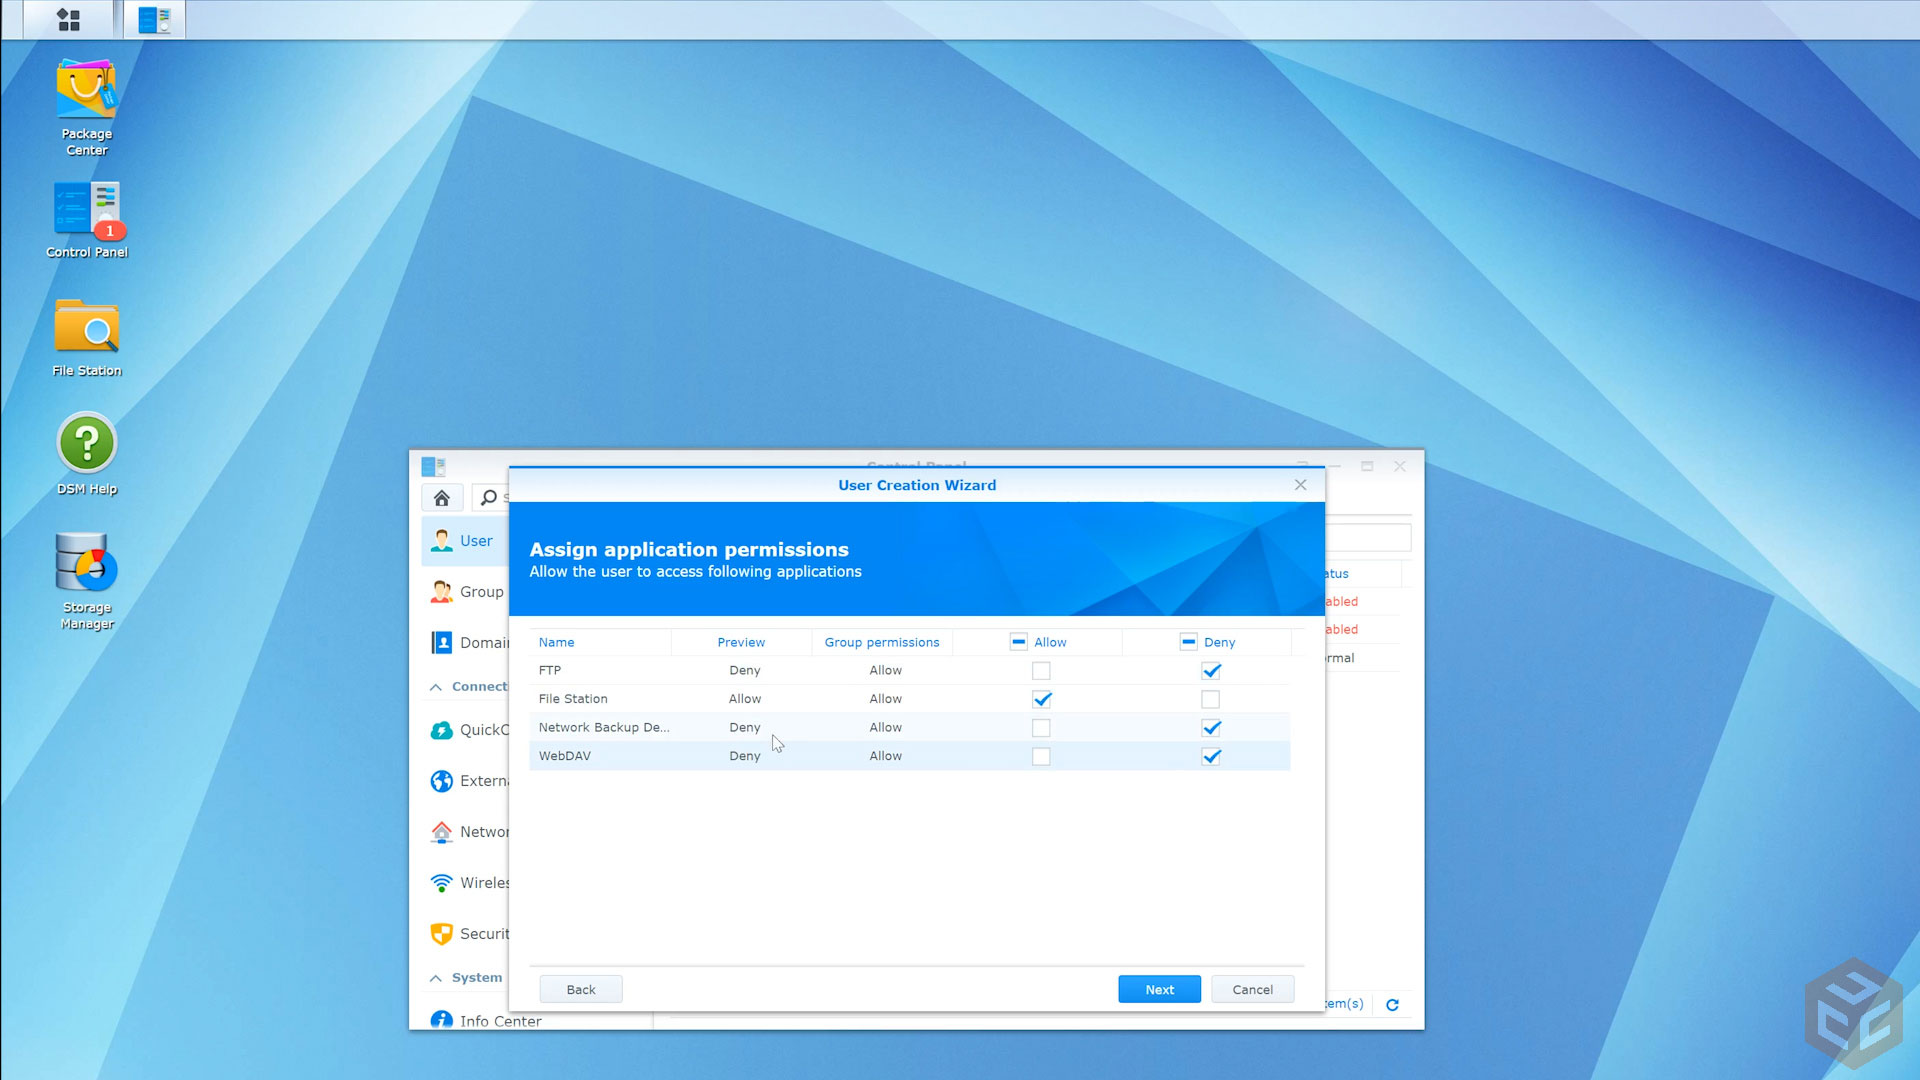
In the left column I’ll select User and create a new user. This user will be for my mobile devices. I set this user to only have access to the File Station. This will be a limited user and I don’t want it to be able to make any major changes to the DSM.
Once the mobile user is created I’ll go back to the Shared Folder tab and edit the NAS storage folder.

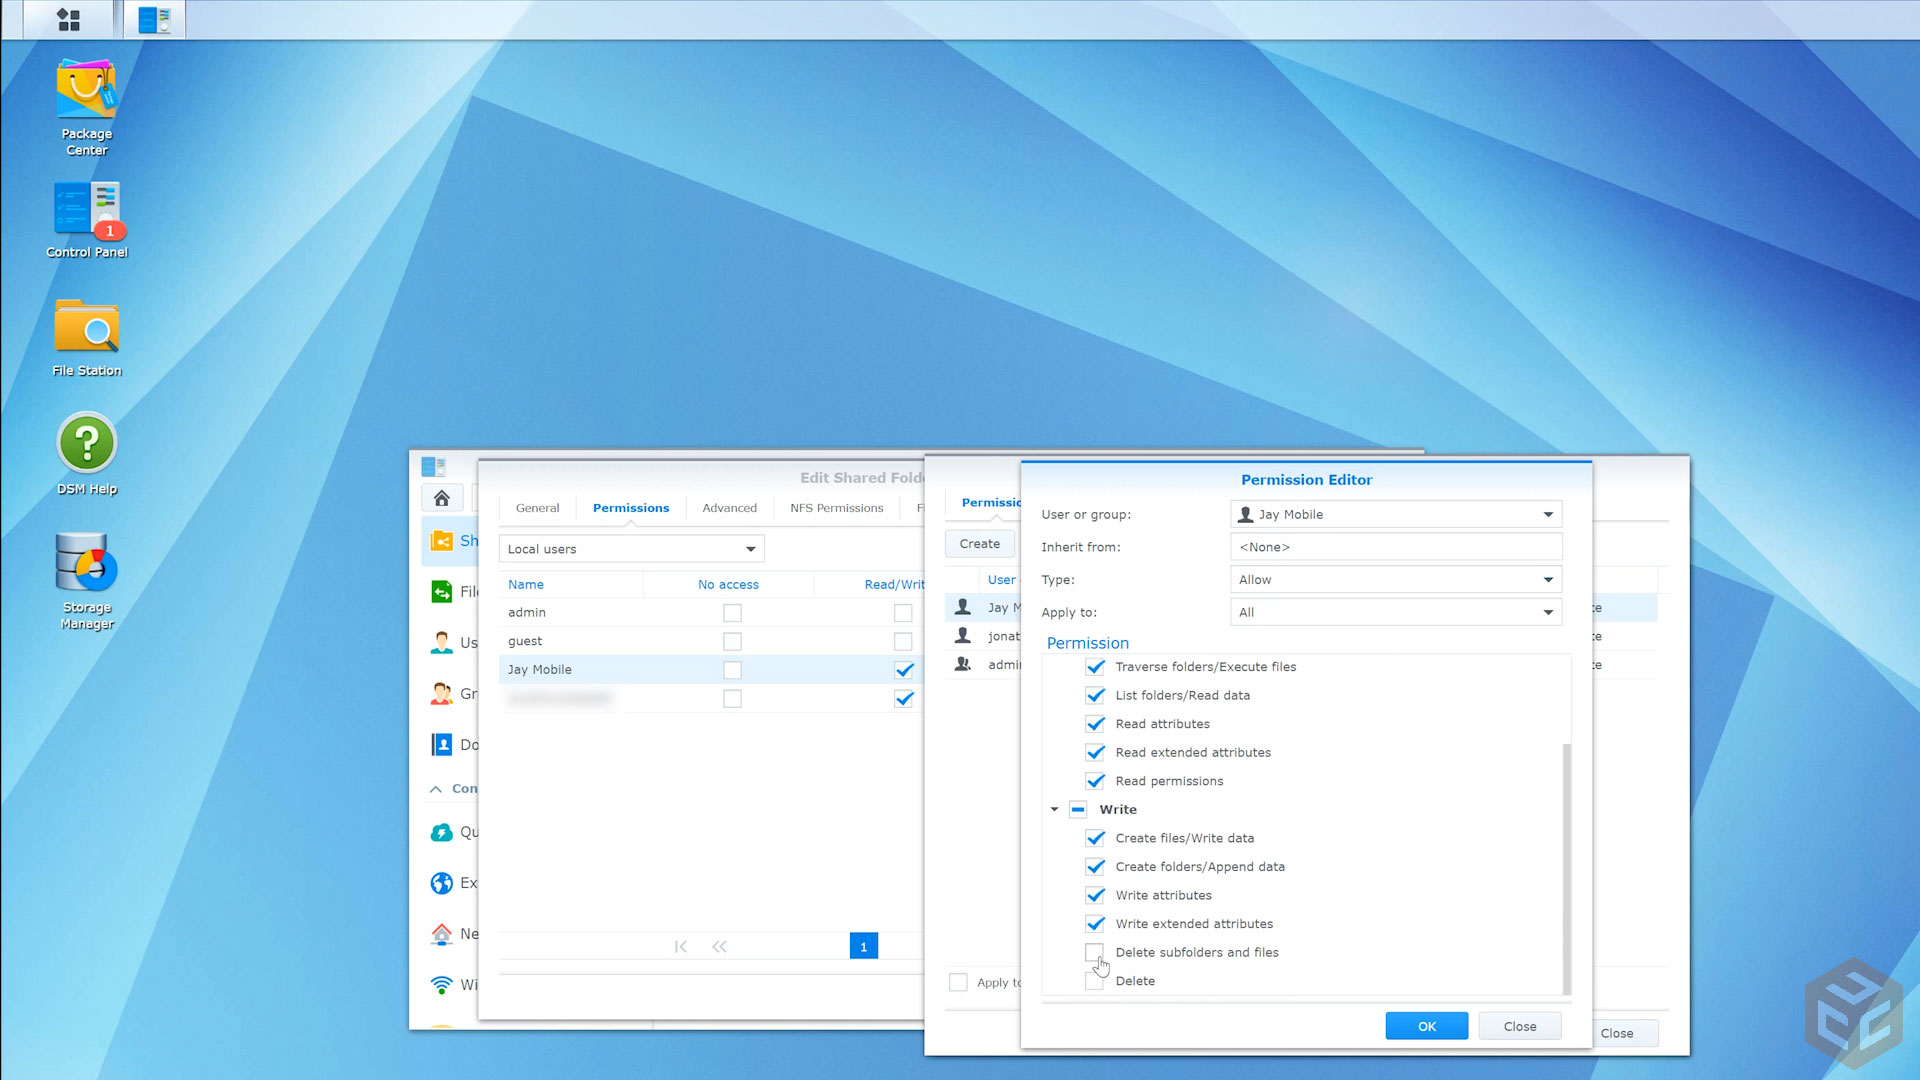
In the edit folder options I’ll select my mobile username and change the permissions to Custom. A new window will open where I can dial in the exact permissions I want this user to have. In my case I want the mobile username to be able to read all of the files, write new files, but not have permissions to delete anything. For me this is important. In the event that my phone or laptop get stolen I don’t want anyone to be able to delete my files if by chance they are able to log in.
The basic setup of the NAS is complete for my uses. I’ll mainly be using this as a large storage drive that I can access anywhere and anytime. The next thing I want to do is setup the NAS to look like a hard drive in my computer. I’m a Windows user so the process for me is to open Windows Explorer, go to This PC, and select Map a network drive at the top. From there I can select any drive letter I want to use and select the location of the shared folder I’ll be accessing. This folder location will be \\the name of your NAS\the name of your shared folder\. If you don’t recall what you named your NAS you can go to the Network tab on the Control Panel of DSM and see your information.

On my main computer in my home network I have my login credentials remembered for this network drive. Now I can see the storage space of my “NAS storage” folder in the This PC area of Windows Explorer. On my laptop I’ll do the same thing but use my mobile username and not save the login credentials.

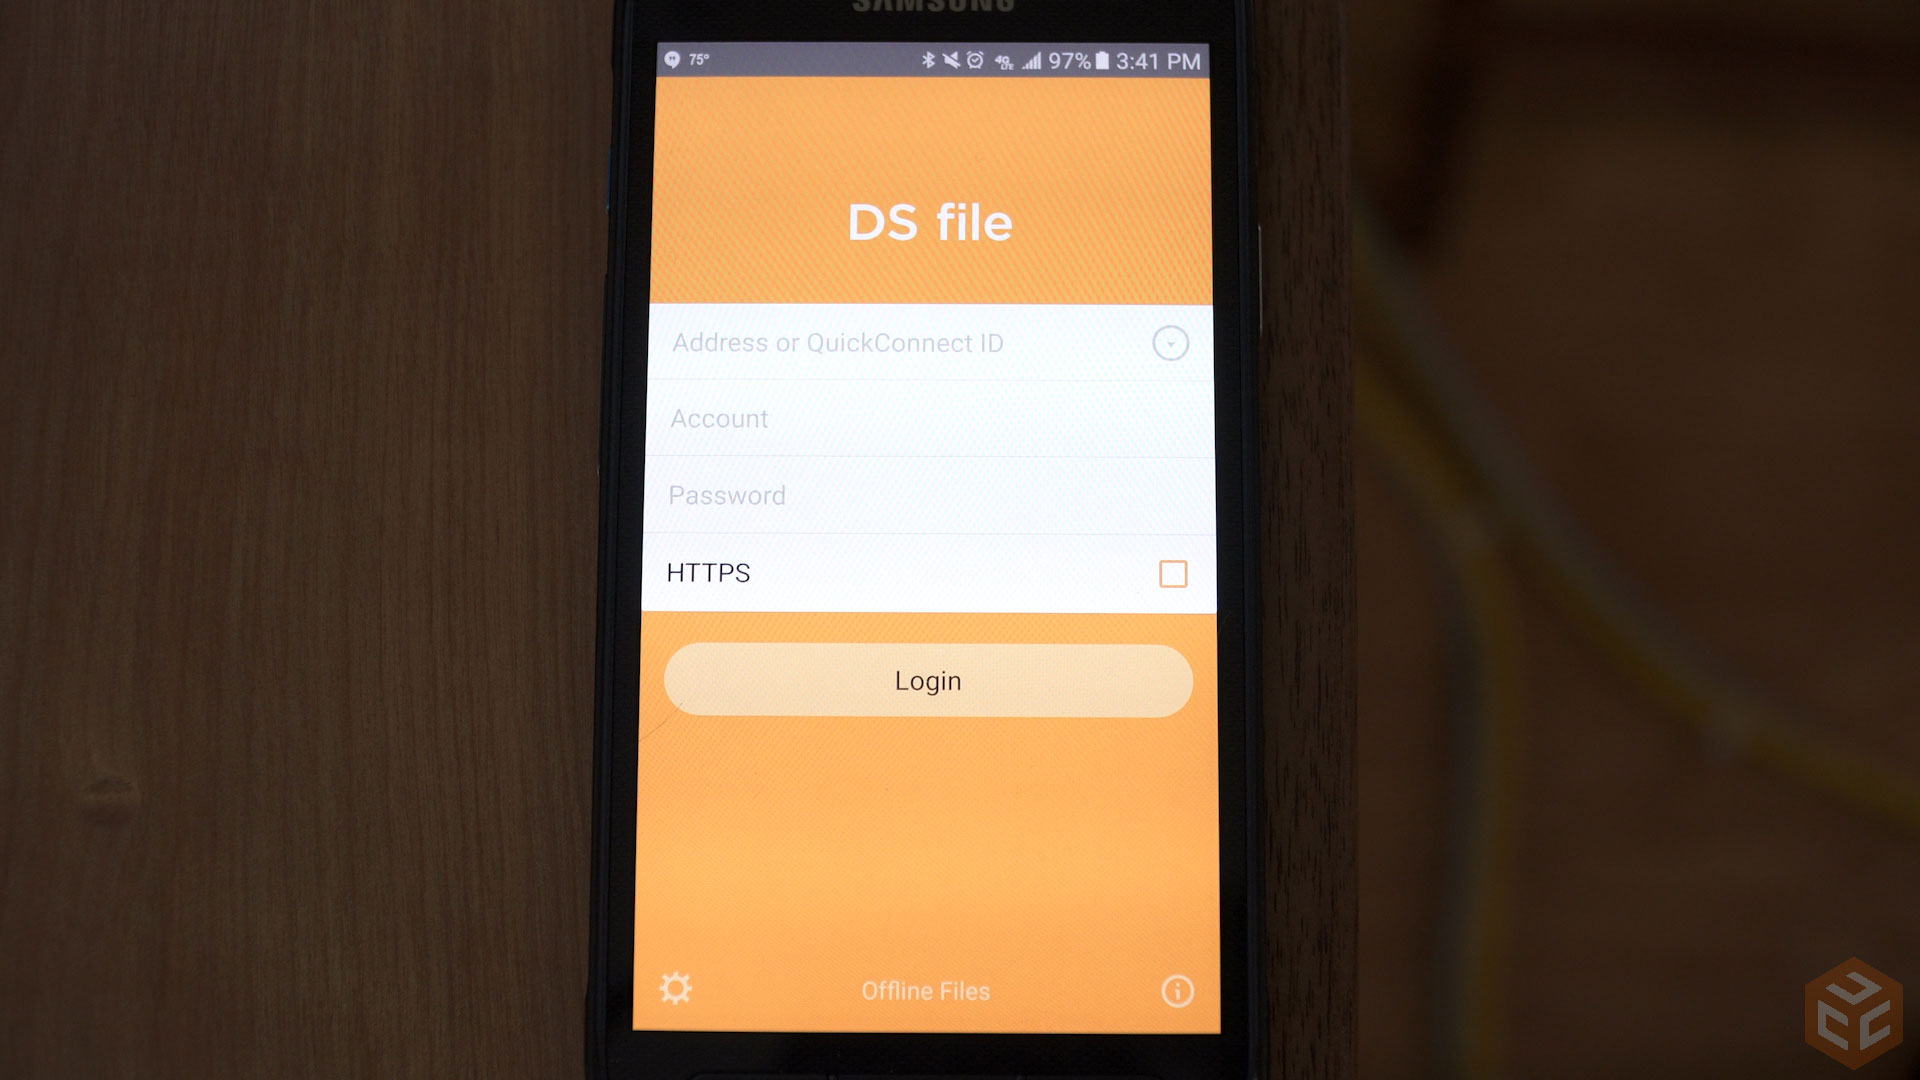
Another mobile device I want to use is my personal cell phone. To contact the NAS I’ll be using the Synology DS file app. When I need to access my files on the NAS I’ll login to this app and I can navigate as needed.
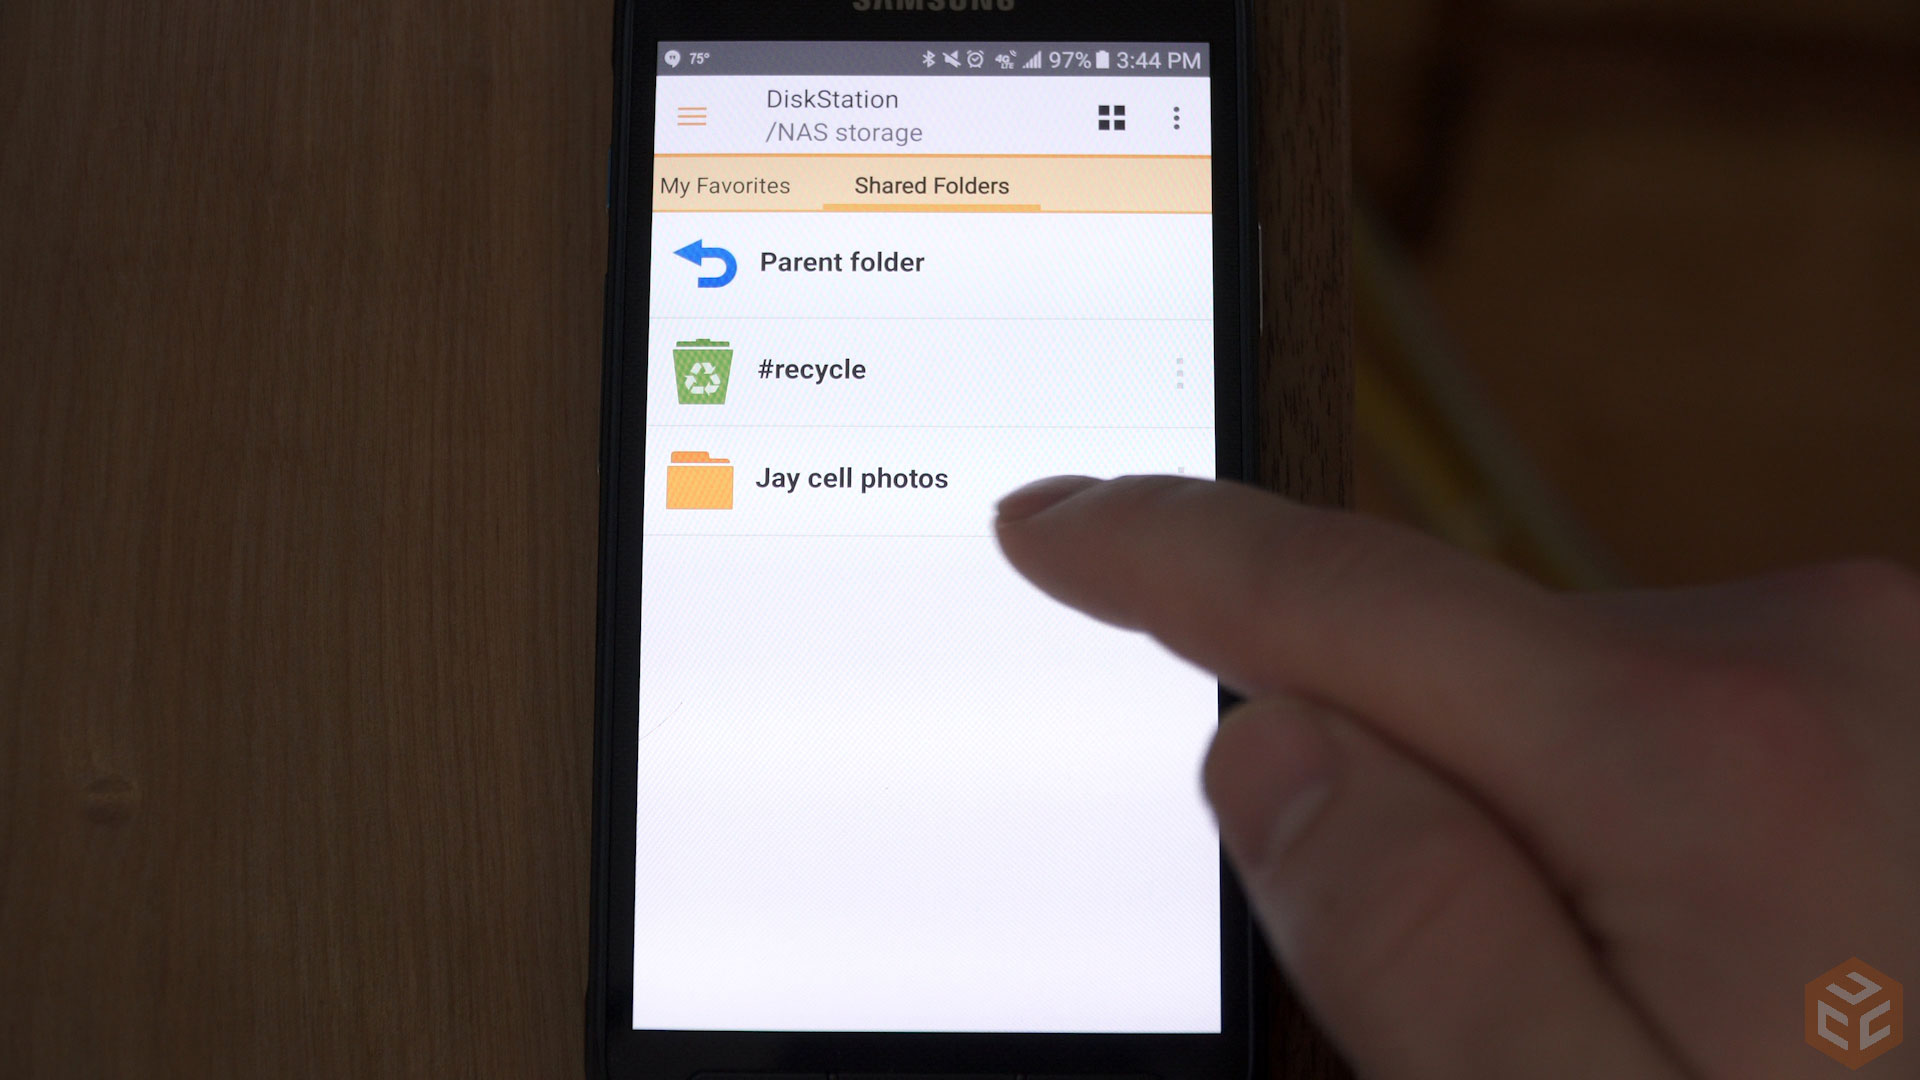
I want to setup one more thing on the mobile app. First I’ll use the app to create a new folder on the NAS called “Jay cell photos”.
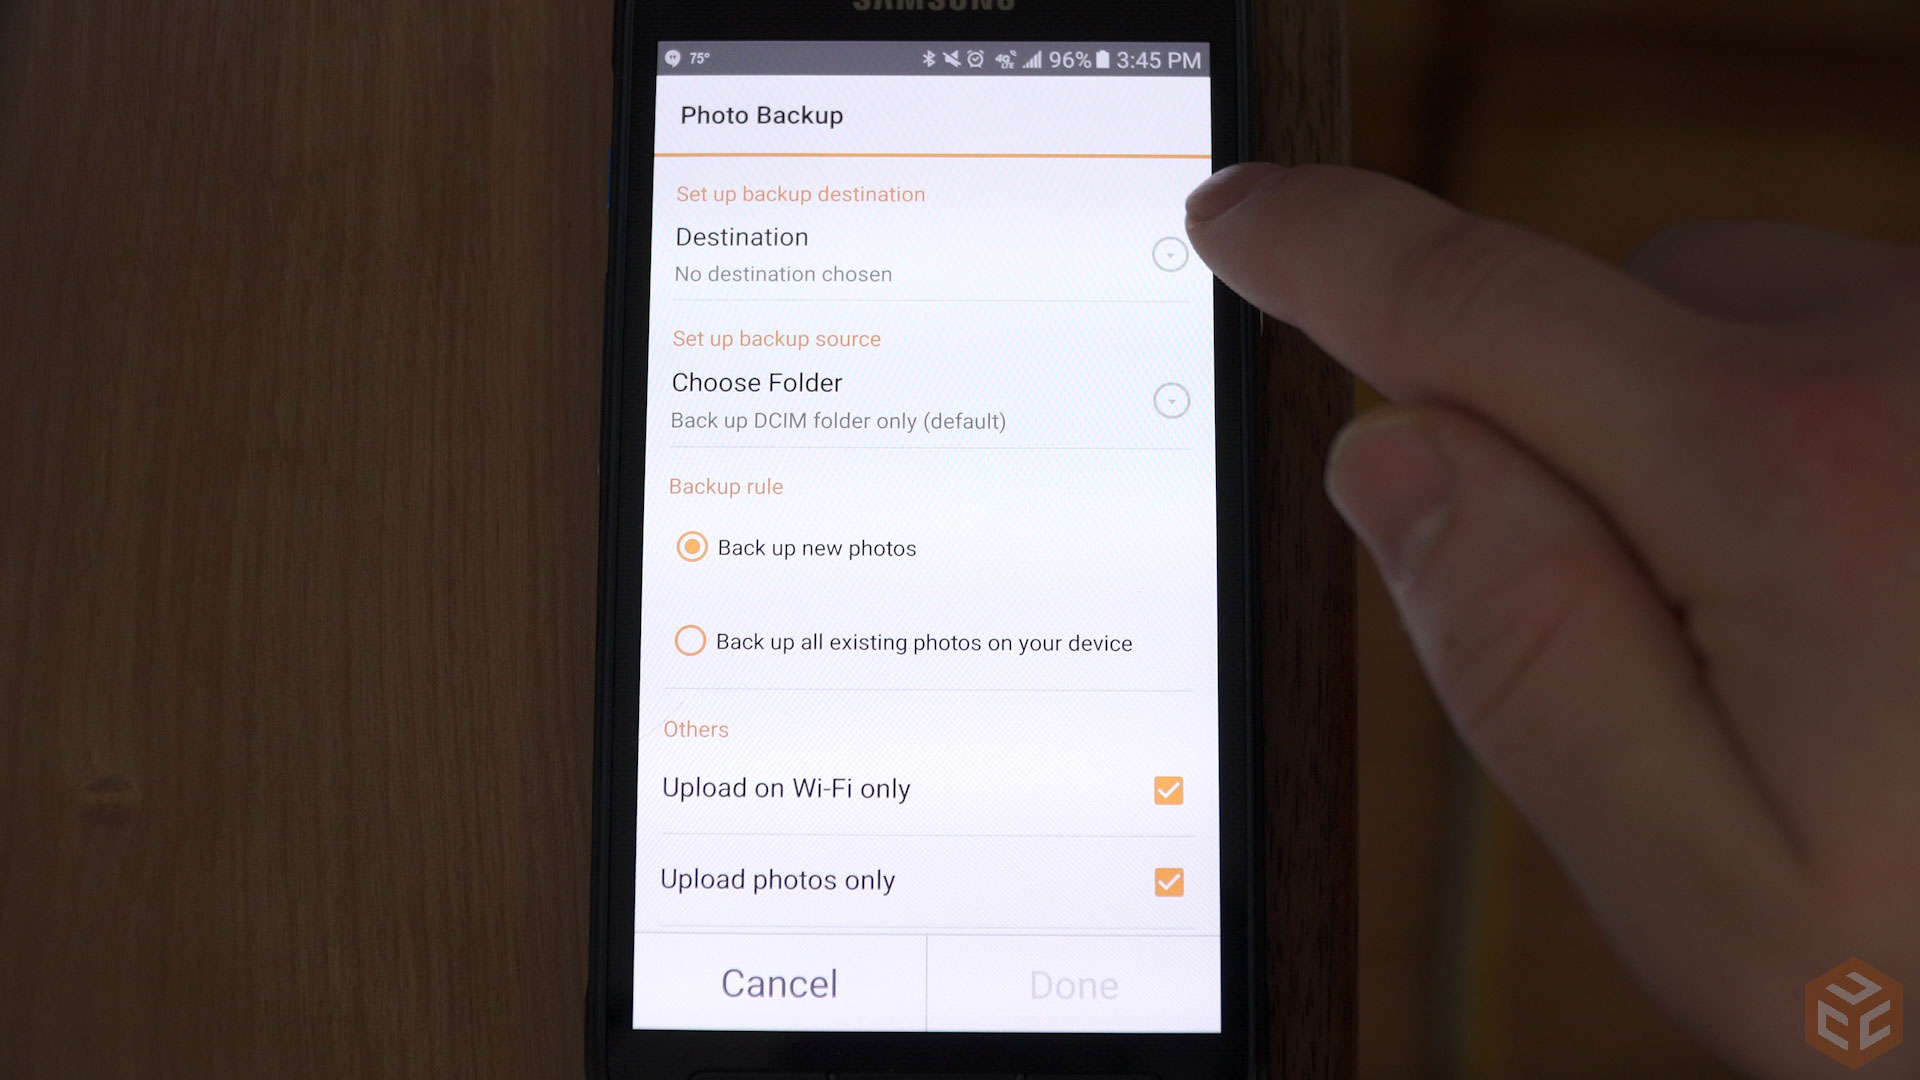
Then press the top left three bars icon to bring up more options. Select photo backup at the bottom and login once again with the mobile username I setup. Now I can setup the camera folder on my phone to automatically backup to the “Jay cell photos” folder I just created. There are options to backup your entire phone SD card if you wish as well as limiting uploads to Wi-Fi only, photos only, and new photos or all existing photos.
I waited a couple minutes for all of my pictures to be uploaded to the folder I just created and then wanted to test the permissions I set for my mobile username. I went into the “Jay cell photos” folder and tried to delete one of the pictures. The permissions were working properly because I got an error message saying I was unable to delete the file due to not having the appropriate permissions. Mission success.

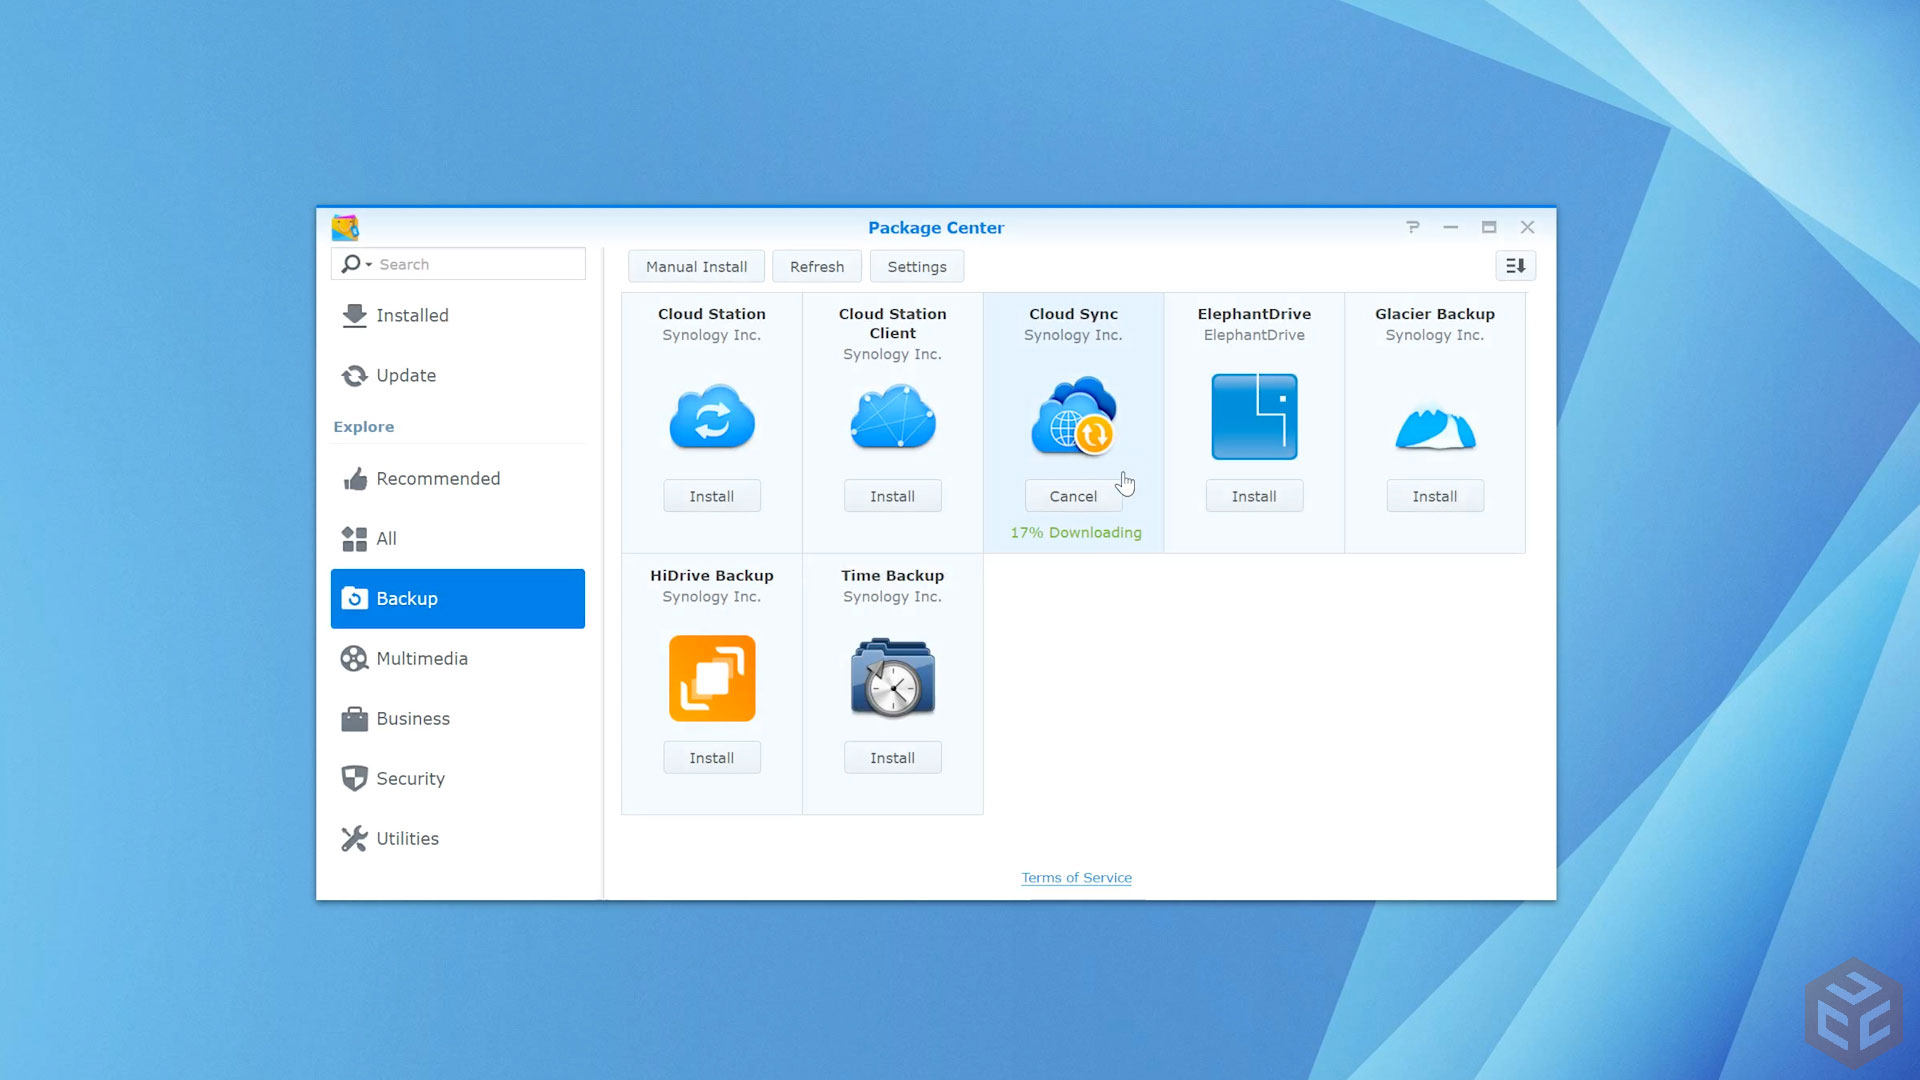
Back at the computer I went to the Package Center and downloaded the Cloud Sync app. This will allow me to sync my Google Drive to the NAS. Previously I was syncing my Google Drive to all of my devices which isn’t necessarily a good thing. If one of those files on my computer was to become corrupt it would sync that corrupt file to all of my devices. With the NAS I’ll have less of a chance of data loss due to the raid setup. Also, syncing all of my Google Drive files to all of my devices uses a lot more bandwidth than is necessary.
Having quick access to Google Drive is important to me as I use it to collaborate and share files with a handful of people on a regular basis.

There is a LOT of options for how you can use the storage space on a NAS. If you have some IP cameras you can use it for a home surveillance setup. If you have a bunch of movie and music files you can use the NAS as a media server to stream the files to multiple devices. This was just a basic setup for me to get going with my network storage. There are a lot of other security options you can look into as well depending on your particular network. I also recommend setting up a backup of some kind. I plan on using my smaller NAS device to do a monthly backup of my more important files like completed videos, website backups, logos, and templates. Then store the backup NAS off site at a friend or family members house. This protects me against total loss in the event of a house fire or theft.
If you were on the fence about setting up a home NAS system I encourage you to go ahead with it. It’s not difficult and Synology’s software makes the setup a breeze. Synology also has a large online information library to help you. Be sure to check it out if needed.


I have a DS216J as well, which I purchased to upgrade from my previous 2-Bay DLink, which worked for years, but had a drive capacity limit per bay. I keep it air gapped though; so no outside access for me or others.
The one thing I don’t like about Synology NAS products is: If you don’t have internet access (steady-non-intermittent access or at all) you essentially purchased a paperweight until you get internet access. It will NOT work until you download the DSM program, and they don’t mention that anywhere on their product pages. I don’t ever use the DSM program. Ever.
Other than that, I think it’s good, as I don’t even notice it throughout my day. Meaning: It’s doing its job.
Jay, Very interesting. 2 questions,
Does the photo upload only work if you are on the same wifi? Or will it connect remotely from a different network.
Can it be accessed remotely, ie if I set it up at my office can I access it from home?
Thanks.
TT
The DS file app works with any internet connection.
Hey Jay,
I also have the Synology DS1515+
Its a great unit. Great run through on the setup and great tips on using it with the mobile device.
Thanks for the video. I like how you reflected on your reasoning for using a data storage system vs only cloud storage. The system walk through was explained very well.
Jay its funny that you put up this run down of a SYnology NAS as I have been bugging my wife about needing to do this for awhile now. Now to just decide what 2 bay model to purchase.