A few months back Laguna Tools contacted me and asked if I would be interested in helping launch a new product of theirs. It’s a midi lathe with quite a few nice features. It’s the Laguna Revo 1216 midi lathe. I originally told them I would have to think about it as I haven’t seen it at all and didn’t know anything about it. After seeing it in person at IWF 2018 in Atlanta, Georgia, I agreed to help with the product launch. So that’s what this entire video and article are centered around. At the time of this article the lathe is still in a pre-launch state but if you’d like to keep up to date with the lathe as it is released head on over to Laguna Tools via this link to learn more.
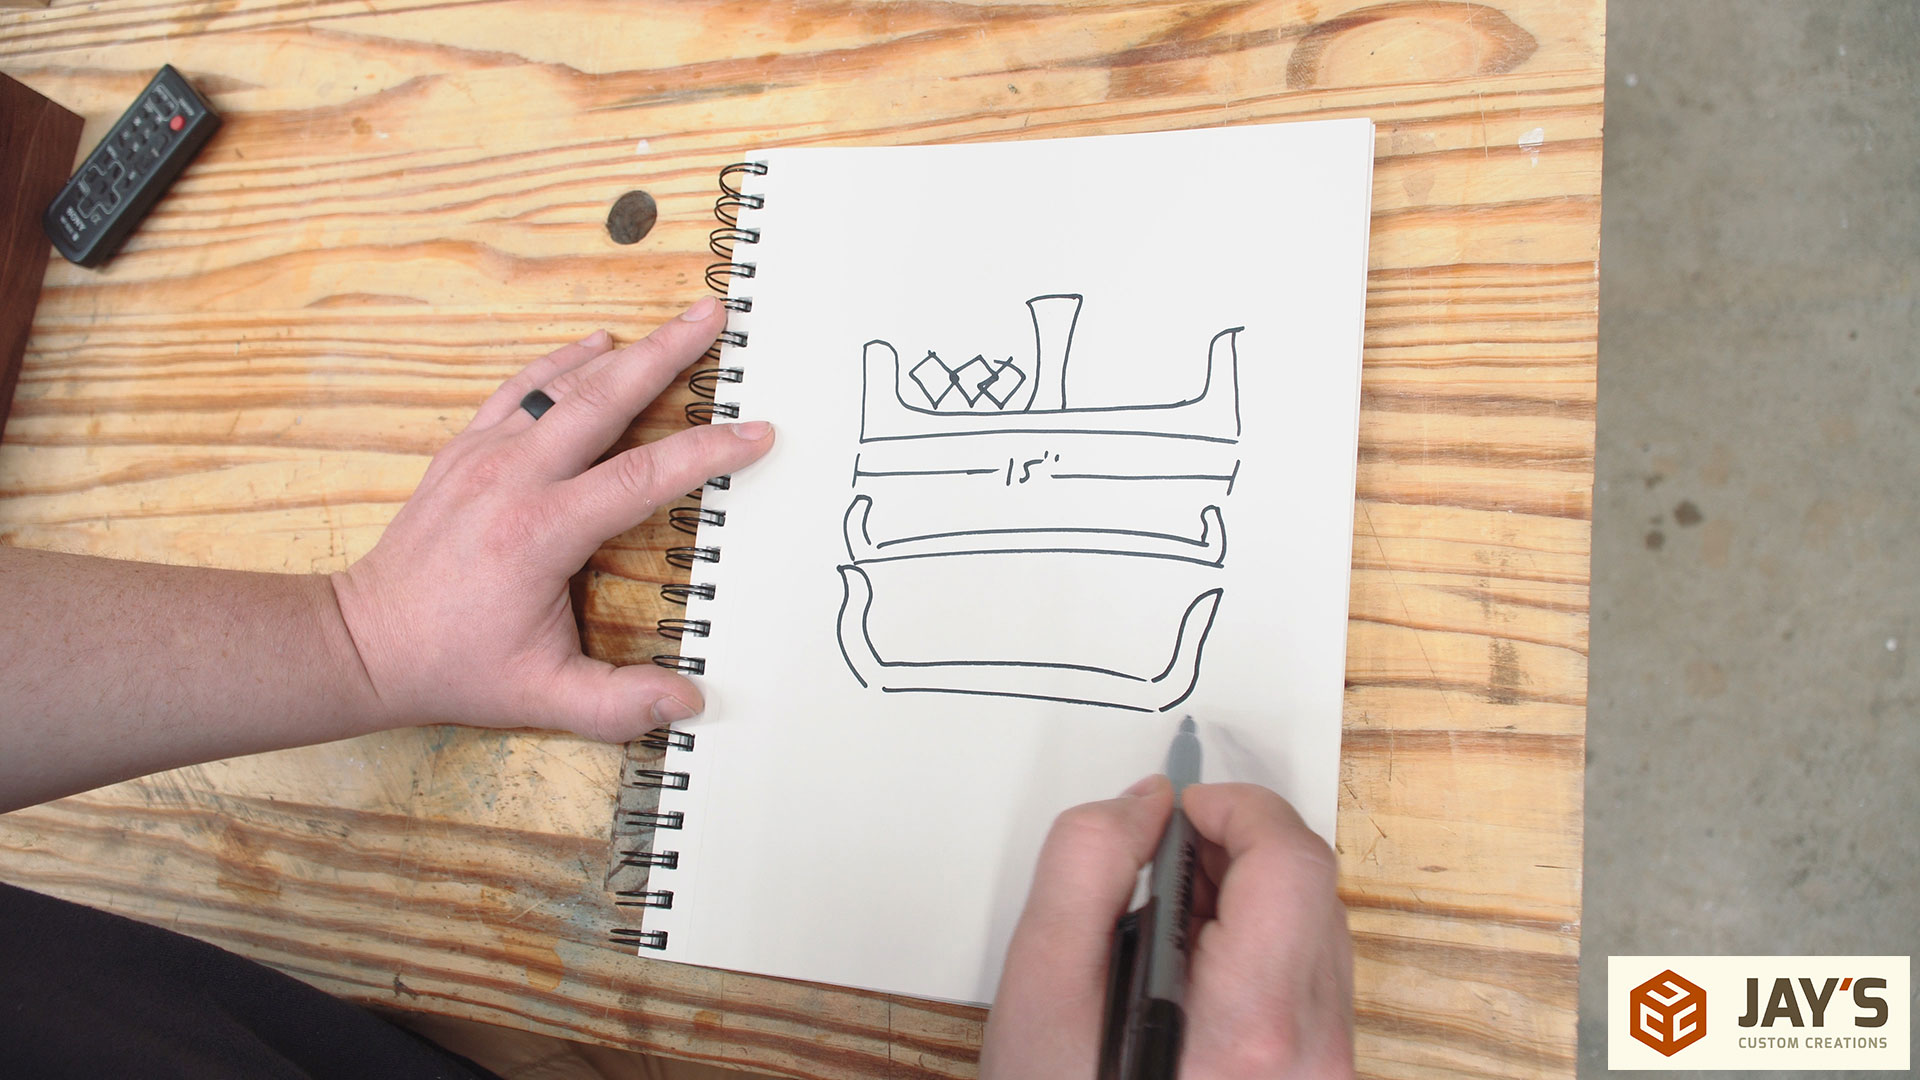
I wanted to show as many of the features of the lathe as I could while making a useful project. To do so I decided on making a large candy dish for the Halloween season. The dish would be shallow and sized around the maximum capacity of the outboard side of the headstock, which is around 16”. The dish will also have a handle or a finial in the center to pick it up with one hand. At this point I was still unsure of what profile the side of the dish would have.
Bubinga was the material of choice. I had a relatively short piece of 8/4 stock that was perfect for this project. To make it work I crosscut it into two sections, ripped the shorter section on the bandsaw, and glued half of it to the longer section. This gives me one piece to get the spindle blank out of and one large piece that will be good enough for a 16” diameter blank.
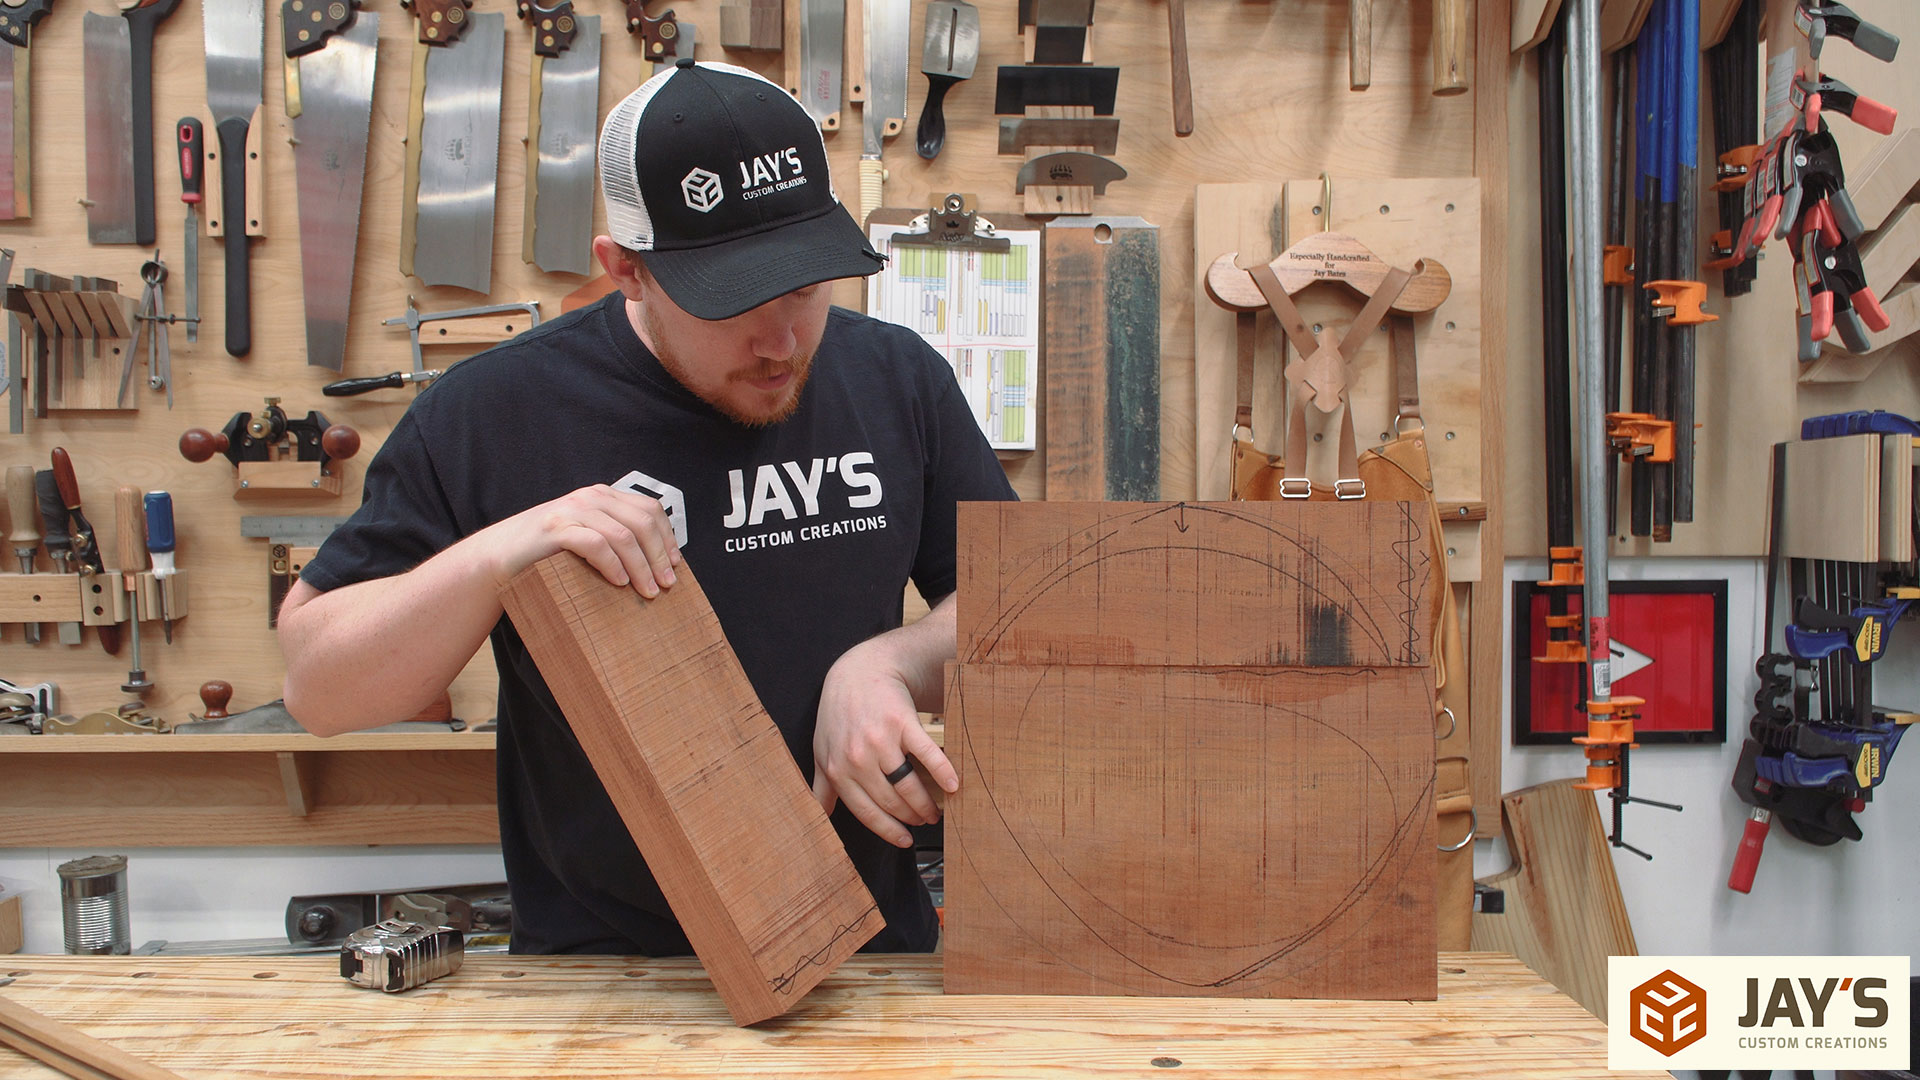
First up is to cut the blank into a circle. The blade I’m using here is a 1” carbide tipped Resaw King blade and it cut this bubinga like a hot knife through butter. I was surprised I could get the 16” diameter cut perfectly with this wide of a blade.

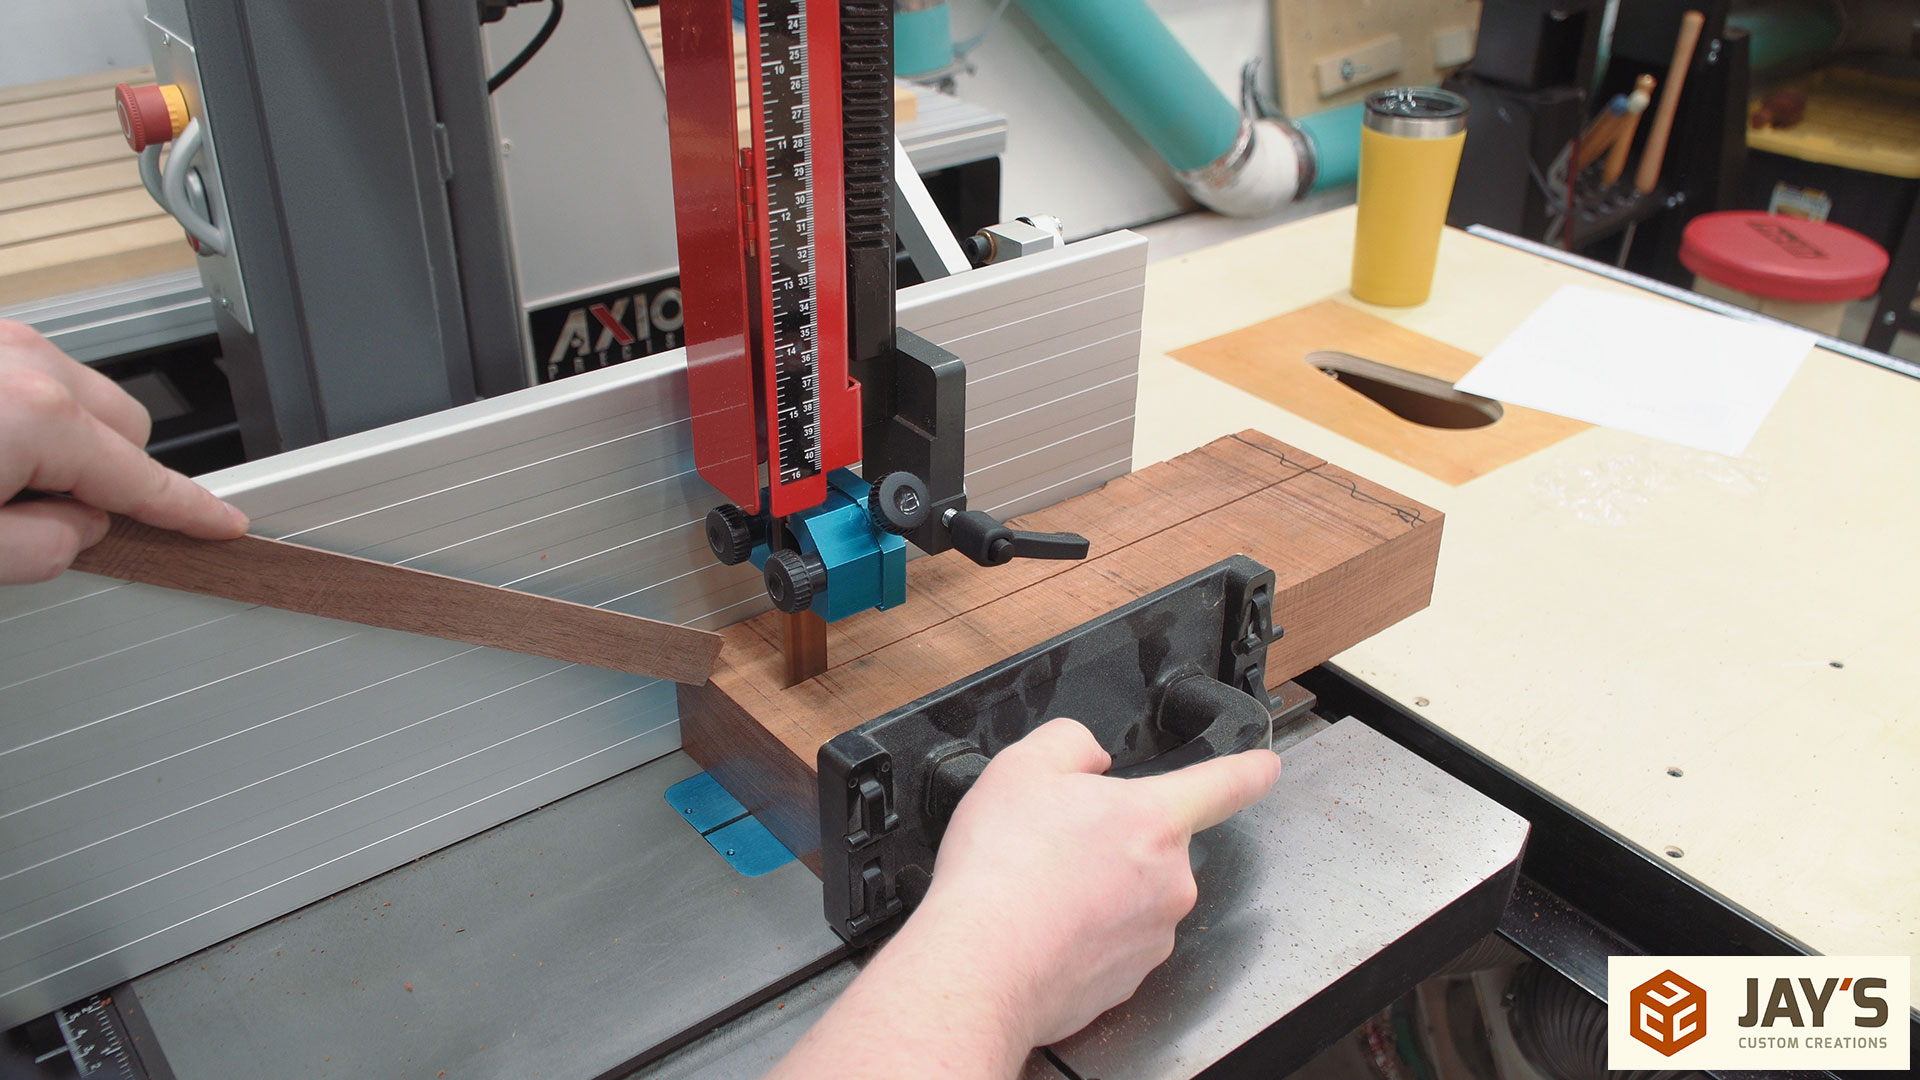
To reduce waste on the spindle I ripped the extra piece down to get a square blank. I ended up using both sides so I suppose I was a bit wasteful in the end.
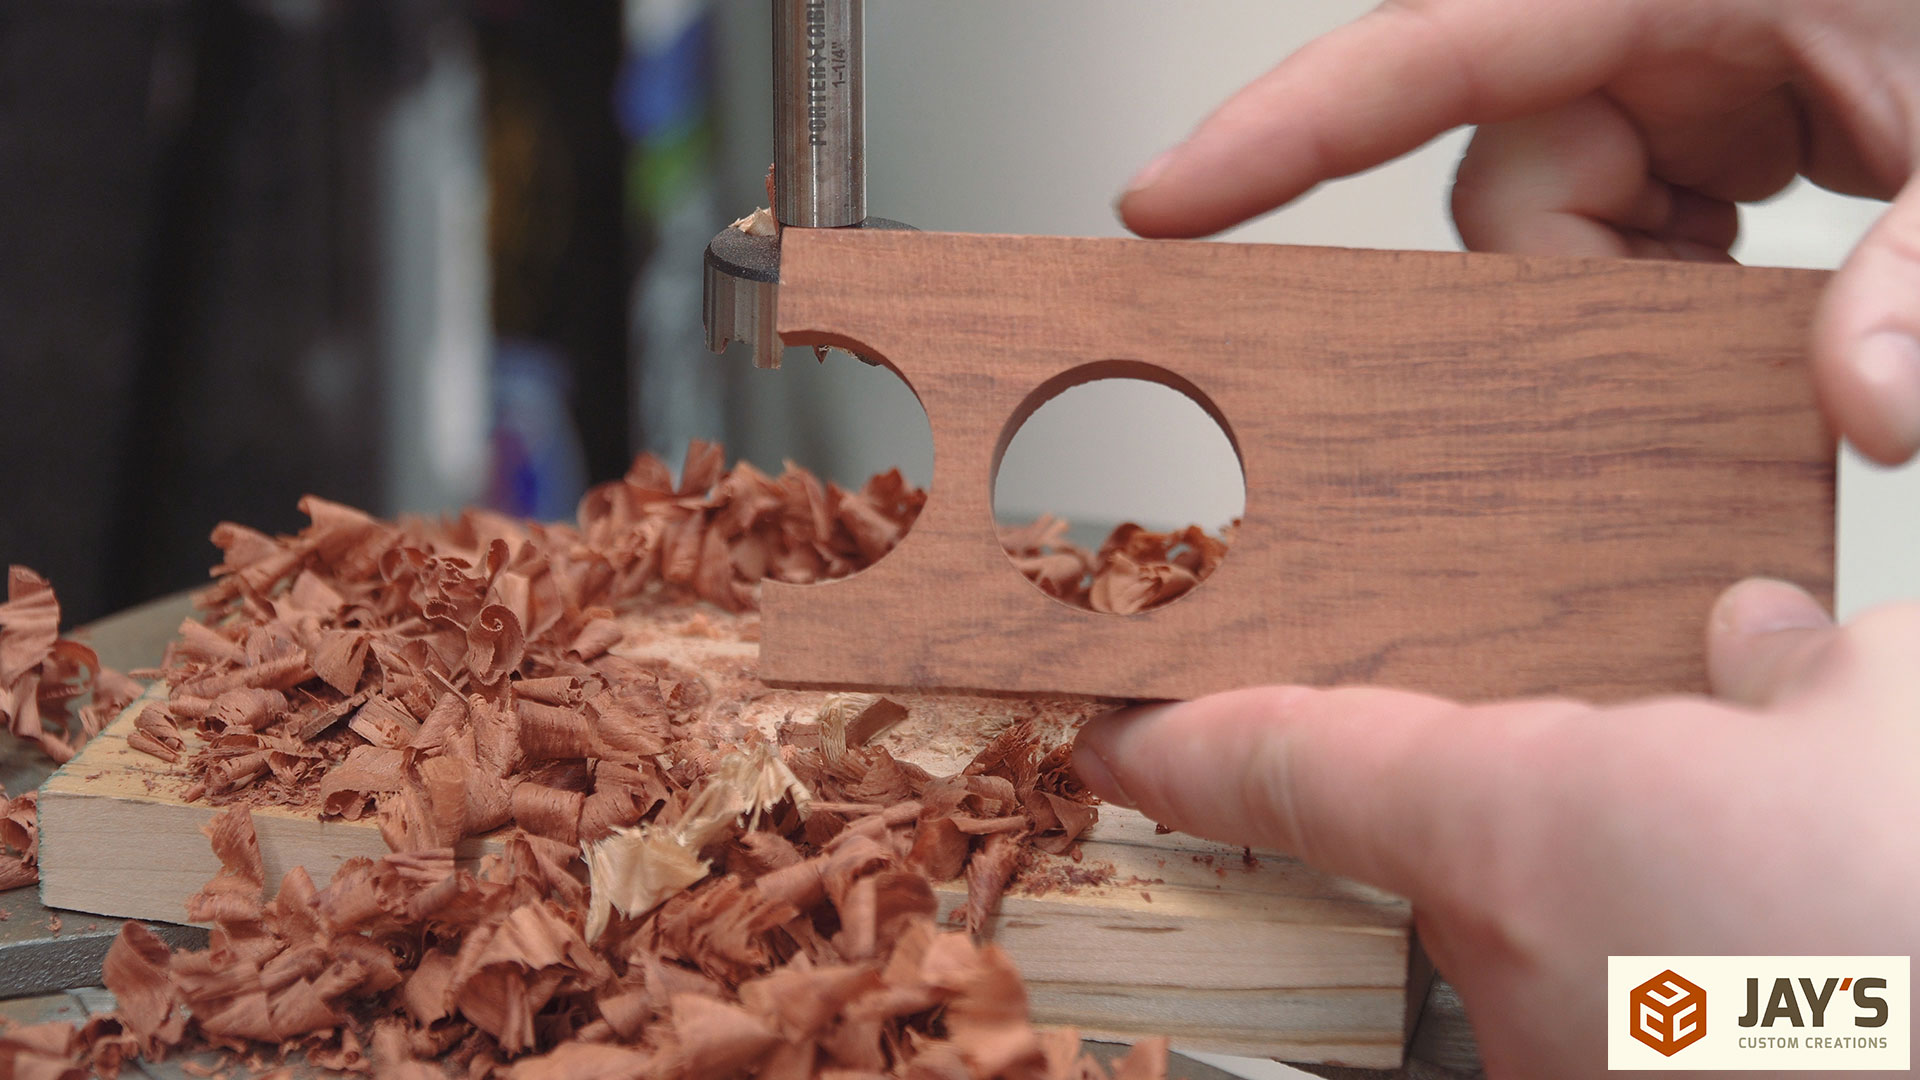
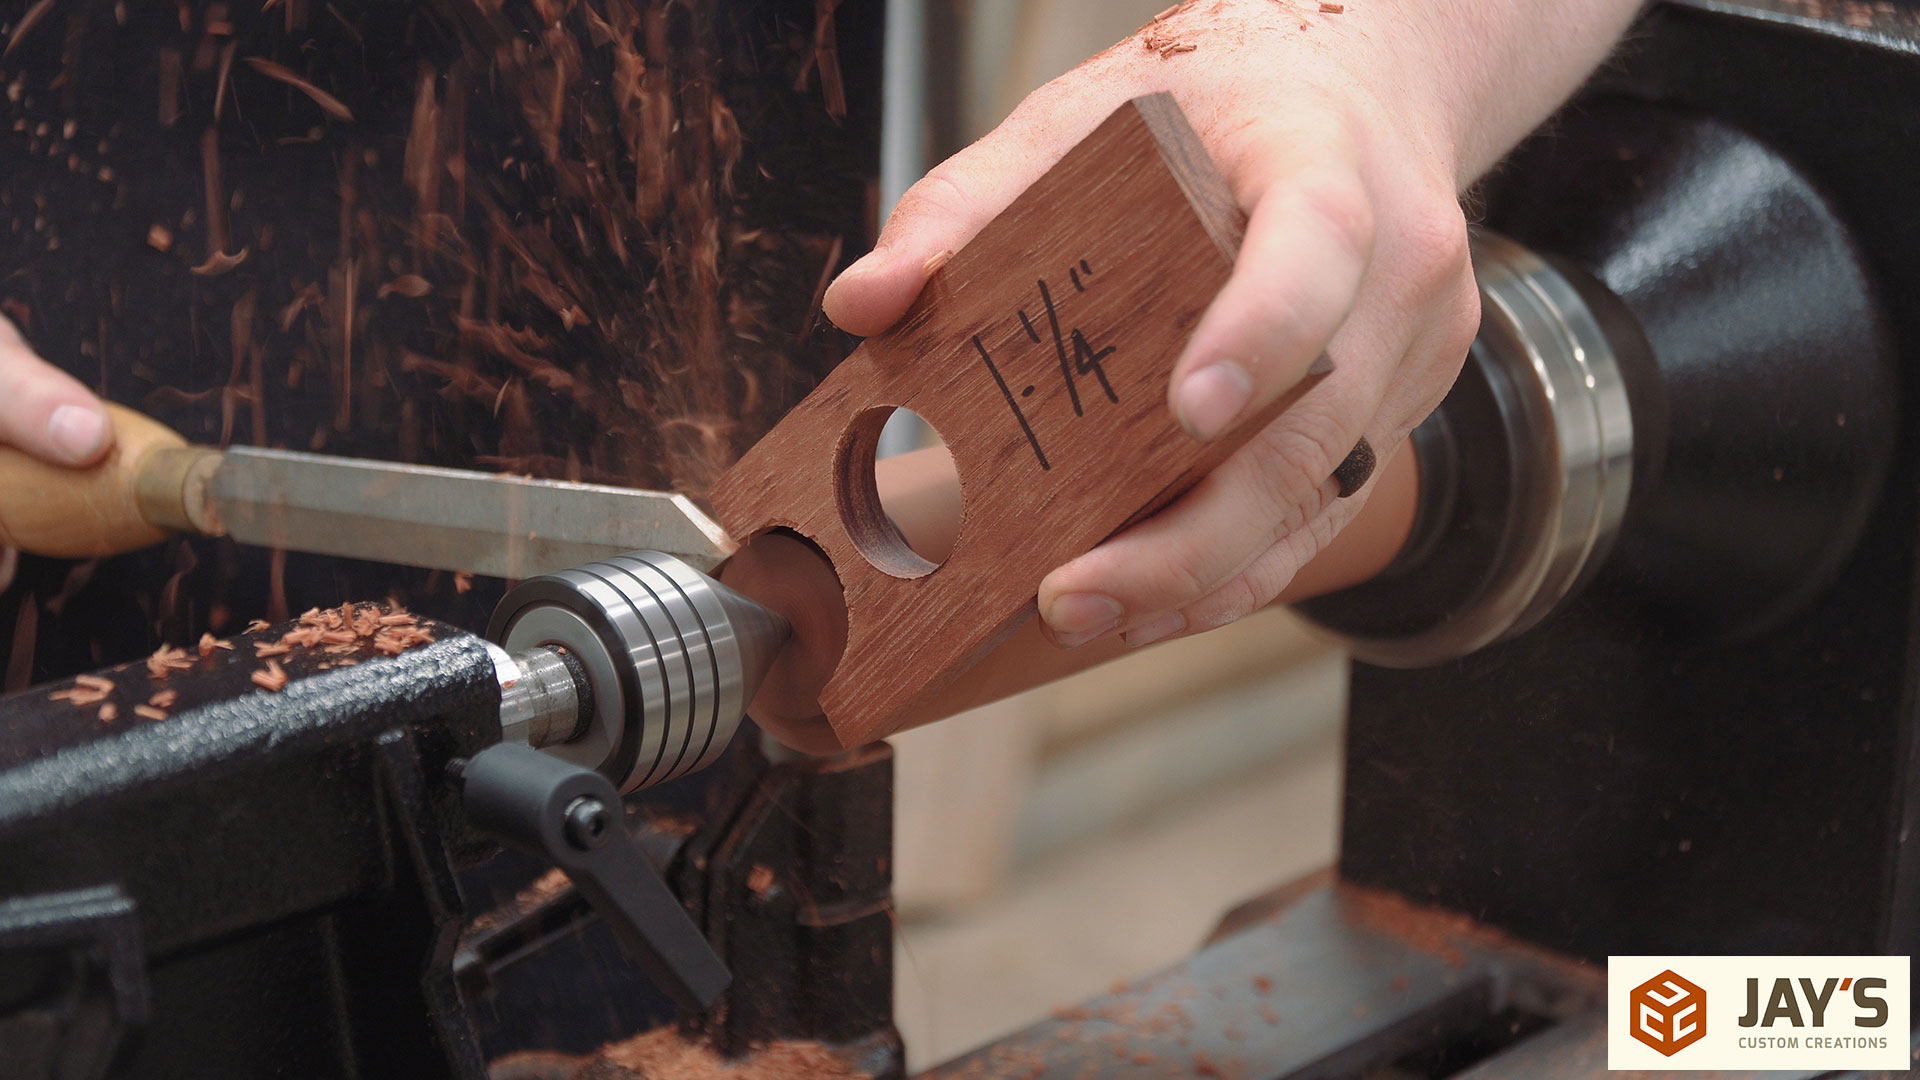
The final thing to cut before turning was a gauge block. This is just a scrap piece of hardwood (bubinga) with two holes cut in it. One cut with the forstner bit a little more than half way into the wood and the other with the bit all the way into the wood. This gives me one half circle that I can use to check my tenon size as I turn. It’s important to clip the corners of the half circle first though. The full circle will allow me to get a better idea of the fit when the tenon is done.
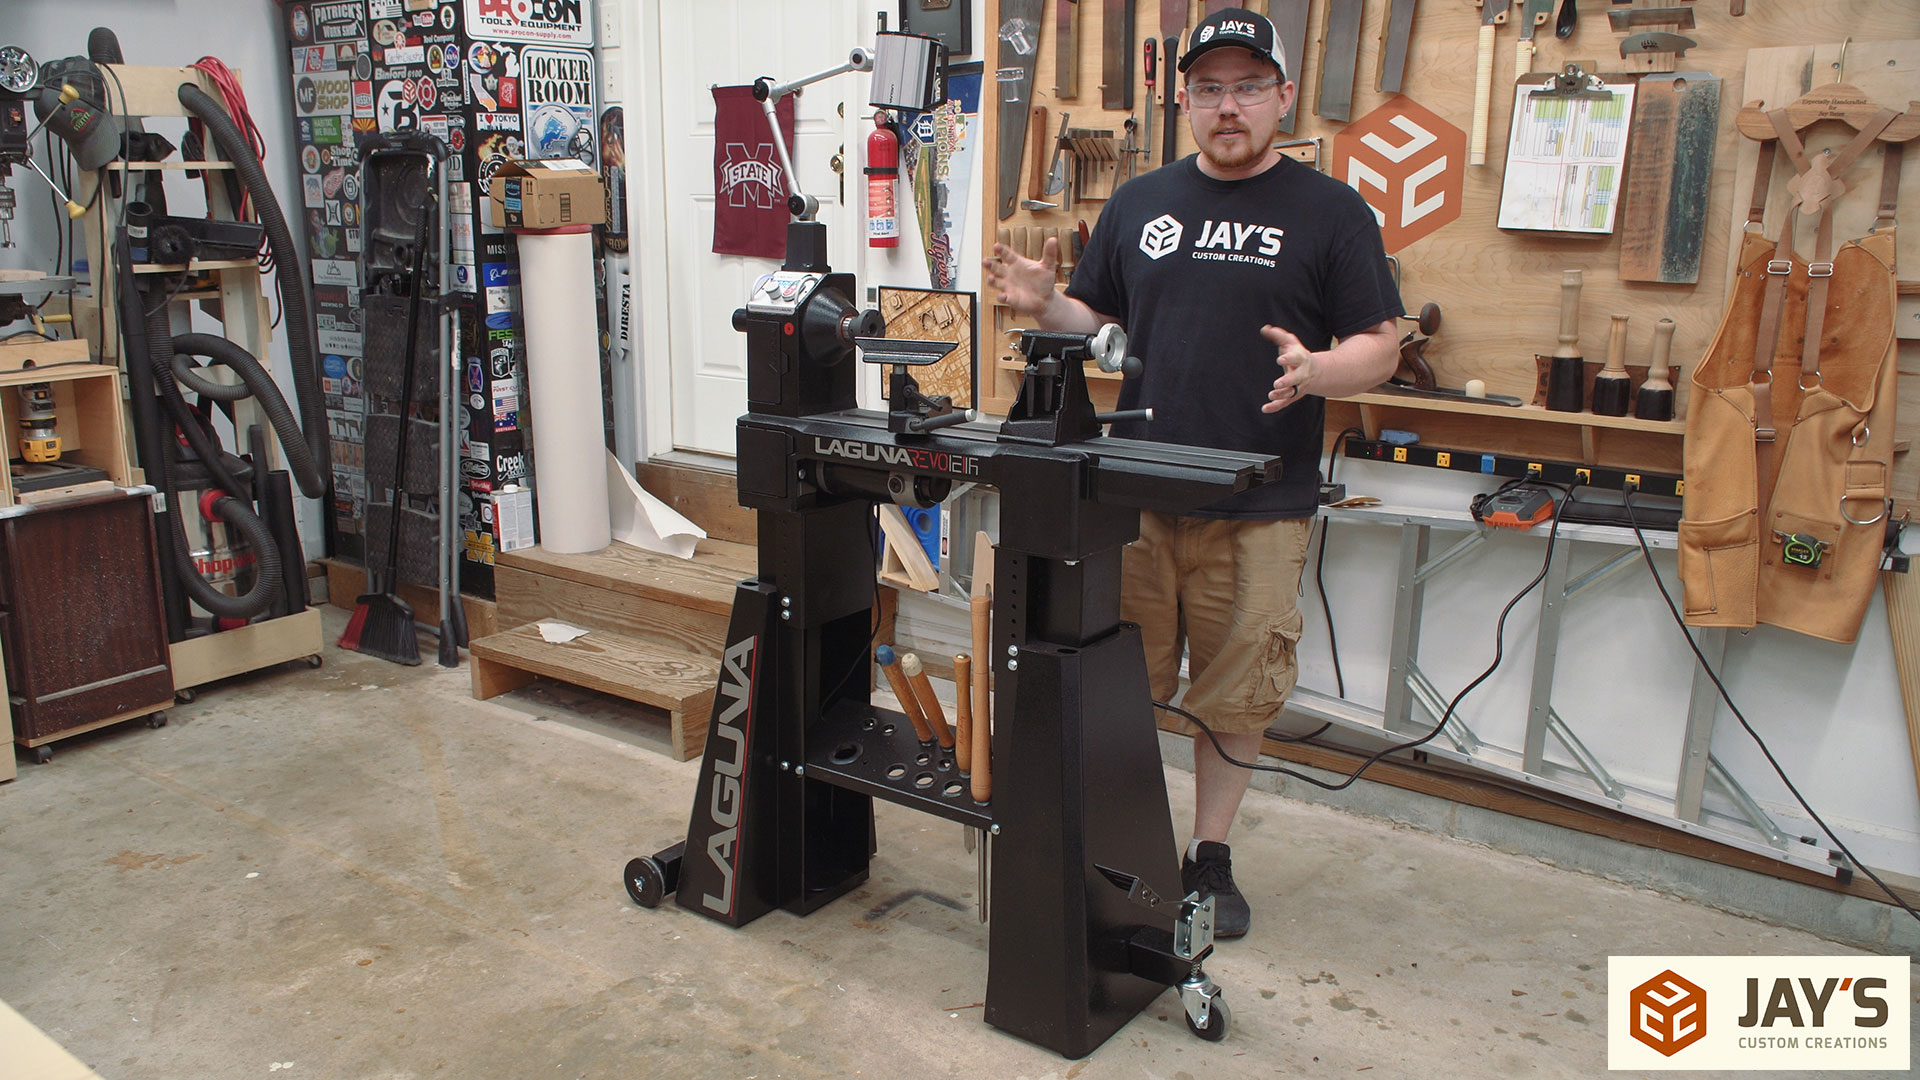
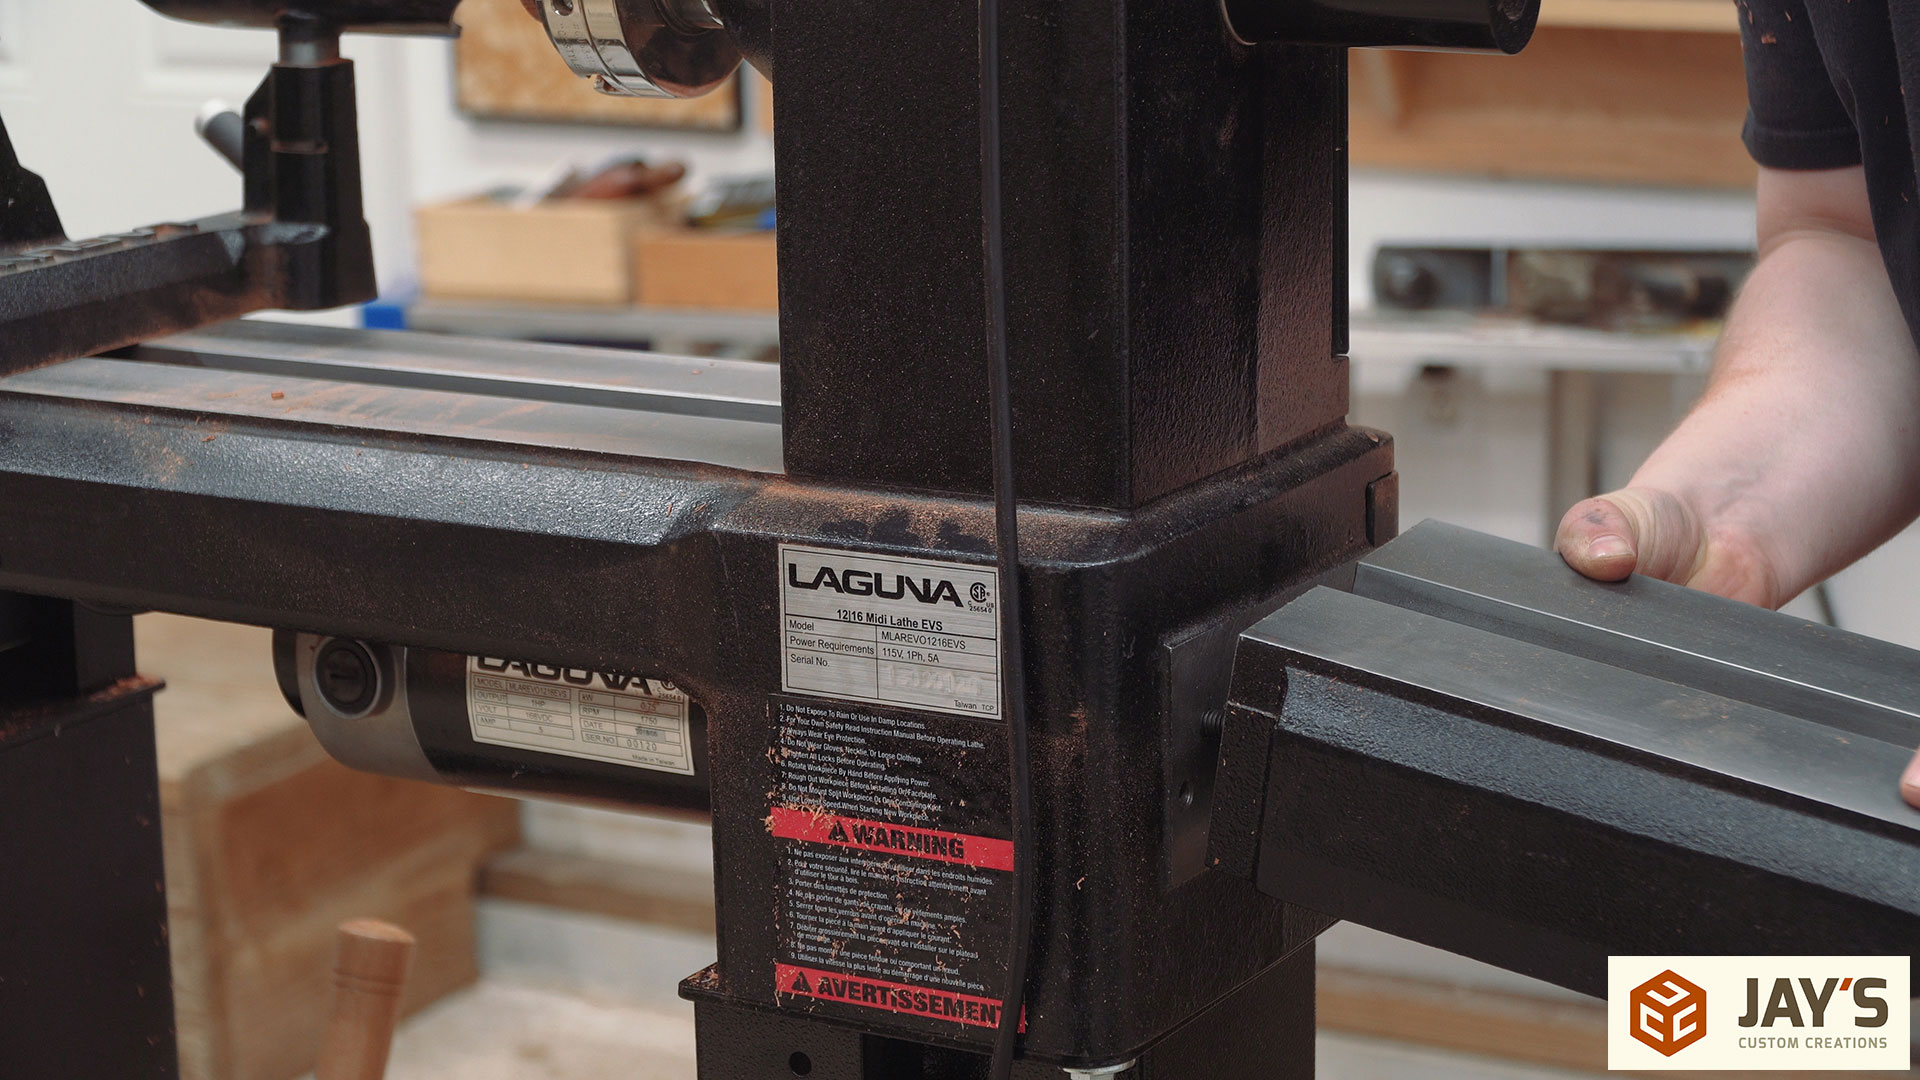
And finally the lathe can take the stage. This is the Laguna Revo 1216 with a few bells and whistles.
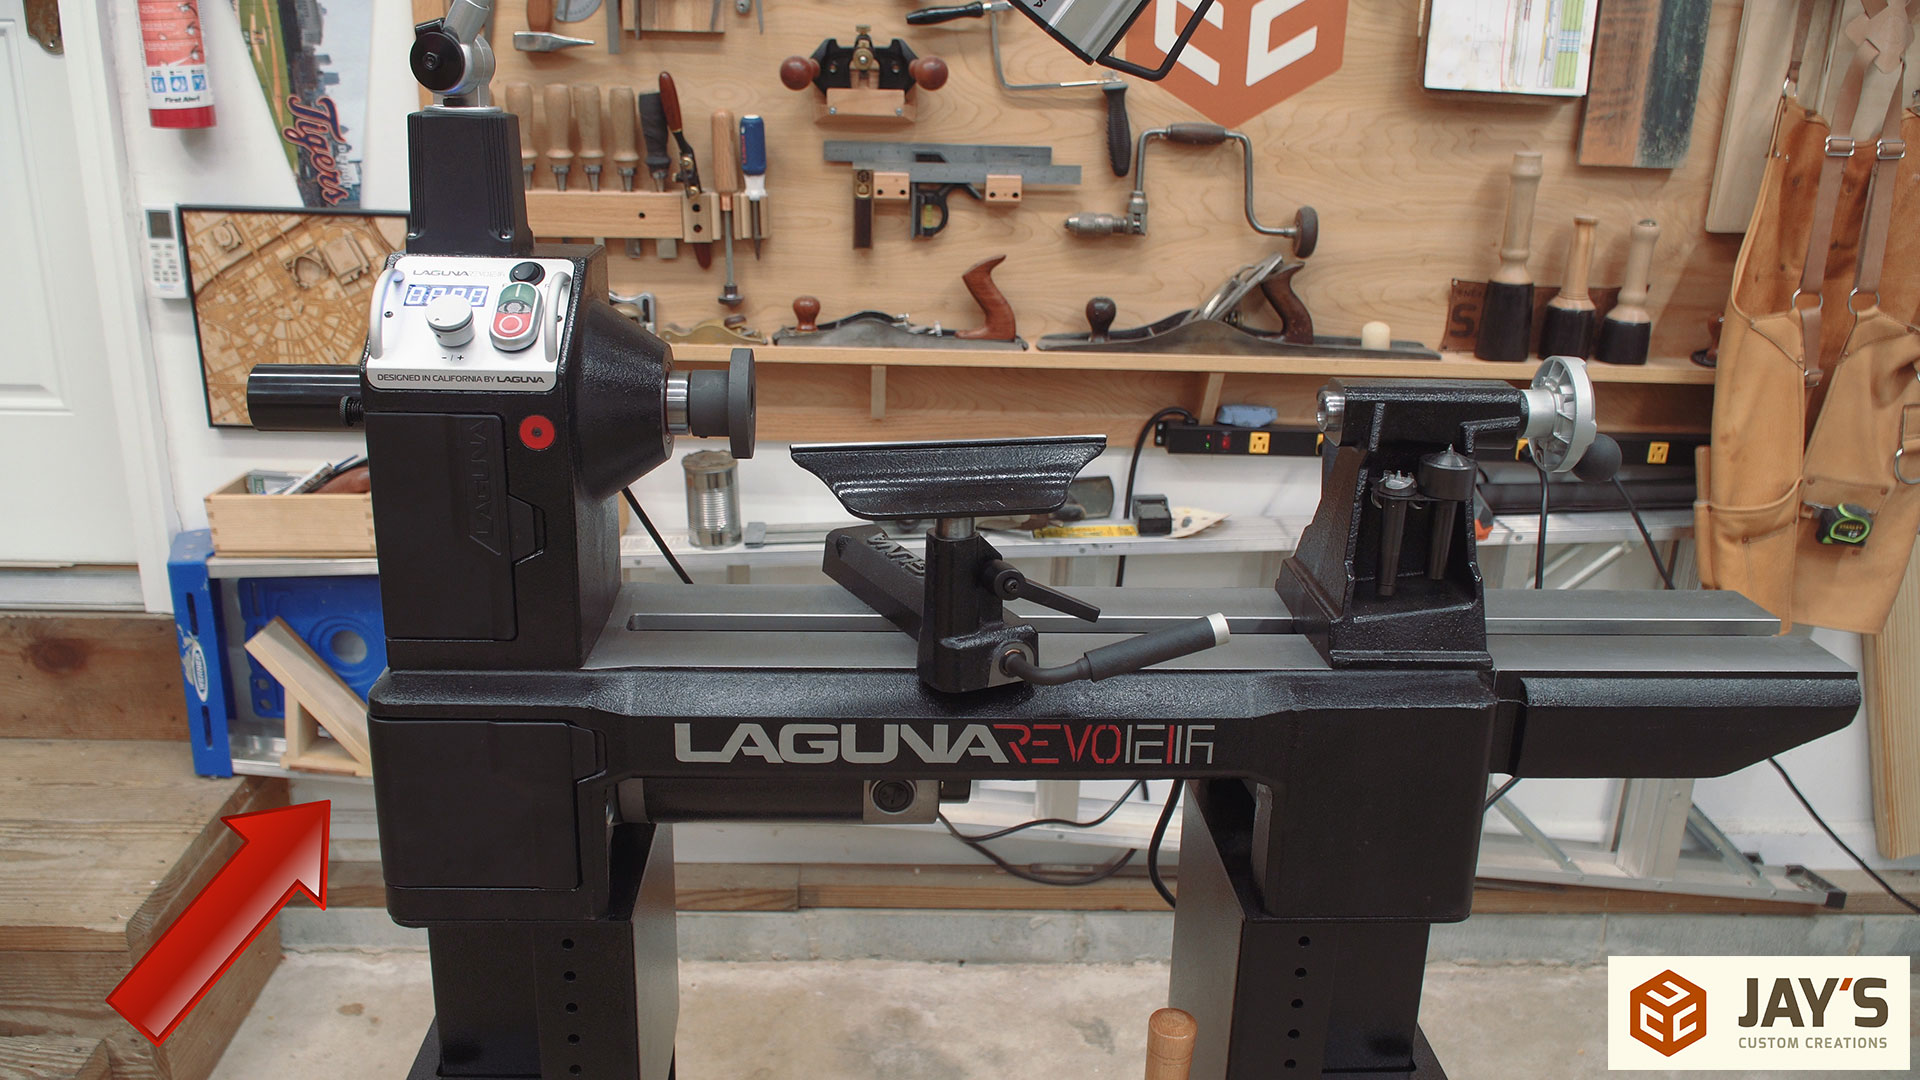
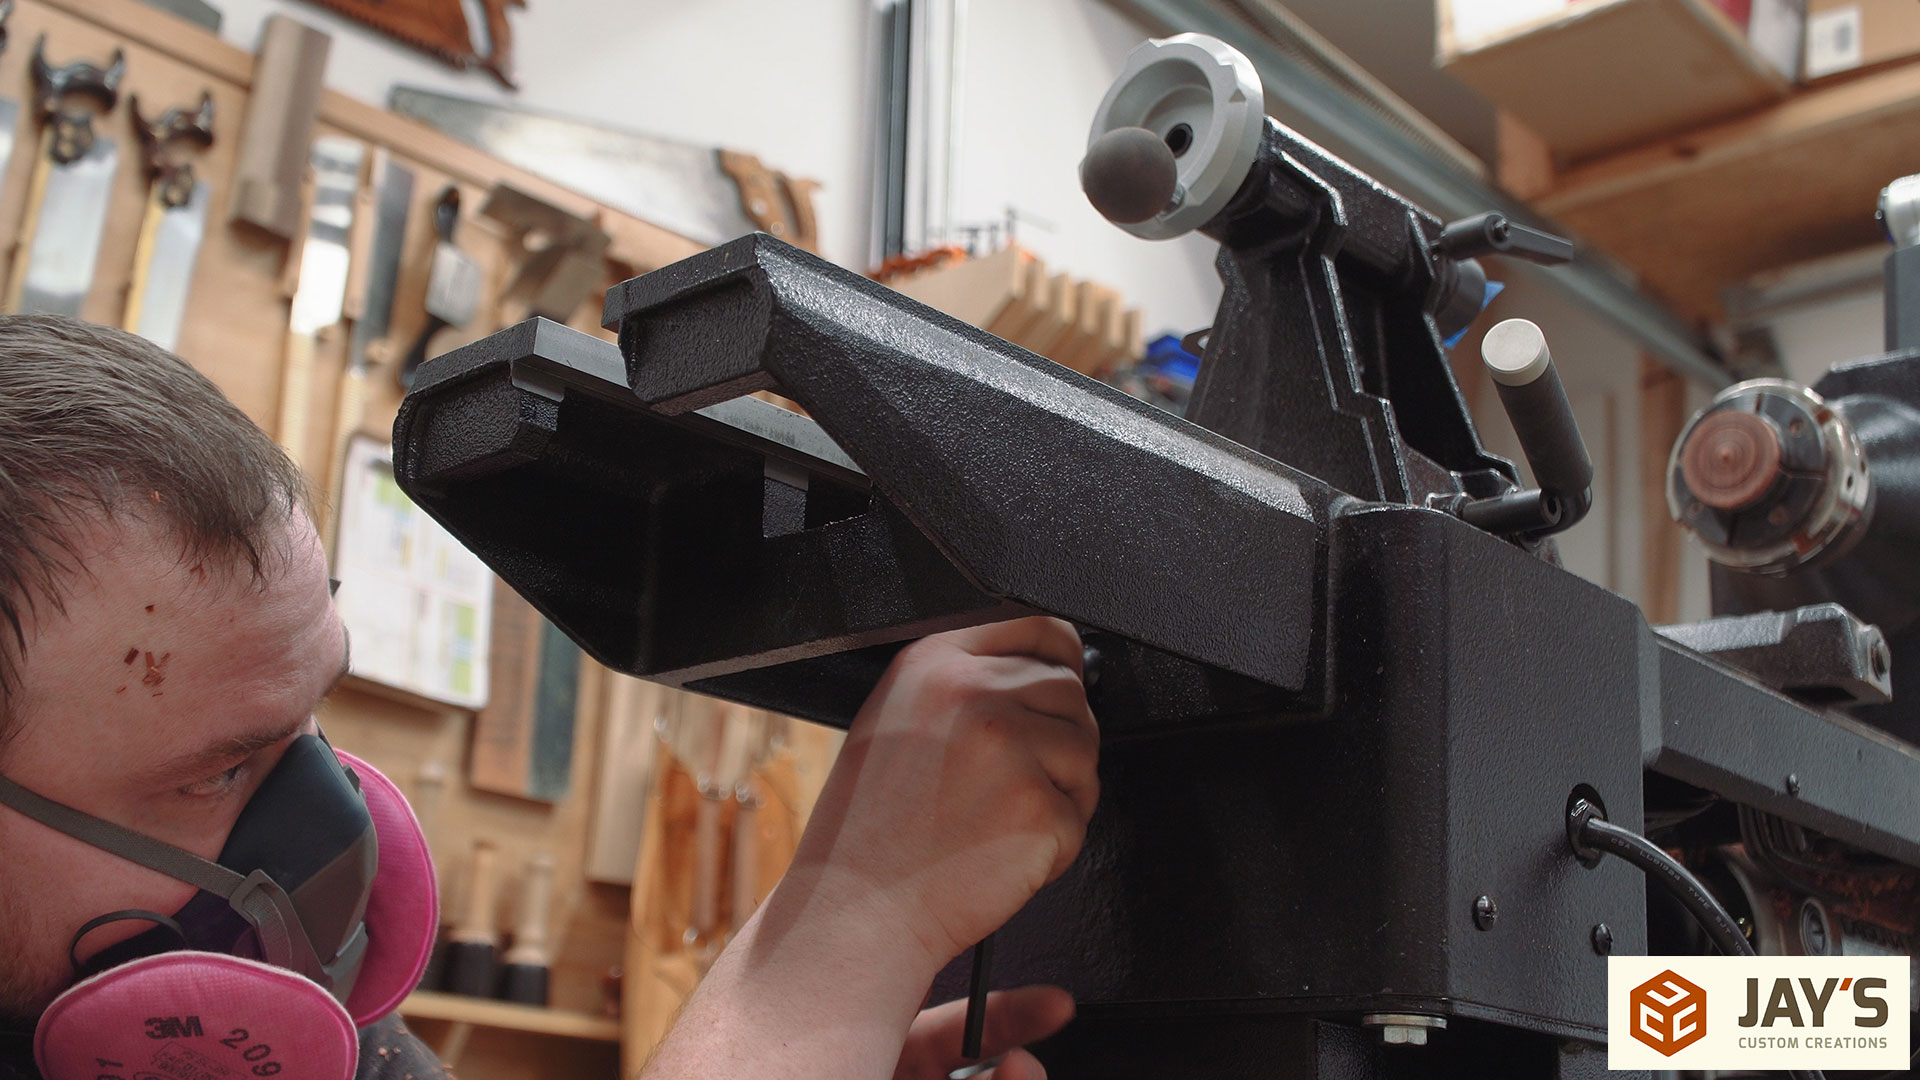
To the right of the tailstock is the bed extension. It’s held in place with three bolts and can easily be moved to the left side for outboard turning.

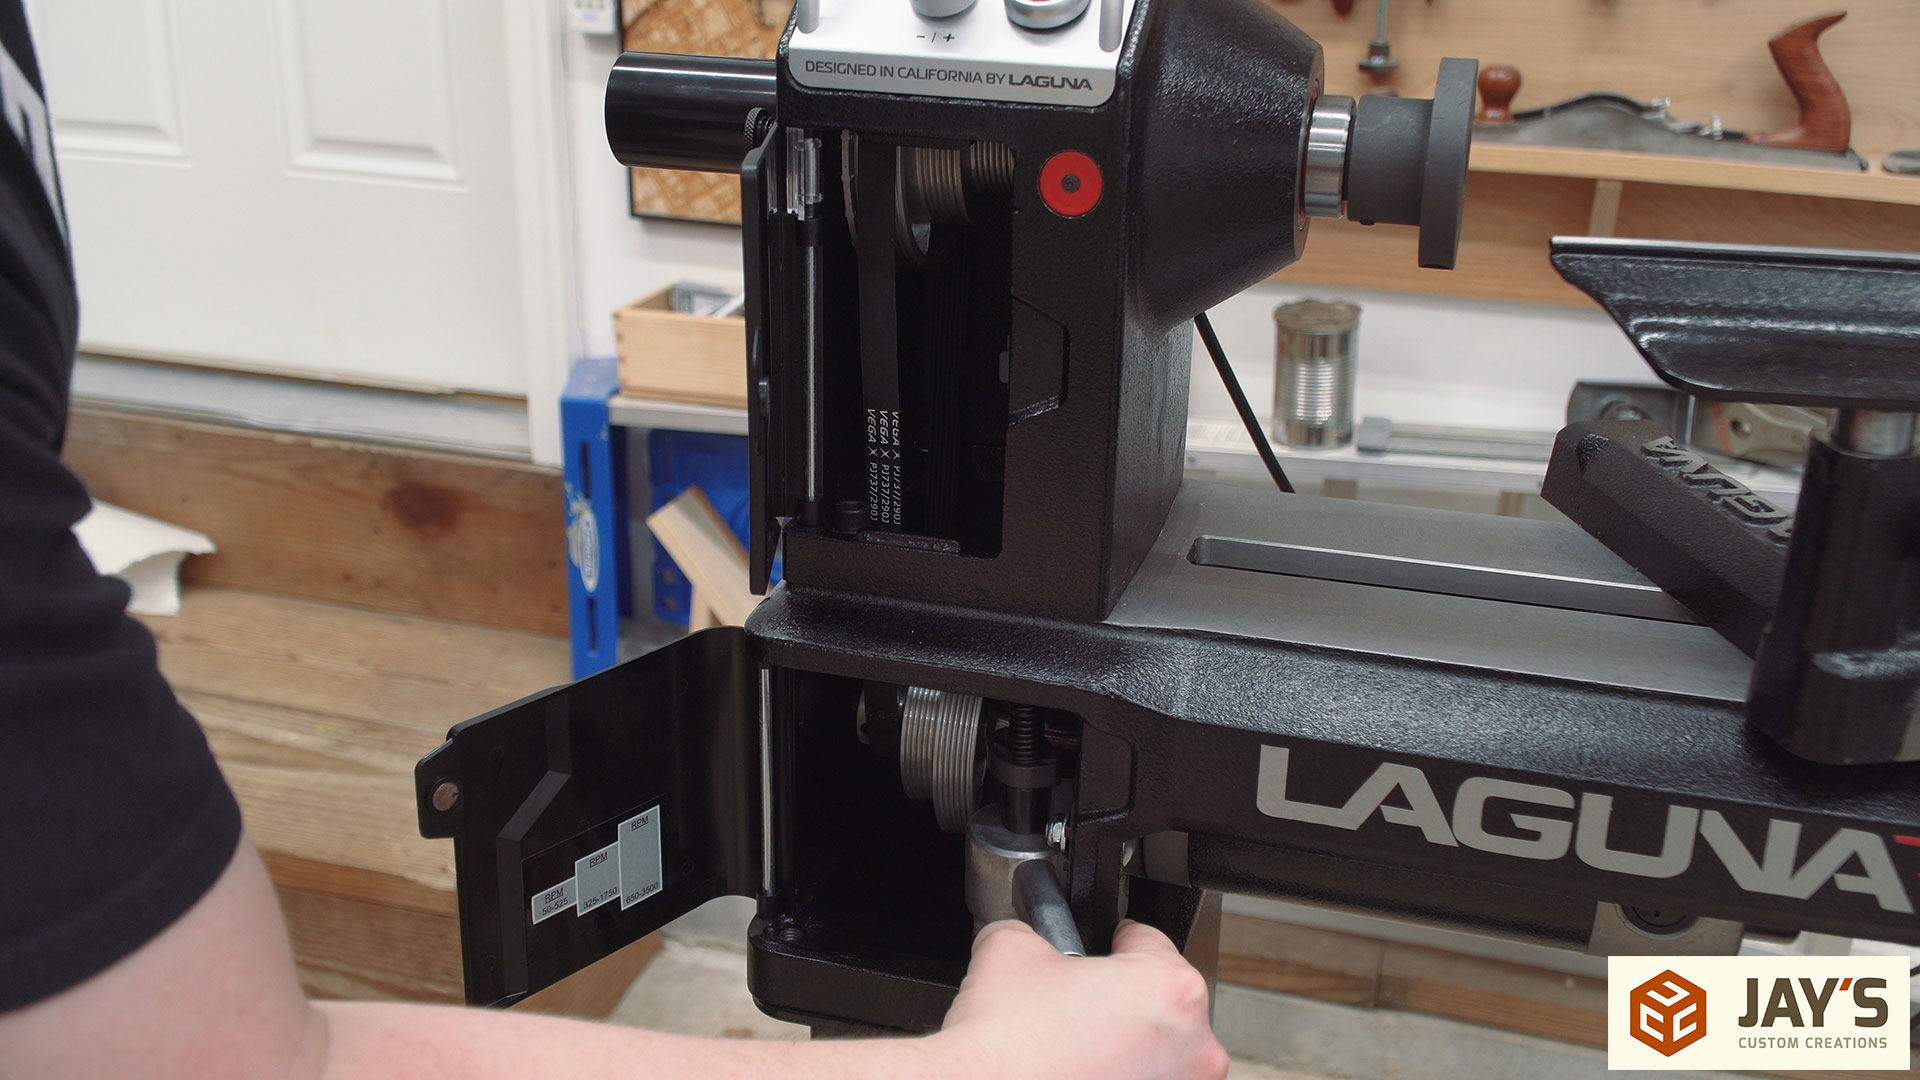
The lathe has three speed ranges which are achieved with three belt positions. A handle is rotated 90 degrees to elevate the motor and lower pulleys allowing the belt to be changed quickly and easily.
On the headstock is the on/off buttons, a forward/reverse switch, a variable speed control knob, and a digital readout for the spindle speed.

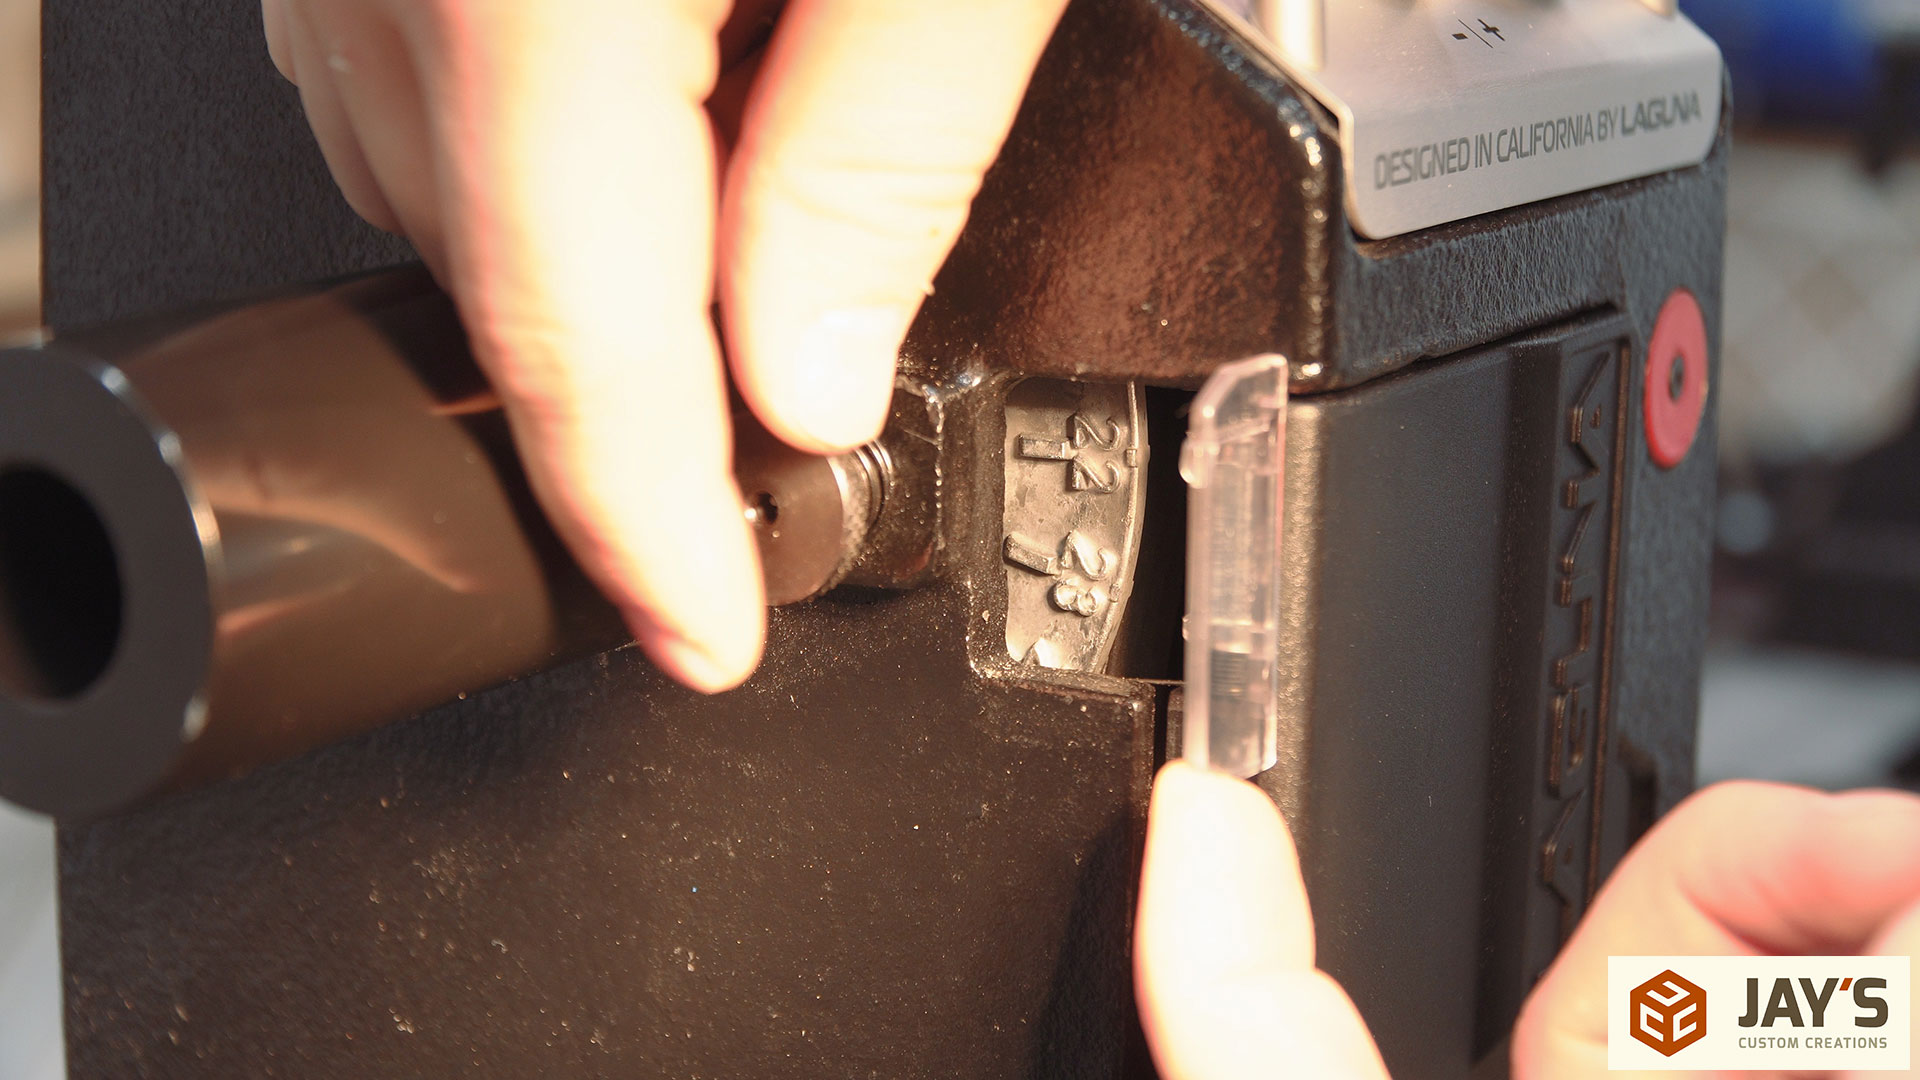
On the left side of the headstock is a screw pin and a 24 position indexing plate that allows the headstock to be locked in 15 degree increments. I was using the light on top of the lathe to get extra light for this shot :)
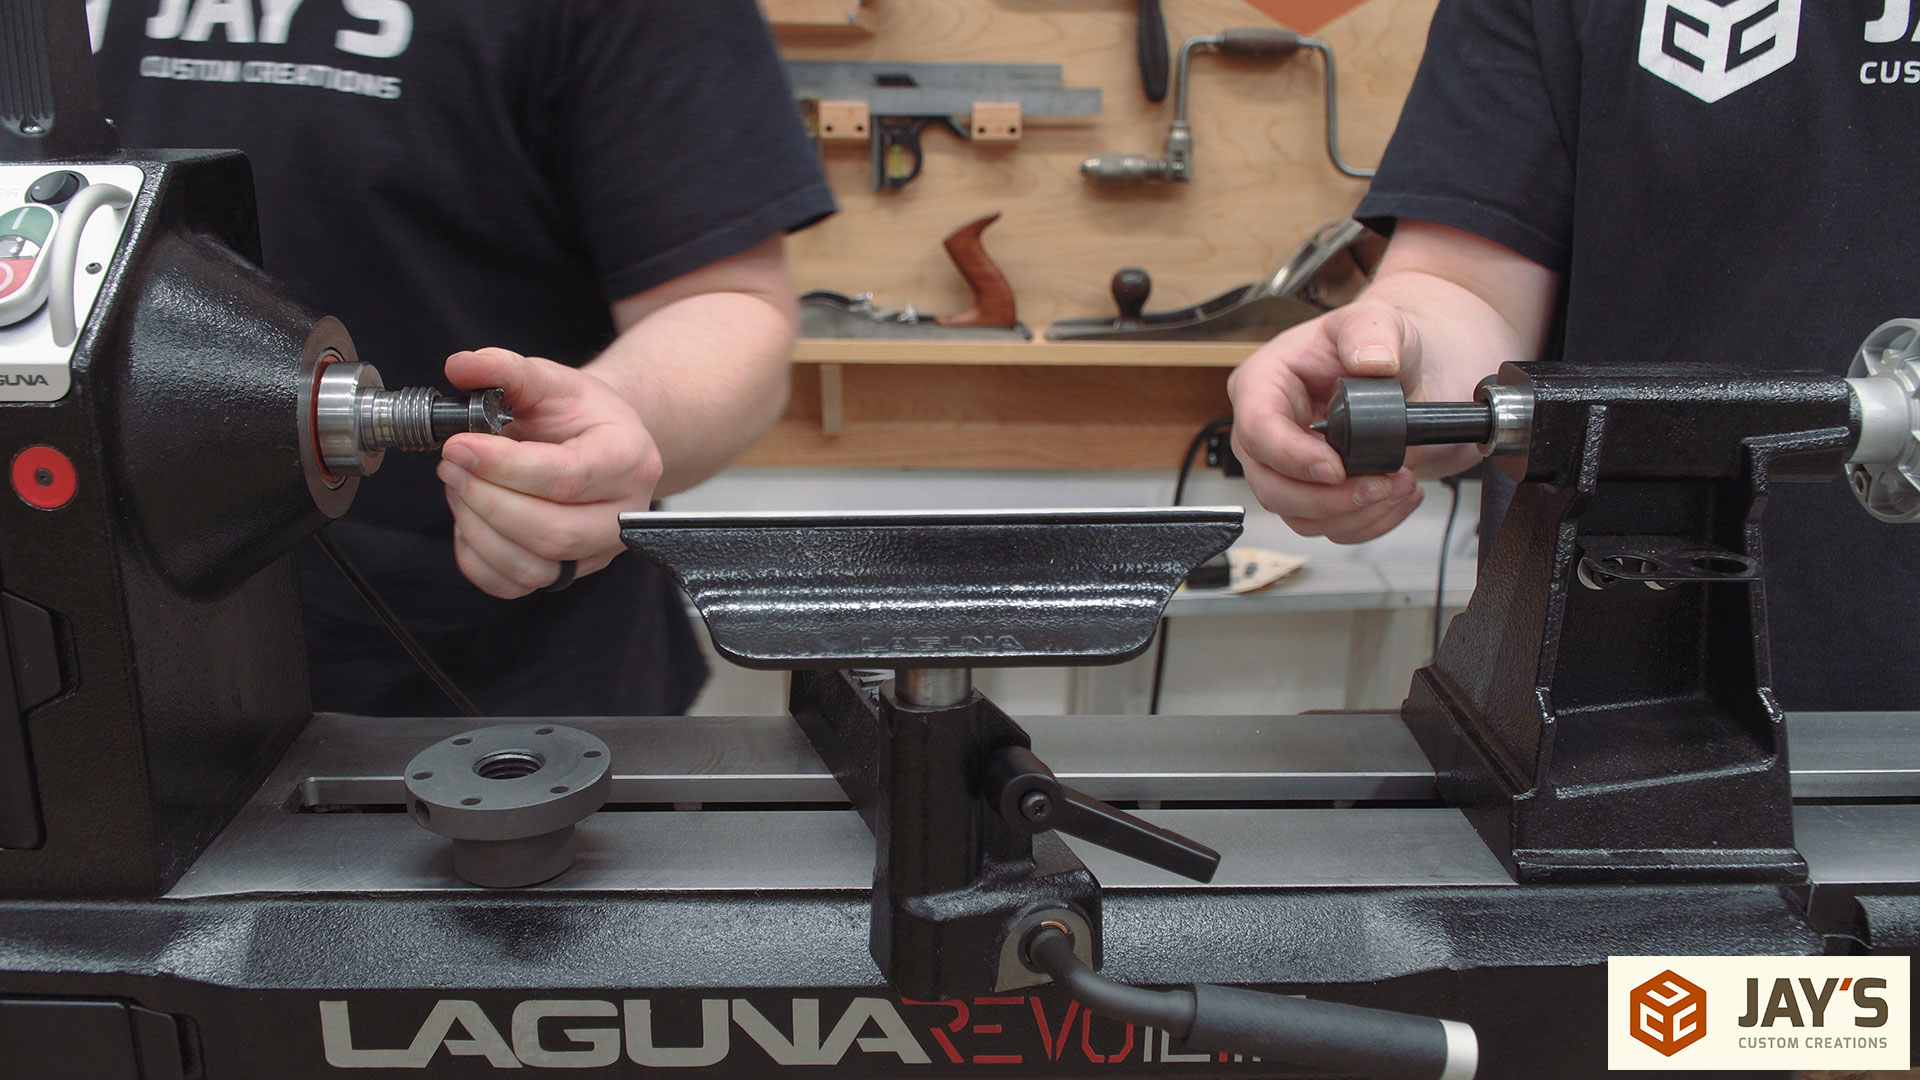
Both the headstock and tailstock have a MT2 taper.
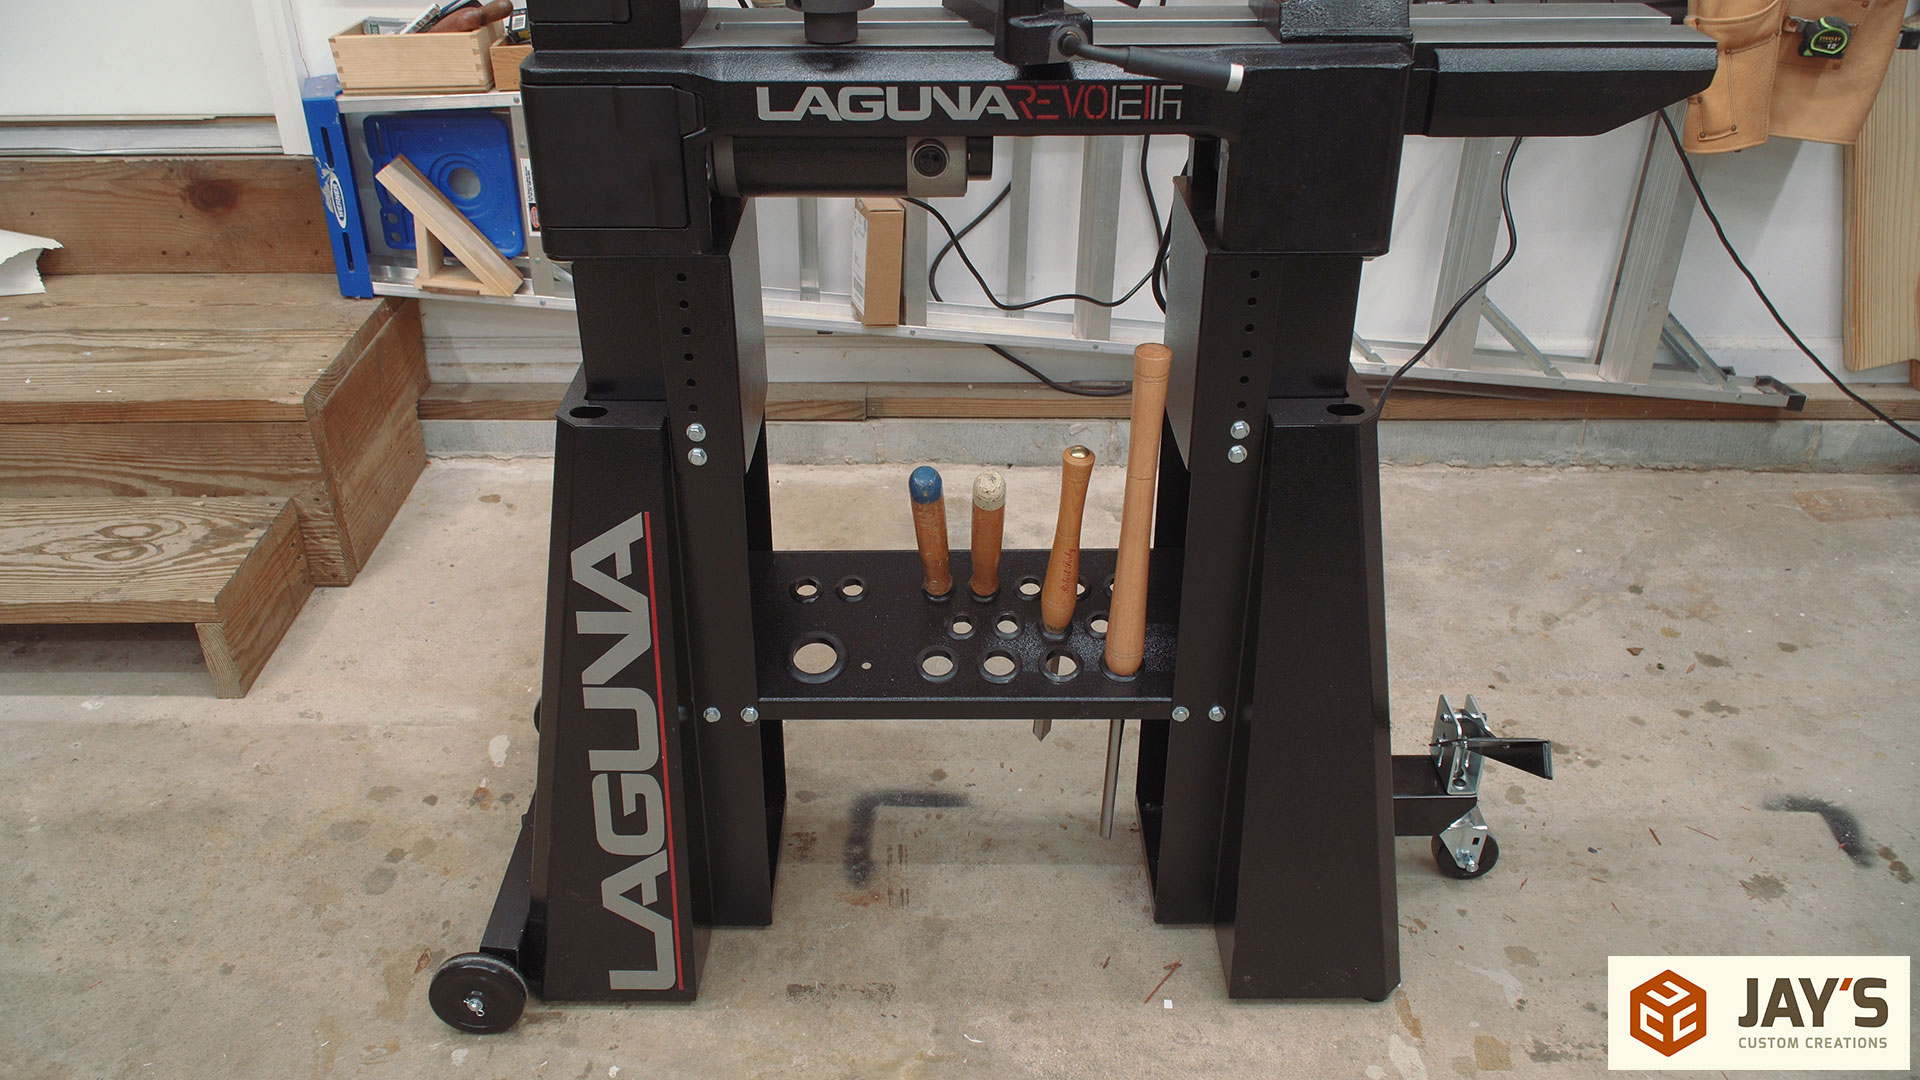
The base or stand has an integrated tool holder and a mobile base kit makes moving the lathe very easy.
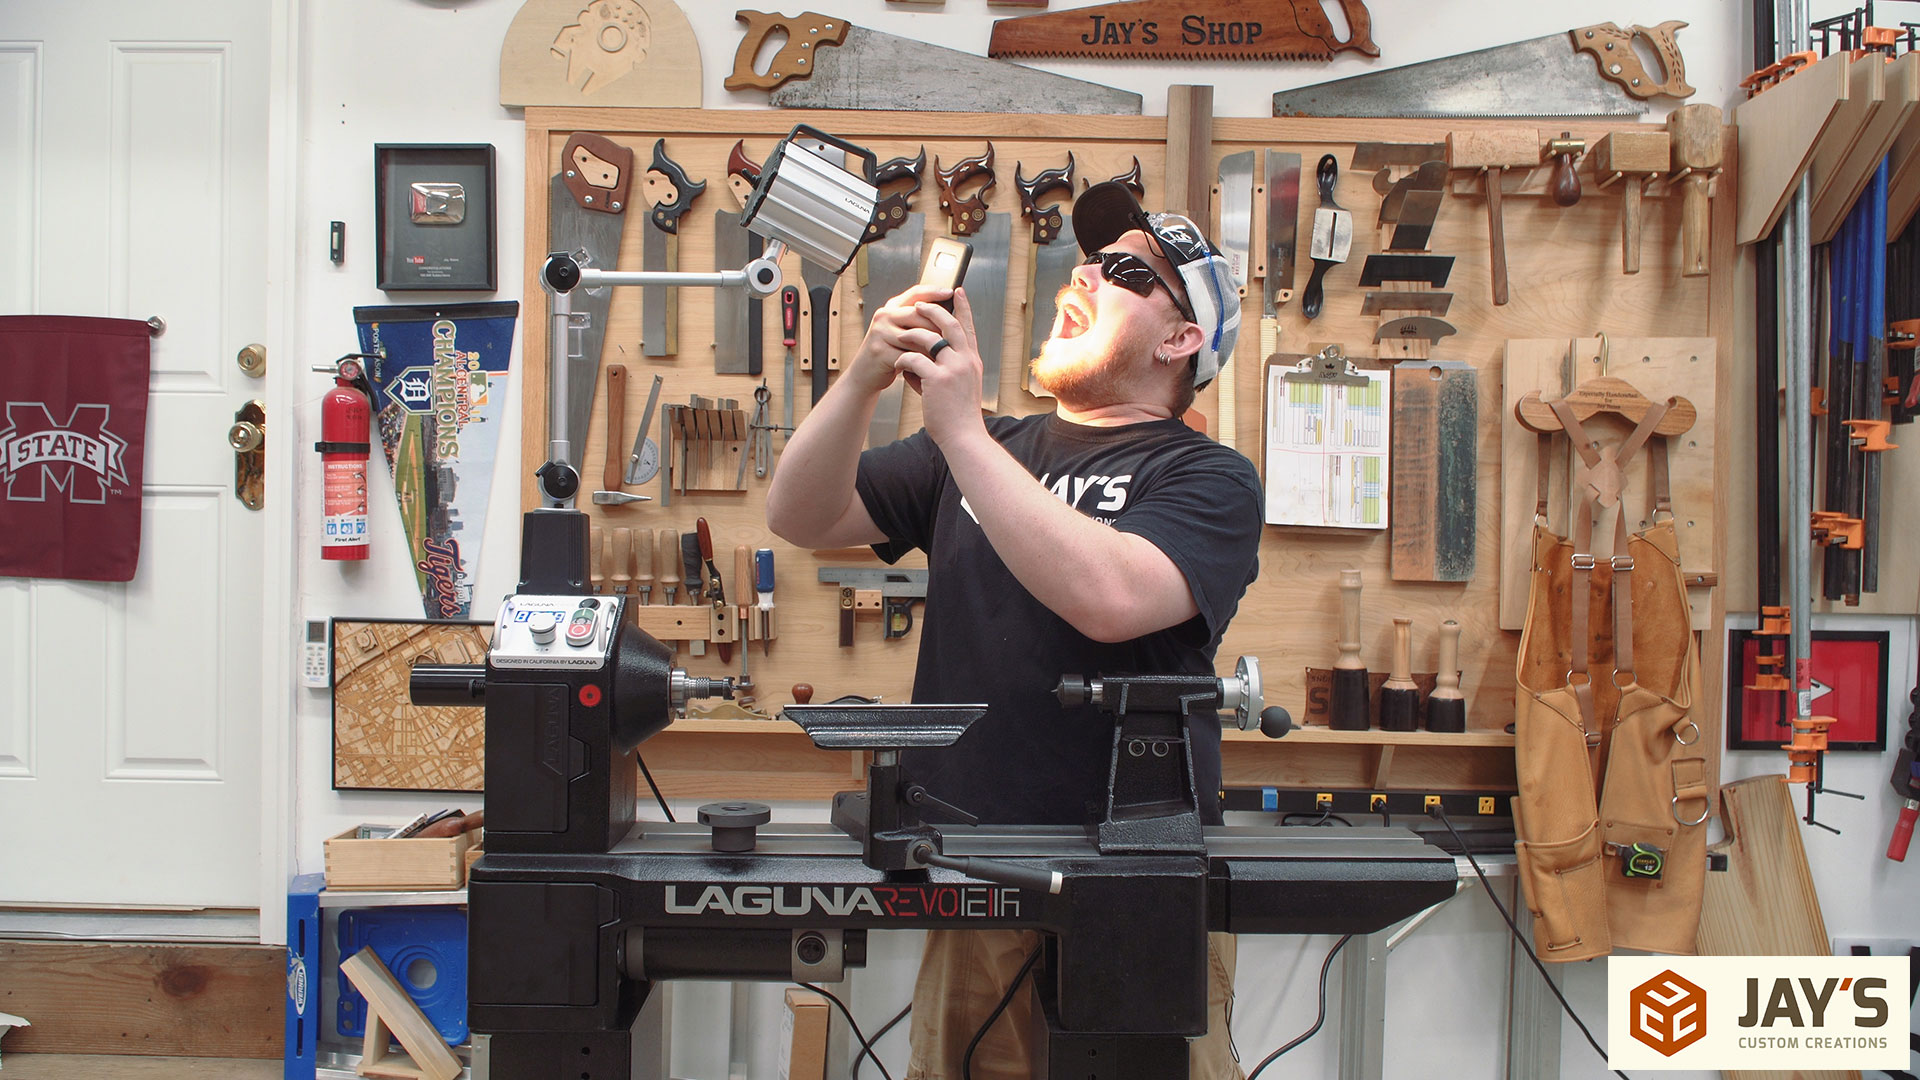
On top of the headstock is where you can mount Laguna’s light kit which is extremely bright. I was goofing off here as the light reminded me of sitting in a dentist chair. It’s pretty bright.
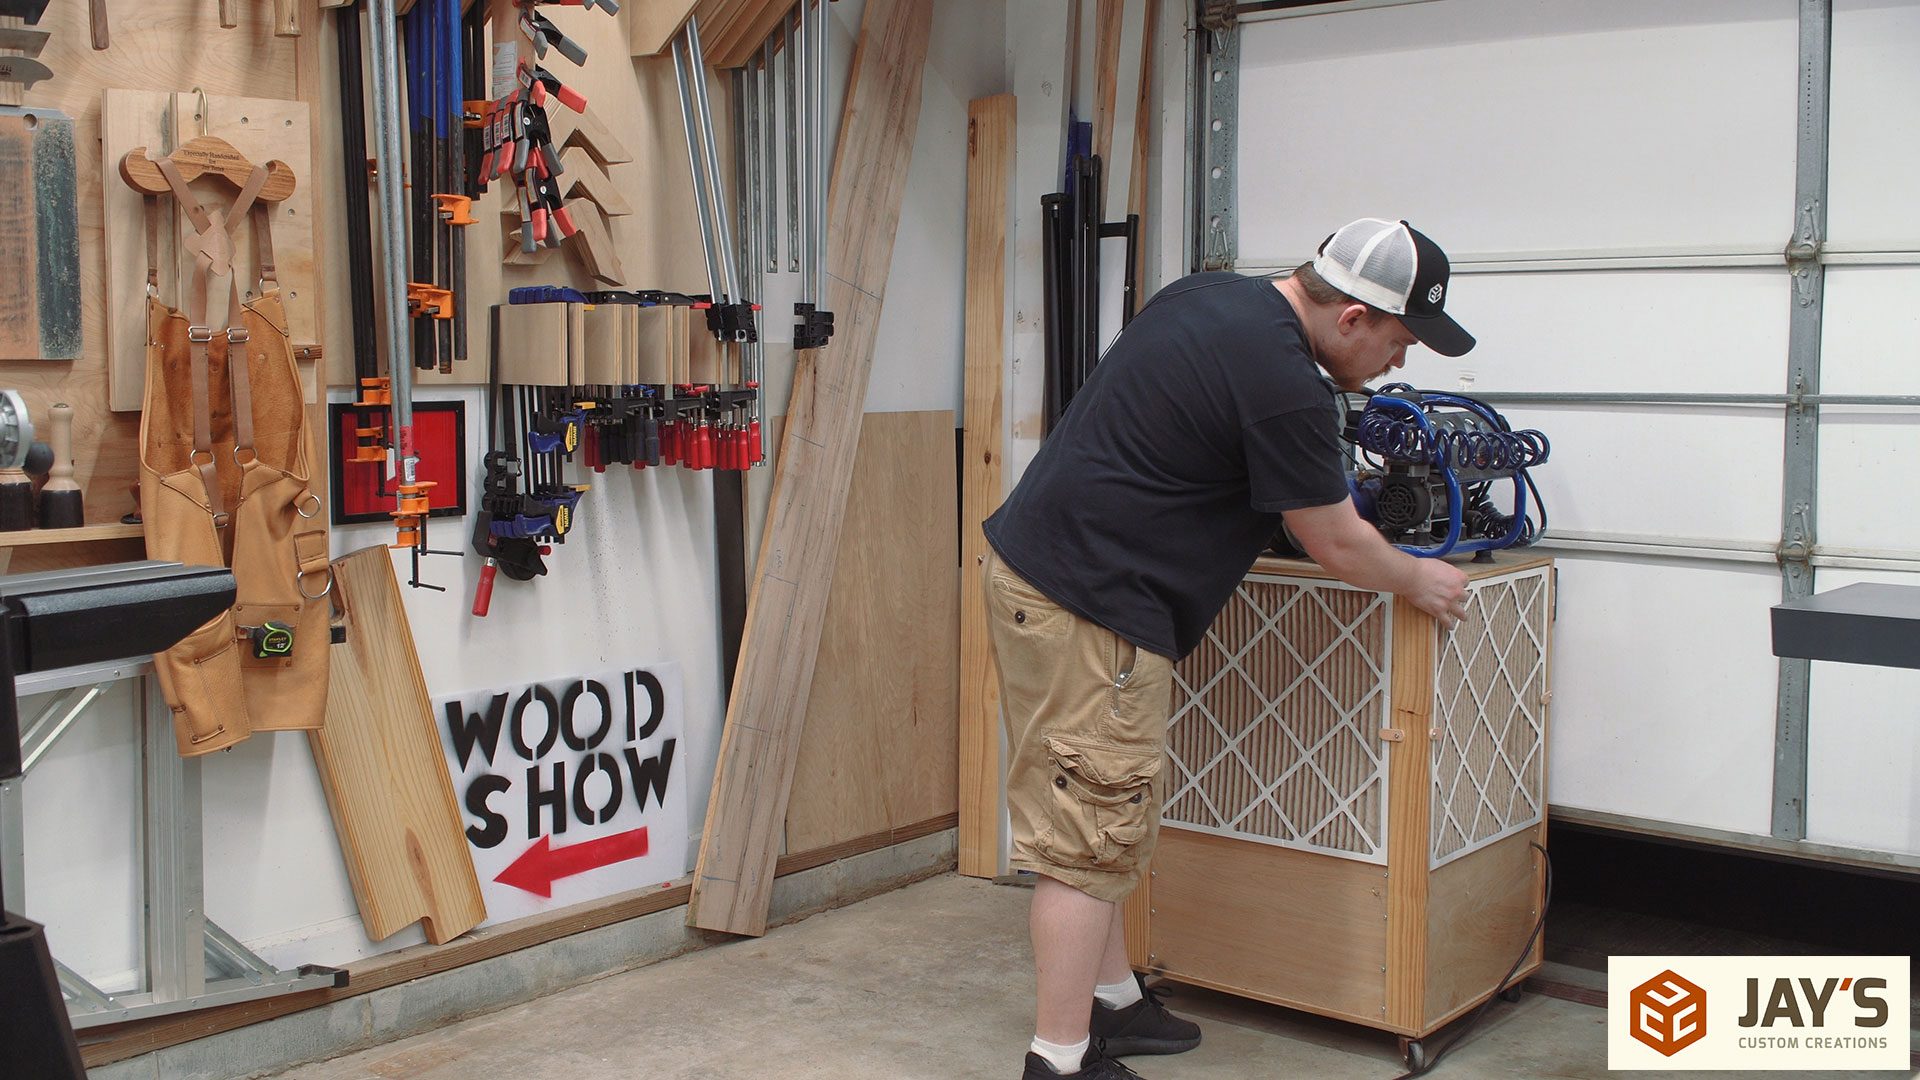
I have an air cleaner cart in my shop and to take cleaning the air a step further I lifted the garage door up just enough to blow the cart air outside. This will still catch the fine dust in the filters but it will also vent the shop as fresh air will return from the outside.
It took a bit but I finally got started turning with the spindle.
A roughing gouge will turn a square blank round very fast. So that’s what I used.
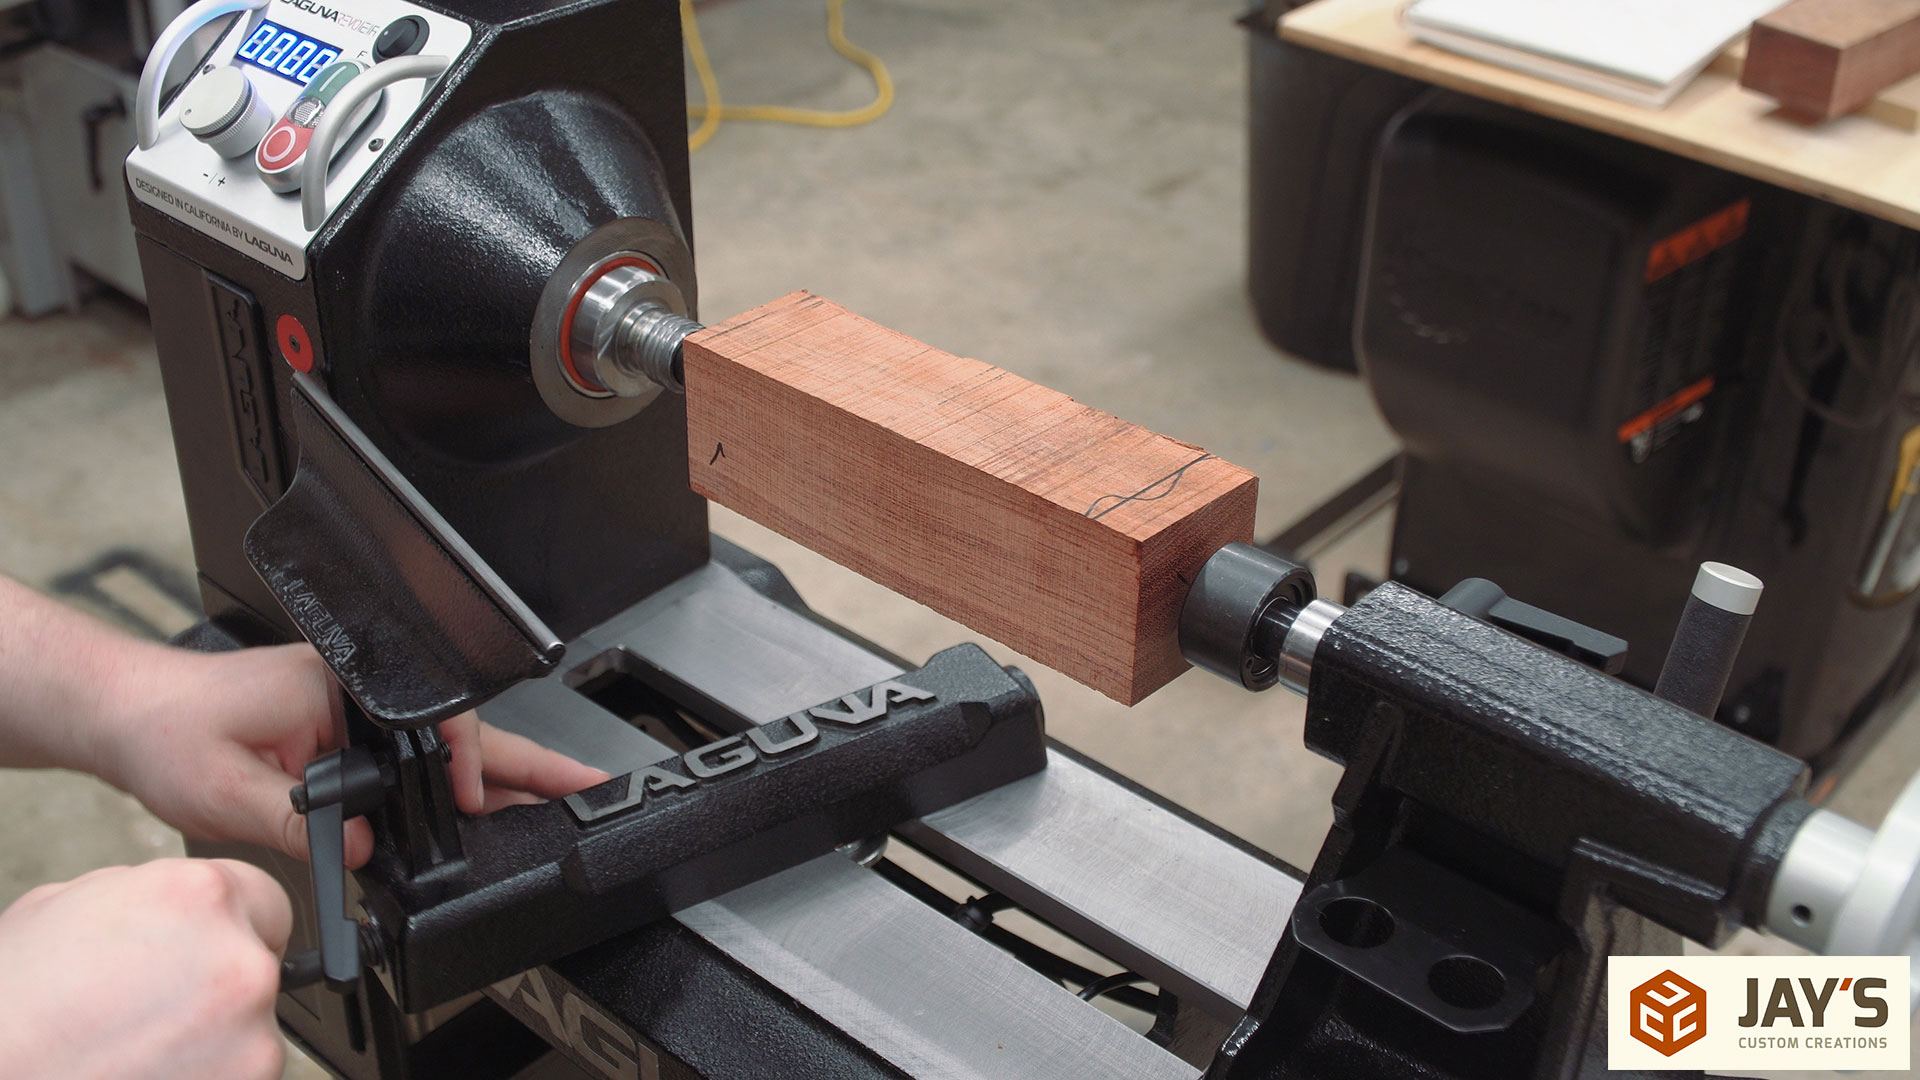
At this point the spindle is being turned with the spur drive. It’s generally safer and more stable if you can turn your material in a chuck instead. But before I can mount it in the chuck I need to cut a tenon on one side. The curved calipers you see in this picture were sized slightly larger than the inside diameter of the jaws on my chuck. Simply use a parting tool to reduce the size until the calipers fit over the tenon. This is safely done with the lathe spinning.

Once the tenon diameter is sized the length can be established.
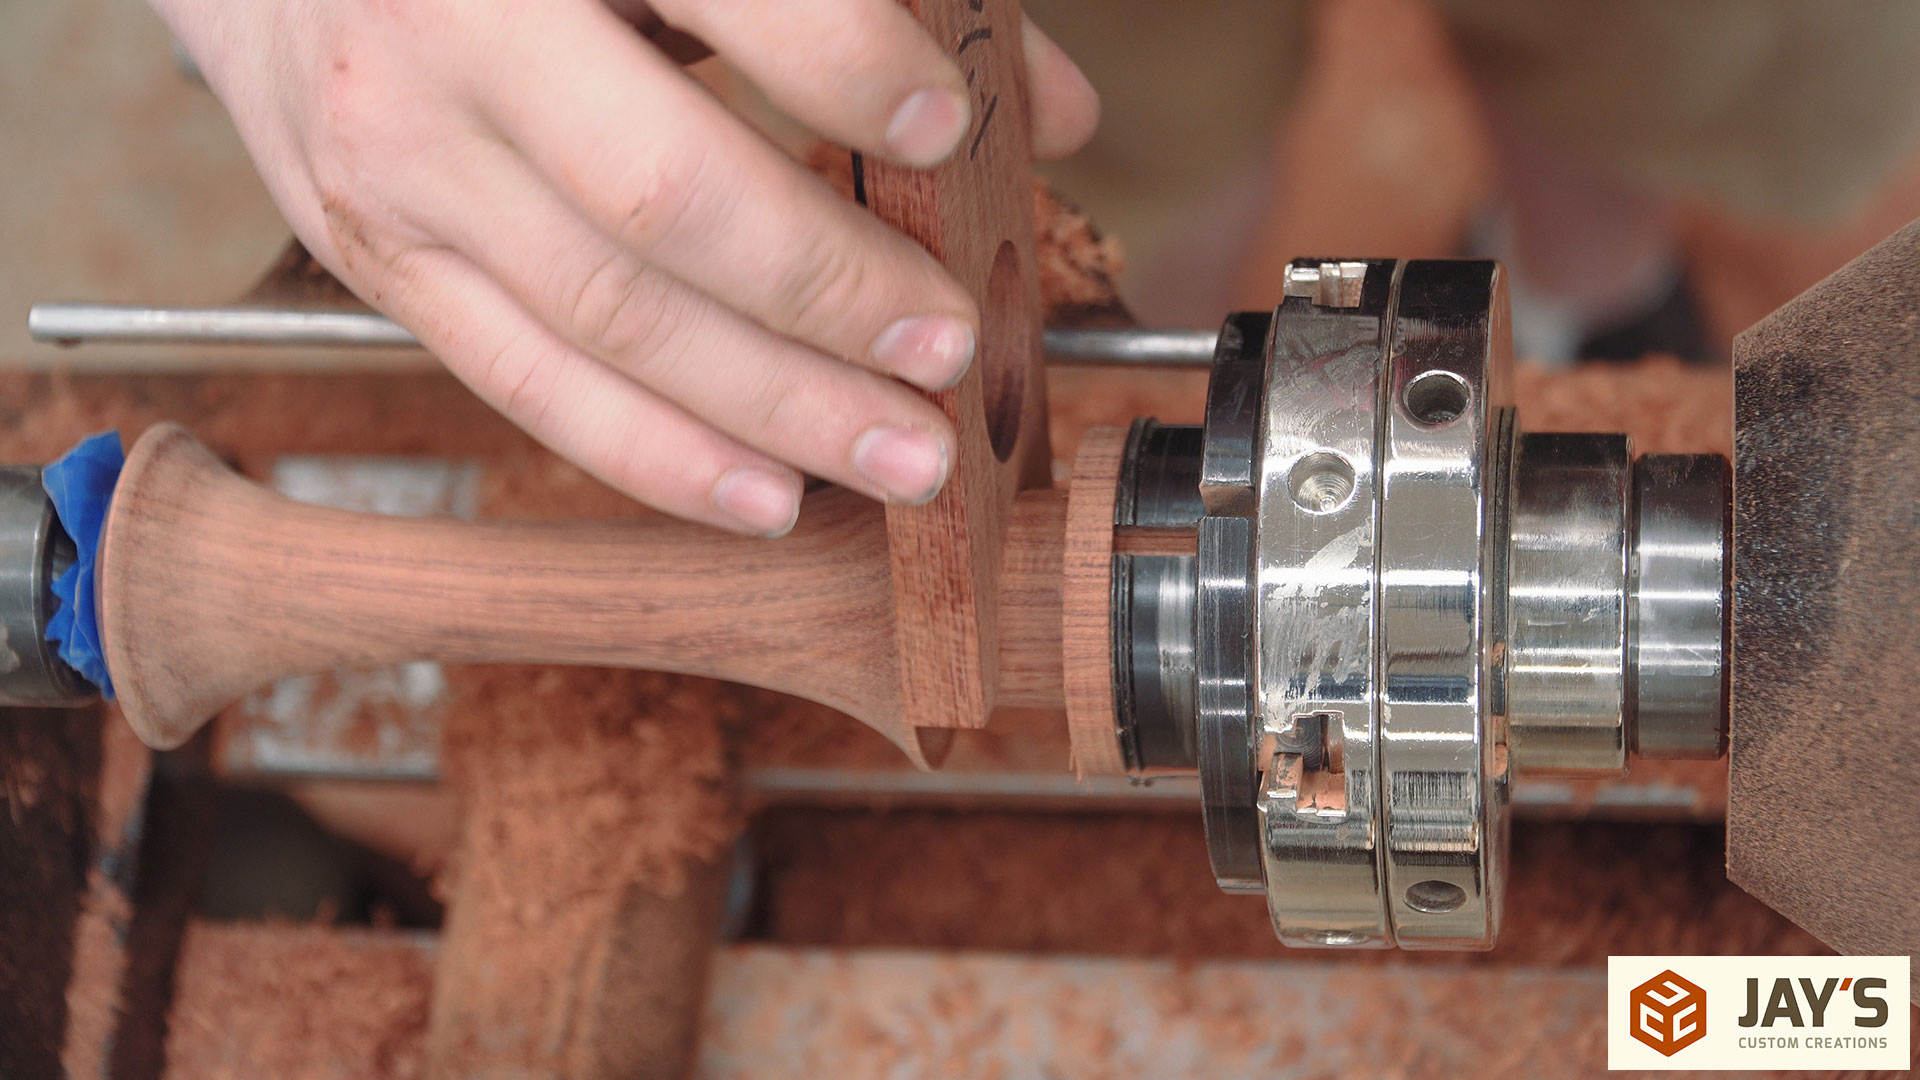
With the chuck installed and the first tenon securely held inside the chuck jaws another tenon was cut on the opposite side. This will be the bottom of the spindle, or handle, where it attaches to the platter, or dish. This spindle ended up breaking and the process was done out of order. I had to make another one but I’ll show the first one as well.
The mortis for this connection will be cut with a 1-1/4″ forstner bit so my gauge block can be used to size the tenon as well. Because I clipped the corners off before using it I can use this with the lathe spinning.

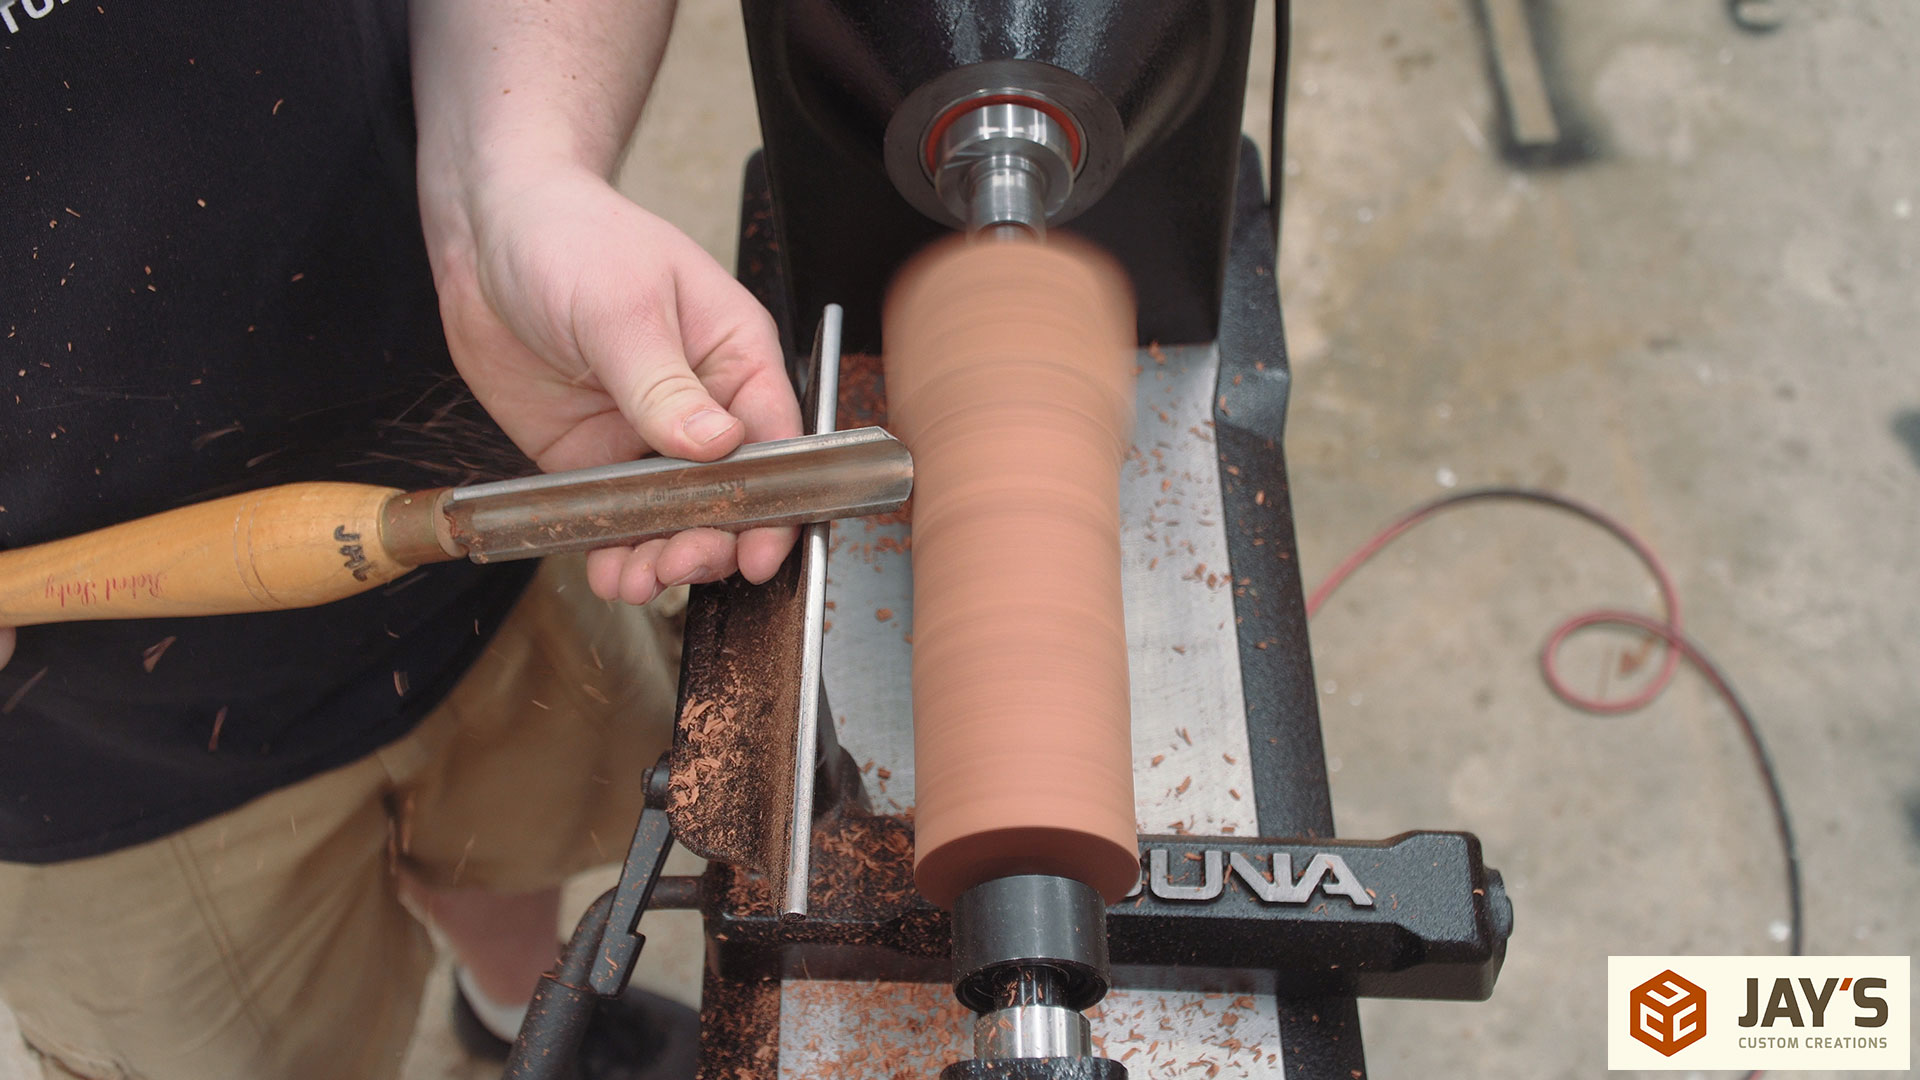
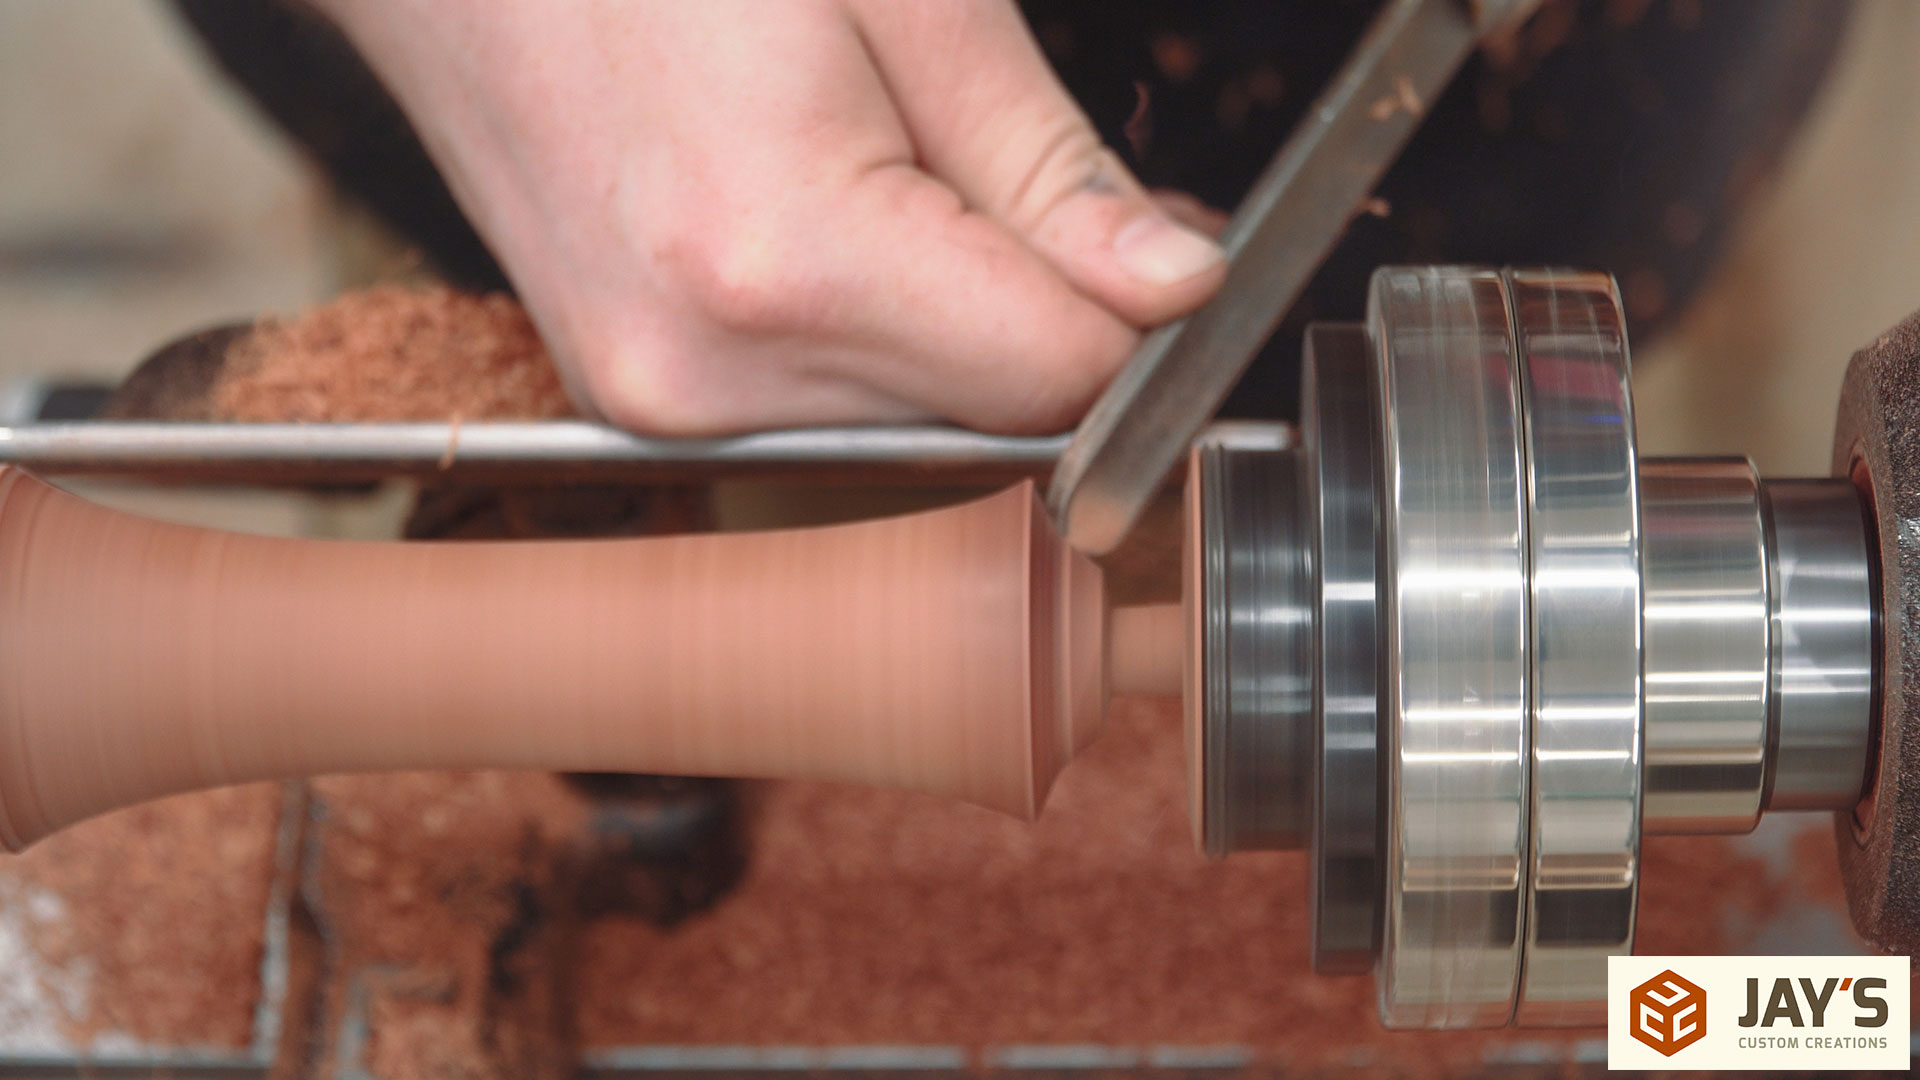
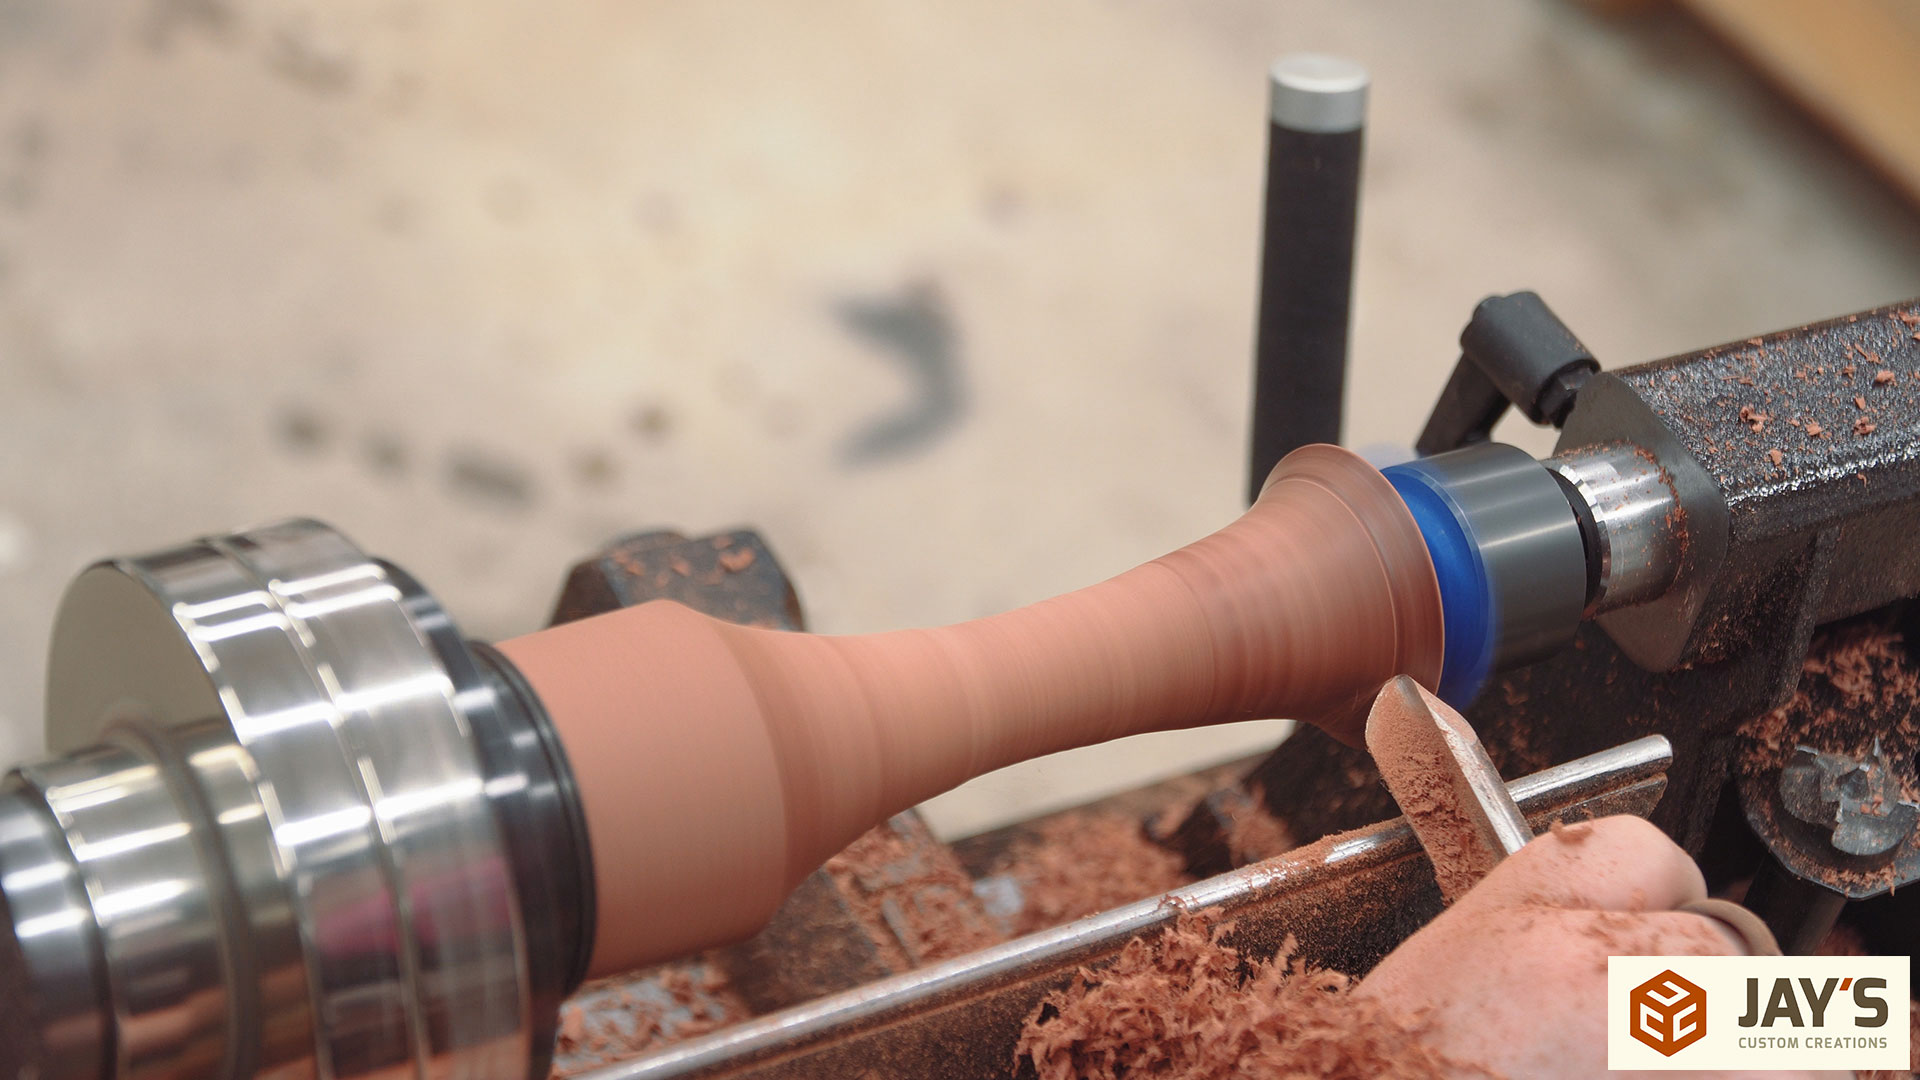
I know I wanted the handle to be thinner in the middle and wider on both ends so I started with the parting tool to reduce the thickness in the middle. This gives me a stopping point as I taper in the ends.

The tapering was done with both the roughing gouge as well as the bowl gouge. It’s been a little while since I use turning tools so I wanted to get a little more experience with both of them.

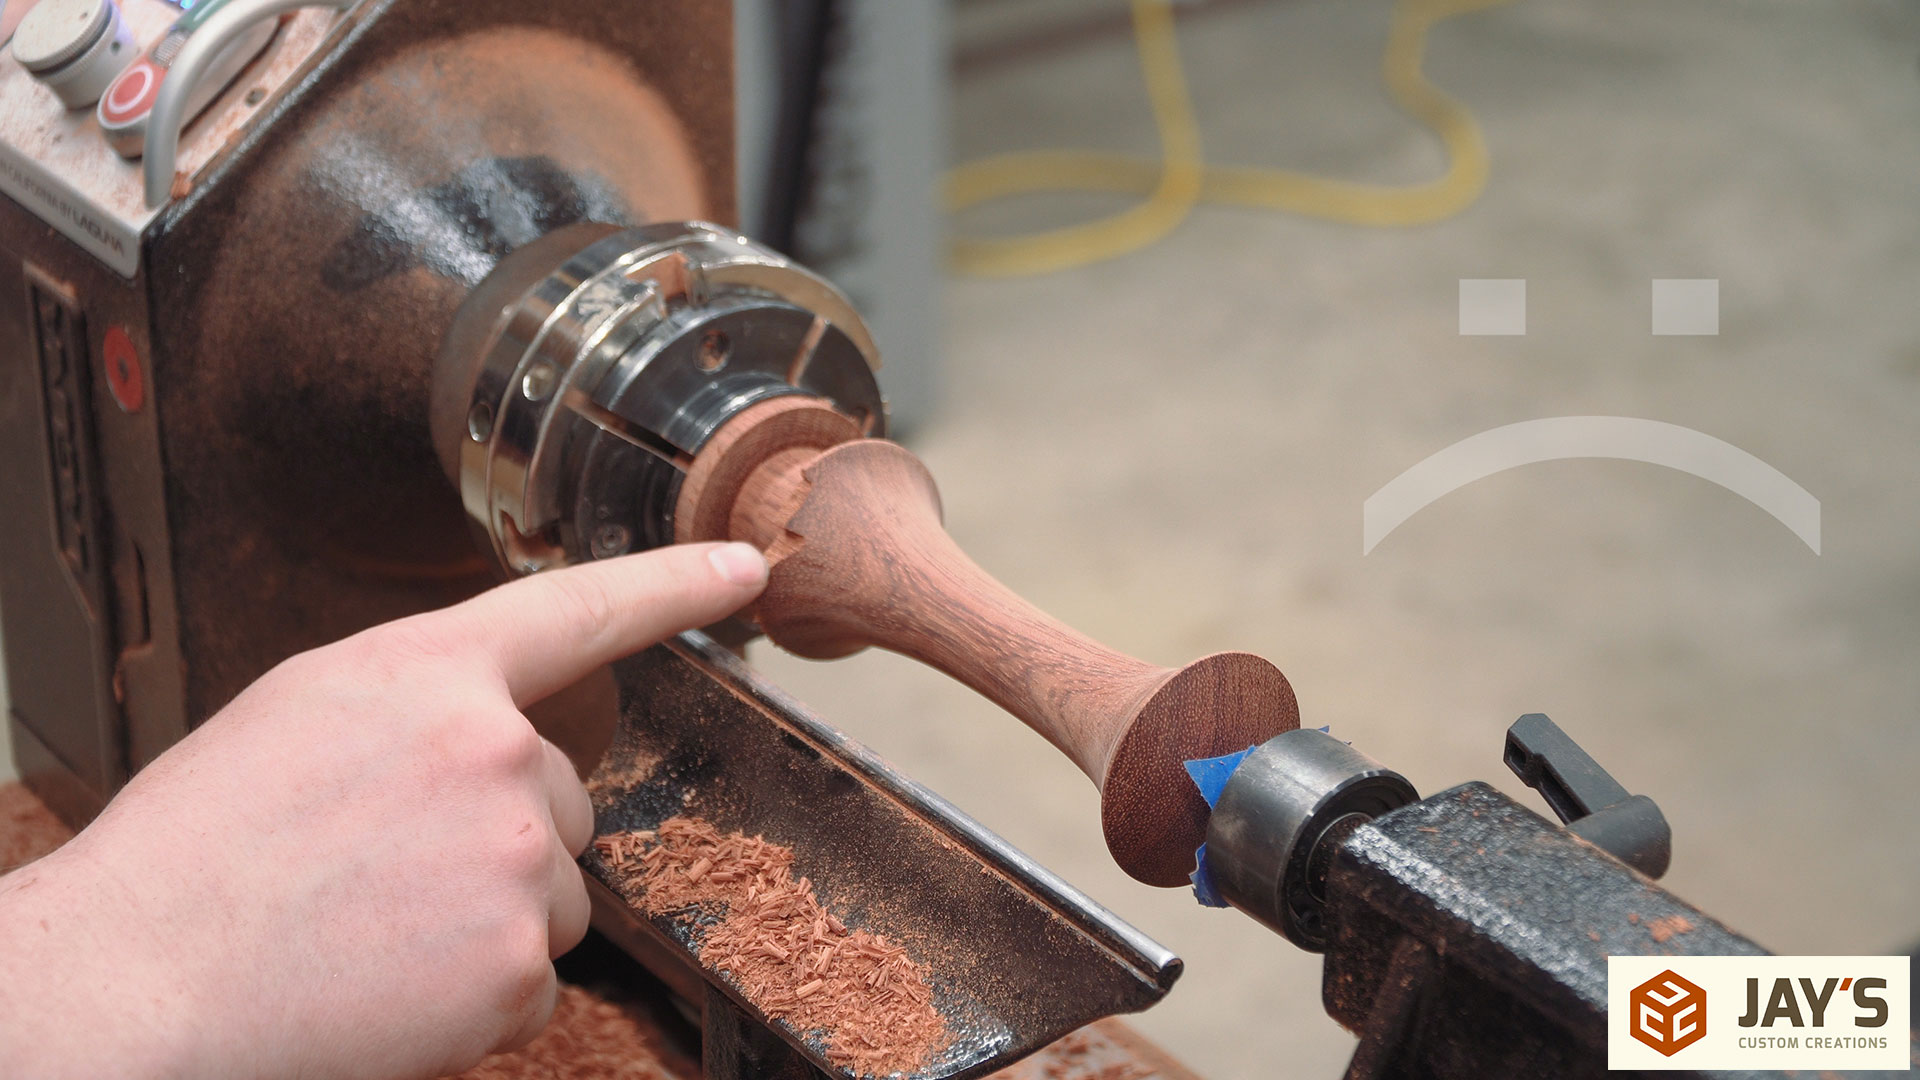
This is where I screwed up. I tried to use a smaller spindle gouge to cut the top of the handle. That’s when I realized that I was turning this backwards and the top of the handle should have been near the tail stock.
I ended up breaking the spindle off of the lathe. There was also some more tearout and a few bad words spoken. Luckily I still had some extra material left to start over though. Round 2.
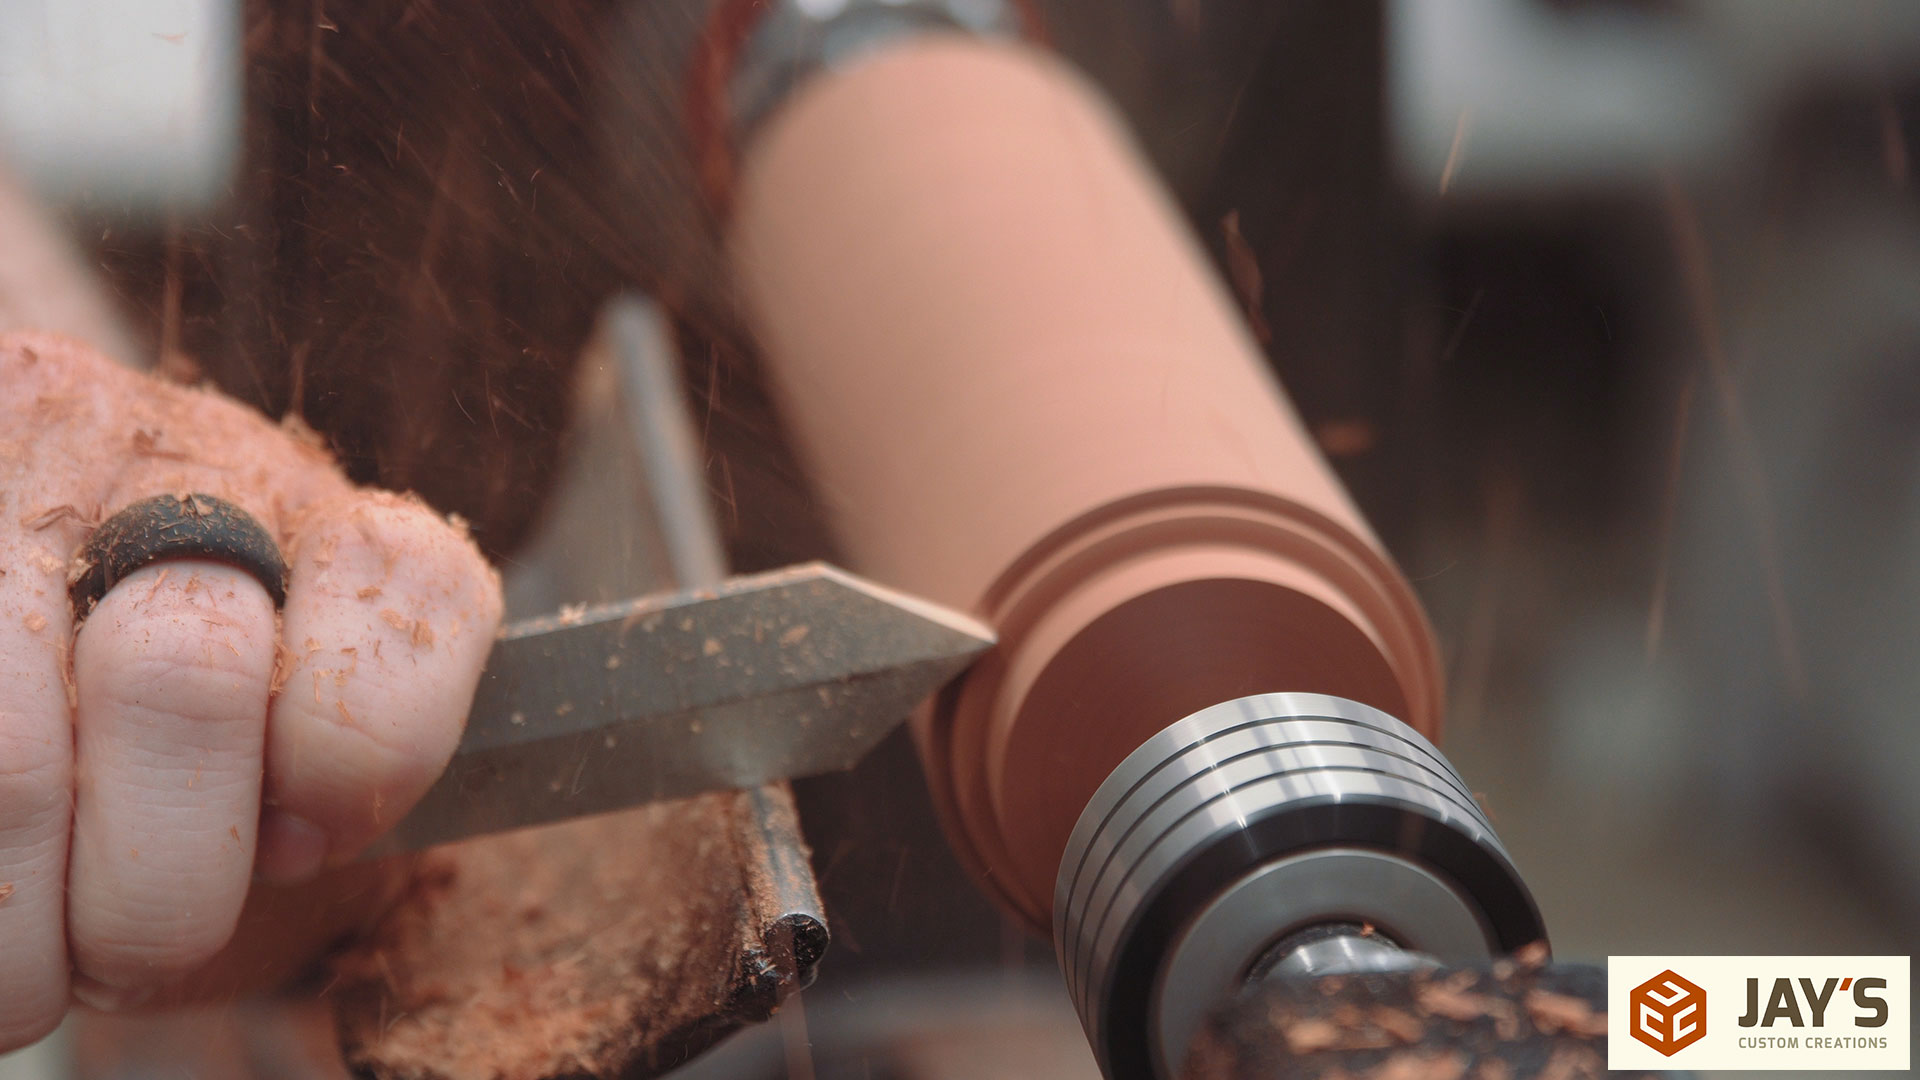
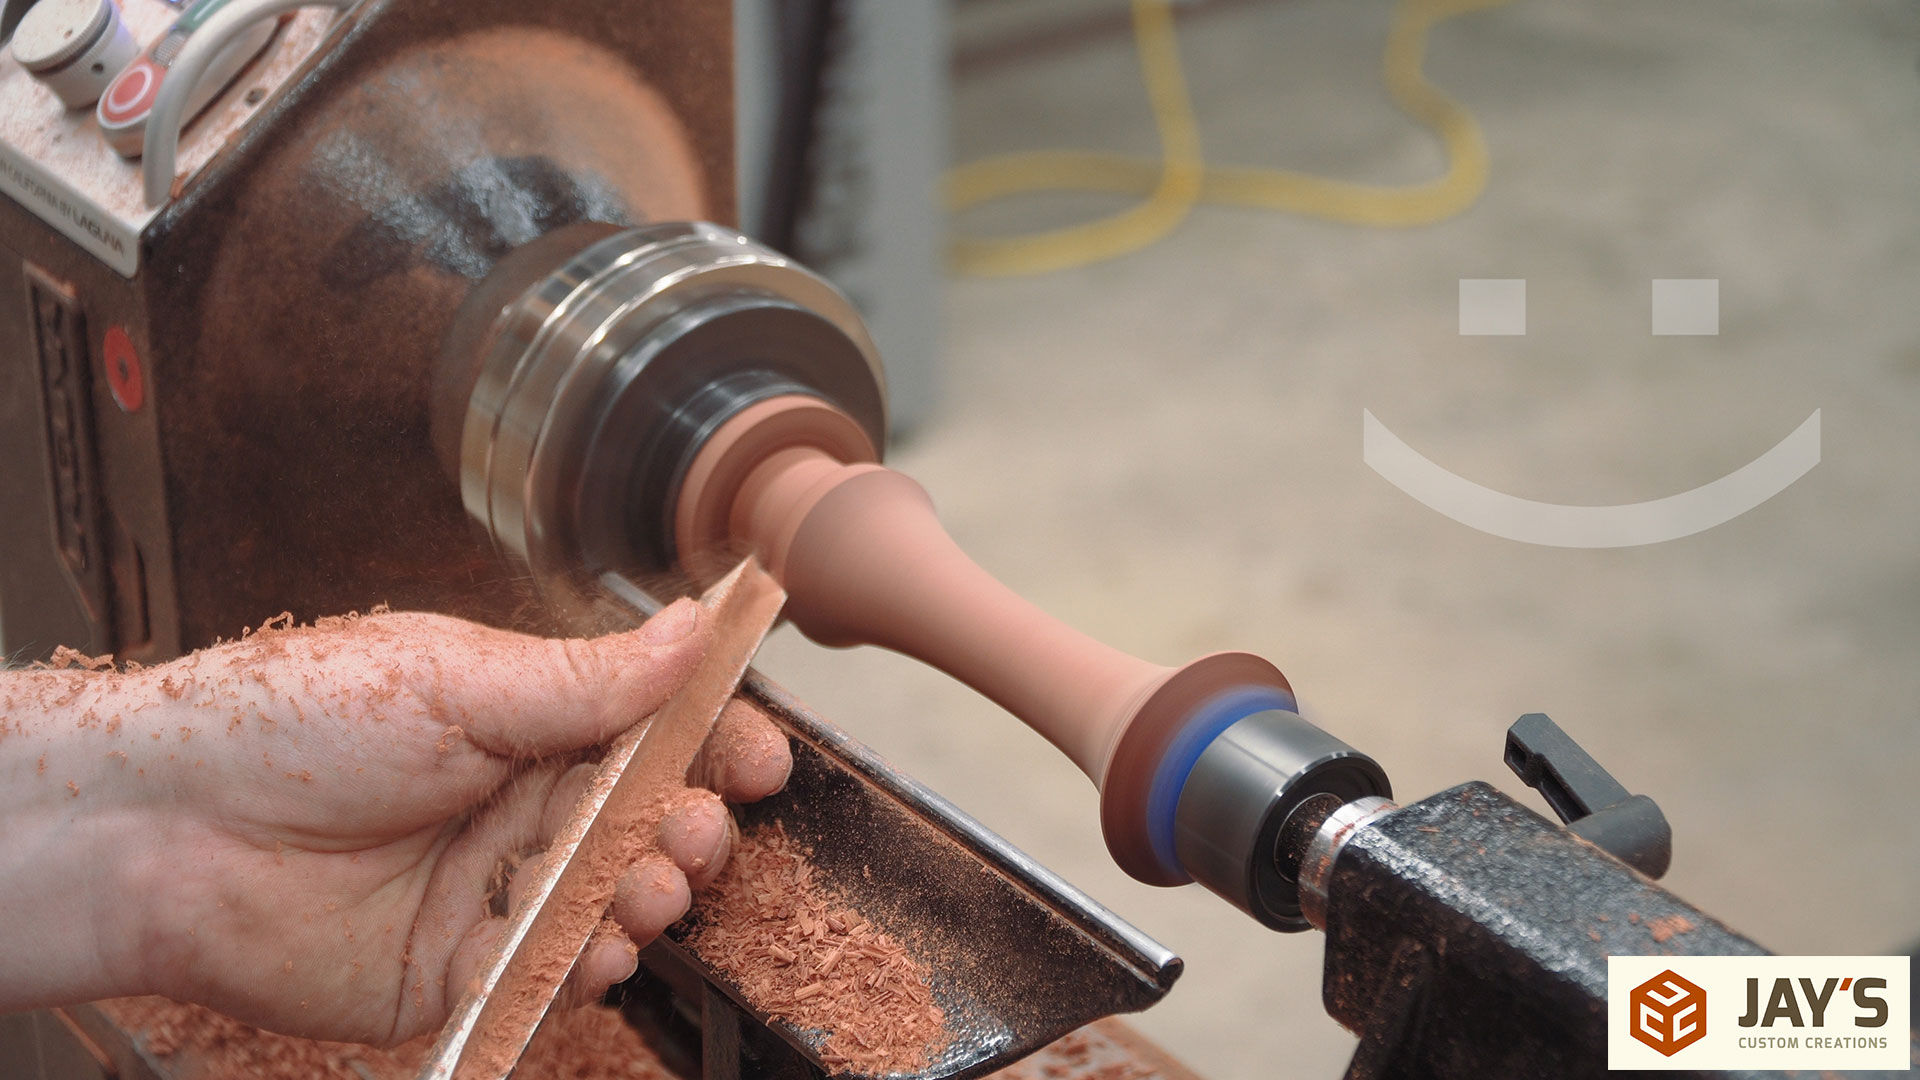
The second spindle started out the correct way. Just as before I turned a tenon to fit inside the jaws of the chuck, reversed the peace, and then started on the opposite end. This time I started with creating the top of the handle.
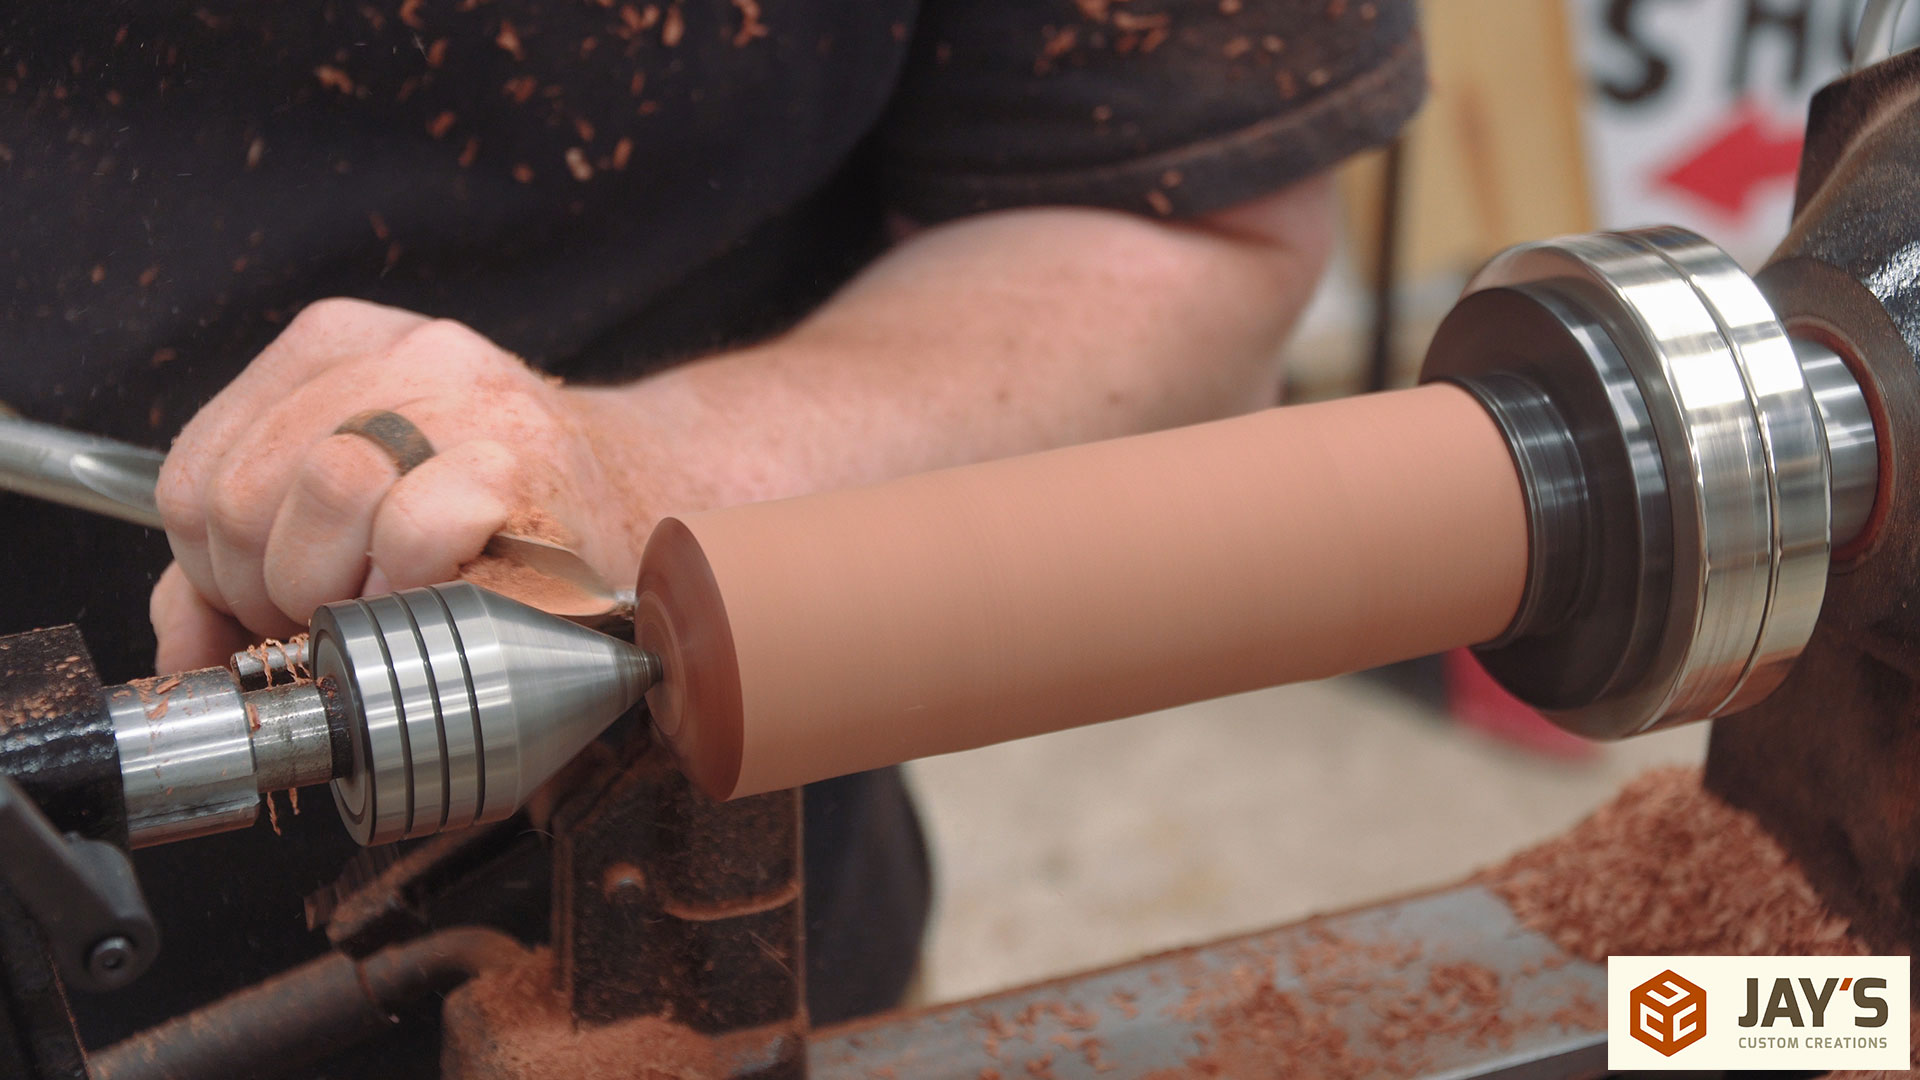
With the spindle already turned true and spinning without any wobble it is easier to remove the tailstock and still have a straight spinning spindle. Then the hole from the tailstock was removed with a bowl gouge and the final shaping of the handle top was done.
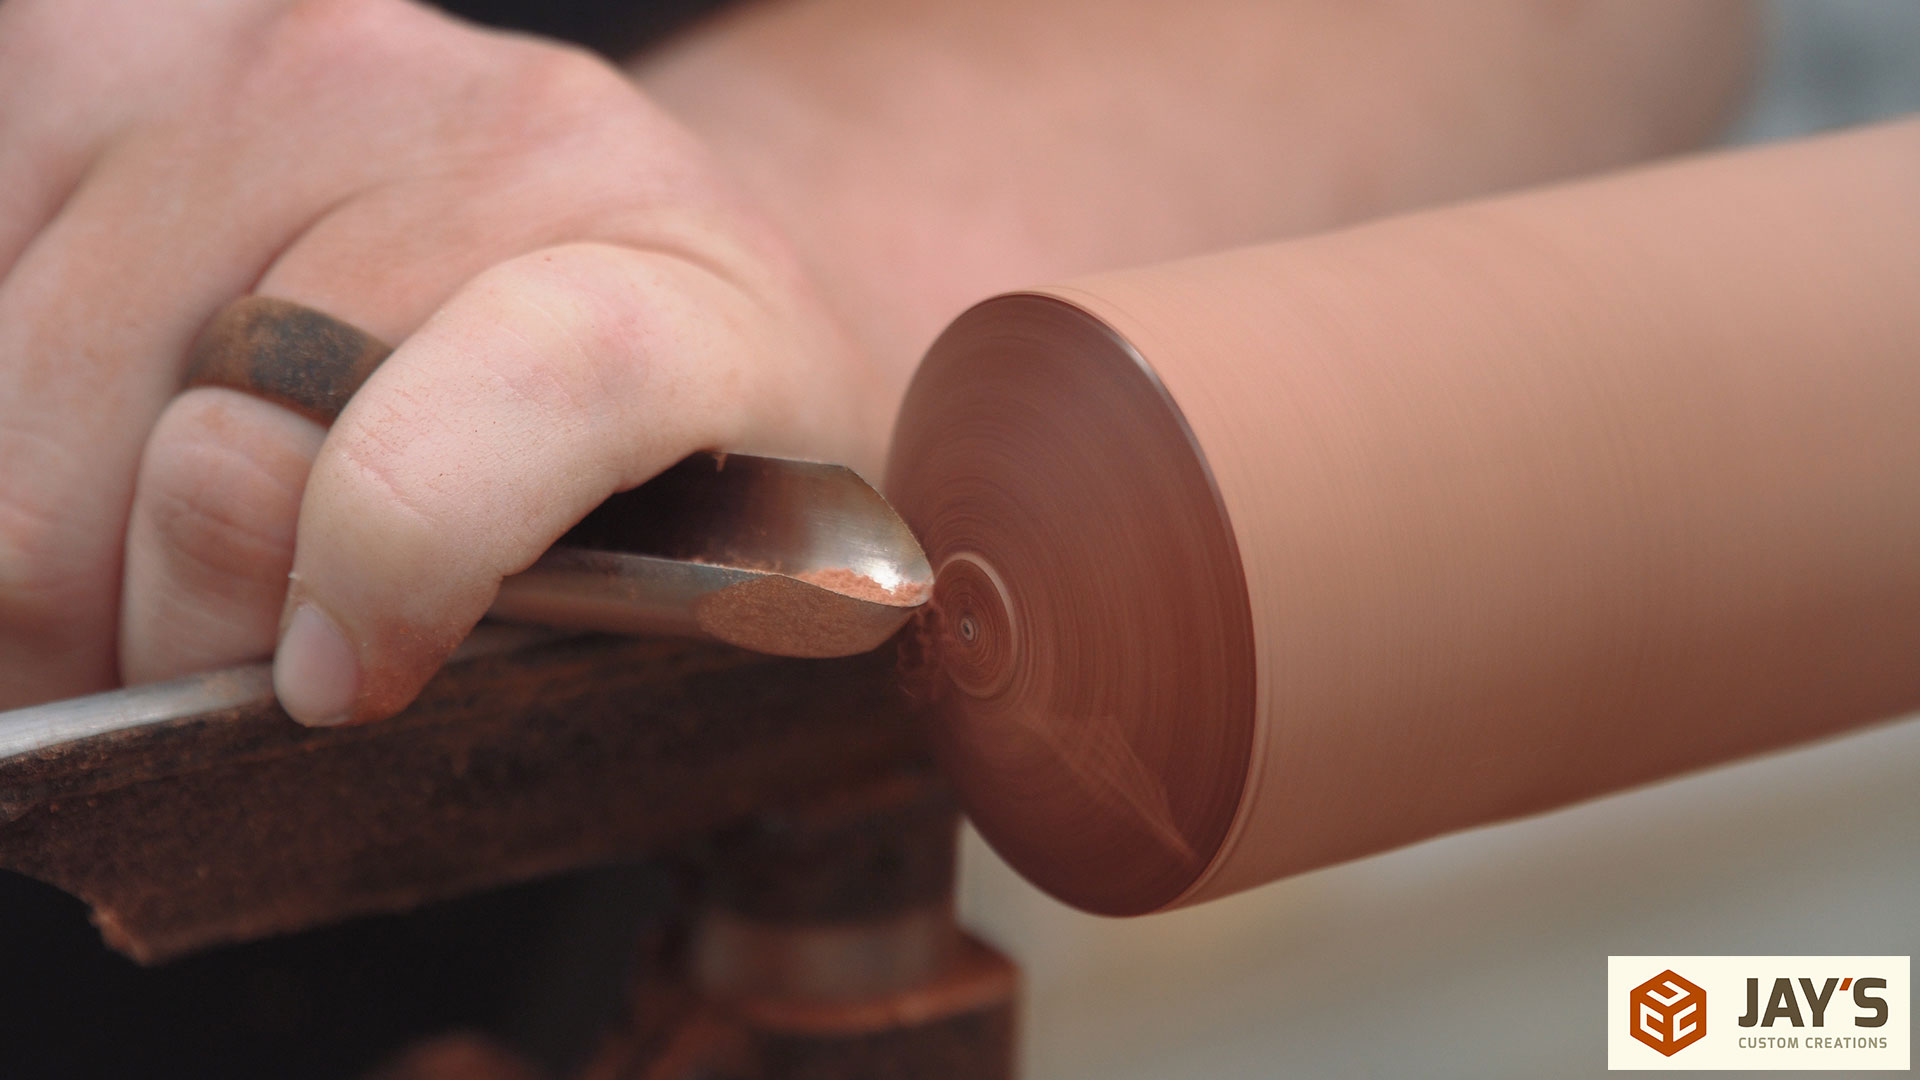
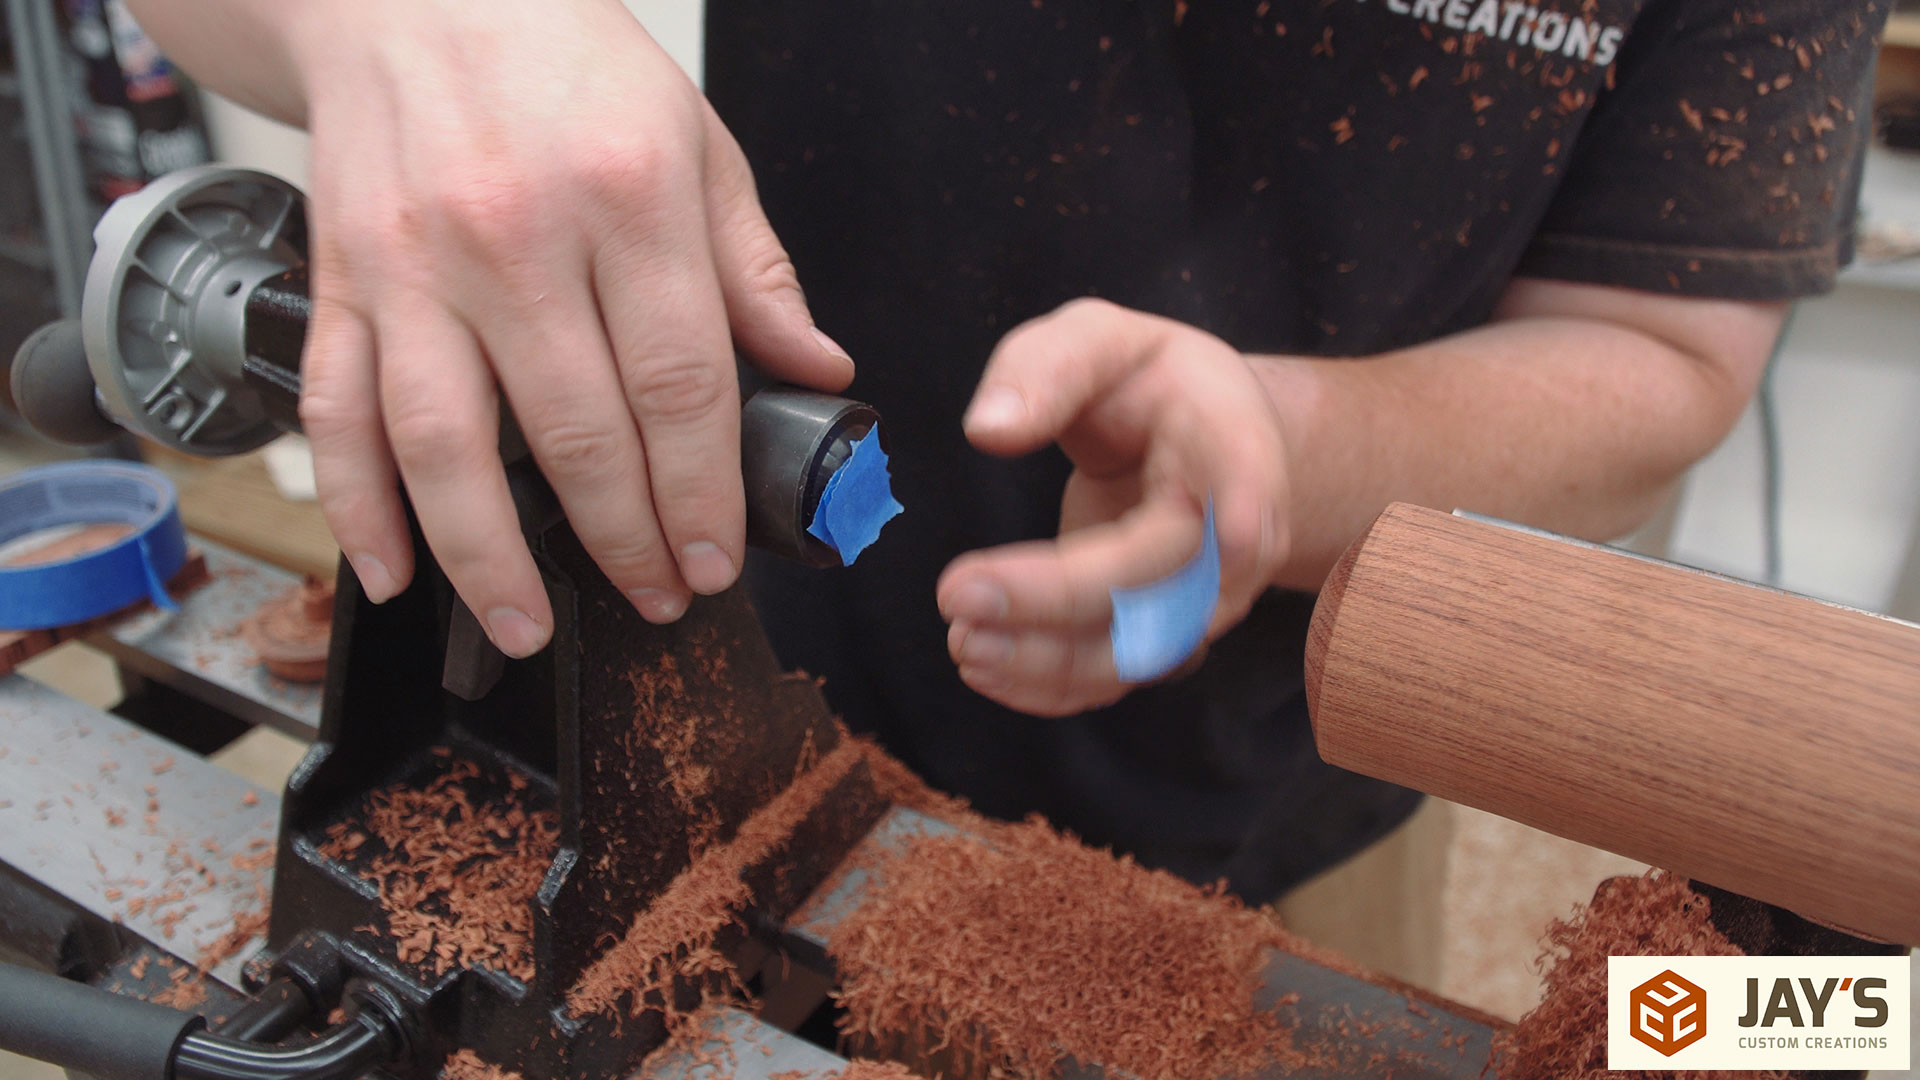
The live Center that came with the lathe has a removable center section. This was convenient so that I can put tape over the top of it and not damage the wood as I push it back in place for more support.
The same process was done to establish the interior slope of the handle.
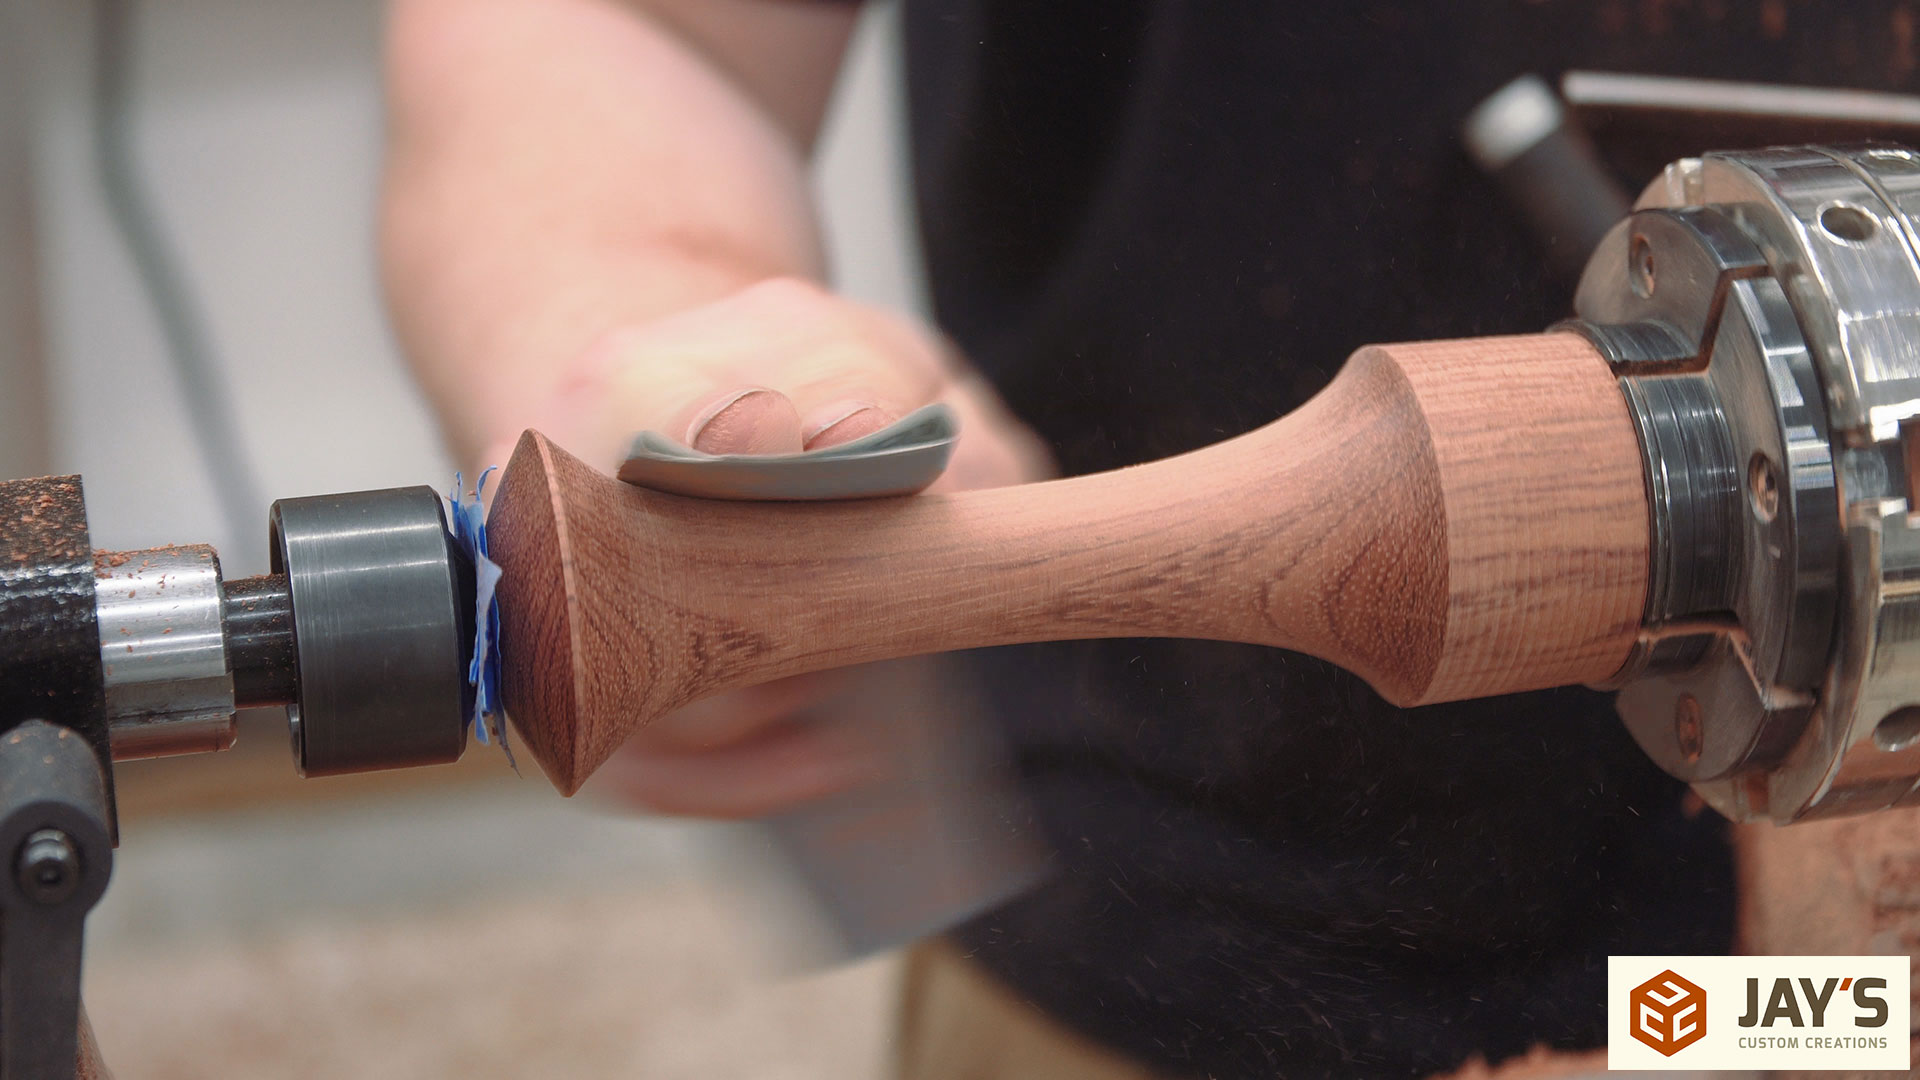
And with the shape completed I went ahead and sanded the interior section. The top of the handle was established with a very fine clean up pass that actually left a flawless surface that did not require sanding.
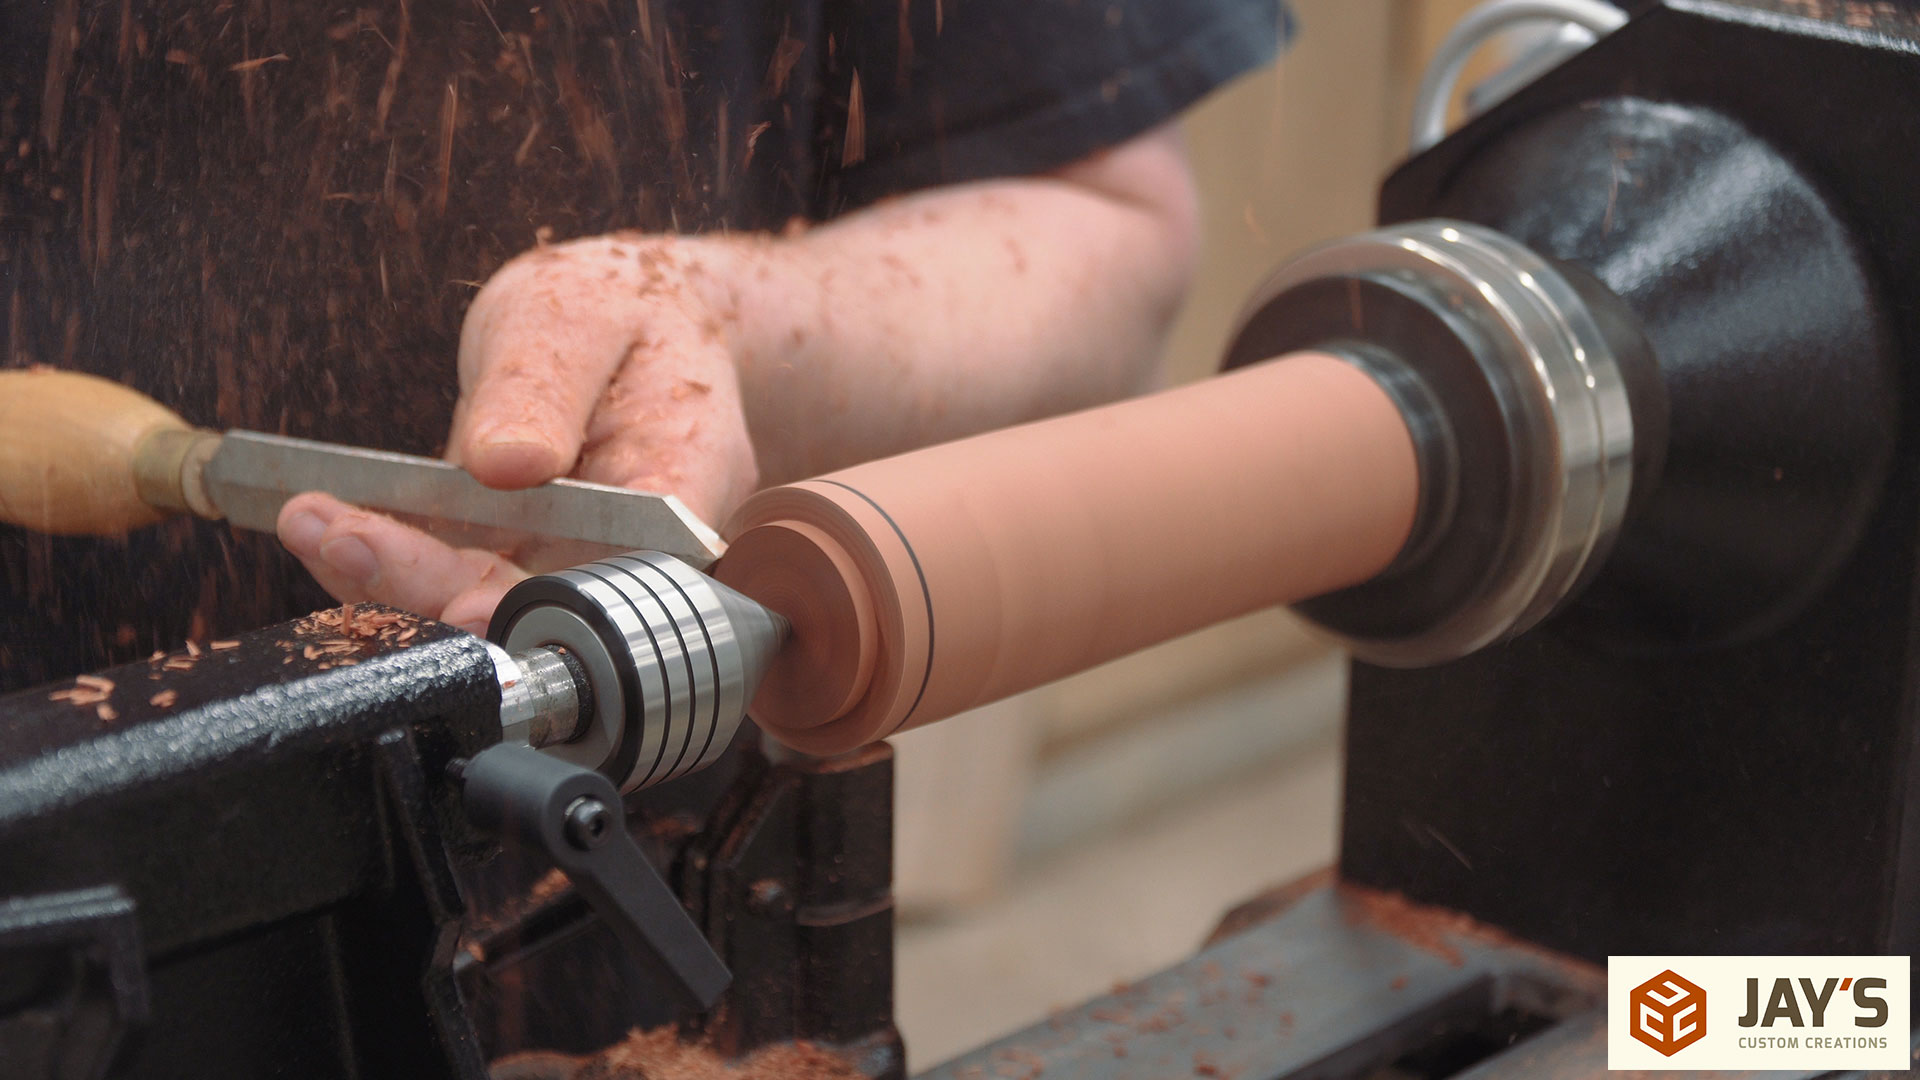
Now it’s time to size the tenon for the bottom of the handle. It dawned on me here that I can’t use the second hole in my gauge block. Luckily the open end hole will do the job just fine.

Unfortunately I had some nasty blow out when I accidentally touched the parting tool to the wrong location. This was just a dumb mistake on my part. I was getting sleepy and I really should not have been in the shop that late.
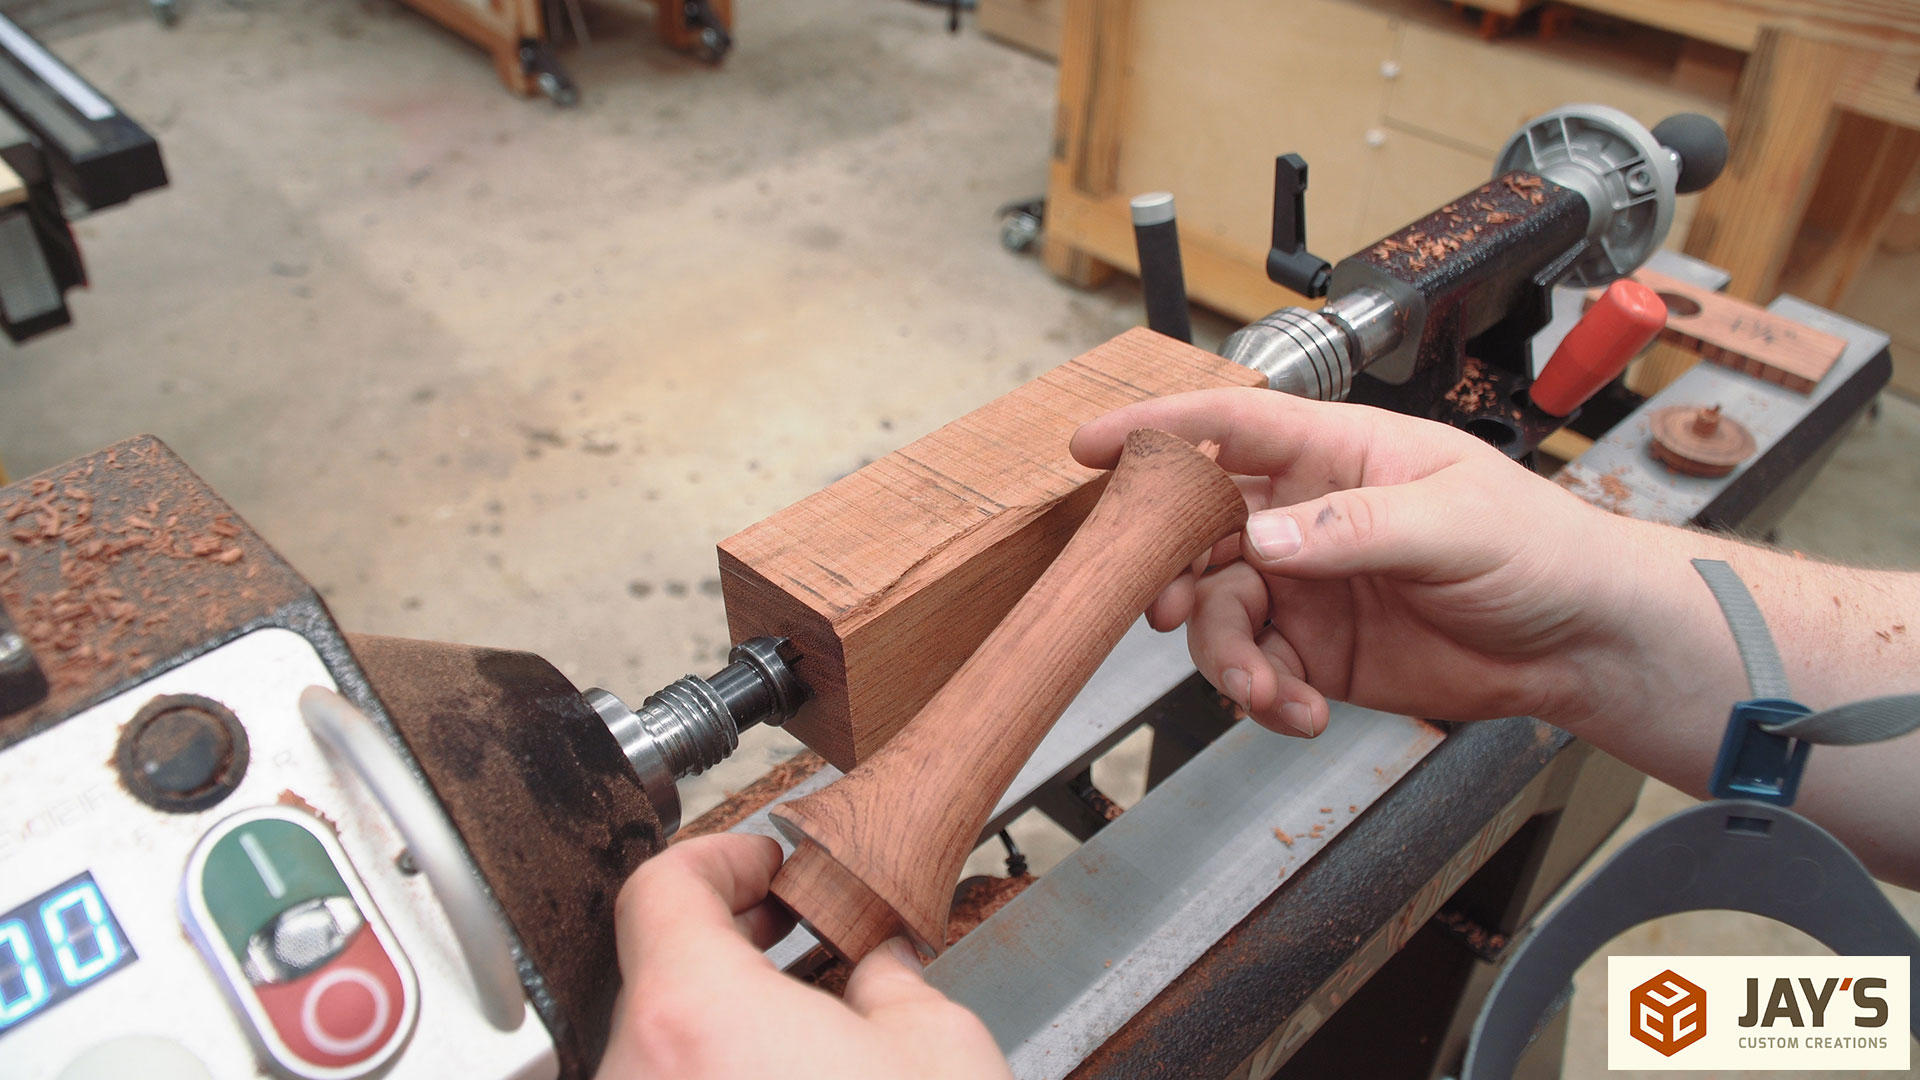
The solution was very easy. Just cut it away. I was a little bummed when this happened but in the end I think it looks even better.
And here’s the completed spindle or handle.

I’m just about ready to turn the platter but first I need to move the extension table to the outboard side of the headstock. The extension table has three slotted holes to slide over and then drop down on top of three bolts. This makes moving the table quick.
To start the platter turning I secured at the faceplate to the platter with screws that ended up being thinner than what they needed to be. Two of these ended up breaking off as I remove the screws.
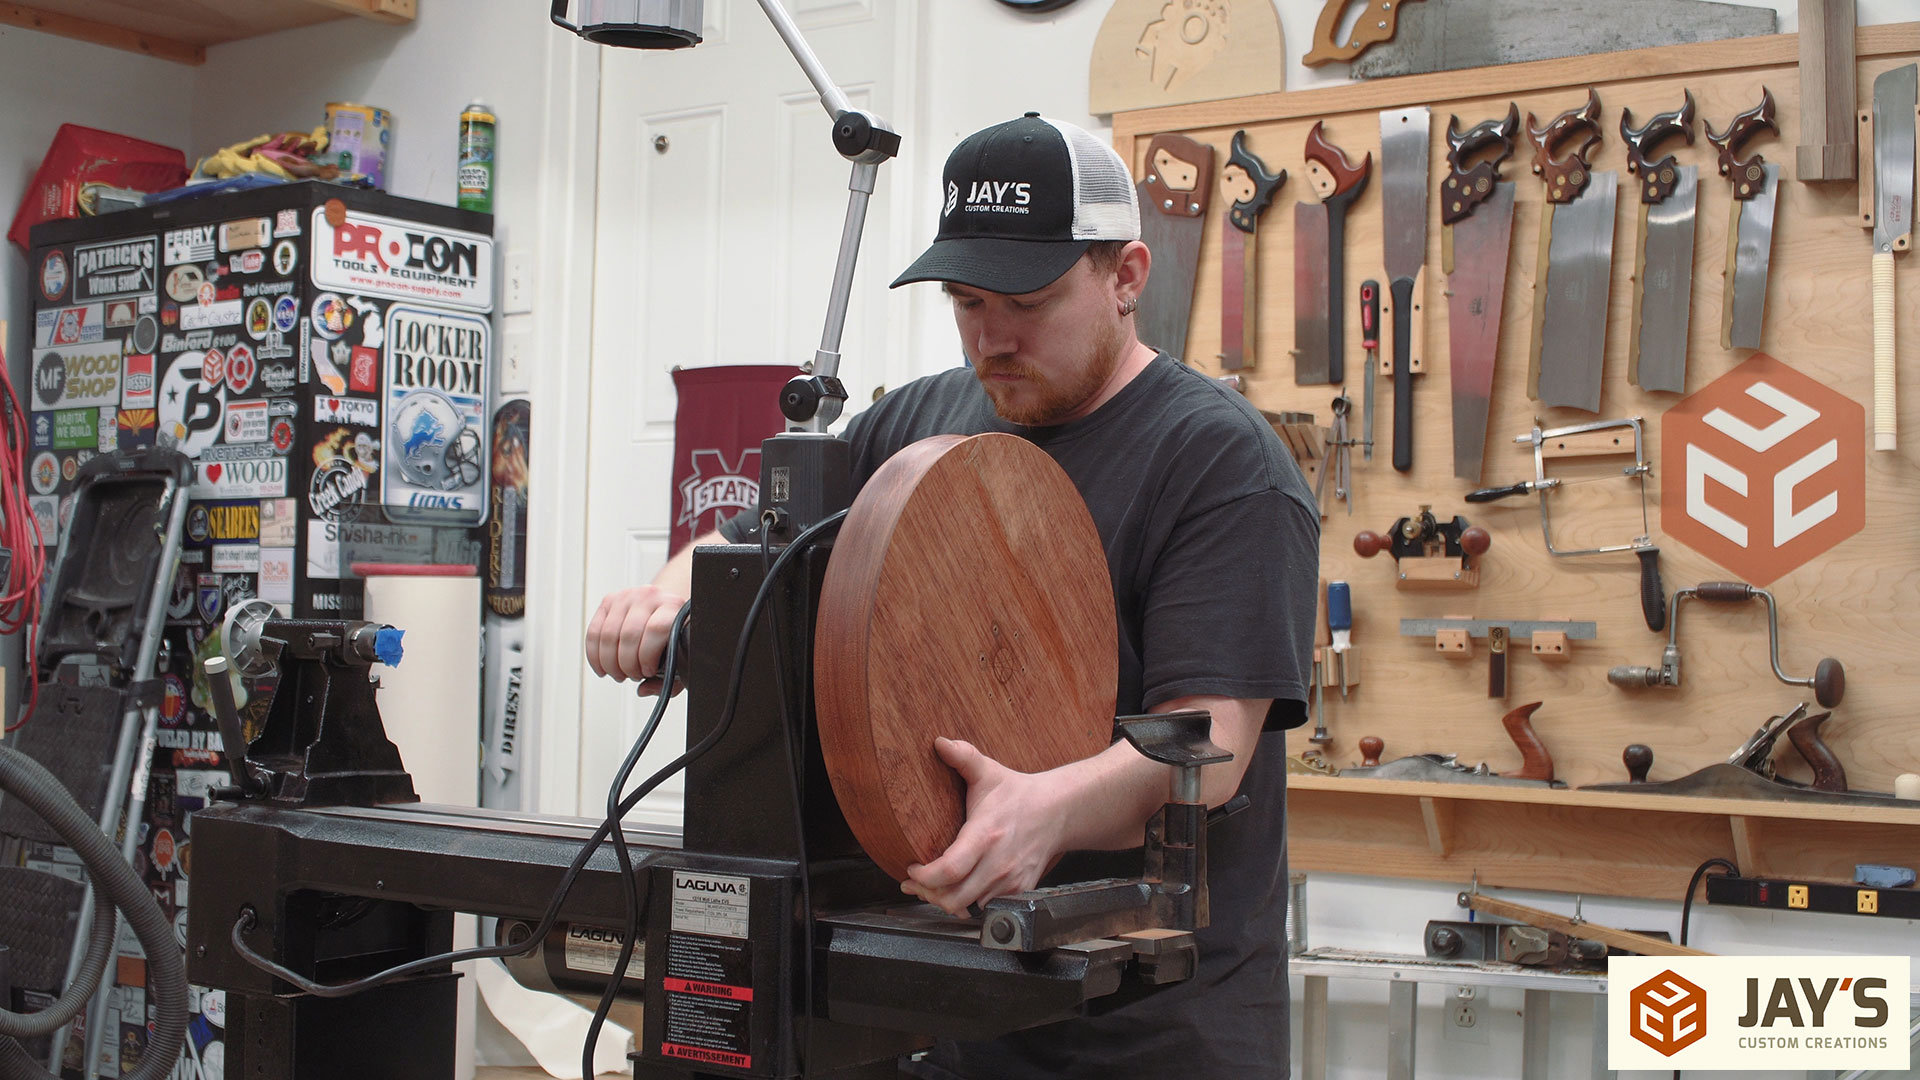
Finally the platter can be mounted to the outboard side of the lathe.
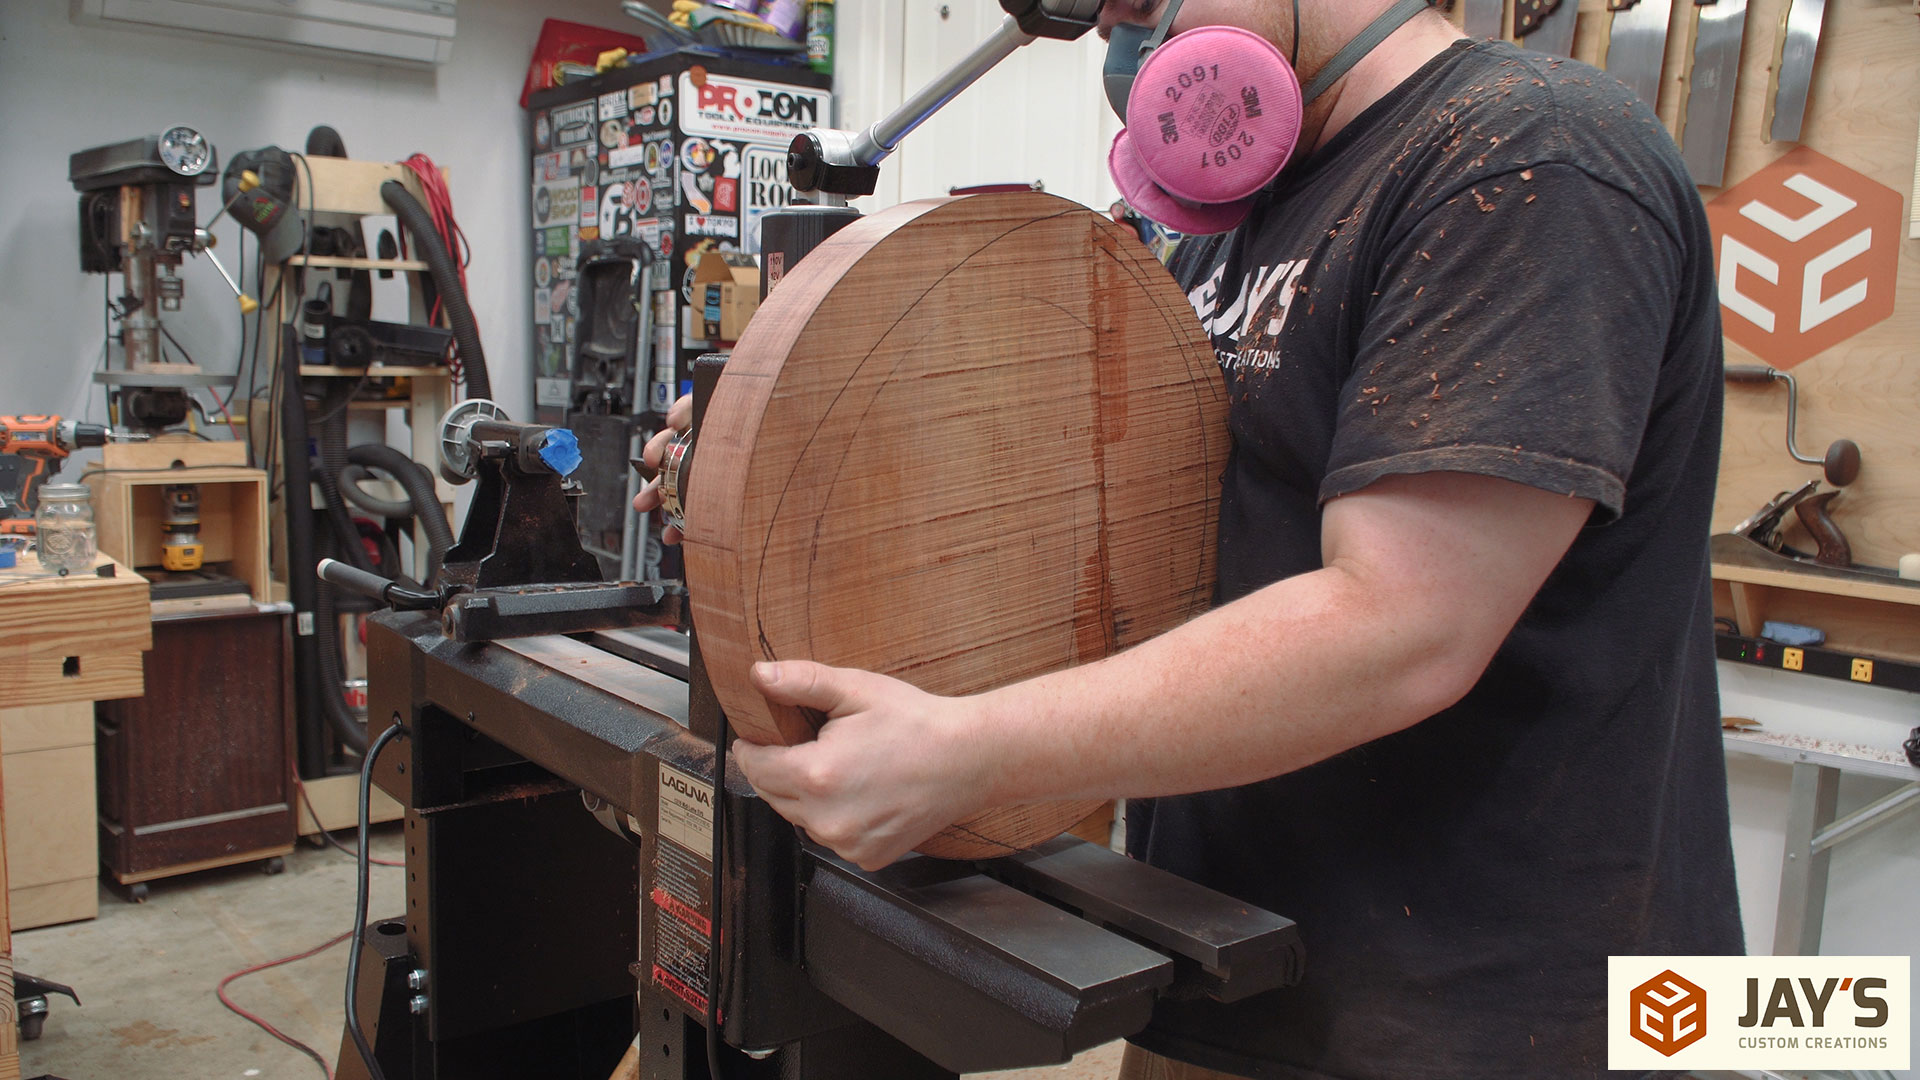
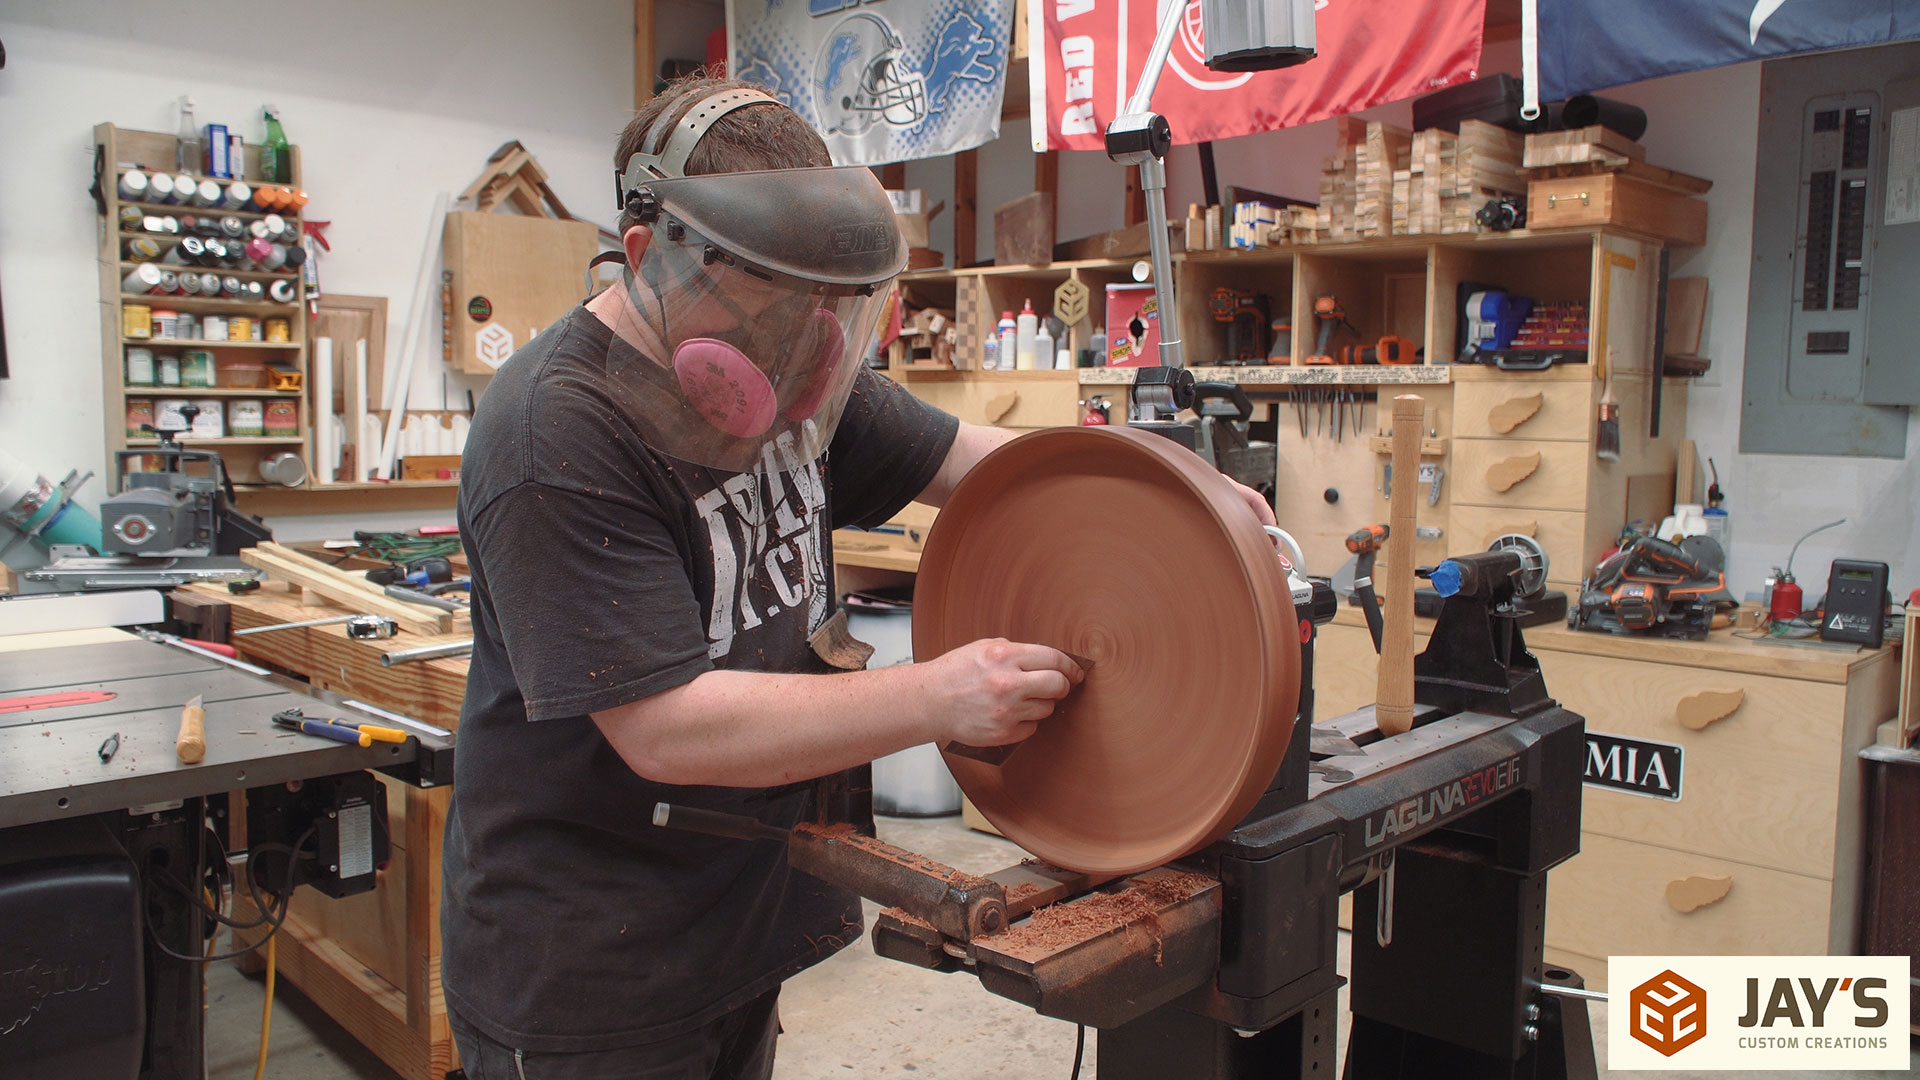
This is by far the biggest thing I’ve ever turned on a lathe. At 16″ it may not be that big for some seasoned woodturners but for me it was just a tiny tiny tiny tiny tiny bit intimidating. Maybe just a little bit more than that…
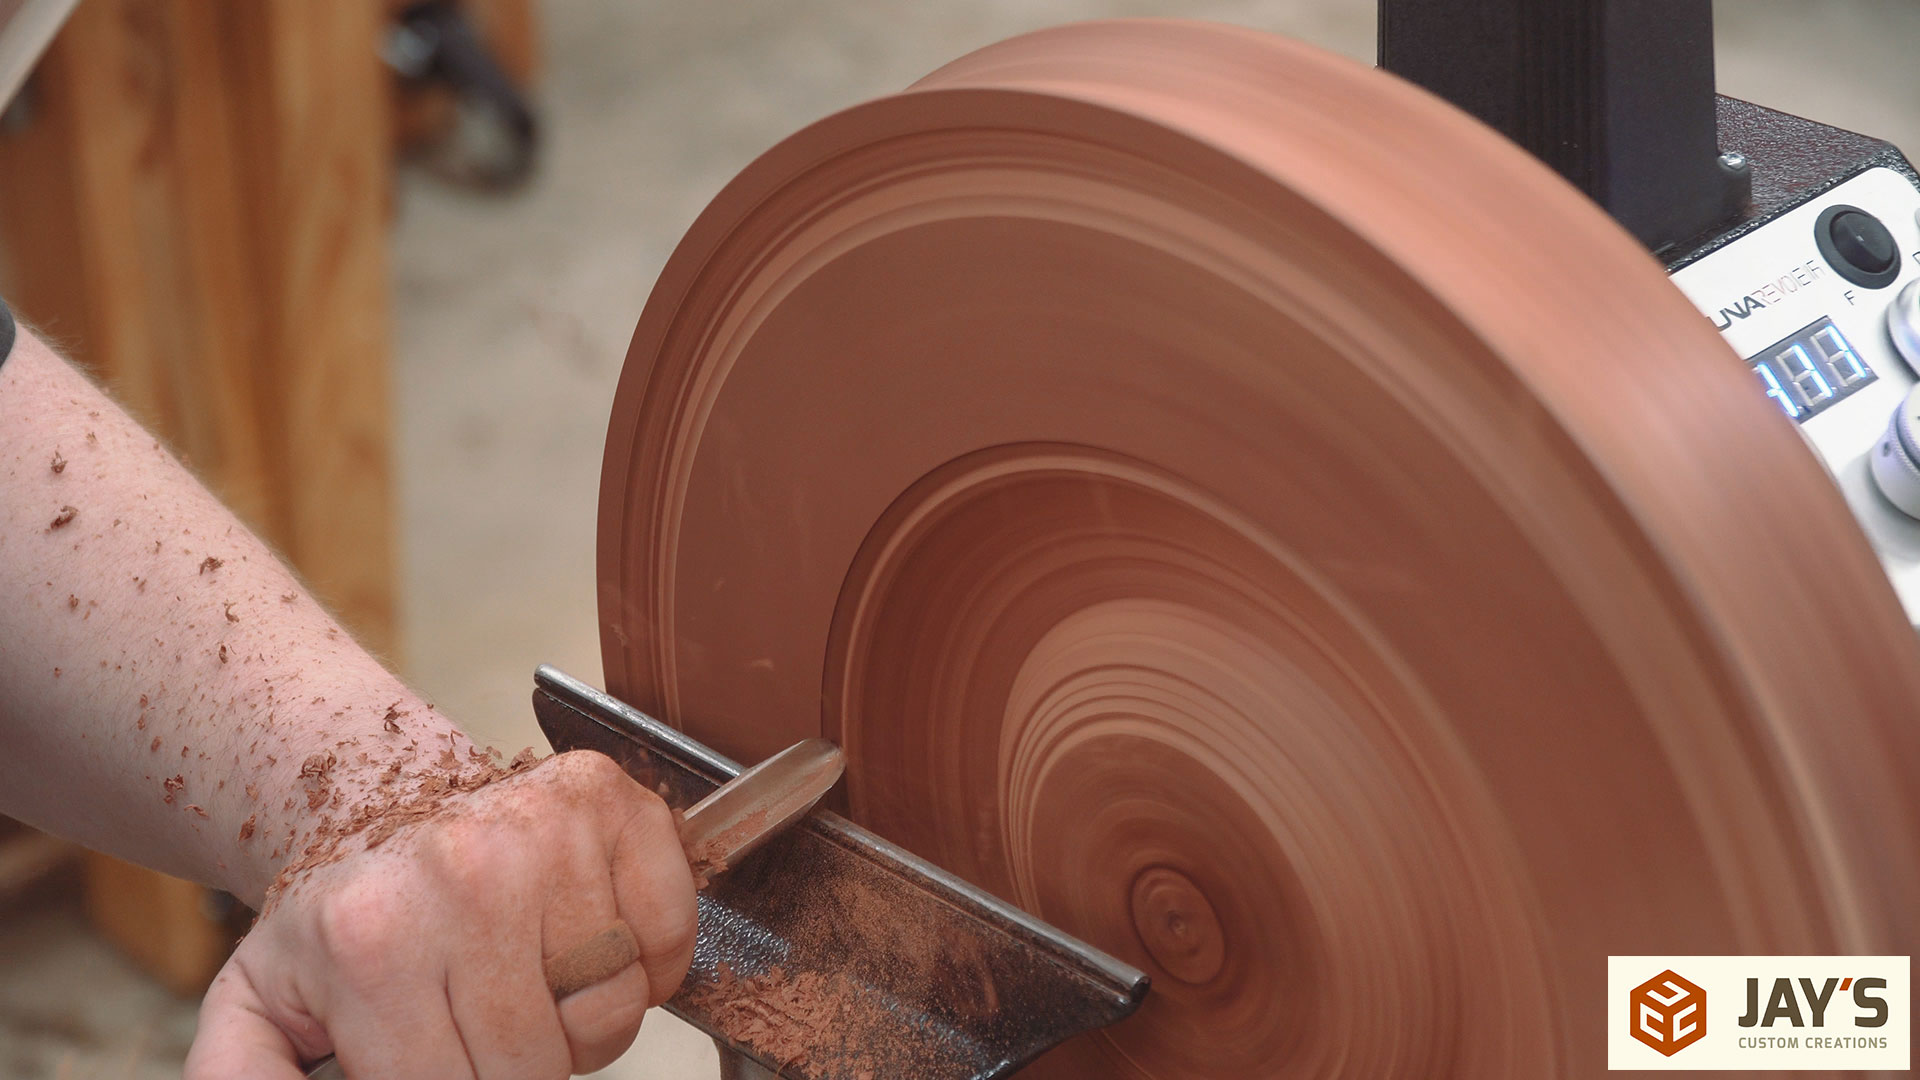
I alternated between the sides and bottom a few times to try to get a feel for the piece and how the lathe would react.
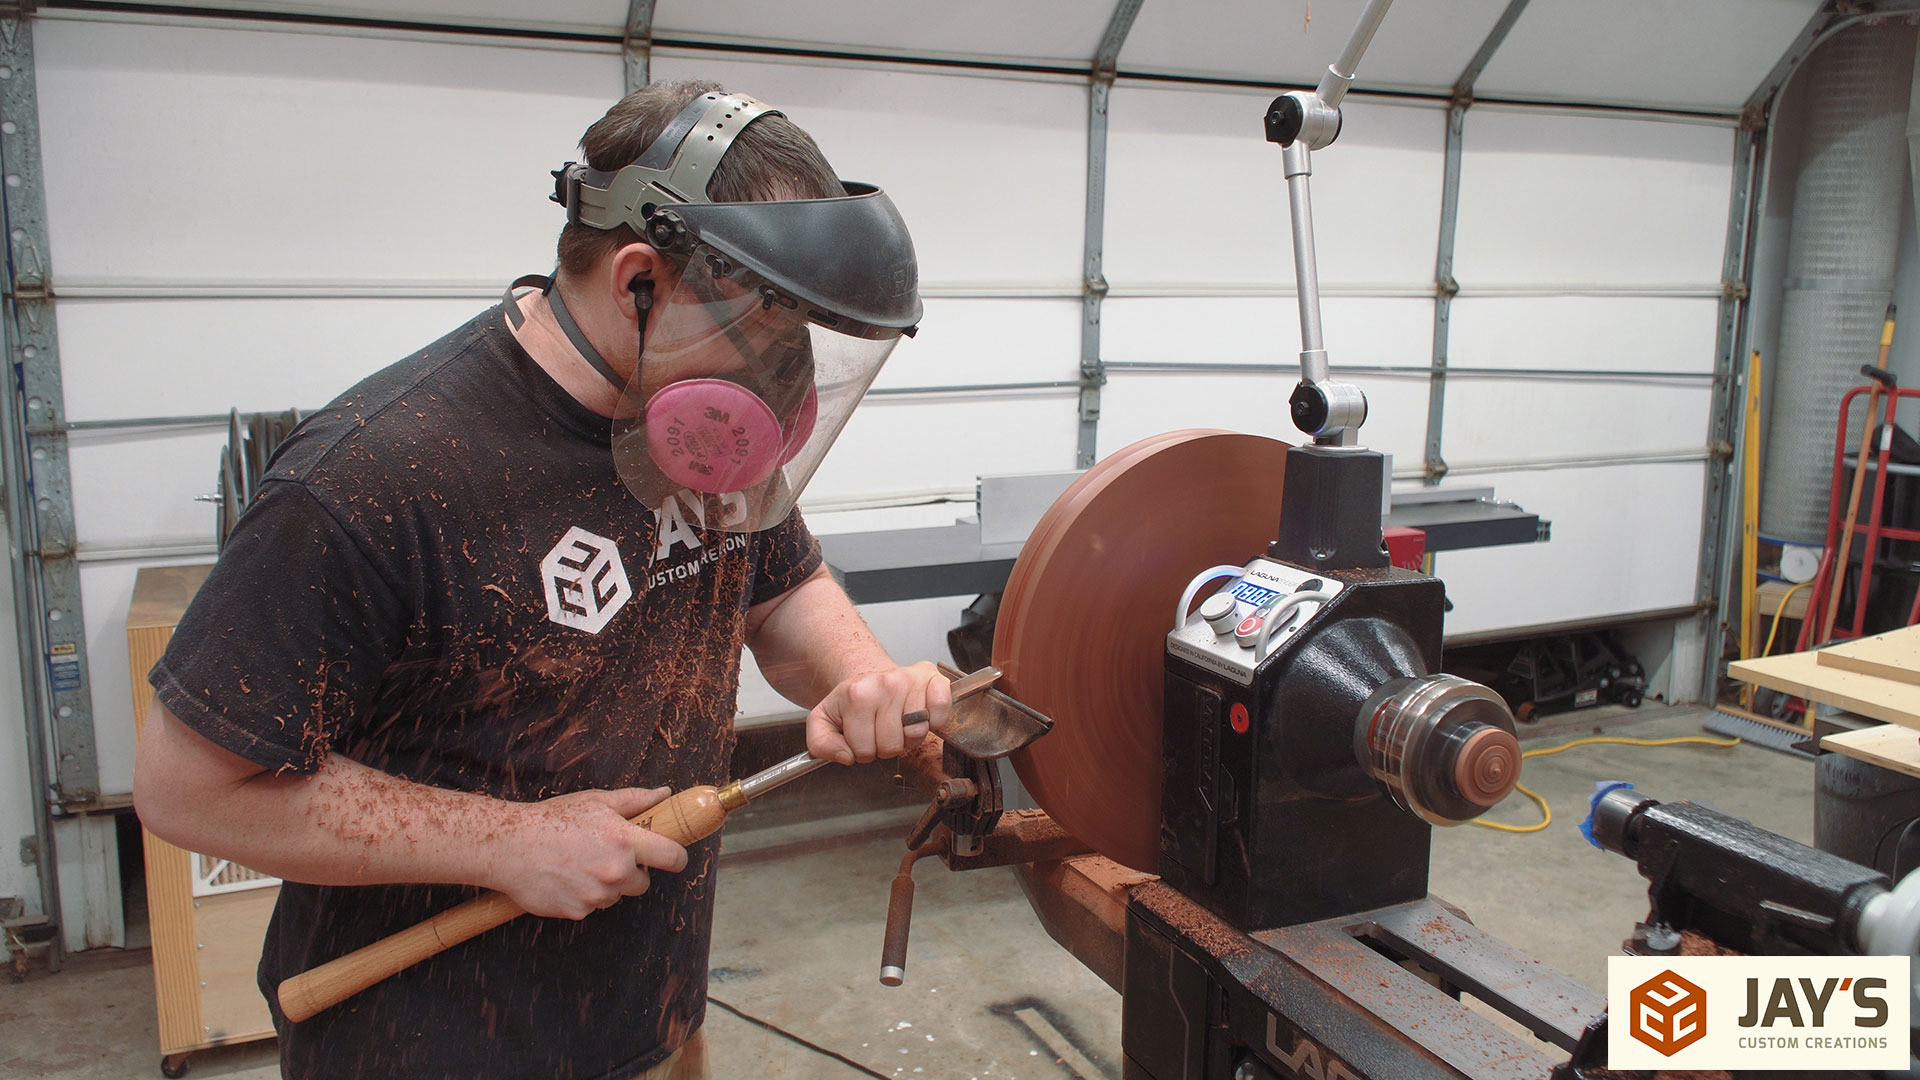
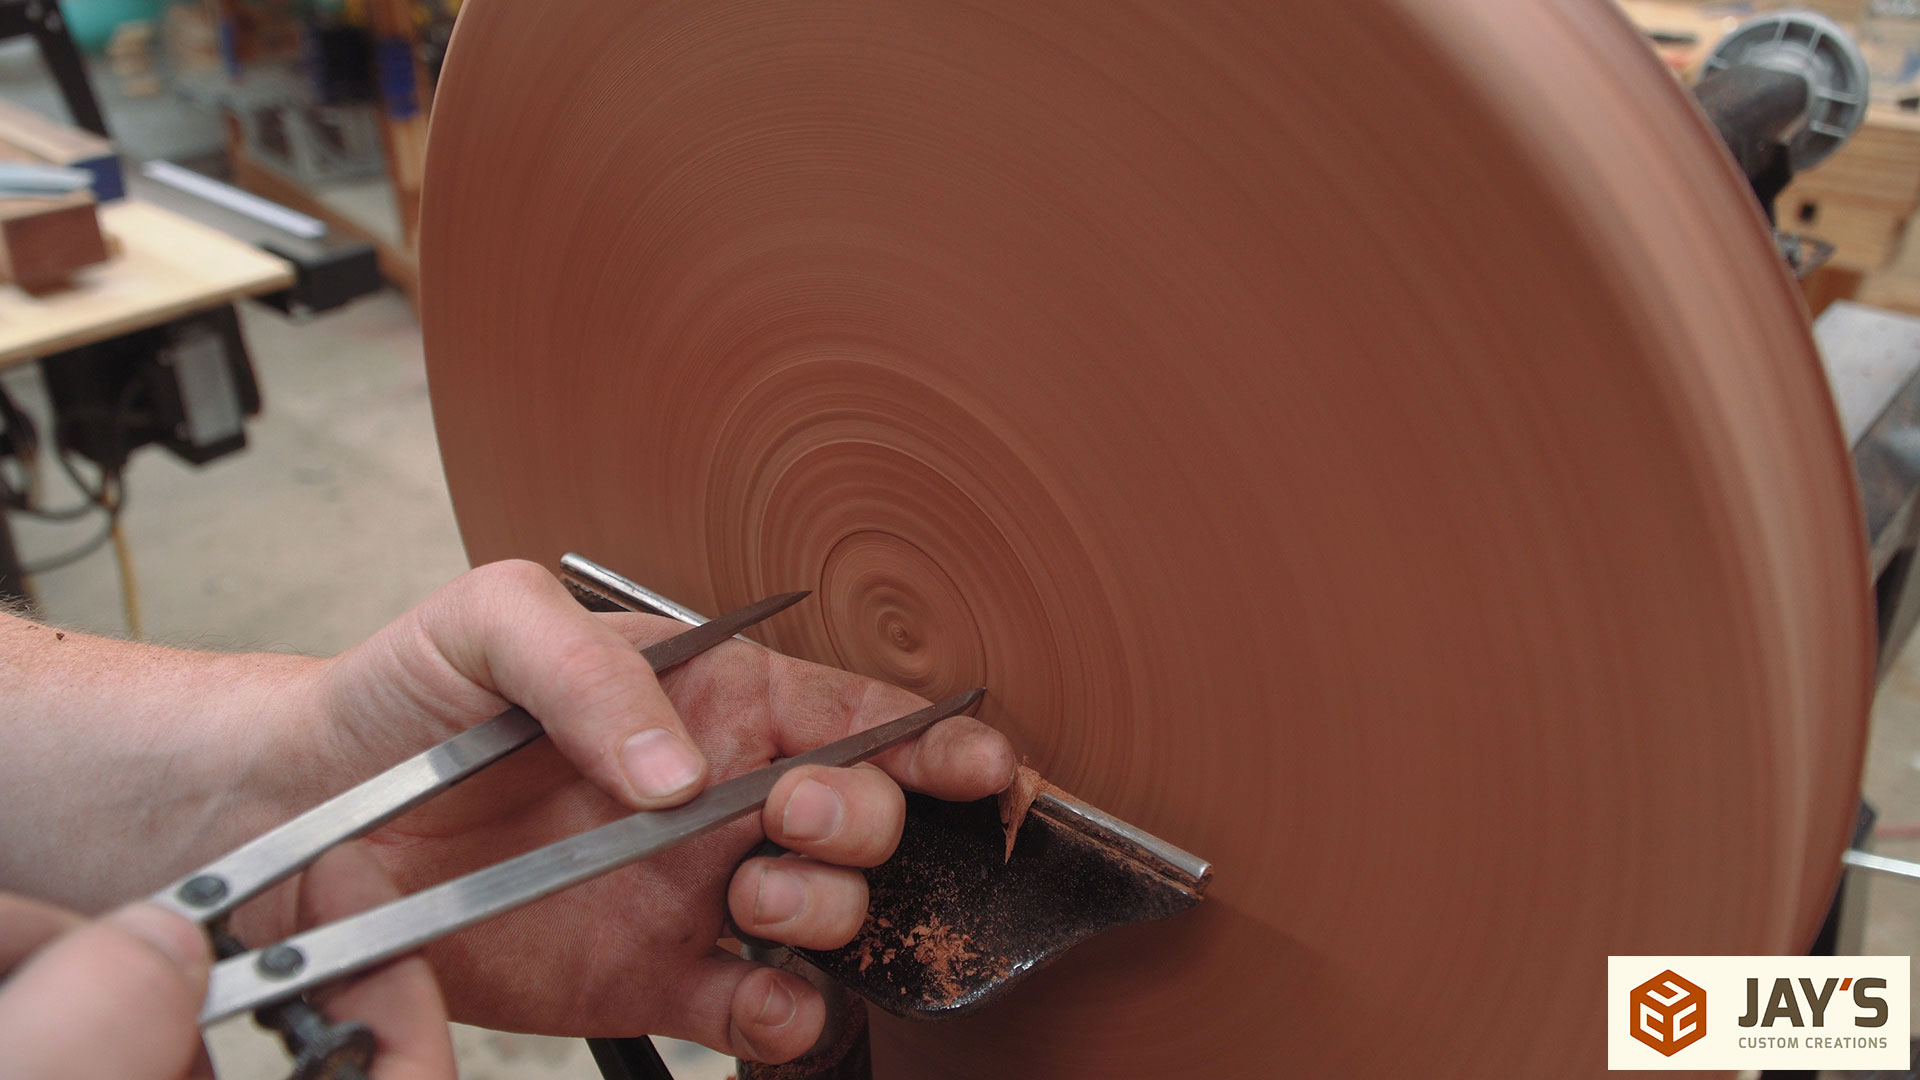
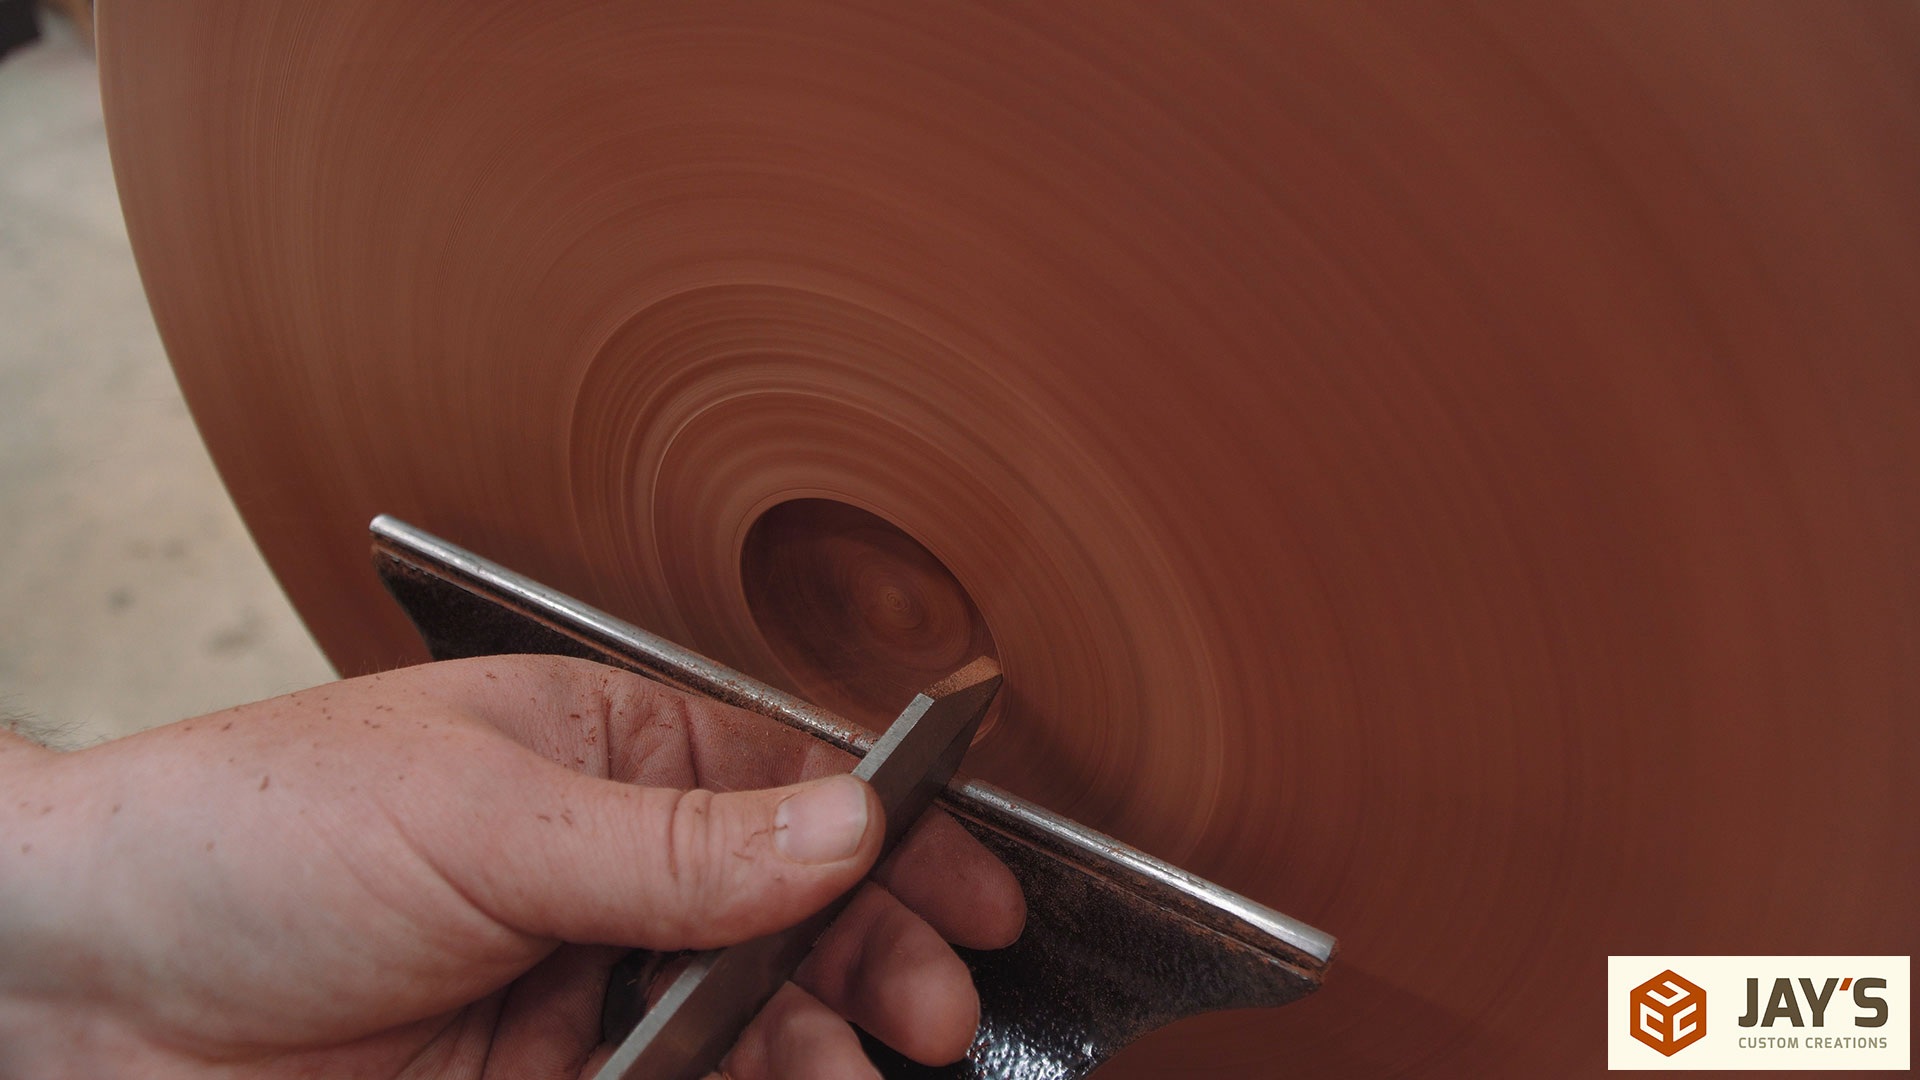
A mortise needs to be cut on bottom so that it can be held on to the jaws of the chuck to turn the inside of the platter. To do this I used some straight dividers and size them to be the same size as the outside diameter of the chuck jaws. Then very carefully just the side that has the wood going in the down direction can be pushed into the wood. This scratches a circle into the bottom that can be used as a reference to cut a mortise.
To remove the bulk of the material I used a bowl gouge.

And then followed that up with the parting tool to get crisp mortise walls.
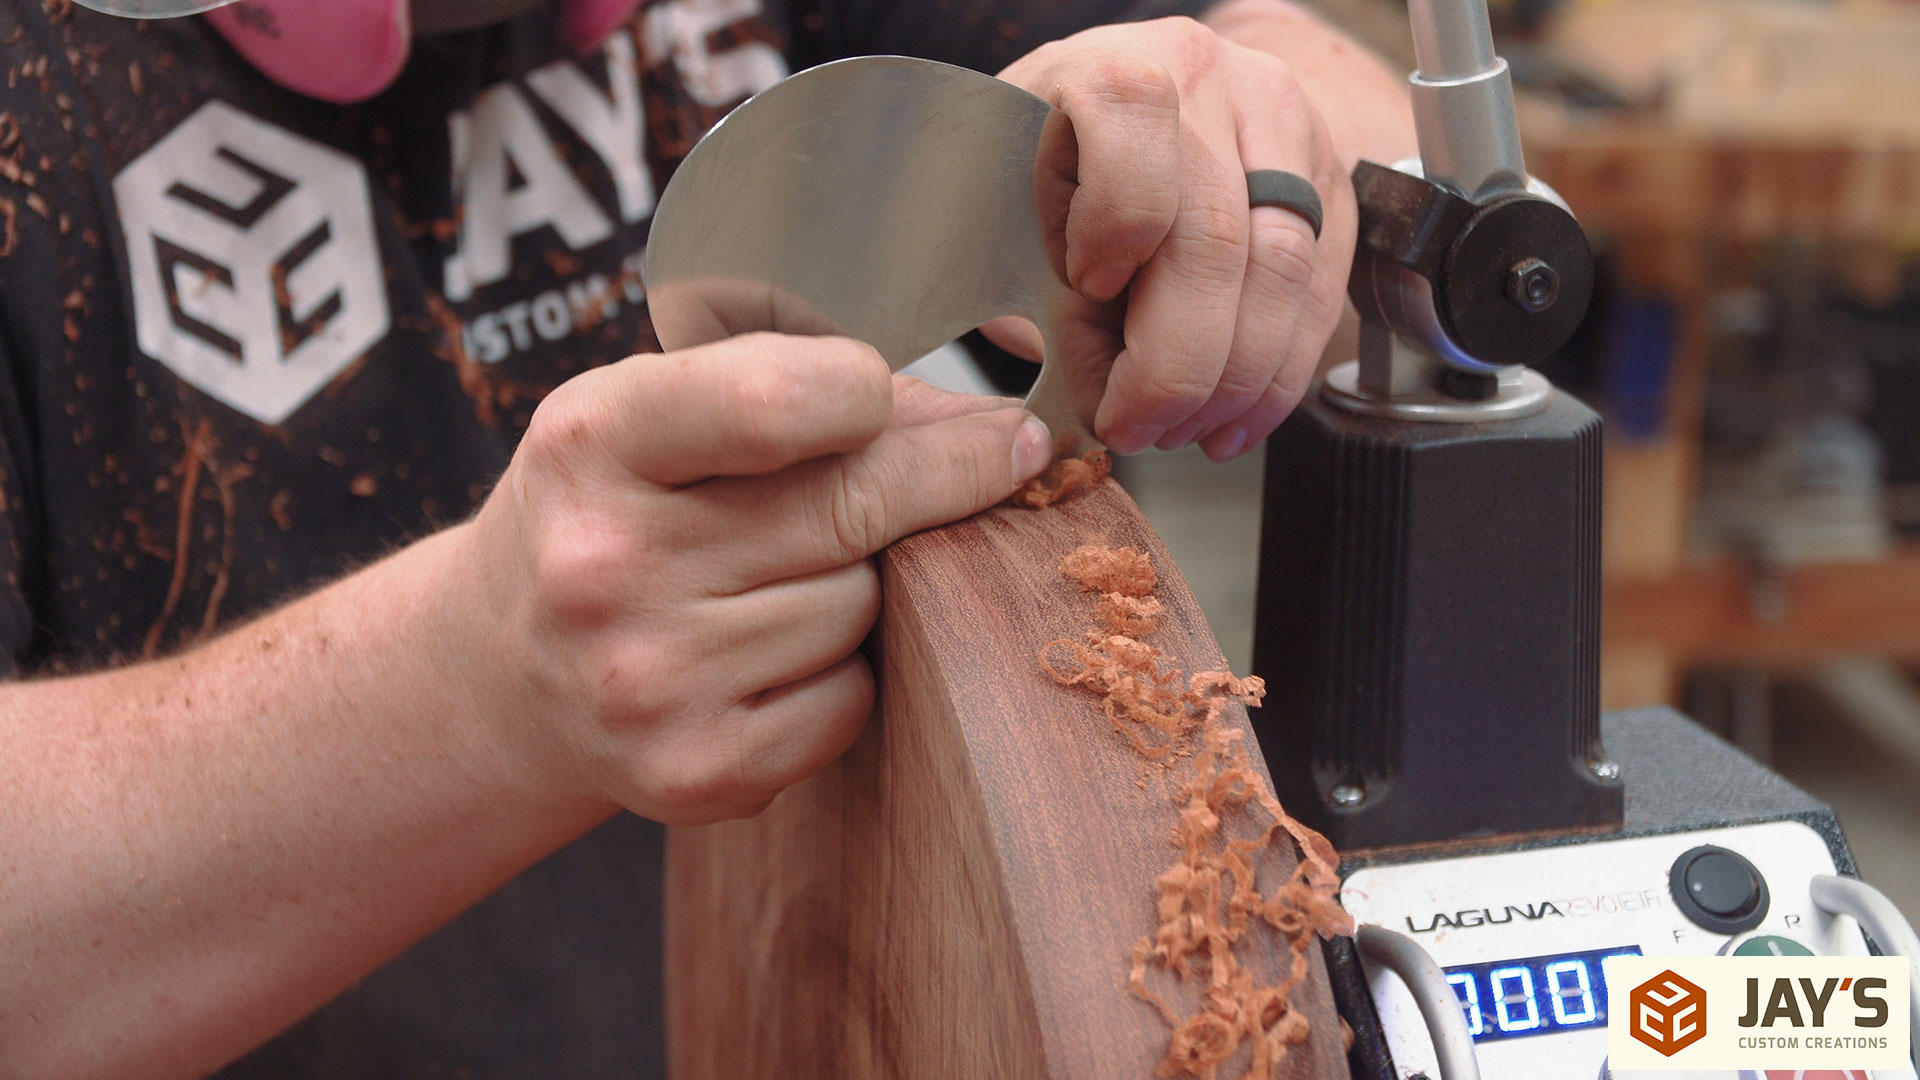
I was almost ready to turn this around and work on the inside but I figured I’d go ahead and clean up the sides just a little bit. This bubinga had a tremendous amount of tear out. I’m not sure if that was technique or the tools just not being sharp enough at certain times or maybe it was the grain direction. Either way there was some areas that really gave me fits so I resort to using hand scrapers.
These two holes or where the screws broke off as I remove the faceplate. Lesson learned; use better screws next time.

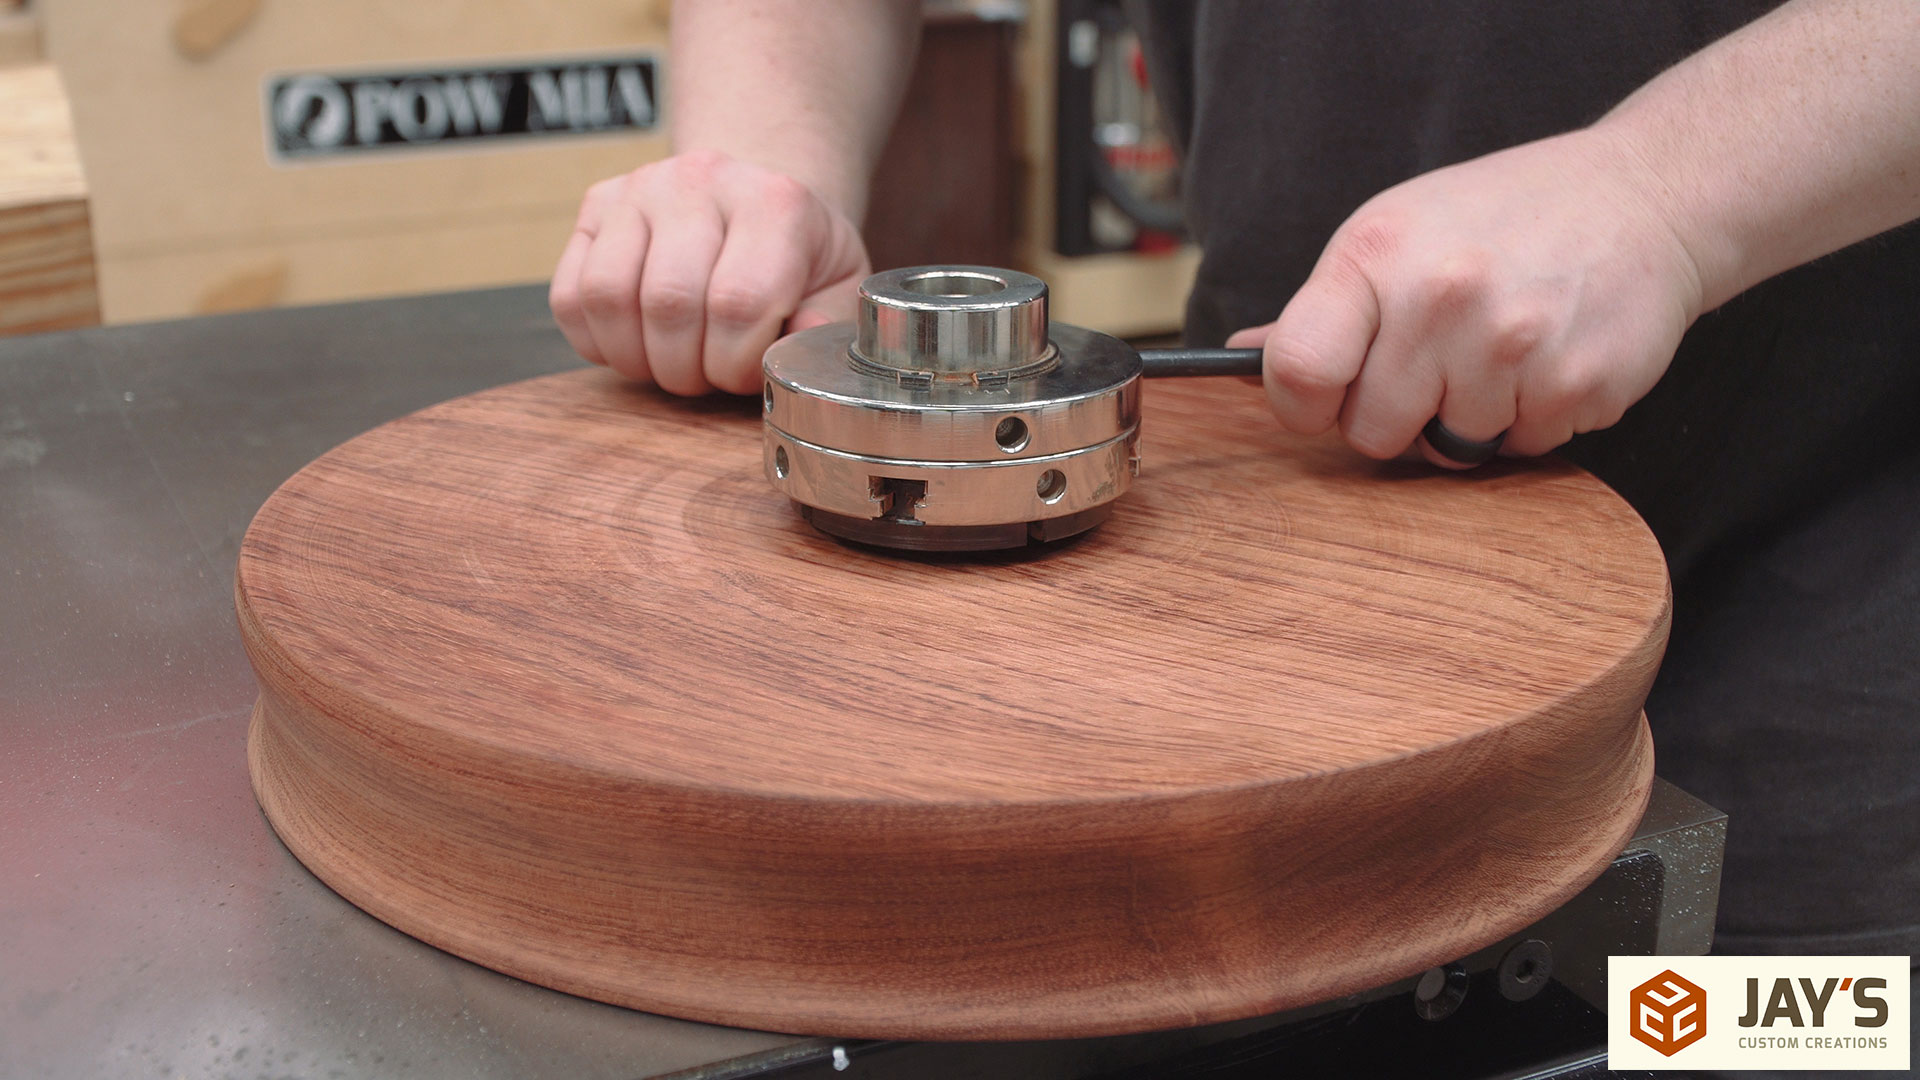
I decided it would be easier to install the truck with a platter laying flat. This allows me to use gravity to hold the truck inside the mortise as I expand the jaws. I figured that would be much easier than trying to wrestle this piece onto the jaws in its vertical orientation. This bubinga was pretty darn heavy.
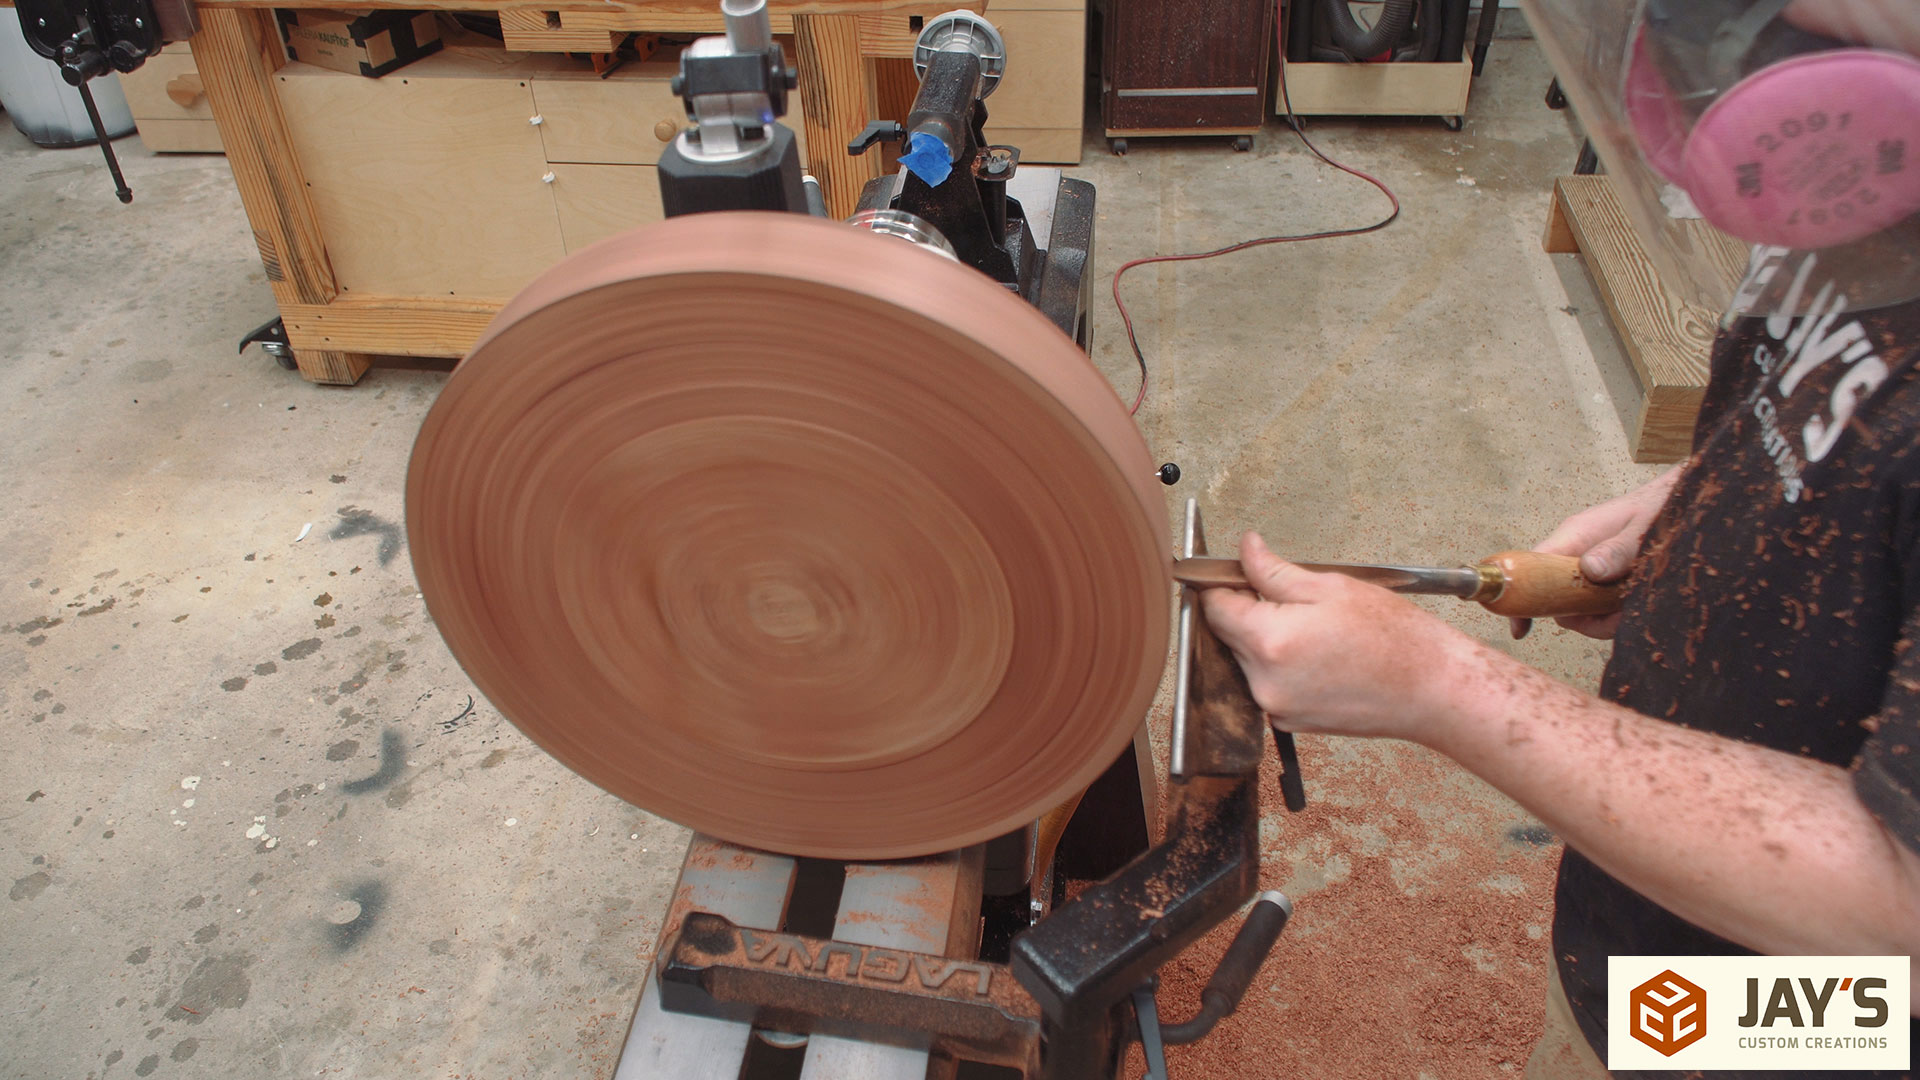
Turning the inside is all about bulk waste removal at first. I have a 1/2″ bowl gouge and it made pretty quick work of this.
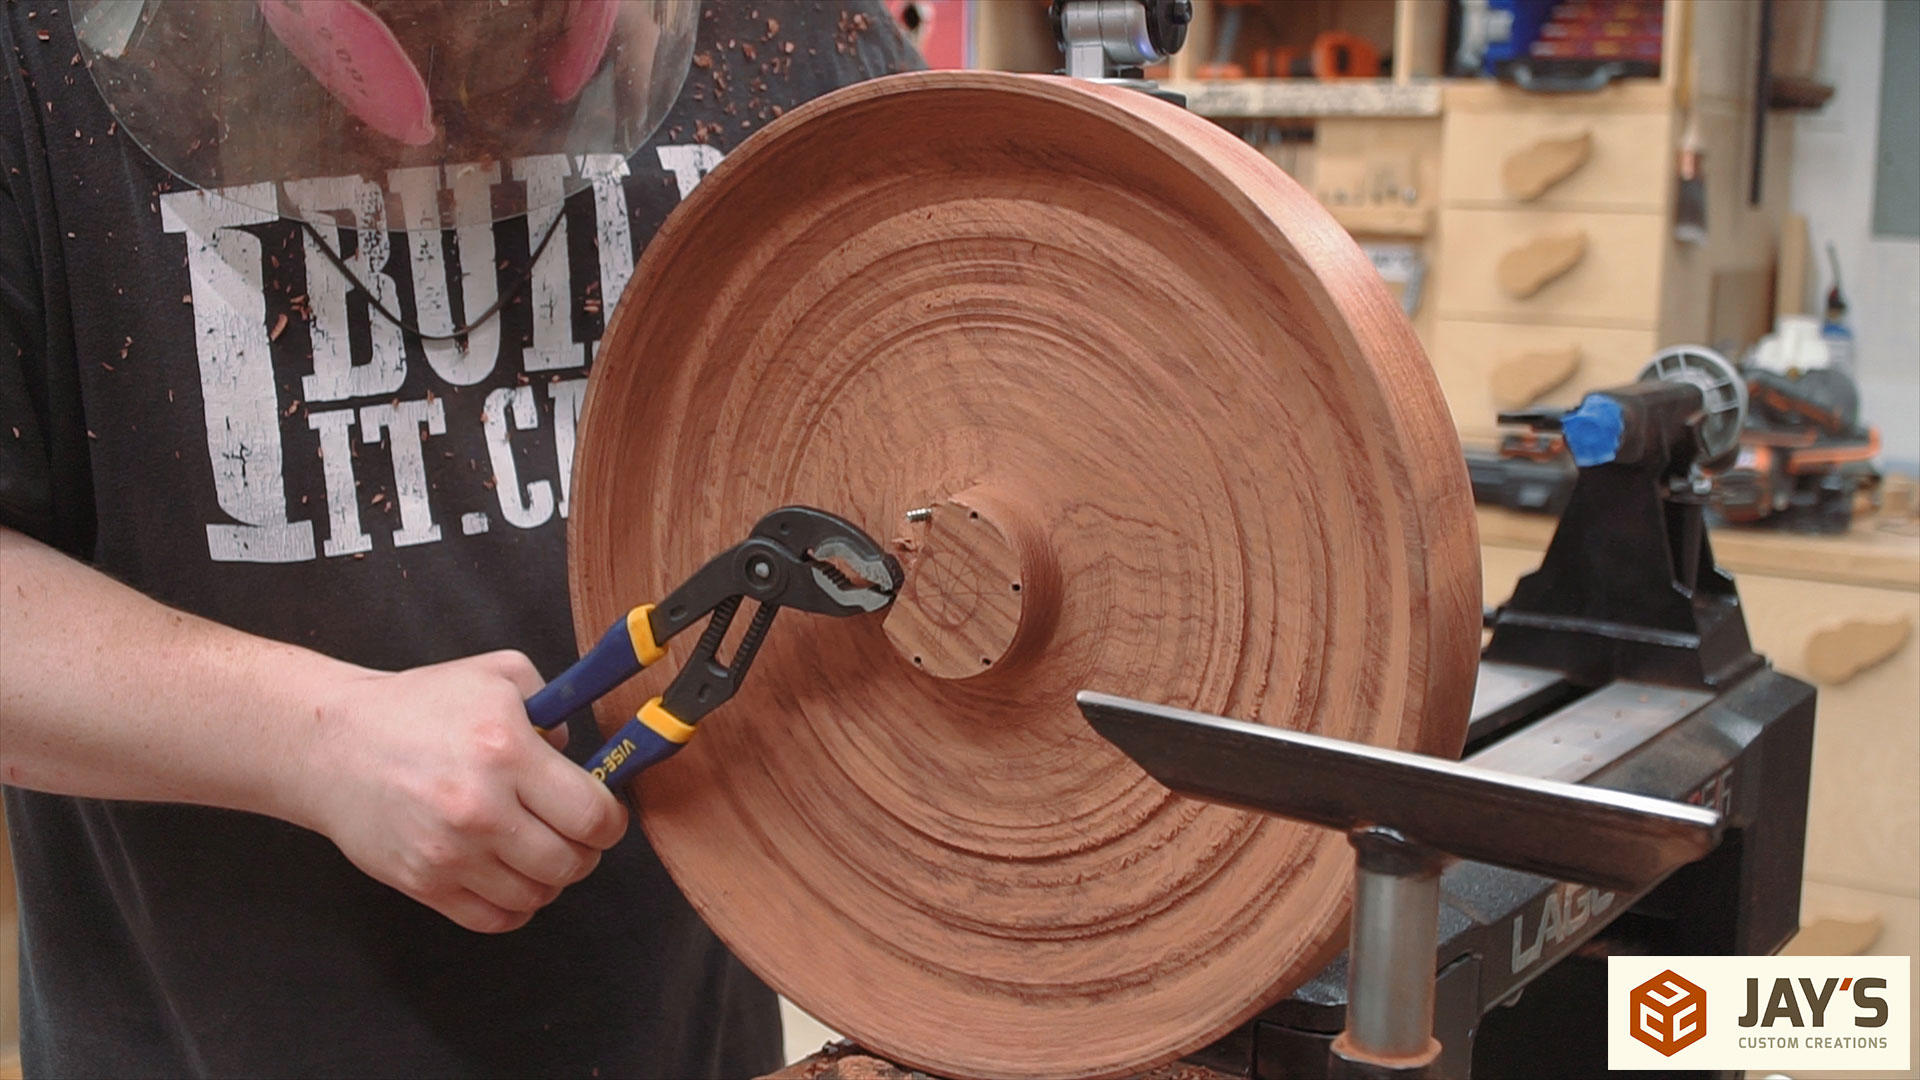
Remember those broken screws? I figured the best solution would be to turn away the waste close to the screws, use a hand saw to section off the interior peace, and then use some chisels to break the grain and remove the bulk of the waste.
When the majority of the supporting material was gone the screws could be removed with a pair of pliers.
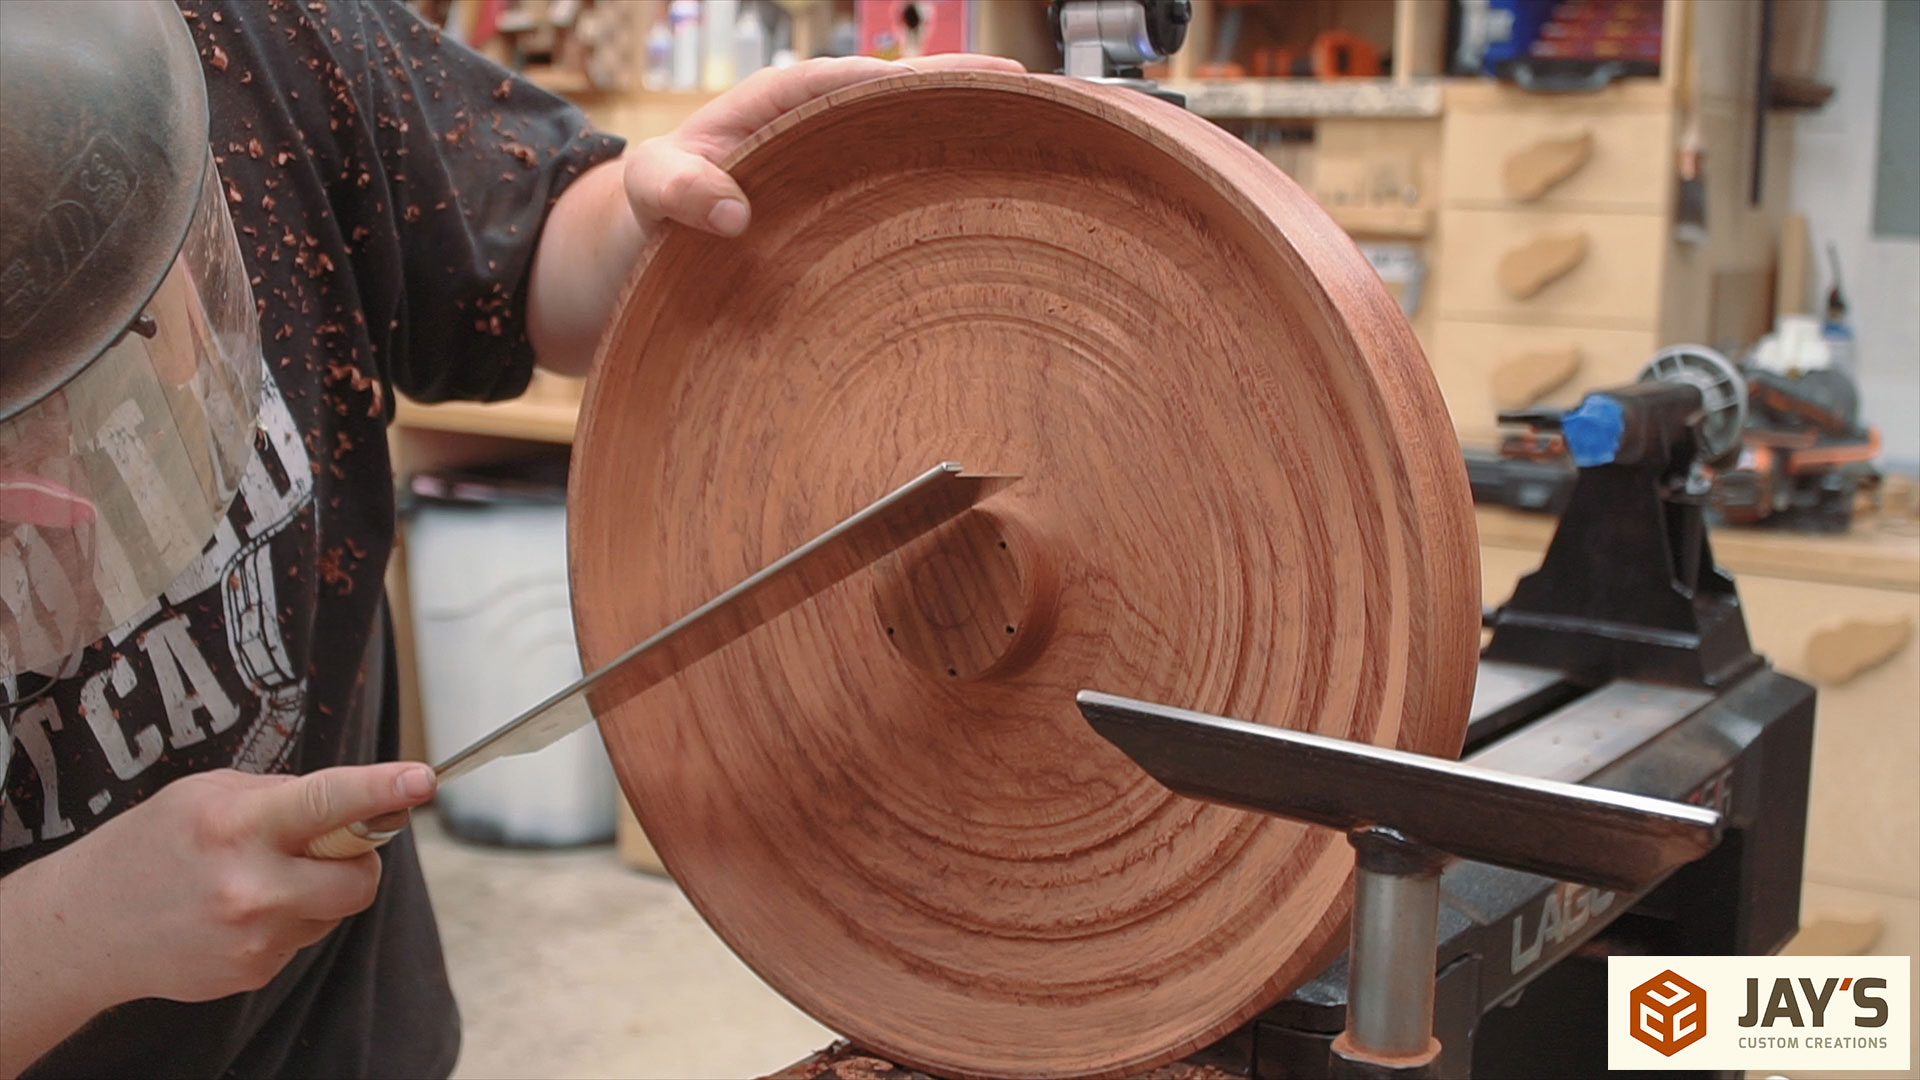
The rest of the Interior turning was all about cleaning it up and trying to get the bottom of the dish smooth. I tried just about all of my turning tools and for the life of me I could not get a flat bottom.
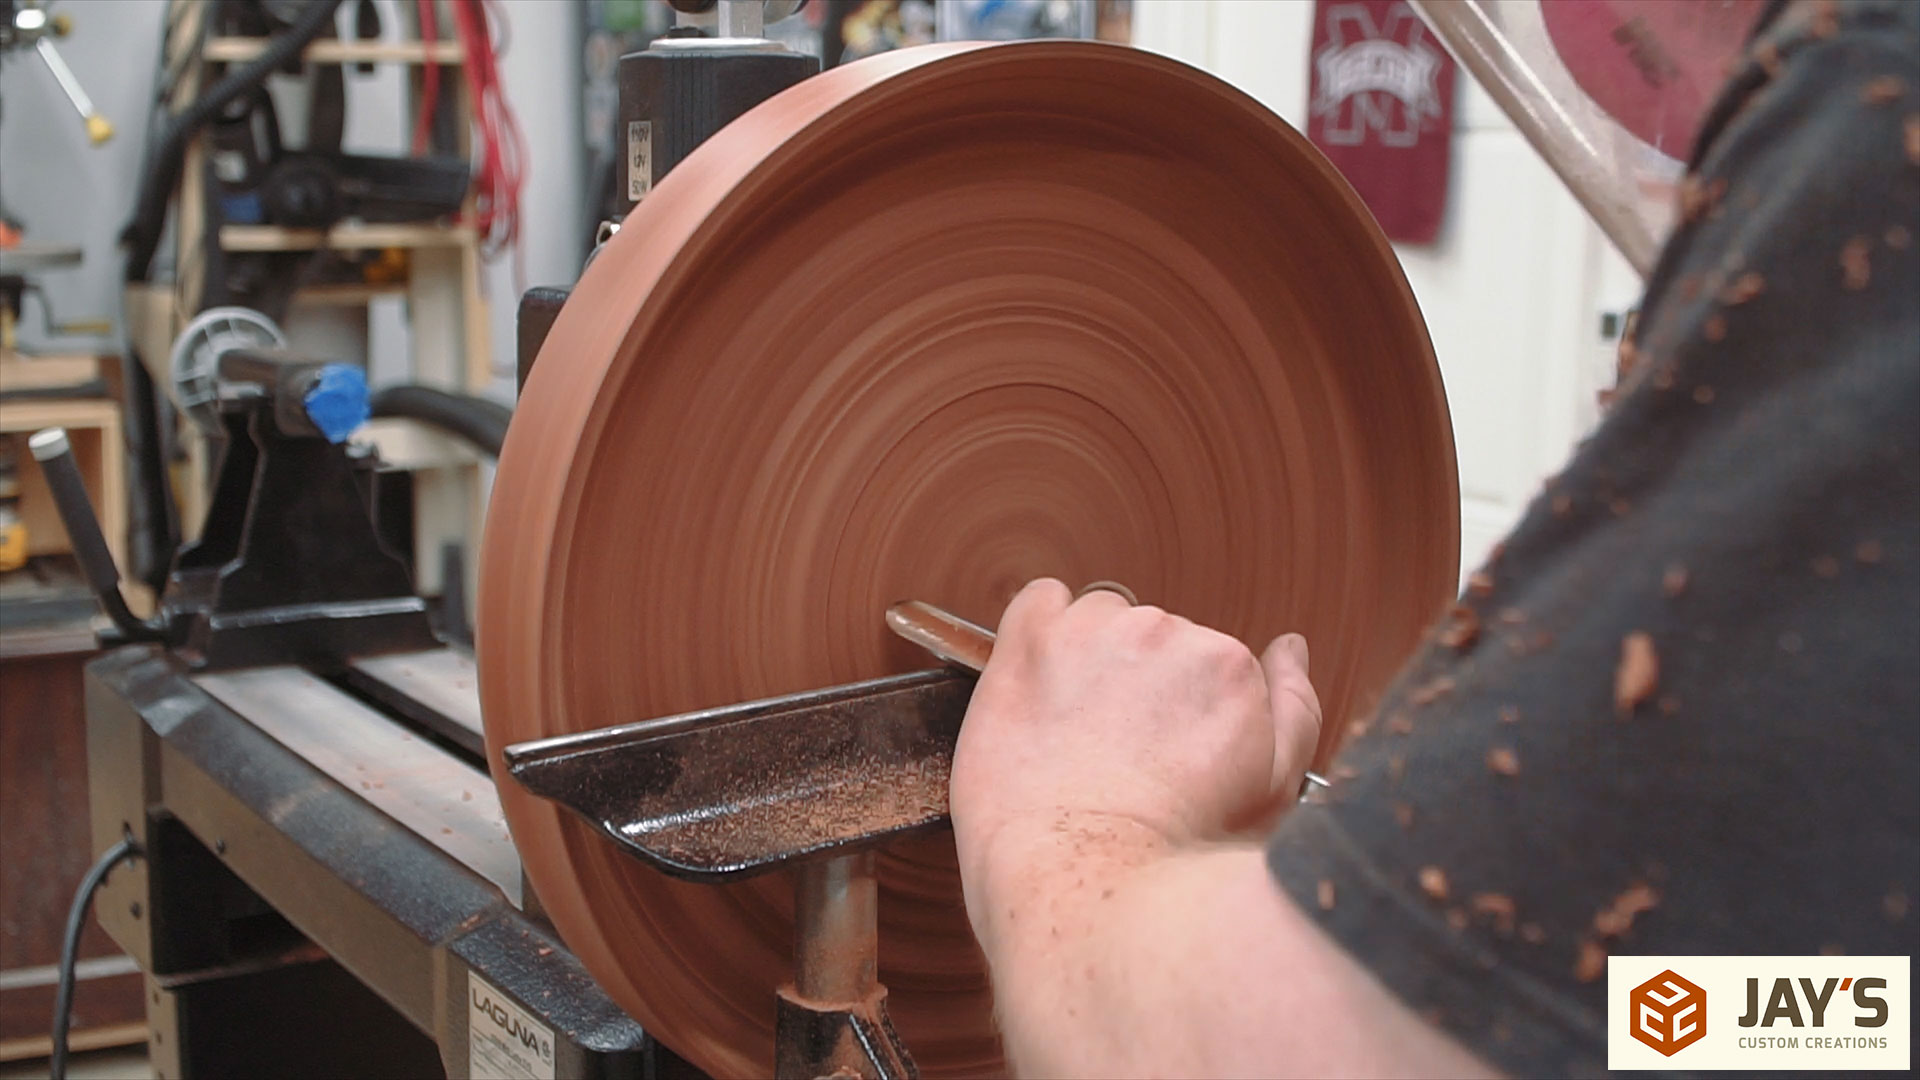
My last resort was to use handheld card scrapers to try to get the grooves out of the bottom. I got most of the grooves off but I was still left with scratch marks that I kept chasing and just could not get rid of. My options were to continue to chase the scratches and risk going too far and having a project that was unusable or to just leave it as is and recognize that I need to get better. I chose to leave it as is.
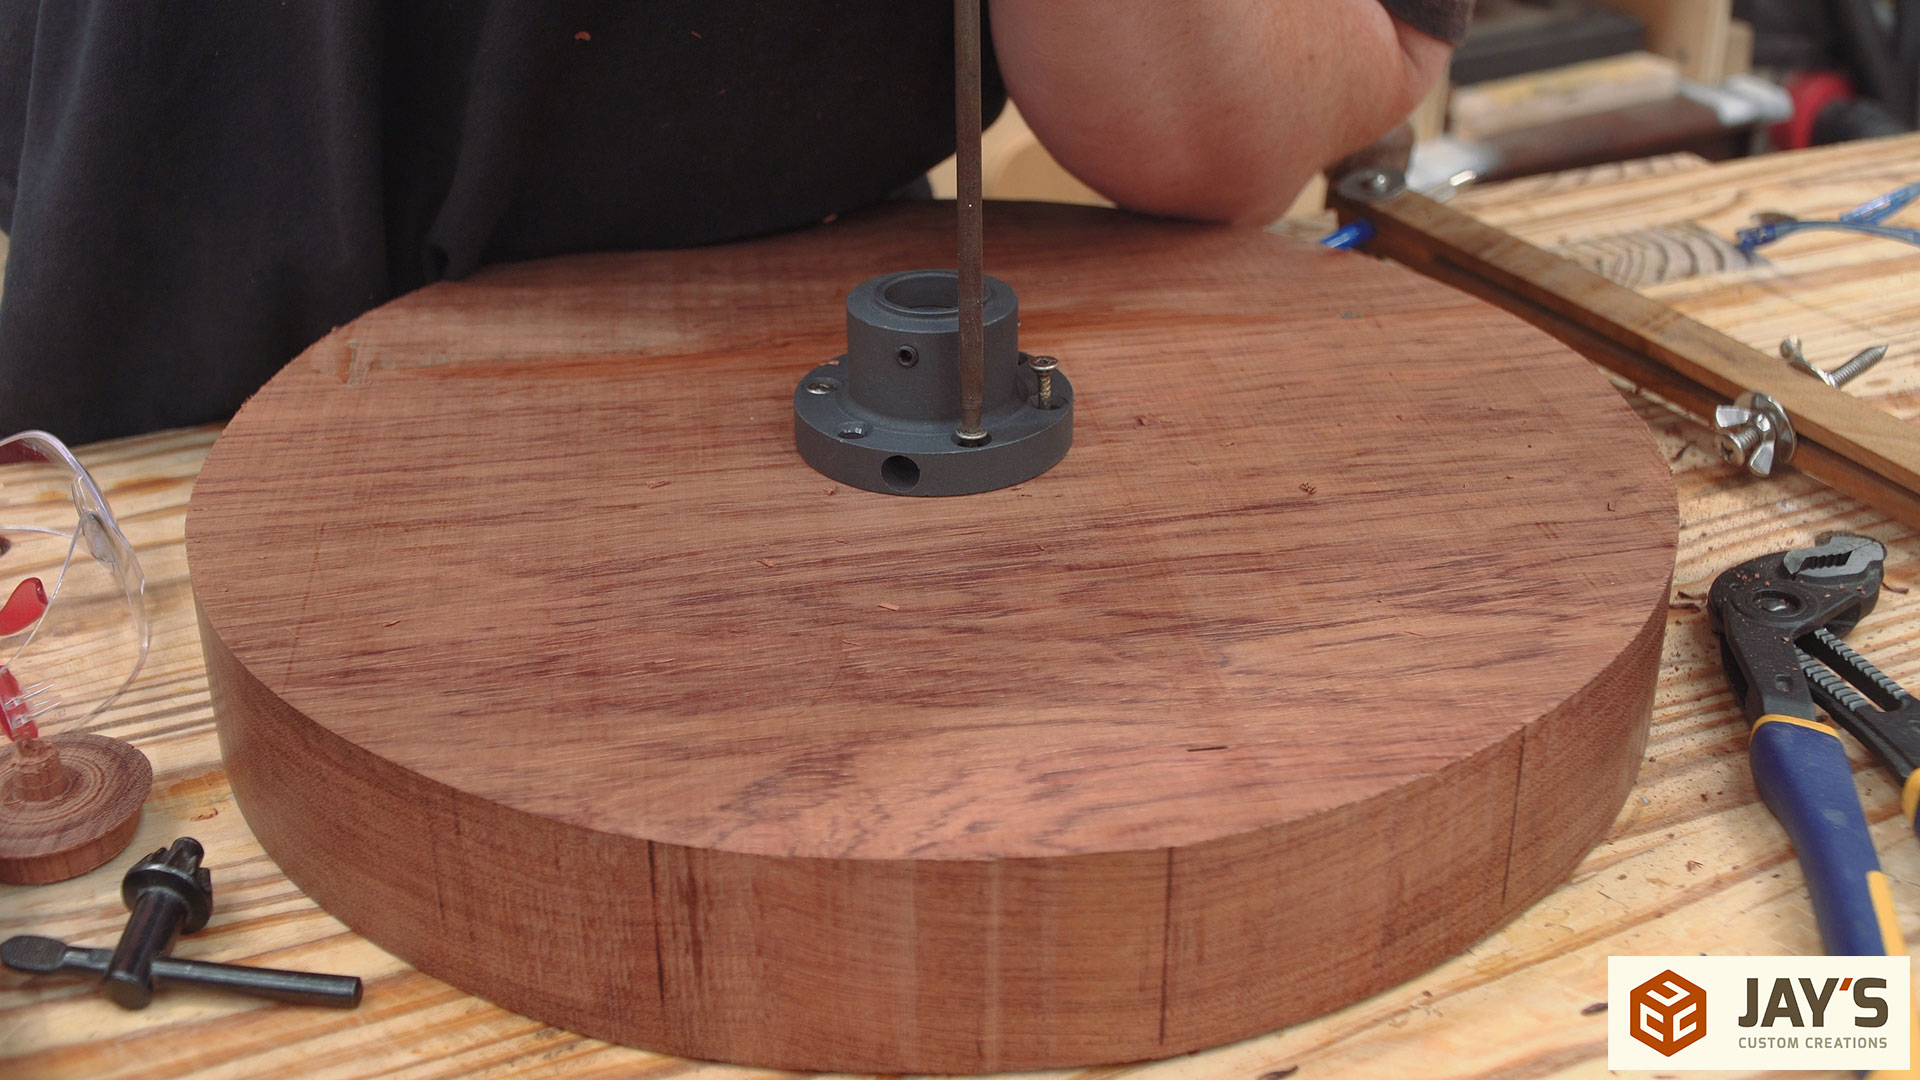
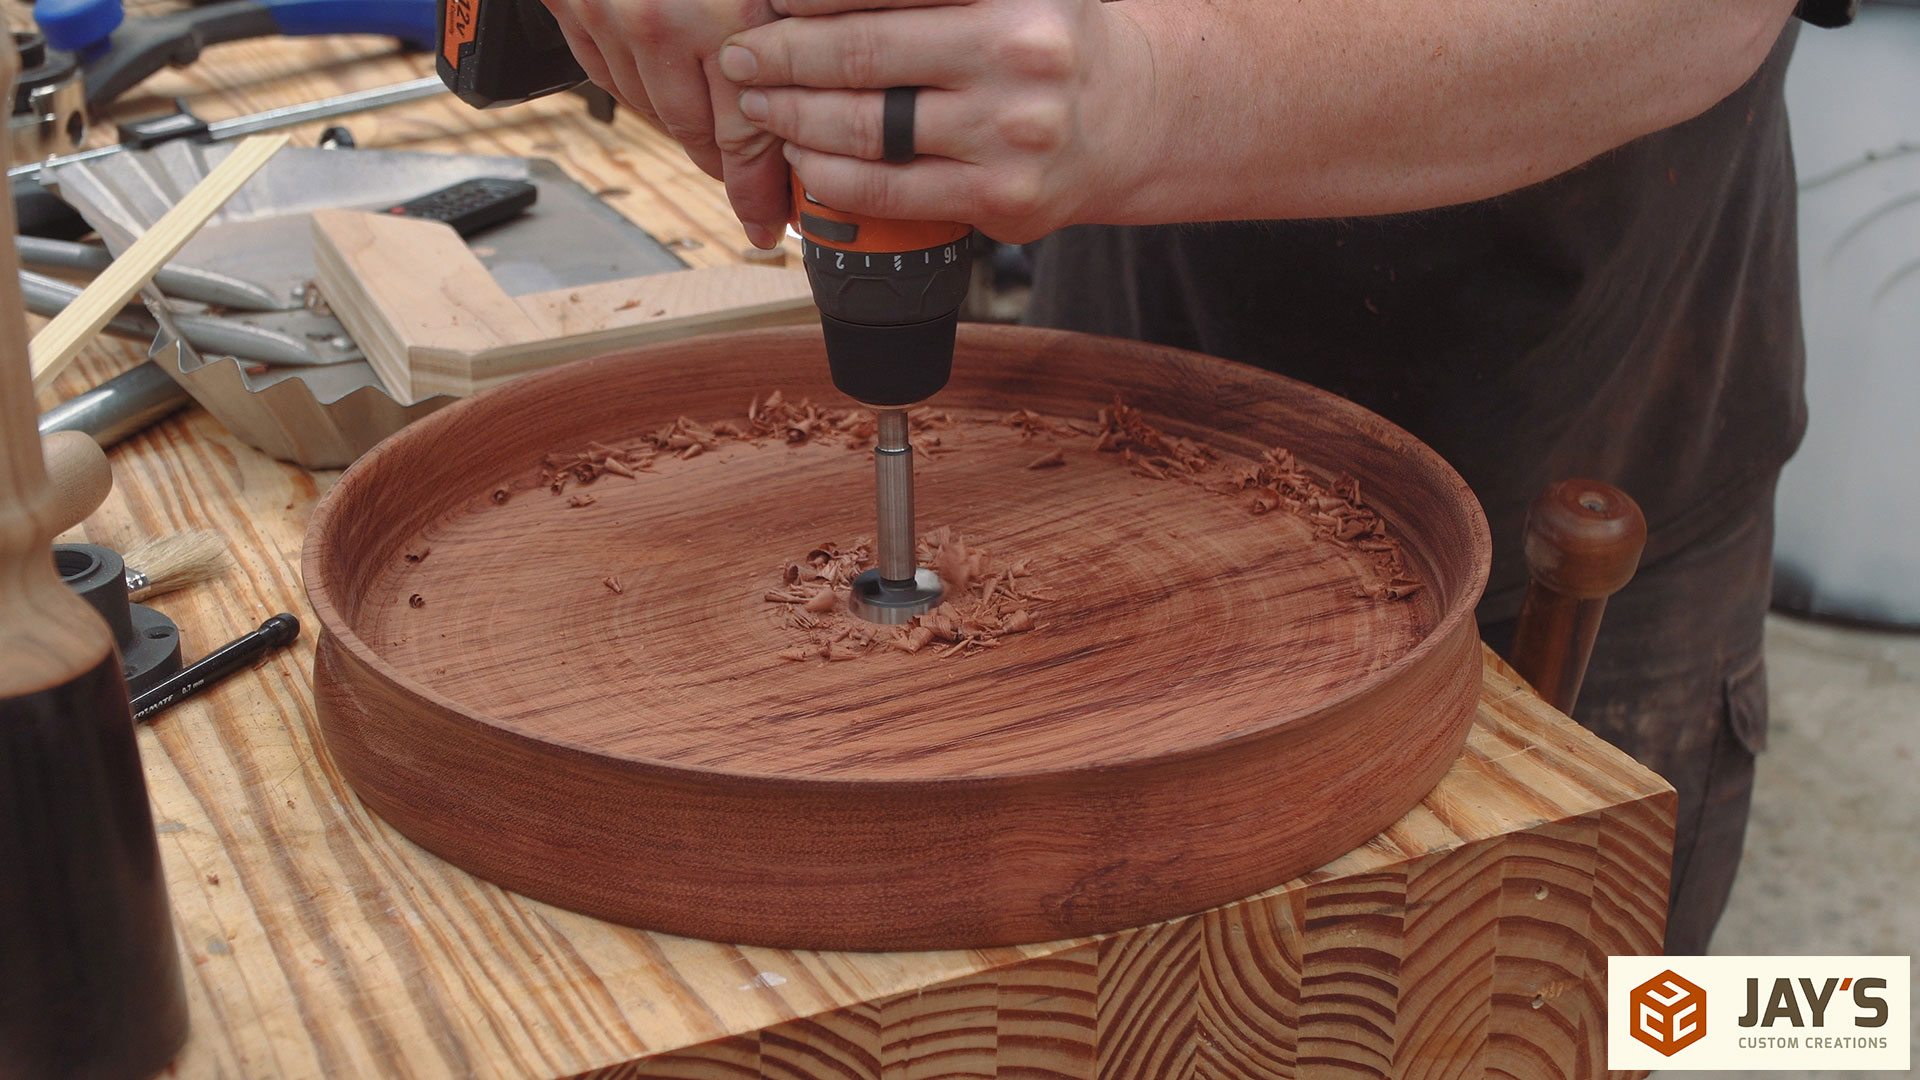
Because this was turned on the outboard side I did not have any room to mount the tailstock and drill a centered hole. So instead I used the turning tools to establish the center of the platter before I removed it from the lathe and then used a forstner bit to very carefully drill a hole is vertical as possible.
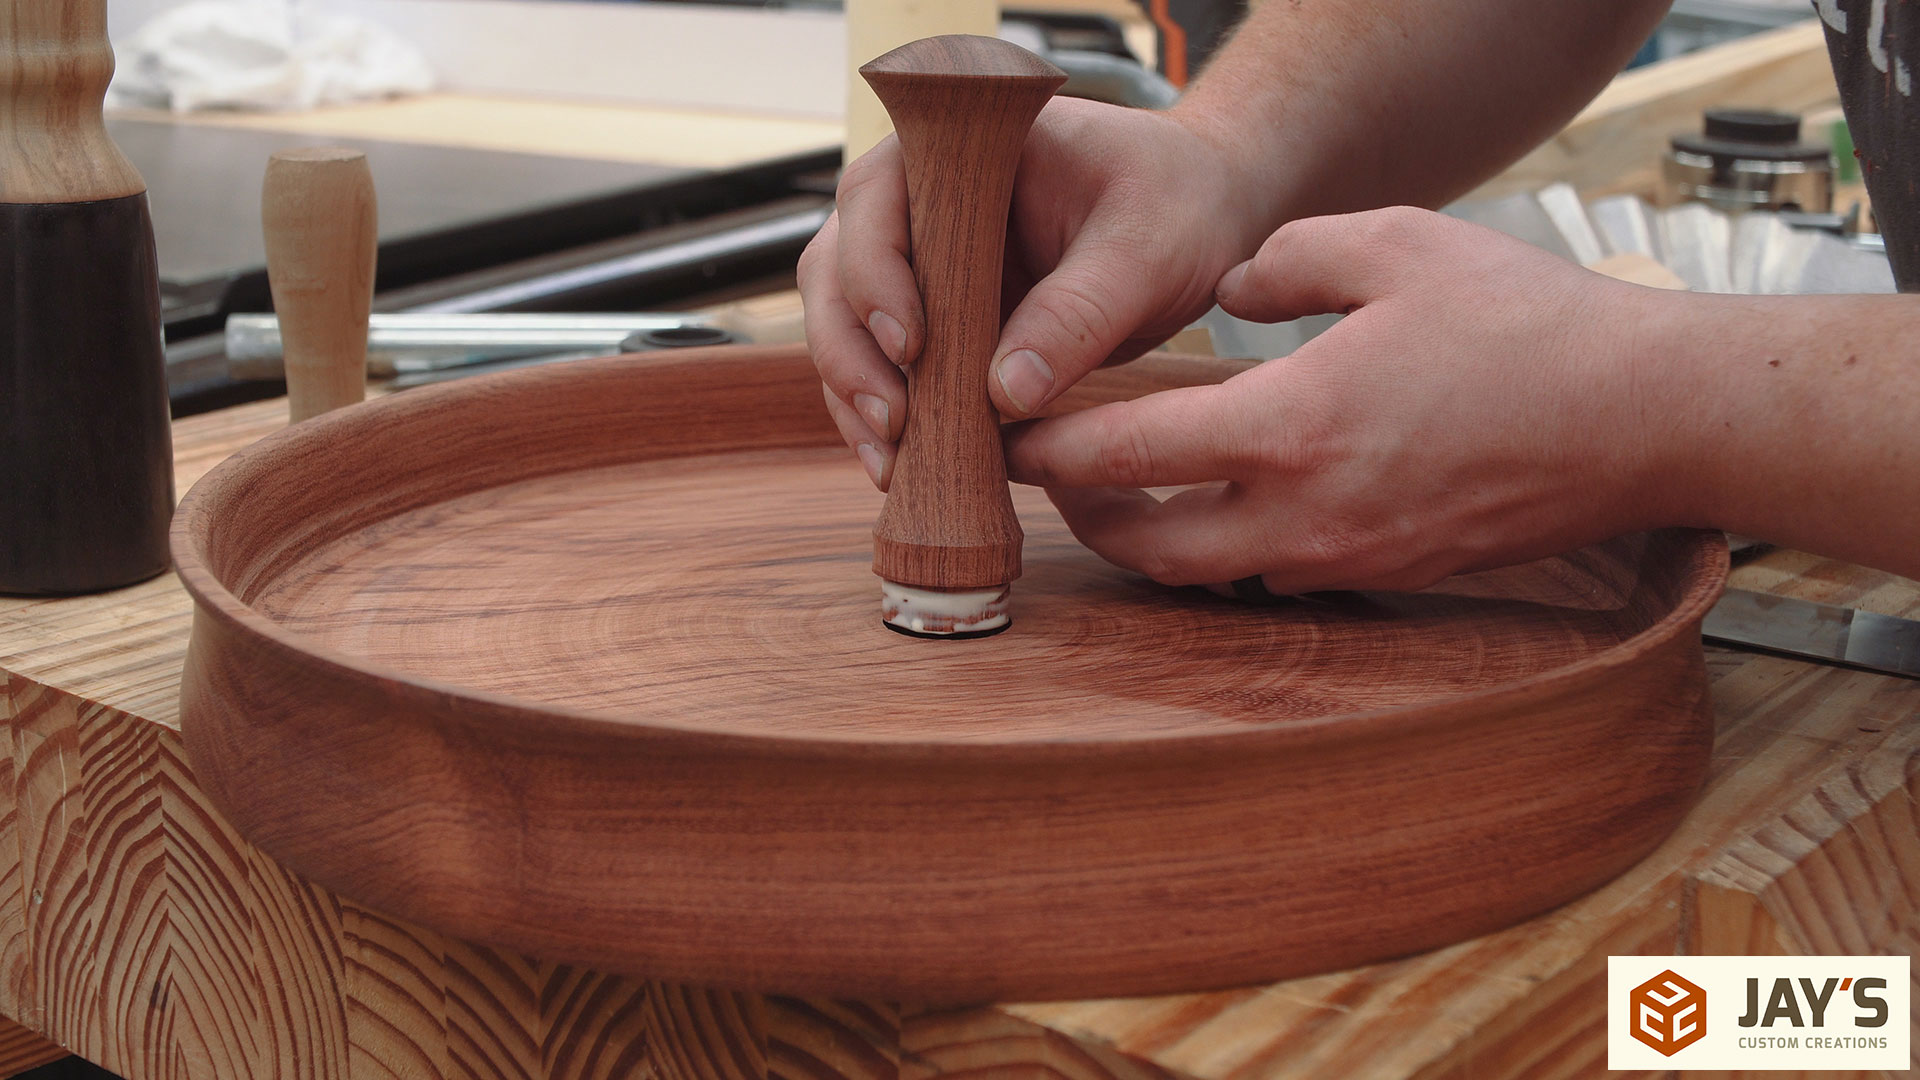
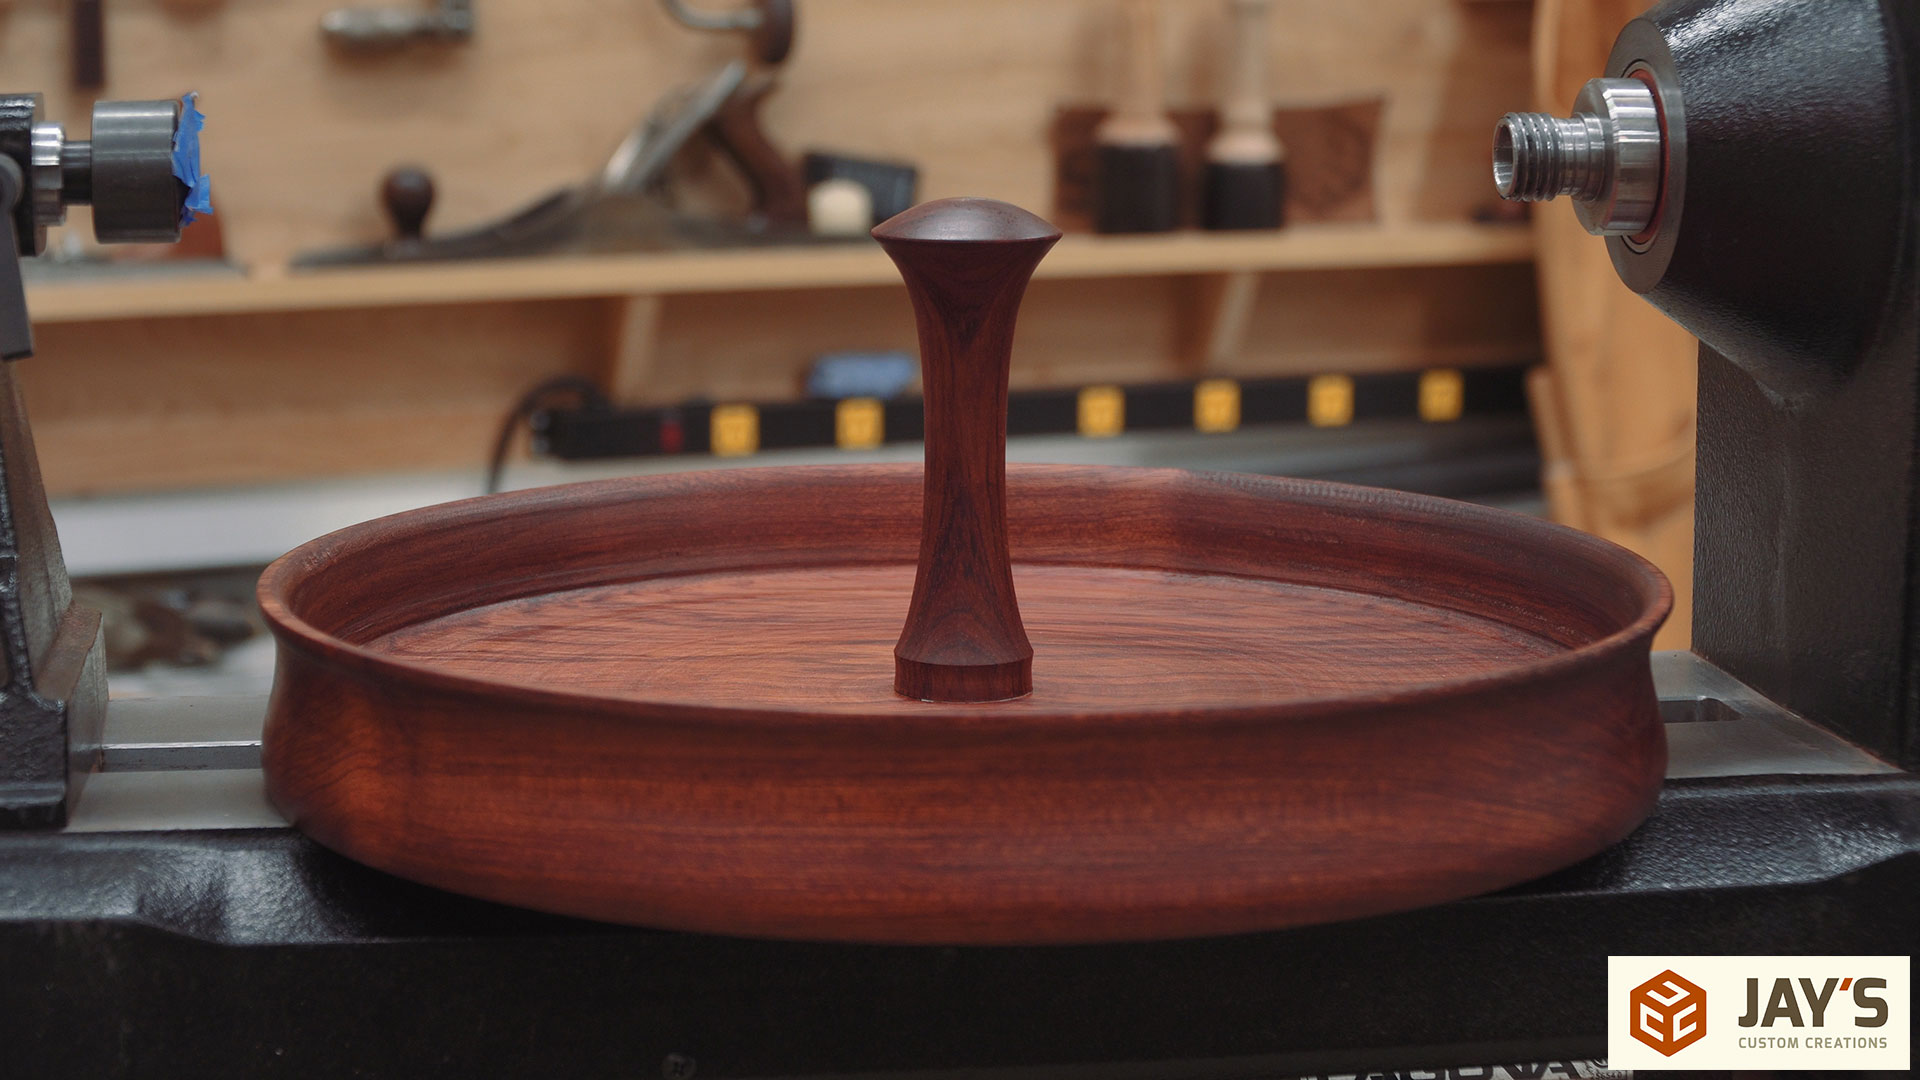
And then the handle can be glued into place.
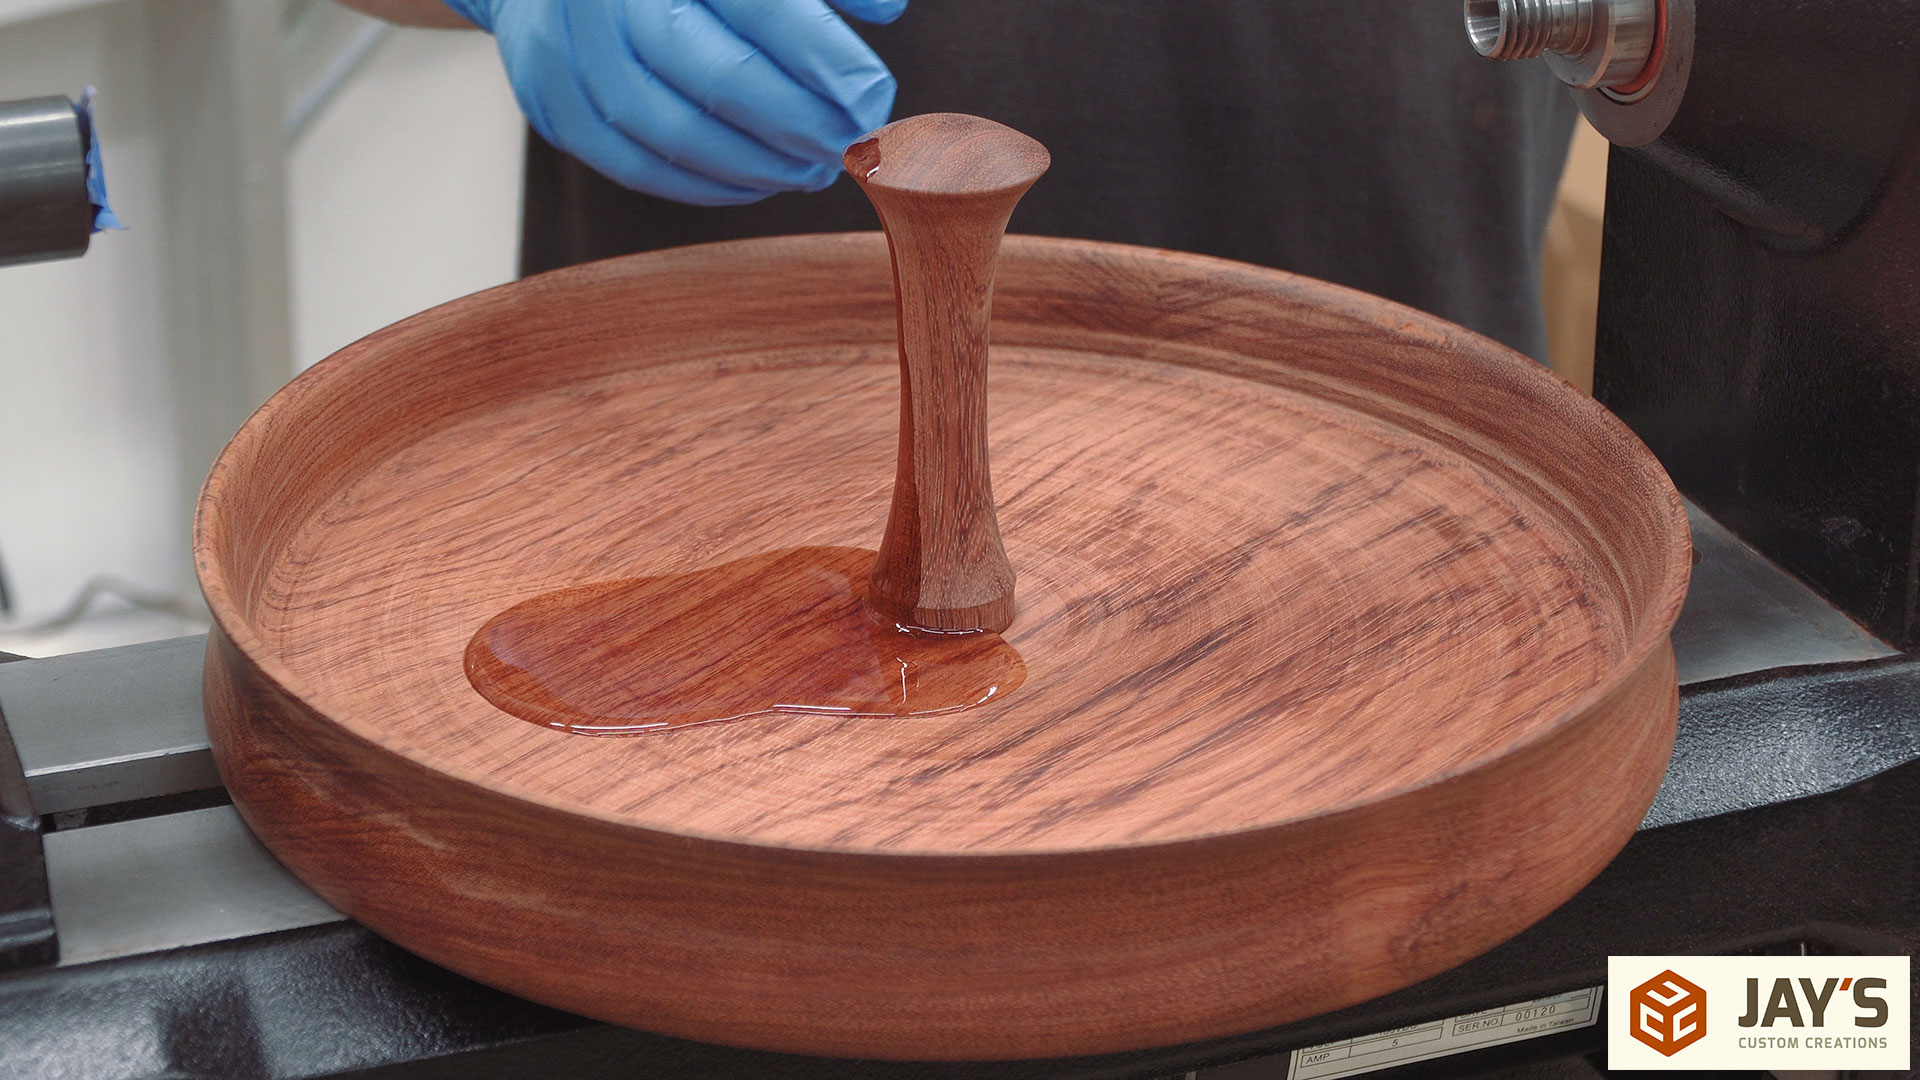
I’m a huge fan of wood being as natural as possible so I went with mineral oil for the finish. I also chose mineral oil because I know from experience that mineral oil kind of blends certain defects.

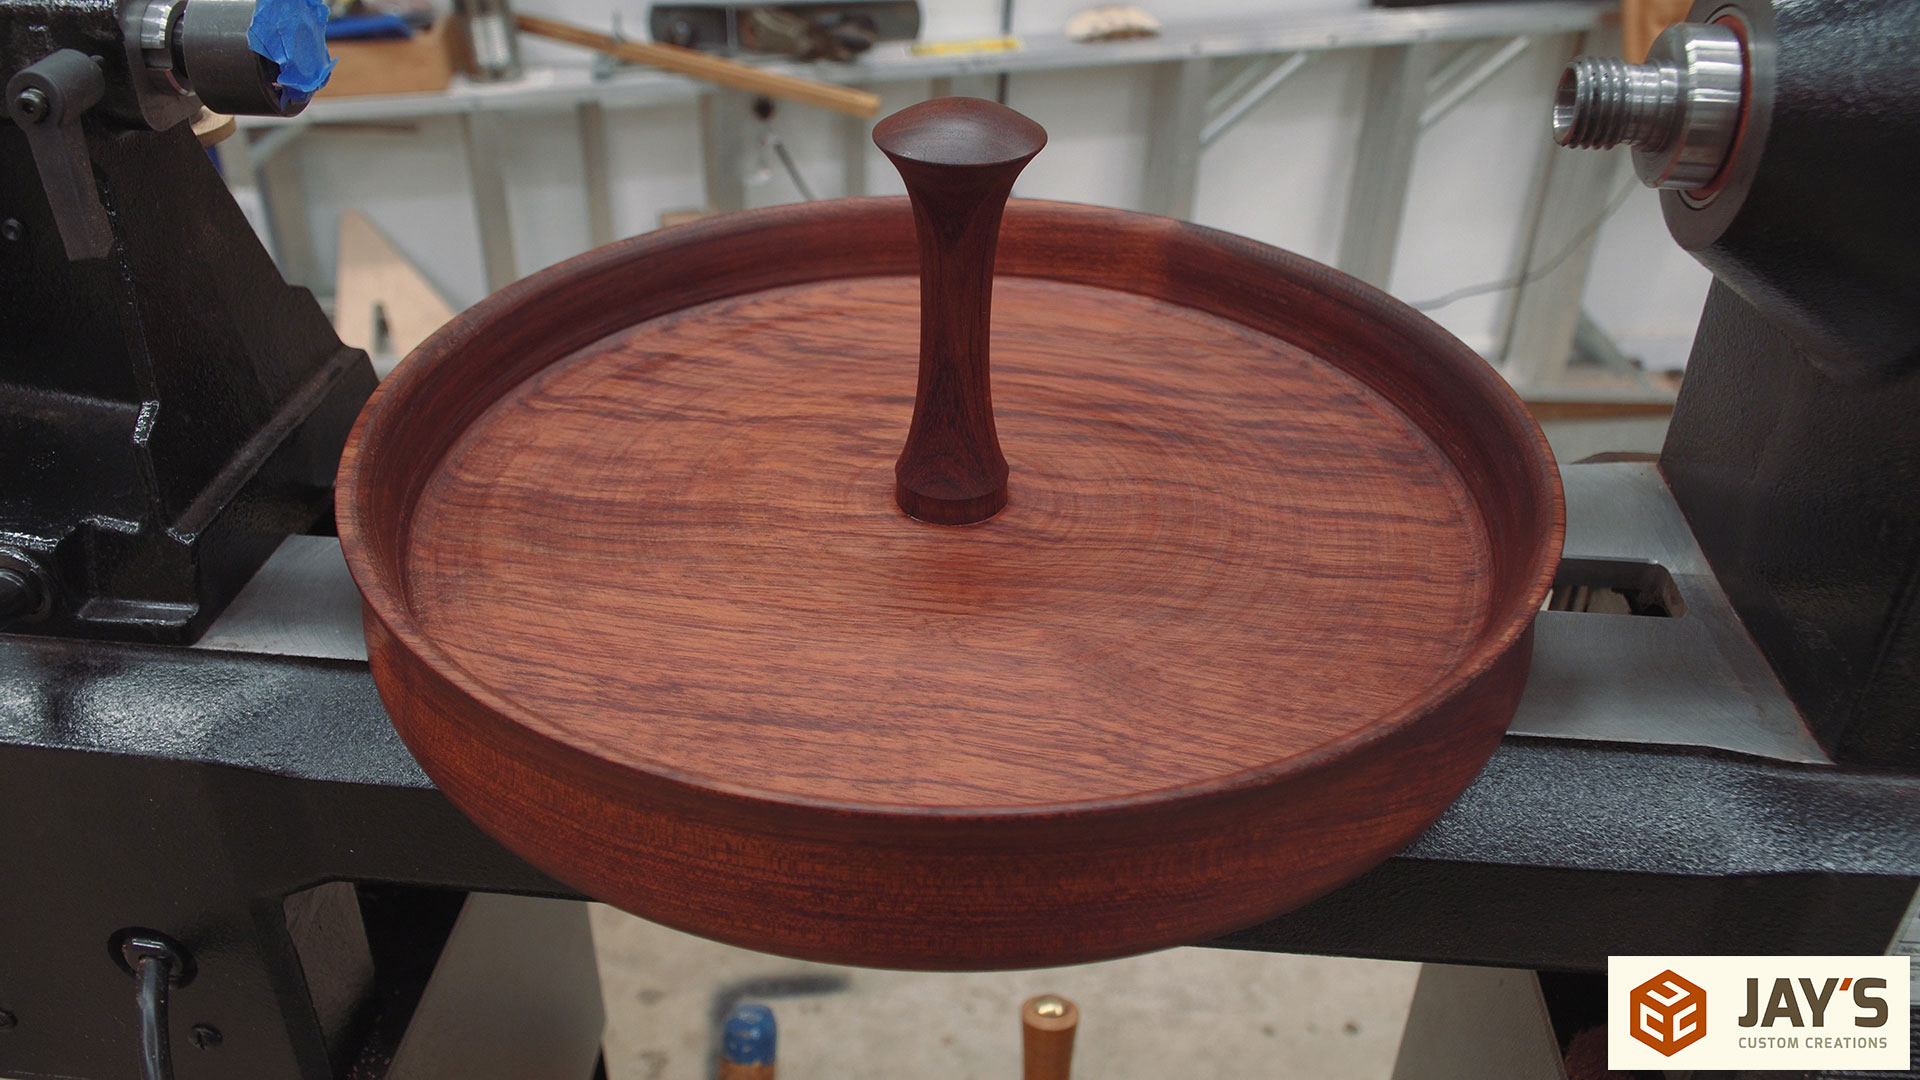
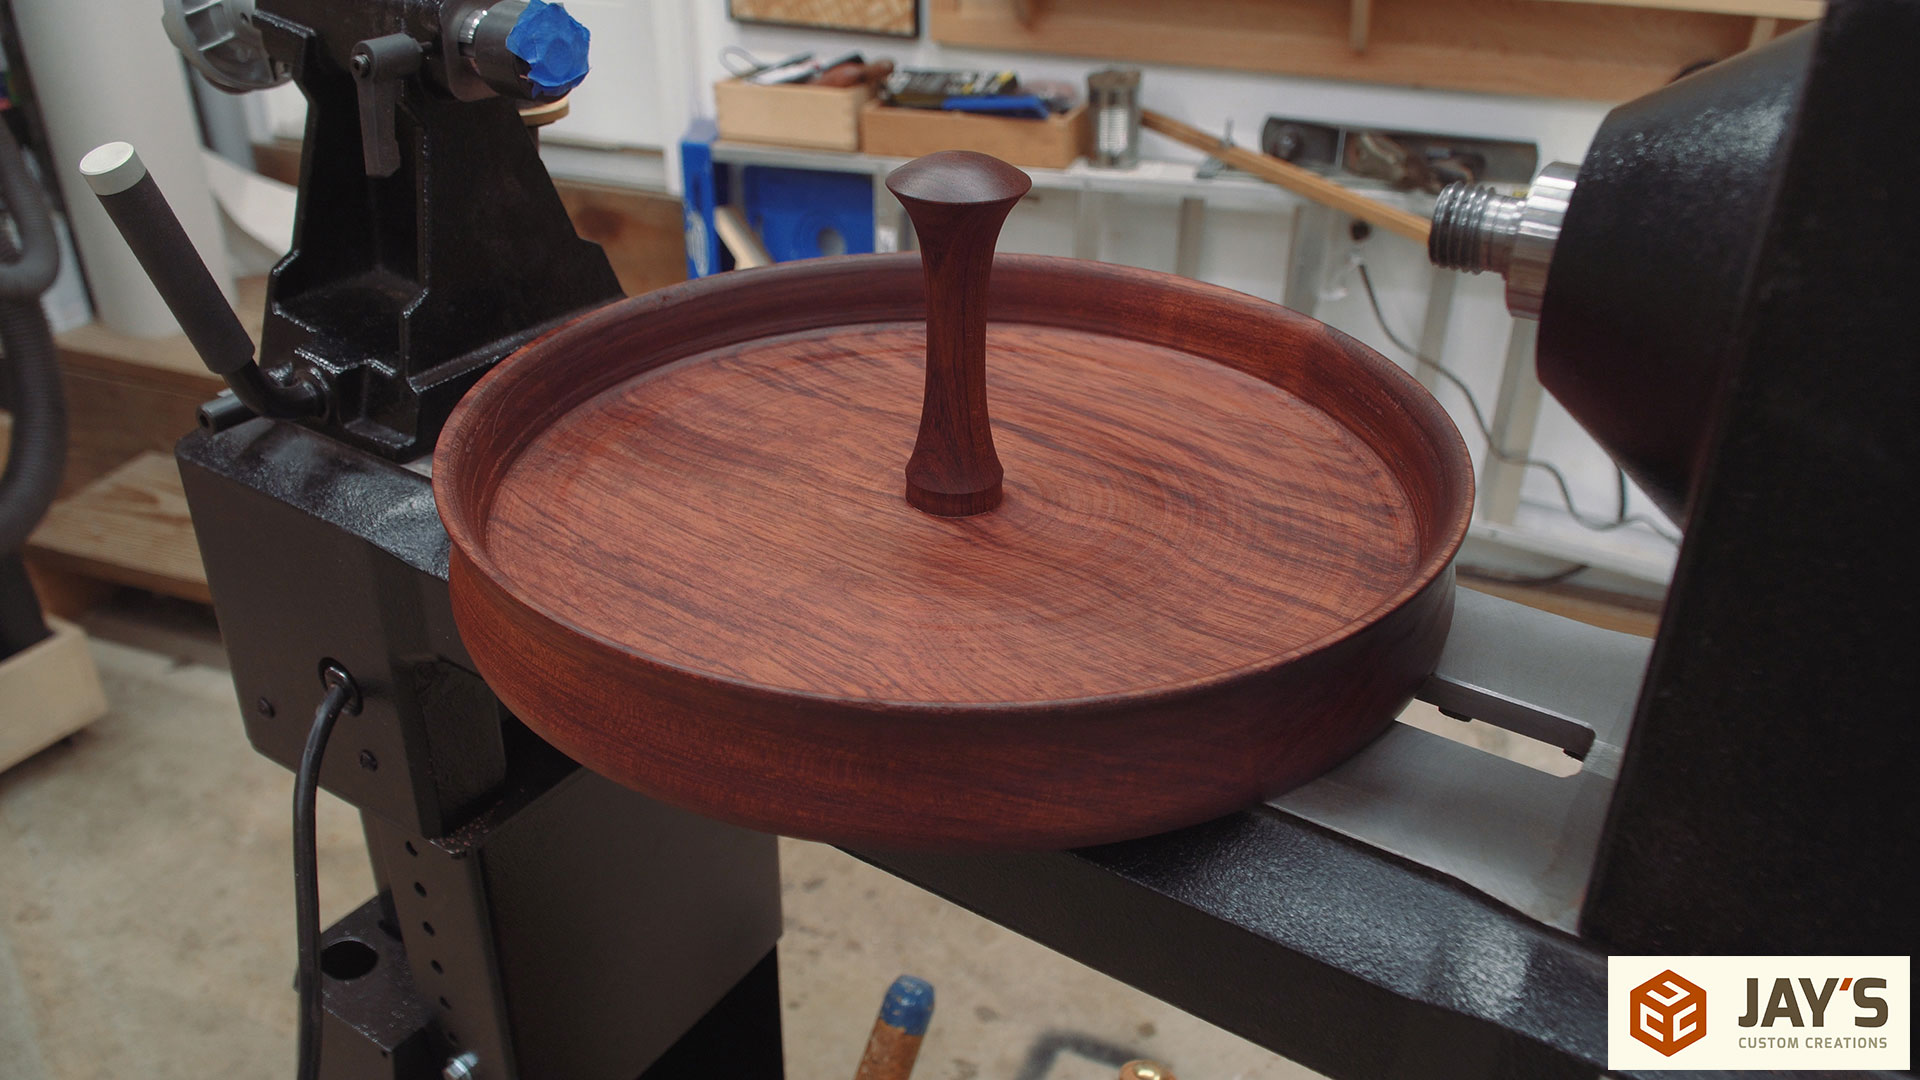
And here it is all done. I’ve got mixed feelings about this project. Part of me is really critiquing and picking apart all of the defects or the flaws. The other part of me is acknowledging the fact that I had a blast turning this in the shop, it’s still a very functional piece,it’s the largest thing I ever turned and was well outside of my comfort zone, and most importantly I am acknowledging the fact that I have a lot of room for improvement.
As I said earlier this project was what I came up with to use as many features of this new lathe as possible. At the time of this article and video publishing the lathe is still in pre-production. If you want more information or want to stay up-to-date with any updates on this particular lathe be sure to head on over to Laguna Tools via this link to learn more. Thanks for watching/reading and have a great day.


Jay, I think it turned out great. The little flaws in it just proves that it was done by hand and not on some computer ran machine. You did a lot better than I could have done. Thanks for sharing with the rest of us and keep up the good work.
How about commenting on the lathe? How did it do for you?
PS I liked the ‘thing’ you turned.
Forget the lathe! What about that new band saw?!
if you had fun, and created a useable object…then it was definately SUCCESSFUL!
Nice work. It appears to be be a great little lathe. I’ve turned on the bigger Laguna and found it to be a very smooth and quiet. If you get down to the coast come by my shop I’ll show you how to deal with tear out and eliminate those rings in the bottom.
I’m pretty impressed with the form factor of that lathe. It sure looks stout, can you comment on weight/feel of machine? Did it seem top-heavy at all? Pretty good looking machine overall.
Don’t think about it as a fail, think of it as your interpretation of a rain drop in a puddle.
Nice, challenging project to test the machine out. I’m curious how it handled such a large, heavy piece on the outboard side like that. I’ve just joined and really enjoy how you illustrate the steps .. keep up the good work!
Jay, I think it was great. What was the music you had going on in the background? I loved it also.
Jay, I think you did a creditable job of building this tray on a machine you were not familiar with the operation of.
I would have liked to have heard a little more of your personal info on the lathe and some of its capabilities and limits but I understand why not.
I loved your new system of directing e-mail and really liked this project.
Hope the baby is adjusting well.
Just so you don’t get away without any negative comments and to prove I was paying attention the following both words pass spell check: piece and peace.
Keep up the good work
I think the candy dish looks lovely! I’m really excited about this lathe. I was eyeing the larger REVOs but they’re too large for my needs/shop. This looks like it’ll be perfect. Can’t wait to learn more about it.
Great job on the piece and taking on the challenge of a large blank! Looking forward to learning more about the new lathe. With practice you’ll get better on the rings and tear out. Sharp tools will help you every time. I’d like to hear more about the functionality and use of the lathe with a large piece on the outboard side. Keep up the great work!!!
Jay, check out Lyle Jamison on his YouTube channel. He can give you some insight on how to make a big jump in your turning. And in reality you are way down the road already.
Great project! It’s good to step outside your comfort zone, though in your case that appears to require a lot more travel than it does for the rest of us. Thanks for sharing. I’m just getting started in wood turning; I’ve tried it on a friend’s machine and am now in the market for my first lathe. I found this video pretty helpful. I really wasn’t aware you could do such large scale outboard turning on a midi.
Good job , i haveaquestion . What are the footpromt dimensions on the 1216 lathe . Ananswerwould bevery helpful. Thanks for demo .
Good job , i haveaquestion . What are the footpromt dimensions on the 1216 lathe . Ananswerwould bevery helpful. Thanks for demo .
Jay
Good job, especially tackling something that size not being that comfortable with. How did the lathe handle when you first started turning the blank on the outboard side. I am just curious if it tried to walk on you. I did just order this lathe for smaller turnings. I already have the 18/36 and it turns some pretty massive stuff, and is a very impressive lathe.
Good Job
Hey Jay,
To prevent getting screws broken in your project, glue a scrap of wood with a piece of paper towel between to the bottom center of the project. Screw the faceplate onto the scrap of wood. When done use a chisel to separate the project from the scrap when your done.