📝 ITEMS IN THIS PROJECT | disclosure – some affiliate links below:
→ Superstrut trolley blocks: https://amzn.to/2Mh6cp0
→ Electric hoist: https://amzn.to/2MheTQc
→ Fall arrester: https://amzn.to/367iQ11
→ Superstrut: https://www.lowes.com/pd/Superstrut-1-5-8-in-x-1-5-8-in-Silver-Electroplated-Half-Slot-Channel-Strut/1000192655
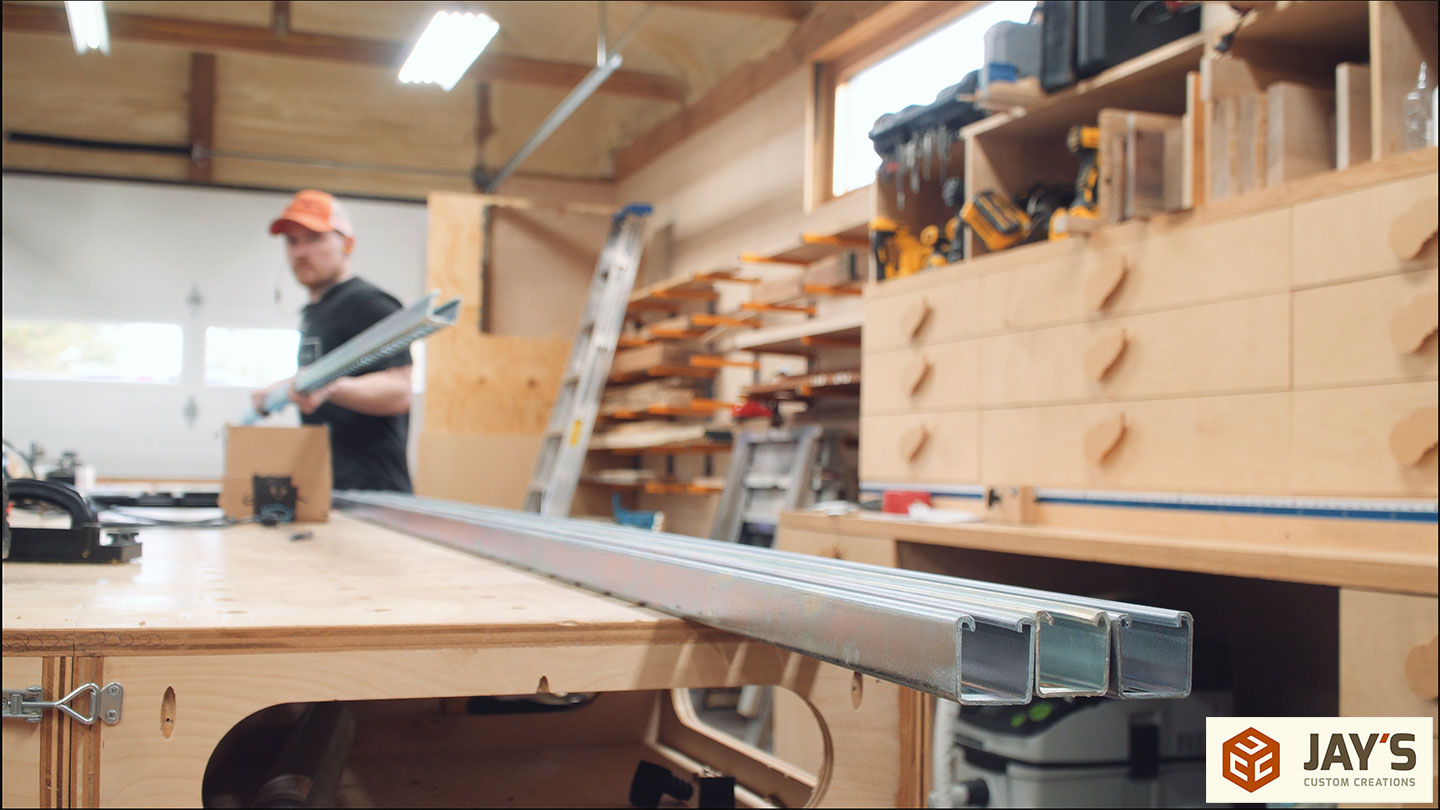
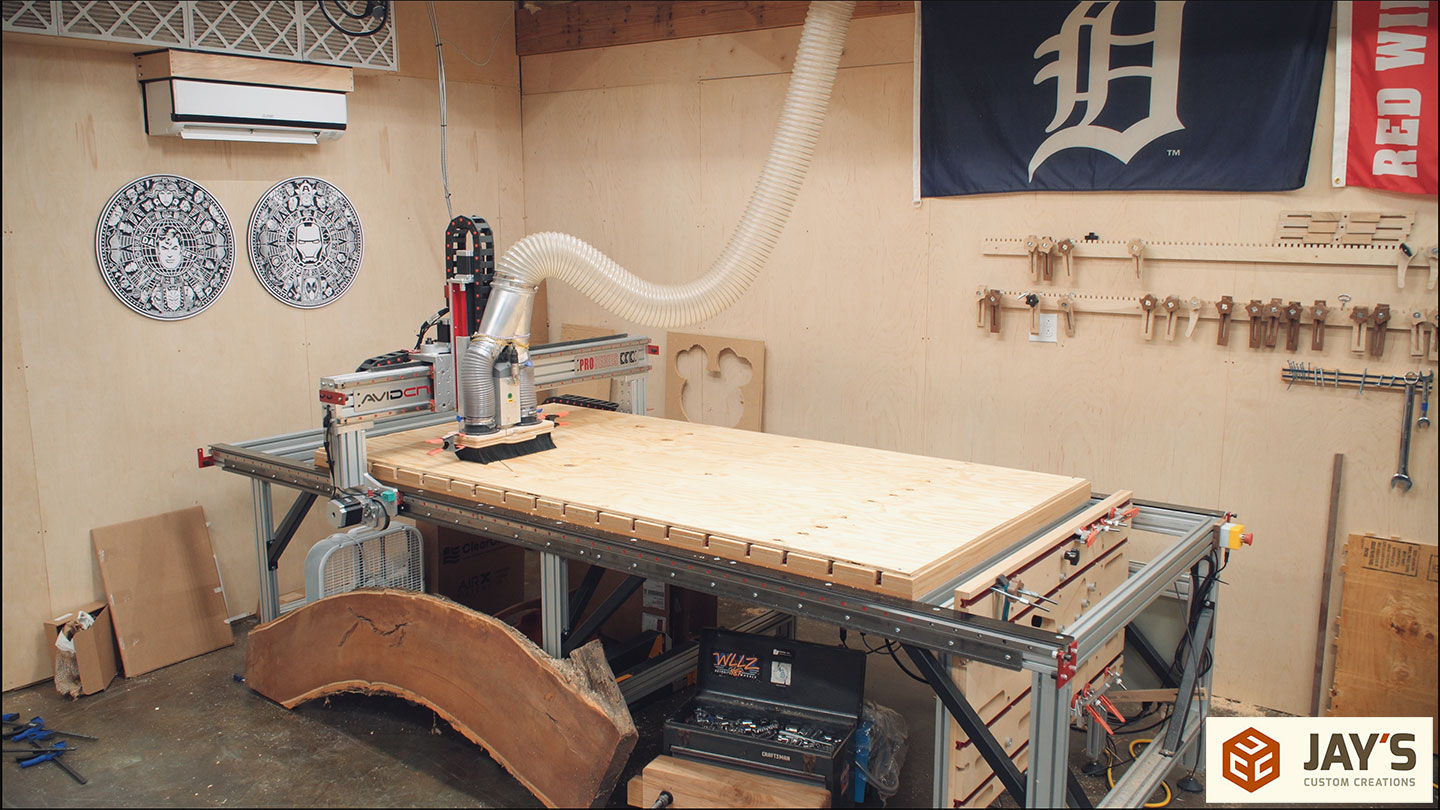
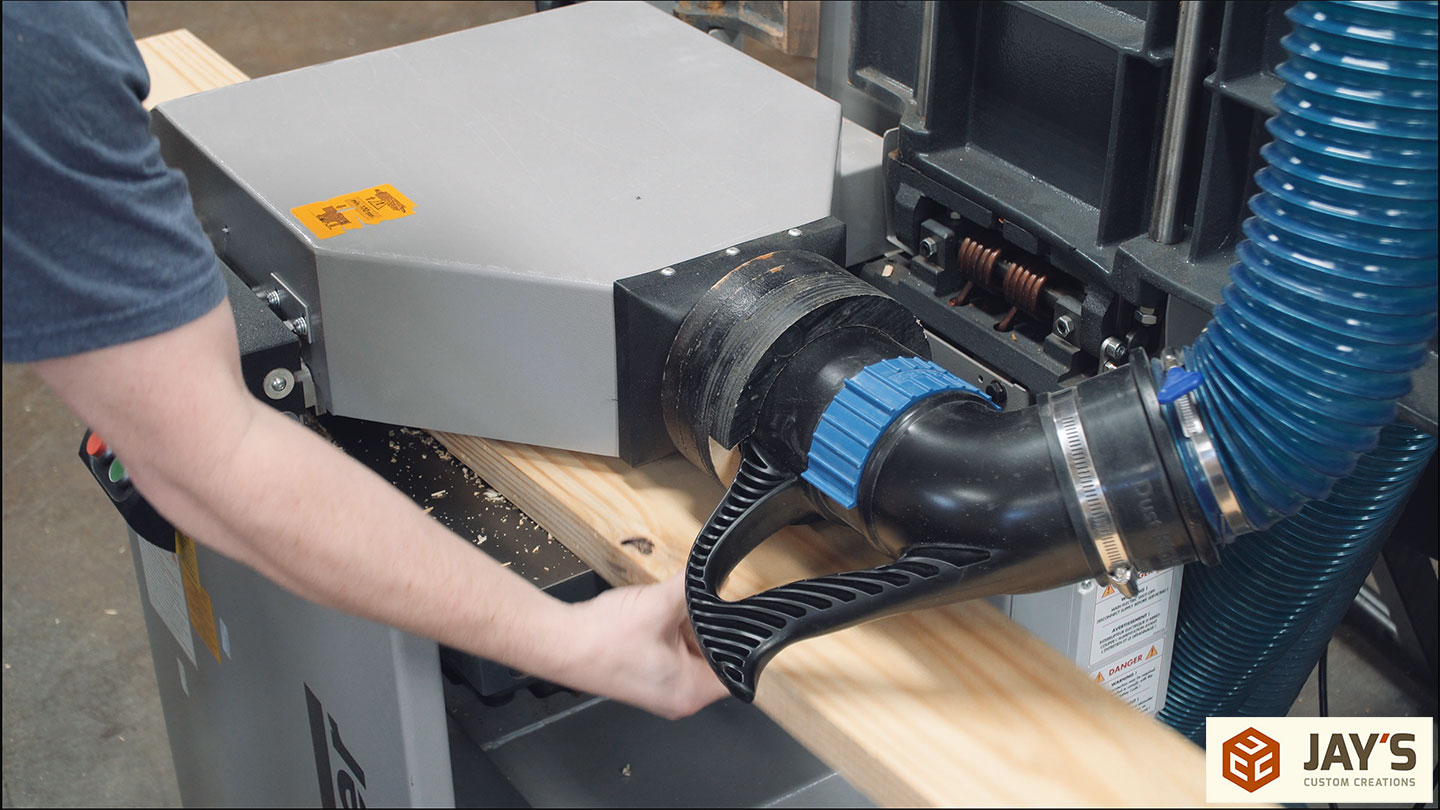
To guide the elevator up I’m using four pieces of 1-5/8” Superstrut. The loft floor is 10′ off the ground and to allow over travel into the upstairs space, three of these will be used for vertical travel. The fourth will be used to suspend the hoist.
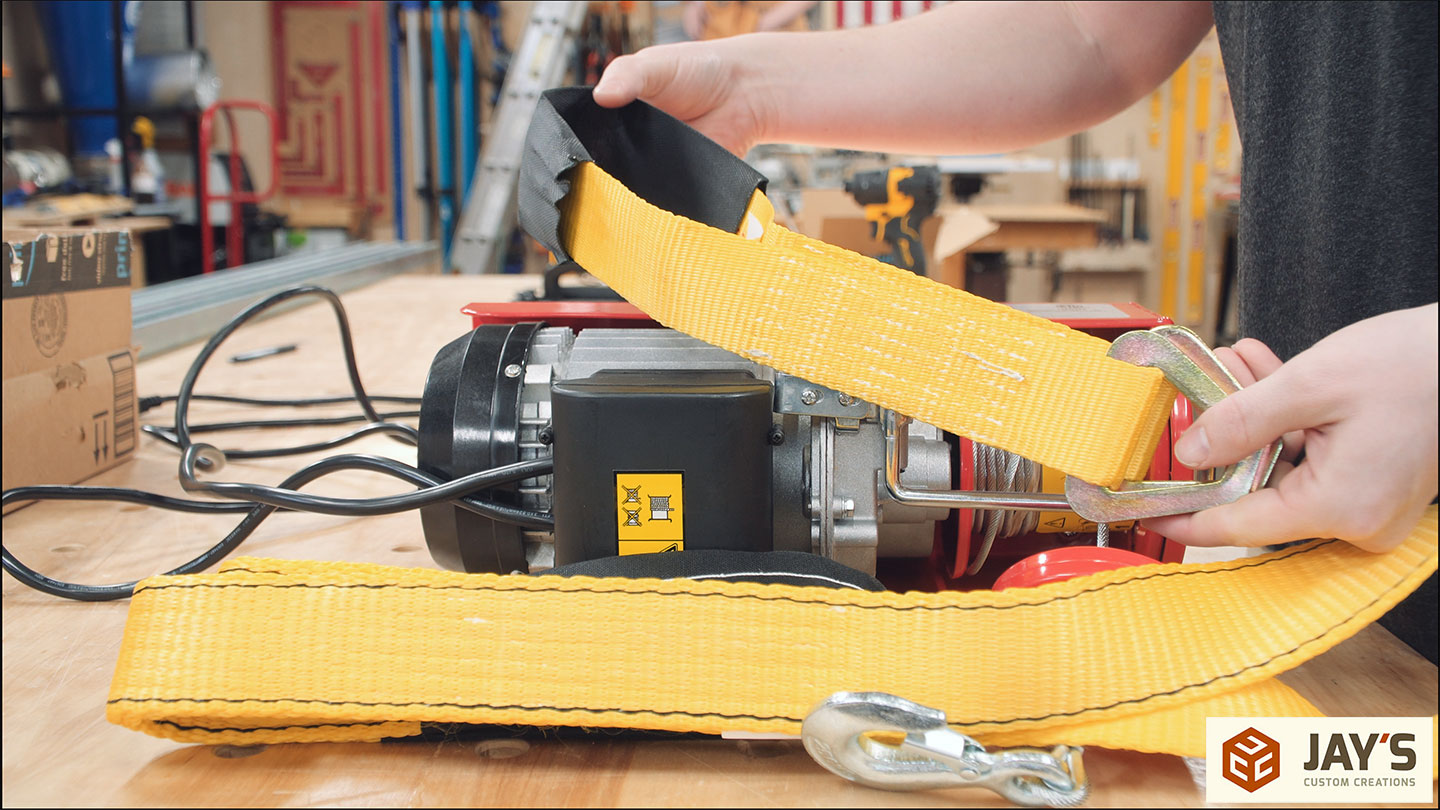
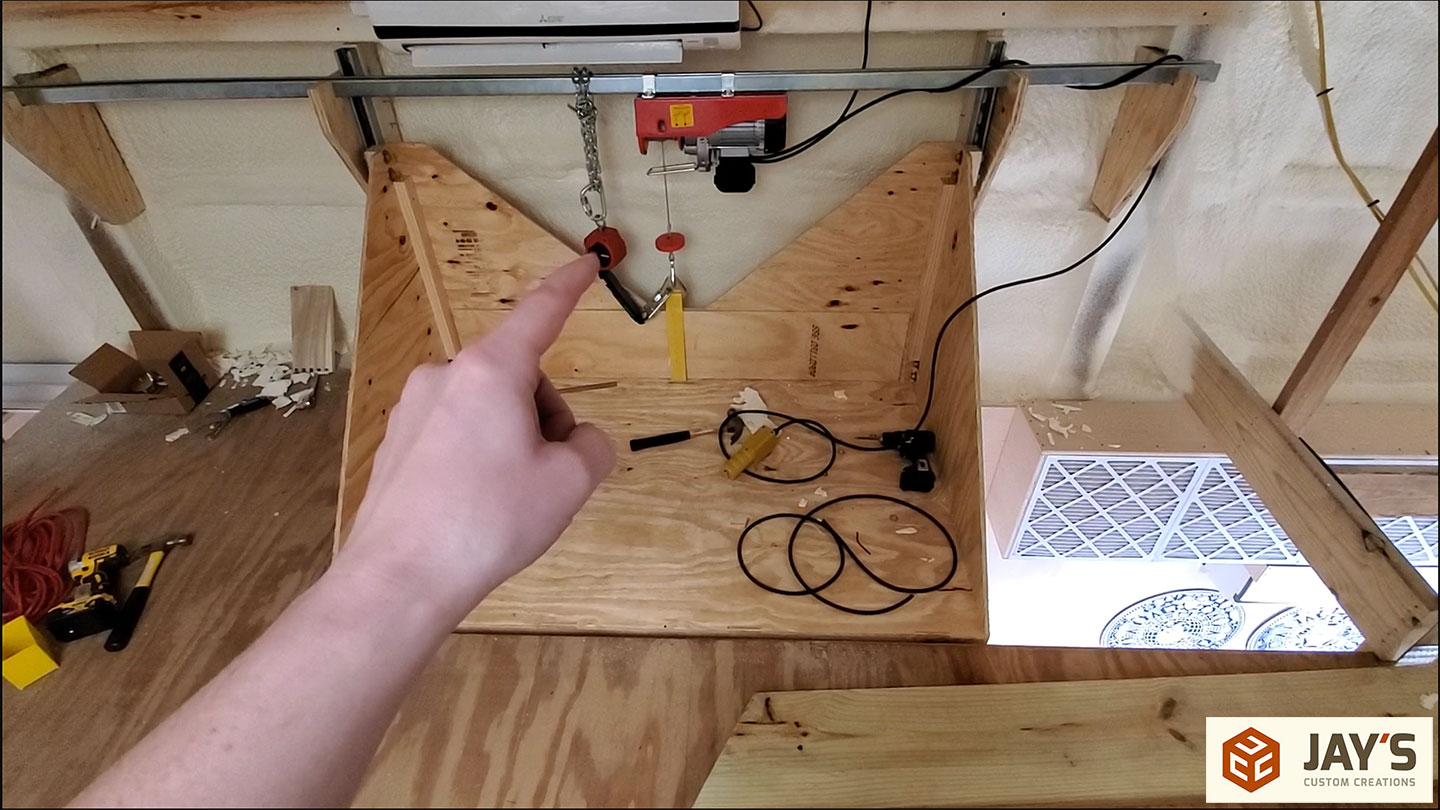
The hoist is a generic hoist I picked up online. You can find these electric hoists from various vendors with various load capacities. They all look the same so my guess is they are manufactured in the same place and branded for different vendors. The one I picked has a 500-pound single line and 1000 pound double-line lifting capacity.

The hoist comes with two lifting straps. I’ll be using the shorter strap as a means of attaching the platform to the hoist.
For some means of safety, I picked up a fall arrester. Unfortunately, I ordered the wrong size. This one is just under the 500 pound capacity of the lift so I need to either replace it with a larger one or add a second one of this size.

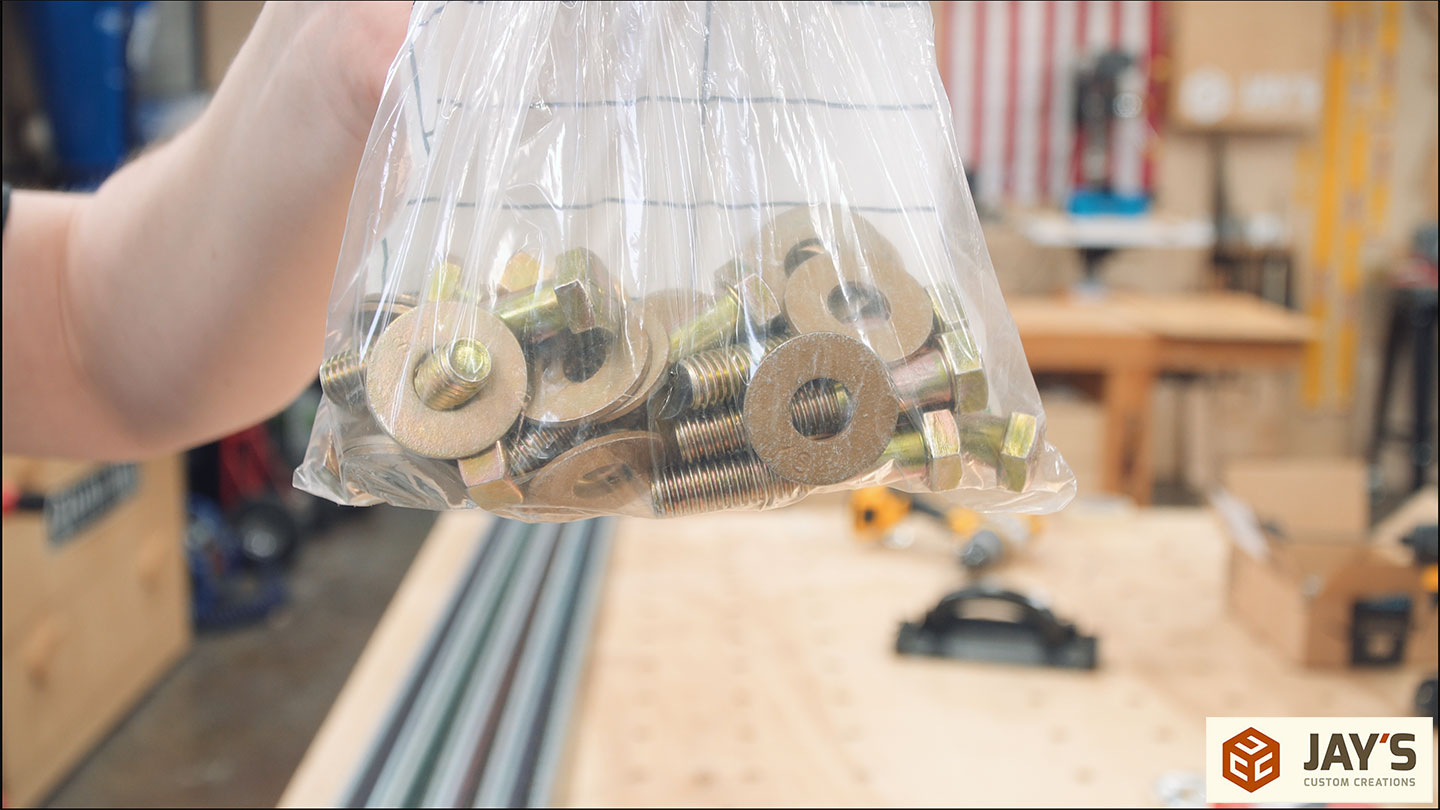
A bag of 1/2” bolt hardware is needed to connect the trolley blocks to the platform. If any of you out there have access to a Tractor Supply store, they always have the best prices on basic hardware.
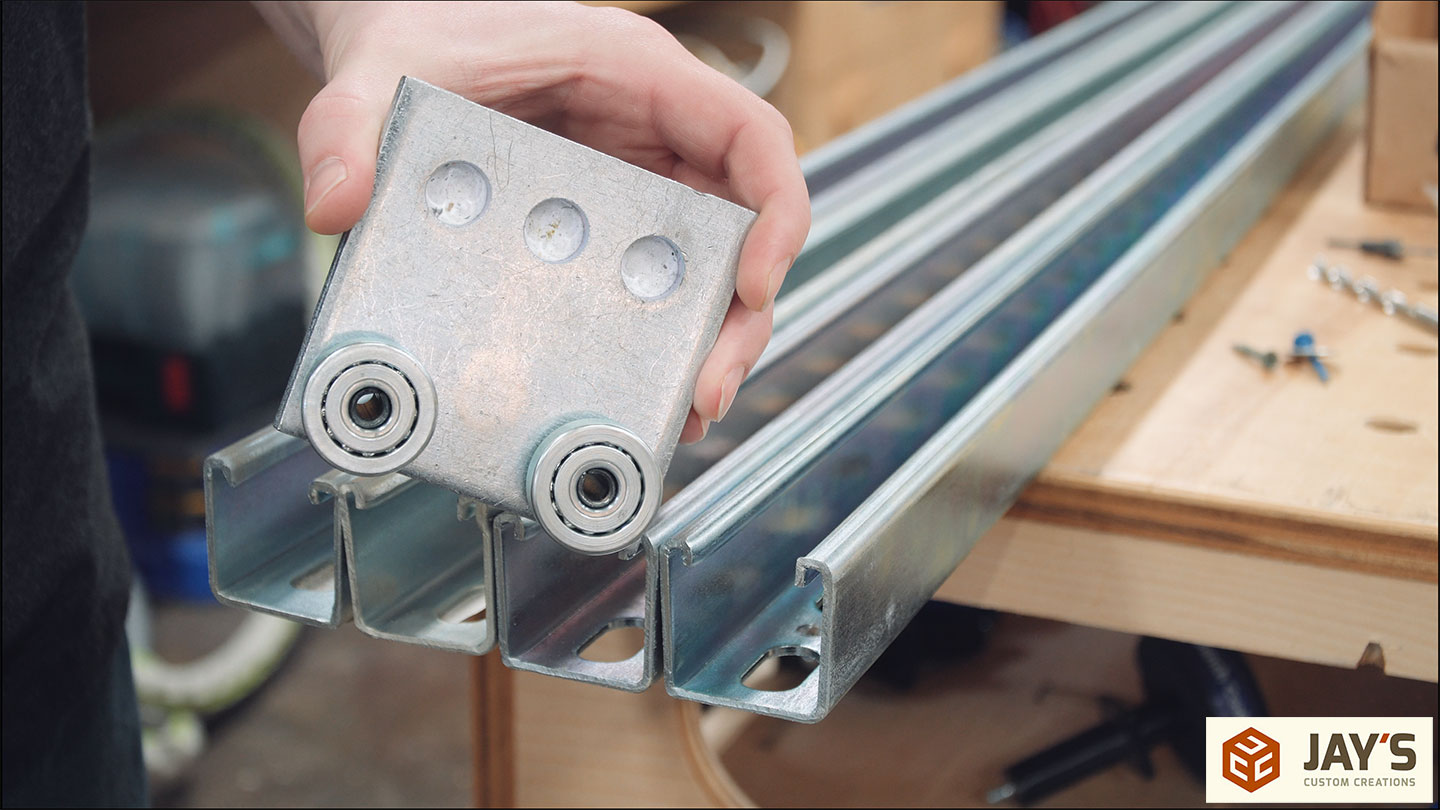
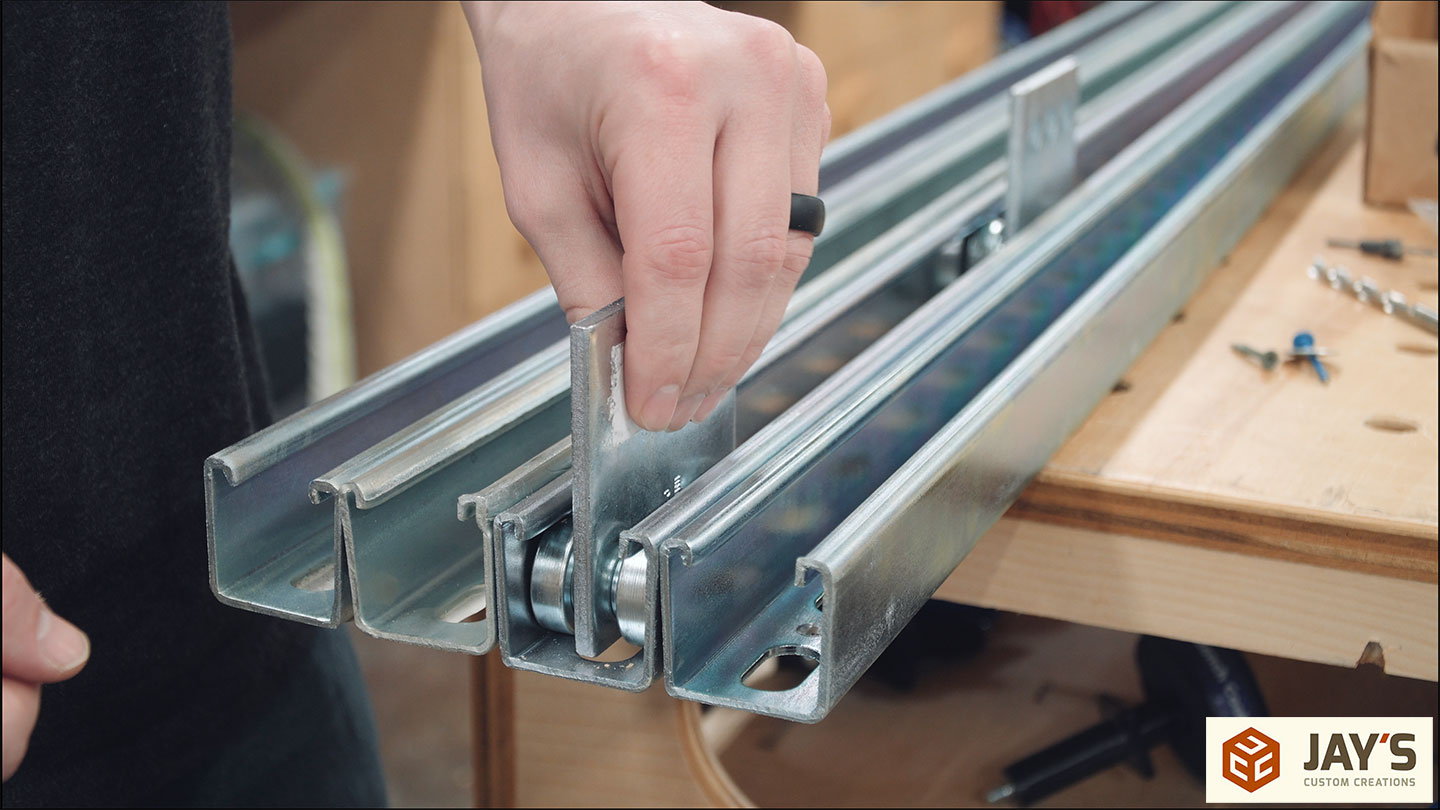
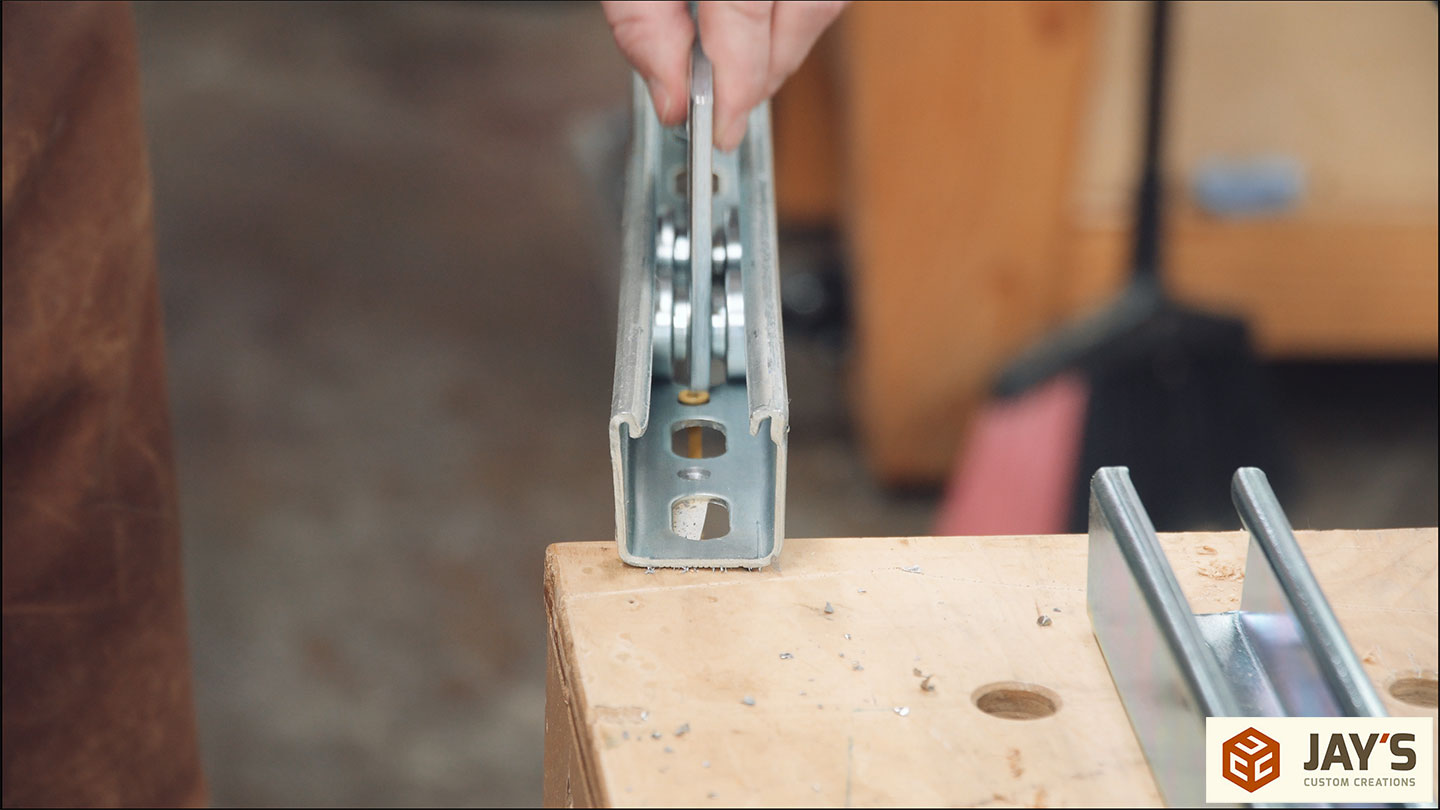
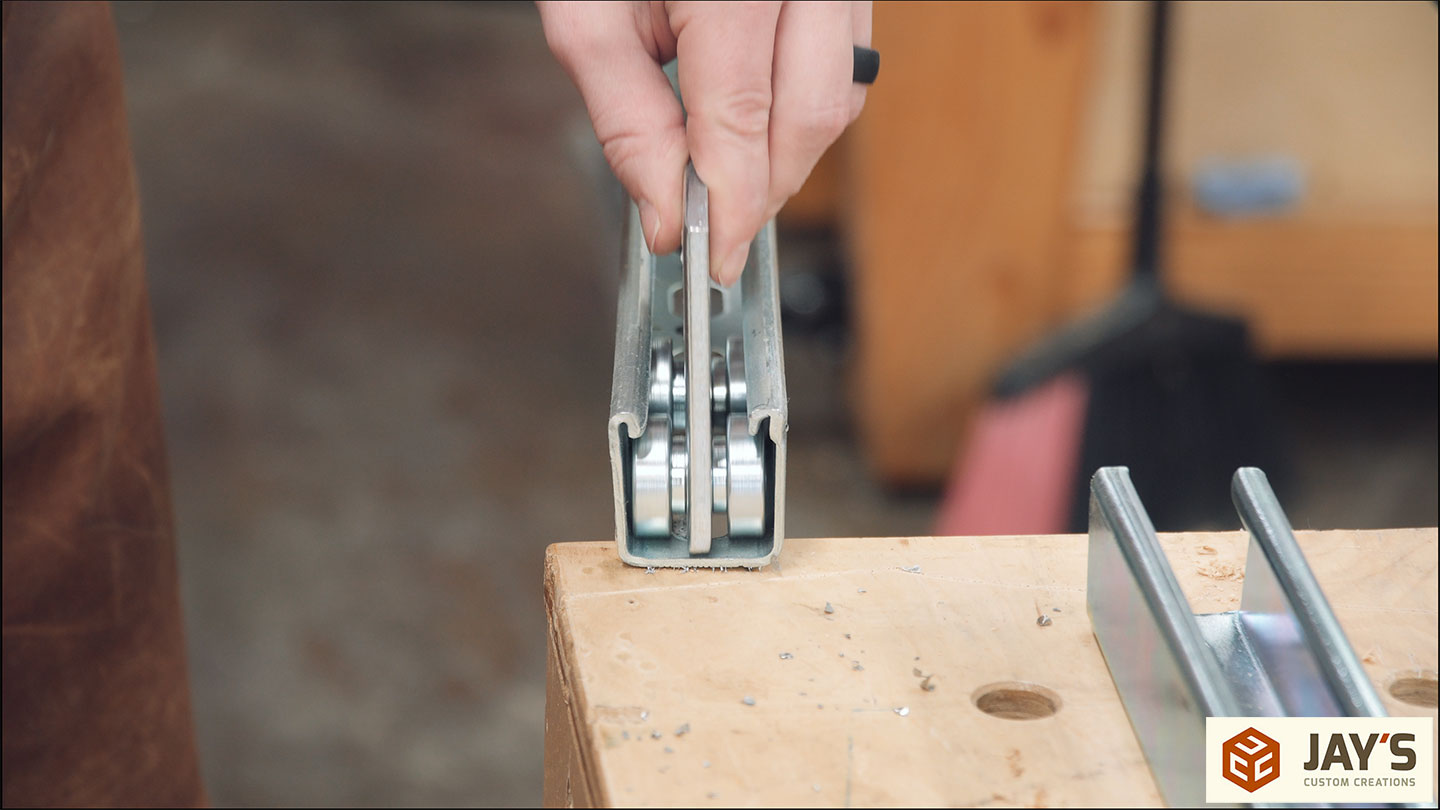
Four trolley blocks will be used inside the Superstrut to keep the lift tracking vertically. These are just steel plates with four bearings on one side made to fit inside the Superstrut.
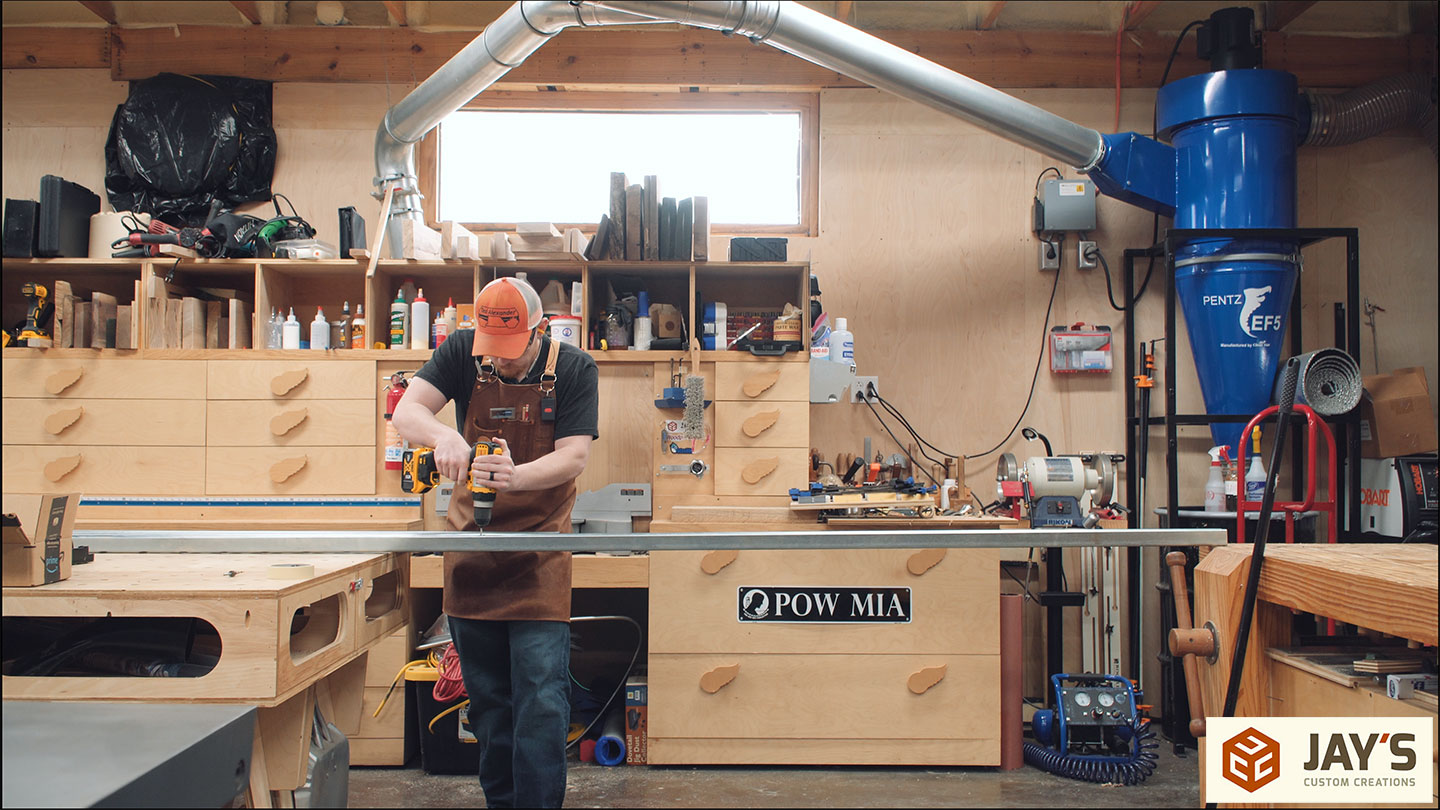
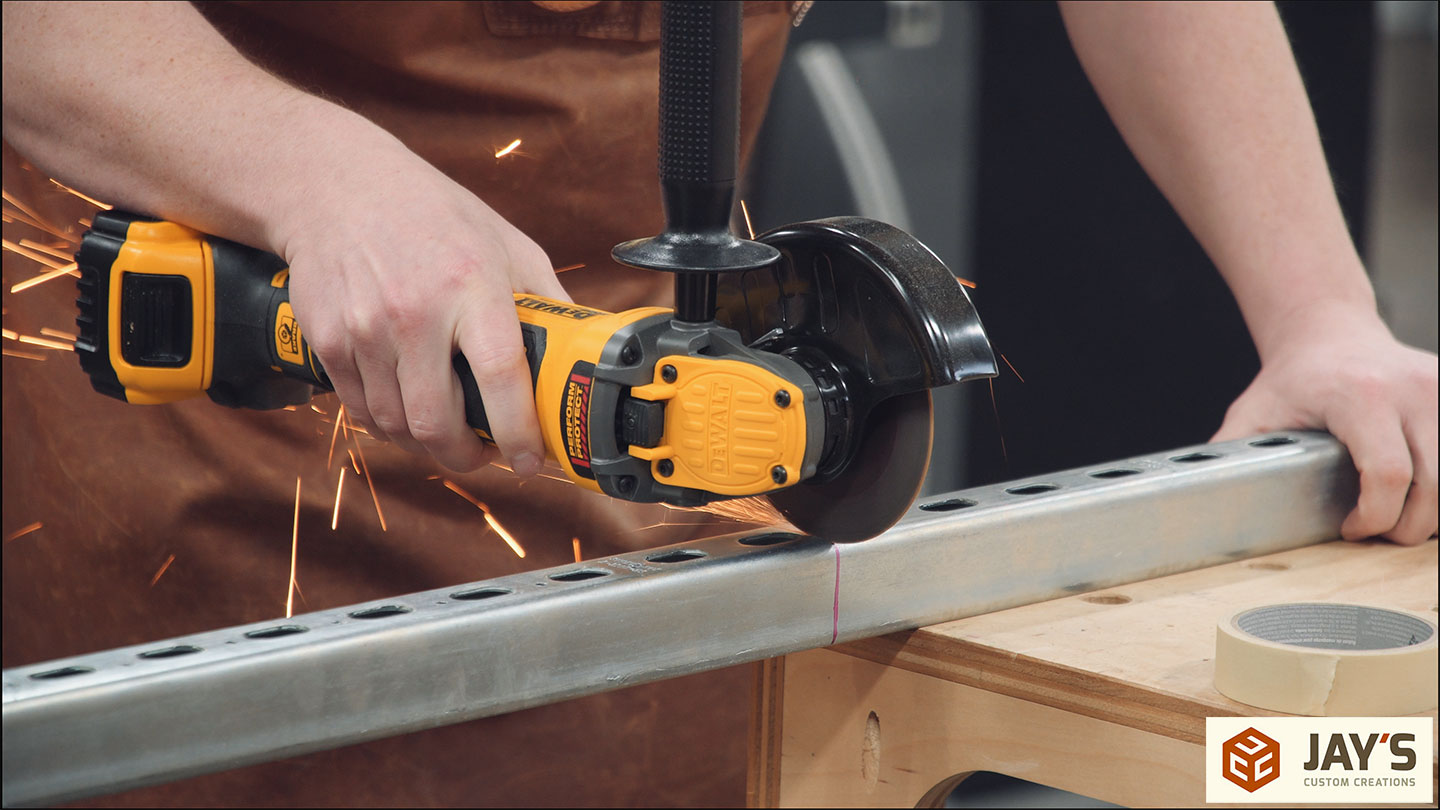
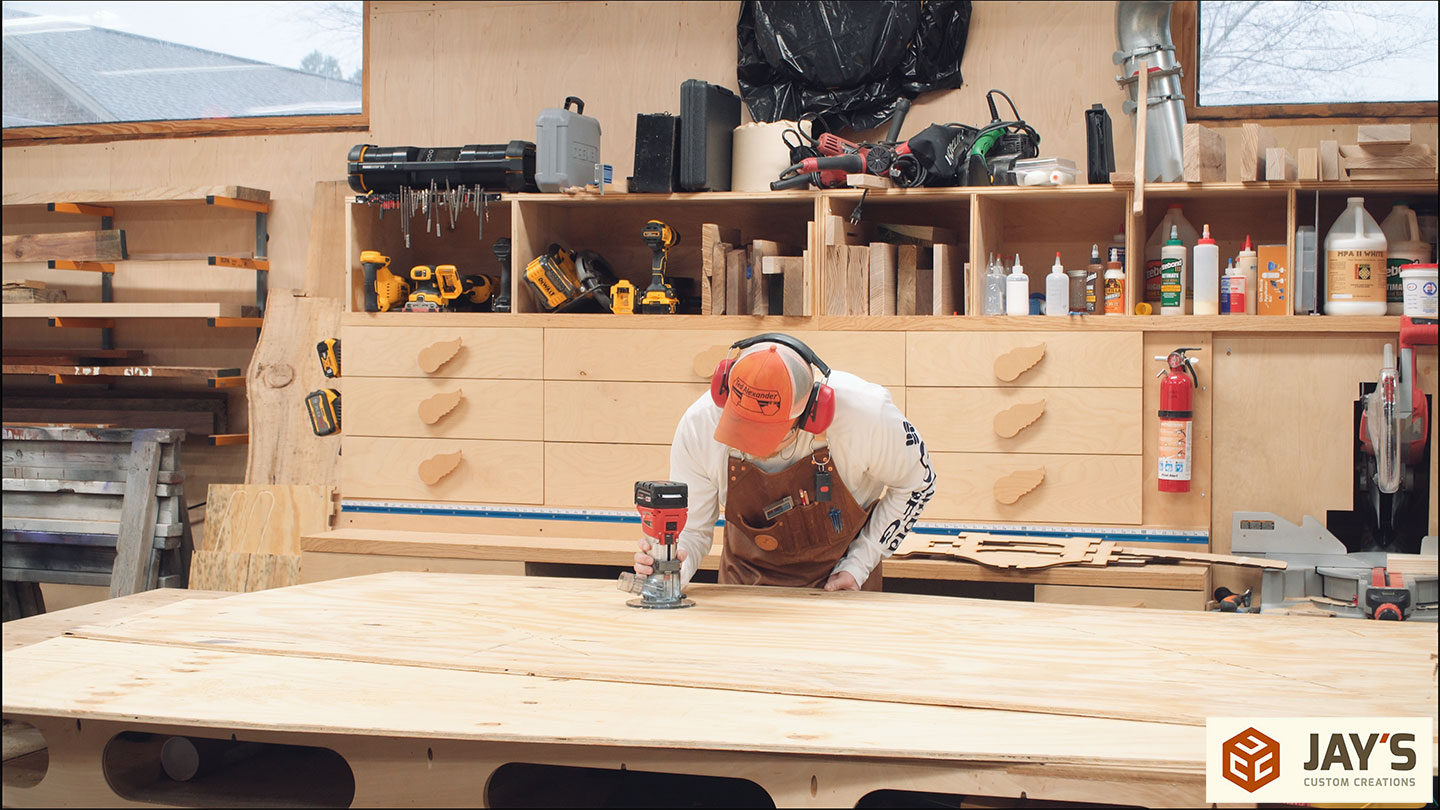
With the design done and the materials in house, I started the build by drilling a bunch of small holes for mounting screws.
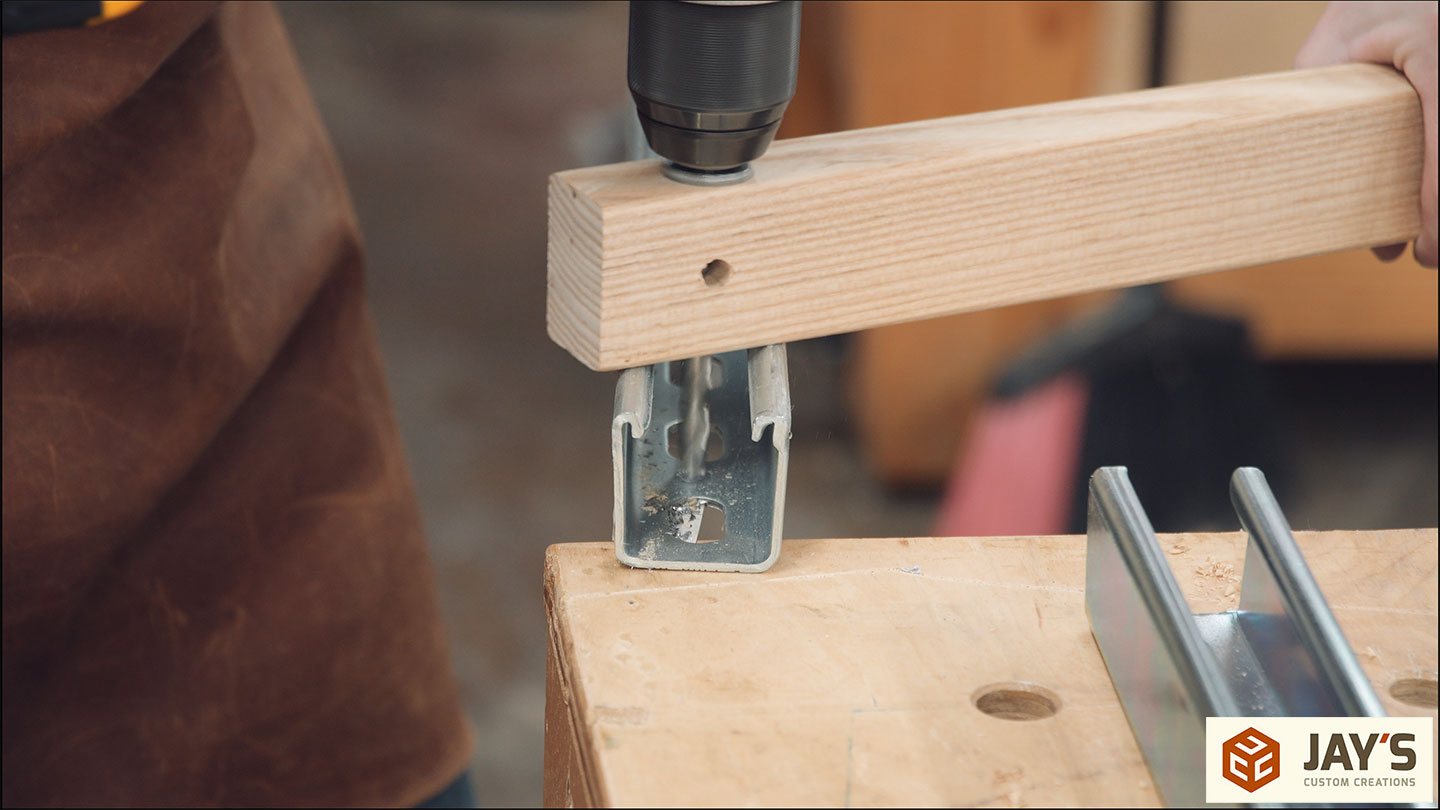
As you can see, with a single hole the screw heads interfere with the travel of the trolley blocks.

The solution is to cut a countersink for each of the holes. This will allow the screw head to sit lower. To prevent going too deep with the larger drill bit I used a washer and a block of wood as a depth stop. This worked really well I did have to come back and make a few of these holes deeper.


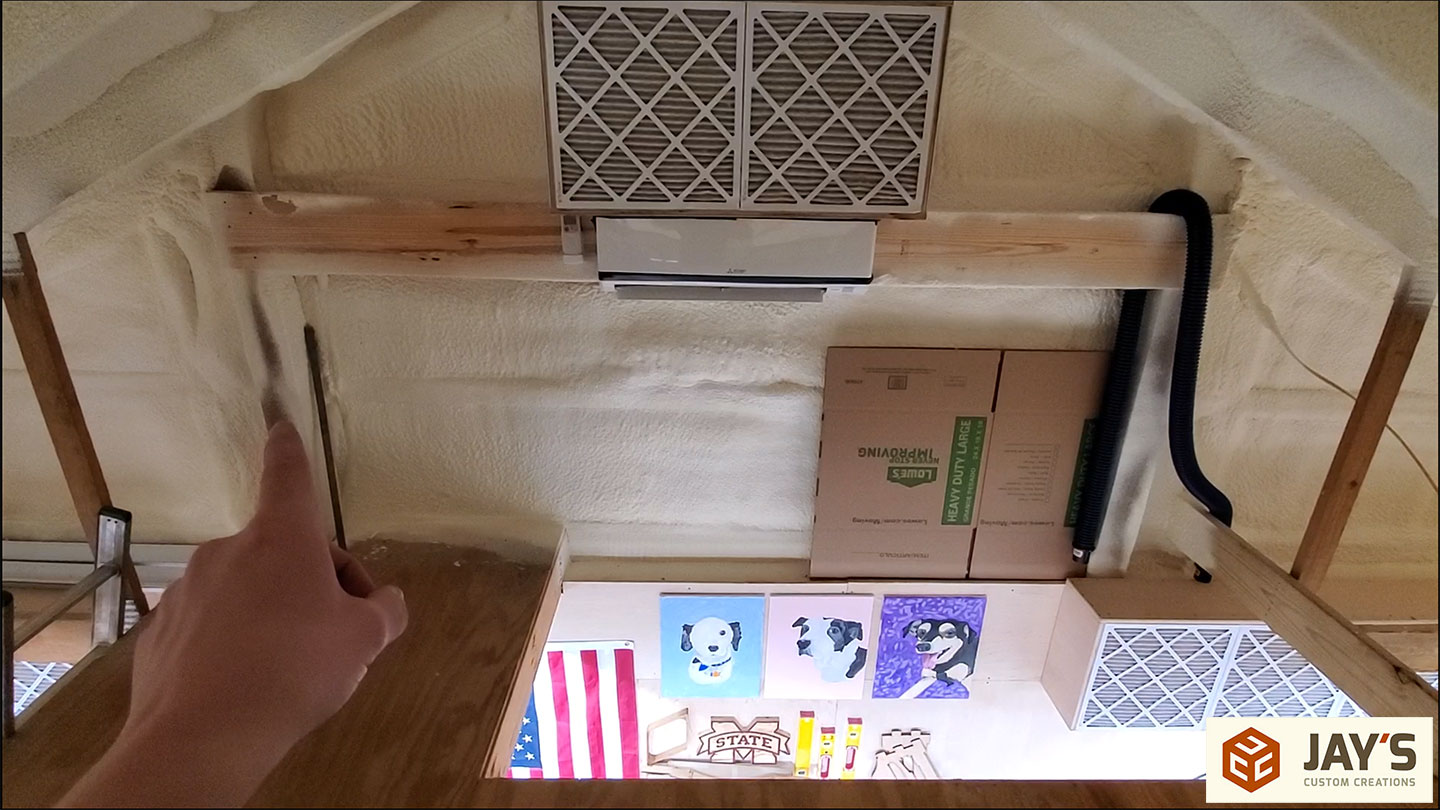
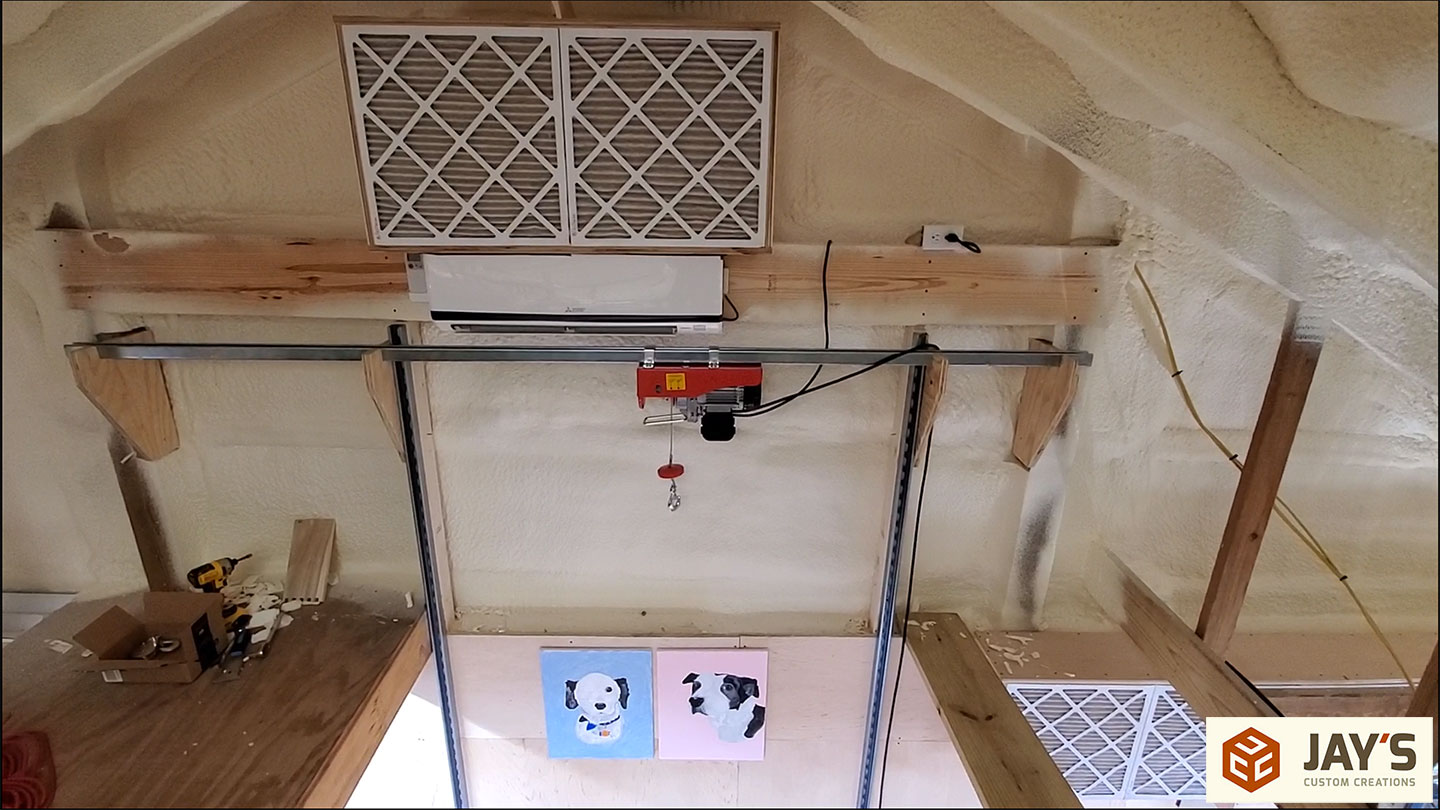
I didn’t record any work upstairs in the loft. My entire focus was completing the work without falling through the hole in the floor. Moving the camera would have just been a distraction. The starting point upstairs is two 6×6 posts 10′ apart with a board connecting them to hold the mini-split. I’ll add the vertical Superstrut, 2×4 bracing behind them, horizontal Superstrut support brackets, the hoist, and a dedicated electrical circuit for the hoist.
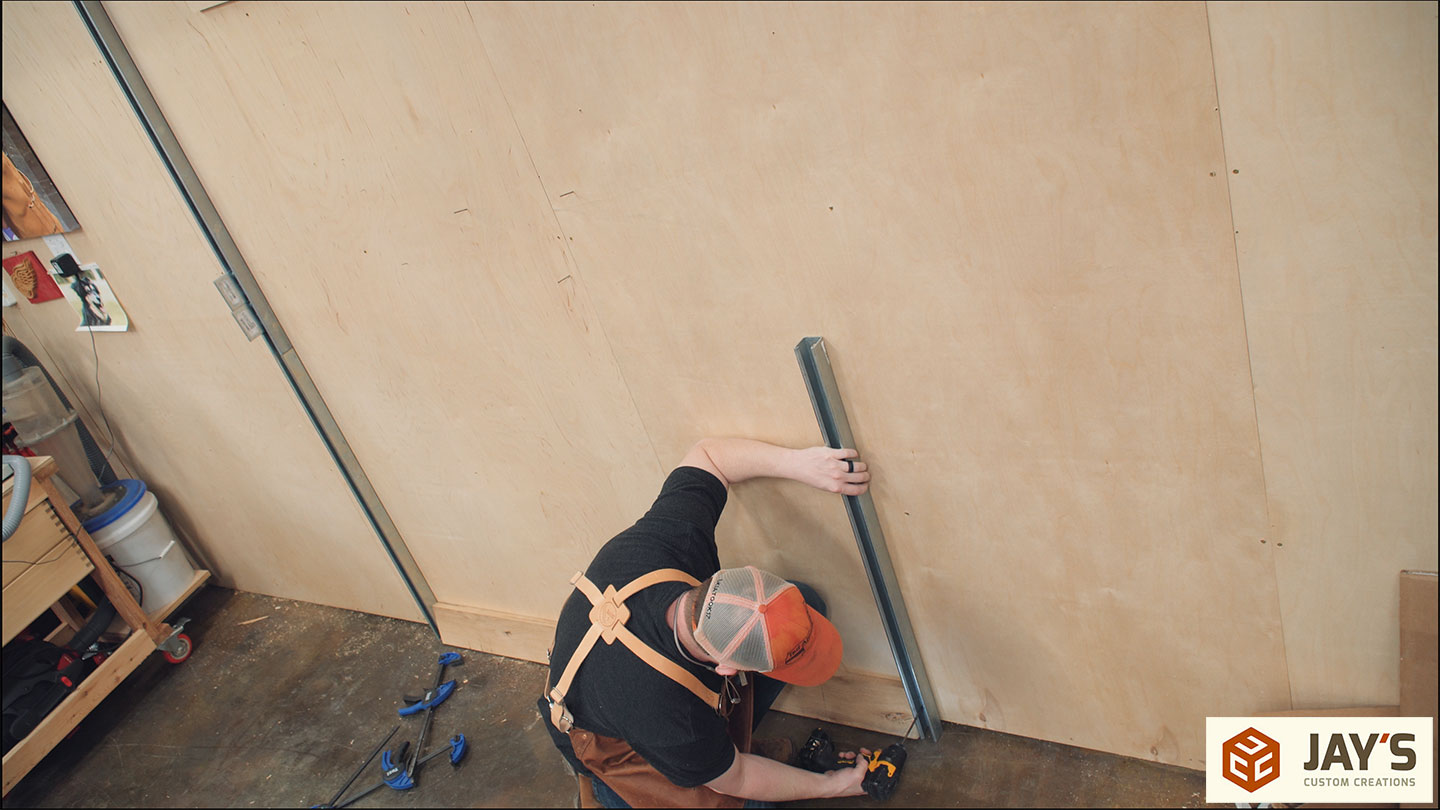
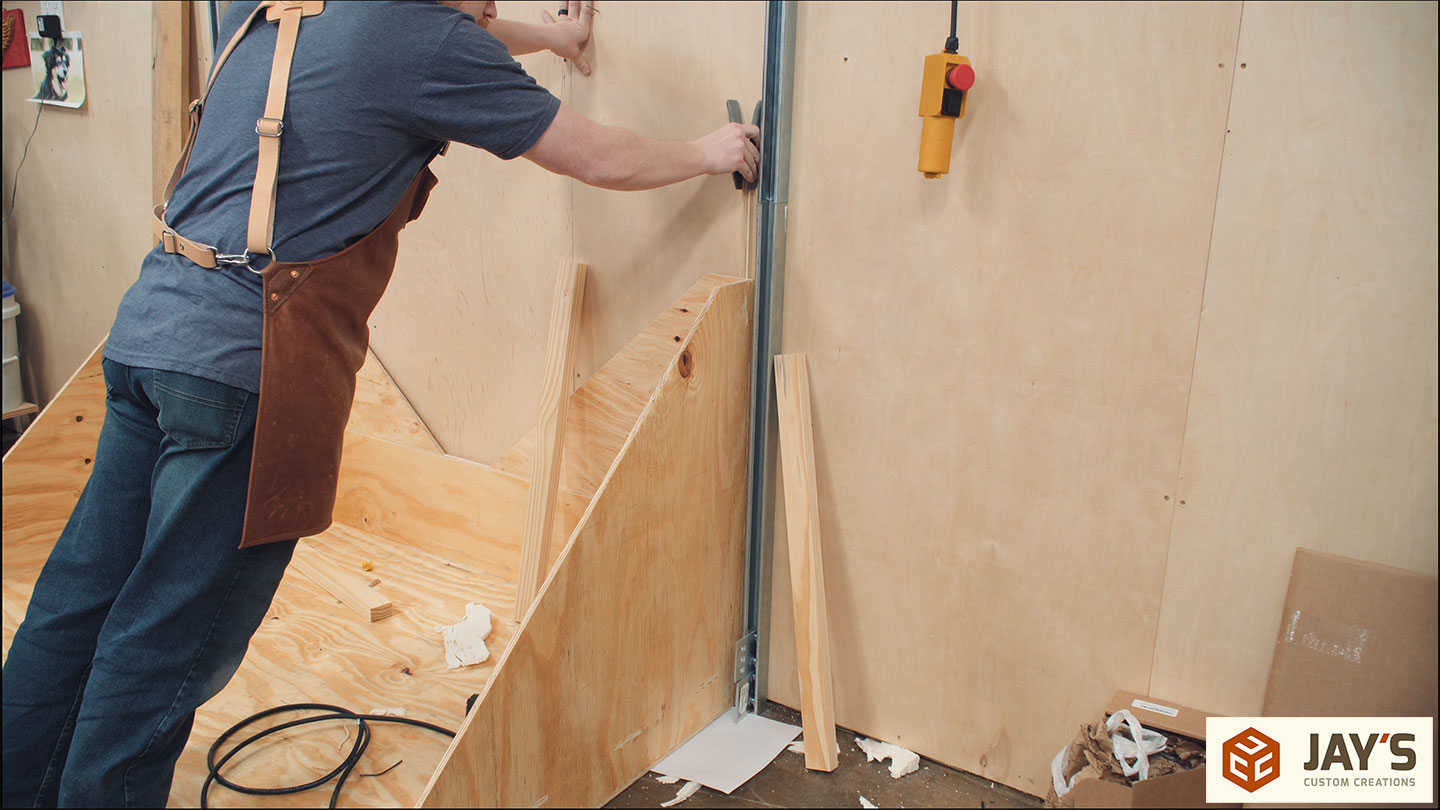
Step 1 is to add the left side Superstrut referencing off of the left side of the opening and an inch or so below the horizontal mini-split board above.
A filler piece is needed to go below the full section on both sides. I can go ahead and cut two pieces to the same length.
The offcut piece was clamped to the side of both the top full section and the bottom short section to make sure they are perfectly in line when securing them to the wall.
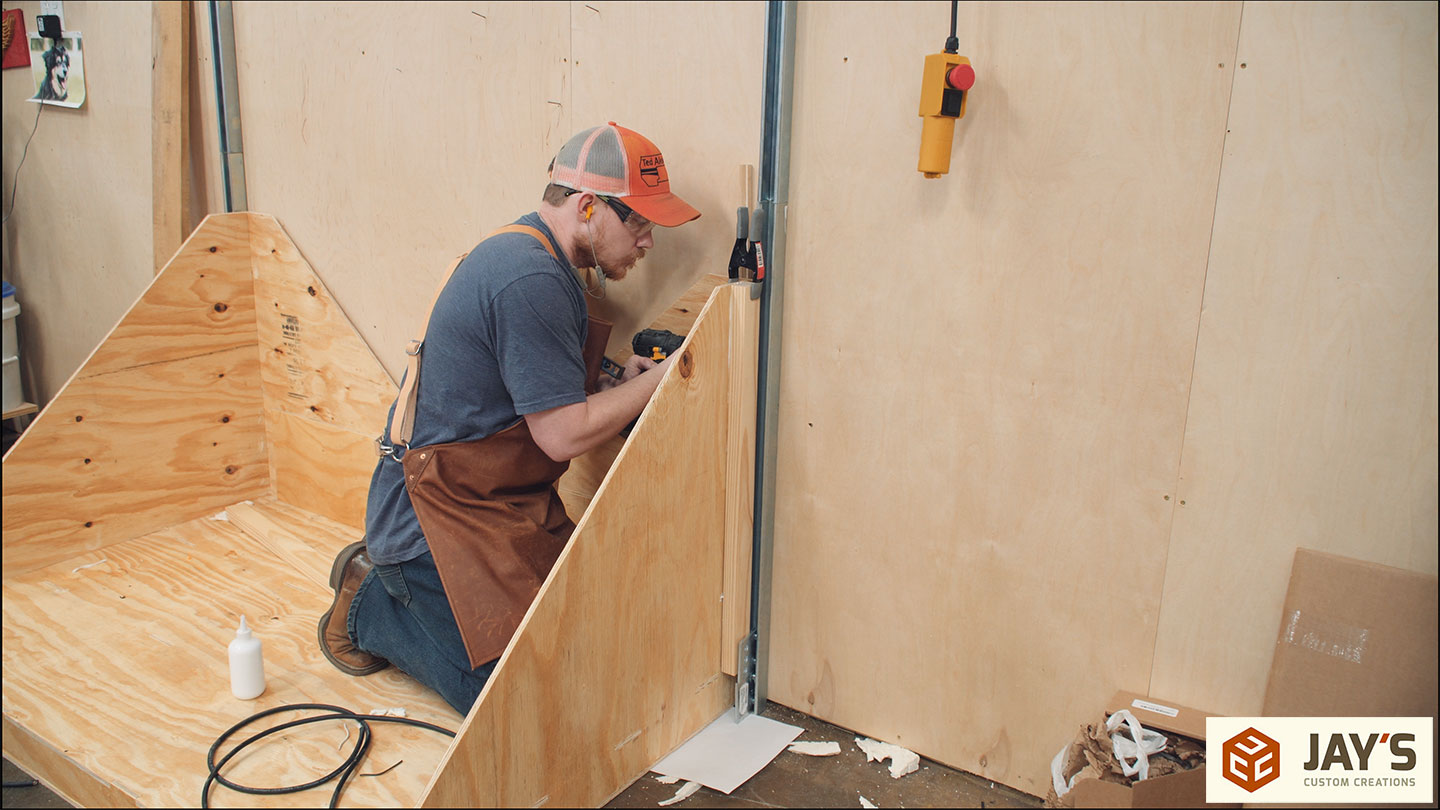
I secured the right side in the opposite direction; bottom to top. First, a spacer block of wood was used on the floor to locate the track at the exact spacing I needed.

Then the full-length piece can be carefully stacked on top and clamped in line with the bottom piece with the offcut. The spacer block was used again to make sure the two tracks remained parallel.
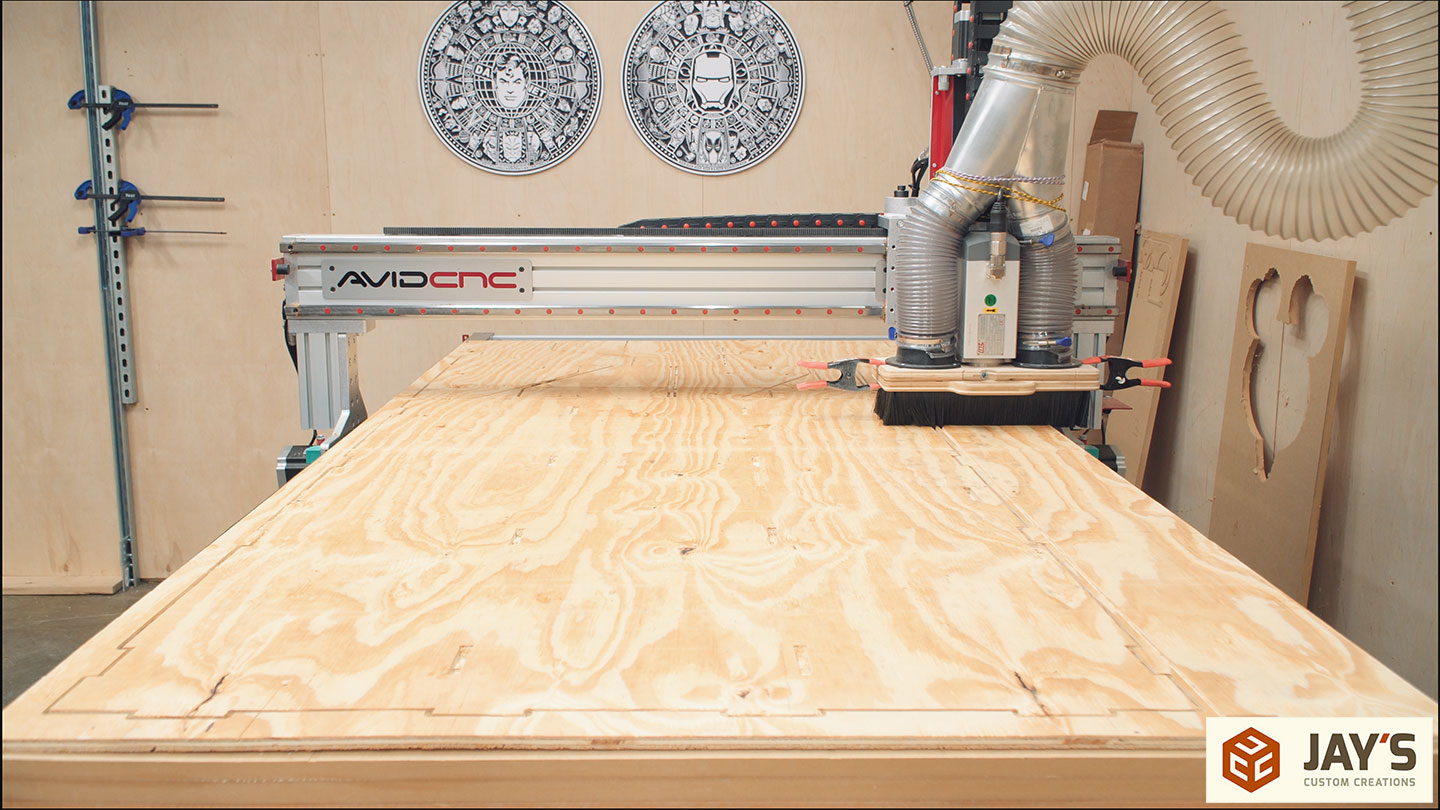
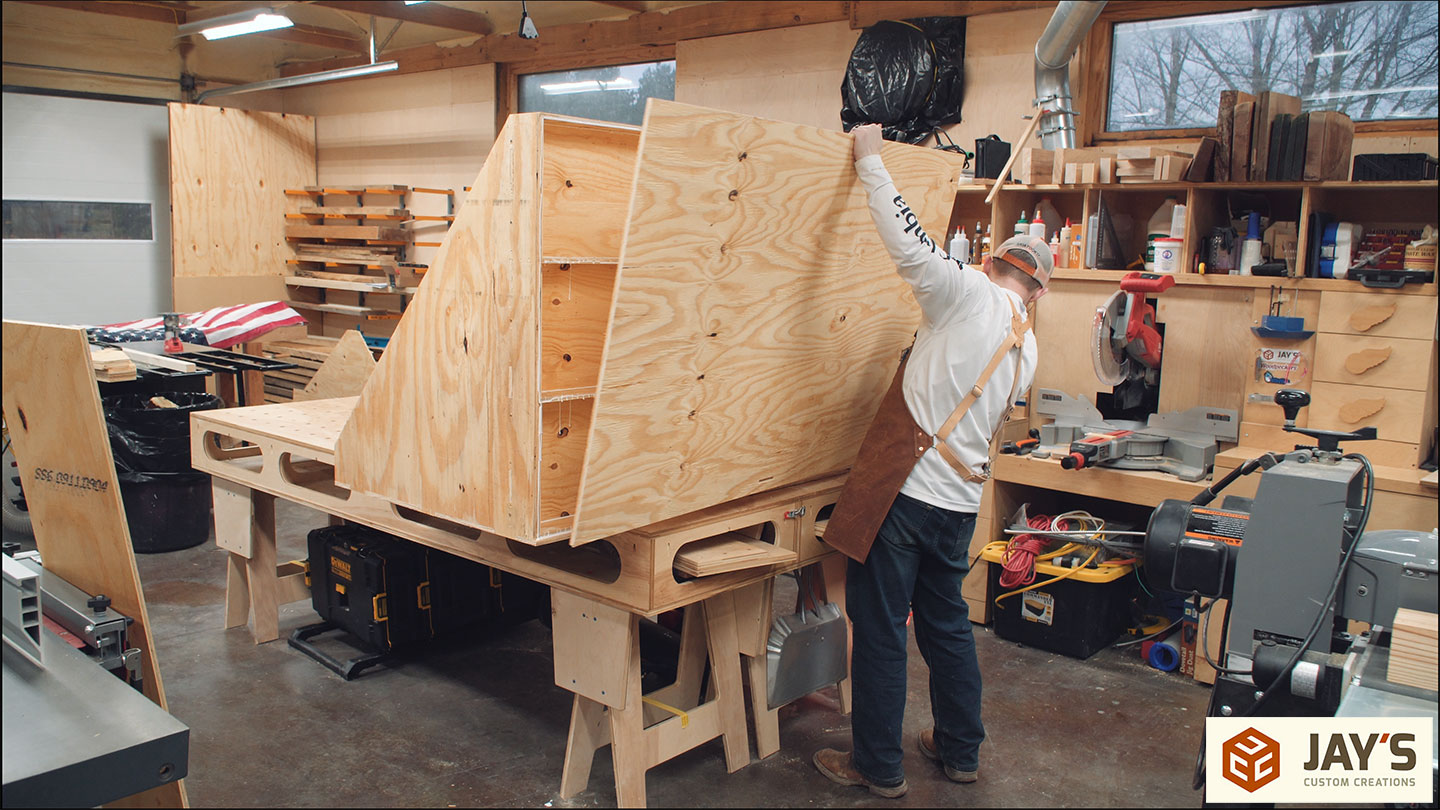
Before starting this build I worked out the entire design in SketchUp. For those who are interested, I already published a video covering my design process. The entire design calls for four sheets of 1/2” CDX pine plywood. Nothing fancy. This is a purely utilitarian project and I just need it to function, not necessarily look a certain way. I used the CNC machine to cut out all of the pieces while I finished breaking them down and prepared everything for assembly.

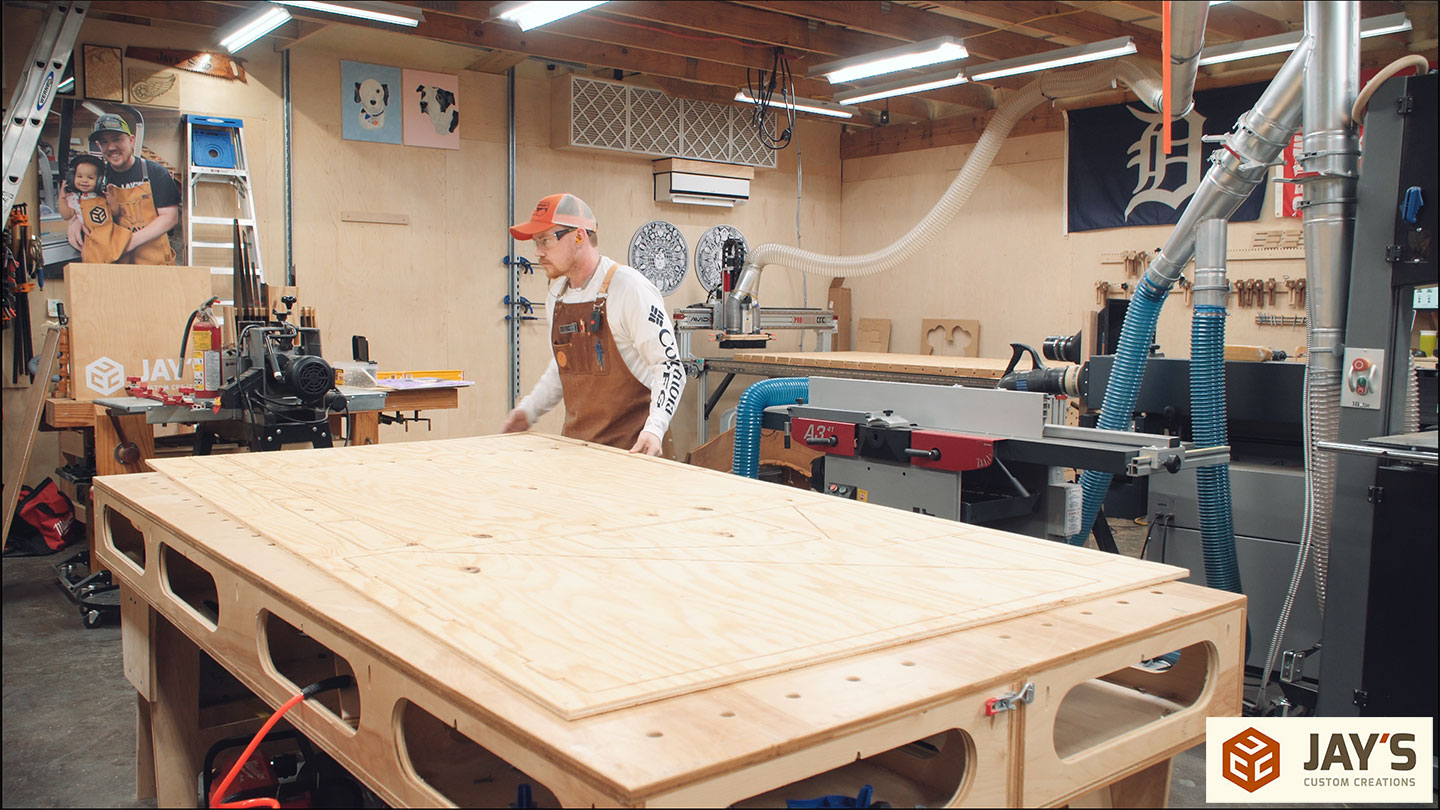
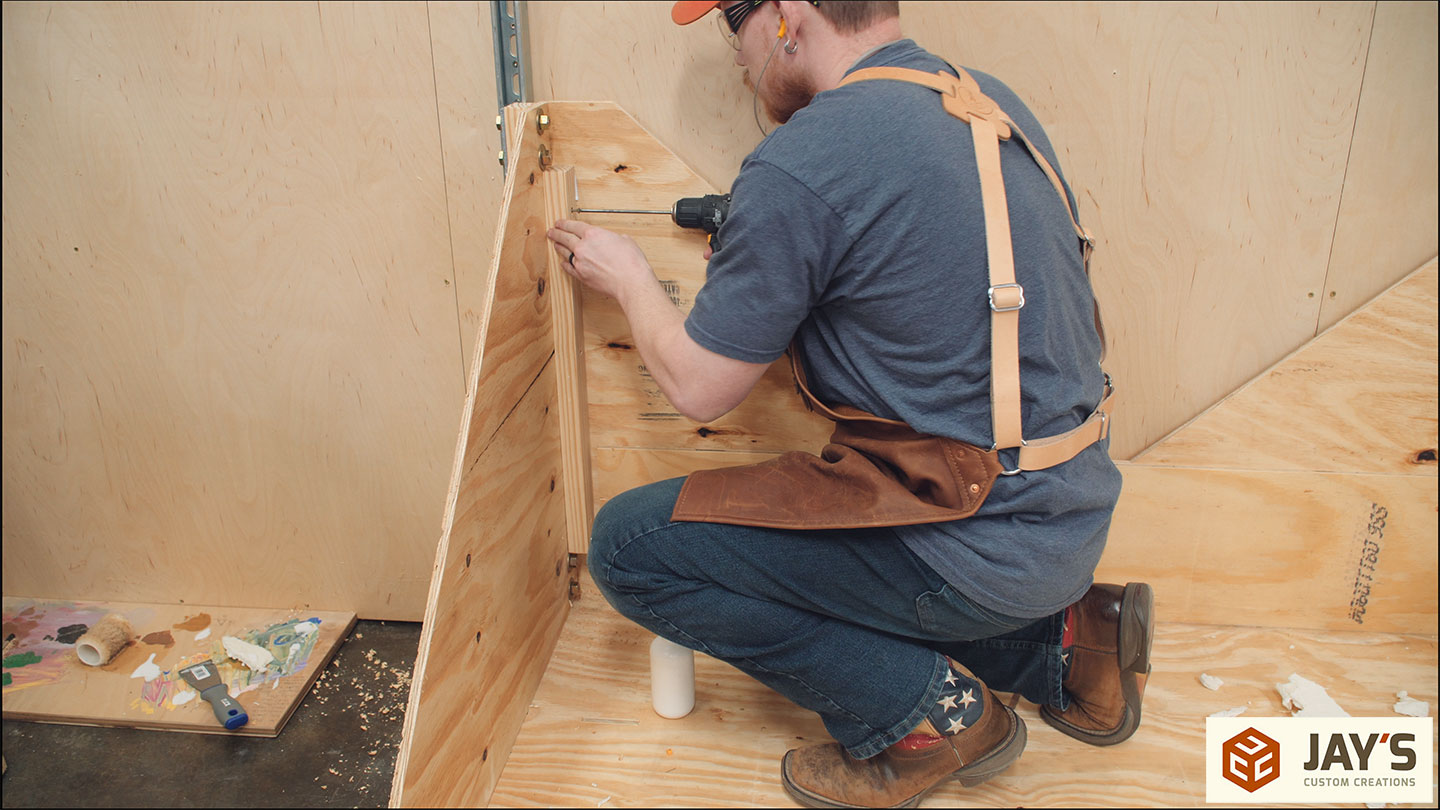
For increased strength without a lot of weight, I went with a torsion box style platform, which is where the assembly starts.
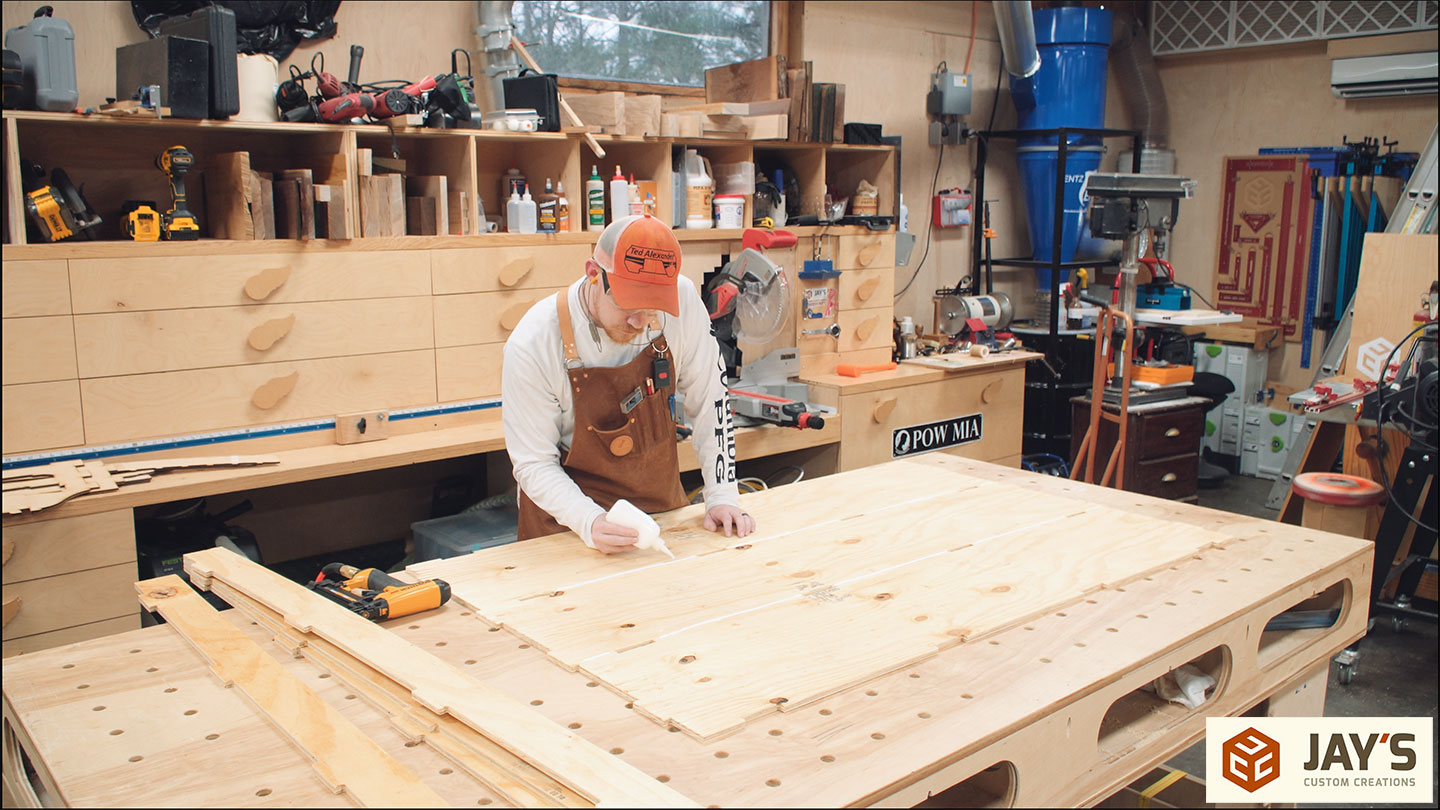
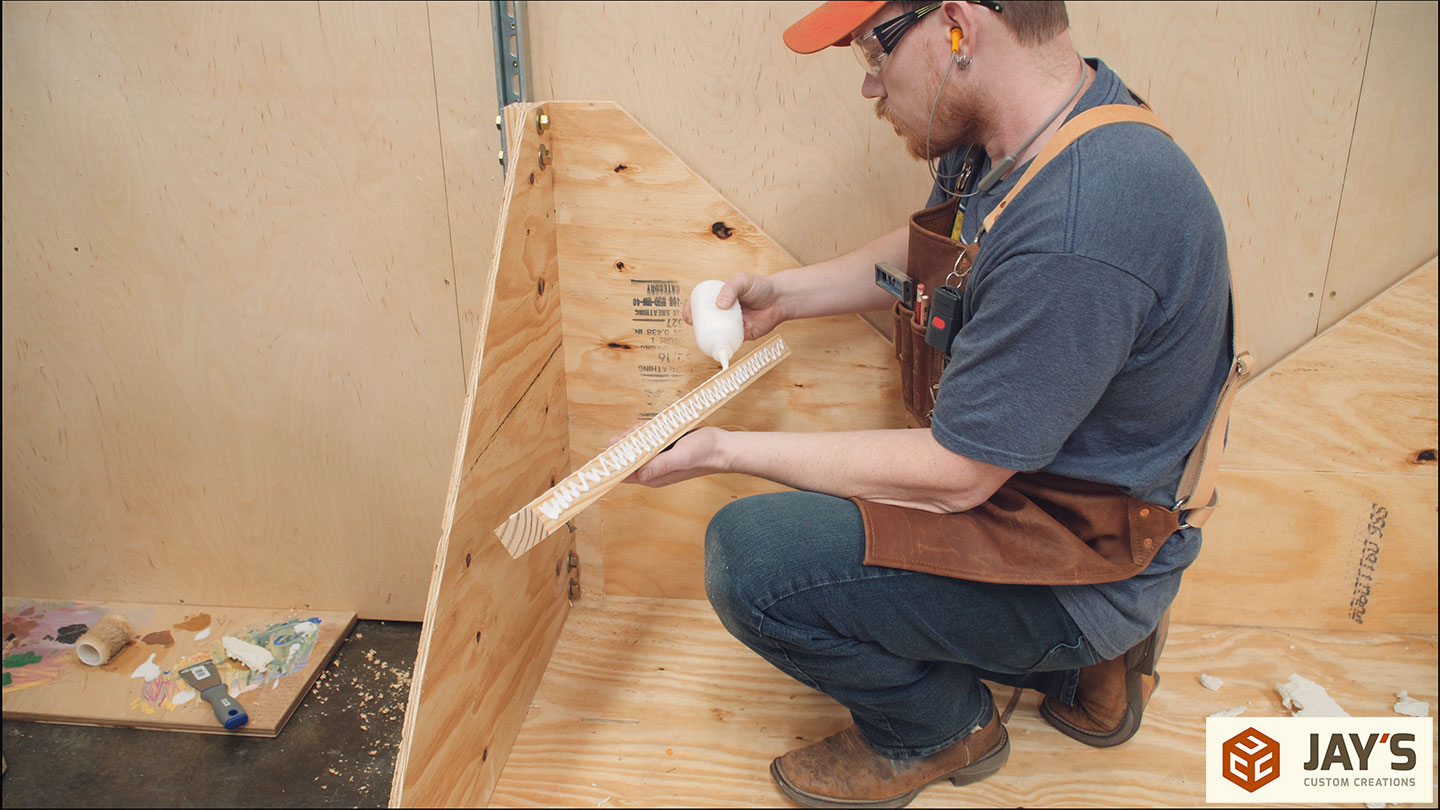
Then the sides and back panel can be added. The platform connects to the sides with mortise and tenon joints and to the back panel with a wide face glue connection. The sides connect to the back panel with a few finger joints.

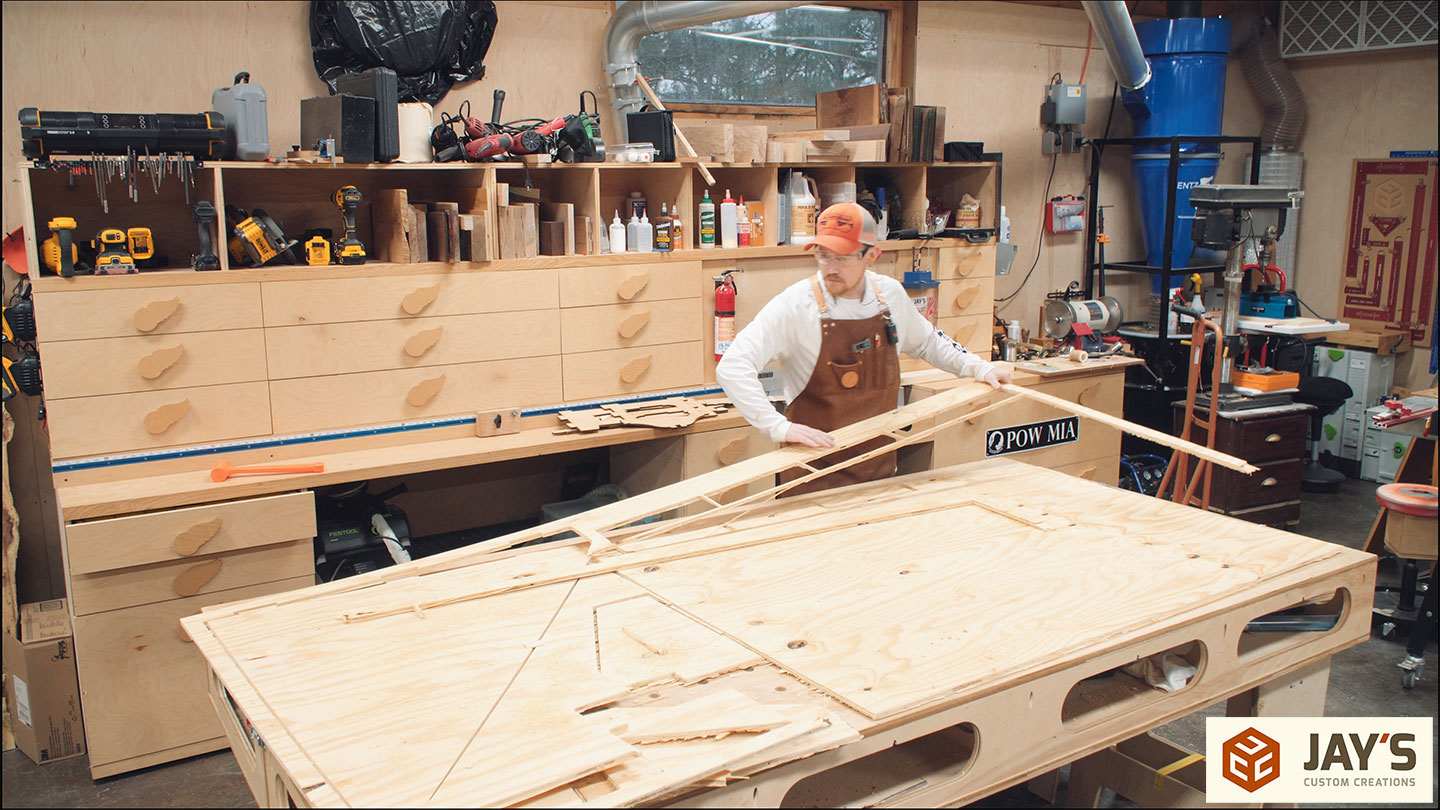
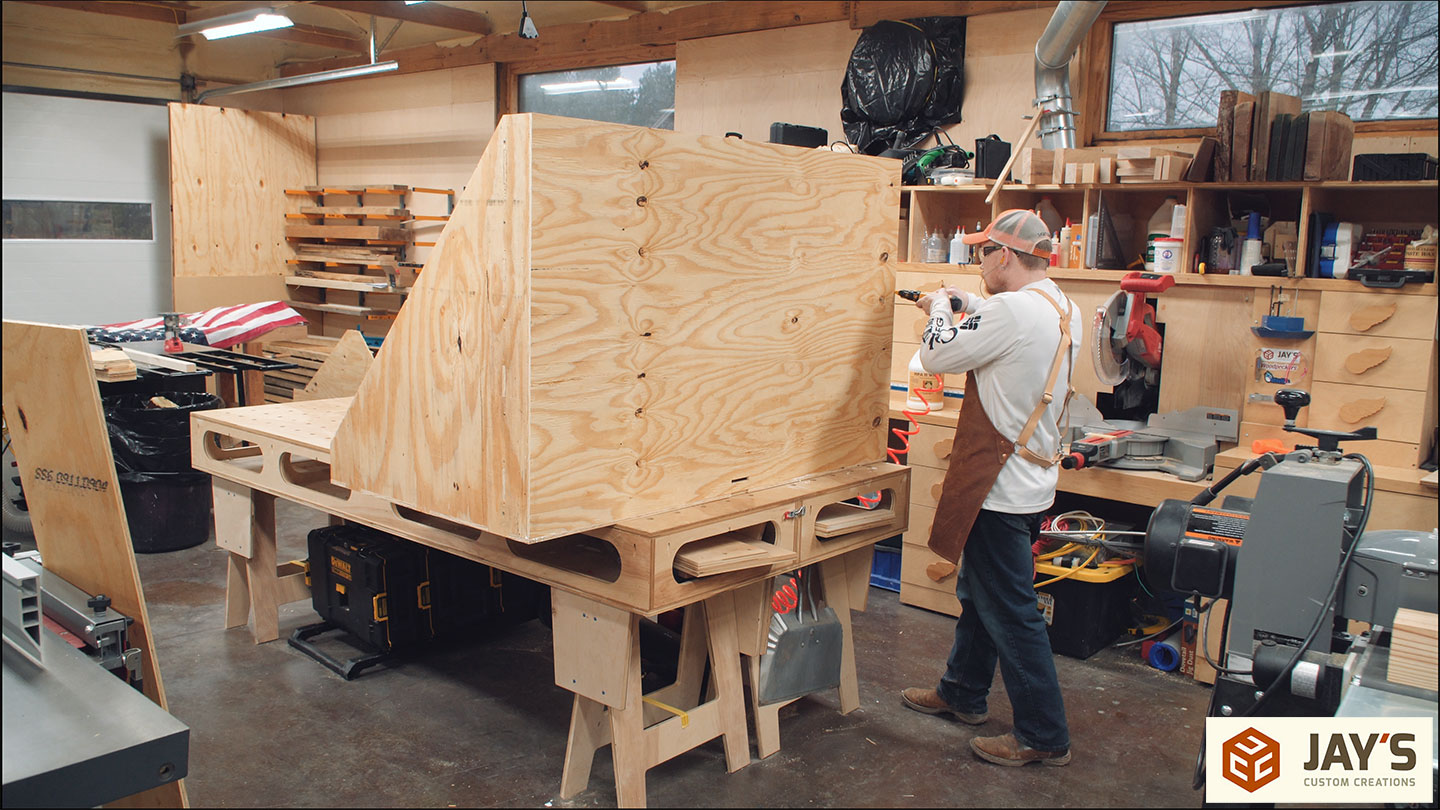
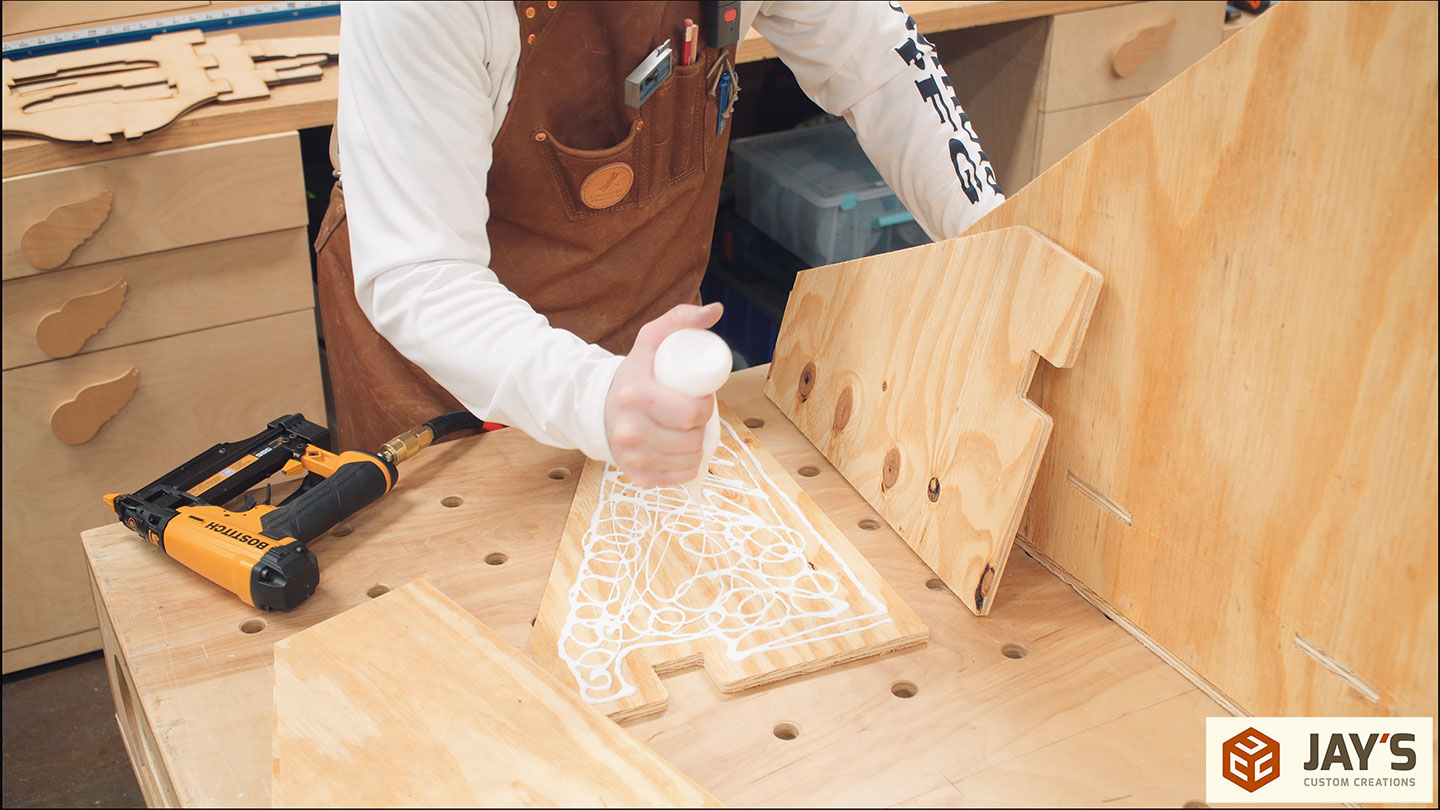
Next, the assembly is flipped on it’s back so the platform interior webs can be added. I made sure to use way more glue than what was necessary as any extra glue would just act similar to caulking around all of the edges.
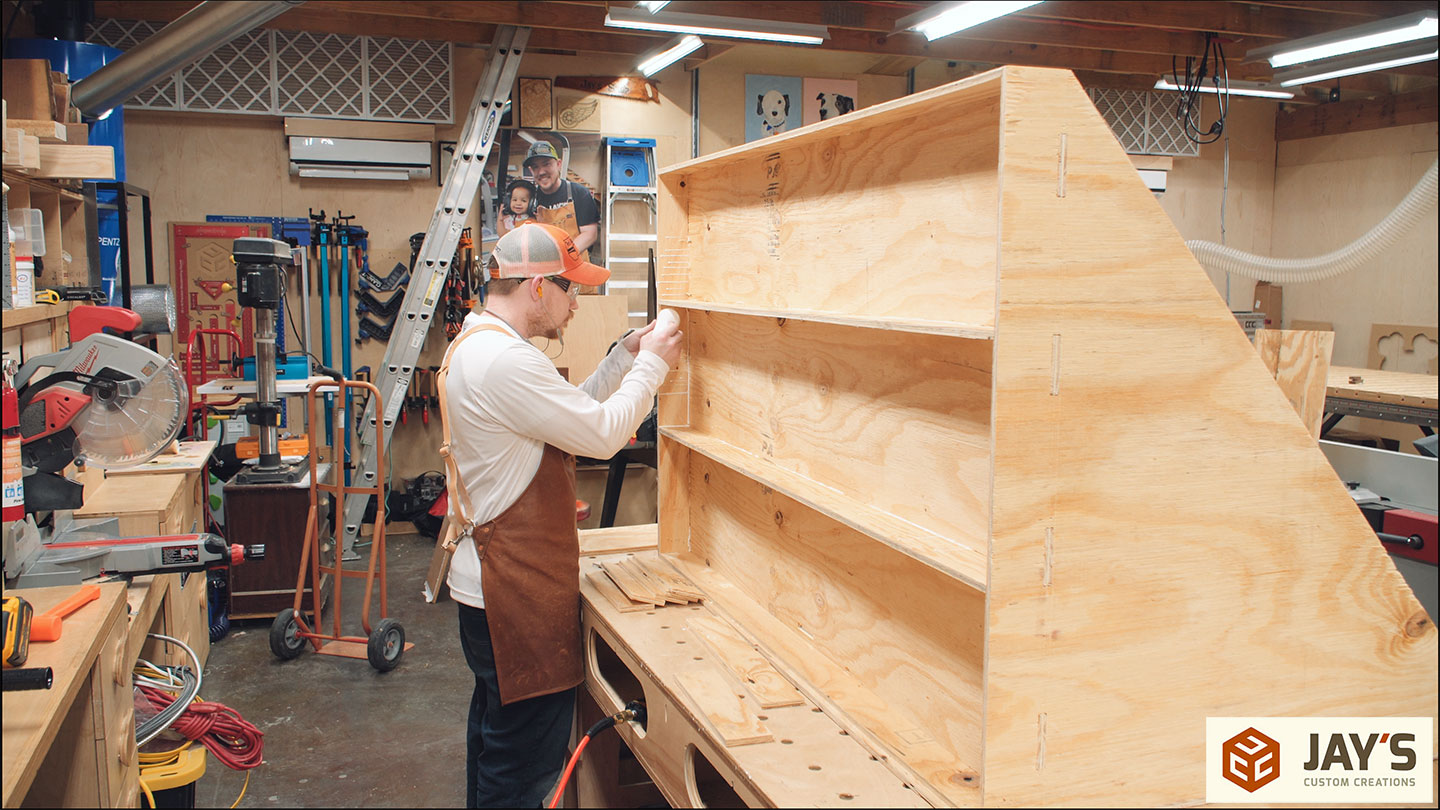

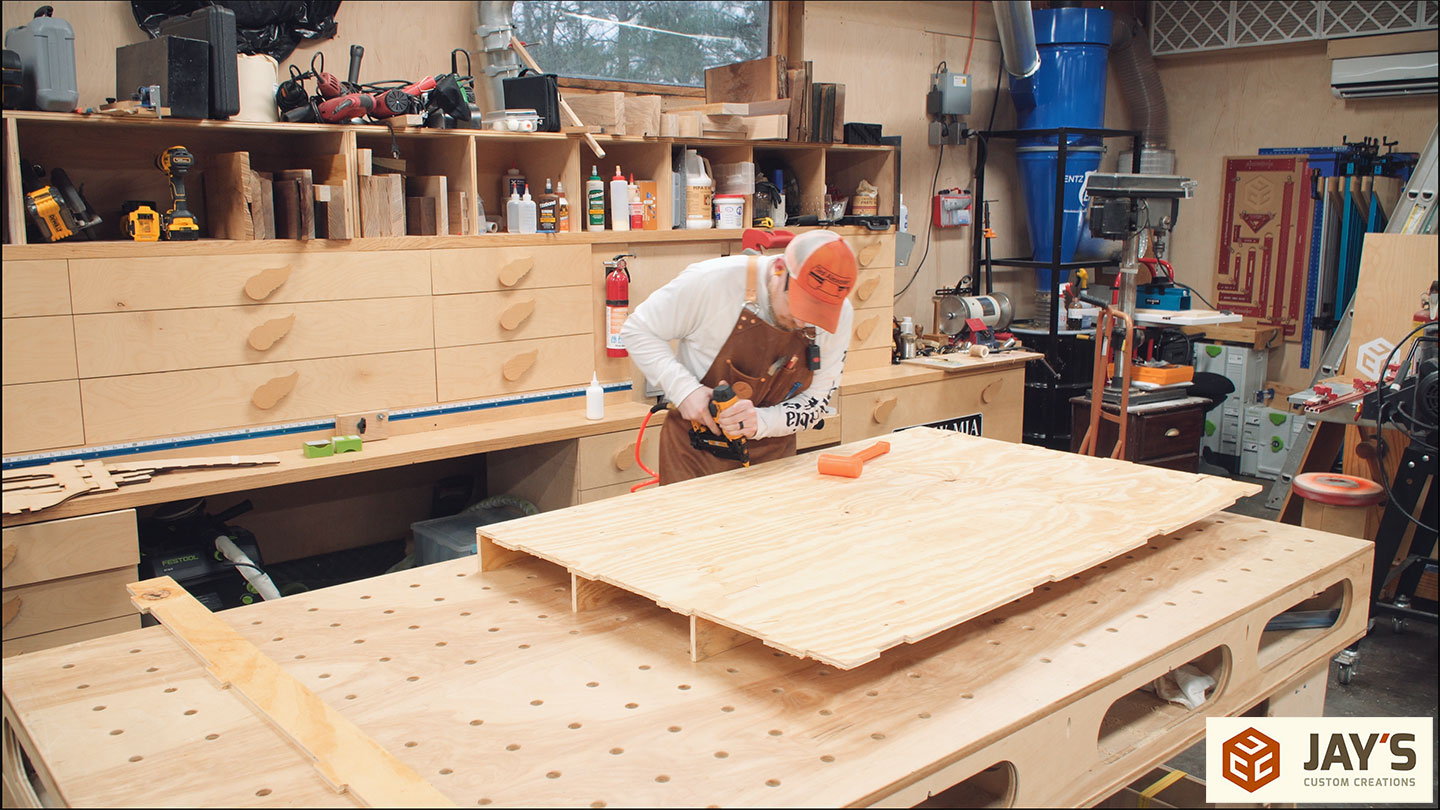
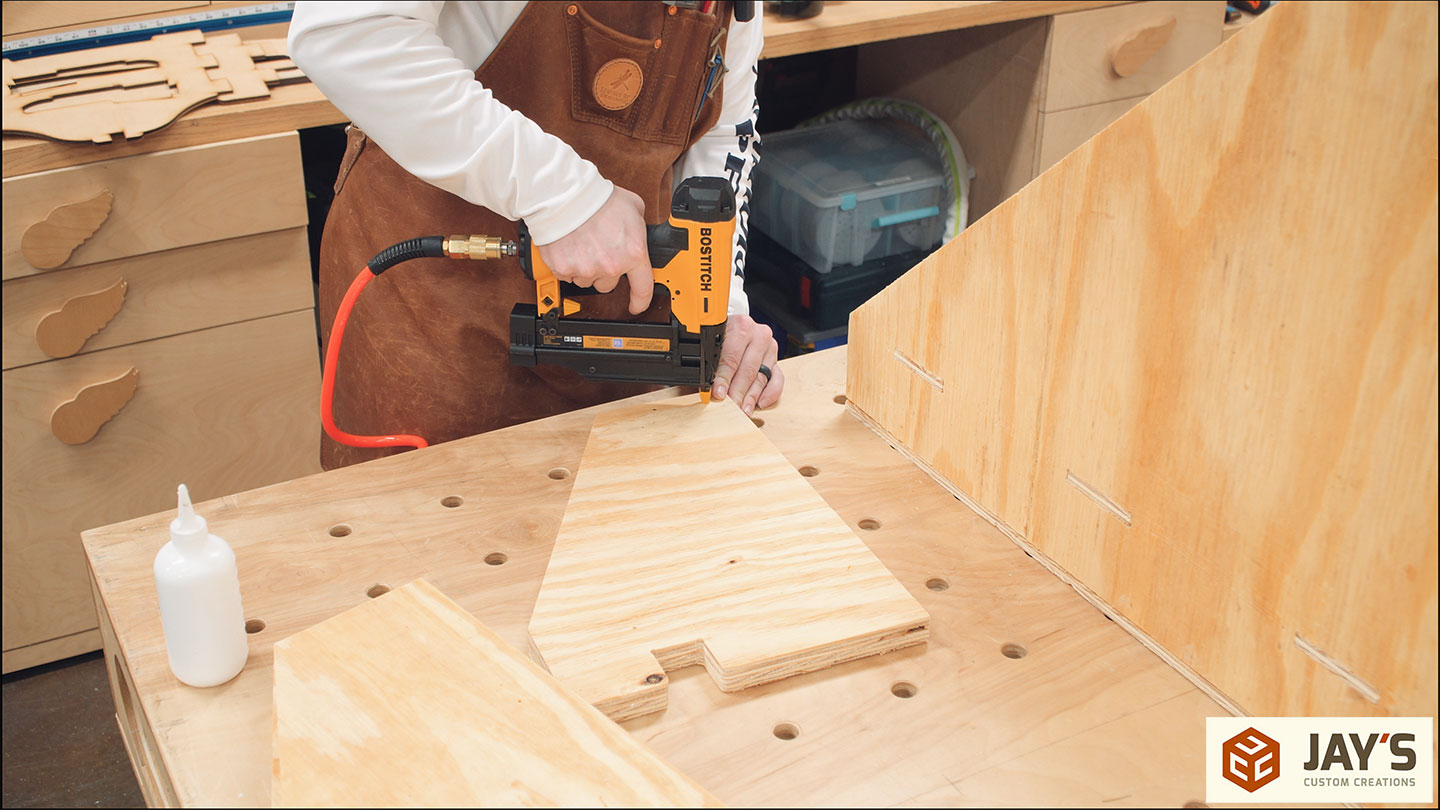
More glue and the bottom of the platform is installed. I am using nails to hold the pieces together but that’s just until the glue dries. The main holding power comes from the glue after it dries.
The last piece of the platform assembly is a wide rectangle that goes across the lower back panel. This is to further strengthen the back panel right where the lifting strap will be.
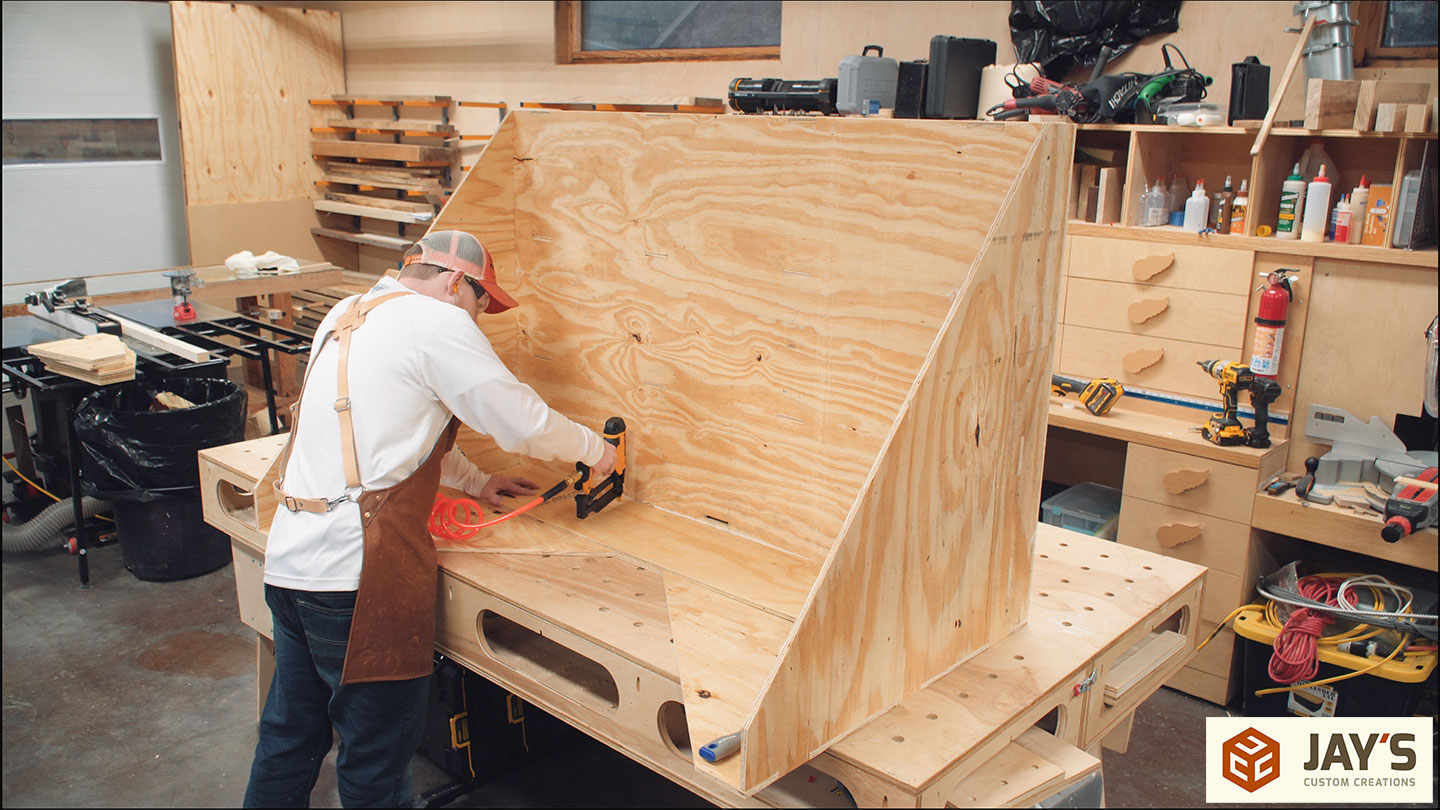
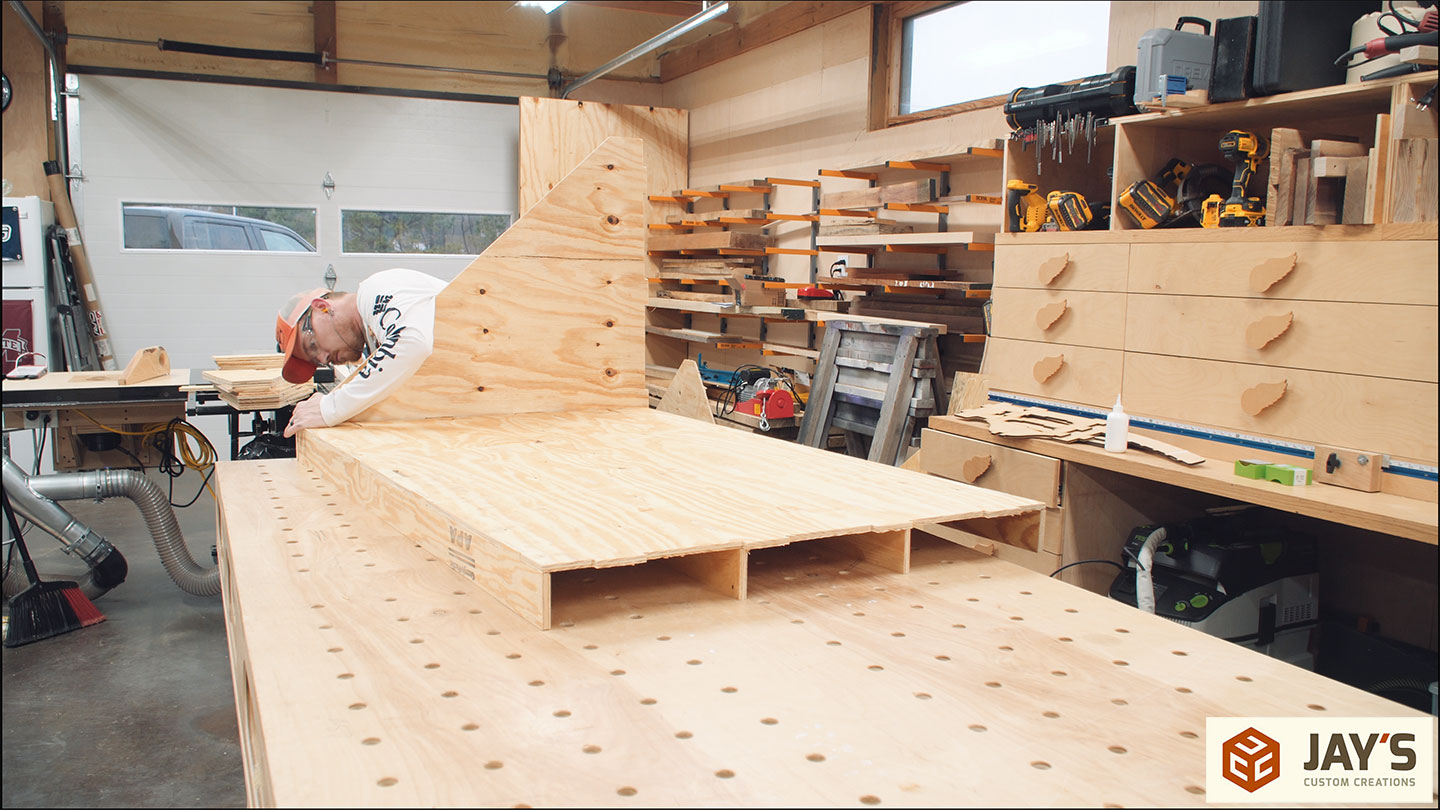
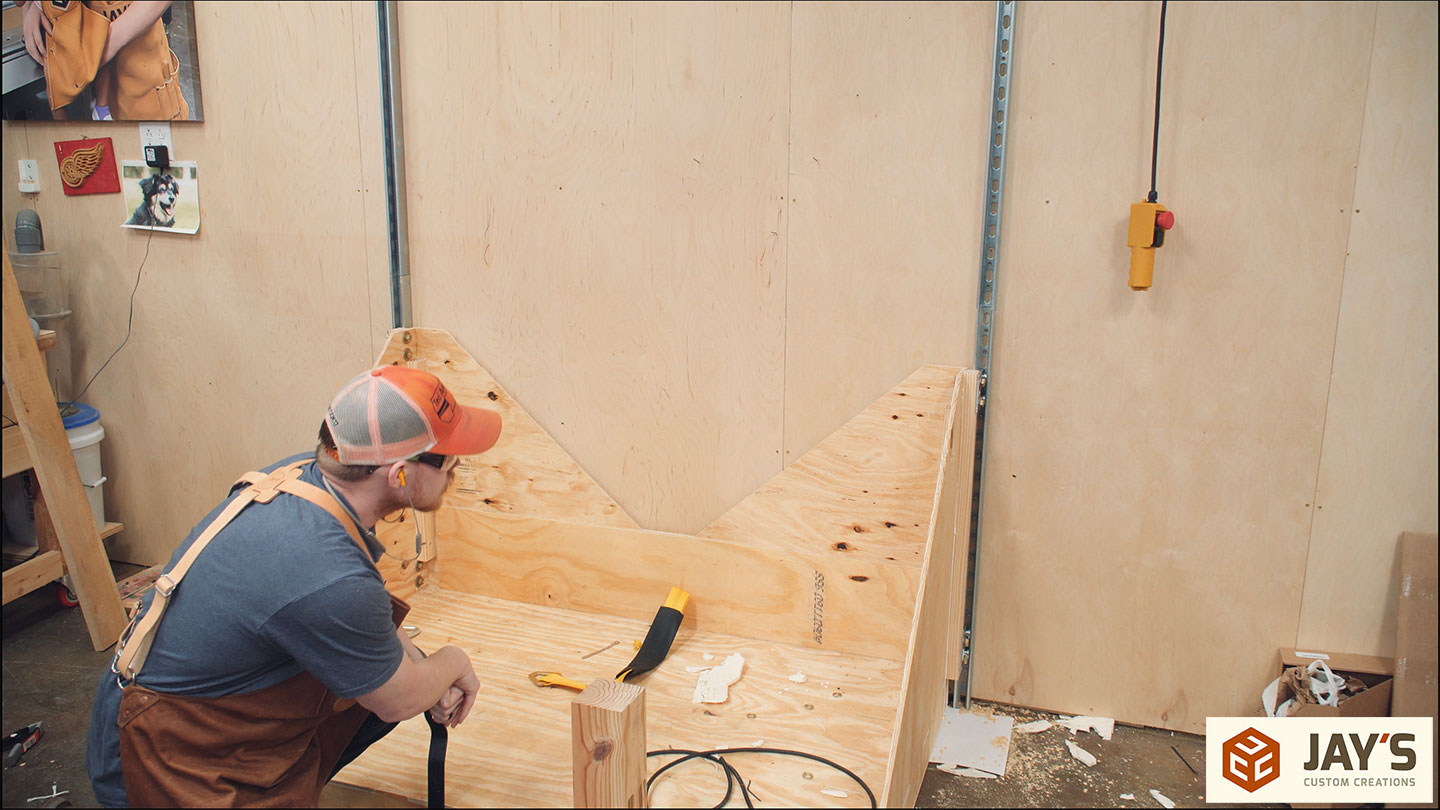
And the last step for that day was to create the brackets for mounting the horizontal Superstrut upstairs. Four brackets total with two pieces of plywood each. After that I let everything sit over the weekend for the glue to fully cure.
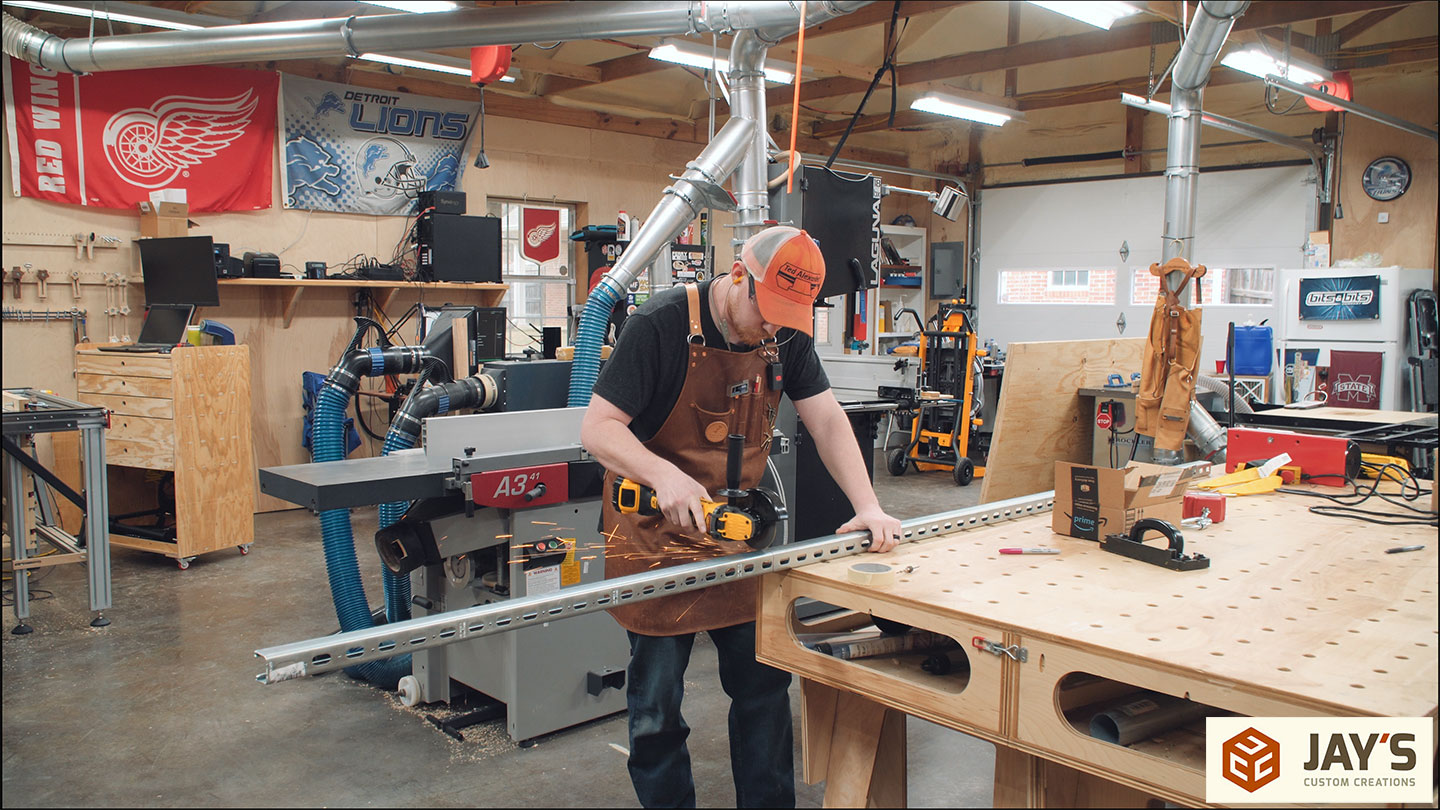
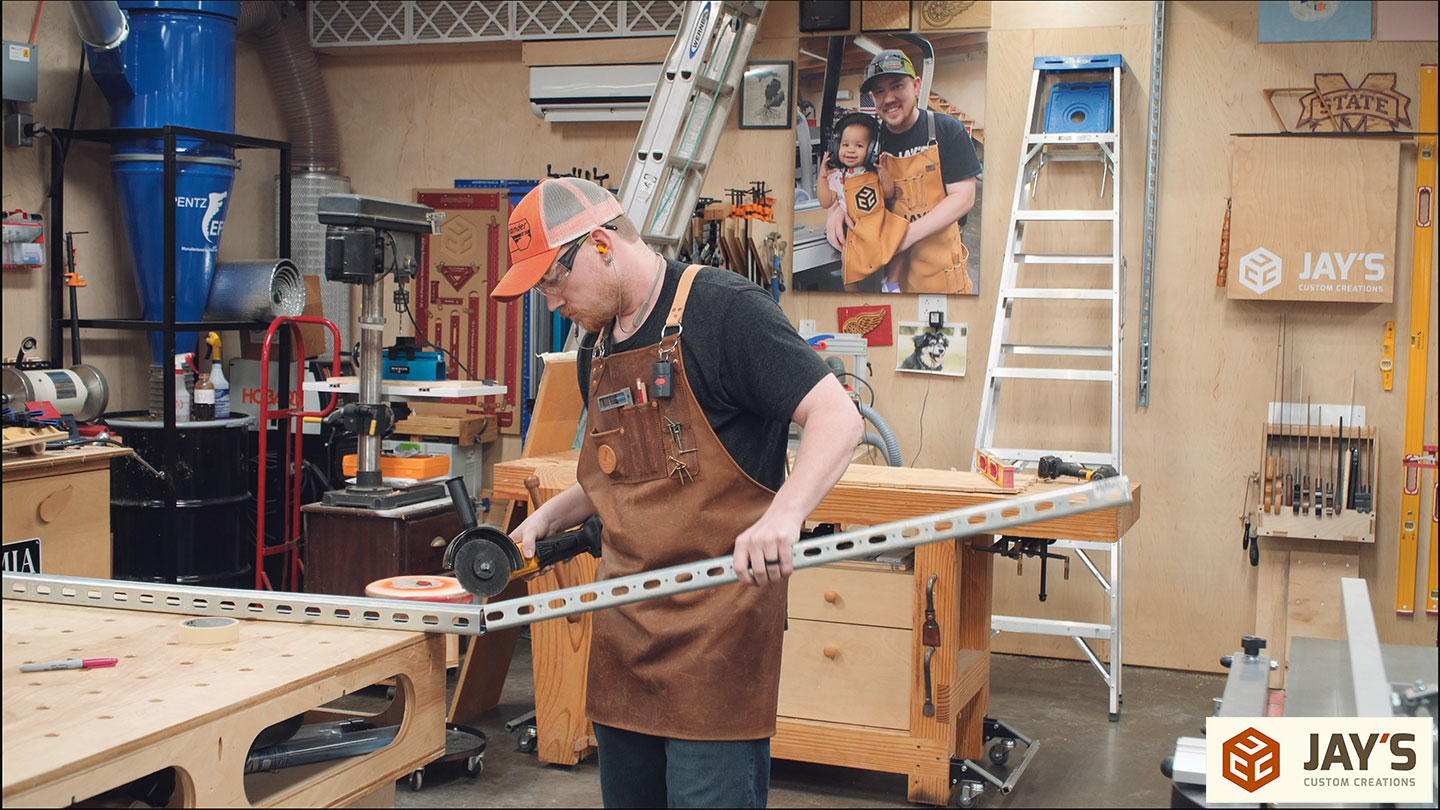
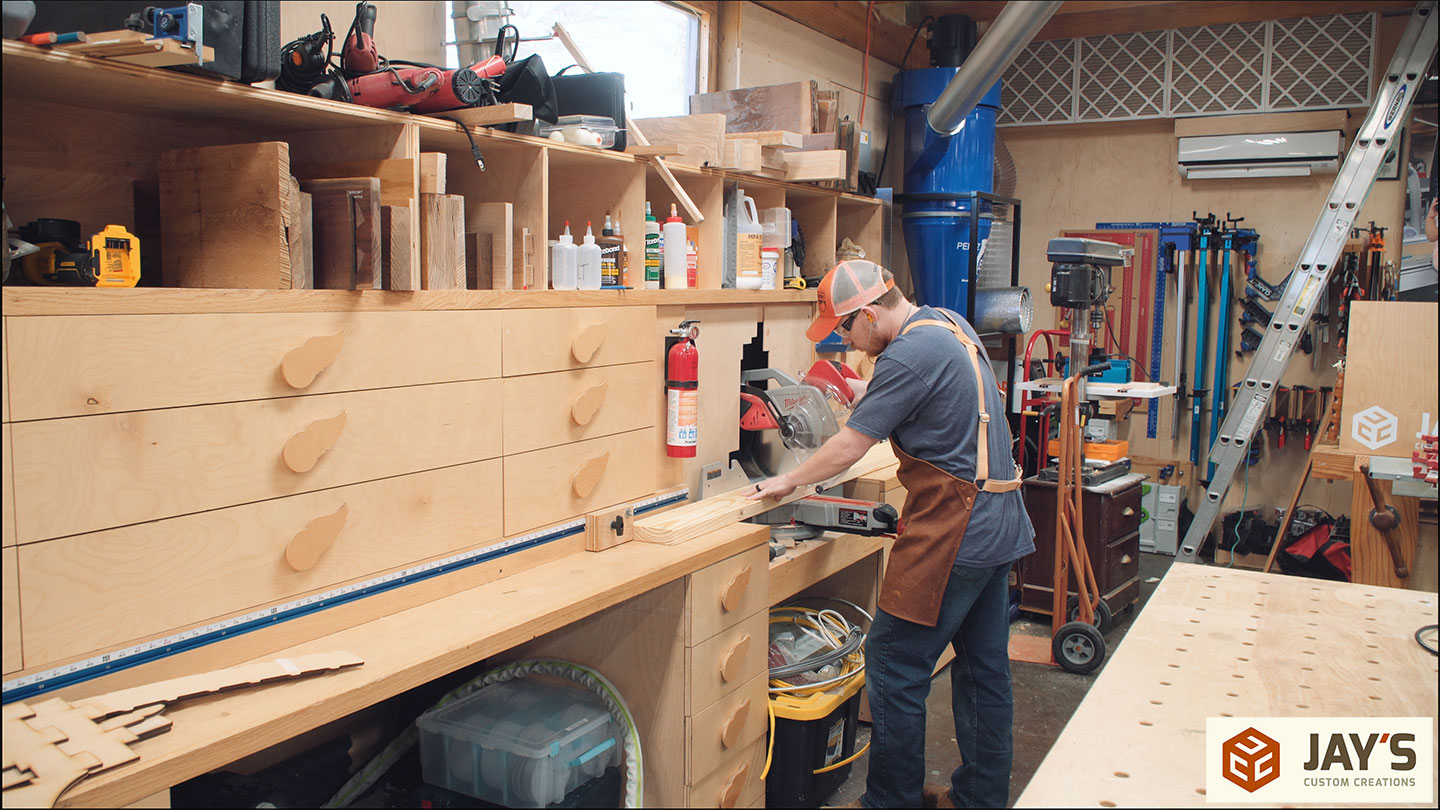
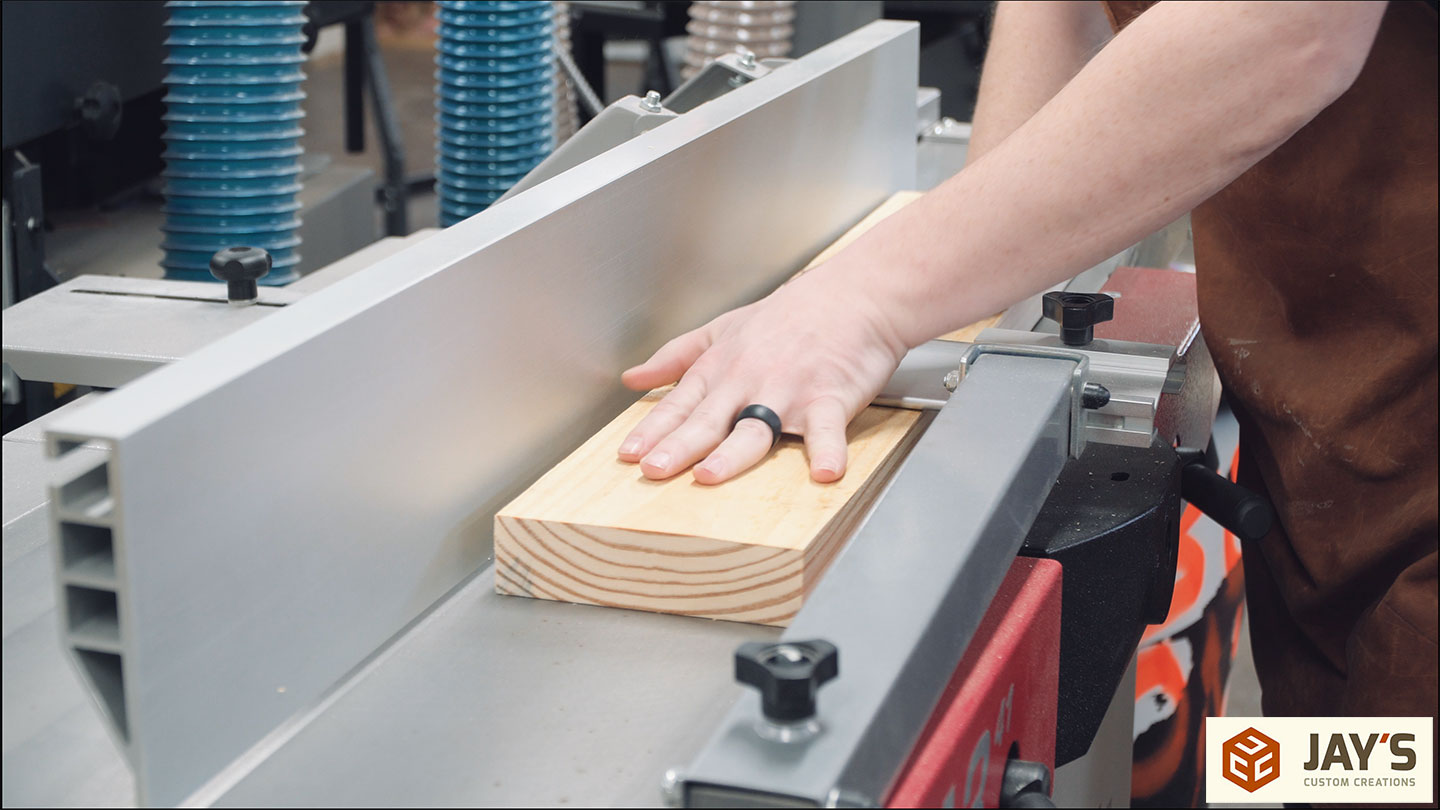
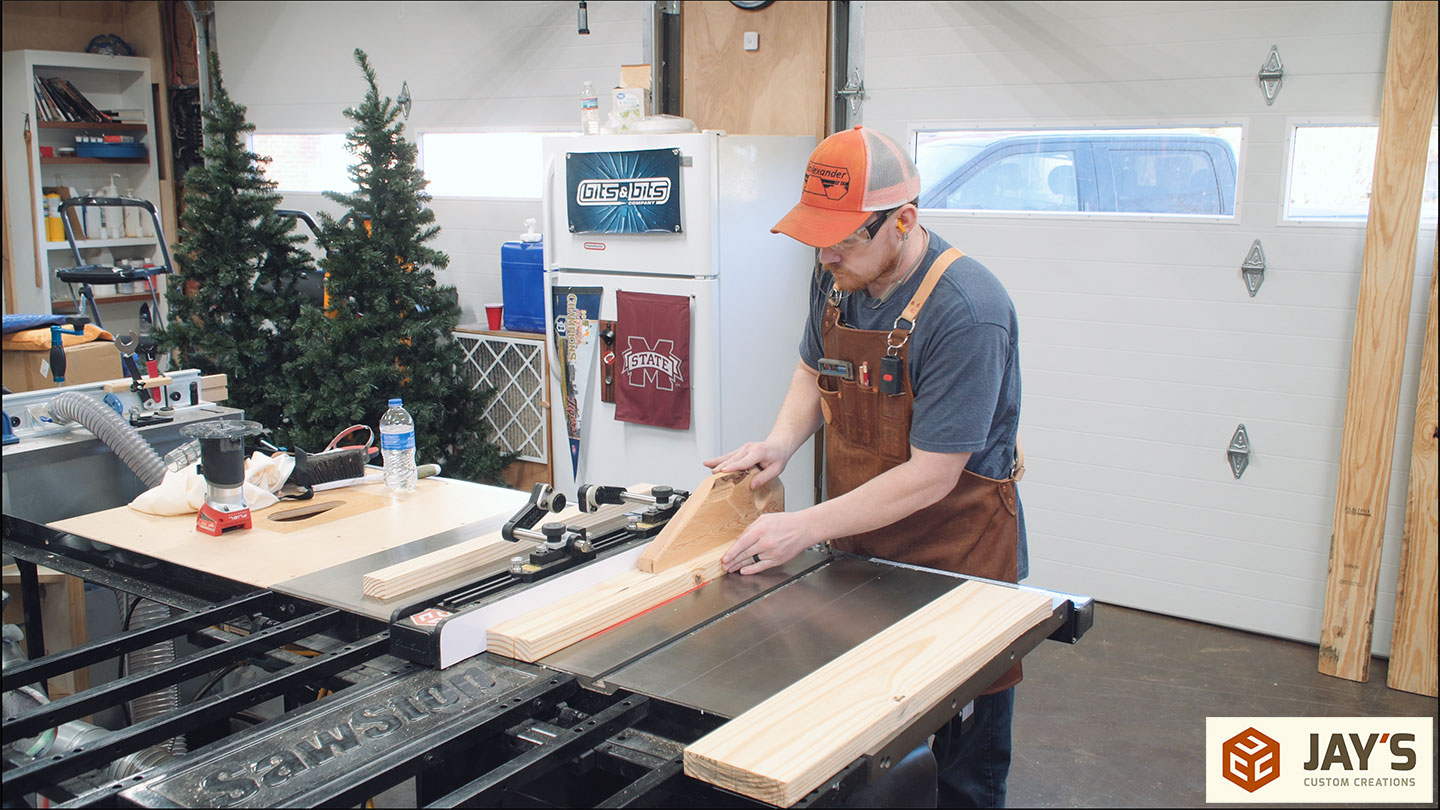
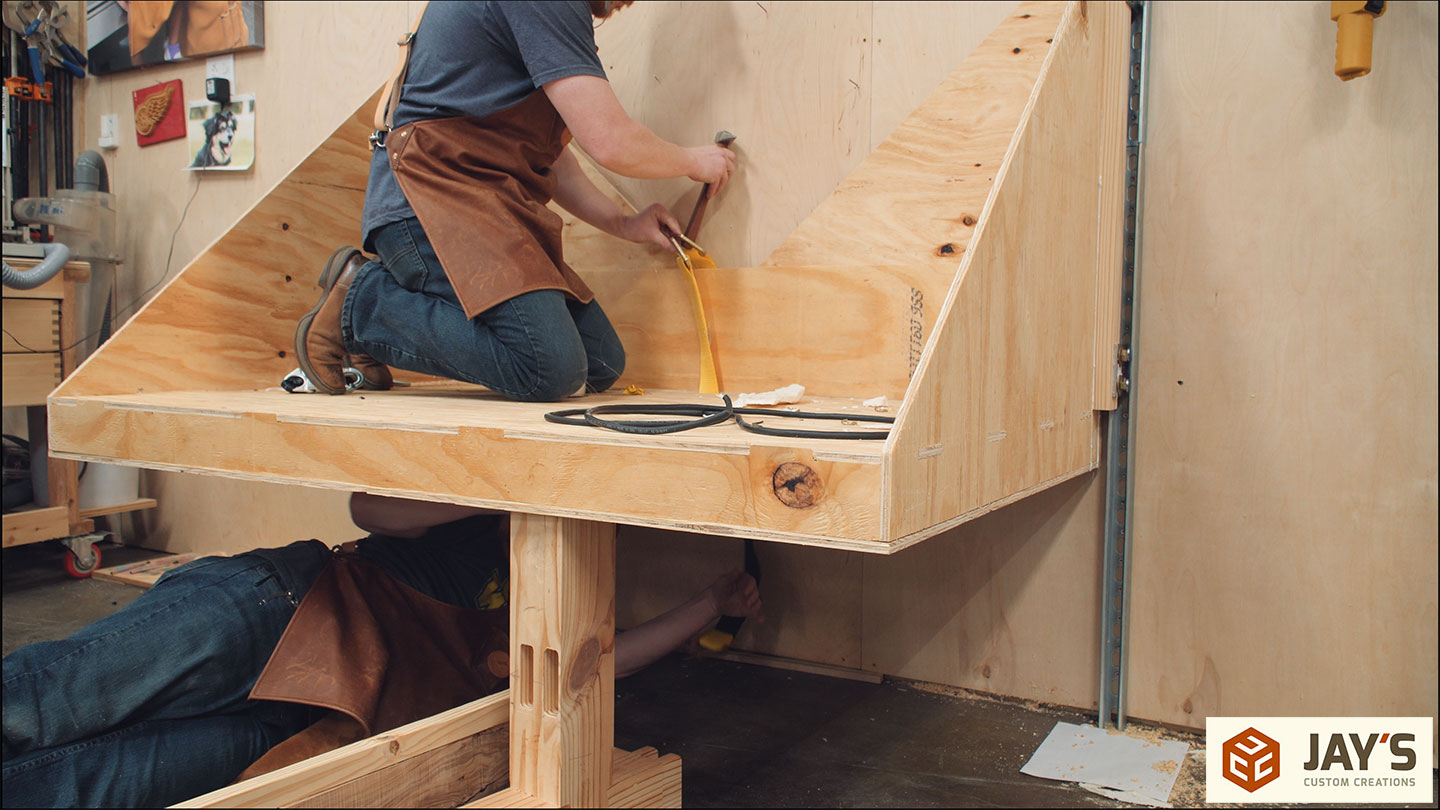
Back in the shop on a Monday, the work starts by breaking down some solid wood boards. Wood pricing is pretty crazy at the time of making this lift. It was actually less expensive to buy southern yellow pine 2×6 boards than it was to buy white pine 2×4 boards. These pieces are for added support for mounting the trolley blocks.
My SketchUp design called for a 1/2” spacing away from the wall so a spacer block was slid into place and the lift pushed against it. Then the outside solid wood piece was attached with a lot of glue and a few wood screws from the inside.

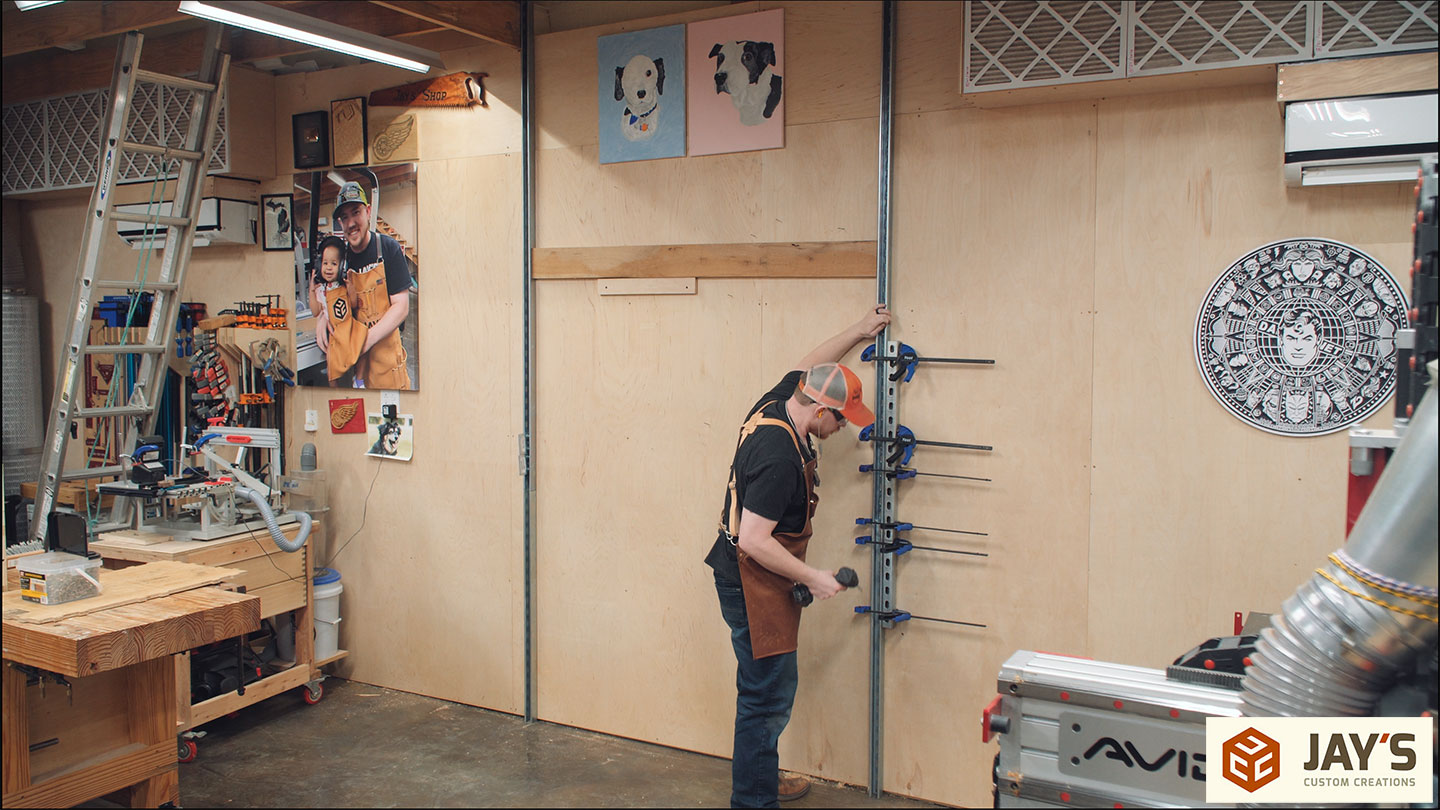
Then the trolley blocks are attached with a few 1/2” bolts.
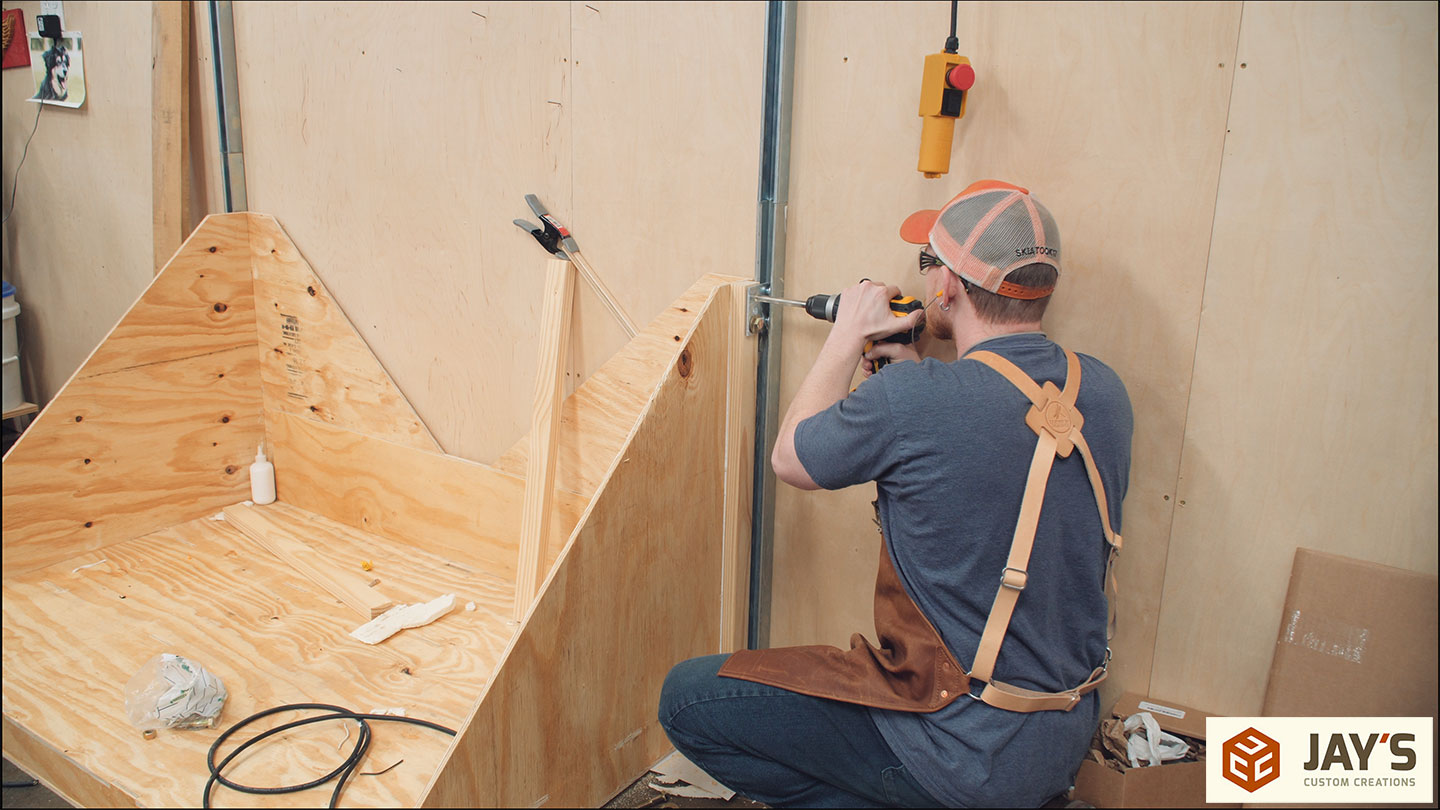
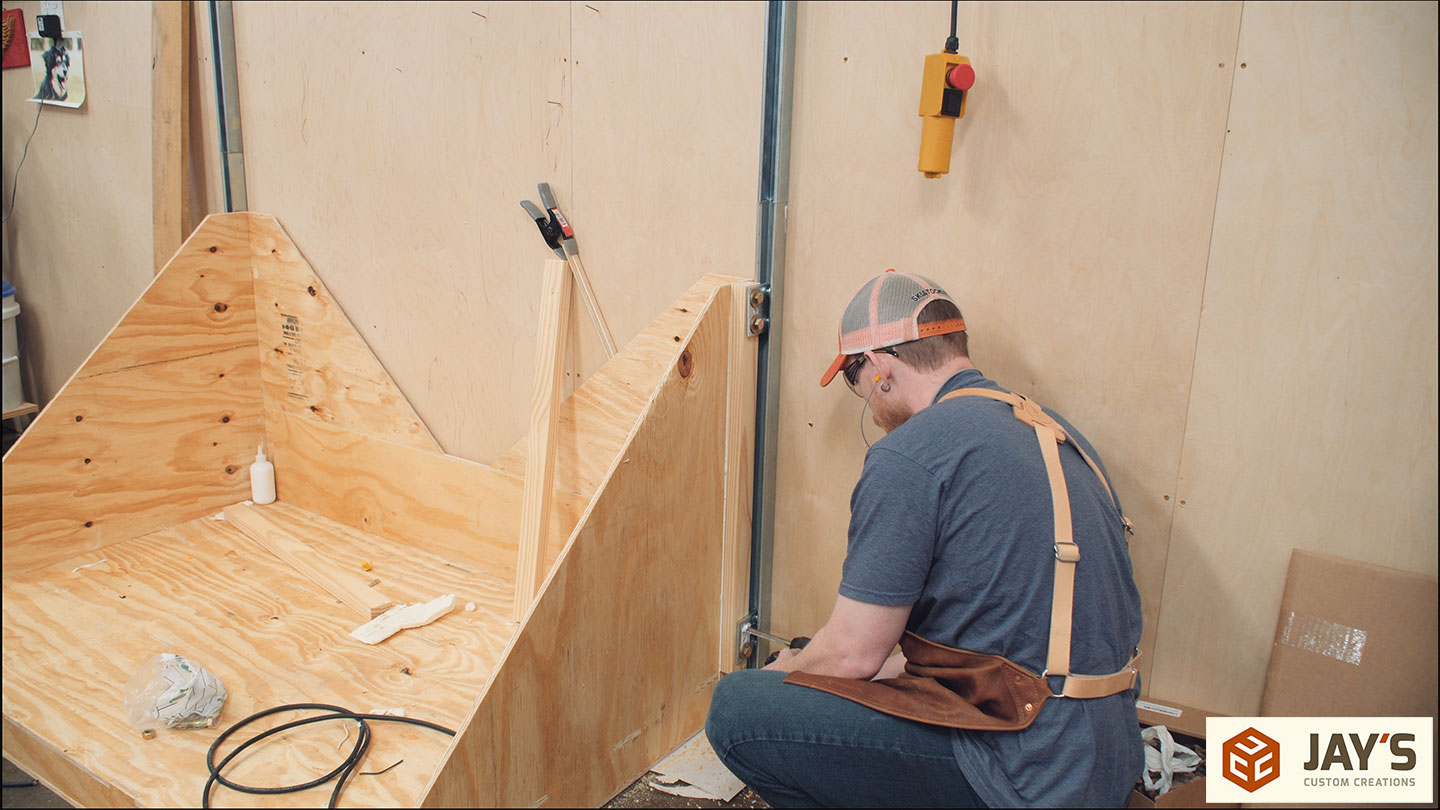
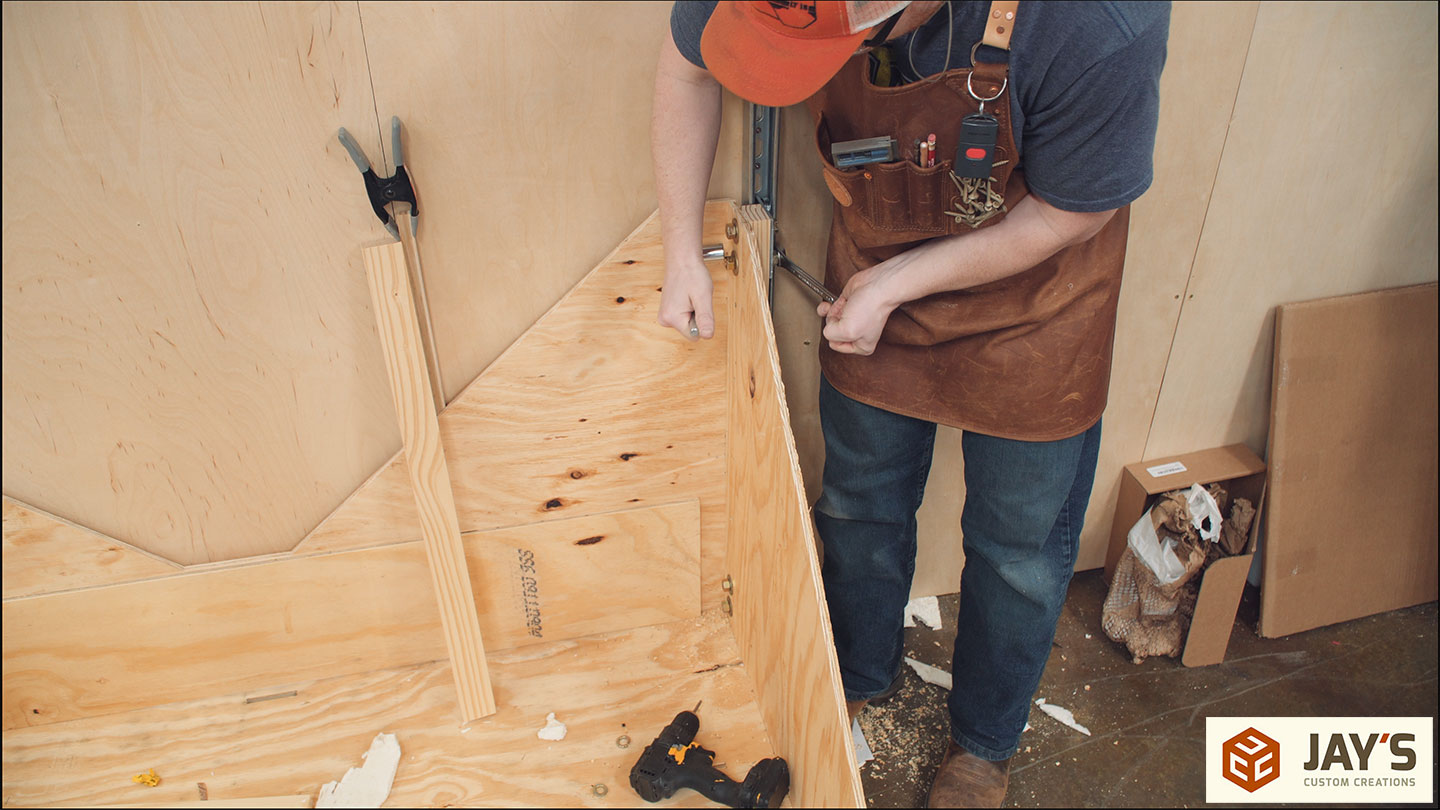
With the bolts in place, I could measure and fit a board between the bolts on the inside of the lift. The purpose of these pieces is to add strength to the side-to-back connection.
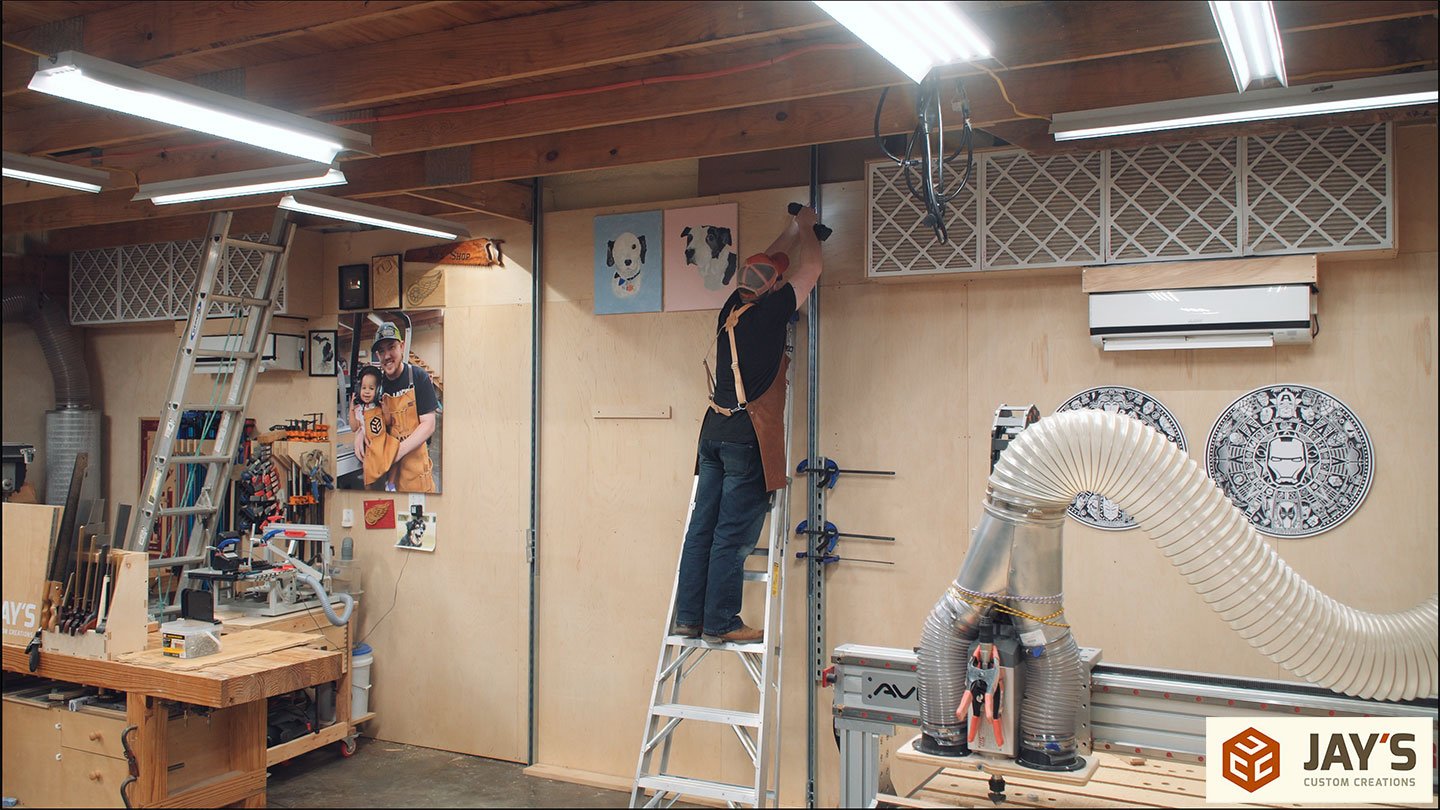
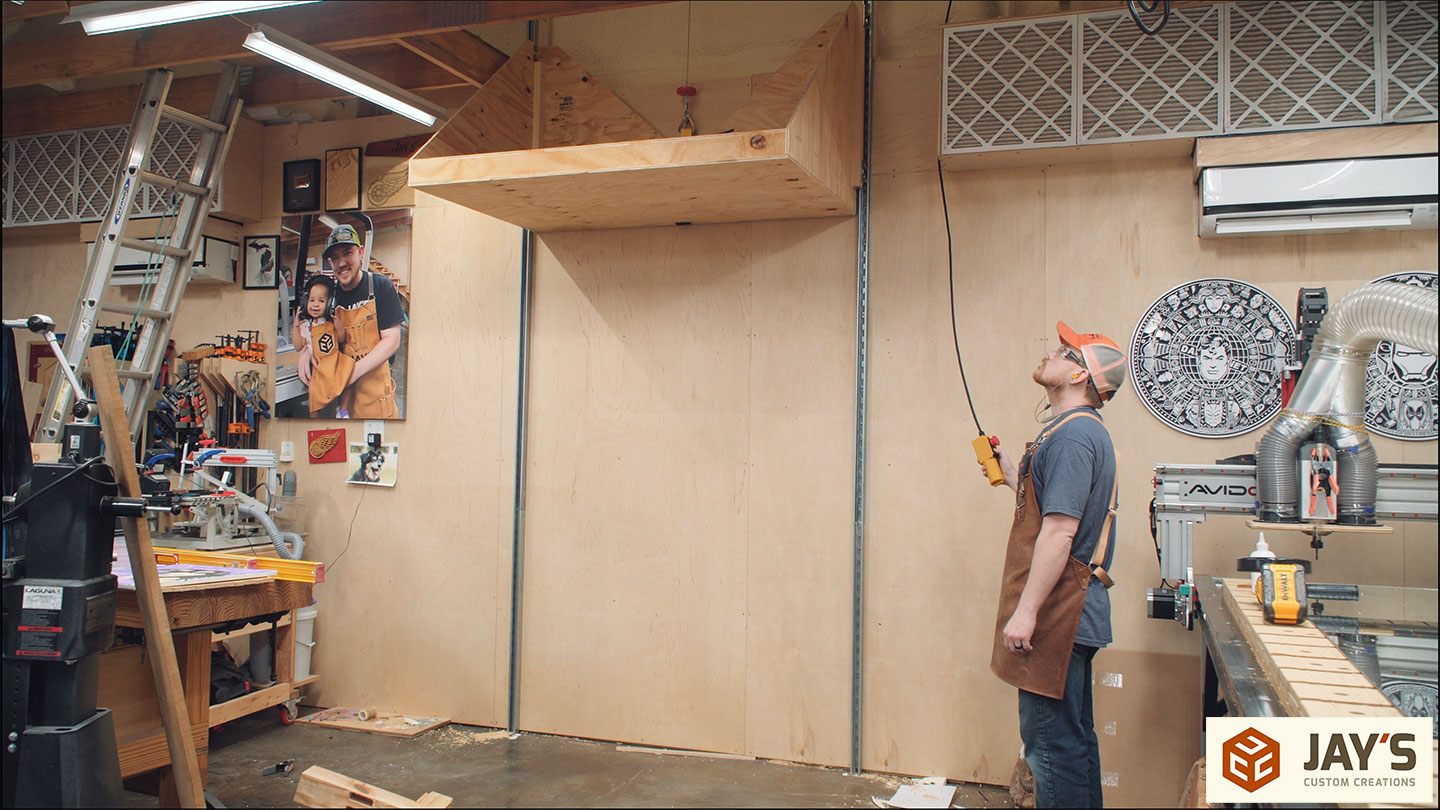
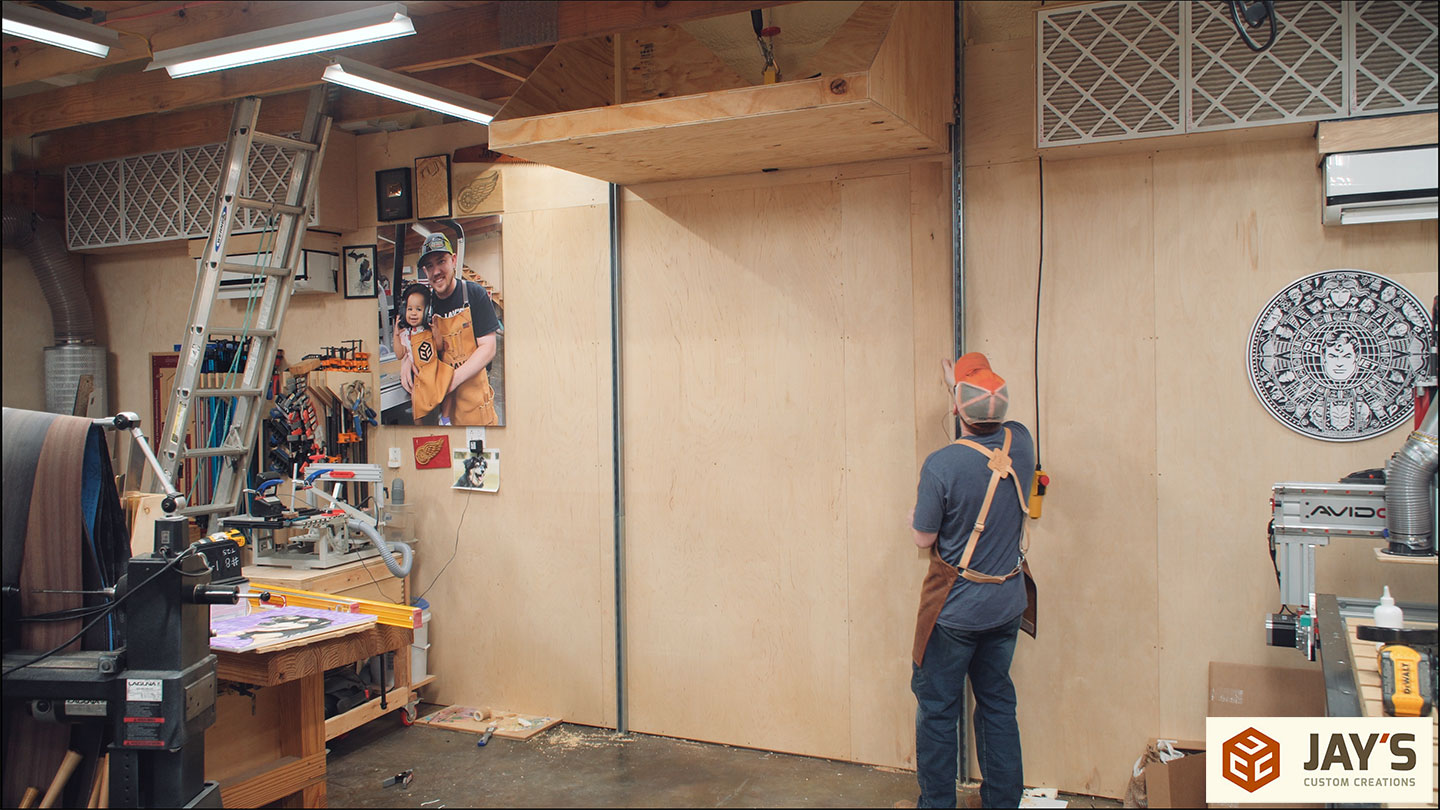
While the glue dried downstairs I shifted focus to the loft. Again, I didn’t record anything as I didn’t want to get distracted by a camera while working over a hole. The vertical Superstrut is secured to 2×4 studs behind them. The studs are secured to the top plate below as well as the backside of the horizontal board for the mini-split. Each stud and both 6×6 posts have one of the plywood brackets secured to them with glue and screws. The spray foam insulation was scraped off at every connection point. The horizontal Superstrut sits into the brackets with no mechanical fasteners. The fit is pretty snug and there aren’t any lateral forces. The hoist is bolted to the Superstrut and is powered by a dedicated circuit. This allows me to keep power to the lift off at all times unless it is needed, which is good for safety both in preventing kids from using it as well as removing power from the hoist in the event that the mini-split above it overflows from its condensation drain.
This is when I realized I forgot to install the lifting strap before bolting the lift in place. I had to use a pry bar and a bunch of blocks to lift it off the floor enough to gain access to the bottom. Then I could fish the strap through. Speaking of fish, I used 50lb fishing line to help feed the strap around the back of the platform. This roll of fishing line has more than paid for itself in the random times I’ve used it over the years.
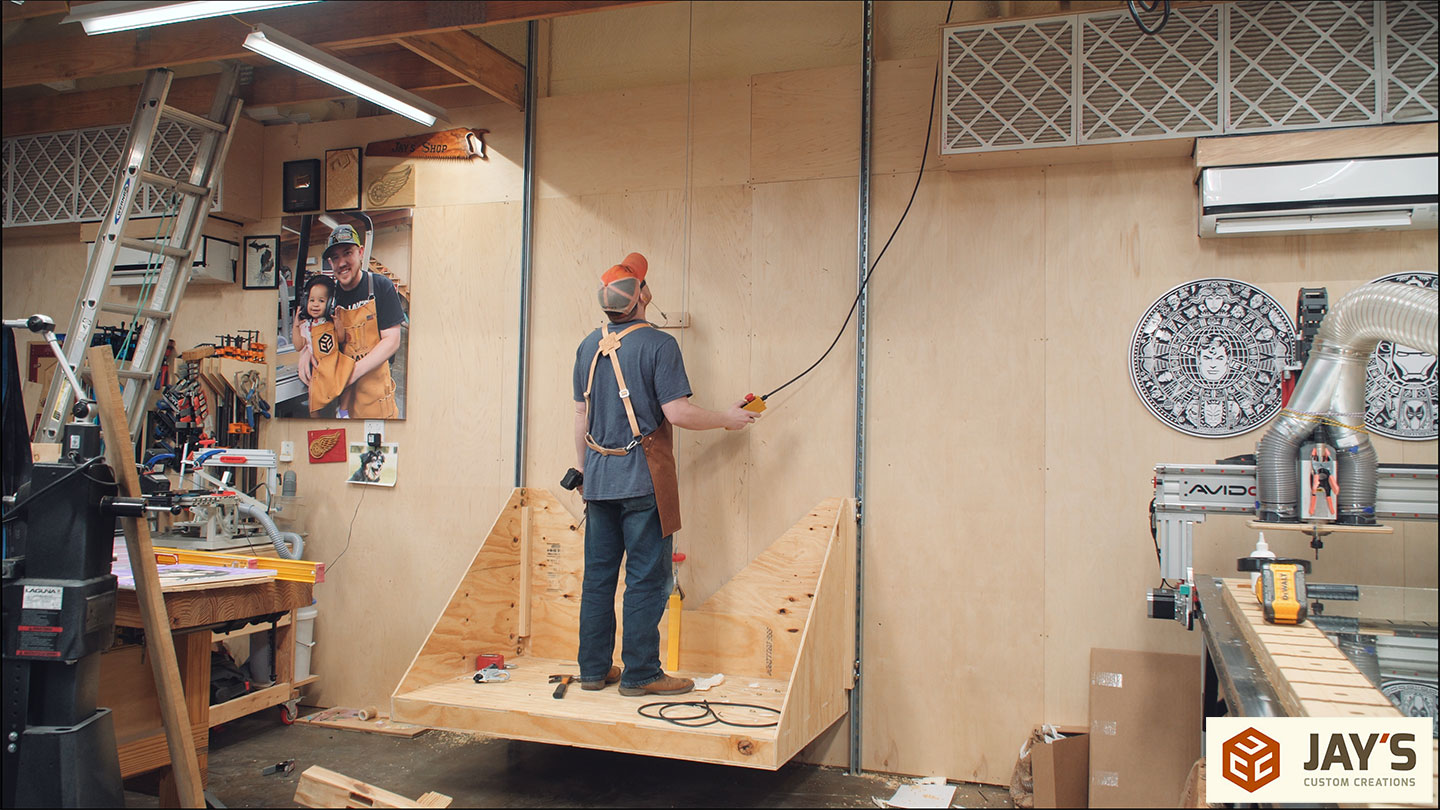
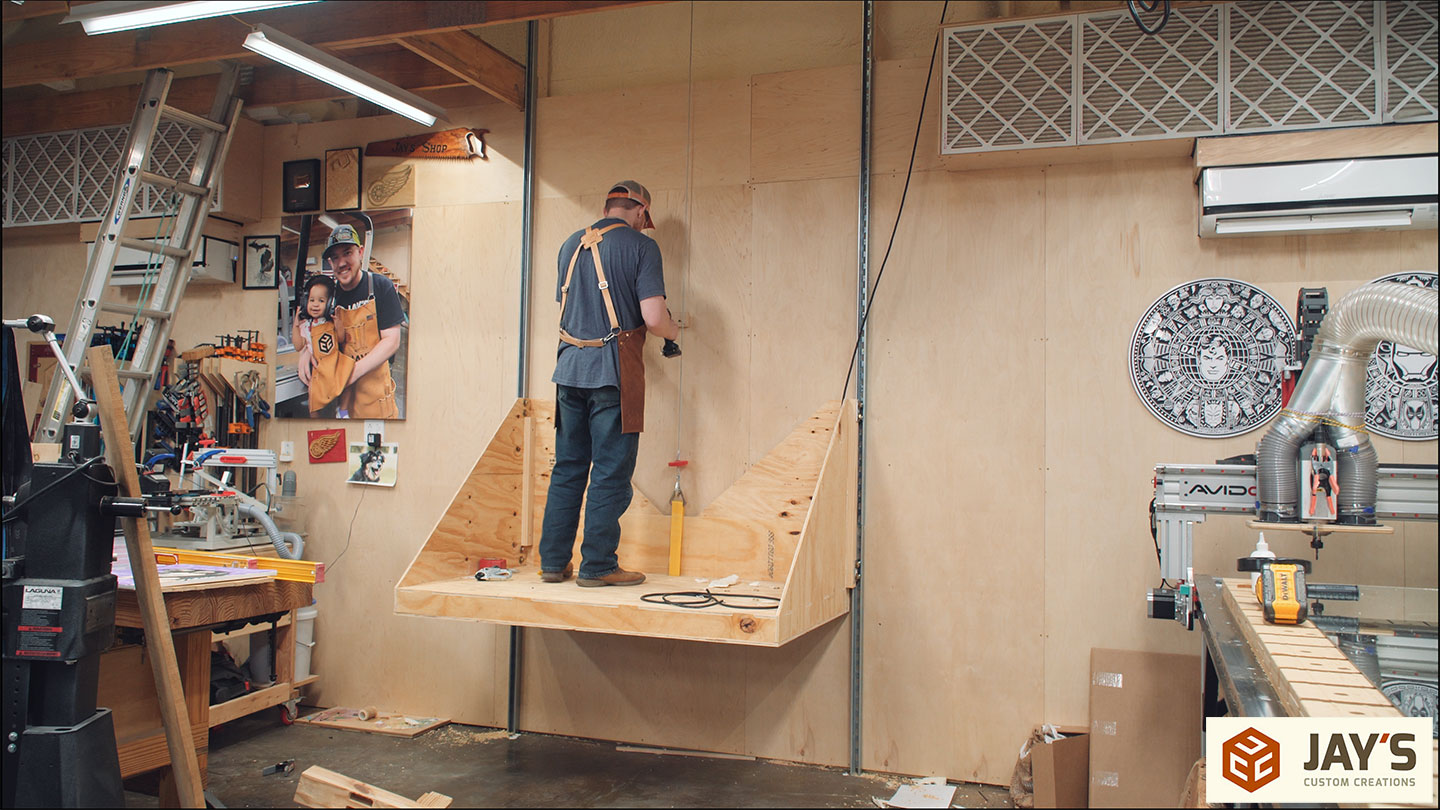
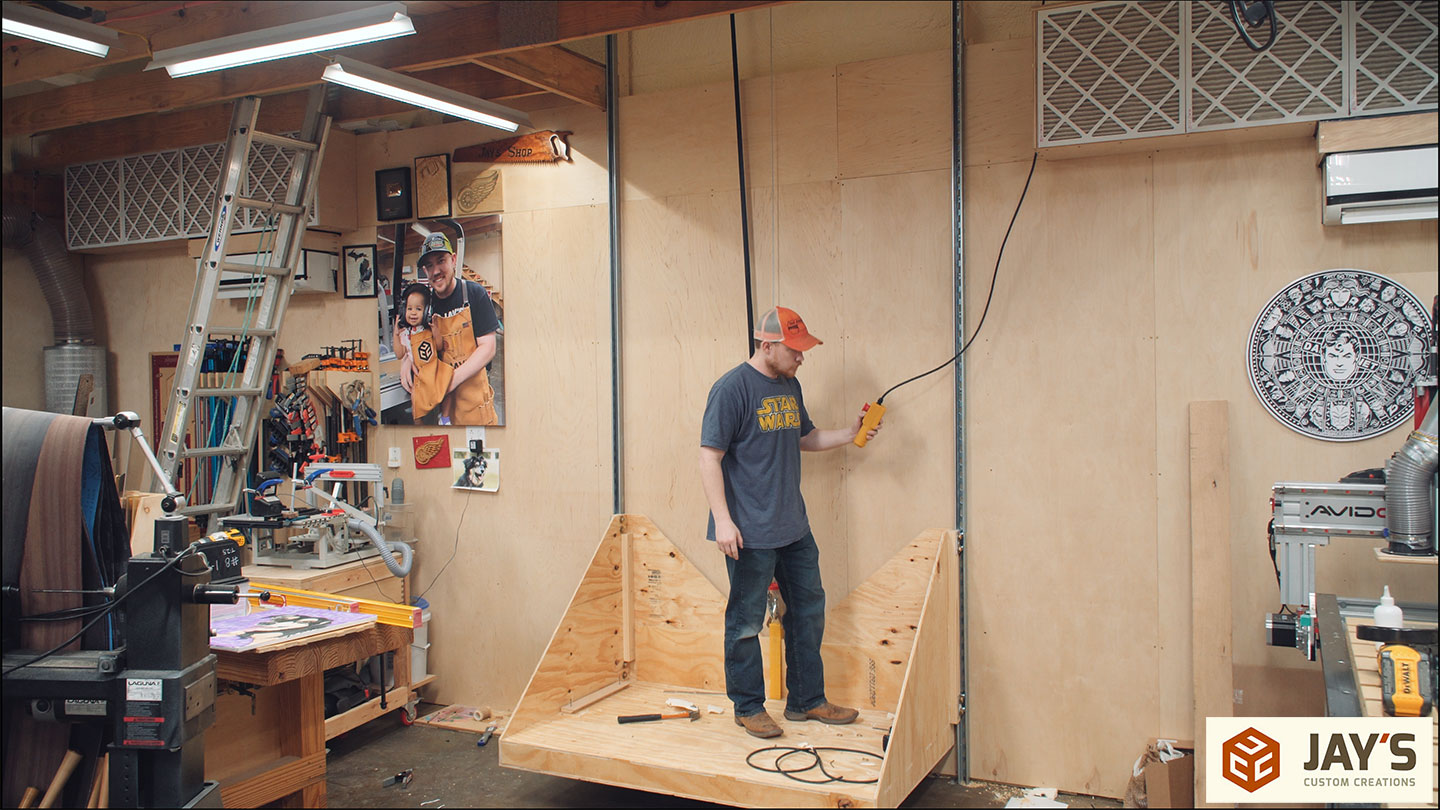
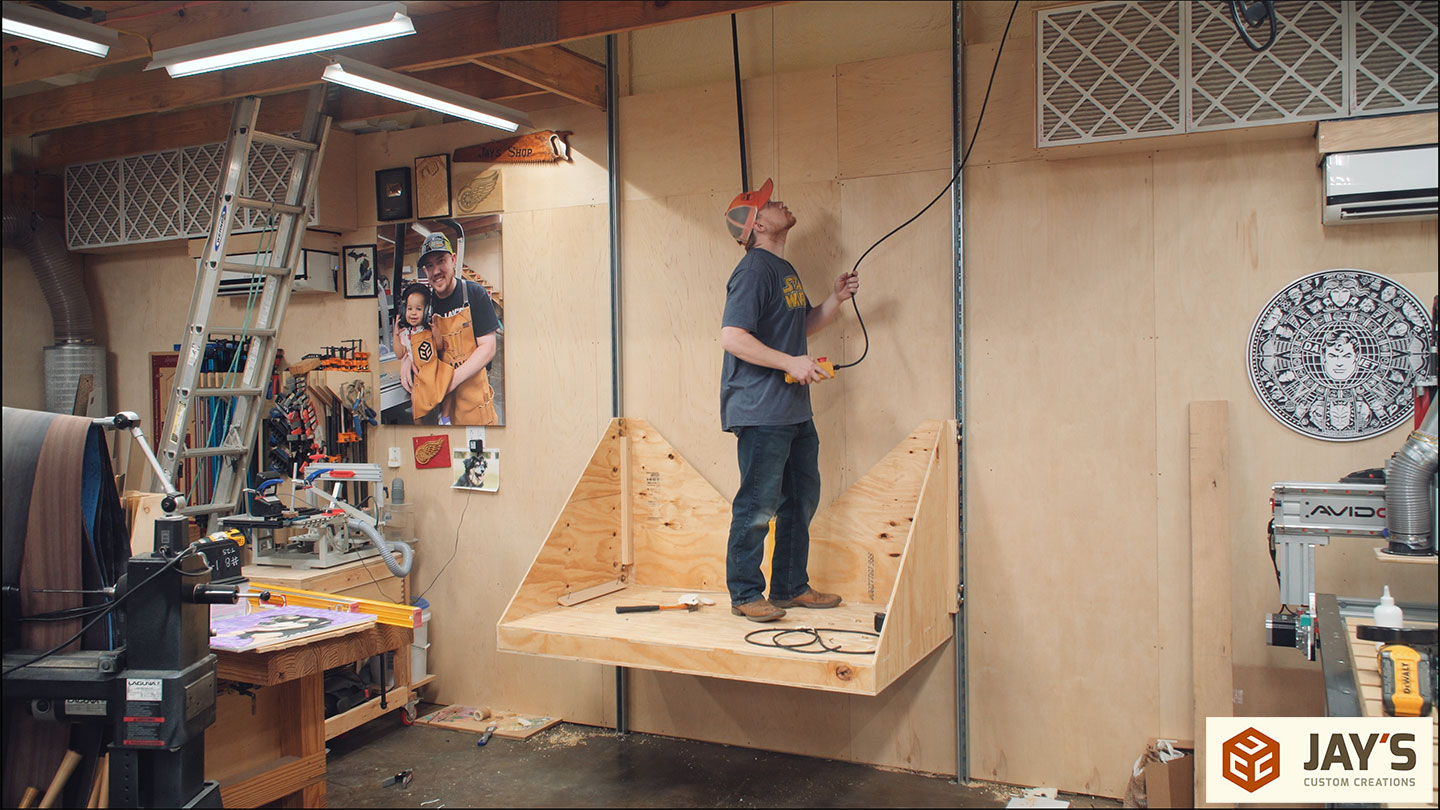
Down comes the cable and I can test the entire setup for the first time. I had two immediate observations.
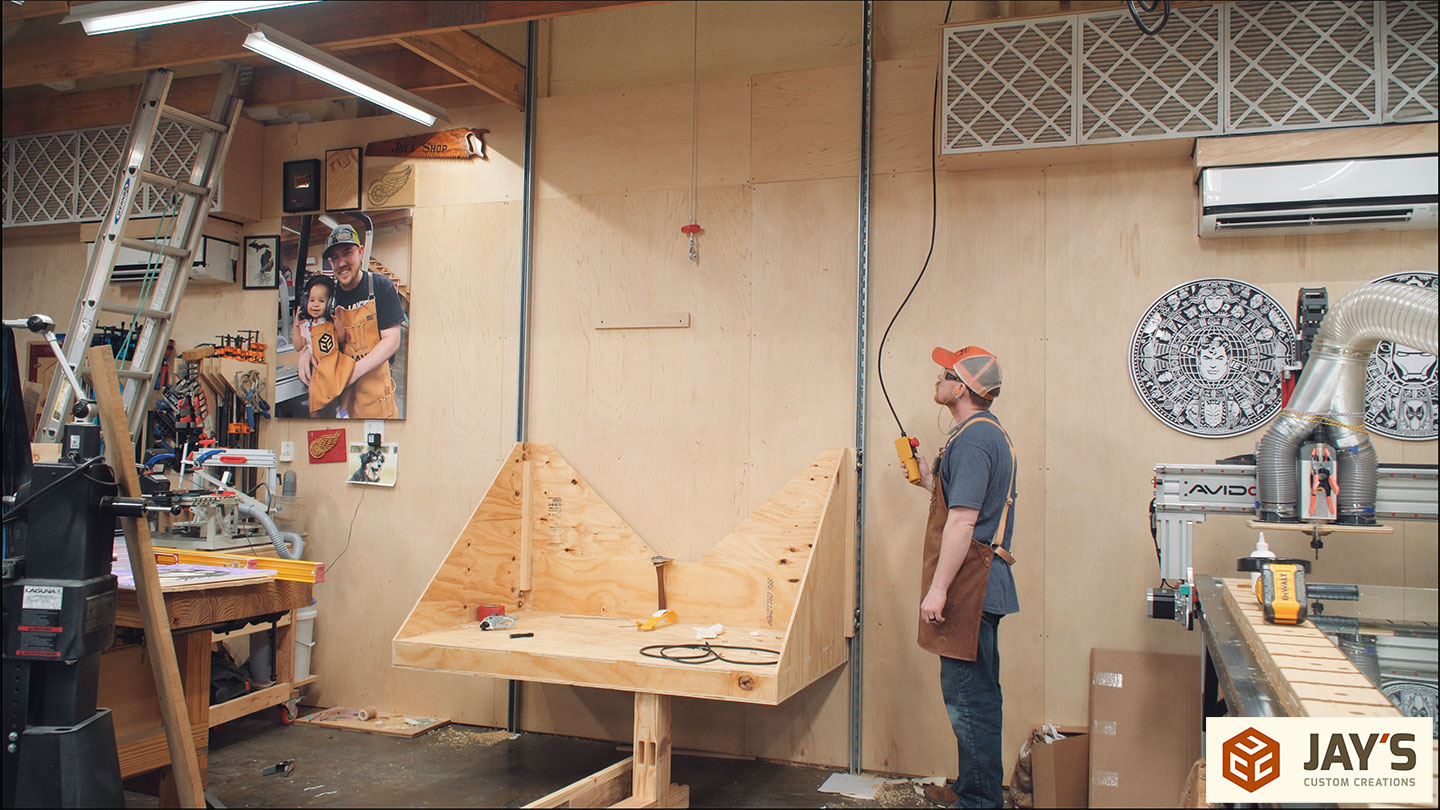
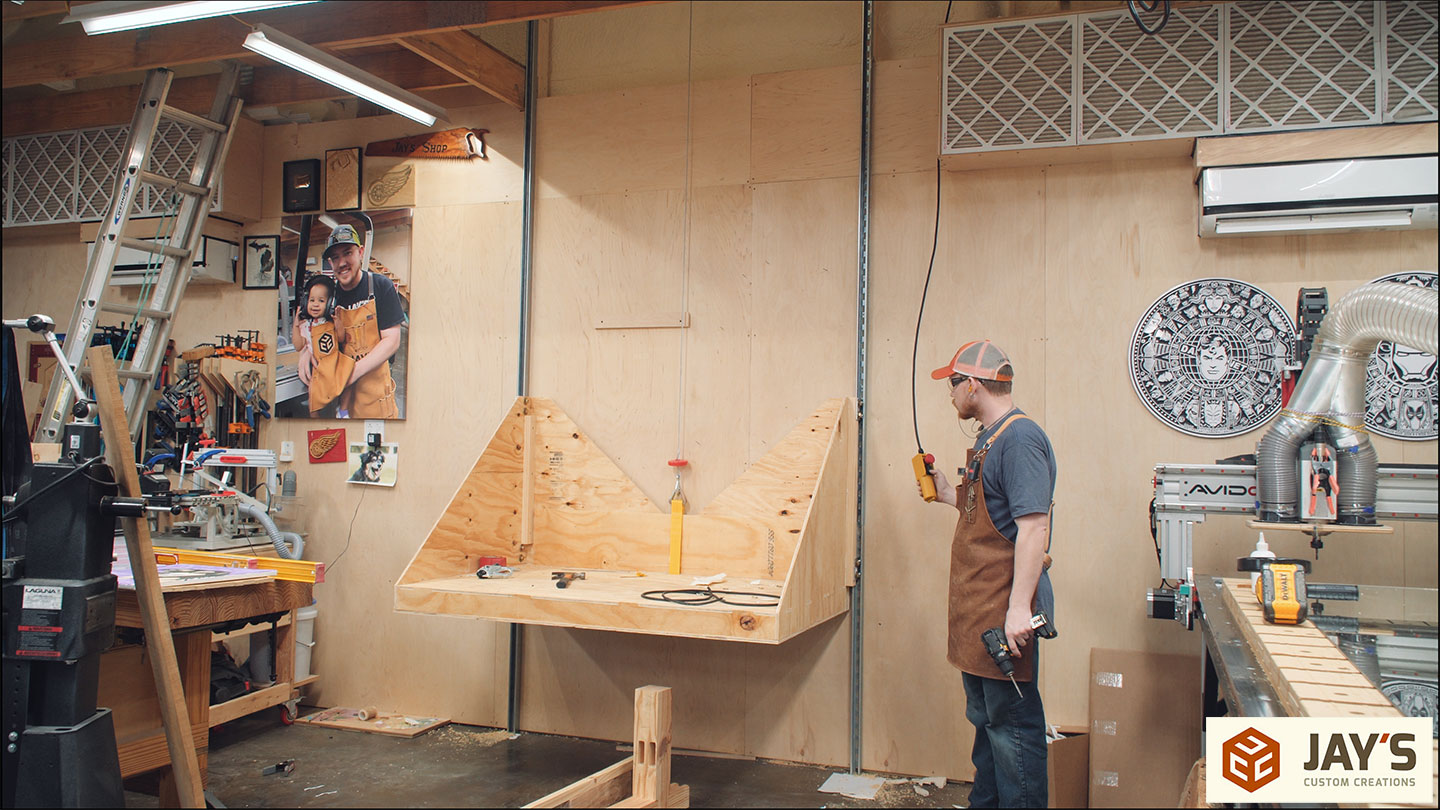
First, there is a little spring to the lift when I bounce on the platform. I initially thought it was from the Superstrut bending under weight but I now know it was more from the Superstrut twisting as weight is applied to the lift. This is because the mounting location of the hoist is not directly above the cable as it exits the hoist. Instead, the mounting location is just centered on the housing of the lift. I ended up solving this a few days later by adding a pulley to the platform to double up the line and securing the end of the cable to the opposite side of the rotation on the Superstrut.
With the lift all the way up you can see the clearance I have on the front side. This is the result of precise planning and then just following your own directions.

The second thing I noticed is a few of the screw heads in the Superstrut were too high and causing some random interference with the trolley blocks. Drilling the countersink slightly deeper was an easy fix for this.
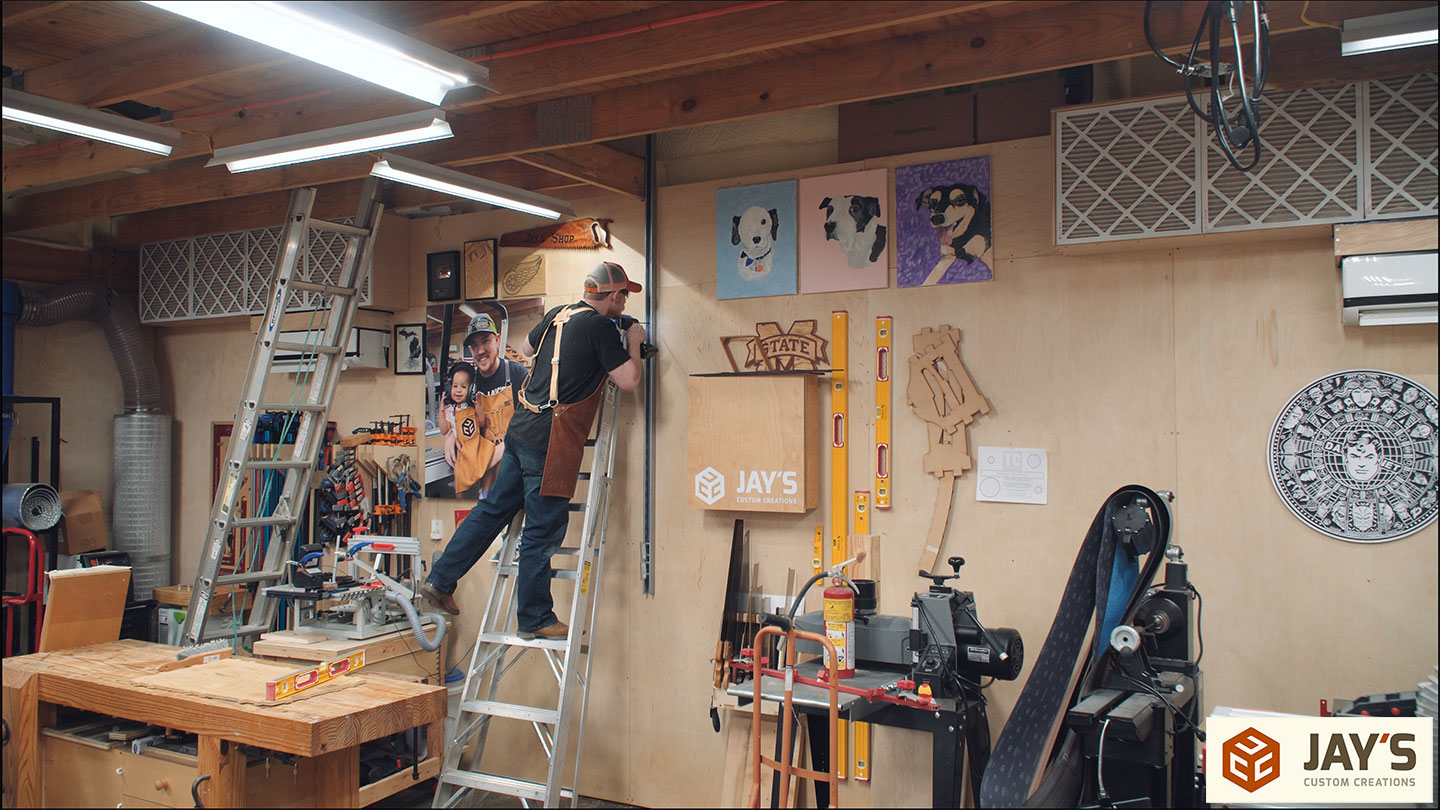
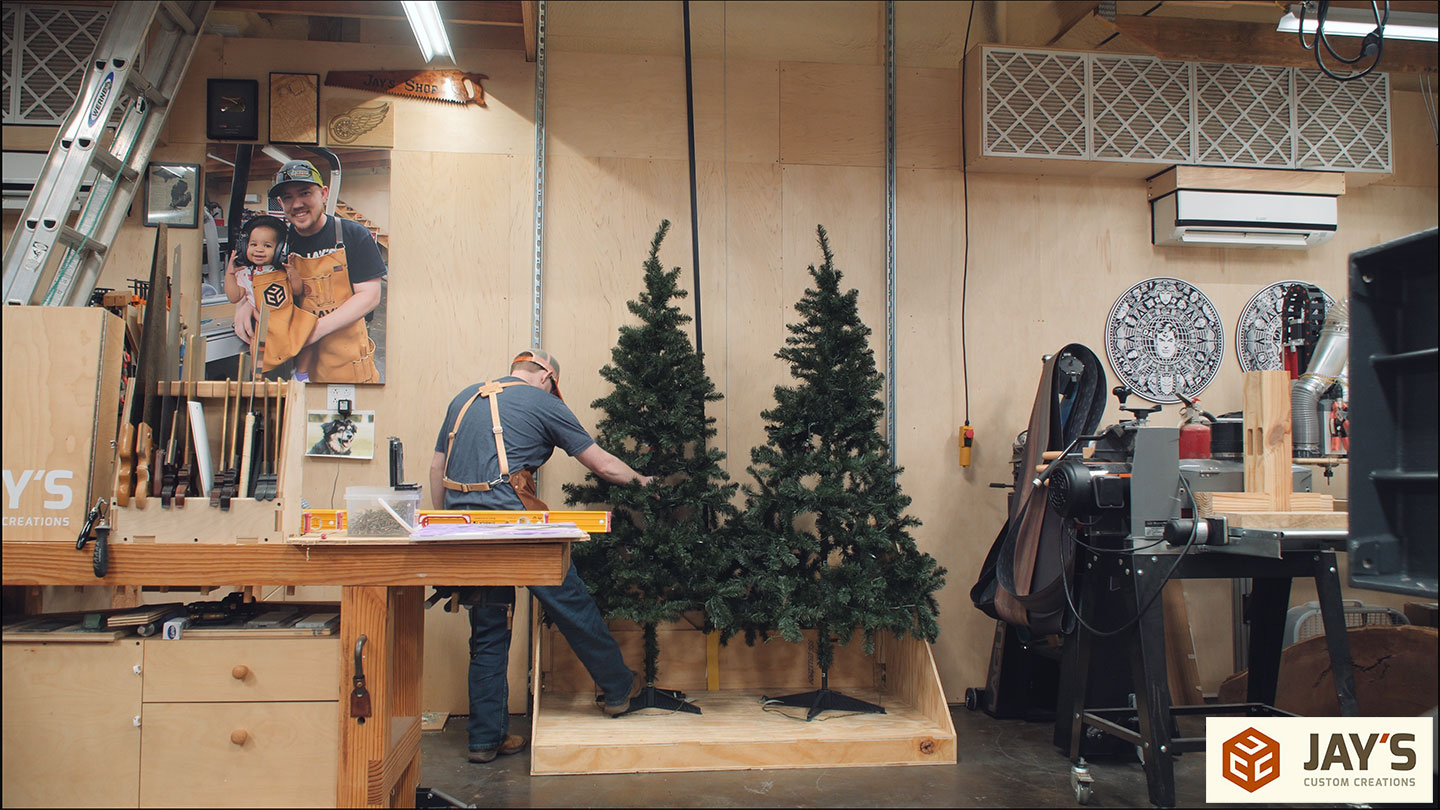
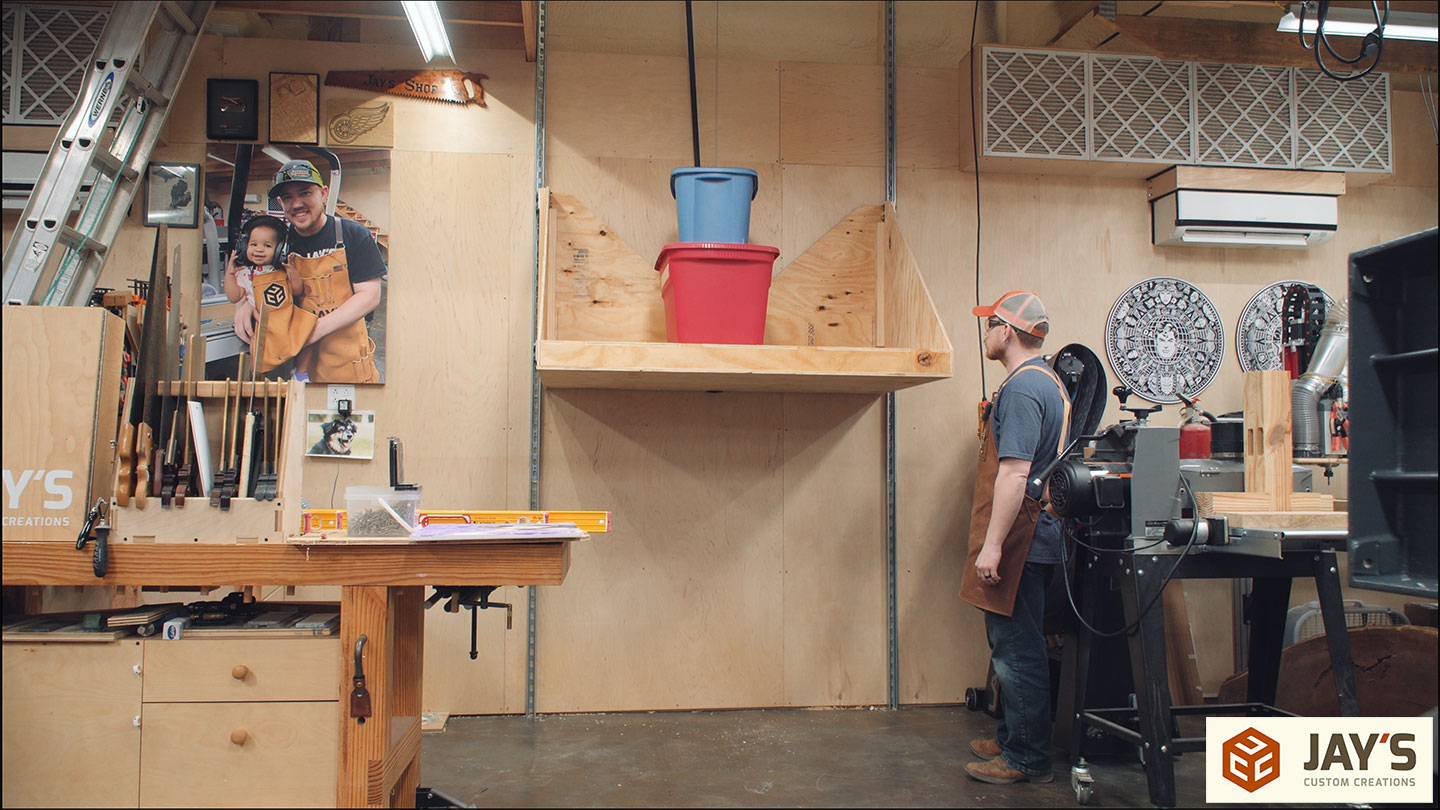
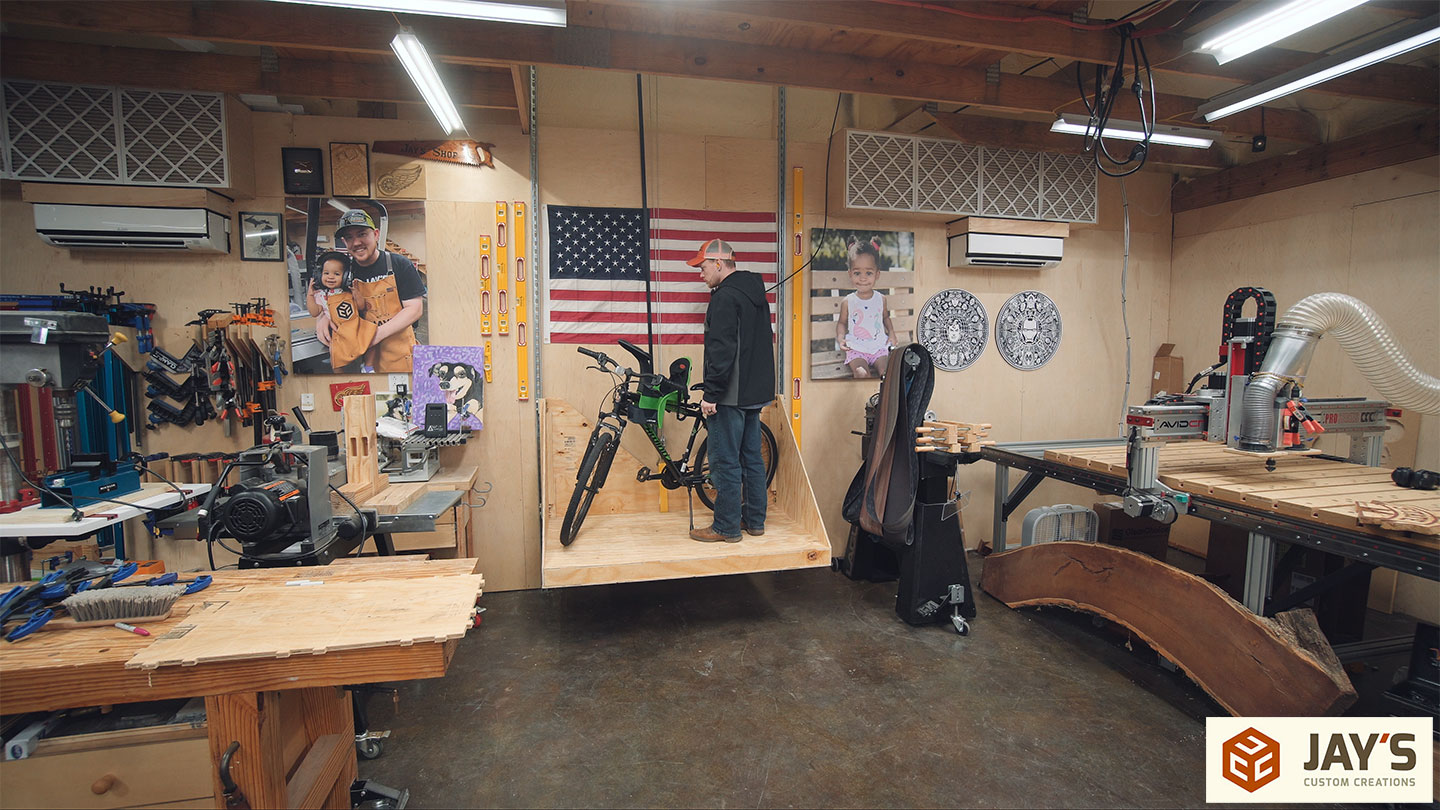
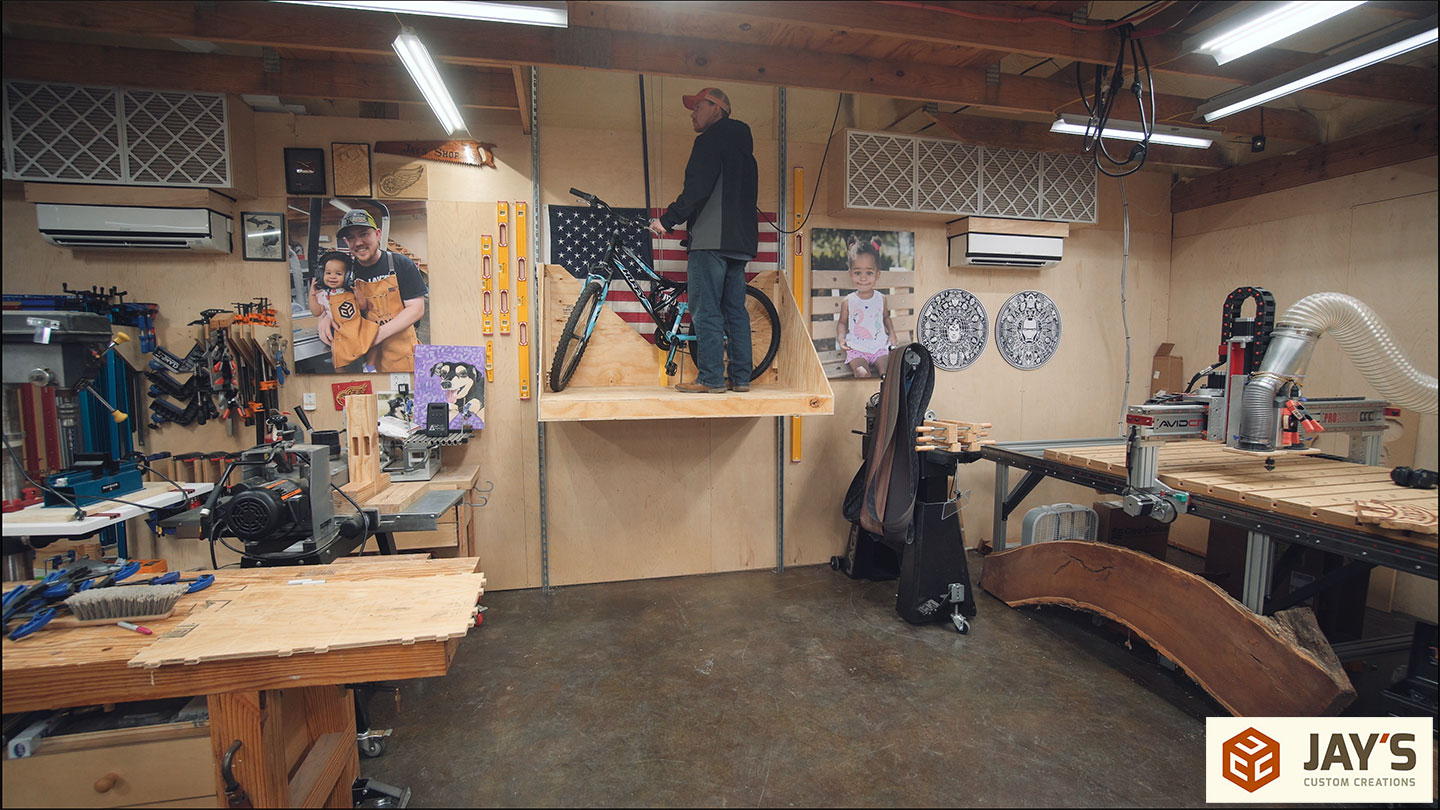
Here you can get a good look at the upstairs work completed with the loft in the up position.
And finally, the lift can be used as it was intended to be used. This is definitely one of those projects that instantly deserves a spot atop the “I should have done this sooner” list. This adds an incredible convenience to access the 16′ x 20′ storage loft in my shop and I finally have a place to store seasonal items like decorations and bicycles.
If you have any questions or comments feel free to leave them and I’ll make a follow-up video on my Jay Bates 2 channel. Take care, and I’ll talk to you in the next video.


Jay,
You have a continuous support to the floor with the uni-strut. Why don’t you bolt a support piece to the top of that to help support the hoist strut, Belt and suspenders….. Is there space above your platform when the floor is level?
great project. I’ve been toying with the idea of installing a hoist in my shop for the rare occasion when I have to lift something heavy. Good thing you stored your long level on the wall like that, handy light switch extension. ;)
Great video again Jay. I bet there was a Brown alert in the jockeys when you turned around and saw her heading up the ladder LOL. Makes me want to build a second floor on my shop LOL.
What an asset to the shop Jay. I agree with the statement, why didn’t I do this sooner. The design looks sound and with fail safe in place I believe it’ll the elevator will serve you well
Excellent video. Shows good planning and execution. I usually find something that I file away mentally to use later.
I made a “book case/display shelves” to go on my desk a year ago. I wanted adjustable height shelves held in place by small ell brackets with ¼” steel pins. I used peg board to space the ¼” holes and a short piece of ¾” square scrap cut to length for my depth stop. I didn’t use a washer but if I do it again I’ll include one
Thanks for posting
Great idea Jay!
Some points to consider:
– uni-strut has what is known as Back to Back struts in various cord thickness enabling various load capacities, reduce or eliminate sag under max load.
– the motor should have a lifting capacity
– perform a load test on your system/platform. Load the platform with weights of known capacity as in dumbbells etc., try 500lbs to start then increase in 100 lb increments.
– you may want to cross brace between to vertical struts to prevent racking over time.
– For safety’s sake, I would develop a monthly safety check list depending on frequency of use.
Just some thoughts for consideration on your good creation.
I’ve always believed that such an apparatus could be sold on the market for people who want to transport items from their garage up into an attic space.
We made a couple of larger ones in wood shop in high school woodshop in the 70″s. They worked almost exactly like what you did. Great job!
Absolutely excellent idea Jay! I’m sure you’re getting hammered by the safety police on YouTube already but I’d suggest at the very least get some striped caution tape for the floor that marks out how much floor space needs to be clear for the platform to lower safely. If it were mine I’d put a simple swinging gate on the front of the platform as well just for the extra piece of mind. As someone who has walked right off of a lift at work(luckily I was wearing a harness and was connected to the fall arrestor) i can honestly say that it only takes one step for things to go bad. Love the content as always!
This is another incredible project you pulled off. Wish I had a 2nd floor in my shop.
Do you have an emergency escape plan in case of a power failure when you are up in the loft?
How about a couple of plywood gussets on the super strut that the motor is attached to? I think it would help stop that flexing.
interesting design, my comments: why not place in the loft similar triangles to tie super struts to ceiling structure. there is a huge load cantilever on that platform being excreted on those struts.
you have a BIG cantilever force from that elevator on those struts, i kinda doubt they were intended for this kind of operation, where i have seen this kind of set up it has been hanging barn doors and the struts were horizontal with the weight of the doors hung on the struts.
why did you cut the back panel into a vee? was just to accommodate the strap? you lost allot of rigidity along a critical load path back to the struts allowing then to flex/twist. making the back a full panel (with a cutout window for the strap access to the cable) then place a 2x between the two triangles sides along the or near the top by the upper trolleys to form a quasi box along the trolley/strut area where allot of flexing will be occurring to the platform assembly. you fully boxed out floor was 100% spot on design. last point is the super strut supporting the hoist. the “U” channel MUST be placed so the U opening is facing down and not up. facing up the channel will compress distort and fail end of story this is mechanical design 101, having the channel facing down it places the sided of the channel in tension not compression. if it is not that way you need to change it because it will fail. the best choice for the support up there is a square or round steel tube not an open channel. pack it with mortar mix and the roof will collapse before that would fail. before i fall prey to the mail-storm i will get here saying what i have, i am a retired structural design engineer from the aerospace industry, looking at what i saw, had i done this i would have been told the same thing for revamping the design to be safer and more solid especially with a human beings life on the elevator. always use a 2.5x load safety factor whenever a human life is involved. not knocking your work at all but with your life on that lift this is my critique of the design. terminal velocity is reached on a 6 foot fall and most falls from this height are fatal remember that.
Love it when someone volunteers critical safety information. Anyone reading your comments would have a hard time construing them as negative or nit-picking. Every recommendation you’ve made included an easy fix and increased safety/injury concerns. I for one thank you for the information and intent. HELP SAVE JAY IS OUR MOTTO.
I have built a lift for my shop also. Used barn door and trolly hardware and a steel frame for the ‘cart’. 1300 lb hoist is mounted to a square steel tube. Would like to add the fall arrester setup. Do you think 2 would work in combo or would one trip before the other one resulting in the 2nd one not catching? Is there a way we might chat?
Gary, thanks for lending your expertise as a structural engineer. I wondered about some of the structural issues as well. First comment is that Unistrut is actually designed to handle both beam and column loads according to their specs (https://tinyurl.com/swa2fupz). But I suppose in the case the downward force is eccentric so some adjustment would need to be made. However, Isn’t it the case that the load is most being carried by the cable and not the unistrut columns? Sure, there is some cantilever force out towards the end of the platform, but the cable must be carrying most of it.
Also, wasn’t following your first comment “place in the loft similar triangles to tie super struts to ceiling structure.” Are you saying don’t attach the superstrut to the wall studs, but direct the load downward to the ceiling joists? I kinda freaked out seeing the whole beam was attached to a couple of 2x4s with a plywood cleat. I would think you would want to transfer the load down to the ceiling joists so it should rest on those. Maybe that is what you are saying?
Finally, when I build mine I will use steel 1×2 12ga steel tube and use your suggestion of filling with mortar mix. Would it be better to mount to the rafters and also have columns that transfer loads to the ceiling joist as well?
Thanks, and Thanks Jay for the video. I binge watched dozens of other youtube videos on this idea weeks before you came out with yours. It’s all fodder for my design.
Love this. I have a storage area above my shop as well and it is a pain to get to. Will look into building something like this myself. Thank you.
So much fun doing projects like this – added benefit that it is such an asset to you. It would be interesting if at the upper height, the platform had access to a mezzanine level – now there is another project.
It will be interesting to see the user safety harness or ‘cage’ to protect you at heights. Afterall, anything above 4 feet (1.2m) needs to include a cage and safety lines – lol
Great idea and especially the fall arrester.
The good enhancement suggestions gives me the opportunity to suggest a I beam to replace the horizontal super strut. I beams are commonly used in overhead gantries and allow hoists to be repositioned with ease.
Following what Gary said, I have seen the unistrut fail holding control panels in a shop with the uni-strut connected to the I beam rafter supports.
i was thinking that you should have some sort of escape if power goes out as questioned above. My thought is that you need something to get yourself off the platform at 8 feet off the floor. That would be a bit of a drop. They have chain ladders in a box for said instances.
I thought you should have a handle or rail if you are traveling up and down. The fall arrest may stop the platform but it won’t stop your momentum.
And the other note would be to have a way to lock the platform when it is in the “up” position in case something lets go. 20 years in a safety committee team/lead.
I don’t want to go through all the other OSHA /personnel lifting standards that our lift company avoids by making only “product lift” equipment. Something about chains 42″ high on all exposed platform edges and chocking (free fall prevention tool in place to hold the platform if decoupled) the platform if anyone is below the platform. And product lifts have 3X safety factor.
I love the design. I like the way you thought out the process. I like your approach. I think it was a great idea. I am on the side of caution.
Great project! Too bad I don’t have a loft above my workshop.
I’ve always enjoyed watching your videos on YT but your articles are excellent as well. I like your writing style and the photos are of great quality.
Step 1 – Must build loft
just so i can have Step 2 of building elevator
Excellent job on this – Always curious, i know locations can vary – but would like to request maybe a build price “range” of your projects – like maybe the material took $400-500 and maybe a rough time estimate as well. Keep up the great work – love the helpful items.
Jay, awesome idea and build. If i ever have a shop with a 2nd floor/storage. I’m totally building one of these.
Rick
Great project, you’re always busy crafting useful projects. Love the videos
I would be super cautious about putting people on that lift. Your insurance company may not cover anything related to injury should the worst happen. Additionally, that lifting strap is a single point of failure. They WILL chafe, and degrade over time, and potentially fail. The fall arrestor that you installed is also hooked to that strap. If you’re on it at the time, there is nothing to stop gravity from happening. Also, what’s to stop anyone from being below it? I get the convienience of it, but overhead lifting is something you want to be very careful about. If you haven’t installed any wear protection around the strap you are using, it would be best to do so. Most likely its not rated for overhead lifting, neither is the winch. You may want to check with an overhead lifting specialist in your area to find a metal mesh sling. That will wear better, but you will still want to periodically inspect it.
Great build! How long did it take you to design this?
Jay, your fall protection device is designed as “PPE” or Personal Protective Equipment. Its intended to be used on your person. The device is used by attachment to an anchorage point and attaching the “belt” to a harness or less effective, belt, that you wear.
Might go back and look at the Amazon product page and review.
Your safety concerns are right on, just not applied, in this case as designed or intended.
Bob
Excellent build! Very ingenious. Disregard all the OSHA howling nervous Nelly’s. Life is a risk.