In this video/article I’ll first give 5 tips that I wish someone gave me before starting the installation, I’ll cover my installation process, and I’ll conclude with a timeline of my BlueOx TrackPro experience, why I pursued an upgrade to the ProPride 3P Hensley system, and a comparison between the two.
5 Tips For Installing The ProPride 3P
- Once the correct holes are determined, assemble the stinger while it is upside down and in the tow vehicle. Upside down maintains contact with the pivot pin and the tow vehicle acts as a vise.
- Raise the tongue jack ALL THE WAY when not in use. Just because the WD arms are the lowest point doesn’t mean you are good to go!
- Take the propane tank holder completely off. Even if you think you know what you’re doing. Just remove it and save the frustration down the road.
- Make sure you have everything needed before starting. A socket AND a wrench of each size. A torque wrench. Any necessary hardware for the extension kit. Marine-grade grease. Any smaller sockets or wrenches for relocating the breakaway brake system, if equipped. Finally, SHADE!
- Be safe! Heat can take its toll on your mental clarity.
Installing The ProPride 3P
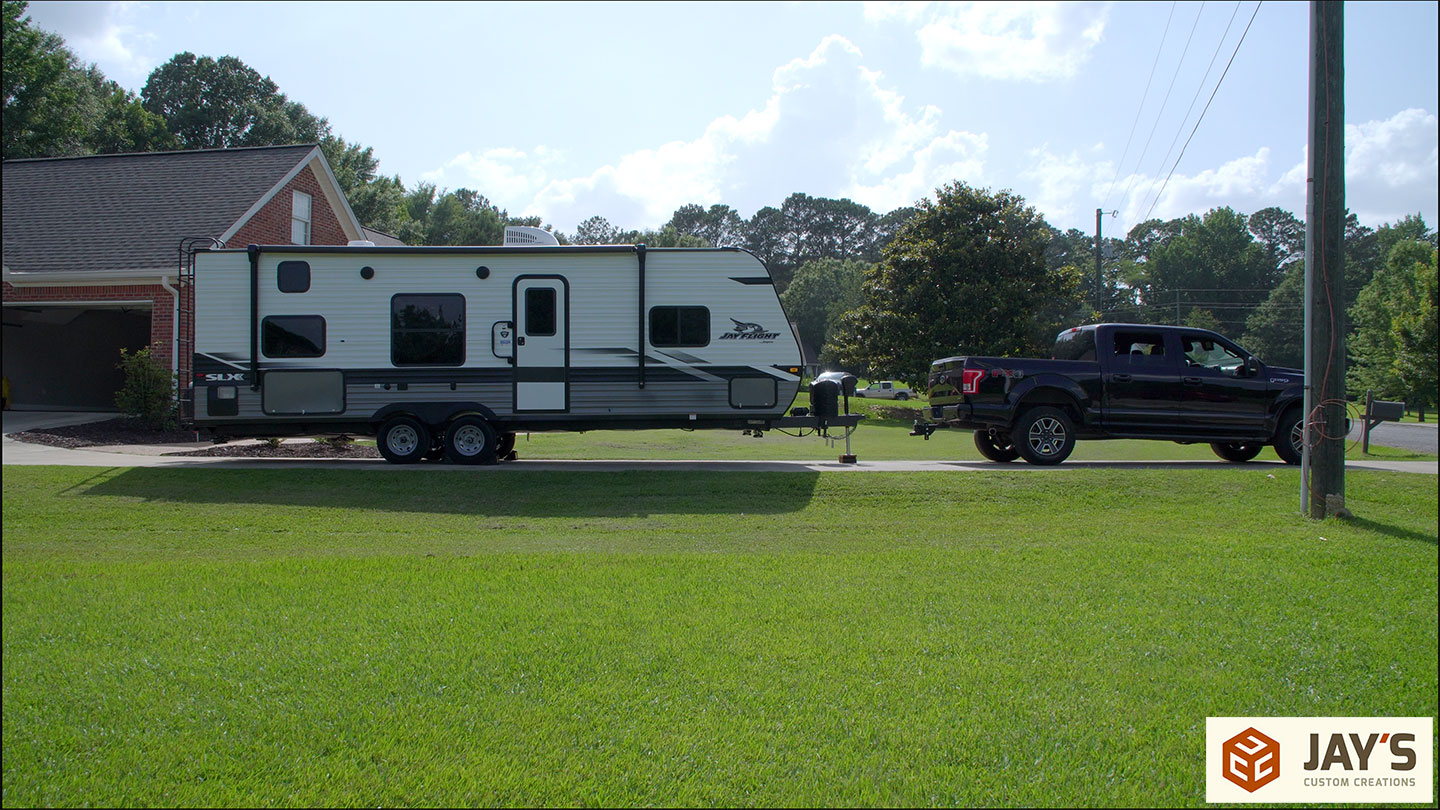
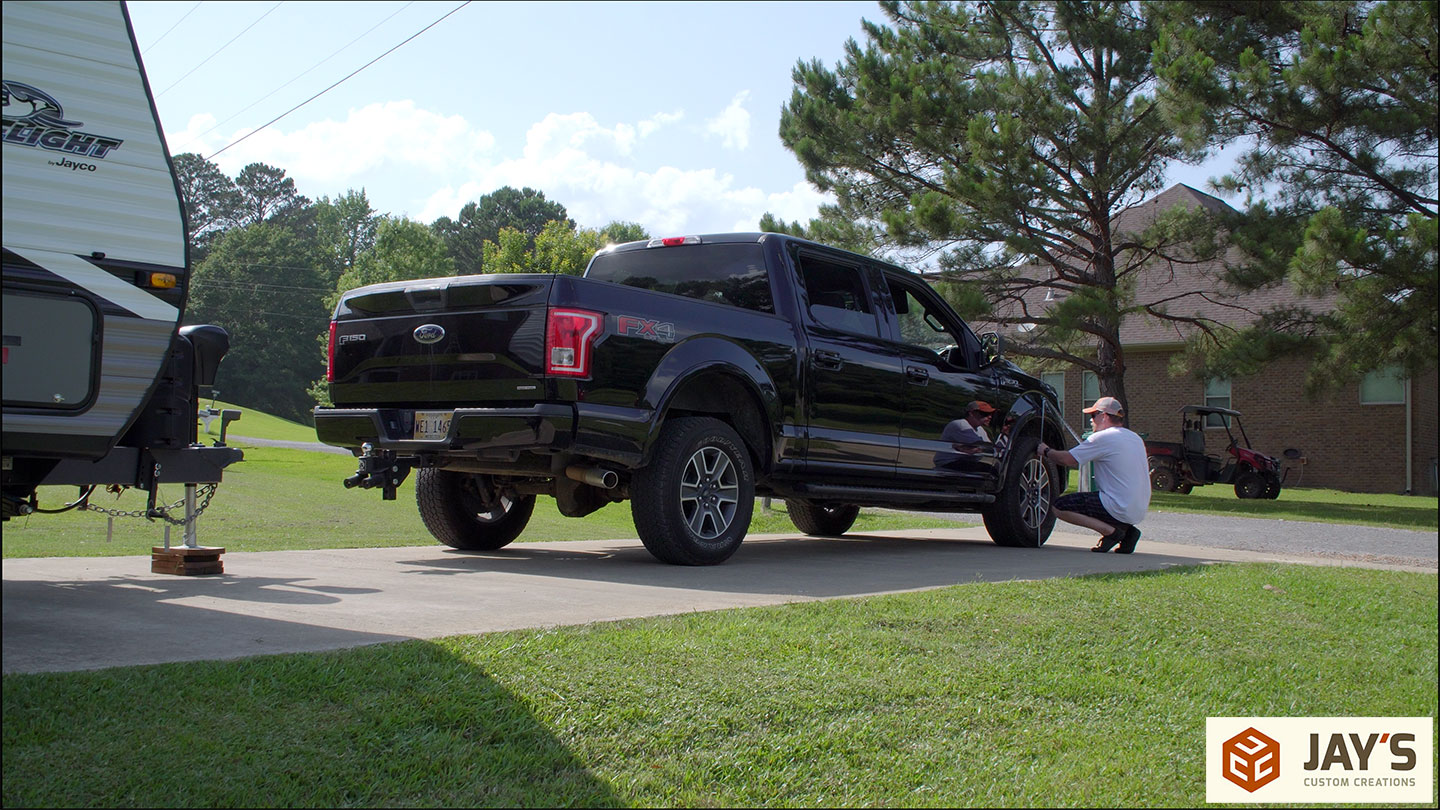
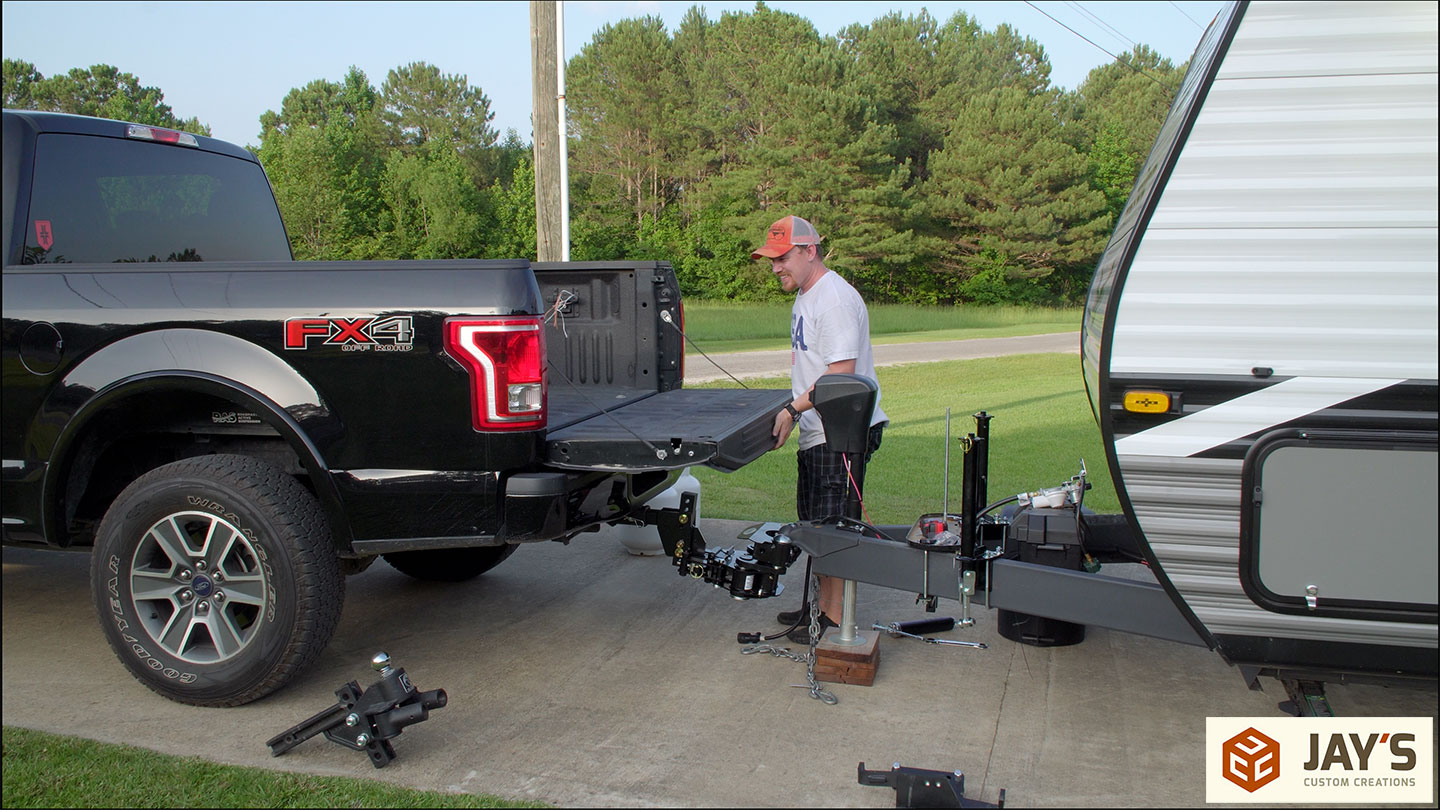
So here’s the rig. A 2016 F150 4×4. The camper is a JayCo 264BH. I believe the 264 stands for a floor plan length of 26.4′ but it has a bumper to tongue length of 29.5′ The truck is rated to tow over 10k pounds and the camper has a GVWR of 6000 pounds.
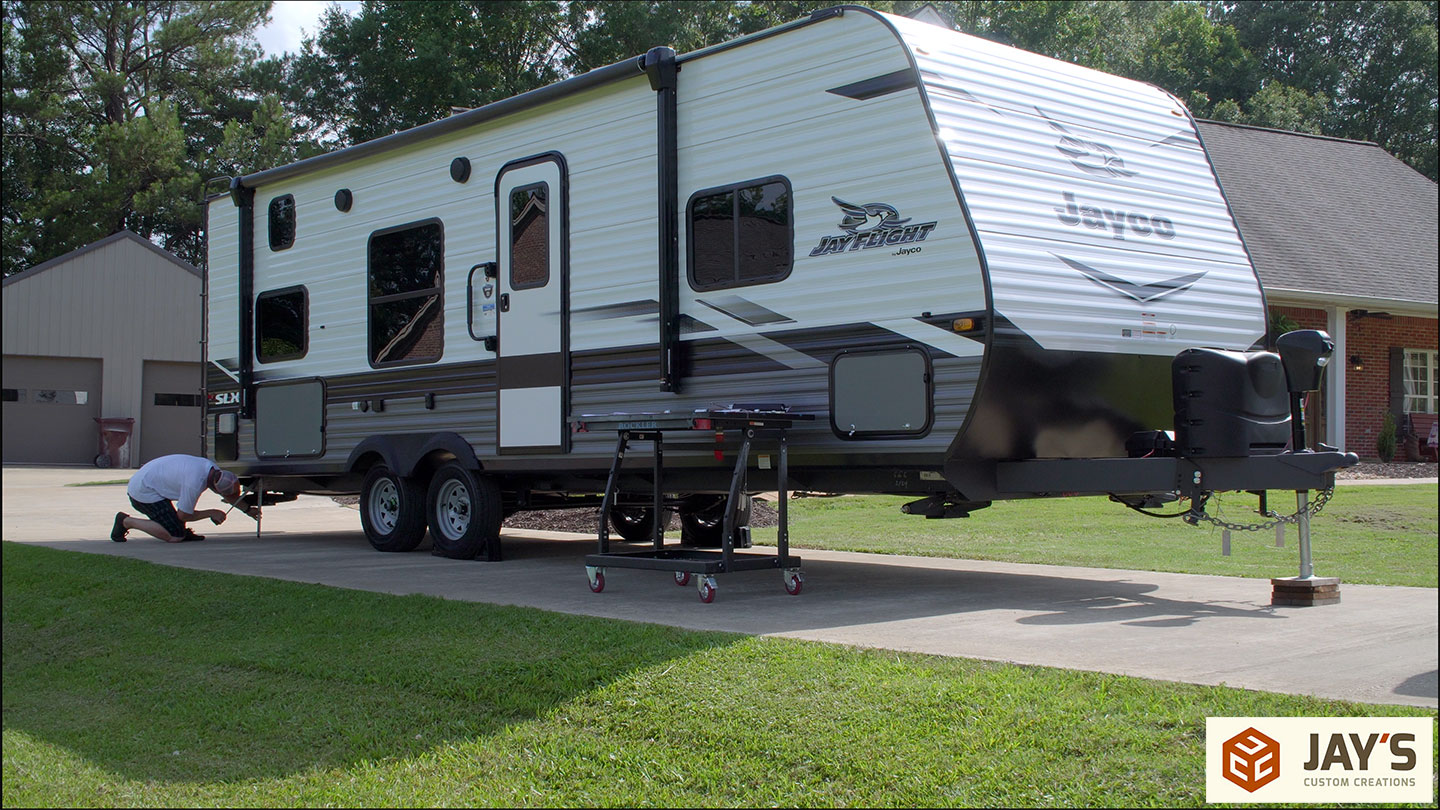
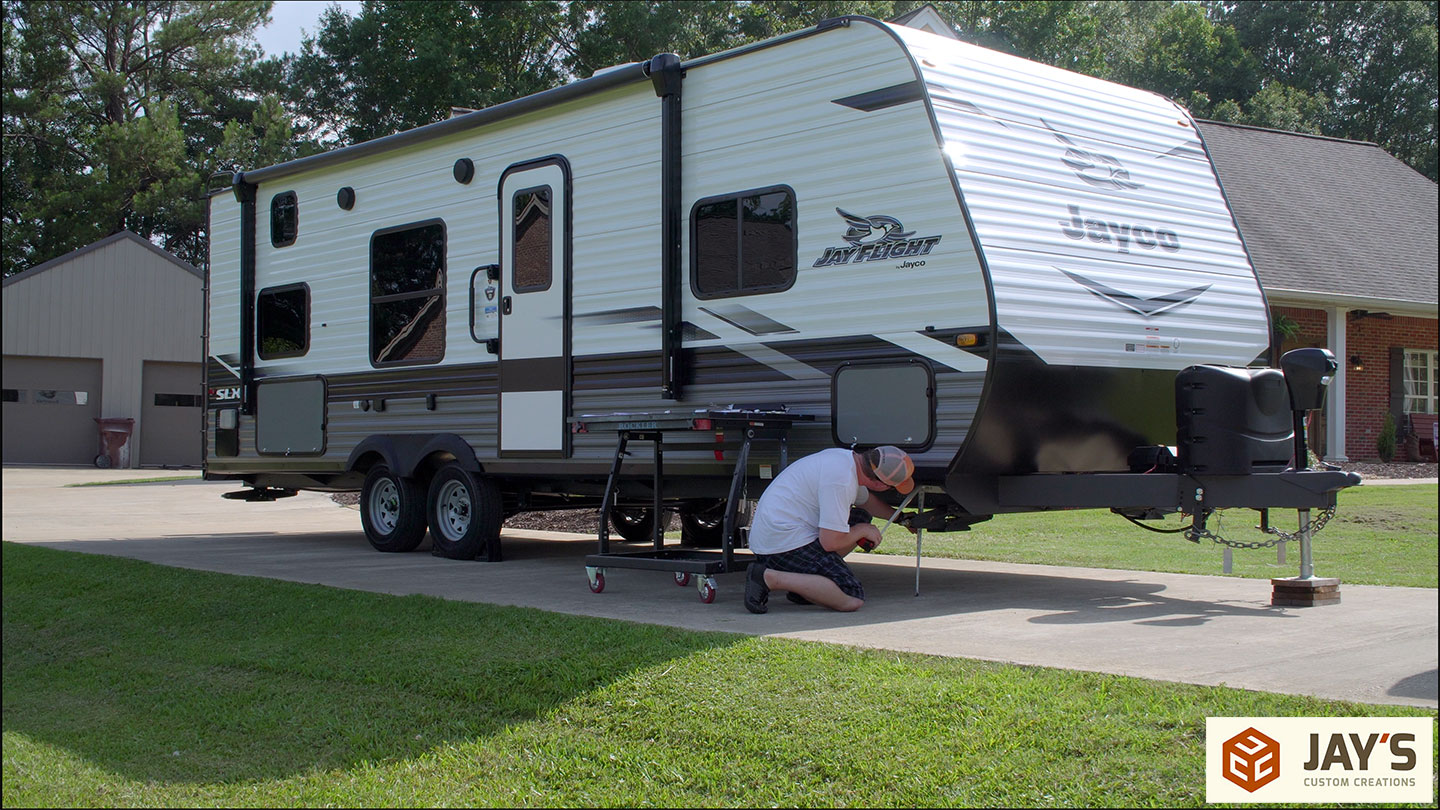
Step 1: Embrace the shade. I used a rolling cart as a portable workbench on the shady side of the trailer. These are my steps to make the video flow better. Not the exact same as the steps in the manual. Use this video as an overview. And use the manual for instruction.

Step 2: Measure from the frame to the ground in the front and back of the trailer and adjust the tongue jack so the measurements are equal. I first measured the straight frame section until I realized the correct place to measure is the tongue and as close to the rear bumper as possible. Record all the measurements for future reference.
If you’re on level ground the result should be a level trailer. If, like me, you’re on a slightly sloped ground the trailer should be parallel to the ground.
One quick note about the truck. This is a 100% stock truck from 2016 except for the rear suspension. I recently added a Roadmaster Active Suspension upgrade to the rear axle. It doesn’t increase towing capacity but rather allows your suspension to work better. It greatly reduced body roll in corners, reduced axle wrap, and most importantly to me, it reduced the rebound of the suspension, especially when towing. So if a bump in the road caused the suspension to bounce for, let’s say, five seconds, after the upgrade the bounce time is reduced to one or two seconds.
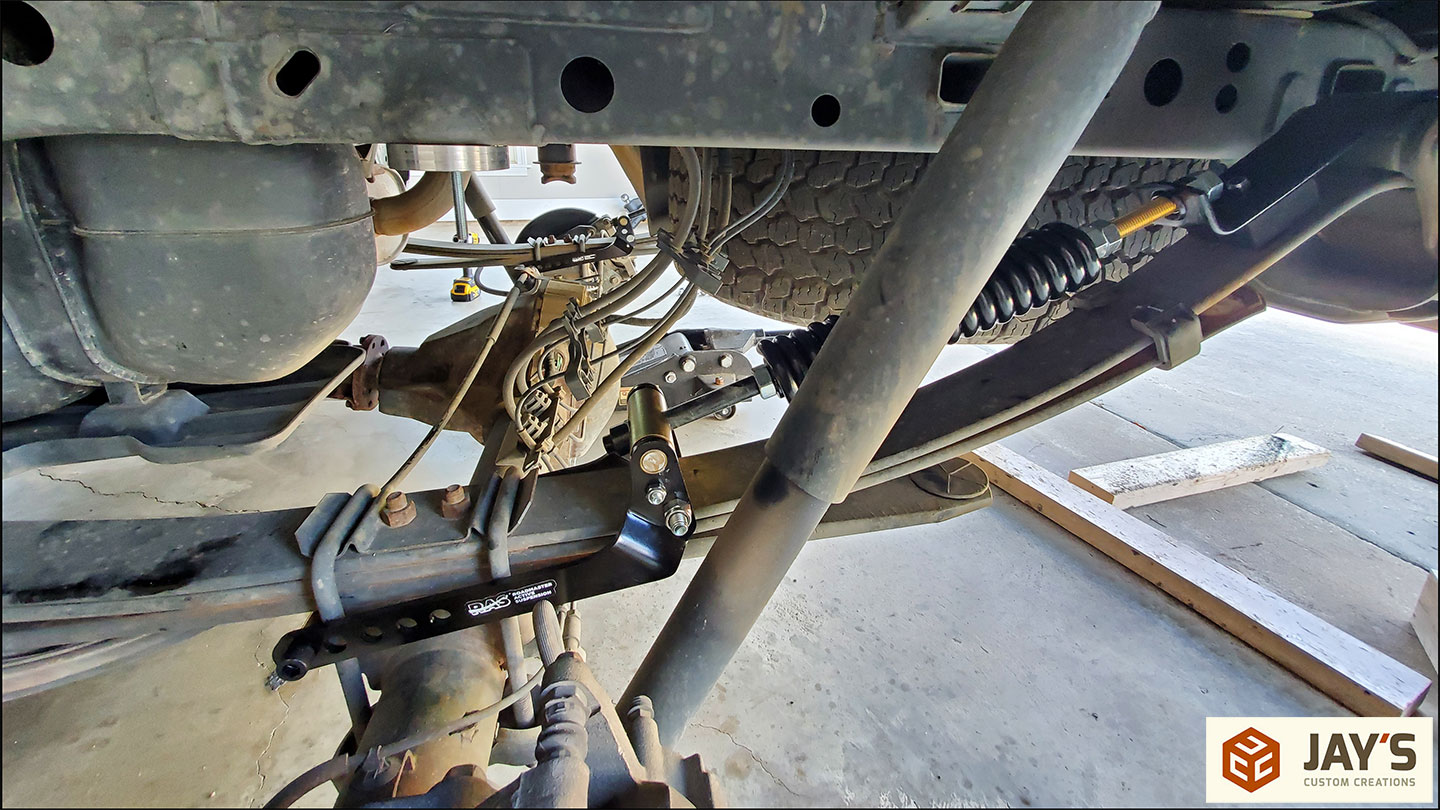
I bring that up because it did increase the rear height of the truck. Cosmetically, the truck not being level is kinda annoying but I see no benefit in raising the front to make it look better. The front and back wheel well measurements are taken and recorded as well.
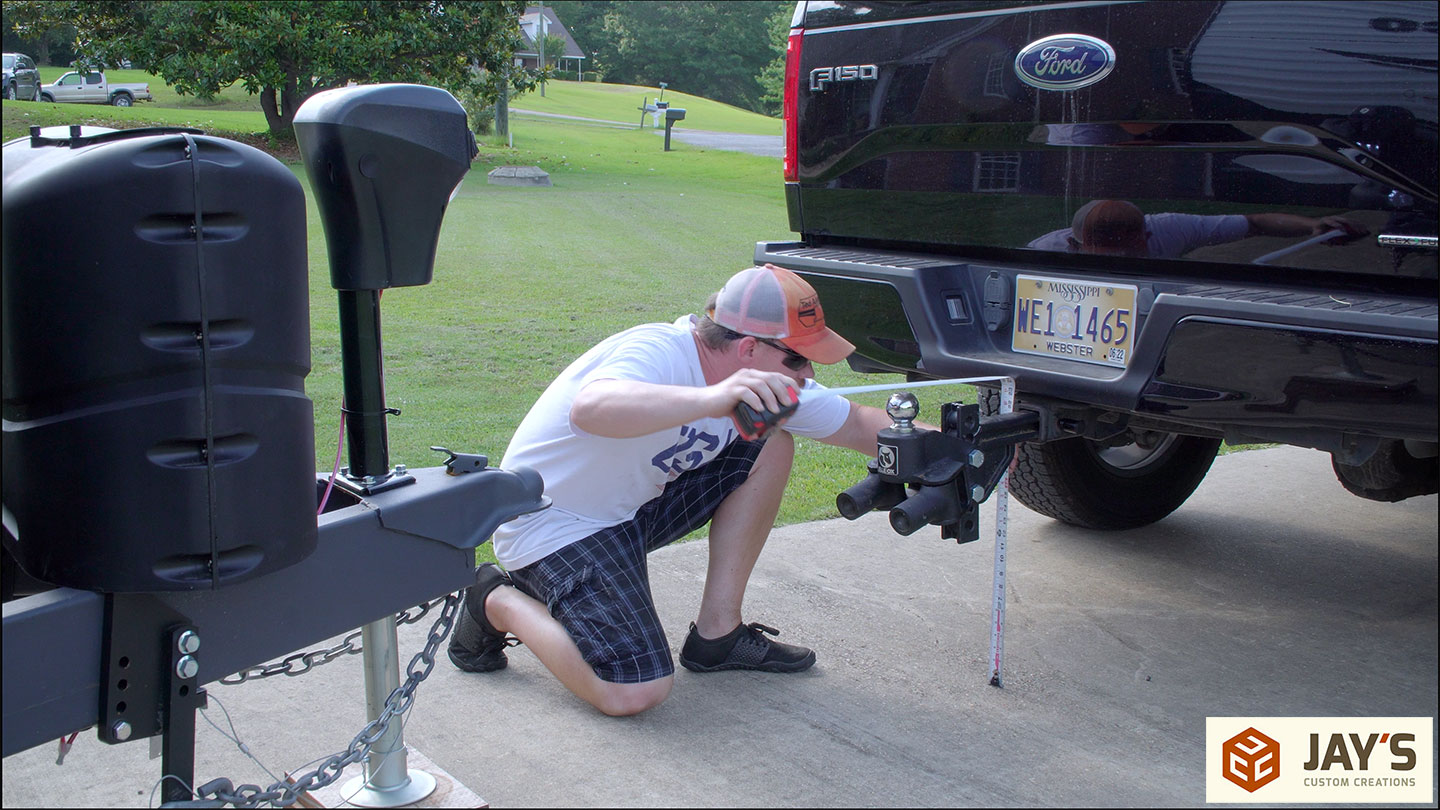
Step 3: Measure and record the height of the top of the receiver box opening and the height of the trailer tongue.
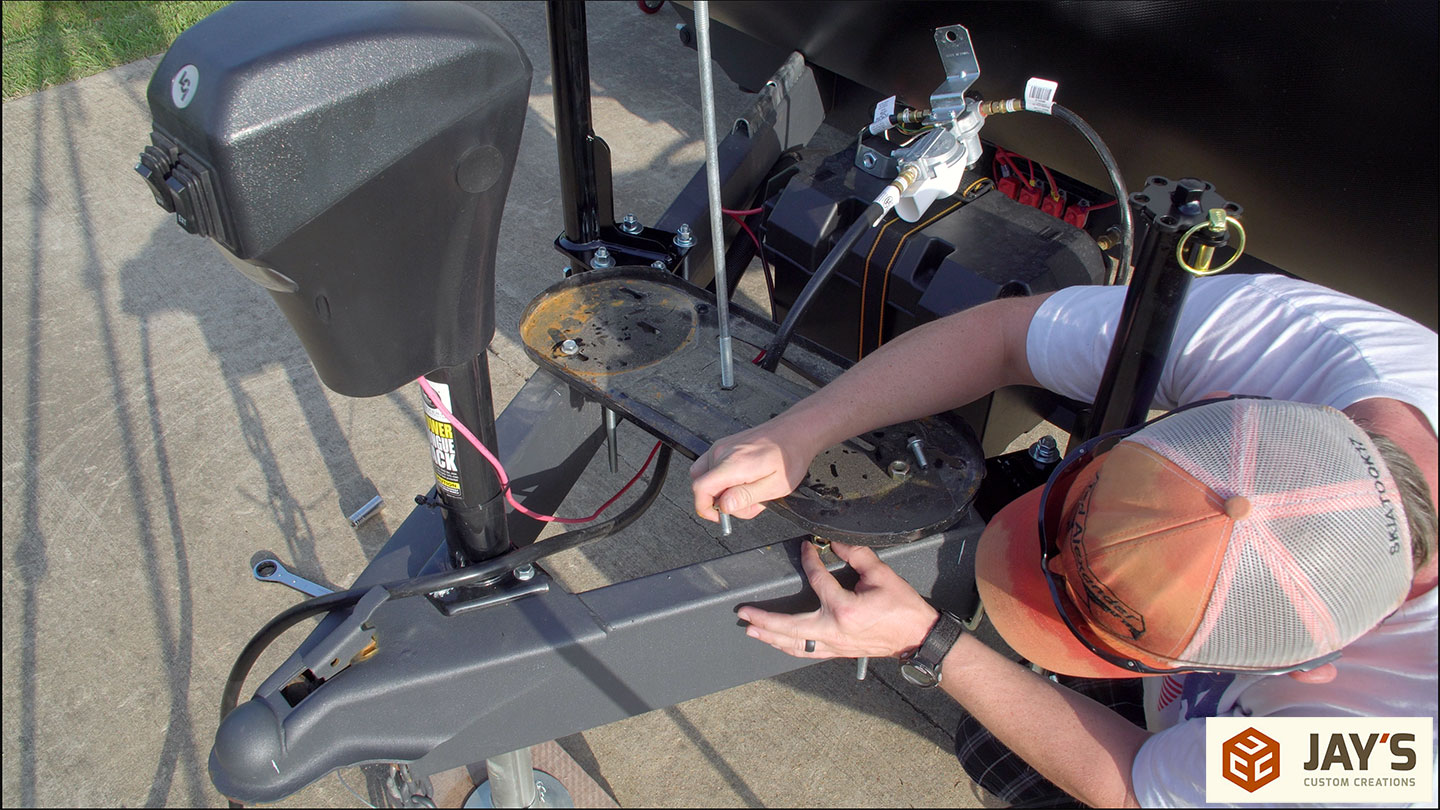
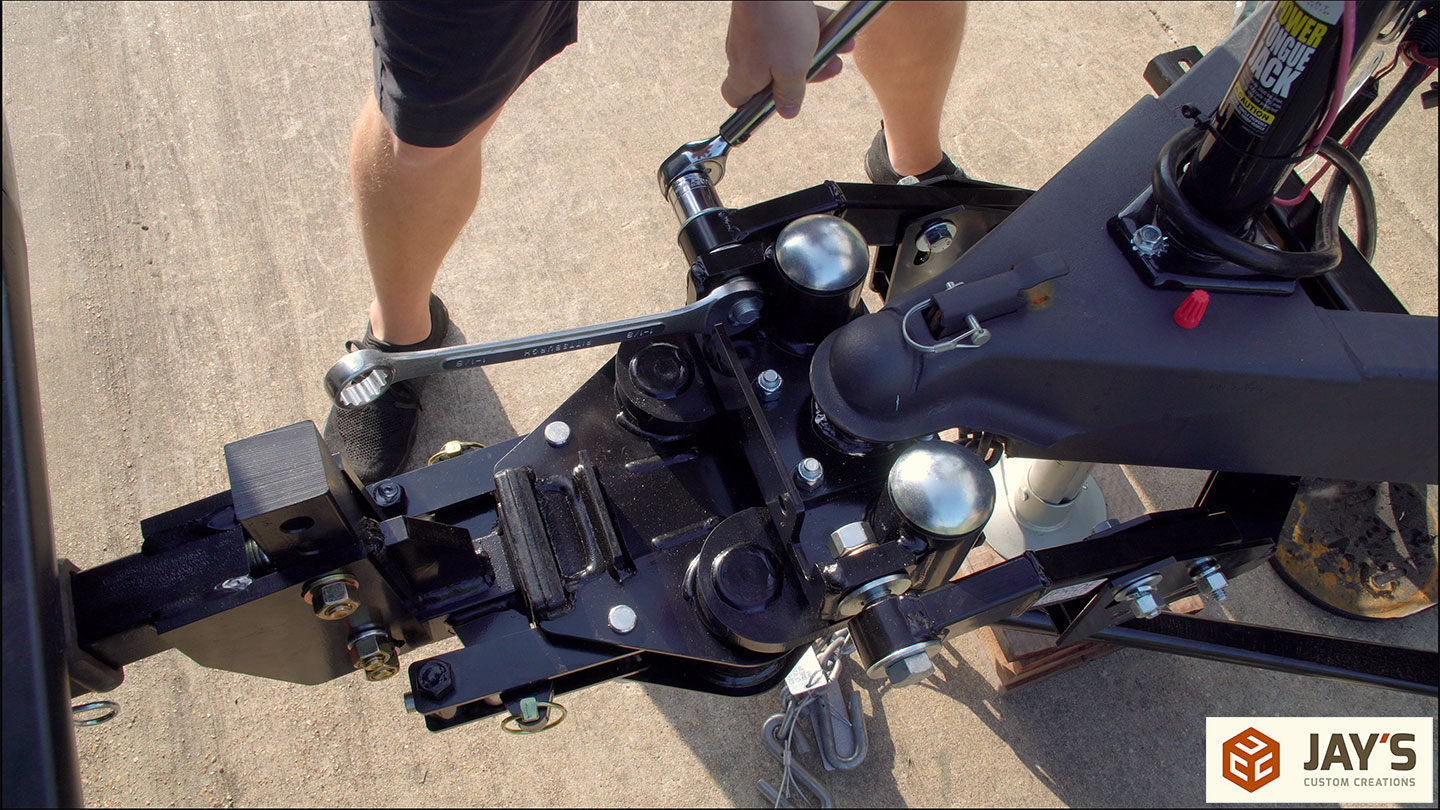
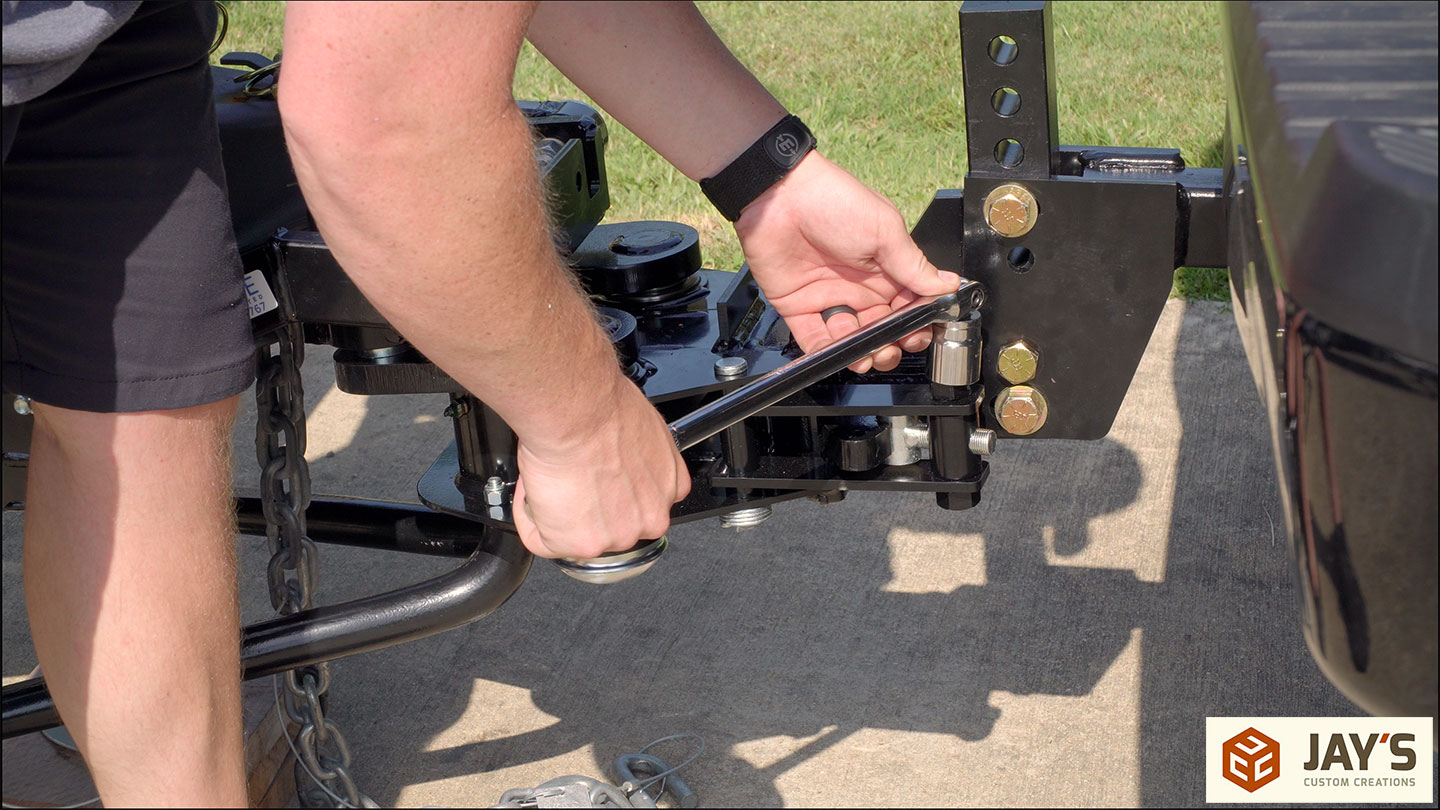
Step 4: Determine if the vehicle side receiver side plates need to be up or down. Then insert the pivot pin with one or two washers into the top hole opening in the vehicle side receiver.
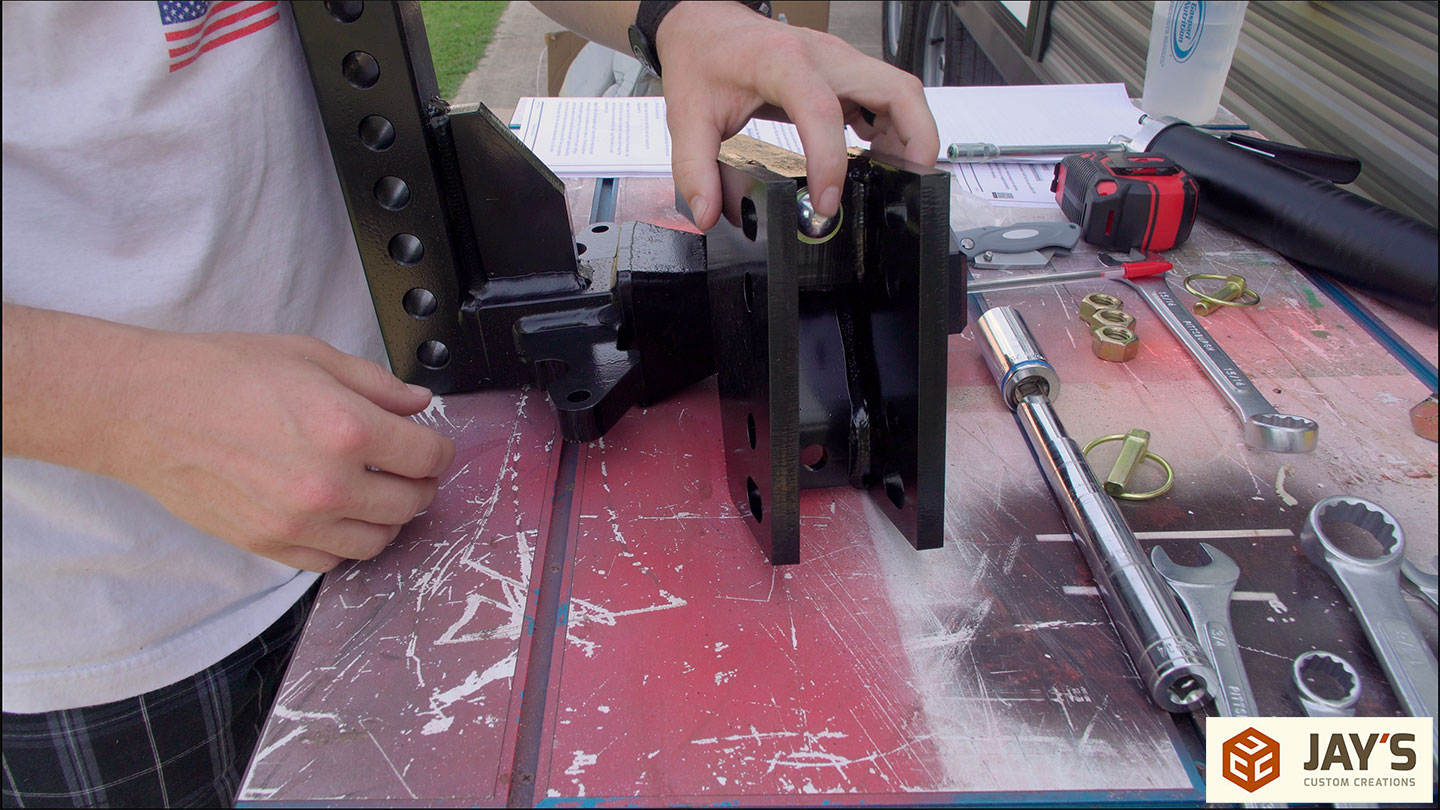
Step 5: Reference the manual to determine the placement of the bolts and insert them to connect both sides of the adjustable hitch bar.
Step 6: Realize you forgot the washers so take the bolts out and add the washers like the manual says.
Step 7: Tighten the bolts and nuts so that the pivot pin is sandwiched tight with no visible gap. See quick tip #1 at the beginning of this video to reduce frustration and, unlike me, actually eliminate the pivot pin gap.

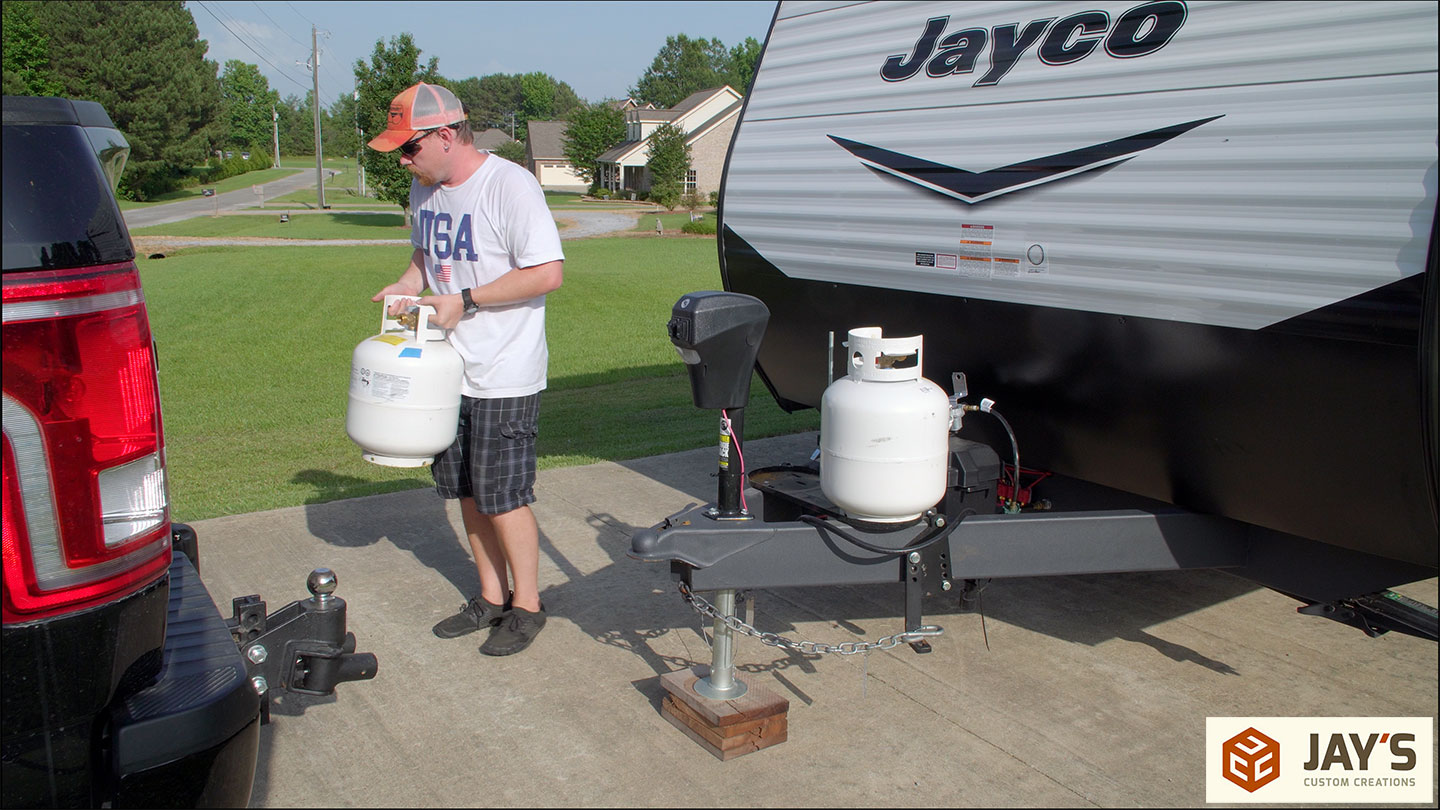
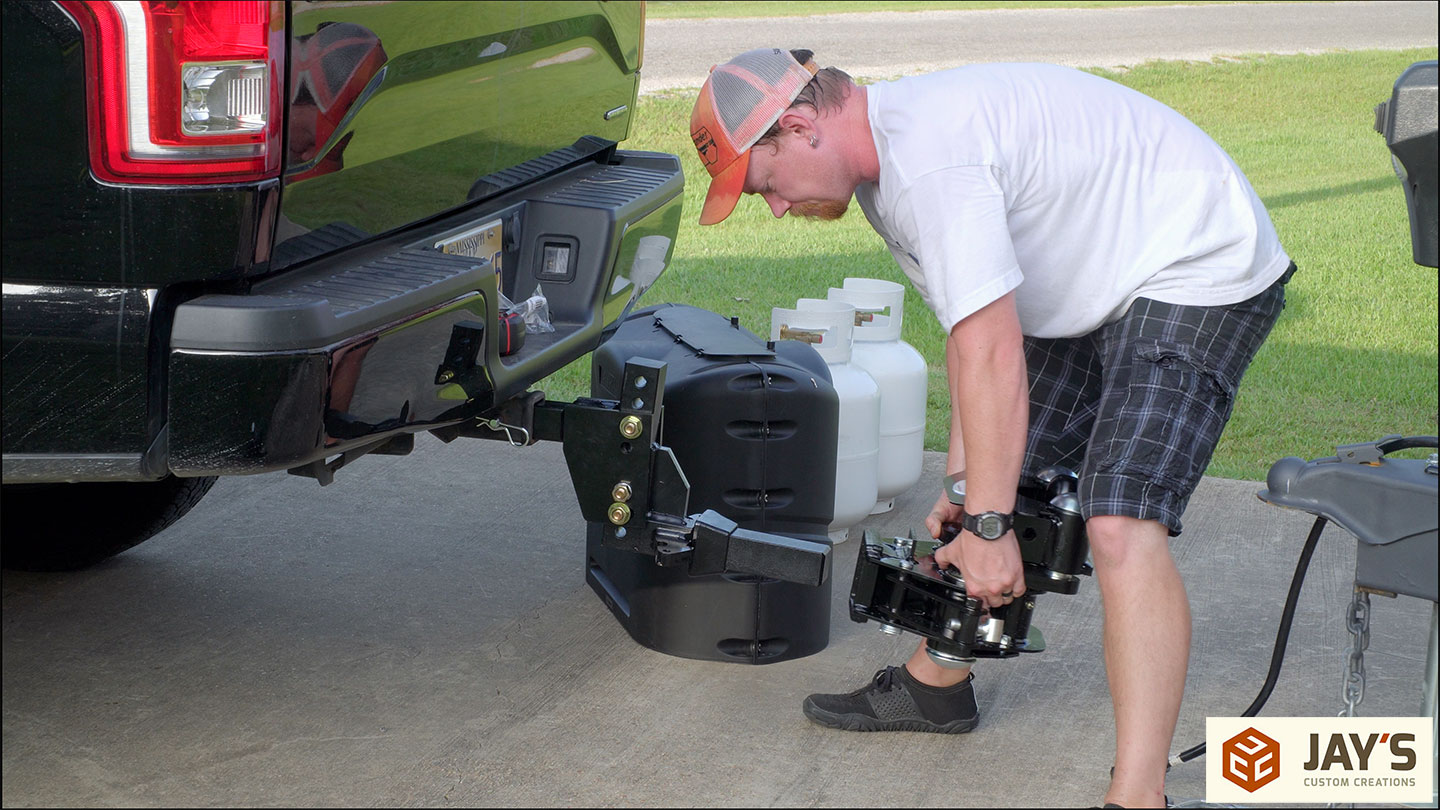
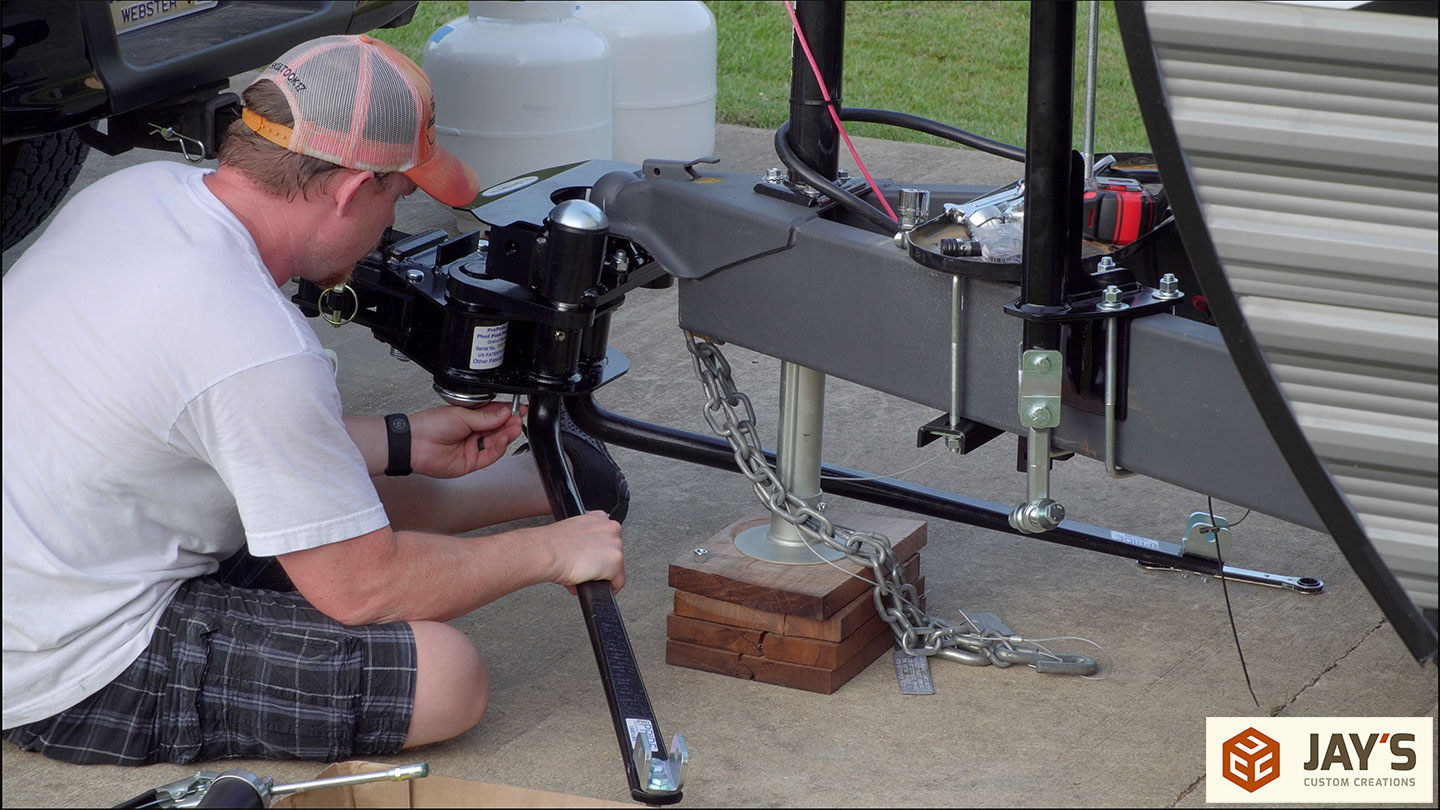
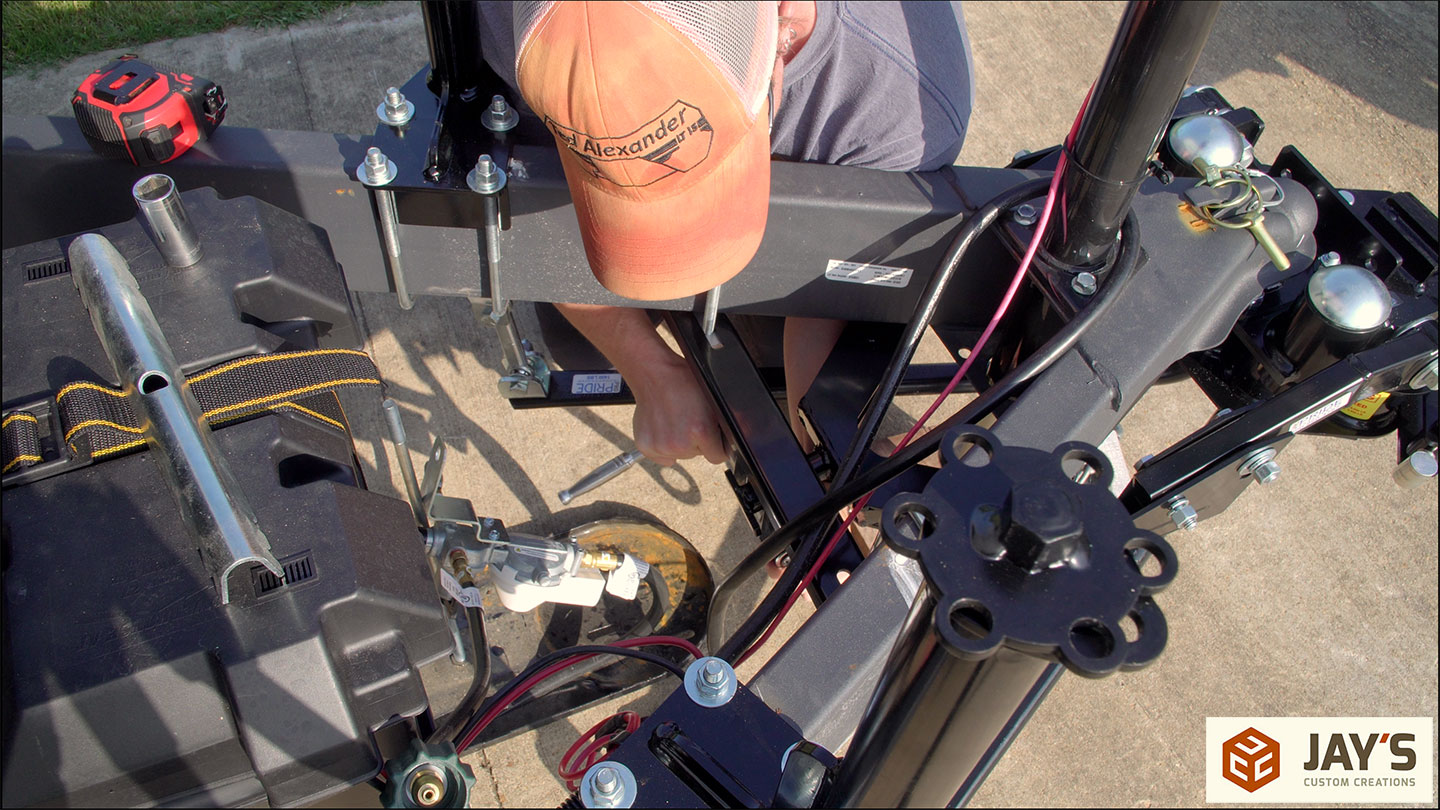
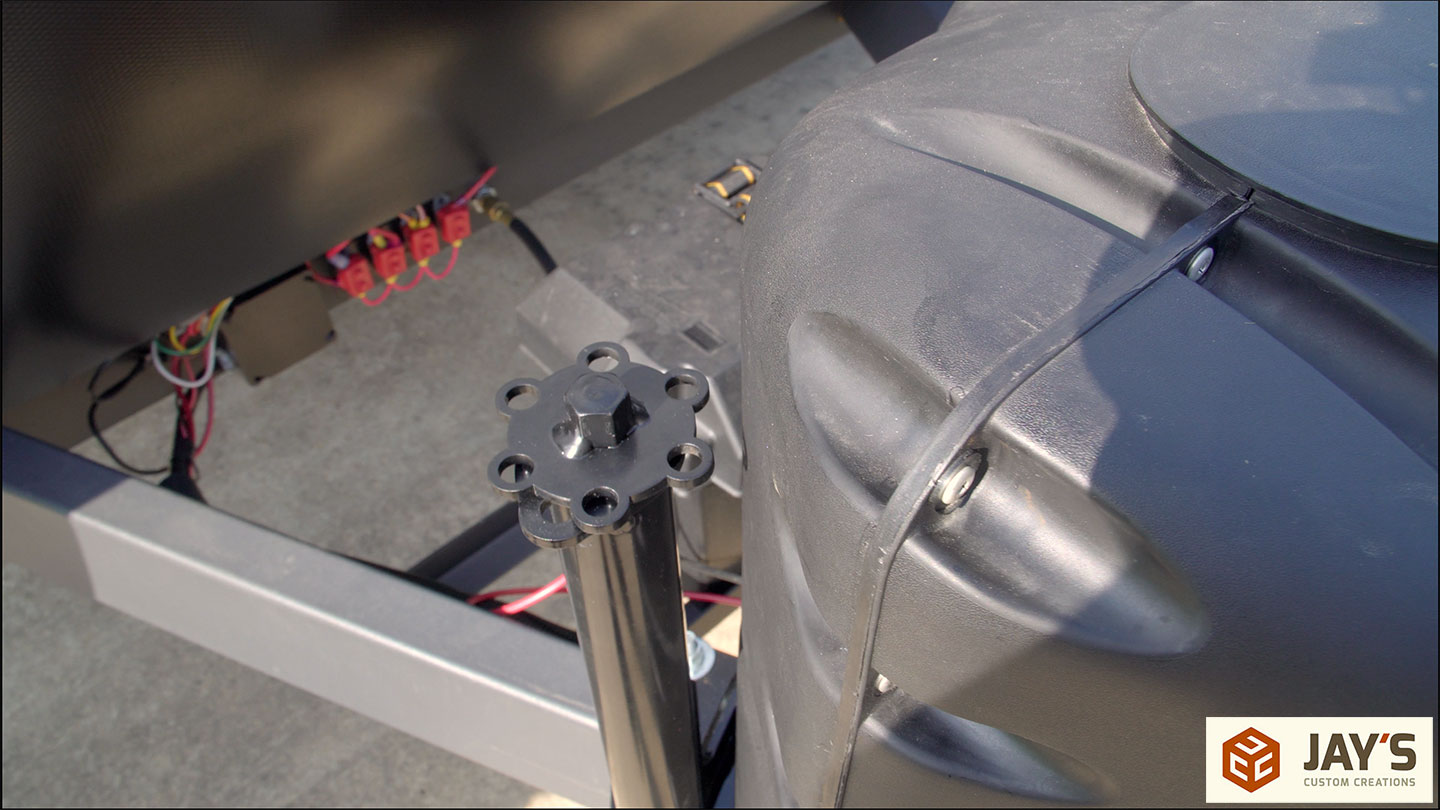
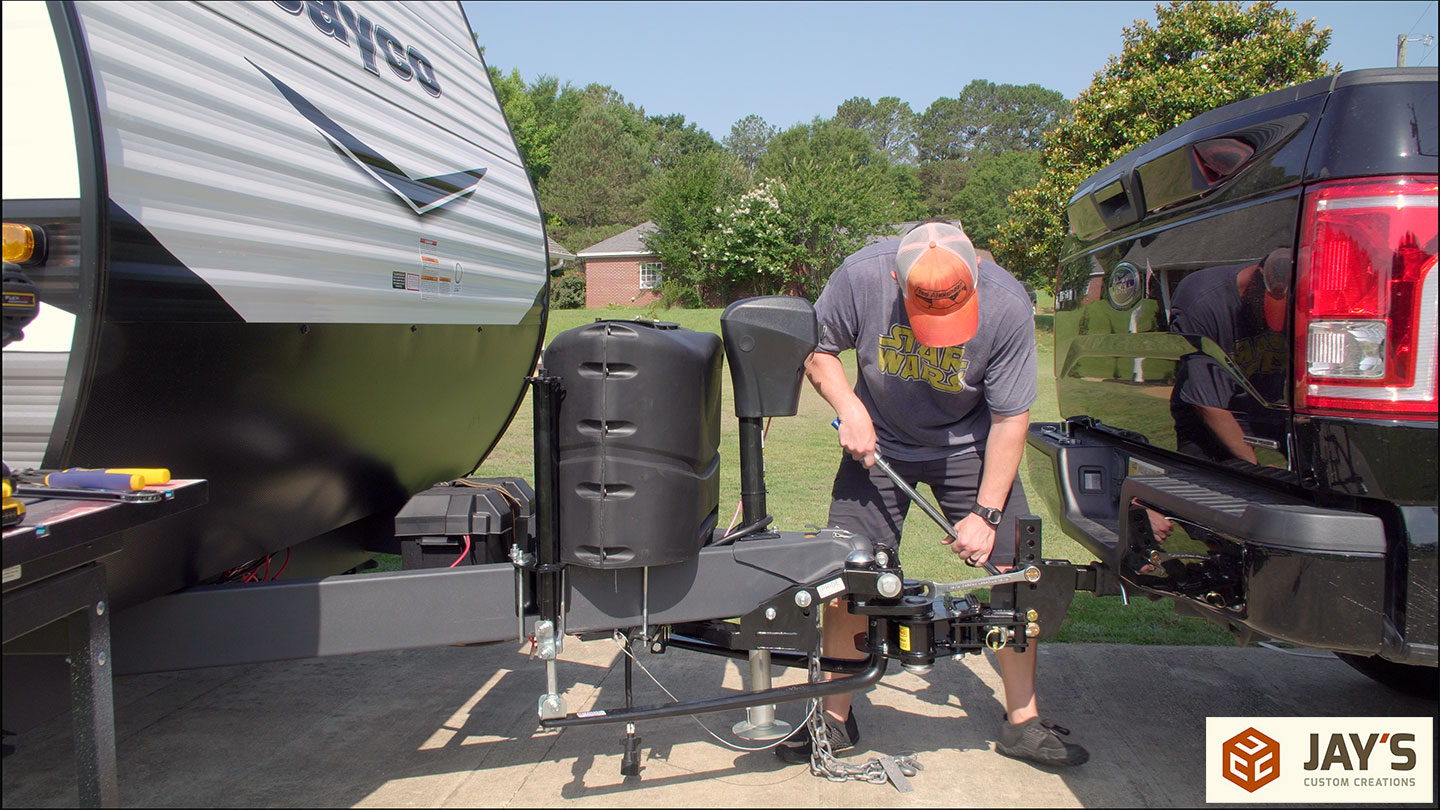
Step 8: Remove the propane bottles and the old hitch assembly (if equipped)

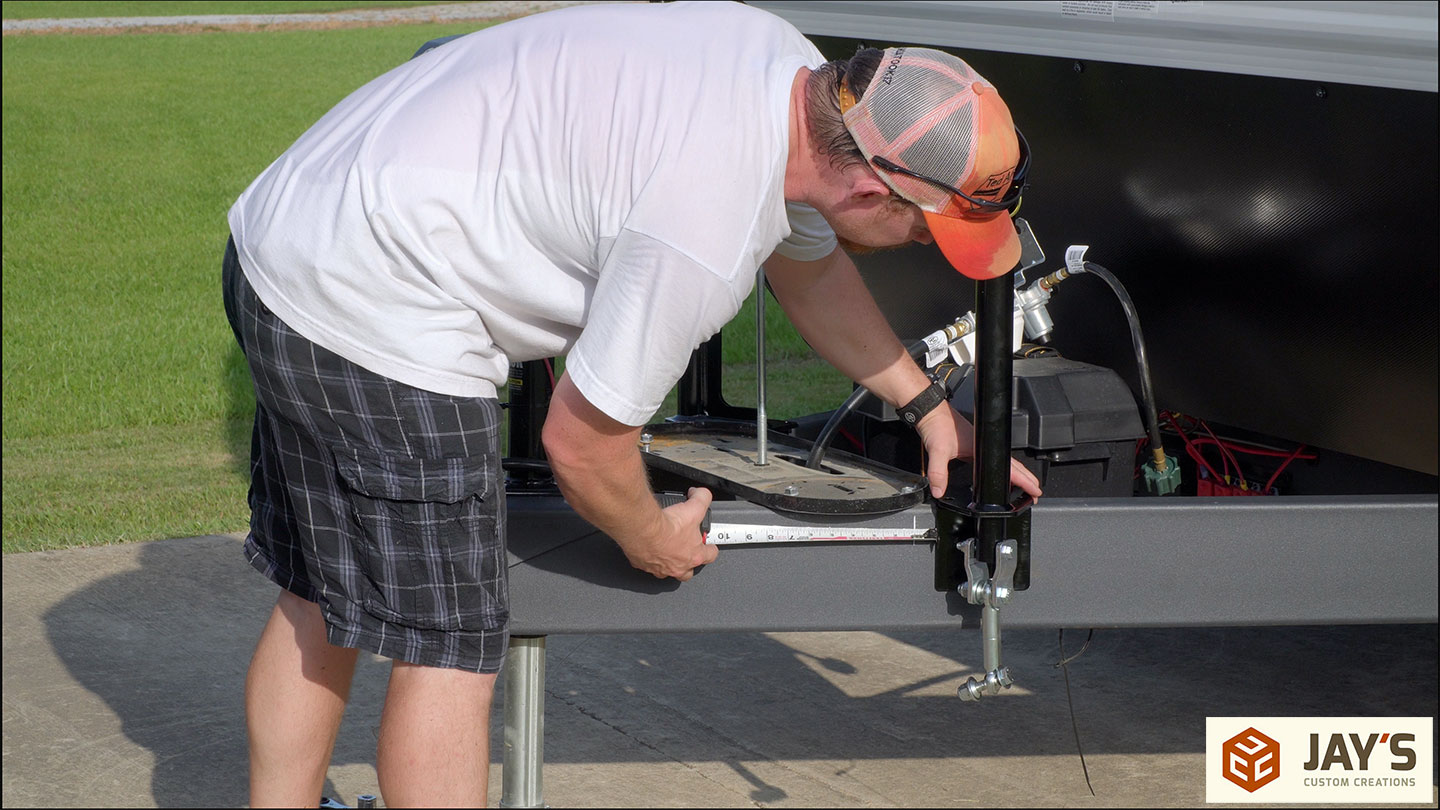
Step 9: Measure and mark from the center of the trailer coupler back 22” and 26”. The 22” mark is for the frame bracket and the 26” mark is for the weight distribution jacks.
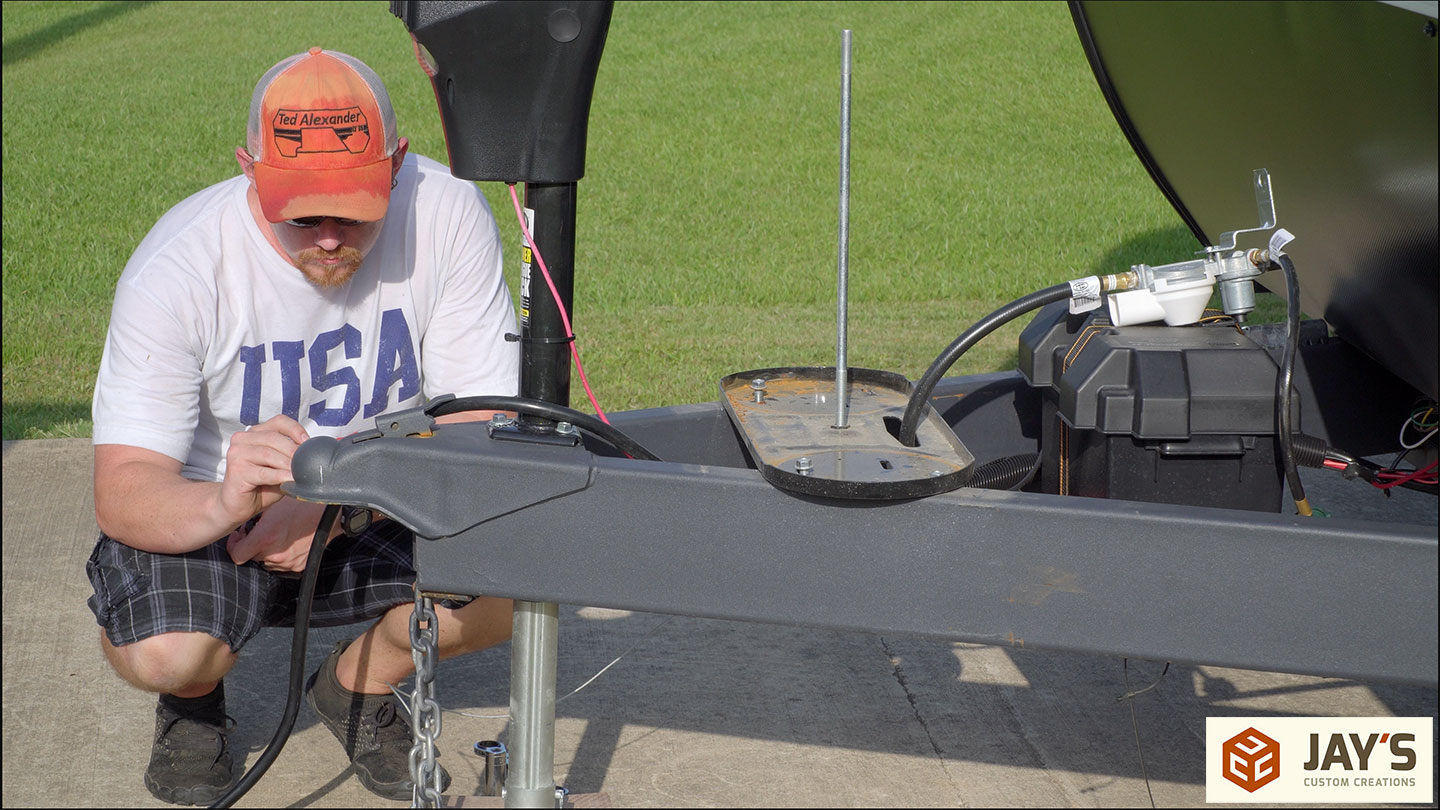

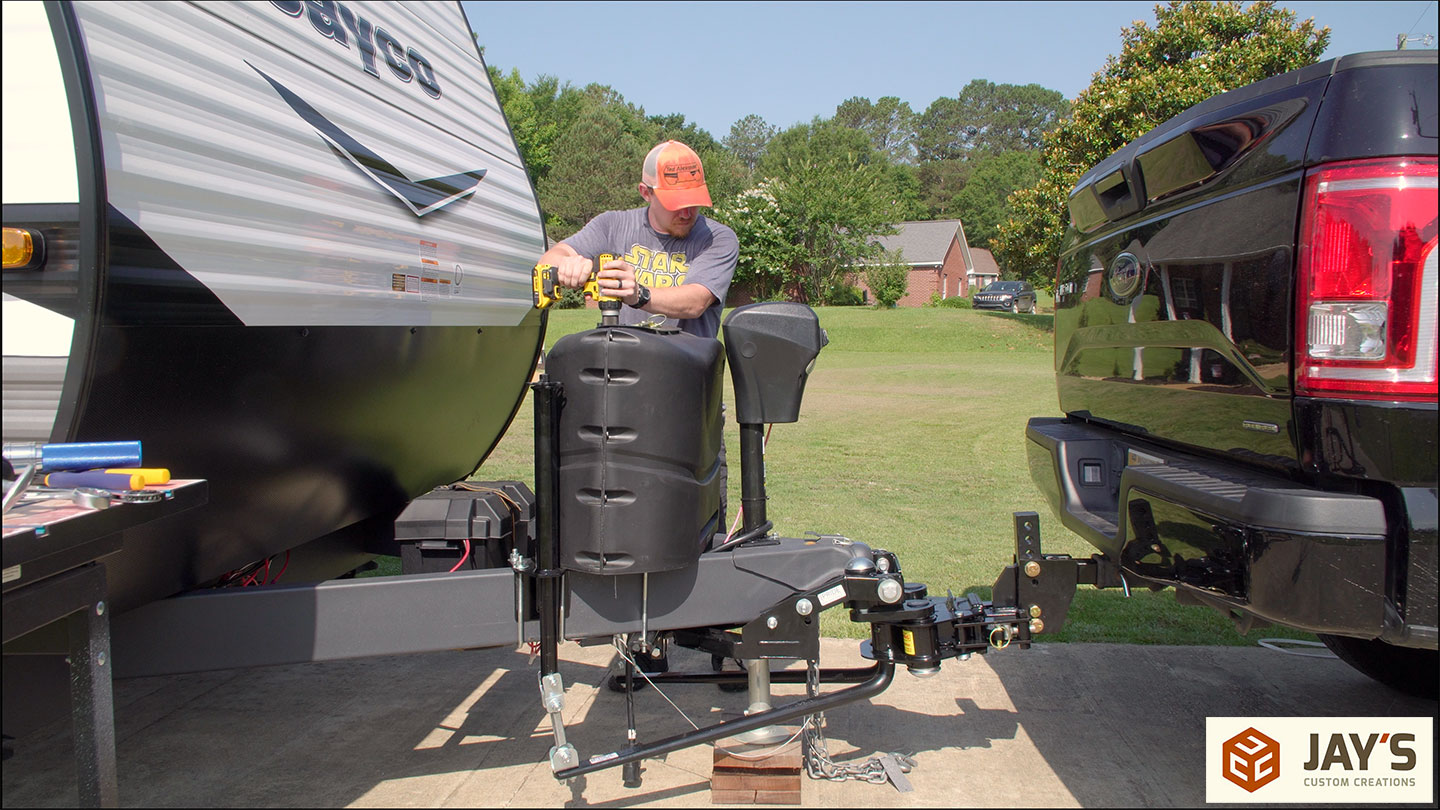
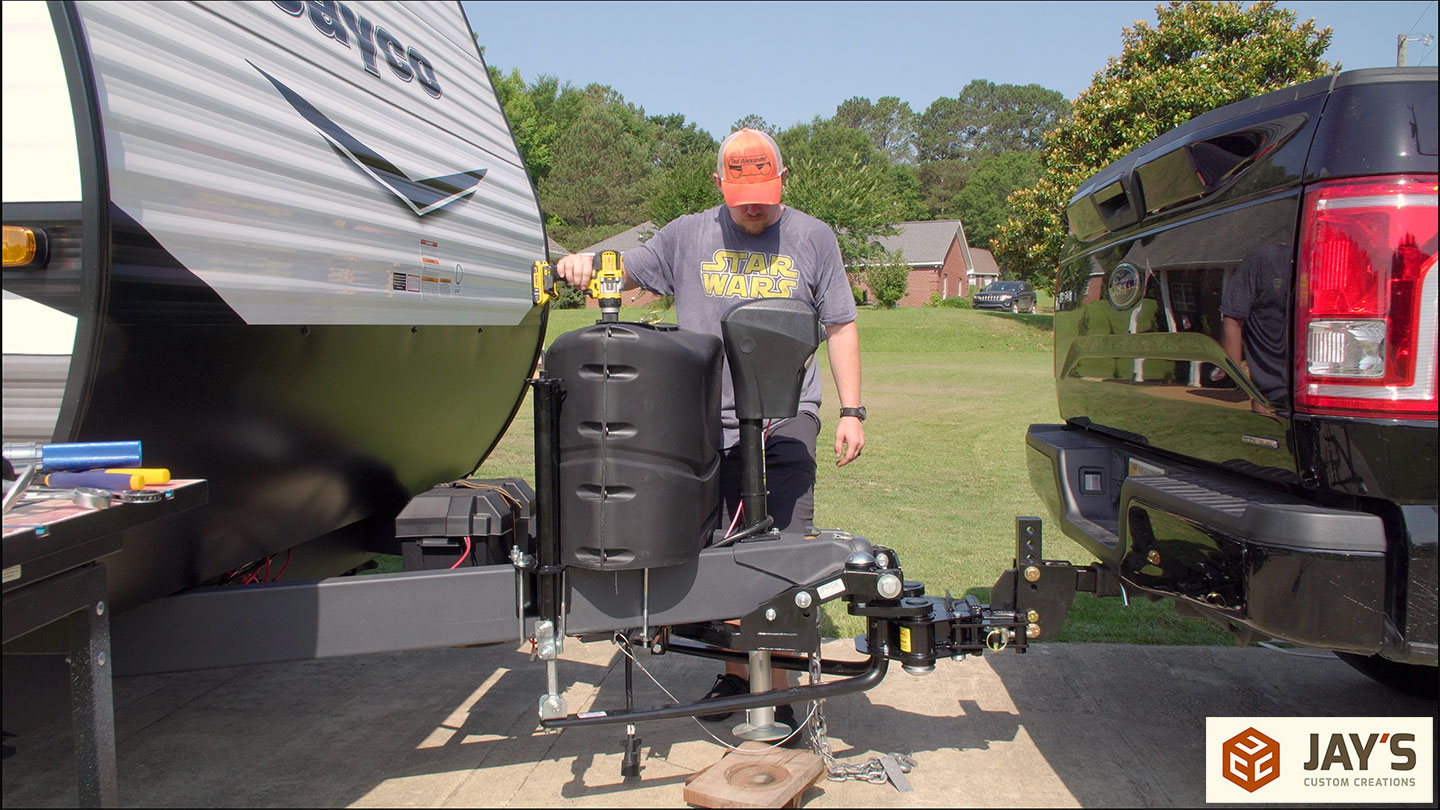
Step 10: Place the weight distribution jacks as close to the 26” mark as possible. Here you can see the propane tray was in the way for my installation. The instructions say you can be up to 1.5” away from that mark so I was technically good to go here. Although, I later removed the tray completely and got the jacks to line up with those marks. I didn’t worry about tightening the hardware just yet as I planned on torquing everything to spec once completely installed.
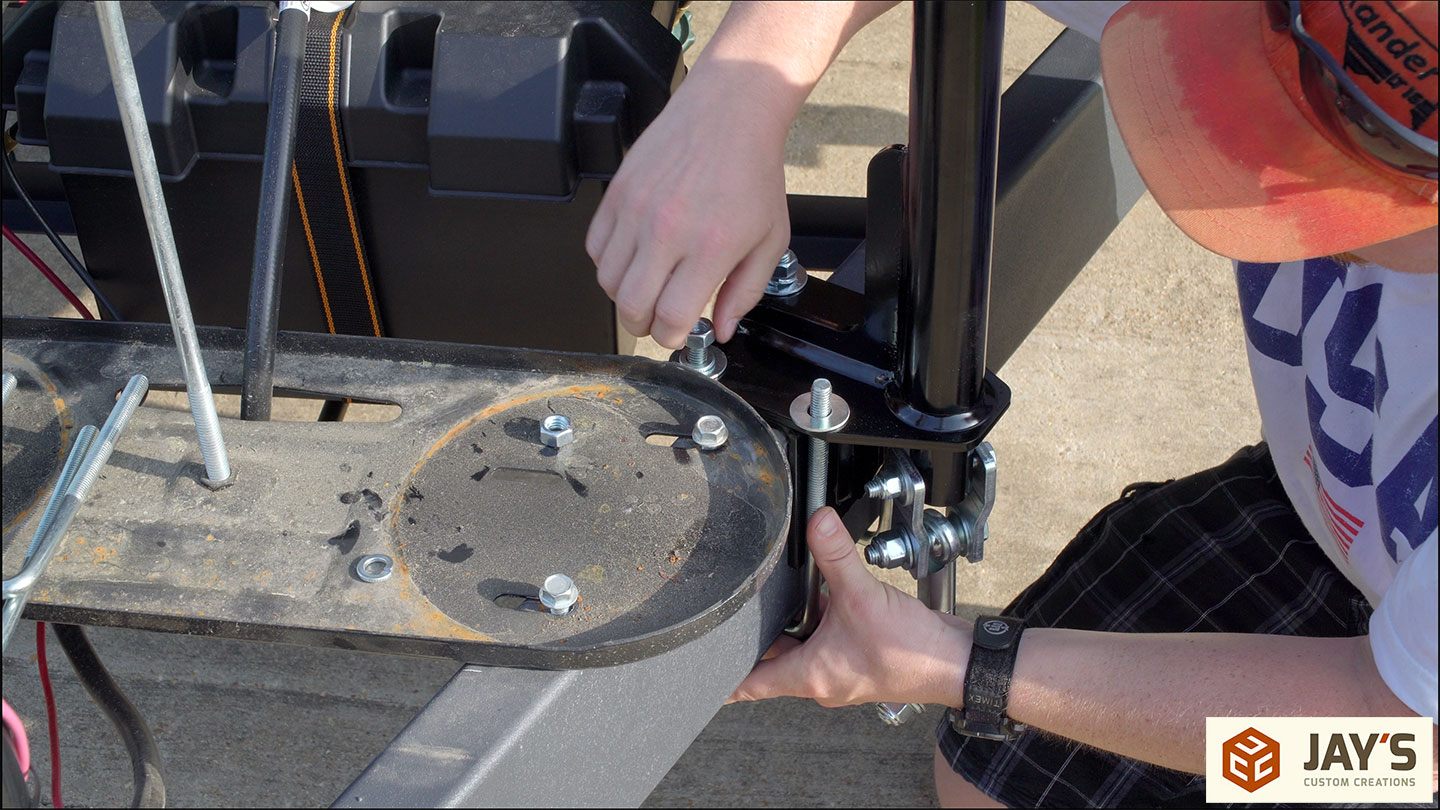

Step 11: Elevate the propane tray by adding washers or an oversized nut as a spacer so that the frame bracket U bolts can be inserted below the tray. This is where I should have just removed the tray completely.
This is about the time I also realized I would have to relocate the trailer breakaway switch. This is connected to the tow vehicle via a small cable. In the event that the trailer disconnects from the tow vehicle while driving the cable will trip the switch which activates the trailer breaks. I hope I never have to use this system.
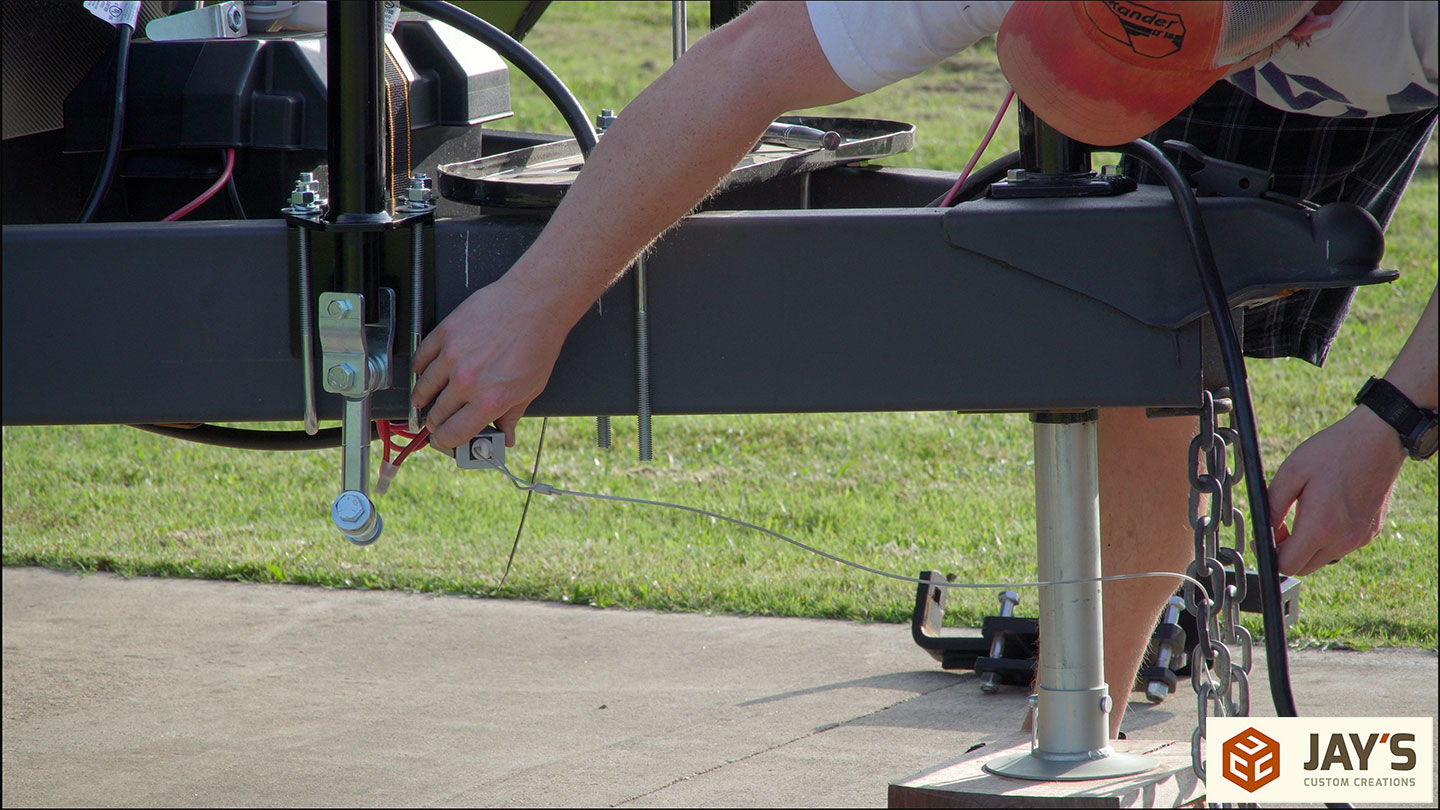
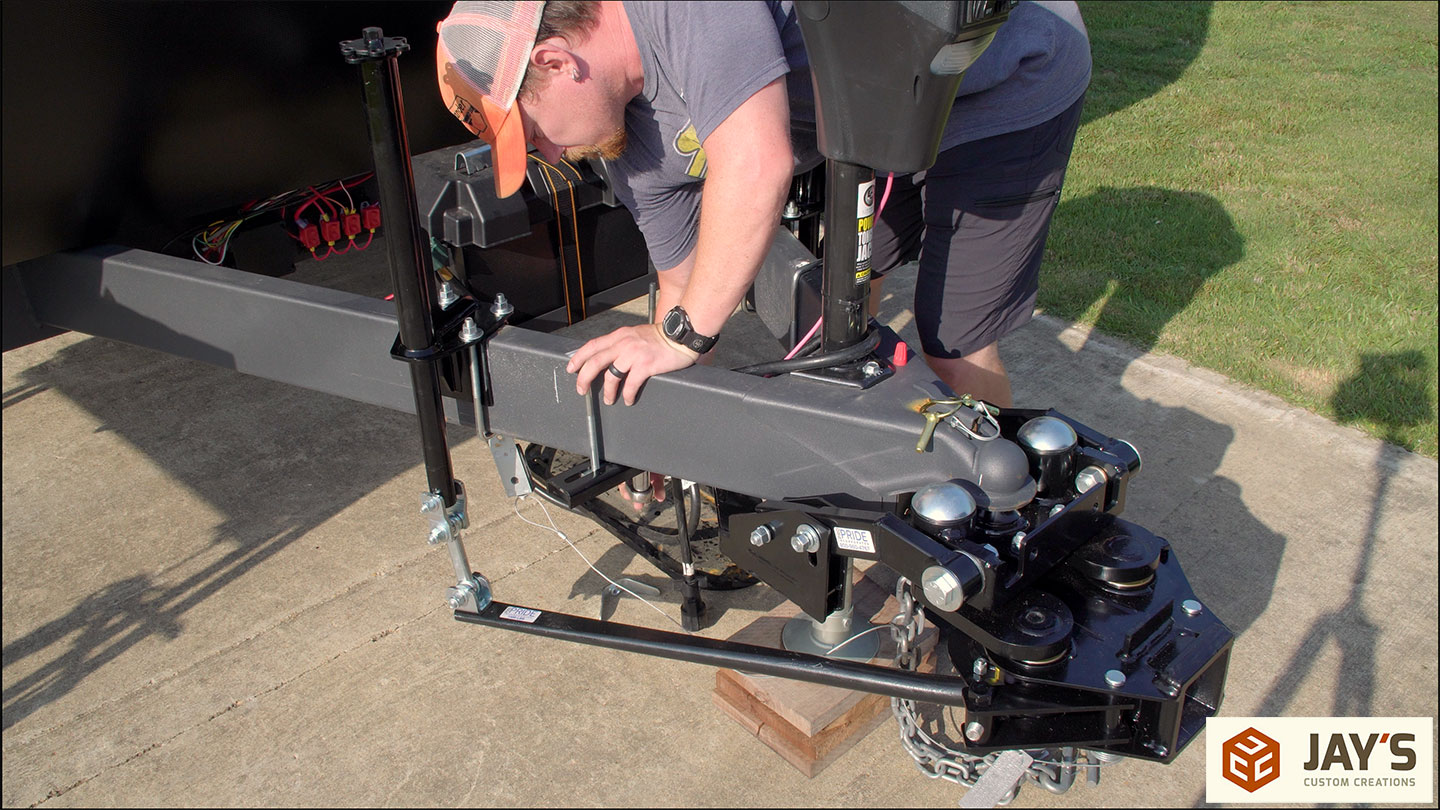
Step 12: Mount the frame bracket below the frame with the U bolts, a washer plate, and nuts. The U bolts should line up with the 22” mark on the frame. Just like with the weight distribution jacks, the instructions say this could end up 1-2” away from the 22” location.
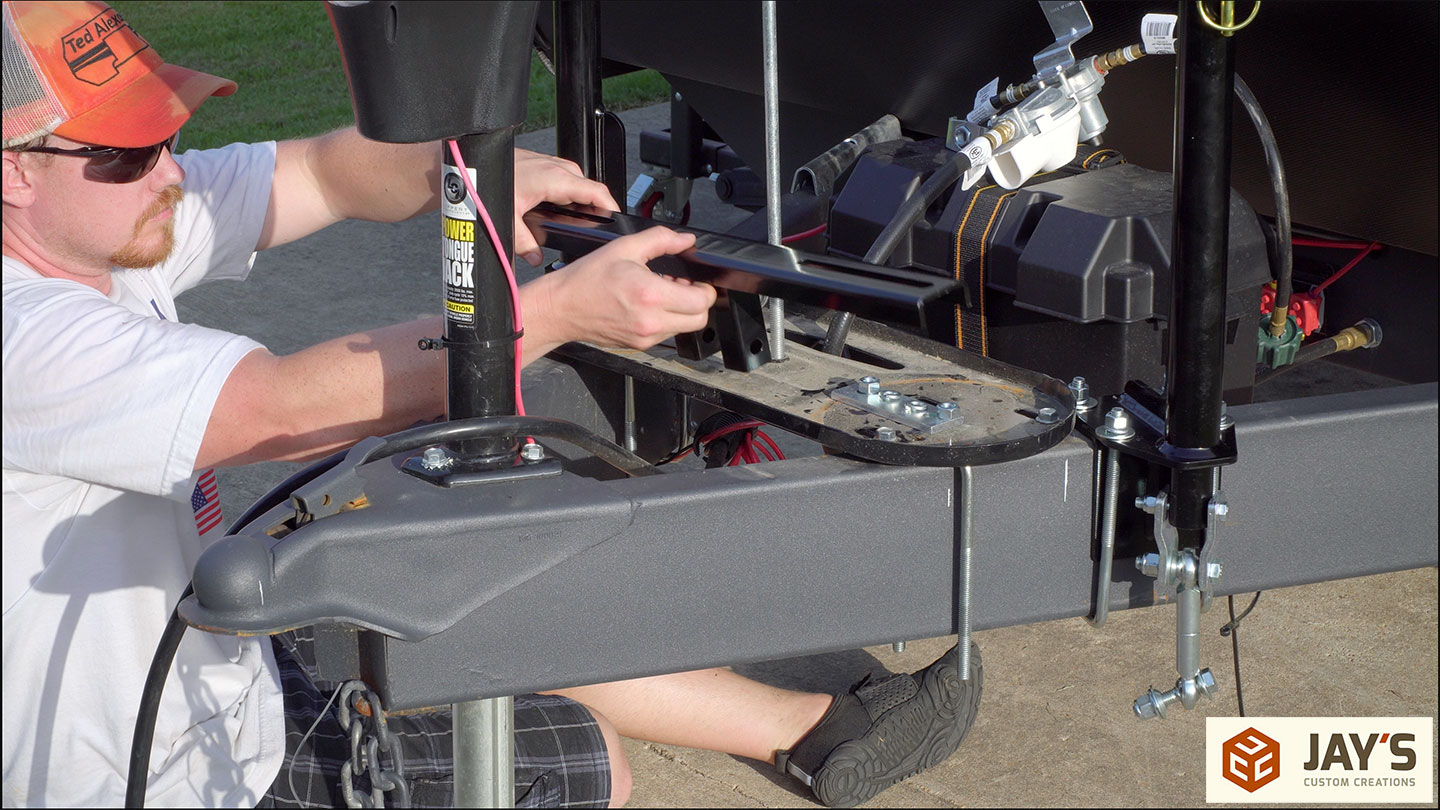

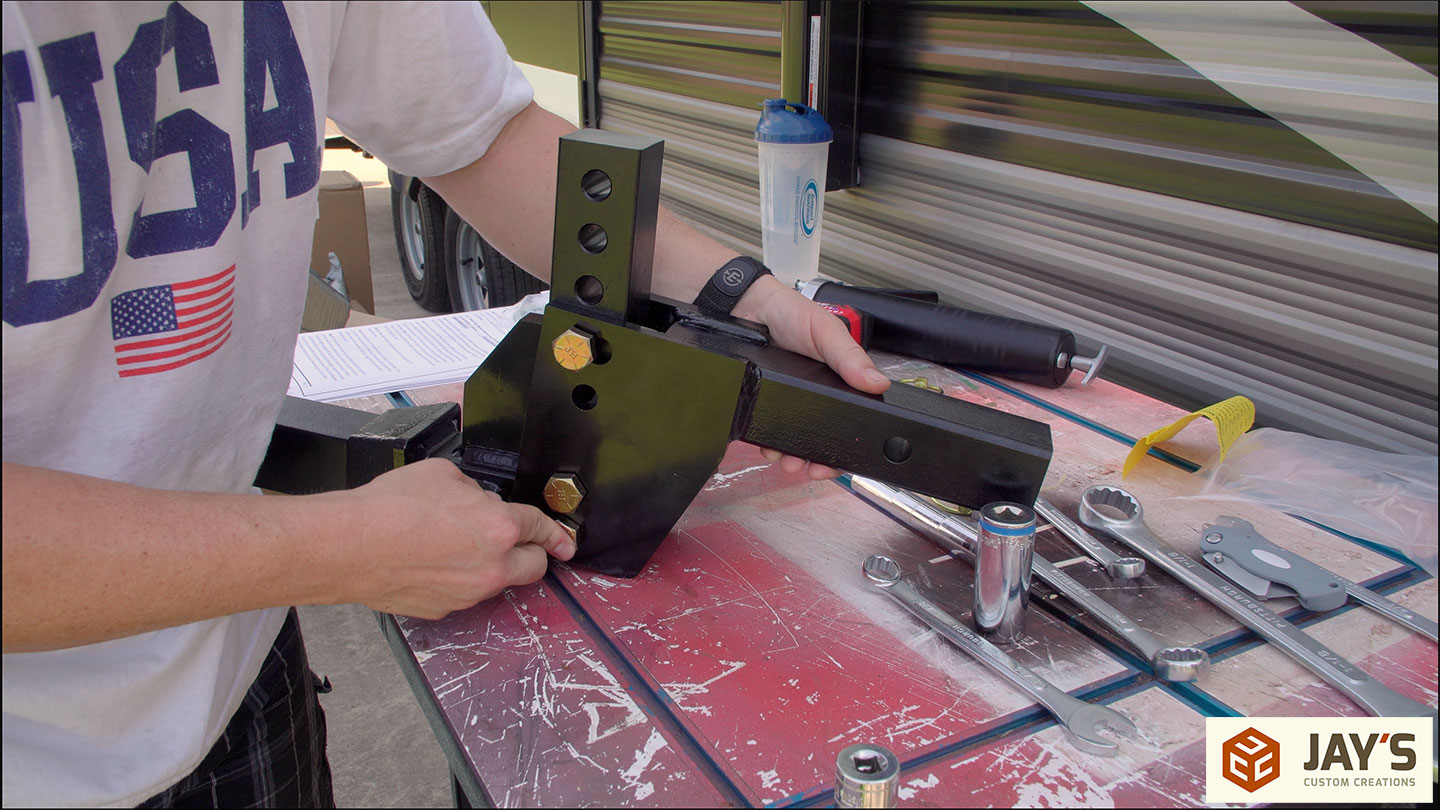
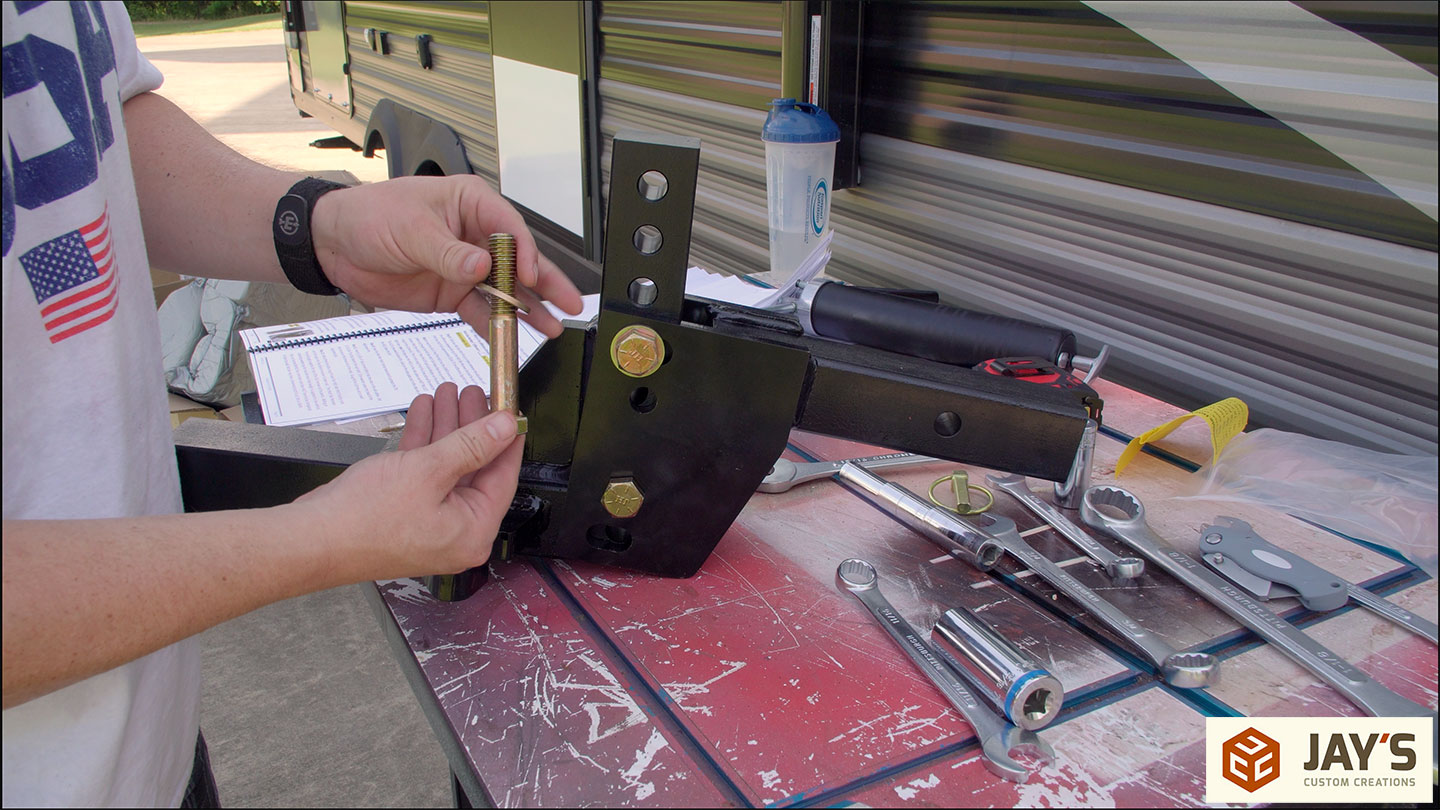
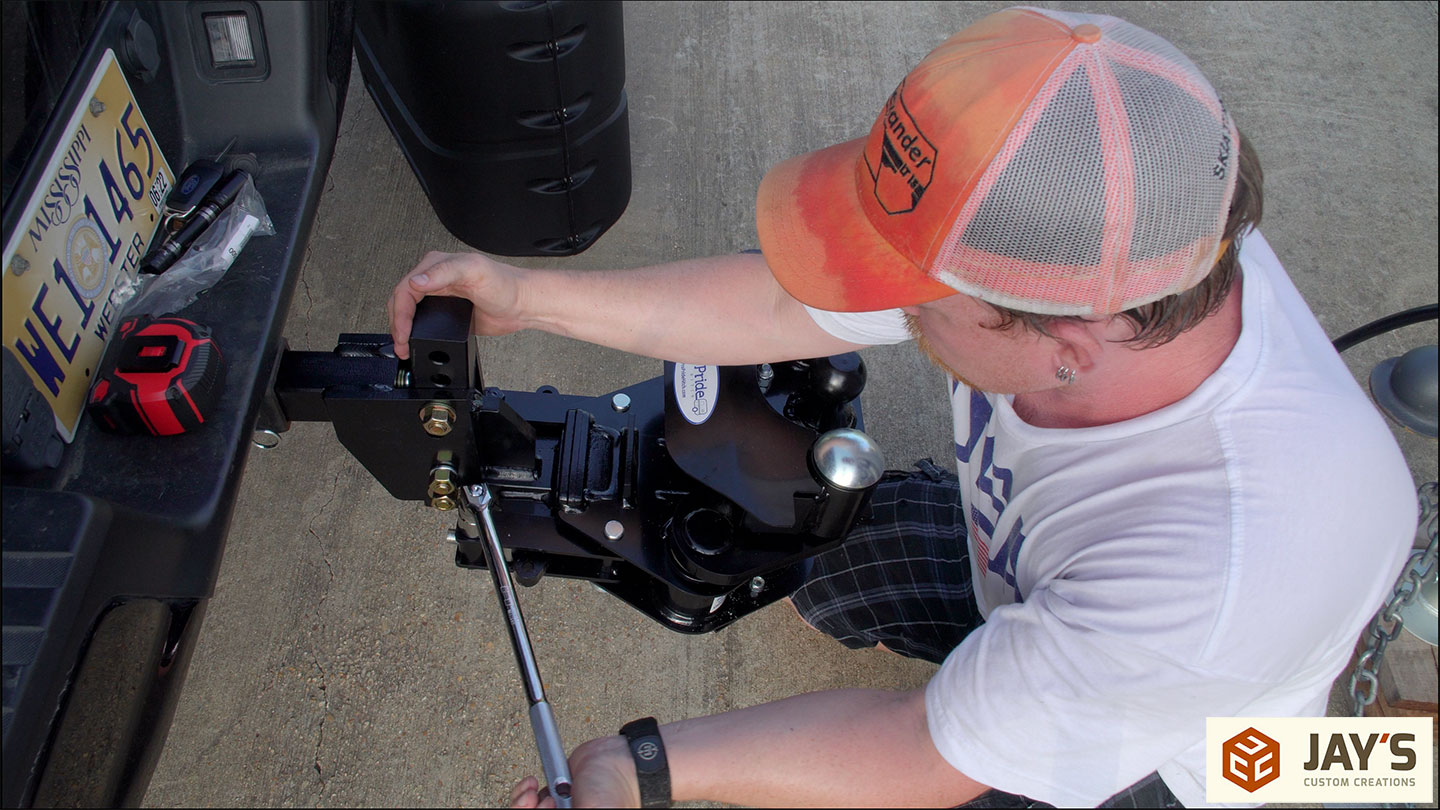
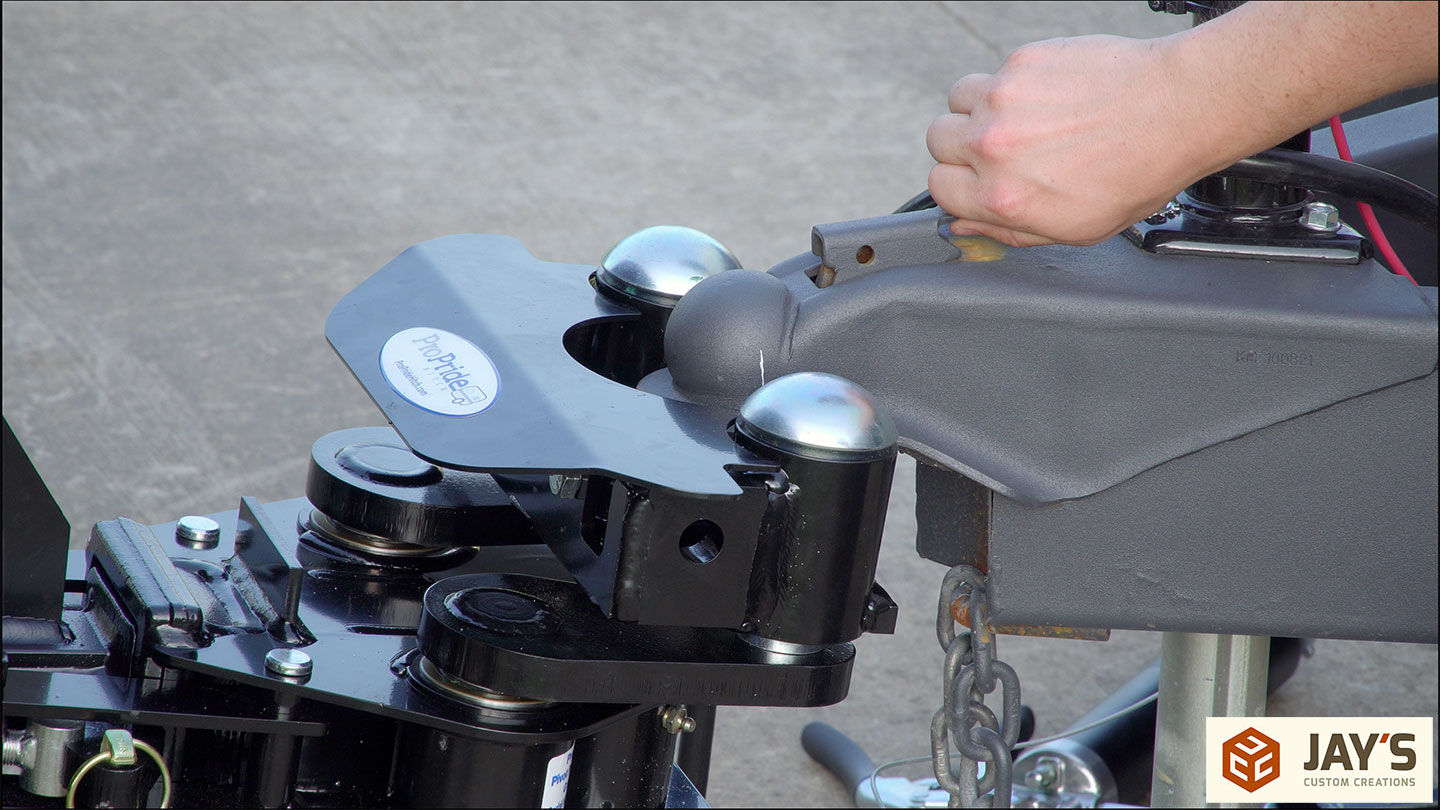
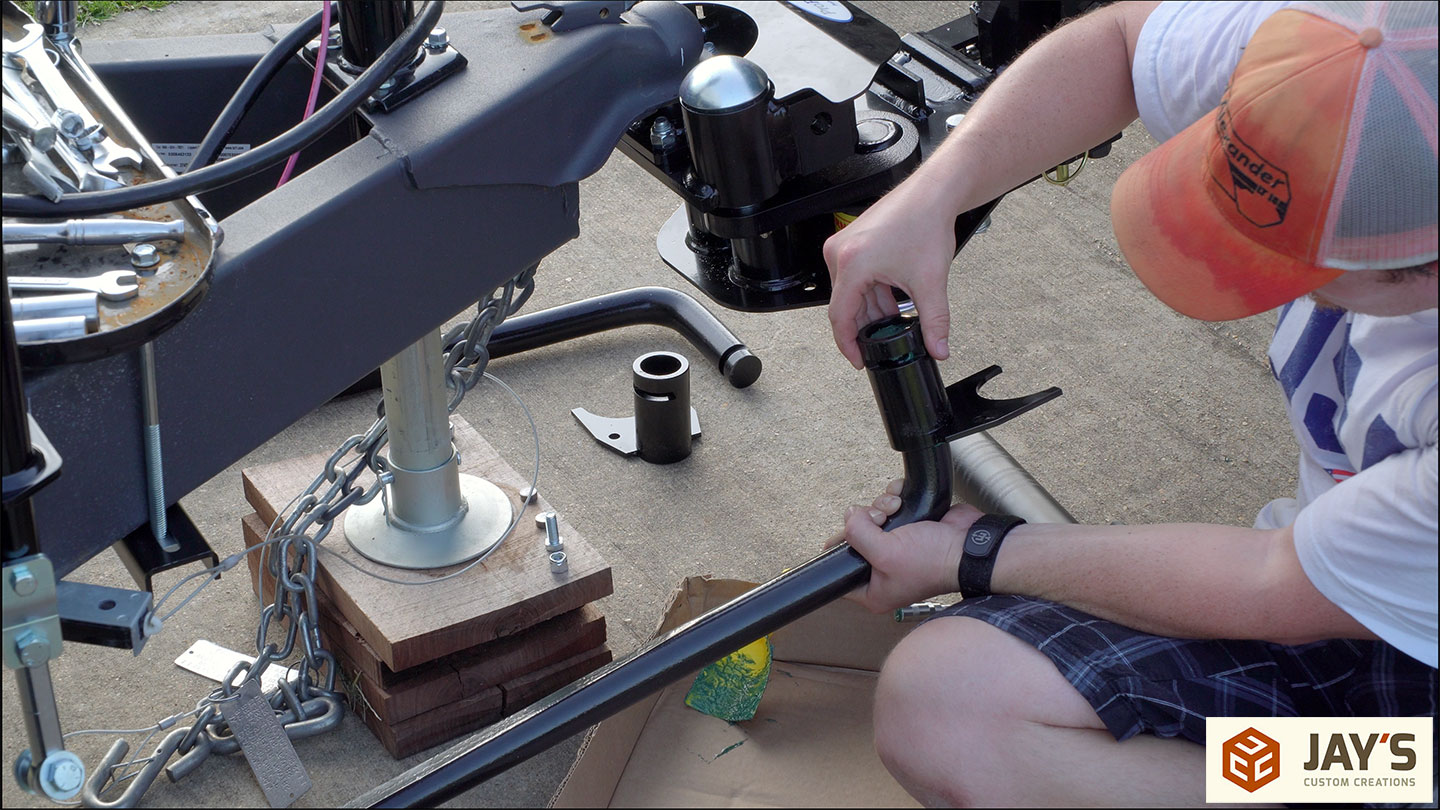
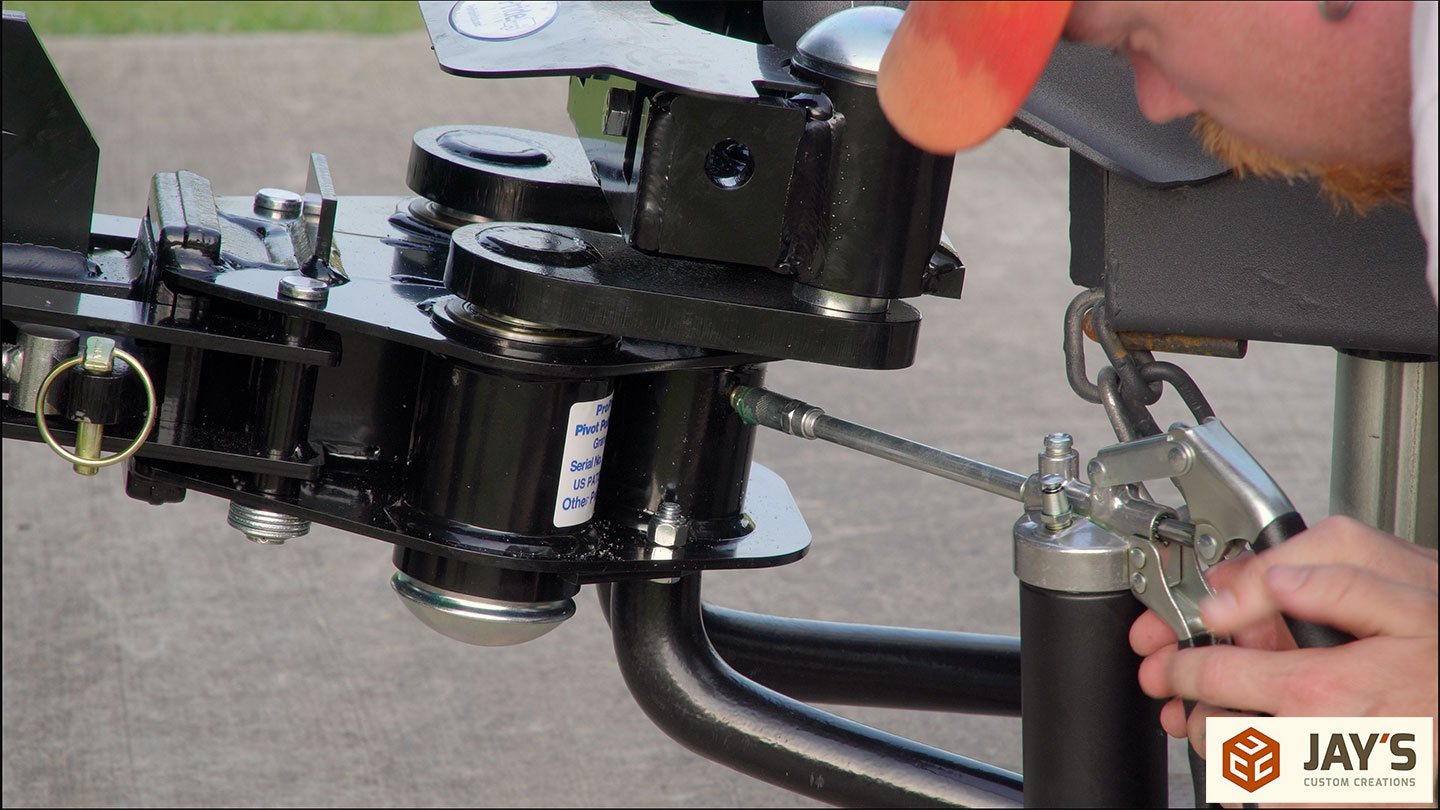
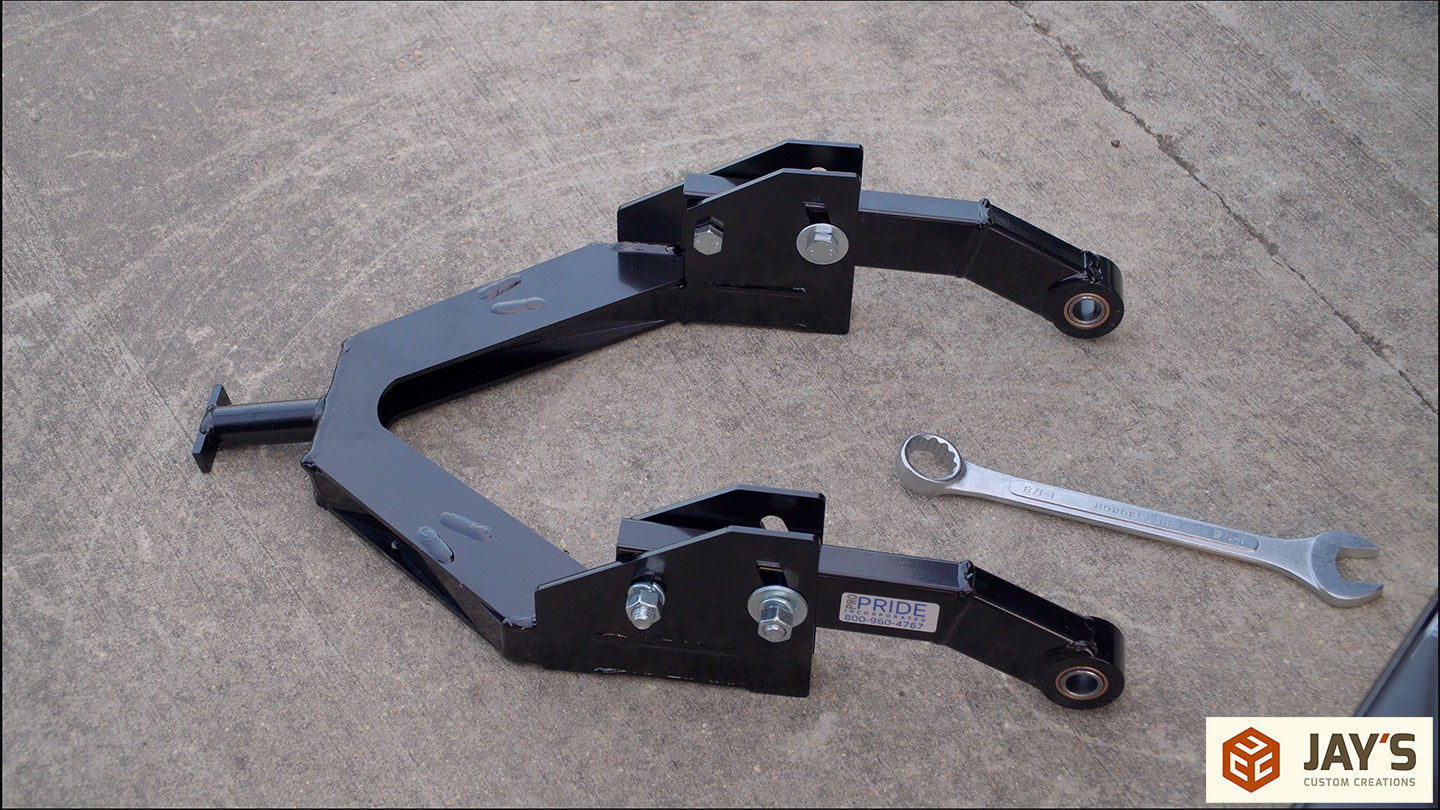
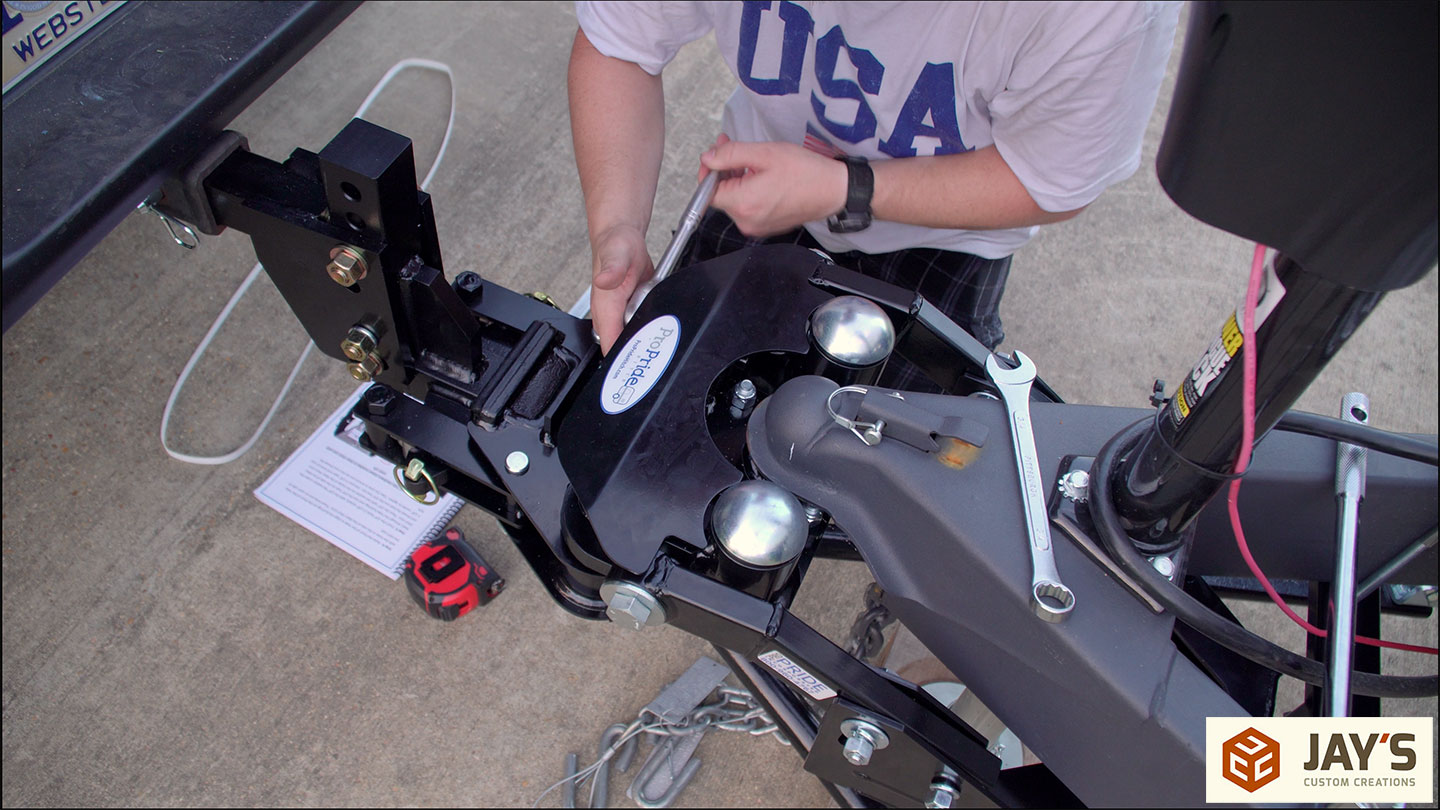
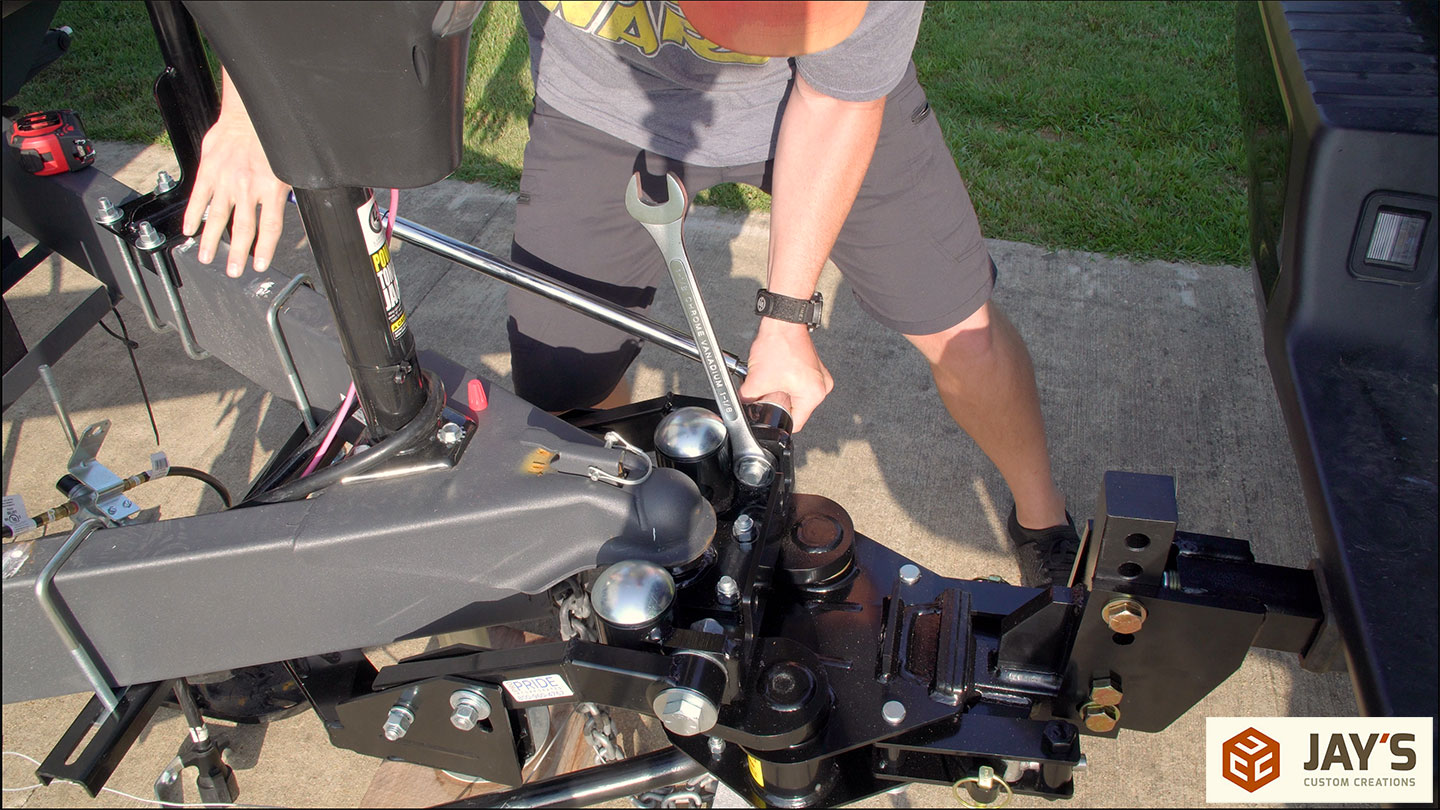
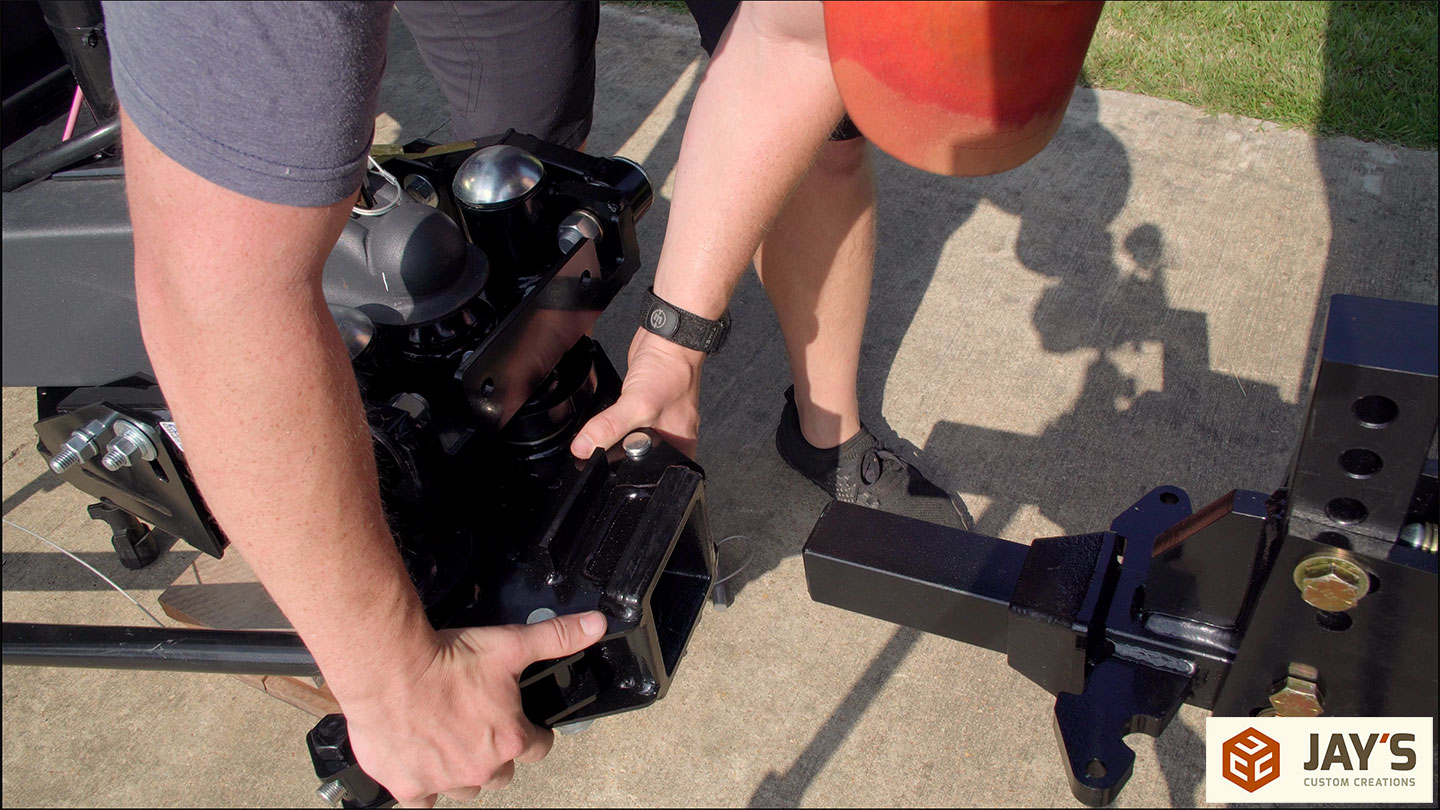
Step 13: Install the adjustable hitch bar (also called the stinger) in the tow vehicle and mount the main hitch unit onto the stinger. They likely named it a stinger because it looks like the truck now has a stinger like a wasp but I really think they named it a stinger because, like me, you will walk into it and bruise your shin a good bit. Holy moly, does that sting!


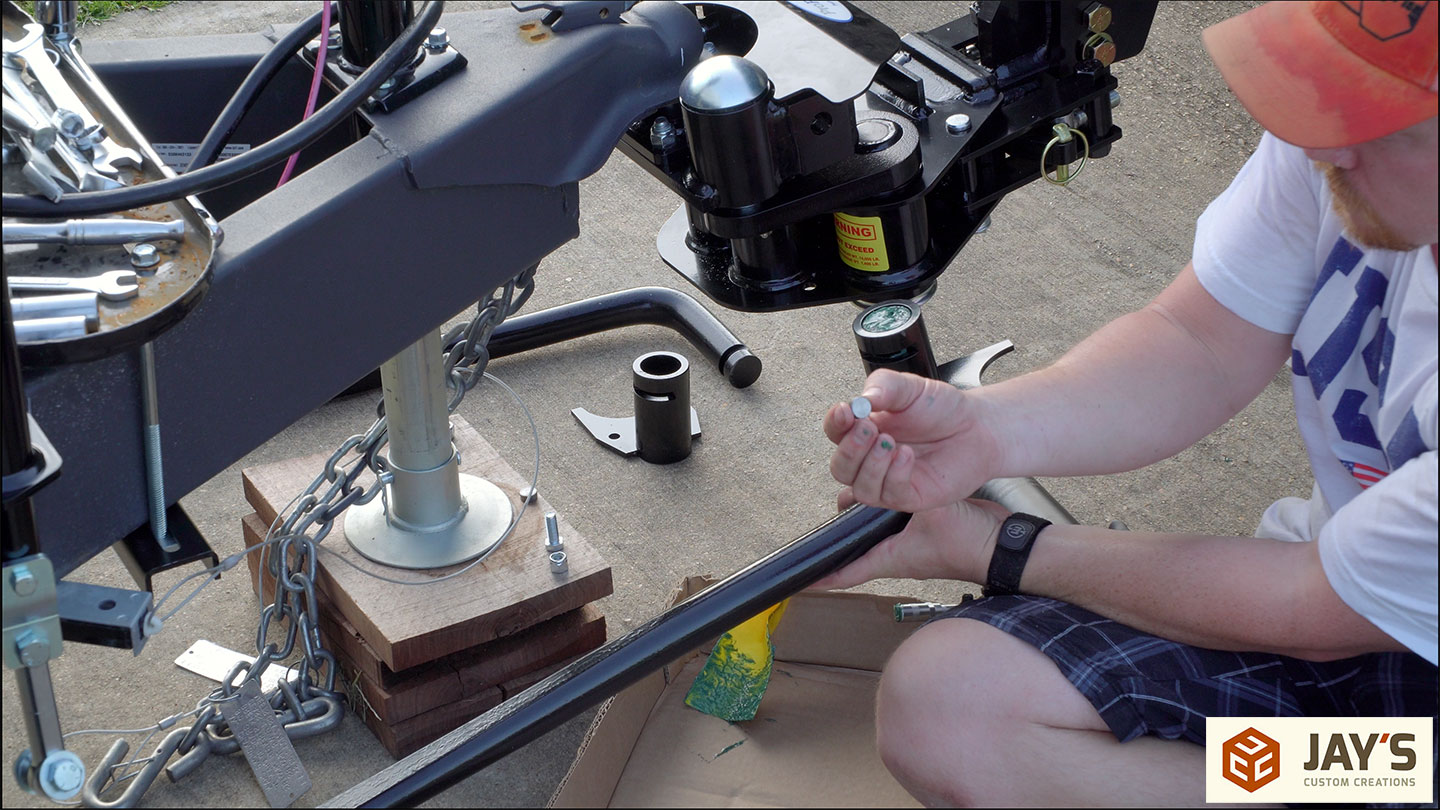
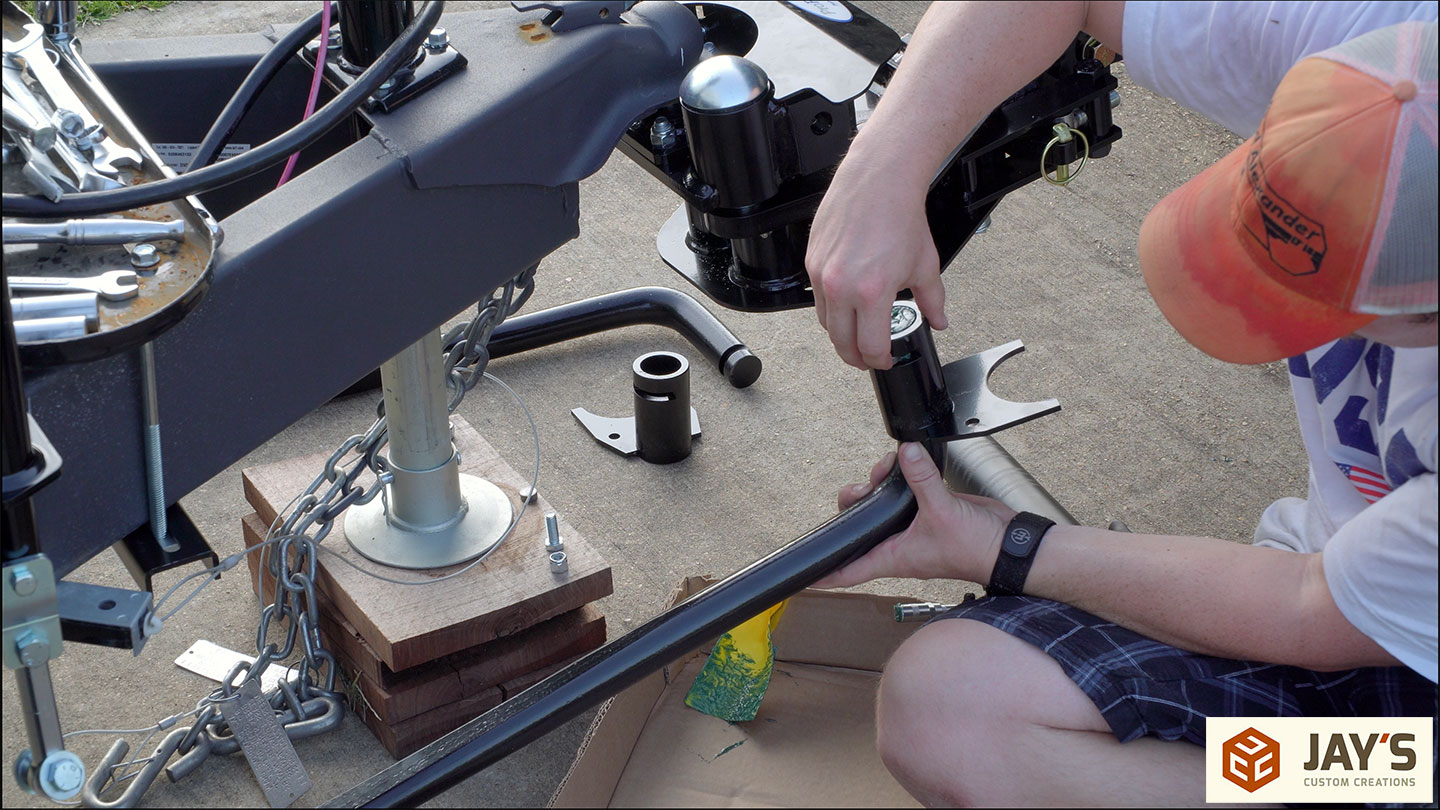
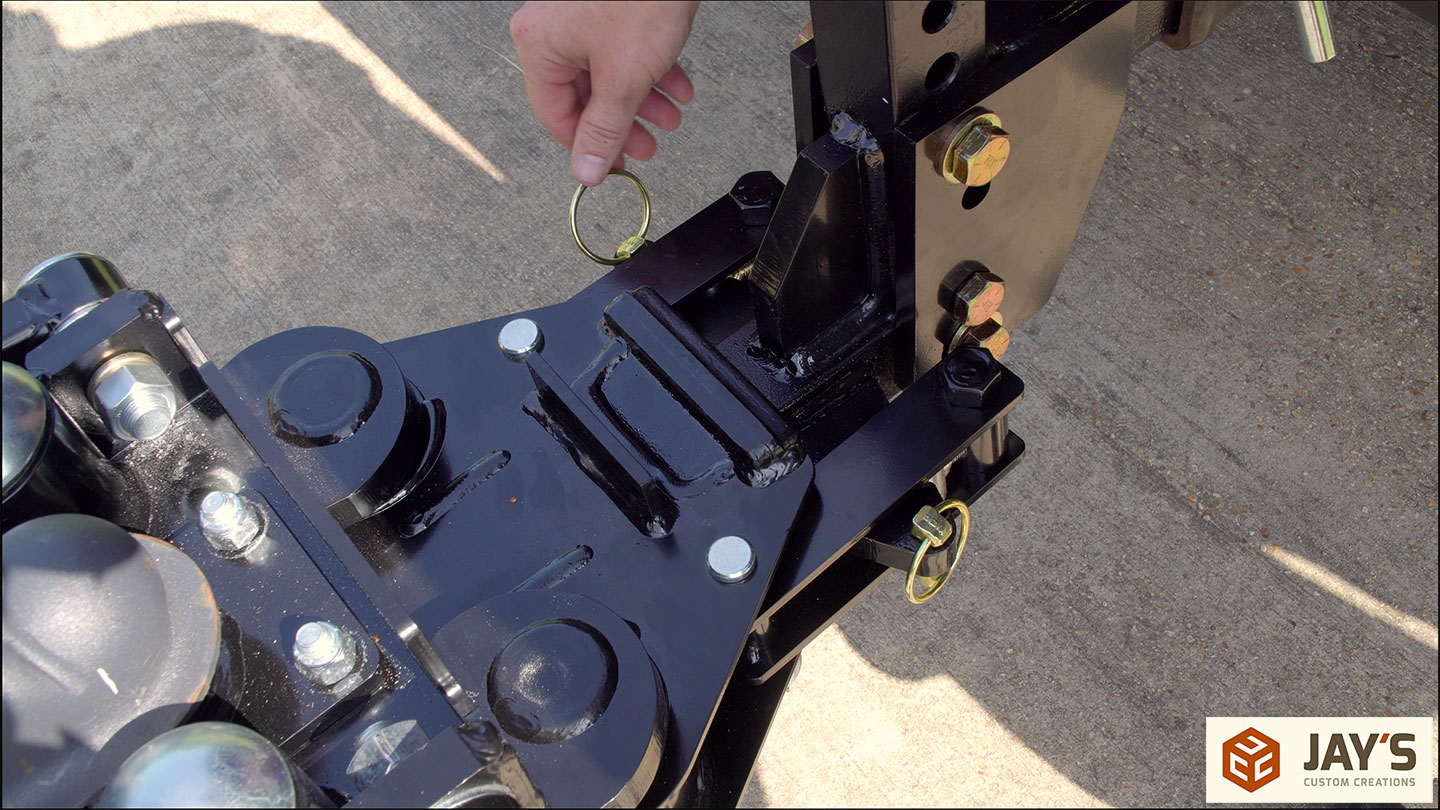
Step 14: Secure the main hitch unit to the stinger with the over-the-center latches. The tightness of these latches is adjusted by screwing the latch in or out by half of a revolution. The latches are secured with a little mechanical advantage provided by an included breaker bar and socket.
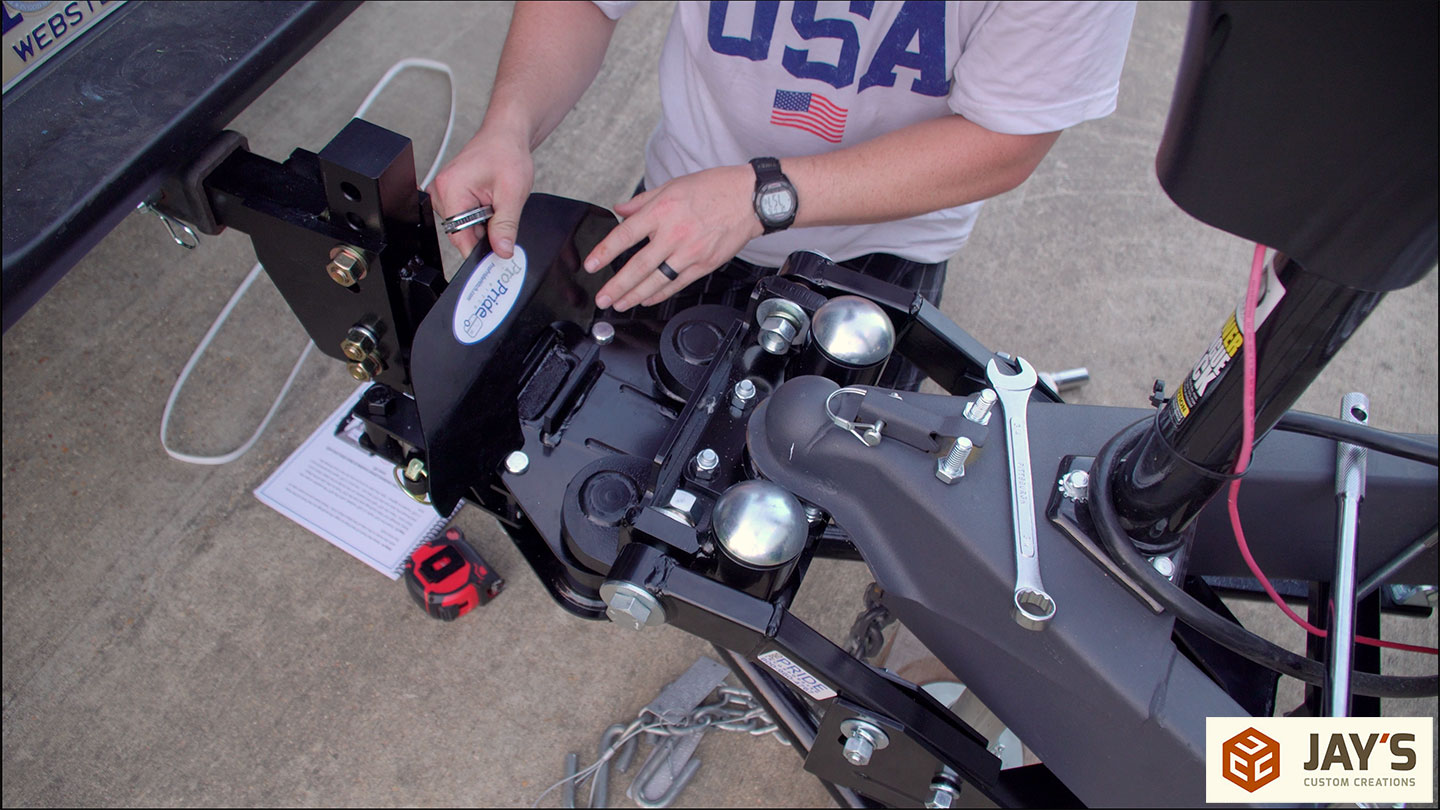
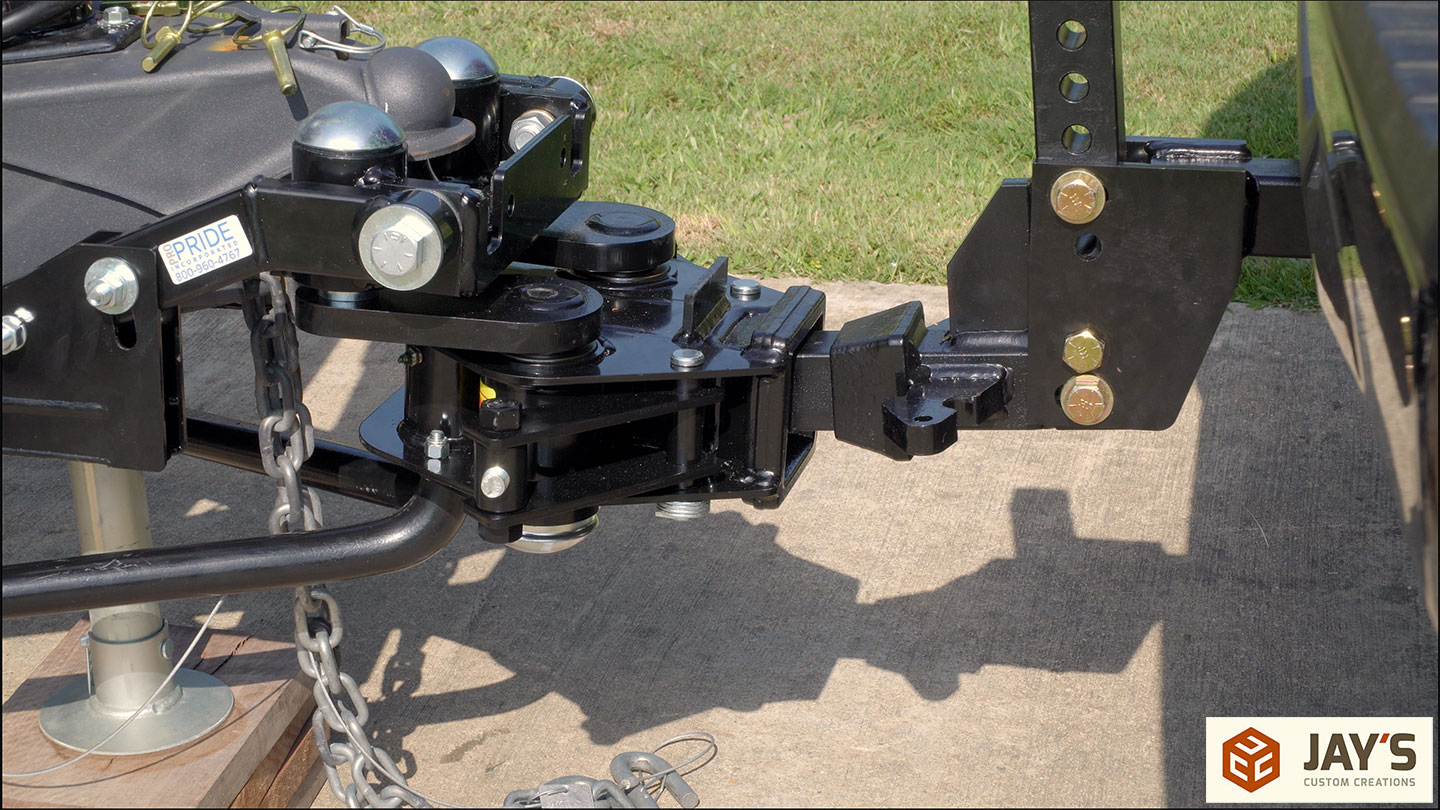
Step 15: Distract yourself by seeing just how far this hitch can twist. Don’t quote me on this but I think I heard that this hitch can allow you to turn 87 degrees if necessary.
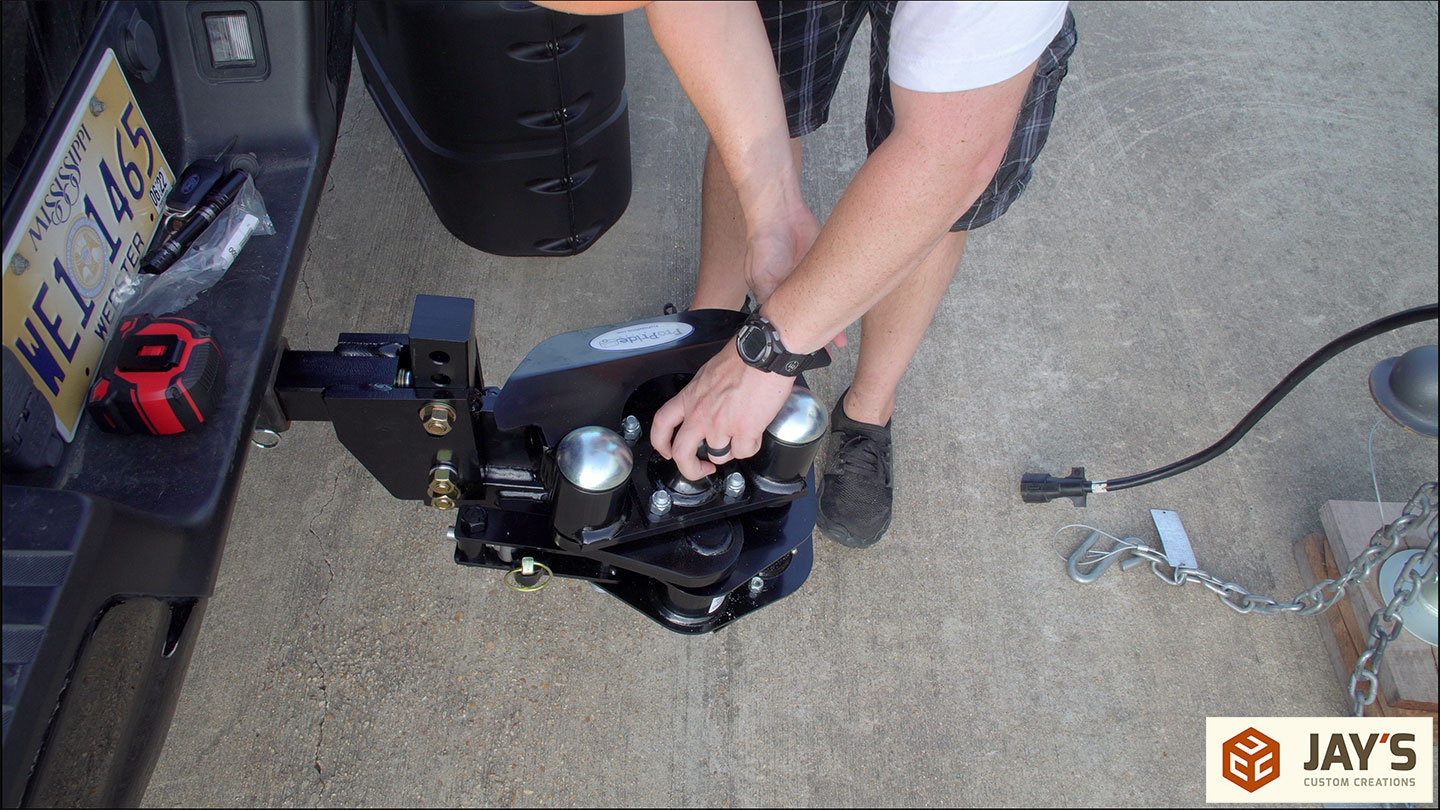
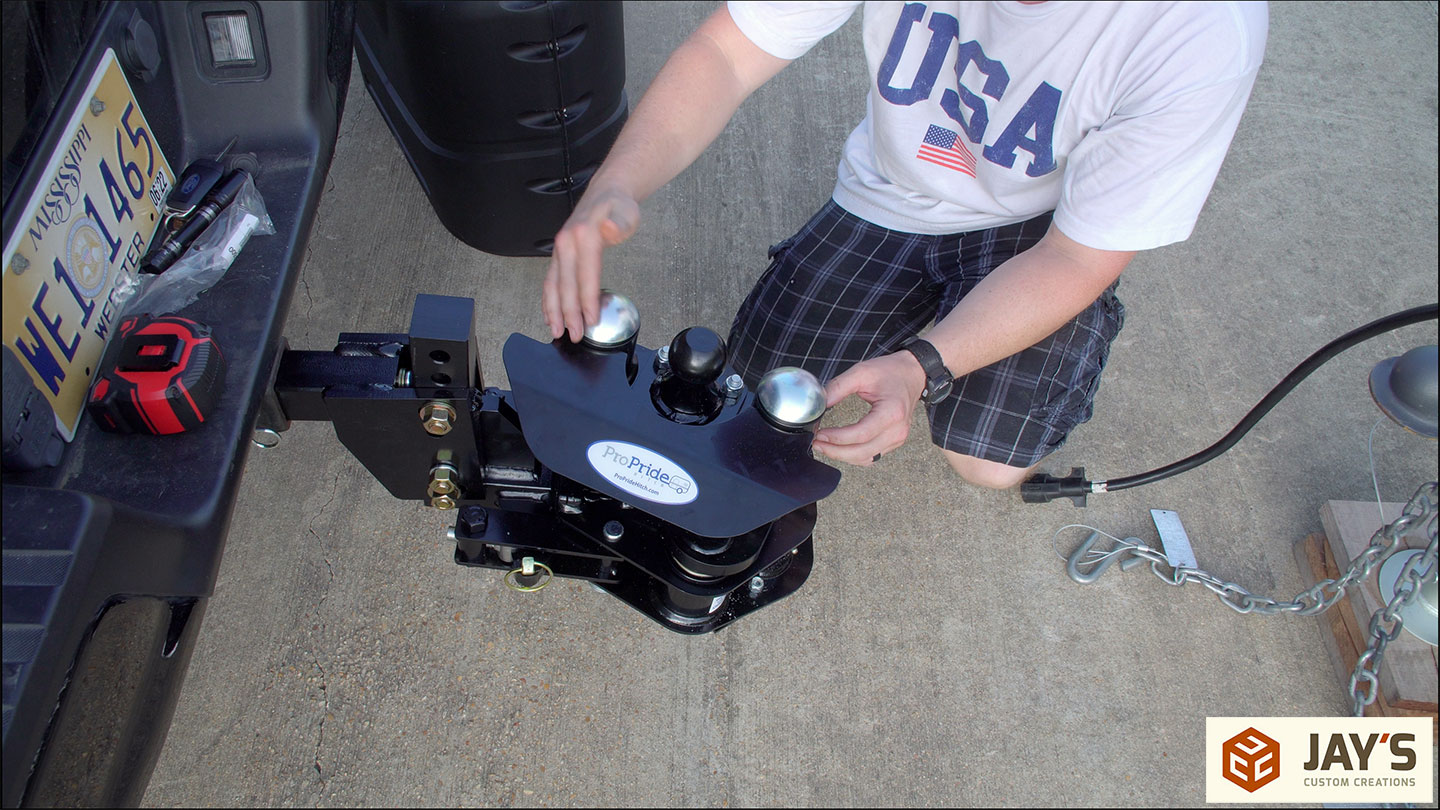
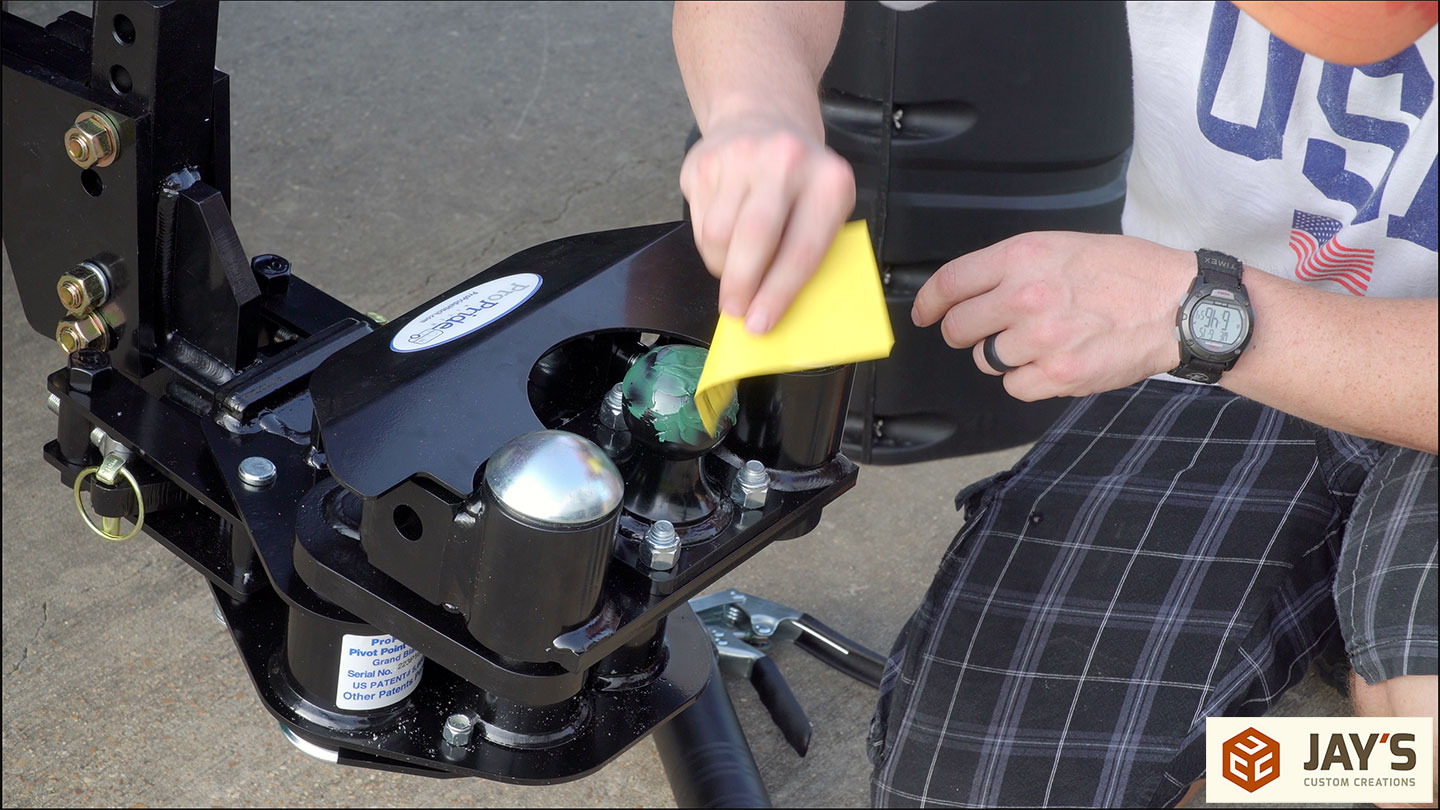
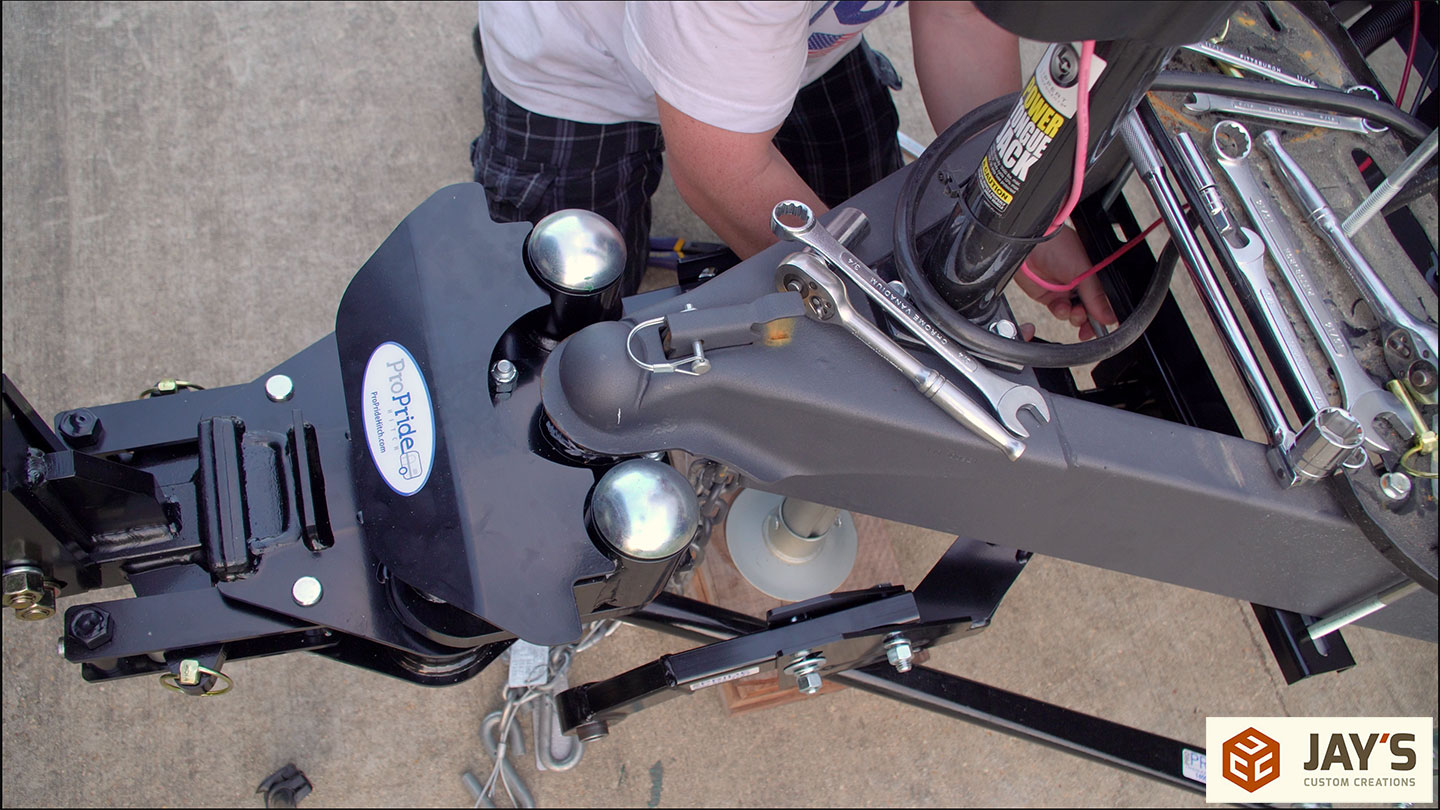
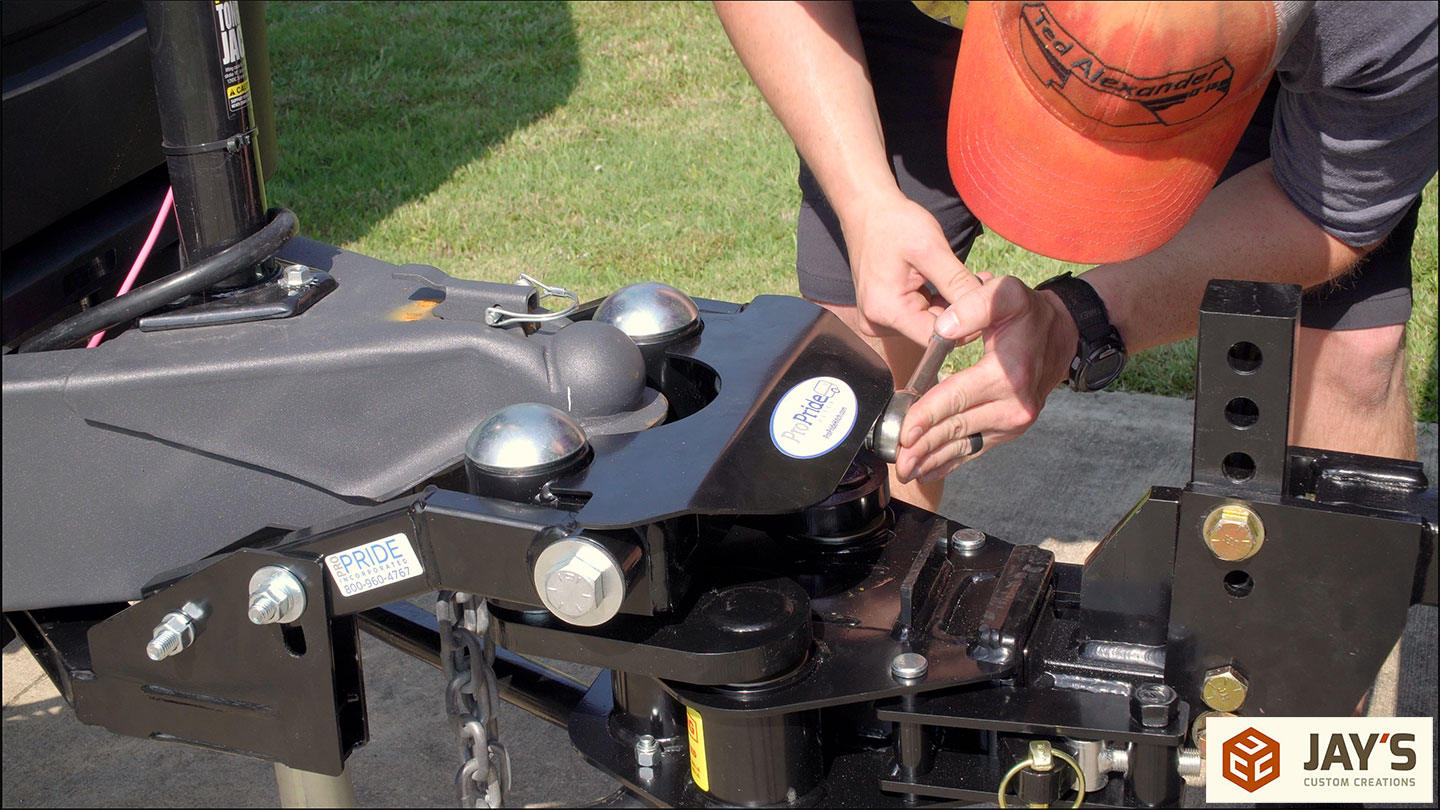
Step 16: Grease the ball. The included hardware package cards are just the right size for this. Faster than finding a glove and faster than washing your hands after touching the grease.
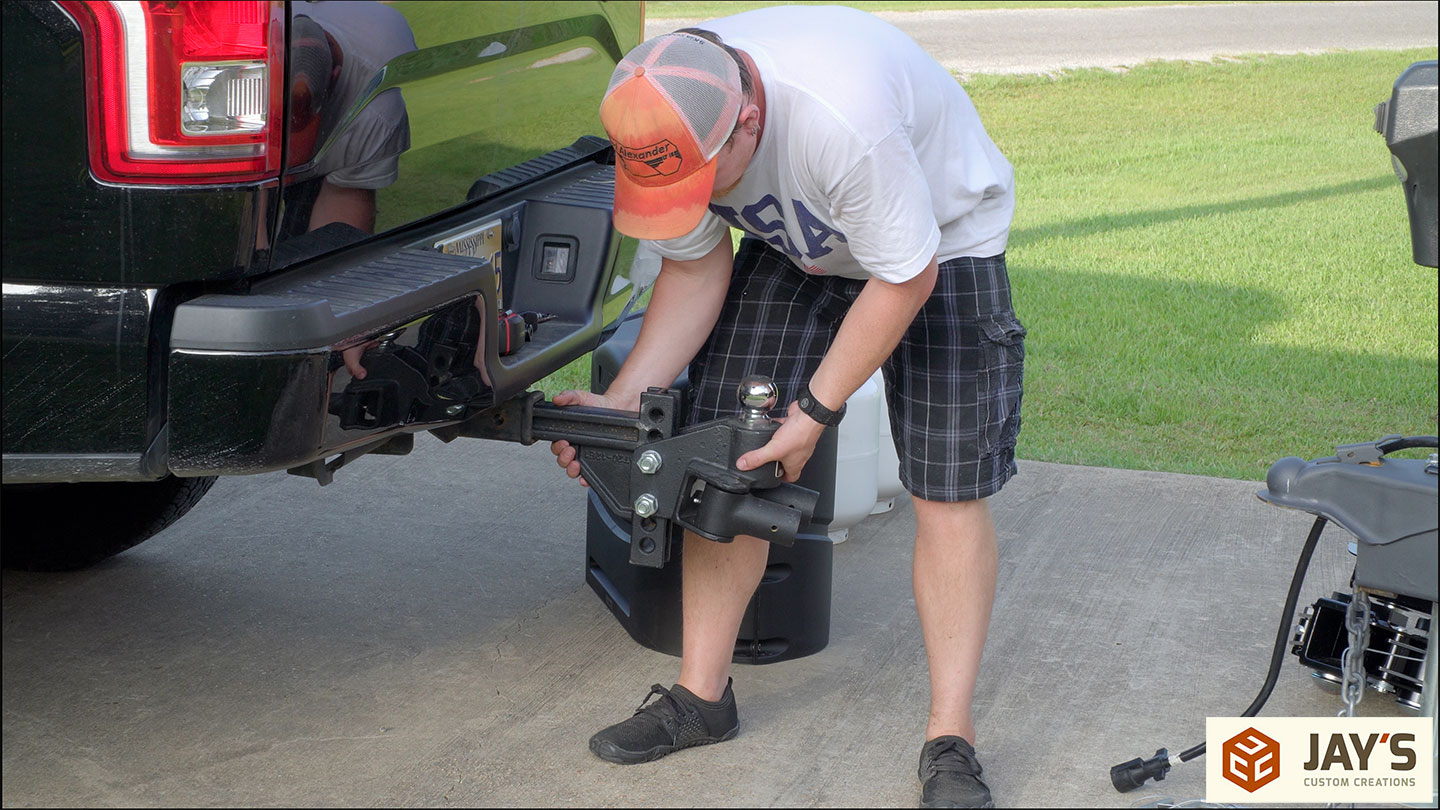
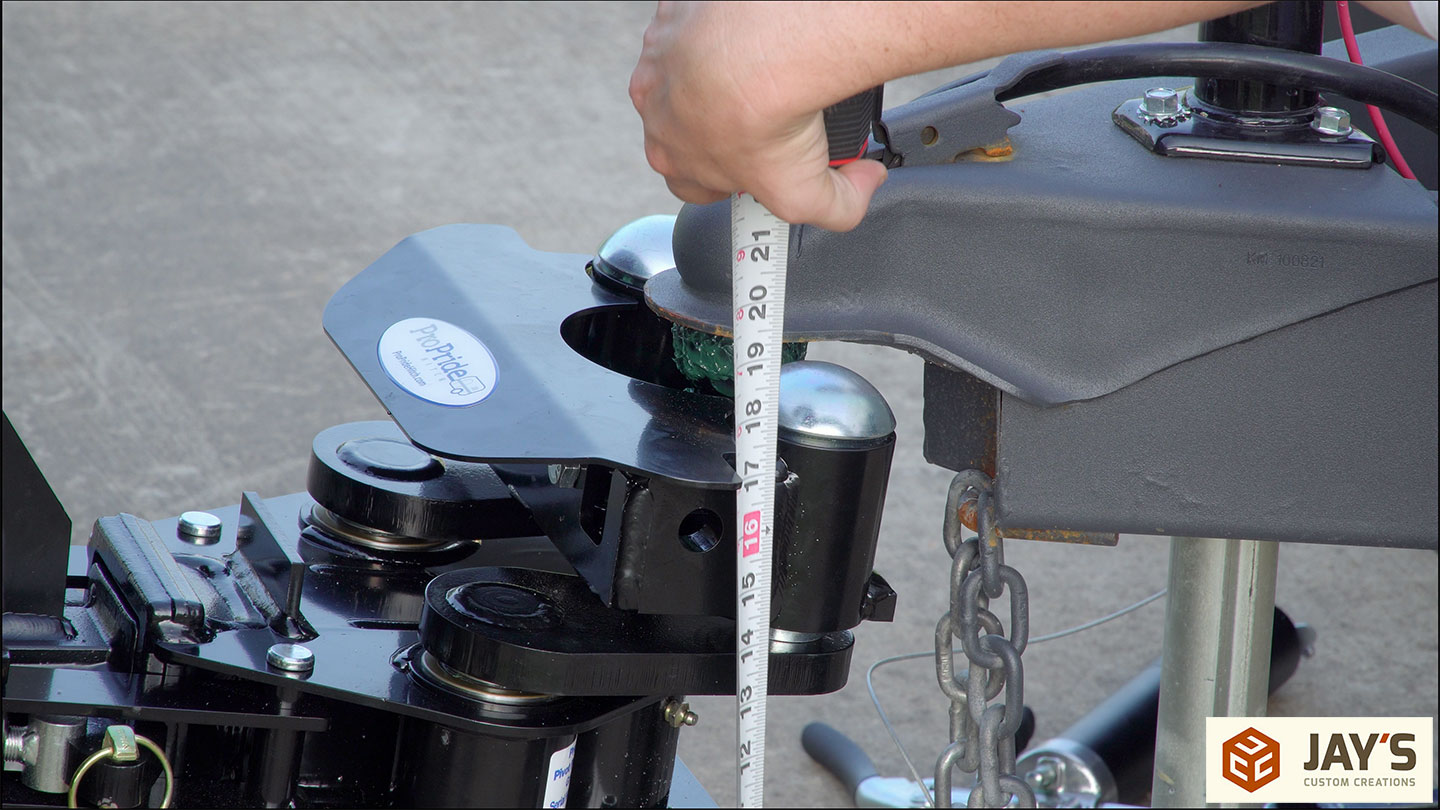
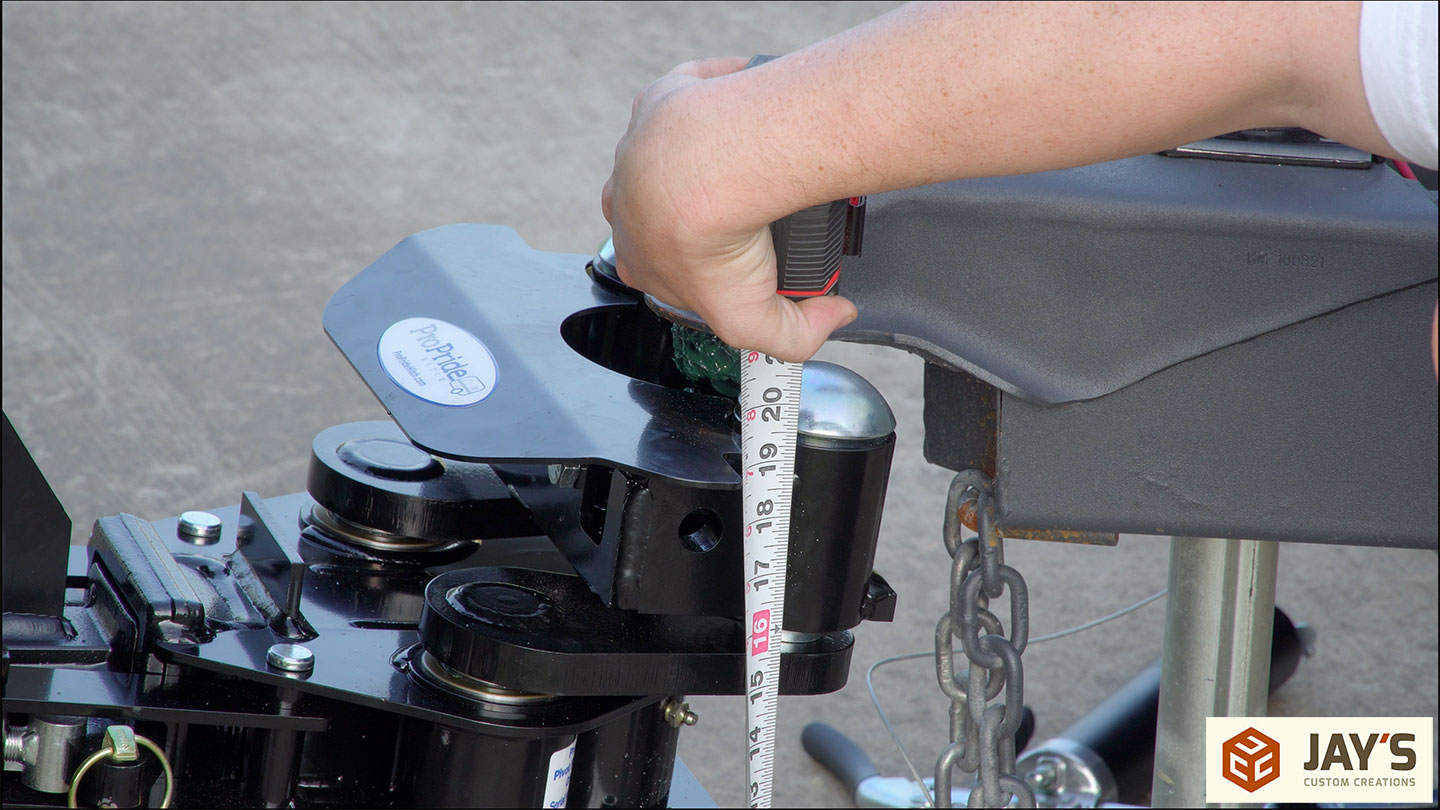
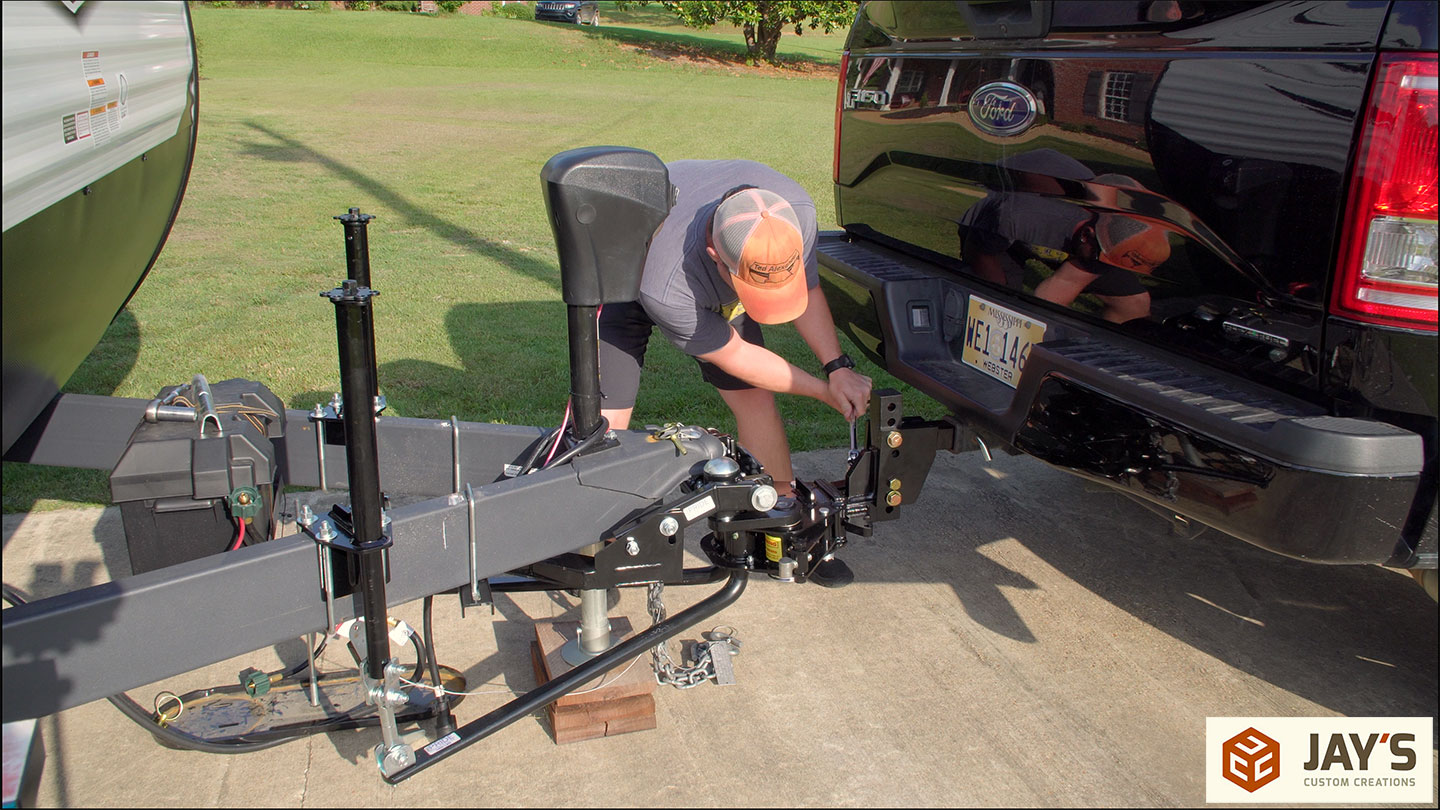
Step 17: Back the ball under the trailer coupler like normal and lower the trailer as much as possible without putting weight on the tow vehicle. A before and after measurement will be handy here. Once set, latch the coupler onto the hitch.
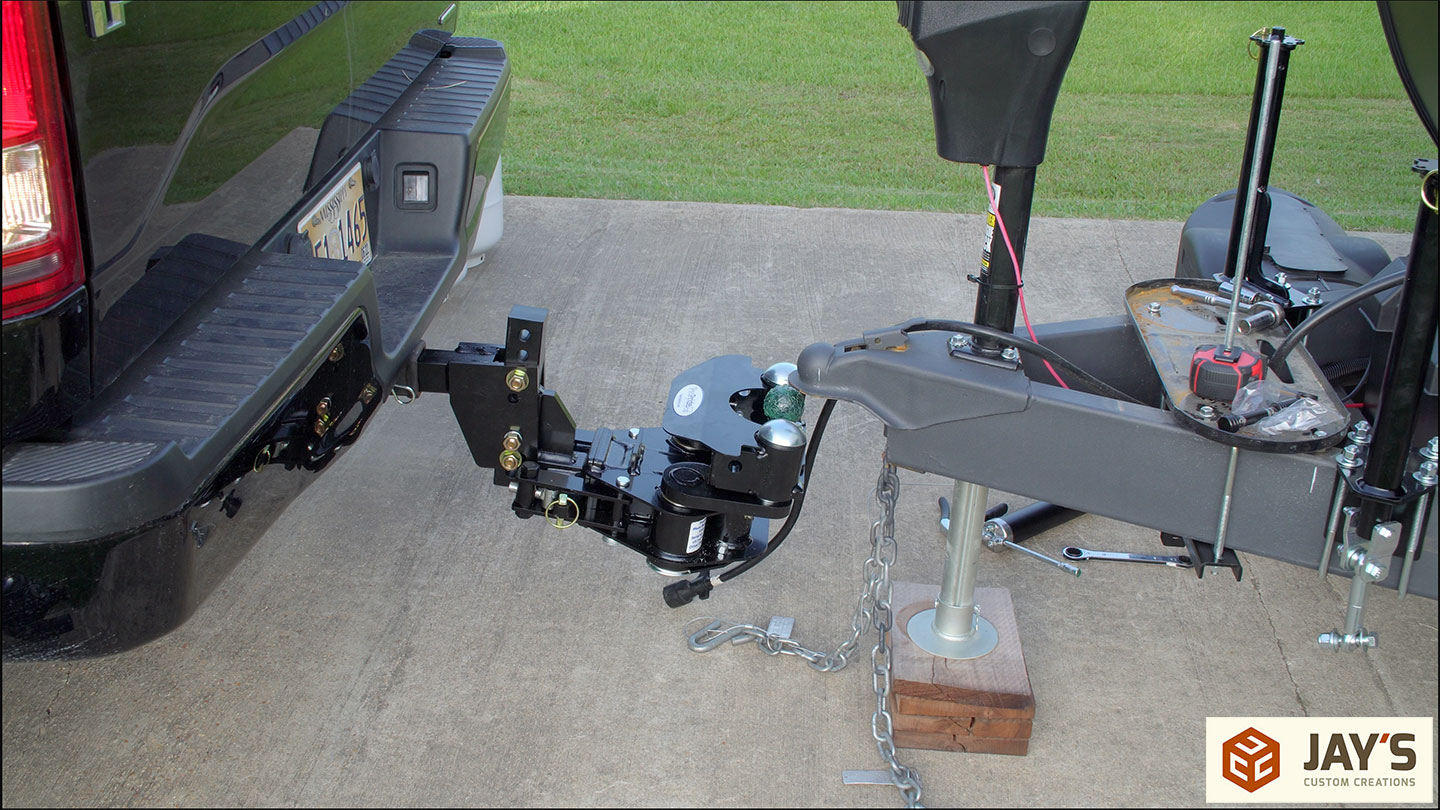
Step 18: Relish in the joy of finally being able to lower the tailgate while connected due to the now greater distance of the ball to the bumper.
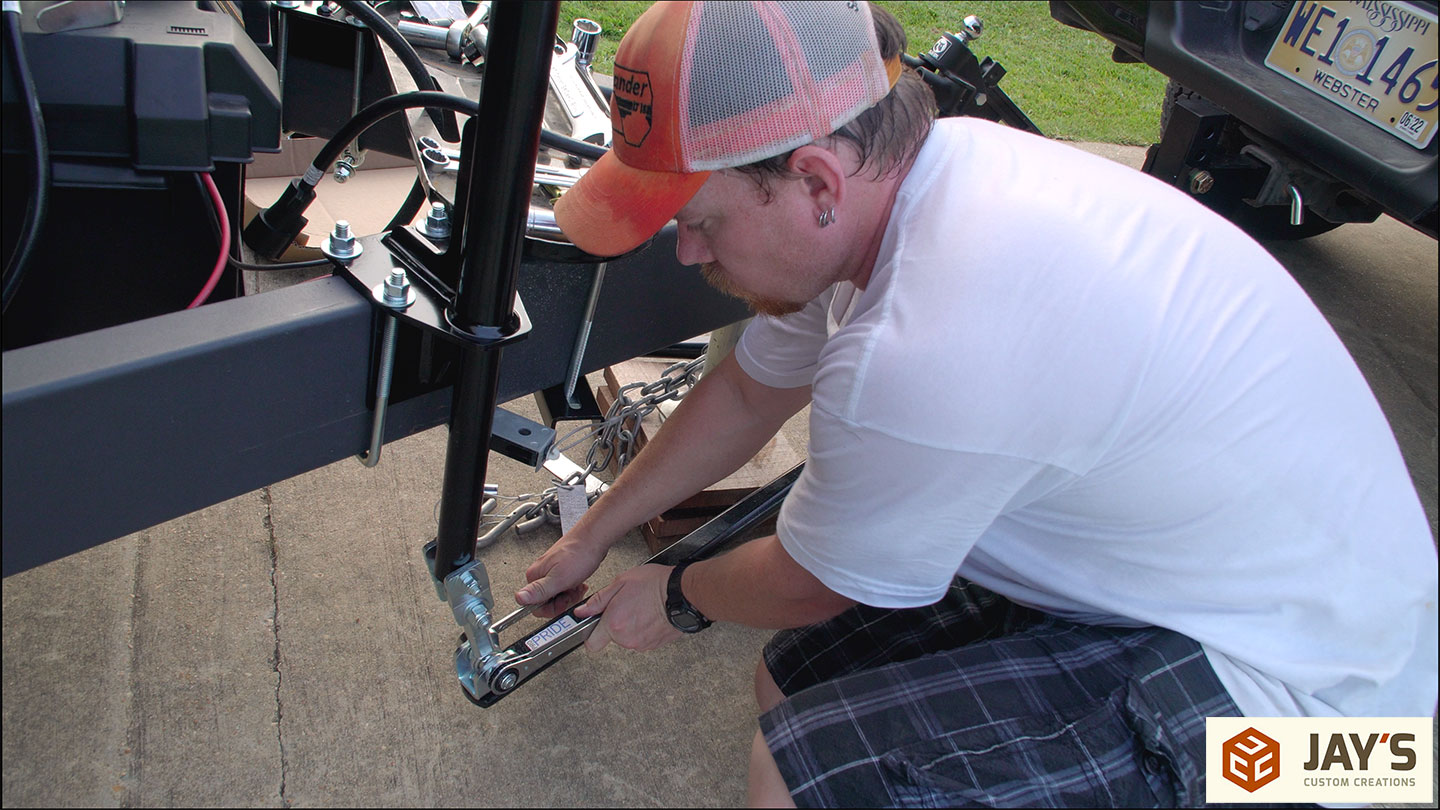
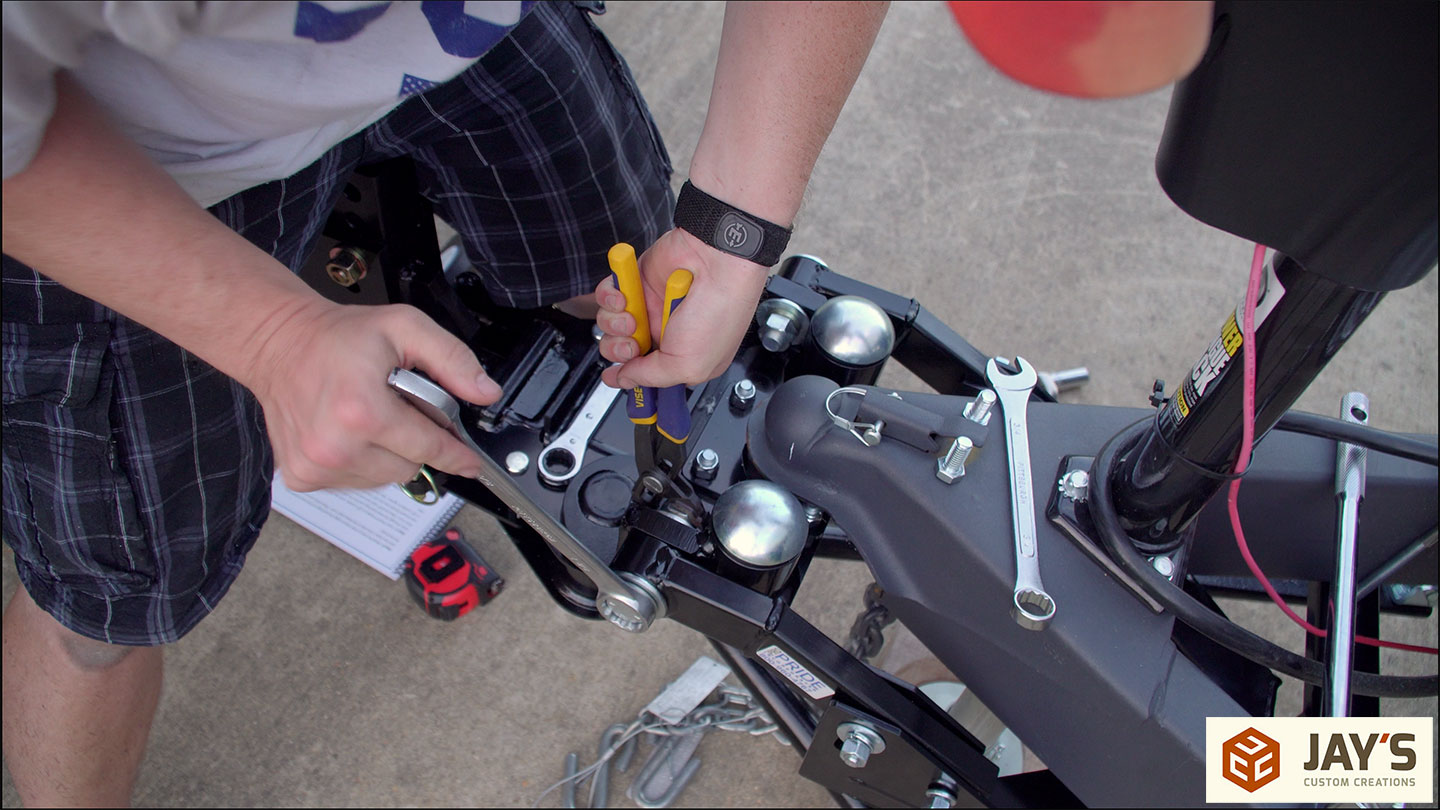
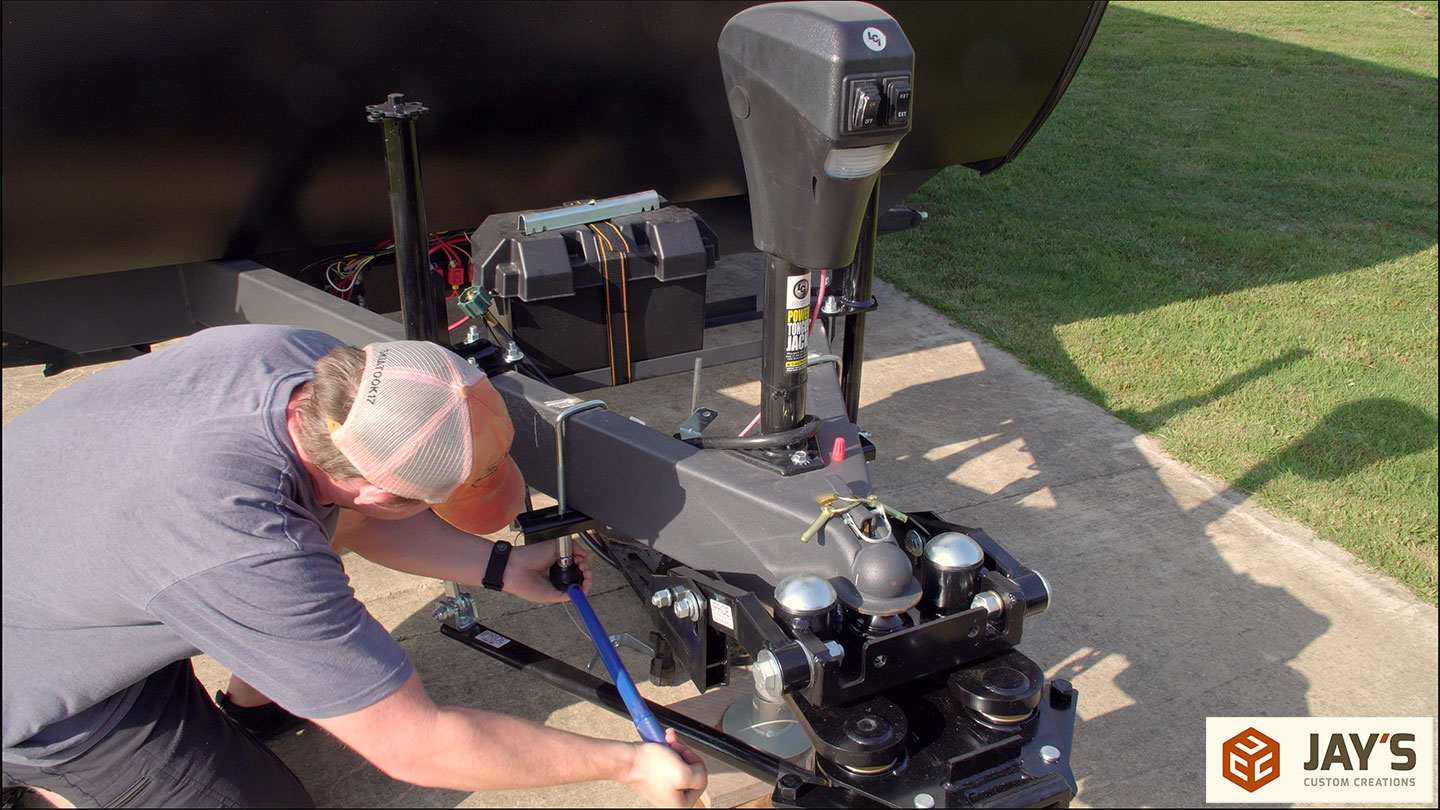
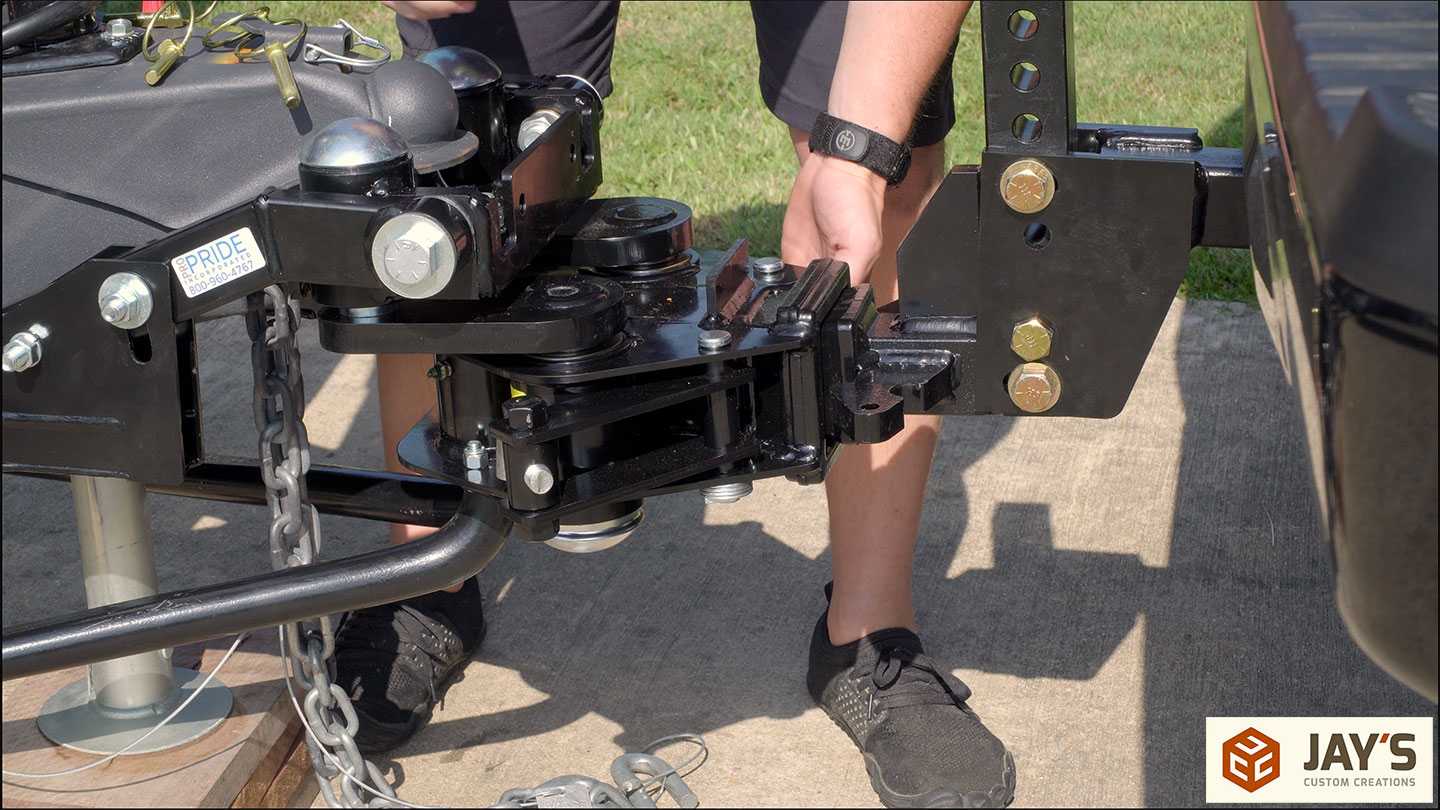
Step 19: Install the weight distribution arms by first removing the spring bar inner bushing from the bottom of the main hitch unit. Grease the end of the spring bar. Insert the spring bar into the bushing and hold it in place with the little retainer disk. And finally, insert the bushing back into the main hitch unit and secure it with the bolt and nut.
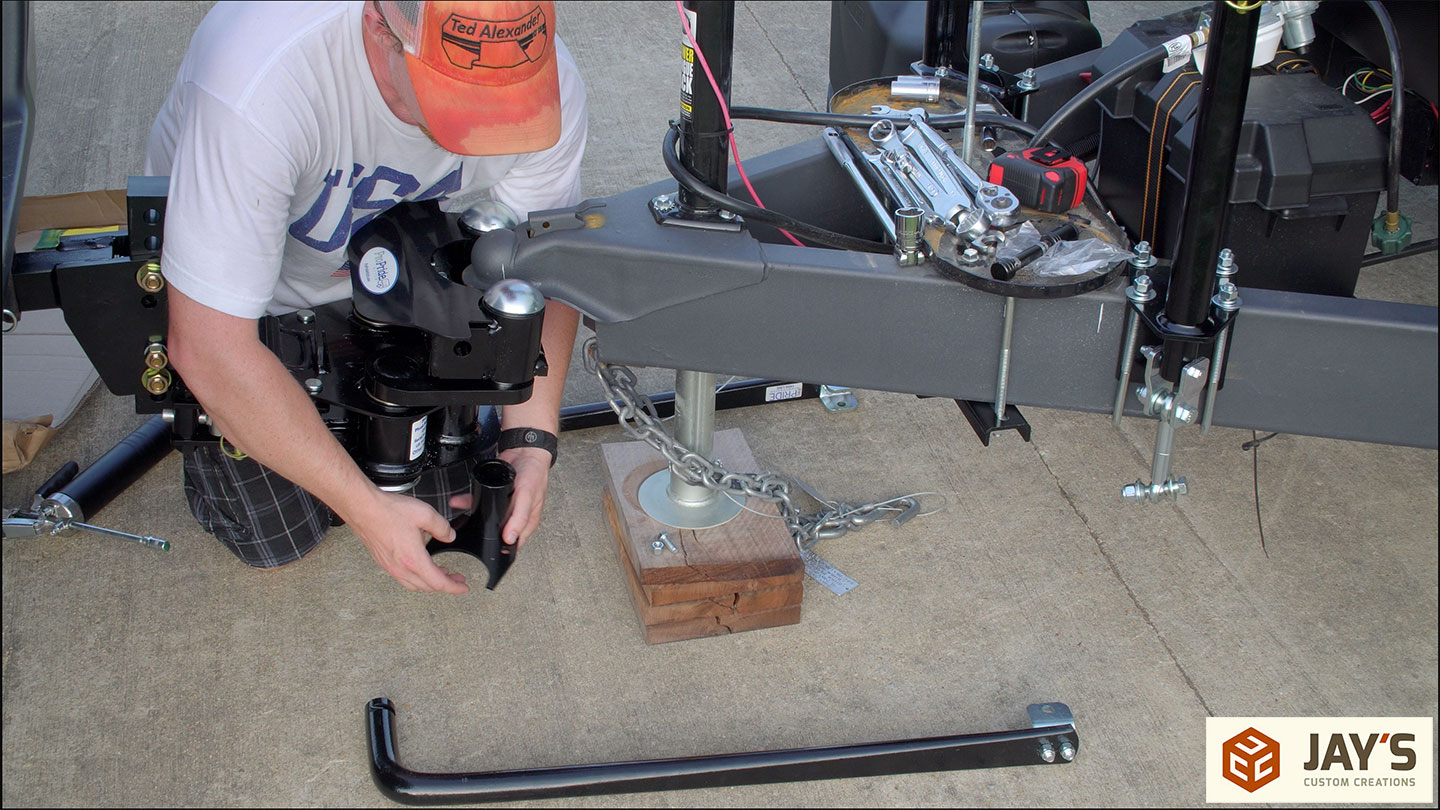
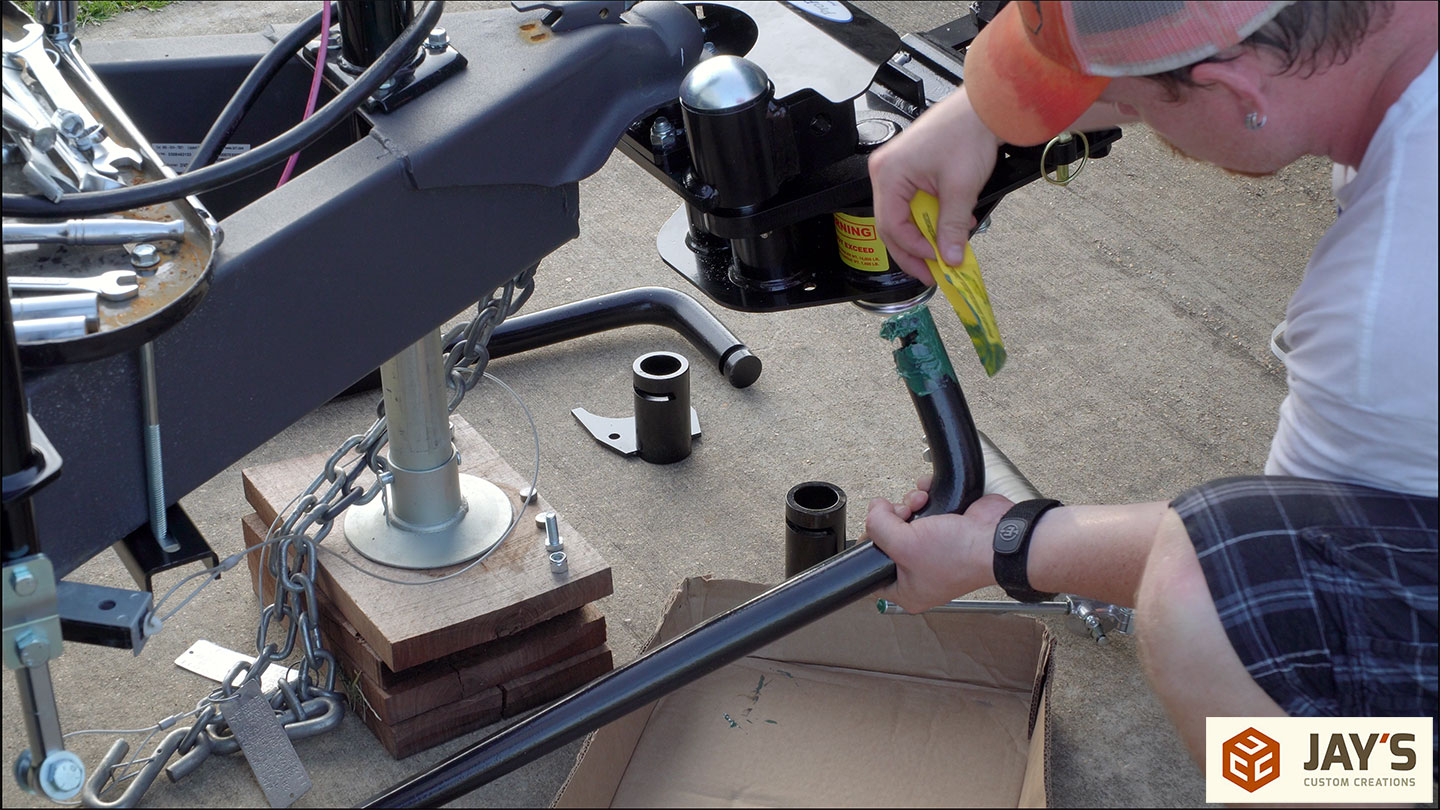

Step 20: Add grease to the spring bars via the grease zerk on each side of the hitch.
Step 21: attach the other end of the spring bars to the linkage on the bottom of the jacks. Pay attention to the specific orientation of the washers and make sure the nuts are facing out. The length of the jacks will likely have to be adjusted to get these installed.
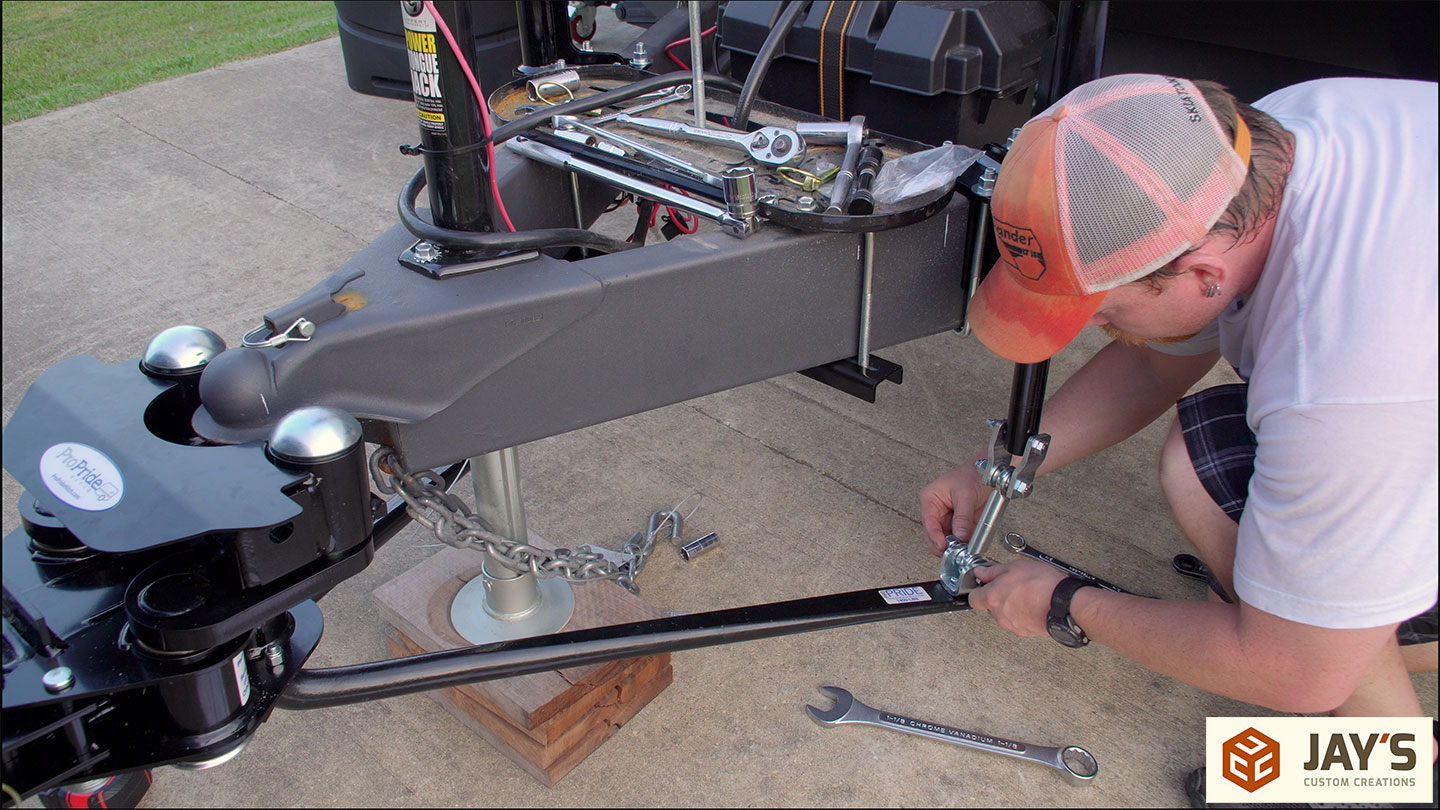
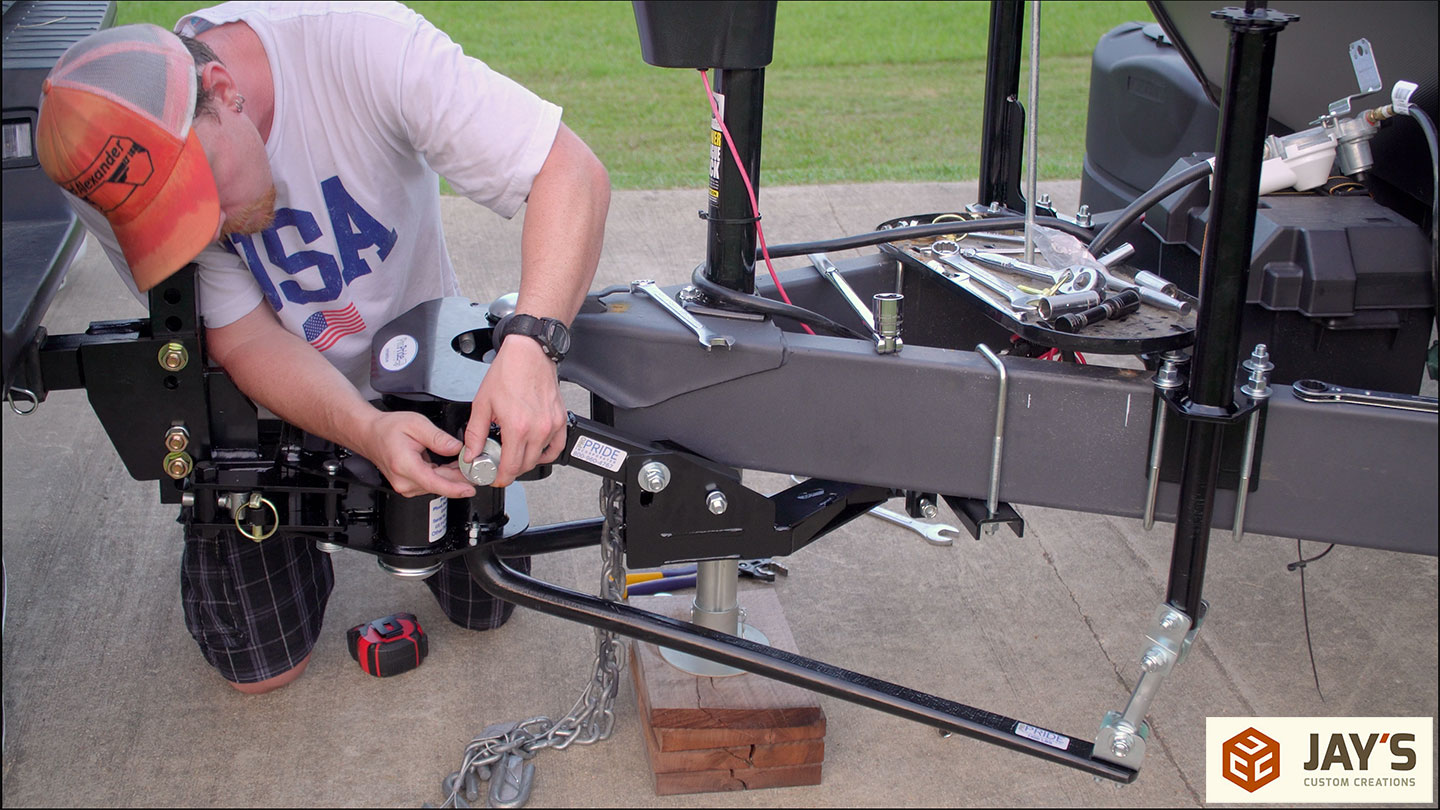
Step 22: The yoke is installed next. It doesn’t have an L in the name so you can’t fry this one.
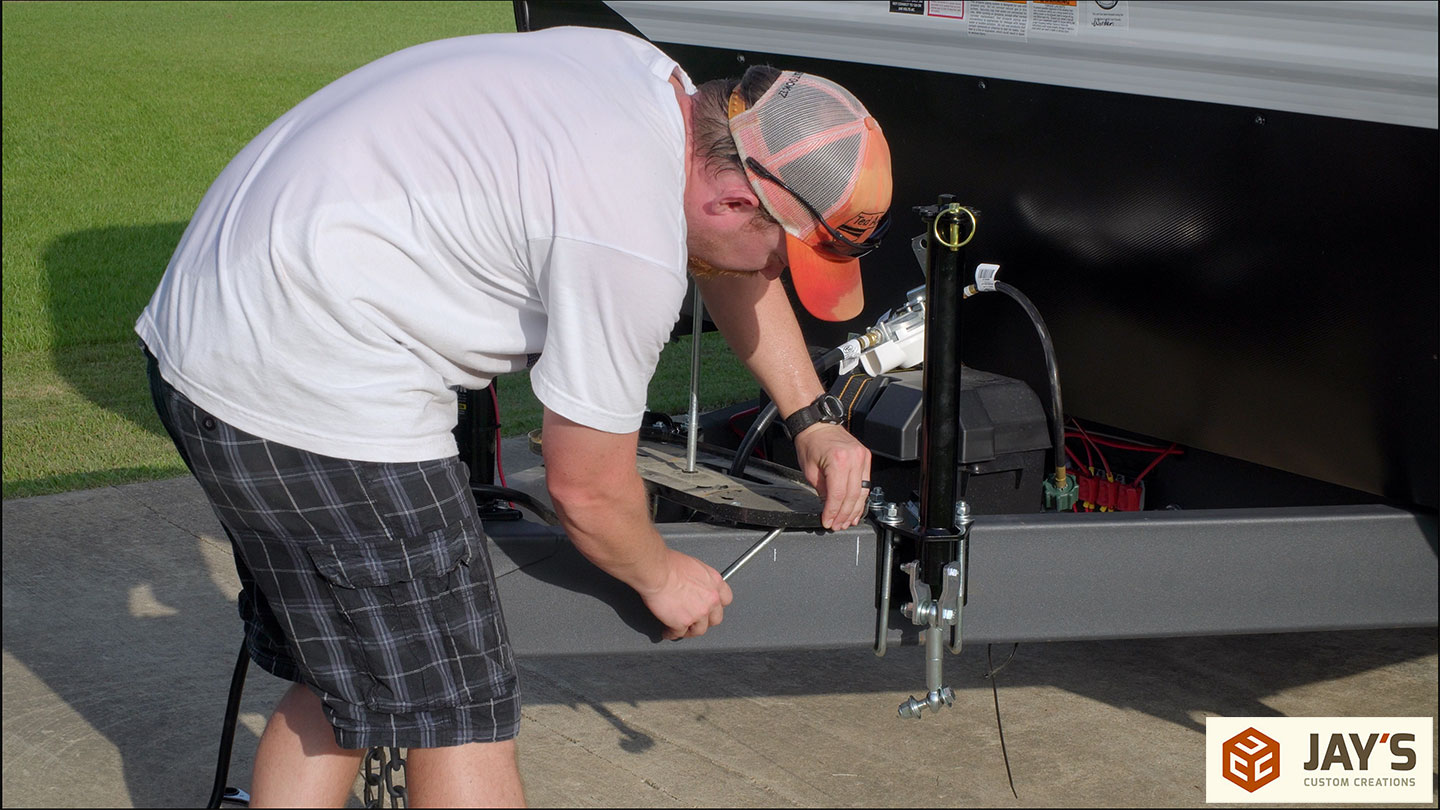
Slide the yoke under the trailer tongue so the small end faces the trailer. I did this sequence out of order by first suspending the single end in the frame bracket with the included bolt and bushing. Then secure it to the main hitch unit with two large bolts. And if by now you’re starting to feel the heat exhaustion like I was you’ll likely read the part about removing the top plate for greater access a few times and then fail to remove the top plate for greater access. You’ll then wonder why they made the space so tight and did not provide proper access to use a wrench to tighten the nut. You’ll then have the thought of “That’s silly. They should have just made this top plate removable.”
About this time the only horse fly in the neighborhood will start landing on you because you smell like a sweaty human who’s about to pass out. Have no fear, simply take your hat off and start waving it around like the dominant species that you are. You will win this battle.
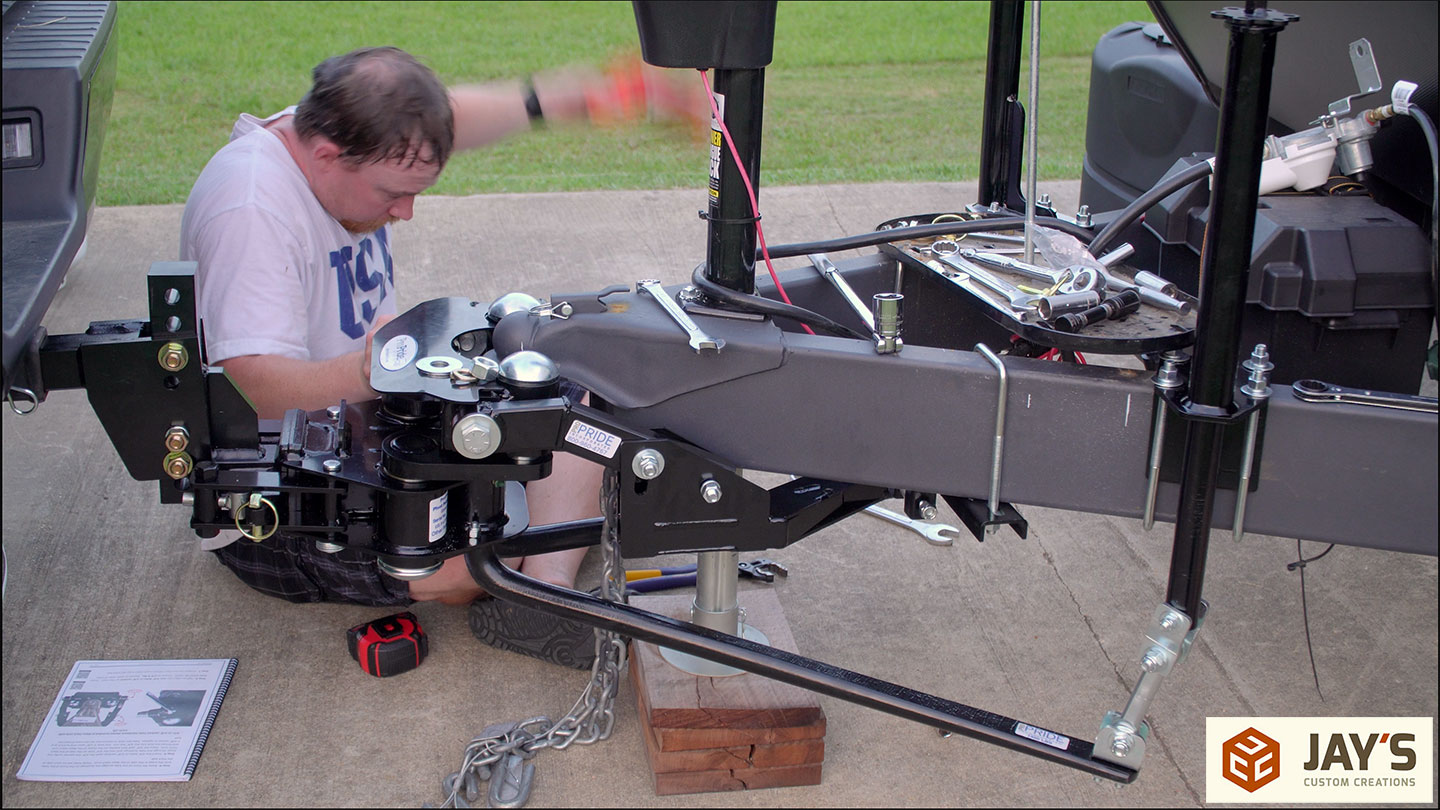
Ah, yes. The instructions do say to remove this plate for greater access. That just sounds like it’s making the job too easy. Let’s complicate things a little bit by removing the panel and tightening down the bolt and nut with one of the flat washers in the wrong spot. Nothing like giving yourself a little extra work later on ;)
Step 23, or something like that: I’m not sure when I gave in and removed the propane tank completely but here we are, and it’s unbolted from the frame. With it out of the way I decided to move the jacks to the original 26” mark and bolt them down. I was losing daylight and knew that I should have been done long ago so my last step for the night was to add some silicone to the old bolt holes to keep rust at bay as much as I could. Finally, inside to cool off for the night and wonder why I had a hard time comprehending simple instructions for the past few hours. Seriously, be careful out in the heat.

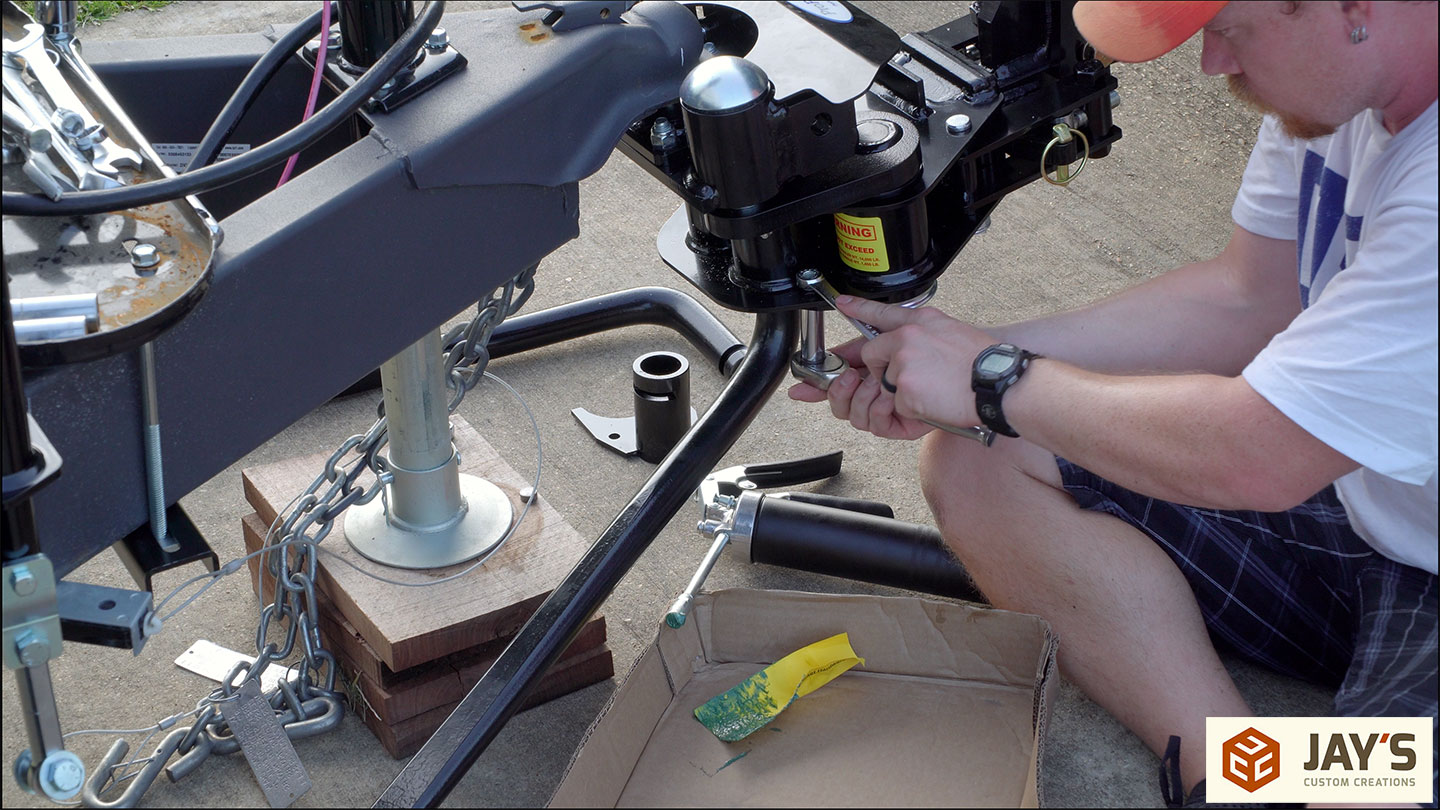
Alright, it’s the next morning and I have no regard for the step numbers anymore as I just want to get this done. I should have been done by now. First up, torquing a few things to the correct torque numbers.
Then the over-the-center latches are released and the truck can be pulled forward. You’ll notice the stinger was tilted down when I pulled forward. That’s because I tightened the stinger assembly with a gap in front of the pivot bolt. See tip #1 at the beginning of this video to prevent that.
At this point, everything is installed so I’m just going through all the nuts and bolts and making sure they are all torqued to the specs in the instructions. The instructions are great overall but one super handy page is the torque spec page. They have all of the specs in a single diagram which makes it super easy to verify everything.

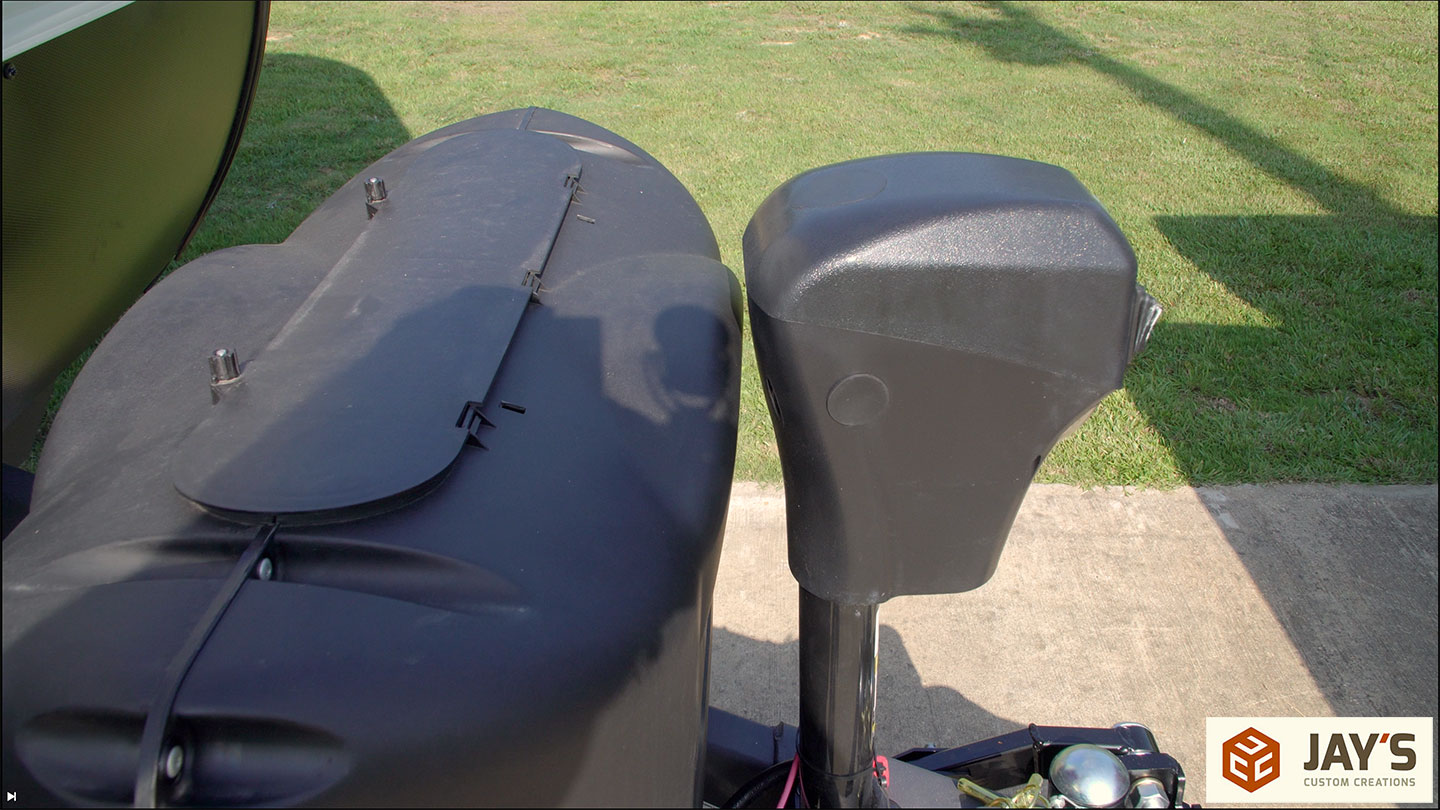
With the propane tray mounted slightly forward I hooked up the bottles and verified that my tank cover didn’t interfere with anything. There’s a slight gap between it and the tongue jack and between it and the weight distribution jacks. The tank cover also covers the front two bolts of each of the jacks.


Now to hook up for the first time. Here you can see how much movement the hitch has when unhooked. This allows you to hook up at different angles left to right. Also, you can twist the assembly in either direction by raising the jack on one side or the other.
Now, trying to hitch up for the first time was a learning situation. This is when I noticed I had the stinger pointed down too much in relation to the hitch. And this was caused by not eliminating the gap by the pivot pin earlier.

Luckily it wasn’t too far off and I was able to wiggle the hitch assembly to make it fit.
Now the over the center latches are latched and secured with a pin on each side.
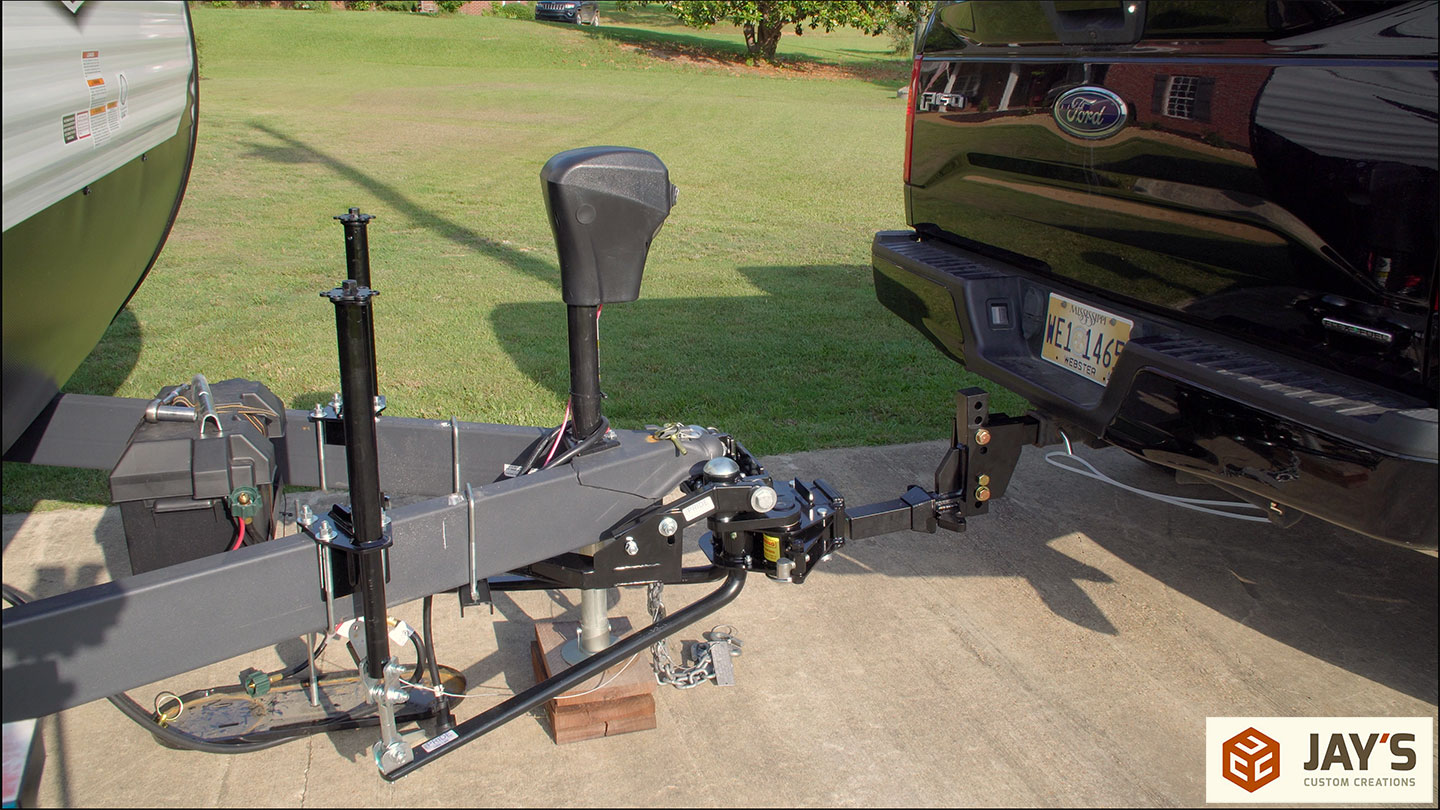
The weight distribution jacks can be raised and in doing so it lifted the tongue jack off the ground.
At this point, I finally loosened the stinger bolts, verified the pivot pin gap was gone and torqued the bolts to the required specs.
The top plate is installed.
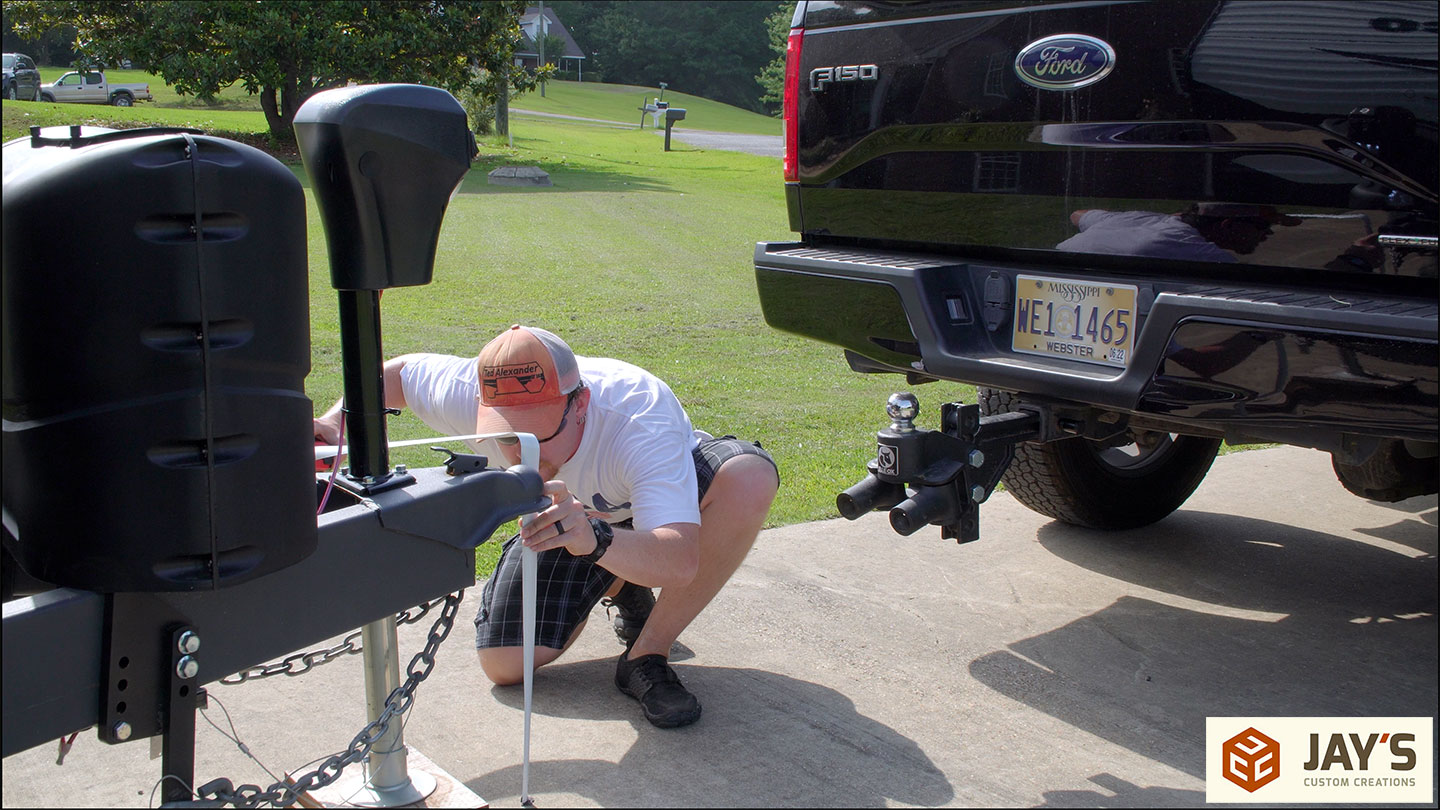
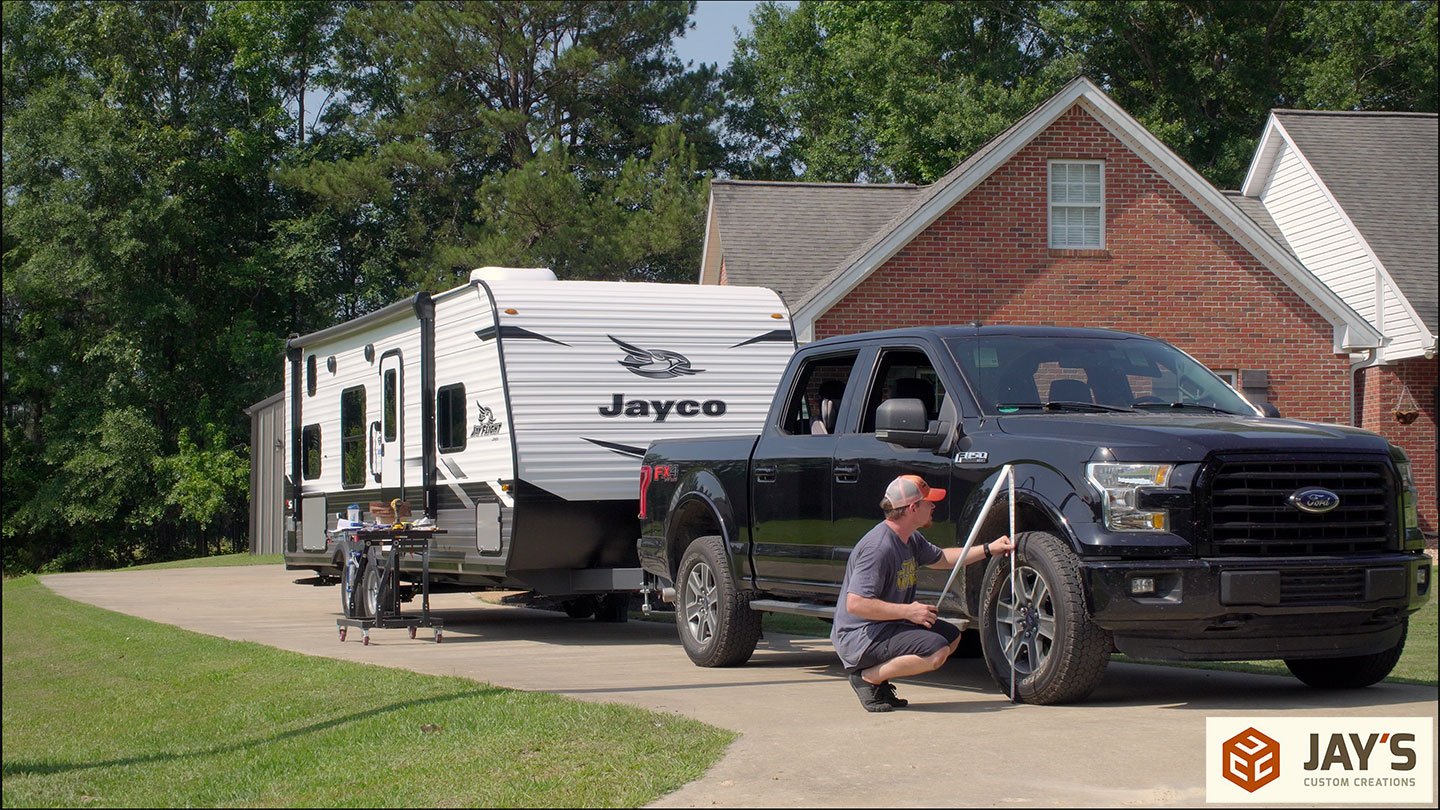
And some final measurements are taken. There are a few pages in the instruction manual where you can log your measurements. After all of my screwups and unnecessary confusion, I somehow got it perfect on the first try. All of my measurement changes were within the tolerances listed in the manual.
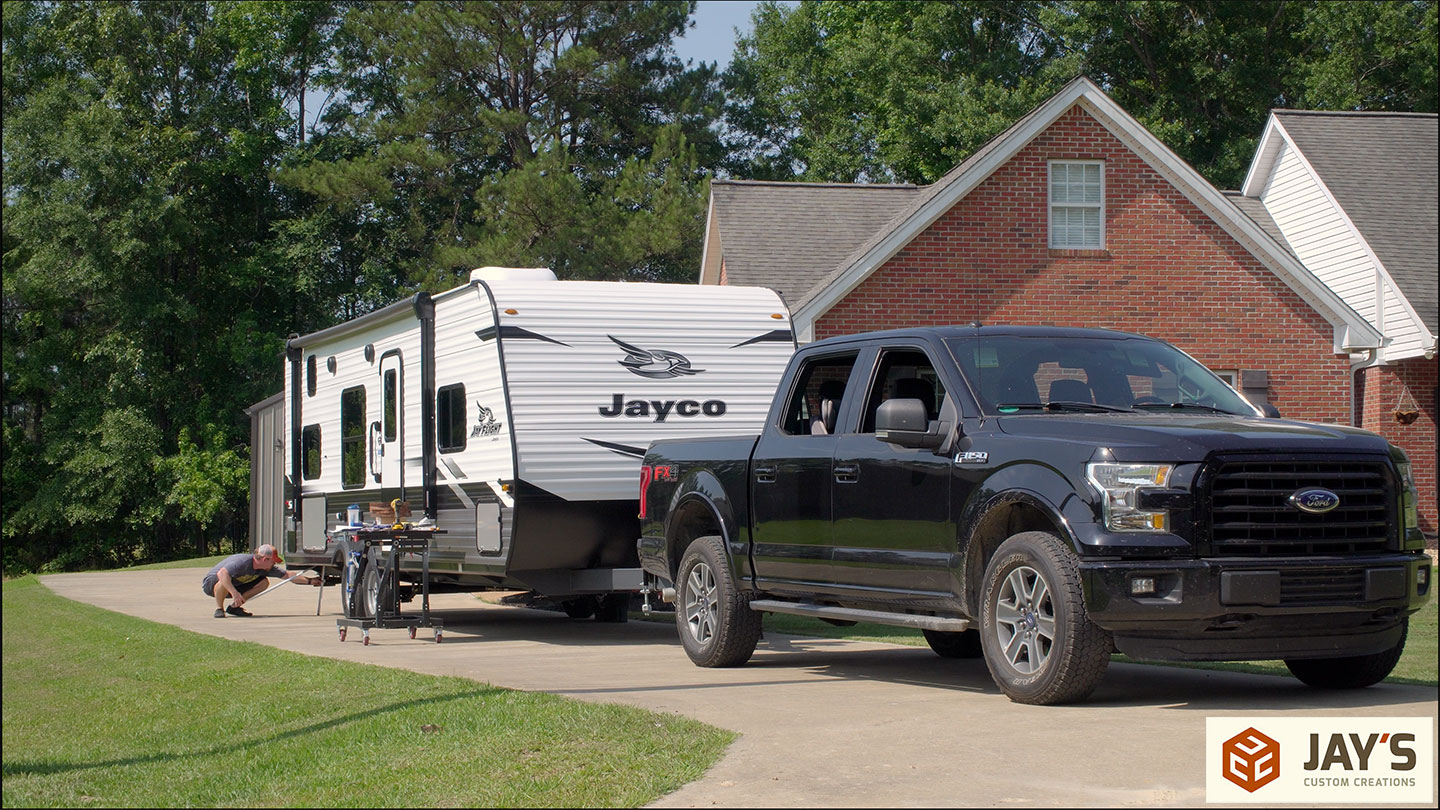
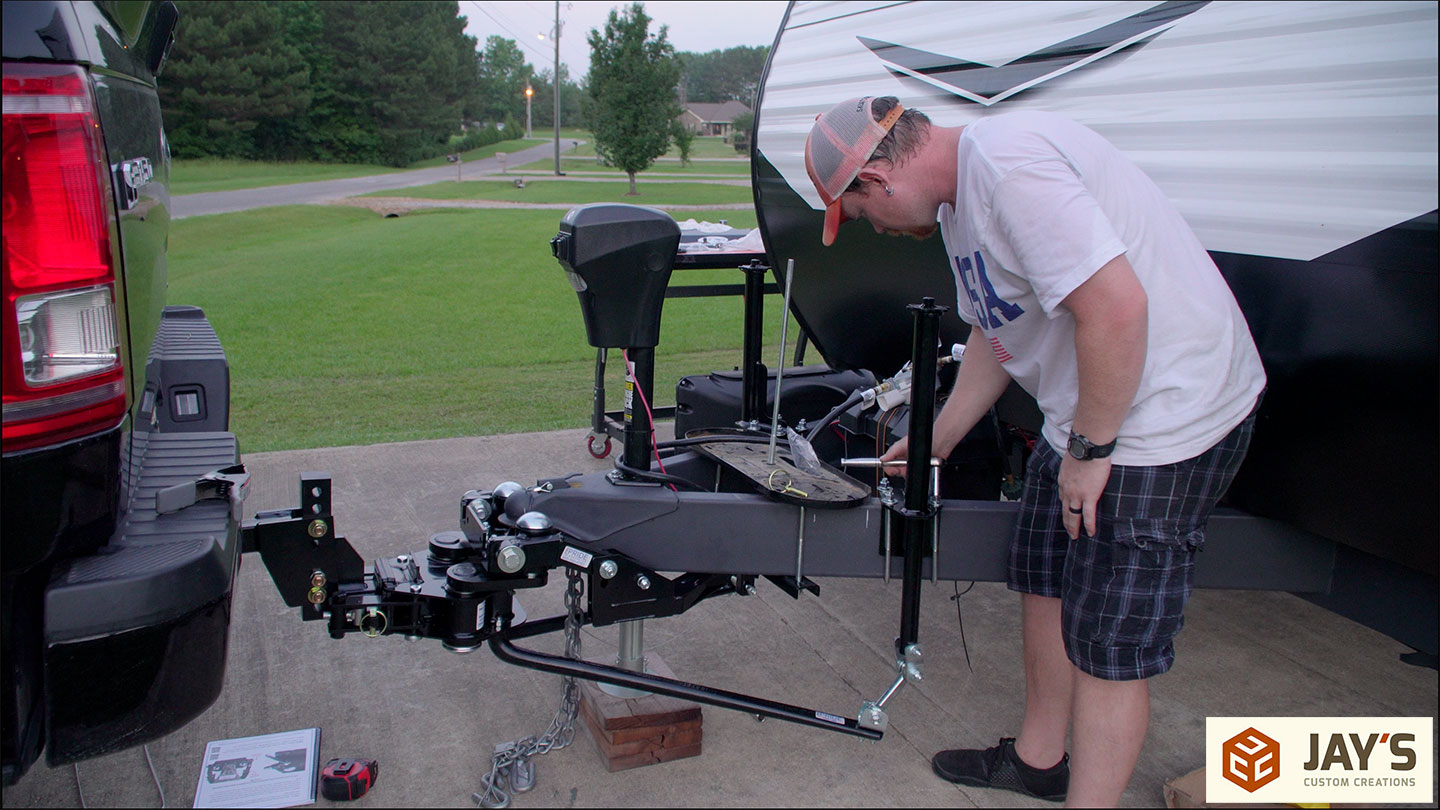
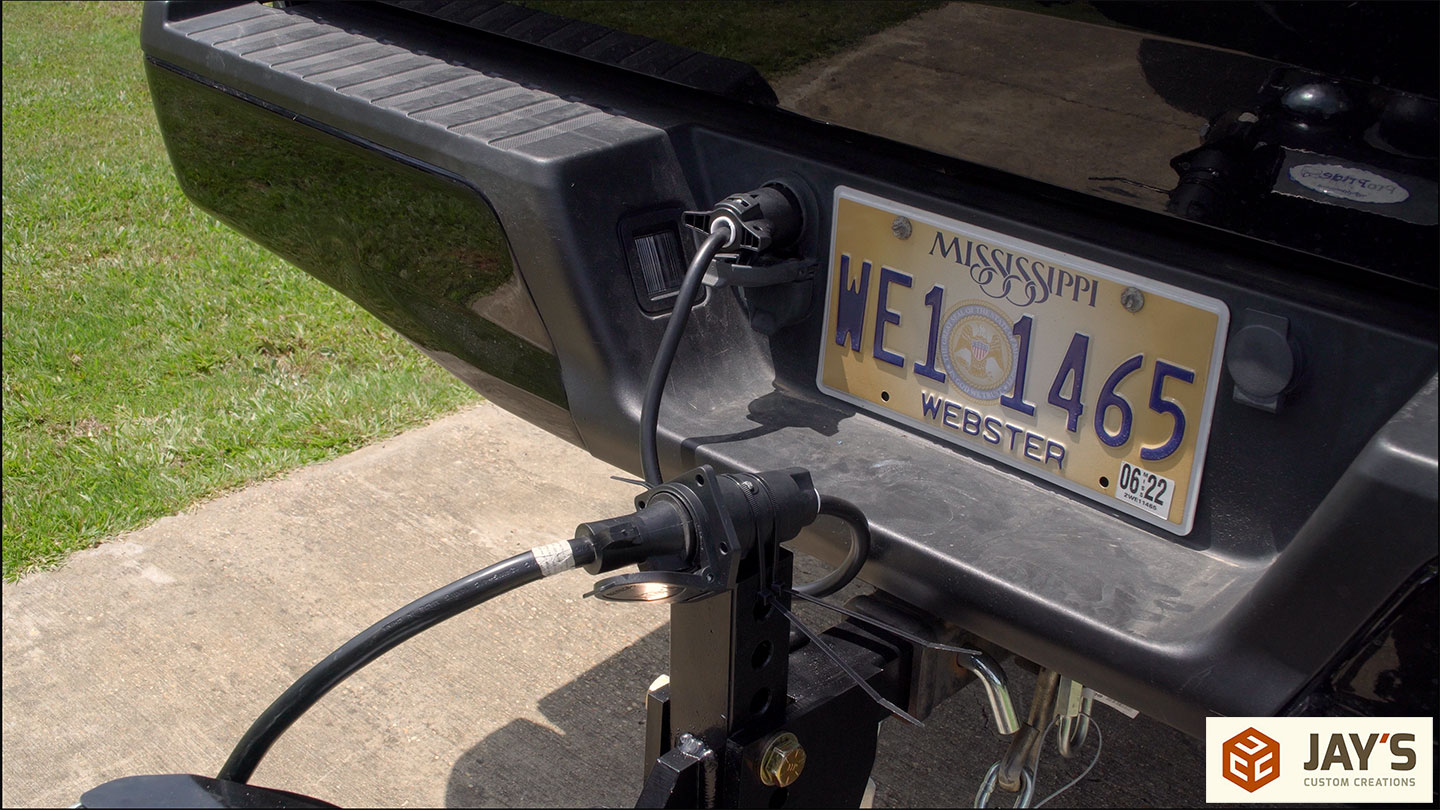
One final step before a test drive was to install the extension kit. This kit has everything needed to extend the safety chains, breakaway cable, and wiring harness. It’s a pretty basic installation so I didn’t record it.
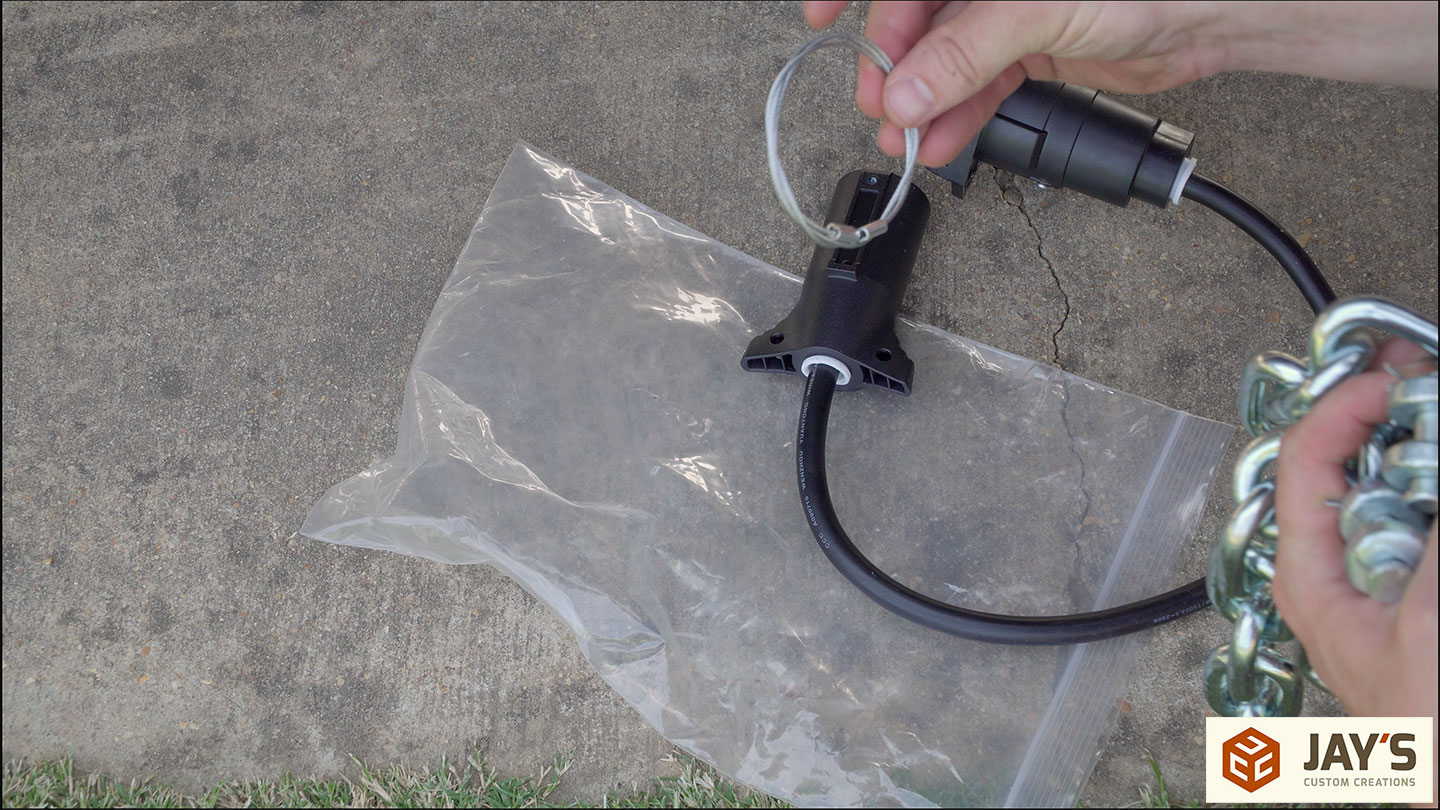
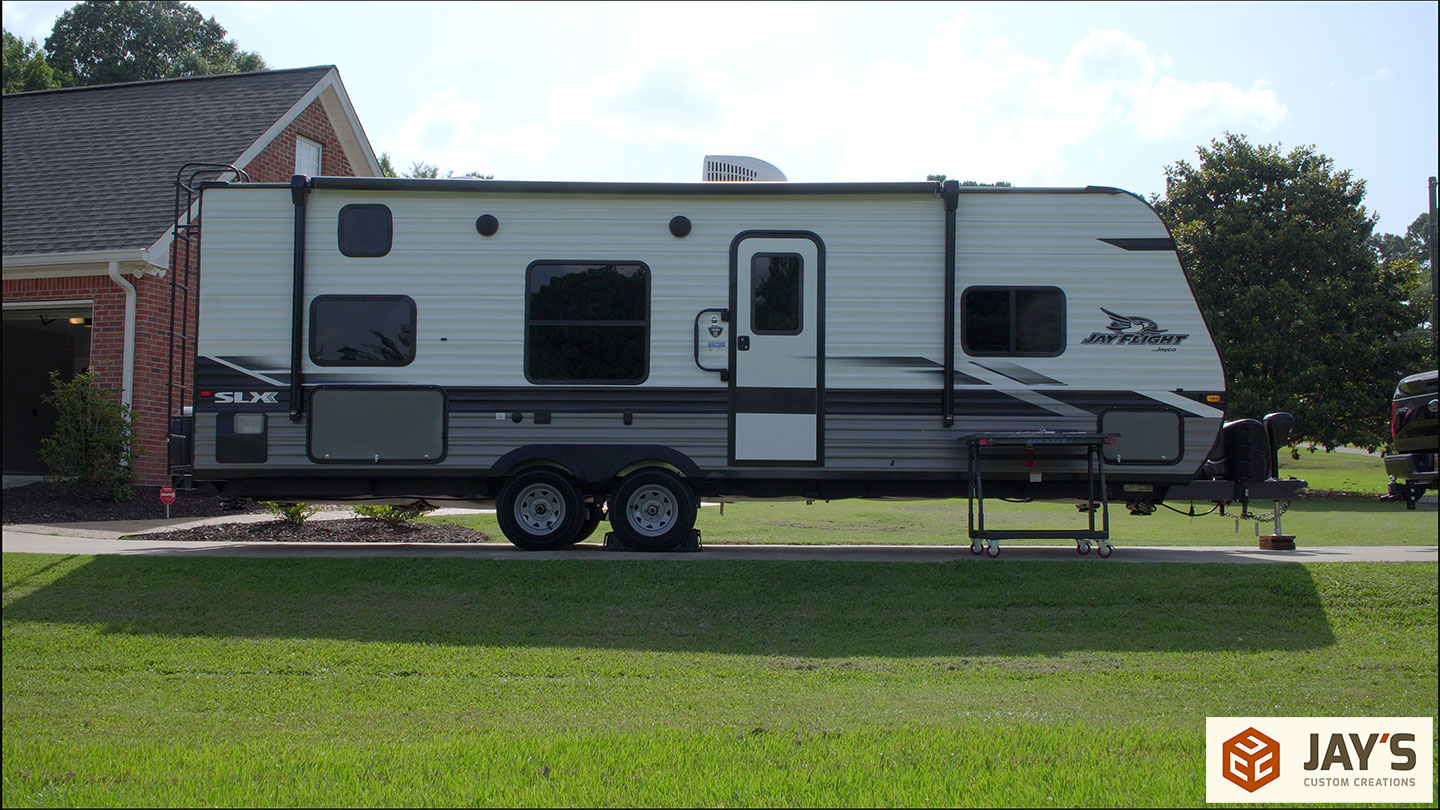
And now we’re road worthy. The safety chains are higher than 6” off the ground. The breakaway switch has been relocated and the cable extension installed through the safety chain and hooked to its own hook on the tow vehicle. And the electrical extension was zip-tied to the stinger. I’ll likely replace the zip ties with a velcro strap or something similar in the future. I want to remove it and keep it in the camper when not in use just to prevent theft.


BlueOx TrackPro Vs. The ProPride 3P
Weight Distribution
- Both platforms offer weight distribution. The BlueOx weight distribution can be adjusted only via the mounted height of the ball. The 3P has installation height instructions as well but ultimately the weight distribution can be adjusted easily by raising or lowering the weight distribution jacks with the included wrench or a drill. I can see how being able to dial in adjustments on the fly, or literally on the side of the road if the need arises, can be handy.
- The BlueOx spring bars need to be installed and removed every time you hookup and disconnect the trailer. It’s not incredibly difficult for me with the included lever handle but my wife can’t/won’t do it due to the difficulty.
- The 3P spring bars are never removed and stay attached to the trailer at all times. A drill or the included wrench is used to raise and lower the bars as needed during hookup and disconnect. Anyone who can hold a drill steady and press a button or operate a ratchet wrench can do this.
- Weight distribution capacity offerings is about the same for both hitch systems.
Eliminate Trailer Sway
- Trailer sway is not eliminated but instead managed, with the BlueOx. Sway still occurs but you’re relying on friction to reduce it. The problem with sway reduction systems is that they start working only after the sway starts. So you’re still dealing with trailer sway. Just not as much as without the friction-based reduction. How much reduction present is kinda un-measurable in my opinion. Drive with the hitch for a while and then once without it. I suppose you’ll see a reduction with it installed but it’s still there and it’s still not a fun experience.
- Trailer sway is actually eliminated with the 3P. It’s literally gone. No trailer induced sway to the drive. The geometry of the hitch allows the pivot to occur only starting from the tow vehicle and not starting from the trailer. Trailer-induced sway is not managed, it’s eliminated.
- One very important distinction to make is the difference between sway and push. PUSH is when wind, either naturally occurring or created from the coming off of a passing vehicle, physically pushes your vehicle around on the road. Think of how many times you’ve driven without pulling a trailer where the vehicle was pushed around on the road. Most people probably don’t notice it. Have you ever said “It’s so windy out today. It feels like I’m driving a kite!” What you’re experiencing is push. You notice the movement, but it’s not that dangerous and very easy to control. SWAY is when a force (wind) pushes just the trailer out of line with the tow vehicle causing it’s momentum and the force of the wind to sway back and forth in relation to the tow vehicle. This is most often a white-knuckle driving experience while you either slow down to try and get control of the trailer or, in some cases, the sway increases beyond what can be controlled by the driver until the tow vehicle can no longer be corrected enough. The result is a sway-induced accident.


Many years ago my family enjoyed trailer camping. I have had many different rigs from tent campers to fifth wheel trailers. I recall having an “anti-sway load compensating ” trailer hitch which worked very well for me. It was a simple hitch system that had load compensating bars that were lifted varying amounts by hooking a chain to a hook at the appropriate height. I ultimately went to a fifth wheel that eliminated all these types of issues. My fifth wheel rig was quite small, as i recall it was trailer about 23 feet long towed by a Chevy S10. Really enjoyed you detailed explanation on how this type of hitch works.
Ok I get all that and I understand. I tow a travel trailer in that size and weight range. I’ve been towing trailers and boats since I learned how to drive. Just a little bit of experience. I’m just curious about the one thing you didn’t compare. And I get that safety shouldn’t have a price but in the world we live in it does. So the blue ox was around $600 so what does the 3P cost?
Separate the chains and cross them underneath the tow bar.