In SketchUp, a good way to think of scenes is to think of different camera angles. In each scene you have the ability to turn on or off the visiblity of different layers. To create scenes go to Window in the menu at the top and select Scenes. This will bring up the scenes dialogue box. From there you can press the + button to add a new scene. If you want to remove an already created scene you can select it and press the – button. Each new scene that is created takes on the current camera angle for the model.
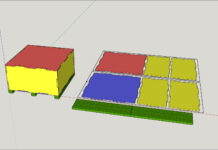
For example, if your model consists of three unique parts you can create a scene with the camera focused on each part. Position the camera on your first part and press the + button to create a new scene. From there you can add a name such as “part 1”. Then position the camera on to the second part. Press the + sign and name the new scene “part 2” and so on for each scene that you want. After that, each scene will have a tab to the top left of the viewing area. You can quickly switch between the multiple scenes by clicking on each individual tab.
Each scene has a few options as to what is saved. These settings can be adjusted via the check boxes in the scene dialogue box. You can also turn layers on or off and hide certain geometry that you don’t want to show in the scene. For example, if you are looking at part 2 and do not want to be distracted by parts 1 or part 3 you can select part 1 and 3 and hide them. Another example would be if you make all of your dimensions on their own layer that you can turn on or off as needed. As you make changes to the scene right click on the currently selected scene tab and select “update”. This will save your changes for that particular scene.


