My wife has had a jewelry box on my “to make” list for quite some time. The very first woodworking project I made was a small, simple jewelry box that she’s simply outgrown. All of her jewelry just sits in a tangled mess with absolutely no organization. I finally gave in and decided to make her some type of jewelry organization project but when I mentioned the idea of her making it she surprisingly said she would.
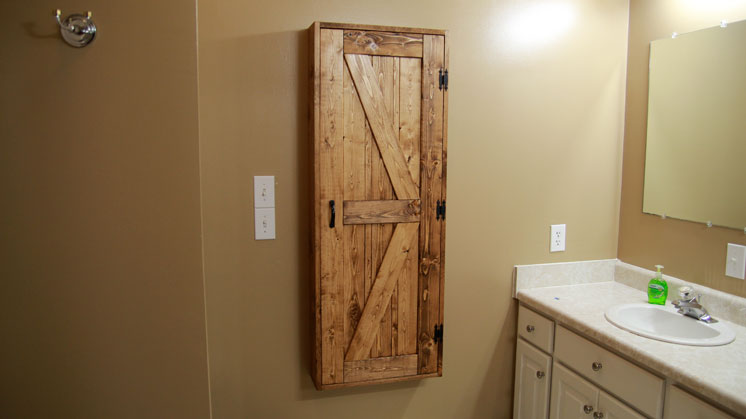
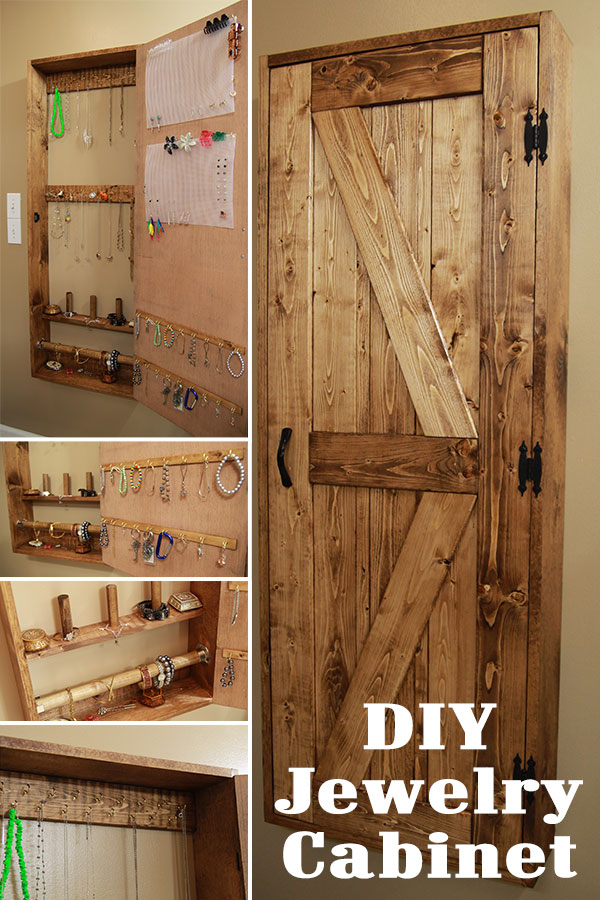
After searching the internet for ideas we both concluded that the Shanty-2-Chic DIY Jewelry Organizer (tons of other free plans too!) would be the best solution for her. It’s a larger wall mounted cabinet that has a LOT of storage for necklaces, earrings, and bracelets. Jamie (my wife) really liked the overall concept of the project but didn’t want to use a mirror for the front. Instead, she came up with a simple barn door look that was easy to make.
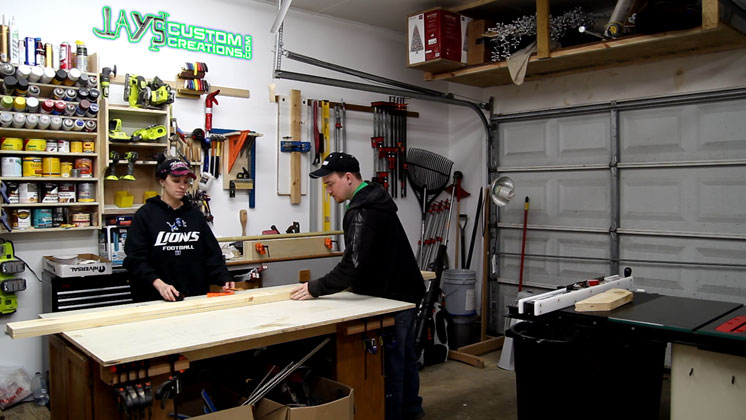
Very rarely do I get to work on something with my wife. She just isn’t into woodworking that much. That’s not a problem though. I understand that we can’t all like the same things. Nevertheless it was a very fun experience to be able to guide her through her first project. The goal was to let her do as much as she was comfortable with and help her out in areas where she wasn’t.
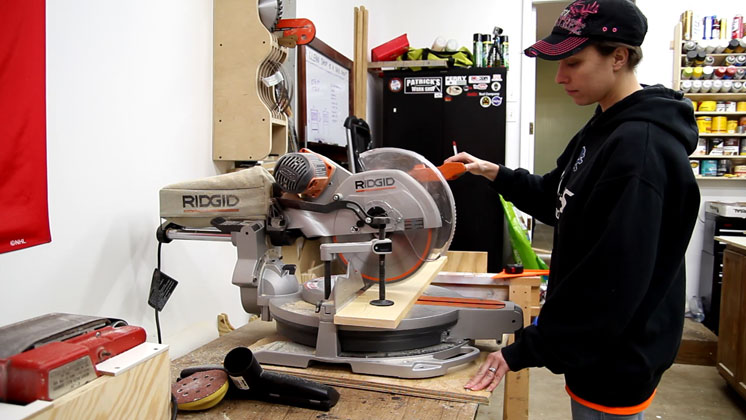
The case of the cabinet was to be made from 1×6 pine material. While Jamie has seen me work with all of these tools countless times she hasn’t actually used any of them herself. So to gain a little confidence and familiarity at the miter saw we were able to use the built in clamp to hold the work piece down as she cut. Notice she isn’t wearing safety glasses here. That was a huge no-no and was quickly corrected. Always wear safety glasses, folks. Always wear safety glasses.
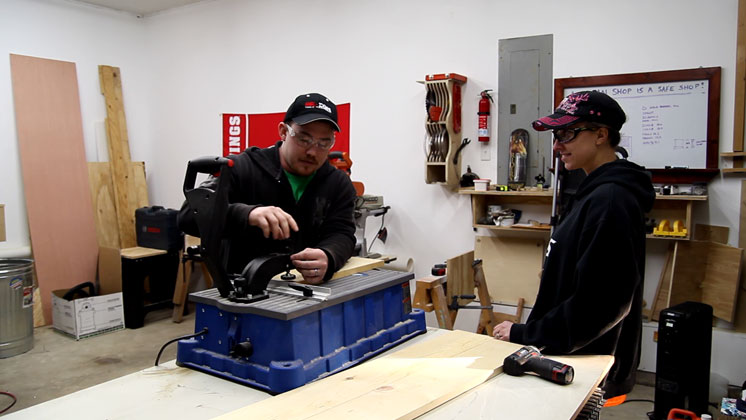
To make the construction go by faster we decided to hand cut half blind mitered dovetails with a pocket knife. Just kidding. We used pocket holes.
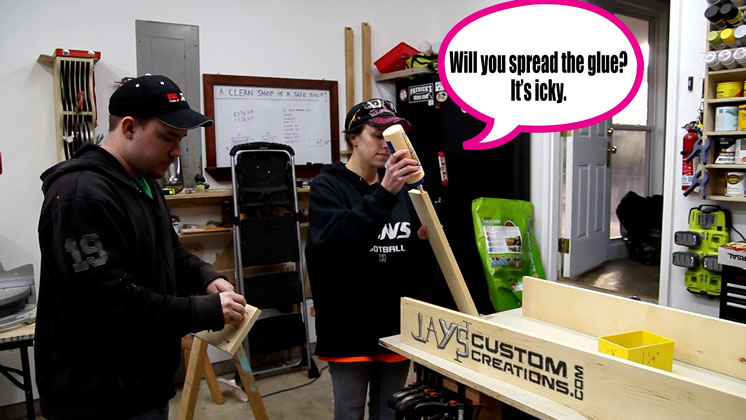
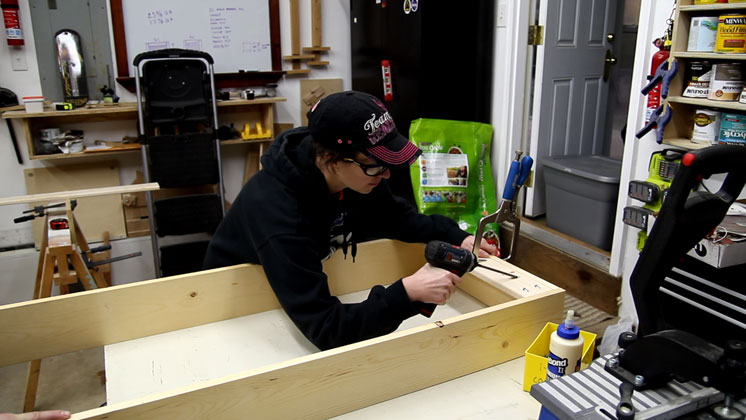
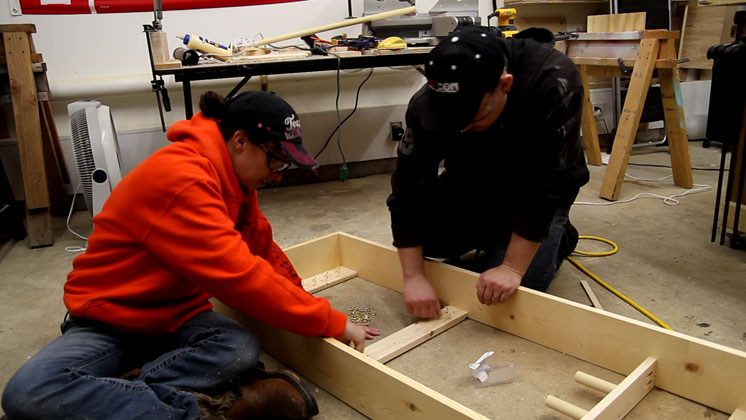
Due to scheduling conflicts and some crazy weather we had the project ended up being spread out over way to many days. But actually building the project went by pretty quick. Especially since we were both able to team up on it. Here’s a perfect example of our teamwork. I loaded the pocket hole screws while she applied the glue. Teamwork, folks. Teamwork.
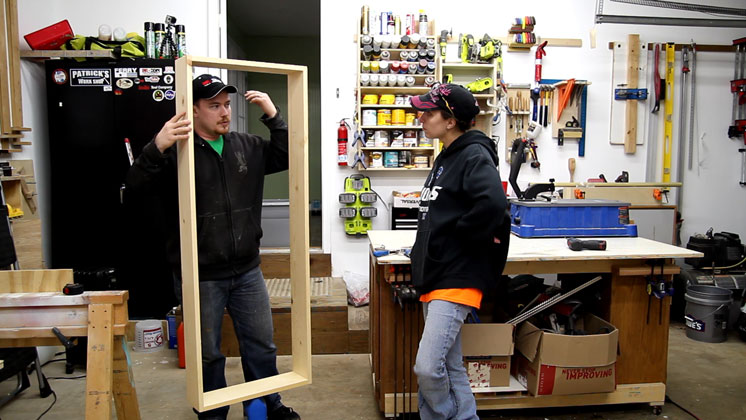
With the frame done we can get a good idea of the size of the project. I didn’t realize how large the cabinet was going to be until this point.
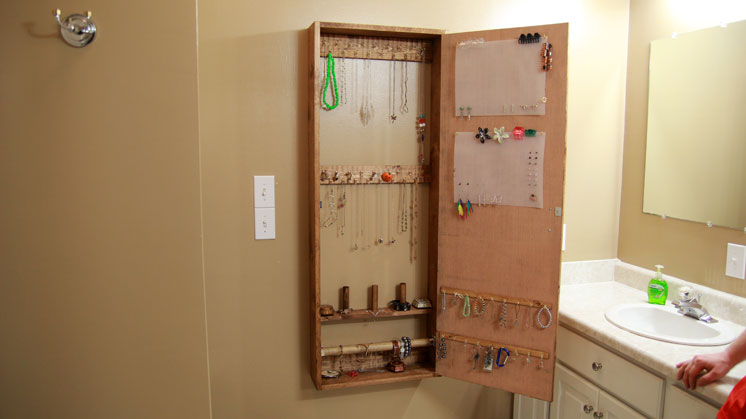
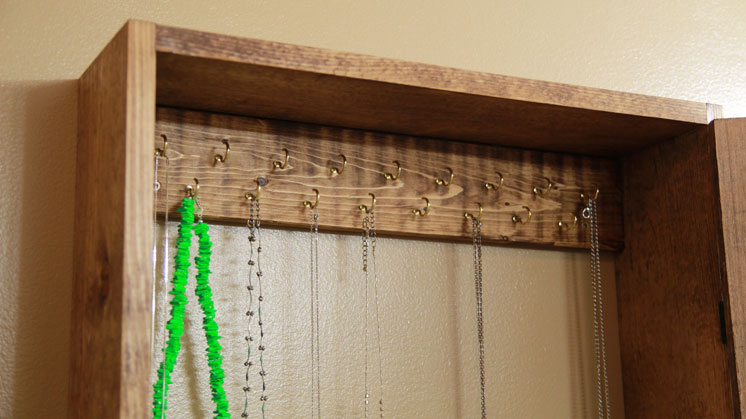
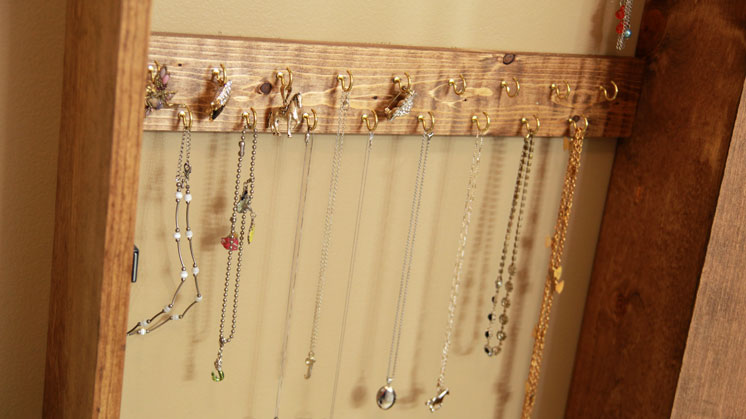
The next piece after the frame is the top back board. This will have a row or two of cup hooks as well as the mounting screws to secure it to the wall.
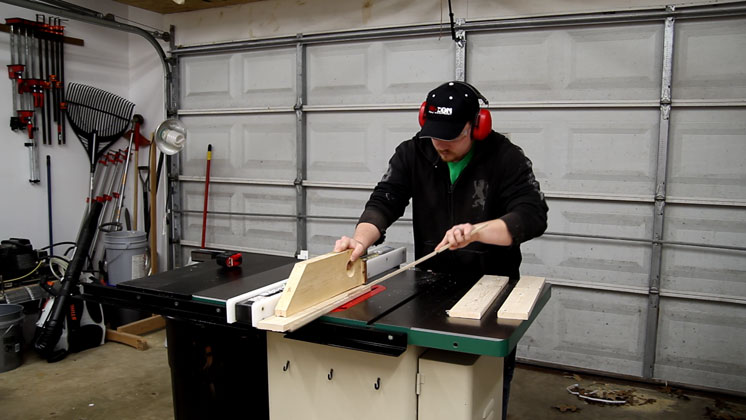
Not only did my wife not feel confident using the table saw but I didn’t want her to use it at all. So I made all of the table saw and bandsaw cuts.
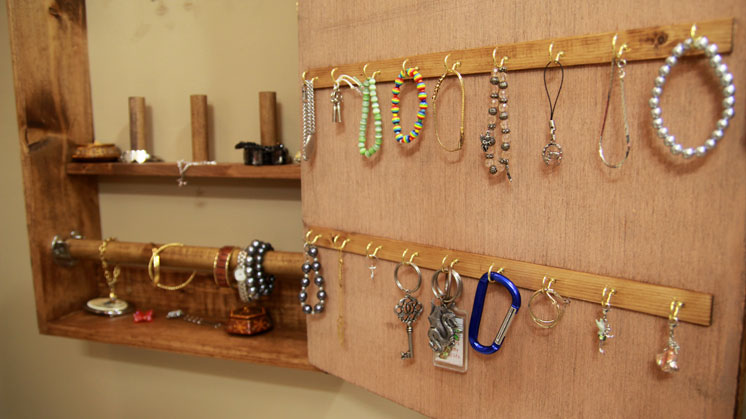
Three more back pieces strategically spaced for hangers.
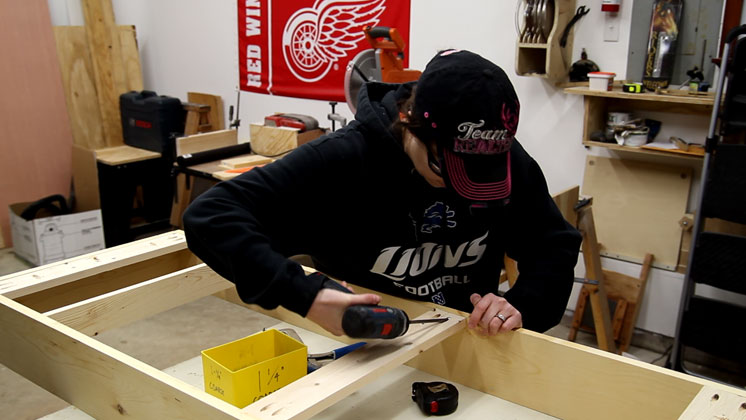
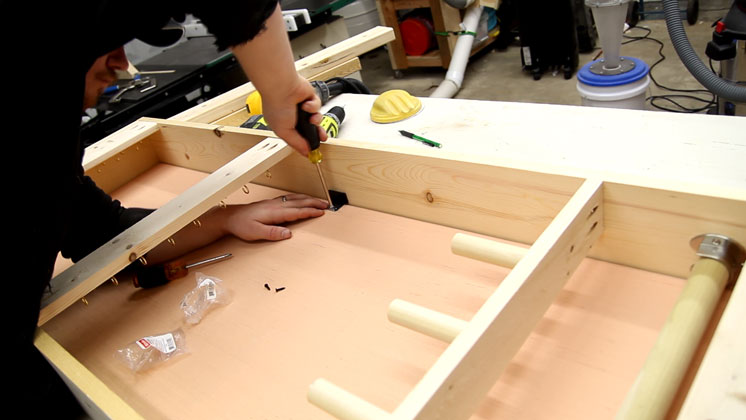
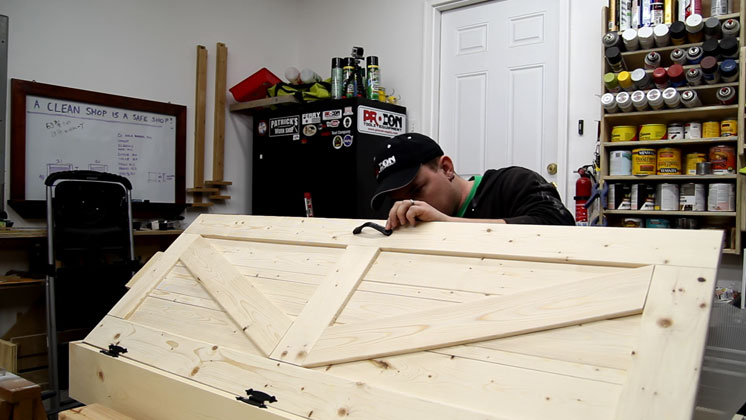
With the frame done the door can be assembled. The outer frame only is assembled with pocket hole screws.

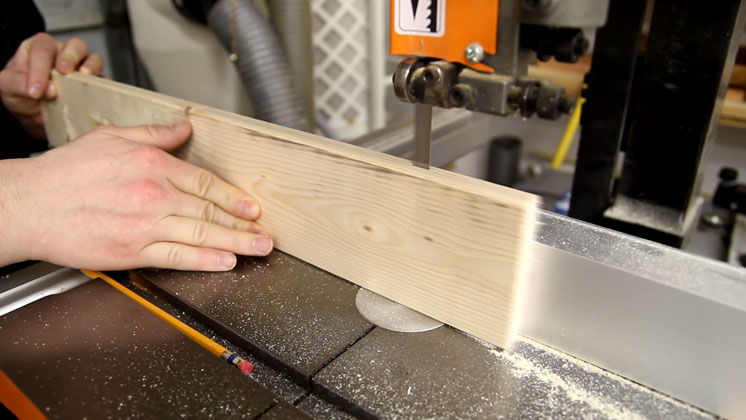
I wanted the interior slats of the barn door to be thinner than the rest of the door so I split a few 1×4 pieces right down the middle on my bandsaw.
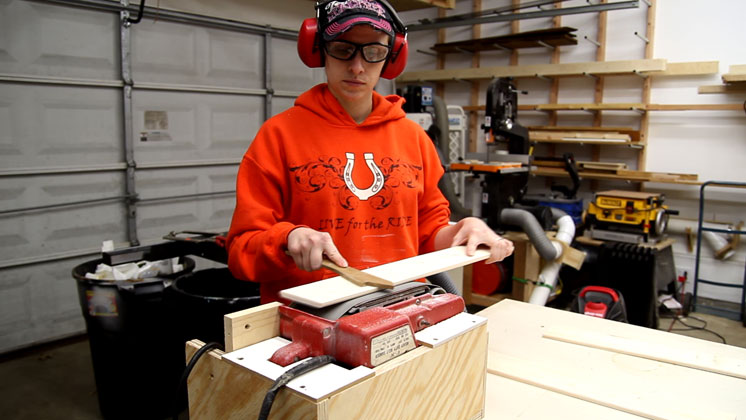
And to remove the saw marks my wife sanded them smooth. See, folks….more teamwork.
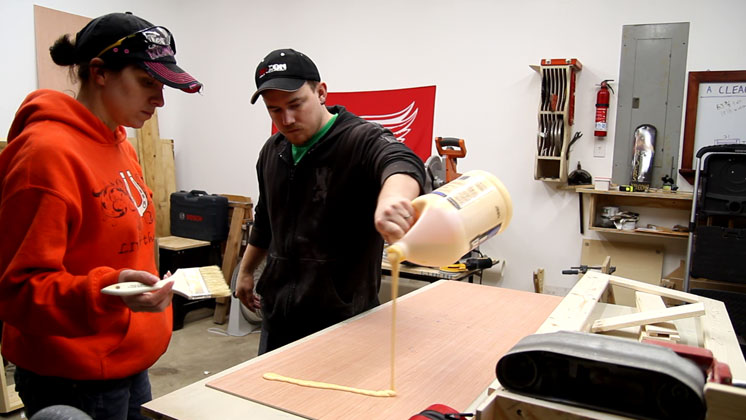
The door will basically be a large glued up panel on plywood. I ended up using way too much glue here. I never seem to pour the right amount of glue on large panel glue-ups like this.
And then we could fit all of the pieces starting from the outside. We made a dry run first so this went without any problems.
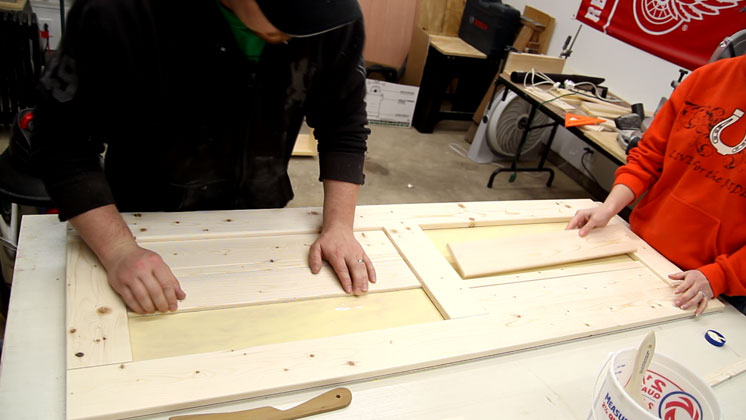
Because the panel was so large my clamps were pretty much pointless. Instead, we just stacked a bunch of cans and junk on top of the pieces to hold them down while the glue dries.
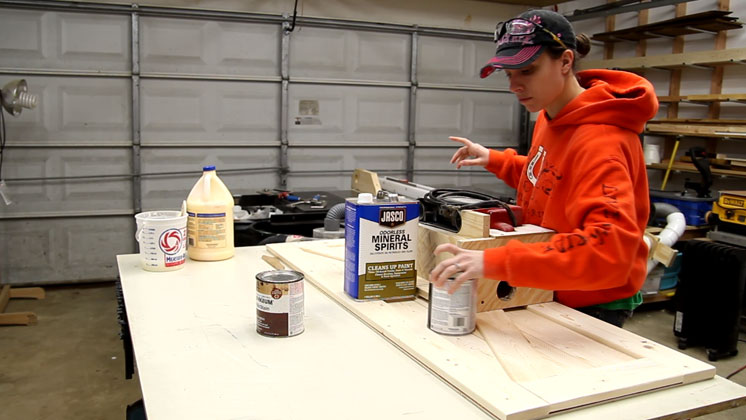
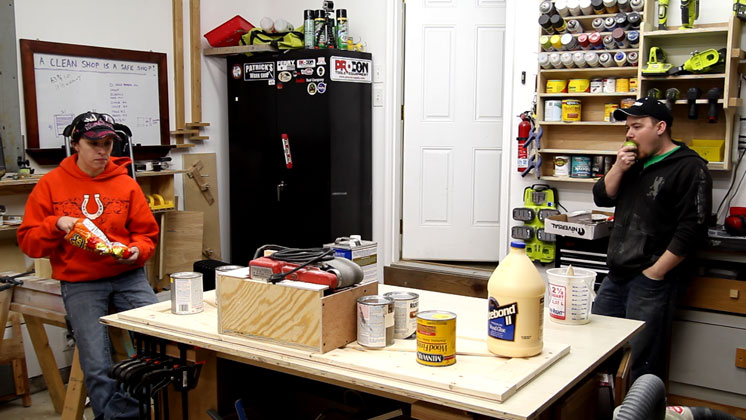
And speaking of “while the glue dries”…I ate a green apple and my wife ate some Flaming Hot Cheetos. I’m going to say I got the better end of that one.
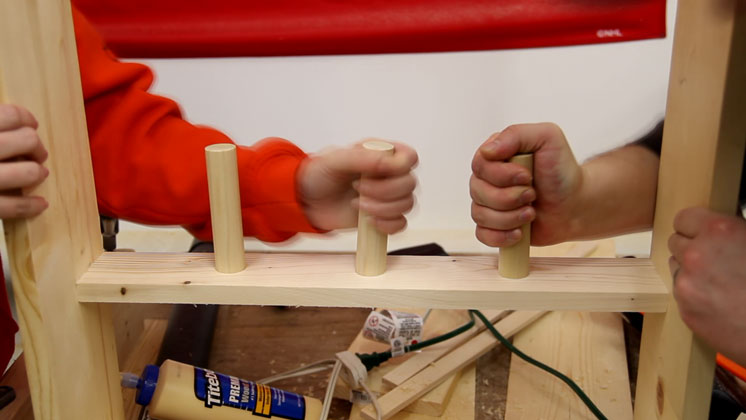
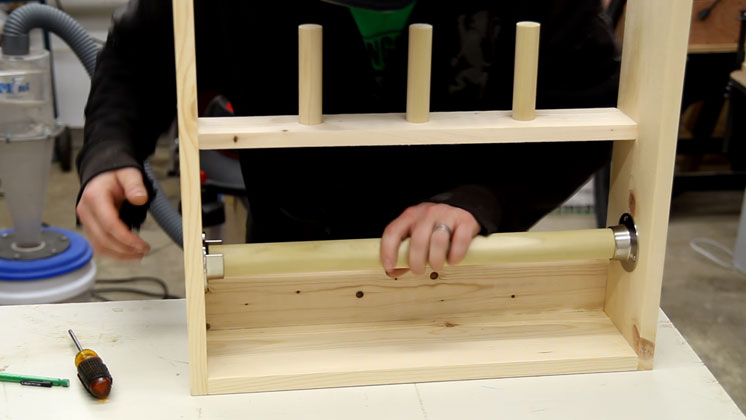
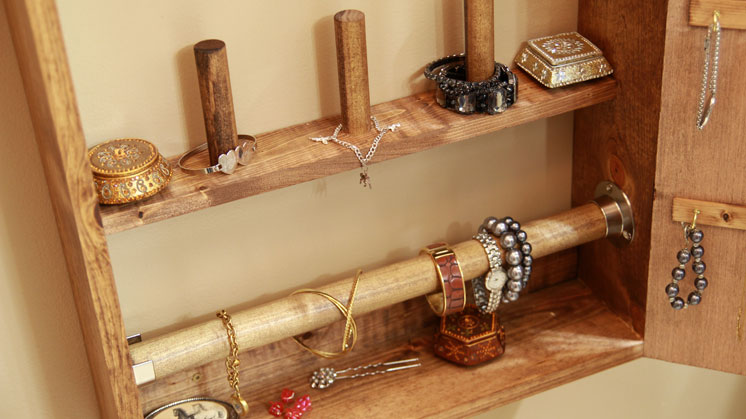
While the door sat we went back to working on the inside of the case. The original plan calls for a few pegs on a shelf to hold bracelets. We used a 1” dowel rod for this but first a few holes needed to be drilled. Jamie didn’t want to mess up the holes by drilling them on an angle so I drilled them for her.
A little bit of glue and these pegs won’t go anywhere.
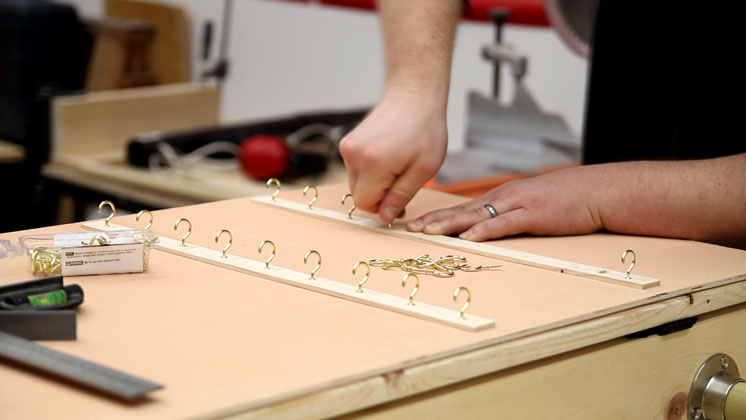
After drilling 3 million holes we had to install all of the cup hooks. I still don’t understand why anyone needs that many necklaces. Screwdrivers I could understand…but necklaces? (kidding)
And the lowest storage option in the case was a removable dowel rod for more bracelets and watches.
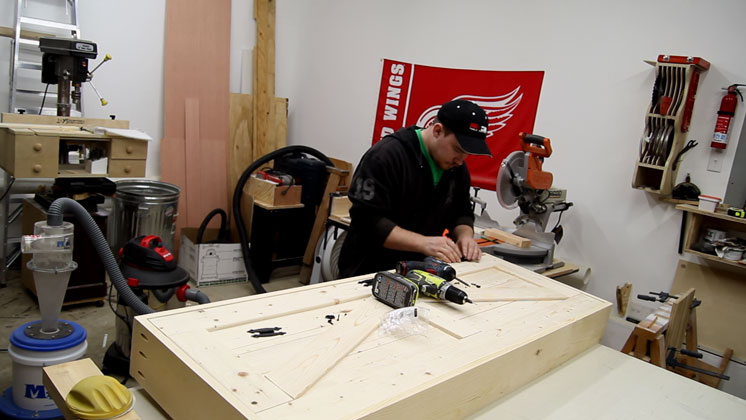
With the door upside down I could place the case on top of it and mount the magnetic latch. This made it super easy to get it right where I wanted it.
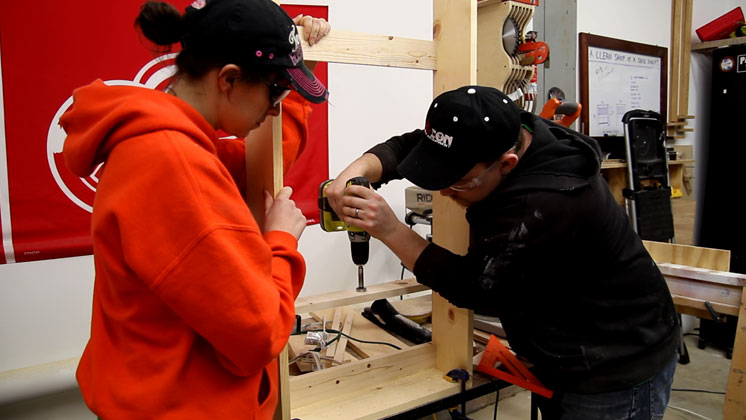
Jamie picked out three overlay hinges to use. Like I said previously, the project was spread out over a few days due to scheduling conflicts. Jamie is also in the Army Reserves so she was gone at a battle assembly most of this day. I couldn’t stand not making any progress so I helped her out with a little bit of the hardware.
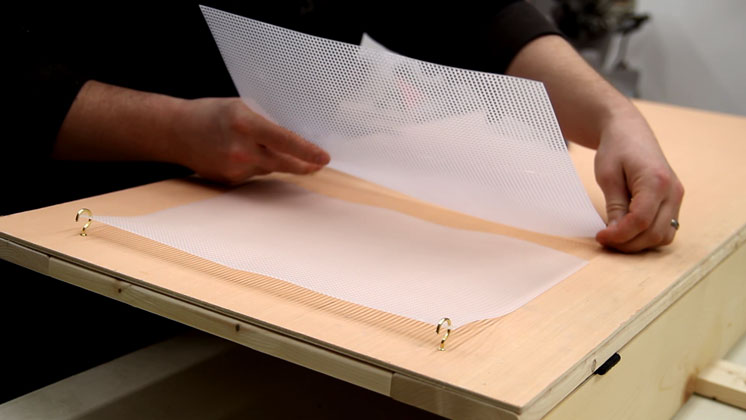
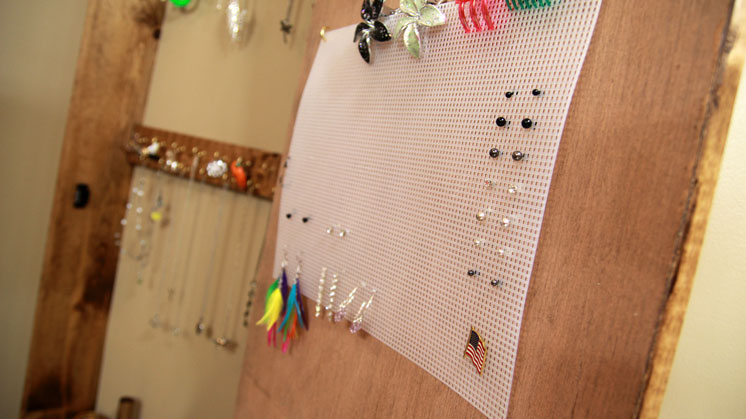
To hold a lot of earrings she picked out some white plastic mesh from the craft section. A couple cup hooks is all that is needed to hang it.
And finally, a billion more of these cup hooks. I’ll be perfectly happy if I never touch another cup hook again after this build. Tooooooooo many cup hooks!
The door pull was the last piece of the puzzle.
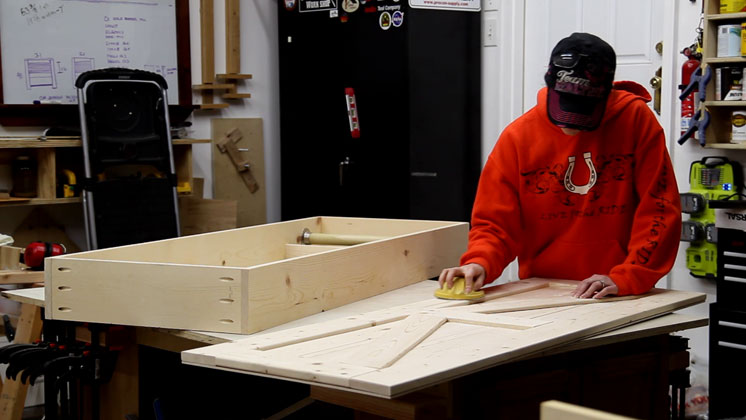
The most boring part of any woodworking project is easily the sanding process. And because this is Jamie’s project it was only fair that she was responsible for all of the sanding.
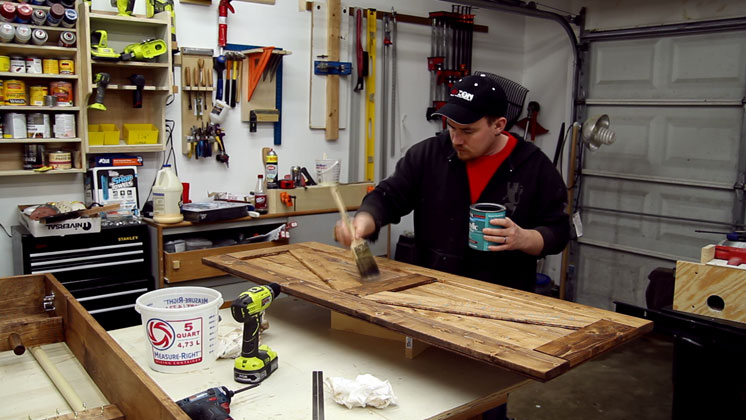
We both ended up staining the project and I applied the final coat of Polycrylic to finish it off.
While my wife didn’t make 100% of this project I can still consider it one she made as she did the vast majority of the work. Not only is the outcome quite rewarding for her but she did learn a few things along the way. We really like the look of this and want to continue to use this style in future projects around the house. I suppose the biggest take-away from this build is that if you are given the opportunity to guide a first time woodworker through a project, DO IT! Being able to watch someone who has never attempted a project like this actually produce a really cool project is incredibly rewarding. Now if I could only persuade her to build my workbench for me…..


Jay that is so cool that! Wish my wife was interested in my woodworking. Nice job.
Great job, really nice. Do like the doors!
Thanks Elaine. We appreciate it.
This is great! I love seeing other people get into woodworking!
Thanks man. Very much appreciated.
This is awesome! I almost bought my wife a necklace stand. Great work! Can’t wait to build this!
Very cool. I love the fact that it looks like a nice piece of furniture instead of a box on the counter or dresser.
Great job Jamie and you too Jay. Thumbs up! Now my wife wants one too. She said I need to use my Kreg jig more often. I totally agree with her!
Sounds like a win to me!
Great job on this. Keep building things. Go Lions!
Thanks Mike. GO LIONS!
Very nice….
Thanks Stephen.
Great project! I’m impressed with your design and execution talent. One note on barn doors. The supports should always point toward the hinge…picture it just reverse to the way you made it. The whole point to those supports is to carry the door’s weight to the hinge, away from the unsupported edge of the door to combat sag. On a small door like this one, sag is unlikely but still possible.
Great job you two !! Looks like you might have a new shop partner Jay she seems to have gotten the hang of things quickly.
I’d love for her to build more stuff :)
Totally love the way both of you are waiting for the glue to dry – lol!! Great job on the cabinet.
Thanks Dan. I appreciate it. That apple was great!
Shared activity; awesome. Nice project.
Thanks John. We appreciate it.
That turned out real nice. Now she has room for a LOT more jewelry – ;^)
SHHH!! We don’t need any of that talk man! Thanks Terry.
Awesome Job, it is great you had help with the project, but my wife keeps asking to use my power tools… and this didn’t help ;-) You said you ordered a ring holder, I once made a soft one for my wife’s box by wrapping self adhesive felt around strips of foam weather stripping, it worked like a champ. Keep up the great work!
Thanks man. I appreciate it.
Jay, I know you experiment with a lot of stains, but what stain did you use on Jamie’s jewelry cabinet? Thanks
Early American by Minwax.
Good job
Thanks Everett!
No offense man, but I think you married UP!
Love your videos and projects.
Getting ready to build your miter sled.
hahaha! I get that a lot :) Good luck with the sled.
Great build.Take it from an old(73) Vet. these young troopers can do whatever it takes.
Larry from Freeport, NY
Absolutely. And thanks for your service!
Nice Jay! The wife did great and looked like she really enjoyed the Kreg Foreman! Really nice team work!
It’s super easy to use. Thanks Drew!
Loved the build, quality time together. Be careful though Jamie might pawn one of your machines to fill that baby up! lol
Hahahaha!
Happy New Year Jay & Jamie. Perfect timing with this beautiful Jewelry Cabinet. Coincidentally this is my next project also. I have the lumber (mahogany) and am awaiting the arrival hardware and tools to make one for my wife. I appreciate all the photos of the various steps you and Jamie took in completing this build. You have a gift for clearly explaining and cataloging the process.
I’m a beginning woodworker and with each project try to develop new skills in joinery. With the main cabinet box I plan to use through dovetails in the four corners. The glass panel door will be rail & stile with extended tenons. Using Freud 99-761 (with 54-760) router bits to cut the rails and stiles. Also the door will house a mirror with plywood backer panel. The whole unit is free-standing with a leg assembly.
Your video has inspired me resume woodworking after the Christmas break. Thank you very much Jay & Jamie. I enjoy watching your videos. BTW, you are an excellent SketchUp teacher as well. Thanks to you I’m finally understanding how to use this powerful software.
Thank you for the kind words Anthony. I very much appreciate it.
Great teamwork. I see why its so long/tall. Nothing worse than my wife handing me her “necklace ball” with that can you sort this for me look..
I totally know what you’re talking about man. Totally. Thanks for stopping by Tony.
Great job.Competition is coming Jay,best hone up the cookery skills and buy a new iron lol.
hahahaha! I actually do the cooking now :) But I’m not allowed to touch the bleach or the washing machine so it works out alright.
Couple of things Jay;
1. Congrats to Jamie on the project and thanks for her service.
2. It’s nice to see you bring her into the videos. You talk much about her and it’s nice to put a face to the name.
3. I would agree with Daryl; you married ‘up’, dude!!!
4. I always love to see you ‘watching glue dry’. Now you added Jamie. Very nice!!!
5. Wait, this is more than a ‘couple of things’…sorry…
Great work as always. I so enjoy your videos. I’m trying to figure out how I can start down this path with my own projects and somehow make a living. I pick up a lot from you and from other online woodworkers, so thanks.
1 She said thanks :)
2 I like to talk about the things I love (cheesy, I know) ((mmmm…cheese))
3 Waaaaaaaay up
4 The best part is the food
5 I understand
Good stuff wife now want to help make this!! Thanks Jay and GO BLACKHAWKS!!!
I’m not sure I understand that last word you said. Hmmm…let me think on this one…hawks are birds….birds have wings….oh yeah! You meant to say GO WINGS!!
That is so cool. I love it! Jamie you did a great job. So glad i was finally able to see this video. Awesomeness!!!! ( love your biggest fan)
Thanks gangsta!!
Great job guys. The mesh solution for ear rings is a great idea. Jay I would like to tell you I’m sorry about the Lions but you probably know that is a lie. GO DALLAS!!!! ;-)
Please, no foul language here. Let’s keep this PG. That last word you wrote was absolutely absurd ;)
Happy New Year, Jay! Great build and great pics; and, yeah, you did marry up. Meanwhile, if you take the advice to rebuild the door, with the supports both going from outside edge to the hinge below it, I’ll make one further suggestion: Put the hinges on the left side. As it is now, your lovely wife will have the door between herself and the mirror as she decides which jewelry goes best with whatever she’s wearing. She’ll have to step to her right to look at each selection, and then step back to return it for another option. If the door opens the other way, she can stand in front of the vanity and simply grab away. I just saved you 8,000 hours of waiting over your lifetime. HTH.
Thanks for the vids.
There is no need to rebuild the door. The interior pieces are not structural.
Jay and Jamie, enjoyed your video very much! (Could not find the like button, so this will have to do). Very informative and entertaining. I have just starting using pocket screws in the last few years, so you gave me some ideas. As a geezer, I have only one comment: Jamie needs to use her hearing protectors when using that chop saw, so that she can enjoy her music when she gets to my cratchery age!
Nice work, but you made a BIG mistake: with all the extra space left, you will need to get her a lot more jewelry ;-)
I loved the door you guys made for the cabinet, it looked very solid and functional, well done.
Very good detail caress the surface of the wood with the saw blade bringing it back, to avoid edge chips when the final cut is made!
Good job enjoyed watching you all working together on the nice Jewelry box my motto is Listen, Laugh, Love together have a bless day.
Thumbs up for sure. Nice that Jamie provided the main design element. Just like a wife, eh?
JUST like a wife!
That was a great vlog! Nice work Jamie!
Great Job.. Thumbs UP! Now my wife said she wants one to go with our barn style doors as it would “Match” perfectly..
Great job my wife has been after me to build one. I like the removable rod good idea I’ll steal that.
nice to see a husband and wife project! nice job! thanks for all the videos and projects you post, and nice shop!
This is great! I think Jamie and I are sisters separated at birth. (Does she have horses, too?) Seriously. I just got a miter saw and stand today. After I assembled it, I called my Dad because I was afraid to cut with it. (My husband isn’t into woodworking at all, so I’m on my own.) Once I mustered up the courage I was off! Love it! However, I’m terrified of table saws, too. Thanks to videos like yours, I’ve been able to build my first work bench with the saw and a Kreg jig. I’m hooked! Thank you to you and your wife. She did great! Hope my stuff turns out as nice.
Comments like yours really motivate me. Thank you very much for taking time to provide feedback. I very much appreciate it.
Geez louise now my girlfriend wants to ‘help’ in the shop while I make her projects….. what did you start man!
Very nice project and going on my short list. Thanks!
It’s not just one but two thumbs up. How Jamie like to do his own project?
Thumbs are up.
Great job! It’s always nice when you can work with your spouse.
boy girls sure do work different than guys and NO safety glasses(shame)
Did you follow the Shanty 2 Chic plans exactly, except for substituting the barn door front? Did you have any plans you made you might be able to share?