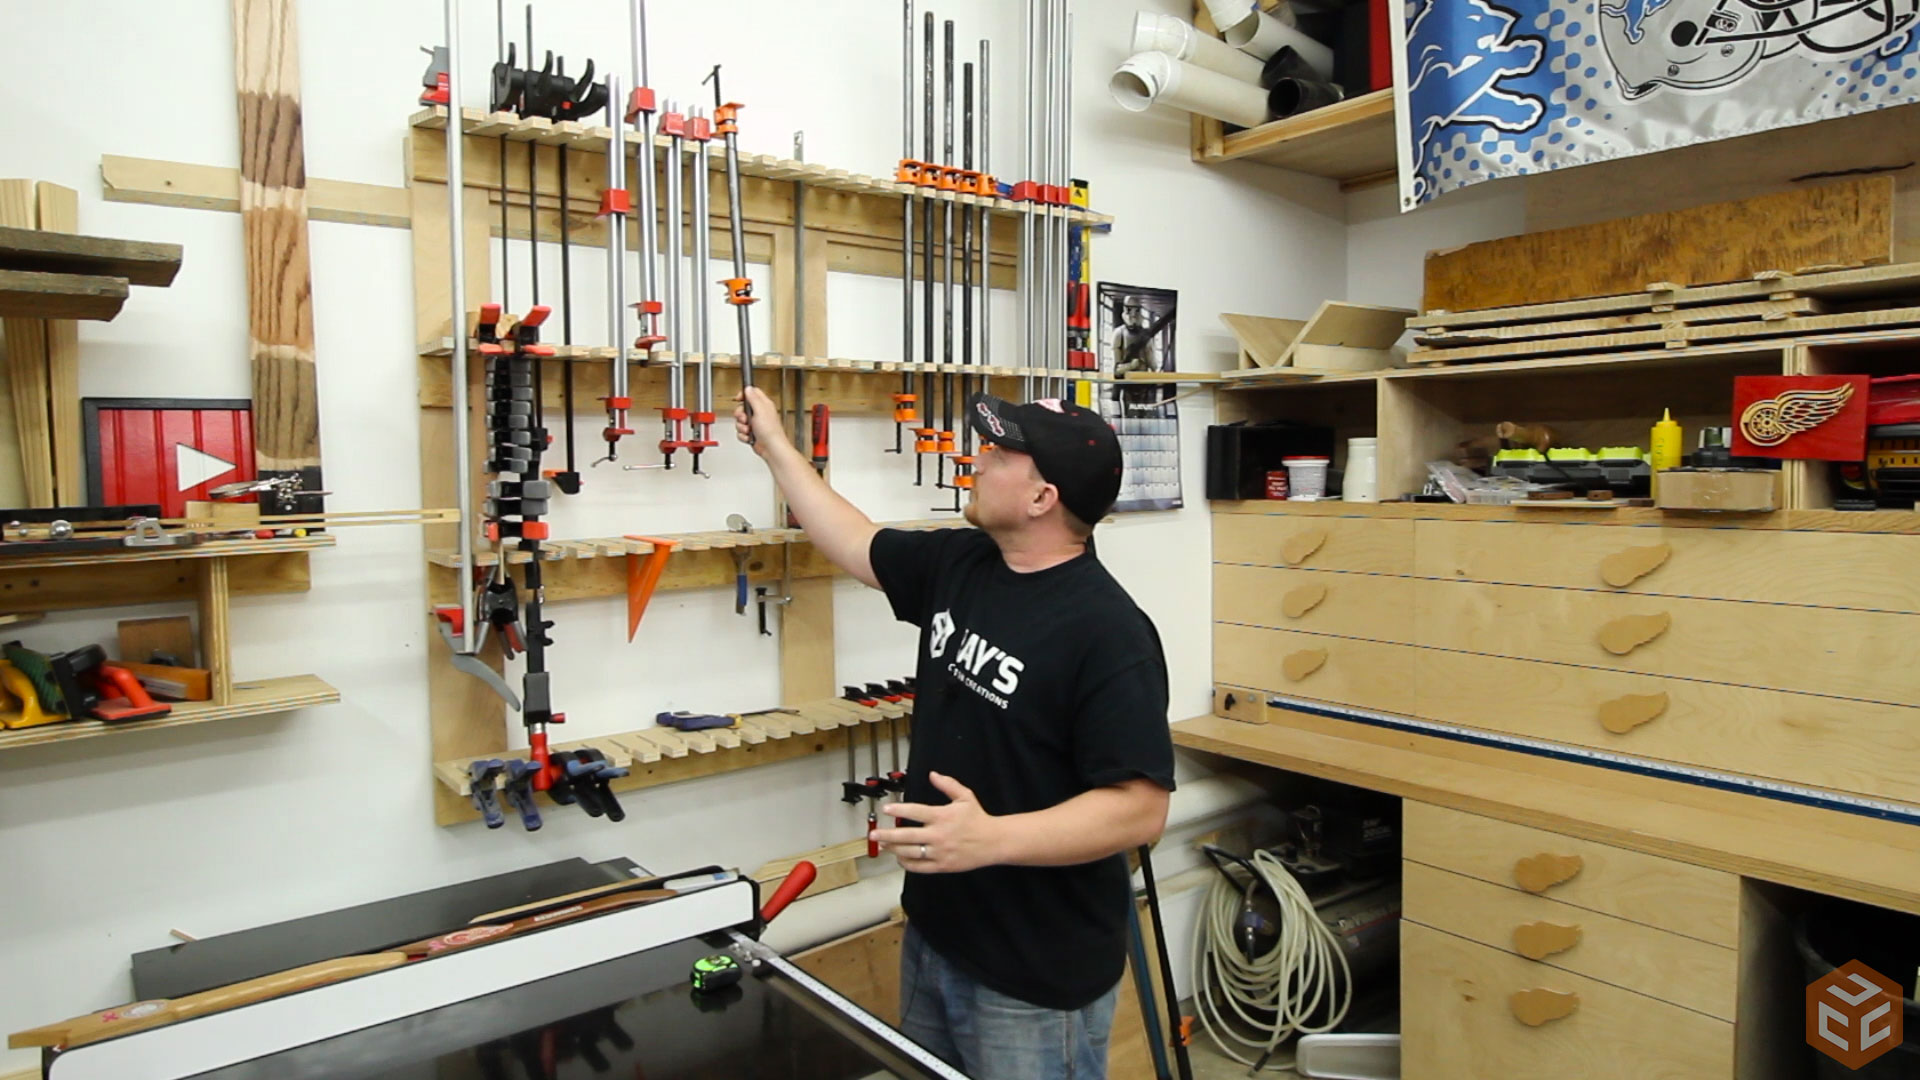
The purpose of making a “shop project” is to either increase efficiency and organization or to make the work space more inviting and enjoyable to be in. Some of those shop projects don’t work out in the long run though. While solving one problem another problem might be identified or magnified. That’s exactly what happened with my universal clamp rack project.
My thoughts behind the universal clamp rack was to have a universal cut-out that would accept anything that I wanted to hang. For that task it was a success. As a matter of fact it was more than a success because I often had items that didn’t belong on the clamp rack simply because they could fit. Such as a hammer. It fits there. But it makes more sense elsewhere.
The original design worked great when there was only one row of holders in use by that item. But when items spanned two or more rows of holders an annoying problem was identified. The holders were not cut with CNC consistency so the slots didn’t line up from row to row making most of the longer items a little difficult to insert and remove. This also made some of the slots very loose which allowed the clamps to fall off at times.
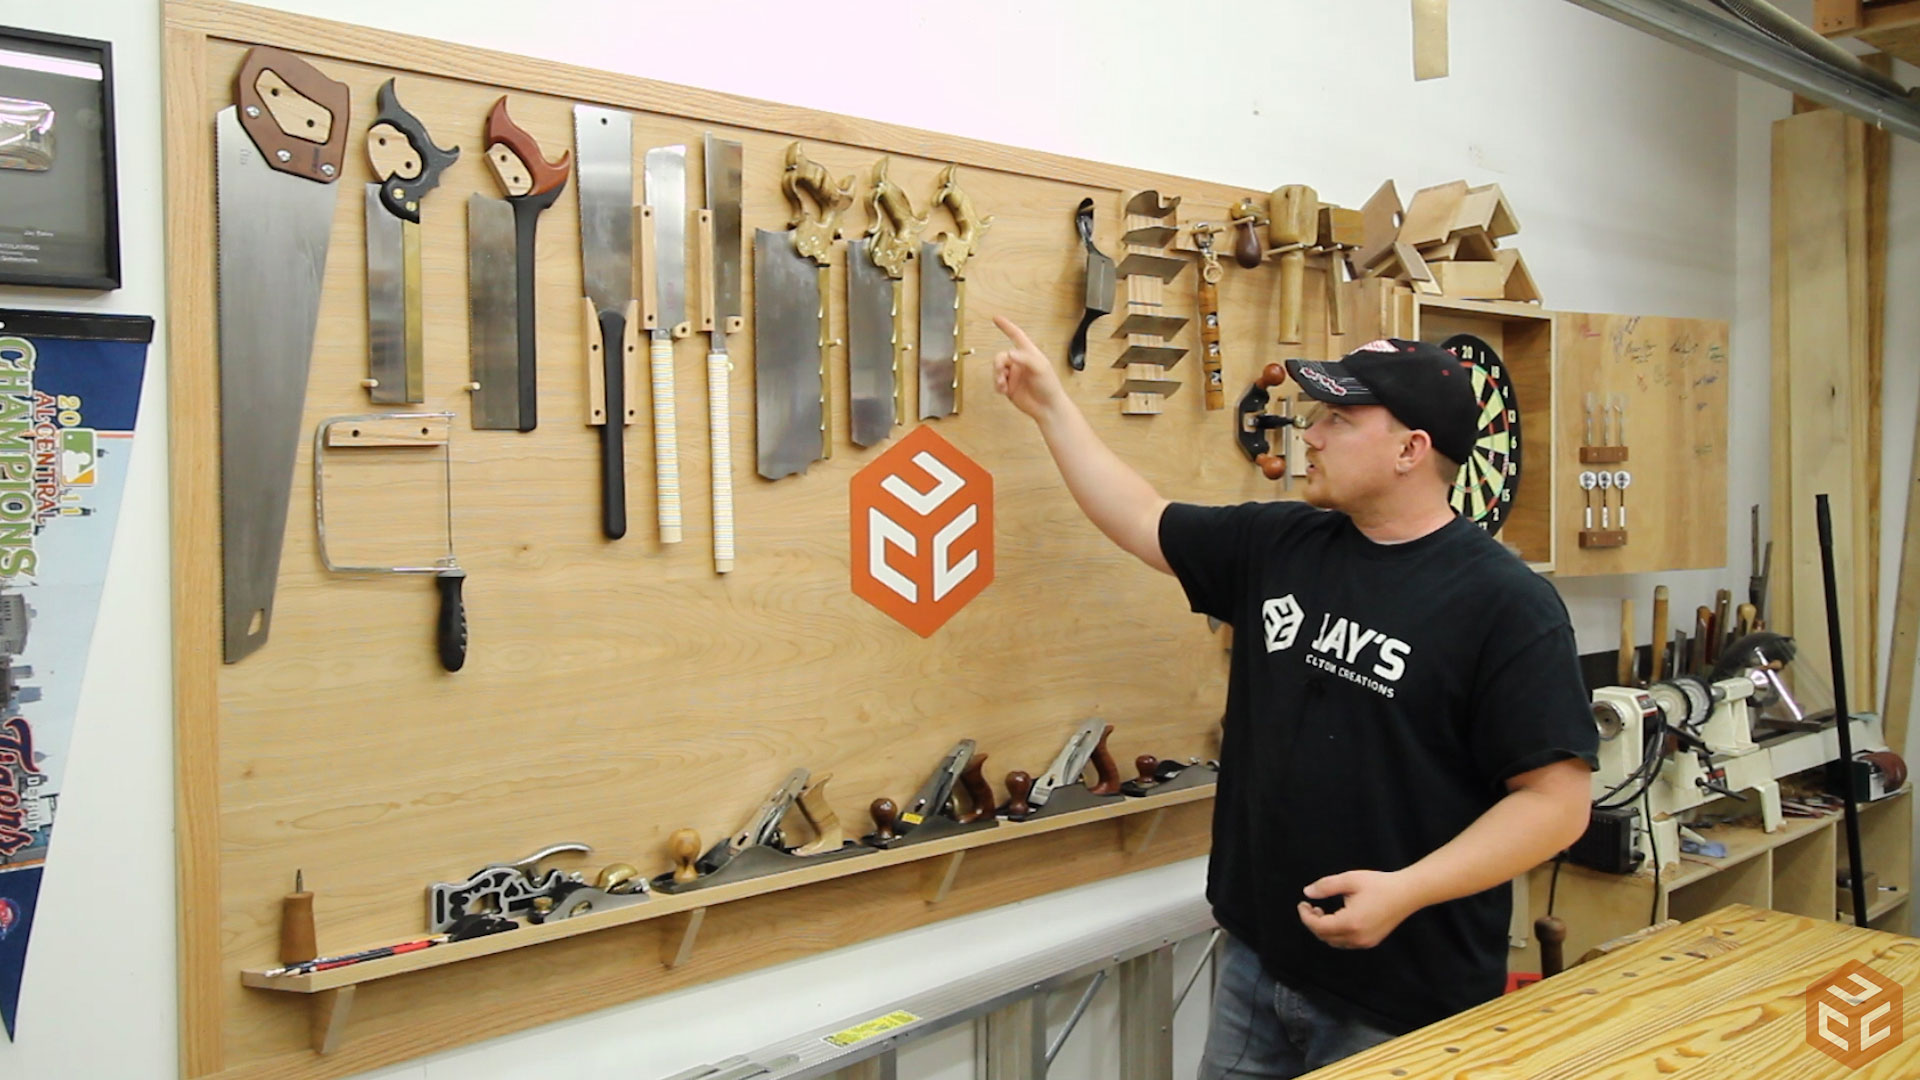
I came up with two criteria for the new clamp rack. It has to store the items from the wall out instead of left to right and I wanted a solid plywood back panel that could be used as a mounting surface. A few months ago I made my hand tool wall and since having it I’ve realized how convenient it is to be able to unscrew and relocate items or drill into the plywood and add a piece of dowel stock for simple holders. It’s an infinitely changeable mounting option.
99% of my projects start on the computer where I make a 3d model to visually approve the project before building. Not so with this one. I figured it was simple enough to just layout on my assembly table and identify what needed to be where. Referencing everything off the bottom left corner of my assembly table allowed me to determine all of my dimensions.

Also, the new shop layout has proven to be a success. Having access to all sides of my assembly table is great and with all of the horizontal surfaces in my shop being the same height it makes moving material from one to the other really easy. I had a piece of 3/4” plywood that was already 40” wide so I used that for the width dimension of the back panel. I went with 35” for the height.

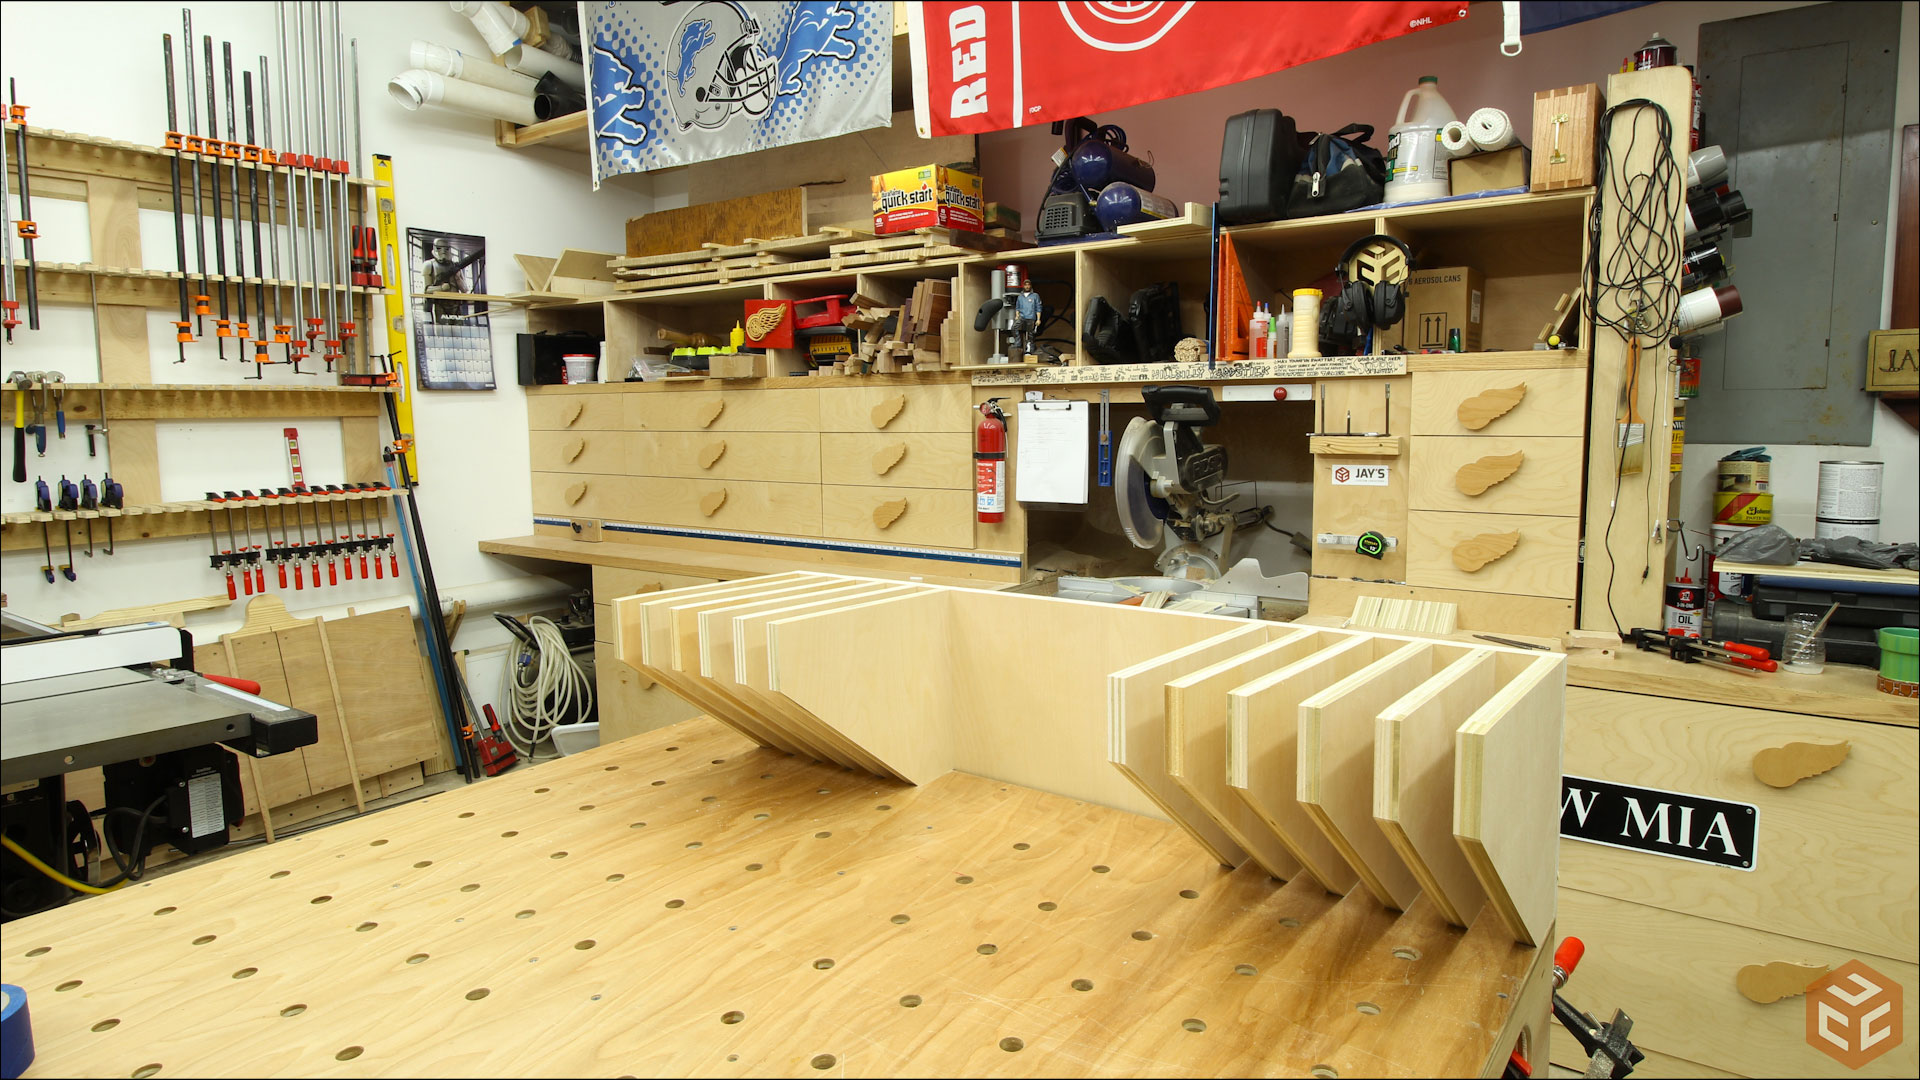
The offcut from the previous picture resulted in just enough material to yield six sets of 12” wide by 10” tall brackets for the large items. To save space I nested a pair of the brackets sharing a common diagonal so that I could get two pieces out of 15-1/2” of material instead of 20” if they were cut individually.
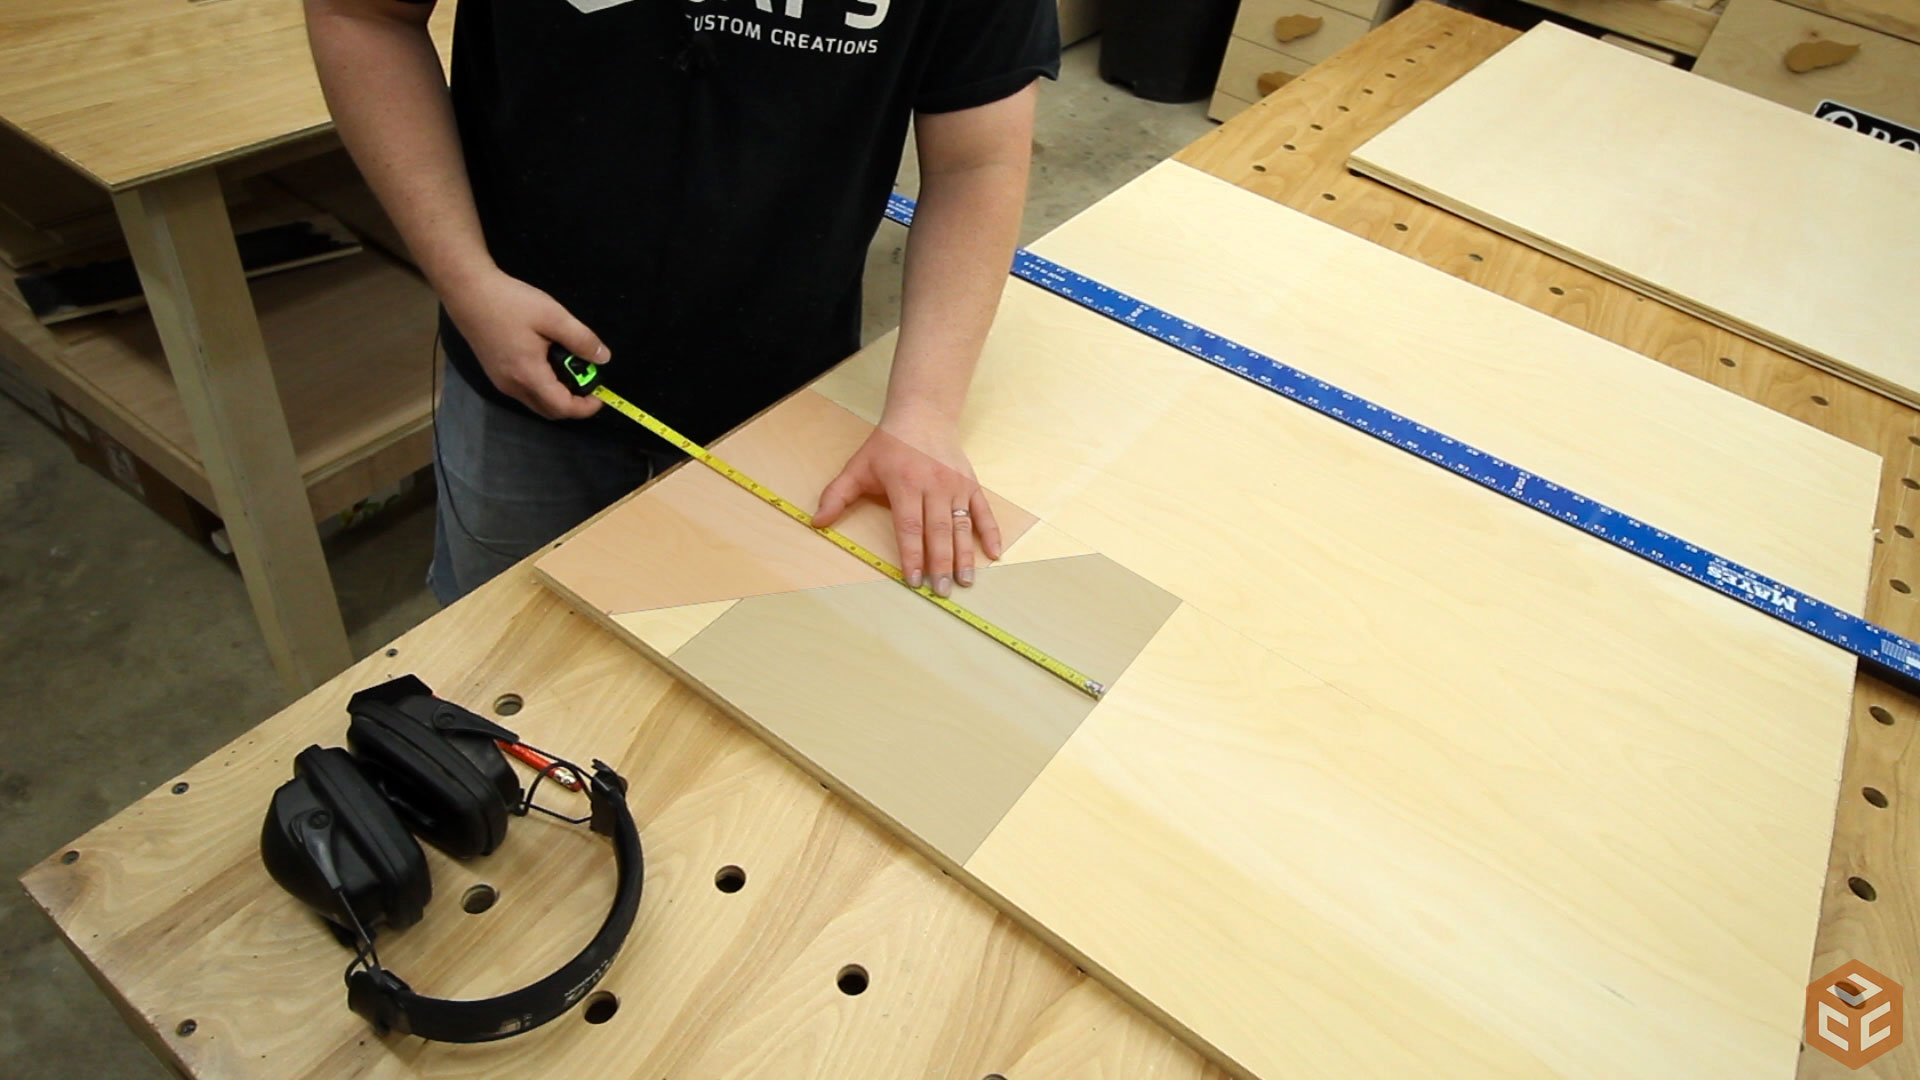
That offcut piece was ripped into three sections at the table saw.

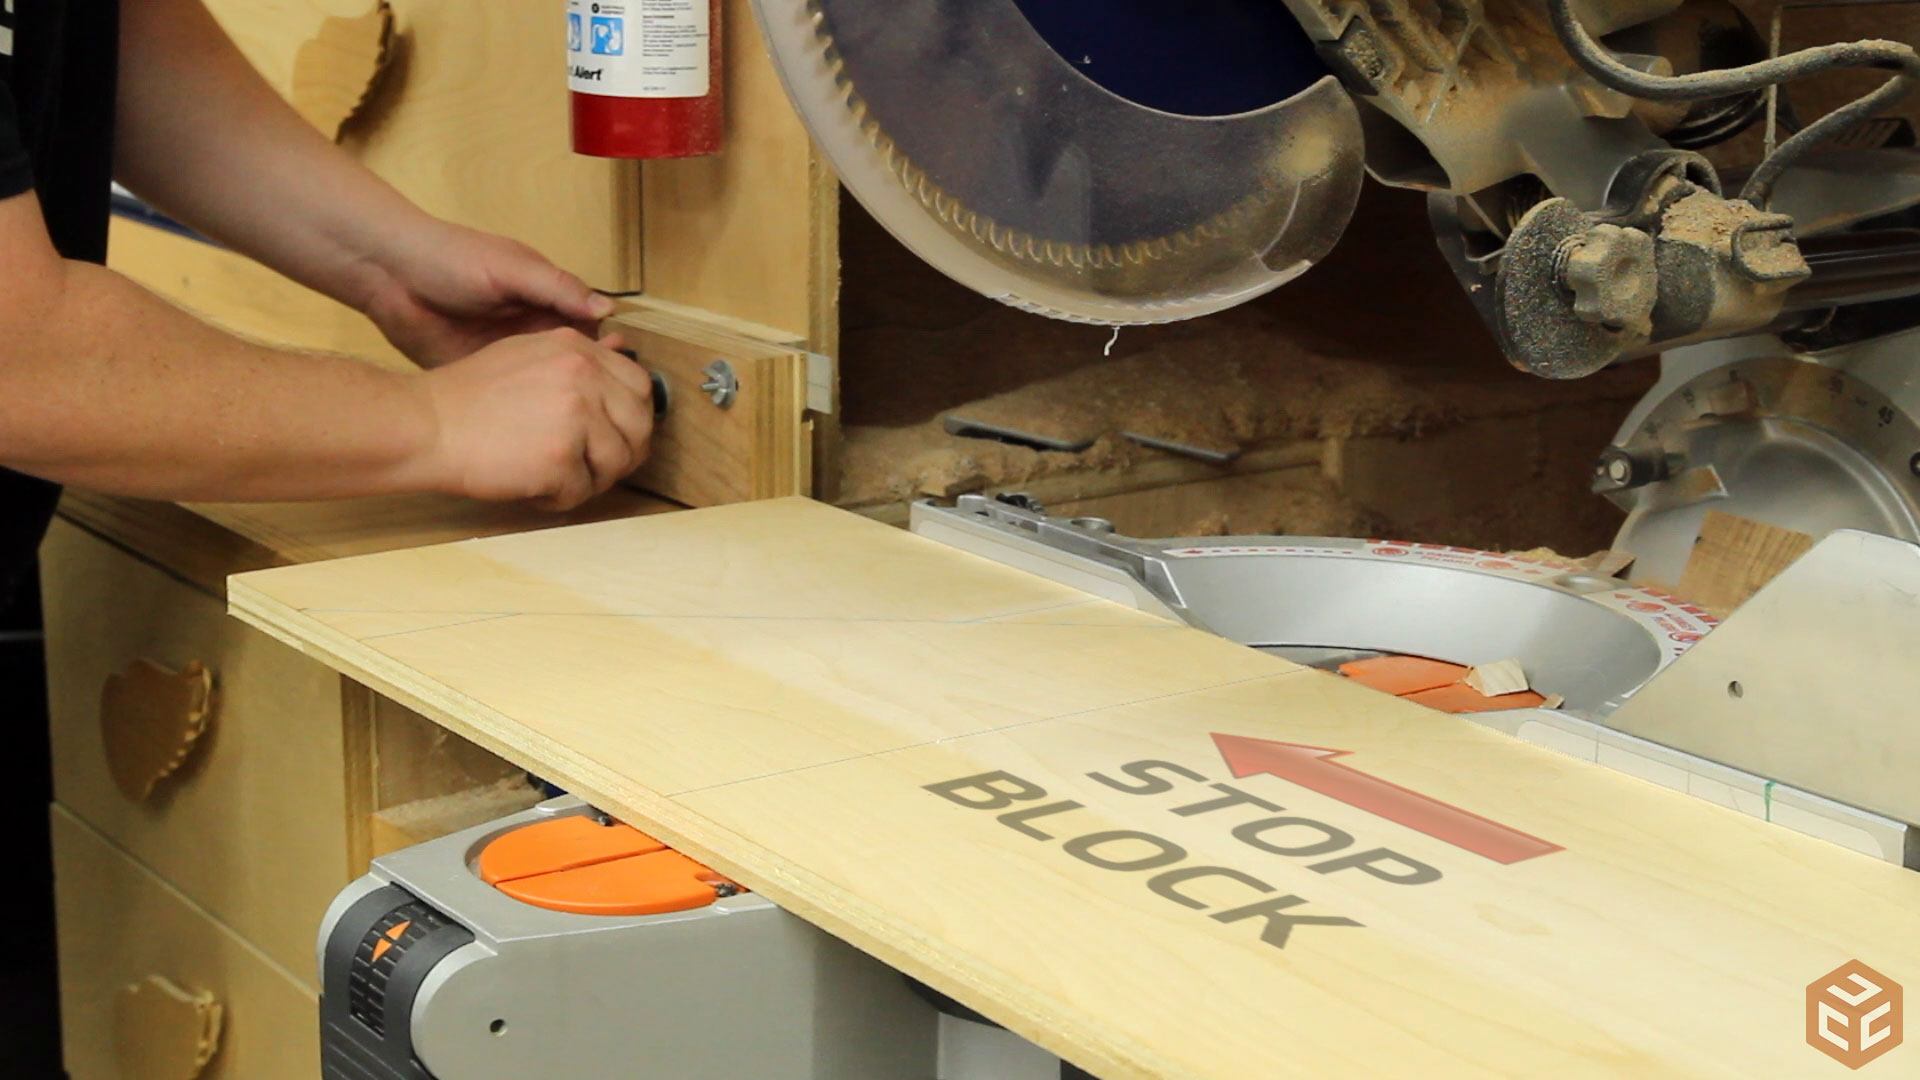
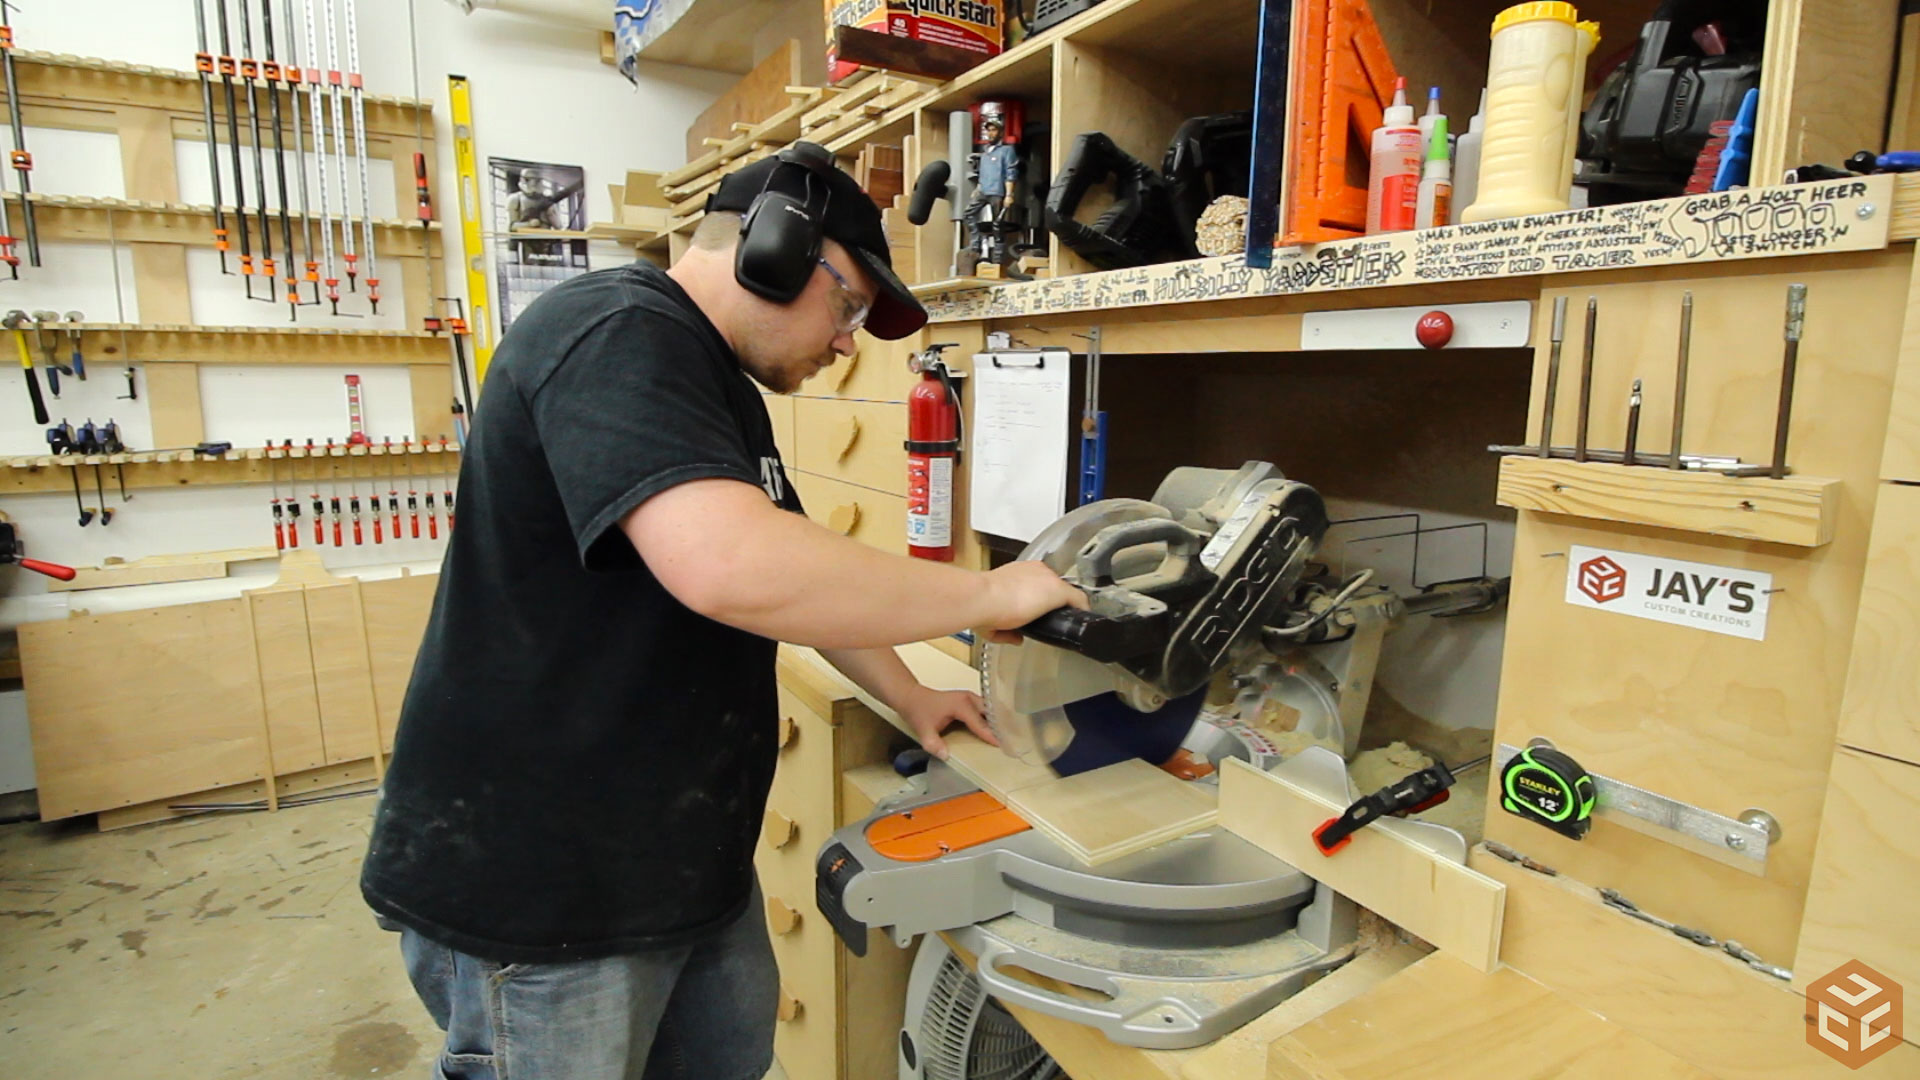
And then cut into six 15-1/2” pieces using a stop block at my miter saw station.
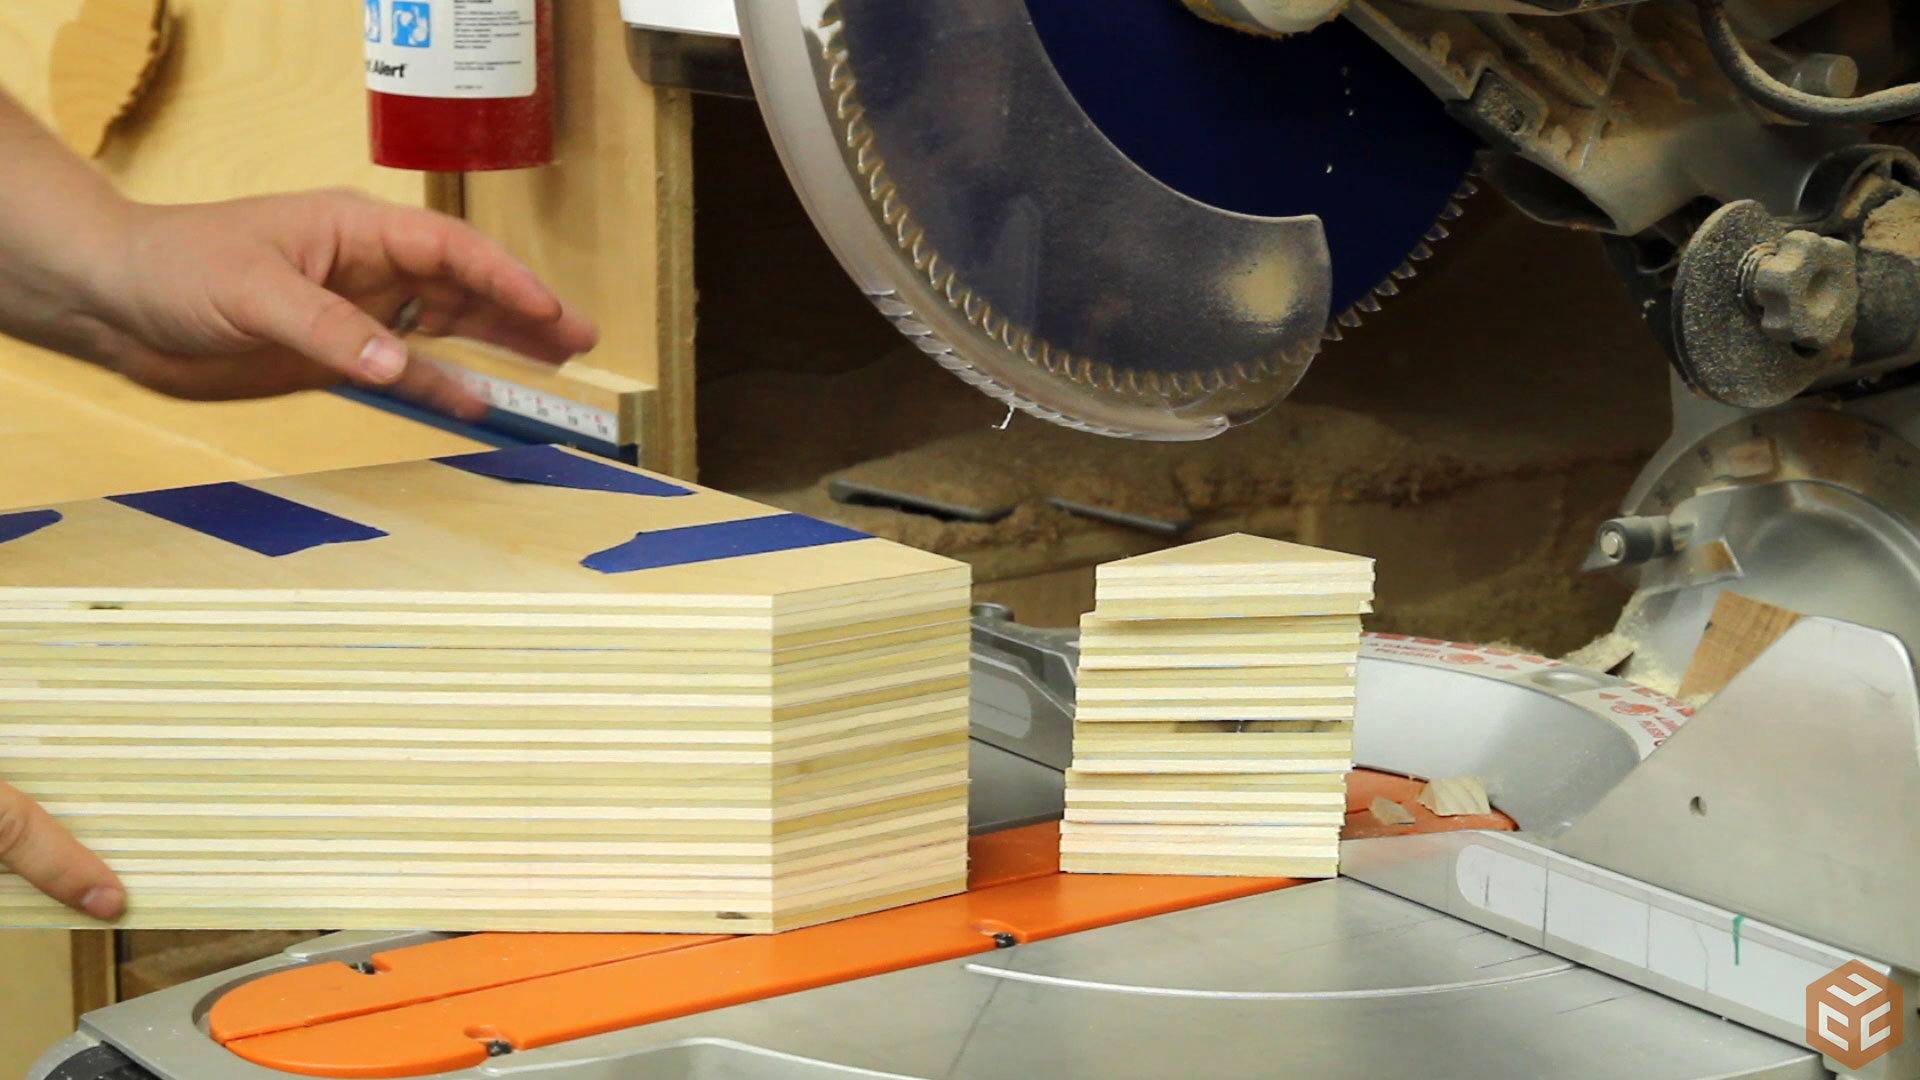
For the angled cuts my first thought was to use my crosscut sled on my table saw but it wouldn’t work because I don’t have enough clearance between the front and back fences to get the appropriate angle. My second thought was to use the sliding feature on my miter saw but I didn’t have the sliding capacity to make the full cut. I ended up taping everything together and using my bandsaw. It worked great.
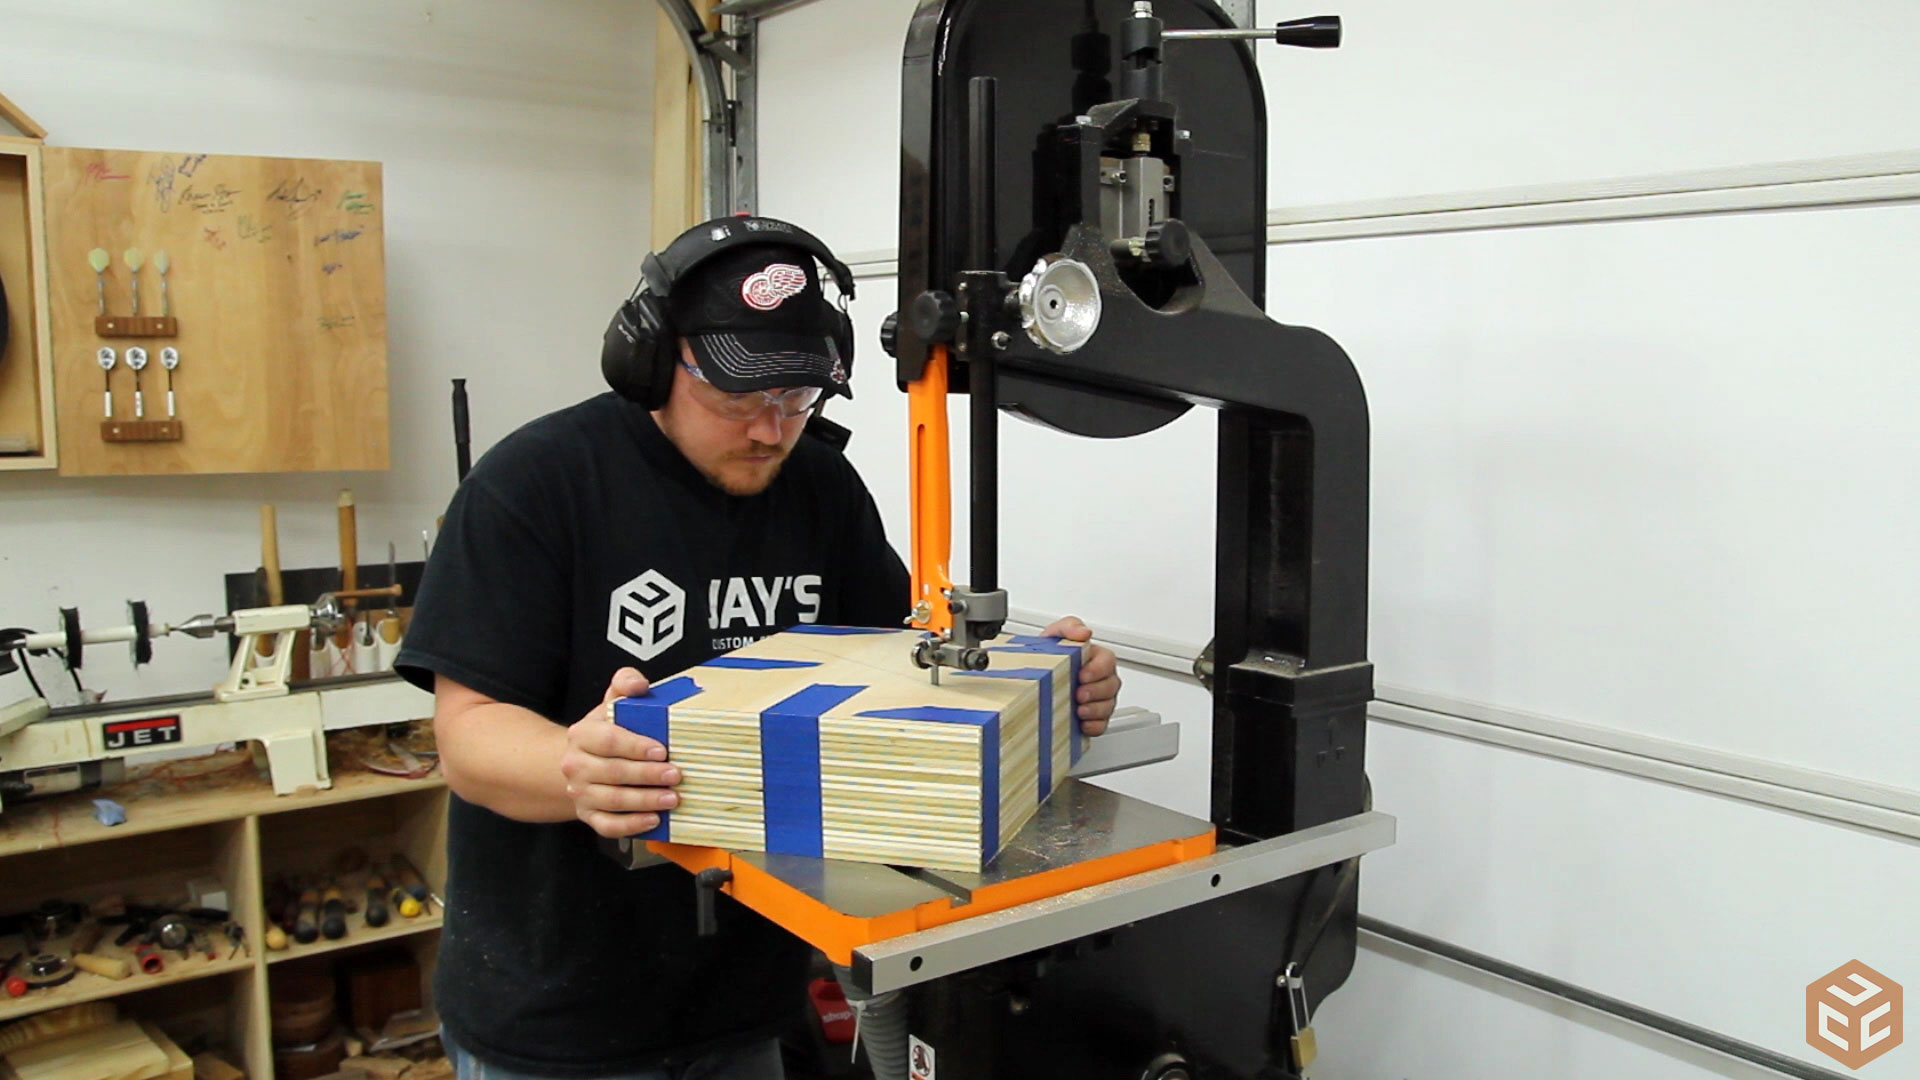
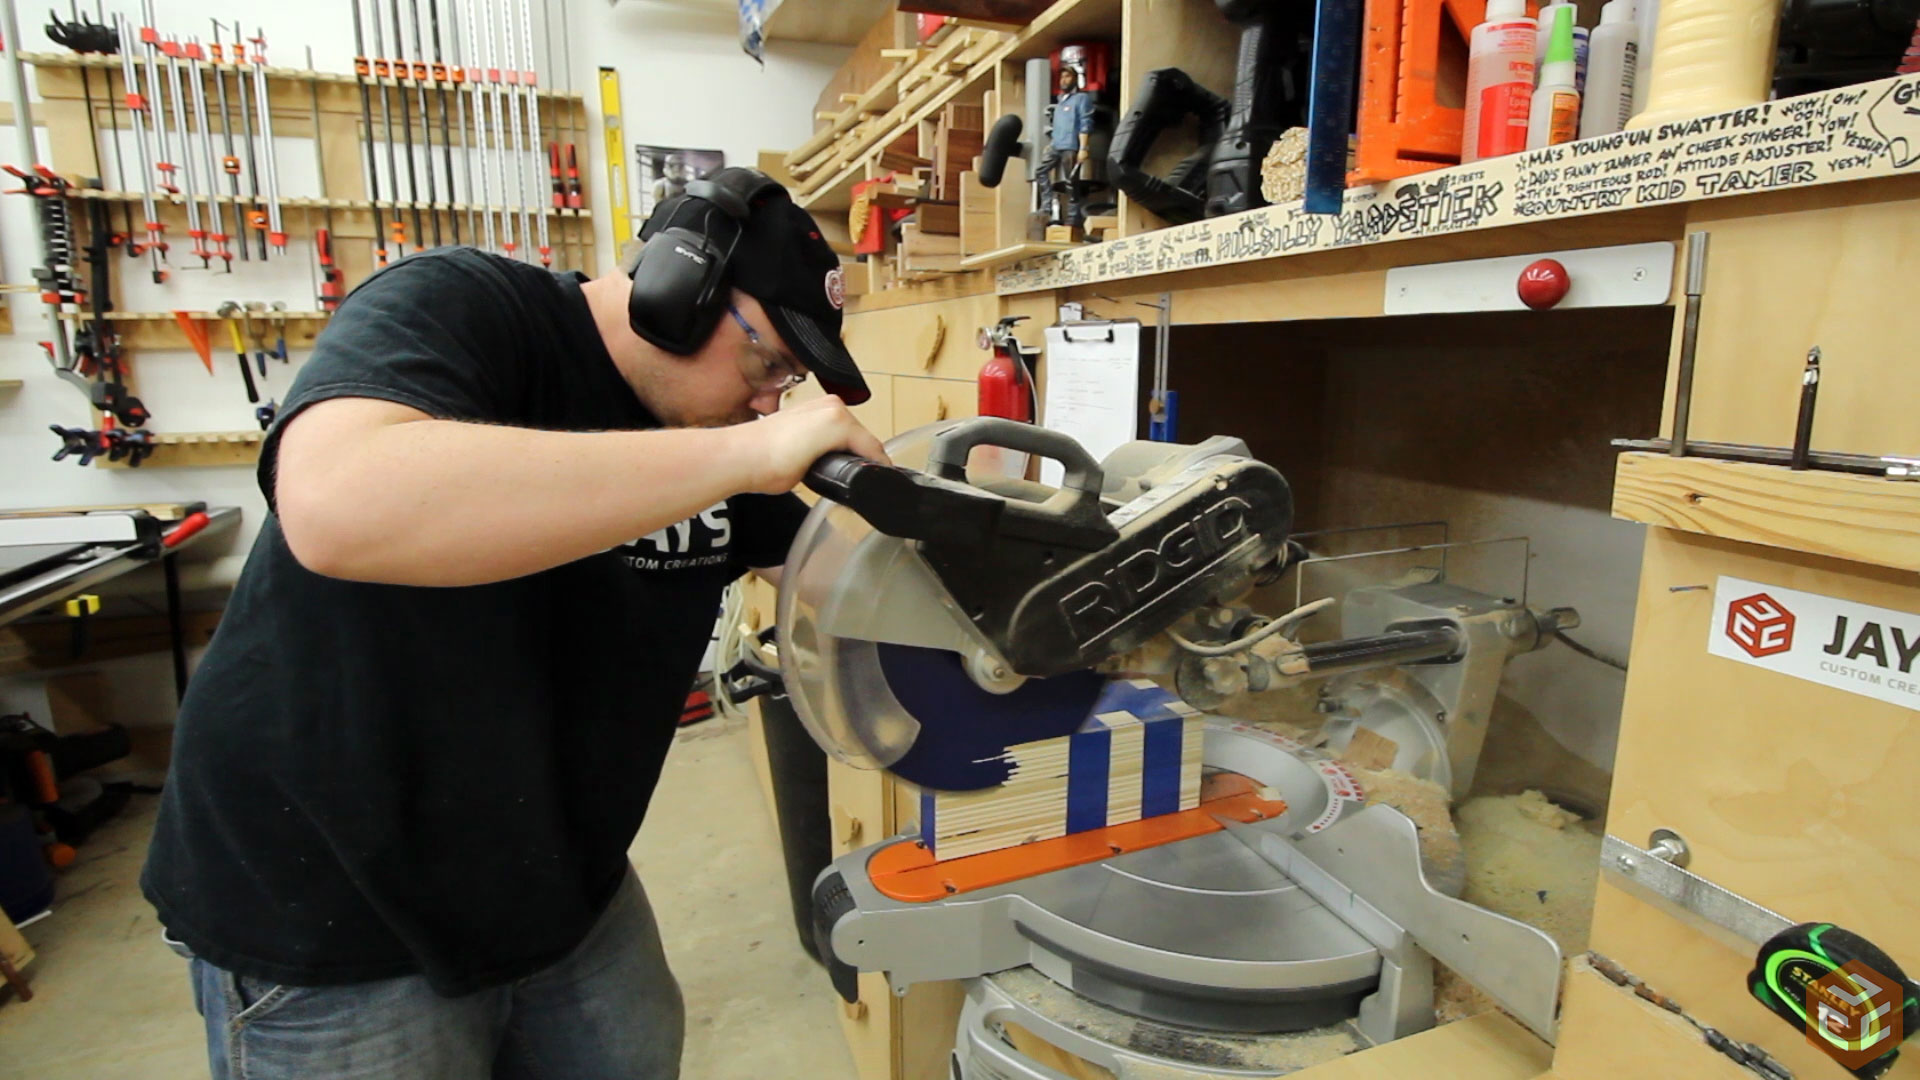
Te resulting angled cut from the bandsaw left a point on each set that needed to be removed. The depth capacity of my miter saw can handle this. The miter saw also leaves a very clean cut.
The final cut before assembly was a two degree bevel on the top surface of each of the brackets. The angle goes down to the back panel so that when all of the clamps are in place and bumped they won’t have the tendency to wander forward. If anything they should wiggle further back which is what I want.
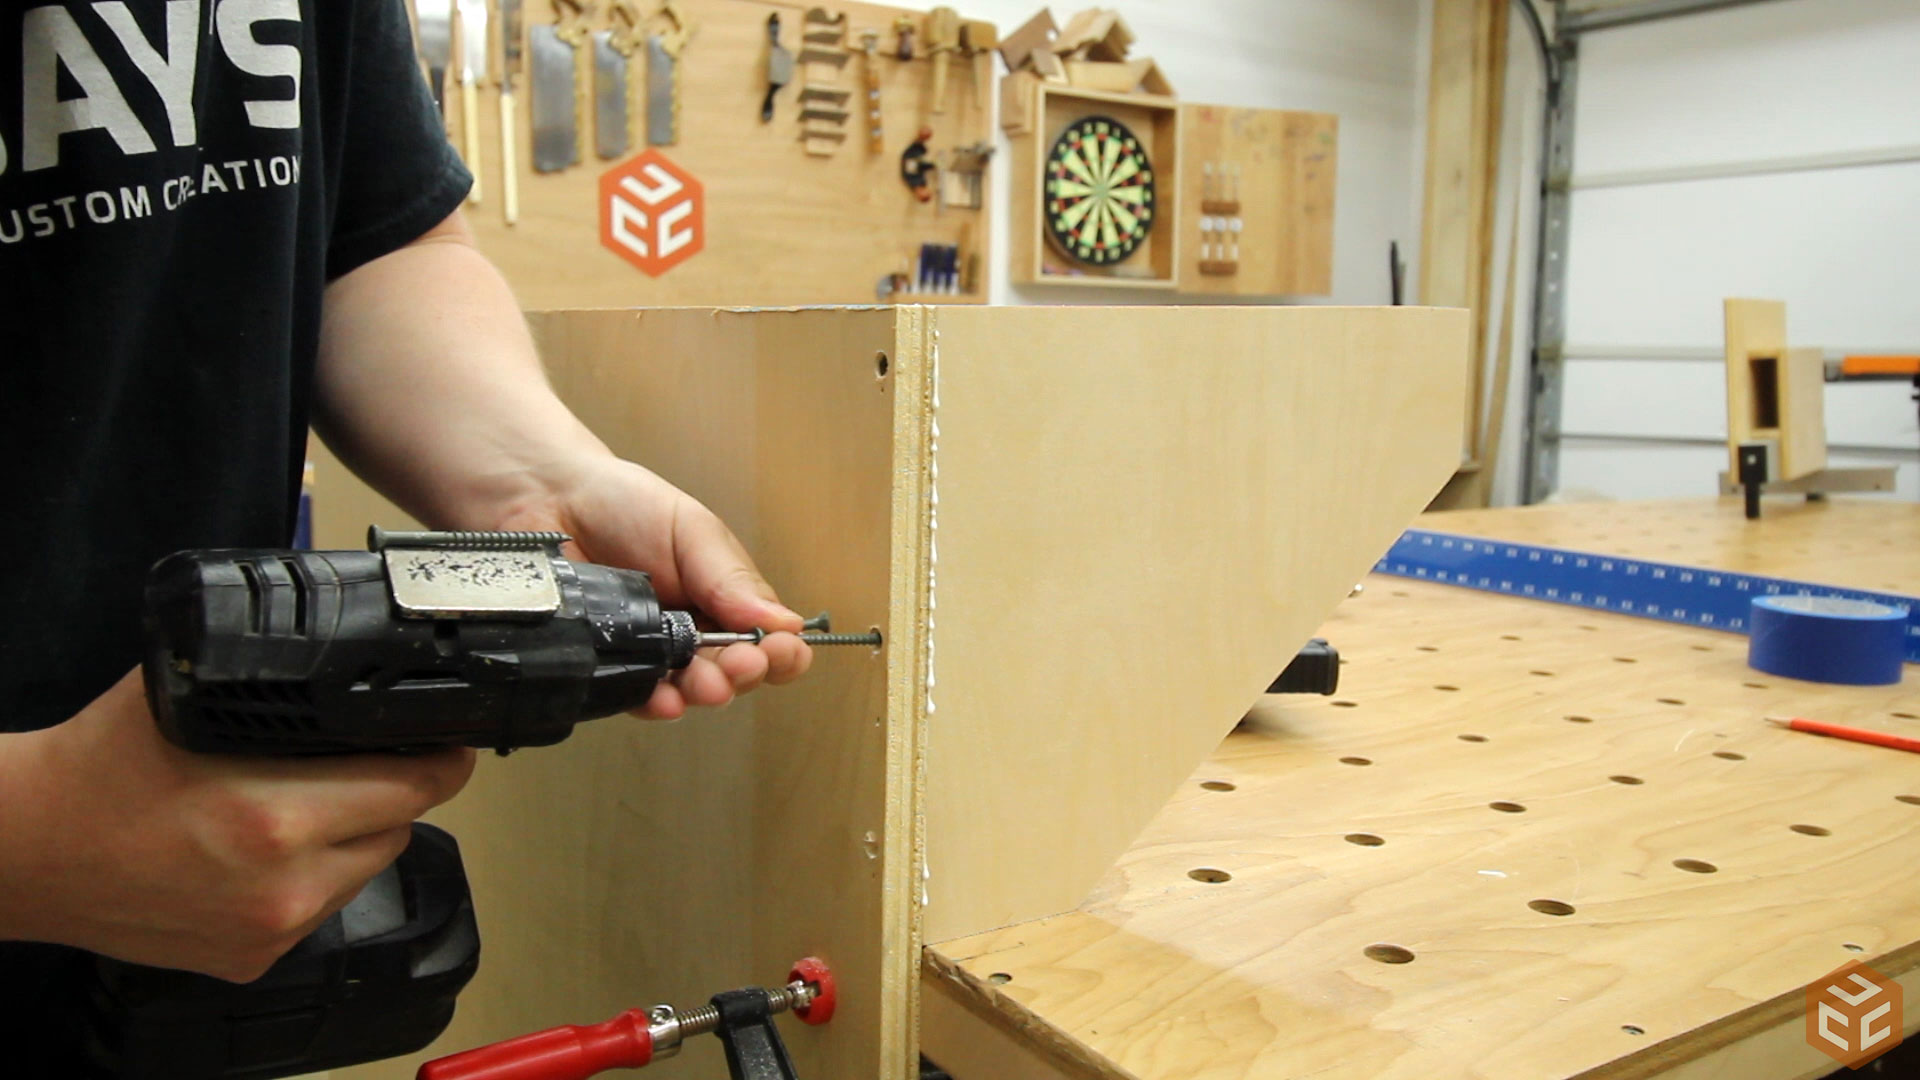
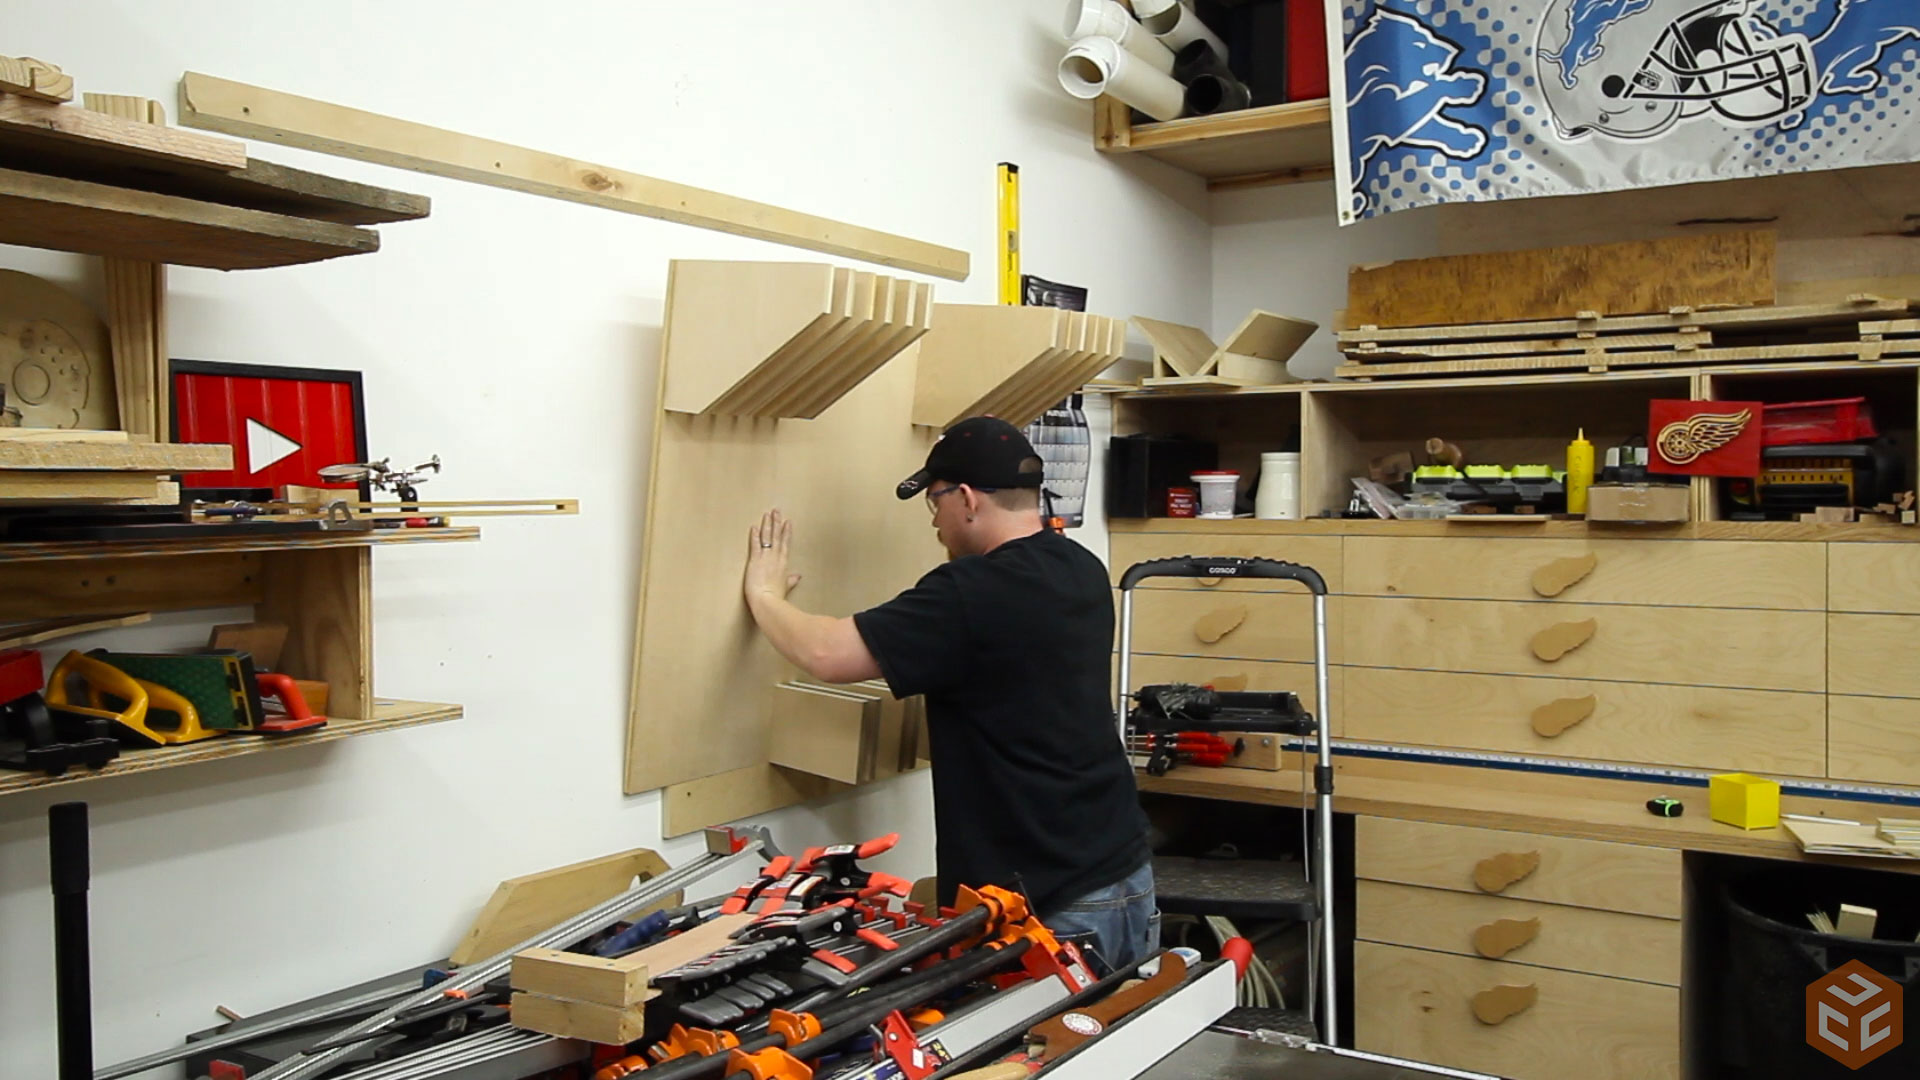
I figured it would be easier to install the top brackets if I could mount the back panel vertically and reach the back side. This was actually pretty easy. With two blocks clamped to the panel at the height of where I wanted the bottom of the brackets to be I used the assembly table top as a shelf and clamped the back panel to the side of the assembly table.

With the back panel still clamped to the assembly table but the previously clamped blocks removed the upper brackets can be installed pretty easy. Glue at every joint and brad nails to hold it in place while a couple of screws are inserted.
Installing the upper brackets went quick. I used a piece of 1-1/2” wide scrap stock to space the brackets. I decided at the last-minute to split the brackets and put half on each side. This gives a more symmetrical look. It shouldn’t affect how items are stored on there. Time will tell.
For the lower brackets I needed a better visualization to determine their placement. I loaded up a few clamps where they would be when installed and was able to see exactly where the lower brackets would be.

Back at the miter saw station the lower brackets were cut out. For these I didn’t make an angled cut on the lower outside corner but I did bevel the top at two degrees like the upper brackets.
Mounting the lower brackets wasn’t as easy as the upper brackets. I decided to just flip the back panel over and support the bottom side with a couple 12” speed squares.
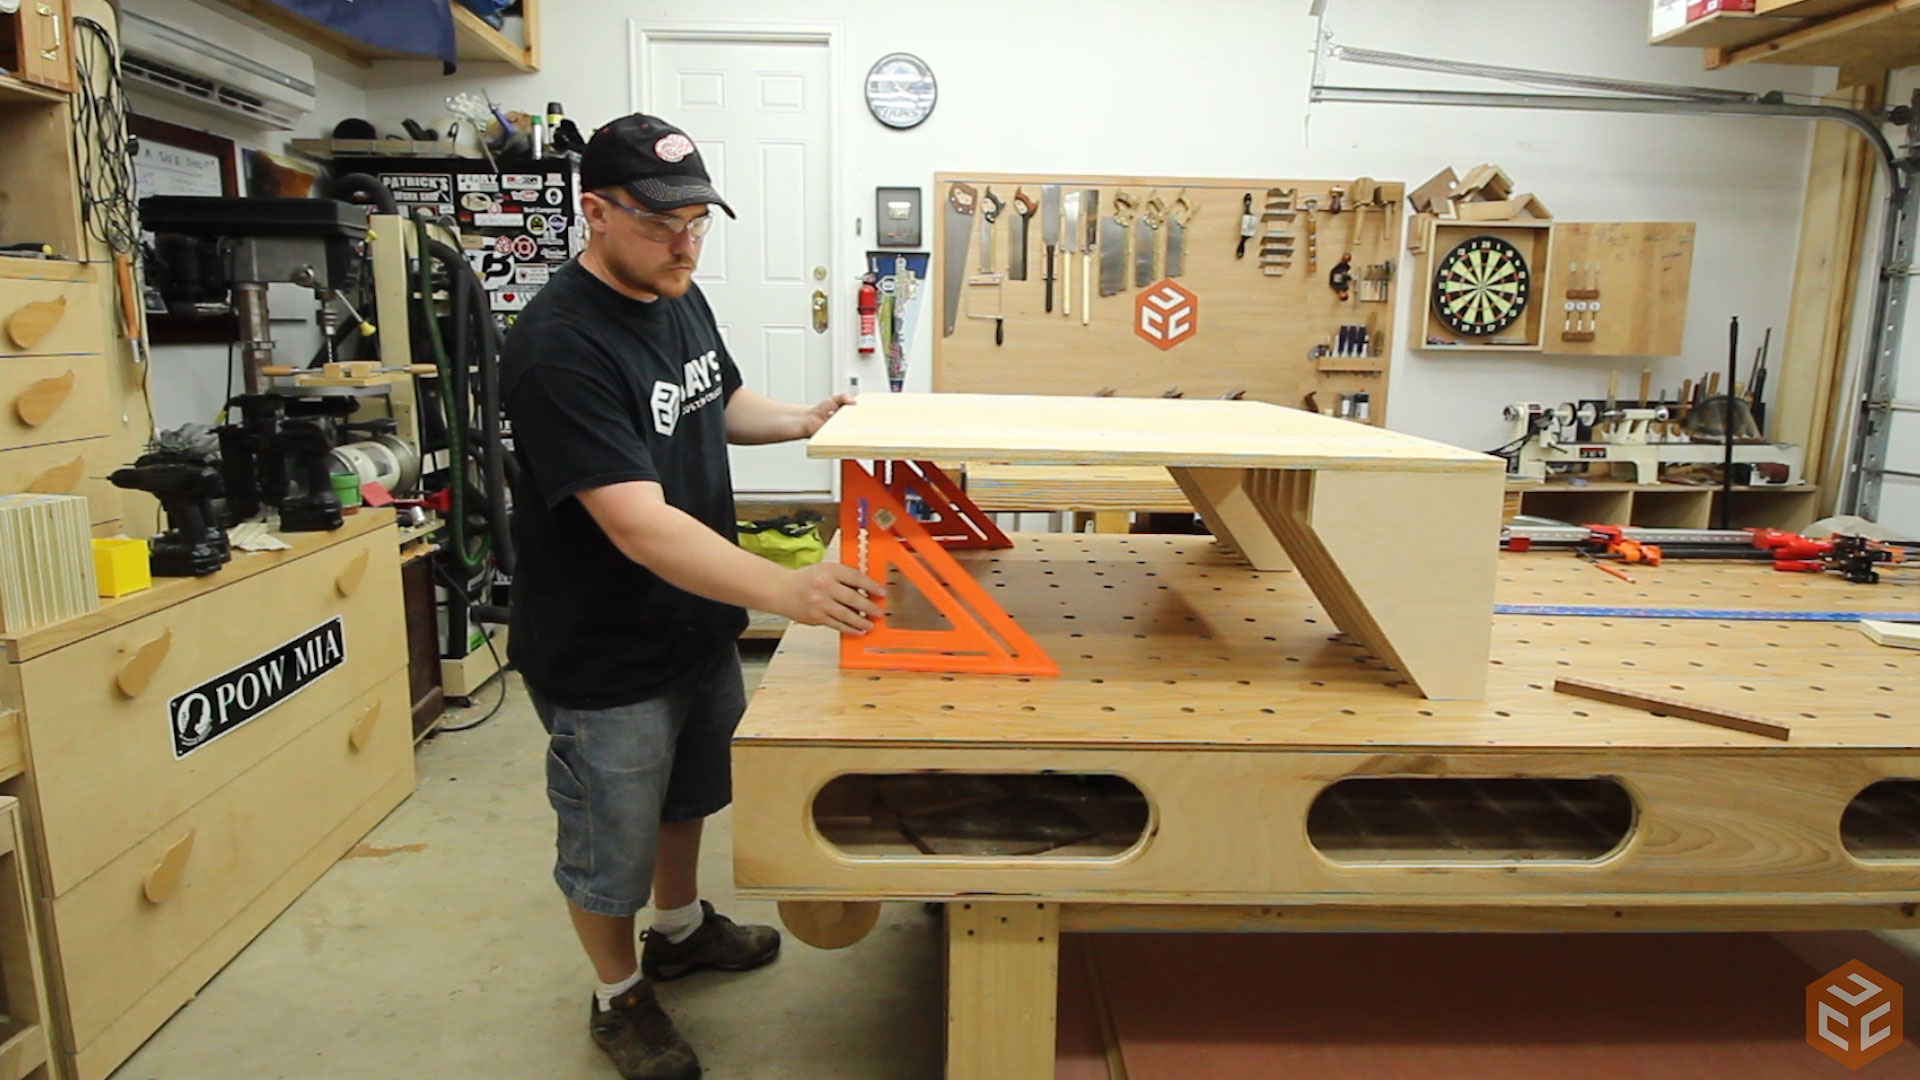
This worked well enough and allowed me access to the back side of the panel. It was a little difficult to hold the pieces in place, make sure they were square, and brad nail them. But it worked and I was able to put two screws in each one of the lower brackets.

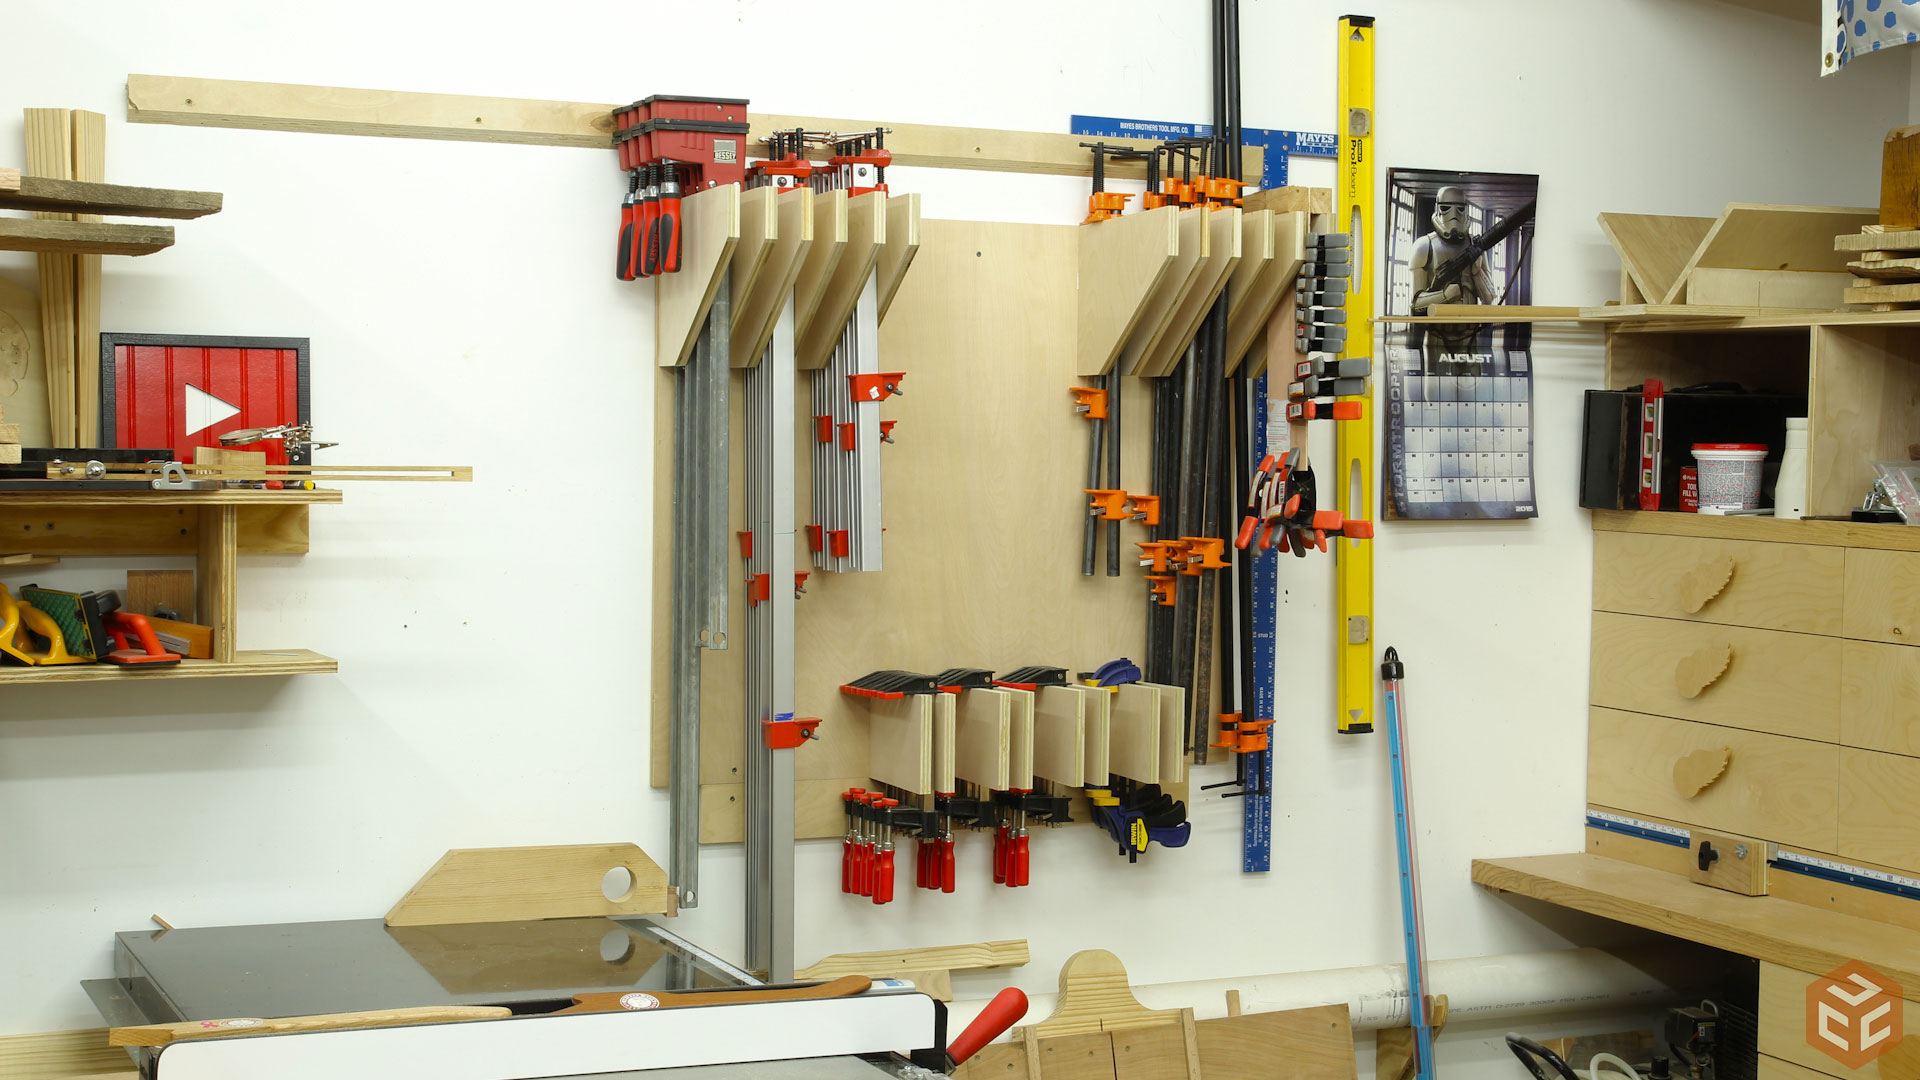
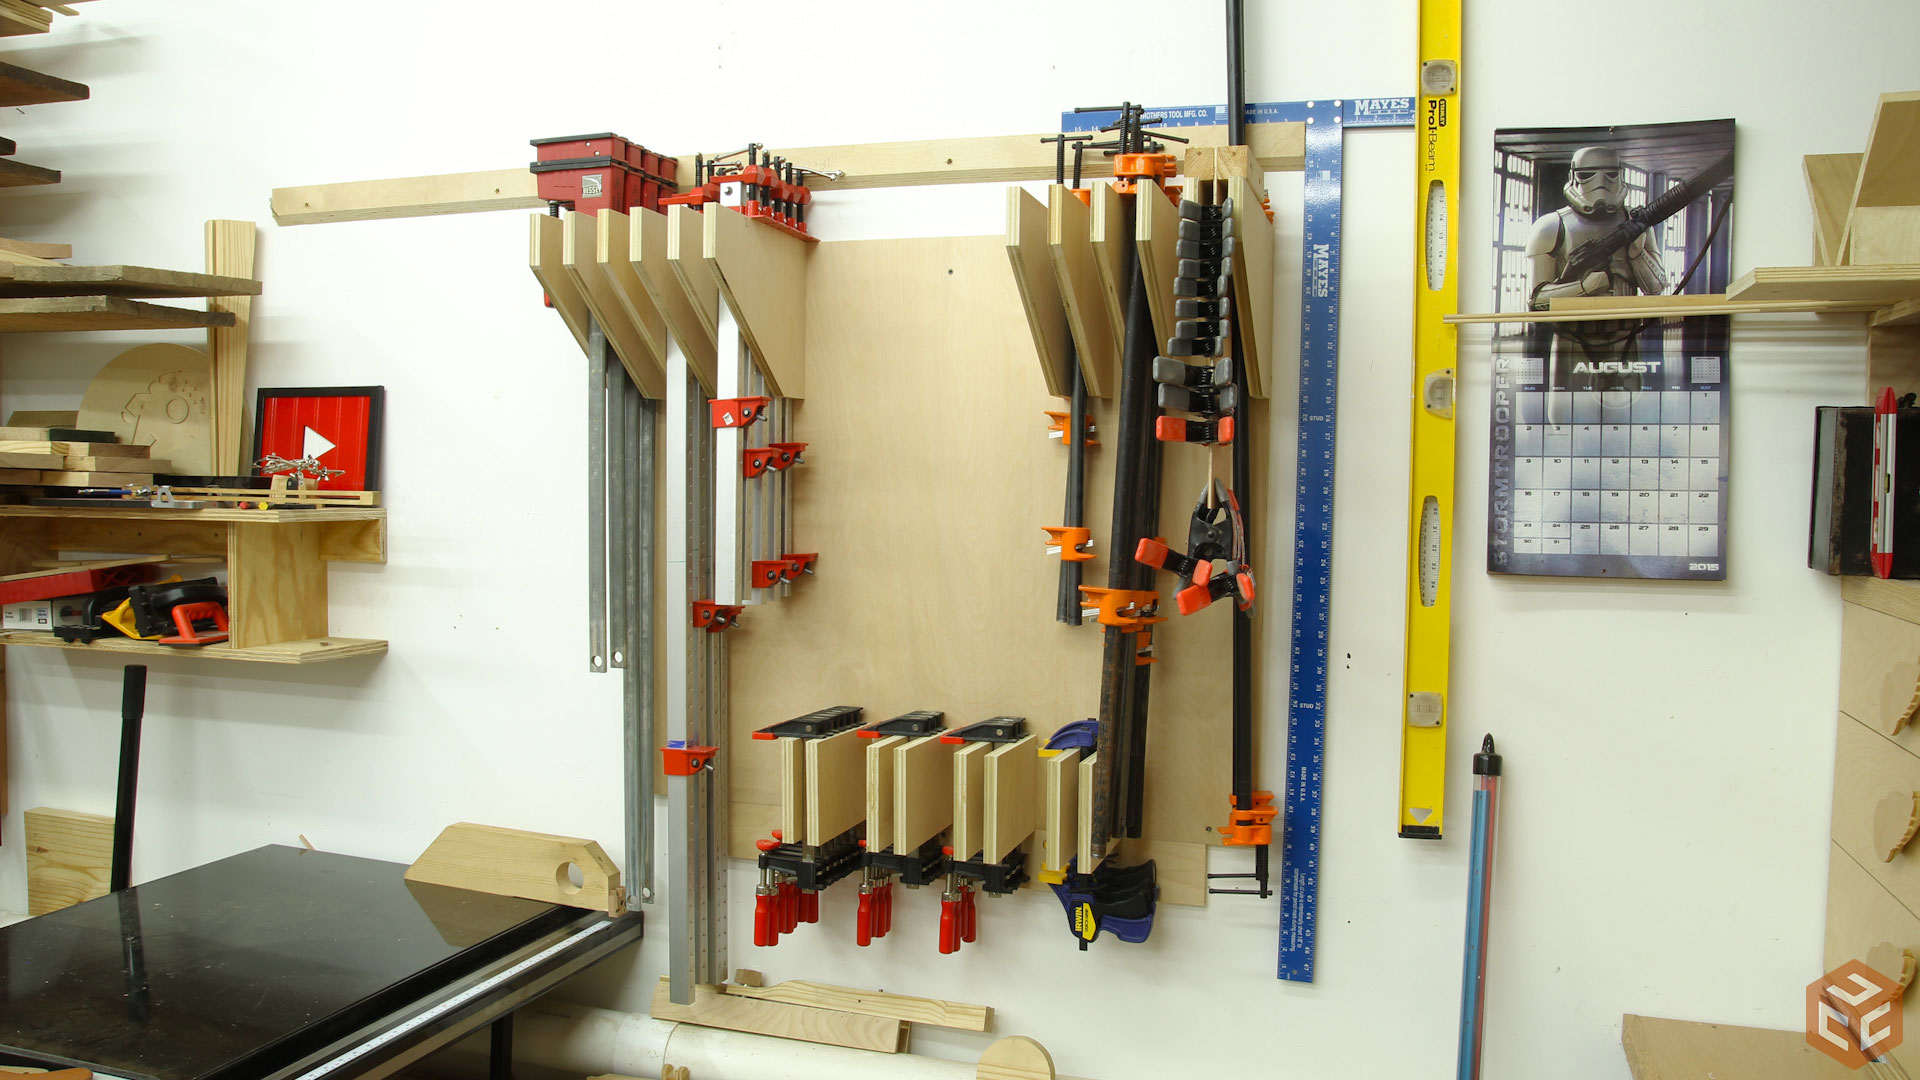
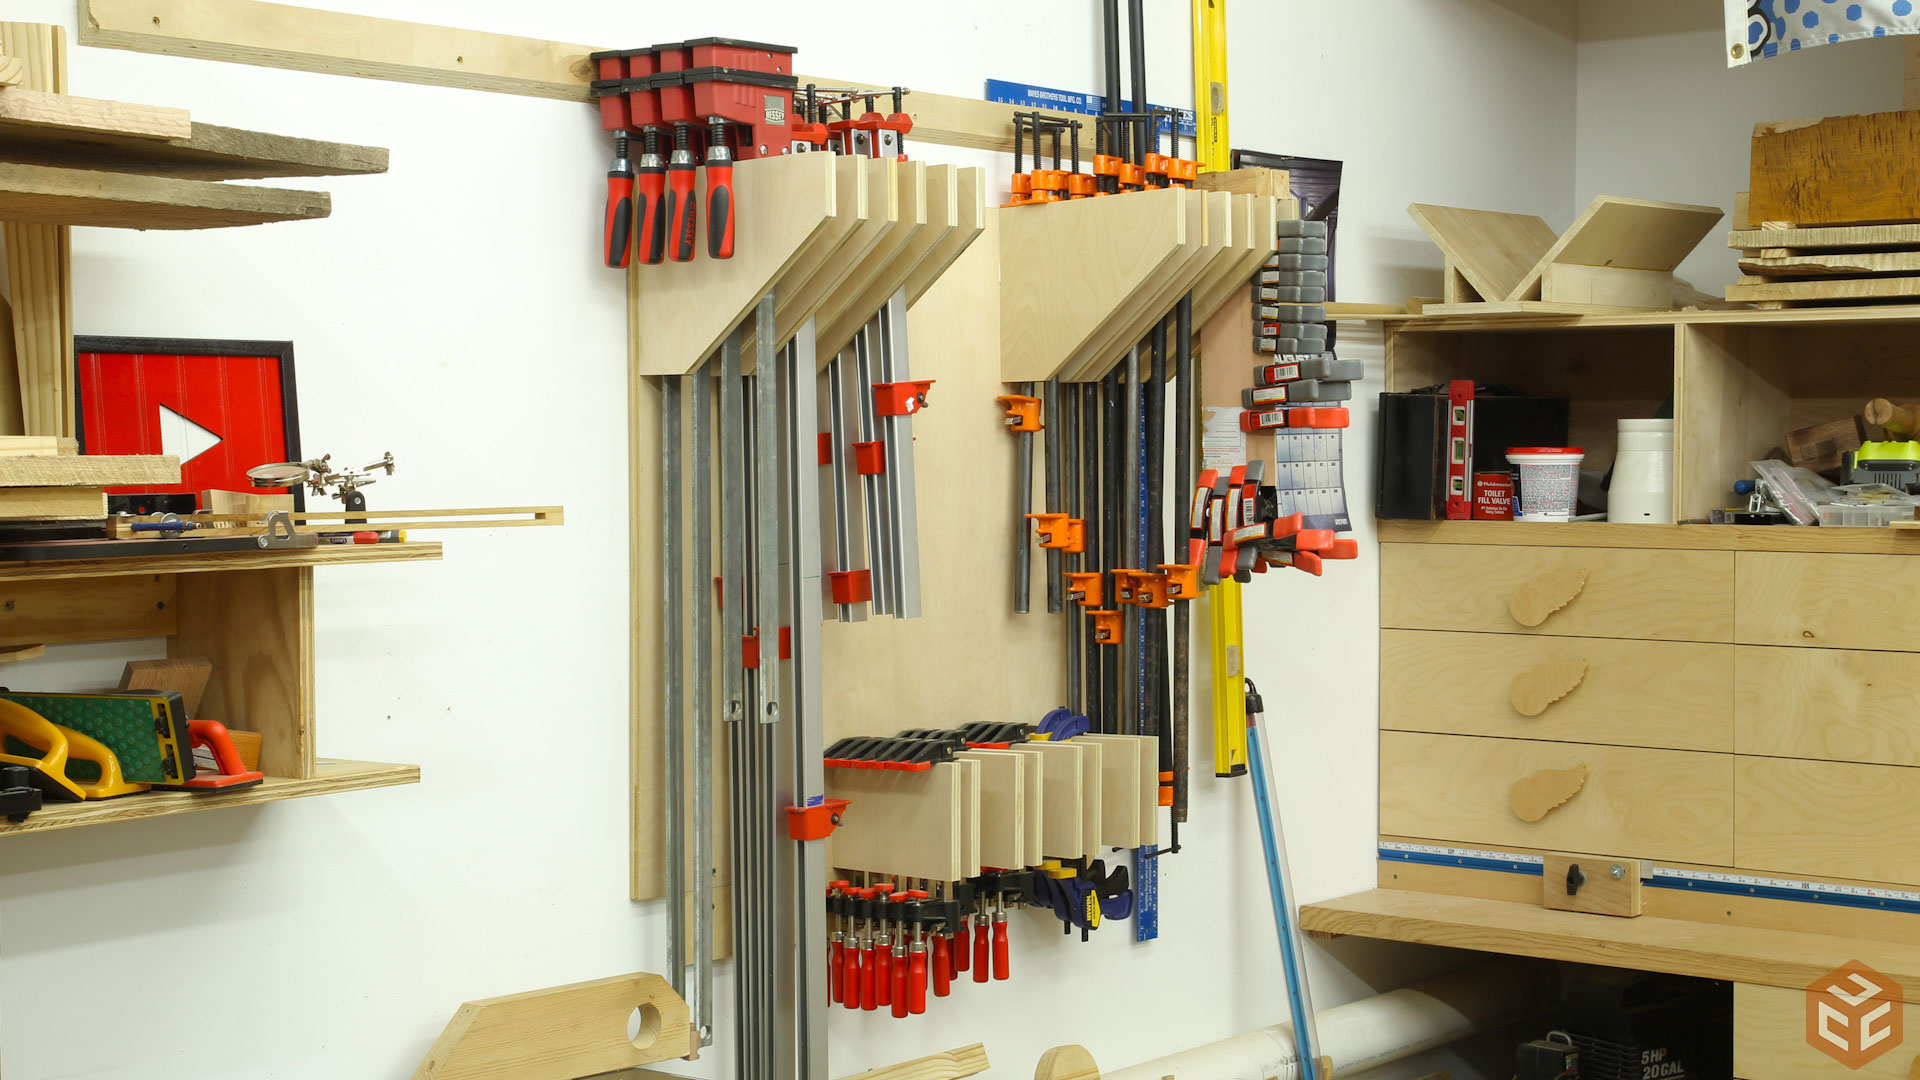
Out with the old and in with the new. The old rack was held in place via a French cleat. I opted to not use one on the new rack though as I didn’t see myself moving it any time soon and I honestly didn’t want to move the existing cleat on the wall and make a matching cleat for the back.
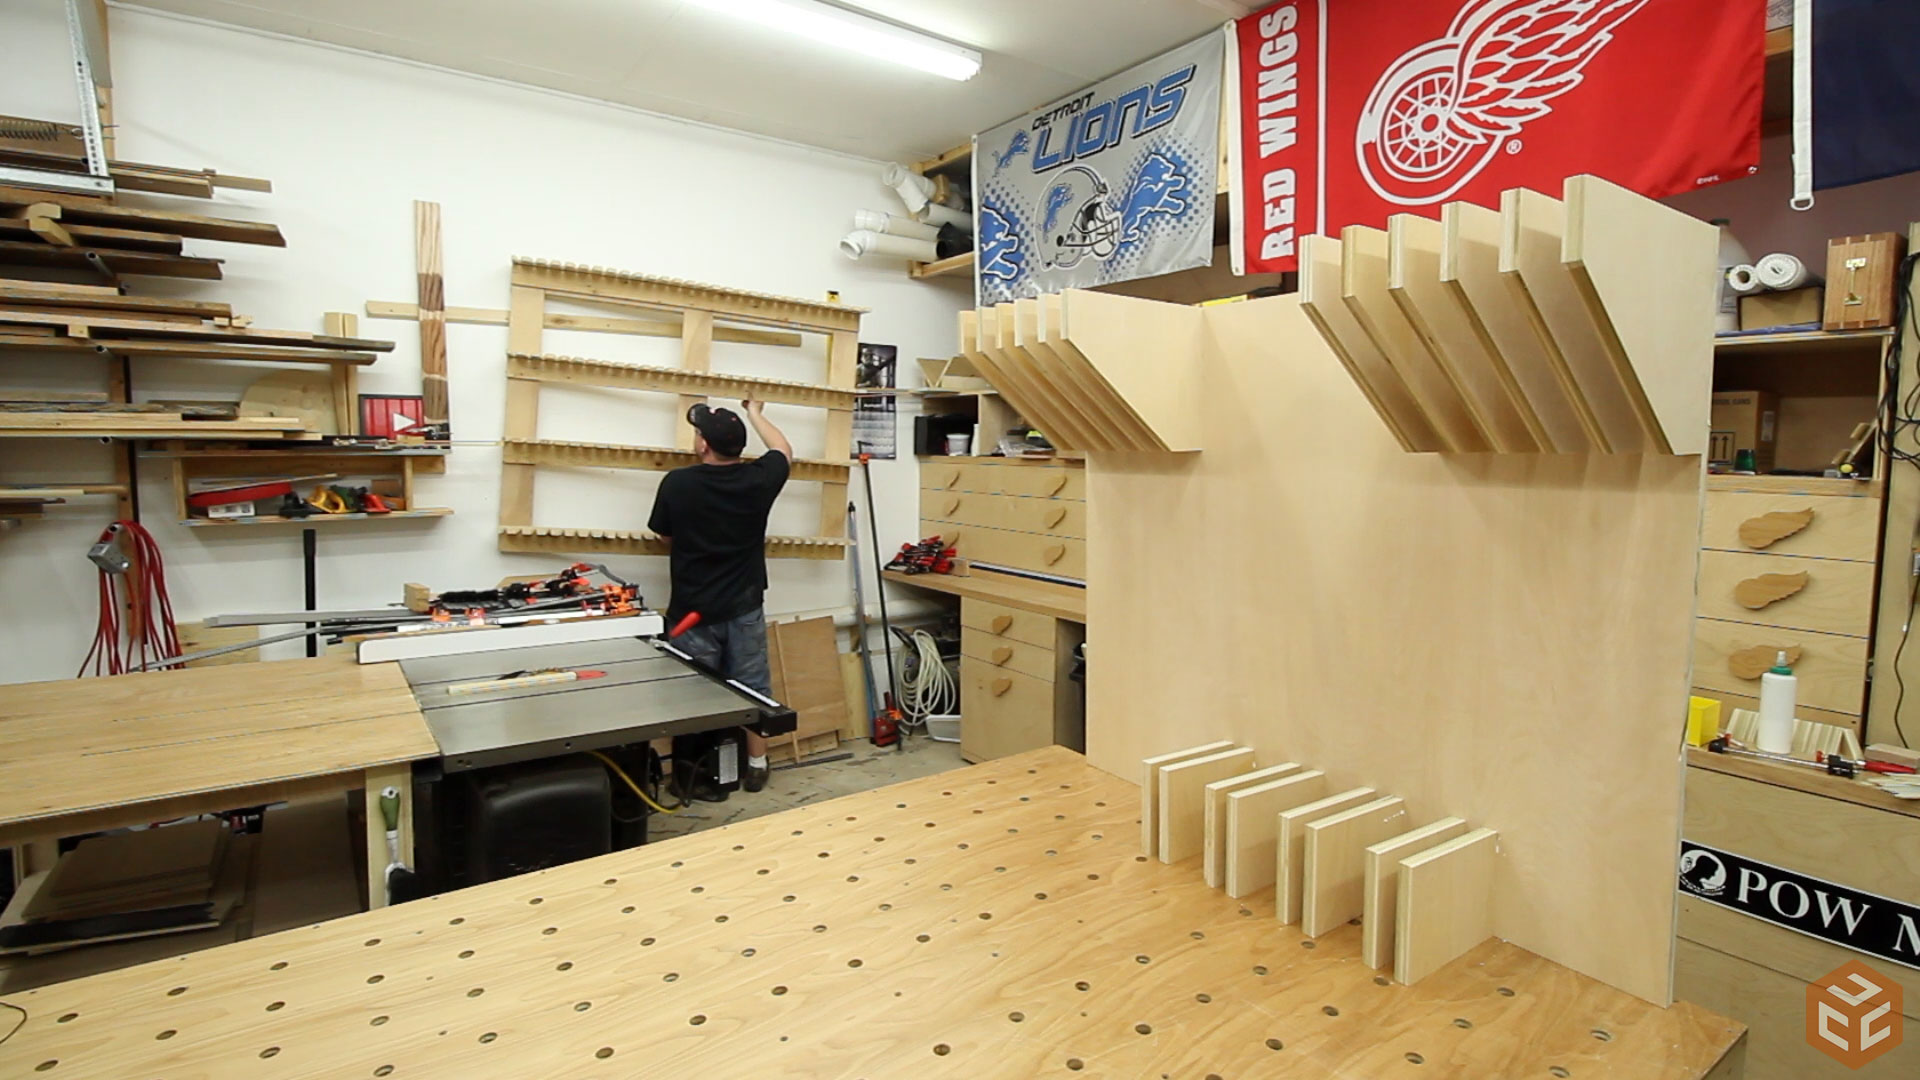
Instead, I mounted a scrap piece of plywood to the wall to act as a shelf to hold the weight of the rack while I drove a couple long screws into the wall studs. This worked very well.
While I really like the look of the older rack better I like the way this one is used more. Each of the clamps are effortlessly removed and thrown back in place without the worry of knocking off an adjacent clamp. I wasn’t begging for more walls pace before but this new design uses a lot less wall space. And I also have a bunch of empty space in the middle for any specific hangers or items that just need to be screwed down. Overall it’s a big improvement from the last design.


great job jay
I just bought a house with a walk out basement so I’ll be doing the same thing soon.
Thanks, Leo. Glad to hear that.
That sure puts my clamp storage to shame. I’ve got long ones mounted on a wall over my table top tools bench, very difficult to access, but seldom used. The ones I use the most are my smaller style clamps which are just clamped to a shelf behind my assembly table. Lastly, my medium sized clamps that are used quite often hang from the edge of my loft, behind my mortising drill press. Very convenient, but all scattered all over, creating many wasted steps. Unfortunately, I haven’t any free wall space to follow in your footsteps, because that would put everything in one easy to access area :(
Looks good Jay, is there a link to your 2nd chanel? Am I missing something on this website – I’ve searched and do not see a link to your 2nd chanel – I must be blind maybe??
Everything on my second channel gets posted here: https://jayscustomcreations.com/category/vlog/
Jay, I am totally stealing, er, borrowing this idea for my rolling clamp cart. While I like my cart for getting the clamps nearer to where I need them, I find the left-to-right stacking on horizontal bars isn’t allowing me to store the clamps efficiently. With your idea, I’ll be able to use one side of the cart for extra long clamps, and the other for my more frequently used (36″ and shorter) clamps. Great ideas, Jay. Thanks for sharing it. (Oh, I finally got my mini-split system installed and now I can work in comfort instead of being run out of my shop by noon. Houston heat and humidity is just awful. Now all I need to worry about is condensation on my tools if I ever raise the big garage door.) So now I’m waxing or oiling all of the iron tools in my shop. Cheers!
Thanks, John. The concept has been used many times previously so it’s nothing super unique to me. Glad to hear you got the mini split going. It makes a HUGE difference.
Really cool!
Nicely executed Jay! If I had the room I would build myself one. Keep them coming!
Thank you very much, Edison.
Nice project, Jay. As always, the video was also well done.
Thanks as always, Earl.
Perfect!! That design fits my space!! Thanks for sharing your design and how to build !!
Jay, Nice Work – I was just about to embark on building a clamp rack and had been doing some “YouTube” research when I herd you say you were going to re-do you clamp rack. Waited to proceed and glad I did. Great ideas and work as always. One question what was the spacing you used for the smaller bar clamps? Thanks Jay, love your channel and all the collaboration you do with other YouTubers…
This is the best clamp rack ever. Nice job Jay. It is nice to see the light in your eyes again. stay with it my friend.
Top idear Jay, now I just need the wall to hang it on. May make one for our Mens Shed https://m.facebook.com/AkoonahParkMensShed/
Great ideas. I’ve recently retired an am slowly getting back to a childhood hobby of wood work. I have a lot of power and hand tools all quite old the oldest being my Grandfathers double boiler hot glue kettle about 110 years old and cant find any one who sells the hoof product for melting down. Would be nice but more modern glues are much easier.
Is there any templates for the clamp holders,I really need to tame my clamps
I built Steve Ramsey’s clamp racks but seeing yours I like your’s better , much more compact and more versatile (plus much safer) Thanks Jay
Just what I been looking for for my large Jet clamps (very heavy). They totally pulled down the peg board pegs!!!
I have a solution for the quick clamp (Irwin type) and F style clamps. I have a old (50 yrs) dresser. I store the clamps in the drawers. Put the dresser on wheels and made an overhanging top to use the entire thing for a clamping table. The clamps are right where you need them below in the drawers. Works GREAT!
I have been looking for ideas to store my clamps, right now all I have are the quick clamp type. This has given me something to try. Thanks for sharing.
Thanks Jay. About to build this in my new workshop. I had to downsize from my last shop, so I’m looking for space saving storage solutions. Enjoy the work you do and how simple this plan is.