So much has happened since I started casually remodeling my office. Casual is the key word there. Not only have I not given it much priority but I’ve also had a few good things happen with life and with the business in the meantime. And with that said, making this bookcase was one step closer towards calling the office remodel complete. If you’re interested in a set of plans for this bookcase click here.
Everything I’ve made for the office so far has been very basic from a design standpoint. I simply do not want to put a lot of time and effort into making fine furniture for this space because I know I have to share it with four of our dogs. This bookcase design is simple as well. It’s a tall bookcase with a fixed shelf dividing the upper and lower areas. In the upper and lower areas are two adjustable shelves. The main joinery method for the bookcase is pocket hole screws and the main material is plywood, specifically 3/4″ PureBond birch plywood. It’s made here in the USA and sold at the Home Depot.
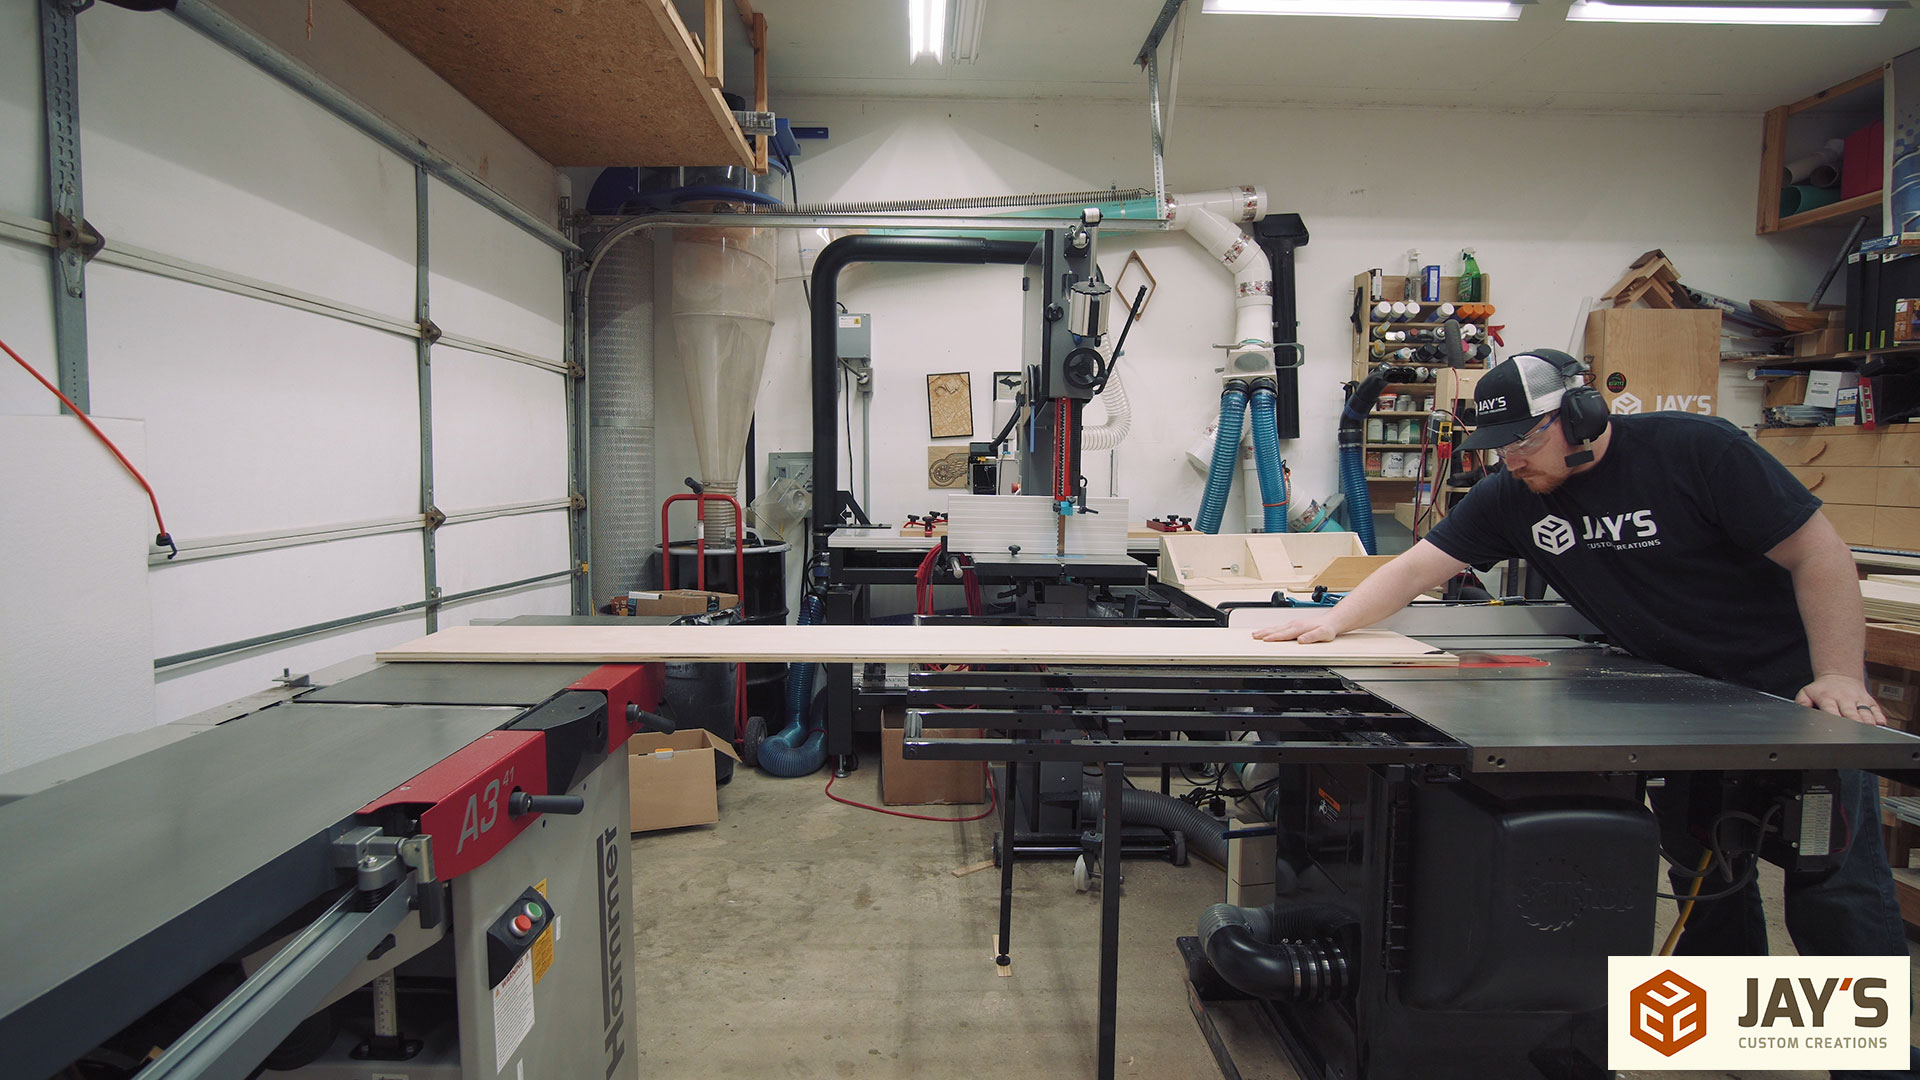
Step one is to break down the sheet of plywood. To start I’m making a full width crosscut with a track saw to remove a small section of material. This kind of cut is possible on a table saw but it’s not easy and can sometimes not be safe due to the size of the sheet and the small amount being removed.
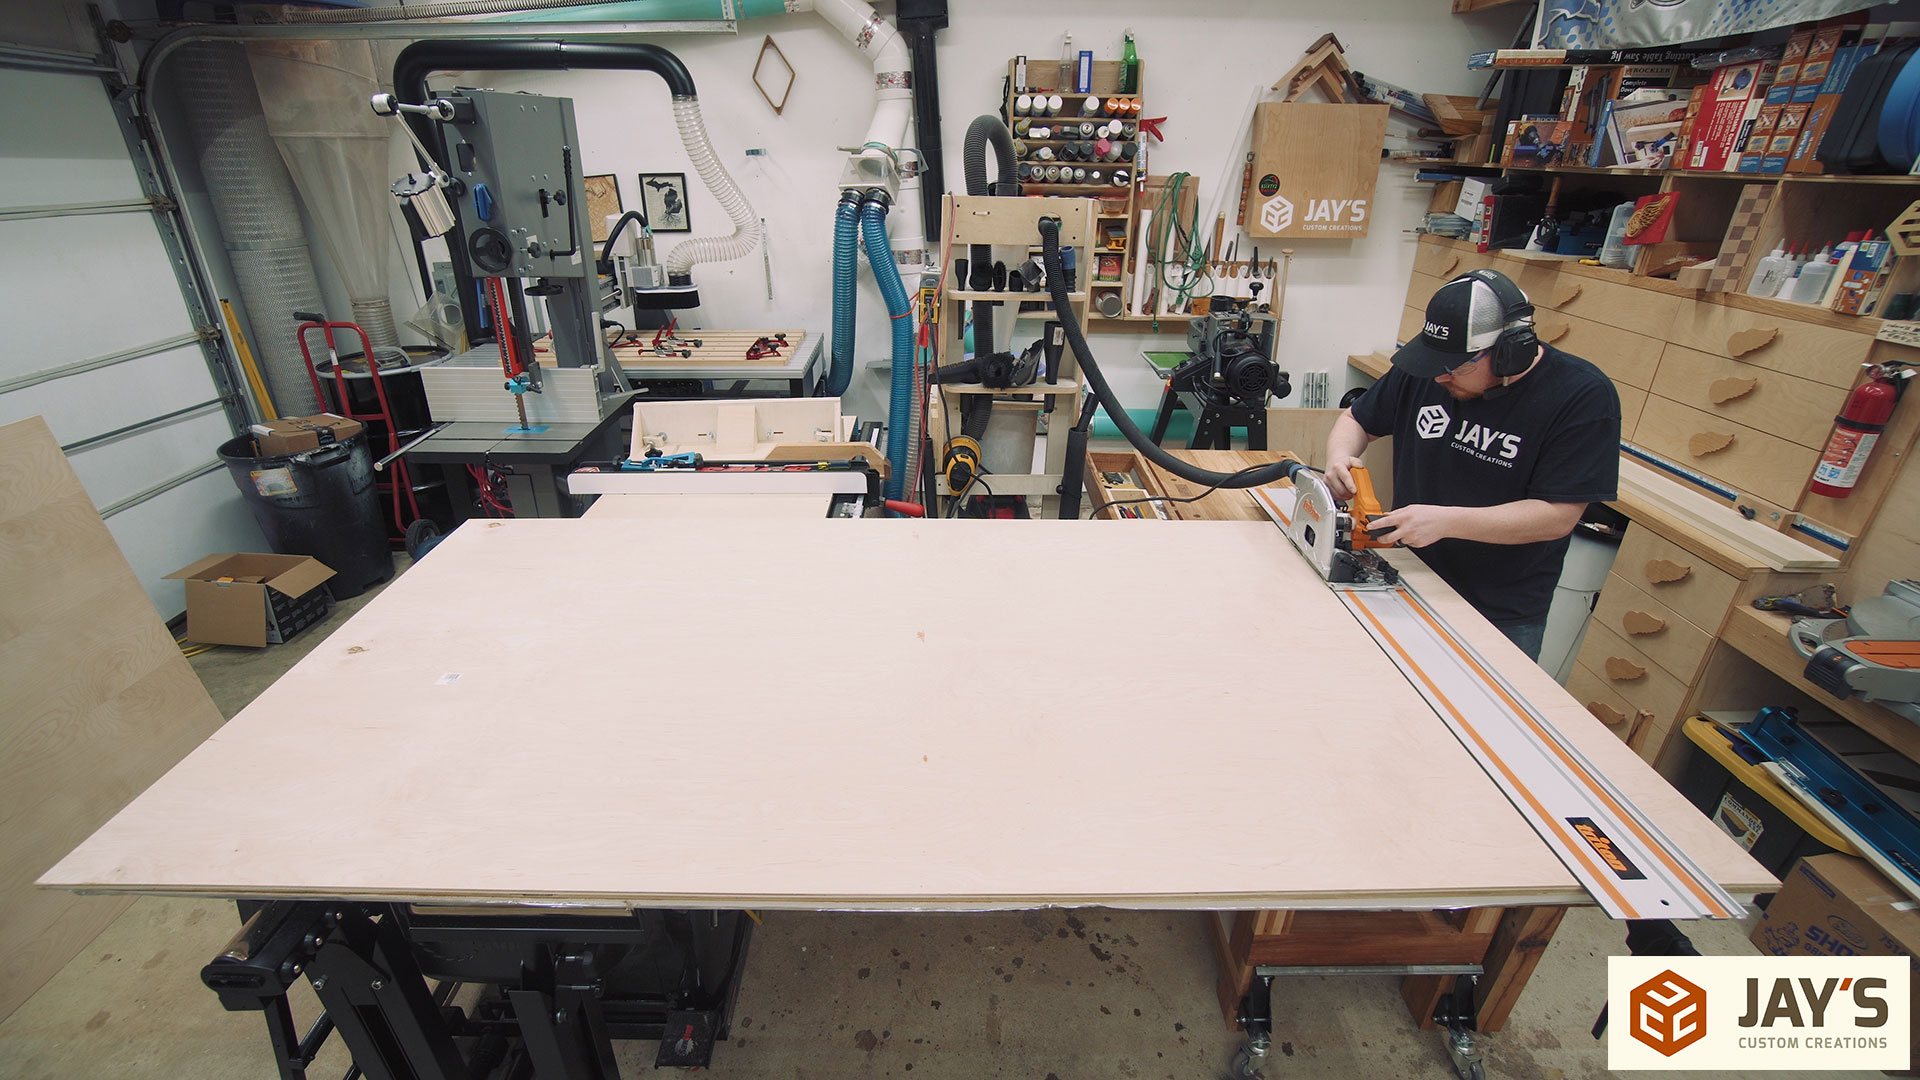
Followed by a nearly full length rip cut. Making a cut like this on a table saw isn’t as sketchy as the last one but with it still being nearly a full sheet it’s another situation where bringing the tool to the material is easier than bringing the material to the tool.

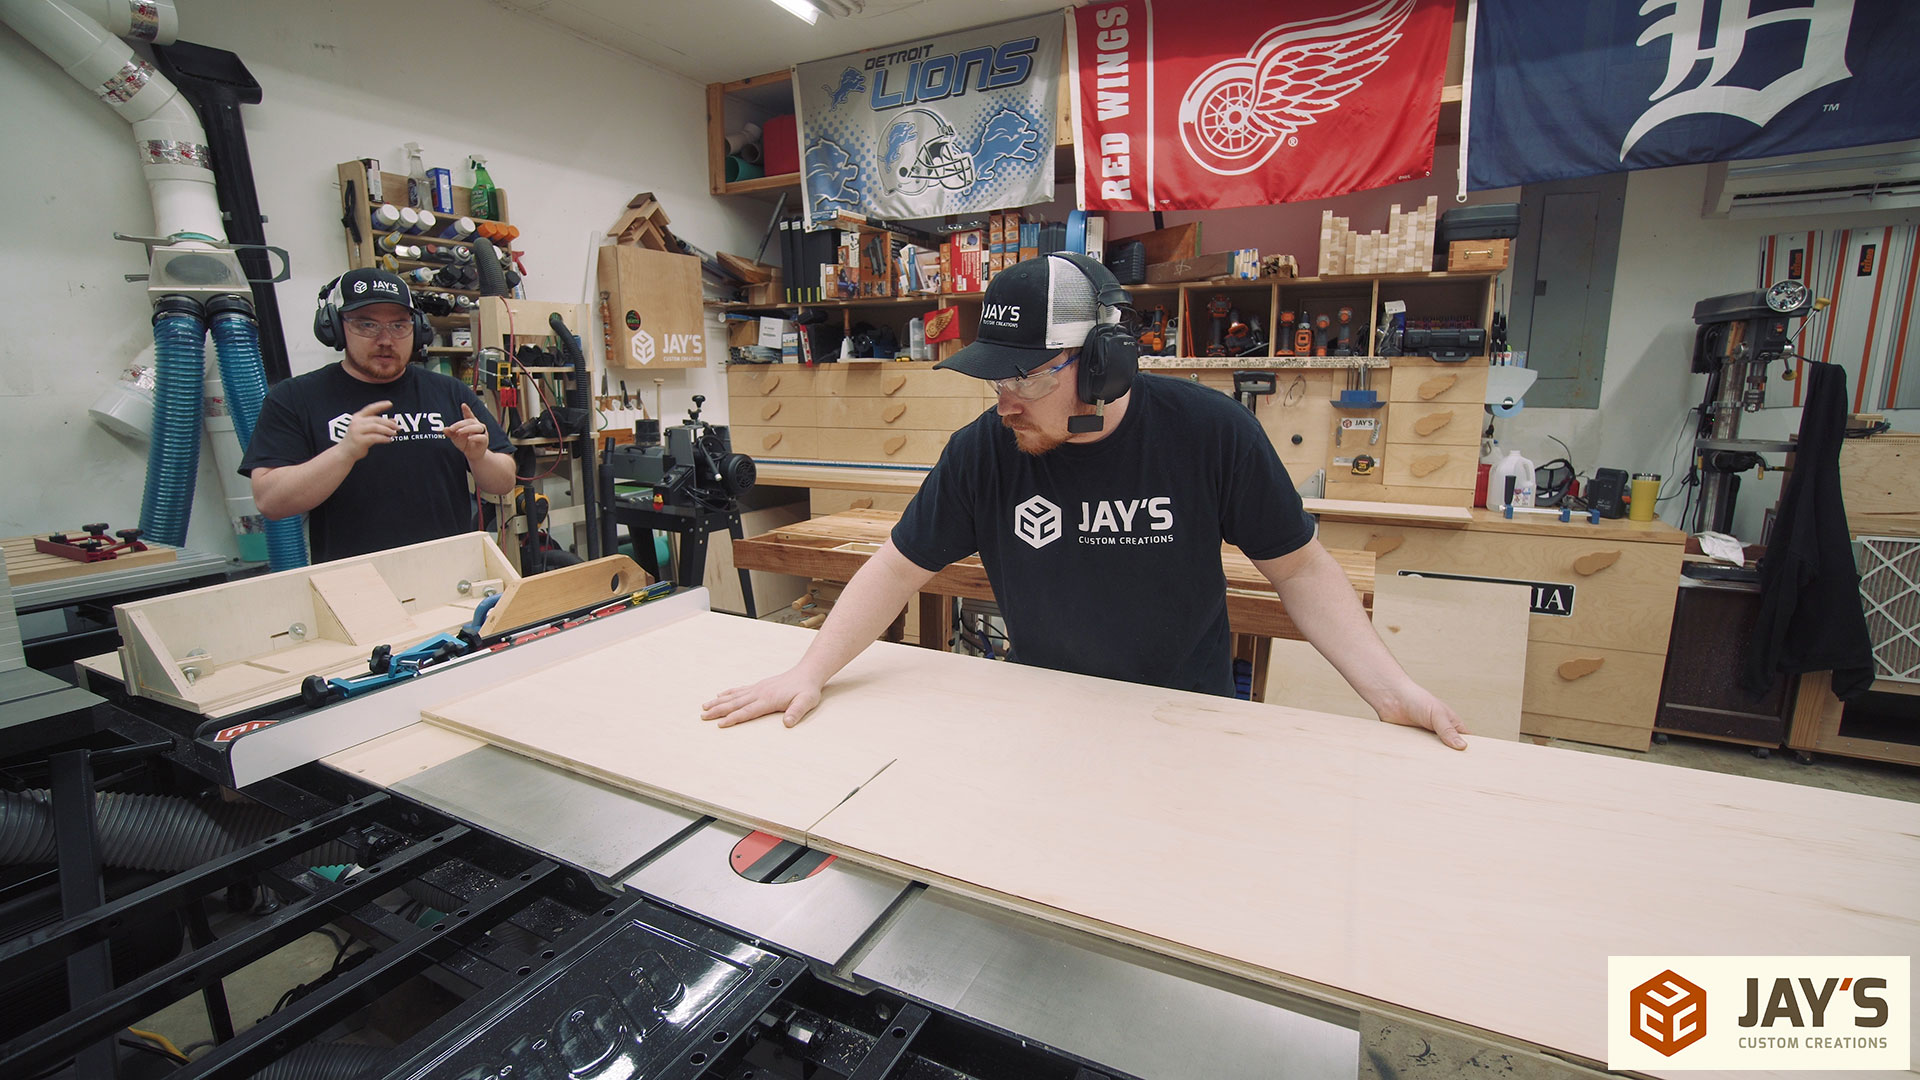
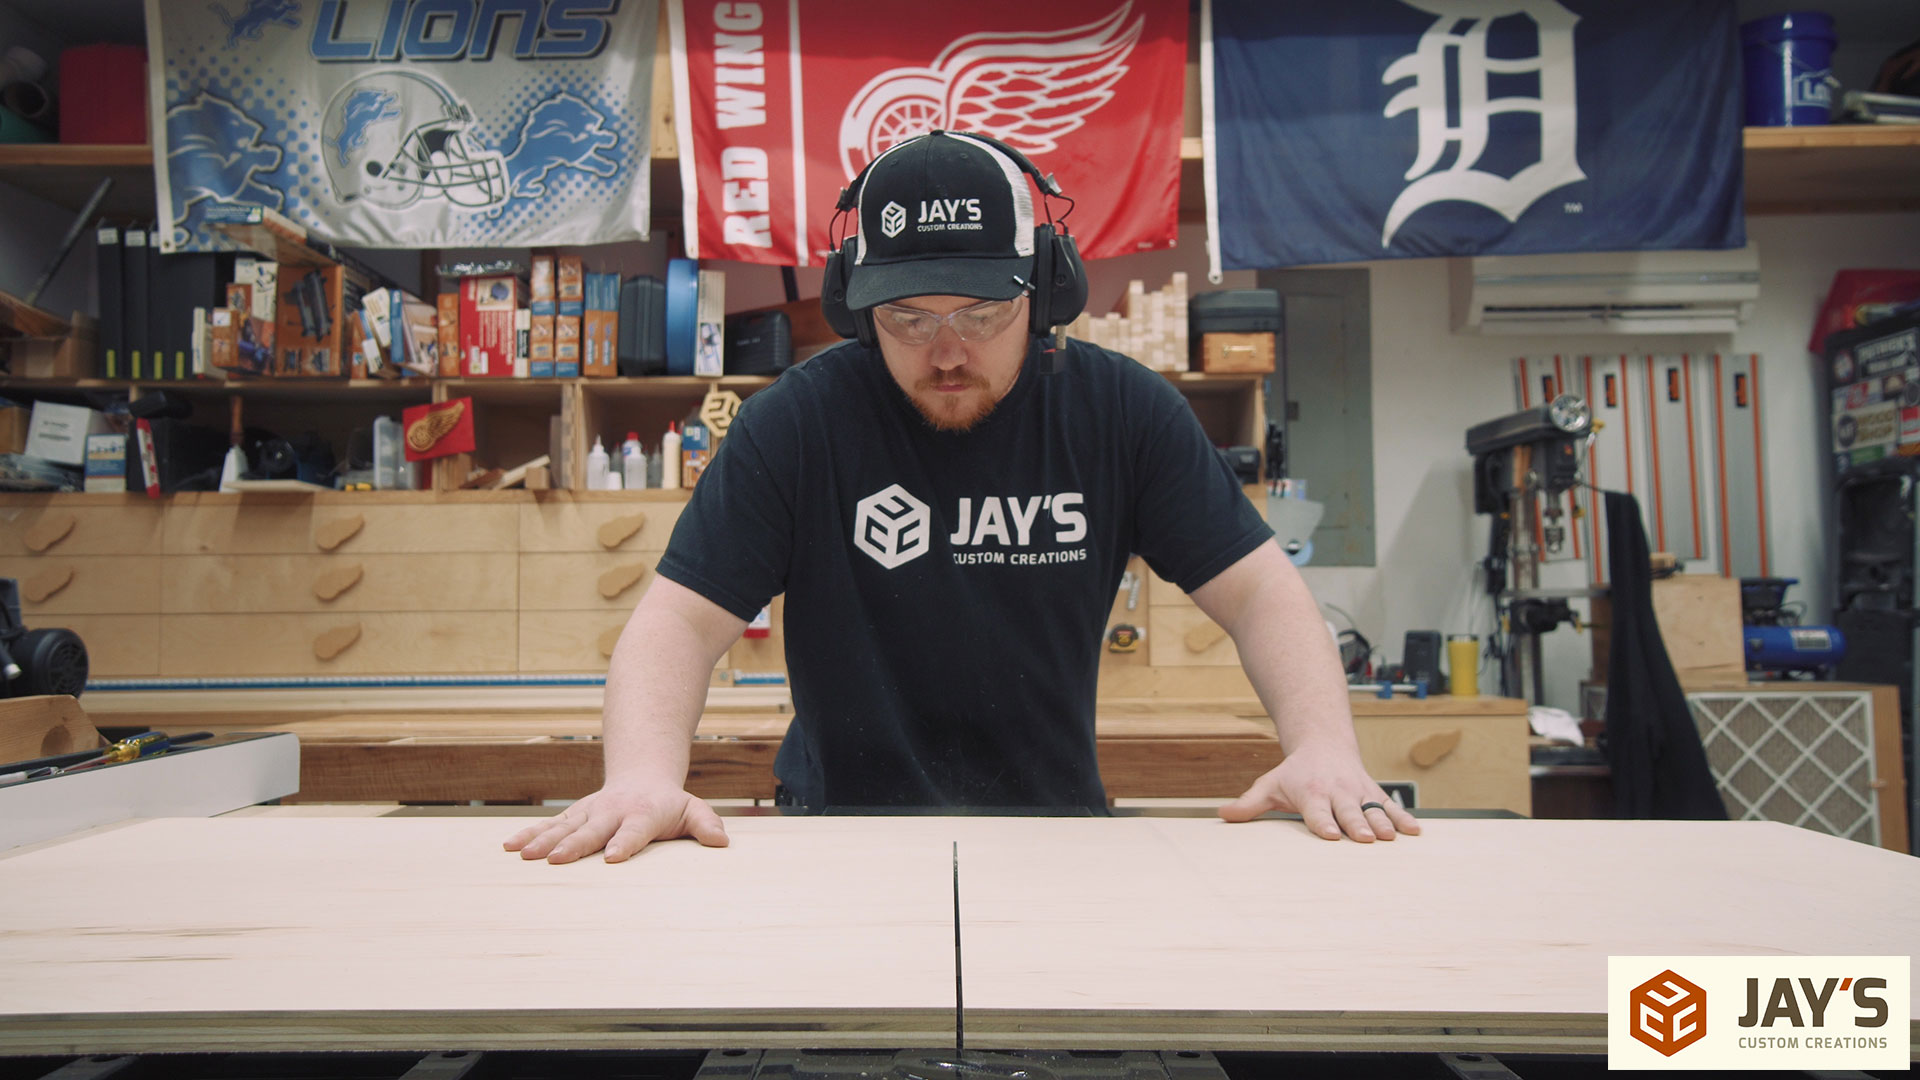
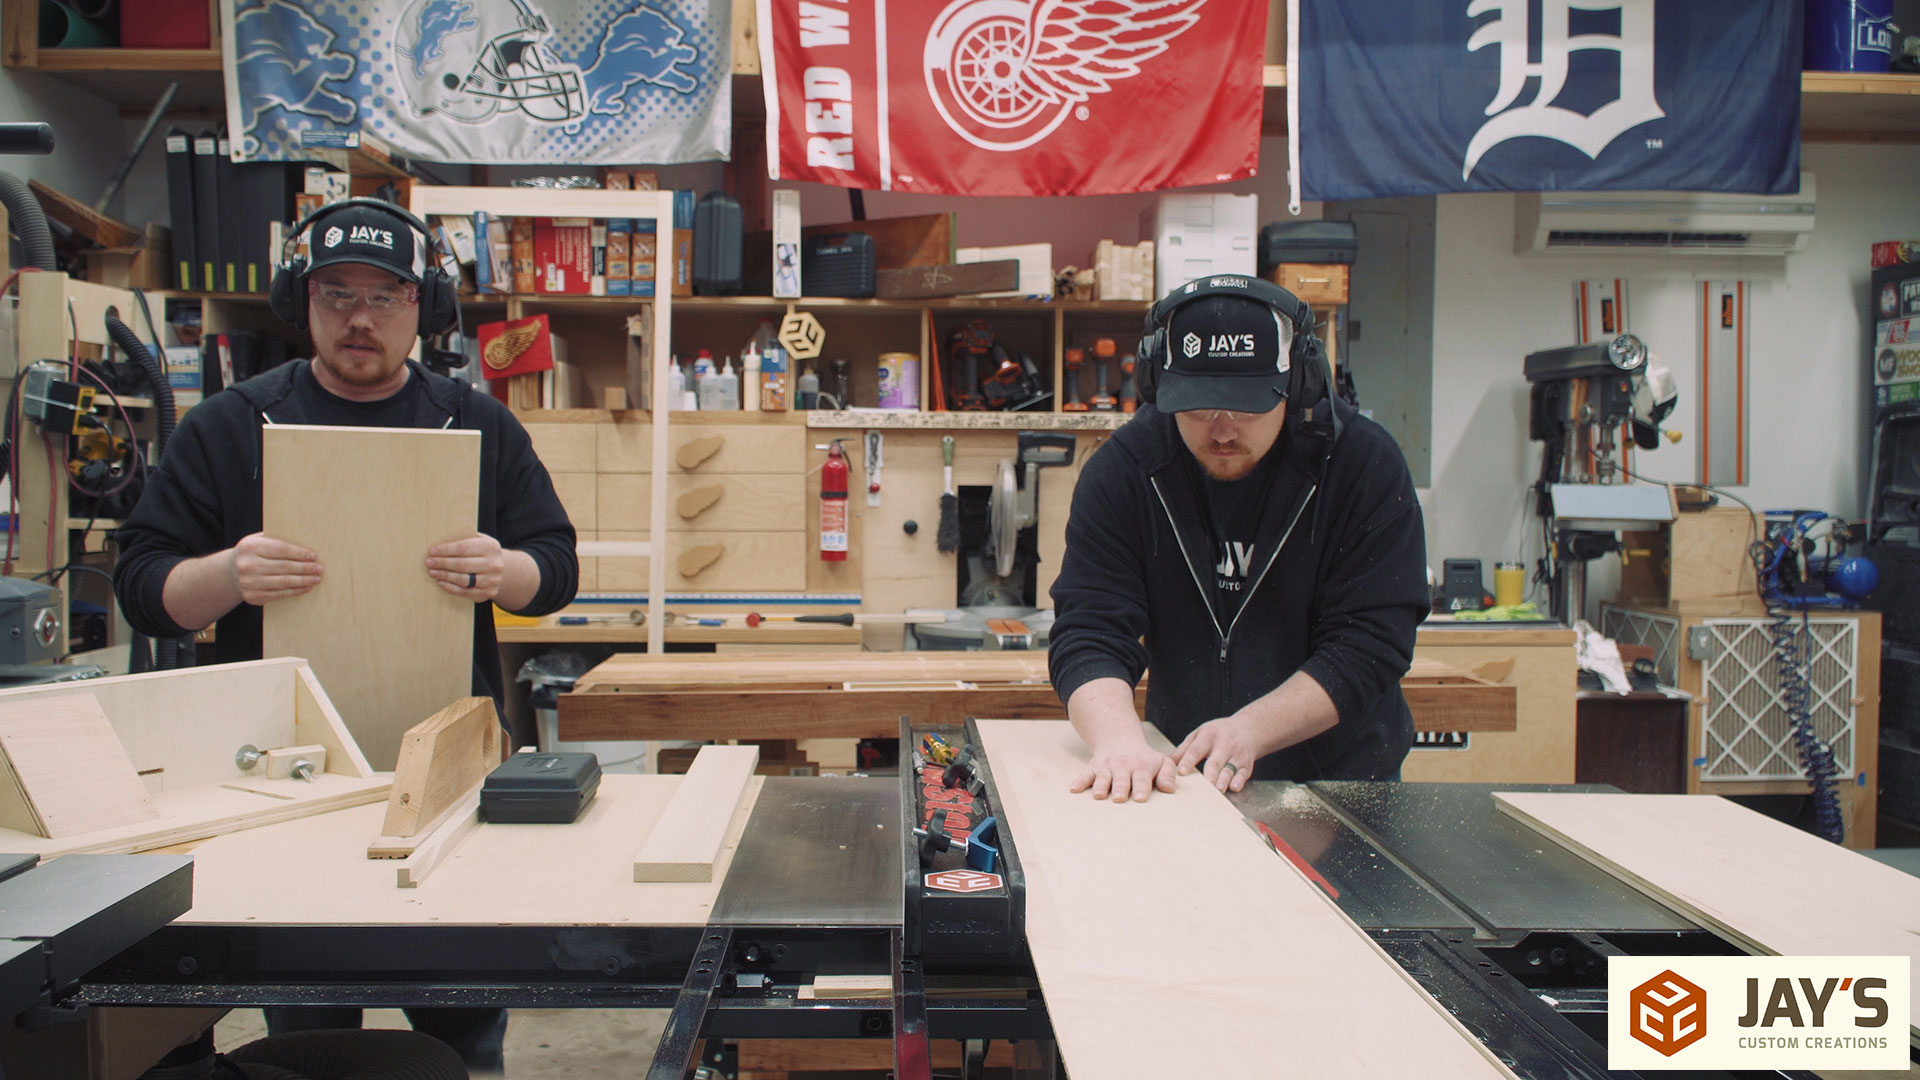
And now the more easily managed pieces can be brought to the table saw. I made a set of plans for this project before I started so the rest of the plywood cuts went by pretty quick.
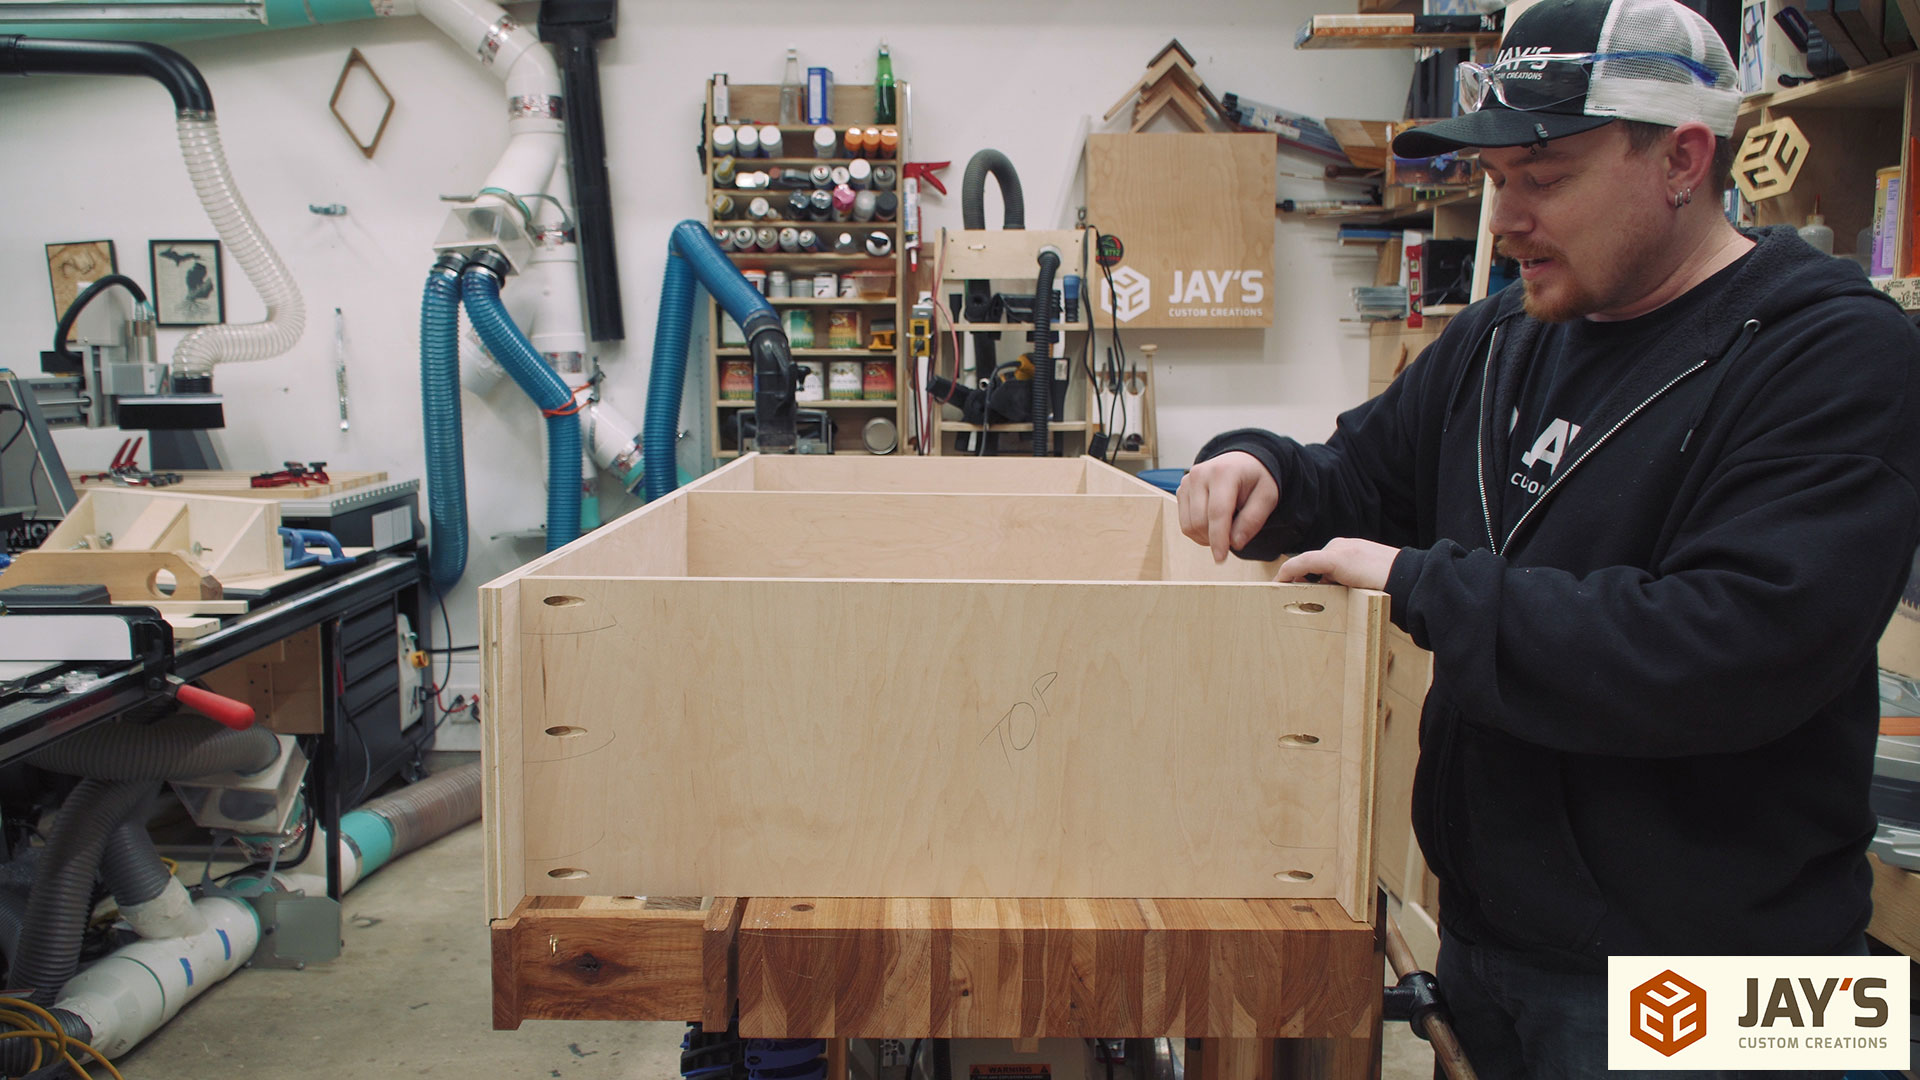
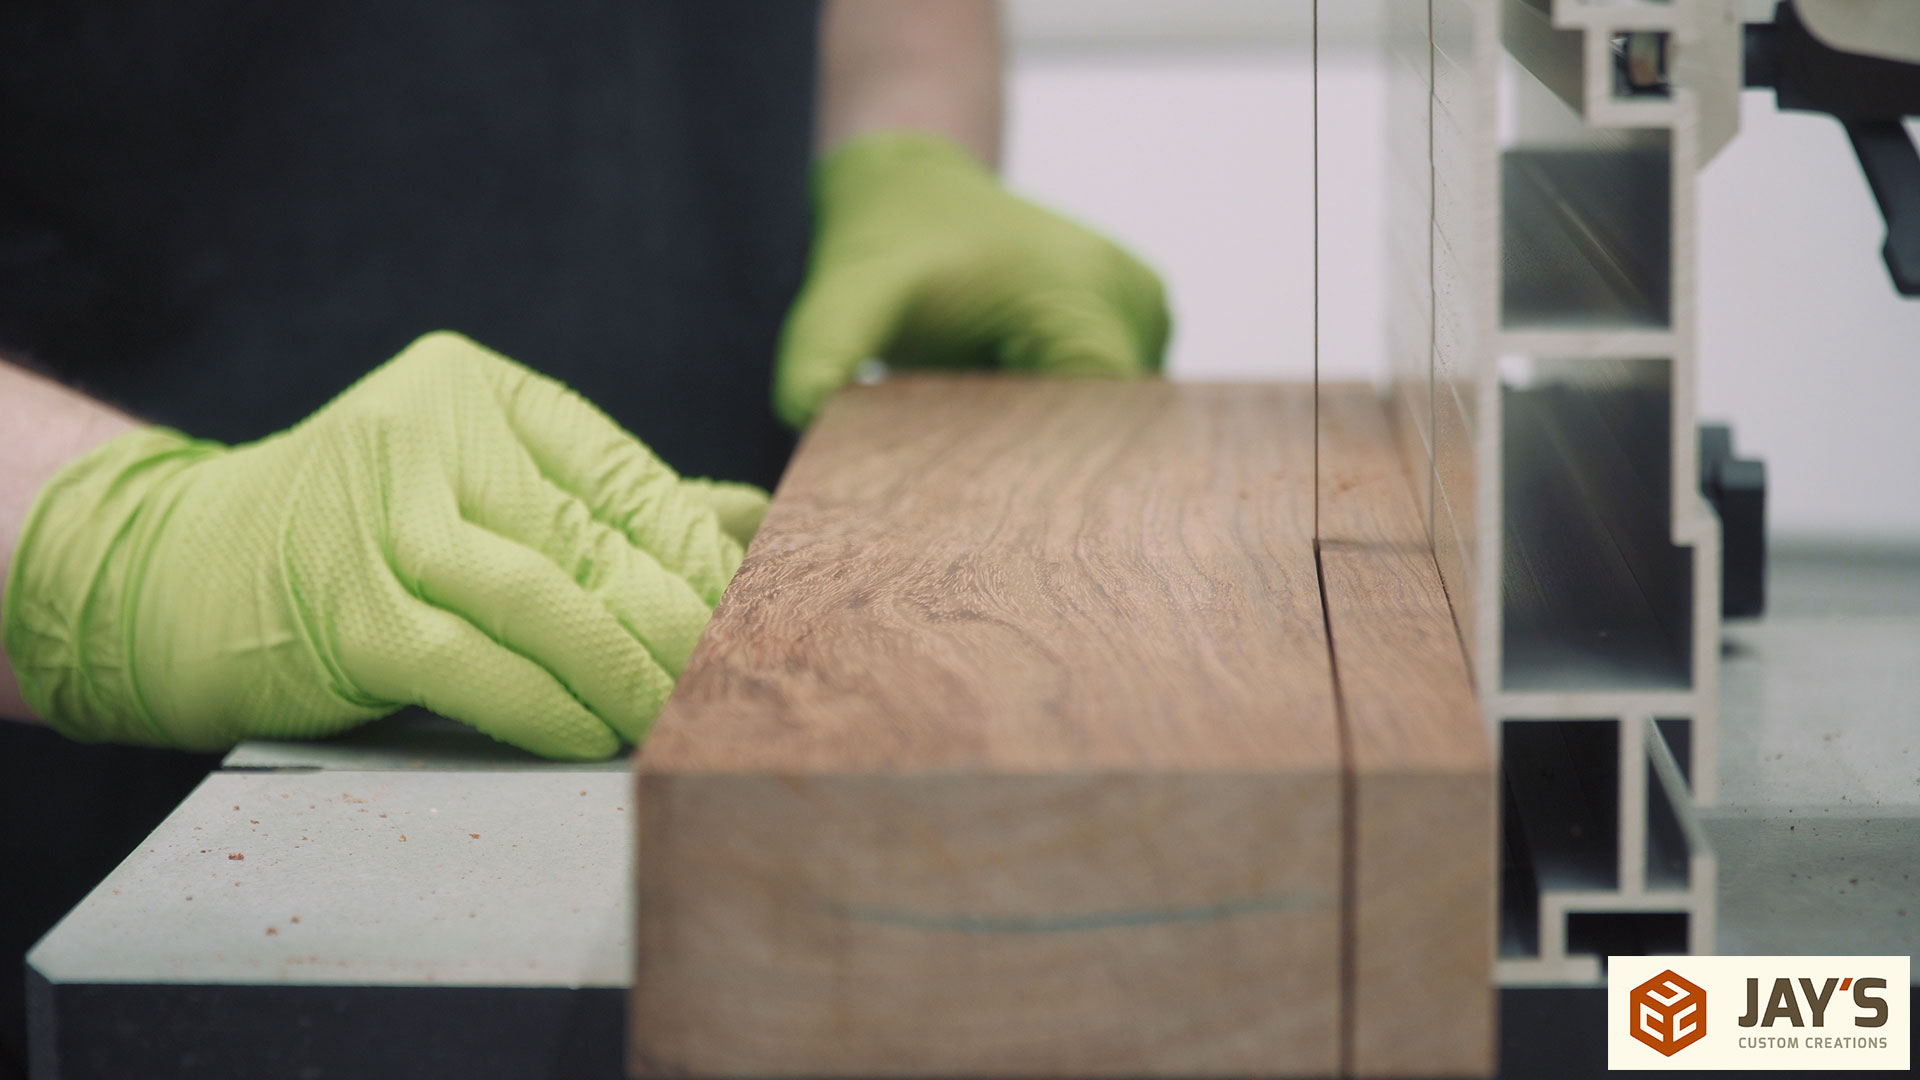
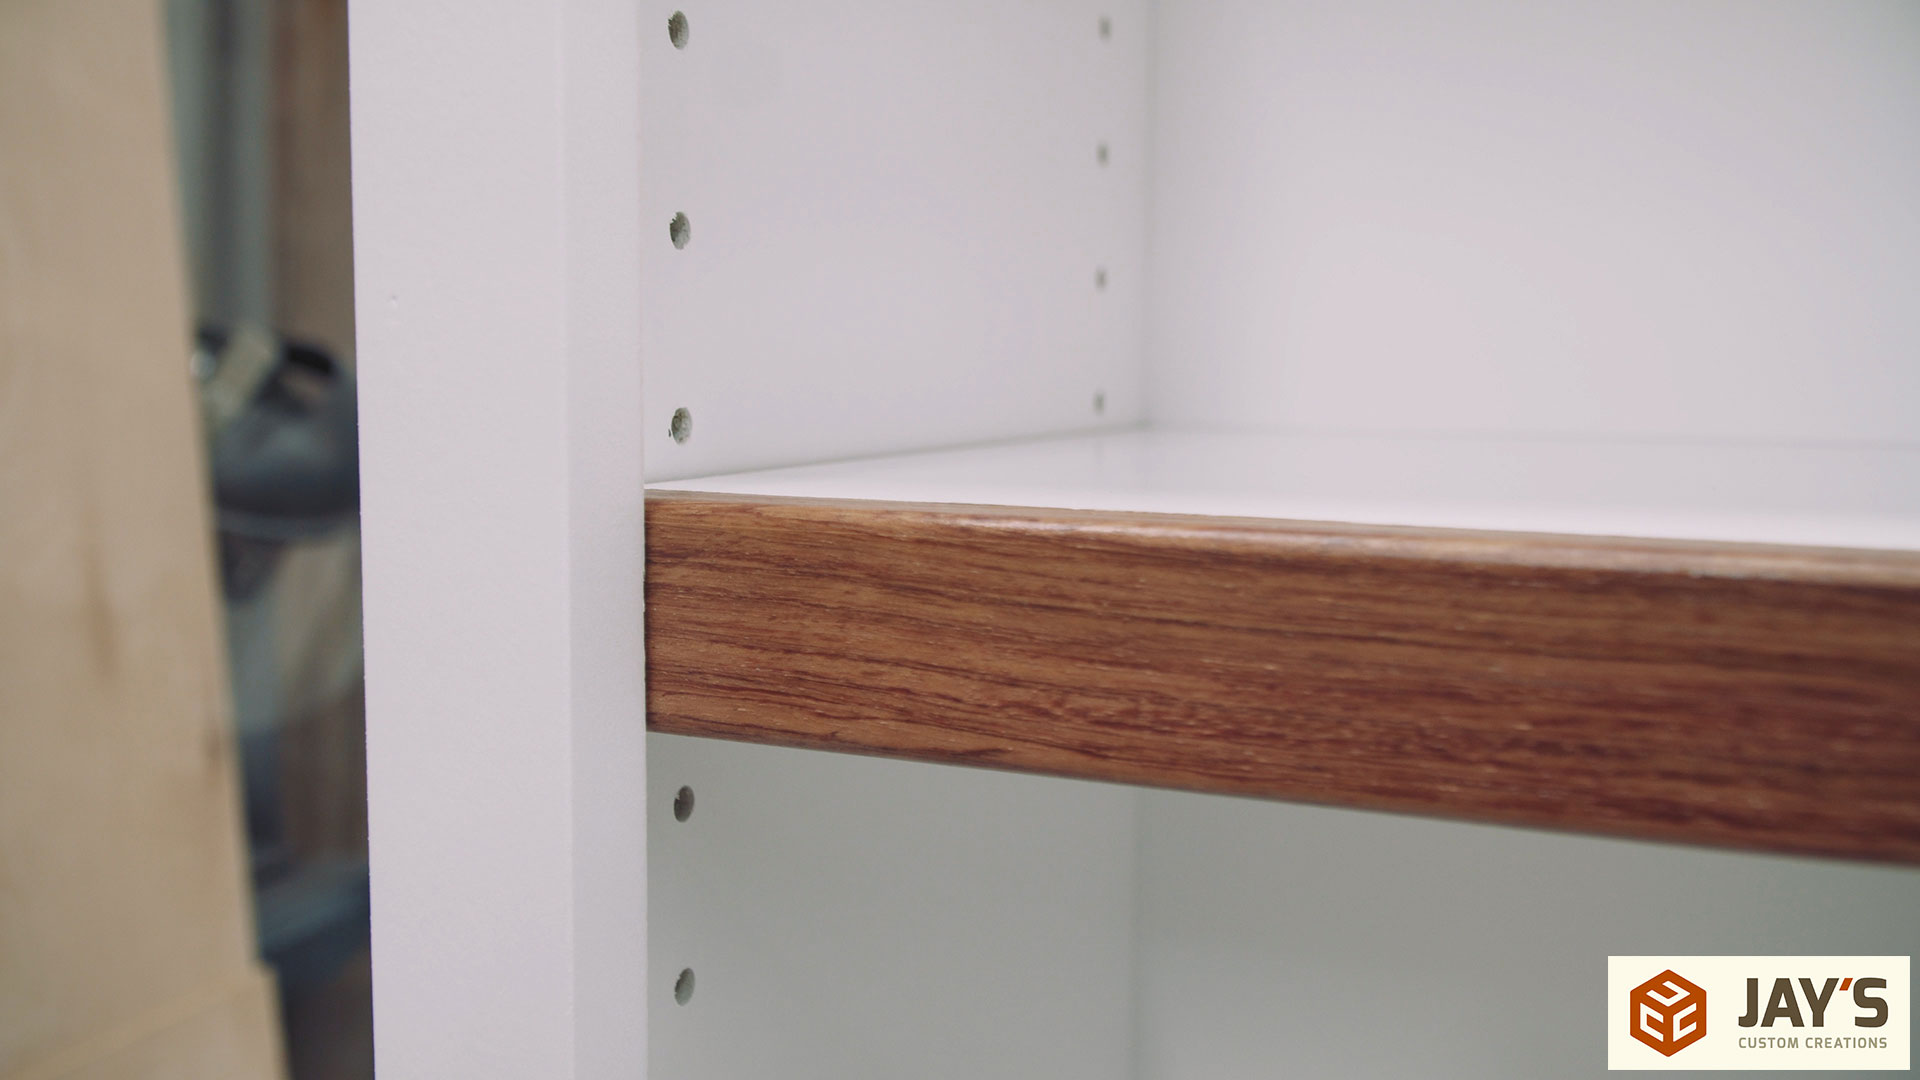
There are a total of seven horizontal plywood pieces for the bookcase. The three on the right are for the fixed top, bottom, and middle panels and sized a little wider than the four on the left in this image. Those are for the adjustable shelves. They will eventually have solid wood banding installed on them.

Here you can see the importance of having as many horizontal surfaces as possible at the same height. In order to make 8′ long cuts I need to remove the fence on my jointer/planer. Not a big deal :)
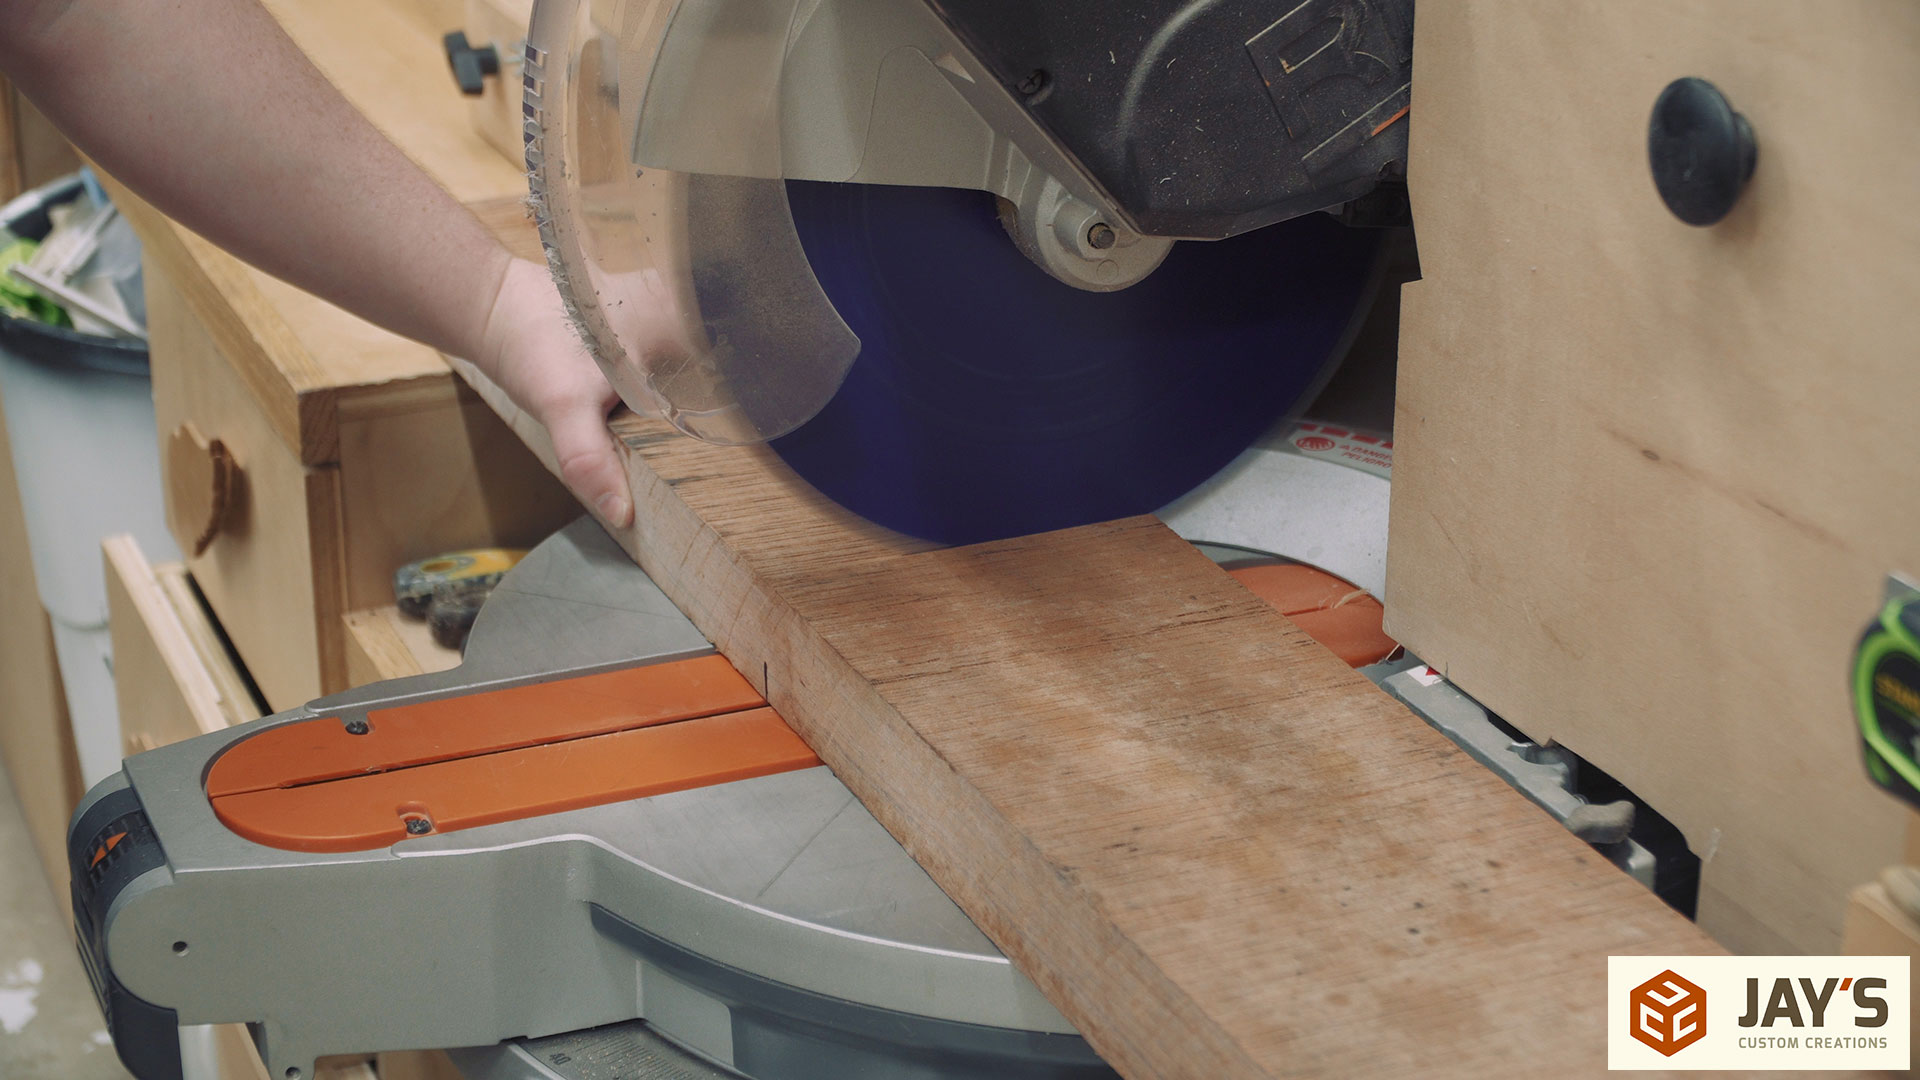
Before assembly of the case I got started on the face frame material. All of these pieces will be cut from s4s poplar. Every time I buy s4s (surfaced on 4 sides) lumber a little piece of me cries. The whole point of having machines for milling rough sawn lumber is to save money in the long run. But in this case it was a matter of access to woods and the best source for this build was overpriced s4s poplar. Breaking down these boards starts with crosscutting to final length at my miter saw station.
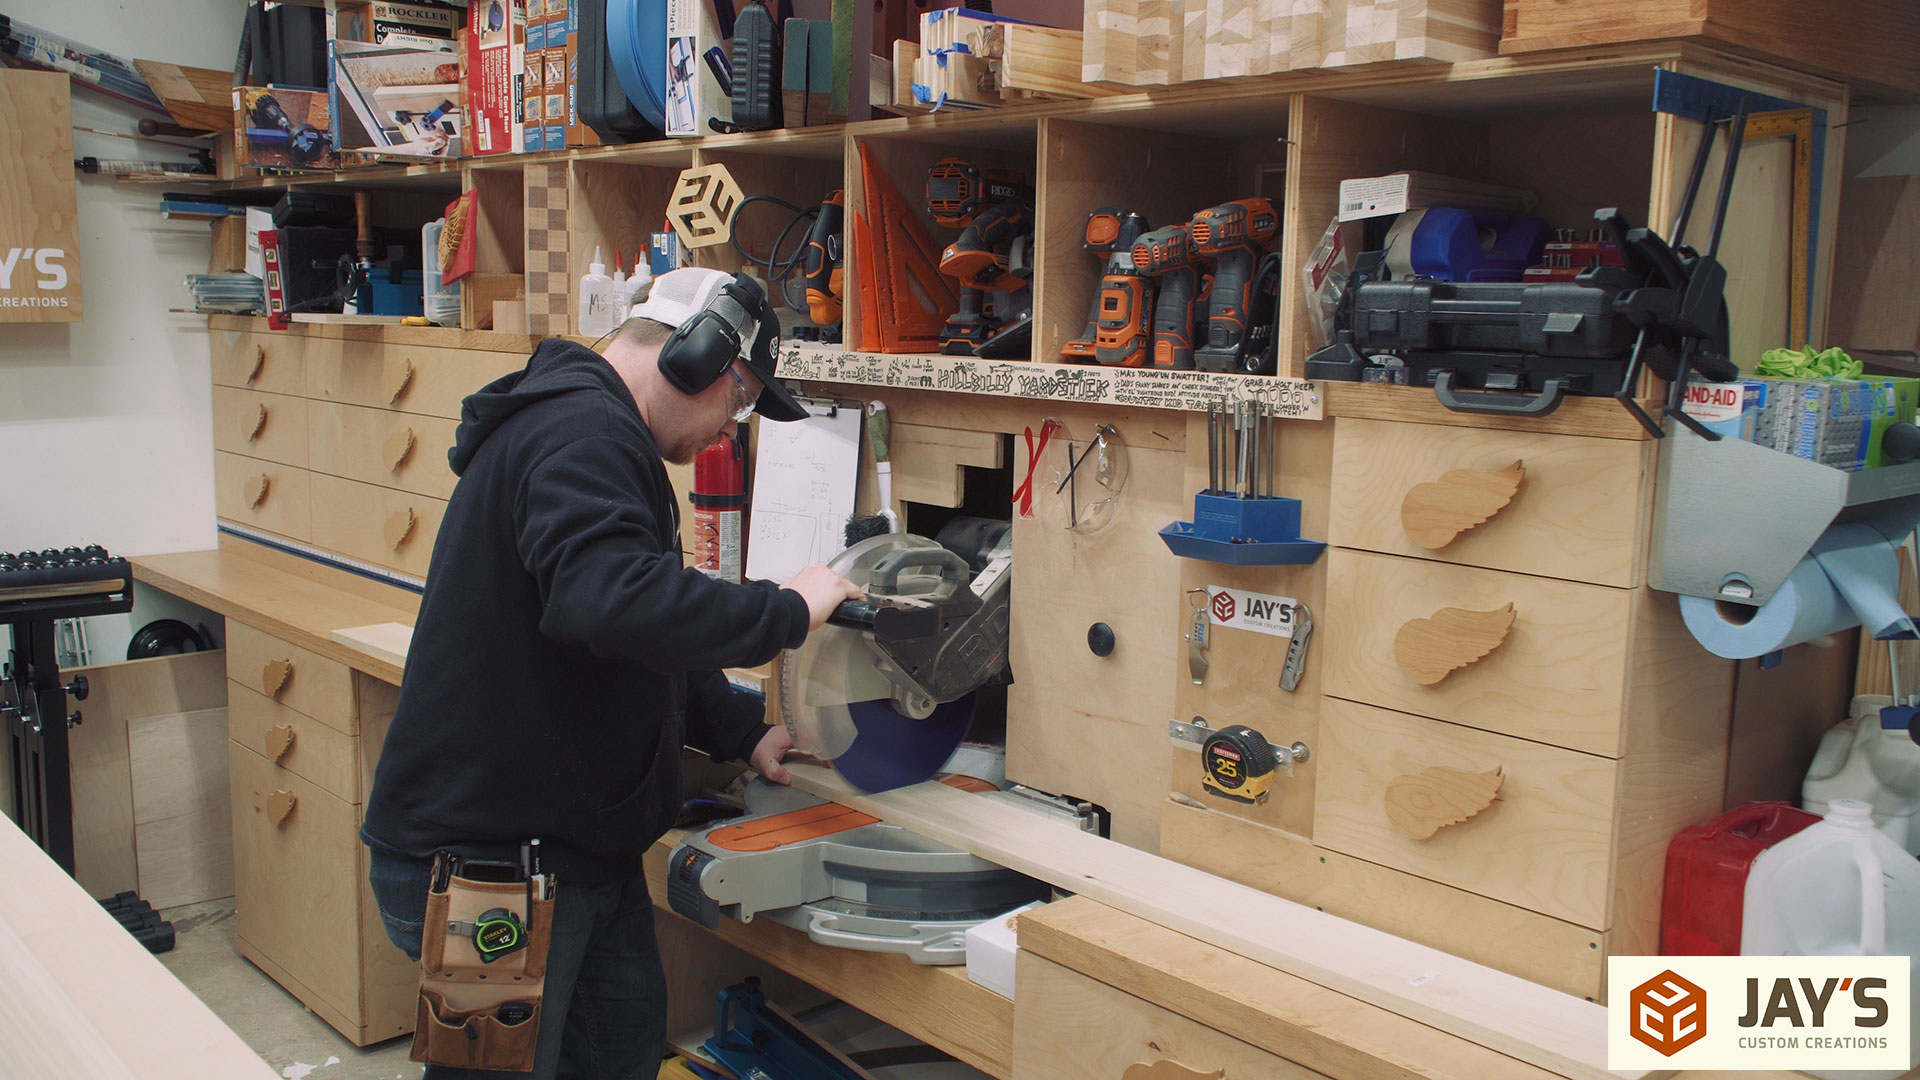
Followed by ripping the pieces to their final width at the table saw.

While the design of this bookcase is very basic there are a few standard design elements in play. The lower face frame rail was sized to allow for the addition of baseboard moulding in the event that I wanted to add it in the future. At this time I do not. The lower rail is also the widest which will give it more of a stronger foundation appearance. The top rail is the next widest to allow for the addition of crown moulding in the event that I wanted to add it in the future as well. And again, at this time I do not want to add it. And finally the center rail is sized the same as the outer stiles just to tie the sides together.
Pocket hole screws are industry standard for cabinet face frames. Because the ugly appearance of the pocket holes is on the inside nobody will ever see them. And while pocket hole joints aren’t the strongest joint out there they are plenty strong enough for face frame construction. Never use pocket hole joints in situations where wood movement is necessary, like attaching a breadboard end to a table top. For more information about this pocket hole machine I have click here.

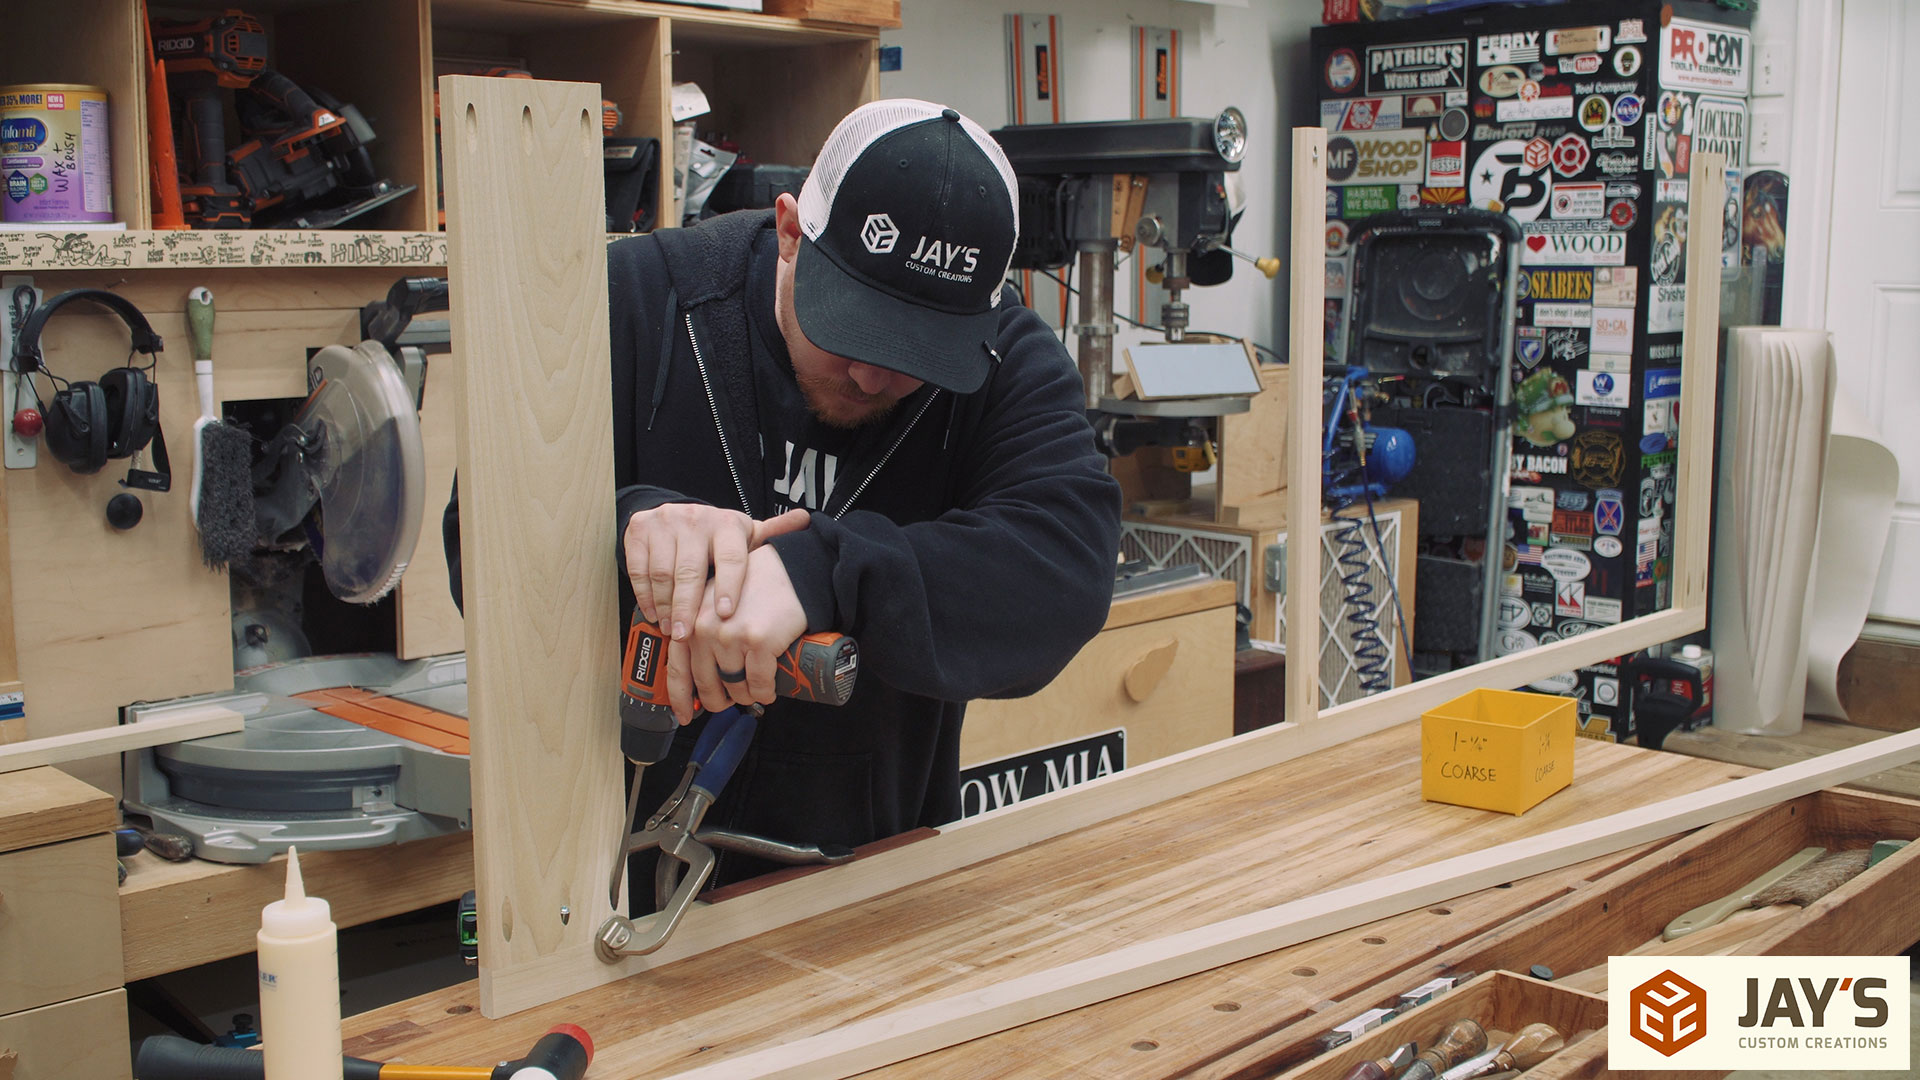
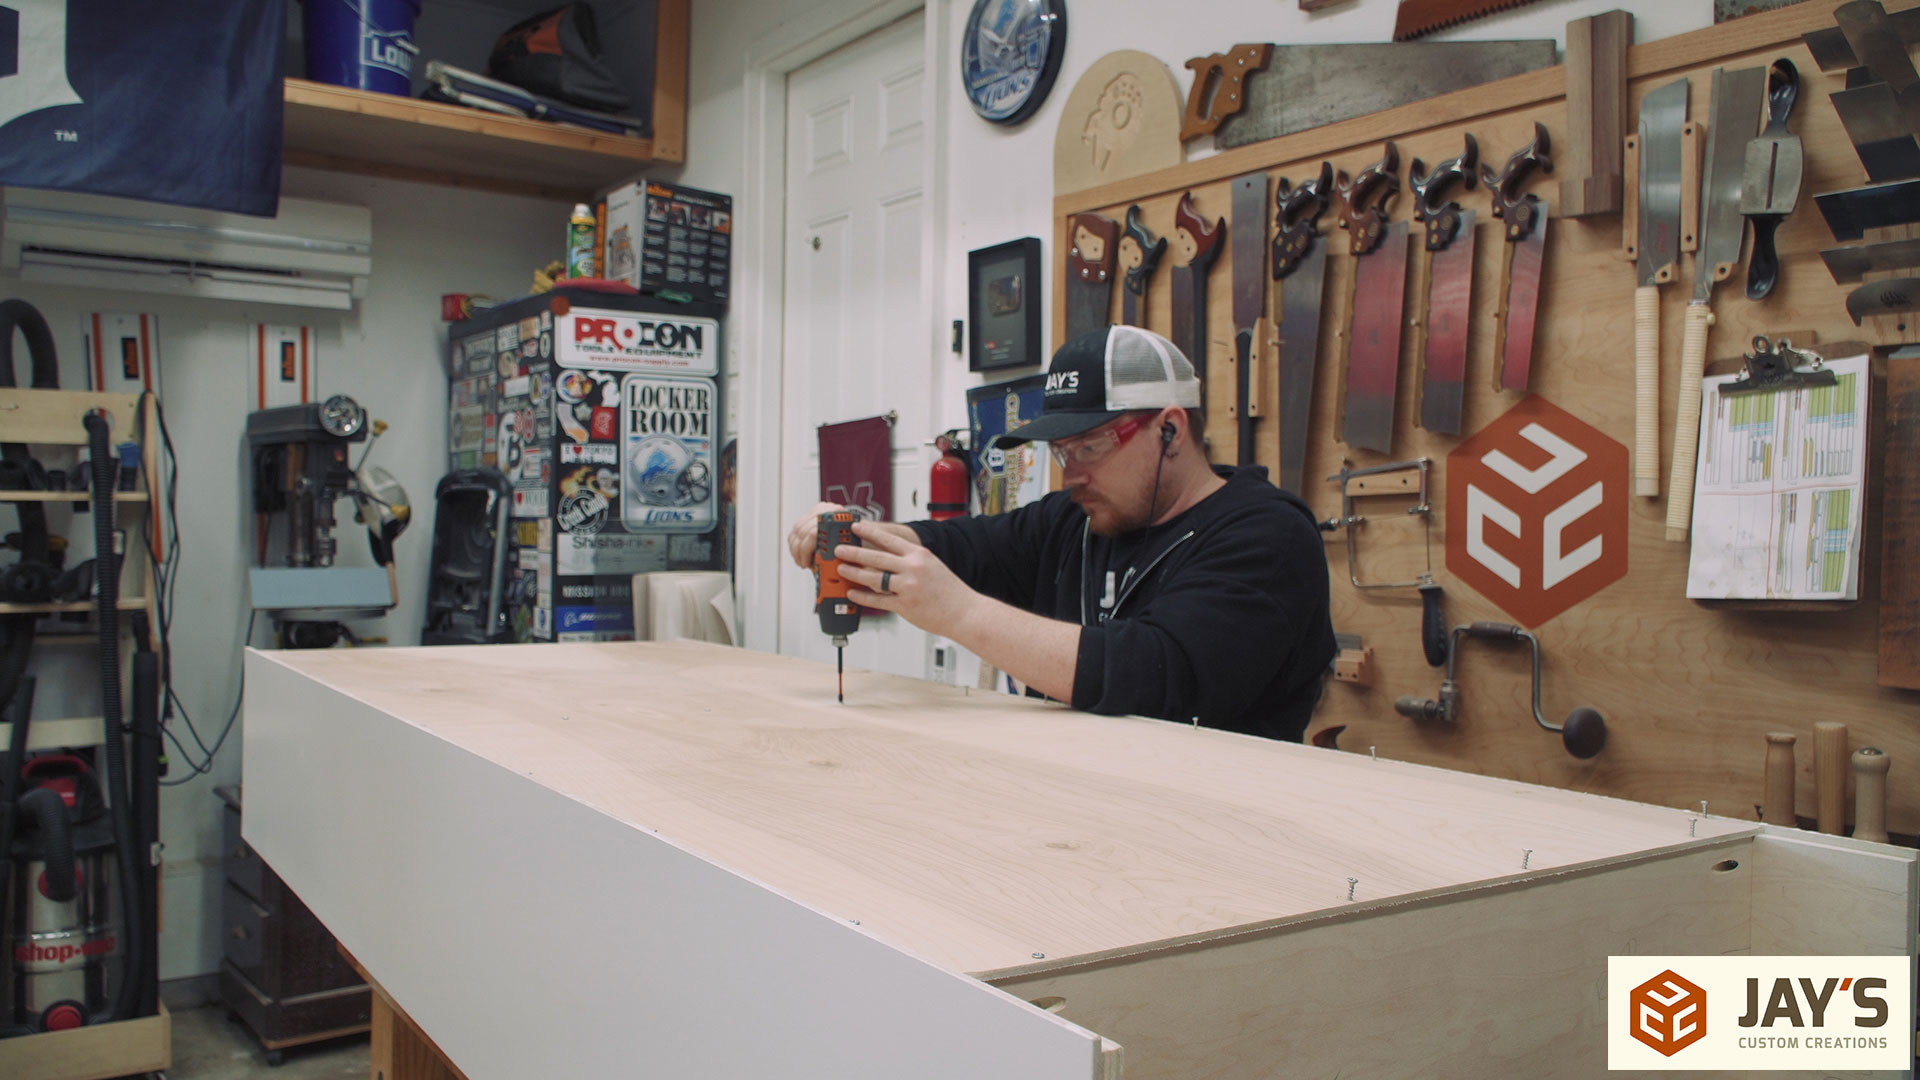
Clamping the outside stiles to the workbench makes quick work of assembly. The most annoying part is actually getting out of the way for the camera. Like this shot; I don’t think I would be standing behind the part to screw it together if the camera wasn’t recording :)
The good aspect of recording the build is that I can easily get a helping hand ;)

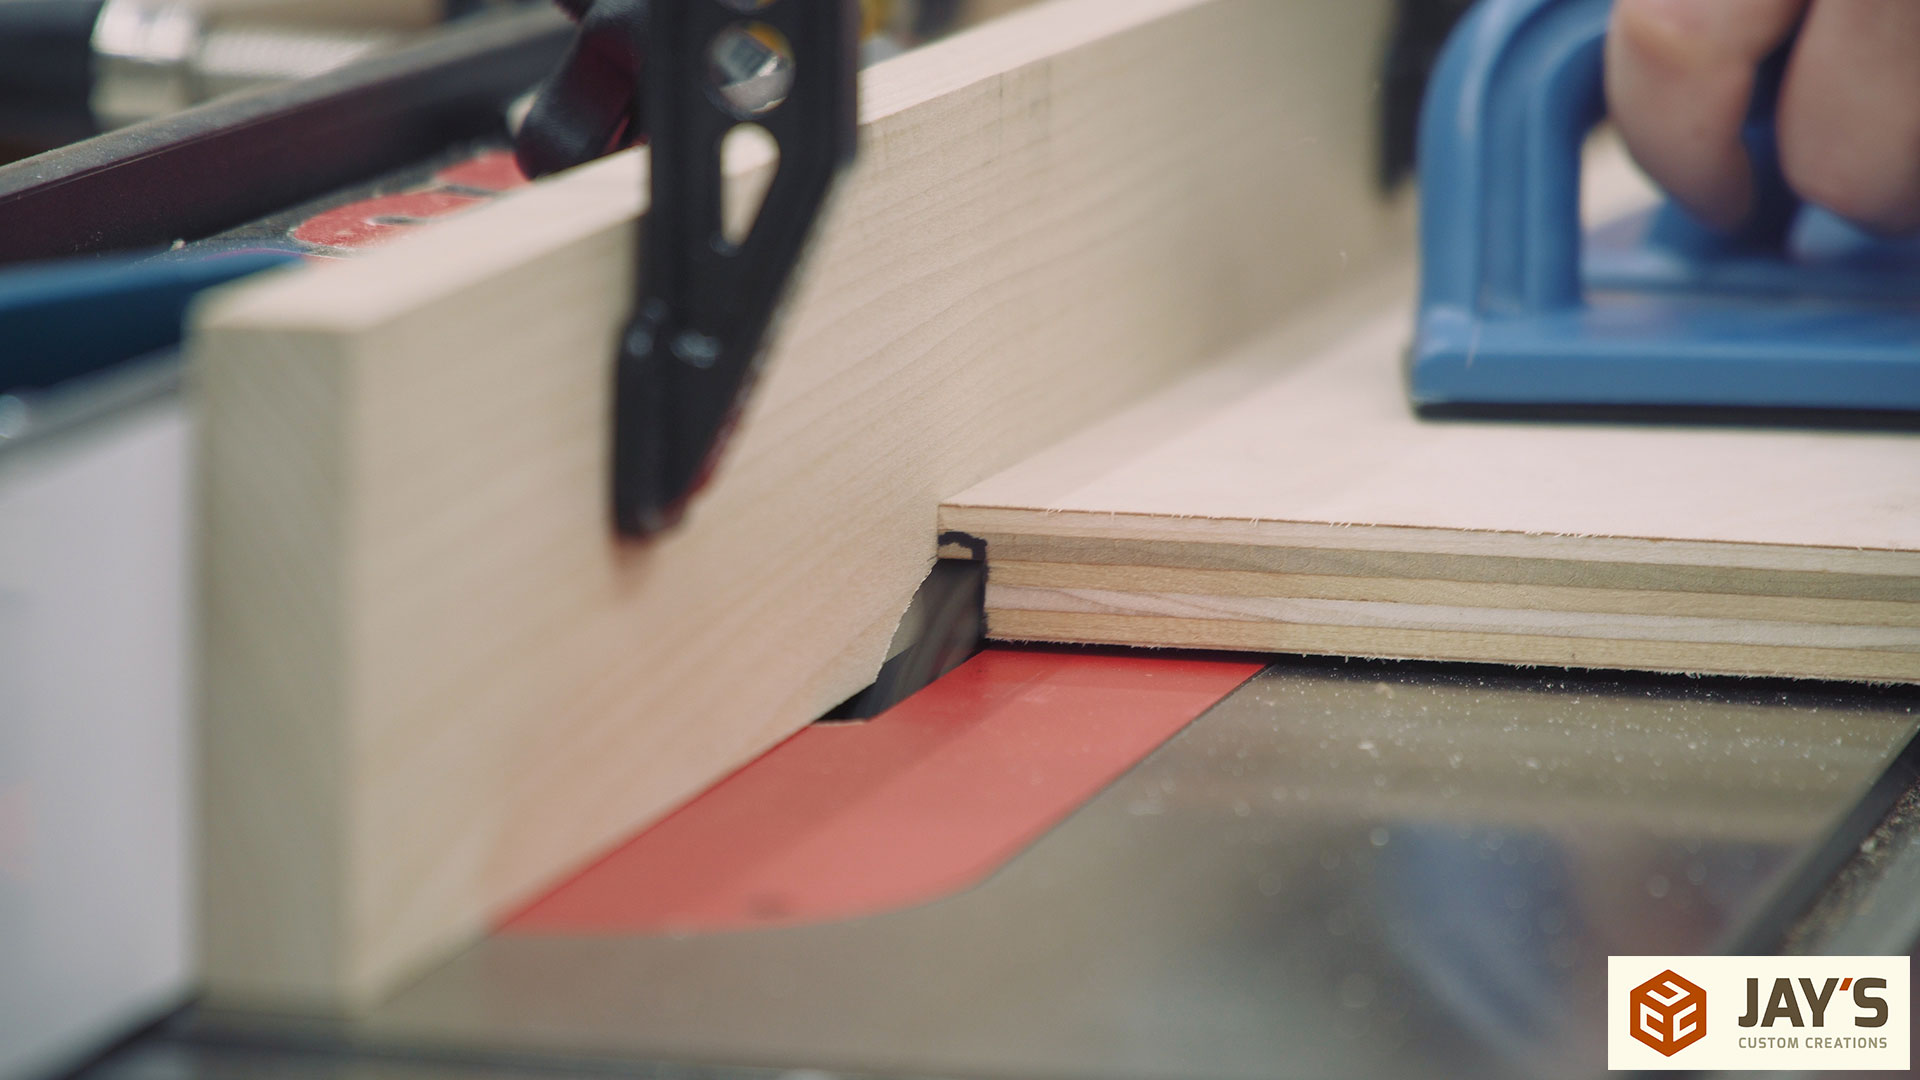
The back panel will be attached to the case via a rabbet in the side panels. In this case I made the rabbet about 2/3 the thickness of the sides and a little deeper than the thickness of the back panel. I have exact measurements in the plan but in this case I just eyeballed it.
This is the most important step of the build. I call it “screwing up the width of the fixed shelves and therefore needing to remove more material from the side panels to accommodate.” …..it happens.
Assembly of the fixed shelves is just as easy as the face frame. The lower shelf and middle shelf will have the pocket holes facing the ground and the upper shelf will have the pocket holes facing the ceiling. This means a 90 degree chunk of wood can be clamped to the sides to act as a stop block for each shelf. Then the shelf clamped to that chunk of wood. Once everything is secured with clamps the pocket hole screws can be driven home to lock the shelf in place. No fuss and no slipping with this method.
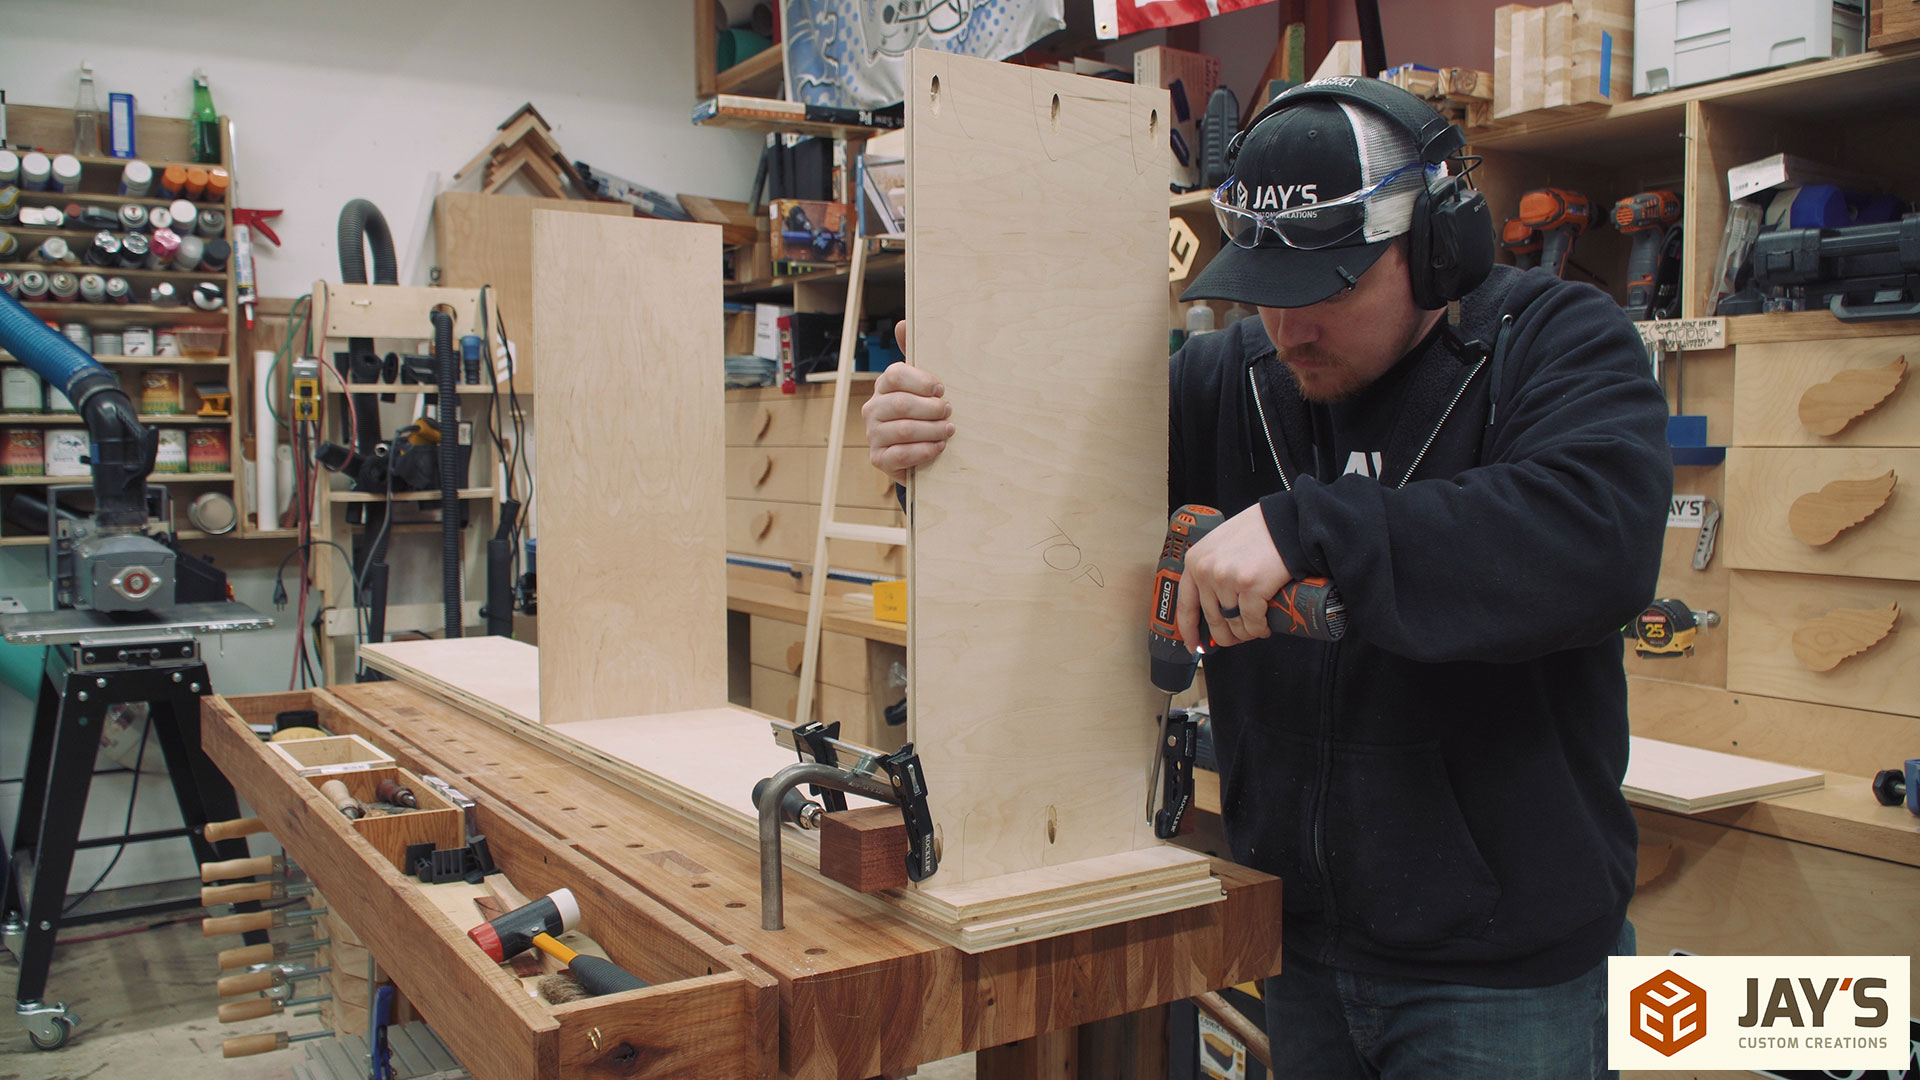
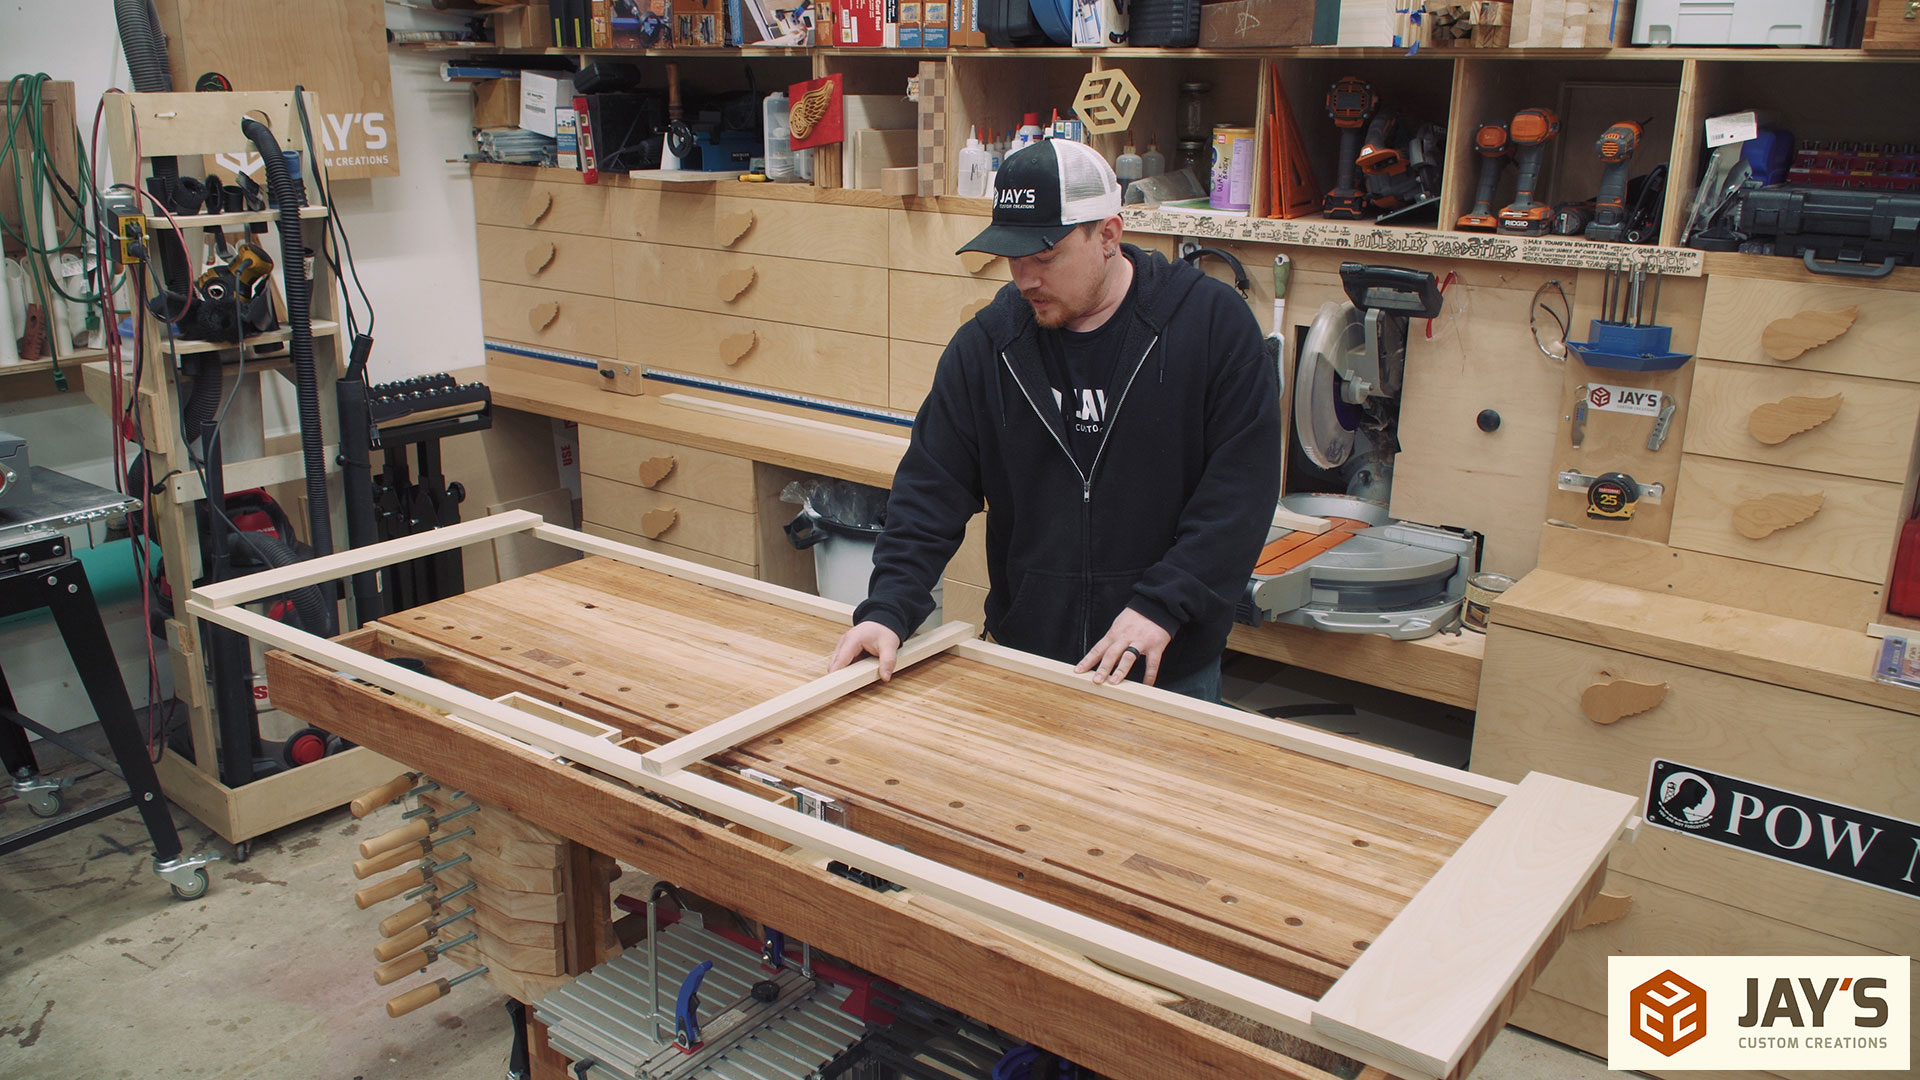
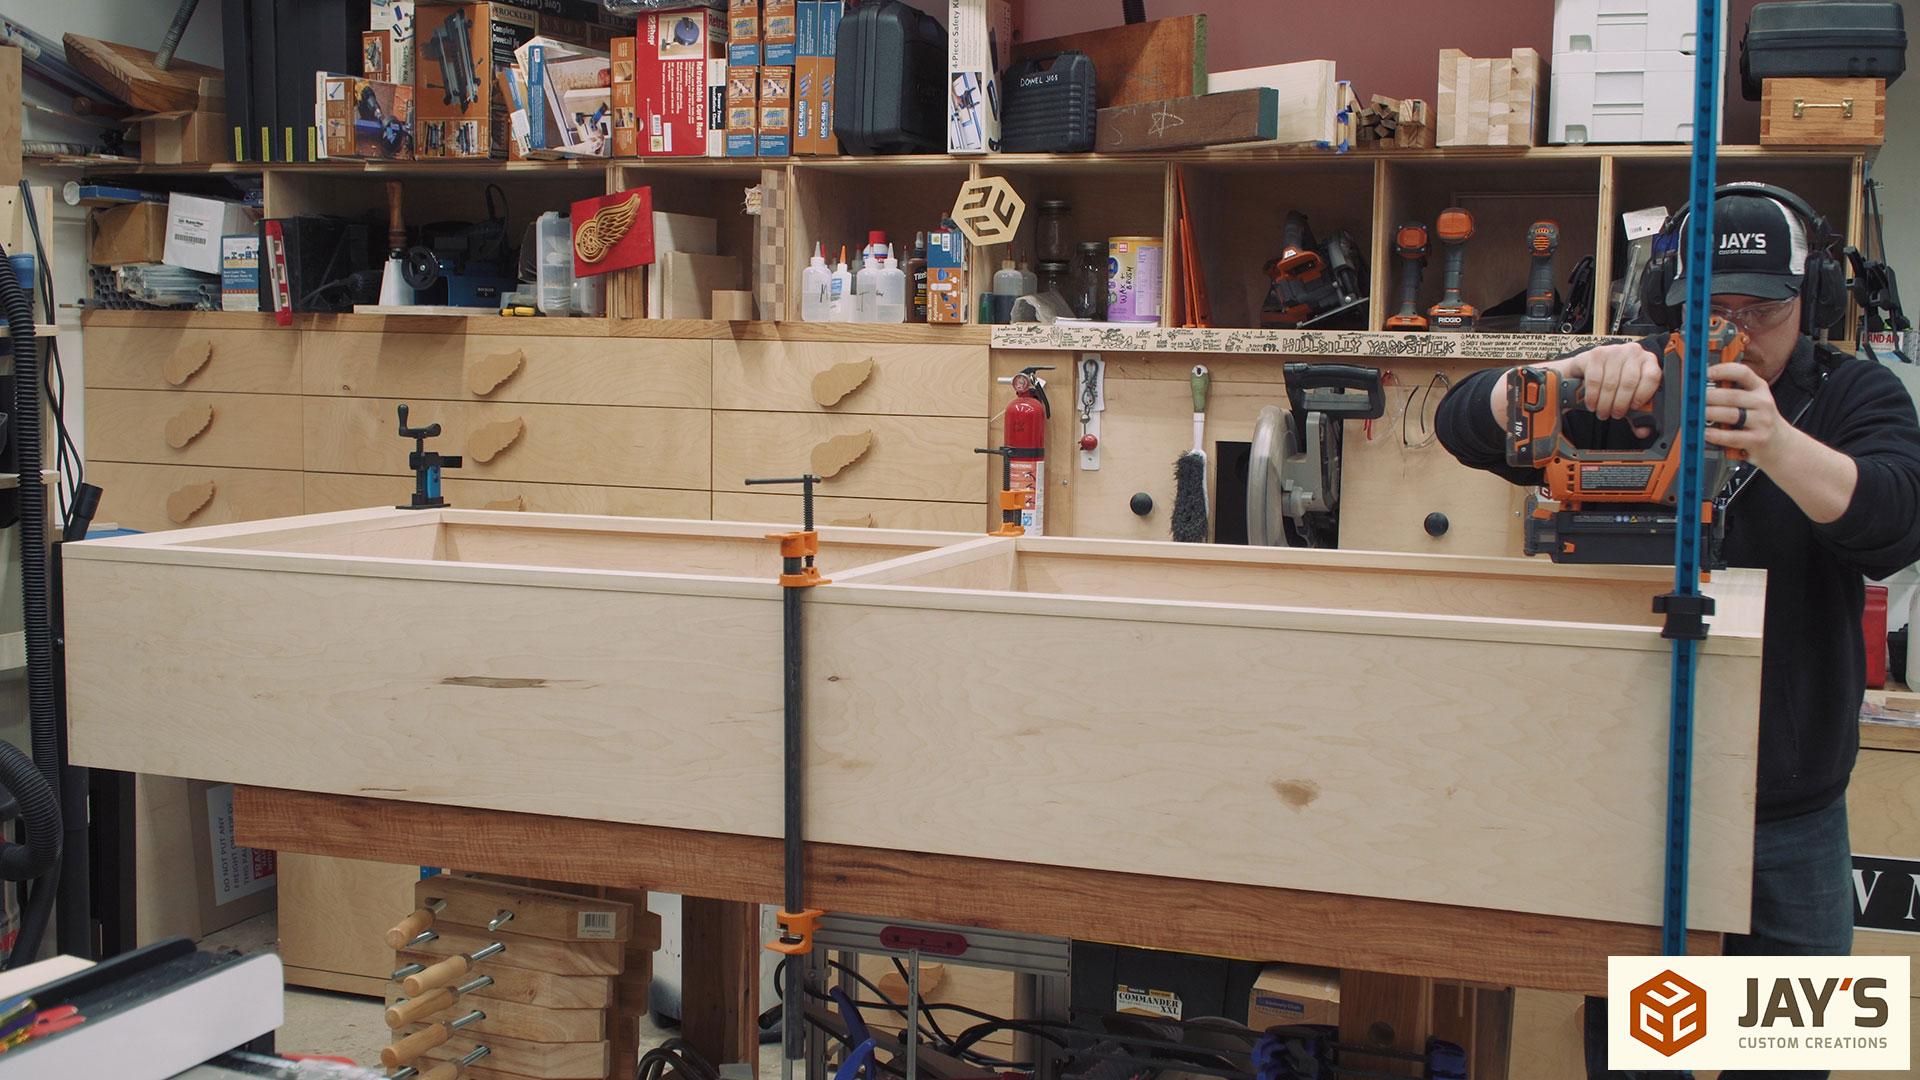
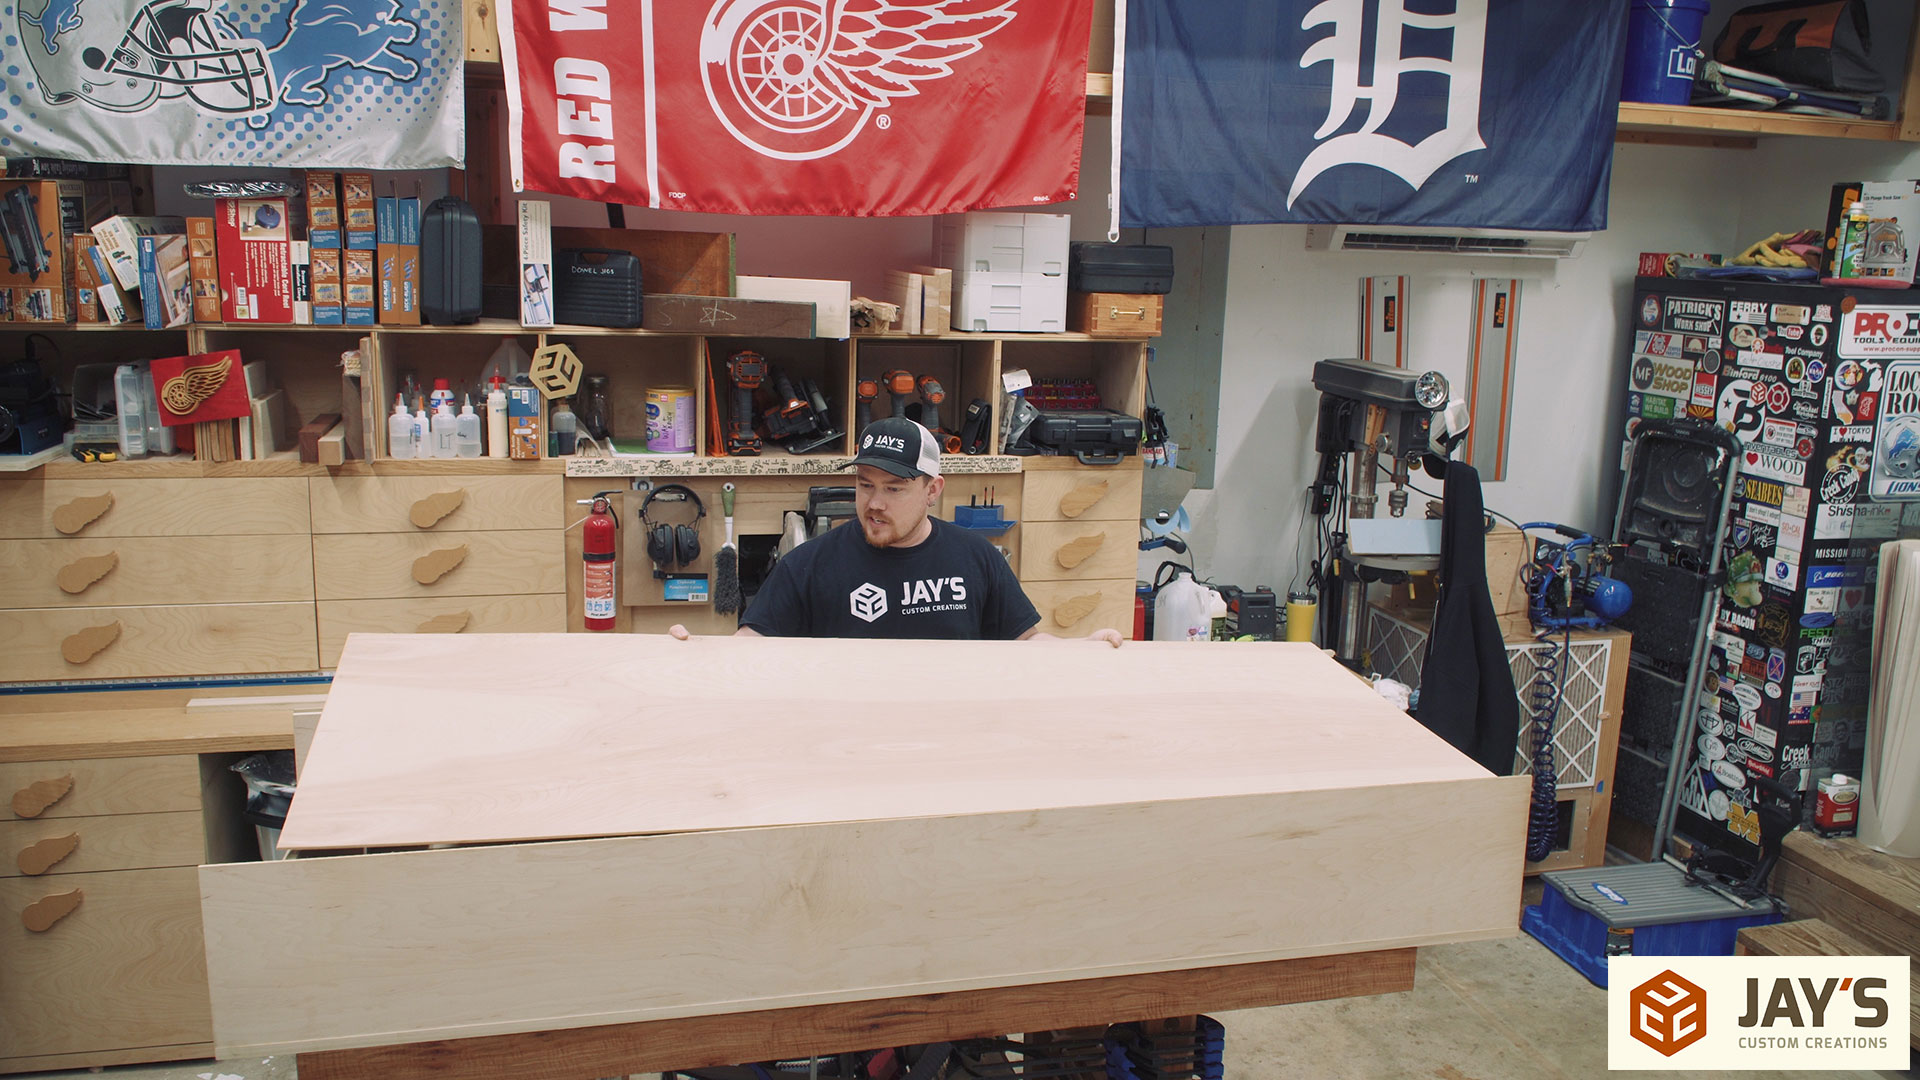
To attach the face frame to the case I laid the case on it’s back on my workbench. Coincidentally, I found out that the back panel needs to be the exact width of my workbench because it fit perfectly inside the back panel rabbets.
A little glue and a few brad nails will secure the face frame to the case. I used a couple of clamps to hold the face frame exactly where I wanted it before shooting the nails.
All of the nail holes get filled with wood putty.
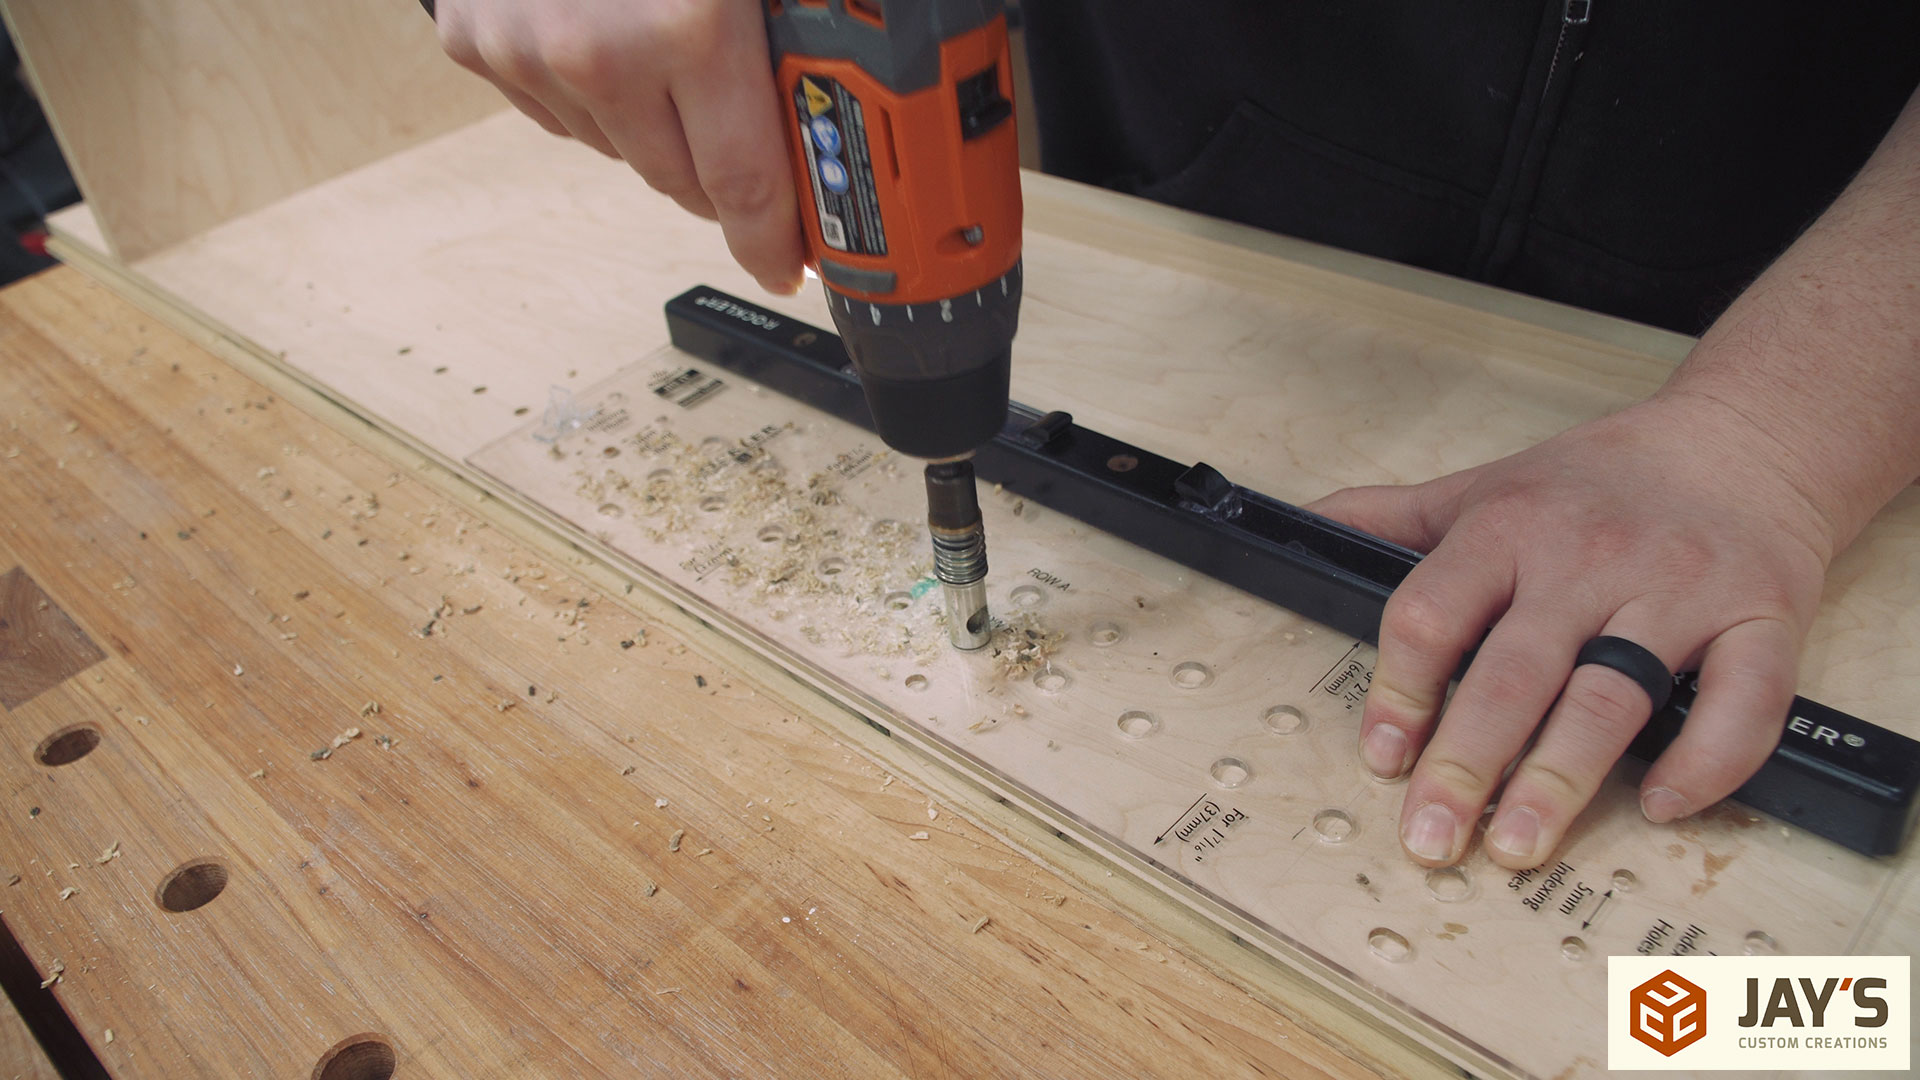
For the four adjustable shelves to be adjustable I need to cut shelf pin holes. And to do that I’m using the JIG IT® Shelving Jig from Rockler. I bought this template back in 2008 when I first got into woodworking and have put a lot of miles on it. Rockler is a partner of mine and sent me another one to use. There is no need for me to open another one though so I’ll pass it along to someone else for free. Just leave a comment on this article and I’ll use a random number generator to select a winning comment 24 hours after this article goes live. EDIT: THANKS FOR THE LOVE ON THIS ONE. ANTHONY SCOLARO WAS THE RANDOMLY SELECTED WINNER.
The jig is simple to use. Line the jig edges up with reference edges in the project, the back and bottom in this case, and start drilling the holes as needed with the included drill bit.
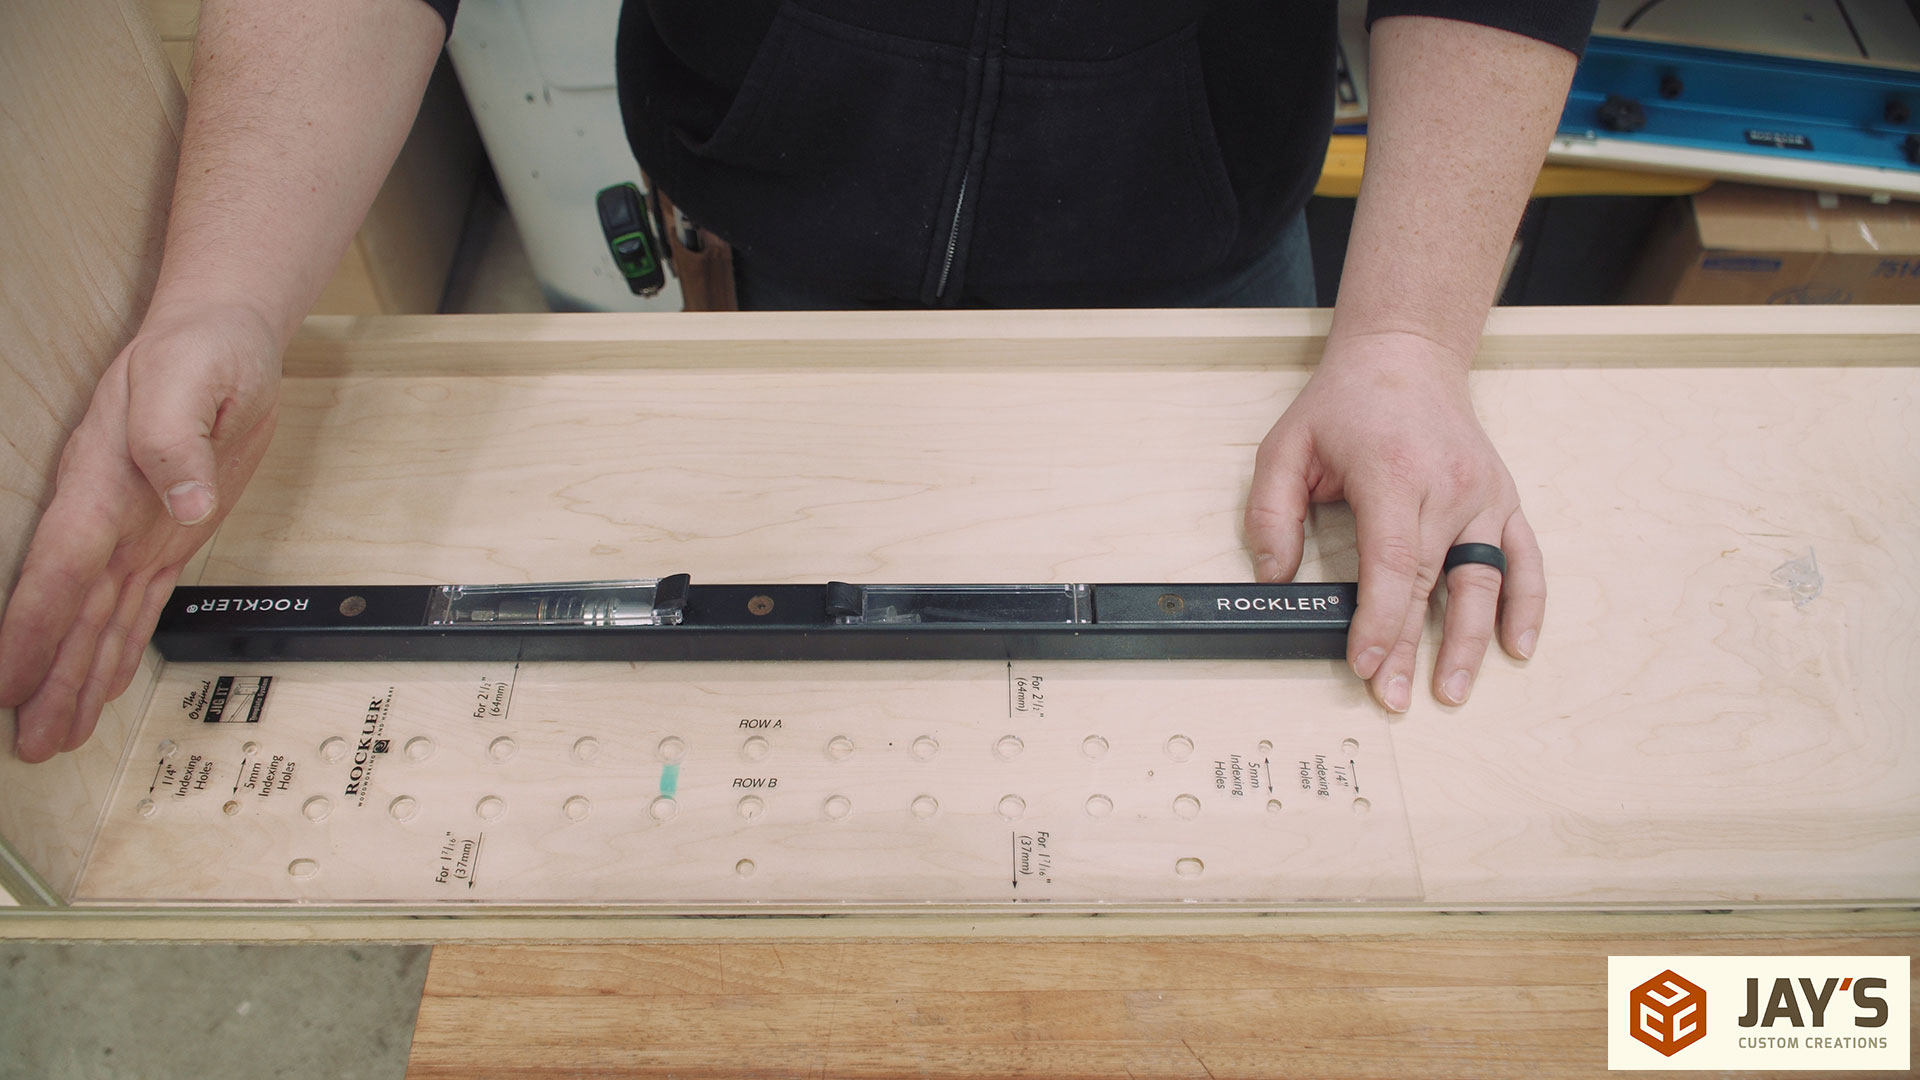
Once you max out the travel of the jig simply use a shelf pin through the template and into a previously drilled hole and continue drilling as needed. Repeat this for as many holes as you’d like. Super easy and precise.
The back panel will eventually get attached with short screws. All I wanted to do here was make sure it was cut to the appropriate size before I started finish prep.
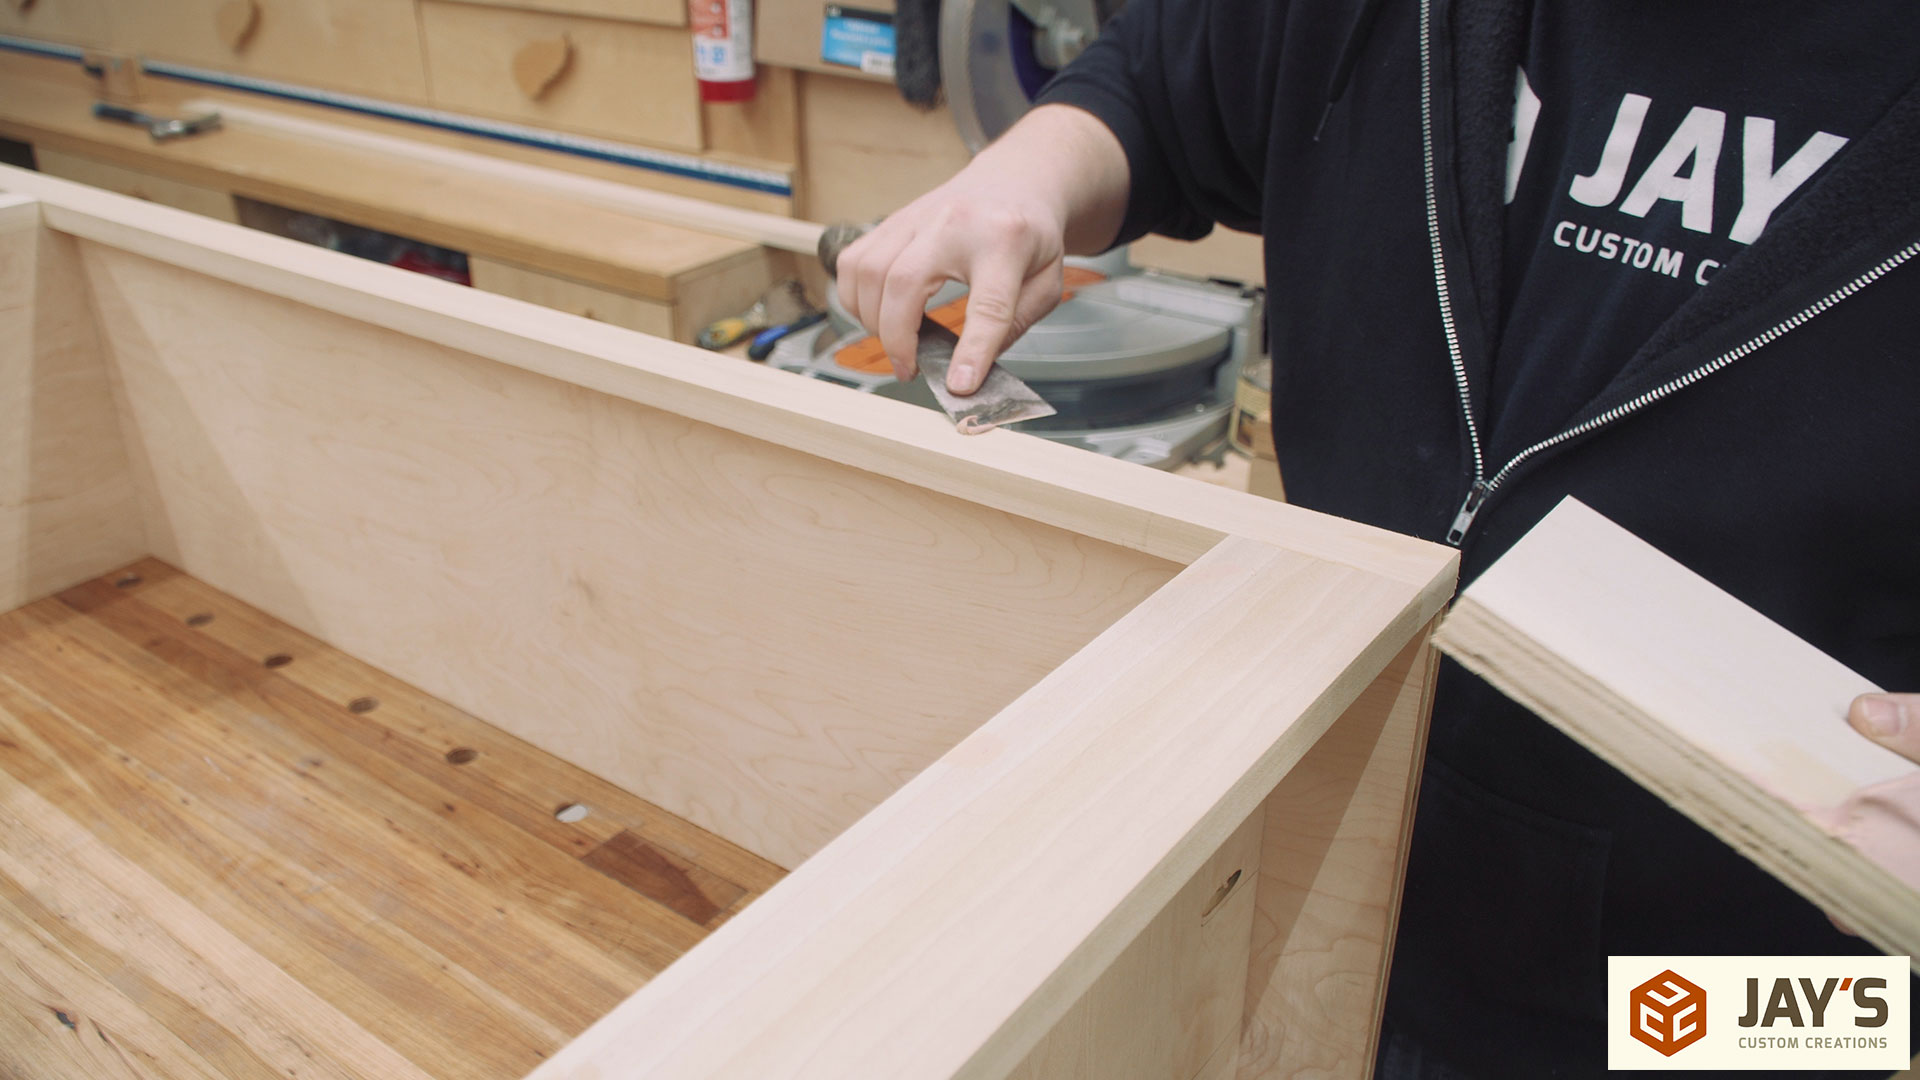
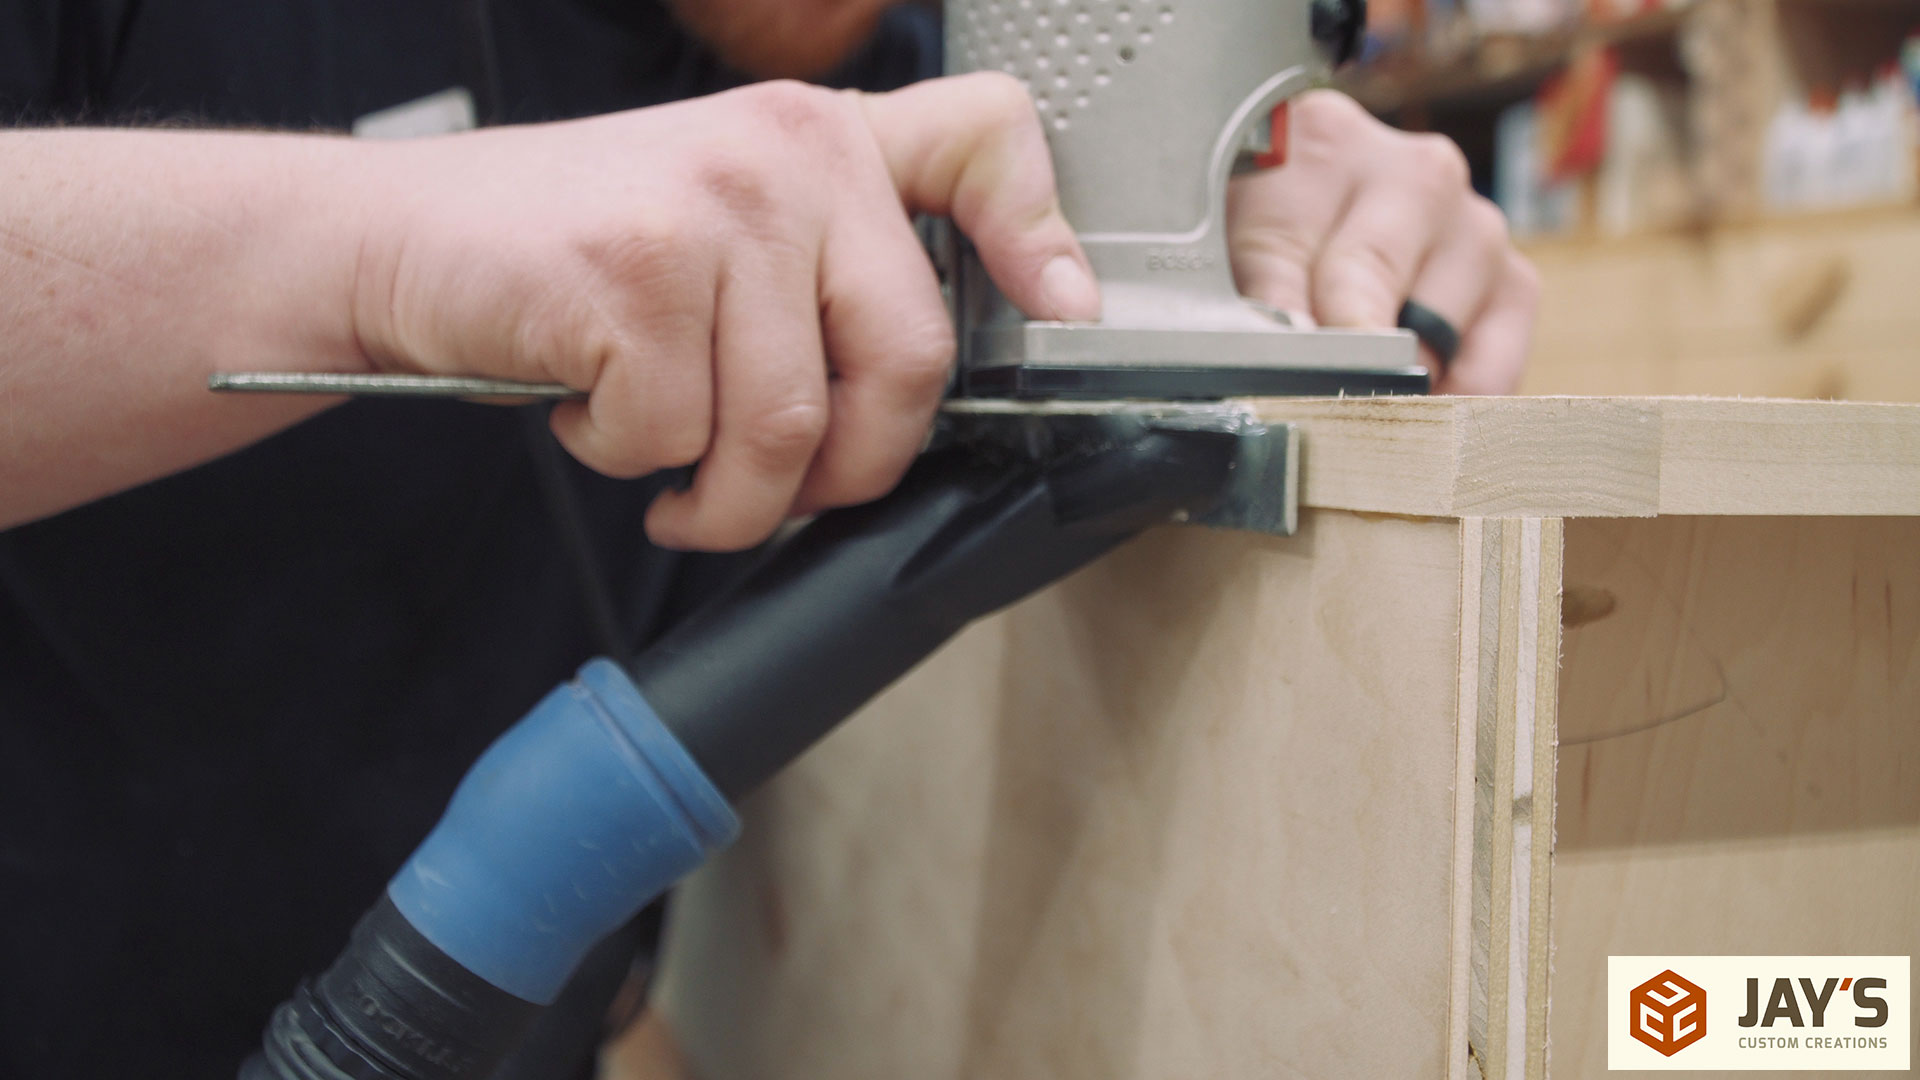
And finish prep consists of using a router to flush trim the face frame with the case sides…
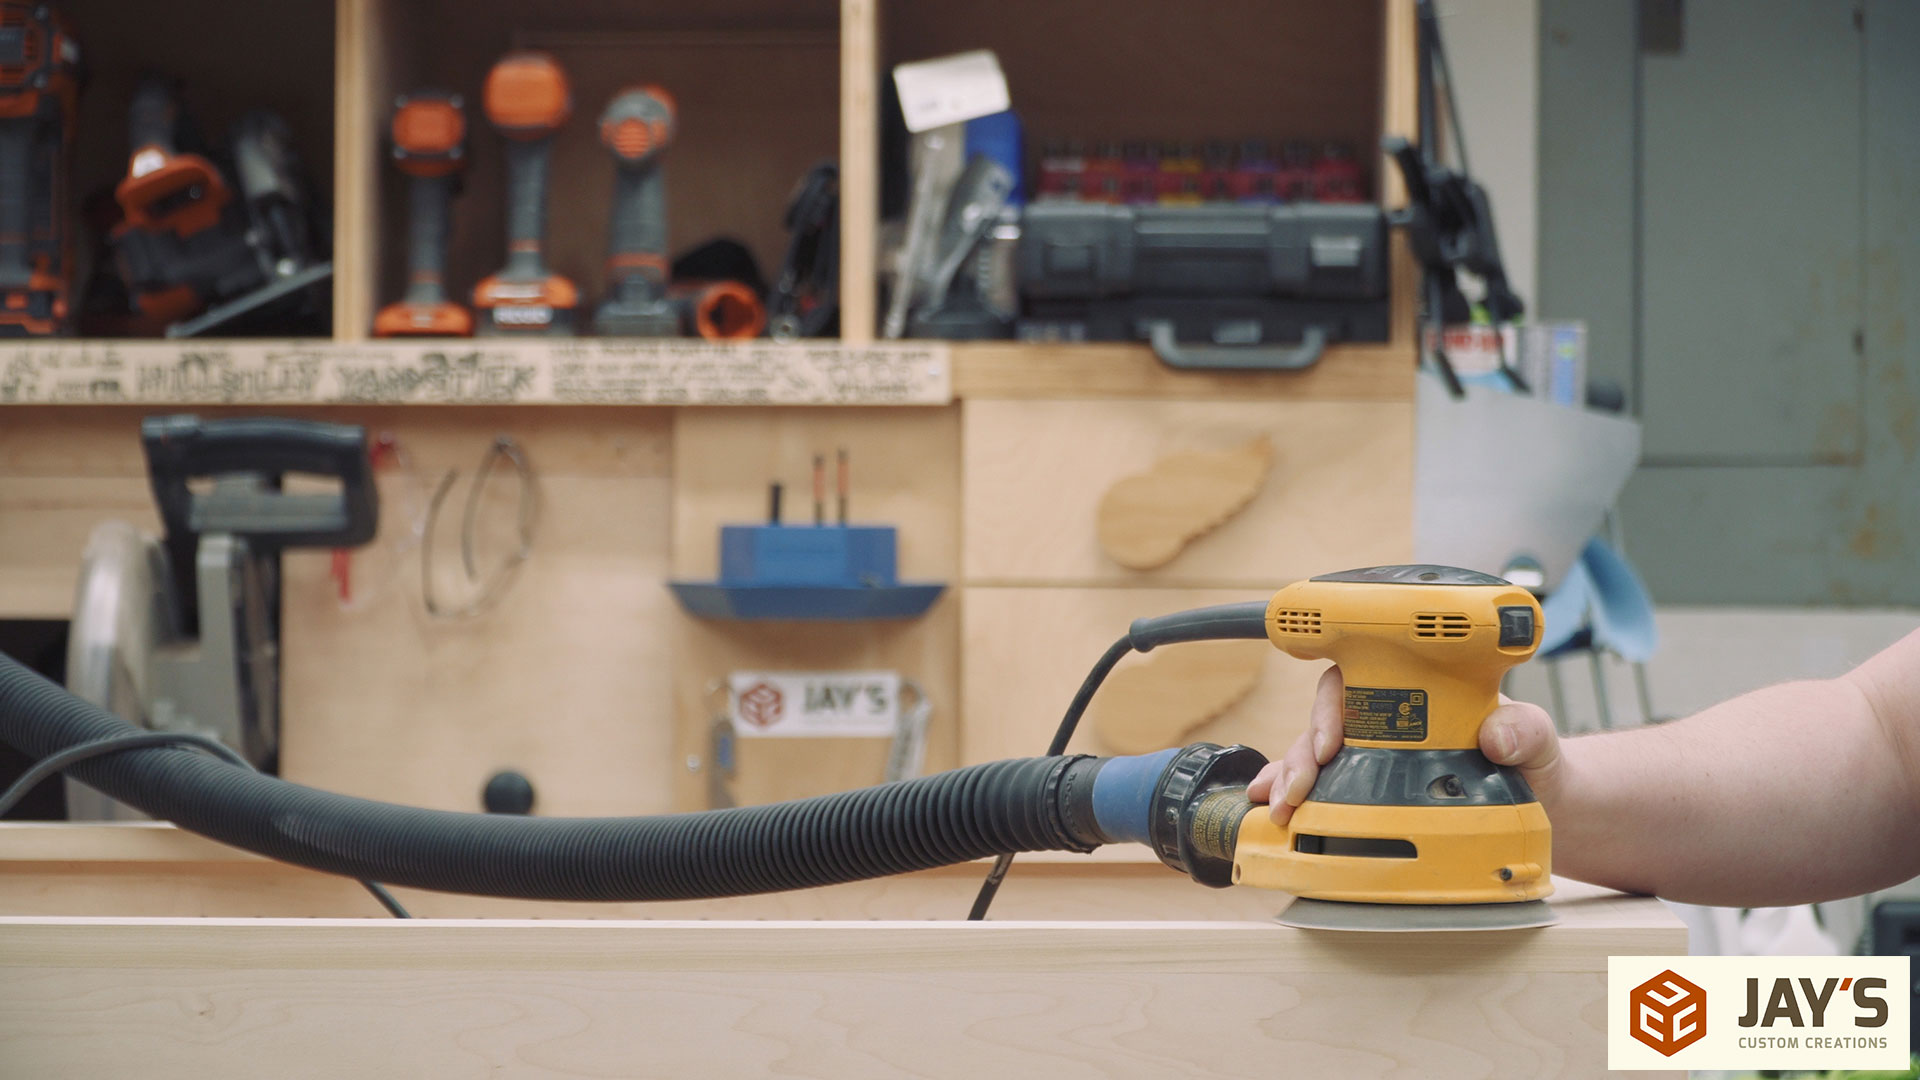
Sanding all surfaces up to 180 grit..
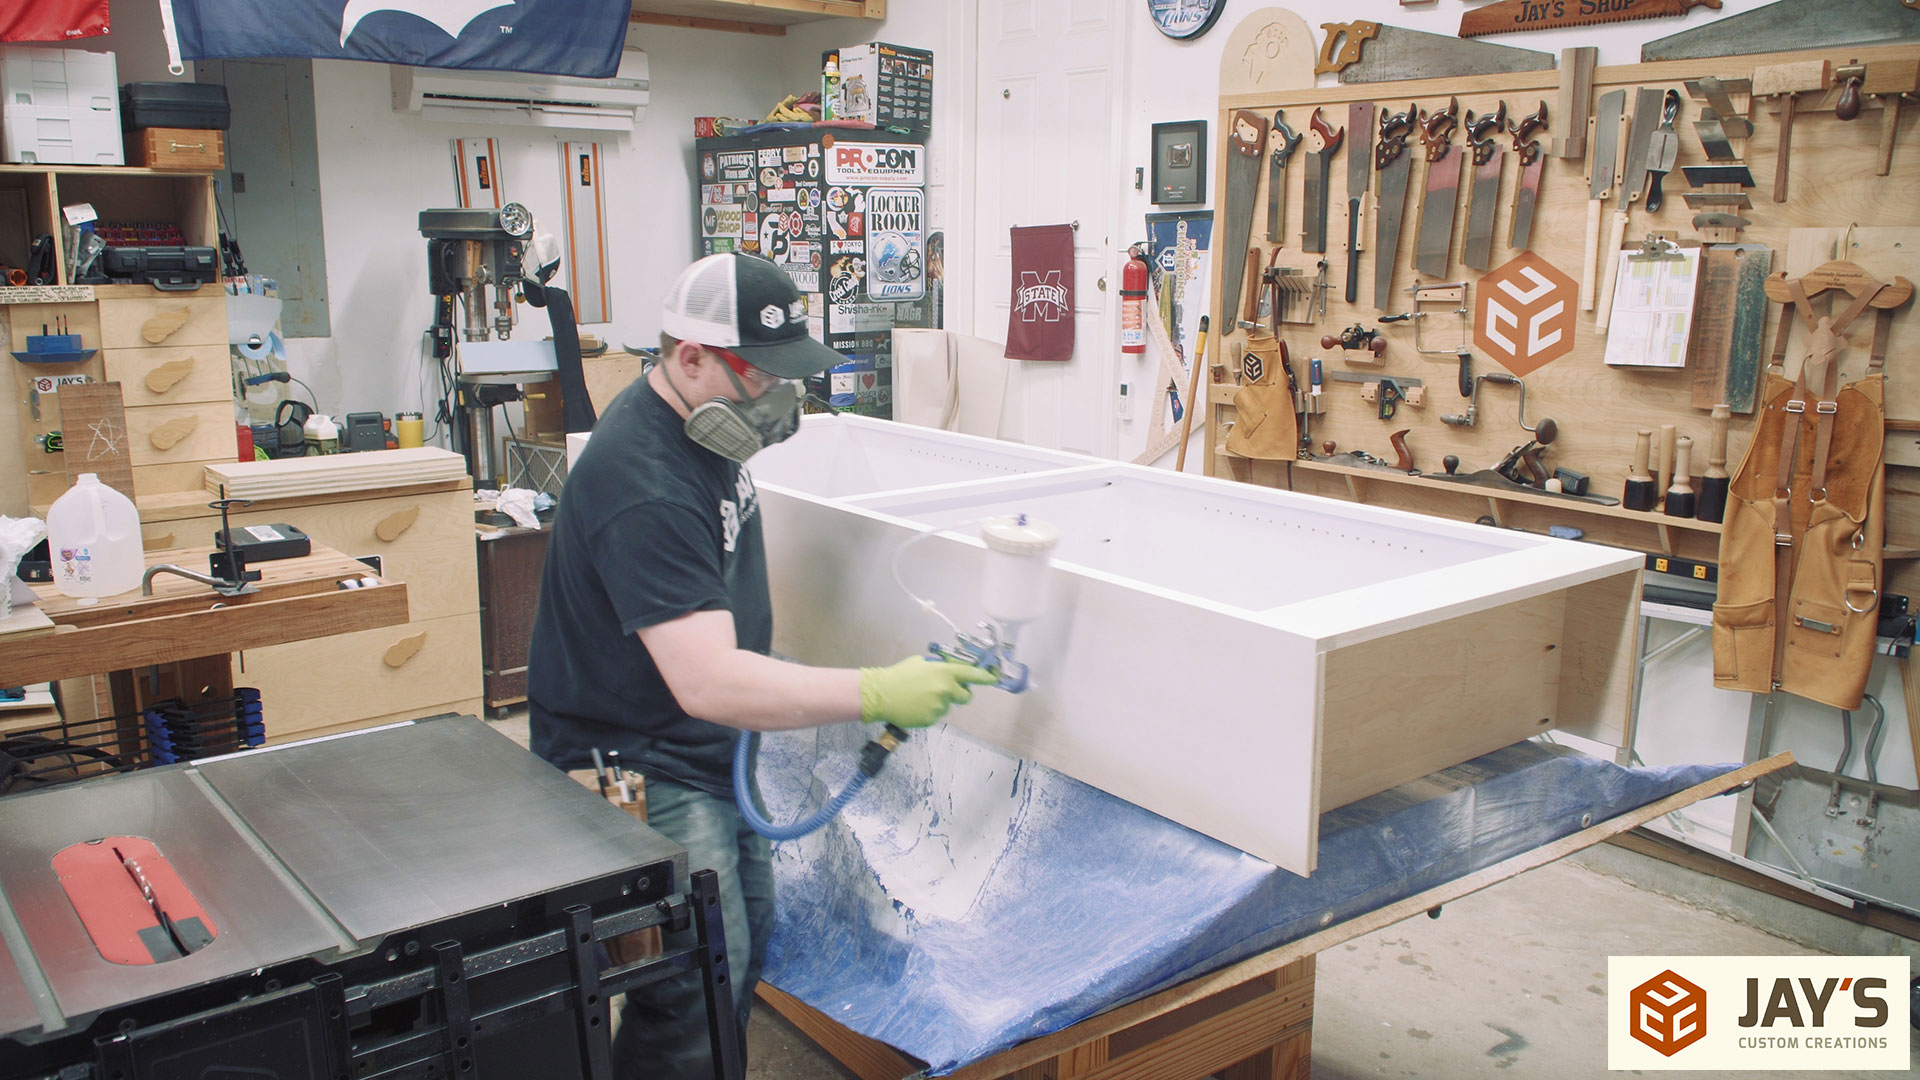
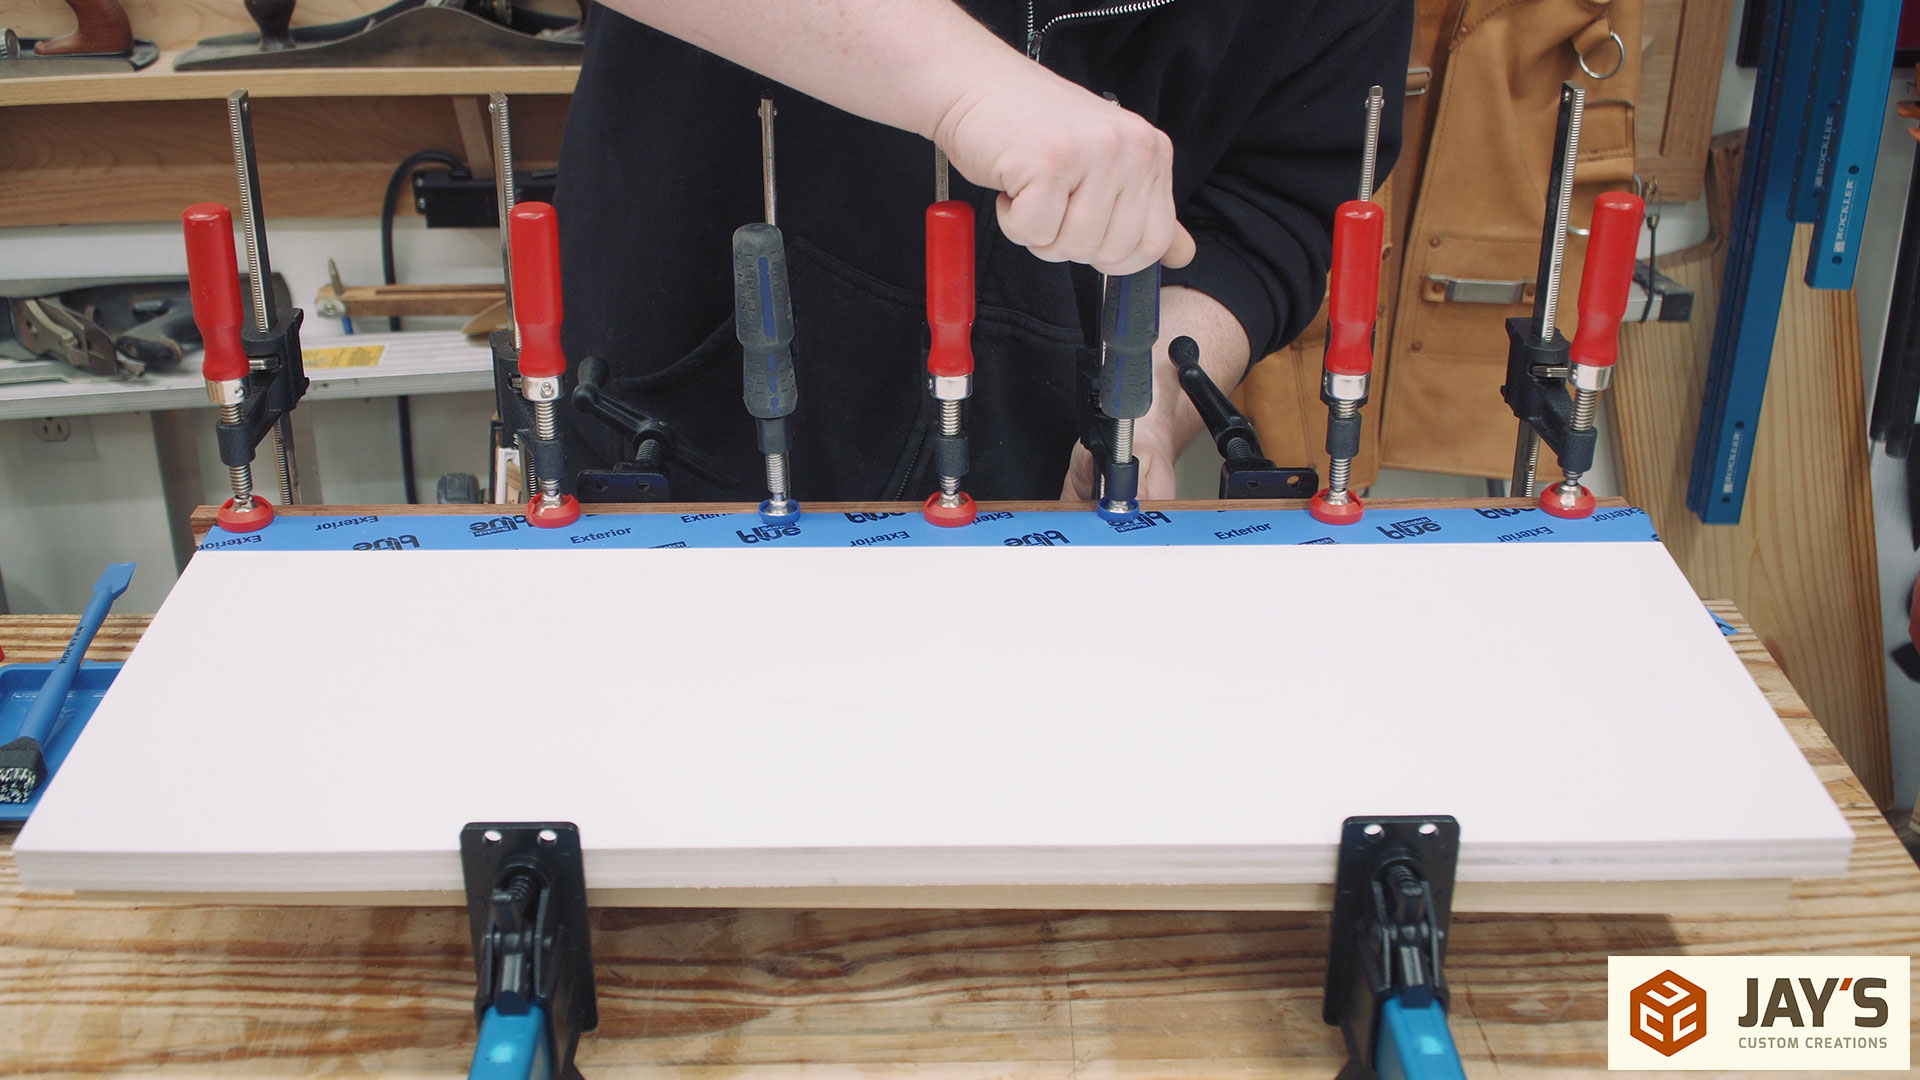
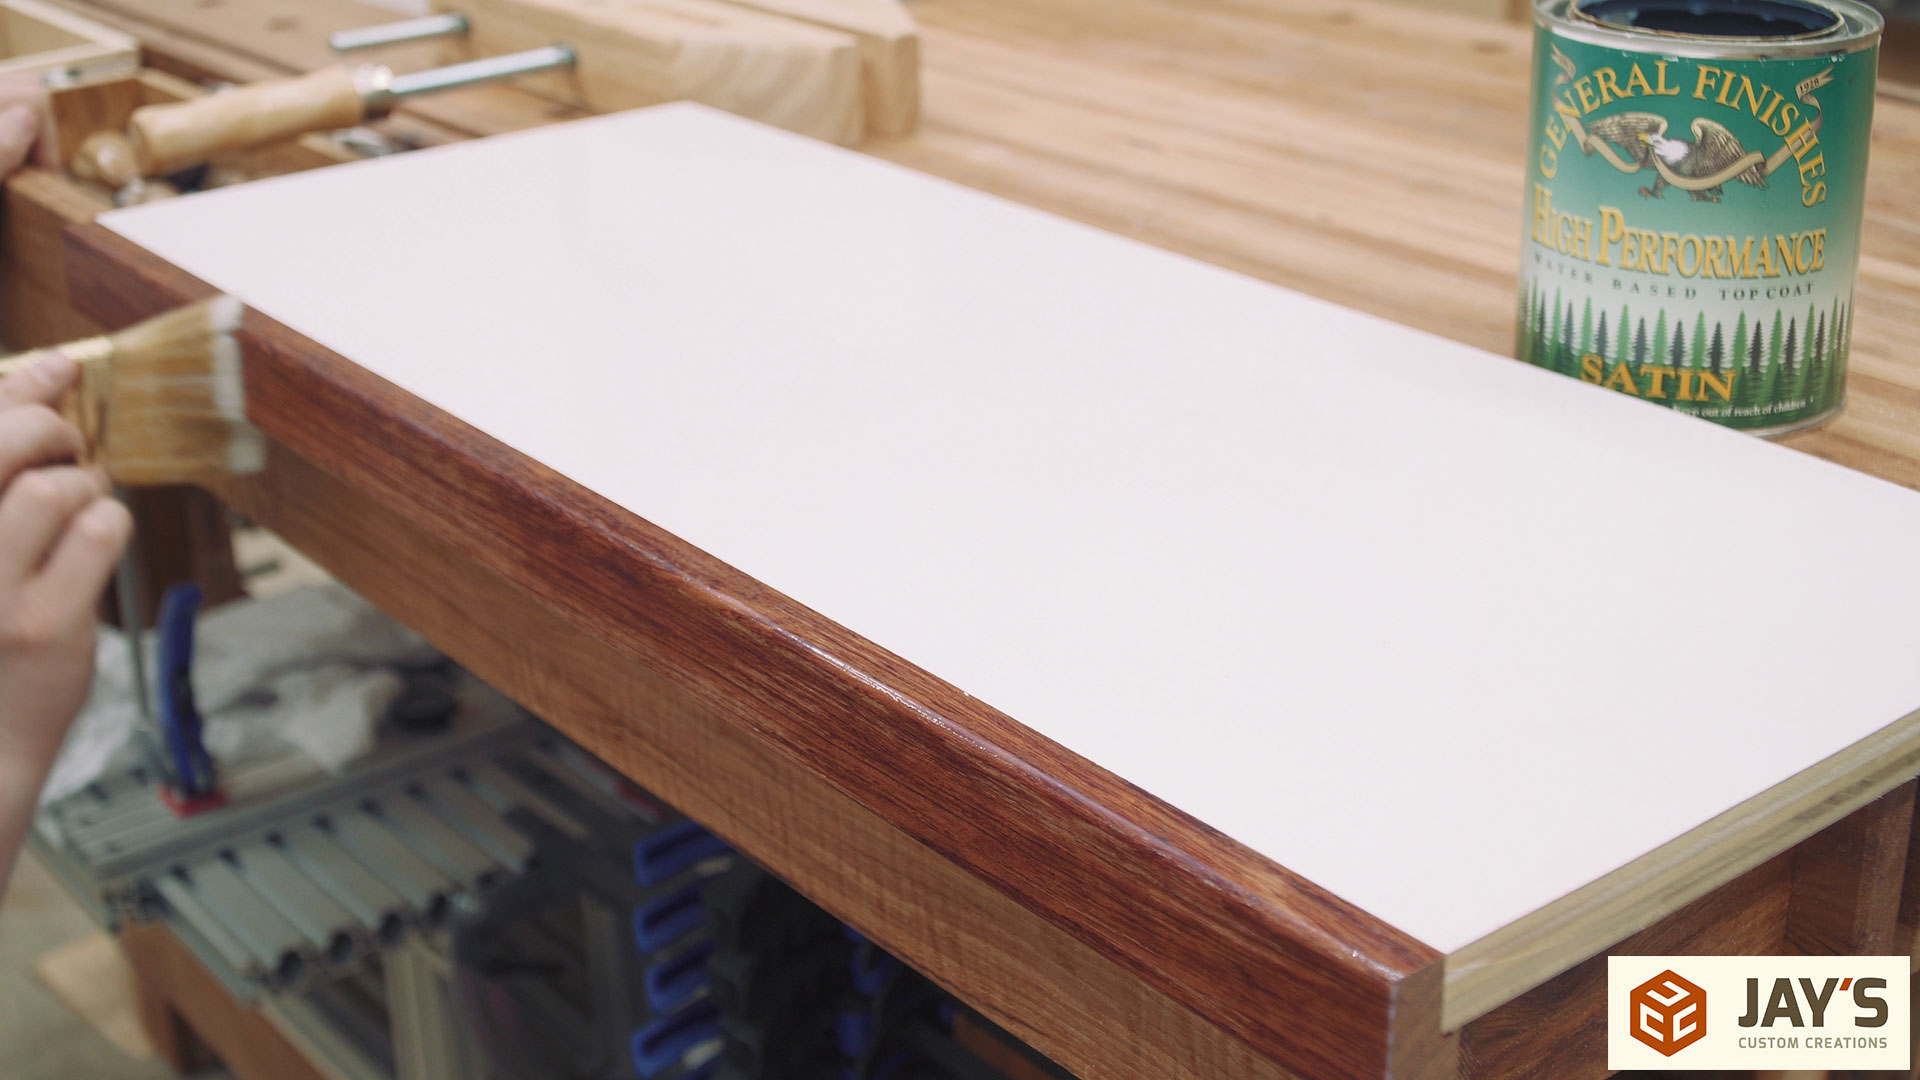
And applying the finish. Just like everything else I’ve built for the office, this bookcase will be white with a few pieces of bubinga trim. On my cabinets and dog bed table I used Sherwin Williams white lacquer. The results are nice but man was it a huge pain in the butt to spray a solvent finish. The lacquer smells up my house for days, even when spraying outside because I store the project in my garage. And I can’t spray in my garage because the solvent smell is even worse in there. So for this project I tried out General Finishes water based white polyurethane primer and white polyurethane satin finish. Long term durability is something I can’t speak for right now but as far as the finished product goes, they both look and feel the same. The main difference is that I was able to spray the water based poly inside my shop and not worry about any of the crazy fumes. I wore a respirator (as you should always do) to protect my lungs from the dusty bounce-back and overspray.
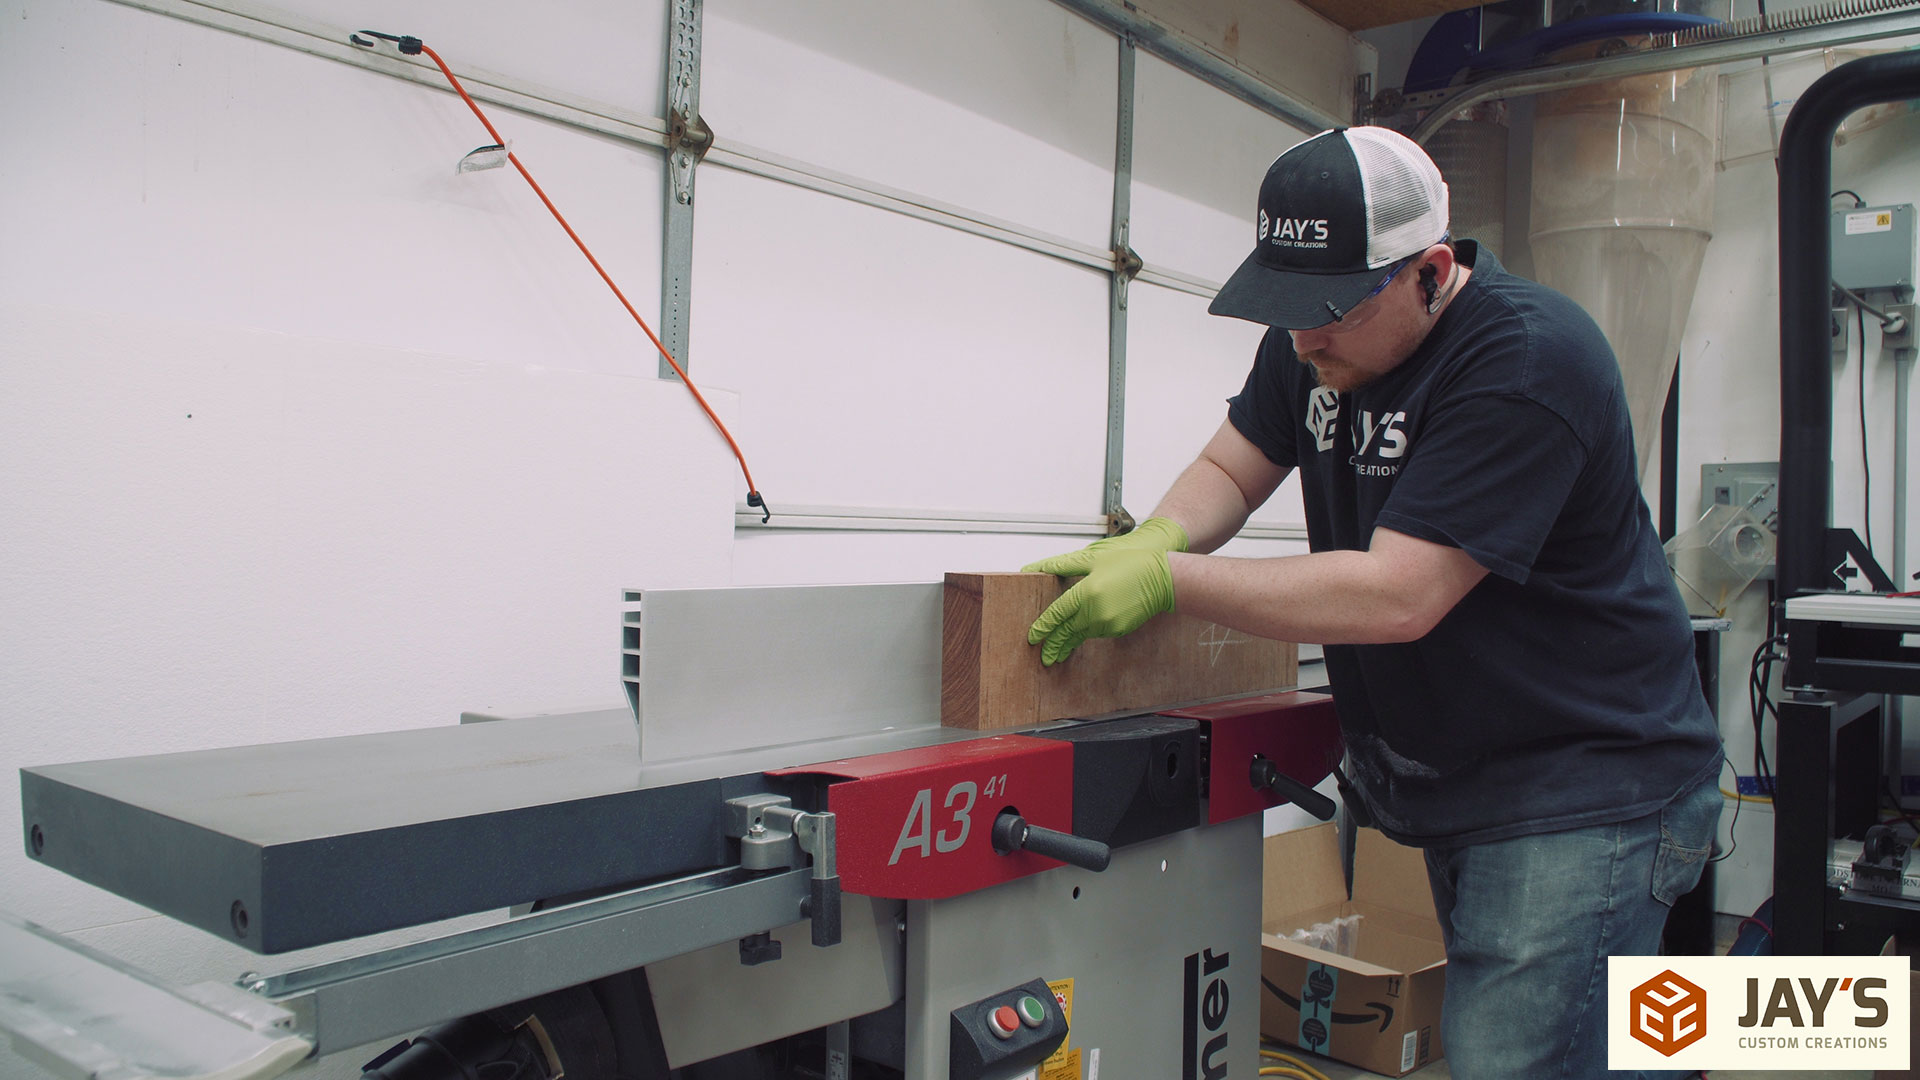
Next up is the bubinga trim for the adjustable shelves. Earlier in the year I found a bunch of Bubinga being sold at $5.50 a board foot so I bought a bunch of it. That’s one of the reasons why I’ve been incorporating it here and there with my projects. For the solid wood banding on the adjustable shelves I started milling a chunk of 8/4 rift sawn material starting at the miter saw.
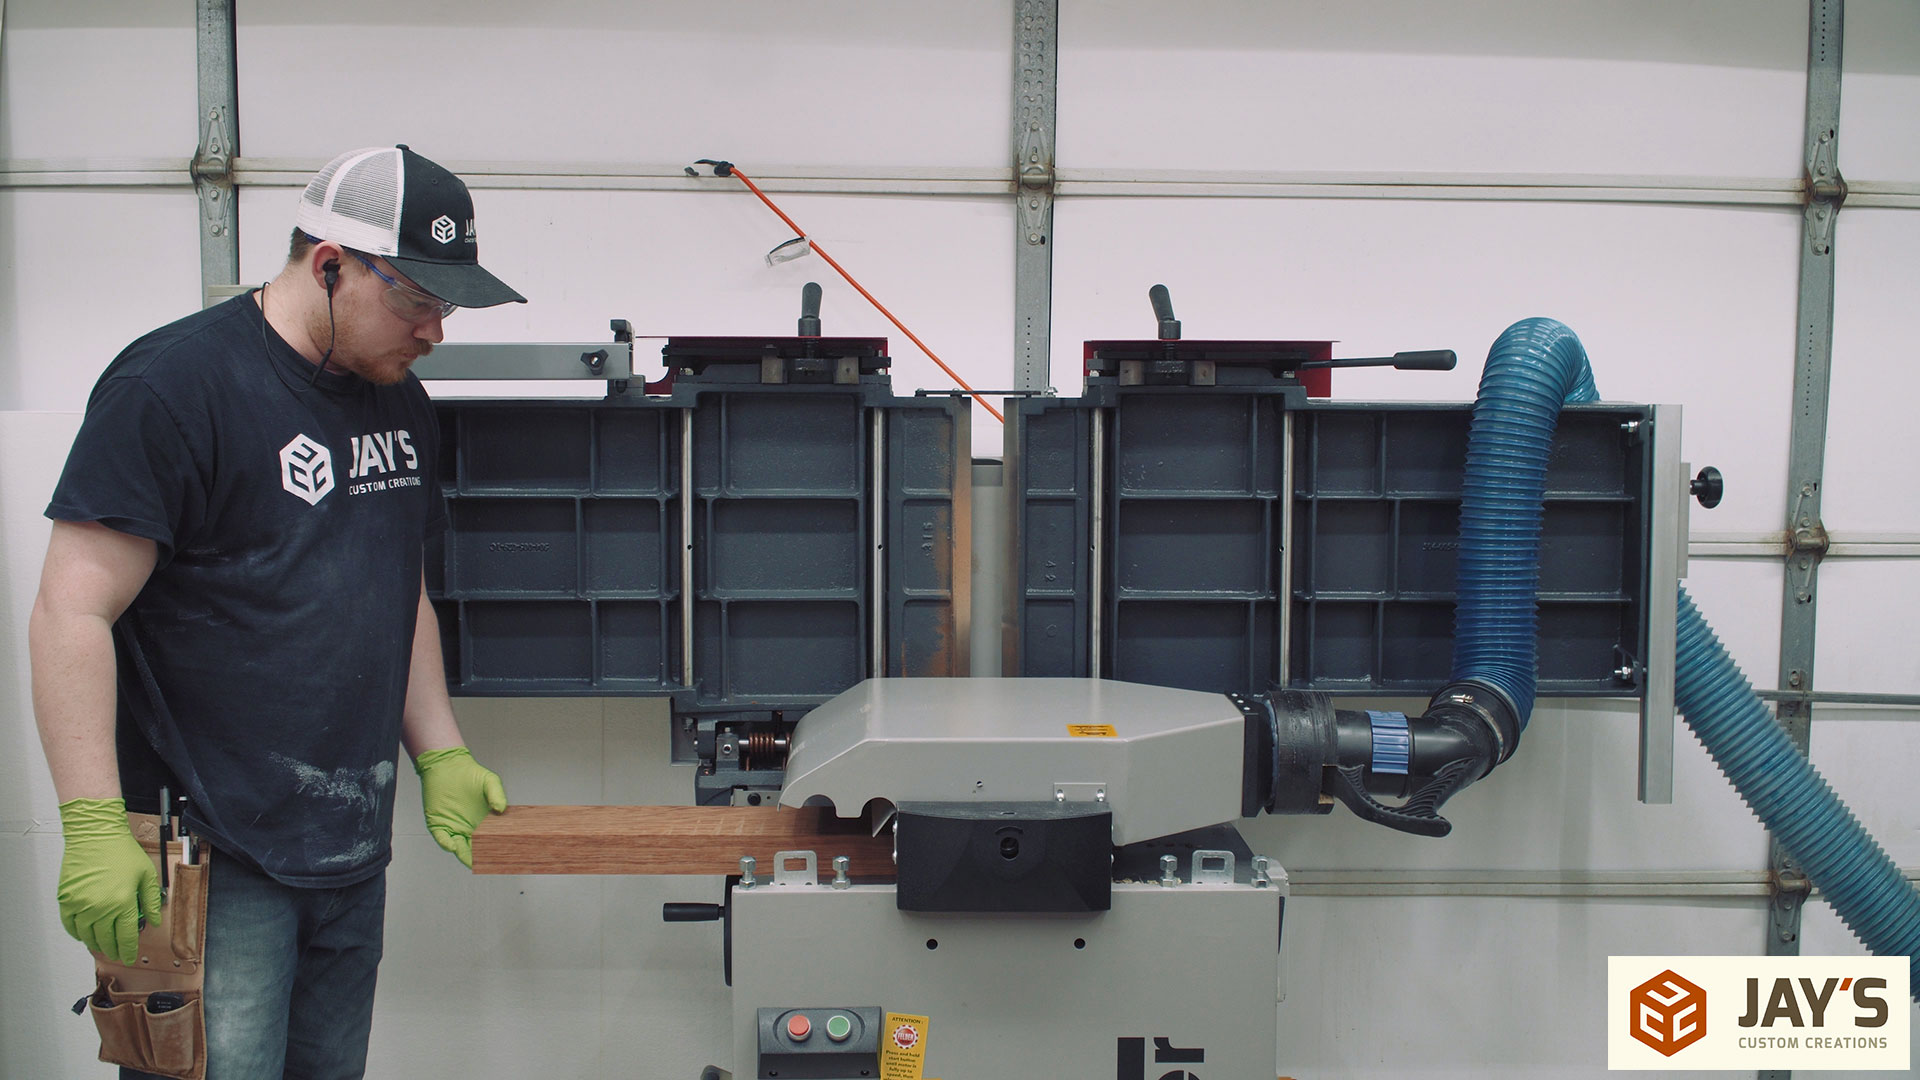
Followed by jointing two adjacent faces at the jointer..
And then getting the opposite faces flat and parallel with the planer..
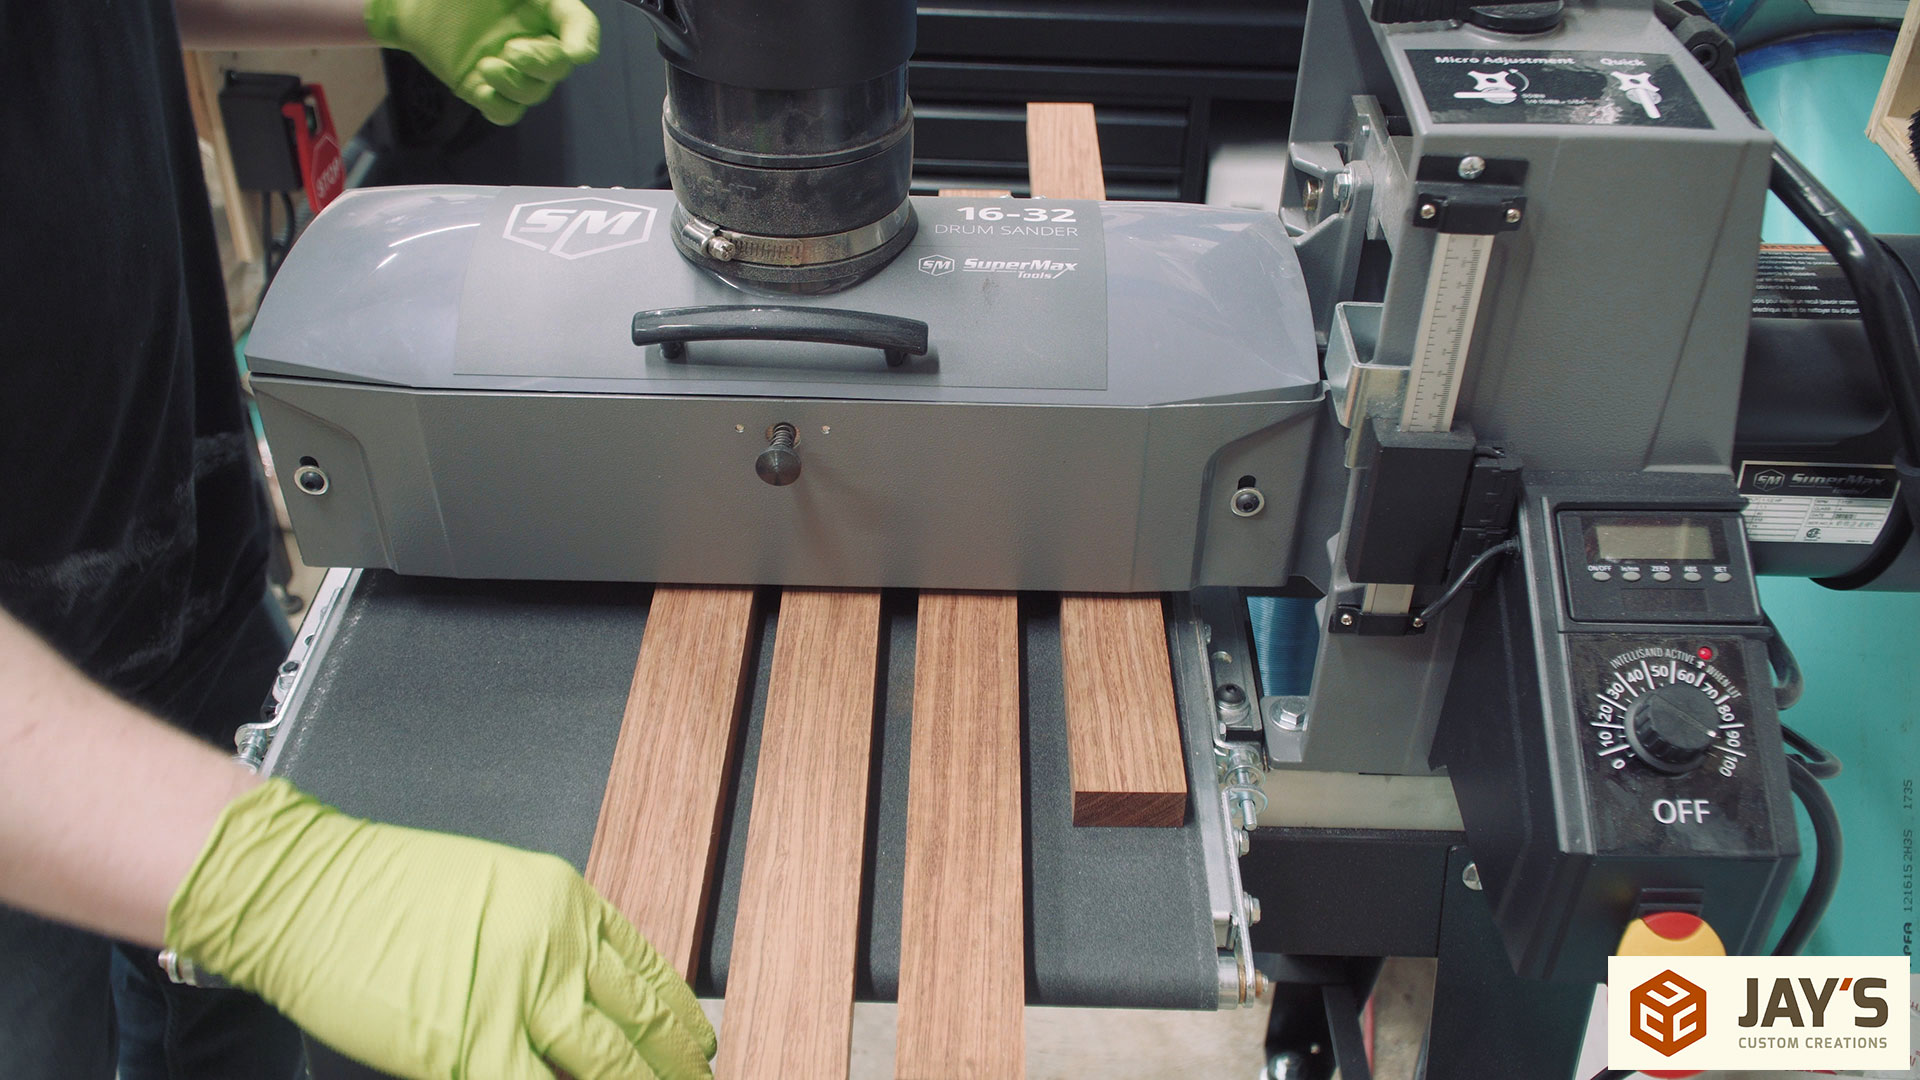
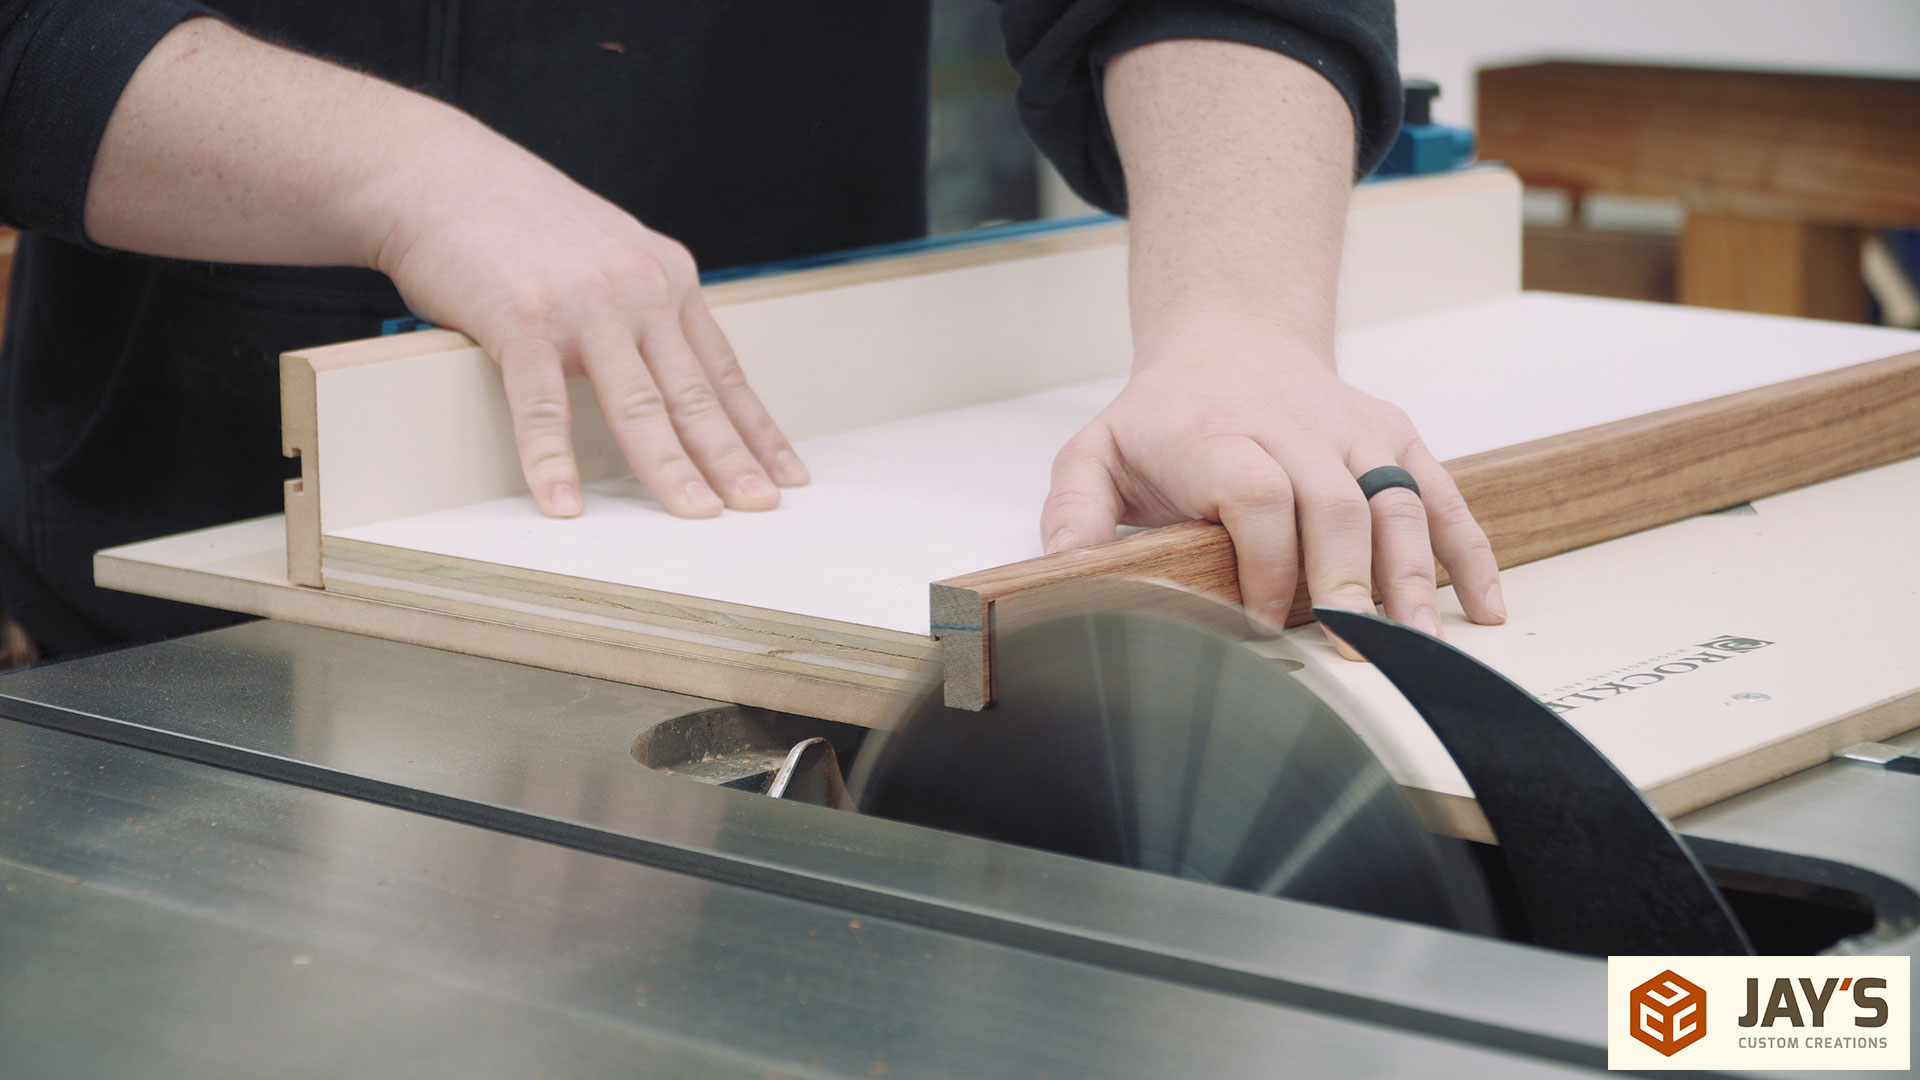
Four pieces are ripped out of the board at the bandsaw. I should have had my fence rotated 90 degrees to allow for shorter cuts to be made with the blade guard dropped to the surface of the wood.
The bandsawn faces were cleaned up with a few passes at my drum sander.
And finally a rabbet is established with two passes at the table saw. There’s two things to notice with this picture. First is that the waste side of the cut is not being trapped between the blade and the fence. It’s on the opposite side of the blade so that it will sit freely once cut and not shoot back like a rocket. The second thing to notice is that my first cut was too deep. I’d love to say that this was on purpose to allow a little room for glue squeeze out but in fact it was because the insert plate on my table saw was set too low. I’m not sure what happened or how it got adjusted but because it was lower the beginning and end of my cuts here were too deep. I’ve since adjusted it but I’m still scratching my head as to how it was lowered.

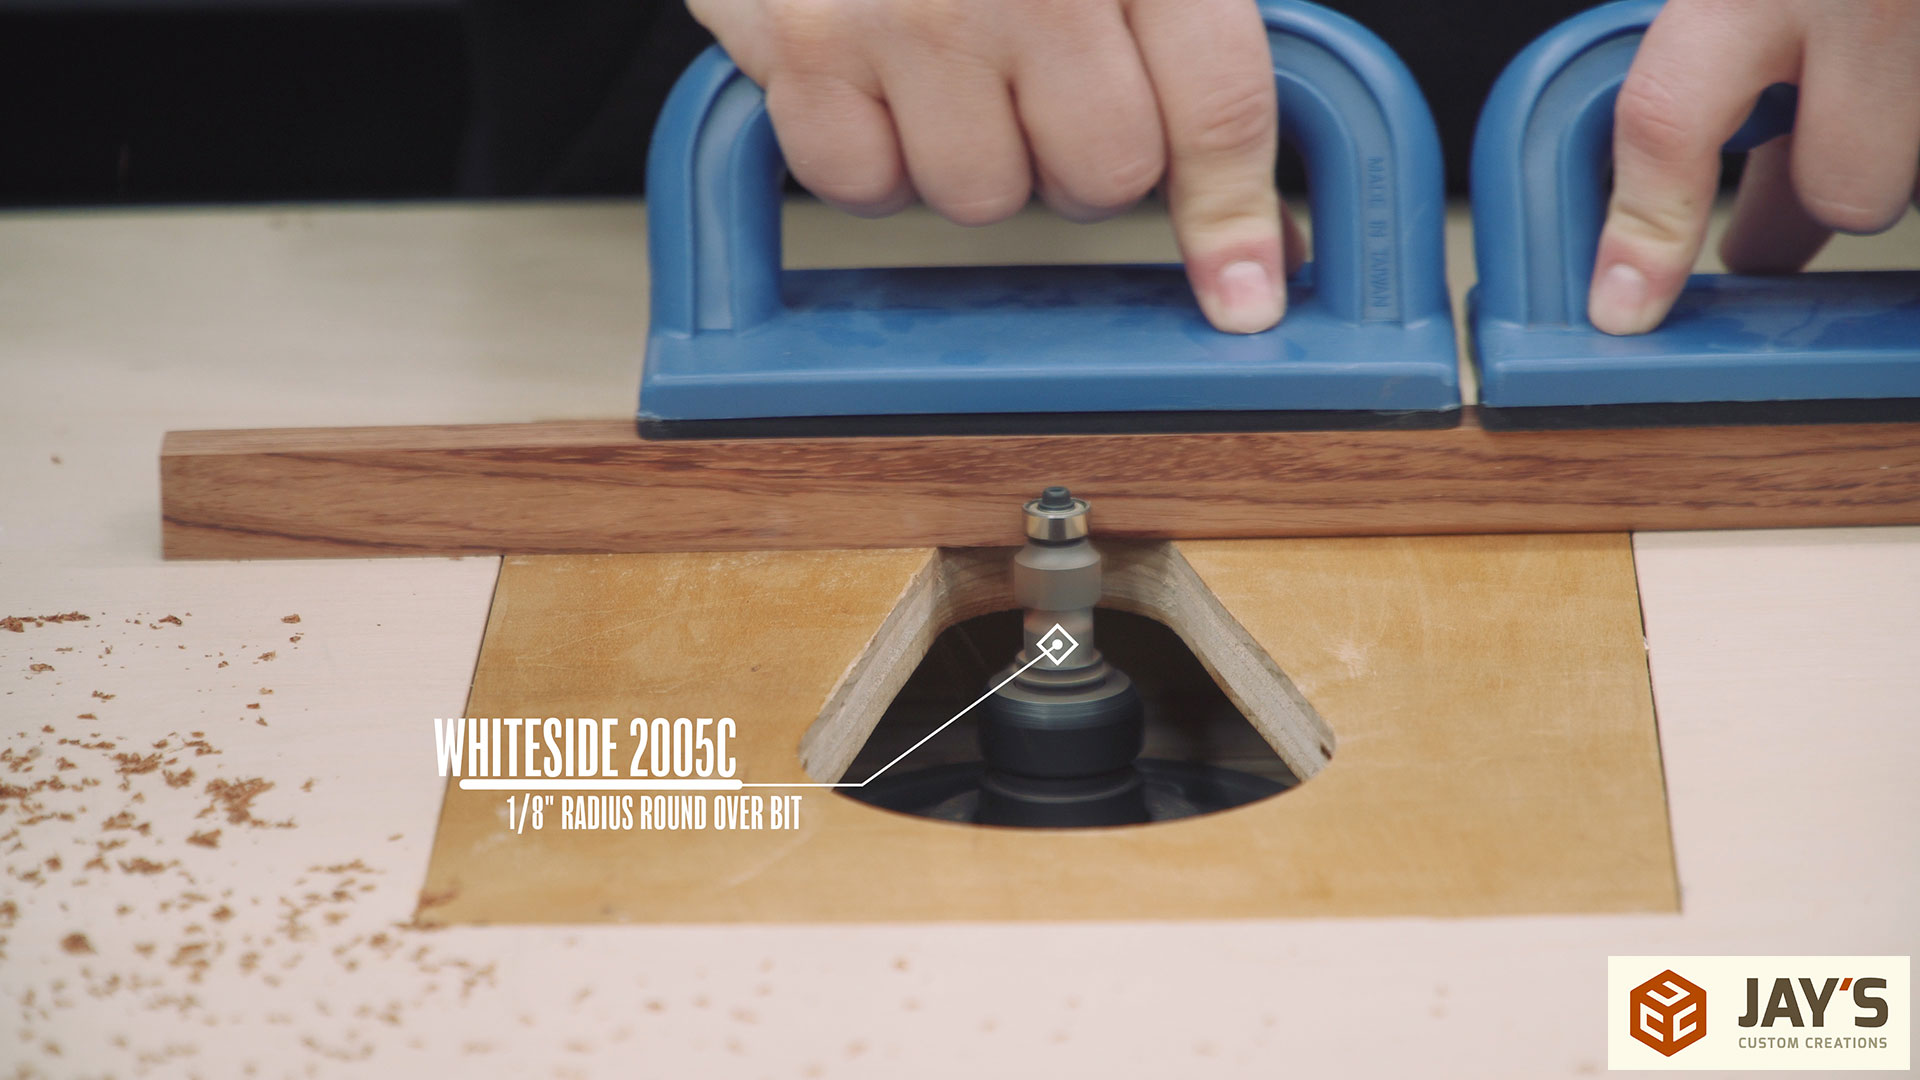
Before gluing the bubinga onto the shelves I wanted to round over the corners. Whiteside Machine Company is also a partner of mine and for this task I’m using a Whiteside 2005C 1/8” radius round over bit.

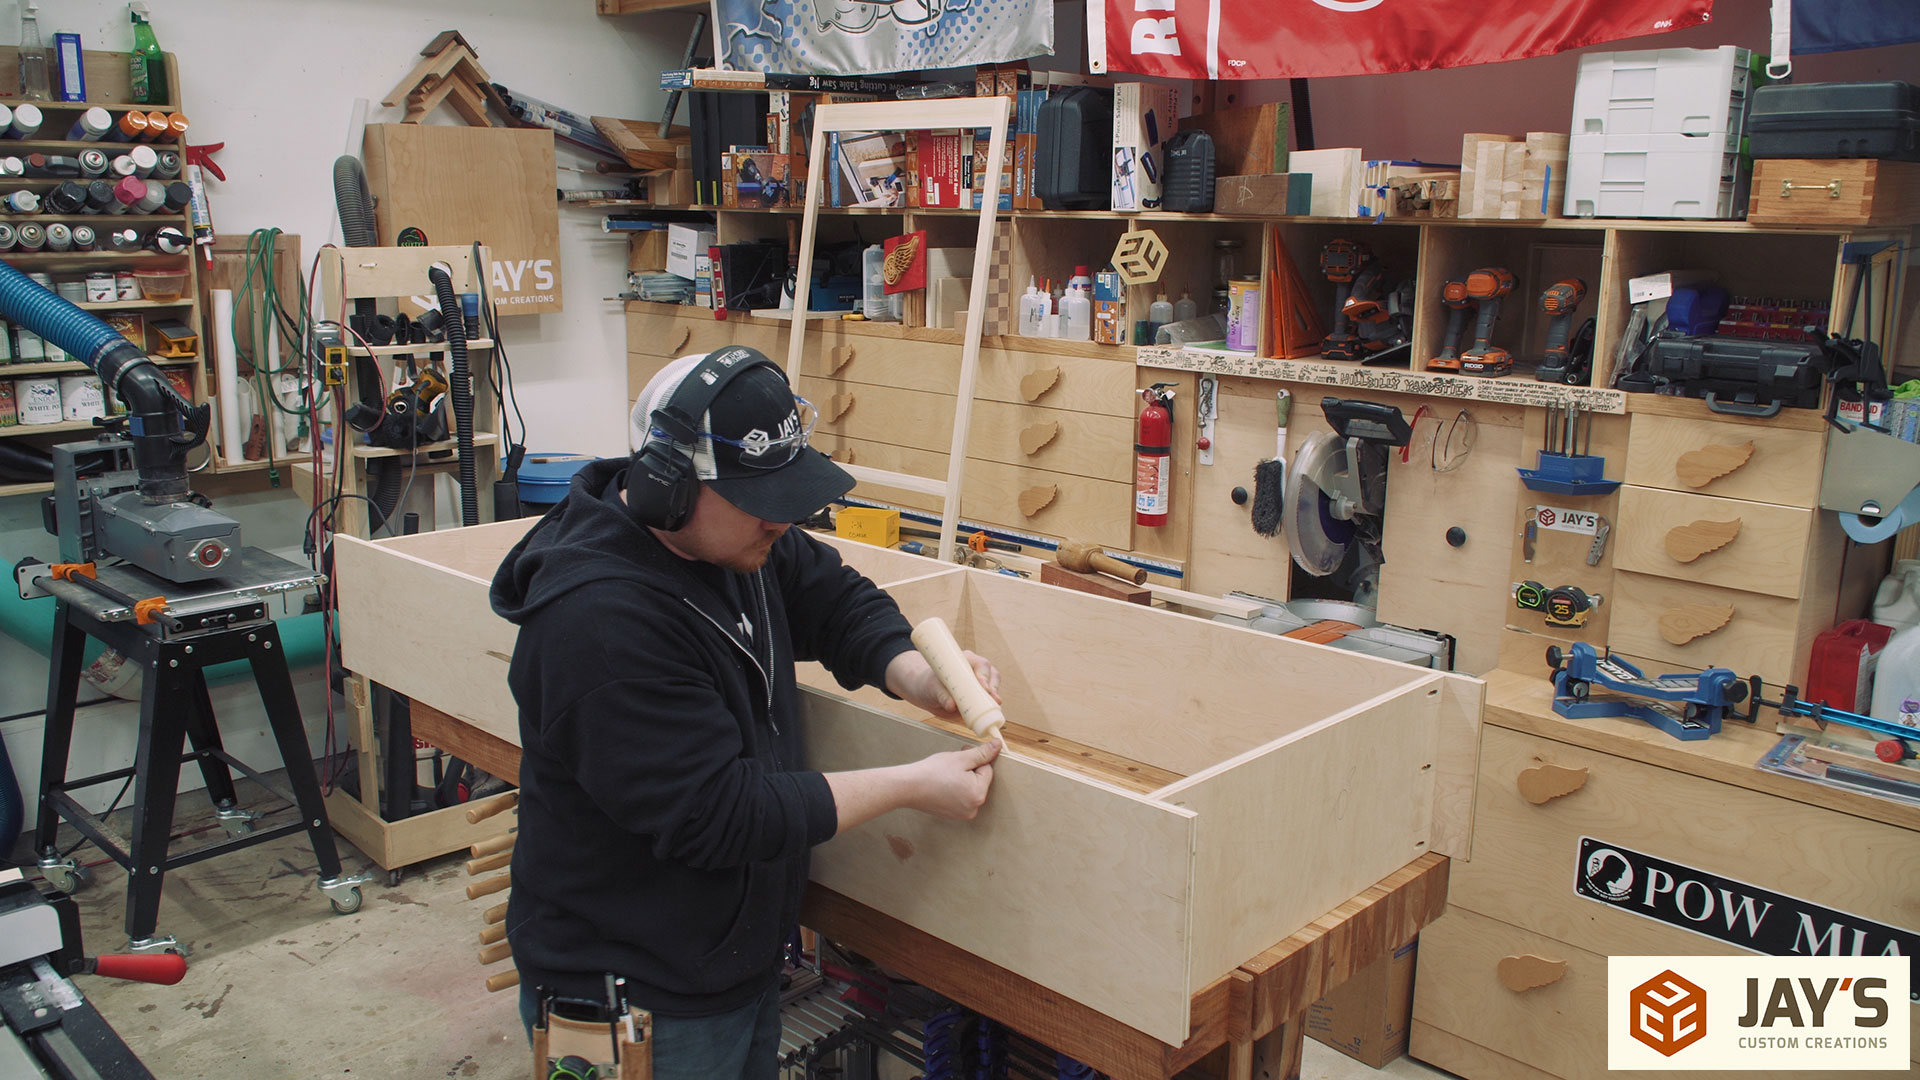
To prevent any ugly nail holes from showing on the solid wood banding I only used glue and clamps to attach them to the shelves.

Finally the back panel can be installed. I used a bunch of short screws to attach it. No glue is necessary for this piece.
By this time the solid wood banding can be trimmed down to the appropriate length on the shelves and to do that I used my crosscut/miter sled. I removed the insert plate here for better dust collection. The eight cuts that needed to be made were all pretty small and the offcuts were small enough to let them pass through the dust collection system.
A final sanding is needed on the bubinga. You can see how the small radius round over combined with the board being rift sawn allows the grain lines to blend all the way around the board. It results in a very even grain appearance regardless of what angle you are looking from.
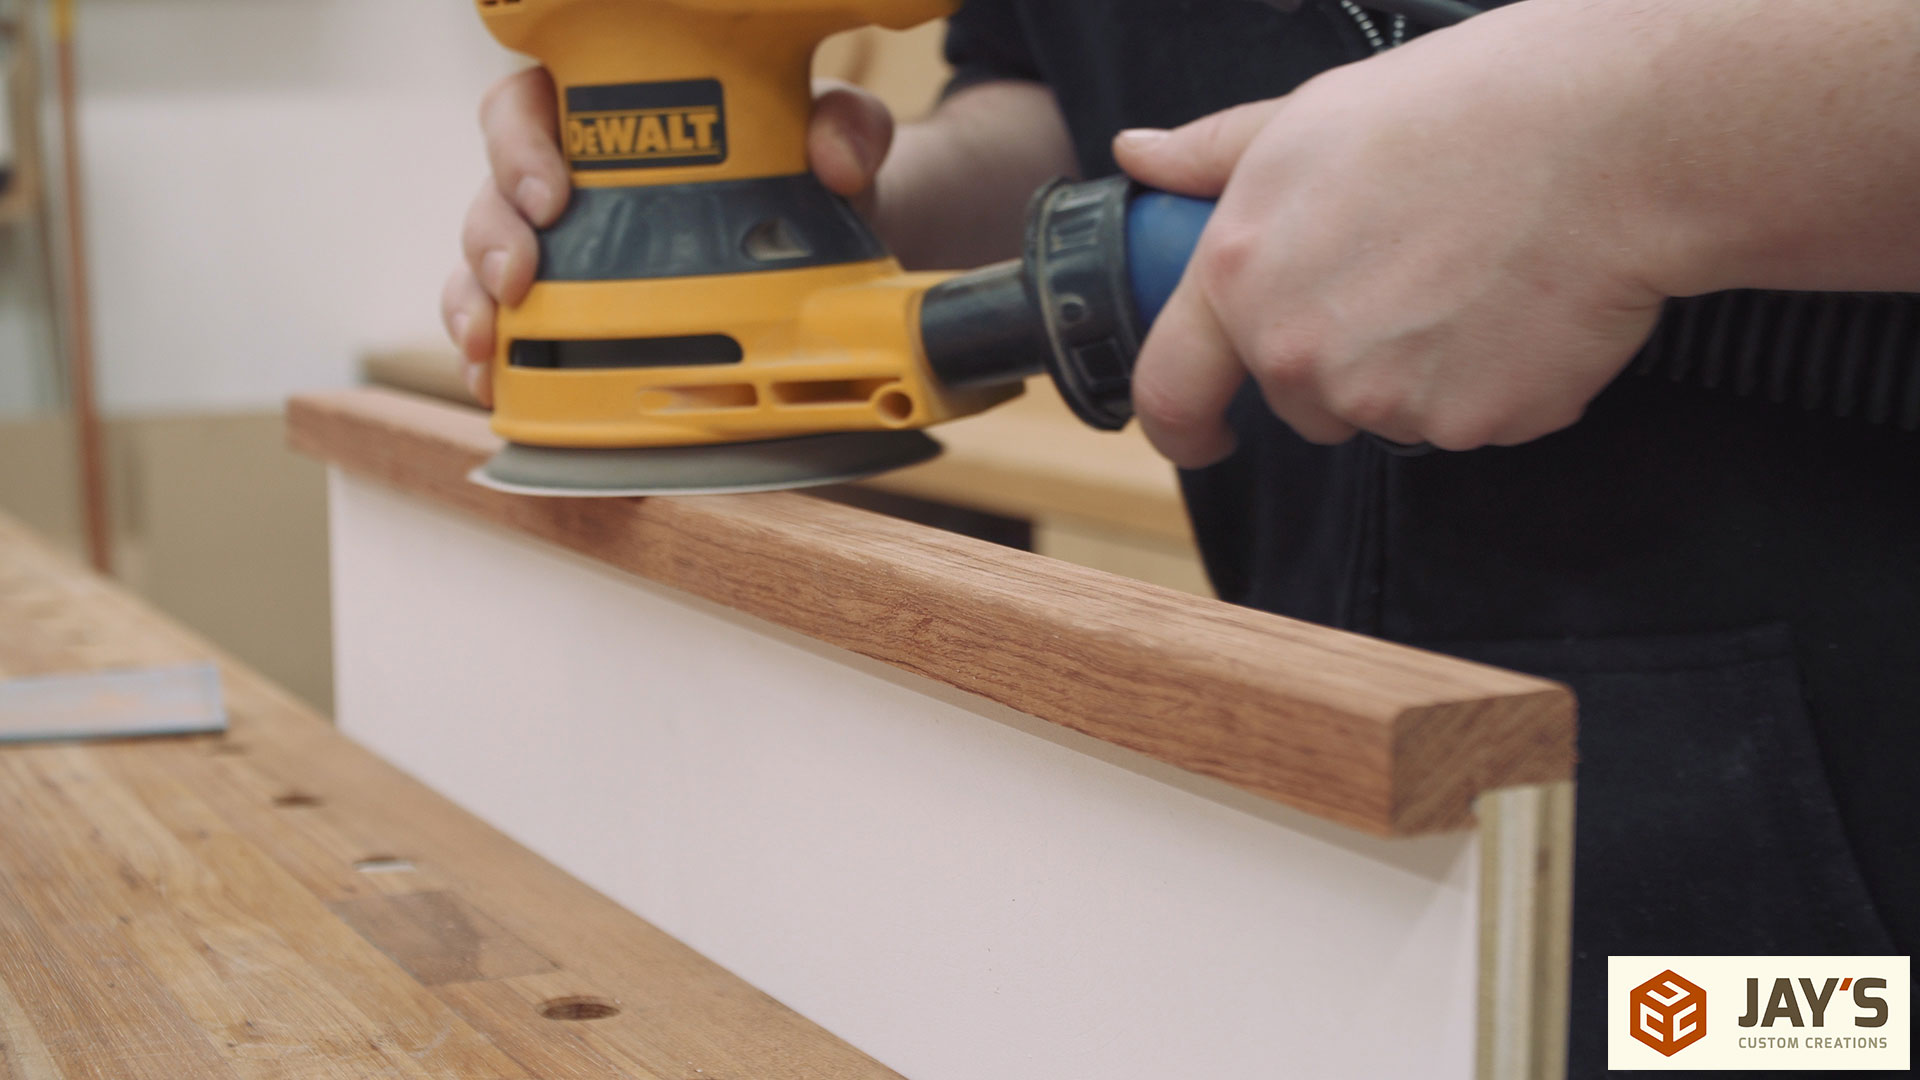
To seal the bubinga I went with General Finishes High Performance satin water based polyurethane. And because it dries clear I went ahead and added another layer to the entire shelf. I figured that these shelves will see the most abuse on the project so one more layer of polyurethane will be nice long-term.
Add the shelf pins and this one is done! (kinda) I LOVE how much the bubinga stands out with the white polyurethane.

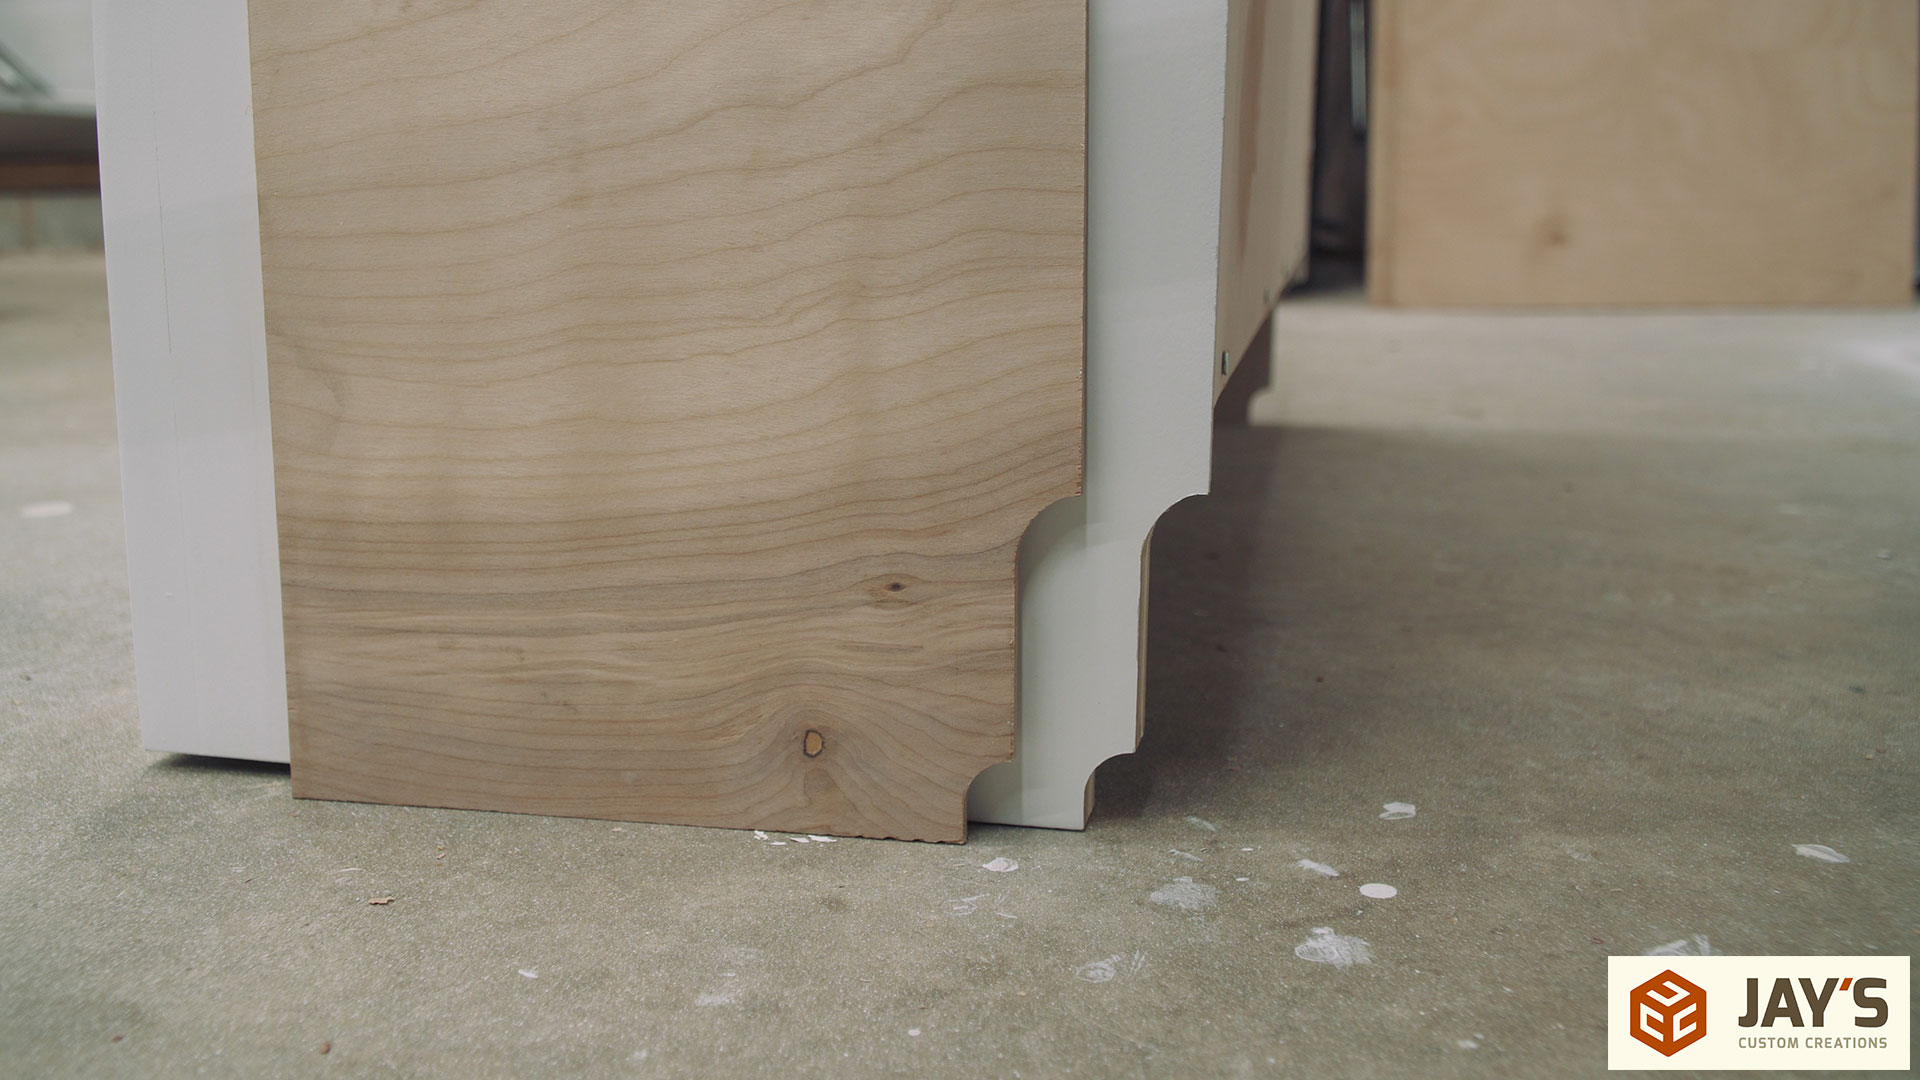
Here’s the “kinda” part I just mentioned. I forgot to record the process but in order for the bookcase to sit flush against the wall I cut out the profile of my office baseboard in the back bottom corners of the bookcase. I did this by making a template out of 1/4” plywood first and then transferring that shape to the bookcase with a flush trim router bit. I just went into the shop and got it done and forgot to record the process. Oops!
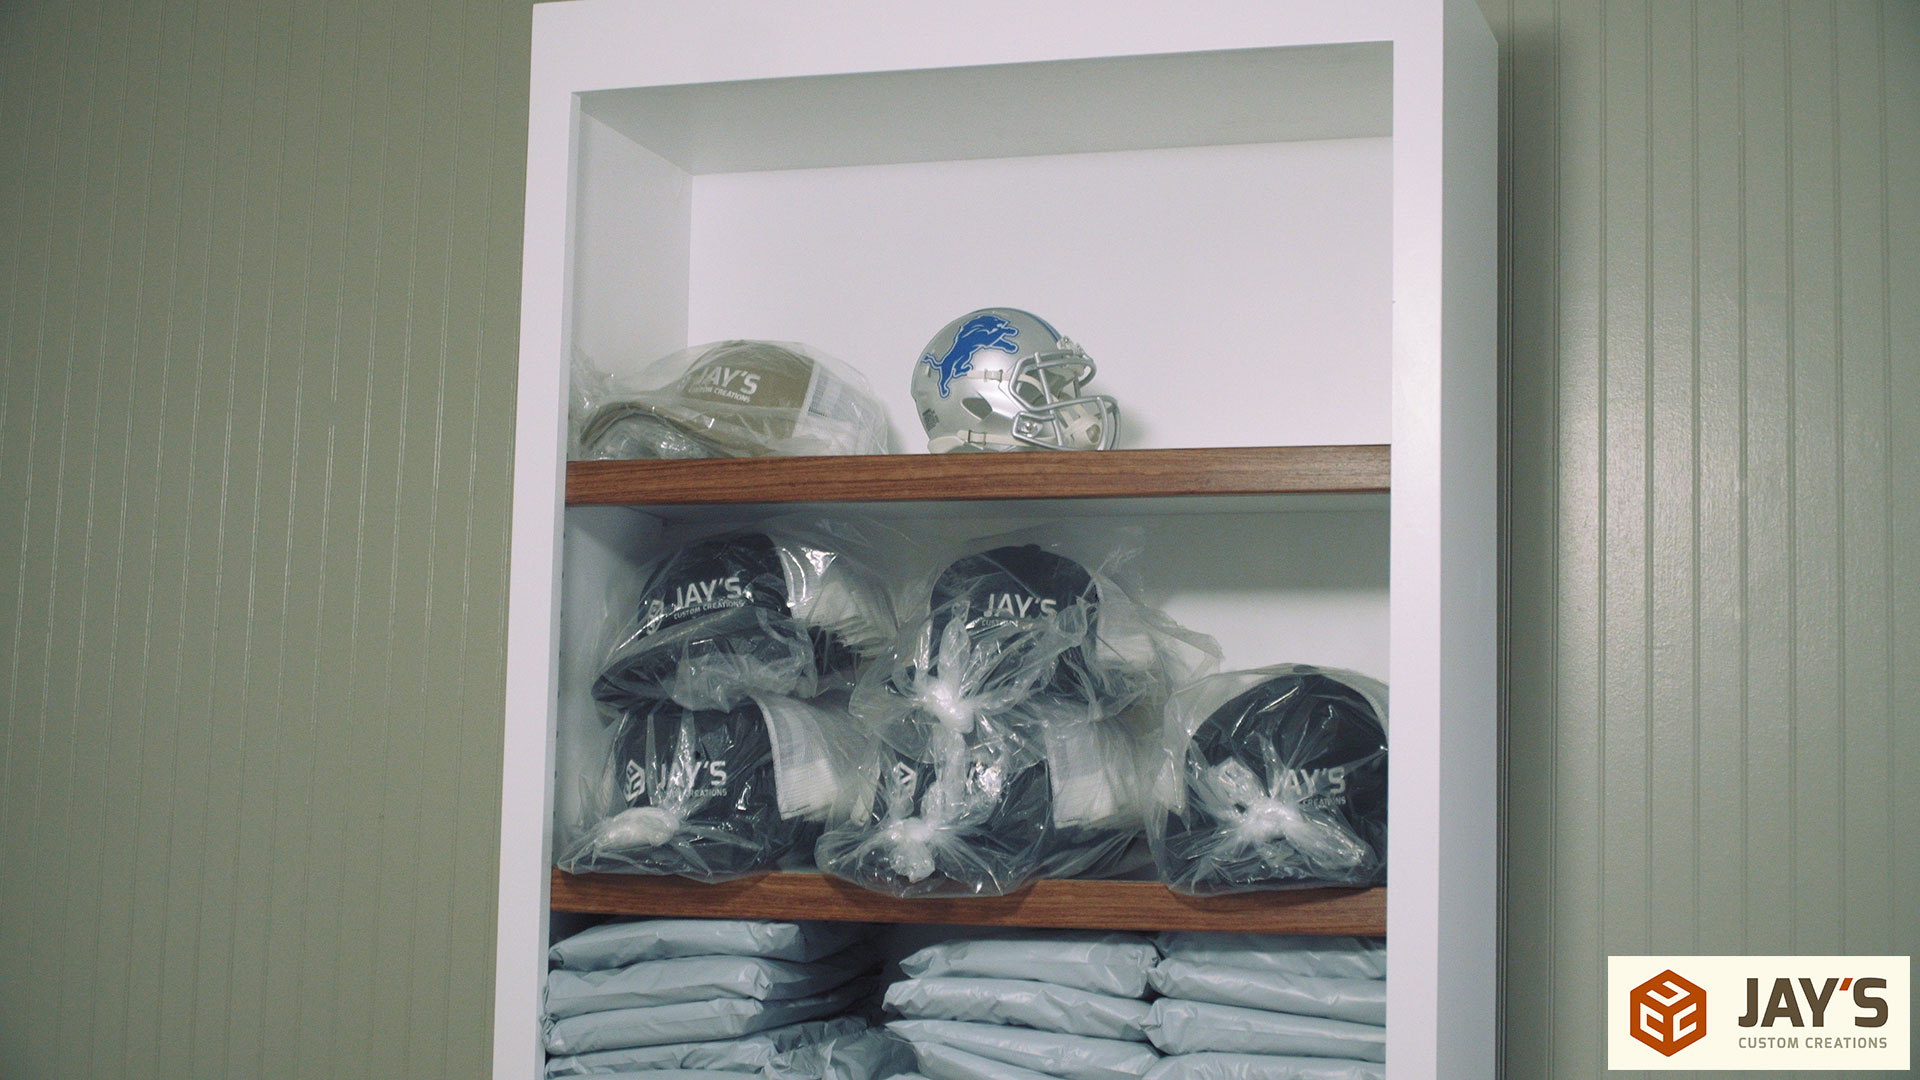
And here it is in use. Holding all of my shirts and hats that I sell here on this website. I finally have a place for them that is in the office instead of in a box in a room on the opposite side of the house.

Thanks again to Rockler for supporting this video. Stay tuned in the next month or so for the final before and after video of the office remodel. If you’re interested in a set of plans for this bookcase click here.


Beautiful bookcase. I love the simplicity.
This looks great.
Nice piece, Jay.
I enjoy your videos. Bought some hardwood yesterday at a garage sale. It was a steal because no one knew the species of the wood.
Clean and simple, looks great.
Nice bookcase Jay! Would love to have that shelf pin jig!
Awesome project. Exactly what I was looking for for my office. Thanks.
I love watching your vids, Jay. I’m aching to get into a house of our own with a garage so I can start doing what you do. One might call me “jelly!”.
Keep it up! Cheers from Northern Ontario.
-Josh
Looks great! I really like the bubinga accent. Thank you for sharing.
That was going to be my next purchase from Rockler since I purchased your plans for a bookshelf that you built a while ago.
Jay, thank you for all that you do for the woodworking community.
Great information, as usual. I’ll be building a couple of these in the near future.
Nice ????
Looks great! Love the videos
Love the look of this bookcase
That shelf pin jig looks really useful. Even if I don’t get it, I’ll probably buy one for myself (or drop Christmas present hints)
Nice work Jay. Always enjoy your videos and articles.
Great example of how to build a nice basic bookshelf. Very clear and concise and easy to follow. Thanks
Very interesting! Any chance of a video on how to use the spray gun to get that great finish?
Great work! Keep it up!
Nice looking, simply designed bookcase. My wife collects Breyer model horses. I have built several bookcases over the years, but usually attach the shelves using dadoes and screws. She needs a certain shelf height based on the height of the model, usually taller shelves at the bottom and smaller at the top, and they won’t be moved.
Great book case, are there any concerns (possible sagging) with using only ply for the shelves? What could be done for a shelf full of encyclopedias…
Another great article and video Jay.
Nice shelf! Hopefully I can build some in the future to help organize all of the books my wife and I have collected!
I’m wanting to build a version of this. Thanks for the great videos.
Enjoyed the build Jay. Thanks!
Nice job. It’s alway interesting to watch your videos.
Great looking bookcase Jay! Love how the Bubinga stands out.
Love the contrast. I’d love to see the finish up close to see how it differs from a painted finish. More grain showing through? Thanks for another great video, Jay.
I’m not a fan of finishing either. I probably would have just oiled it, and been done with it. I like the bubinga trim.
Jay, always love your videos. Thanks for being at the front of the maker movement!!
Nice bookcase that looks like it wouldn’t be too difficult to build. Thank you for the videos you do that even a newbie like me might tackle.
Thank you for doing what you do. I look forward to each and every one of your videos and this one did not disappoint, as always.
Thanks for all you do, Jay. Beautiful work as always.
Are you planning on securing this to the wall with having a little one in the house ?
I need more information on this pigmented poly… Never heard of it but sounds nice. Also love the new editing style
Love the Book case with the contrasting wood. like the jointer/ planner from Hammer. Good job.
Nice build as always :)
That project went smoothly as all of yours do, jay. If I ever get my messy shop organized,, I will definitely have that bookcase.
First class lesson, as always.
JB
Nice job Jay. Funny, I am building the same shelve for my wife’s books, I understand:) I am just building the face frame now. I have to admit my heart sunk a bit when I saw this in my emails, as I know you do a great job on your projects, and I’m sure I would have done a nicer job had I seen this first. I’m not too late to do the template thingy for the baseboards though.
Ray
Jay the bookcase looks amazing. The bookcase is something I can do in my shop since I do have limited tools.
Another great build. Thanks for your videos.
Well timed video! We just had a cheap particle board bookcase break, so the wife wants me to build a replacement. Imagine how much easier that will be with a free shelf pin jig. ;)
Always enjoy the amount of detail you put into your descriptions. Nice looking bookshelf.
Your videos have been very helpfull as I get into woodworking as a retirement hobby. Used to build things in the ’70s so here we go again.
Rick
It look‘s great. Nice Job ????????
Fantastic instruction as usual Jay! Look forward to the next one!
Another great video.
Great job, both with the video and the bookcase.
Jay, I always enjoy your videos so very much. You are a great teacher and I also love it when you inject some humor
This bookshelf will work well in my office.
Thanks for sharing!
Nice project!
Nicely done! I just finished using your workbench plans to build 7 woodworking benches for a high school program that starts in 2 weeks. Very exciting!
Nice work as always Jay! I agree with you on the bubinga and white finish. Just a clean look.
This video has a very nice filming style. I enjoy the angles and quality of the filming.
Excellent work, as always. Nicely done Jay!
Really enjoy your videos!
I really like the contrast of bubinga and the white. Is the faceplate just for looks or does it actually provide structural strength? Thanks for all the informative videos. You always provide great tips for those of us that are new. I hope you have a wonderful Christmas!
I love the clean look of the White Poly with the Bubinga Accents. I recently sprayed Latex paint and will look into this General Finishes Poly next time I have to Spray anything big.
Great timing. Looking to build one like this very soon.
I love this build and need to build a bookcase myself and will be getting the plans. Thanks
Another great build, I very much enjoy your relaxed and informative video style.
Thanks.
Bookshelf looks great!
Hi Jay, yet another great video. I think the reason I keep coming back is you share my attitude about not cheaping out, but not wasting. Top notch materials and quality workmanship. A pleasure to watch you work.
I smile whenever I hear you say bubinga, I know you love saying saying it’s name.
What a great weekend project. I love the attention to detail you show in all aspects of your builds and videos.
I have learned so much from you. I enjoy watching your videos. Thanks for all that you do.
Nice build. I’m currently building a miter saw station based on your plans, with a few small changes of my own added in. As always, i’m looking forward to more of your videos. keep up the good work!!
I think I need some bubinga so I can say bubinga over and over. I like the name.
Very nice and clean looking bookcase, good work. I’ll be starting a big project in the winter next year to turn a spare room into a library, this would be so much easier with a free shelving pin jig.
Thanks! You are the first woodworker I ever watched on YouTube and I still always enjoy every video. Even the projects I have little interest in ever doing.
Bubinga! Bubinga! Bubinga!
Really enjoy your videos! Wish there were more!
Love the video.
Awesome job! I love all the shop upgrades!
Enjoy your videos! Keep up the great work!
Great project and great timing. I am planning a similar cabinet build for our bedroom and I could use the Rockler jig and I am going to try the General Finish
Nice bookcase. I recently did a home office for my wife. The white poly would have been good to know about then!
Nice job, simple project looks good enough to sell. Like how you left in part about “error”and recutting sides, sounds like my projects.
I’ve been looking at shelf pin templates, there are a lot to choose from. It would definately help out.
I really like the office remodel series. Just getting into wood working and the simple Projects make me motivated.
Thanks for these videos. Gives me confidence as a beginner woodworker. My YouTube mentor.
Nice project. Love the bubinga!
Thanks Jay. I’m starting a project in the basement and your office remodel series has been very helpful.
Nice looking Book Shelf, the Bubinga trim looks awesome.
I bet it would awesome if the frame was done in Babinga as well.
Why no bubinga on center fixed shelf? Looks great though.
Nicely done!
Thanks for a great build, Jay! I’ve been needing to build a bookcase for my office, too.
Love the bubinga!
Love your videos. Is there a recommended white spray poly for those of us without a good compressed air spraying setup?
Also would love to be entered for the drilling template.
Thanks for sharing your knowledge, Jay. I’ve learned a lot from your videos.
I really like the contrast between the two colors/woods. I will be keeping that in mind on my next design build.
Thanksfor all you do for the woodworking community. It is appreciated.
Thanks for this your timing is impeccable I have a book case to build as part of the bosses wish list. Thanks as always your videos are such a joy to watch!
Is the Jointer / Planer combo unit new? I don’t think i’ve seen you use it before…
Looks nice. Like you, I hate finishing/painting.
Wow! Simplicity really is the secret to mastering carpentry. It looks great. I built some wall-mounted shelves for my special needs twin girls’ room using just dadoes, glue and brad nails. I painted one pink & the other purple, LOL. Needless to say, they were a hit. Thanks for sharing!
Nice wok Jay…always love your stuff!
Thank you for the video. Bubinga is always the best. I made a shop mallet from it..
And I am in for drawing. Cheers
Loved the joke about “screwing up the width of the fixed shelves..” thing. Great build.
looks nice, I really like the finish, I scrolled to the end before reading the whole article and thought it was melamine instead of plywood. Awesome Job
Thank you for your video! I like the white with the bubinga look. I want to make a side table with this combination in the future. That new jointer/planer is HUGE!
Nice clean and simple project. Great job!
Nice Job Jay. I especially like the look of the babinga.
New jointer?
Great build Jay (as always). You’re an inspiration (really–not sucking up).
Nice book case, love how it fit your workbench perfectly.
Nice project, thanks for putting the video together.
Nice article and video!
That pocket hole drill saves so much time. Bookshelf turned out great!
Very nice! I’ve been wanting to build a bookcase for my office as well, now I may give it a try
Thanks for the post Jay. I always look forward to your videos.
Nice one! Really like the simplicity of it!
Love the bookshelf.
Looks great!
I need a twin to help me out in the shop.
Jay that cabinet came out look great with the babinga wood accent.
This is perfect for my office as well. I’ll have to use pre-cut oak from the big box store though, because I still don’t have a jointer or planer…. I could really use that shelf template!!
Would love a free shelf pin jig ;) Book shelf loos great Jay
Thanks for the video. My wife is wanting to redo our entertainment center with some bookshelves so this info might come in handy.
Nicely done.
I’d like the jig, fingers crossed ????
Looking good Jay. Loving the way the office is turning out.
Love the result! The Bubinga trim looks great and the baseboard cutouts gave me some ideas for some “built-in” projects I’ve been planning. Thanks!
Cool bookcase. Maybe next year i’ll make one too
Great project, as always. Love the way your office turned out. Thanks!
Hey there pops!!!
I love this channel almost as much as I love our Lions. So Suh is back, I can only dream Calvin returns. I hate Tate is gone.
But,
Great job with this shelf, it’s something I would like to do(X4). I will have to re-watch & re-read a few times before I have confidence in doing this myself.
I’d love to be considered for the jig. New to woodworking so any free tools/supplies are highly appreciated.
Super cool look with the white and bubinga! I really like that white color poly, Ill have to give that a try in the future.
Love the videos. Just got into woodworking and love it. Really teaches me to slow down compared to my day job which is being a chef. Keep up the great articles and videos.
As always love the videos, wondering where the Paulk bench went but looks like you’ve had to make room for some stuff. Wouldn’t mind the jig either.
Nice bookshelf. I like the template you used to account for your baseboards.
Great job at getting to the points, too many people want to talk and talk. I love your videos and will definitely be building one or more of these myself. Thanks again Jay!
Great bookshelf and plans. I see a lot of really nice new stuff in your shop. Congrats on all of the great things going on in your life. You deserve it.
Great project! I have to say I learn a lot of techniques from your videos and articles but I just love seeing all the new tools all the time. It really gives me prospective on what I want to upgrade to in the future.
Looks great. The only thing I would have done different was bubinga on the middle solid shelf. Show your CNC work too! That looks like a great jig.
Agreed
How do you like the Triton track saw?
Great video. Nice, clean, simple build. Always get something from your videos
That a nice, simple project.
I had never heard of white polyurethane before. I will investigate it.
Are you wearing special edition Grinch gloves?
I would be happy to win the shelf pin guide.
That’s a good looking bookcase!
Great video! I’m about to build a bookshelf for our baby’s room (due in 3 weeks, our first!) So this jig would come in very handy. I’m hoping to have my first built bookcase in my first childs room and have it be something they can have forever. Thanks for the video Jay!
I’m going to have to try that white poly. It looks great and the fact it can spray is nicer than trying to spray latex paint
I love the babinga accents. I am going to incorporate that in an upcoming project. I would love to have the shelf pin jig so sign me up.
Love the contrast of the bookcase.
Pocket holes are back :) . Thanks for the video and the give away
I’m intrigued with the white poly as well. I’ve sprayed general finishes milk and poly and the project turned out great. I’m anxious to use it again.
Great article and build Jay
I’d love to win that jig. I make a lot of adjustable shelf projects.
Did anyone win yet?
Great book case. Long time follower. Thx for sharing.
I like be your videos, no fluff just the beautiful work.
Jay that bookshelf looks fantastic. I thought that the idea of the cut out at the back of the cabinet for the floor molding was a really great idea.
Very nice indeed! White poly, I’ll have to check that out. Would love to be a winner of the Rockler template but feel lucky enough to view your videos. Thank you for the time and energy you put into them!
Jay I love your simple design on this bookcase! It came out great. You are such an inspiration to us novice woodworkers that do this as a hobby. Thank you for everything you do for the woodworking community.
Looks great, about to do a similar project for my wife!!!
Nice
Great looking bookcases. Thanks for the details of the build process.
I would like to be considered for the shelf jig.
Nice design and job. Maybe the middle shelf should have been faced with Bubinga to give five matching shelves.
Another great job Jay
Really nice. Simple and well done. I have been following you since just before the famous Horse Bench. You have come a long way and inspire me to continue to improve. If it isn’t too late, love to win that shelf jig :)
Oh yeah, thanks for admitting the mistakes. I never remember Norm Abram ever making a mistake… or at least showing one.
Love your channel! Learning a lot and hope to have a shop as nice as yours someday! Keep it going!
I really need a bookshelf in my house. I think i’ll be able to make the wife happy with a few of these.
Just in time for a shelf I am wanting to build
Great bookcase!! I love the video too, and hope to buy a set of plans for it in the near future. Keep up the great work Jay!
Great to see a new video of you building something again that I could maybe pull off.
I could use that Rockler jig to help ;)
Good video as usual. This is the winning comment for the jig. Fingers crossed.
Clear, concise, and real. Well done@
.
Love the simplicity and contrast.
Great work man! Really enjoy your attention to detail and how inspiring your videos are. Thanks Jay keep the beautiful work coming!
Love the videos. You’ve been inspiring me to start building my own custom furniture for my new home
Keep up the good work!
Great Job Jay! Always enjoy your videos! Jig it up!
Awesome work Jay
Going to try and make this for my wife great video and article very easy to follow.
I’m enjoying your videos. And would really appreciate the shelf pin kit.
I just bought my first house and my wife wants me to build bookcases for the living room and she loved this bookcase.
plywood dosen’t move and lays flat.quick way to make bookcase. looks good.
Looks great. I love the contrast between the bubinga trim and the rest of the bookcase. Also, love the new jointer/planer combo.
I love your editing on this video. Your content is always educational. Thanks.
Great job! Hope I win!
Great video! Love to win the Rockler jig!
Nice work. Do you have any issues with overspray when using the HVLP indoors?
Nice to keep it simple. Trust me other people dislike finishing as well, so maybe you sub it out…
Nice build. My wife wants some custom bookshelf units in our living room.
Awesome job, very nice bookshelf/ hat and t-shirt..
Great job. I still struggle with the finishing as well.
Jay. You’re the hardest working youtuber I know. I’ve subscribed for over 4 years. Great project sir.
Thanks for posting. Gives me an idea for our office!
Great looking bookshelf! The contrasting Bubinga sets it off for sure!
Nice build Jay!
Your videos are great! Inspires me to keep pushing on my own shop.
Great company to partner with. Your video are awesome, keep it up.
Good stuff.
Man, that’s a clean looking bookcase. Good on ya!
Great work as always
Love your videos, Jay. Would love a shelf pin jig, too!
Good looking bookshelf!
Love the bubinga. Would you ever consider making a desk with it?
Really like how the bubinga offsets the starkness of the white cabinet.
Hope your family is well! Glad to see you get some time back at it :)
Love the channel and the site.
Go wings.
Clean with elegant contrast.
I don’t own anything from Rockler. This pin jig would be an awesome Rockler item to start with!
I’m digging the new feel of the videos! Also liking how you are calling out the things you use, not many do that!