The office remodel saga continues. One of these days I’ll be done with the office for good…one of these days. This article and video will cover the last (I think) piece of the puzzle which is a nice looking dog gate.
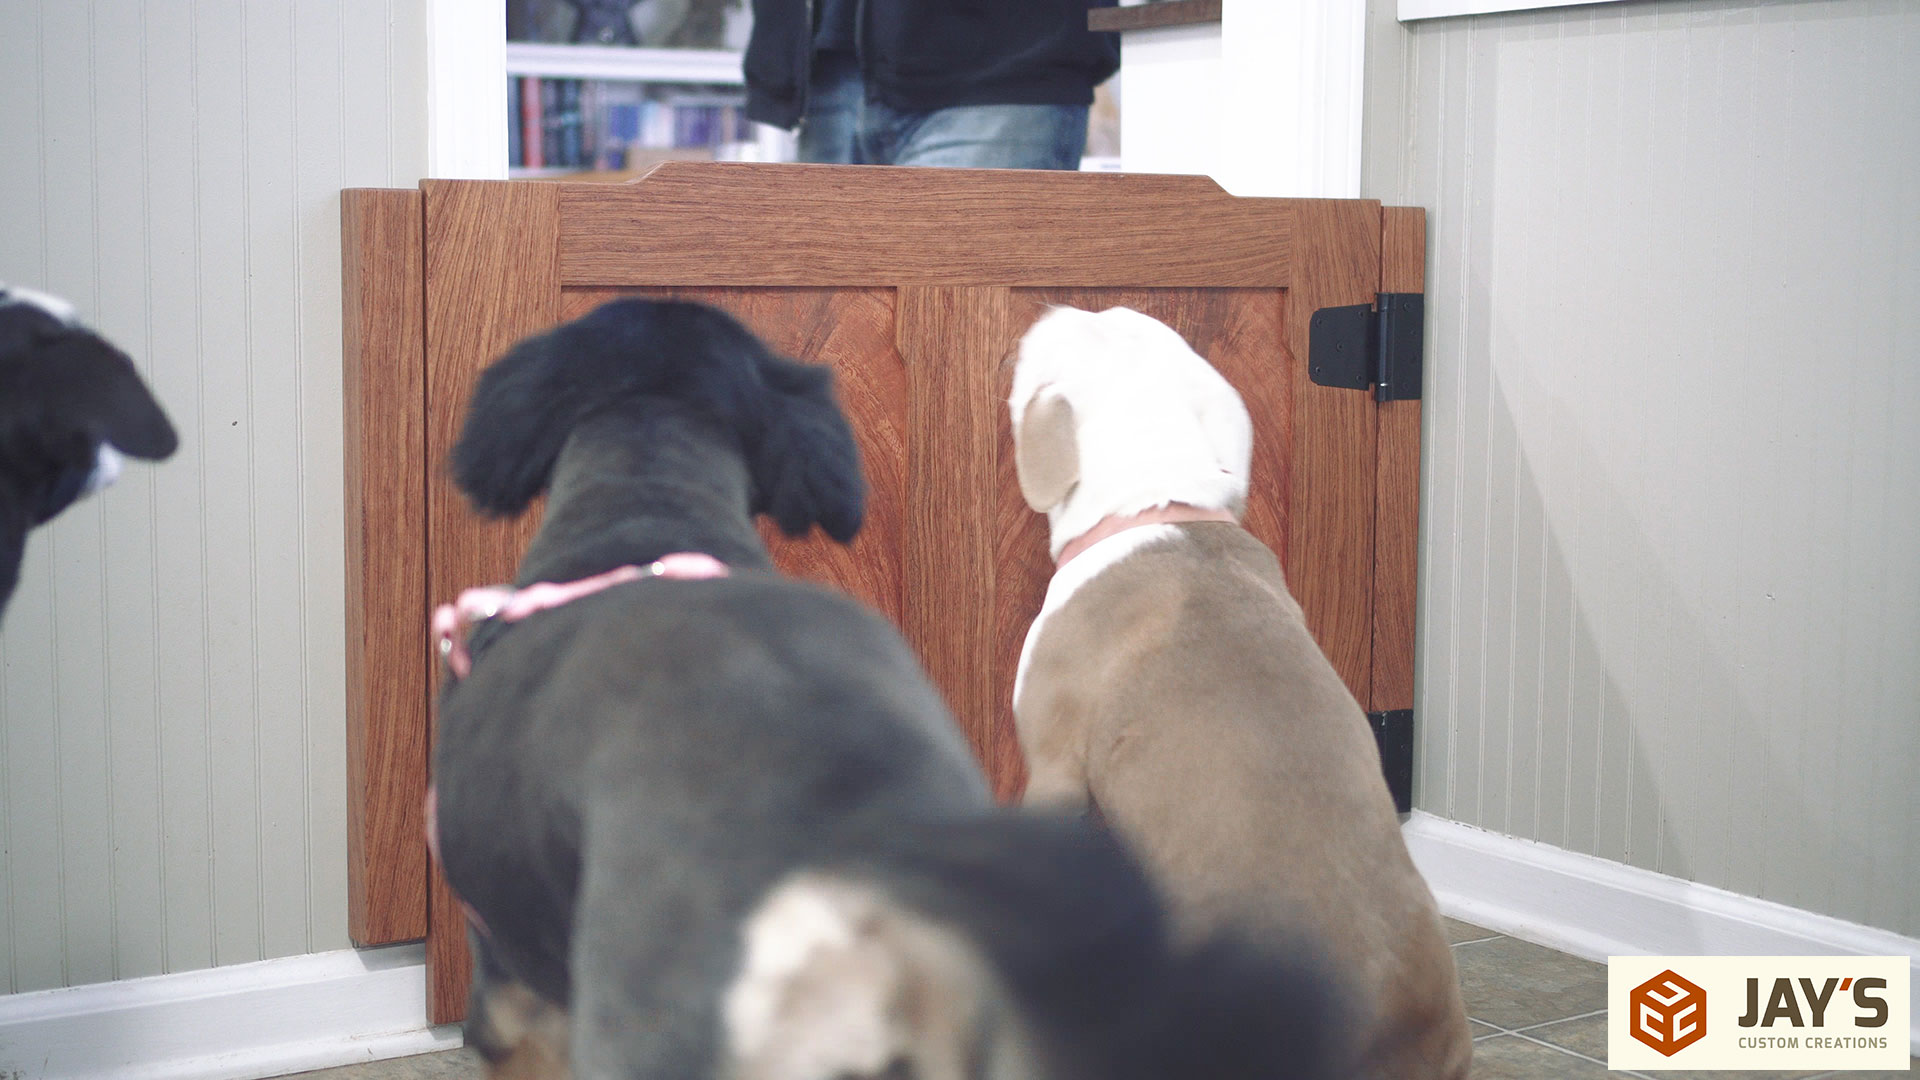
For those of you who haven’t been following along, my dog’s “bedroom” is my office. They stay in the office at night and anytime we are not home. We have four dogs, three of which have been together since they were young and are now all 9+ years old. For the first 8 years of their life they had free roam of our home. They are obedient and respectful. The fourth dog is a puppy that we rescued last year. She’s obedient but still learning her manners. She’s just so full of energy and has no concept of personal space. She want’s to be physically touching someone at all times. Such a great dog. My concern with her is chewing. Several months ago she did chew on a piece of furniture in the office and while I think we have corrected that behavior and she’s never shown any signs of chewing since then I have a fear of her chewing on my nicer furniture in the living room.
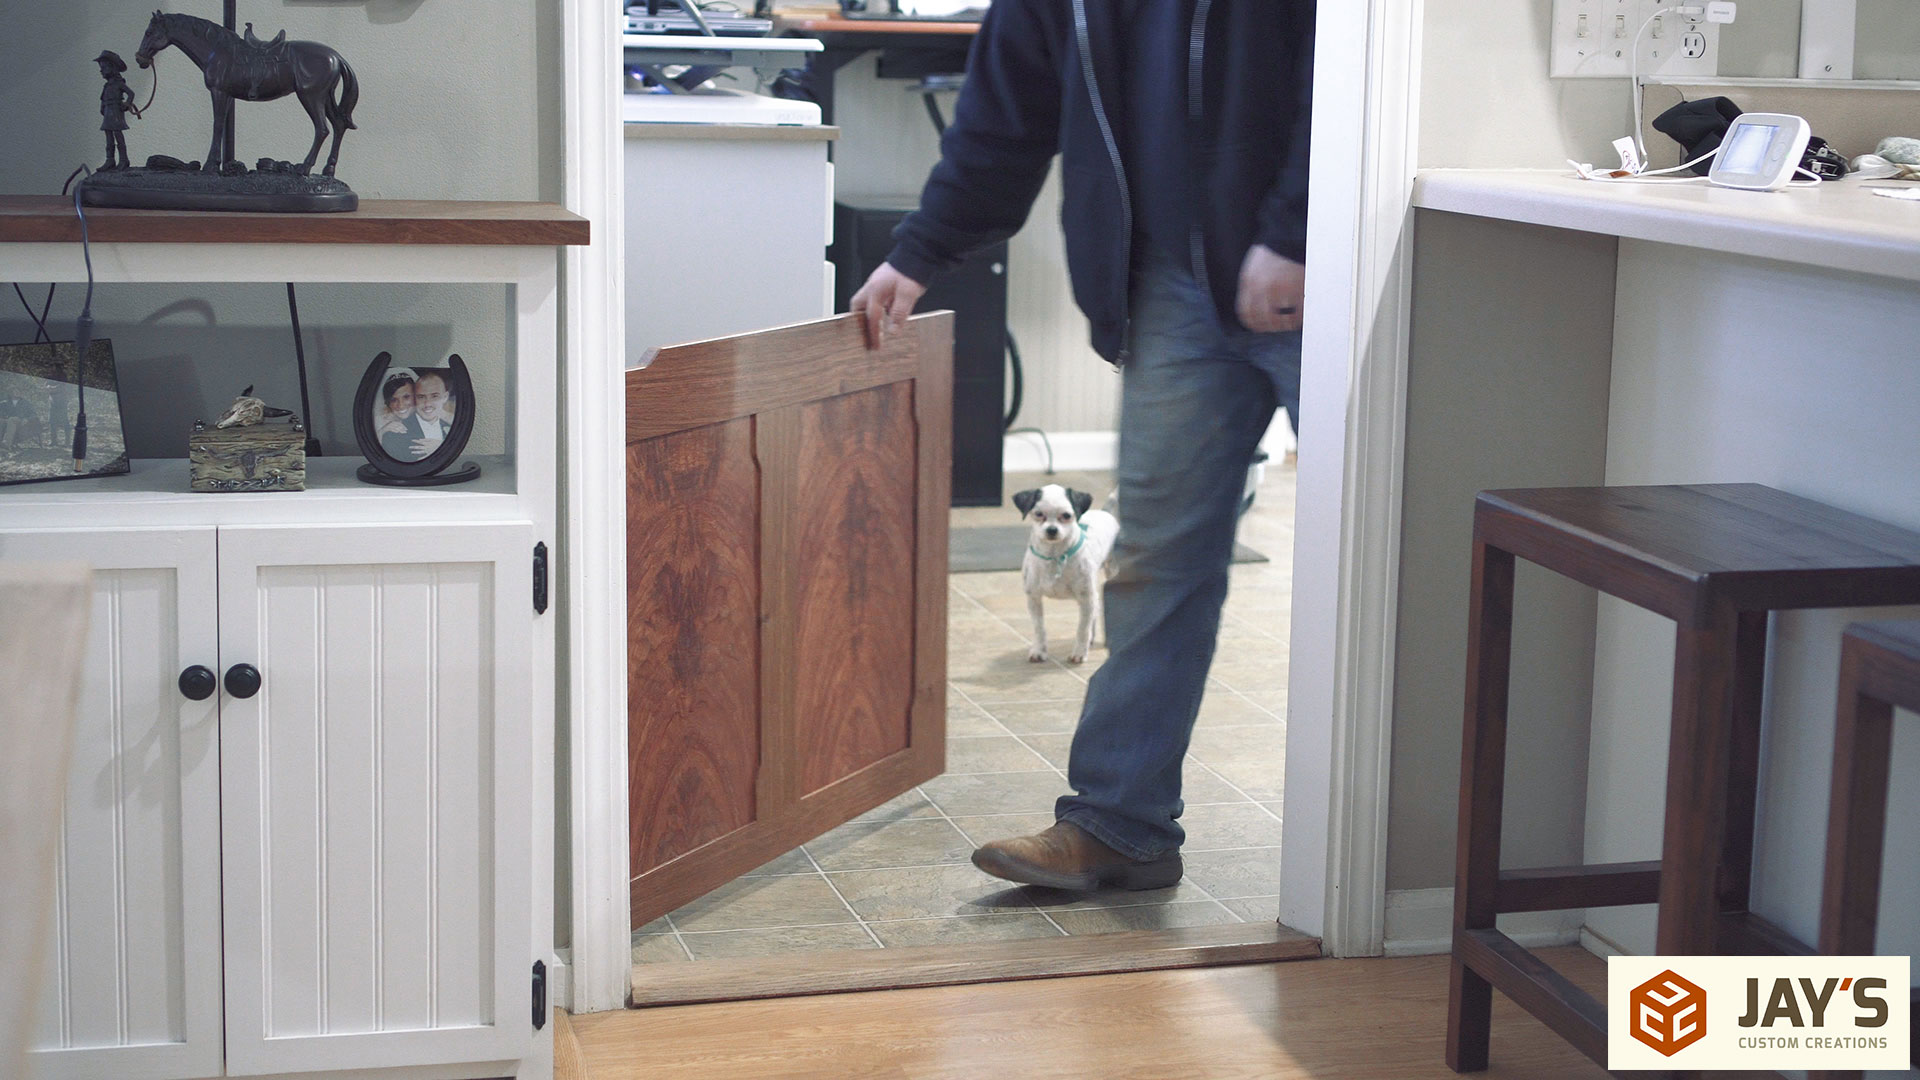
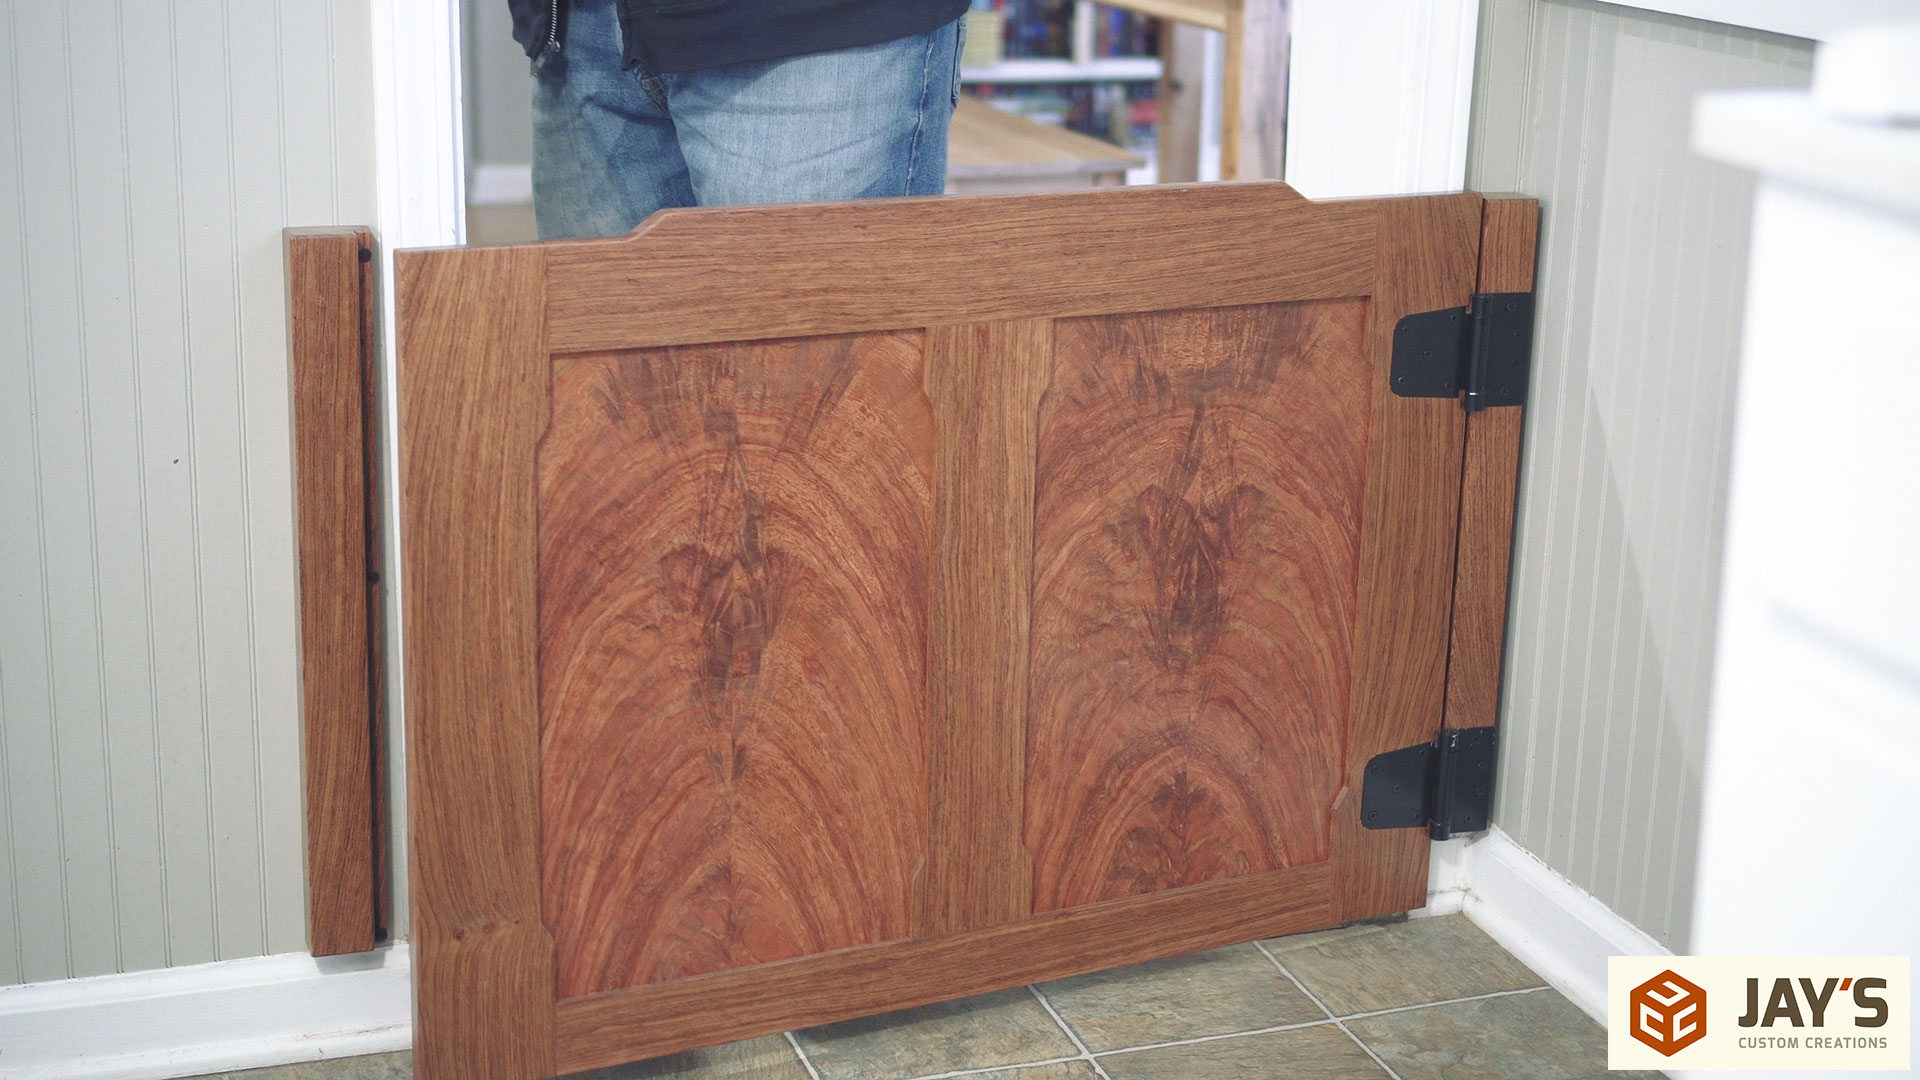
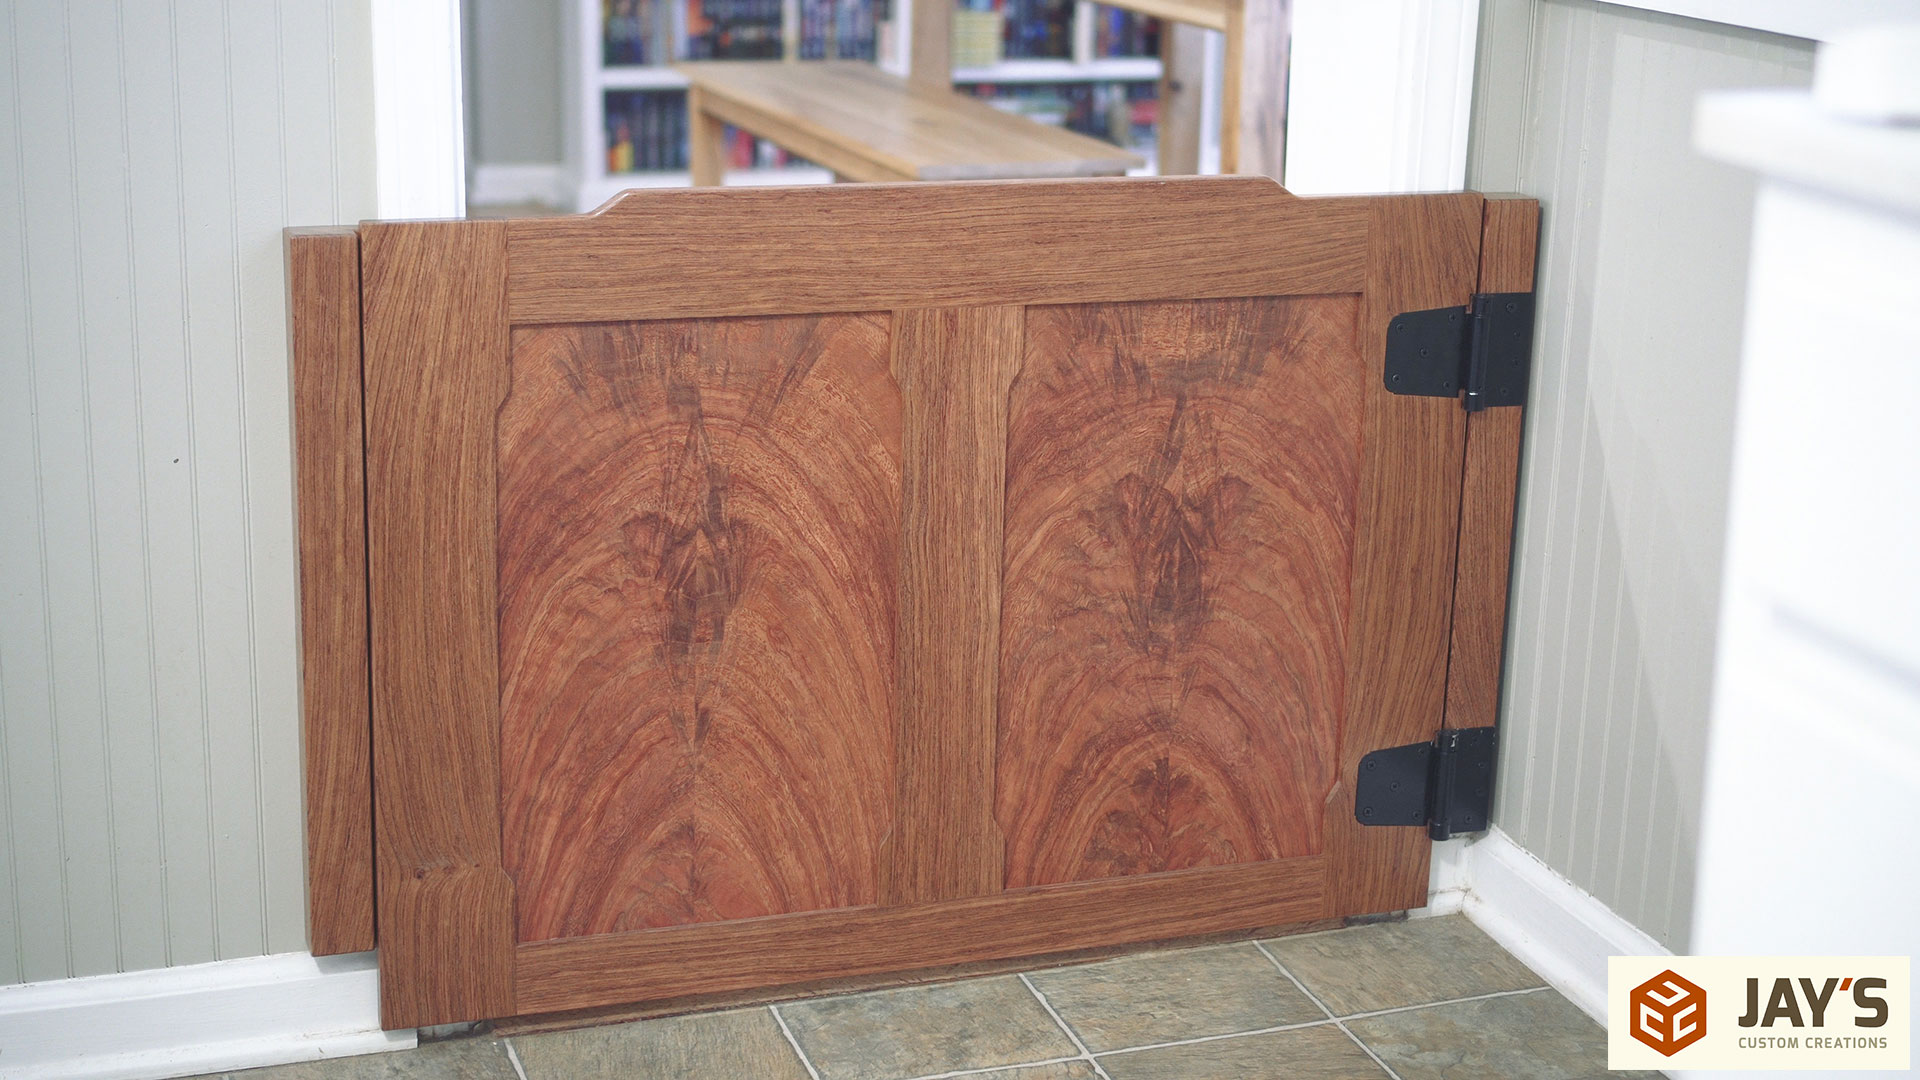
That’s where the dog gate comes into play. Since the chewing incident we have been using a piece of plywood as a temporary dog gate between the office and our dining room. The dogs understand and respect the plywood as a barrier so now it is time to replace it with something nice. Typical dog or baby gates mount to the inside of doorways. The design I came up with is a wide gate that mounts to the outside of the opening. This keeps the entire doorway width unobstructed when the gate is open which is necessary for moving furniture and other items out of my shop. Another benefit of this is that if I want to keep the gate pinned open then 100% of it will be out of sight when looking from the house and into the office.
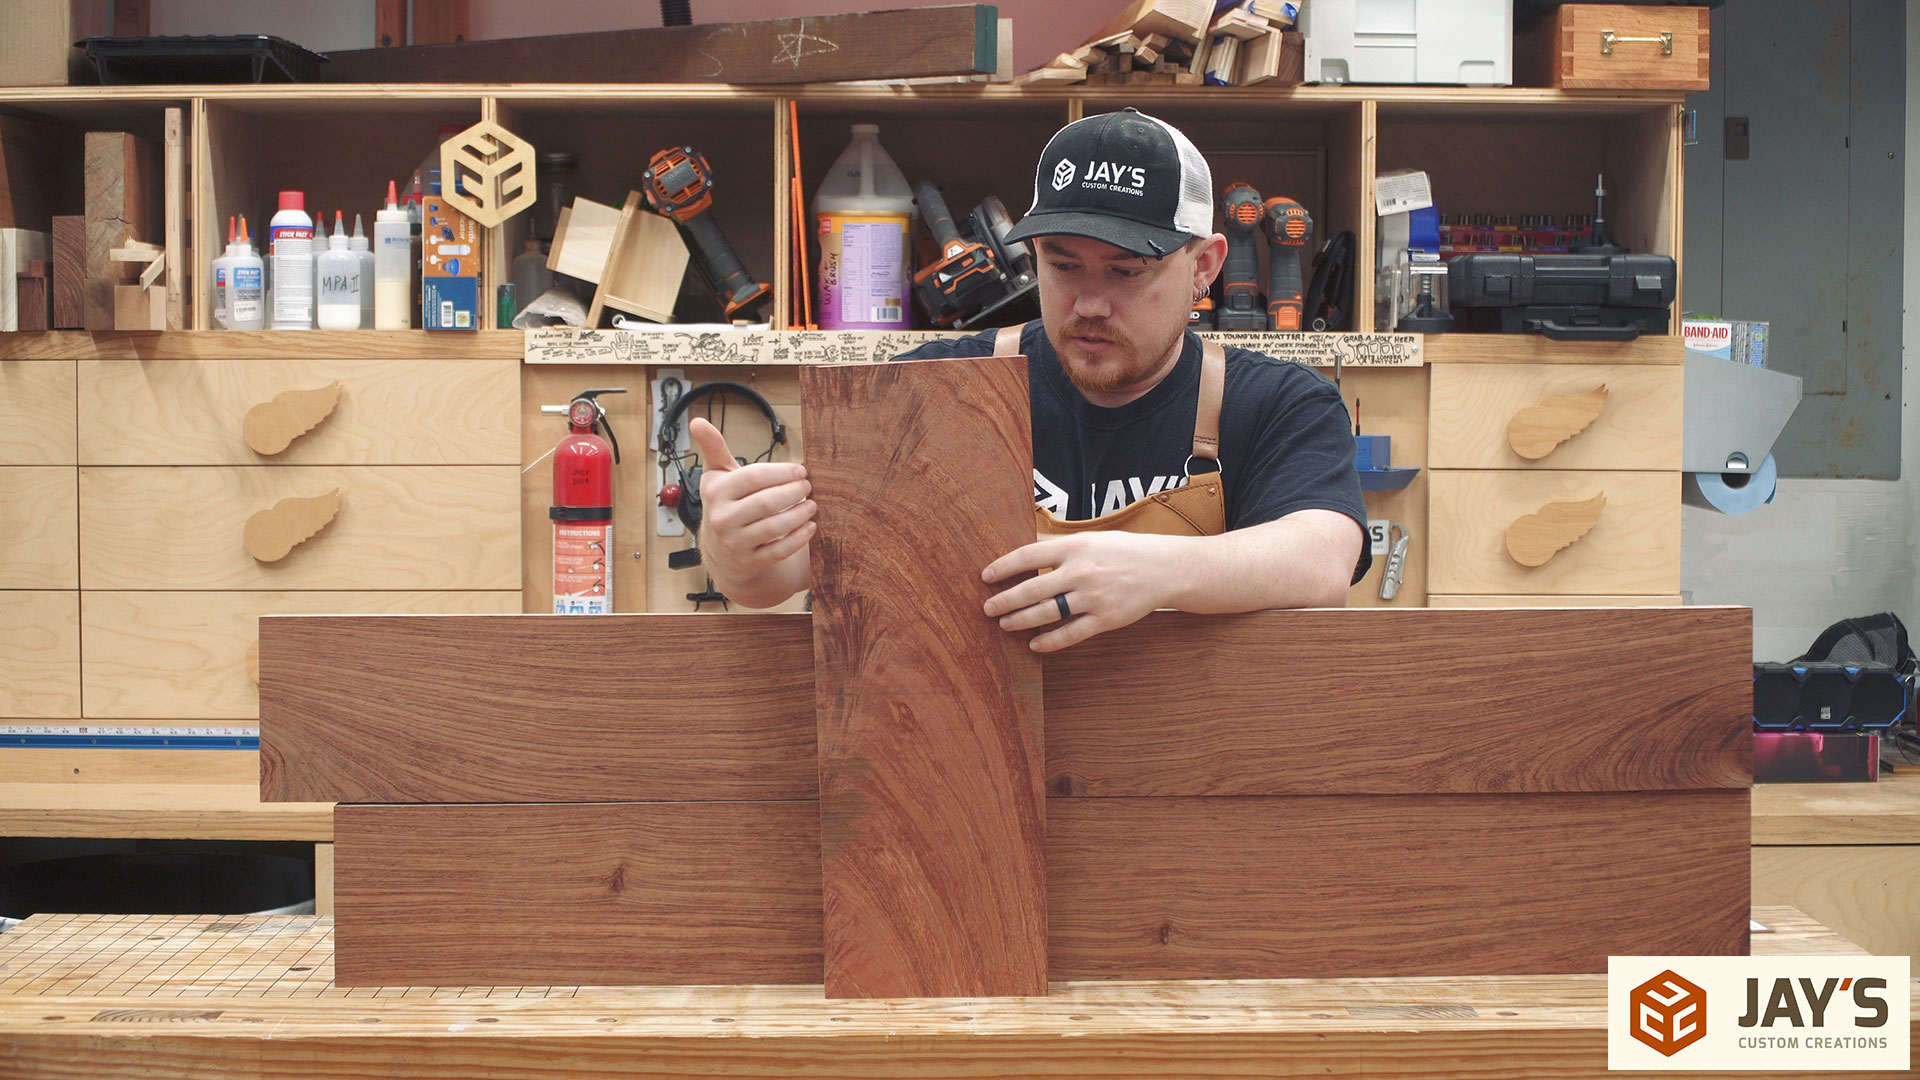
I went back and forth on whether or not to make the gate out of nice wood or just use plywood with a white finish and small bubinga accents like the rest of my office furniture. I decided that because the gate would be seen from our dining room and living room that it would be best to make it look nice. Solid bubinga was the choice. Bubinga is a really nice and somewhat difficult to find wood species to build with so I know some people will mention that it might be overkill or over-the-top for a dog gate. Early in 2018 I found a bunch of it for $5.50 a board foot from Chad Fletcher at GoodWood Sawmill in Pontotoc, Mississippi. I bought as much as I could. This dog gate took a total of 12 board feet which means I have right at $66 in lumber for this gate. That’s not bad. I chose to use two boards with relatively straight grain for the rails and stiles and use a figured piece for the bookmatched panels.
I always design my builds in SketchUp first. This lets me determine how much wood I will need. And if I have the wood on hand I can take it a step further to layout the pieces according to the exact lumber I have on hand including each board’s defects. All I need to do is transfer the layout to the actual lumber in the shop and get to work.
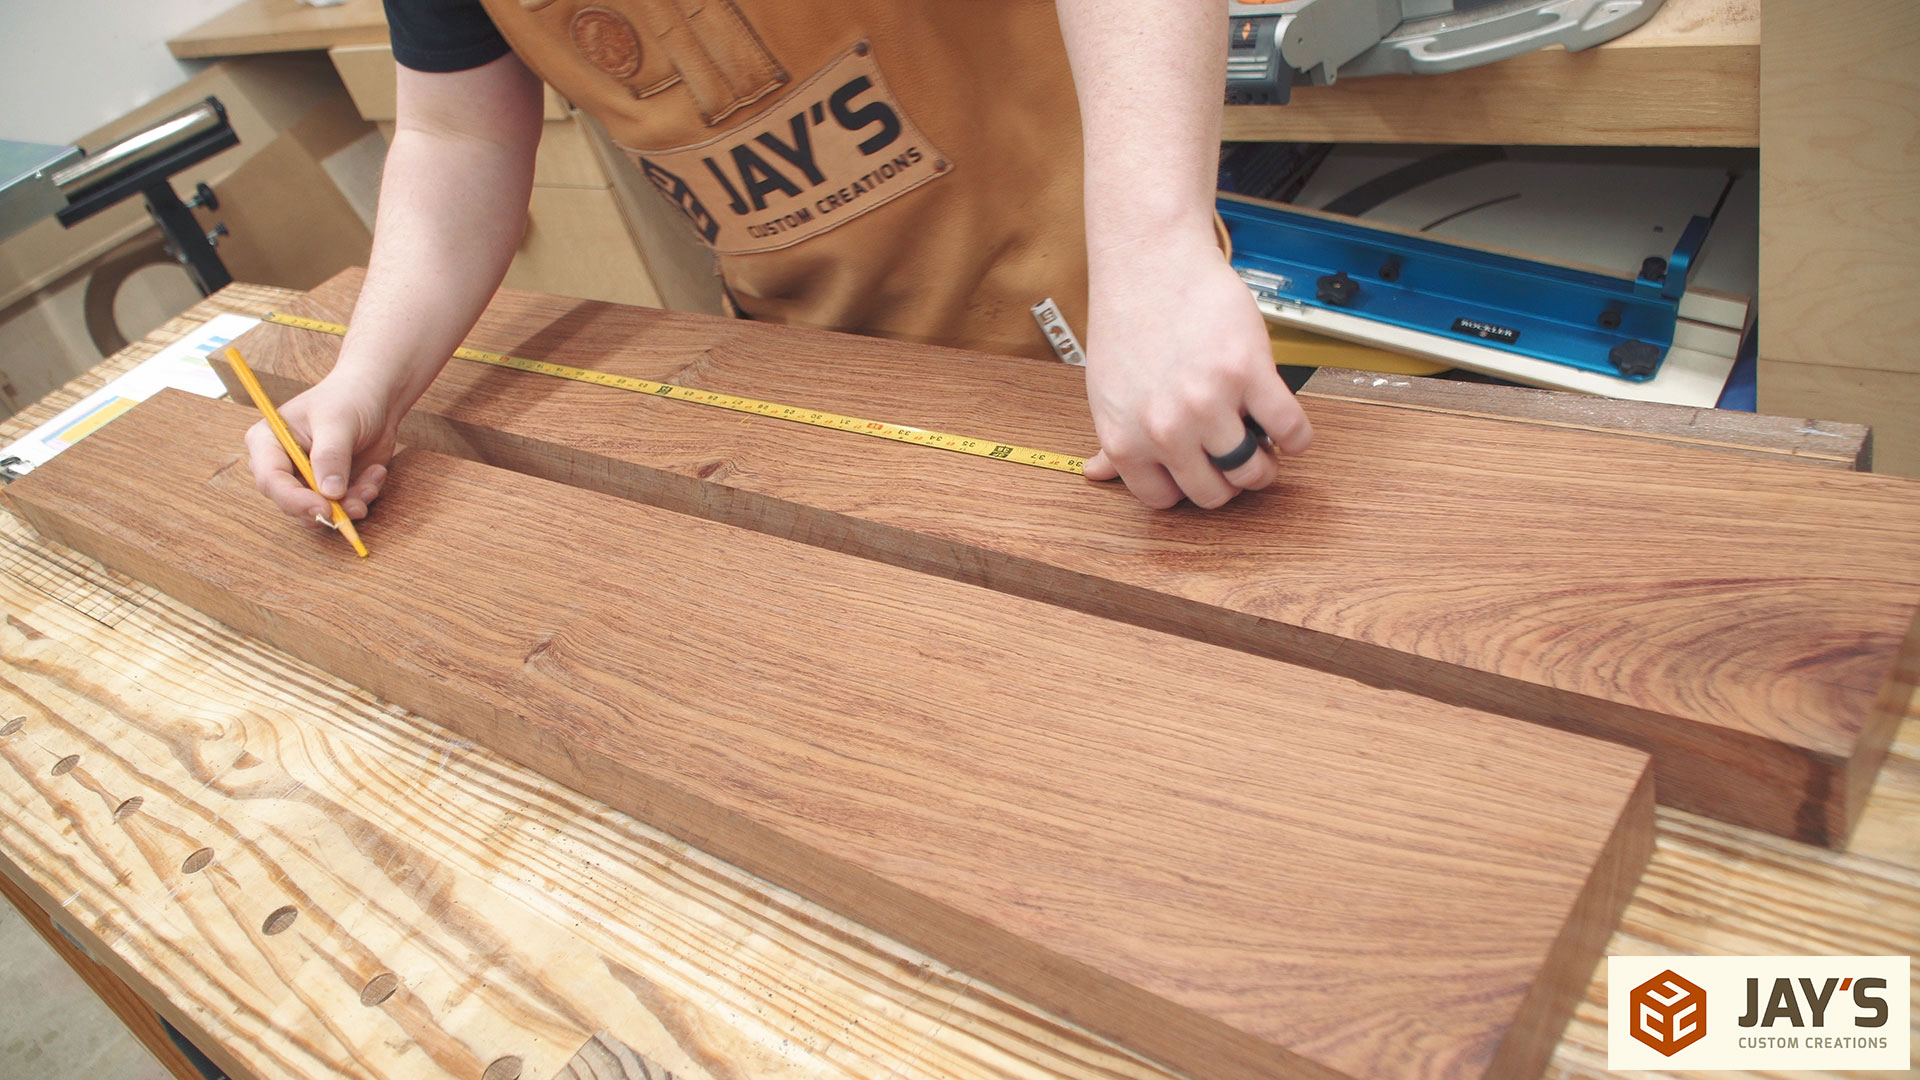
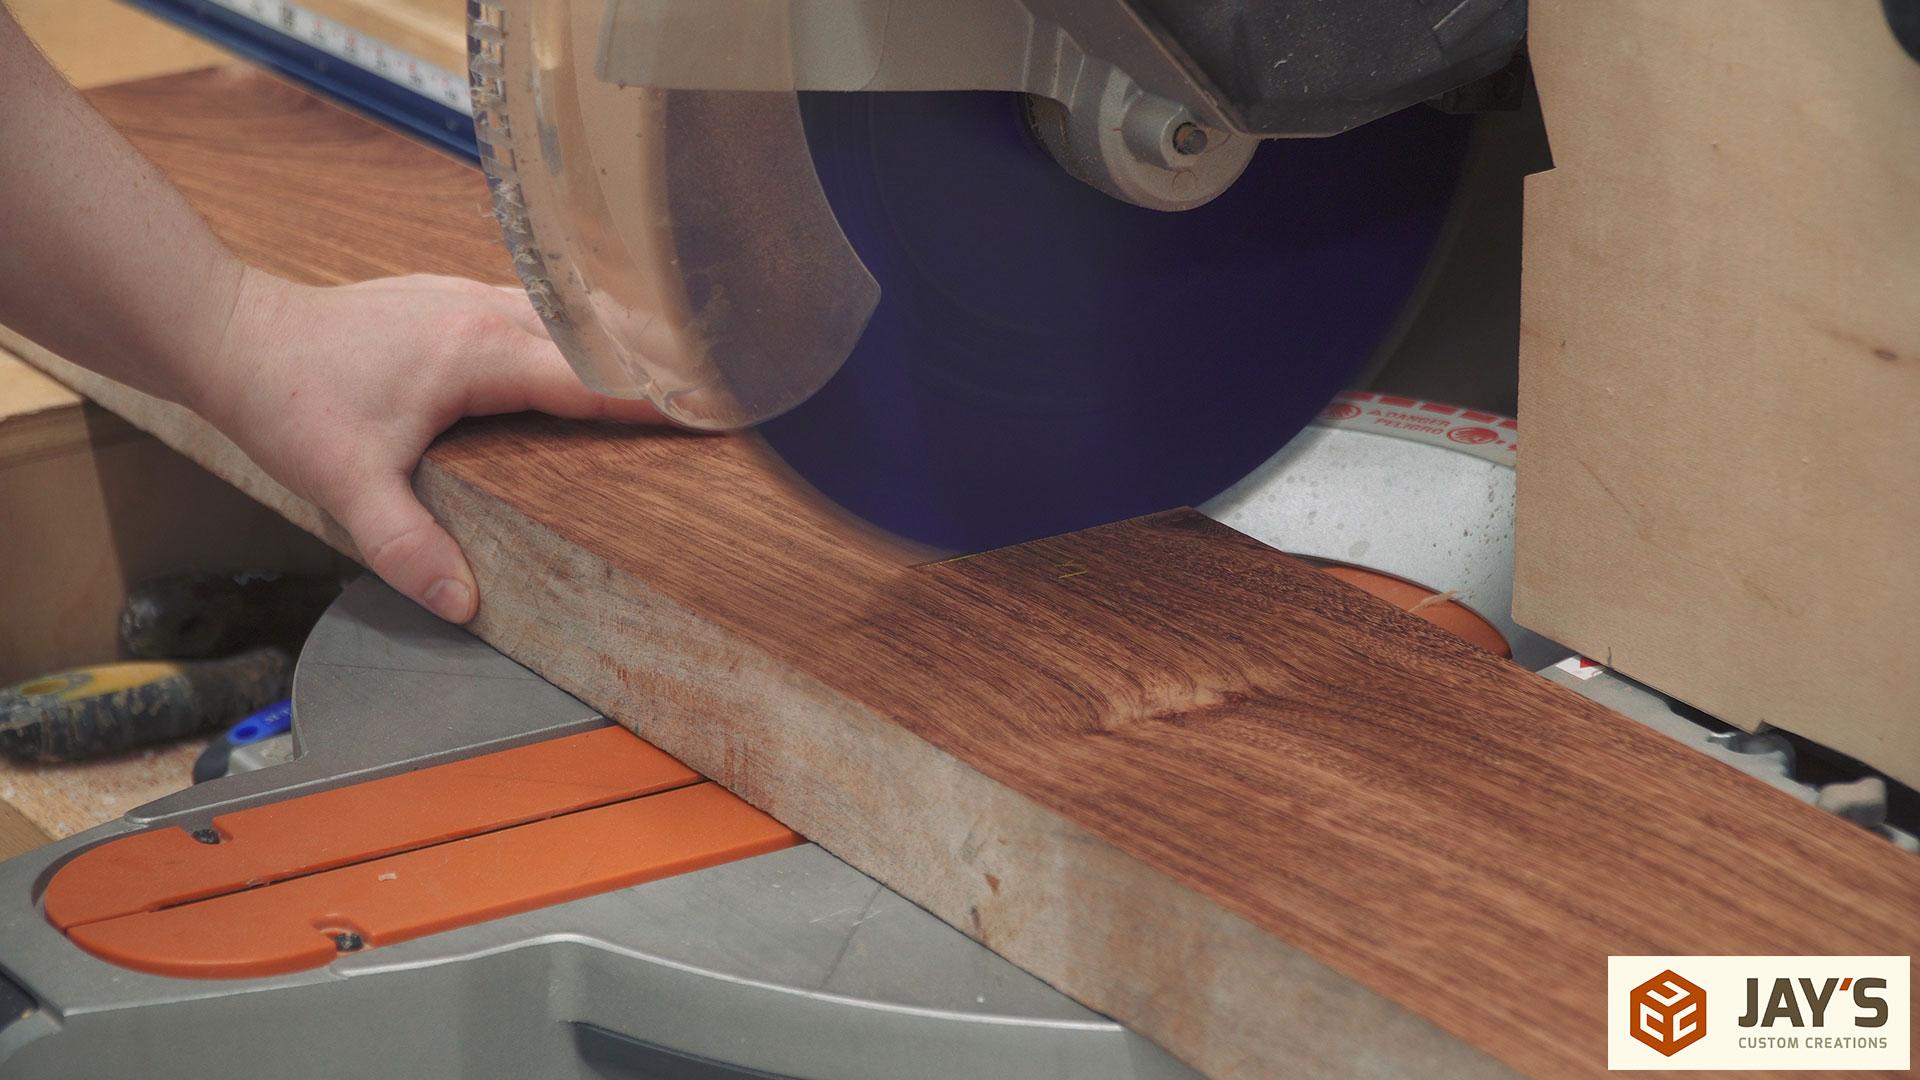
I always crosscut my rough lumber to a rough length first at my miter saw station. This generally reduces the lumber waste at the jointer and planer as you don’t need to extend that flat plane through the entire length of the rough board.
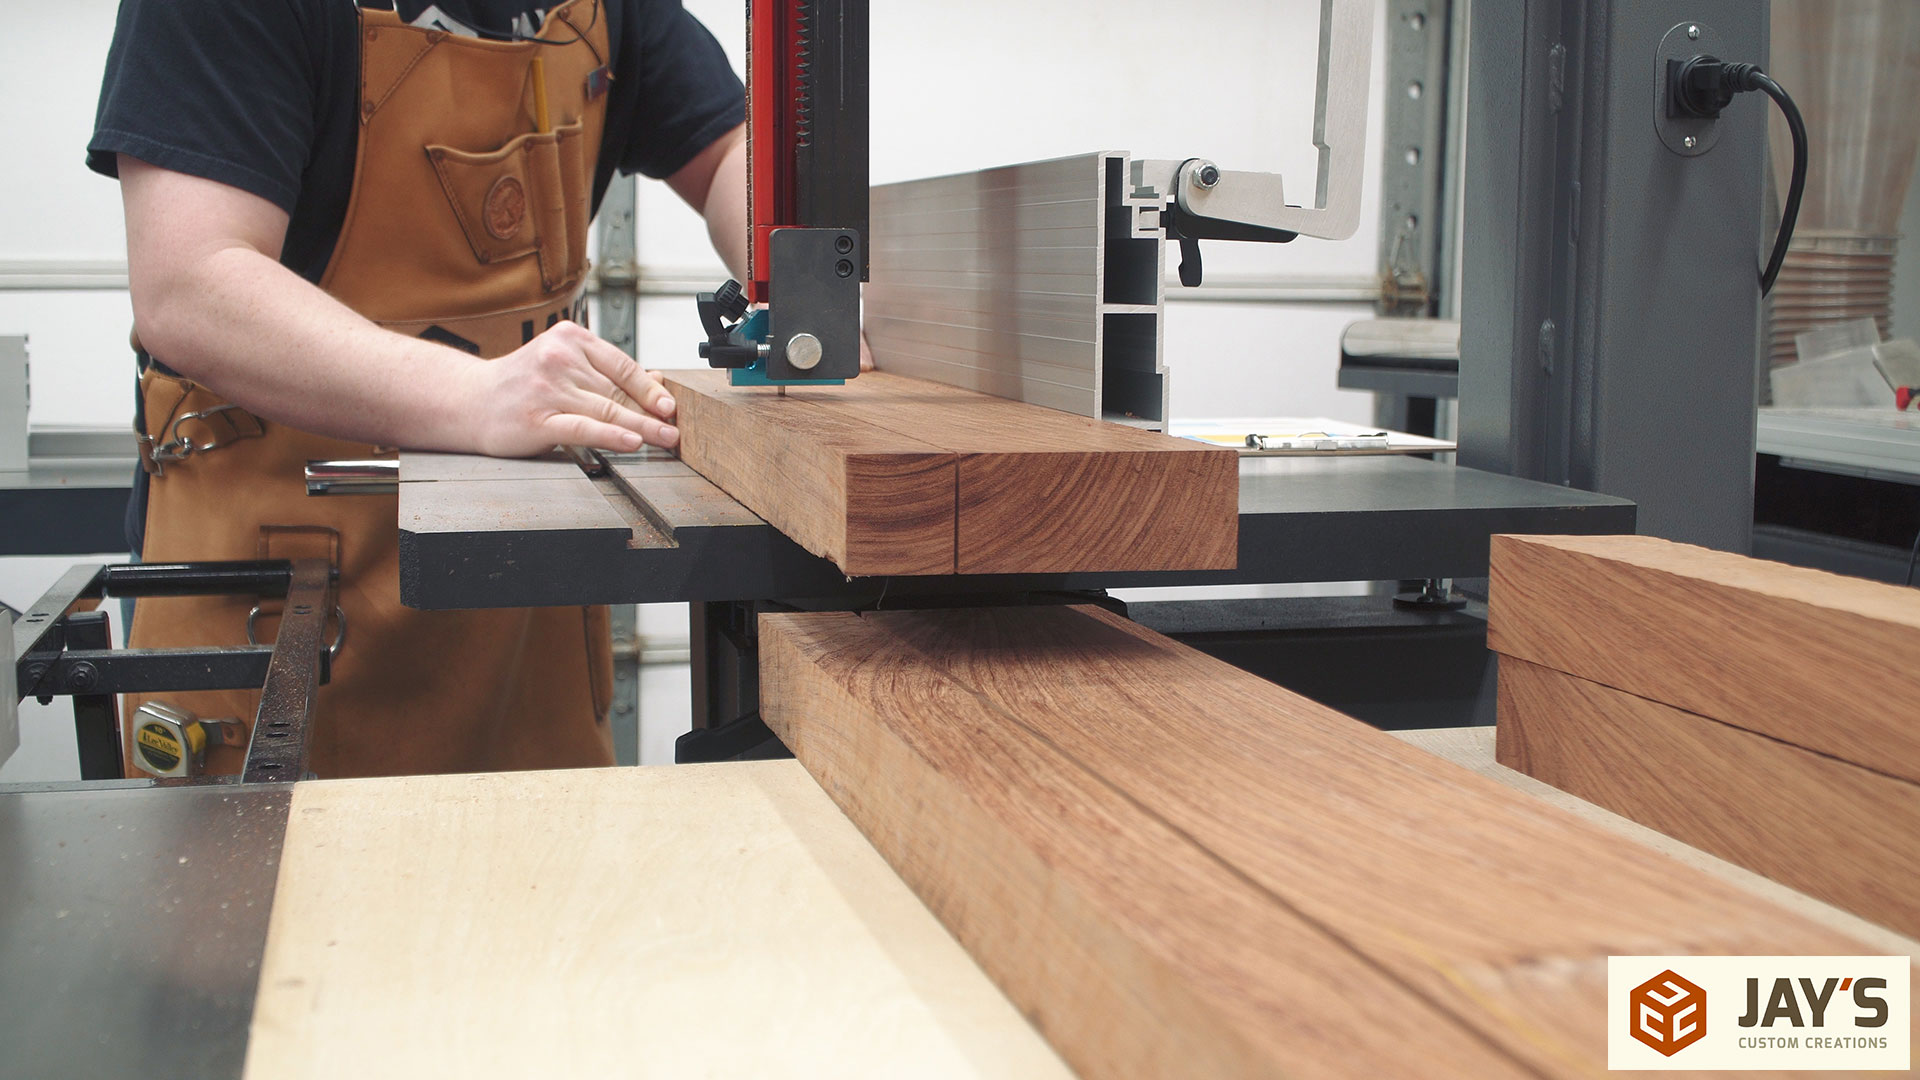
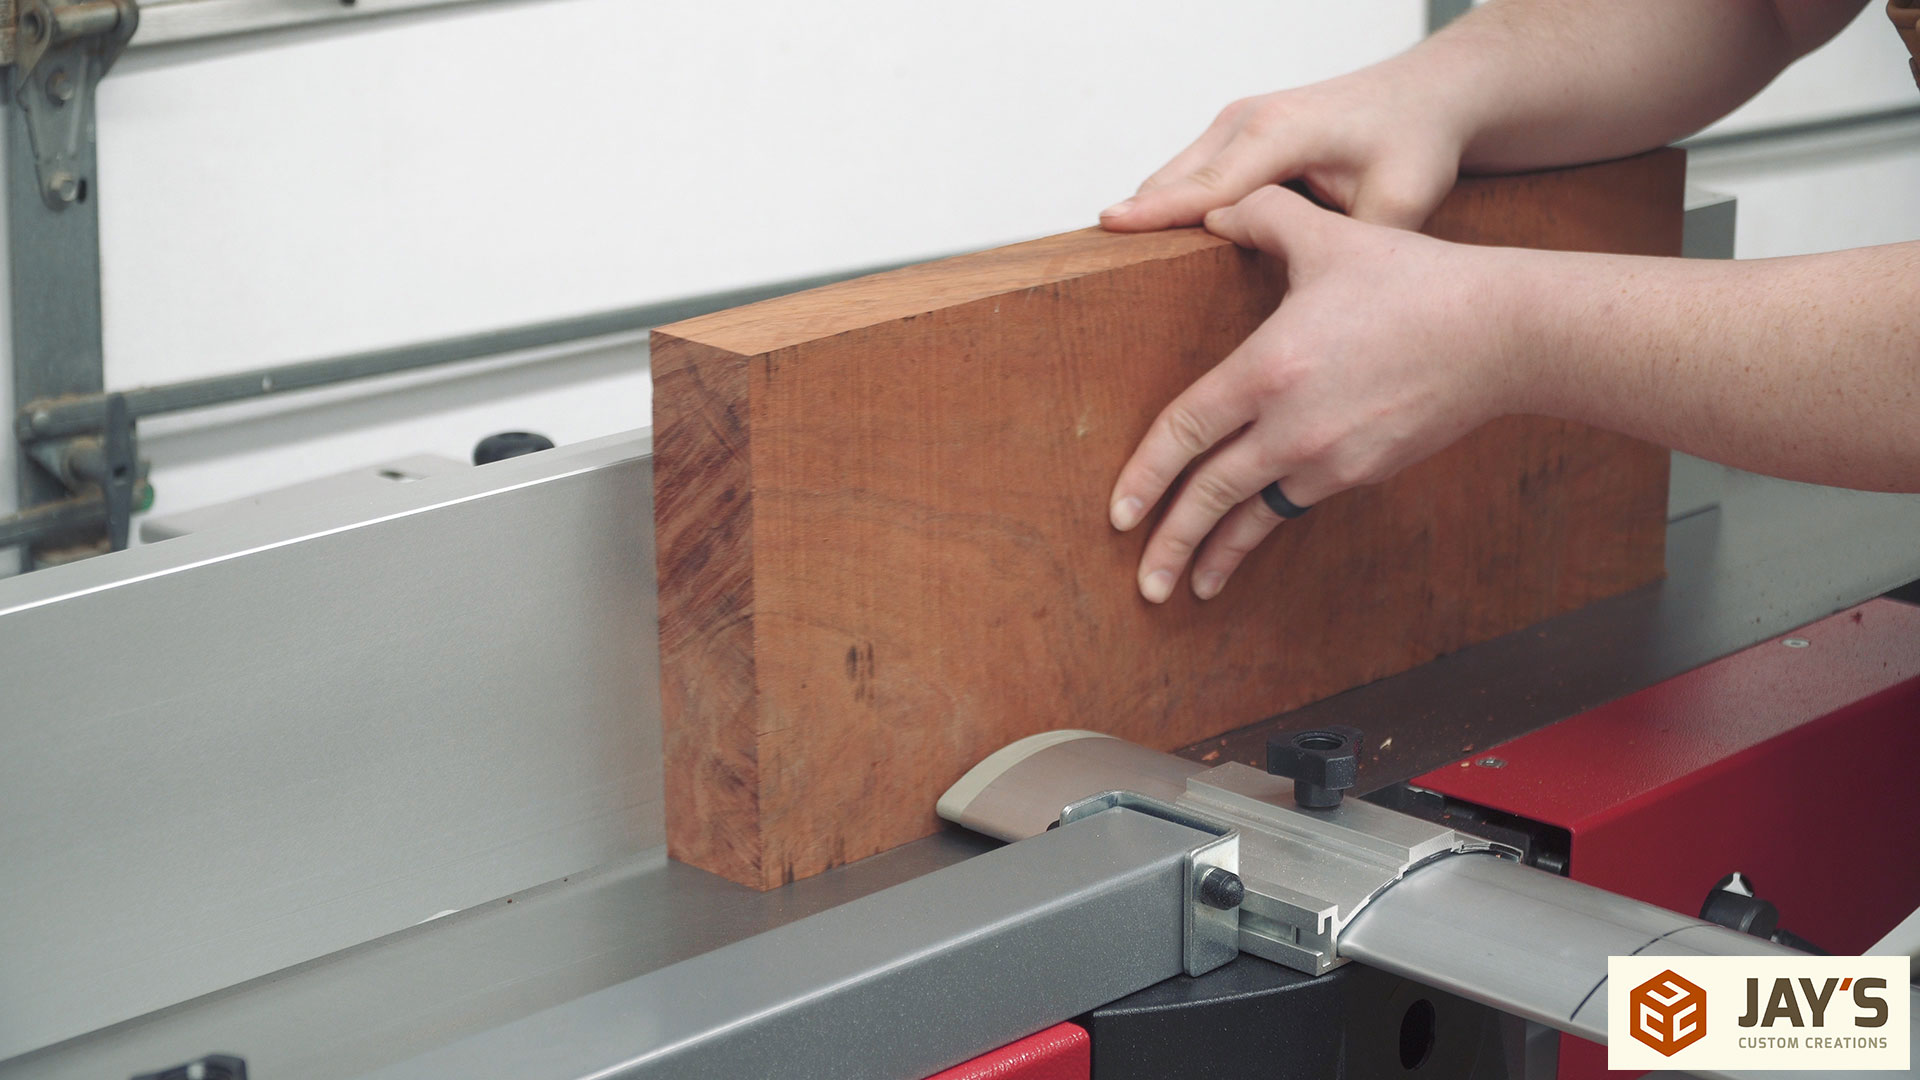
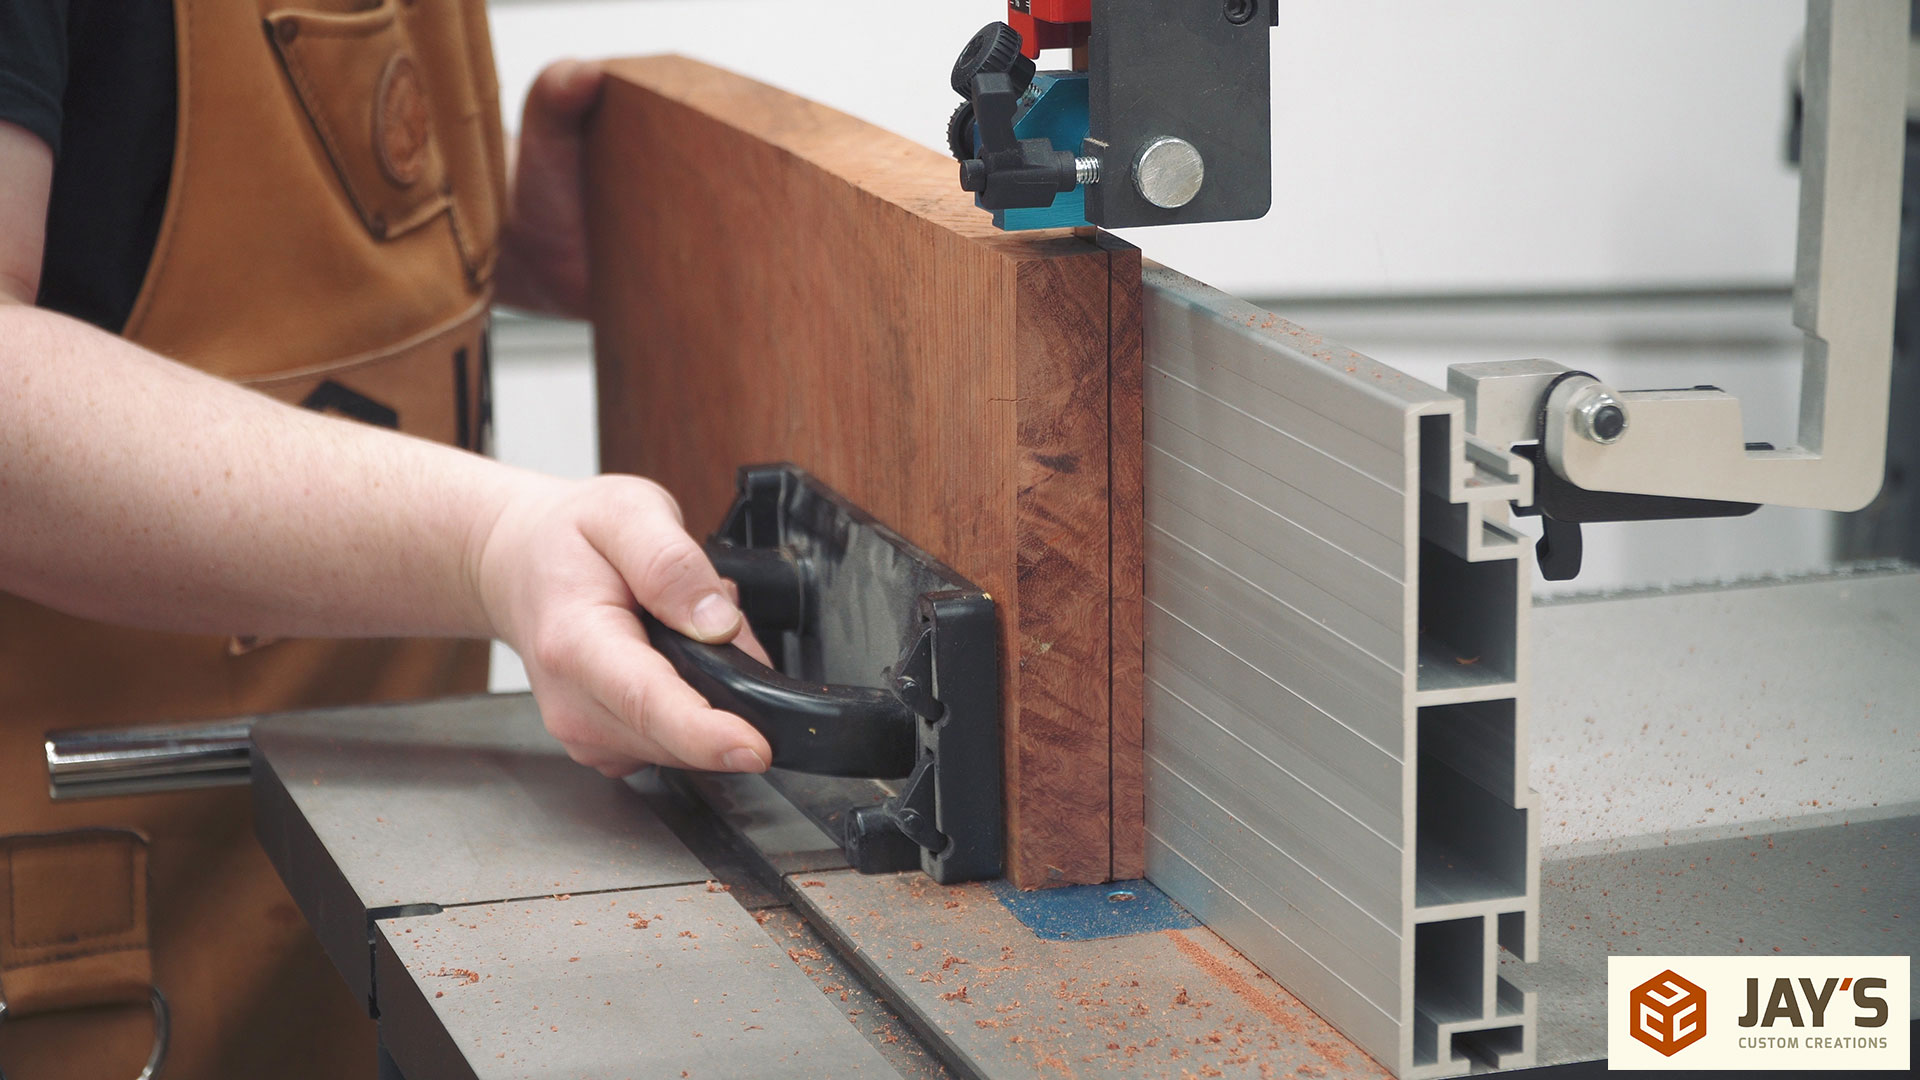
All of the bubinga lumber I bought was 8/4 stock. When working with thicker rough sawn material like this it is safer to make rough ripping cuts at the bandsaw instead of a table saw. Ripping rough sawn lumber at the table saw can be dangerous if the board doesn’t have a flat bottom or a flat edge against the fence.
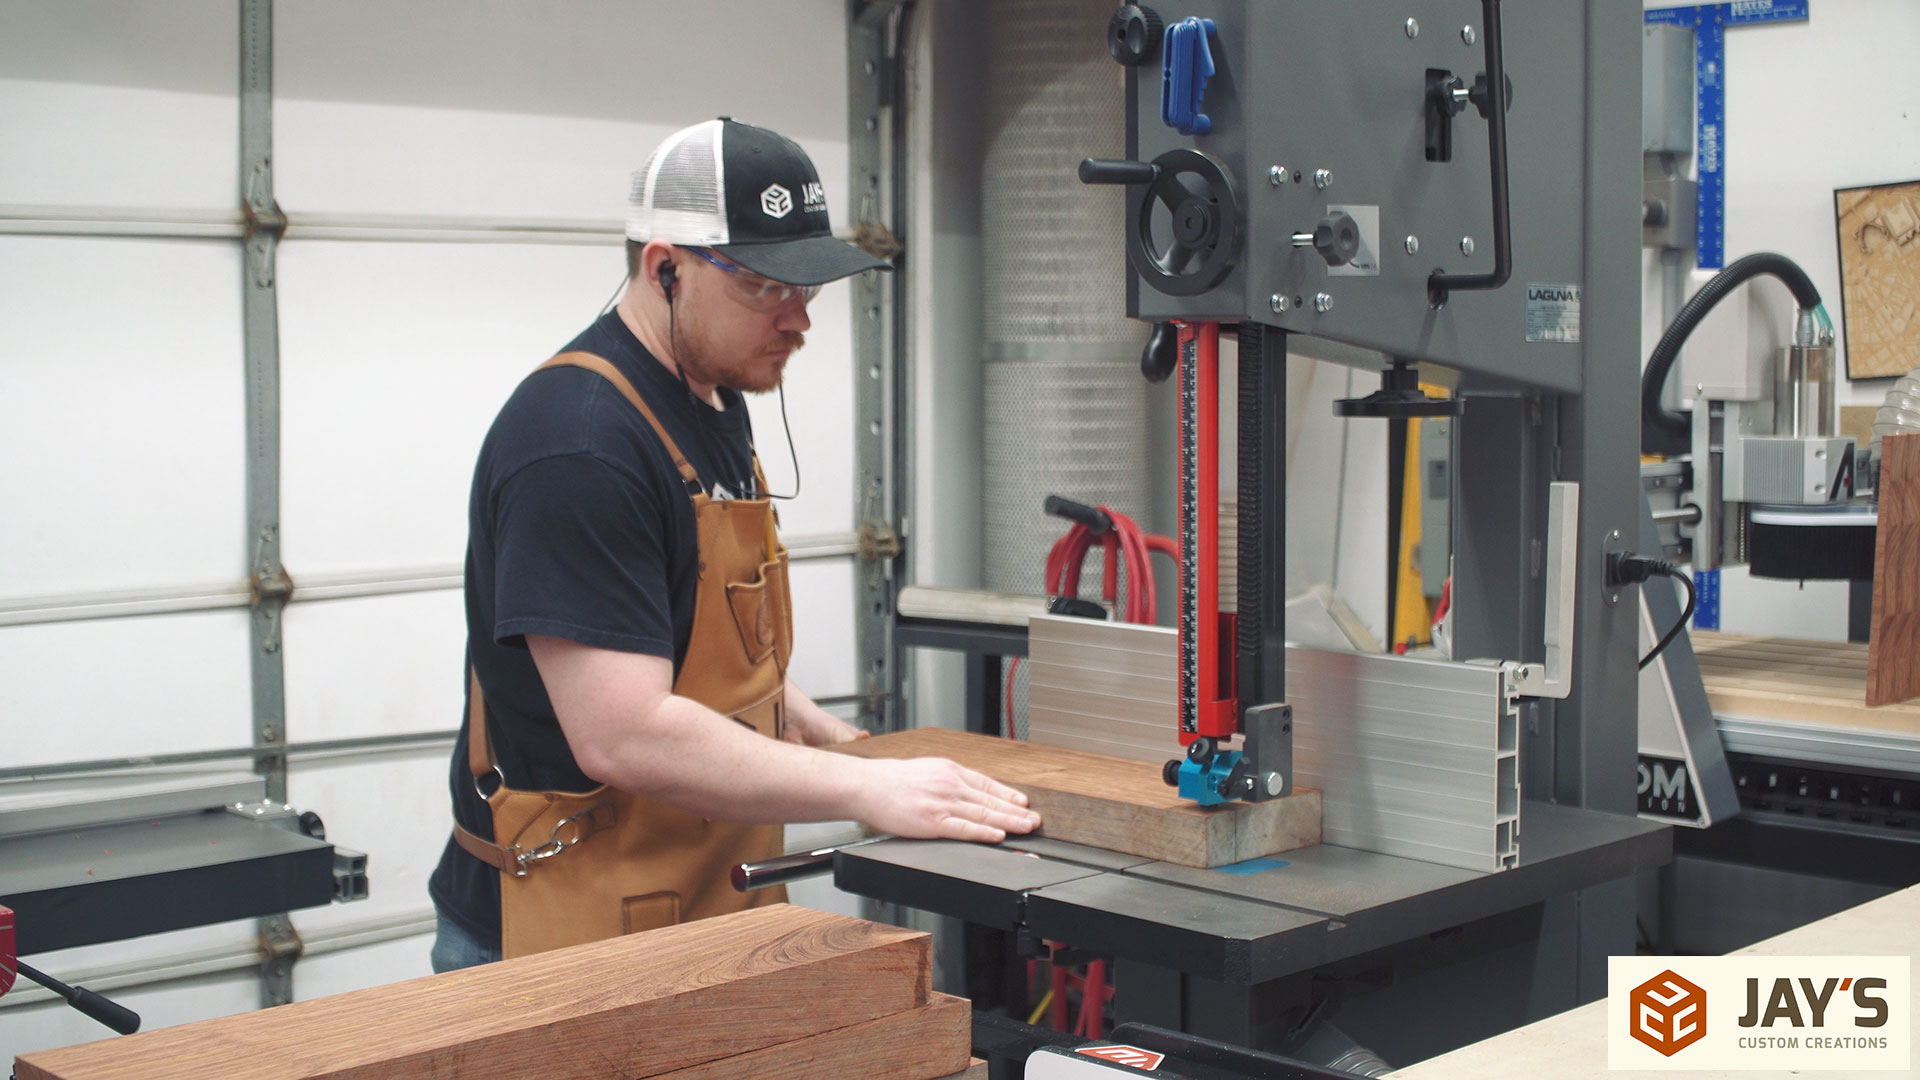
The way my bandsaw is positioned I can feed material through and let it stack right on top of the extension wing of my table saw. This “catch” table has been really convenient.
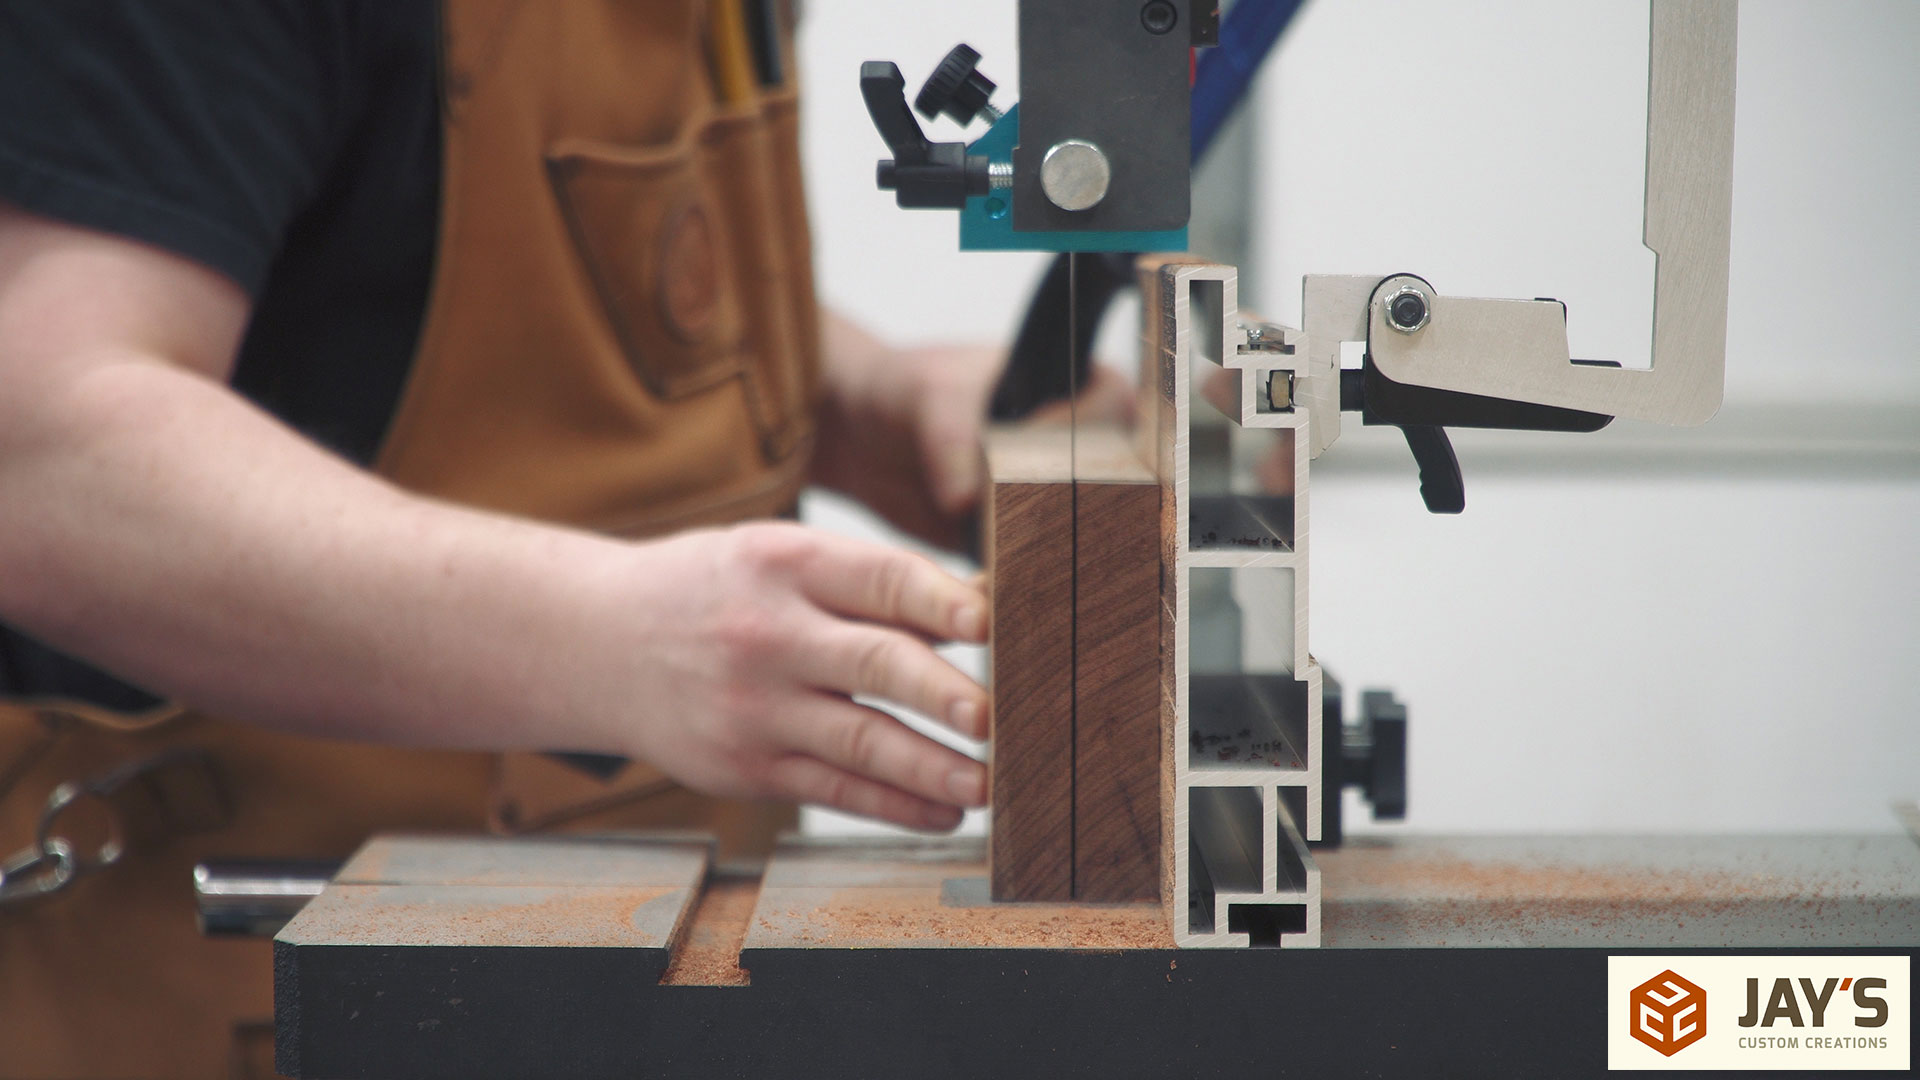
After ripping the parts to rough width I ripped them to a rough thickness. 8/4 material is 2” thick which means if you rip them right down the middle you typically have enough material to get two boards with a final thickness of 3/4” or more. That was the goal here. It all depends on how many internal stresses each piece has. If the board twists or bows like crazy when it cuts then you will have to joint and plane away more material to get each piece flat.
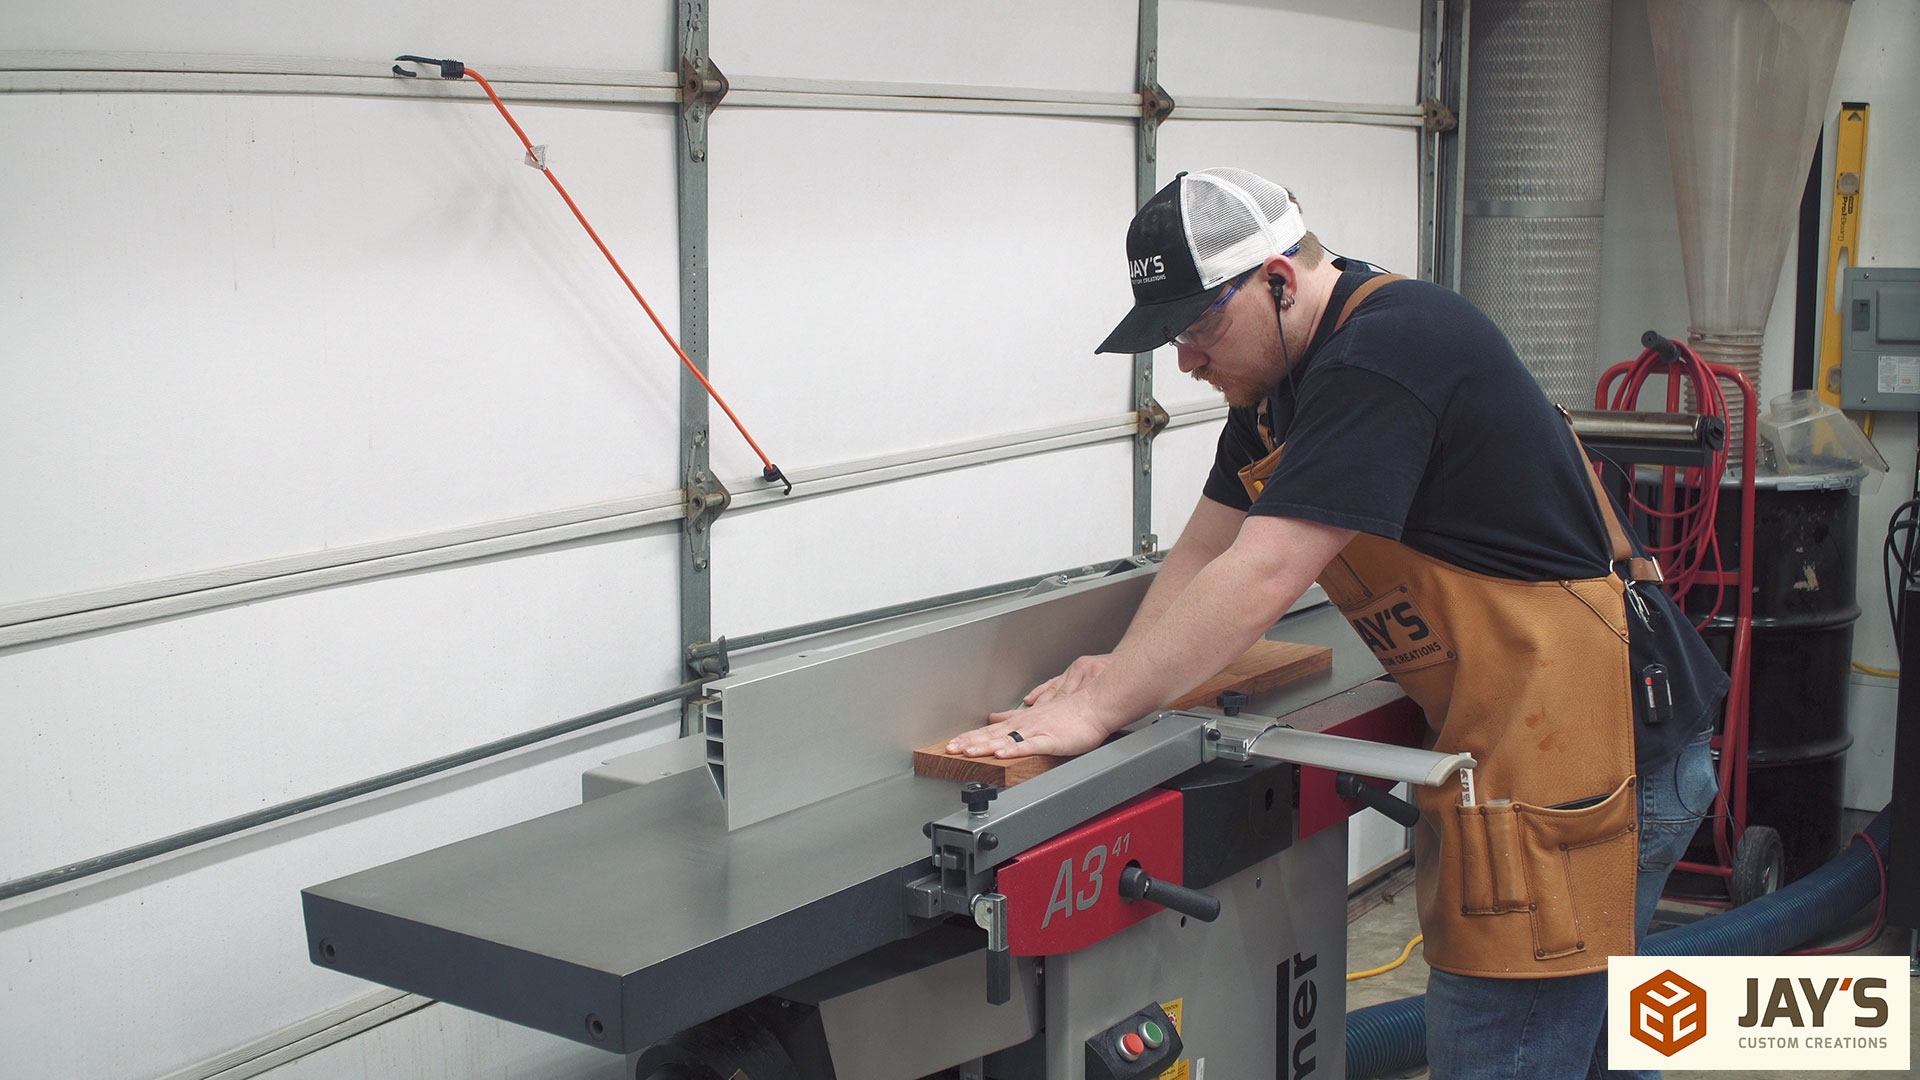
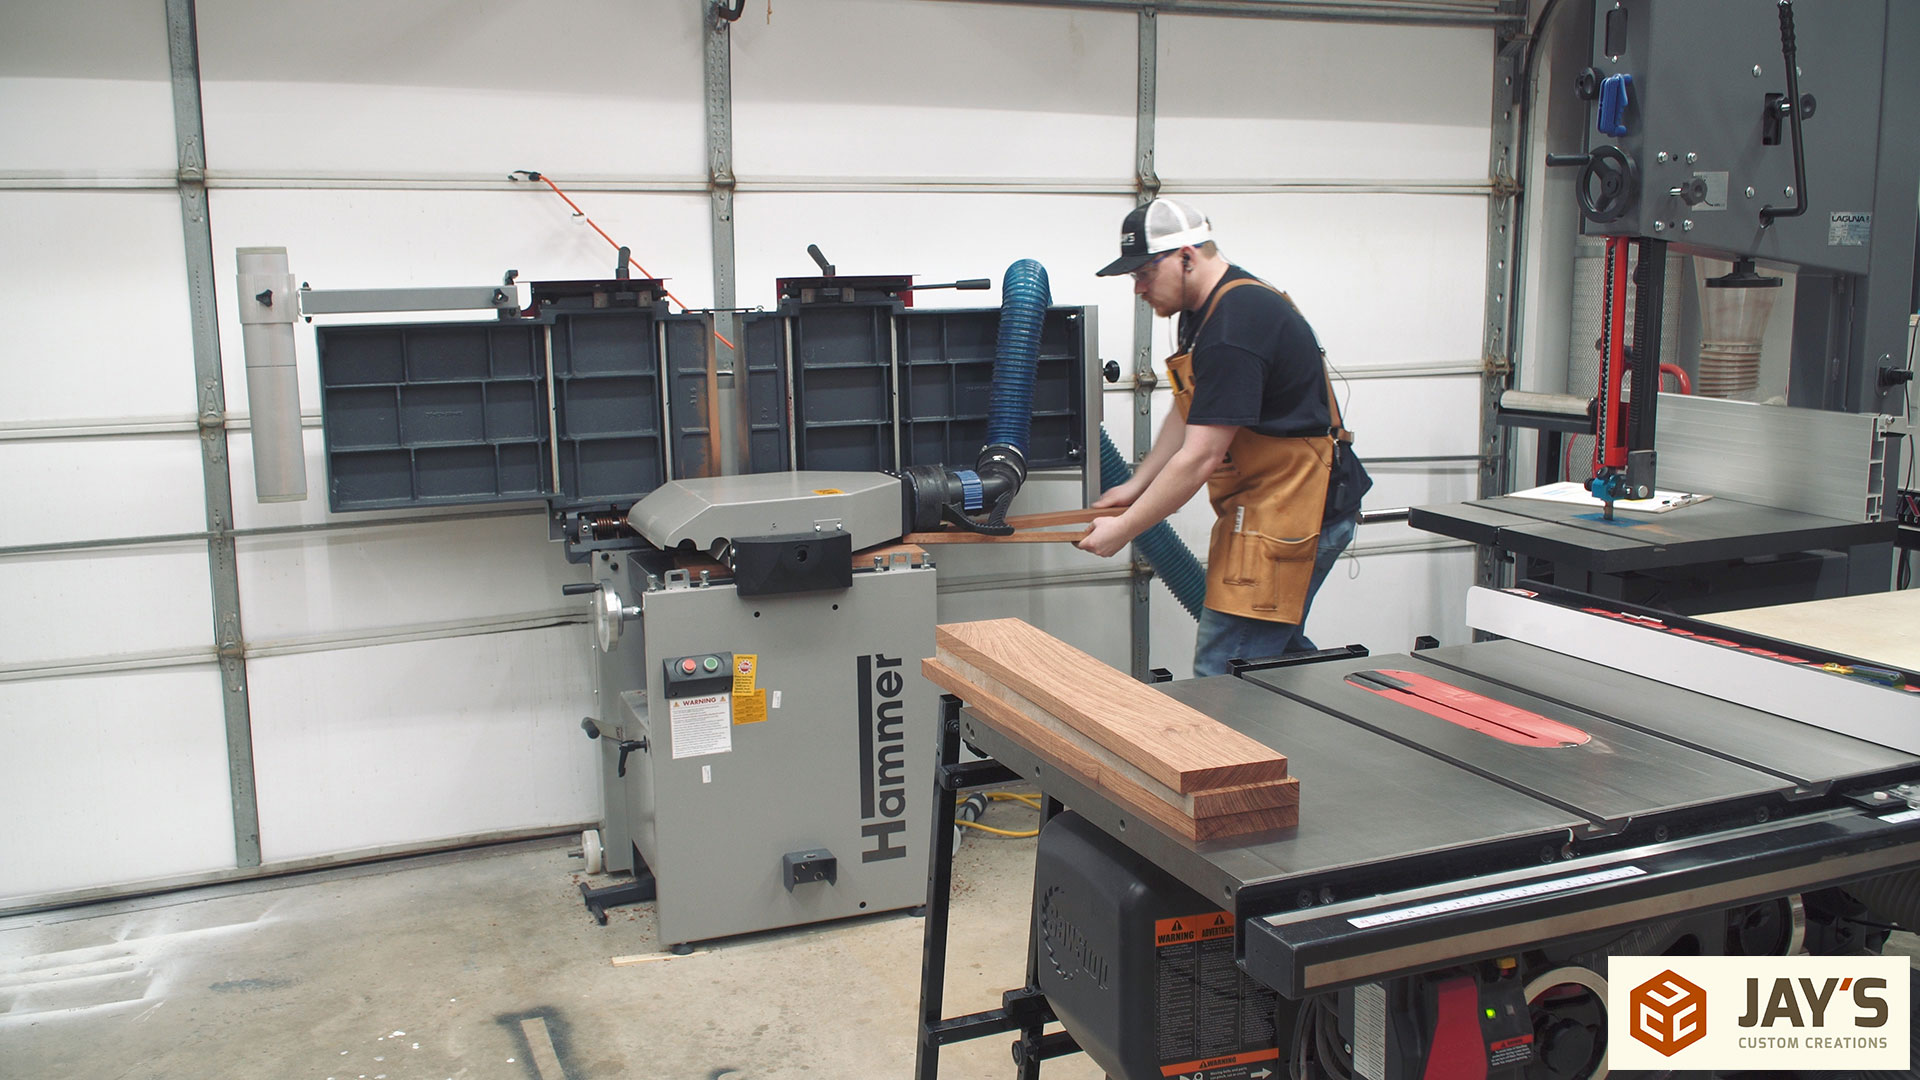
Each board is then jointed flat at the jointer.
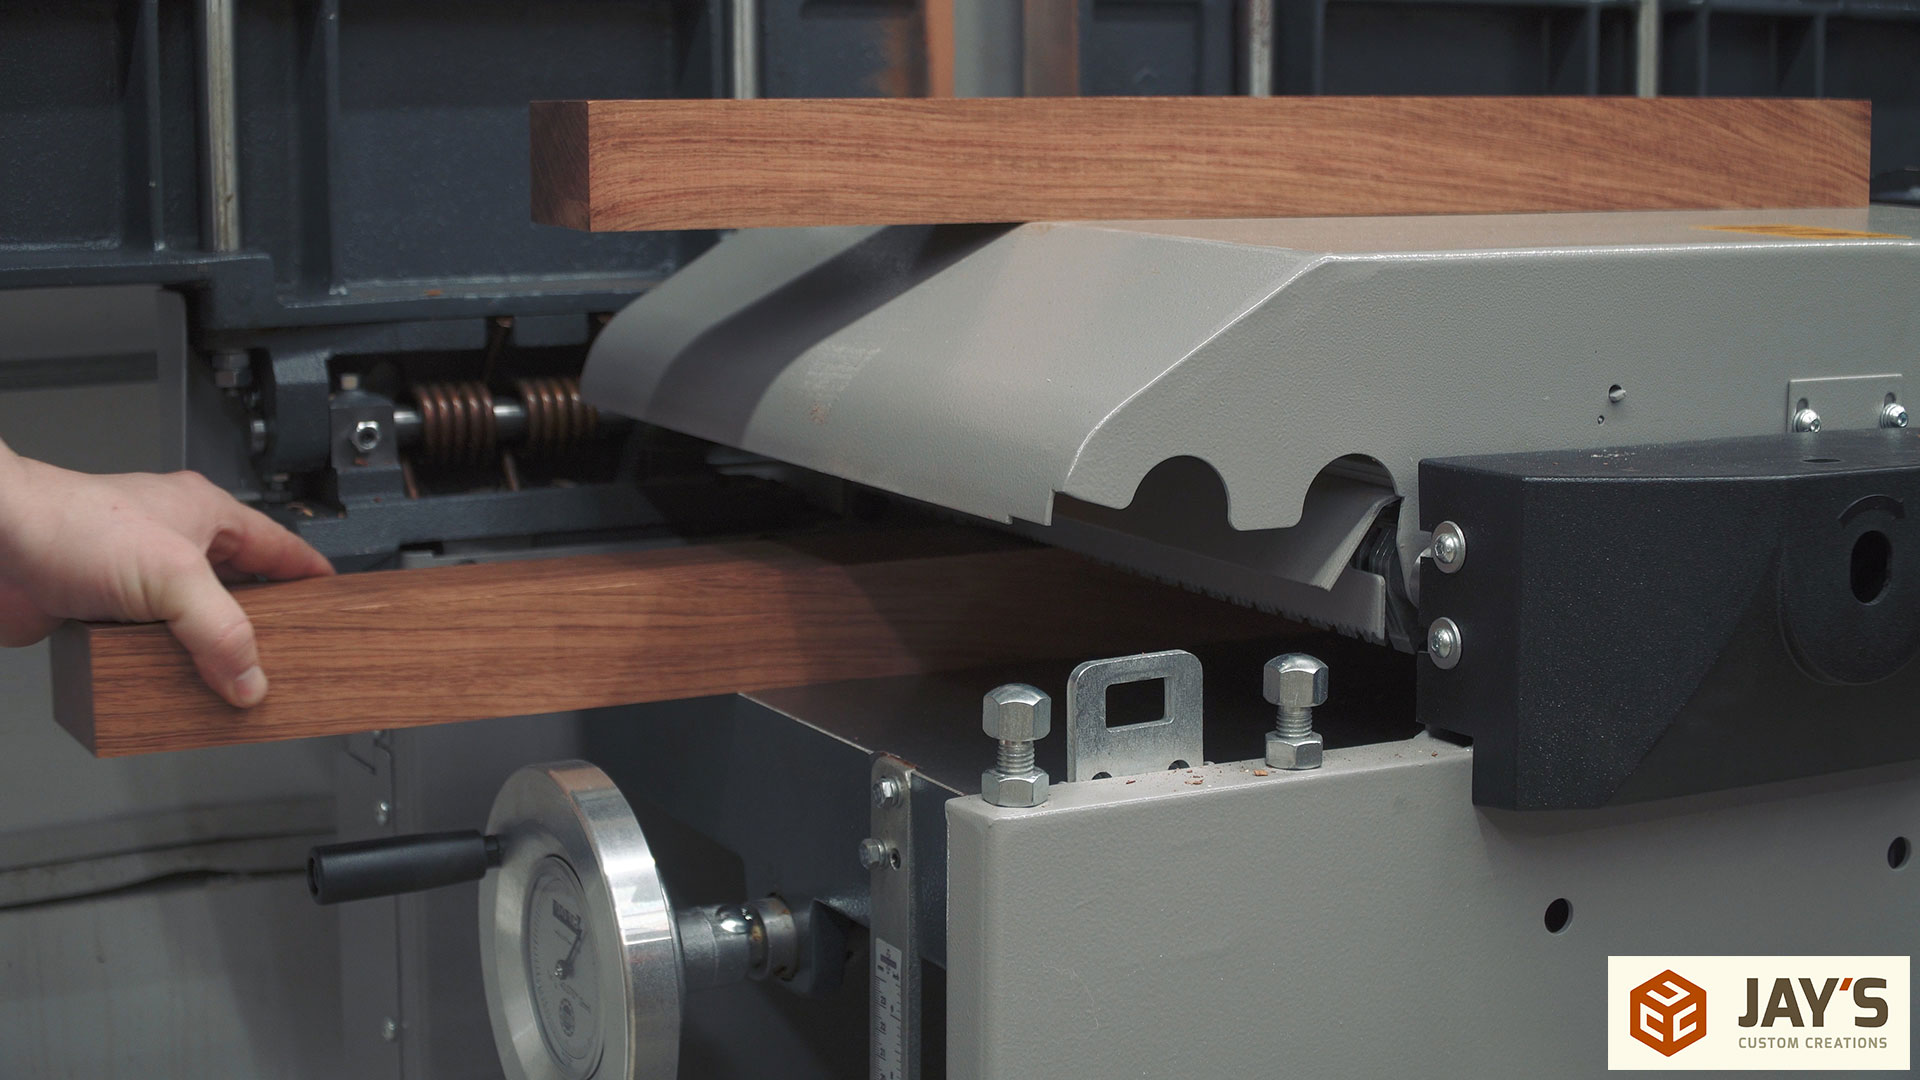
And then planed to a final thickness with the planer. The two pieces in this image are thicker than the rest. They are the two mounting pieces that will connect the gate to the wall.
Since getting this jointer/planer combo machine I have gotten a lot of questions in regards to the lack of infeed and outfeed support at the planer. This has not been an issue for me (yet) as I was used to my last planer that didn’t have infeed and outfeed support. Well..it had folding tables but they fell off in use and I never put them back on. I don’t have an issue with the lack of infeed or outfeed tables on this planer.
Typically this is where I would stop for the day when milling thicker lumber. Letting the pieces rest overnight will allow them to finish releasing any internal stresses and let the freshly exposed faces acclimate to the air. Then you can send each piece through another round of milling the next day to remove any of the new cup, bow, or twist that may have shown up. In this case I noticed very little movement out of the boards when ripping them and I was already getting pretty thin so I decided to keep my current thickness as my final thickness.
With each wide face flat and parallel the machine is put back into jointer mode to joint one narrow face. Another common question about the machine is about switching it back and forth. It takes one minute to switch between the two modes and isn’t an issue for me. The capabilities of the machine far outweigh the one minute inconvenience when switching it back and forth.
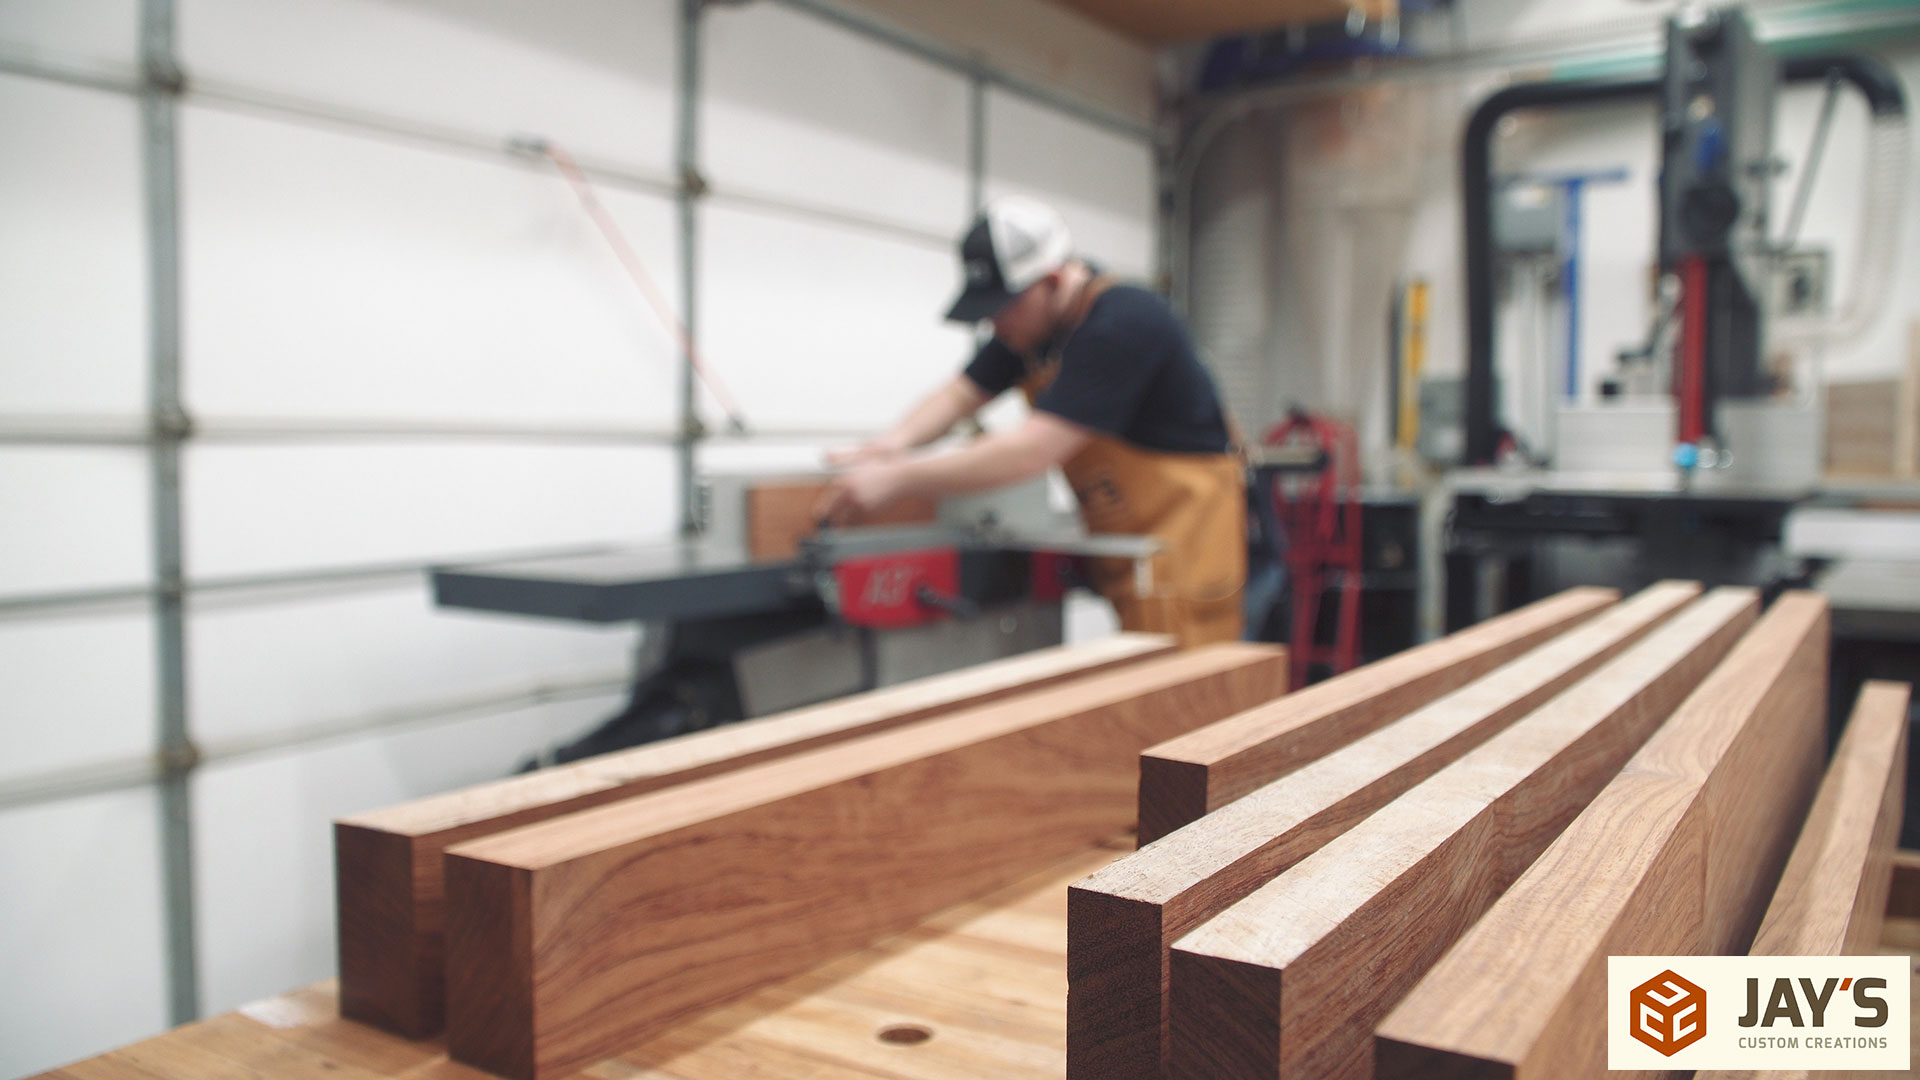
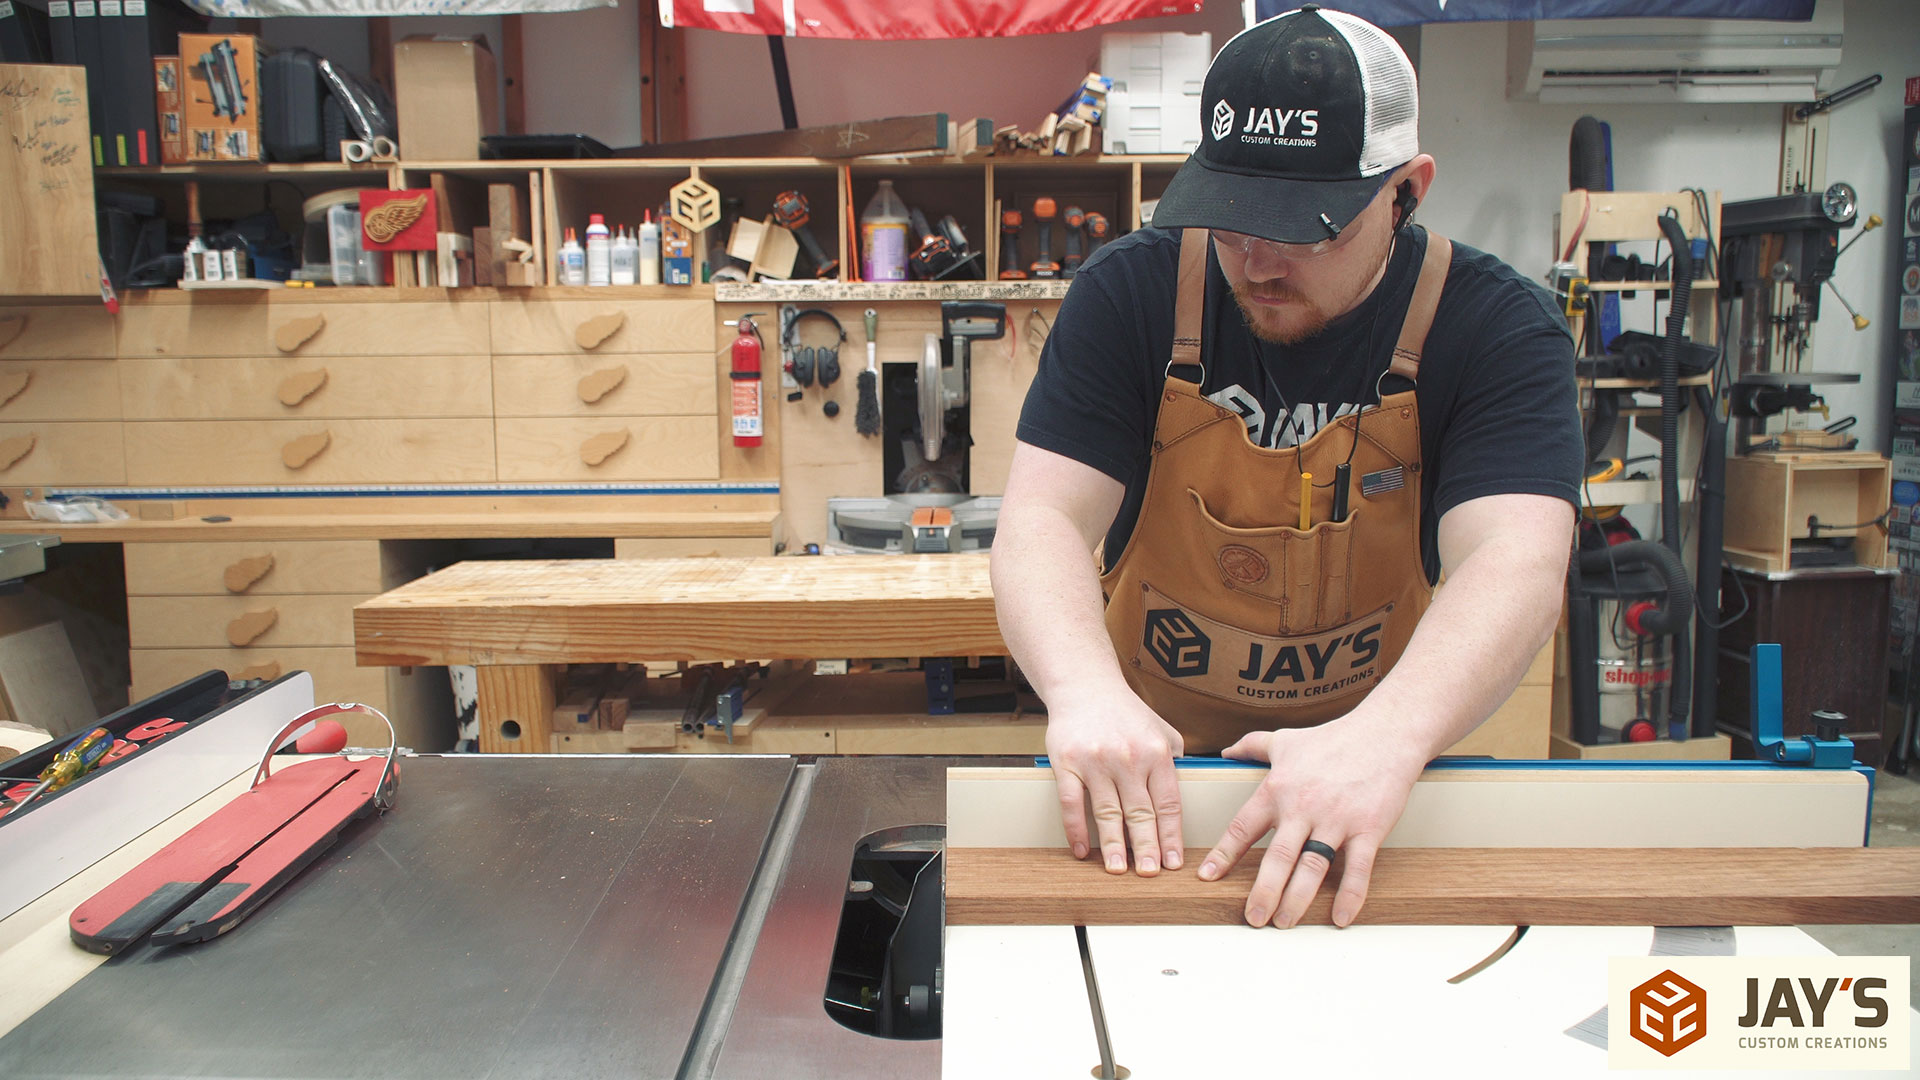
With the freshly jointed face against the fence each piece can be ripped to their final width at the table saw.
Cutting the pieces to their final length starts with a cleanup cut on one end with my table saw crosscut sled.
Followed by flipping the boards end for end and cutting them to length. These two boards were a touch longer than the stop block capacity of the crosscut sled so I stacked and cut them at the same time. As long as the opposite ends are flush the cut will be more accurate than measuring, marking, and cutting each of them individually. I typically use my crosscut when the pieces will fit on it rather than the miter saw for final crosscutting due to a better cut quality and for more accurate cuts. I haven’t done any maintenance to my miter saw in quite a while and have noticed a bit of slop out of the sliding mechanism that affects cut accuracy.
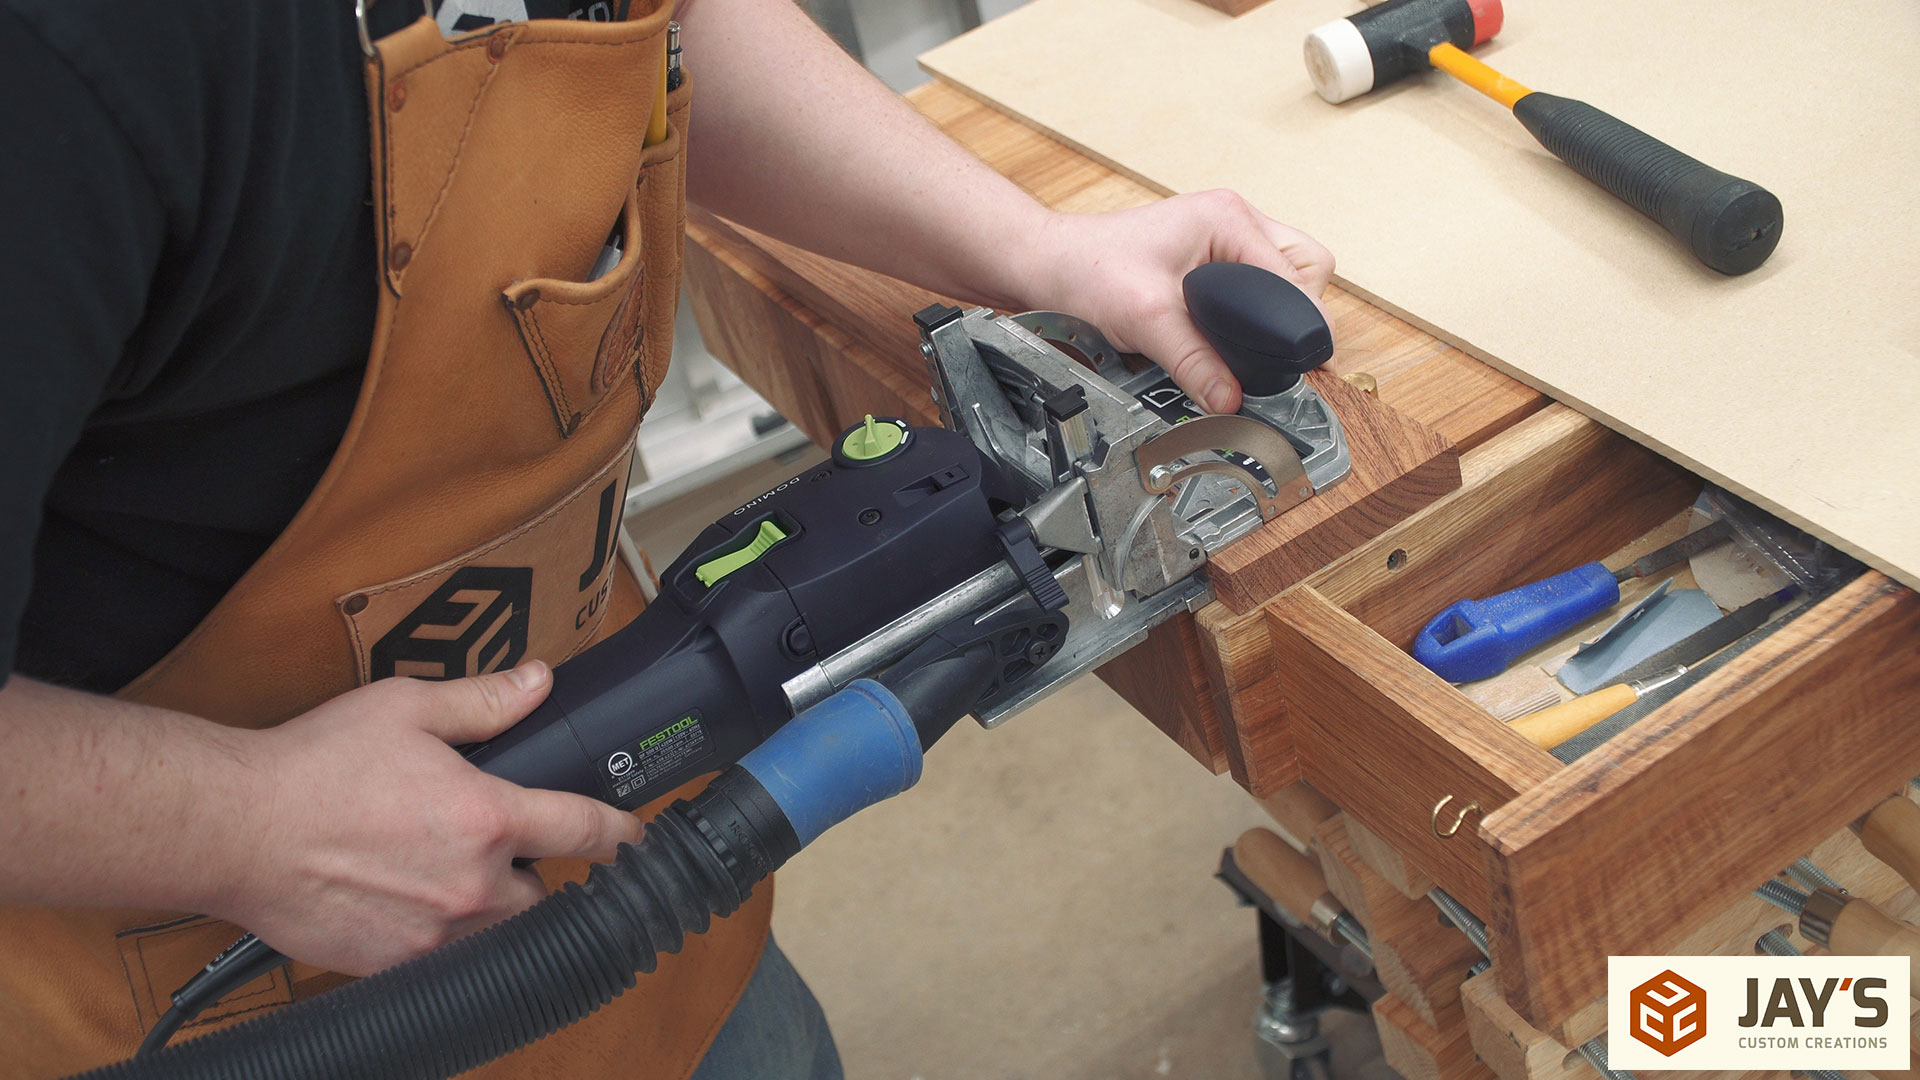
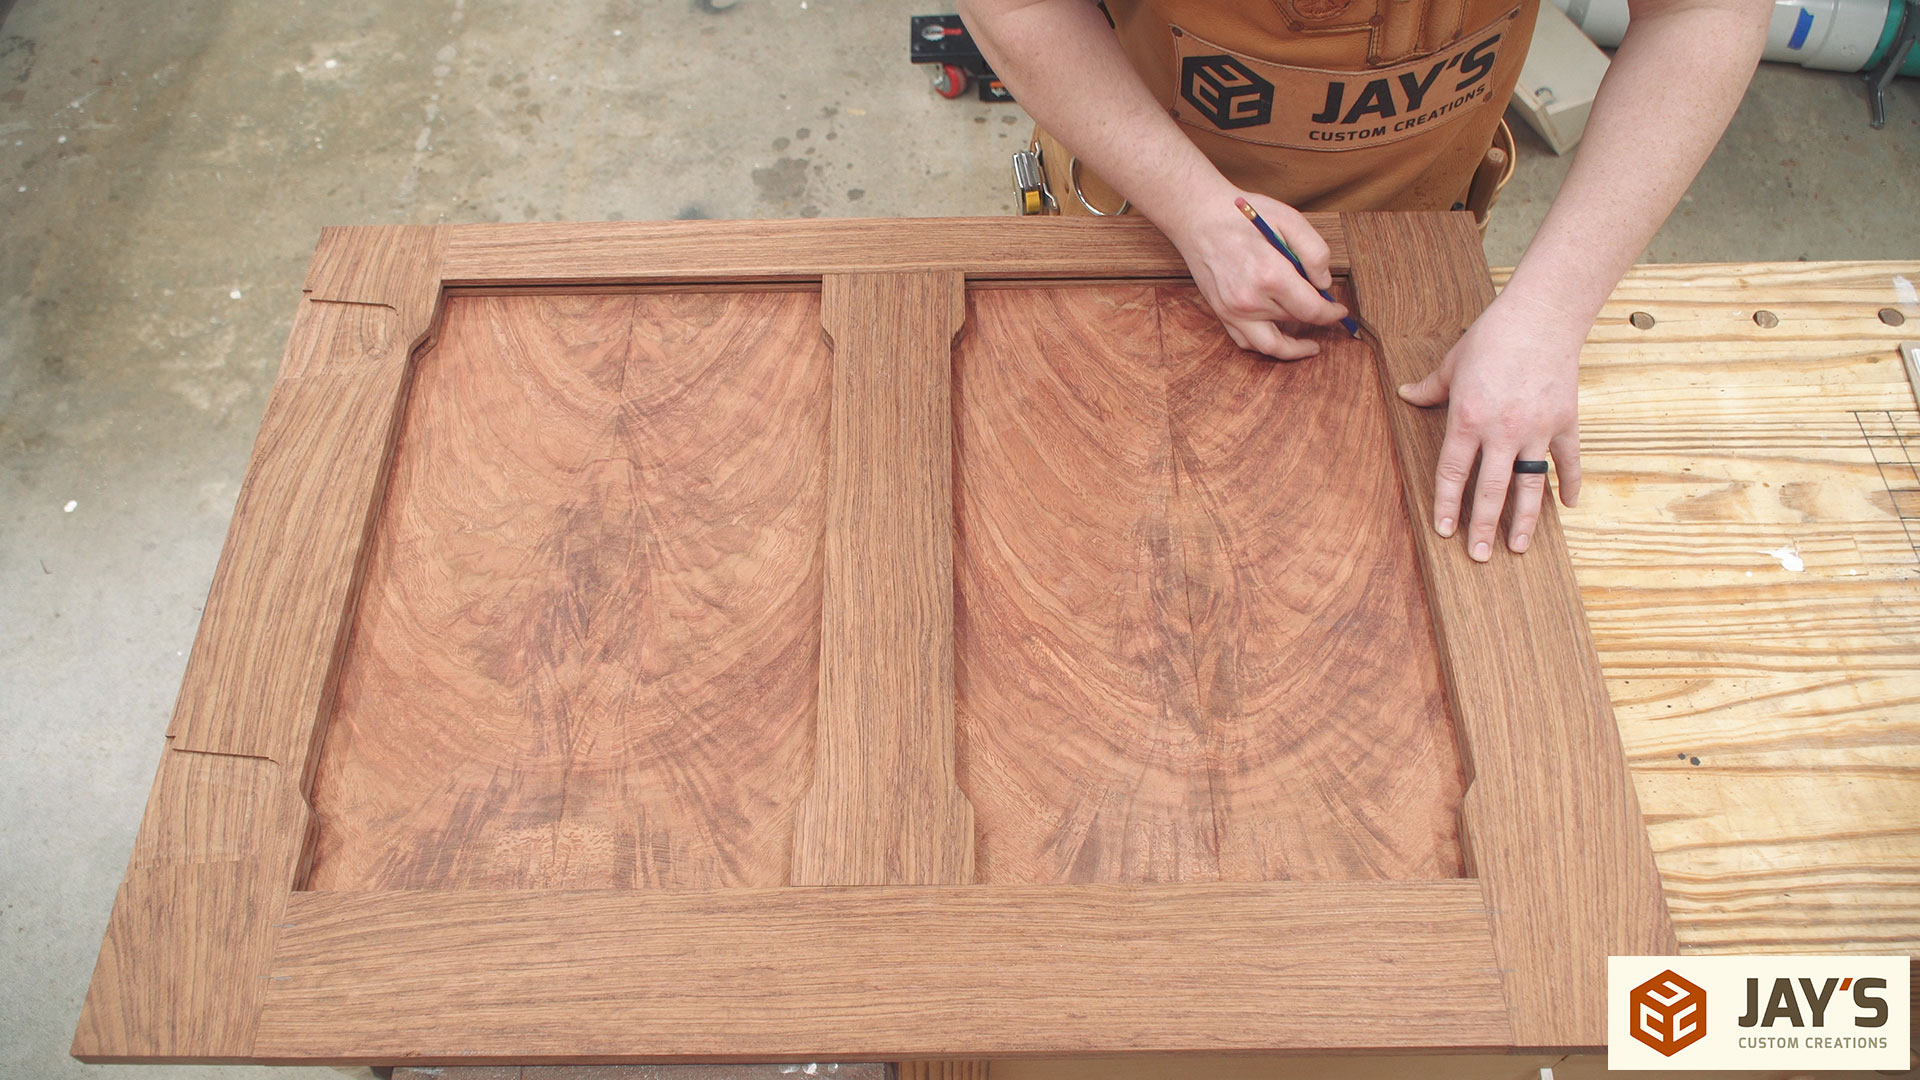
All of the pieces can then be clamped together in a dry assembly for the joinery layout. I’m using floating tenons for the main joint. Specifically, domino joints. The Festool Domino is used to cut an accurate mortise into each board of the joint and then the beach domino is inserted with glue to connect the pieces. The machine isn’t inexpensive but is very impactful for woodworking speed and efficiency when a strong joint is desired. It’s such a time saver that this is the second one I purchased. I made the mistake of selling my first one because of a small segment of my audience complaining about the price. It was the single biggest business mistake I’ve ever made. Something like that will never happen again.
All that is needed is a reference line on each board where a domino is to be placed. Then the machine is plunged into the material the same way a biscuit joiner is used.
A master craftsman by the name of Ramon Valdez (@ramonartful on Instagram) makes a Domino Dock for both the smaller DF 500 that I have and the larger DF 700. It’s a dock that positions the machine in a vertical orientation and allows you to bring the material to the machine. He designed it to more easily and safely cut mortises into smaller material by clamping the piece to the fence rather than trying to hold the machine onto smaller stock. I tried it out for the first time on this project and it was nice to use. I can see it being really handy for mission style furniture where a mortise and domino joint is used to connect a large number of stiles.
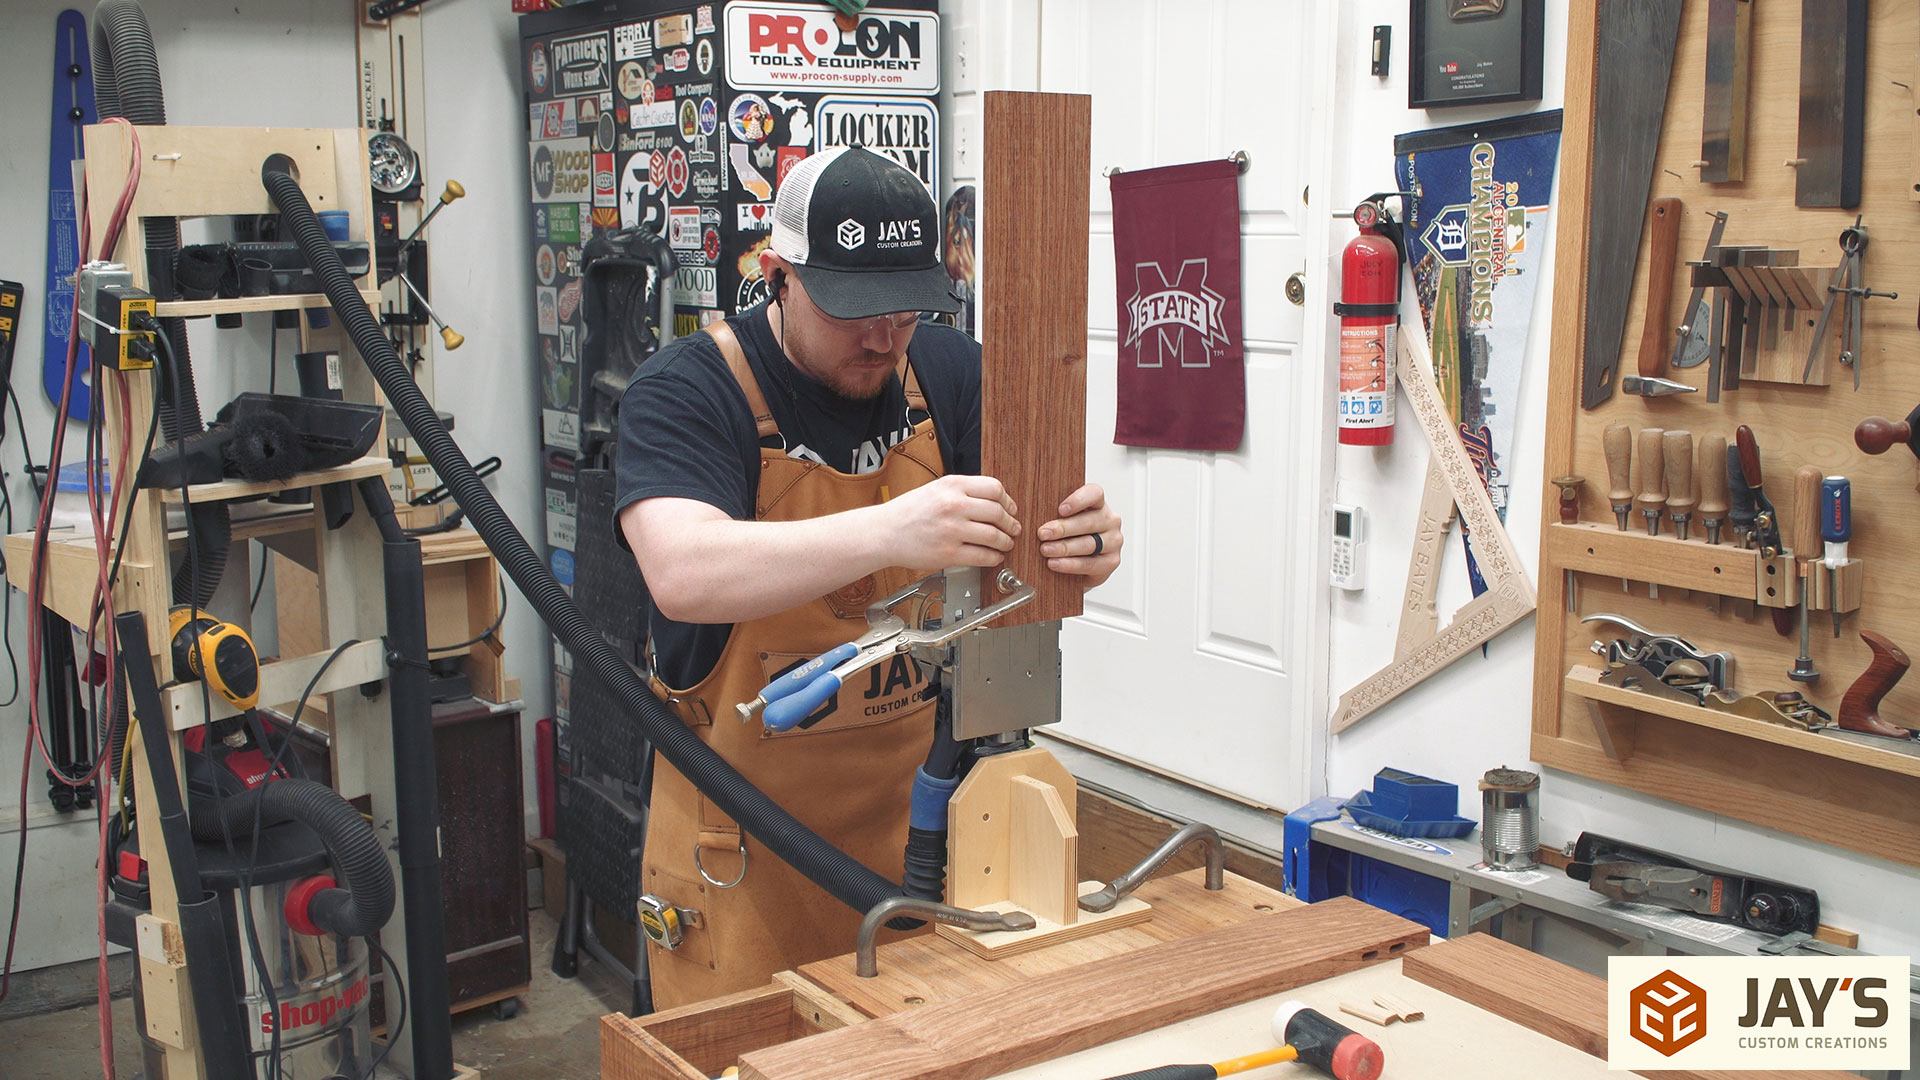
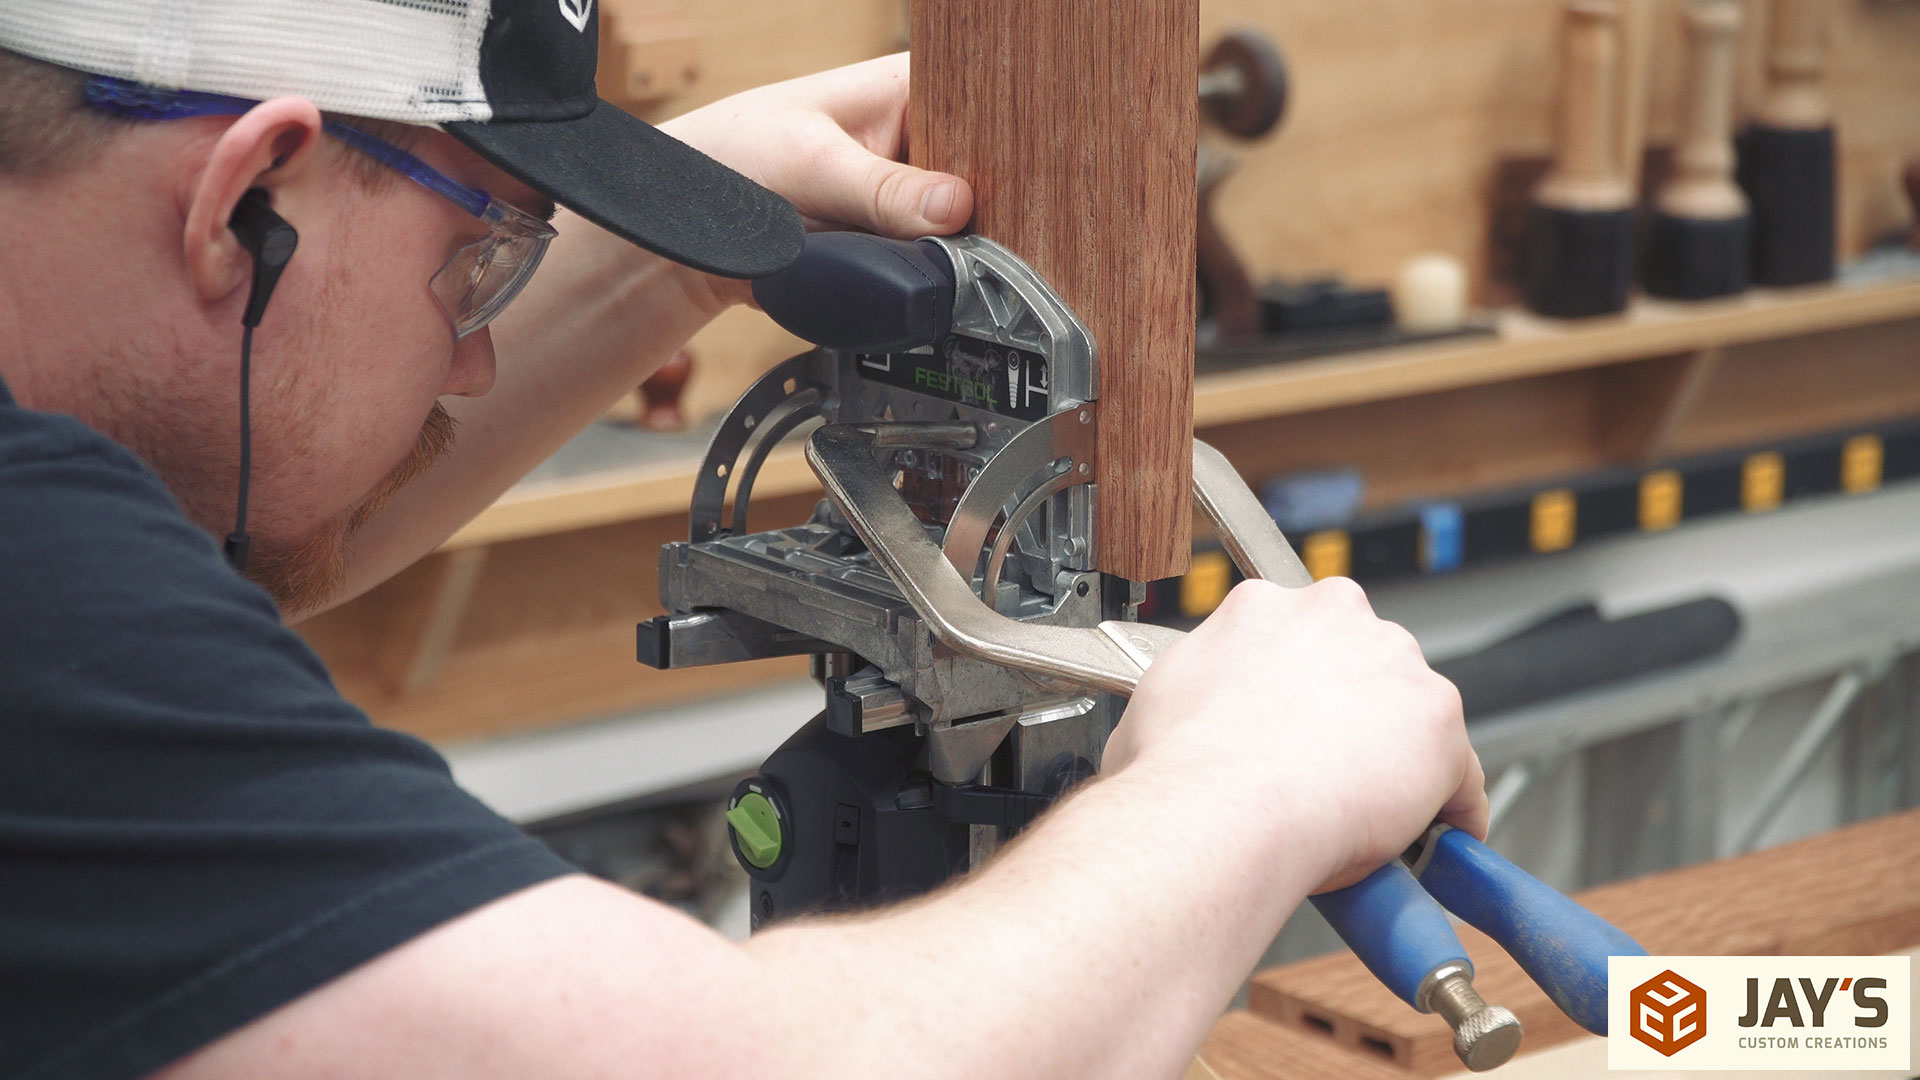
Precision mortises at biscuit joiner speeds.
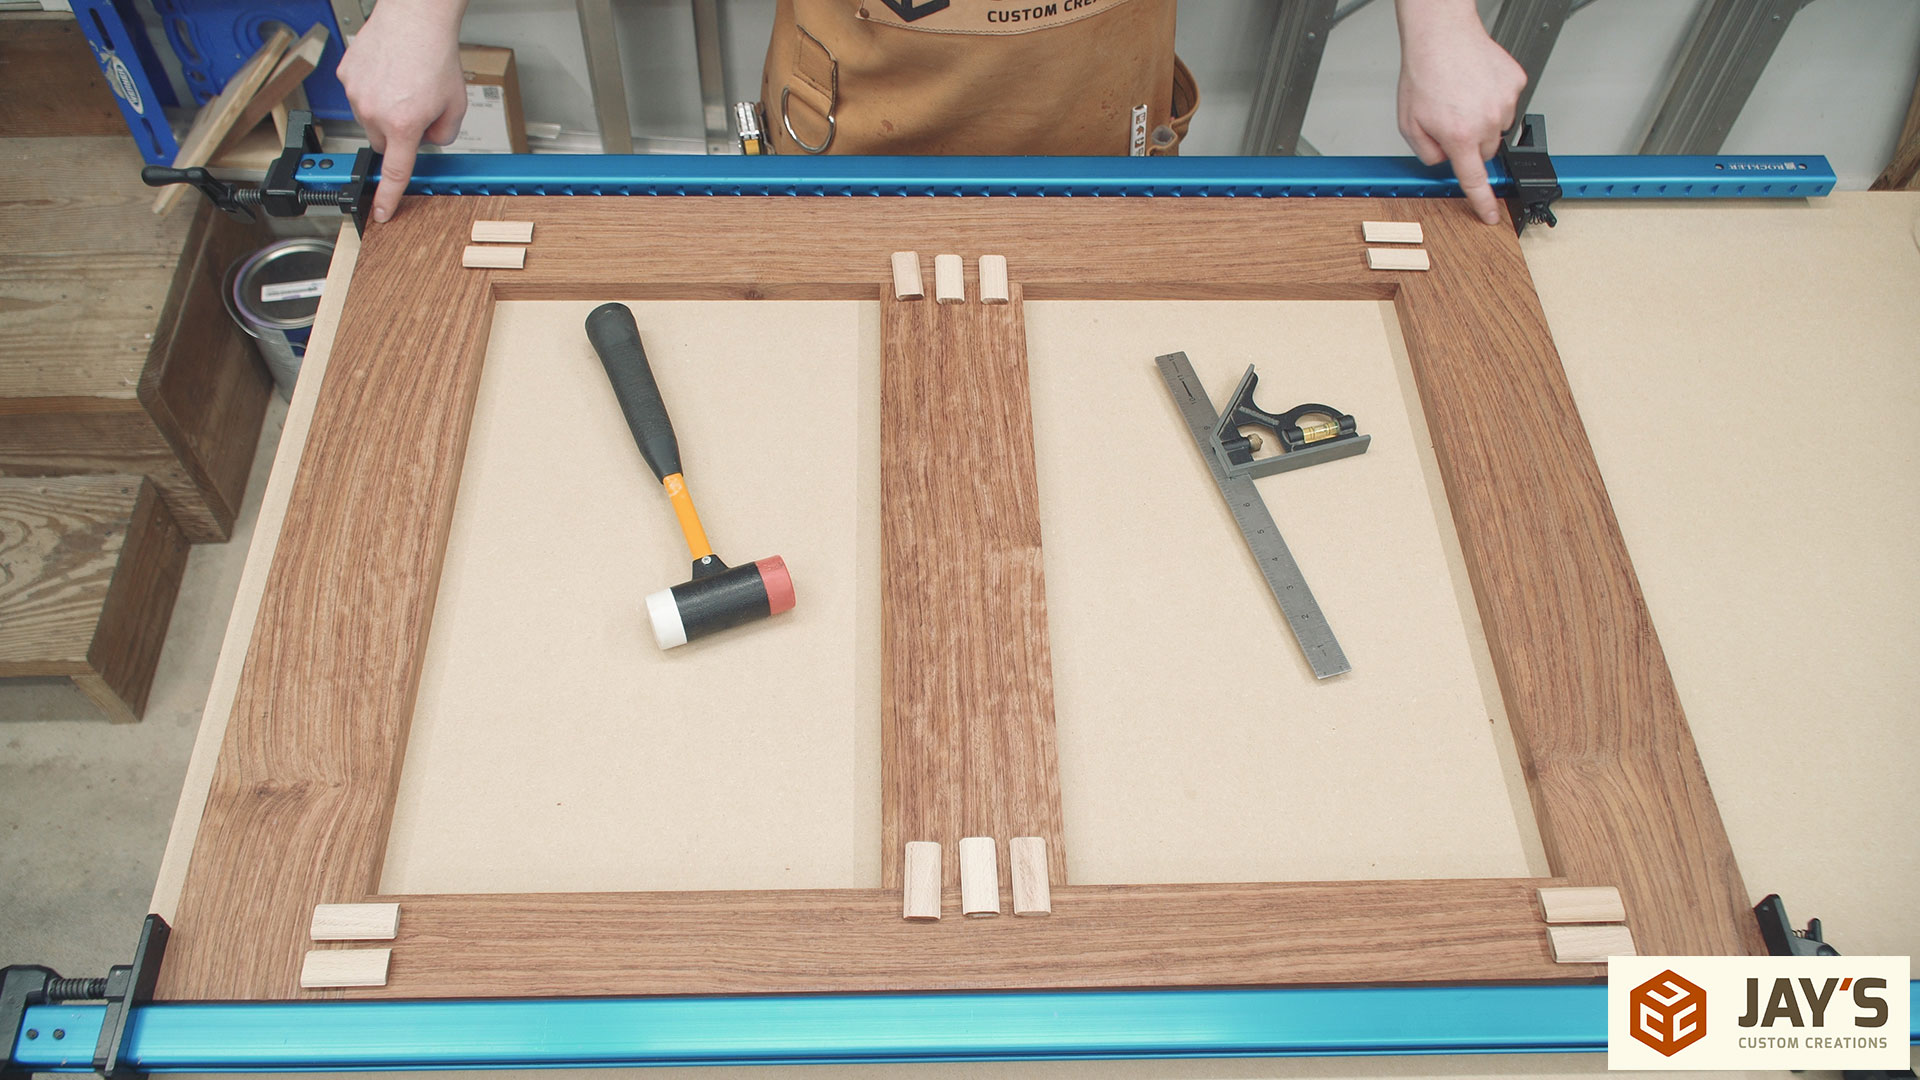
A dry assembly is next.
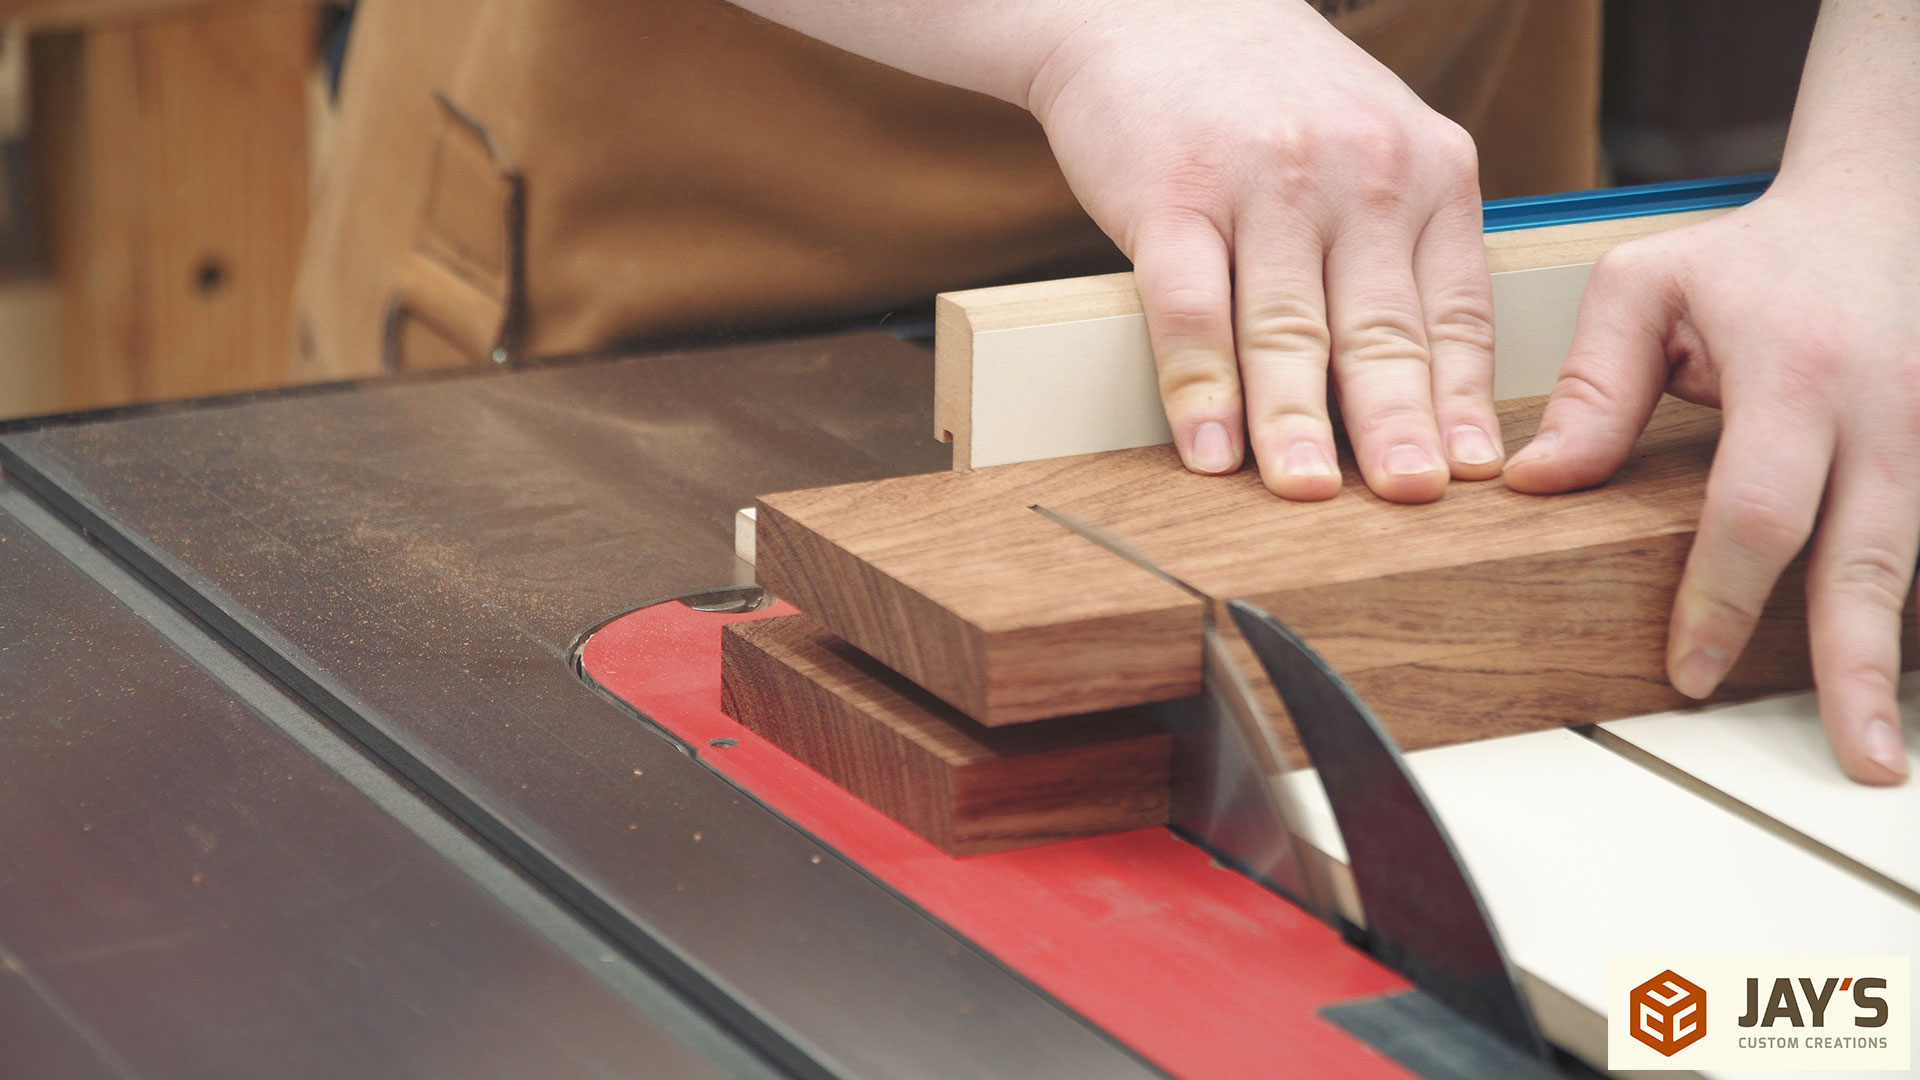
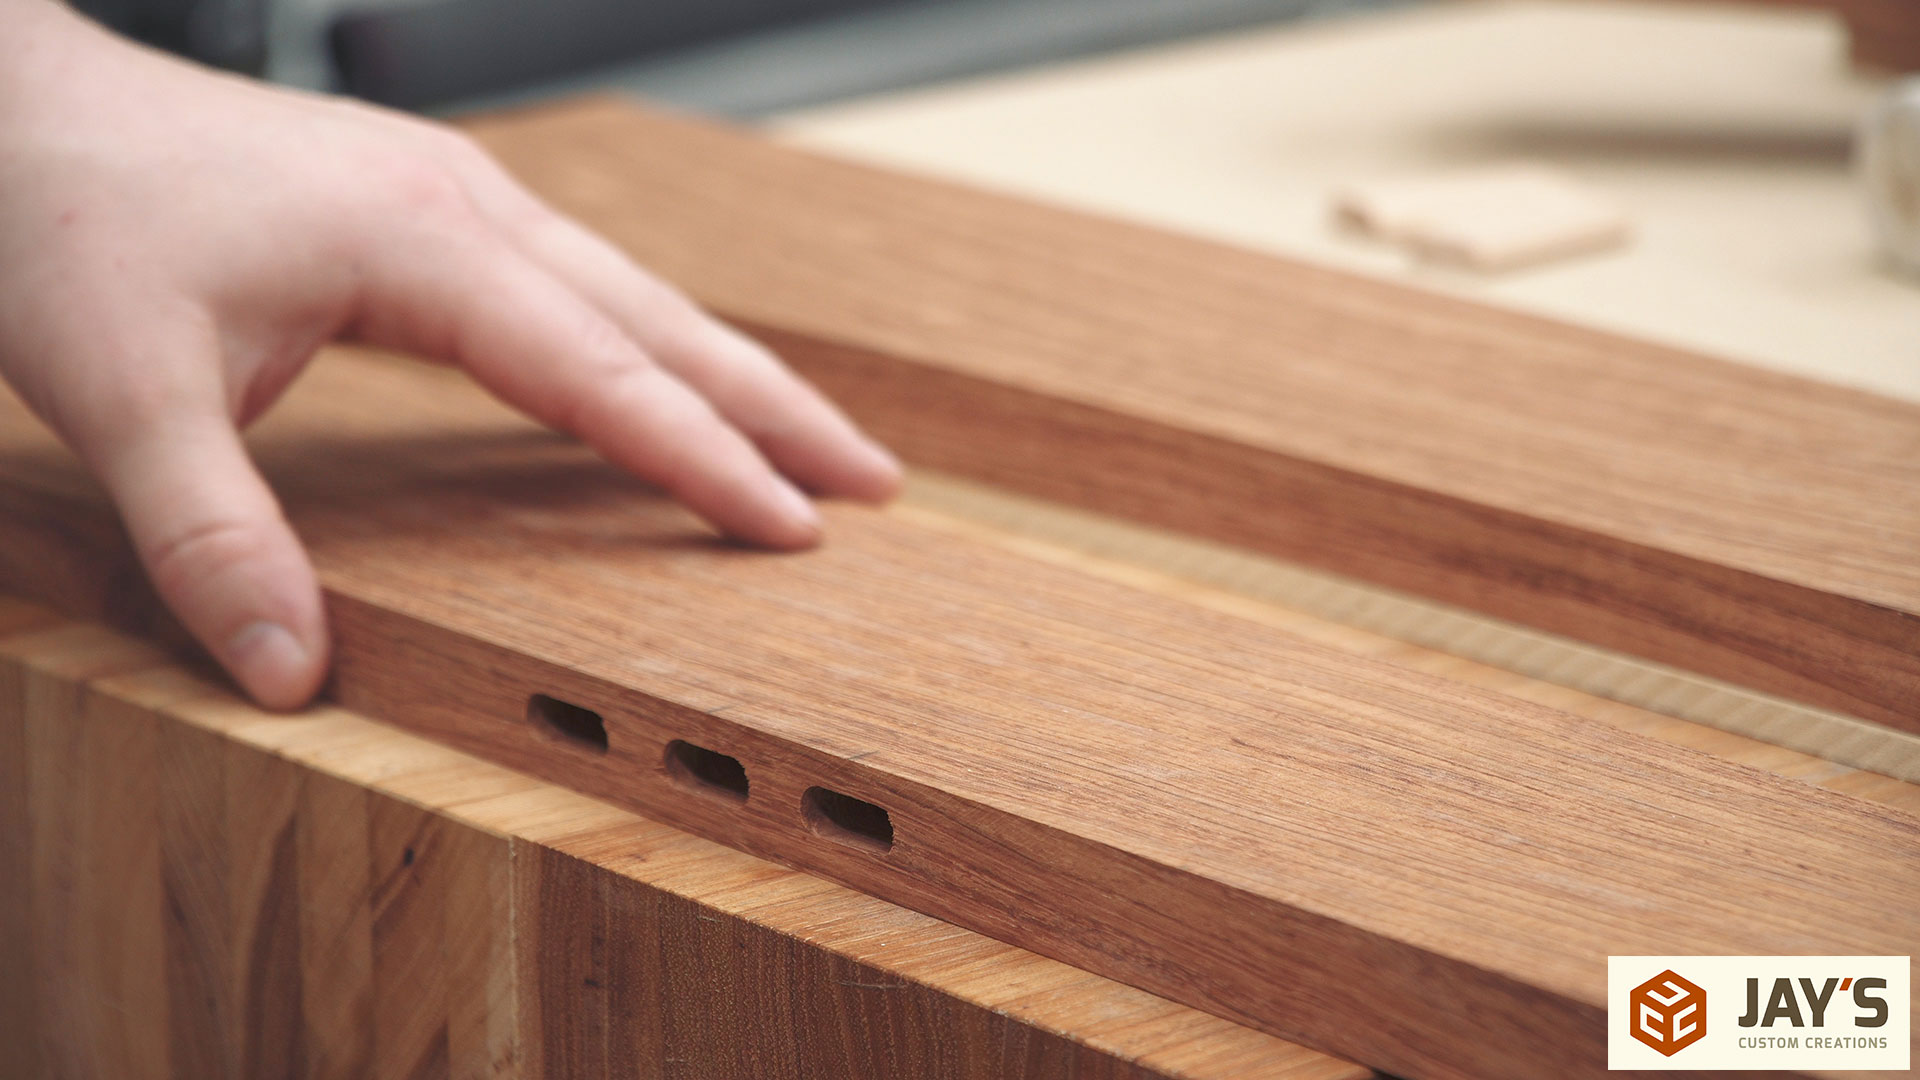
When using dominos in a dry assembly (no glue) the joints are always extremely tight. My plan is to keep the project dry assembled and then use a slot cutting bit at my router table to cut a panel groove inside each opening. For the groove I’m using a Whiteside 3375 tongue and groove router bit with the bottom cutter lowered below the surface.

And here is where I messed up the order of operations. I should cut the stile detail before cutting the groove but I got ahead of myself. I was rushing most likely because I knew I had less than a half hour left in the shop for that day. Rushing normally causes mistakes like this. Luckily it wasn’t a major mistake but rather a simple process error.
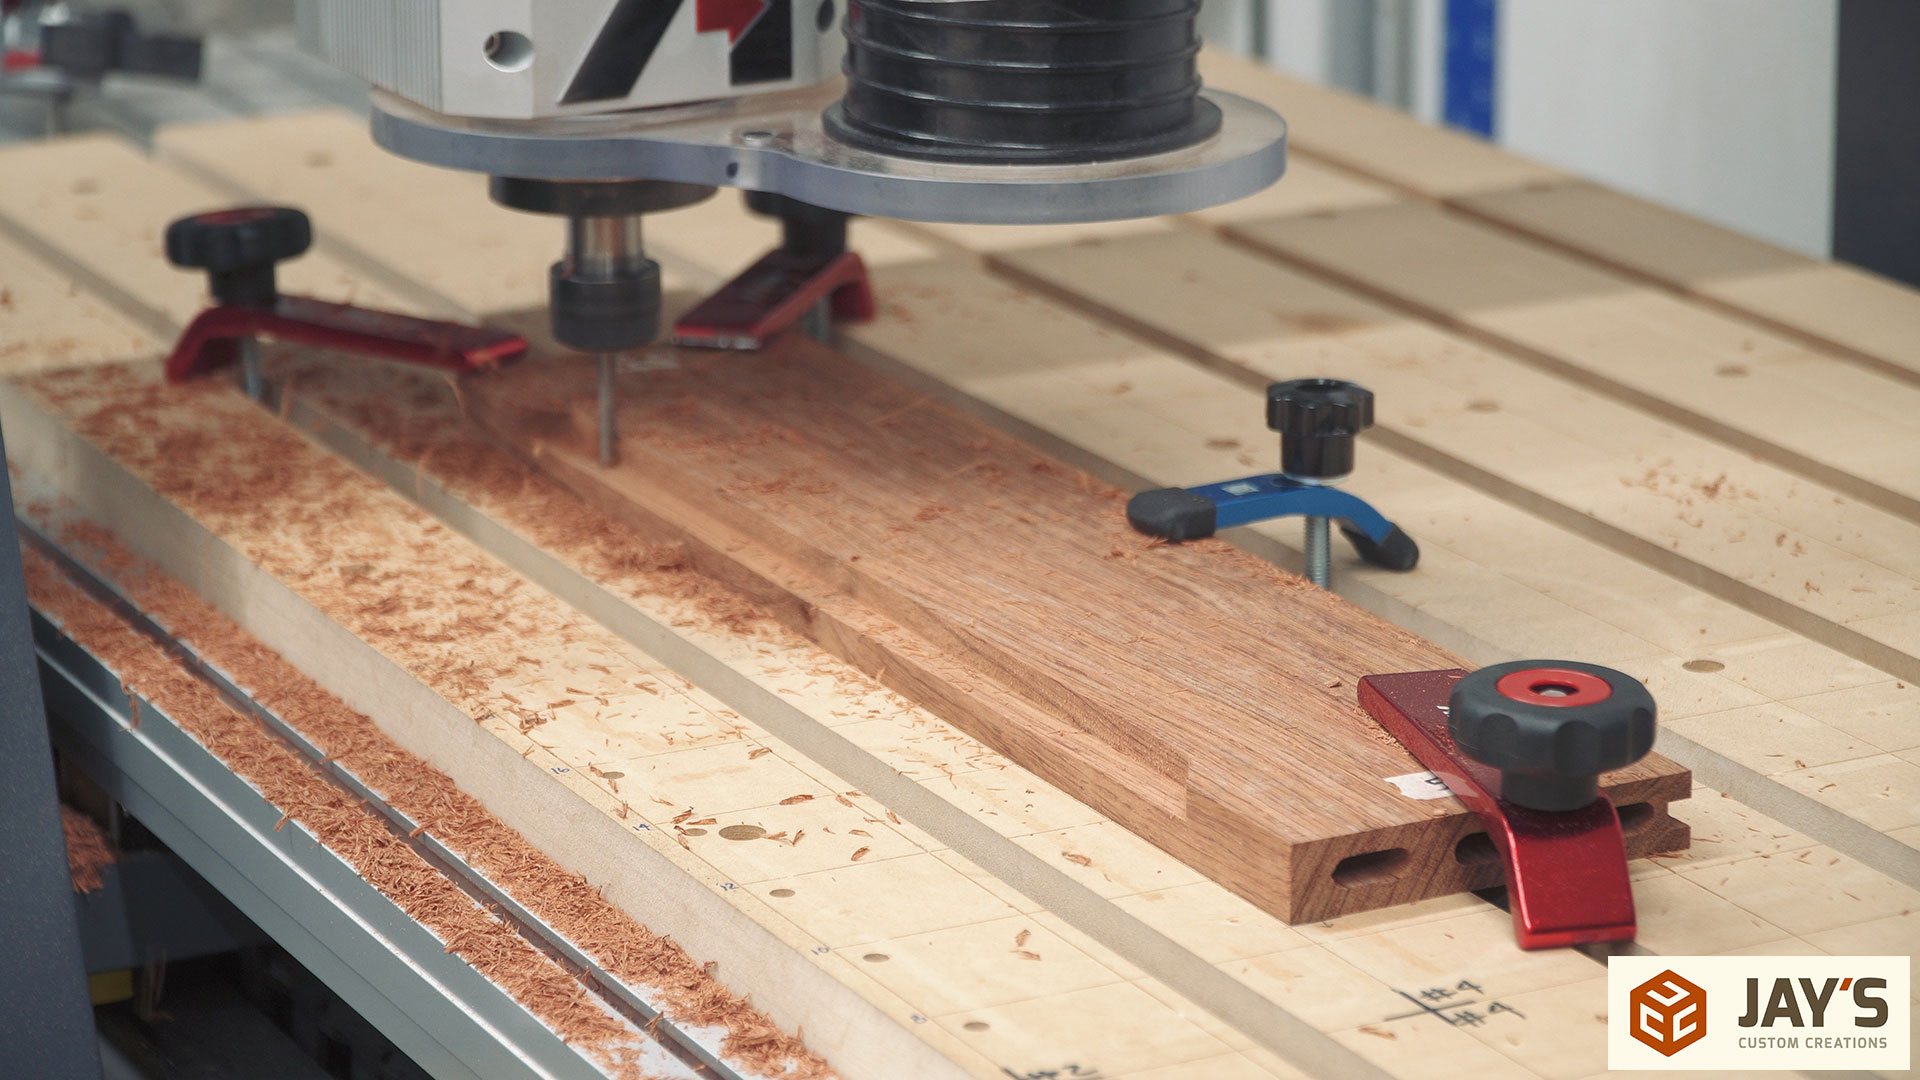
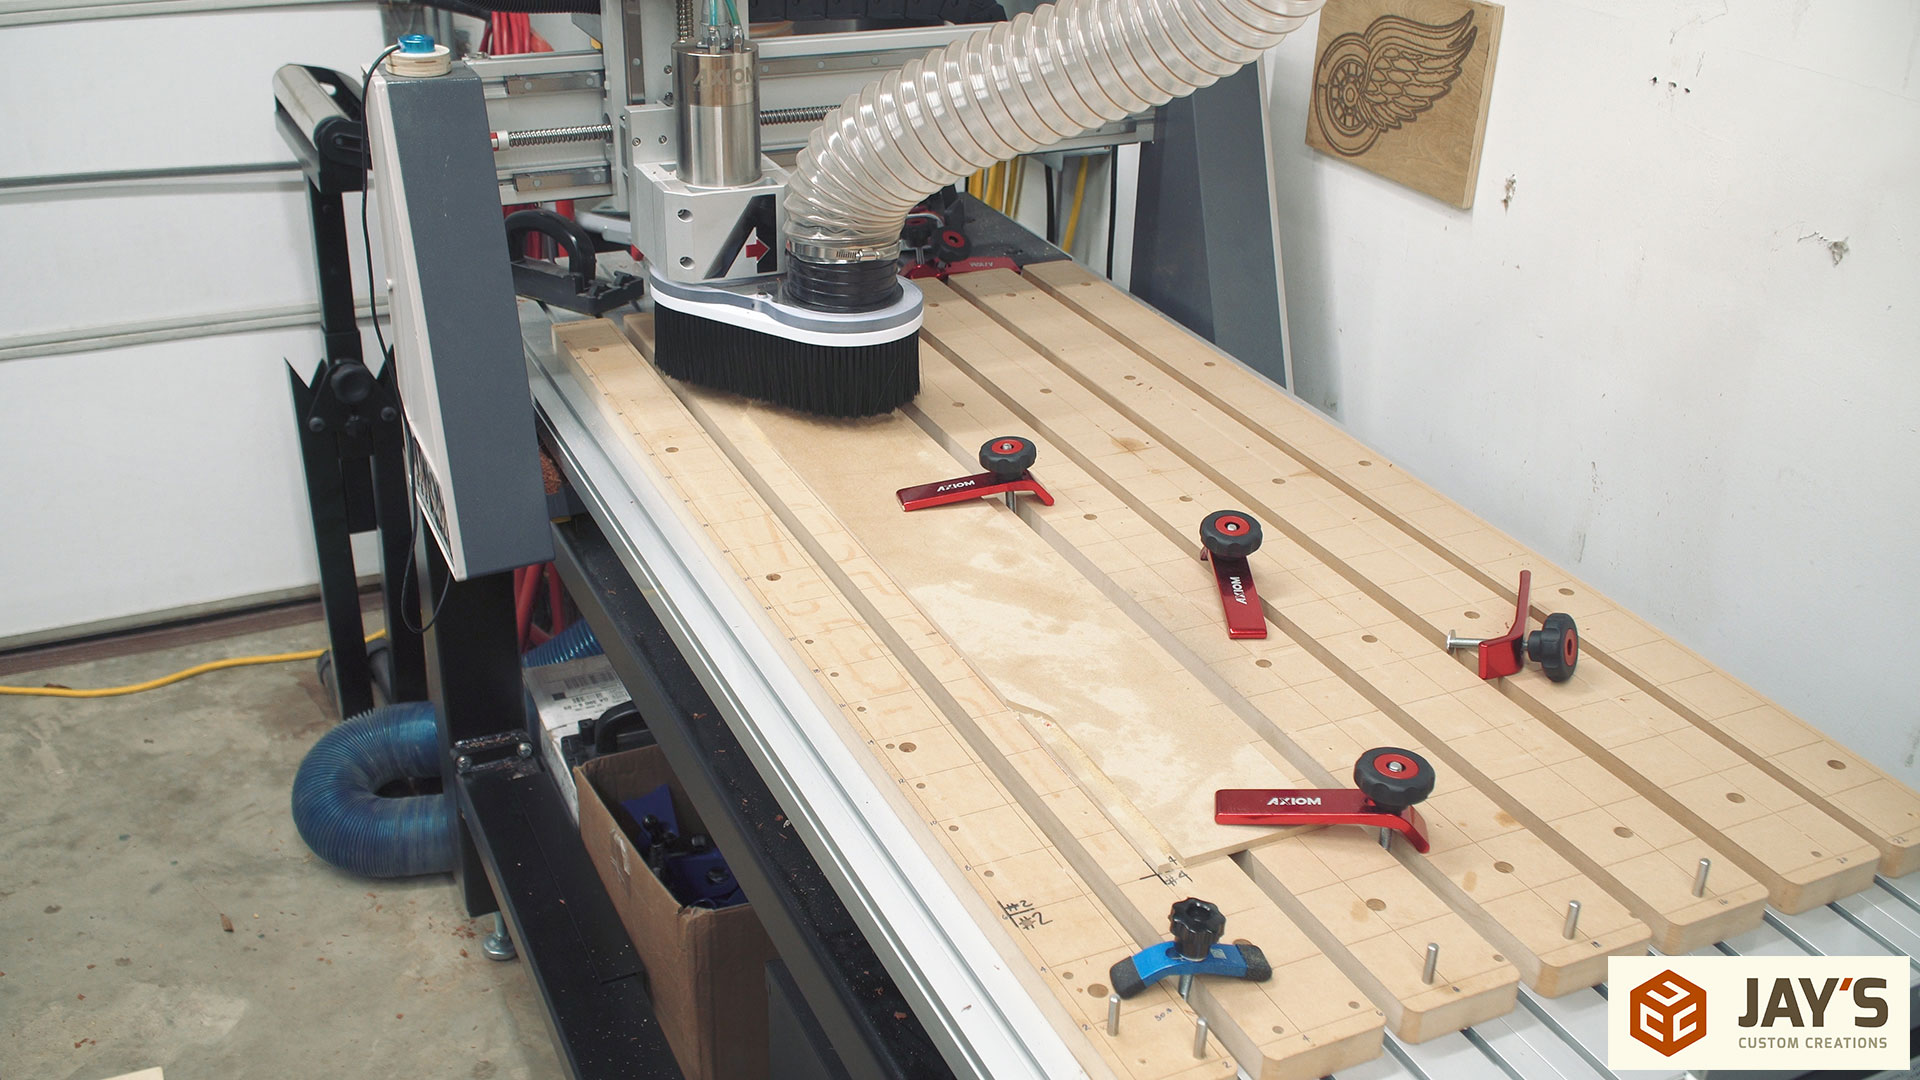
The next day I started by cutting the interior stile detail on all of the stiles with my CNC machine. Typically this would have been accomplished by sketching a design on a template, cutting the template with a bandsaw, sanding or filing the template to get it exactly how I want it, sticking it to the wood, removing the bulk of the cut with a jigsaw or bandsaw, then finally using a flush trim bit at the router table to transfer the shape of the template to the wood. I always say that, generally speaking, the best tool to use is the one that is the most efficient and in this case the CNC won the argument. With the grid cut into the wasteboard, positioning each piece is quick and accurate allowing me to use the same file with two different size pieces. Accurate positioning on the wasteboard is all that is needed.
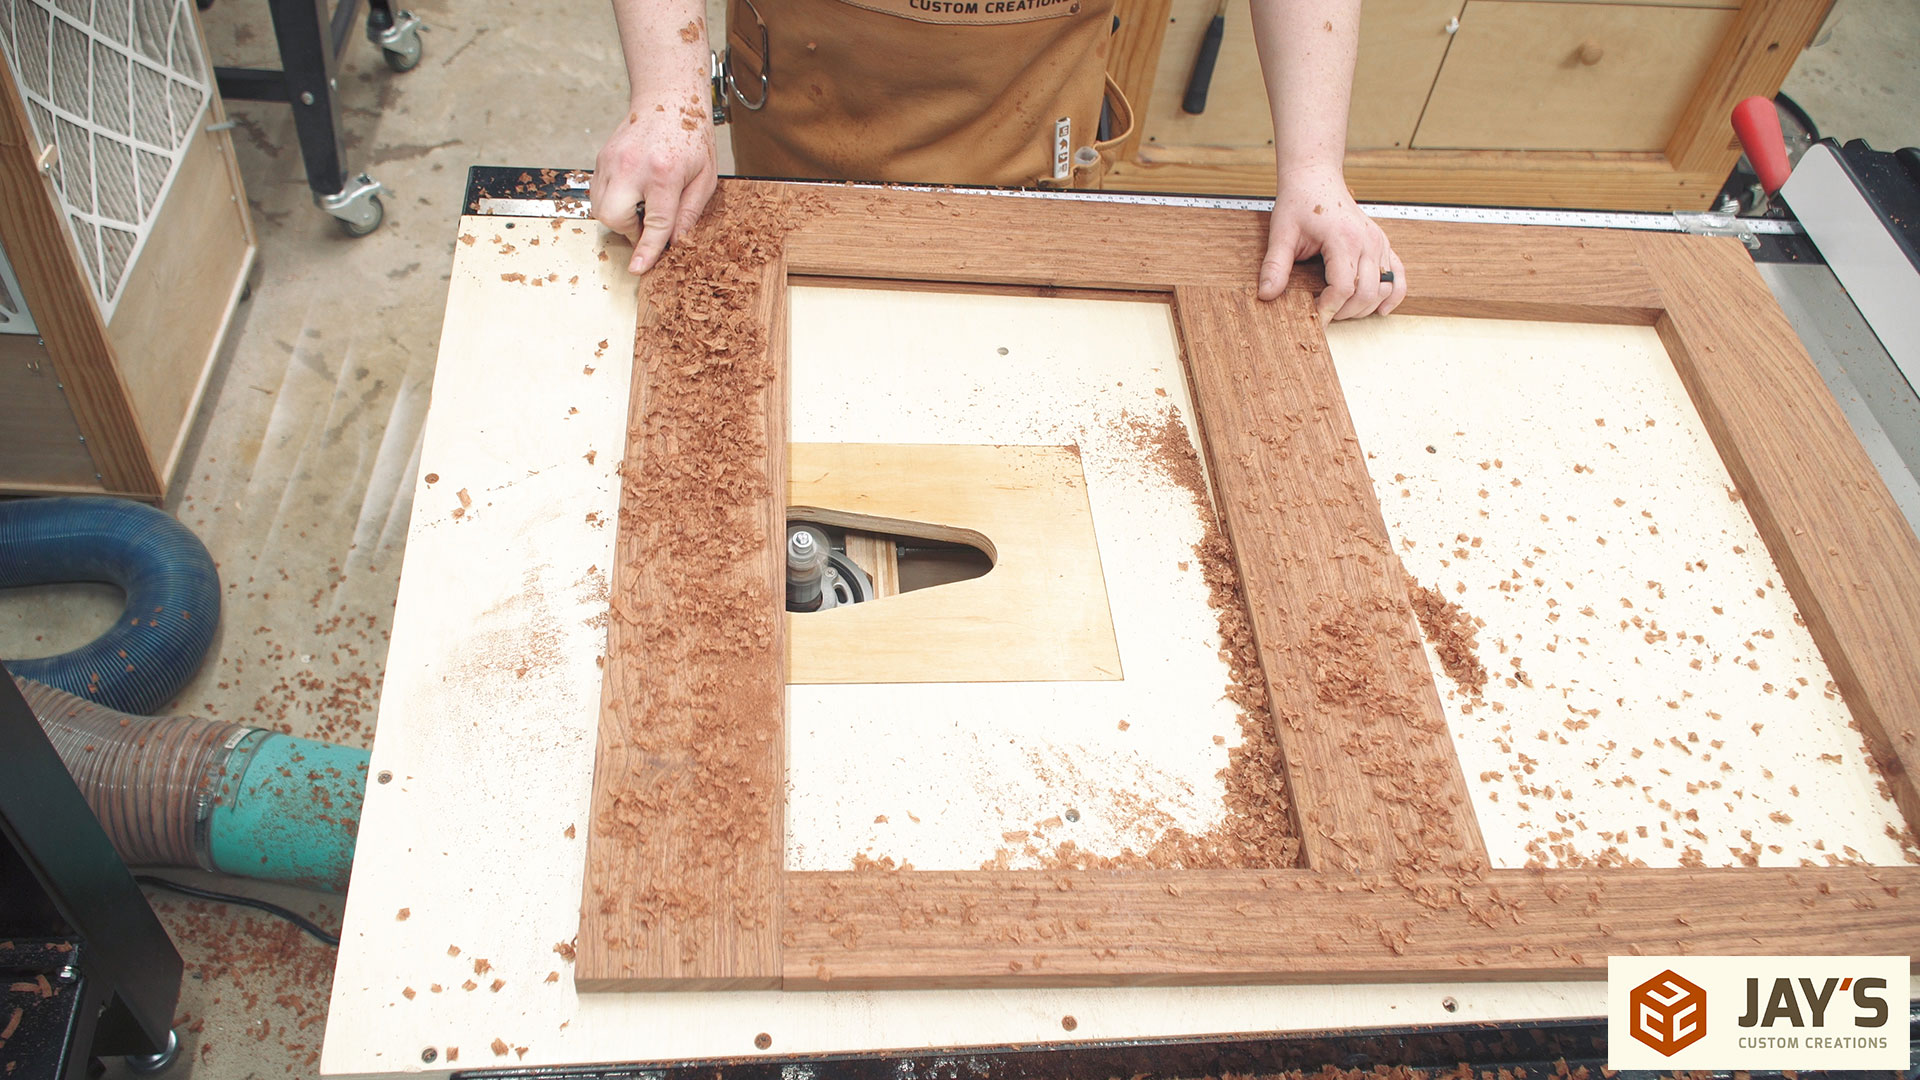
Now that the stile detail has been cut the pieces can be assembled once again. Because I hadn’t changed the router table setup the groove is accurately recut into the side I cut the day before.
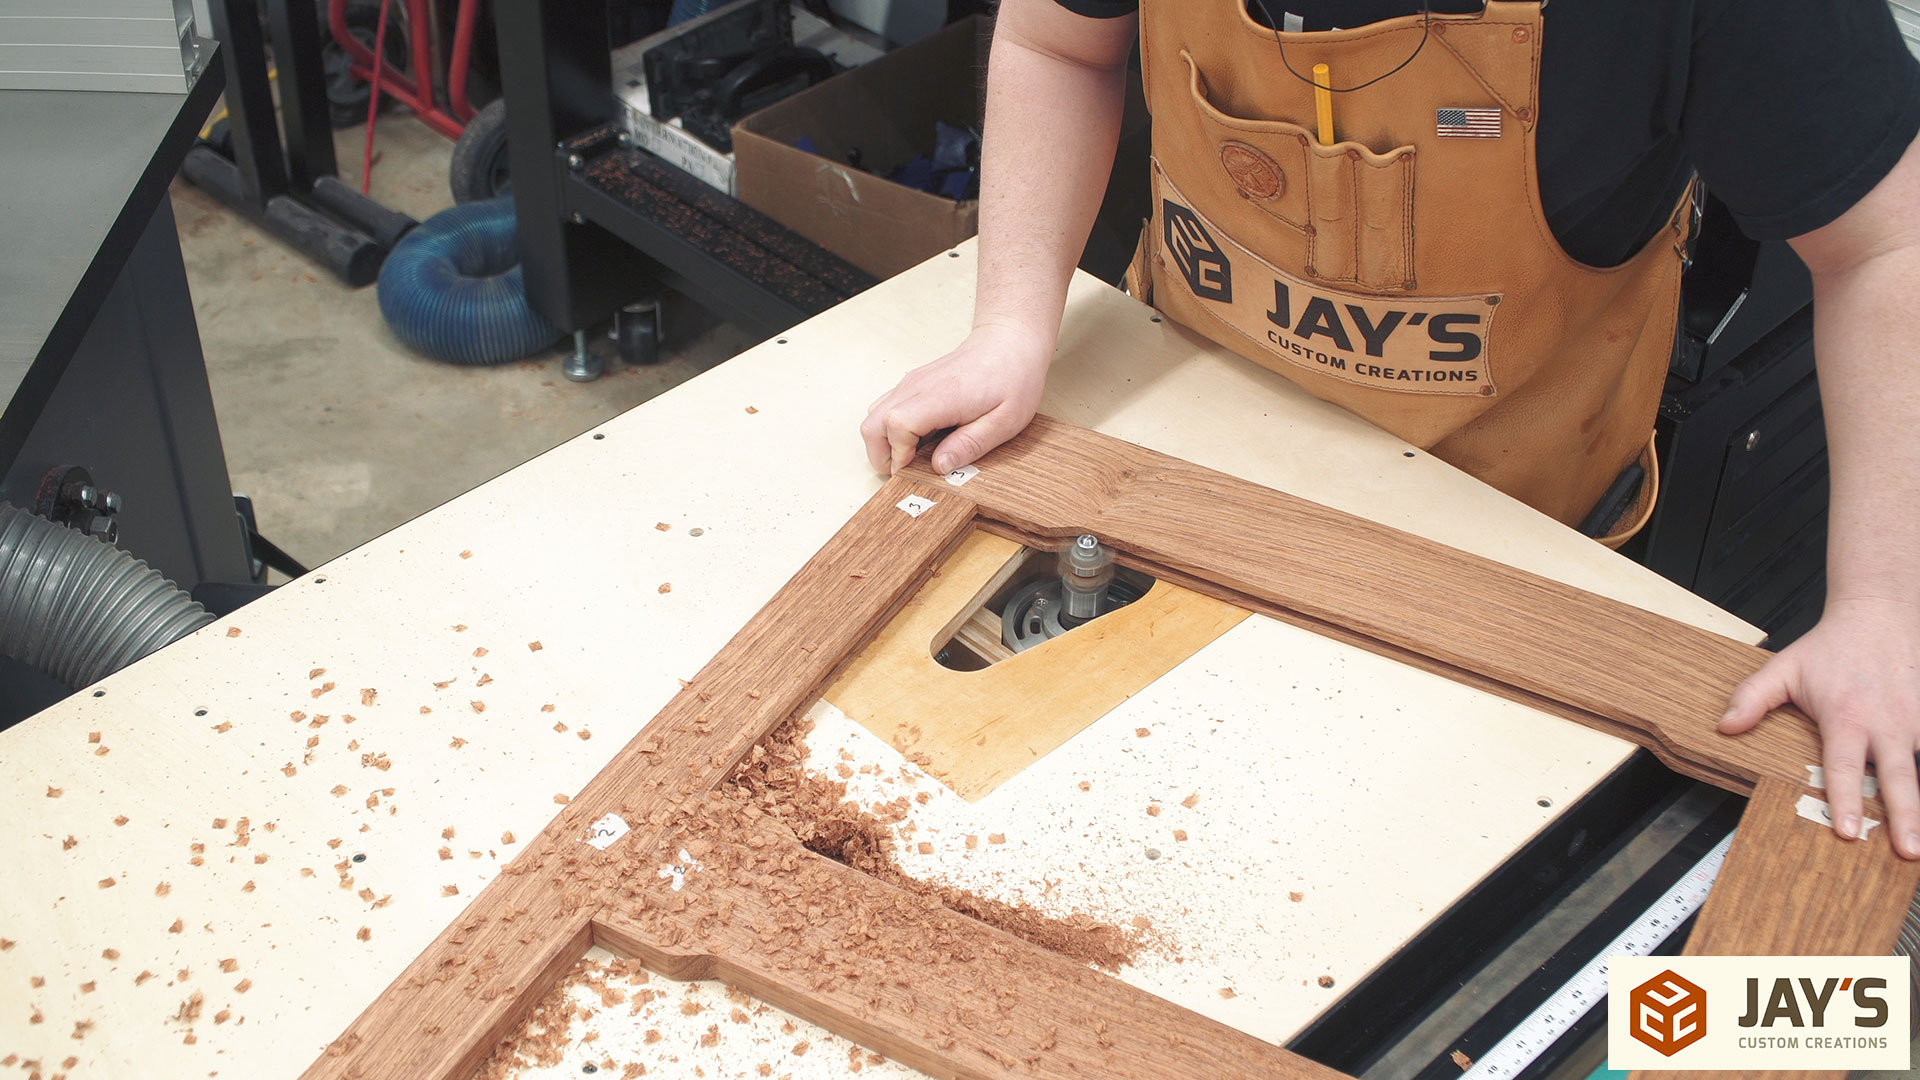
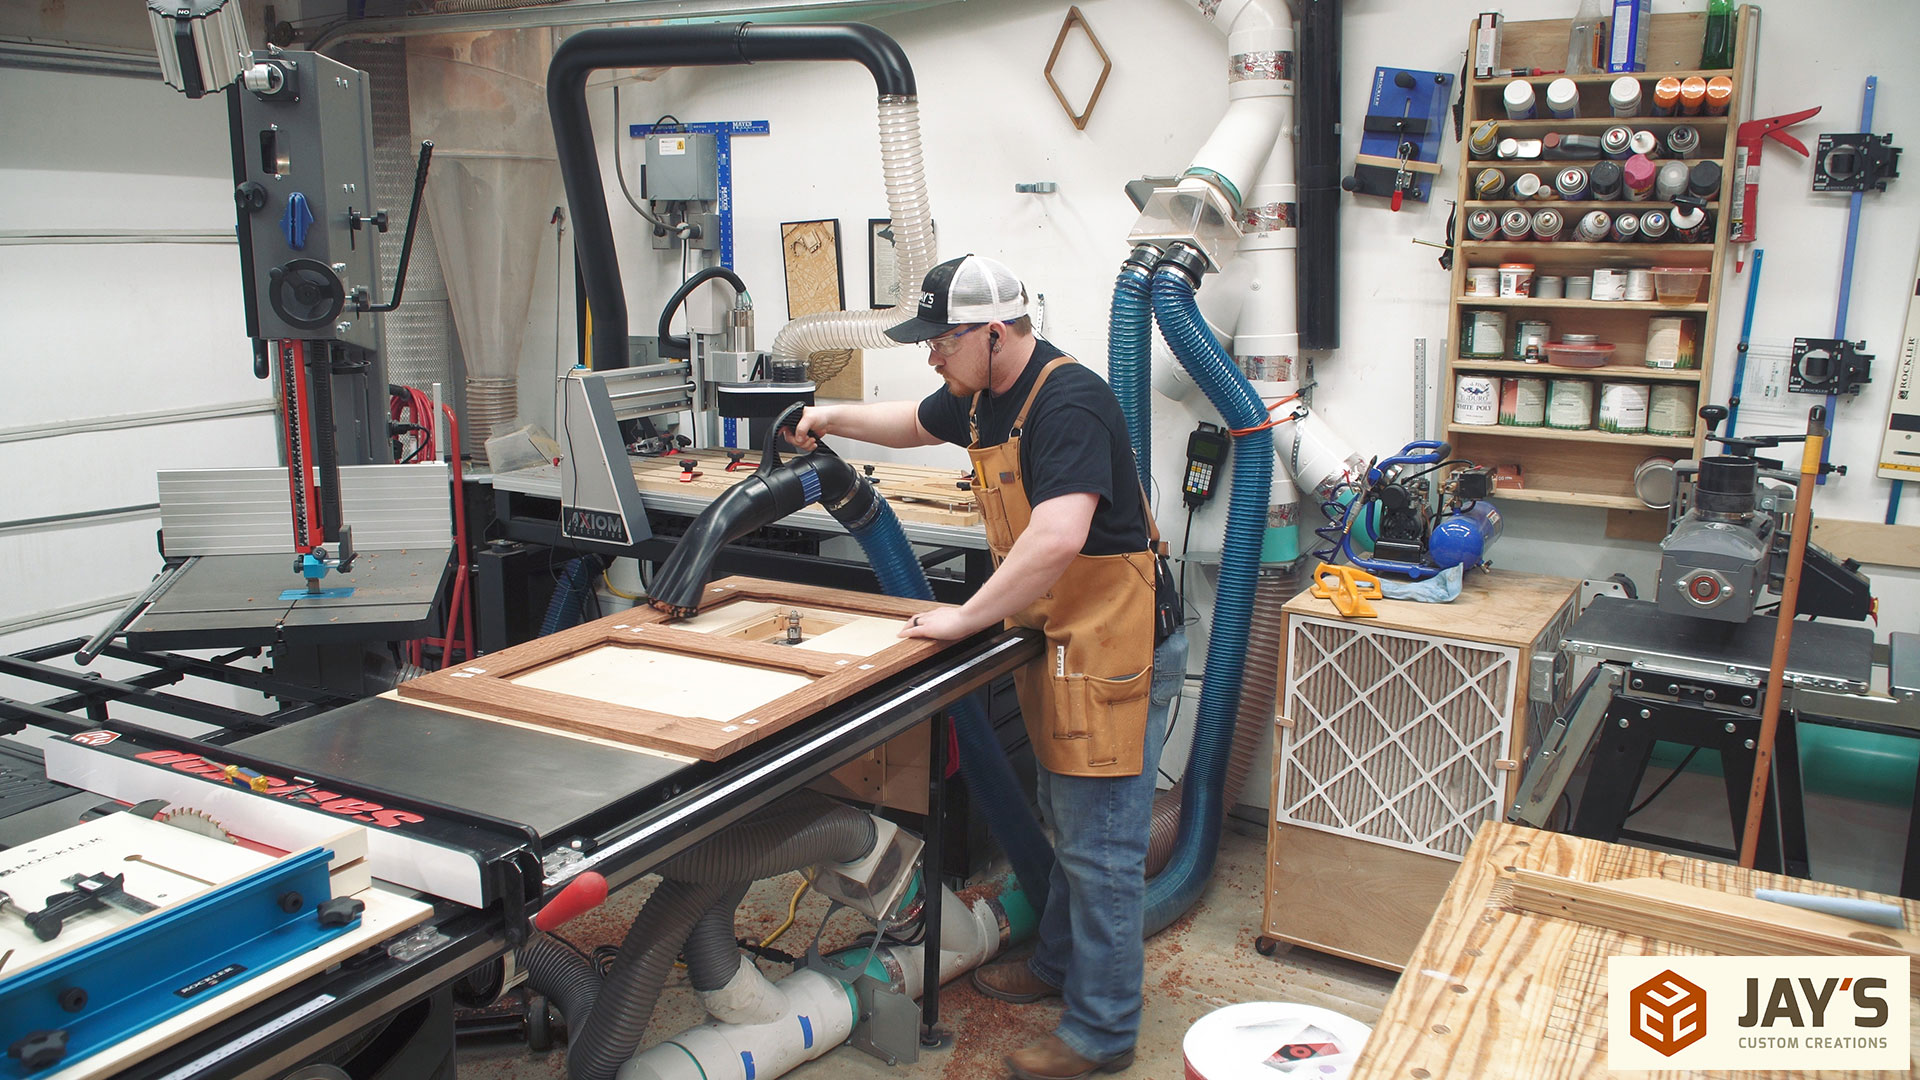
And of course the other side is cut as well. I removed the insert plate as an attempt to increase the chances of sucking up the larger chips off the table. It didn’t make much of a difference. There was still a big mess.

A lot of people comment on the overall clean and tidy appearance of my shop. Cleaning up as I go is one of the reasons why it stays clean. A clean and organized shop is so much more inviting and encouraging to work in. The biggest advice I can give anyone reading this is to make it quick and convenient to keep clean. If it’s not convenient then it won’t get done. For the past few years I’ve had one of these 28′ Rockler Dust Right hoses attached to my dust collection system. It’s always setup and ready to go which makes it very convenient to clean. It took me less than two minutes to clean up all of the mess that the router table made.
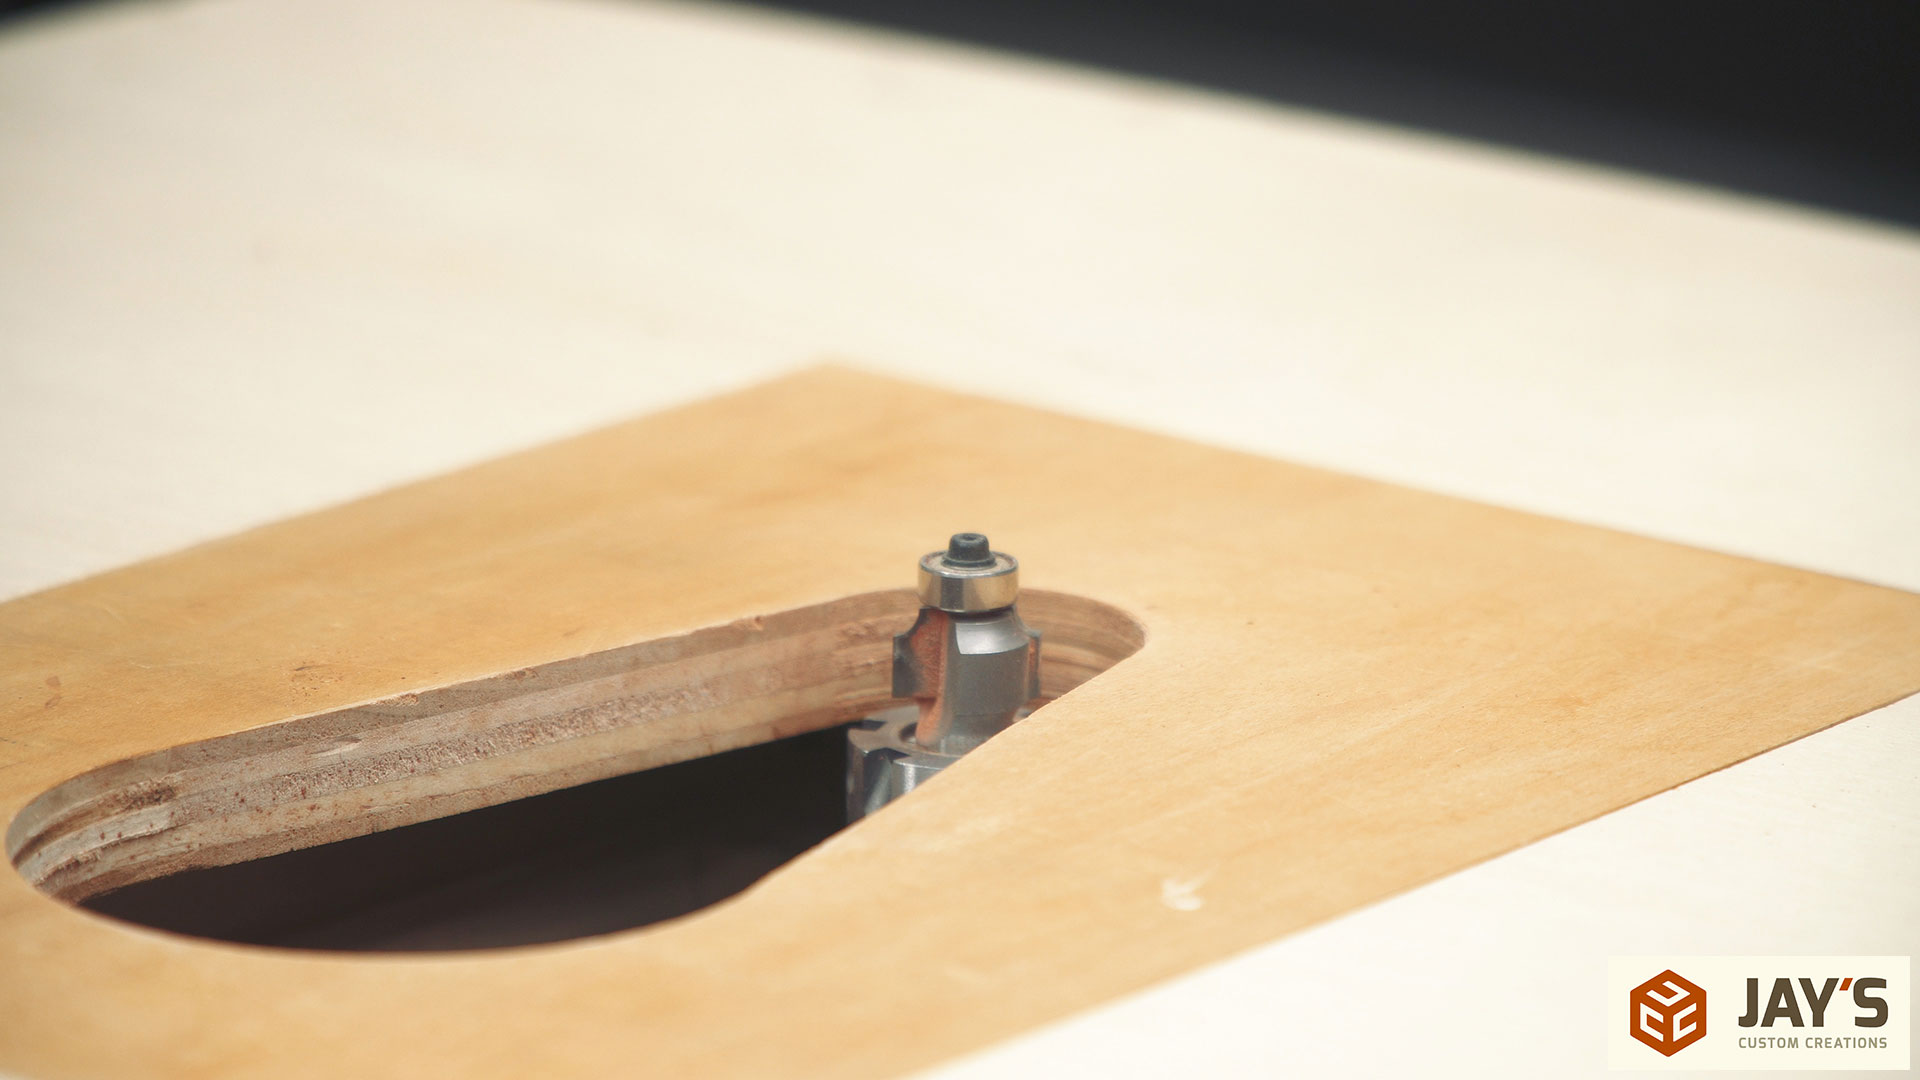
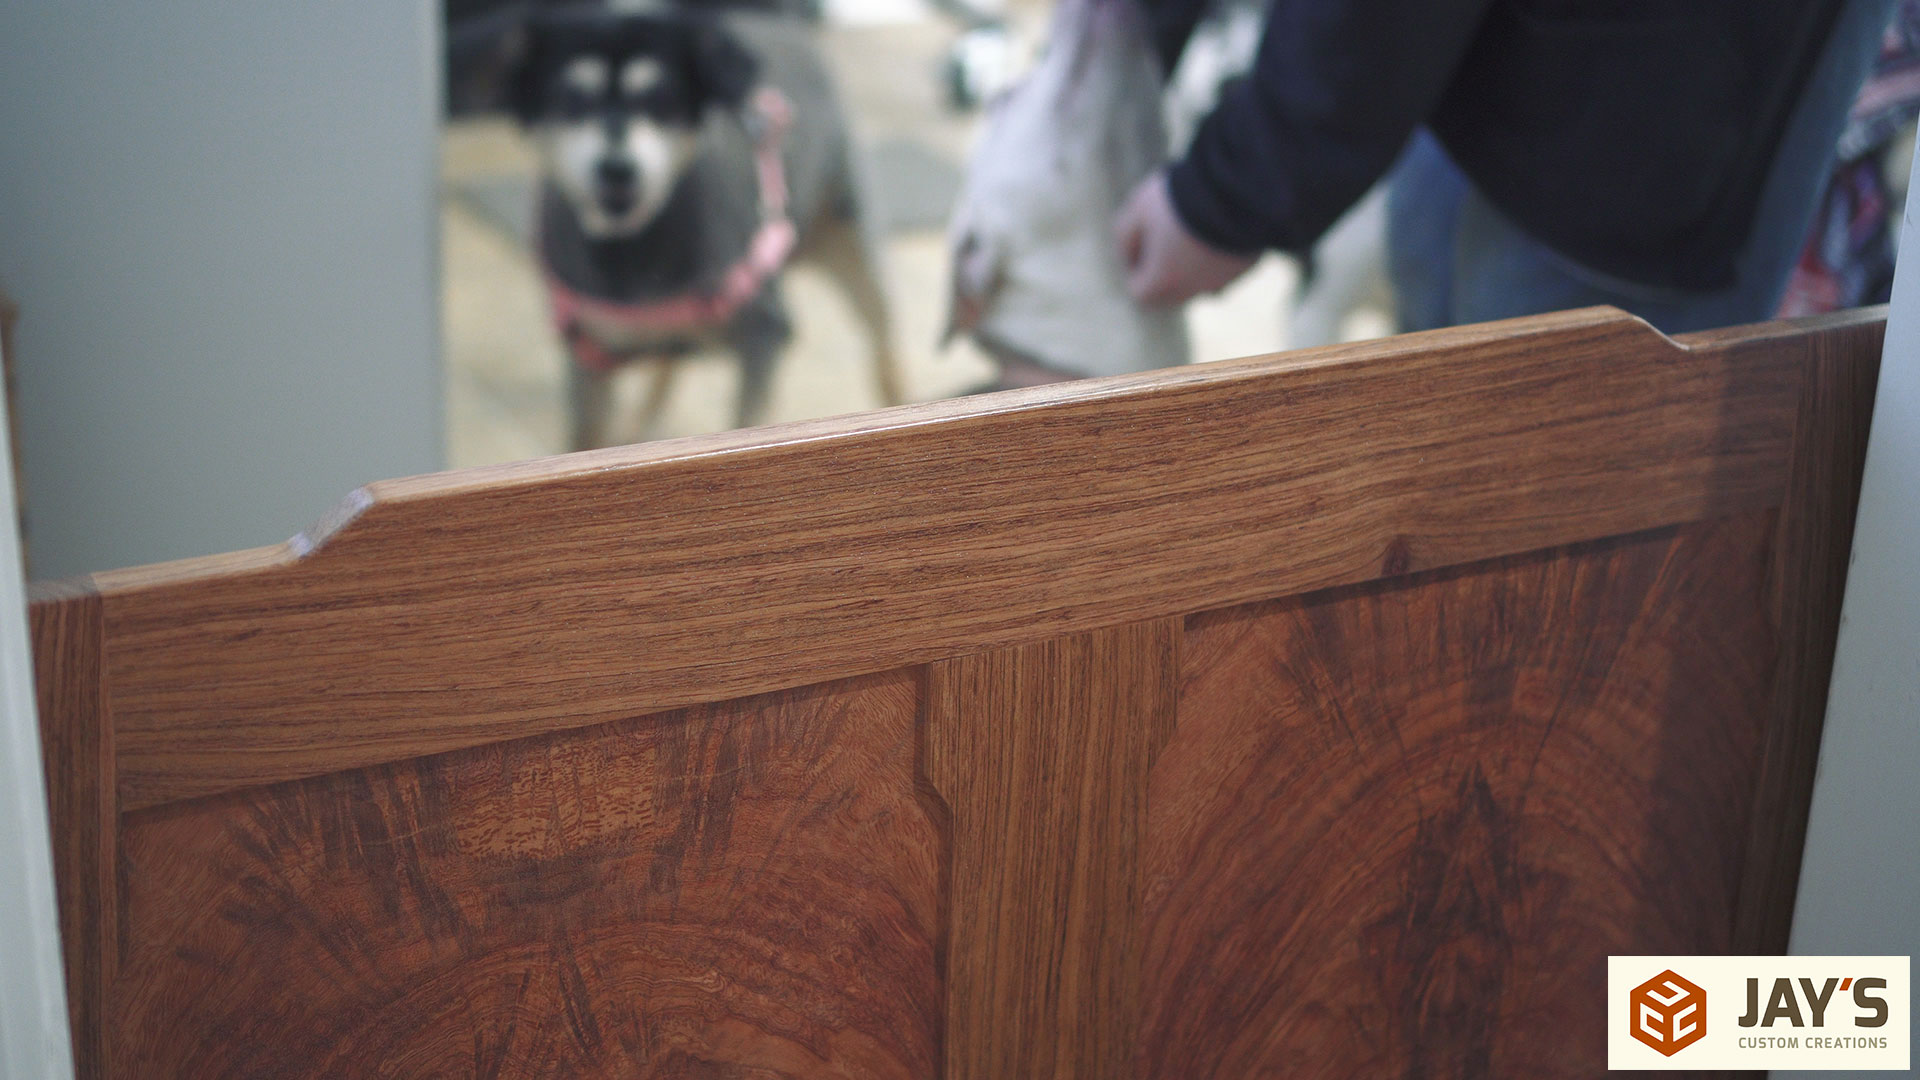
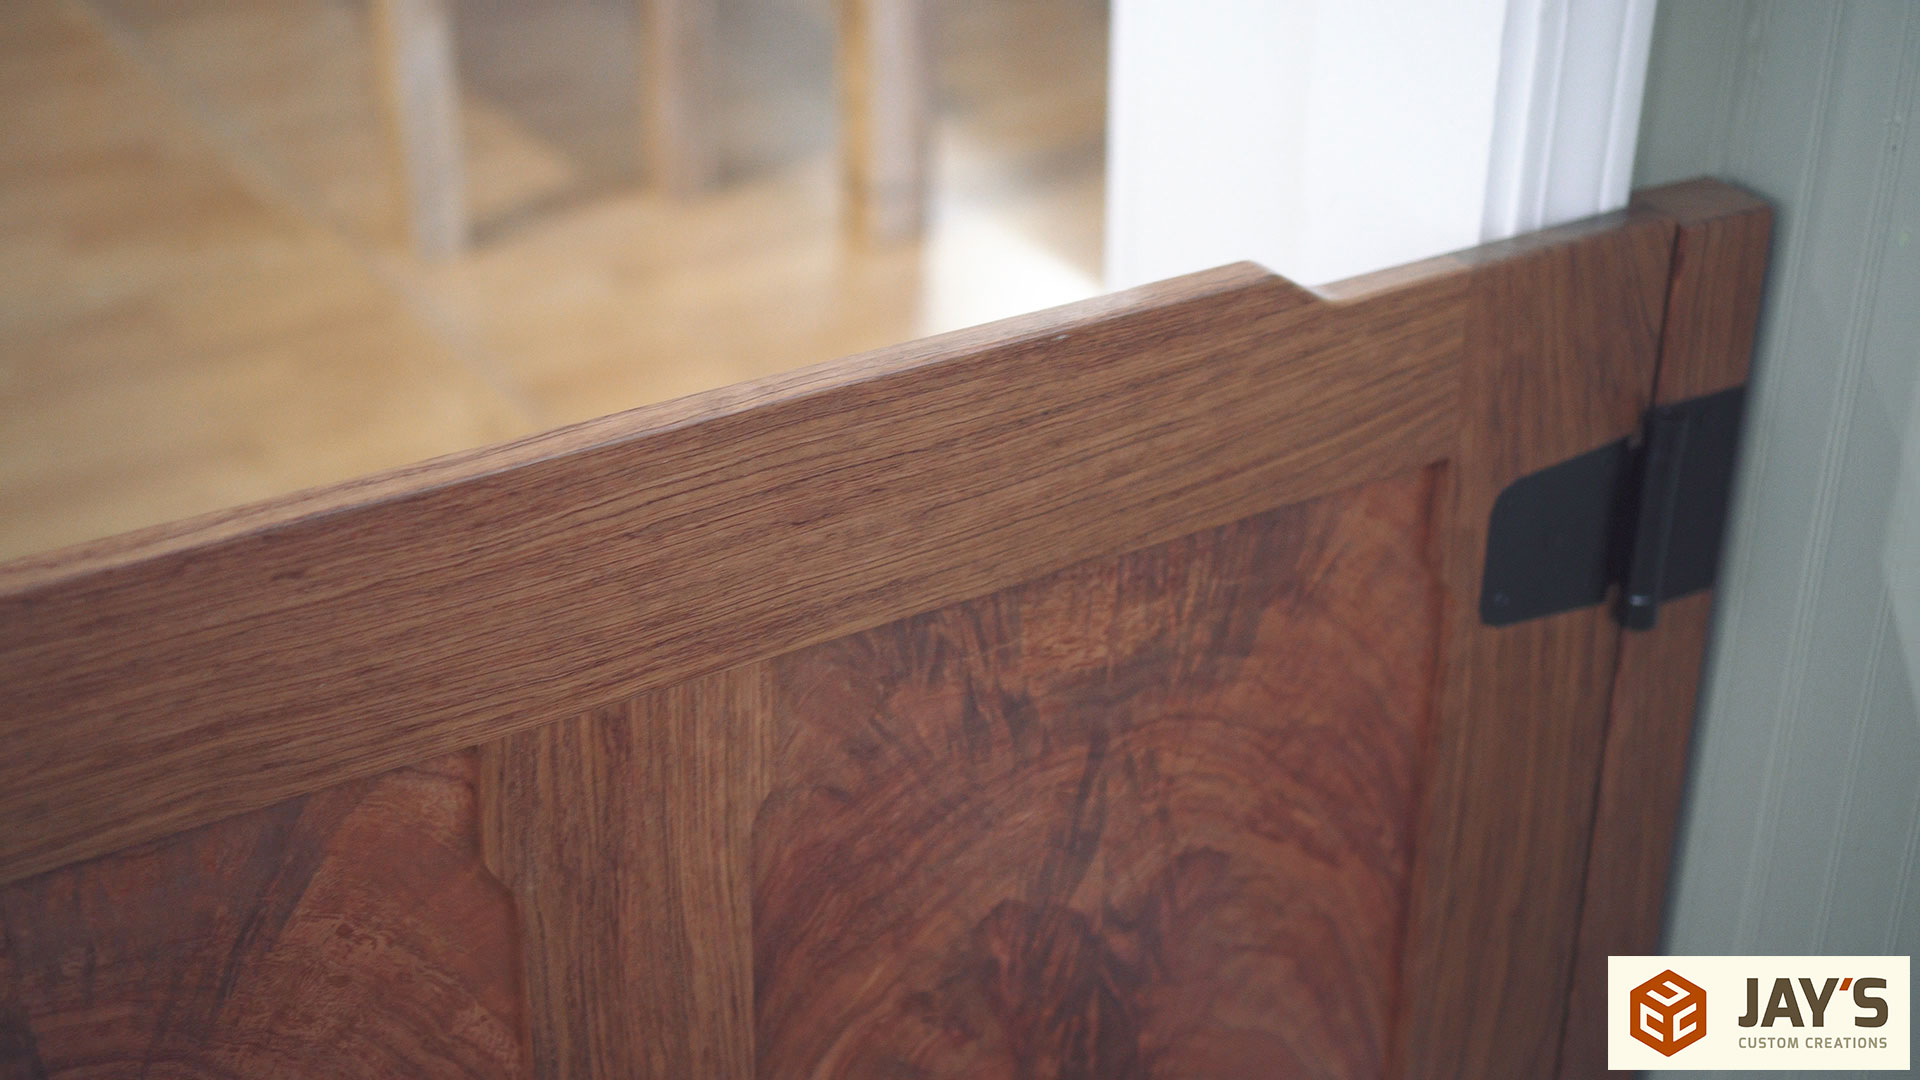
After viewing the dry assembly with the stile detail cut I decided to not go with a continuous curve on top as originally planned and instead cut a design similar to the ones cut on the stiles. It makes the piece lean a little more towards the Greene and Greene style but without the common ebony plugs and splines and proud joinery. But before cutting the top I needed to get started on the bookmatched panels.

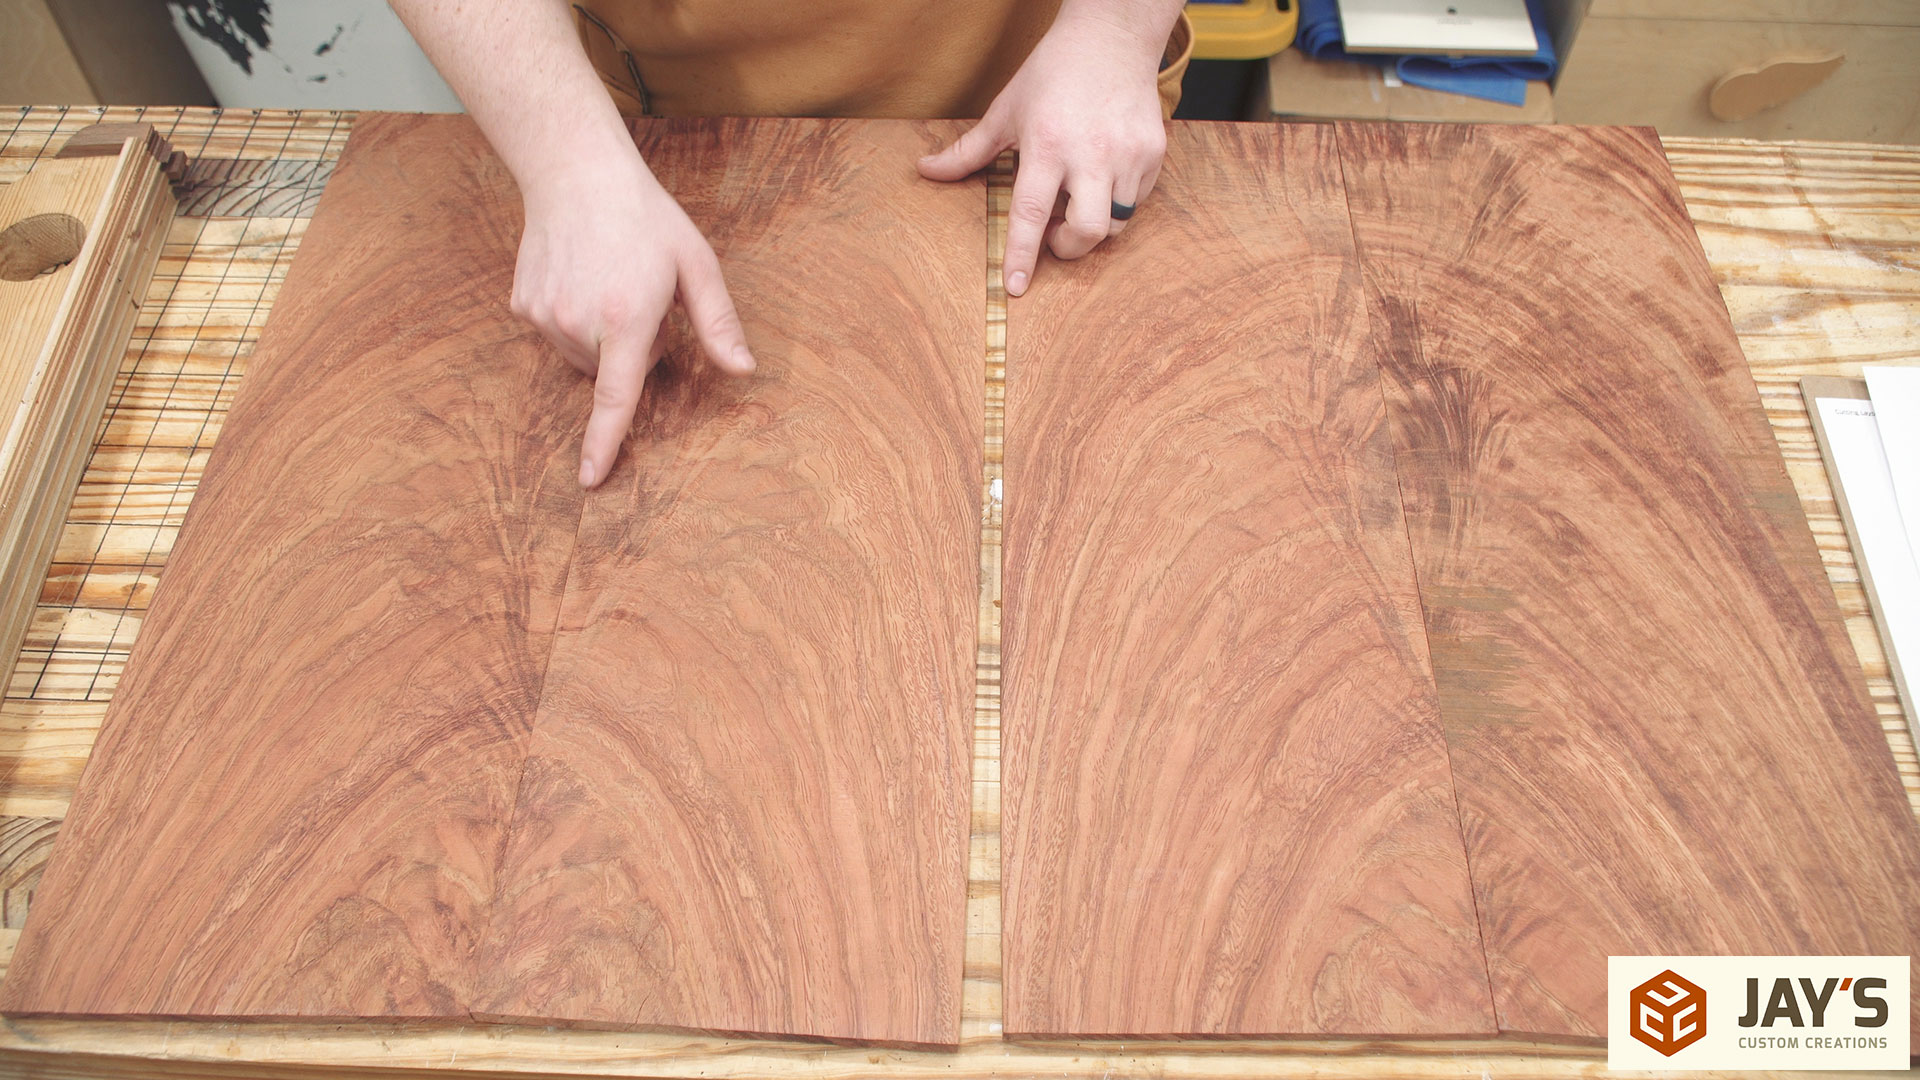
The board I picked for the panels had a pretty interesting grain pattern. The first stop for that board was to joint one edge so it would sit flat on the bandsaw table.
The rough sawn board was a little more than 2” thick. My final thickness goal was exactly 1/4” thick and I had no idea if the pieces would warp when cut so I cut each piece at 3/8” thick. This left more than enough material to get down to the final thickness after glue up.
I was quite pleased at how the panels looked before glue-up. I knew the grain would form a single arc when bookmatched but I had no idea there was this much figure in the board. Seeing the panels side by side for the first time definitely made me smile. :)
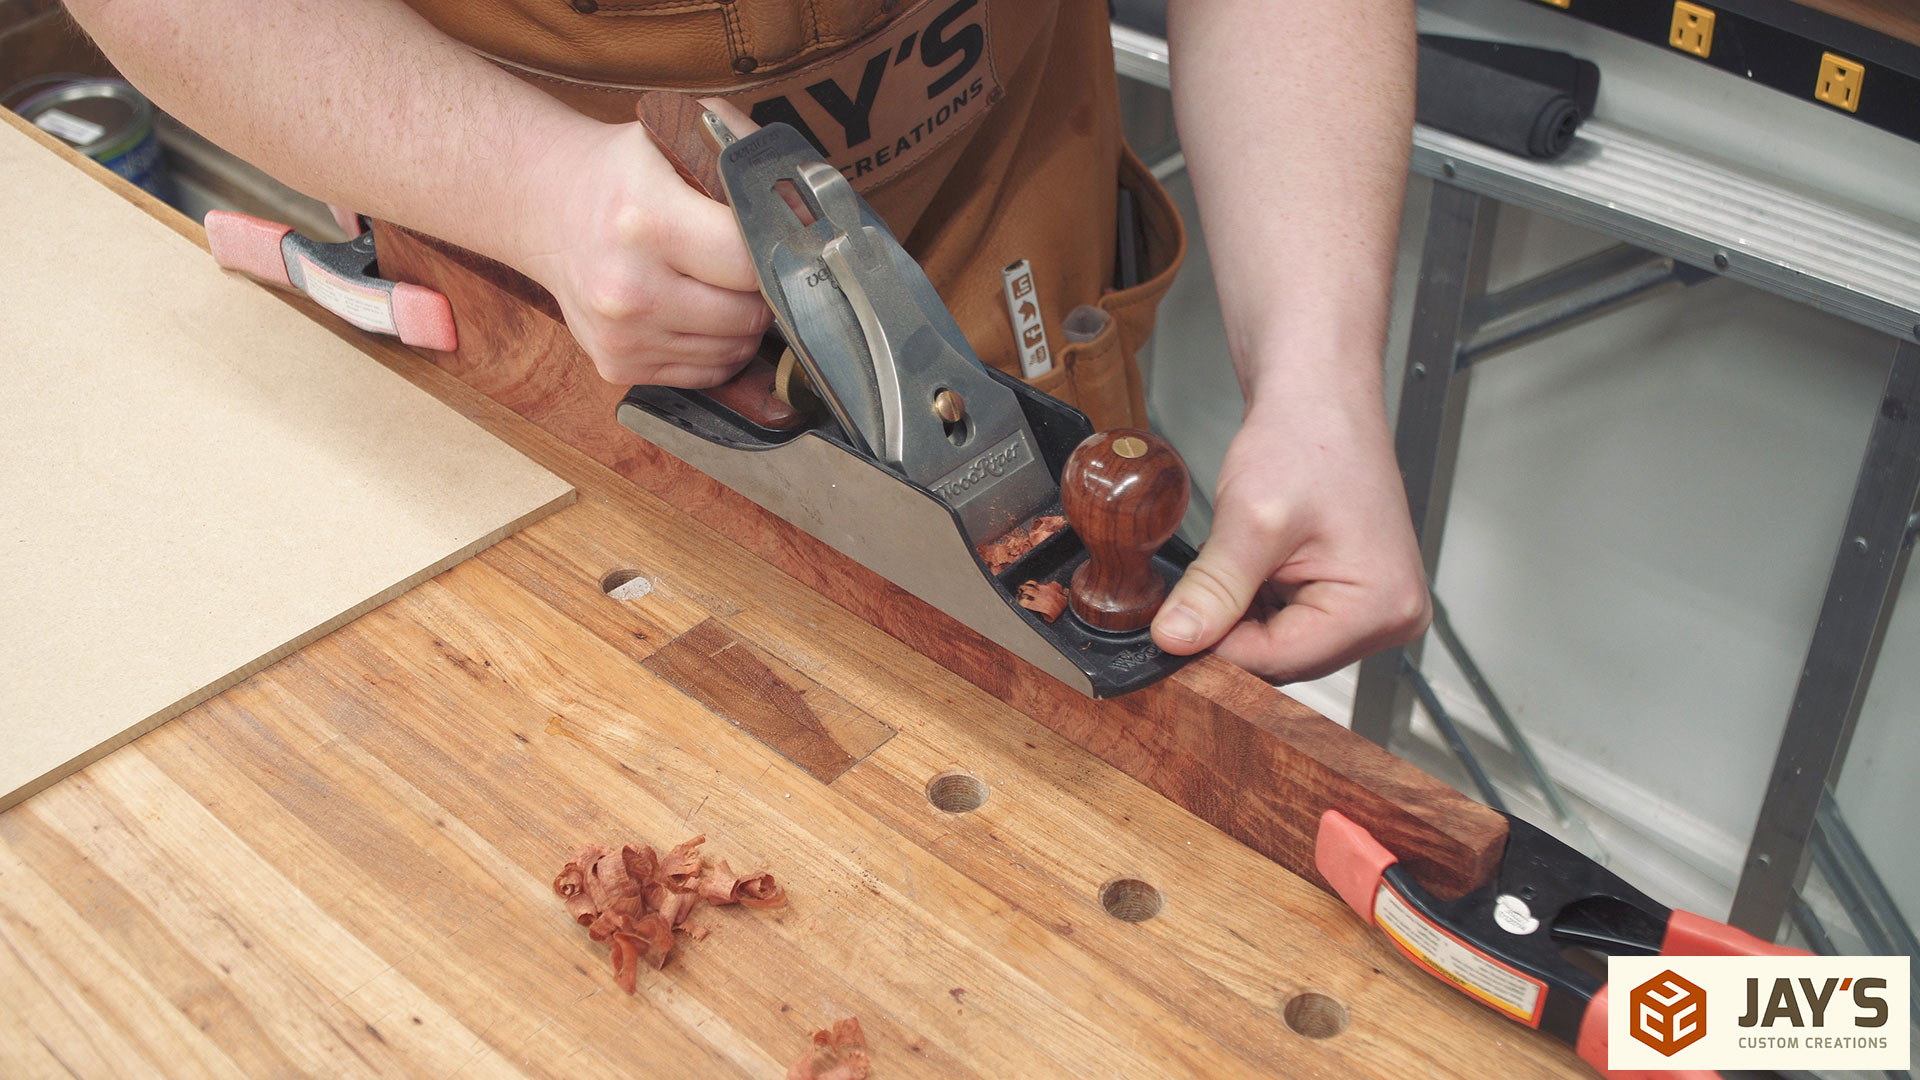
Each pair was clamped together with the jointed edge aligned and placed in the vise. Then the jointed edge is cleaned up with my smoothing plane for an absolutely perfect, tearout-free jointed surface.
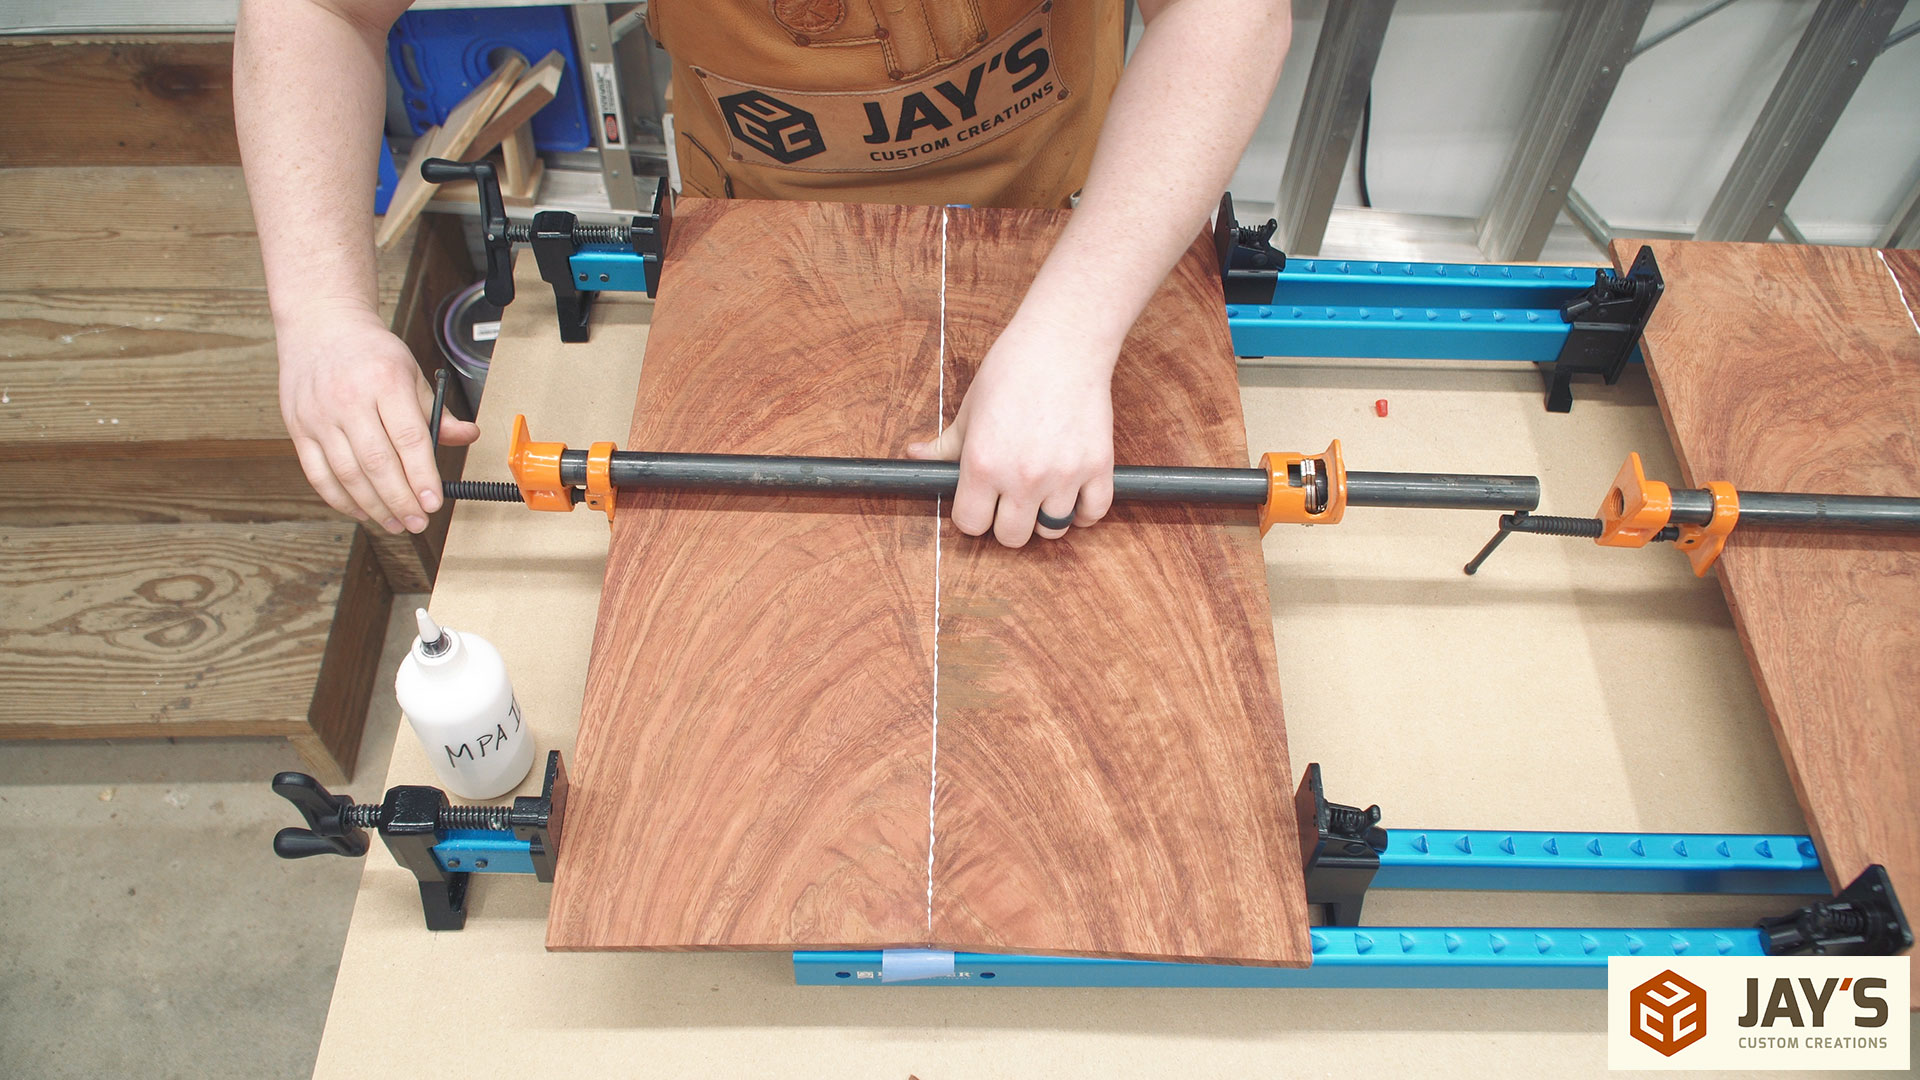
Gluing thin panels like these is really easy with the help of some tape. With the panels positioned so that the grain lines up perfectly light clamping pressure is applied to hold them together. Then tape is added along the length of the joint making sure it’s securely pressed down. Then the panels can be flipped upside down and the joint opened slightly to add a bead of glue. I like to slowly lower the panels a couple of times to let the motion of closing the joint evenly spread the glue.

Clamp lightly as you normally would with thin panels and look for an even line of glue squeeze out. In this case I applied an extra clamp in the middle making sure to clamp from both the top and bottom faces of the panel. It’s important to look down the surface of the panel and make sure the panel isn’t bowing up or down.
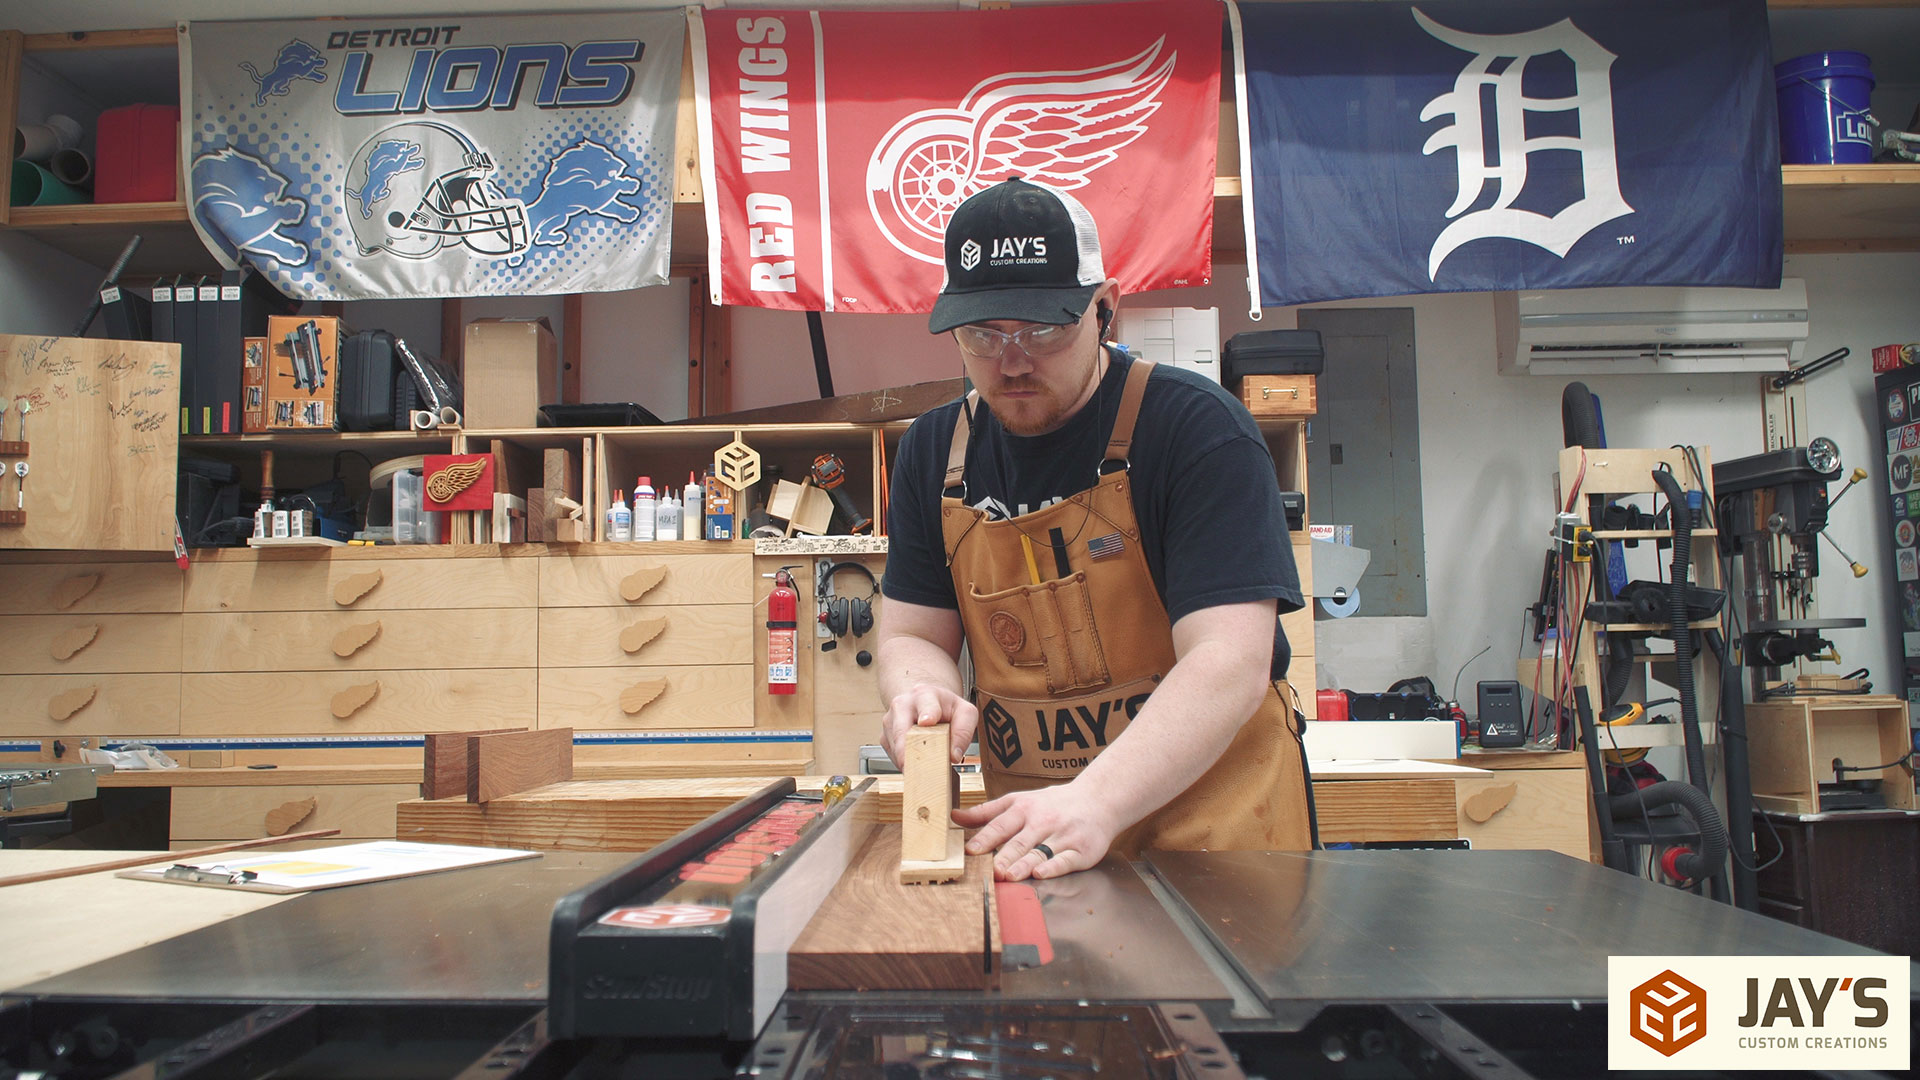
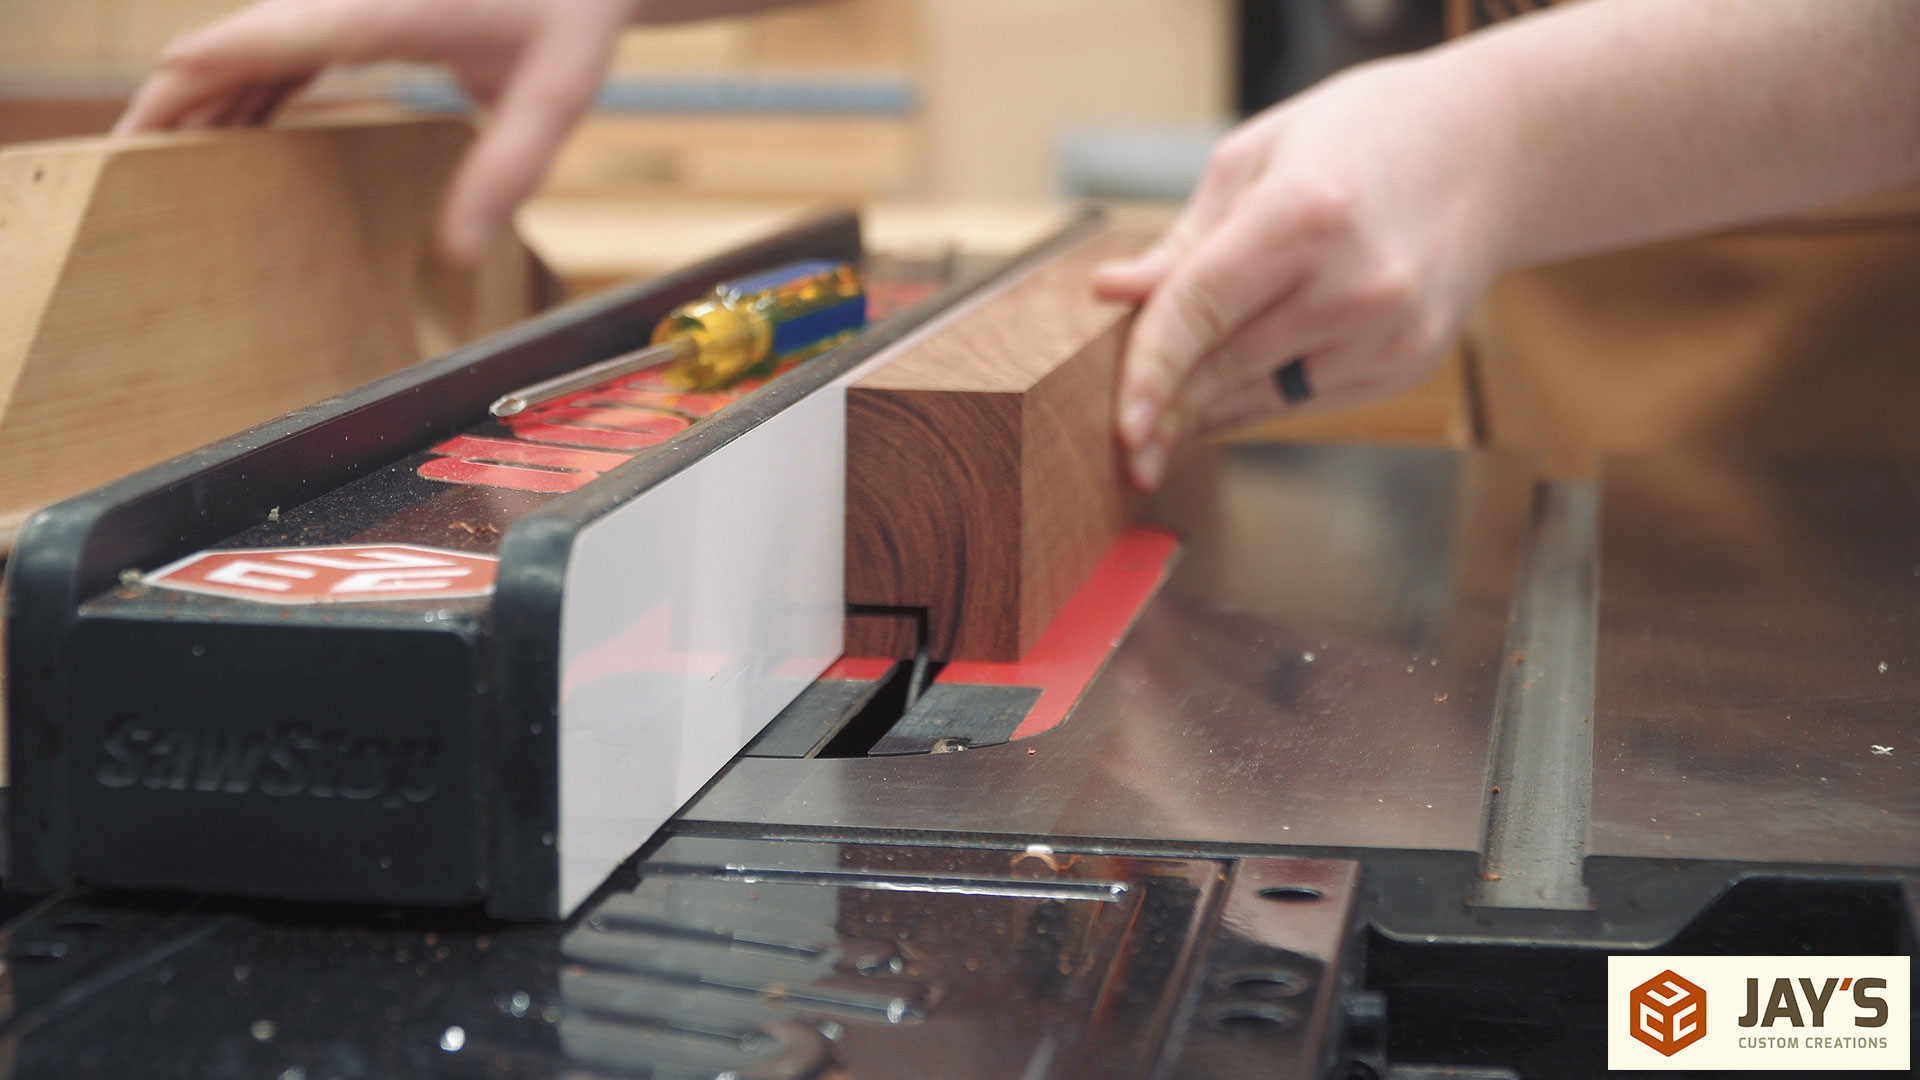
While those were waiting in clamps I cut the rabbet in both the hinge block and the catch block with two cuts at the table saw. Note that I cut this the “wrong” way. This cut should have been made with the waste piece being cut free away from the fence, not trapped between the fence and the blade. Cutting it like I did will sometimes result in the piece catching the blade and shooting back like a missile. But based upon how stable the wood was being while cutting thus far I went ahead and cut it this way. These are the boards that will be mounted to the wall.
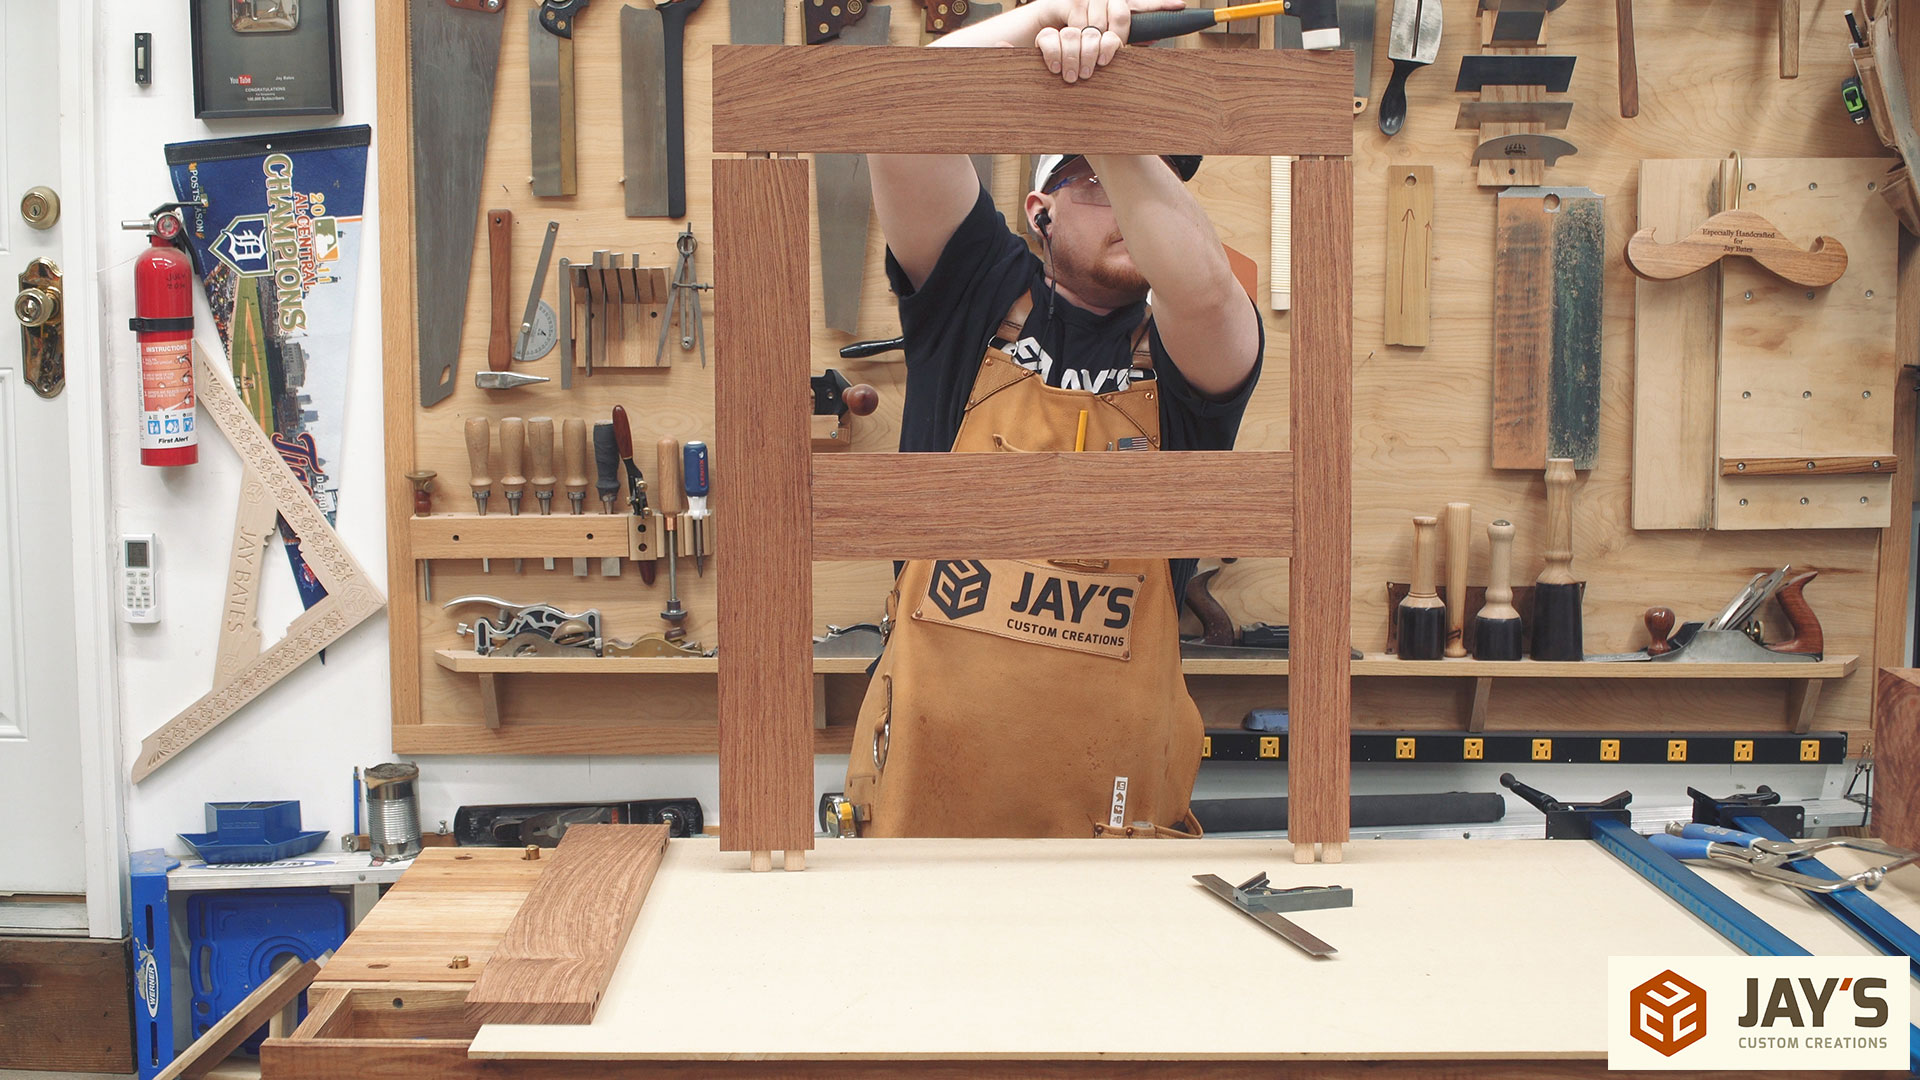
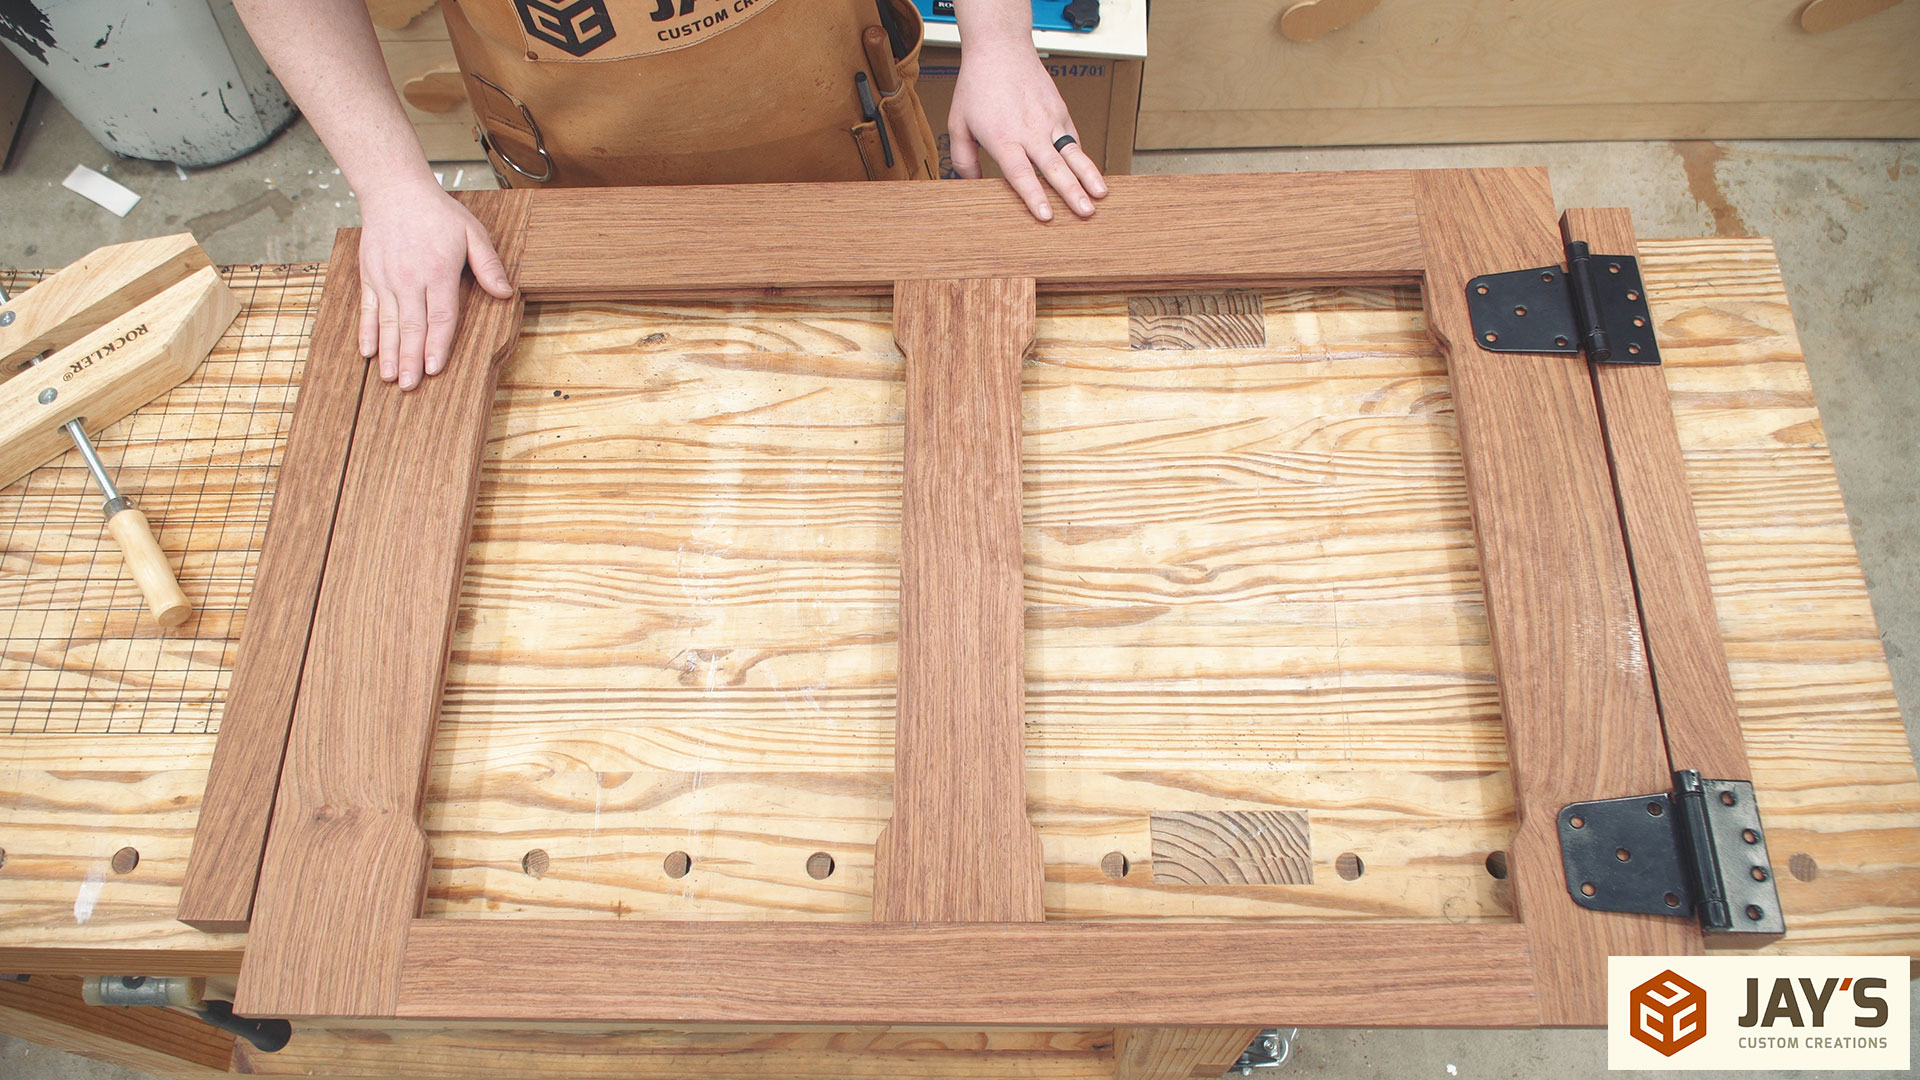
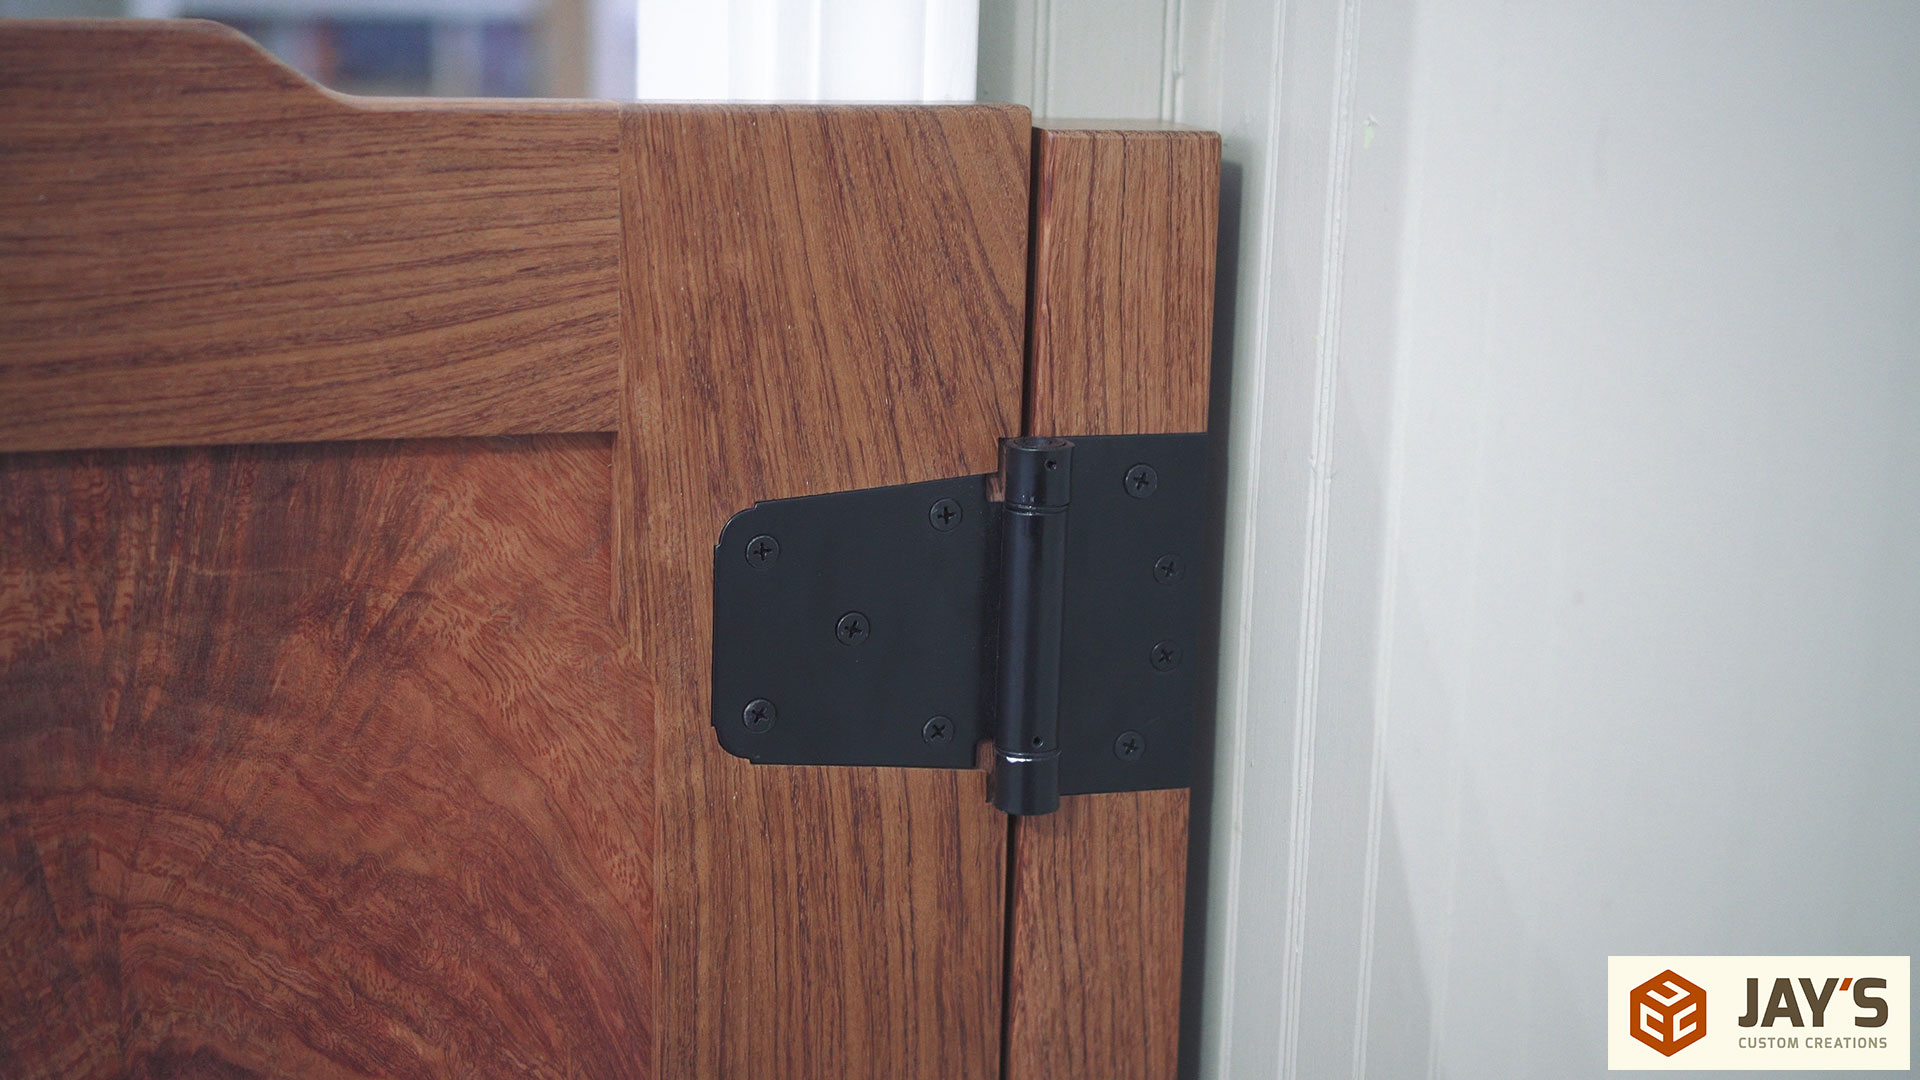
More work to do while the panel glue-ups dry. This is the first mock-up to really see it as a dog gate and to work out the final position of the hinges. These hinges are spring-loaded so they will close the gate when someone lets go of it. Just the springs should be enough for the time being but the design allows room for strong magnets or a latch of some kind to be used for when my daughter gets old enough to push on the gate.
This is the clamping setup to mark for the hinge mortises. I wanted a 1/8” gap between the gate and the hinge block so the two pieces of wood are clamped together with two 1/8” drill bits being used as spacers. Then each of the stationary components of the hinges are clamped to the hinge block. When mounted, gravity combined with the bottom hinge acting as a pivot point will result in a rotational force that will pull the top hinge apart and compress the bottom hinge. If this is not taken into consideration when cutting the hinge mortise then the consistent 1/8” gap won’t be there if there is play or slop in the hinges. These hinges did indeed have some noticeable slop in them. The solution is to use another clamp to pull the top hinge apart and compress the bottom hinge before marking for the mortise.

With the hinges accurately located a marking knife is used to trace the exact location of the hinge into each piece of wood.

A small router with a 1/4” down cut spiral bit was used to remove the bulk of the waste. A larger diameter bit can be used to remove the material faster but I find controlling the router to be much easier with a smaller bit.

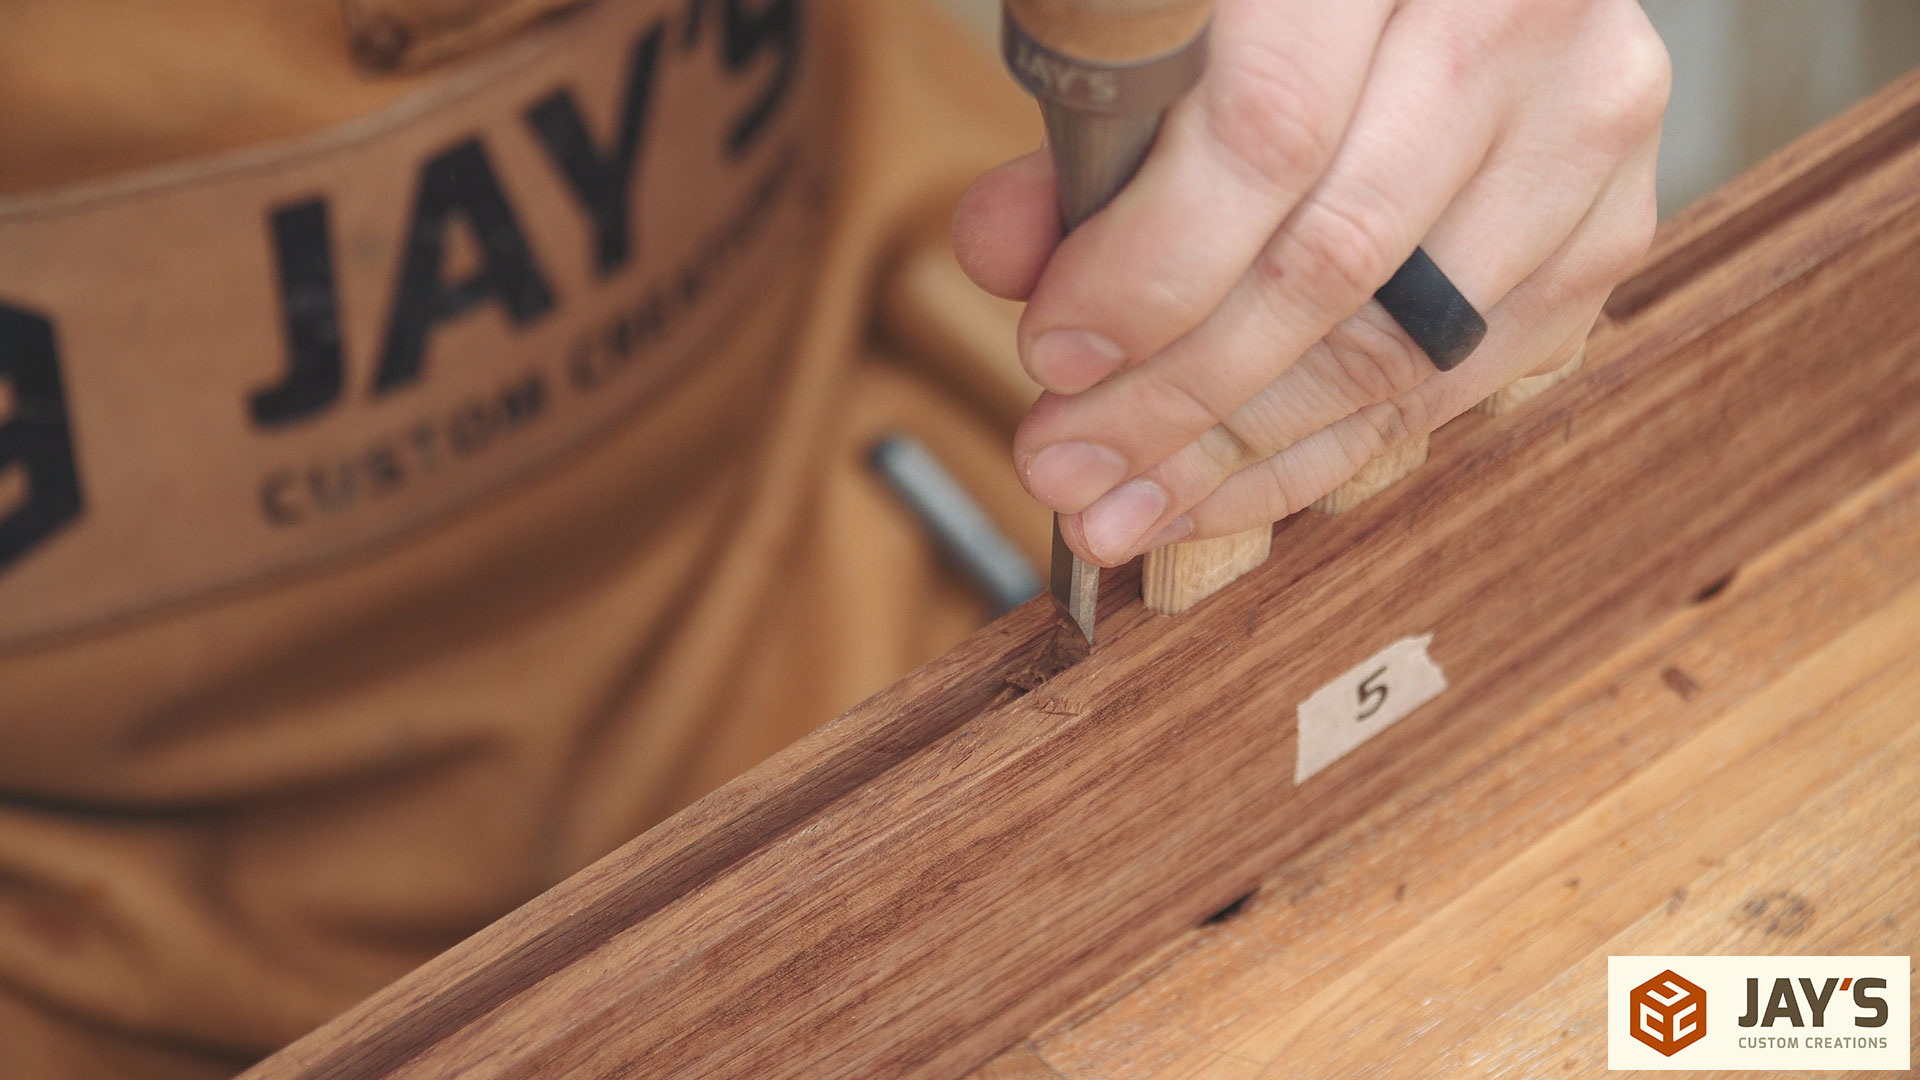
How close you get to the marking knife line is up to you. For radius areas I’ll let the bit touch the line very carefully. For straight areas is just easier and less stressful to get close and finish the job with a wide chisel in the marking knife line.
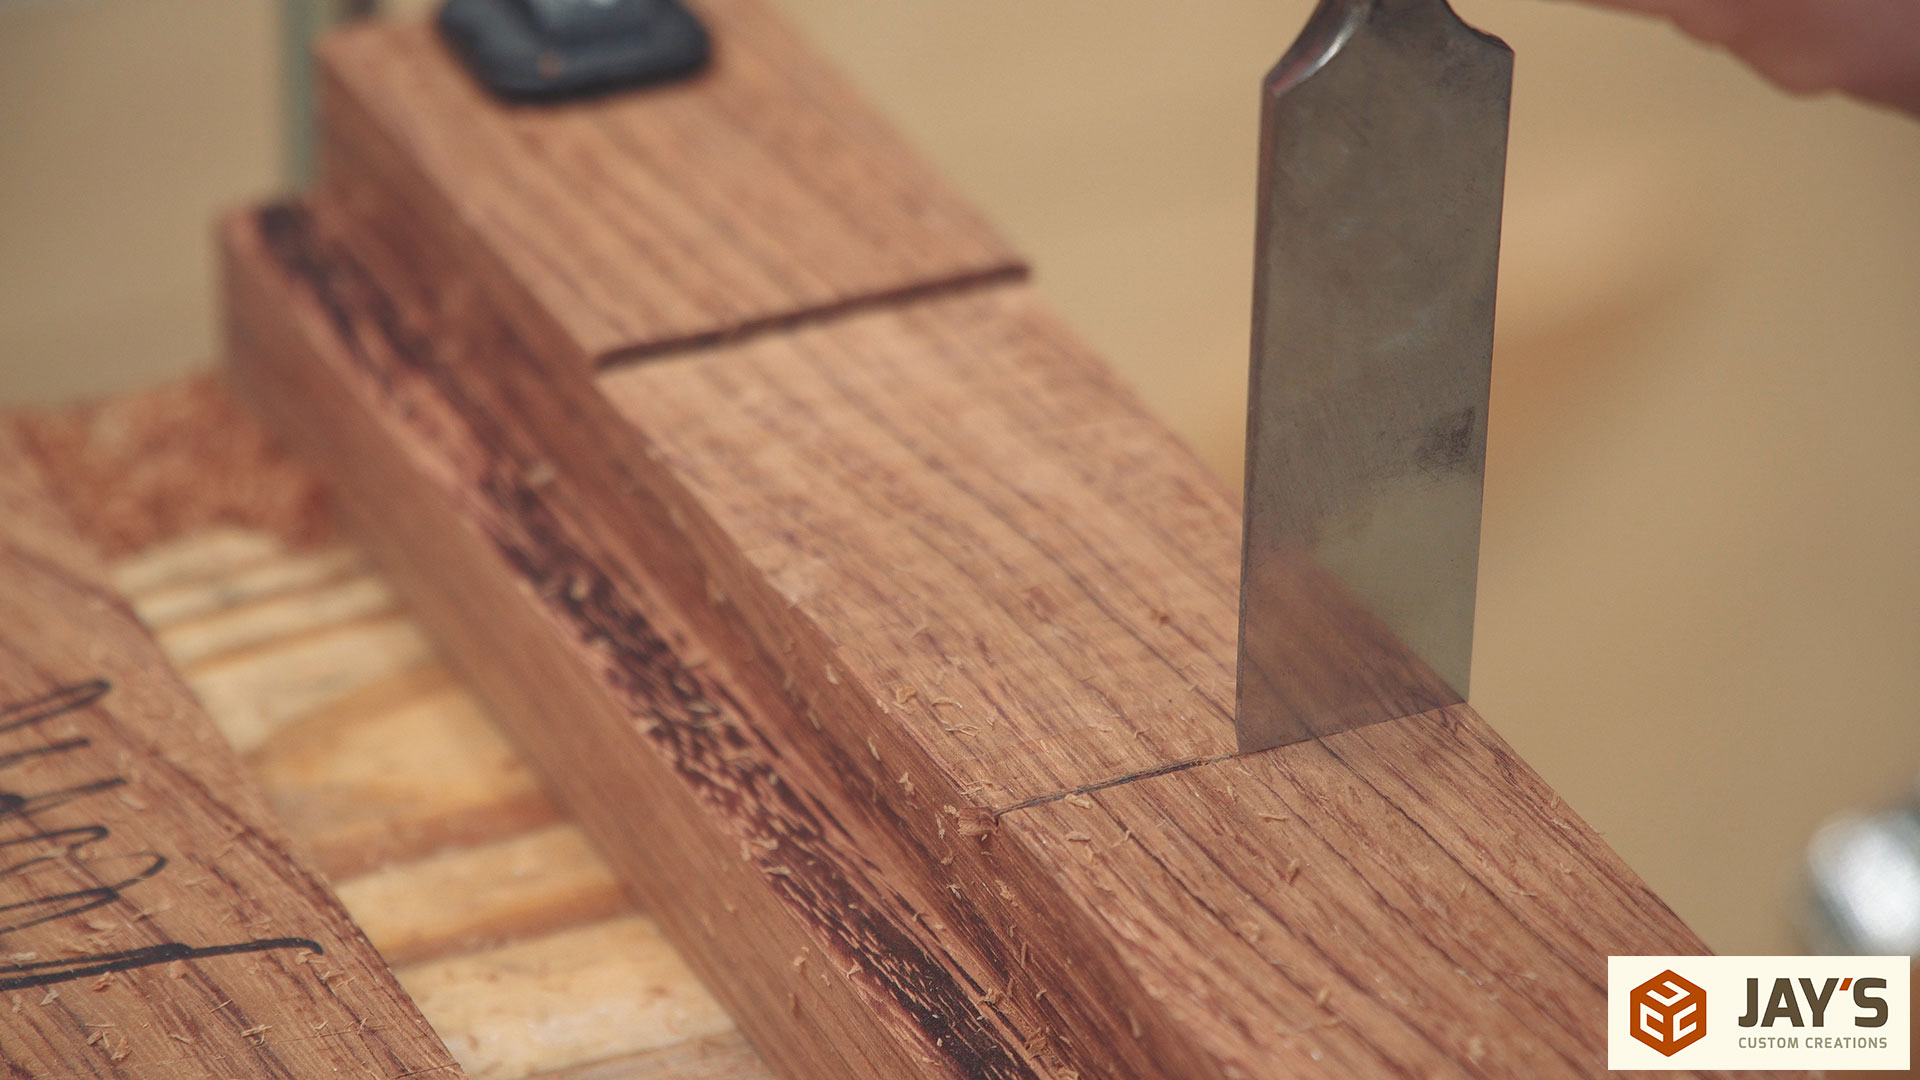
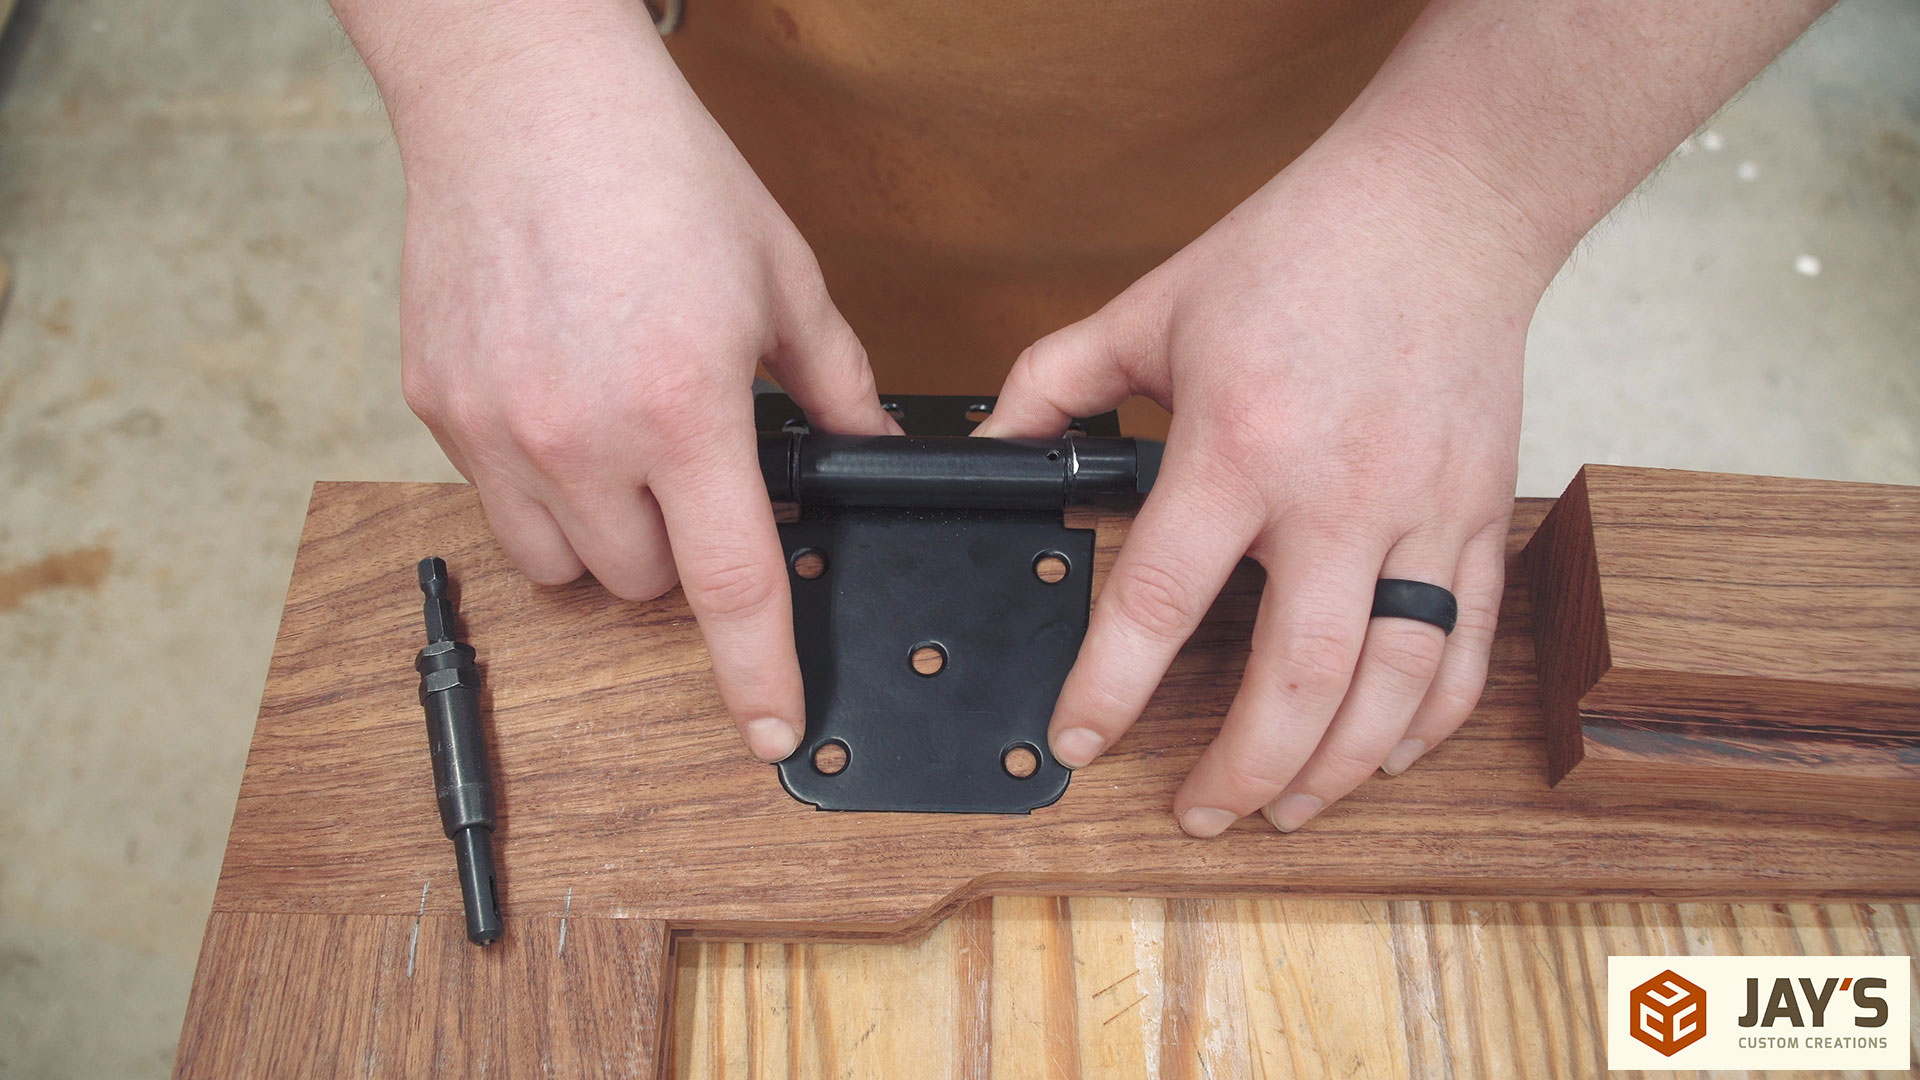
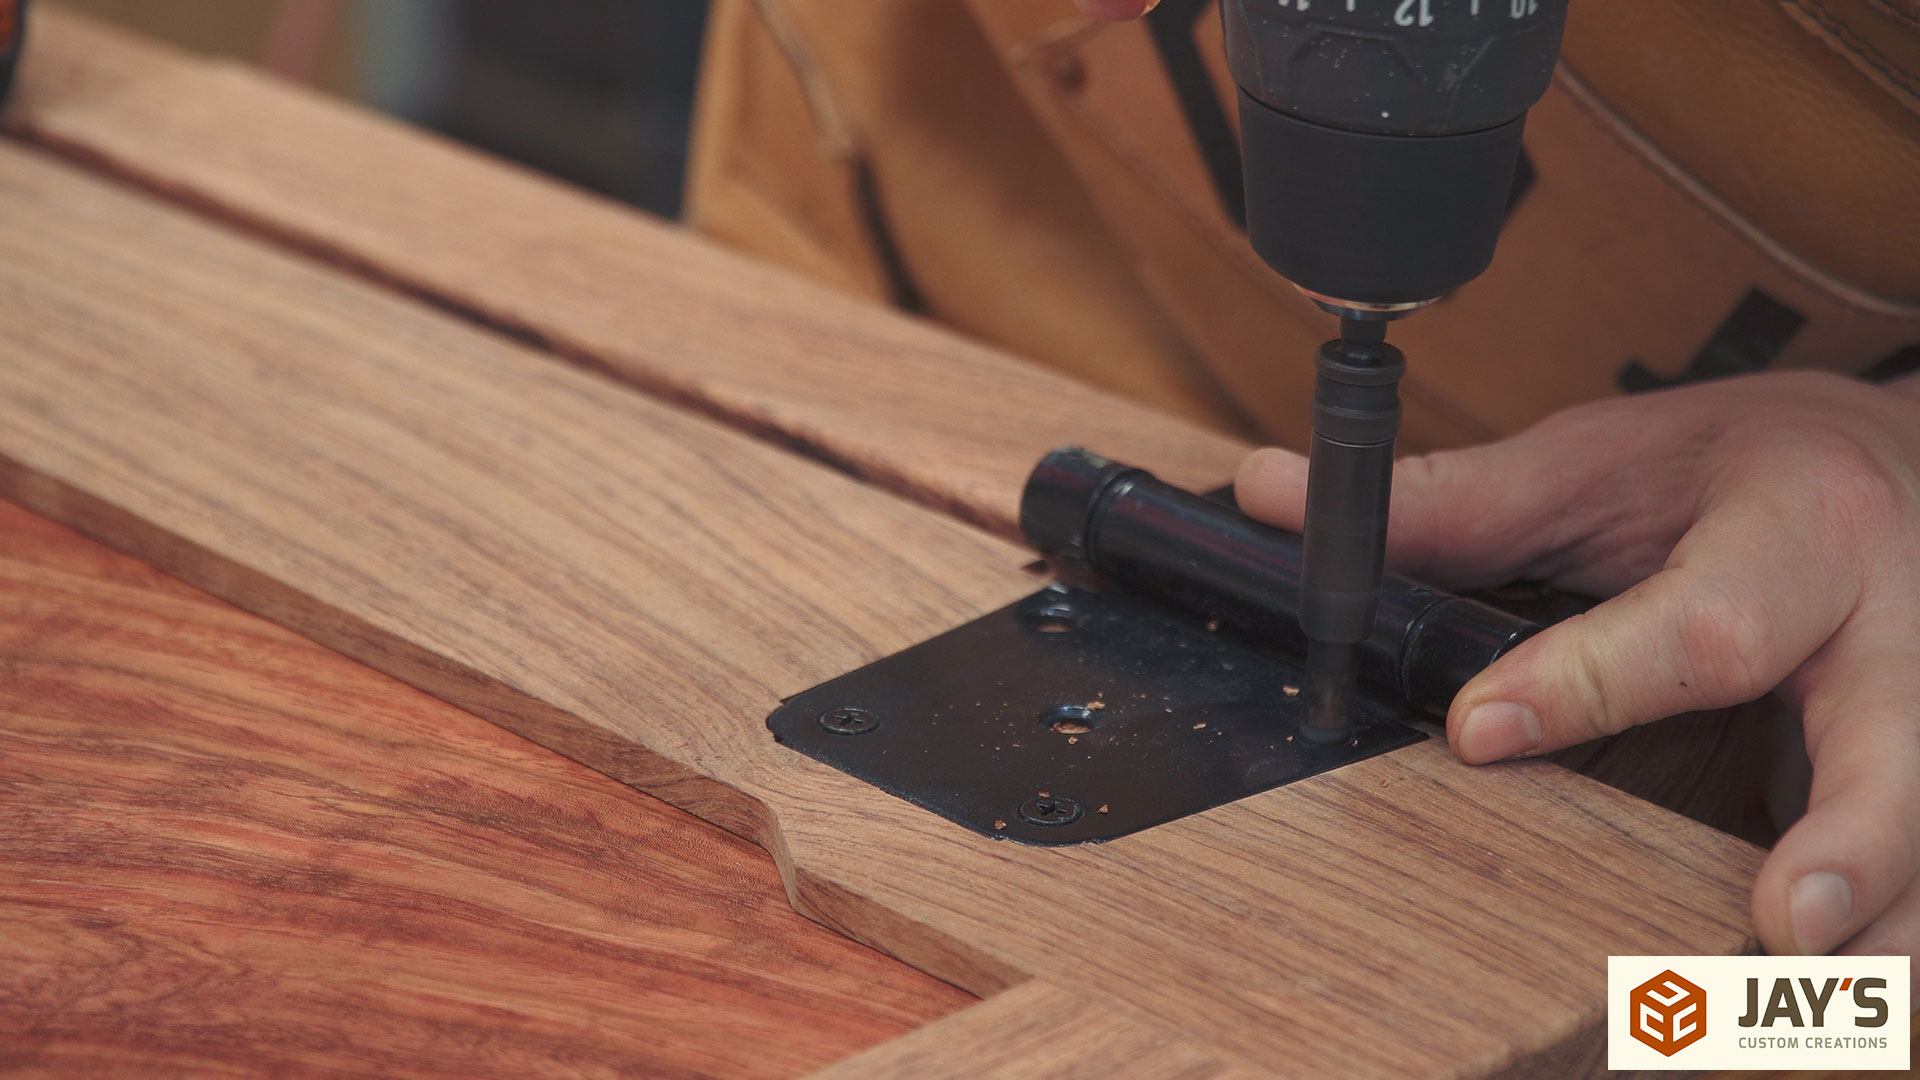
If all goes well the mortise should be a perfect fit. You can see a little bit of the radius detail that had to be cut. When drilling holes for the screws its beneficial to use a drill bit with a spring-loaded registration collar that centers itself in the screw hole. This will keep the pilot hole perfectly centered in the screw hole on the hinge. If the screw is located slightly away from the end of the mortise it can pull the entire hinge out of the mortise as the head of the screw is seated.
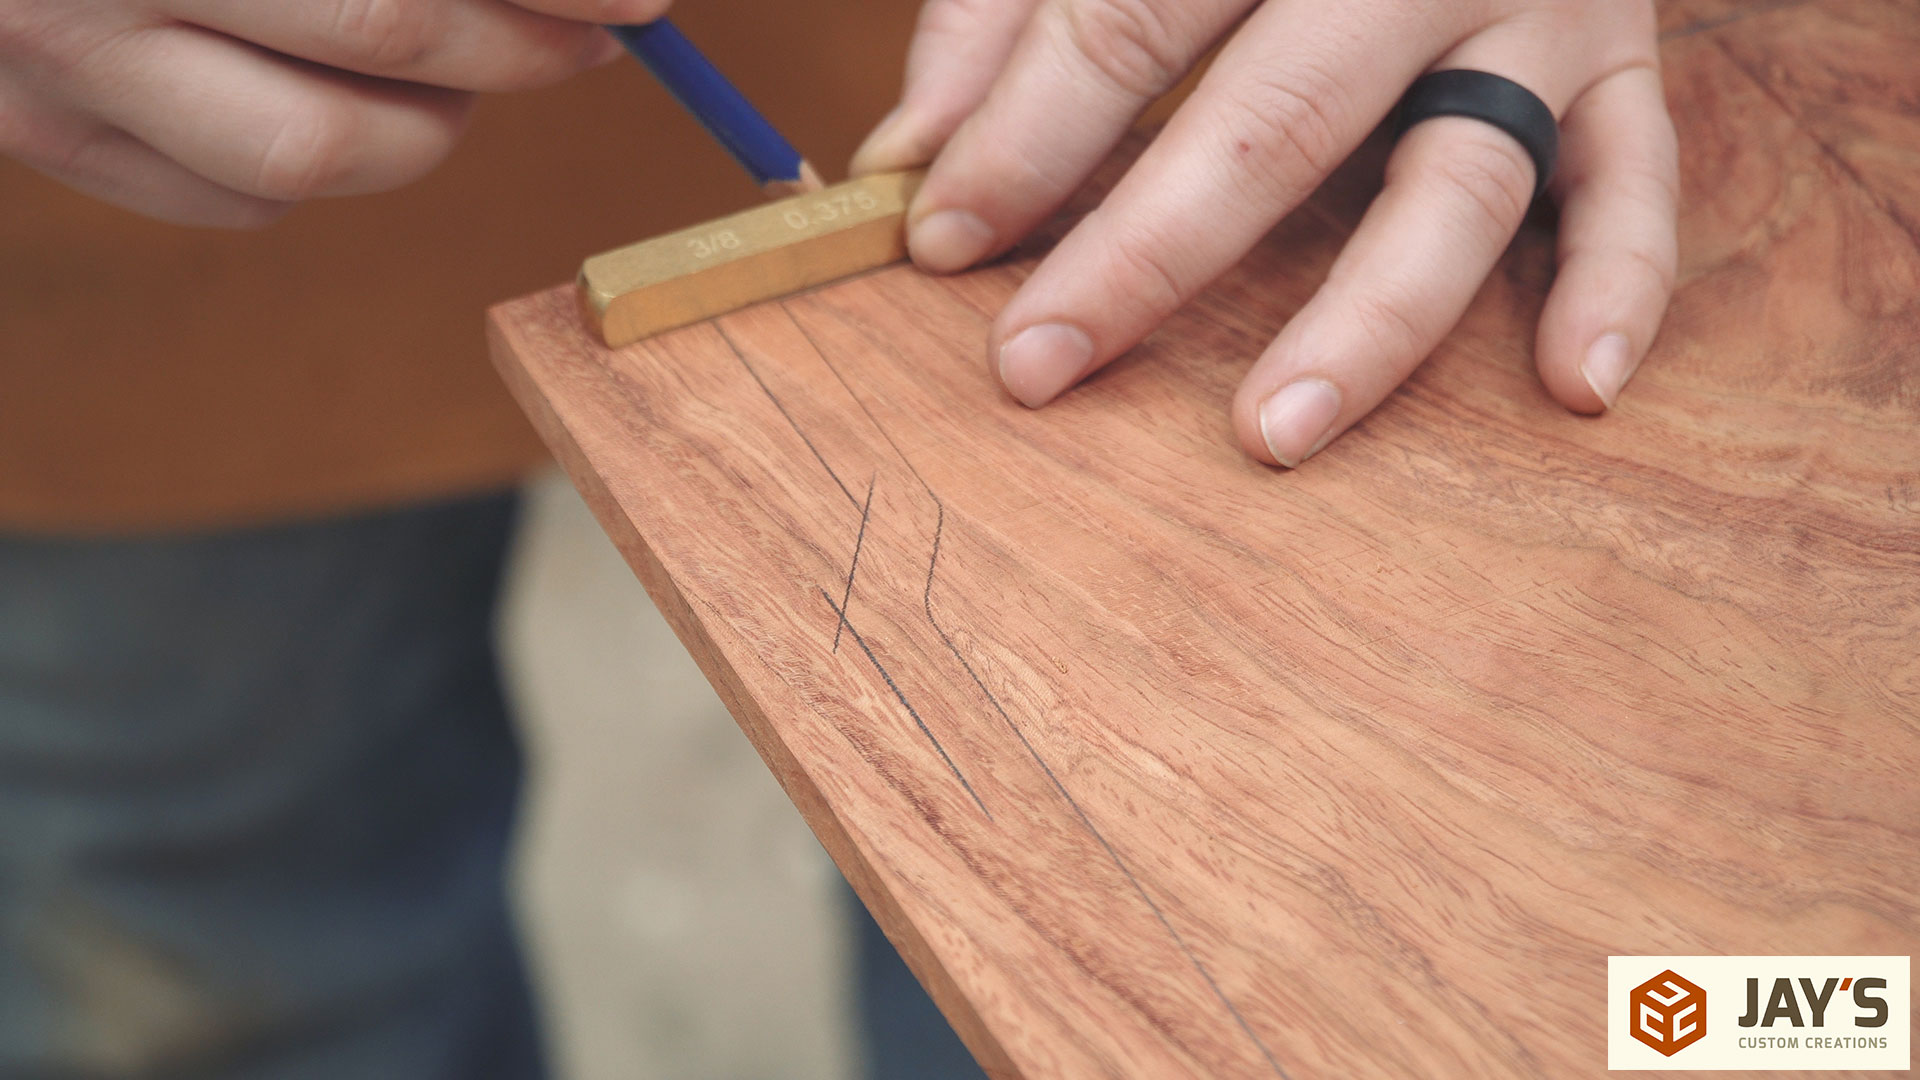
After letting the panels sit in clamps overnight I could start getting them to their final size. First, a center line is drawn on the inside face of each rail in each opening. This allows the glue line of the panel to be easily centered in the opening. I also made a mark near the bottom of the panel to let me know how far up to position each panel. Once each panel is in place underneath the frame I traced the inside to transfer the location.
Because the panel groove is 3/8” deep an offset line is created with a 3/8” brass setup block.
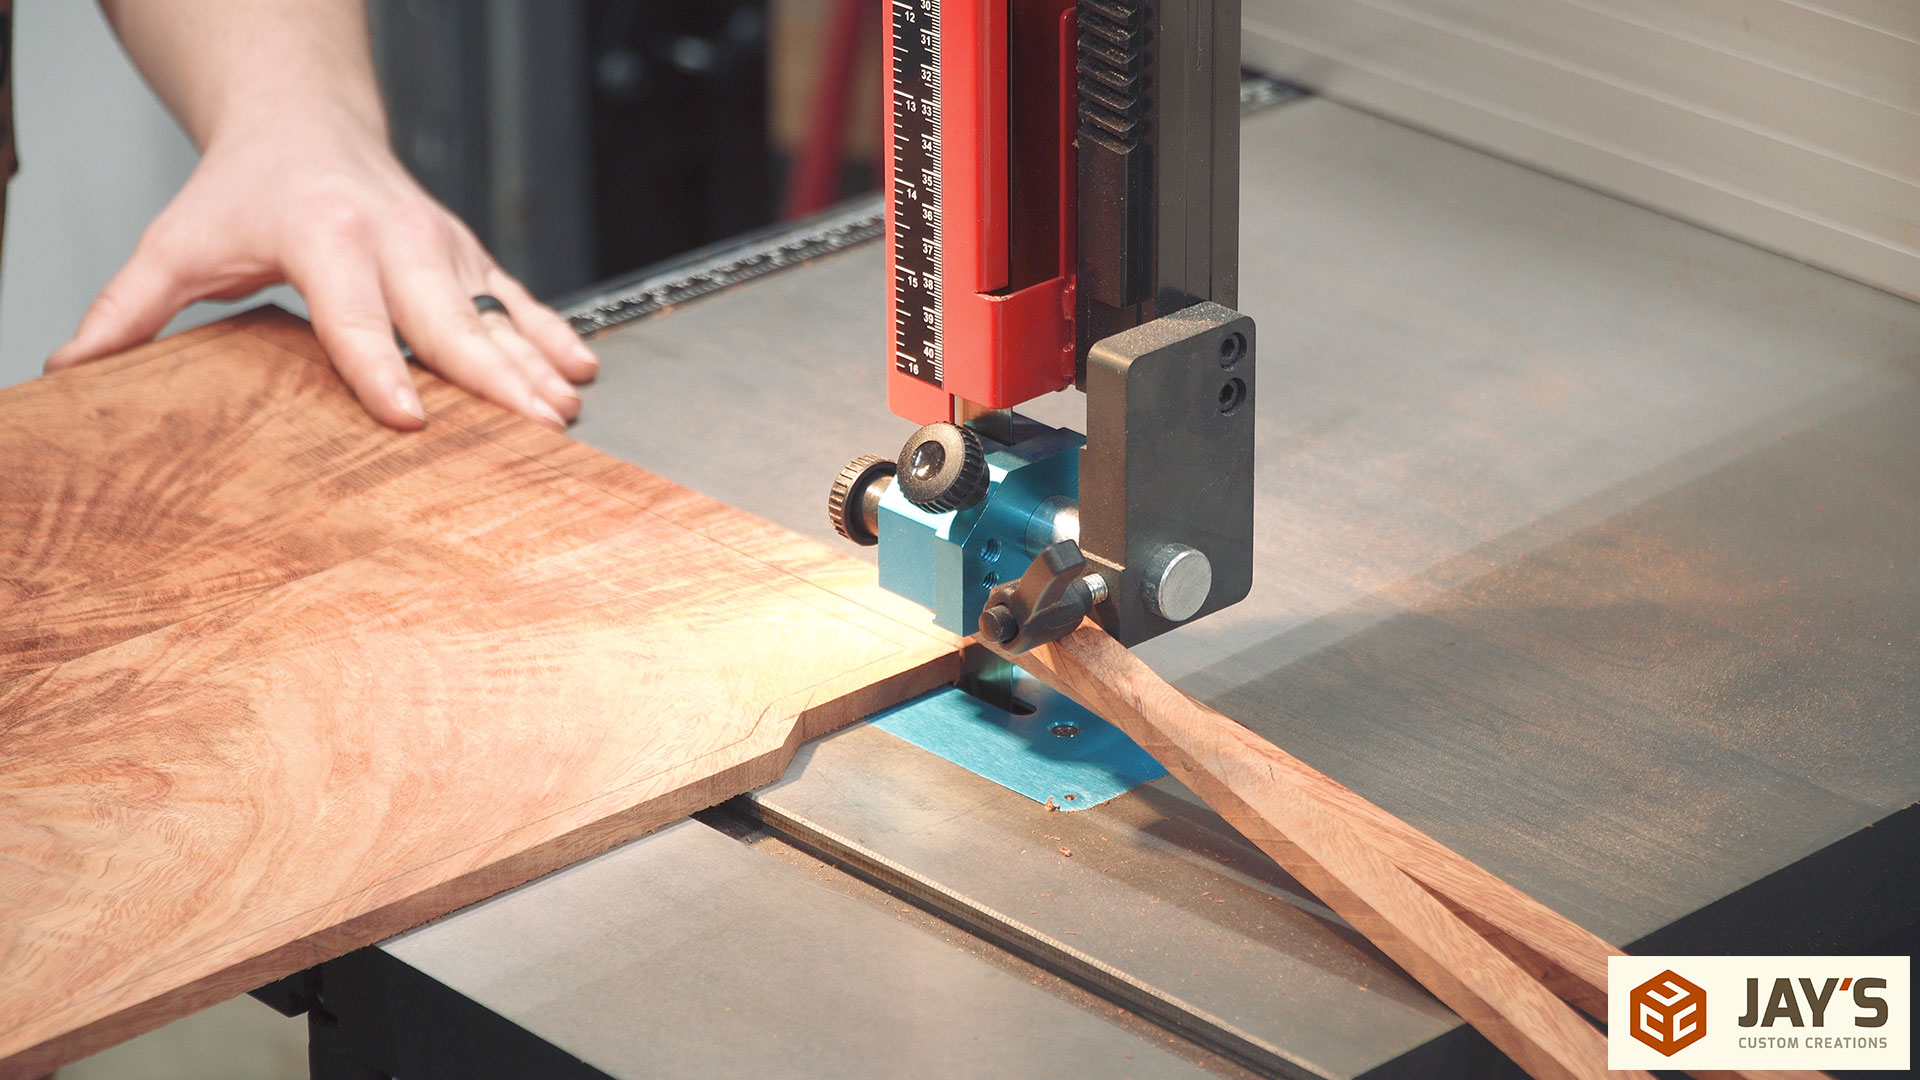
And then the panels are cut out at my bandsaw. To allow a little bit of expansion and contraction room I made the cut with the blade a tiny bit on the inside of the offset line. I ended up with about 1/8” of play for each of the panels in the grooves.
Once cut to size I ran the panels through my drum sander to get them down to their final size. My drum sander has made my short list of most impactful tools for a woodshop. Nobody enjoys sanding and yet we all do it on all of our projects. This tool allows a lot of that time to be eliminated.

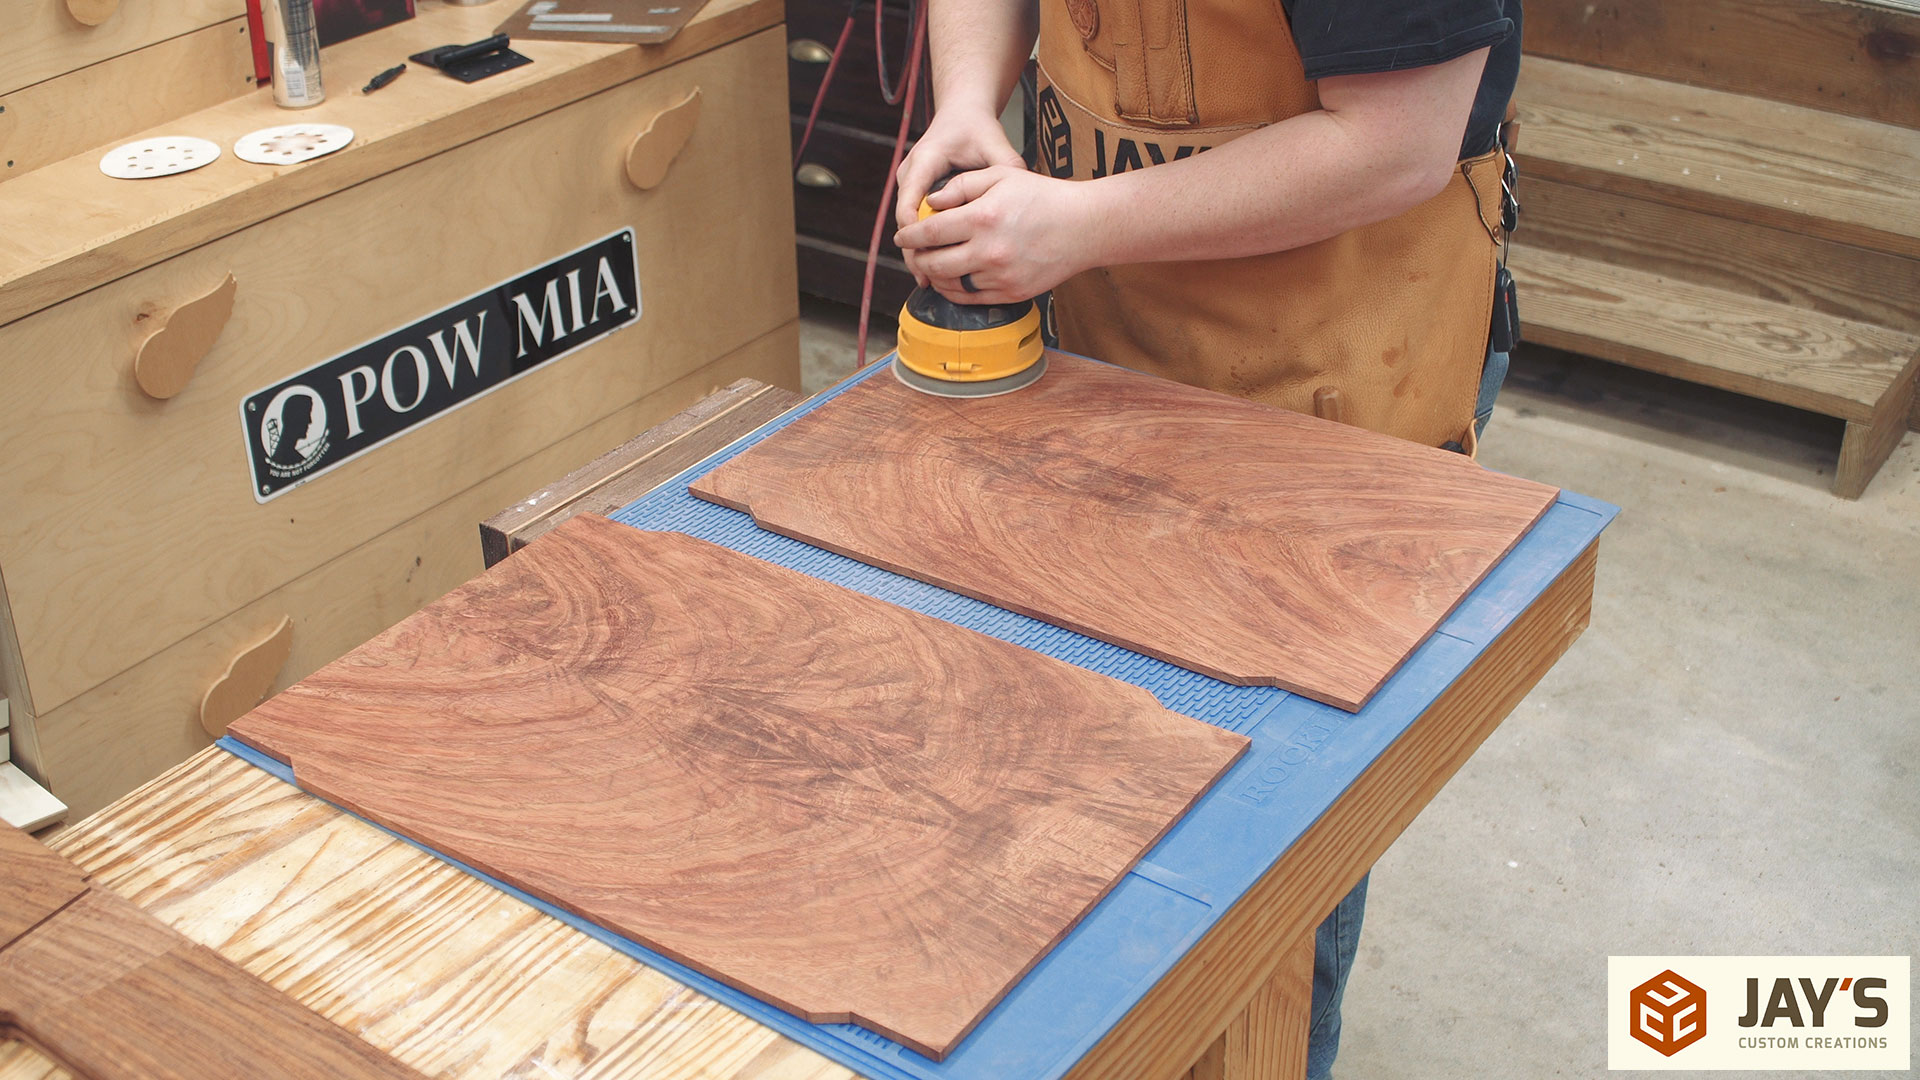
The drum sander won’t eliminate ALL of the sanding time though. I still needed to hit the high grits with an orbital sander. The panels are starting to come to life here.
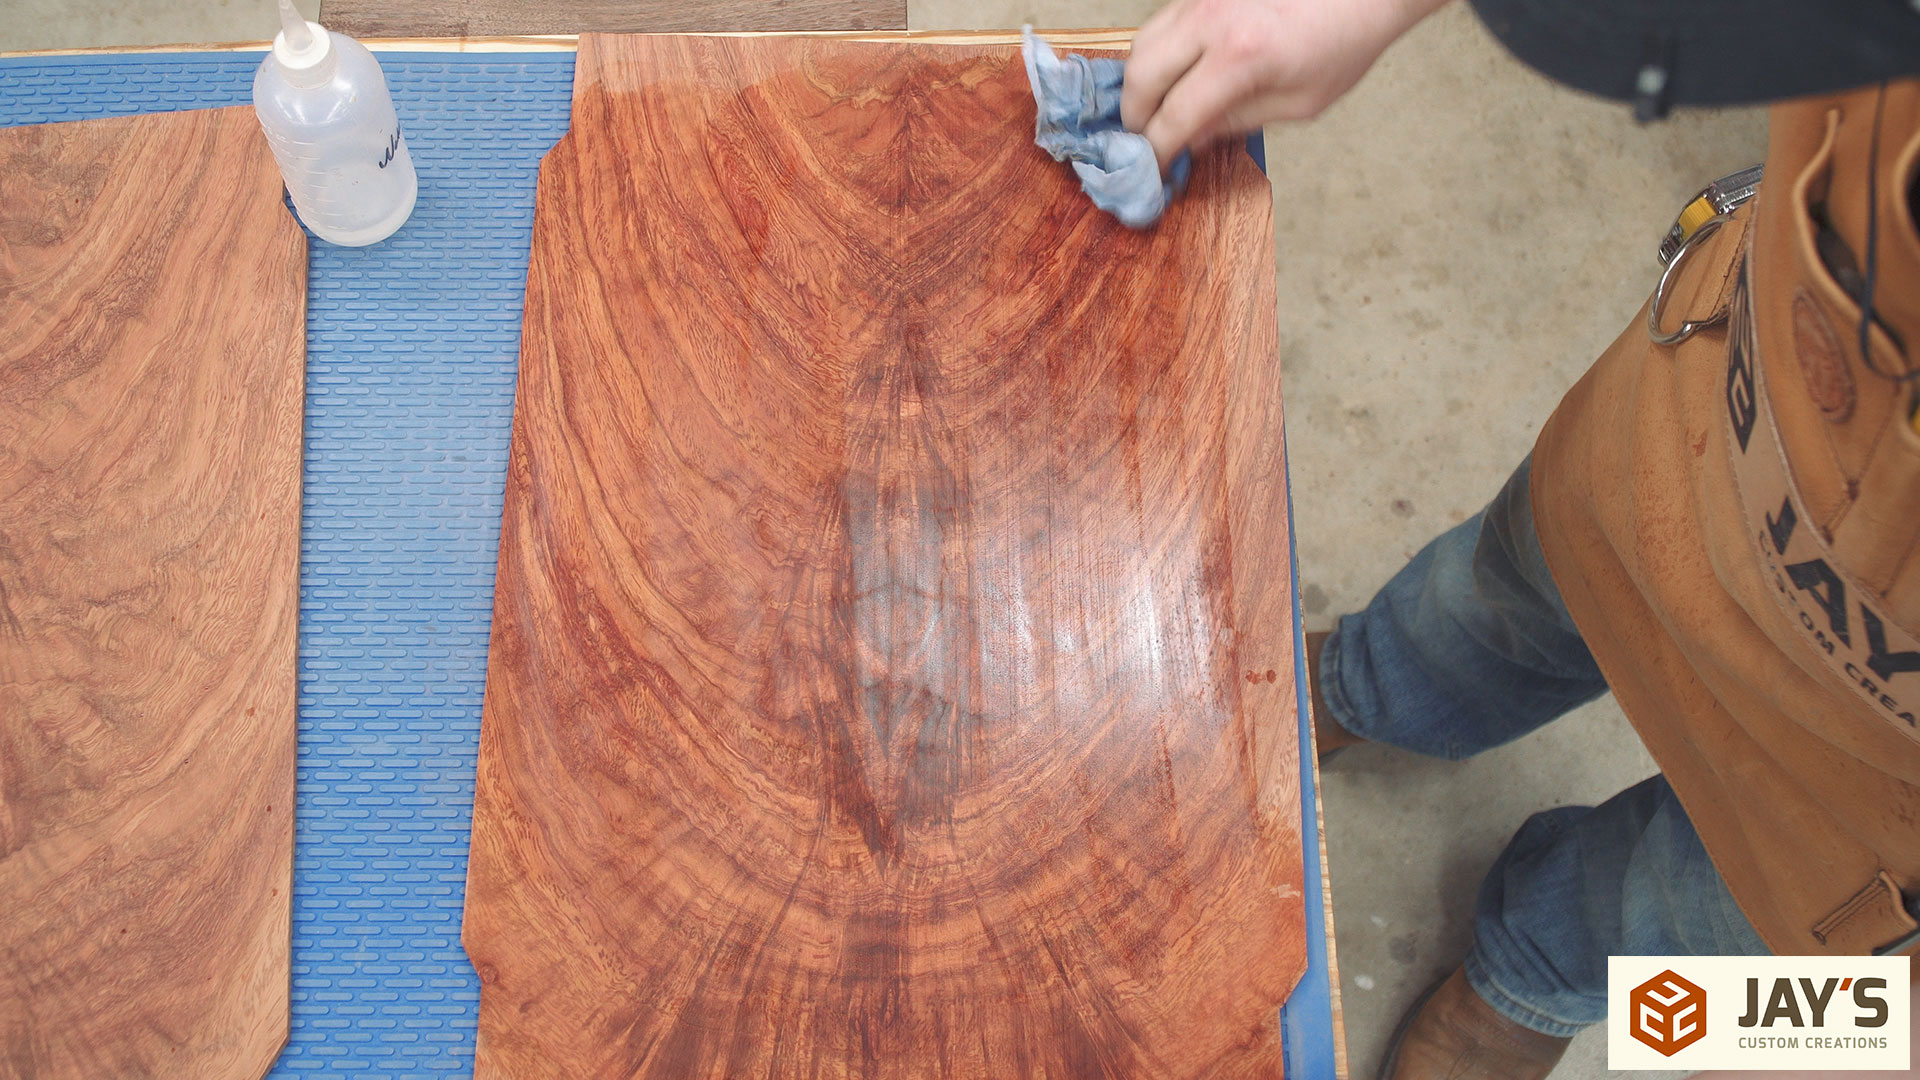
When installing floating panels it’s best to prefinish the panels before assembly. If you wait until after assembly you risk the panel shrinking over time and revealing a line of unfinished wood. I’m using a water based polyurethane for the finish so I’m raising the grain with water first.
Followed by knocking down the wood fibers gently with 320 grit sandpaper. Doing so before applying finish will prevent the finish itself from raising the grain and making the surface rough. The grain will only raise once with water.
The water based finish dries so fast so I can go ahead and start sanding some hard to reach areas without worrying about getting too much sanding dust in the air. And honestly, I wouldn’t care too much about that problem because my air cleaner cart stays running while I’m in the shop. It’s incredibly effective at cleaning the air. My shop air is routinely cleaner than the air outside and in my own home according to a Dylos air quality monitor.
The last step before assembly is to square the inside corners of the panel groove and check for fit of the panel.
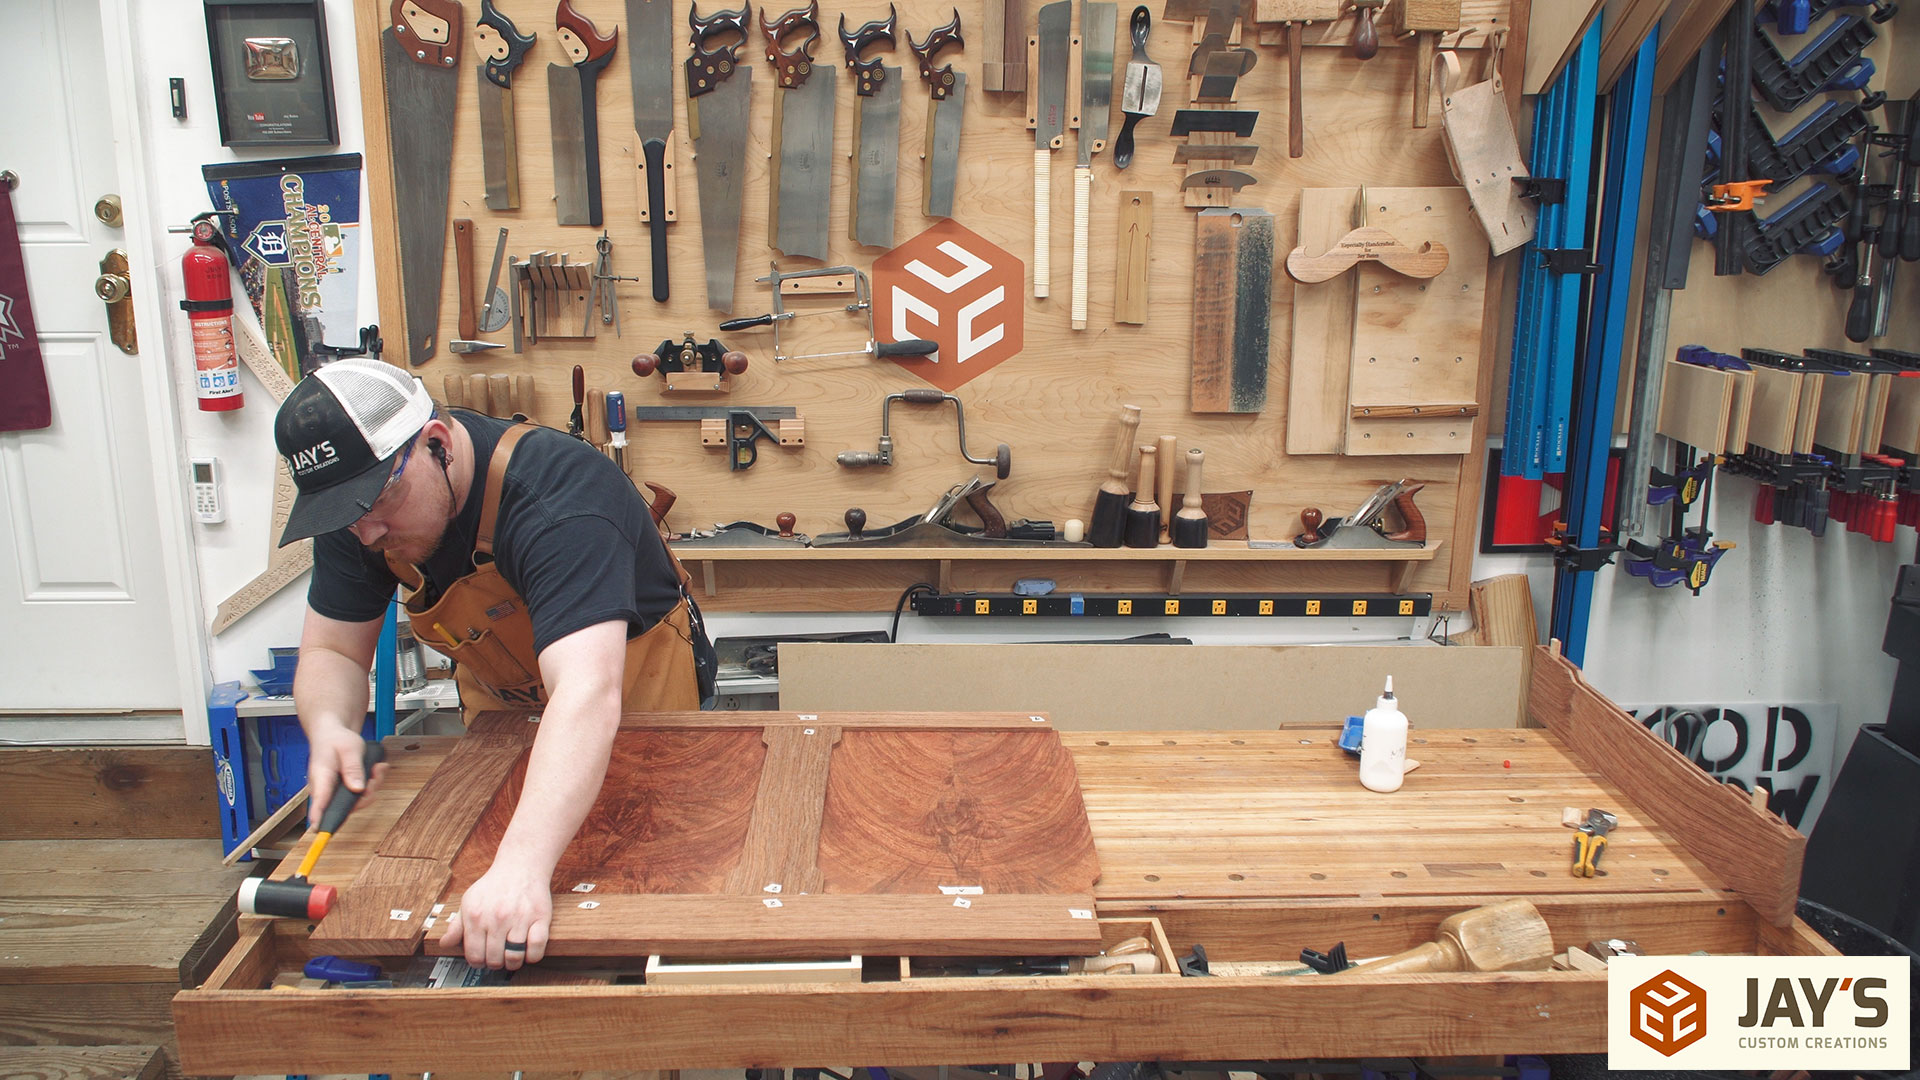
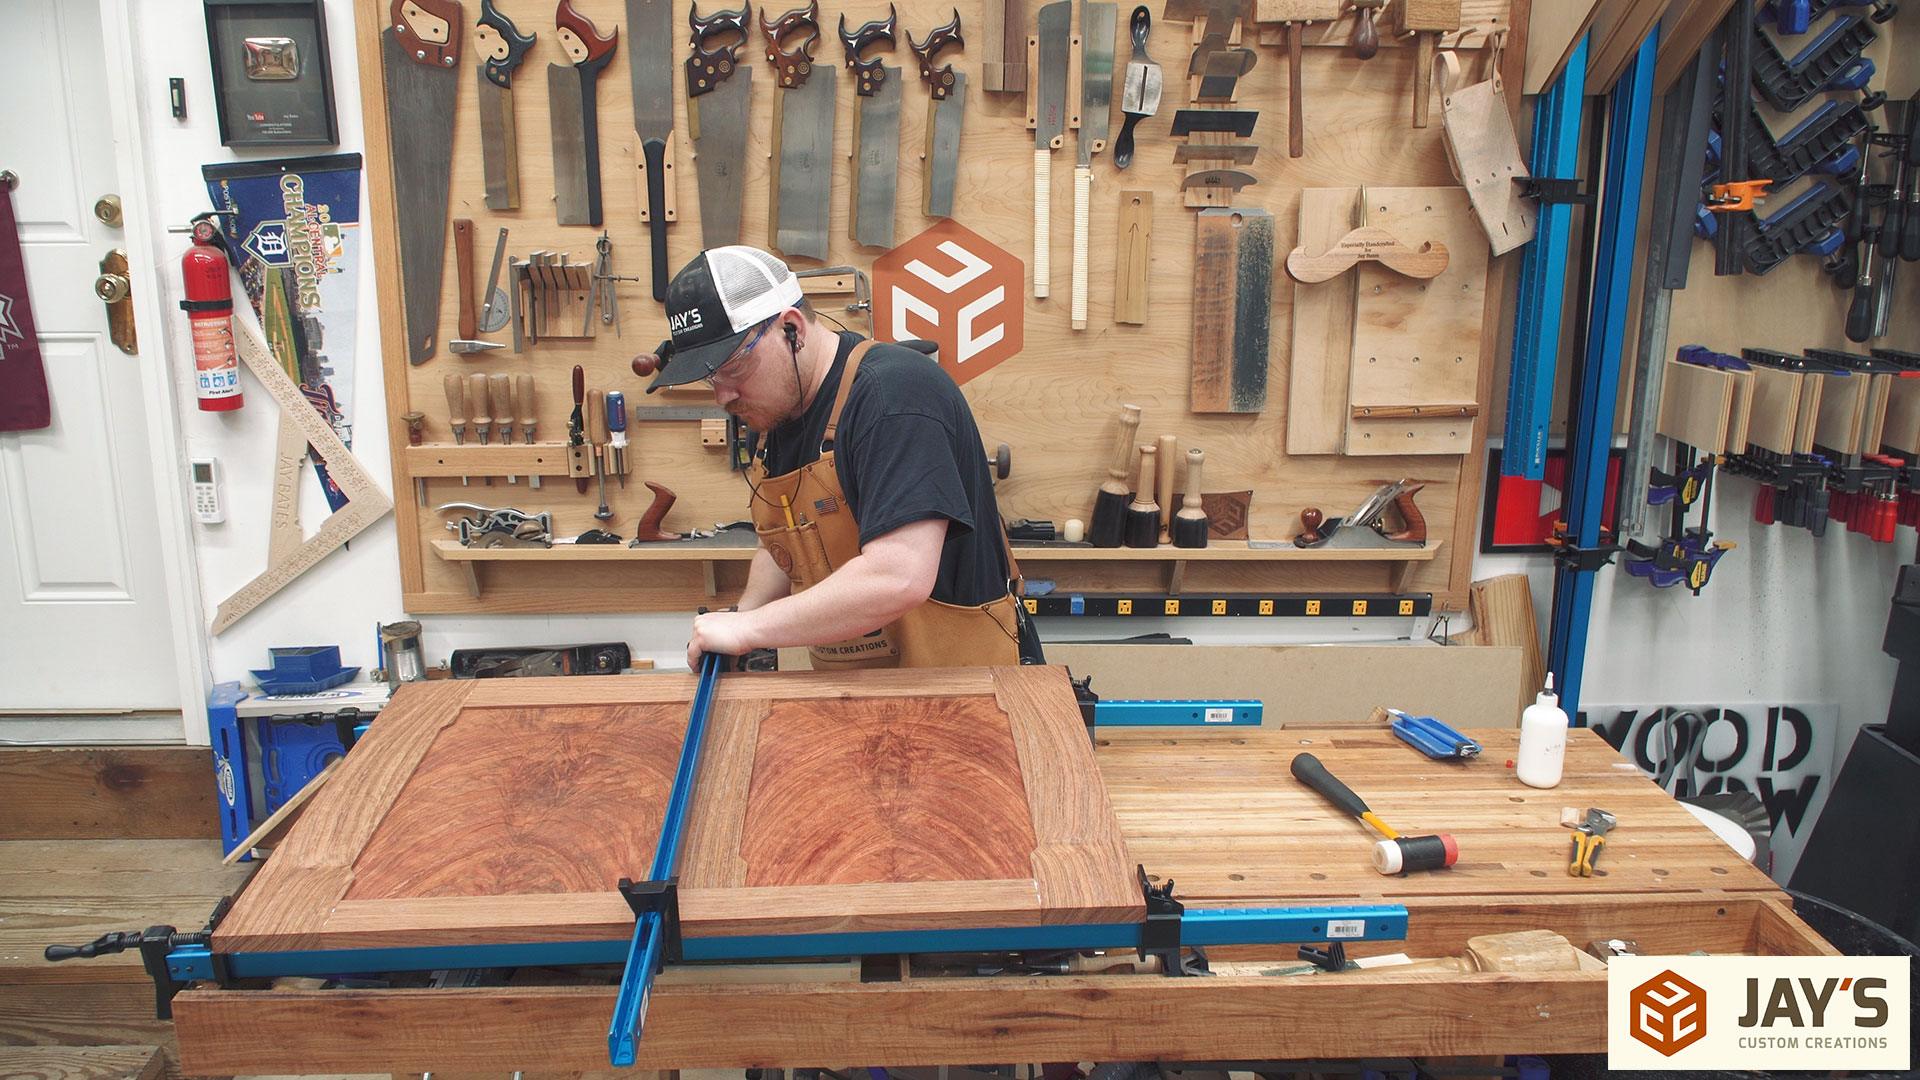
Finally the final assembly can take place.
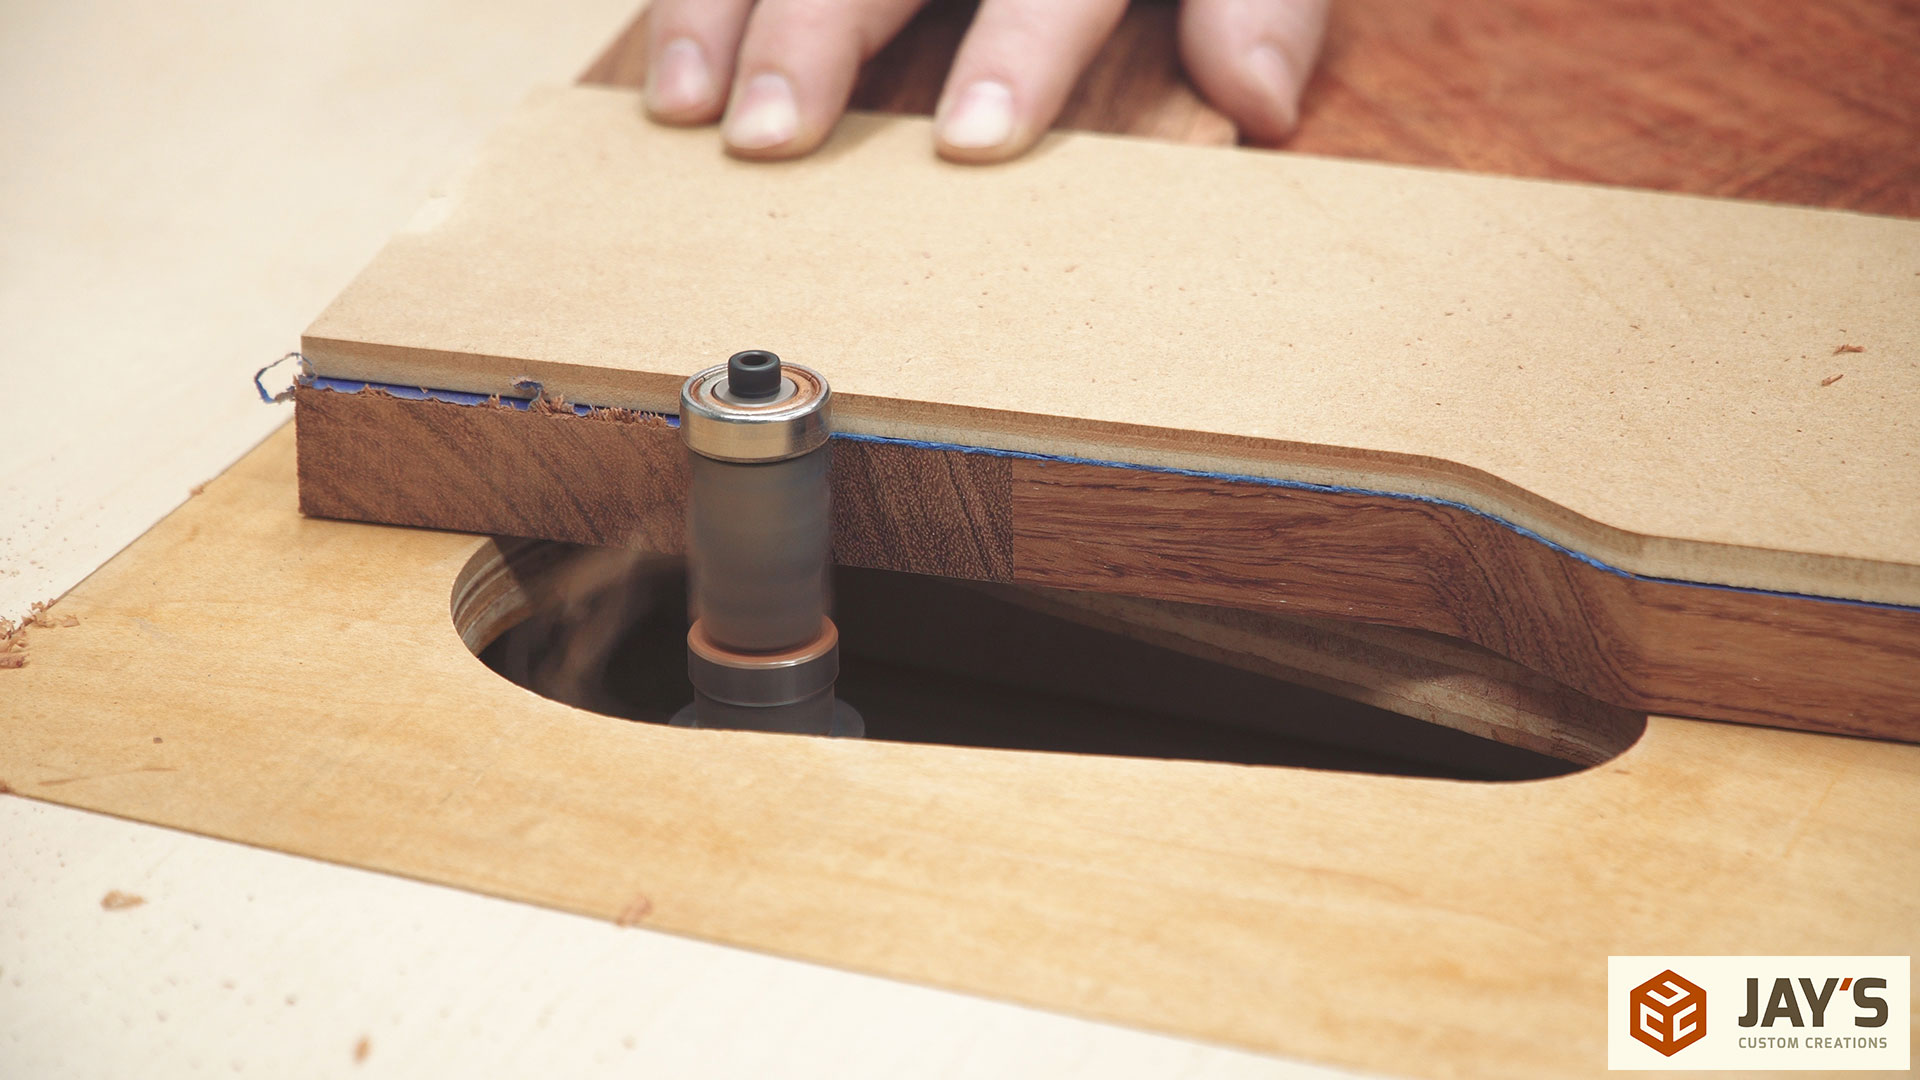
While the glue-up dried I went back to the CNC for the top rail detail. I would have just cut the detail directly into the project but this happened to be the first project I’ve found that was too large for the bed of the CNC. No worries though. I cut a template out of 1/4” MDF instead.
With tape acting as a sacrificial surface I used hot melt glue to secure the template directly to the dog gate.

You can see how strong of a connection this is by lifting up on just the template and it supporting the weight of the gate. This is plenty strong enough to stay put while a flush trim or pattern router bit is used.

Instead of routing away all of the waste I used a jigsaw to get close to the template first.
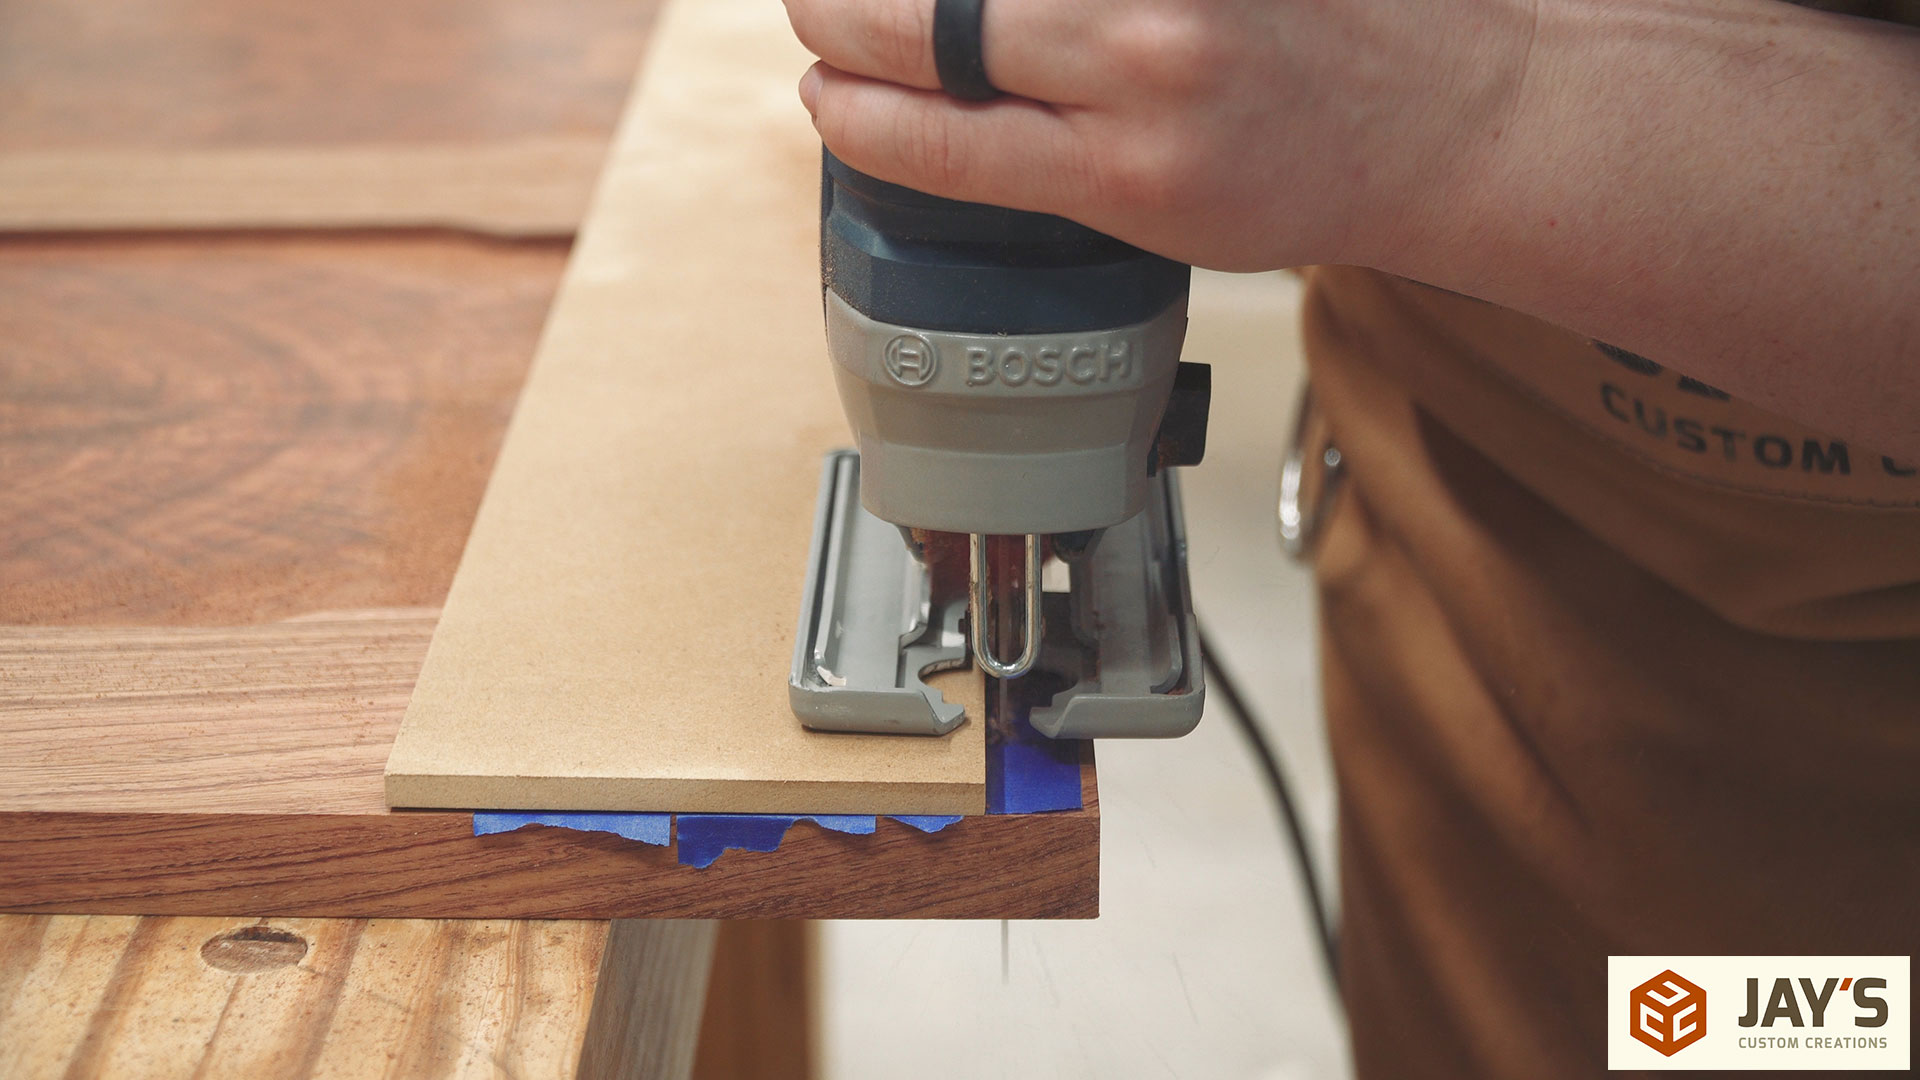
This bit is incredible! And the results speak for themselves. It’s a compression pattern/flush trim bit so both the top and bottom edges of the material are 100% perfect. The bottom section cuts up into the wood and the top section cuts down into the wood. The larger diameter makes it chew through tough grain easily without tearout.
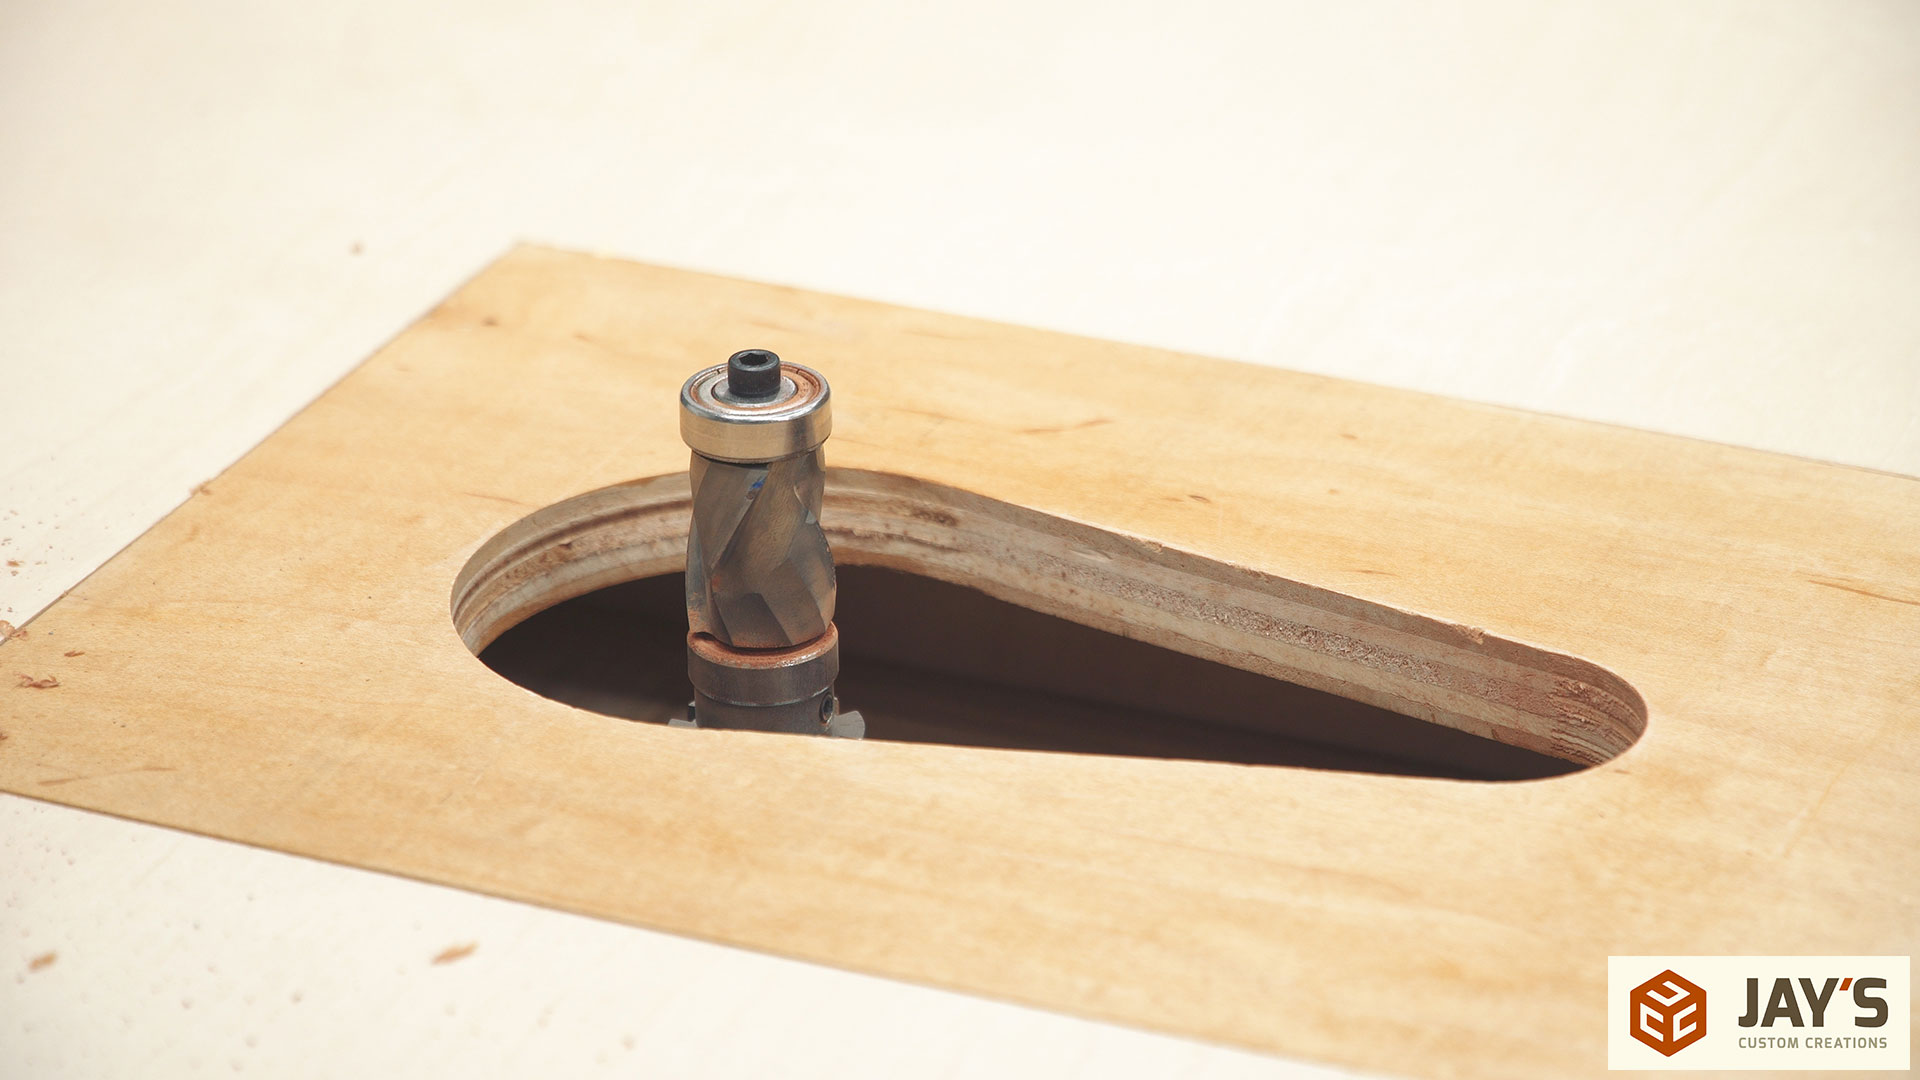
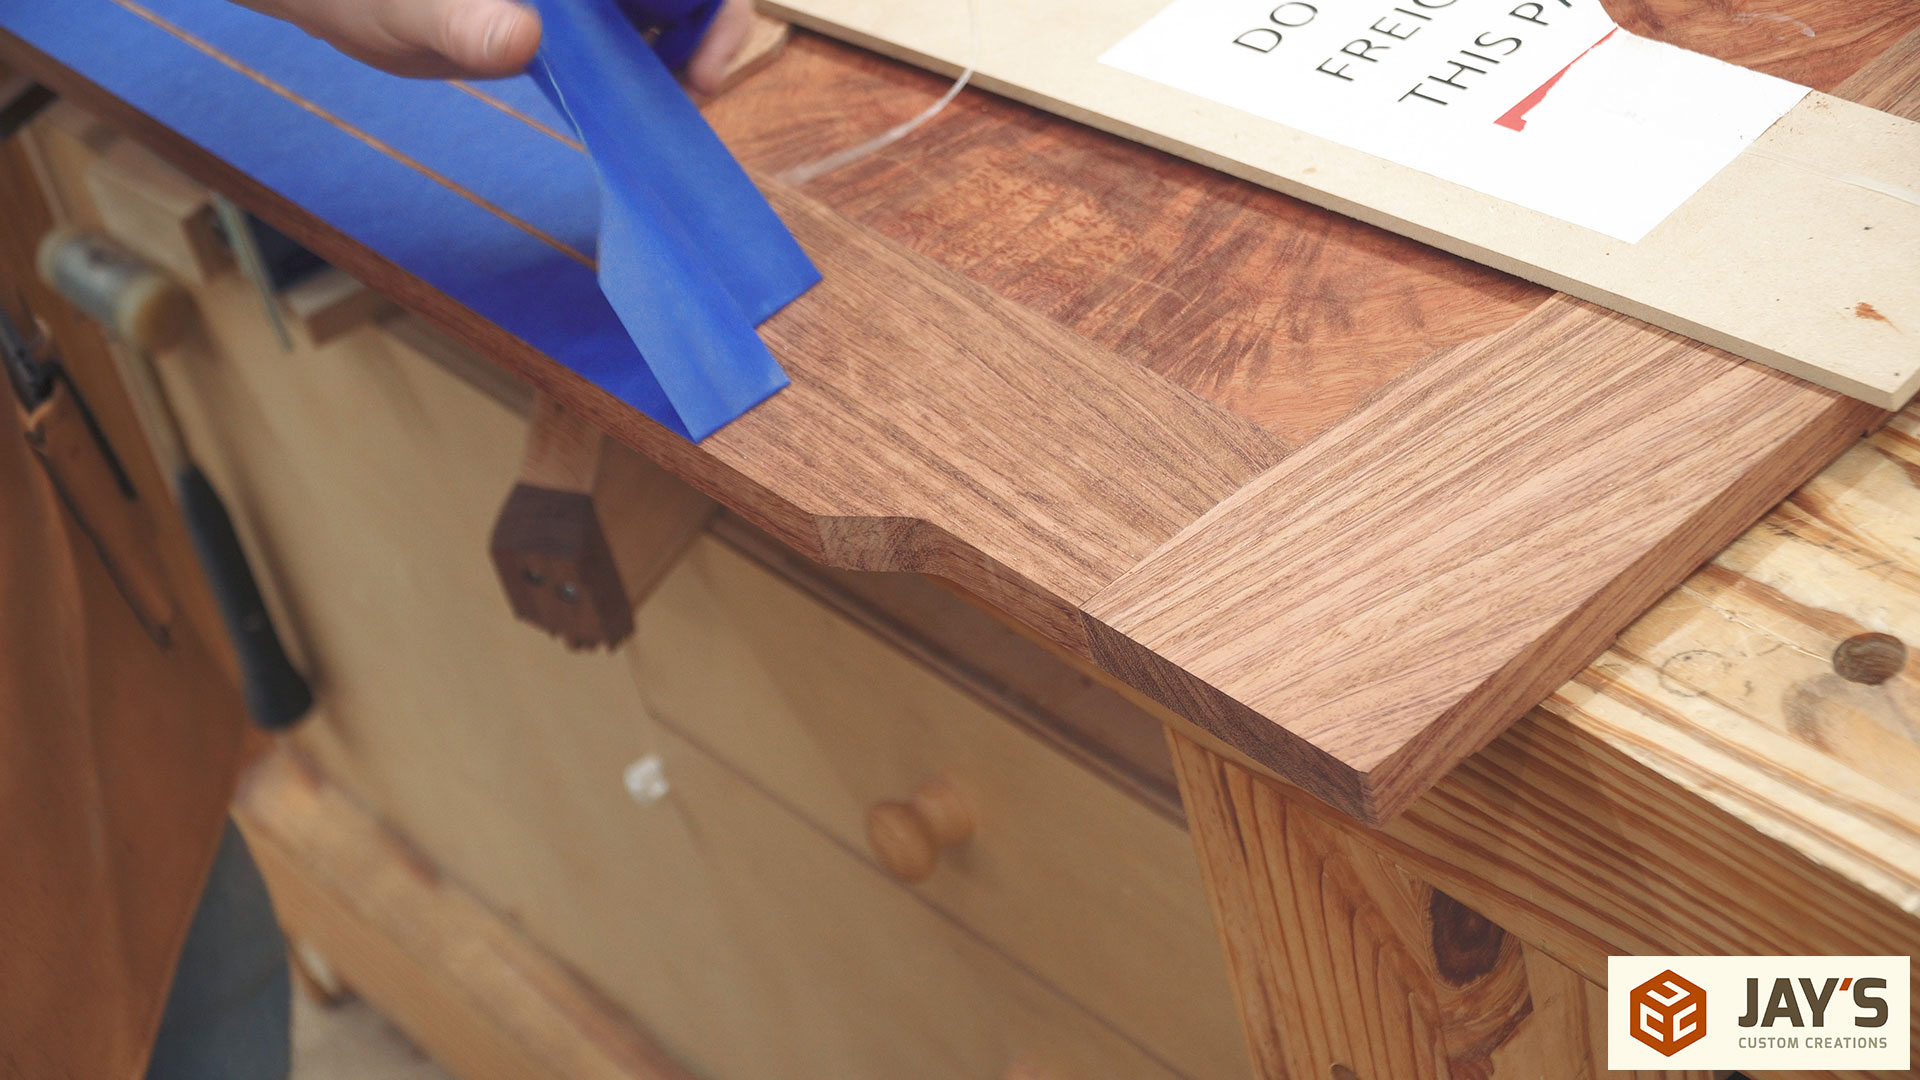
Pealing back the tape to reveal the fresh cut.
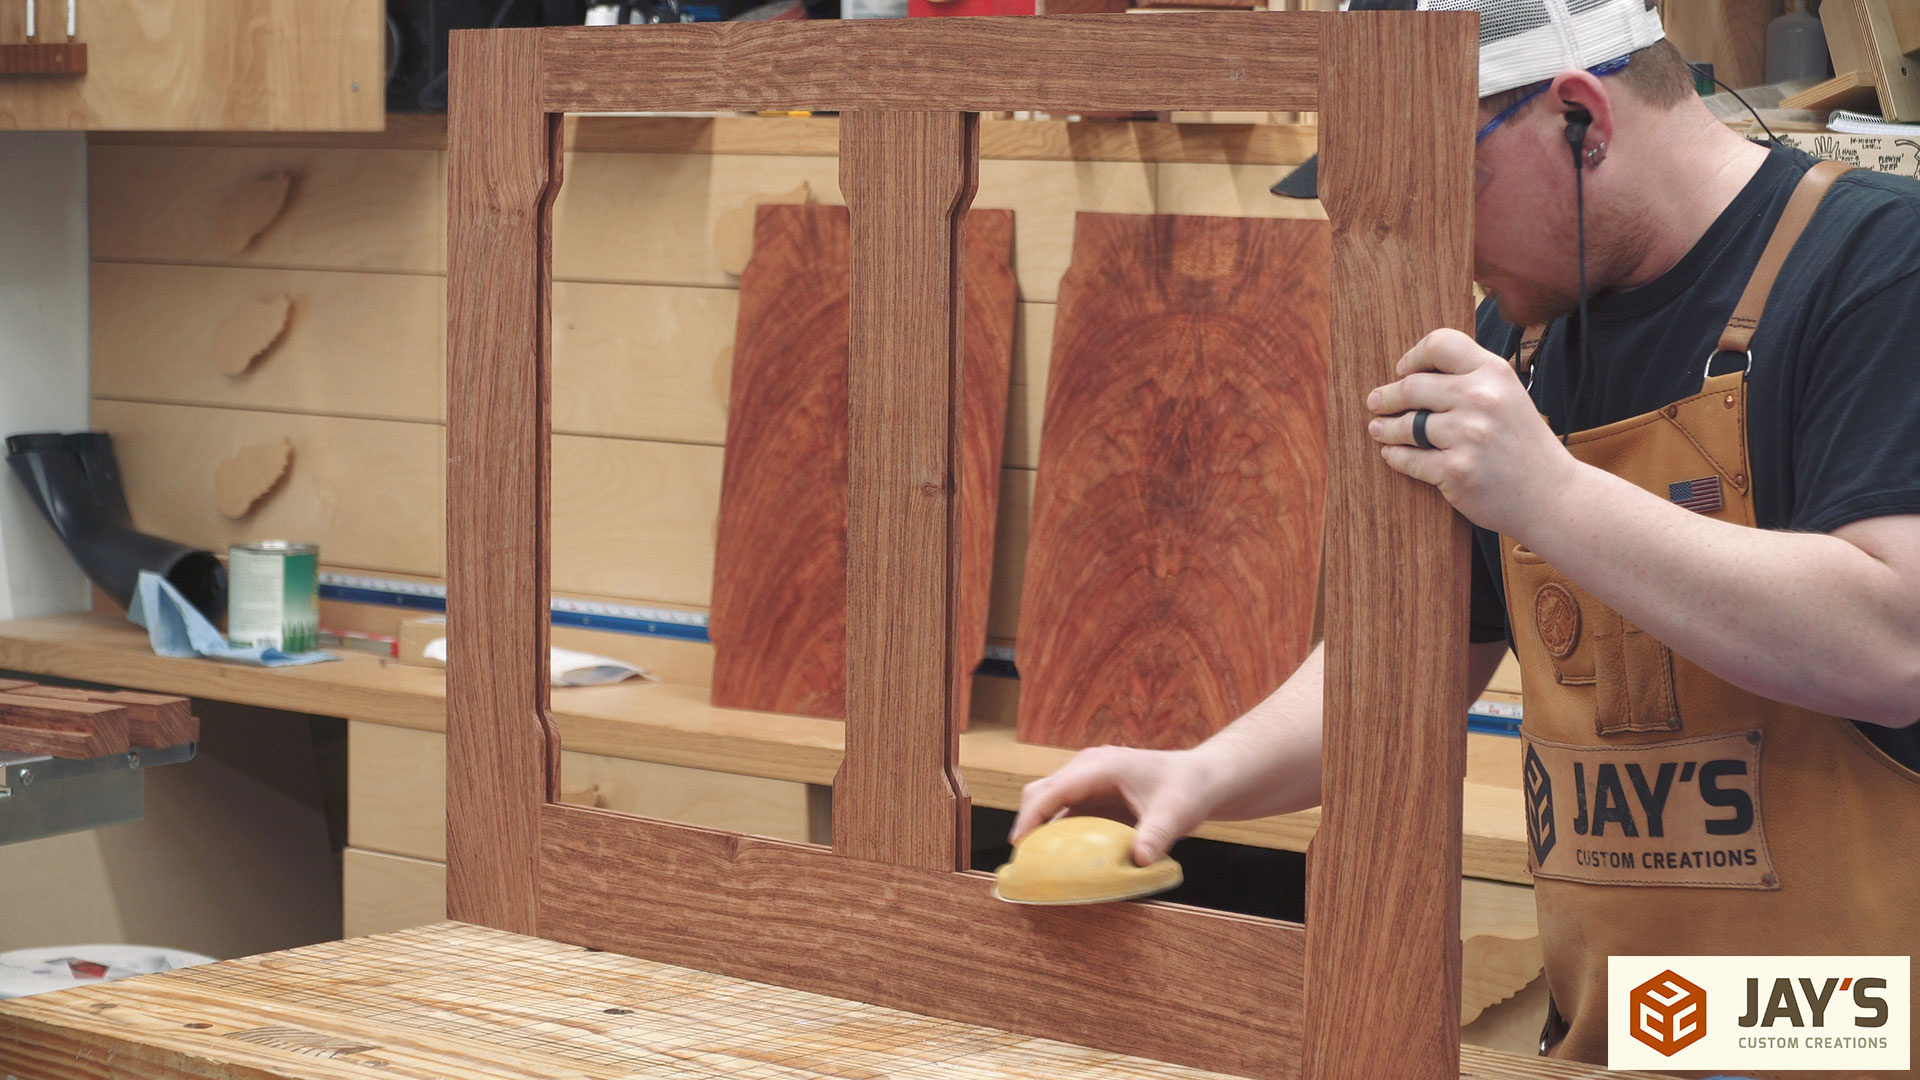
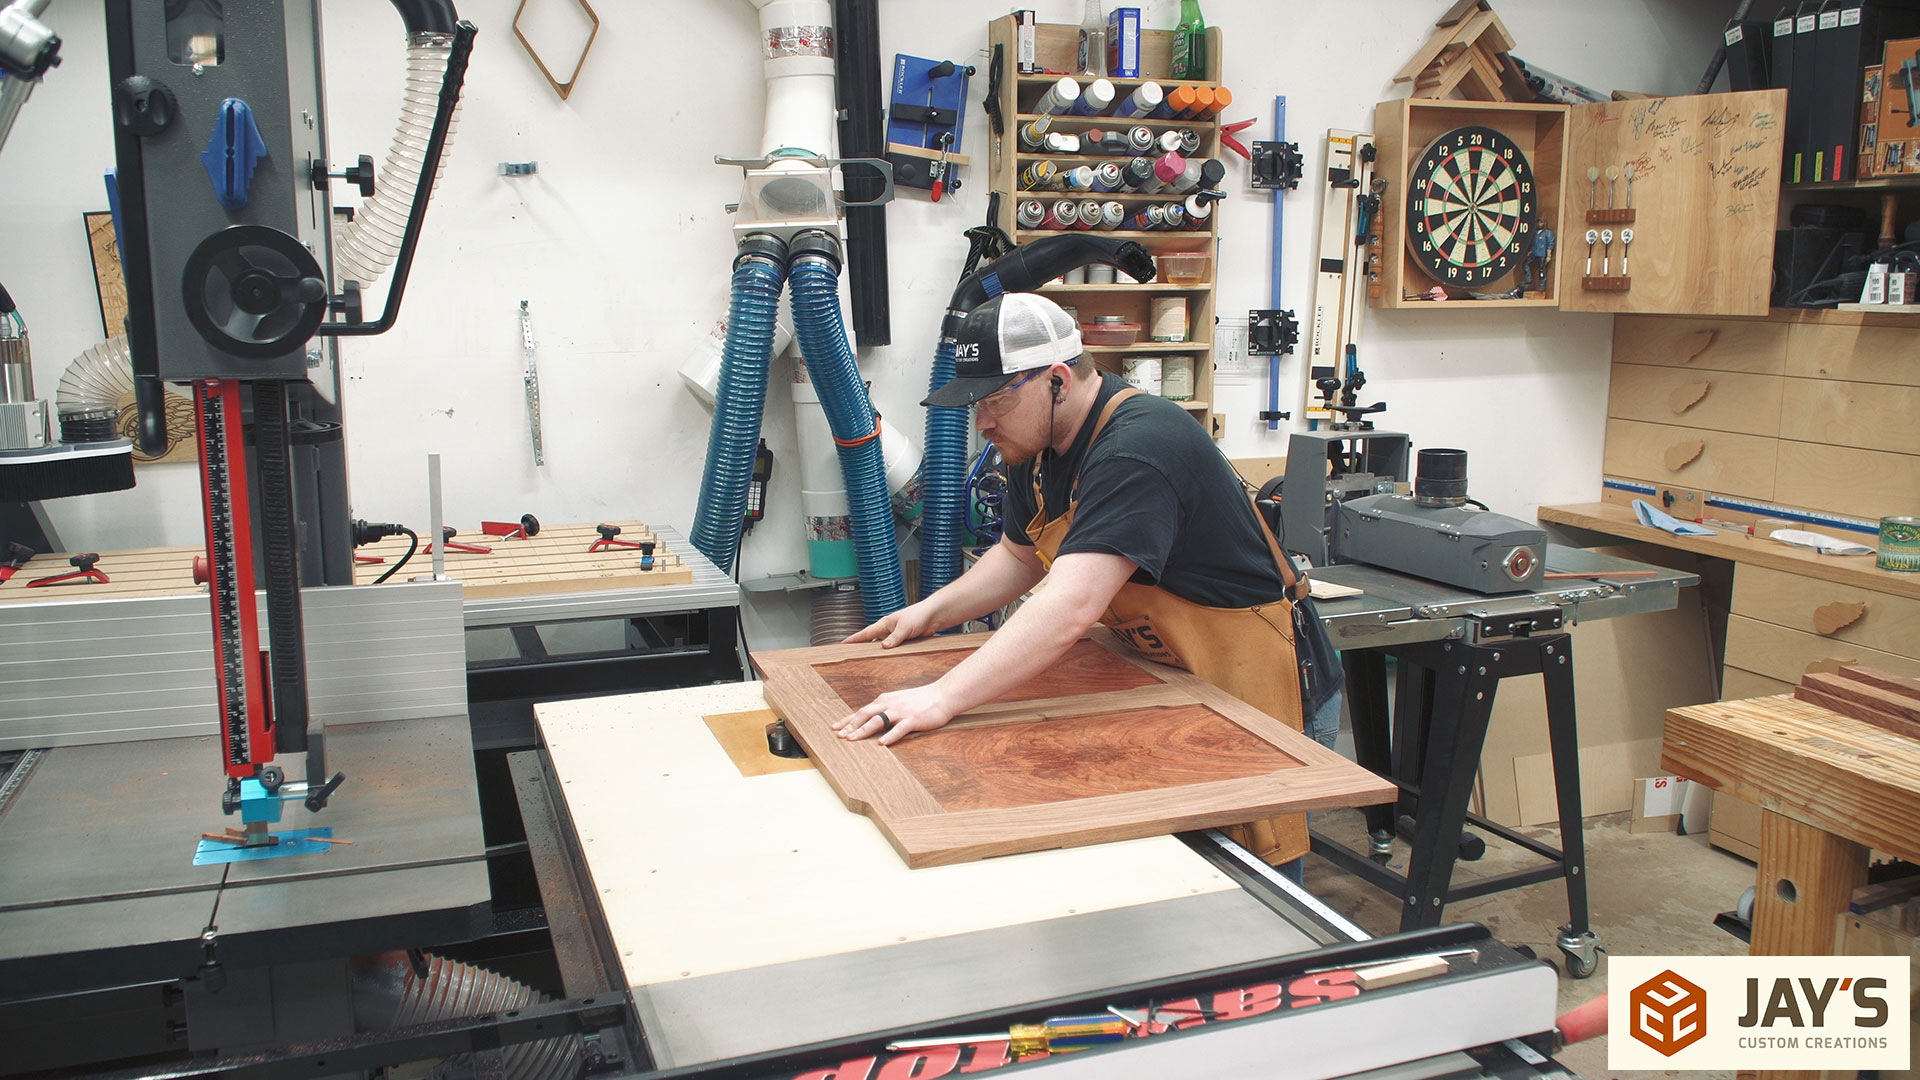
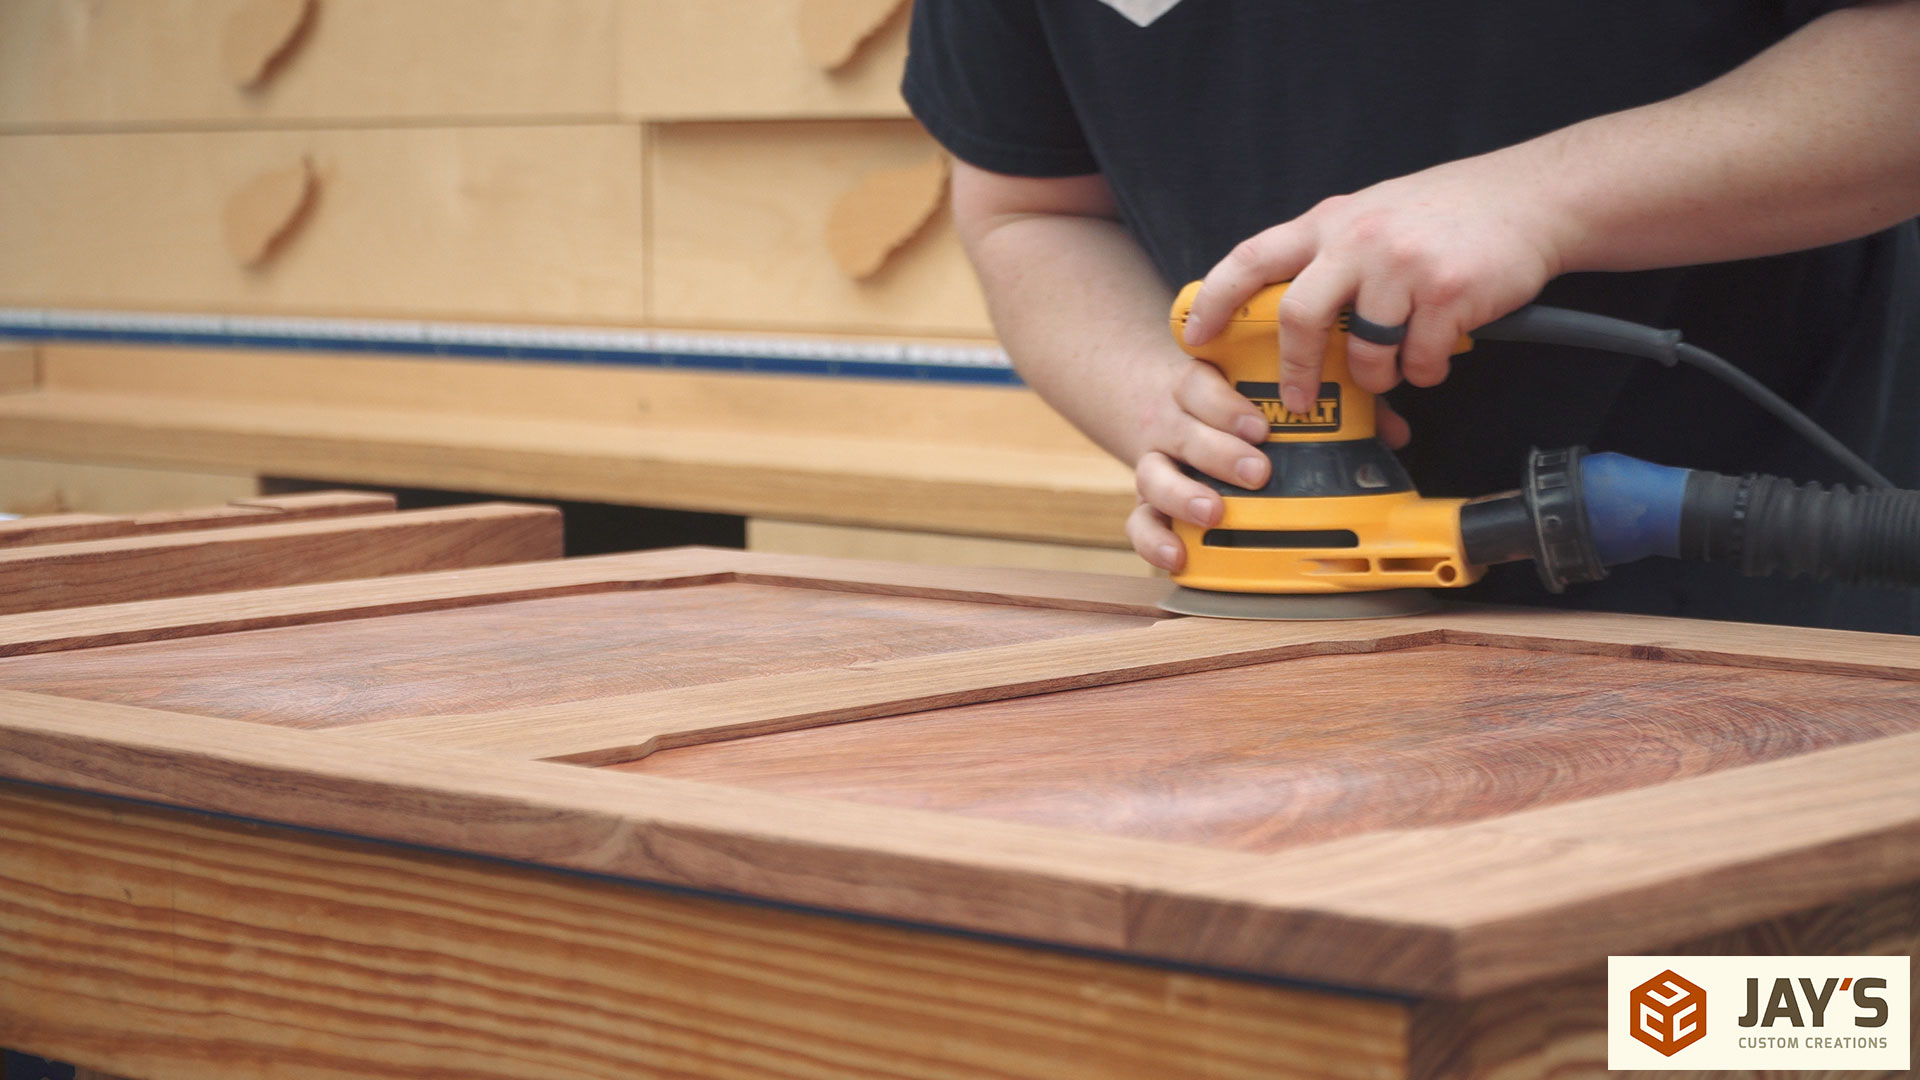
This gate is obviously too large to go through the drum sander and the grain is in different directions as well. So that means I get to go through the grits with the orbital sander. I hate sanding…
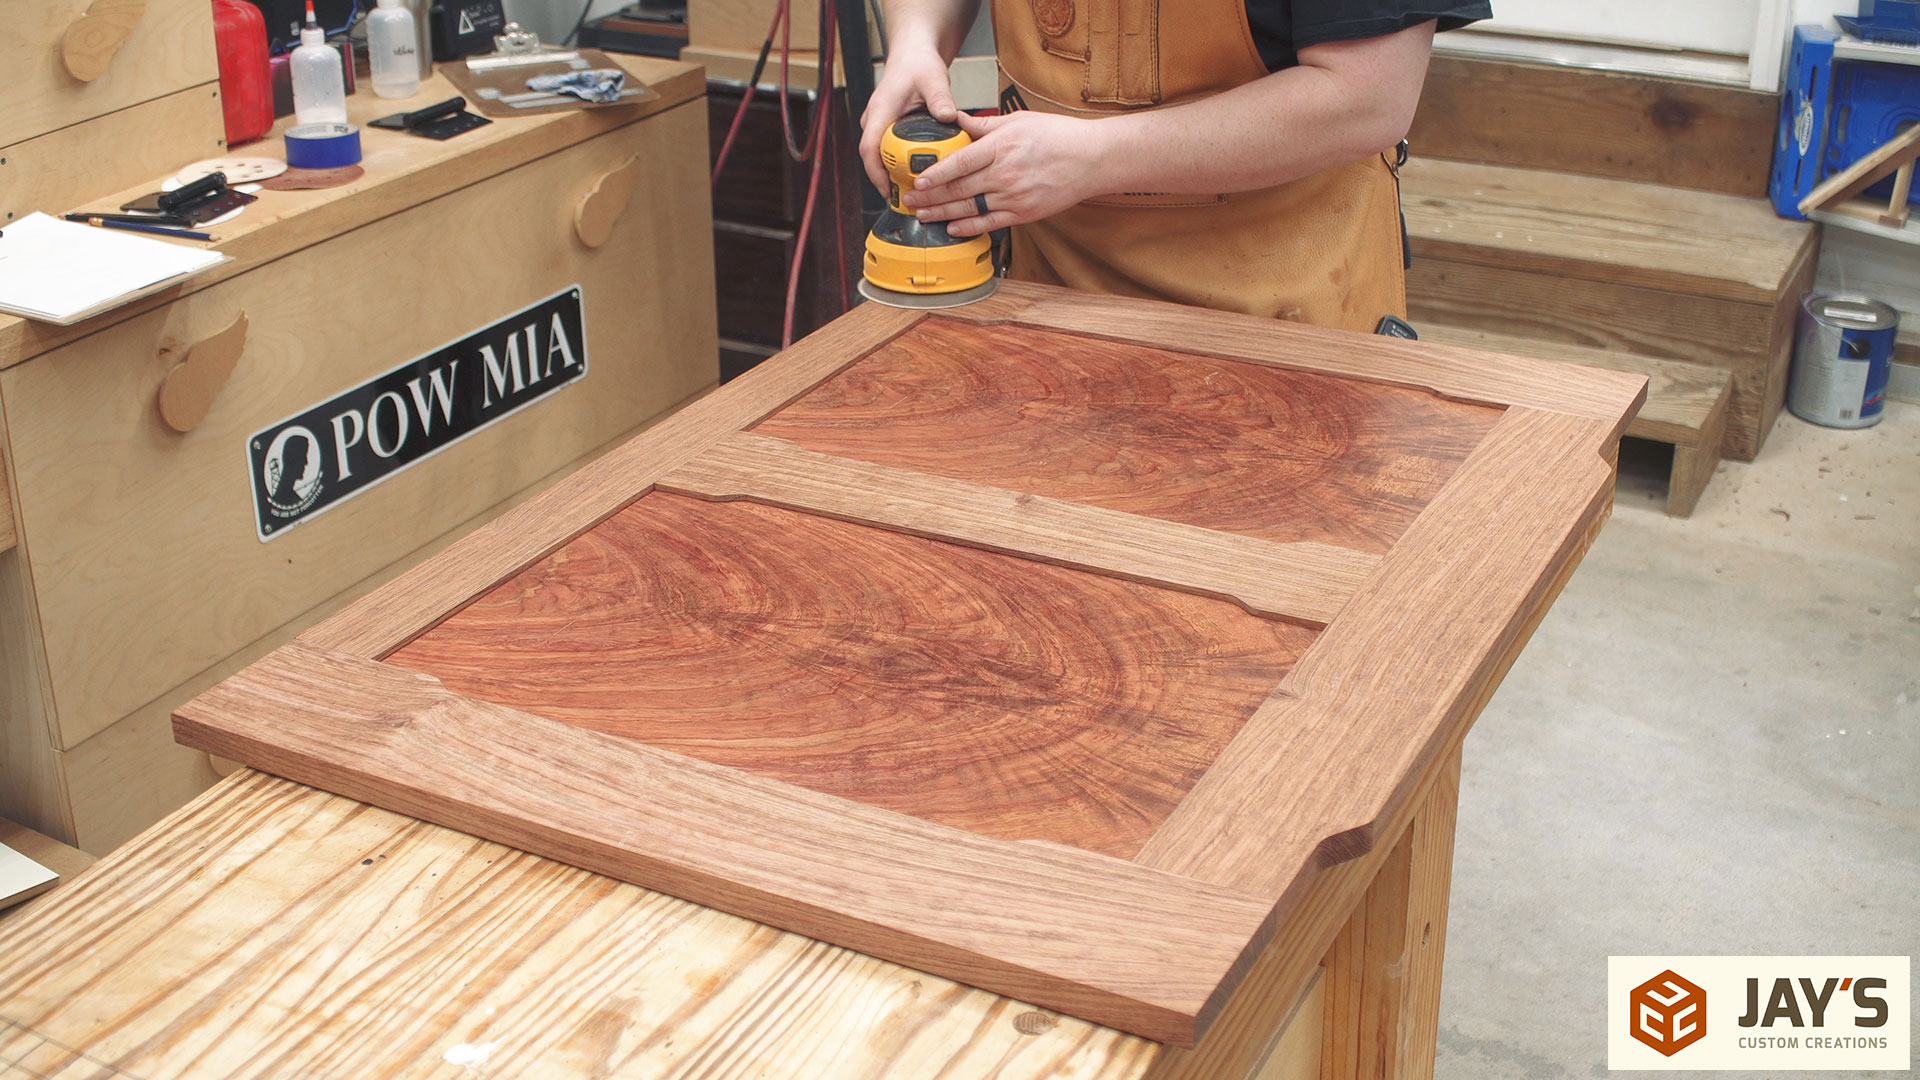
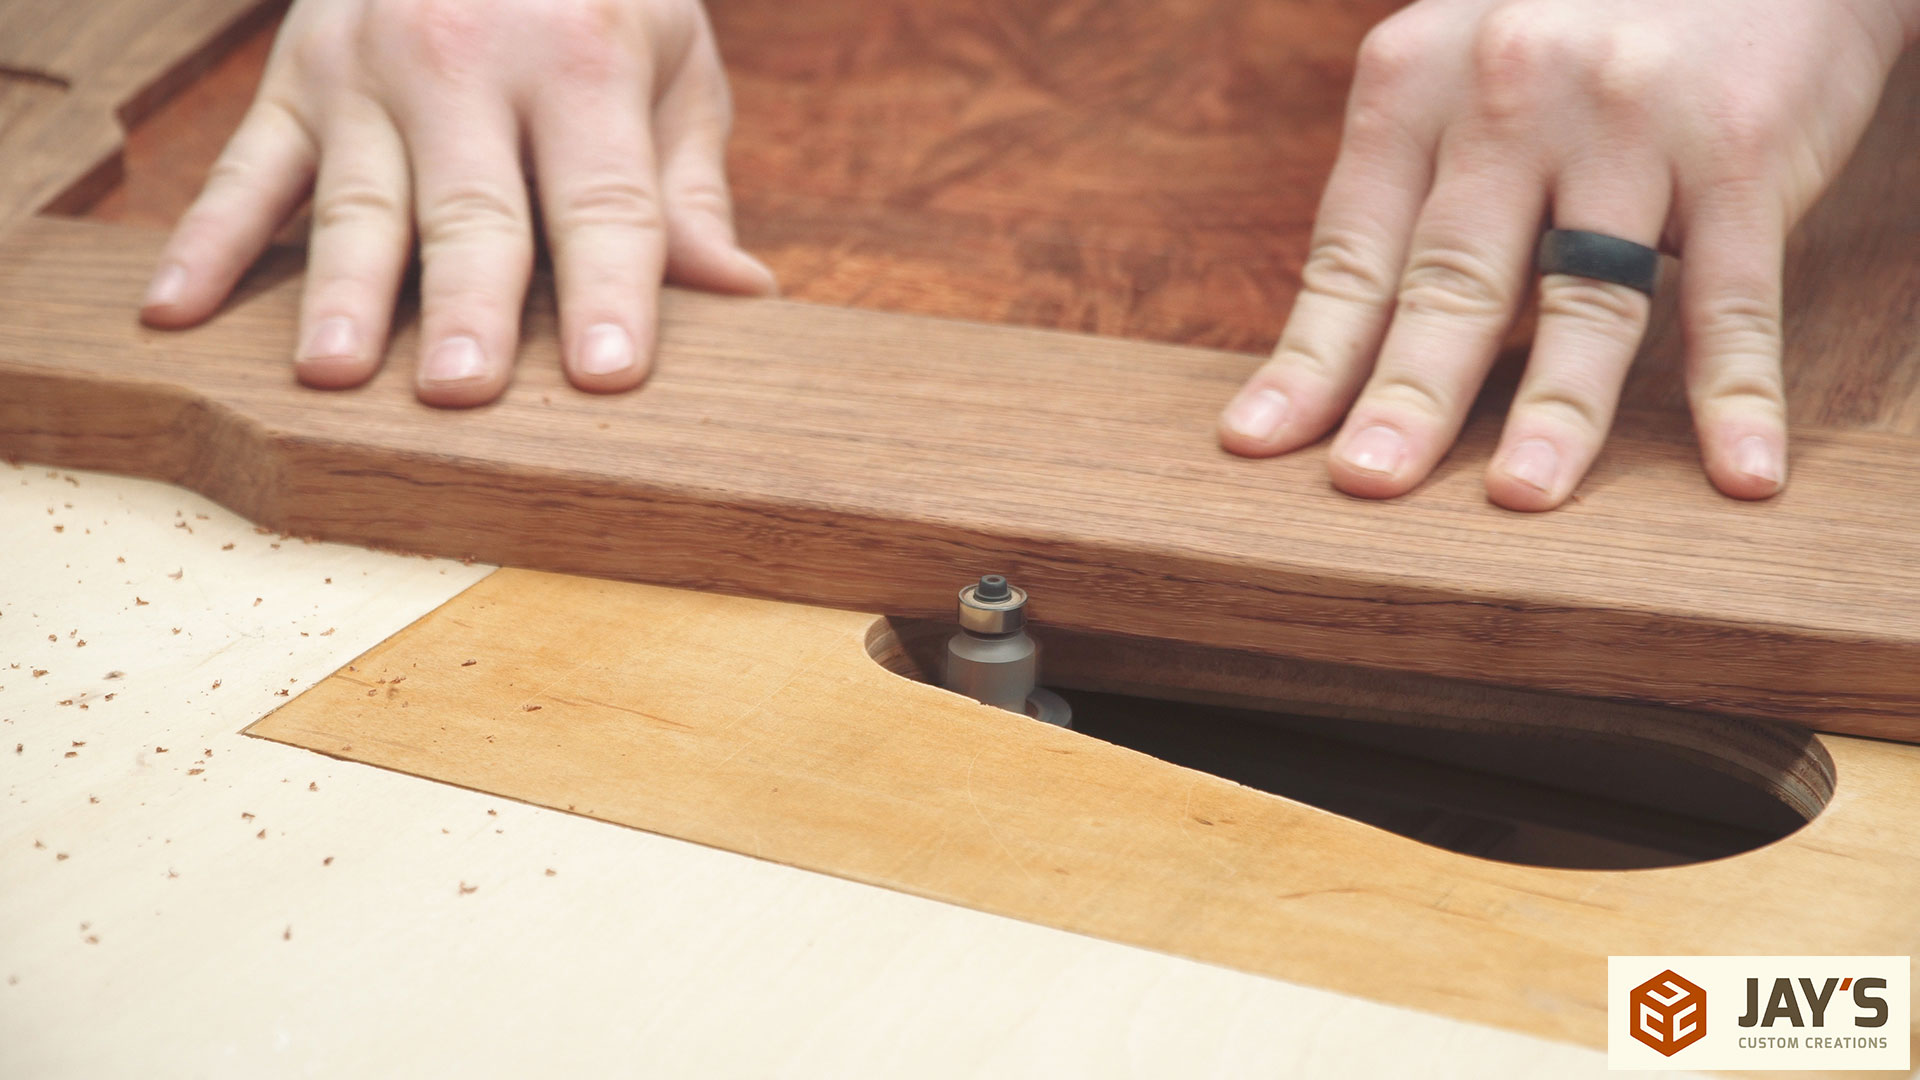
After the rough sanding but before the final sanding a roundover is applied to everything. This is a 1/8” round over bit and it’s perfect for breaking edges without changing the style of the project. It gives the edge more of a refined look in my opinion. I quit using chamfers since getting this.
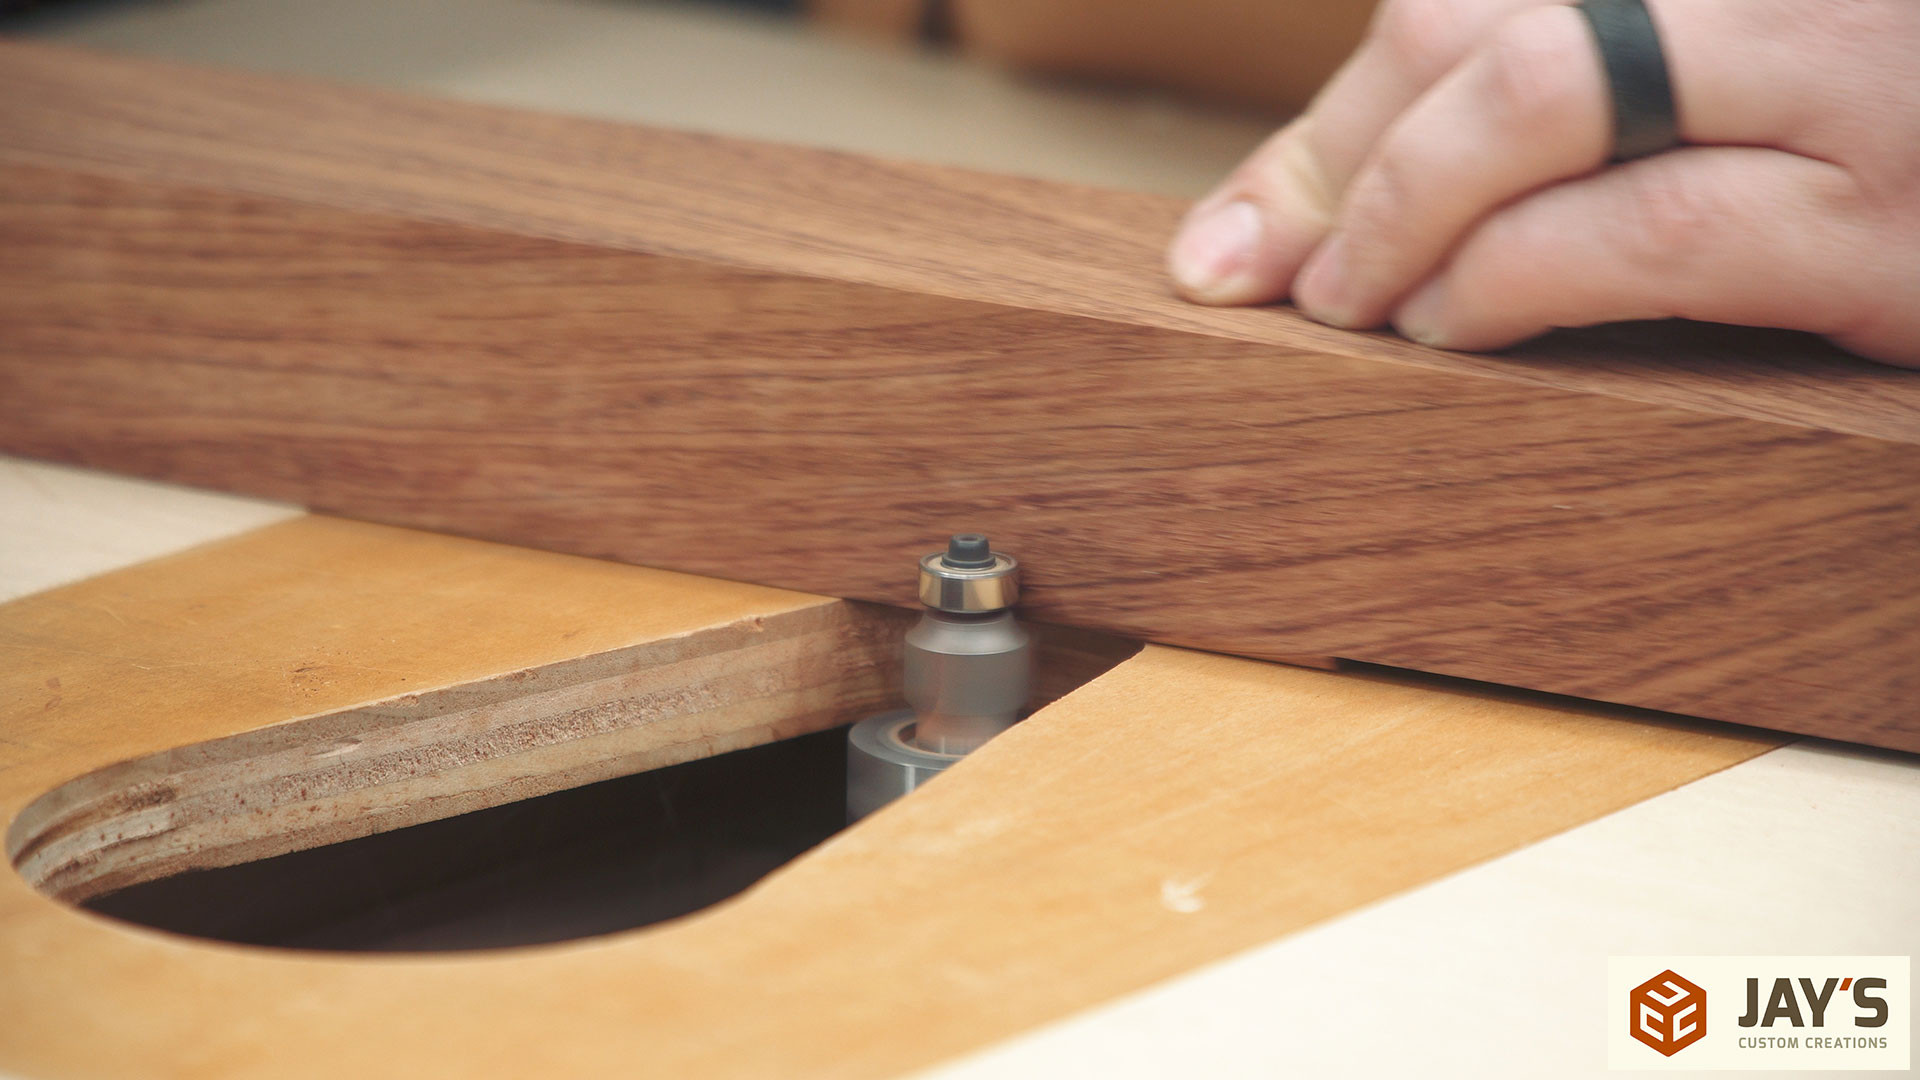
The larger surface of the table saw extension wing offers a lot of material support for large pieces like this.
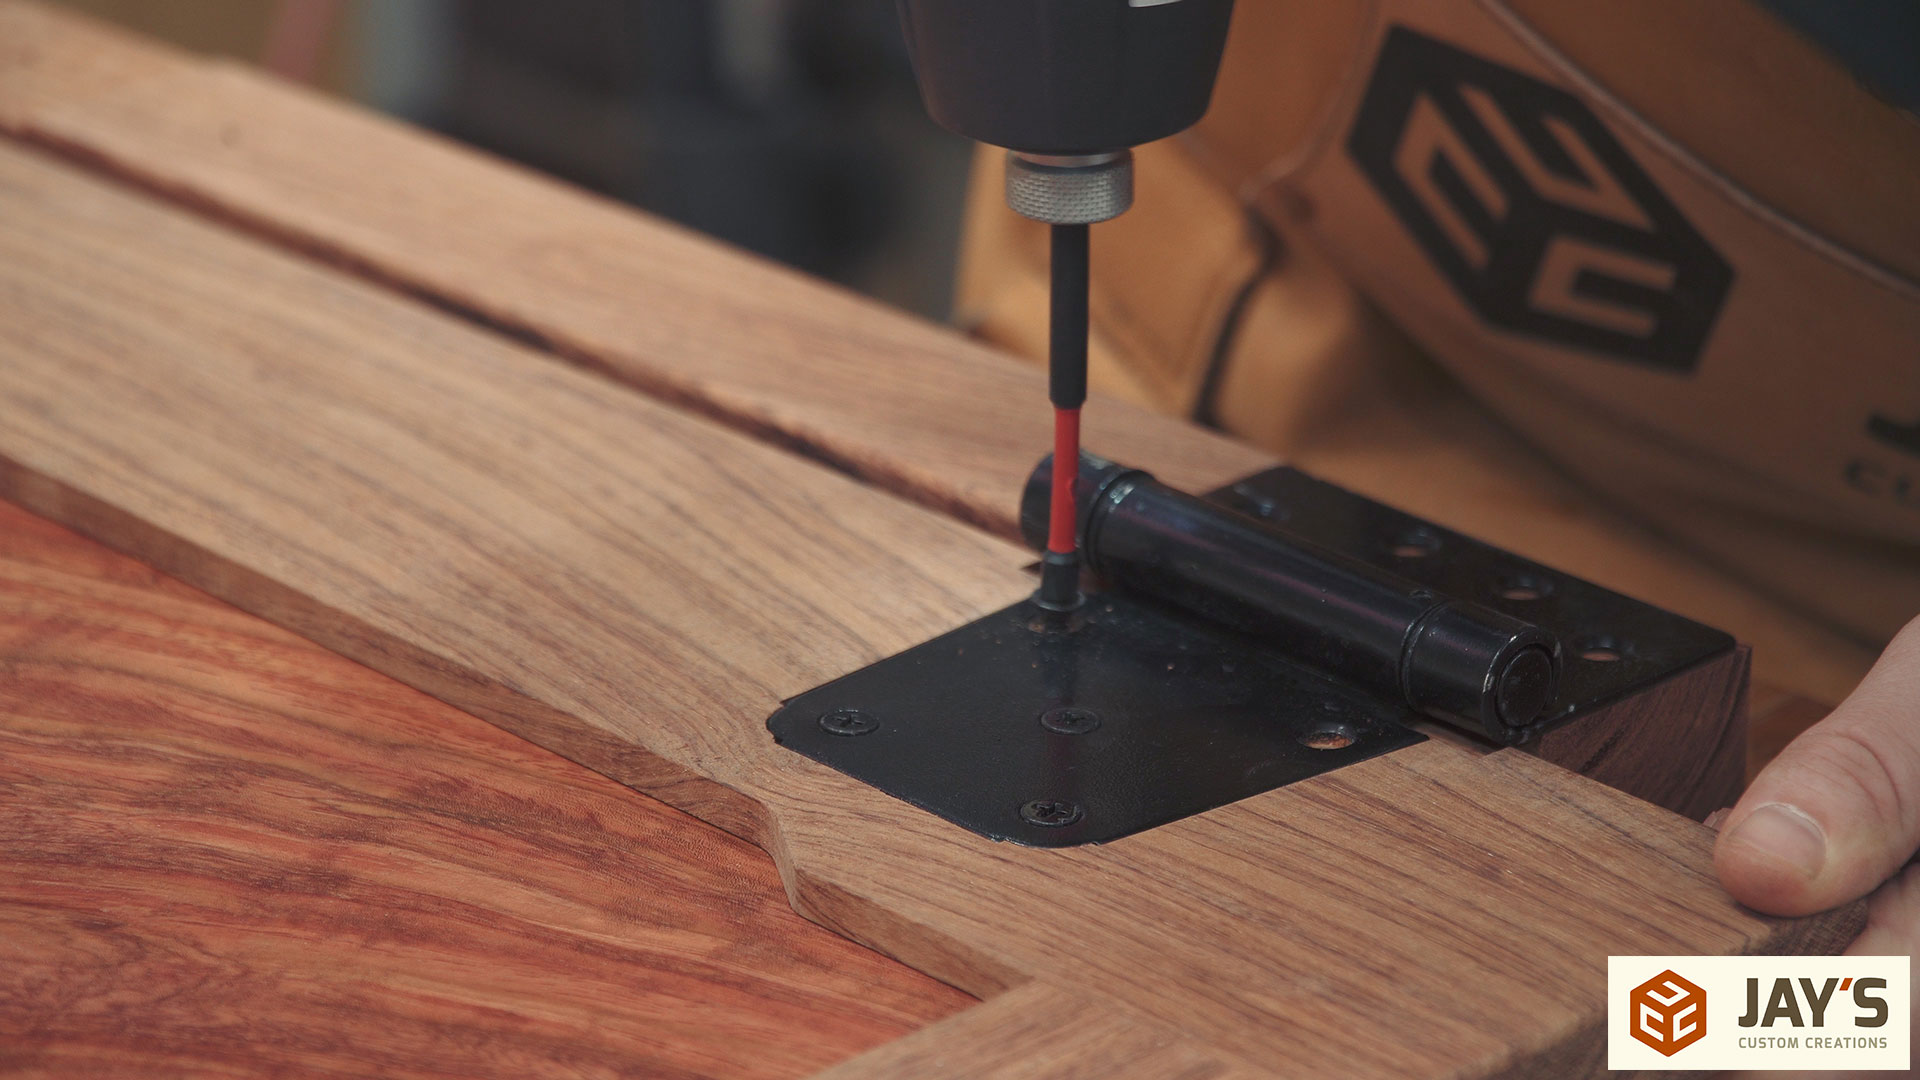
I installed the hinges next so that I could install the entire gate before finish. I wanted to make sure there was no fit issues that needed to be addressed.
After verifying everything fit as it should in the office I brought it back to the shop prep for finish. First, the grain is raised with water.
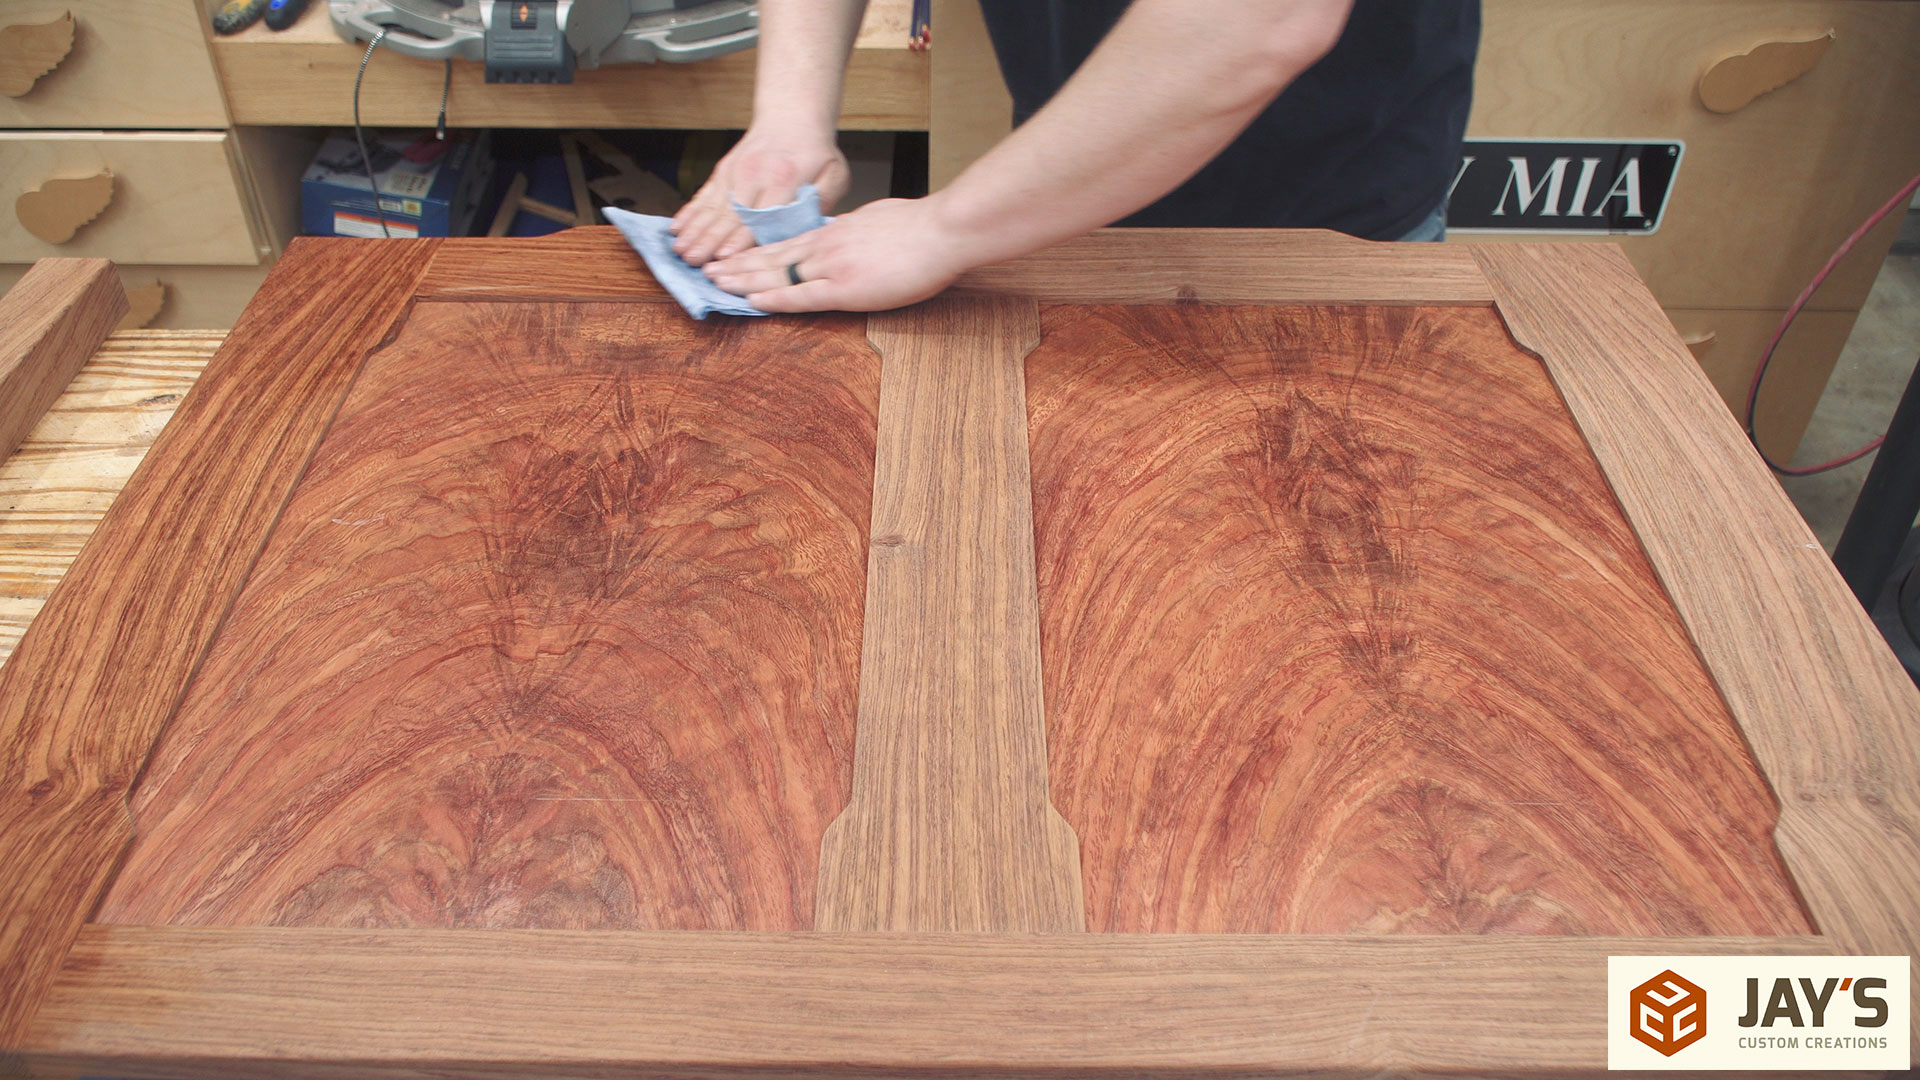
And gently knocked back down with 320 grit sandpaper. You can also see the panels are scuffed up in this image. I lightly sanded them by hand with 320 just to make the final coat really smooth.
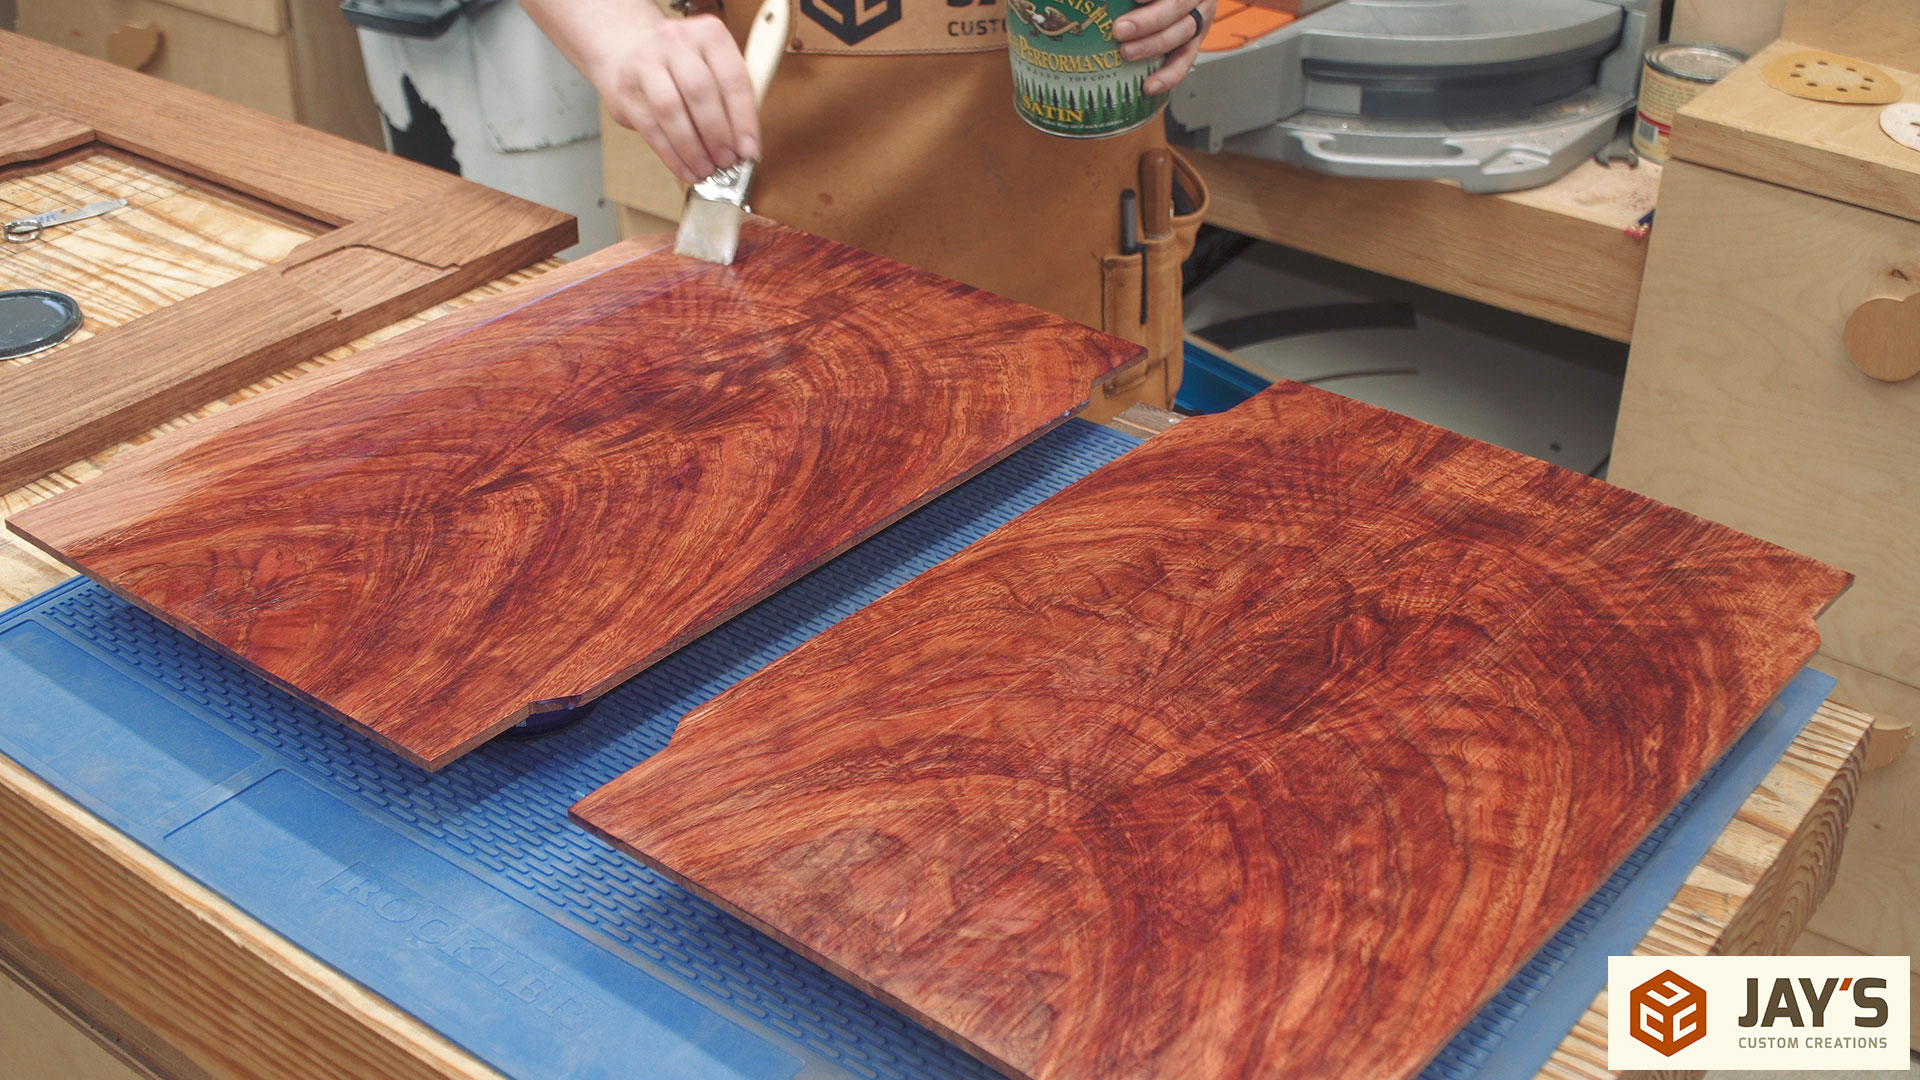
More water based polyurethane on everything. A total of two coats were applied to everything. I didn’t want to go any higher than two coats and risk the satin finish obstructing the wood grain too much.

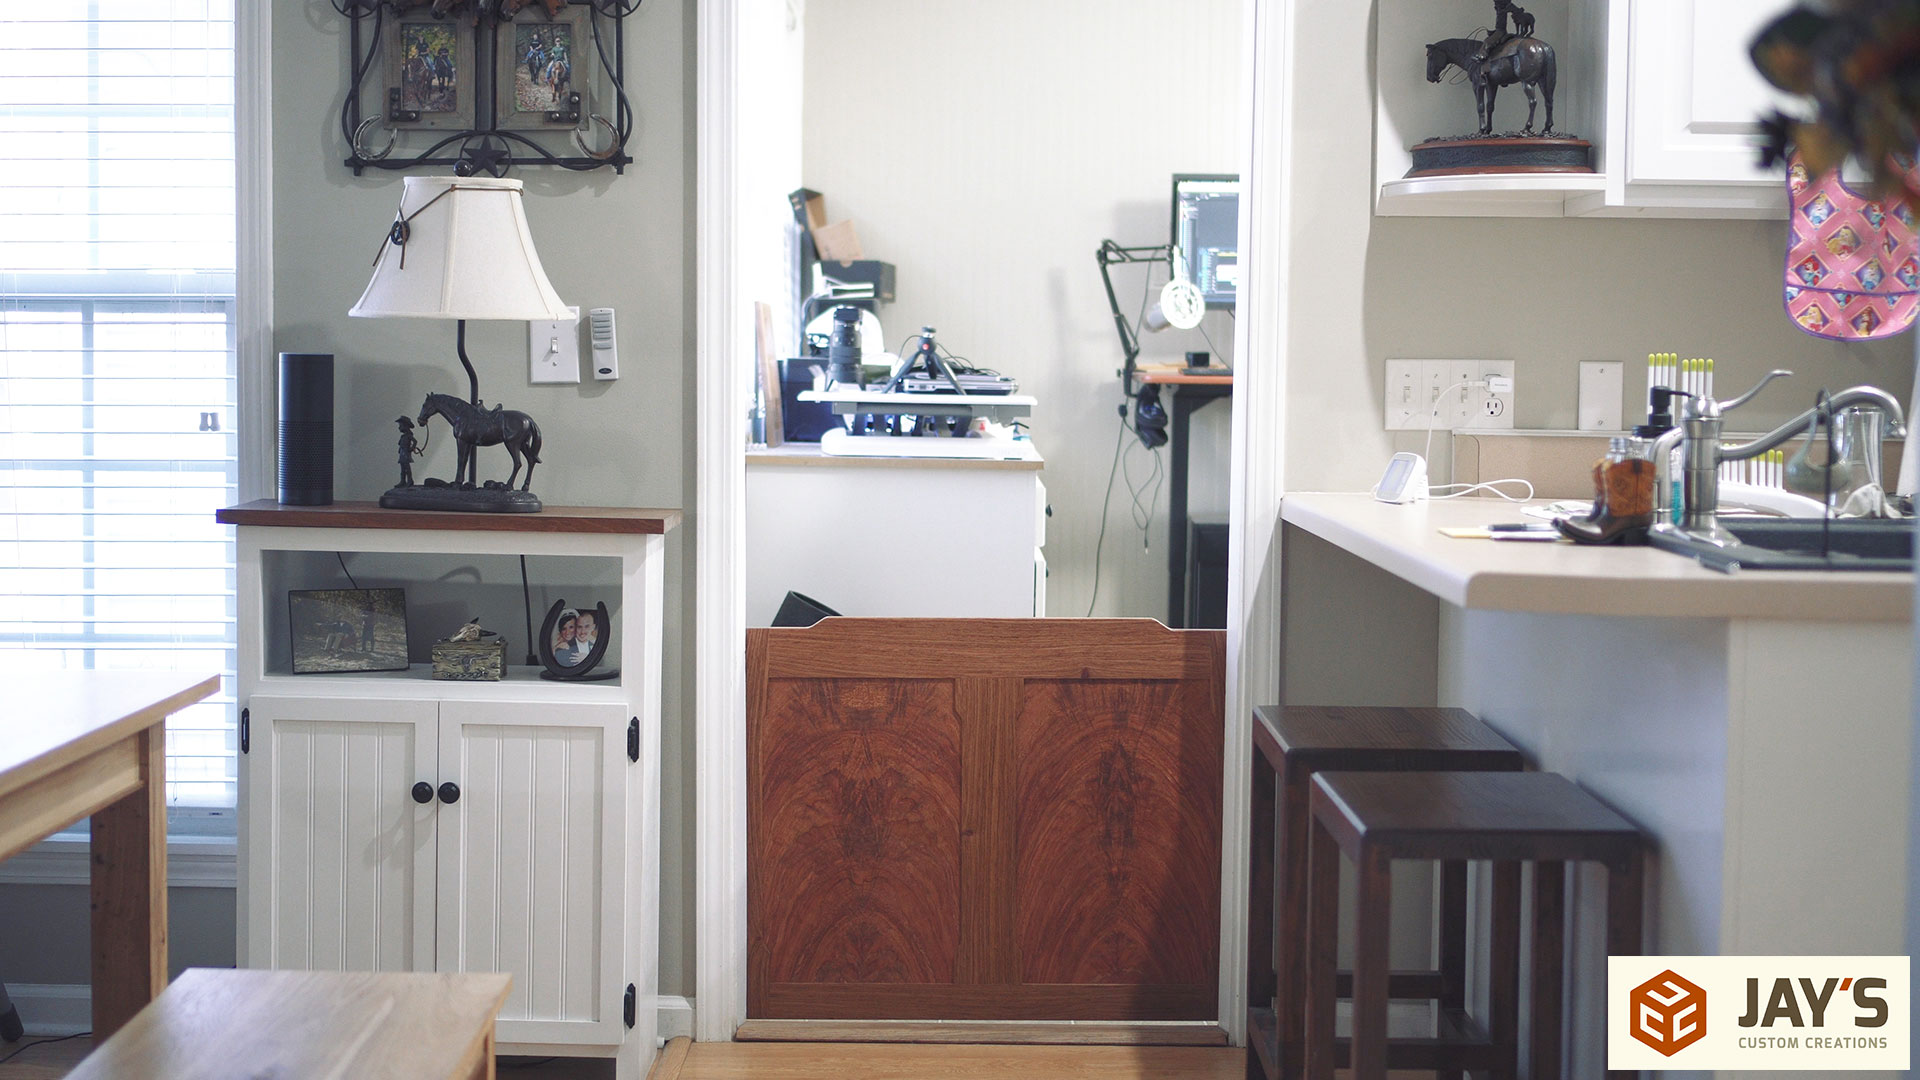
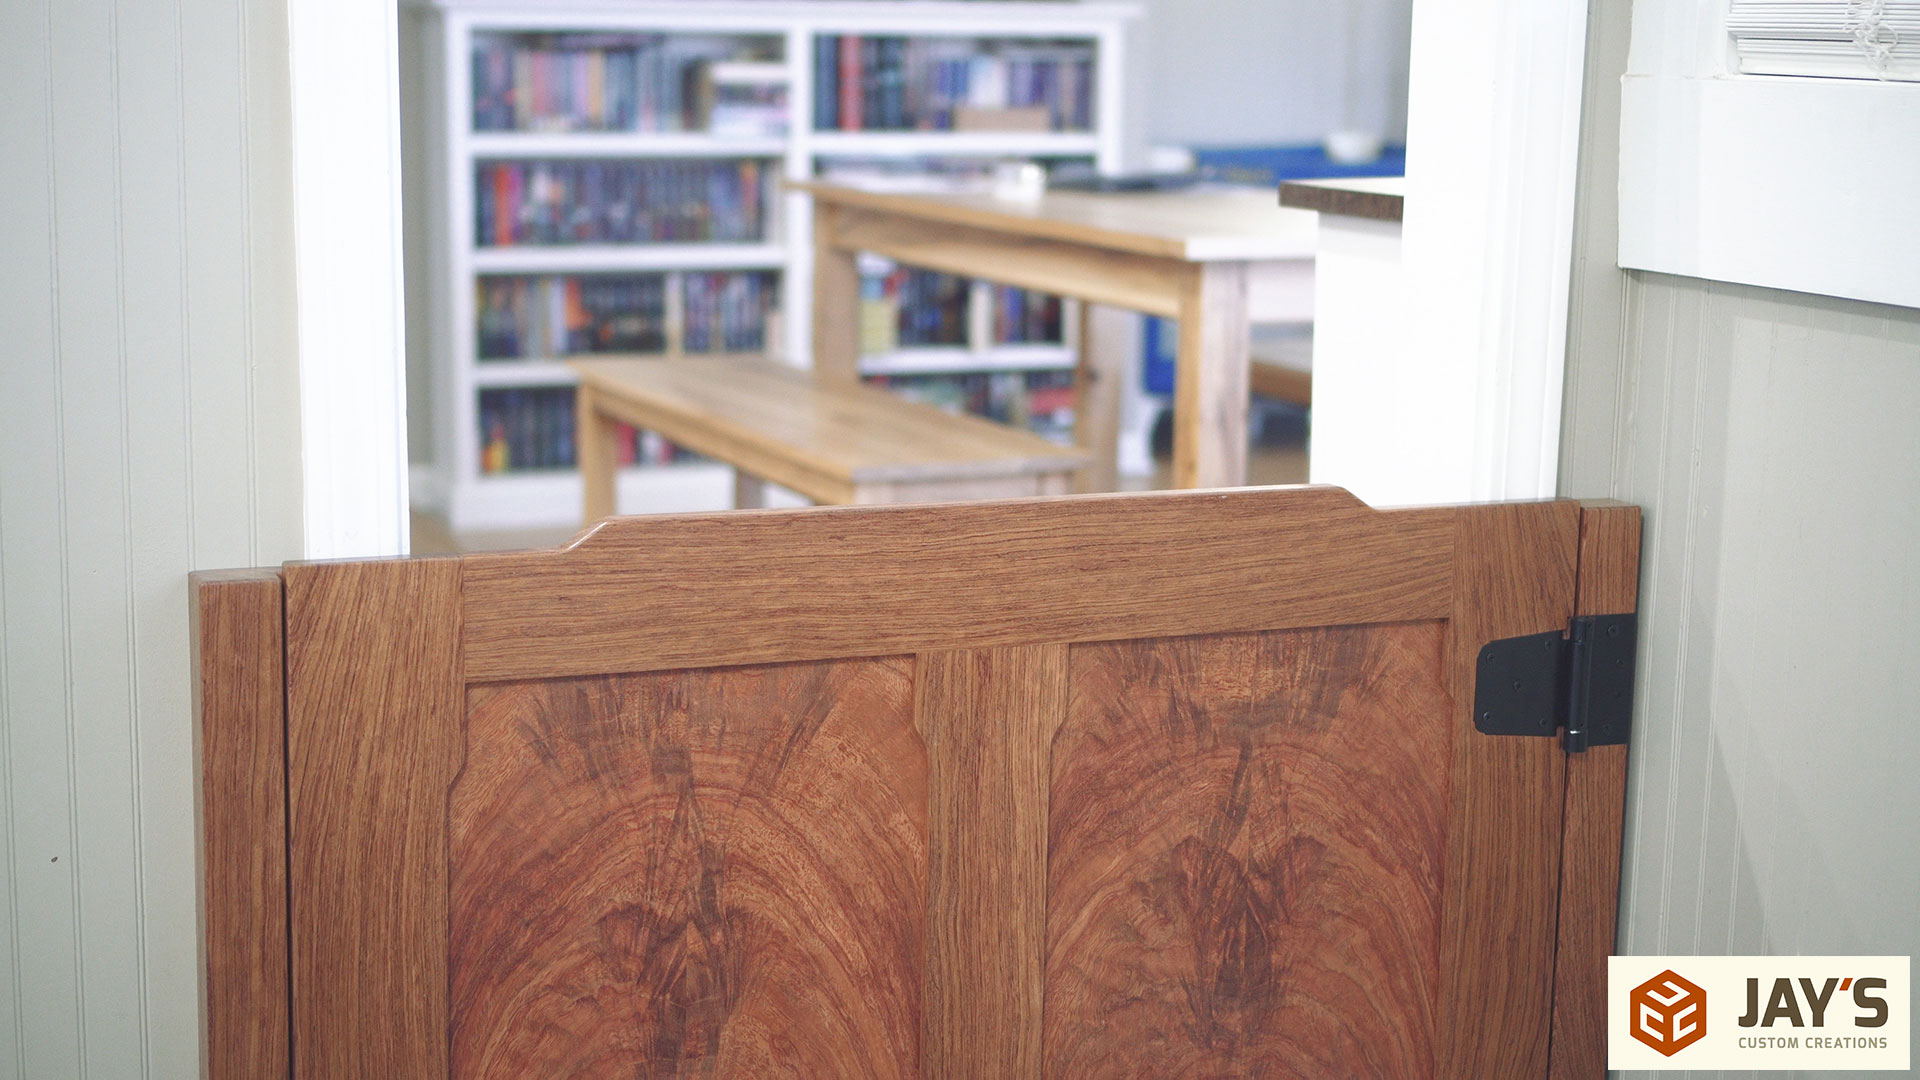
Here’s the finished view from my dining room looking into the office. Notice that none of the mounting hardware or blocks is visible from the outside.
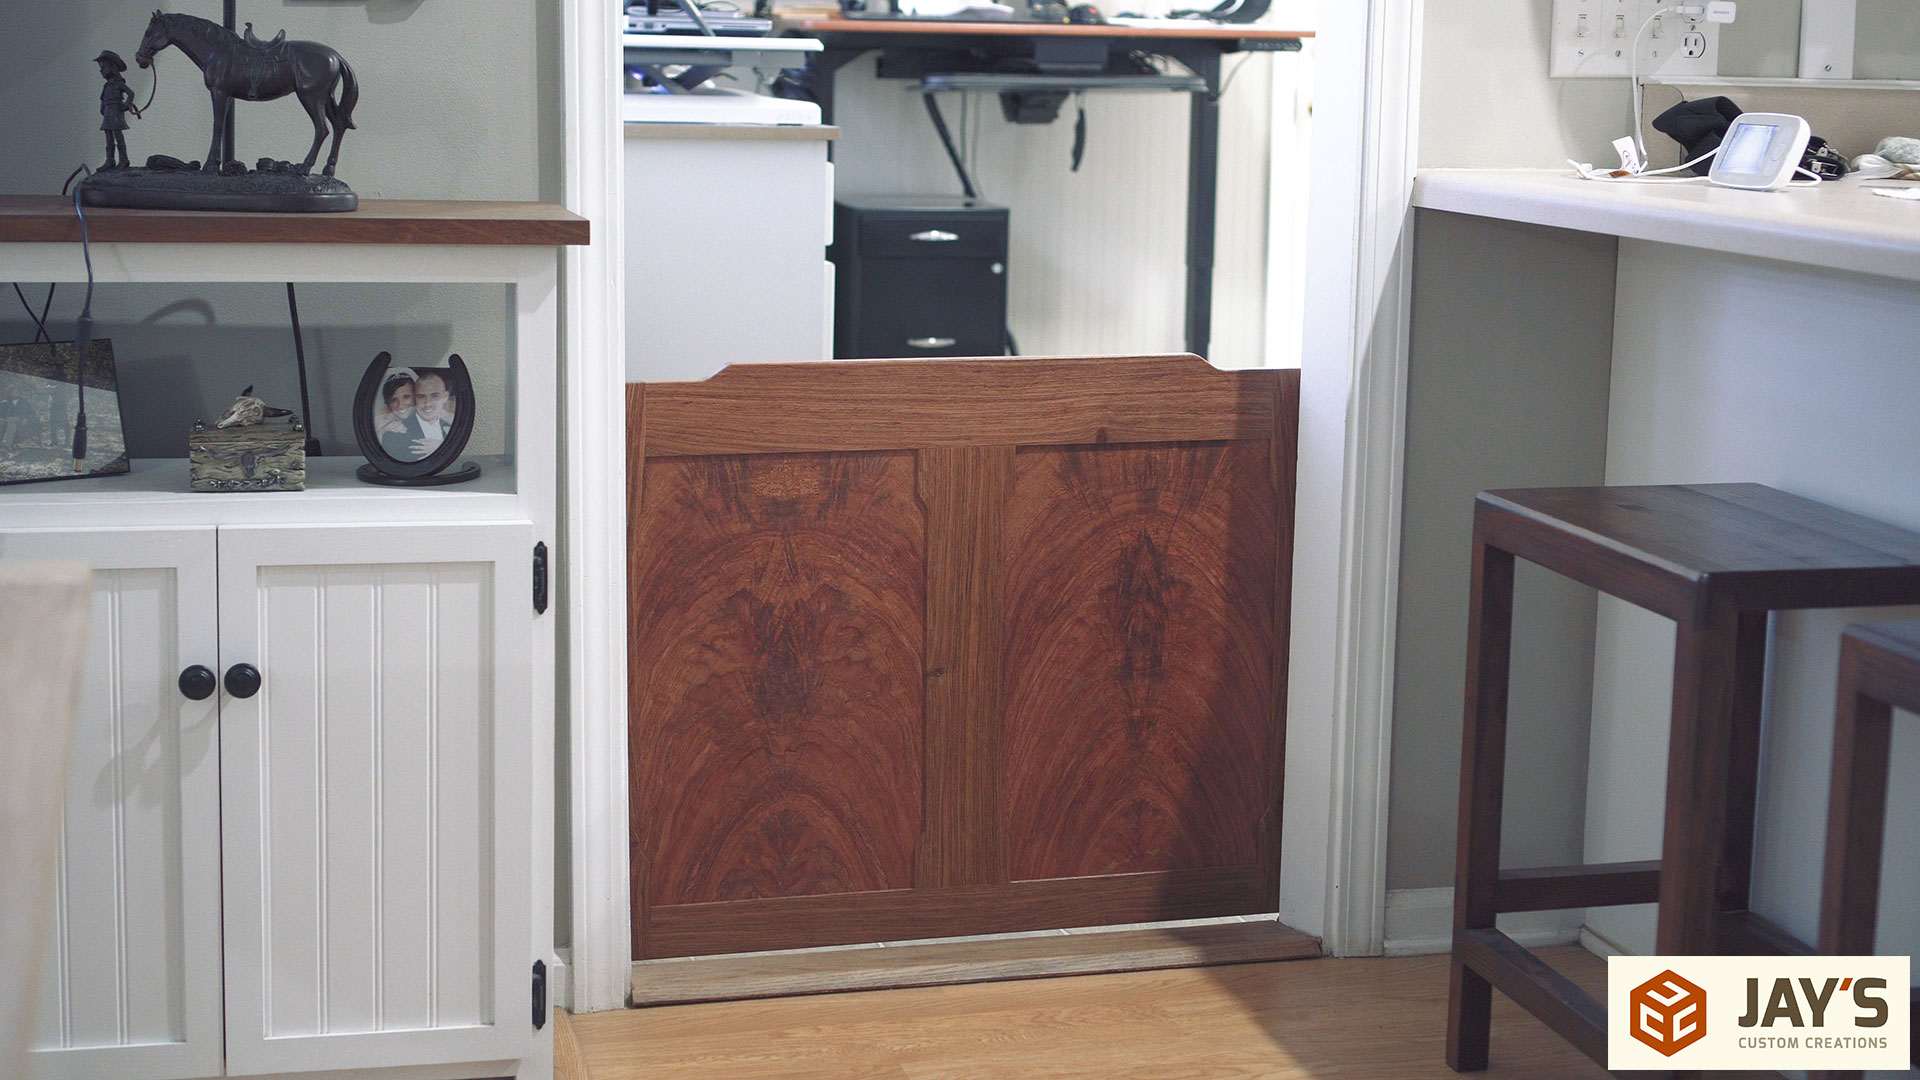
My only disappointment is the knot that ended up being in the top rail on the outside face. I’m not sure if I mixed up the top rail when laying out for the dominos or if I mortised the hinges on the wrong side but regardless the knot wasn’t supposed to be on the outside of the office.
The inside of the gate looks great. The bookmatched panels aren’t a perfect alignment like they are on the other side but that is expected due to this being the secondary side.
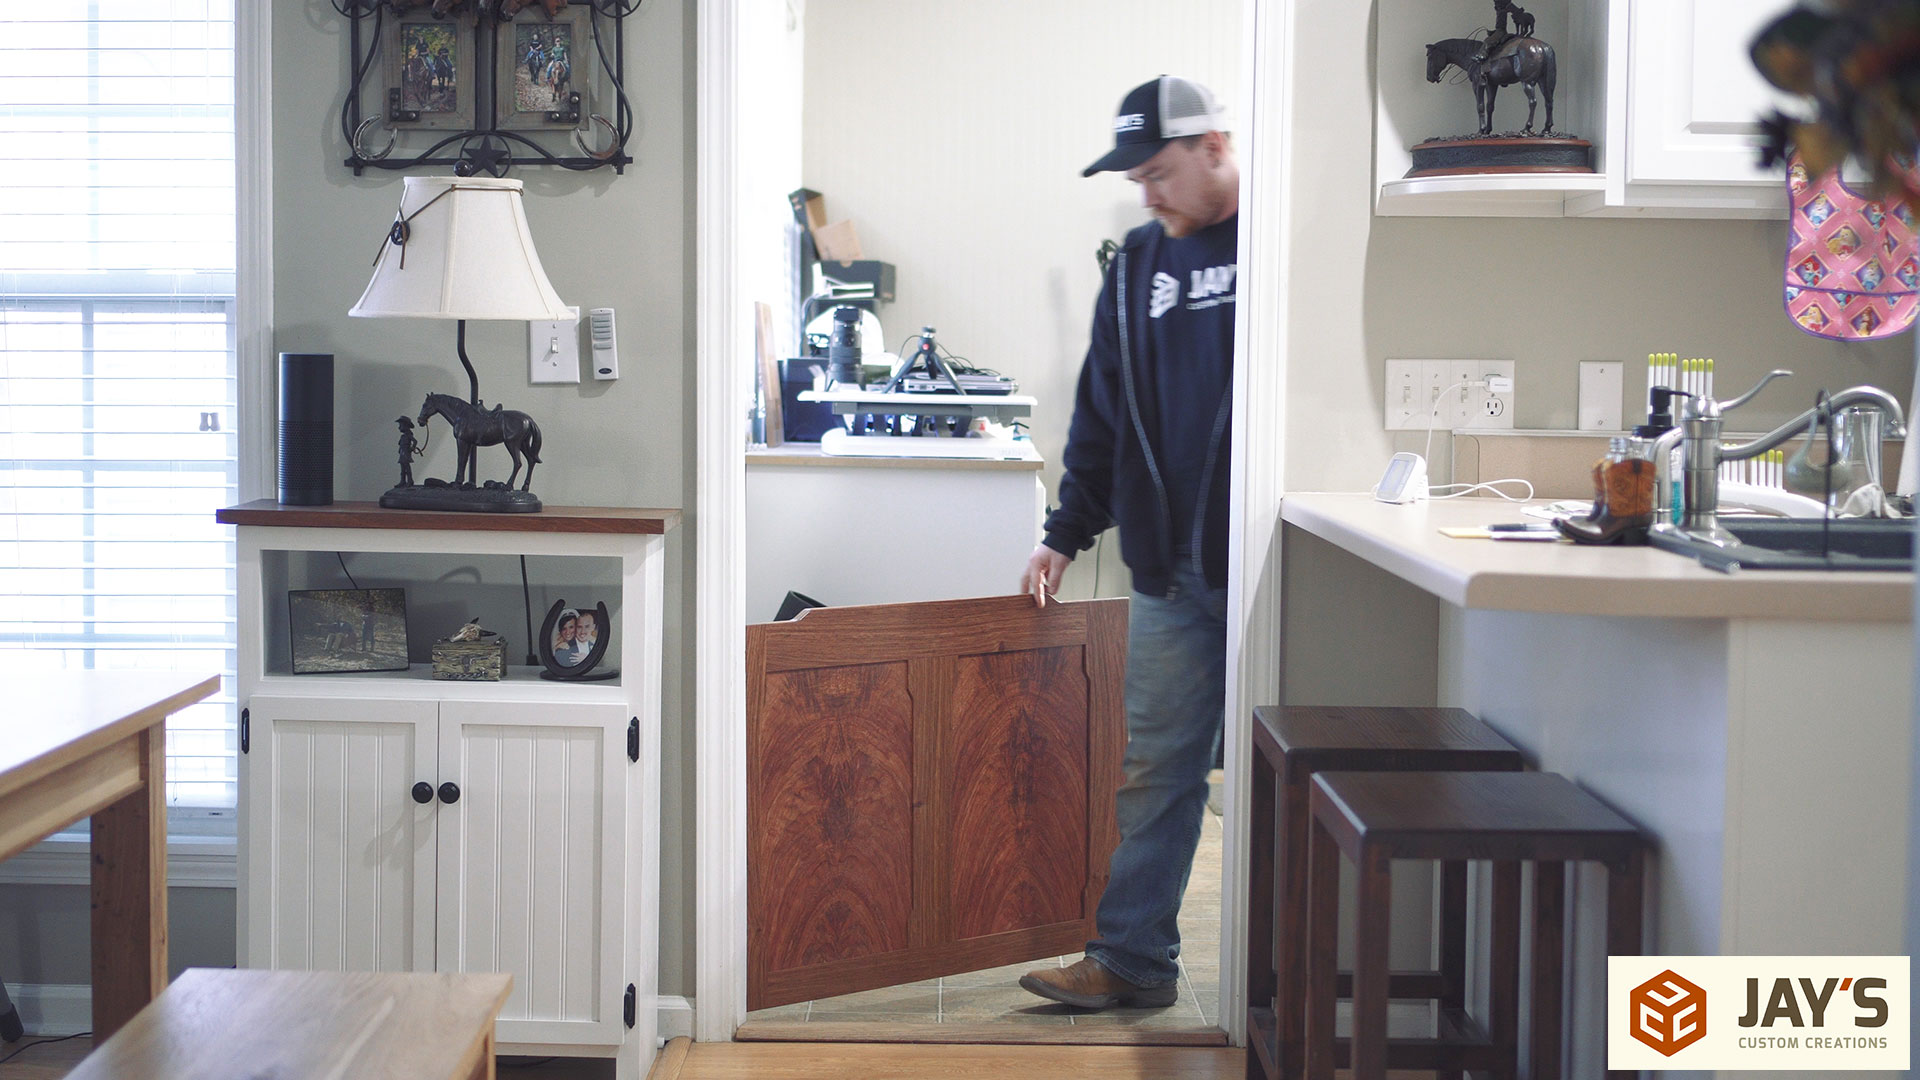
I really like the fact that I can go through the door without using my hands in the event that I’m carrying something. On the dining room side it’s just a simple push forward with your foot. On the office side I can get my boot around the bottom left corner of the gate to open it. That technically means the dogs will be able to do that too if they figure it out but I really don’t see that happening. They are happy and content in the office when left alone.
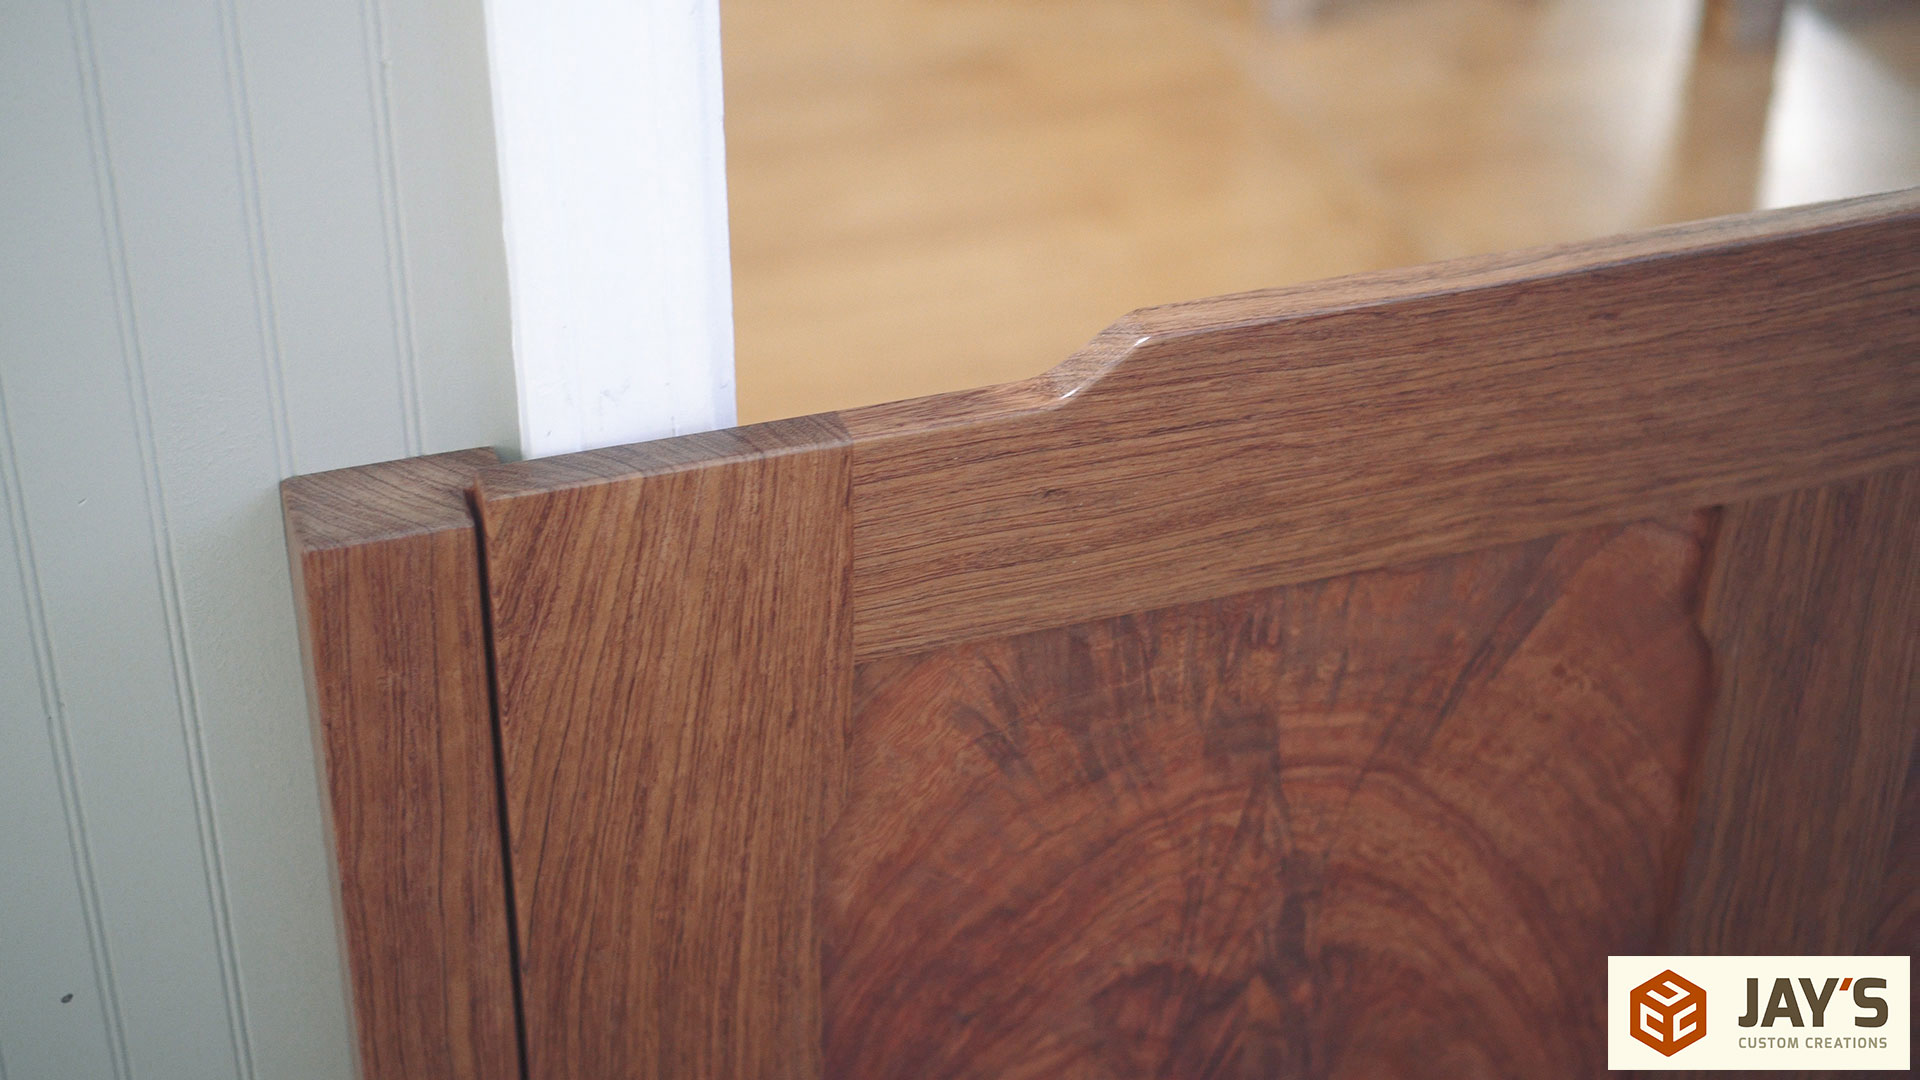
To mount the right side piece to the wall I used two 3” decking screws behind the hinges. To mount the left side piece I used two 3” decking screws on an angle in the interior corner of the gate rabbet.


Excellent job Jay.
Although I don’t need a dog gate, I always watch your videos because I learn so much from studying your methods. As I am a hobbyist, and a fledgling one at that, I am impressed with your teaching skills – you are a natural-born teacher. Thanks again.
All the best,
Fred
Thank you very much for the feedback, Fred. Much appreciated.
Love the gate! It’s always a pleasure watching your videos. I do have an off topic question though. The music used in your videos for the intro and exit, is that a particular artist/song? I really like it but shazam doesn’t recognize it.
Thanks and Keep it up!
Jeremy
Gold Rush from ampletunes.com
Very nice Jay, man that bubinga looks amazing!!
Really nice project Jay. You have some excellent equipment as well.
Unfortunately I don’t have the room or money to have that type machinery, which makes me wonder if I am being left in the dust not having CNC machinery, Domino’s, track-saws etc.
I am finding more and more that projects in the woodworking magazines that I subscribe to, are now using CNC machines for their projects. : (
Keep up the great work it’s nice to see the pictures and watch your videos.
Dan
Your not it take a lot of time to build up to it. Its not a one year process or even 5. Jay has been at this for 10 years or more and slowly built up his machines as he could afford too.
Love that gate Jay simply AMAZING! Its stunningly beautiful. Thanks for the video.
That’s a beautiful gate! You’ll soon be making more for your baby girl, she’s going to everywhere you don’t want her to be soon!
Hey Jay! Loved this project! There were so many tips tucked in here to learn from. Two that stood out were the trick about removing slack from the hinges in each direction before mounting and using blue tape and hot glue to affix the template. I also agree about the clean shop being more inviting.
I don’t need a dog gate currently, but learned a lot from the video. Thanks for the inspiration!
(Also, looks like you are having more fun with video titles and callouts – I like it!)
Easy to modify into a “baby” gate. ????
Hi Jay; the dog gate looks great one excellent workmanship, hopefully the dogs will like the end project, well done Jay.
Ian Mac
Beautiful job Jay. That wood is something else.
Hello Jay, my, you make me so envious of your skills, that gate is brilliant, I don’t have a dog, but my grandson has one, I may try and make one for his dog.
your film and teaching skills are better than any I have seen so far.
Thank you so much Jay.
Great project, well done. Thanks for the effort you put into your website. I love YouTube but I think you are smart to control your own content. YouTube thinks it is theirs when you put it there.
Beautiful and functional for sure. Not a negative comment but just wonder why you chose solid panels over slots? Think the dogs would be better behaved when locked up if they could see you when they are contained? Guess I’m a cheapskate but even though it only cost you $66 the value of the wood is more. Love your video’s and all the pictures and text you provide alongside them.
The opposite is true. We previously had a shorter piece of material as a temporary solution. When they could see over it they would sometimes sit at the gate and whine. We switched it to a higher piece of plywood so that they couldn’t see outside and they were then content playing with each other and their toys in the office. This is only on rainy days though. They prefer to play outside for most of the day.
Thank you for the inspiration! Great build and video! I completed my first sketch up drawing to prepare for my own dog gate build. I have purchased quarter sawn wenge for the frame and bubinga for the panel. I was happy to find some figured bubinga in the back of the stack for the normal board feet price. My desire to look through all of the wood in the racks paid off. . . this included moving 20′ pieces of bubinga. I know you mentioned that you were building this specifically for the door, but did you consider any way to make it adjustable?
I was considering the use of drawer slides or domino connectors for 1″ expansion pieces. . . Thanks for your thoughts!
Beautiful work, as usual. Any chance you can post a link for the hinges you used? Thanks so much.
Thanks. I used these hinges: https://amzn.to/2Bn3Exy