An inexpensive hardware kit for this vise: https://lddy.no/gu1v
A better, but still inexpensive, hardware kit for this vise: https://lddy.no/gu1w
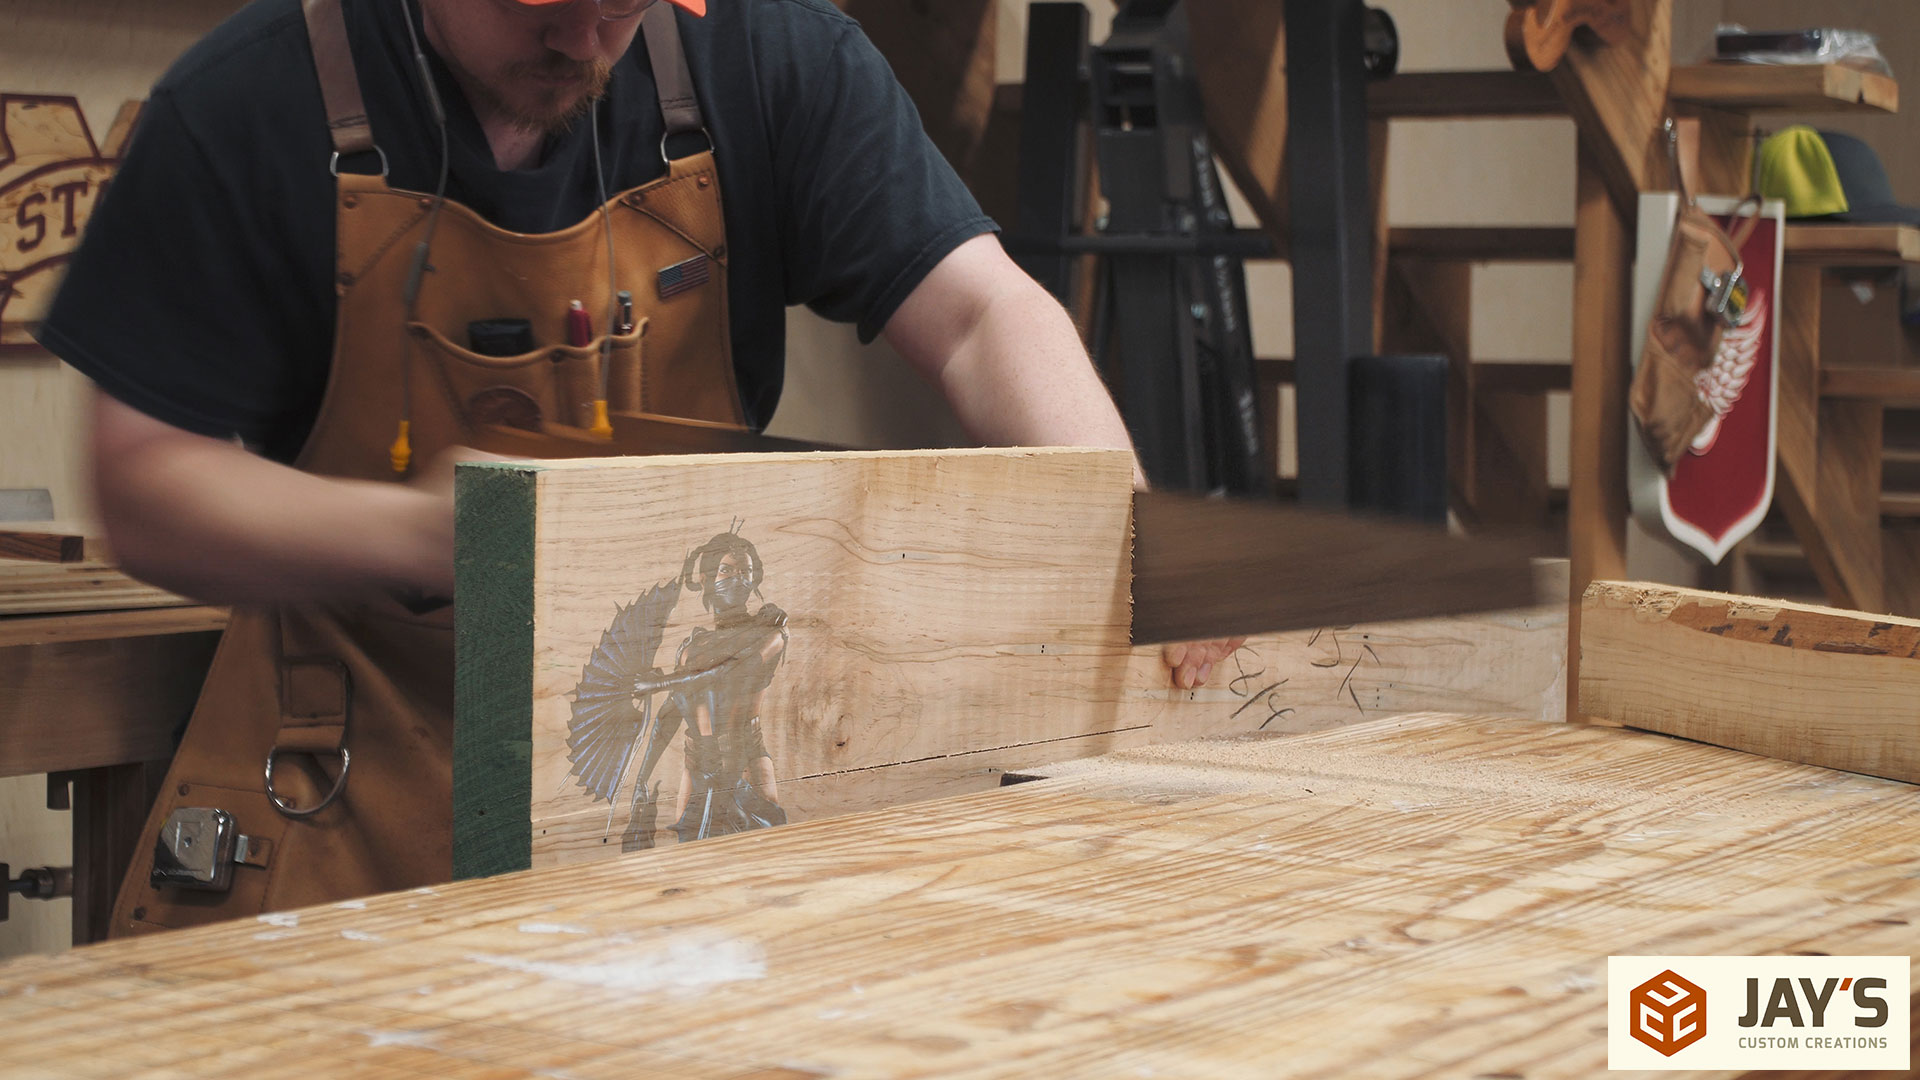
This is a quick win project. I started recording at 12:30 and wiped off the excess finish and left it to sit overnight at 4:50. That also includes the slow down of setting up the camera a hundred times and also a 15 minute break for a peanut butter and jelly sandwich. Extra crunchy peanut butter, of course. To make this moxon vise really quick I used a set of templates from Jonathon Katz-Moses. Templates make the process repeatable and quick. With decent hardwoods and inexpensive hardware I bet you could make a profit selling these if you wanted. The process is quite simple. I started with a piece of 8/4 rough sawn ambrosia maple and traced the templates to be cut.

Then it’s over to the bandsaw to rough out the shapes. At this point the pieces were nested too close to complete the rough cuts at the bandsaw and because they were nested I couldn’t use the miter saw to separate them. So all I could do here was two long rip cuts to establish the rough height of the jaws.
To the workbench! Hand tools are problem solvers. In this case an aggressive crosscut saw did the trick in a minute.
This allowed me to break the board into four pieces. Two jaws and two scraps that went back to the lumber rack.


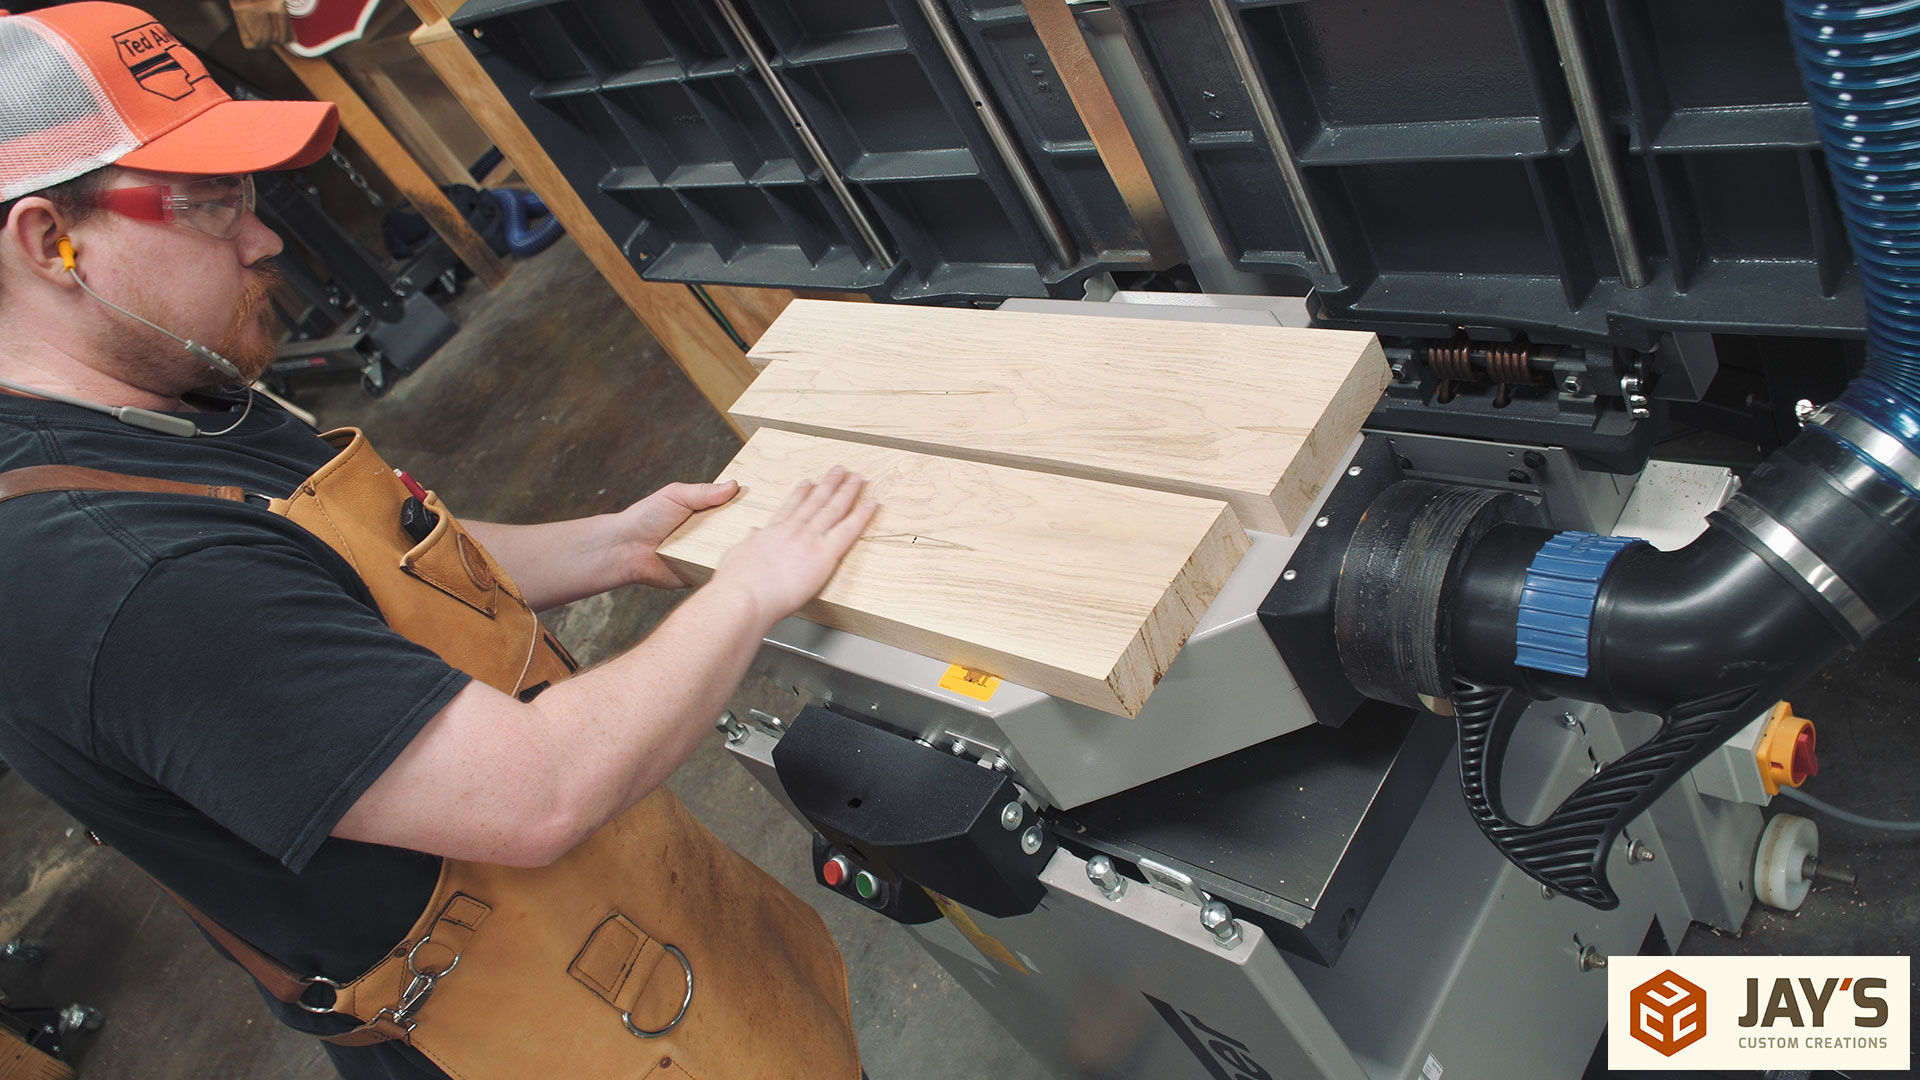
More refinement is needed at the bandsaw but first I wanted to get the material down to final thickness and get rid of the rough sawn wide faces.
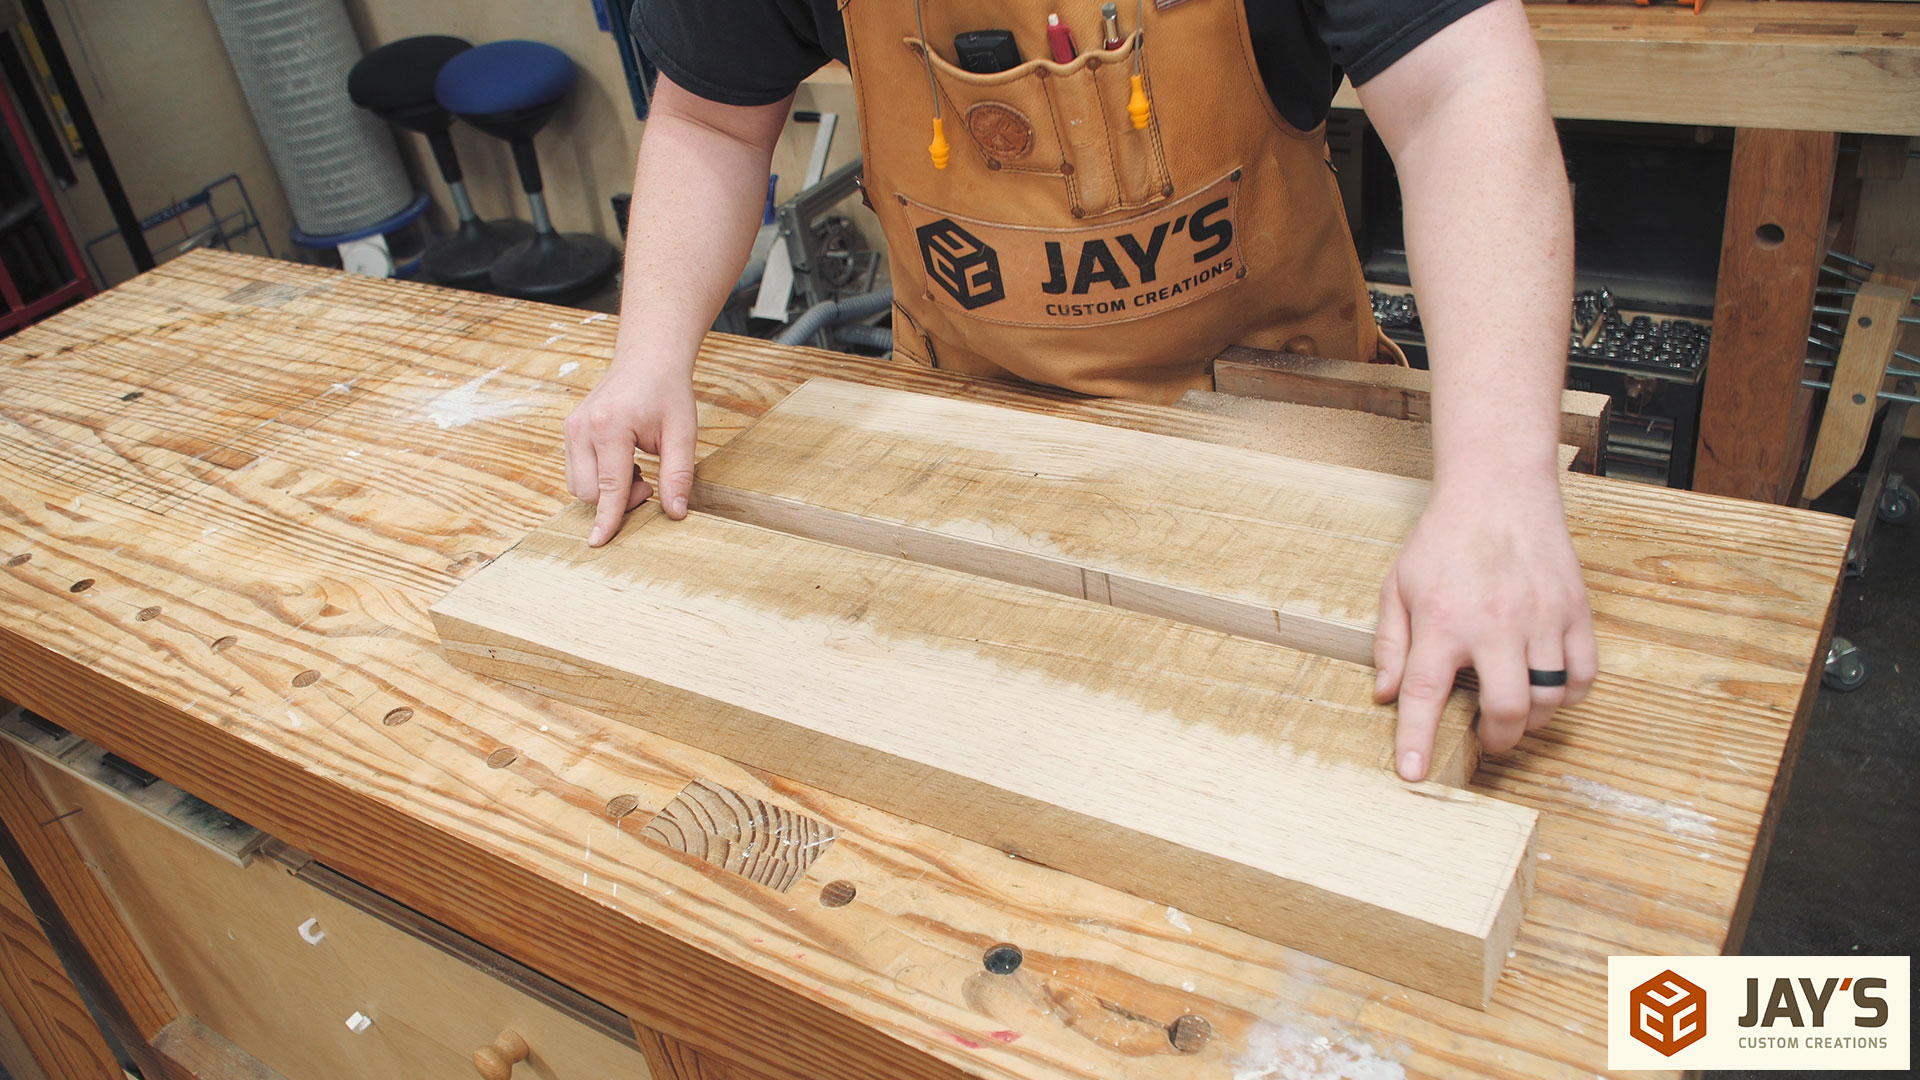
At the jointer the flattest wide face is jointed flat.

And one adjacent narrow face is jointed flat and square to the first.
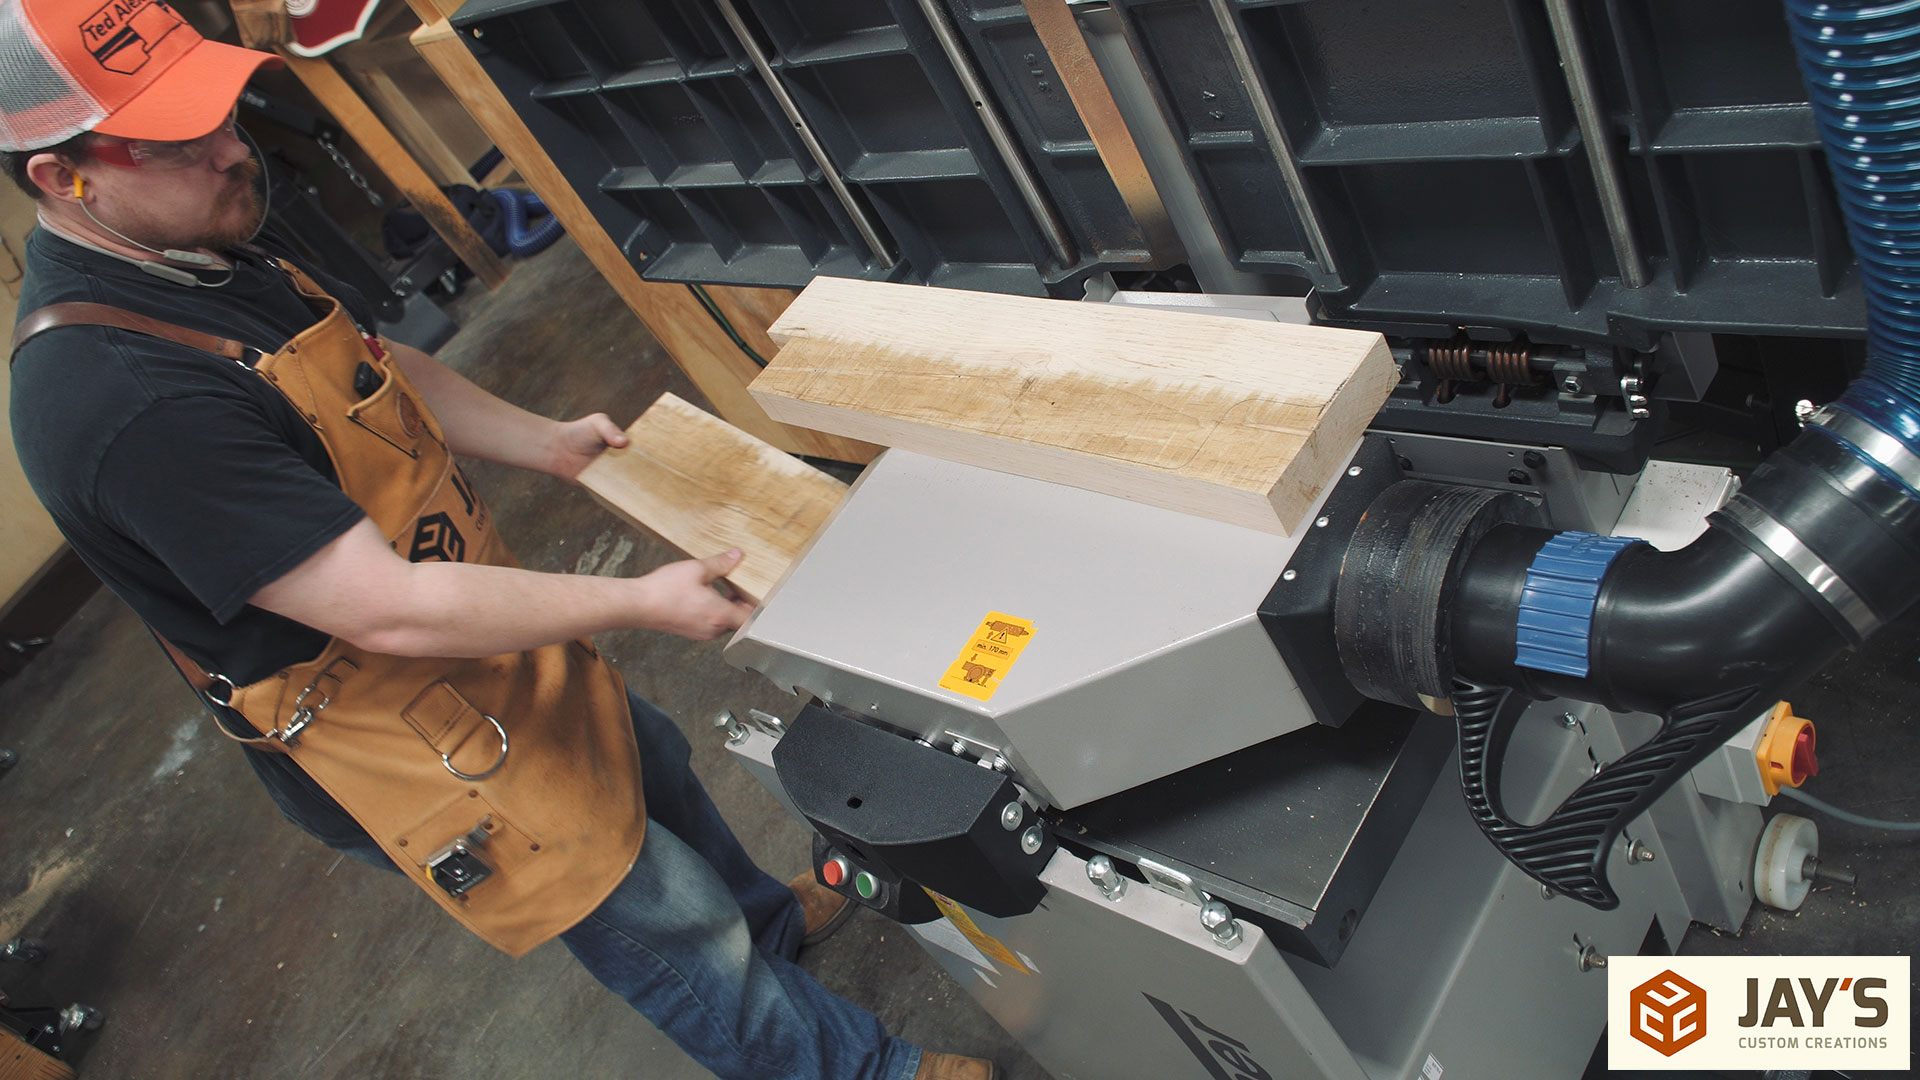
The jointer I have is the Hammer A3-41 jointer/planer combo machine. After taking 60 seconds to switch over to a planer the opposite wide face is planed flat and parallel.
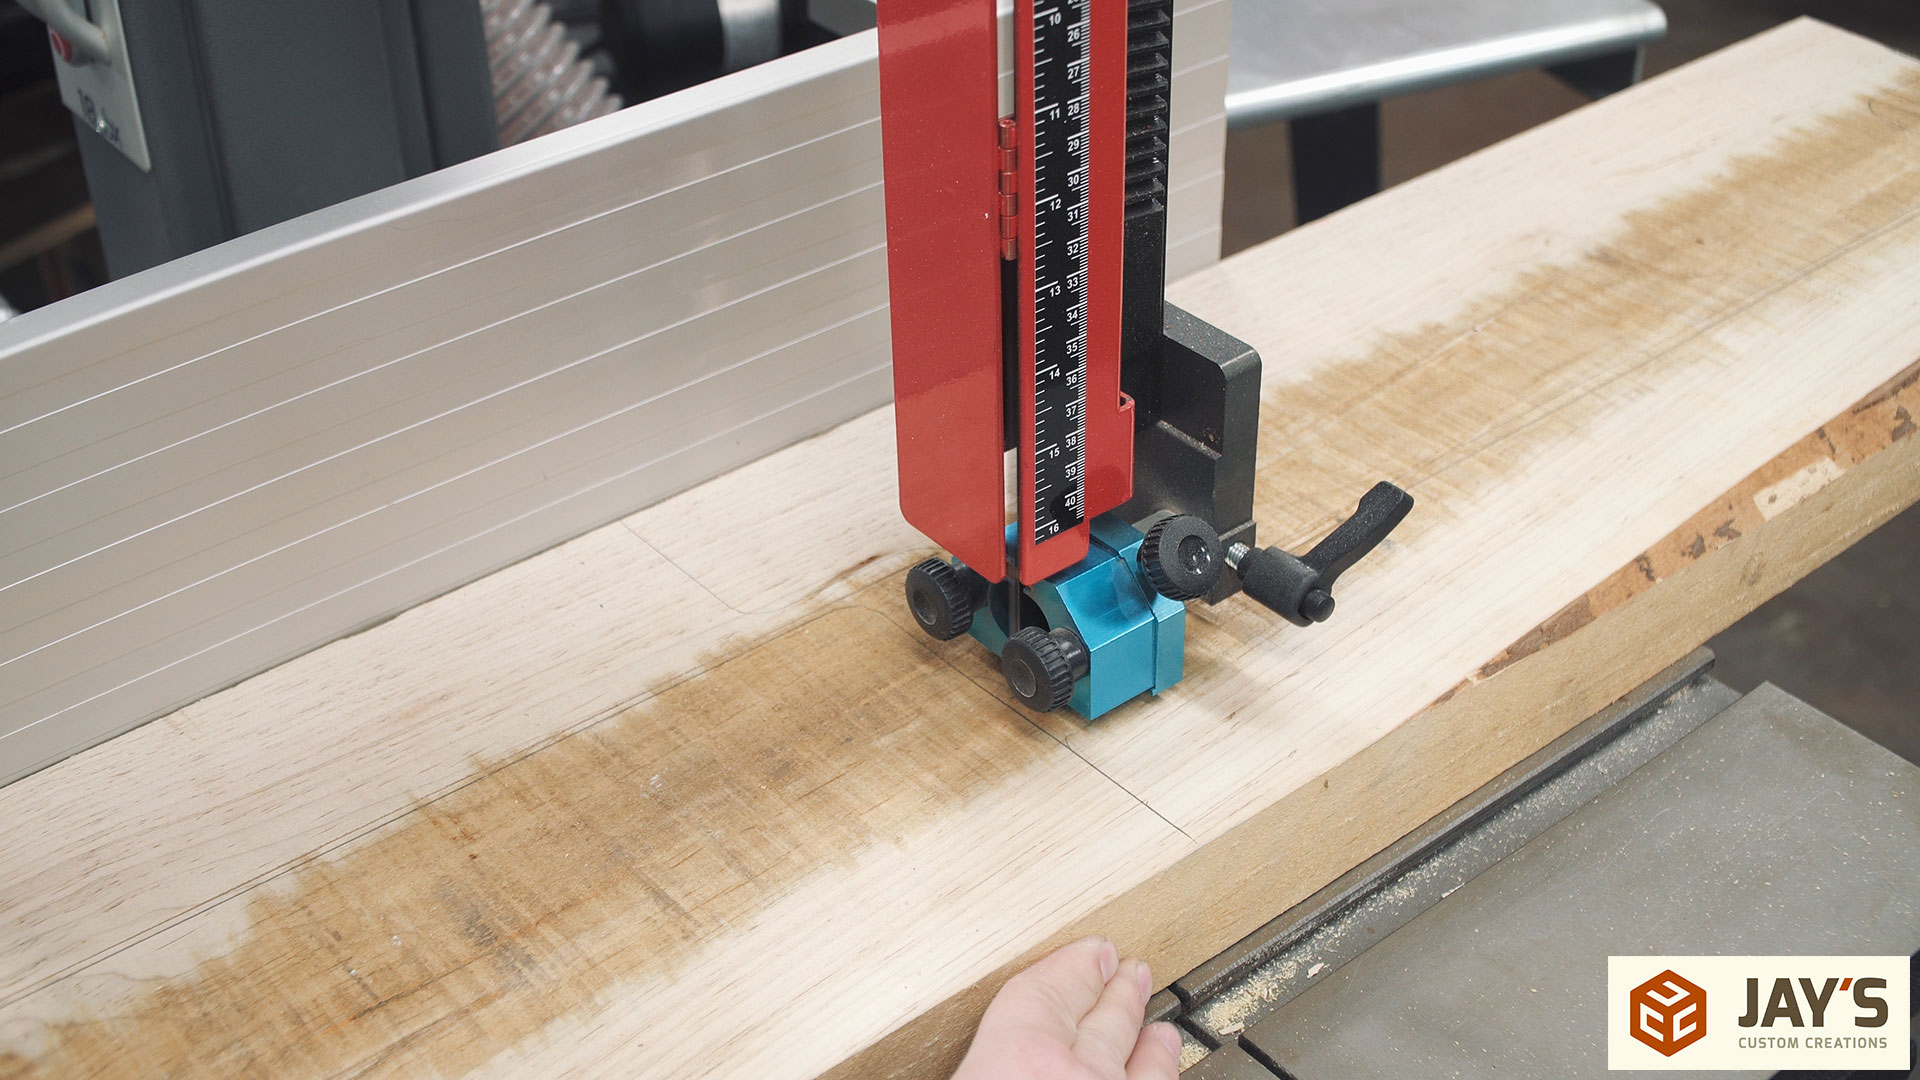
Now the templates can be traced for the last time referencing the bottom straight edge of the template off of the jointed narrow face on the boards.
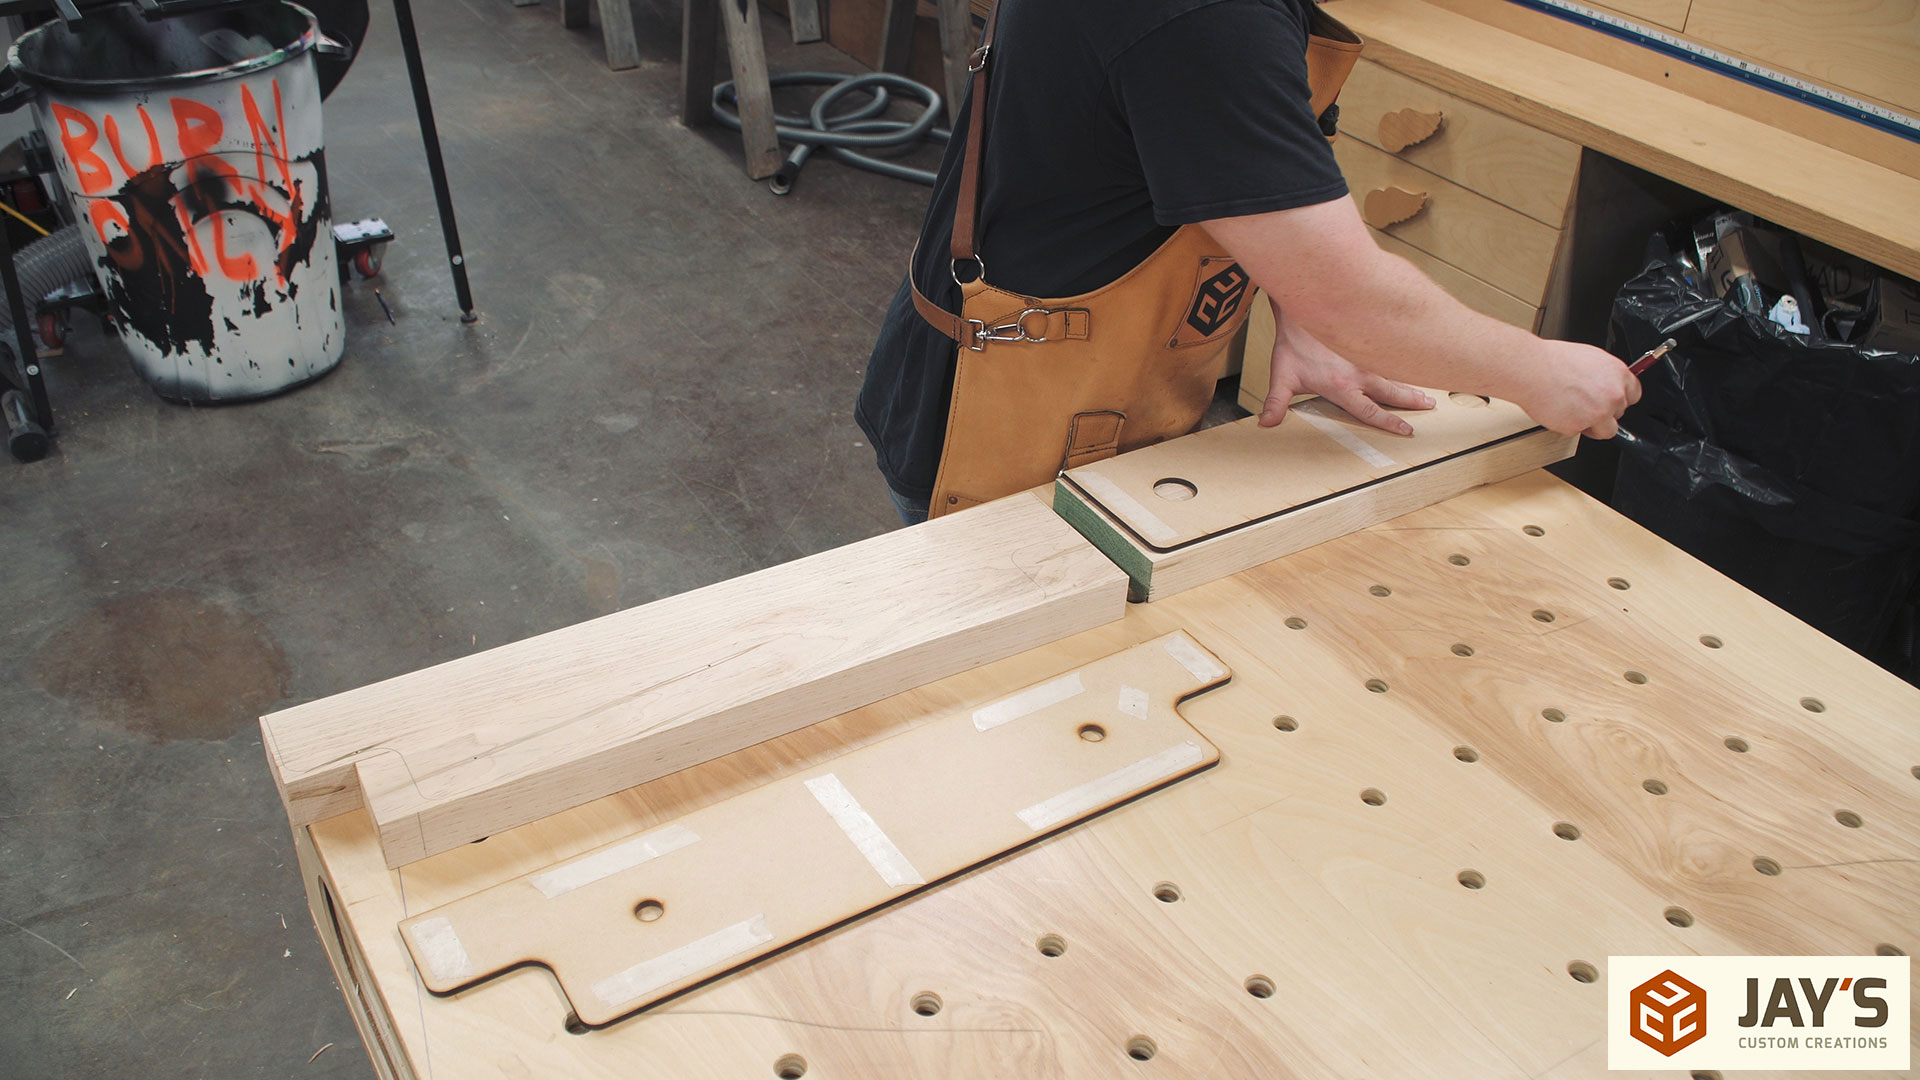
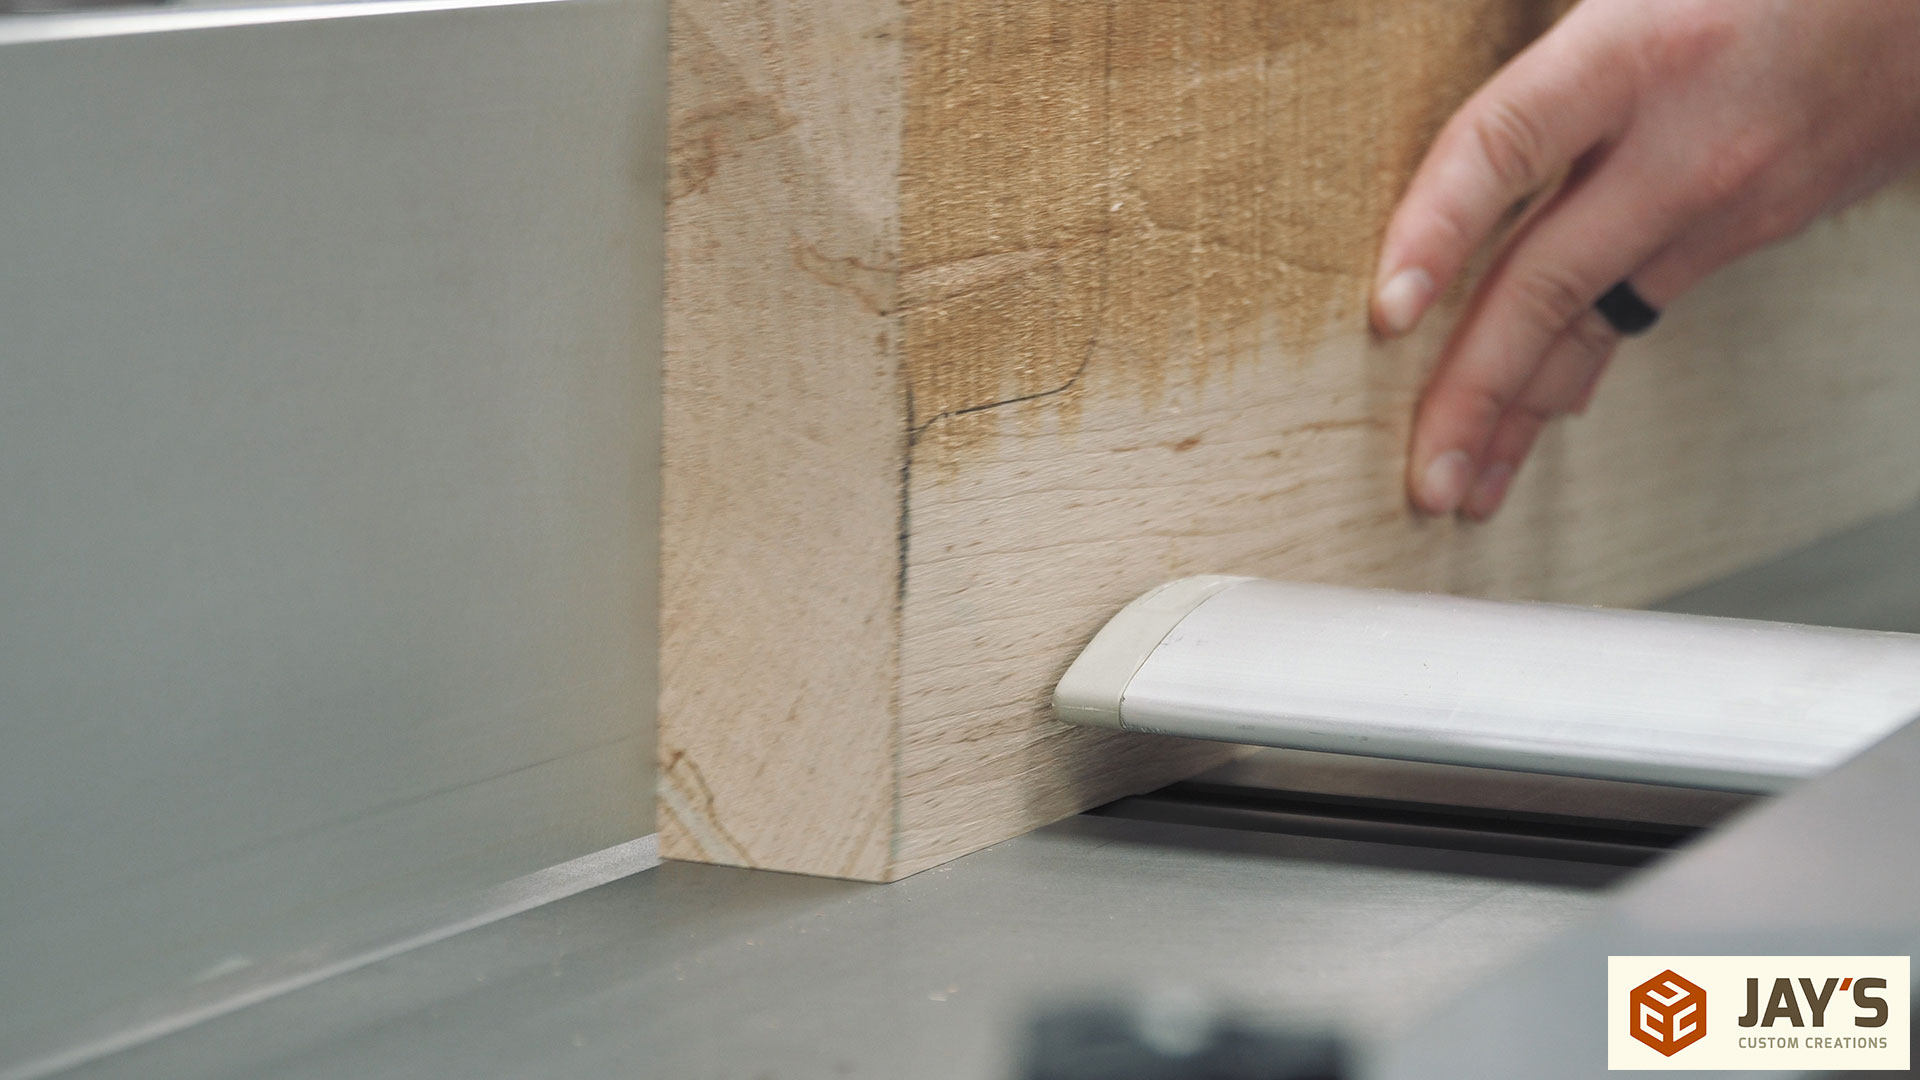
With the final outline established it’s back to the bandsaw to remove as much of the waste as I felt comfortable with. Since getting this bandsaw I’ve kept a carbide tipped 1” resaw blade on it and honestly don’t want to take it off. It’s such a pain in the butt to take that blade on and off so I’ll just deal with the inconvenience of not being able to cut a tight radius in this case.


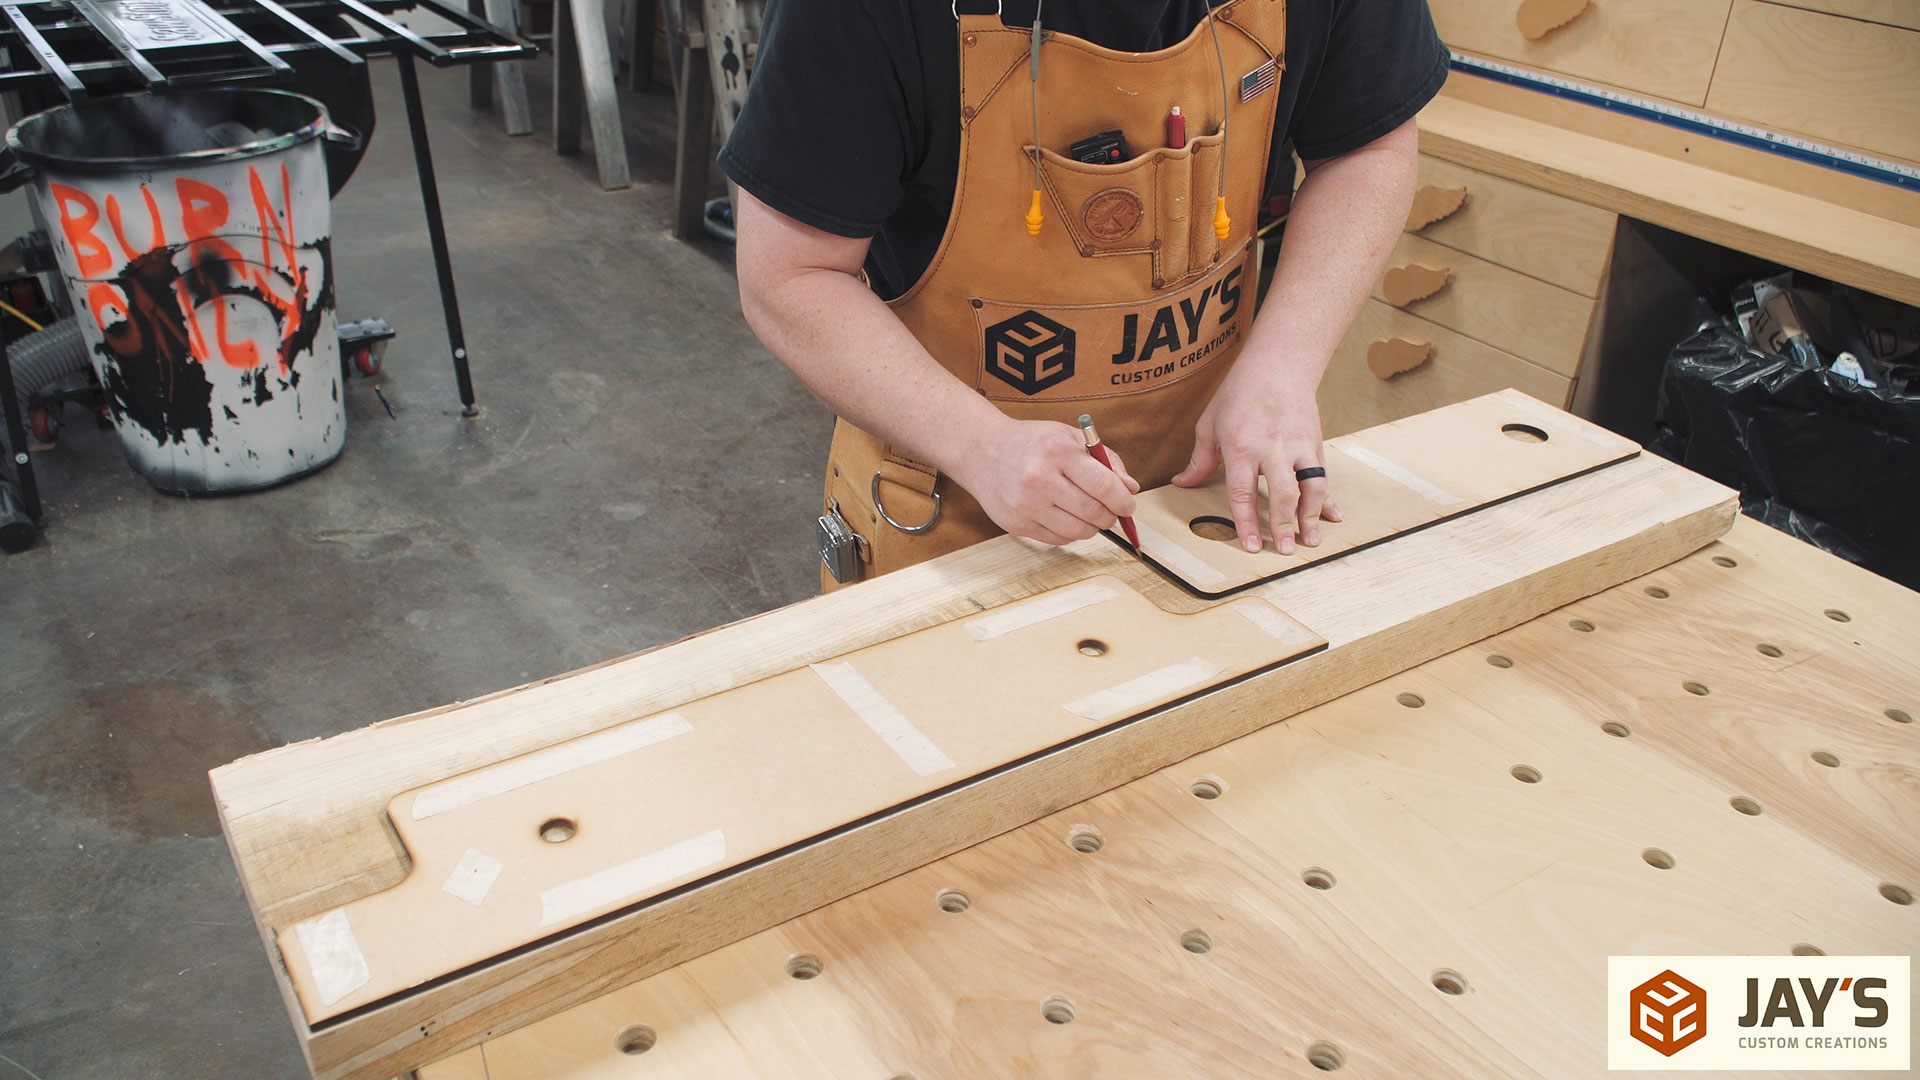
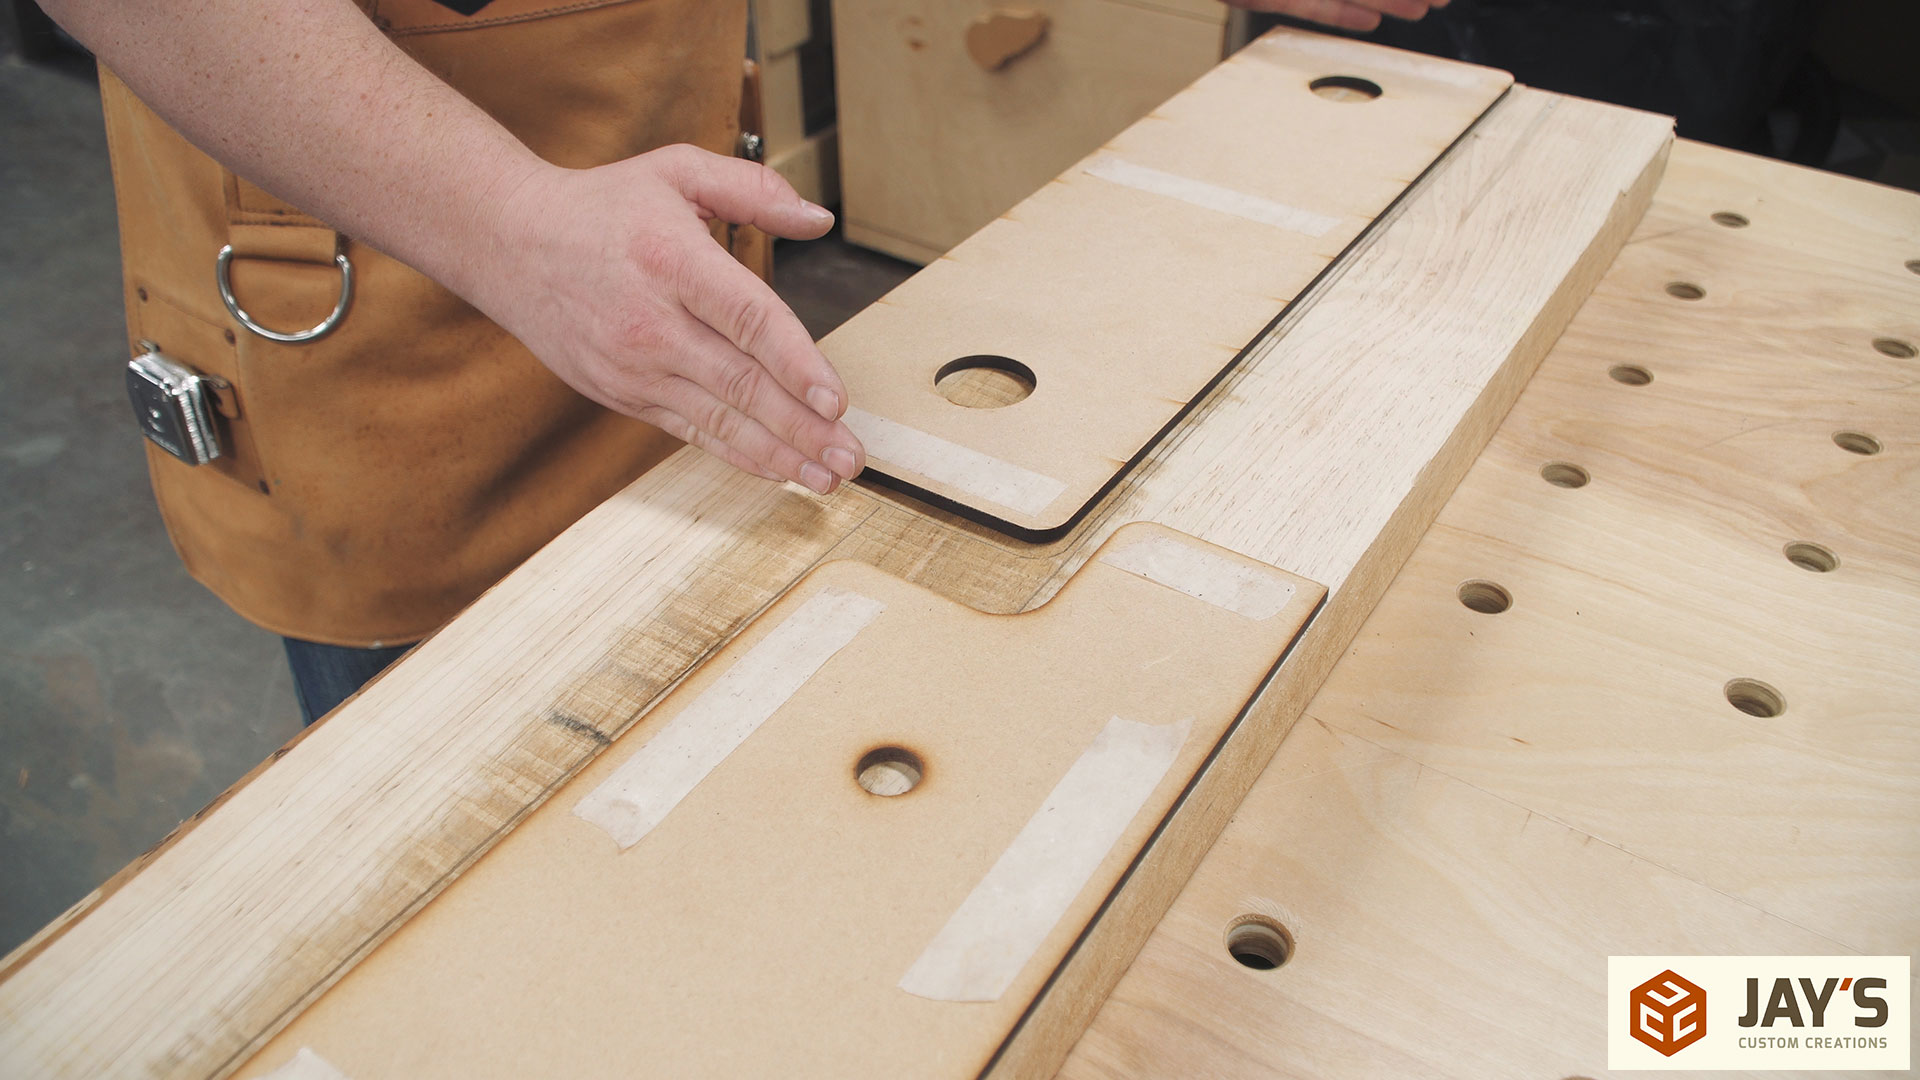
The templates are then secured to the wood with double sided tape making sure to reference the bottom of the template and the bottom of the wood on the assembly table.
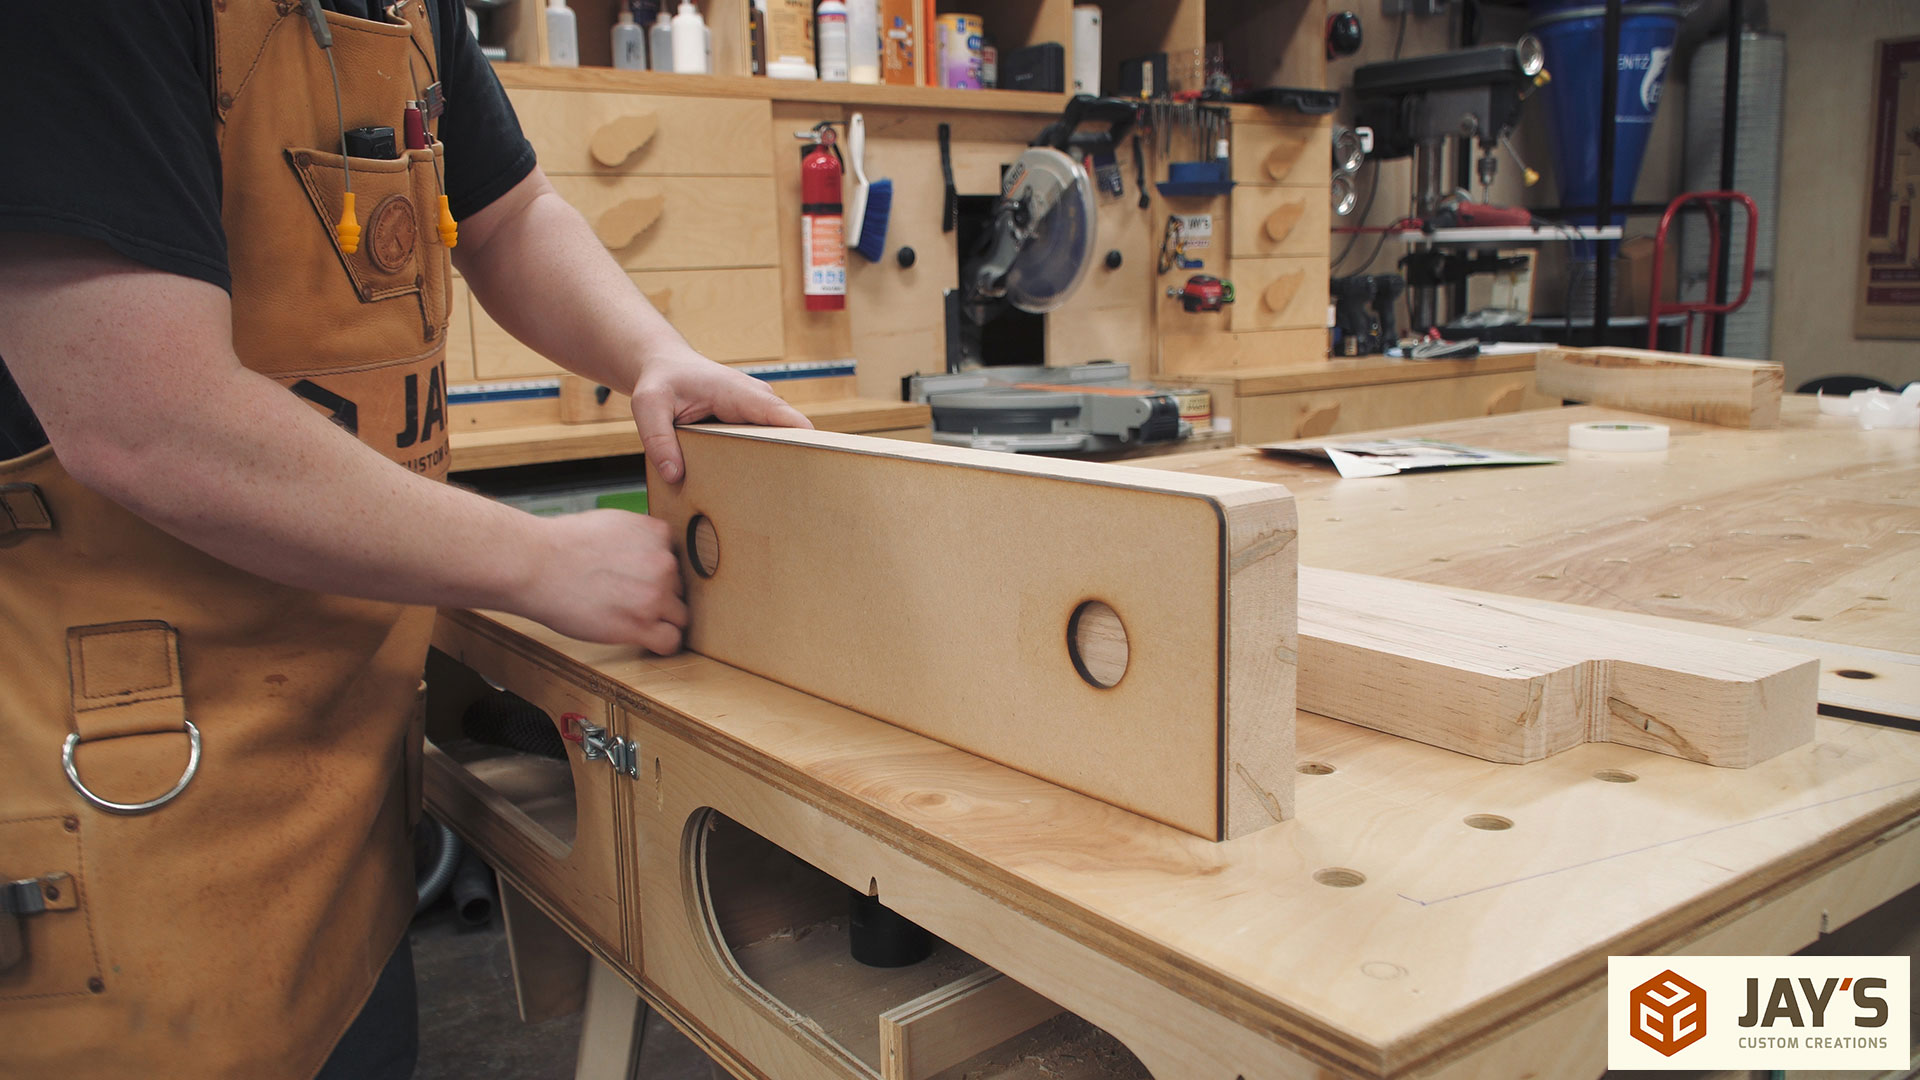
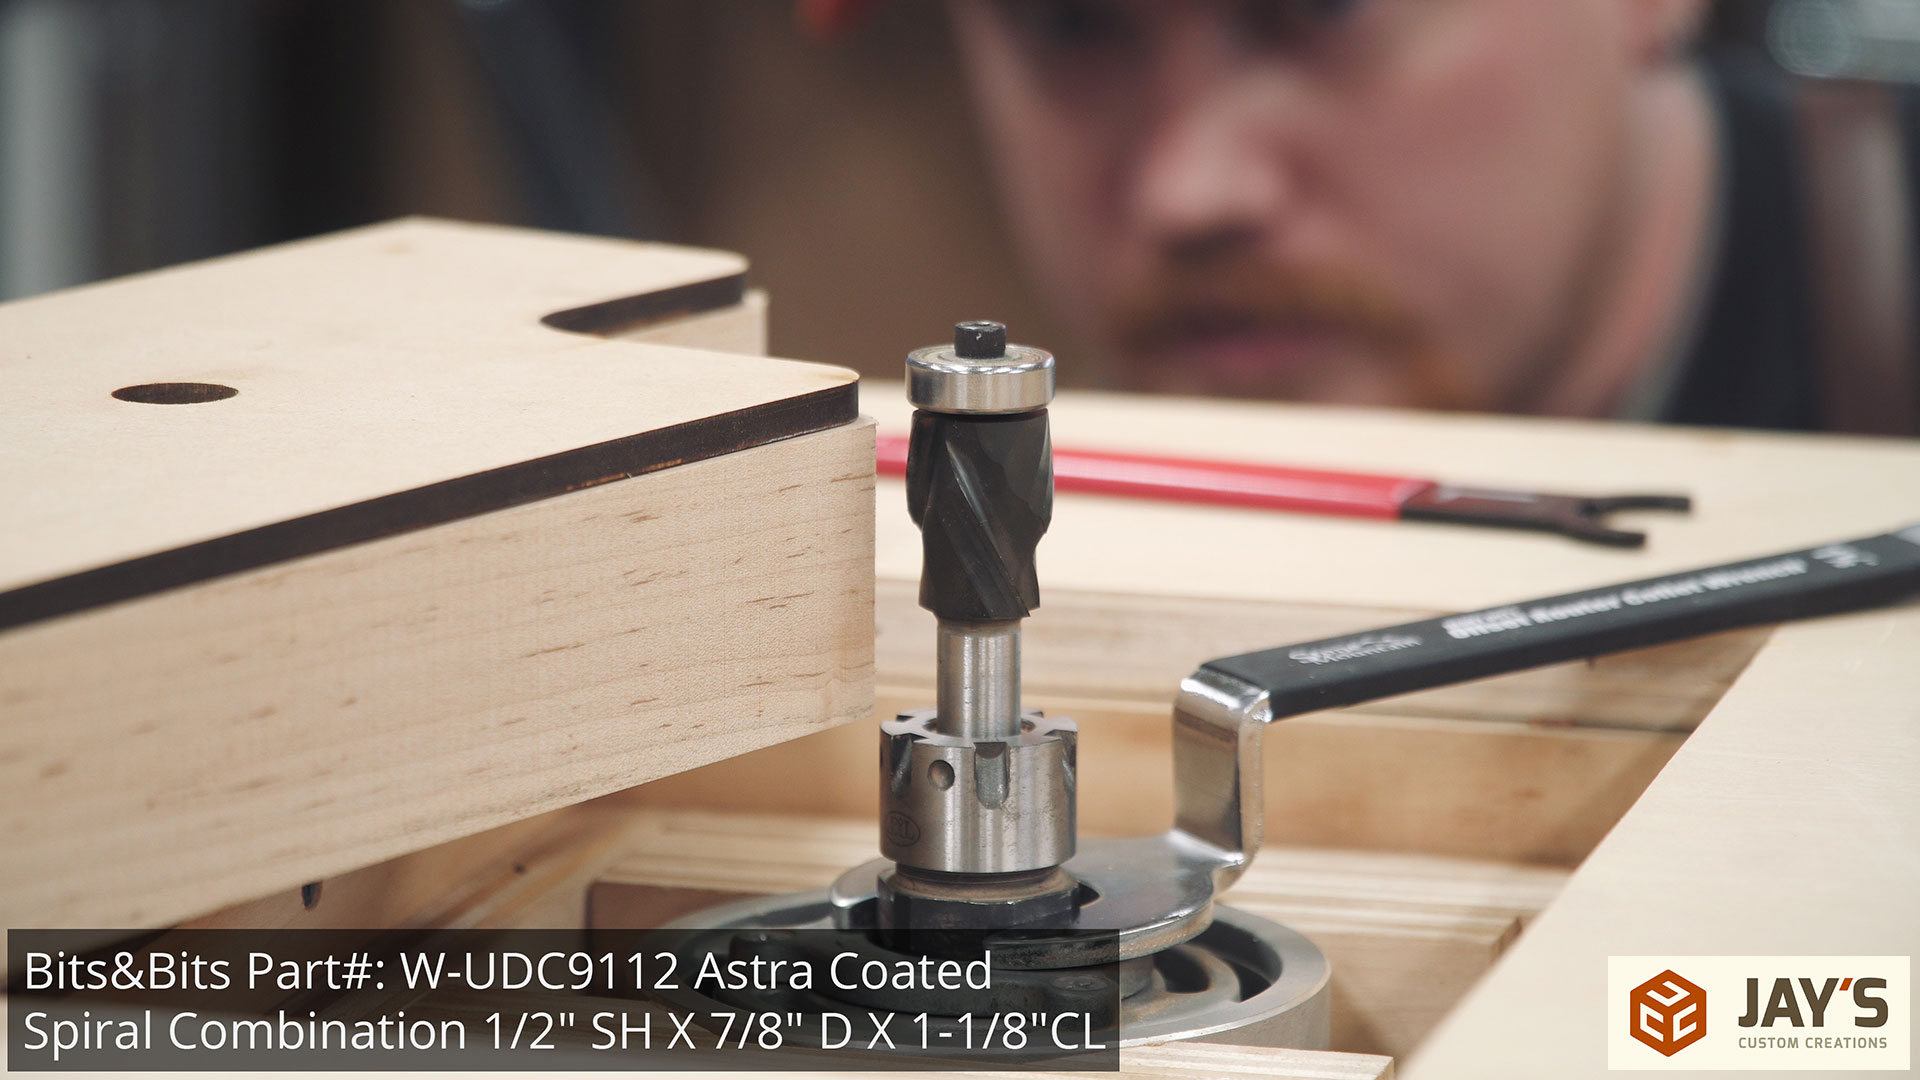
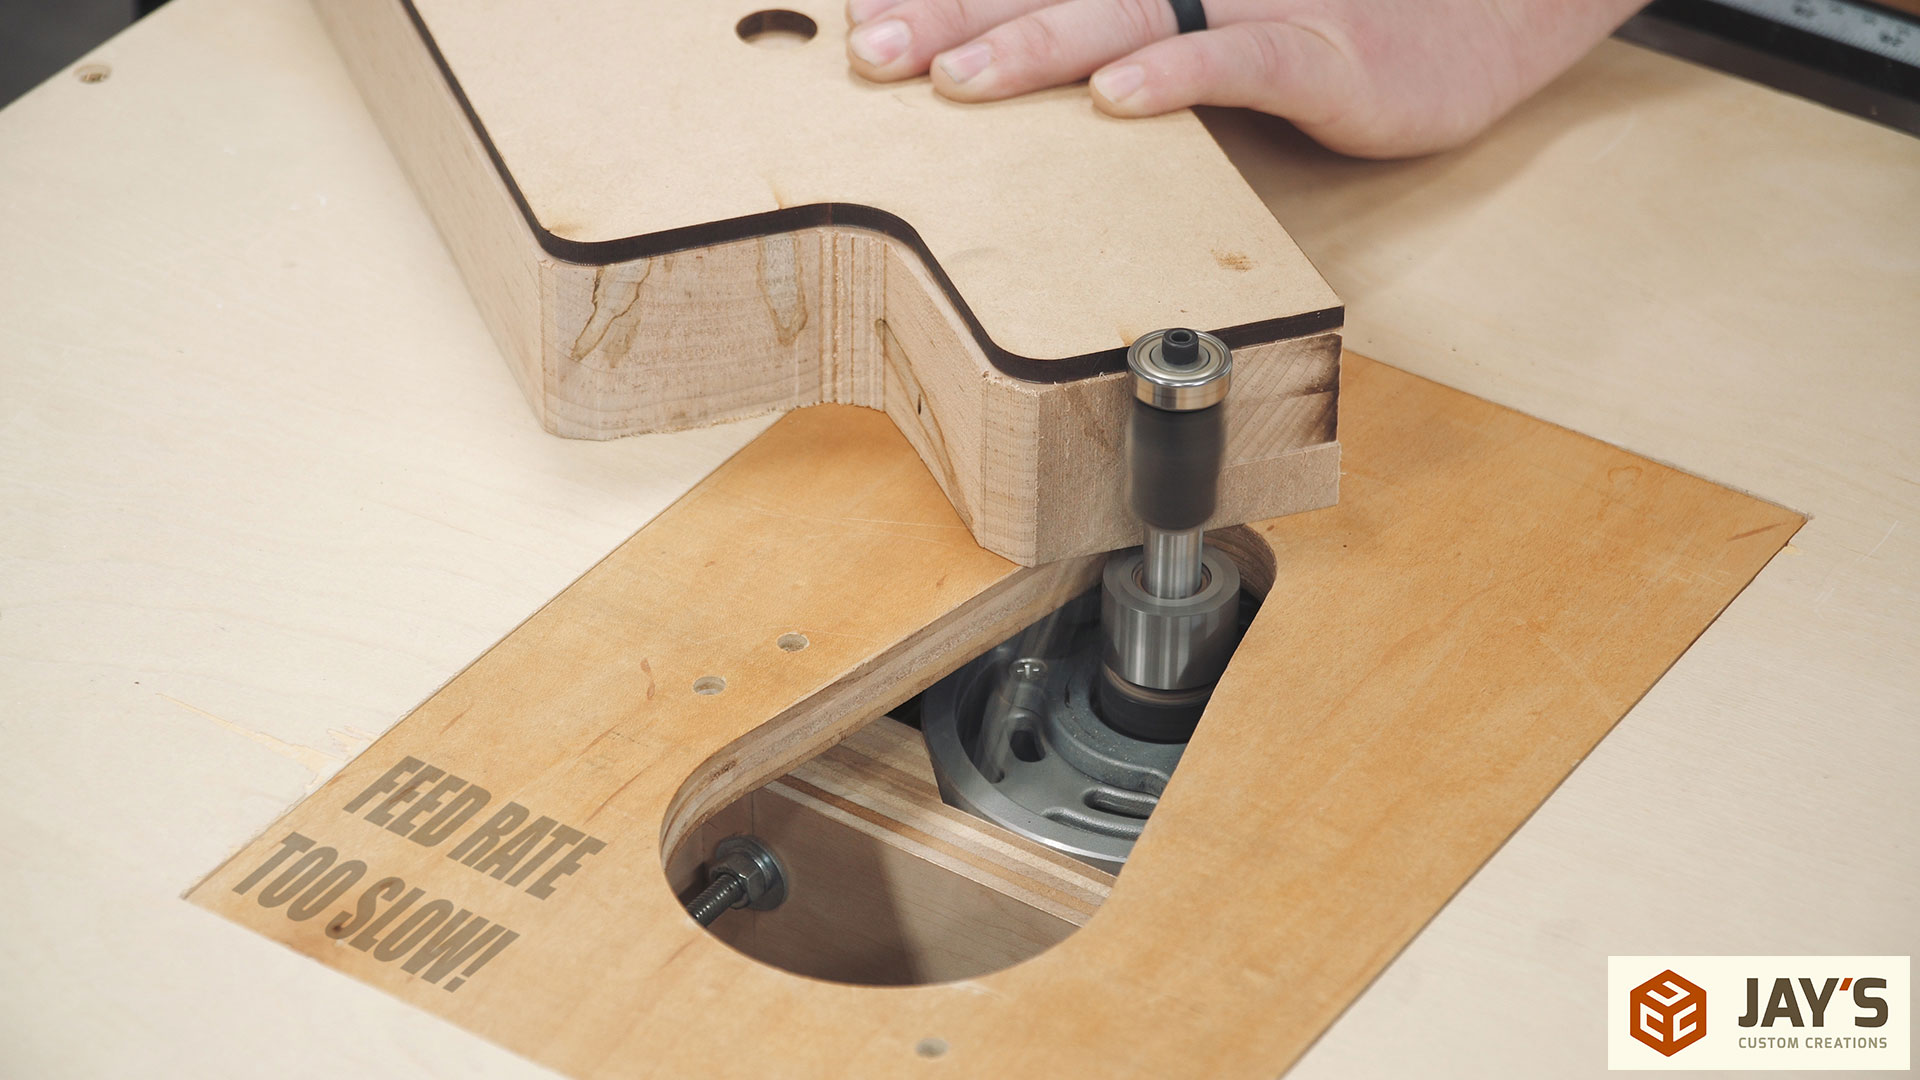
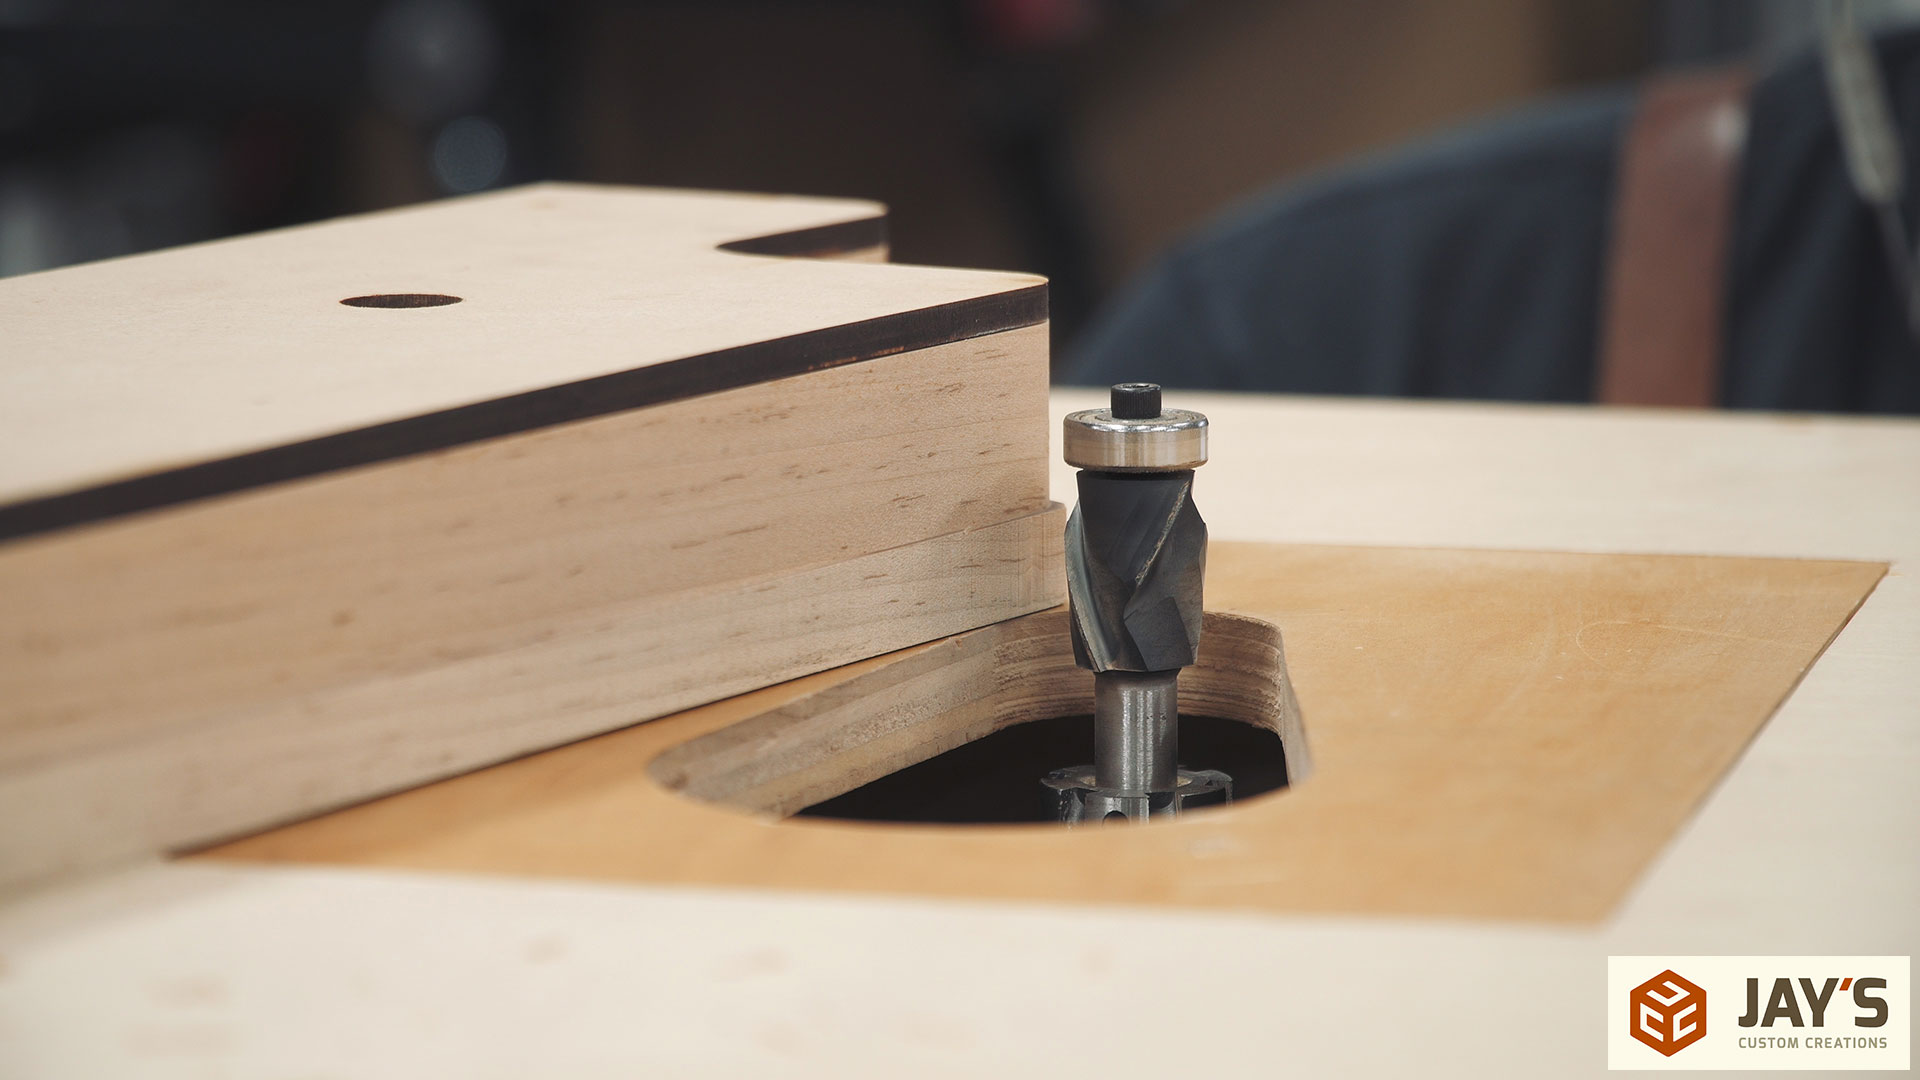
Finally the template routing can begin. I’ve recently become a big fan of template routing. Perfect results every time. The router bit is more important than the template though. In this case I’m using an Astra coated spiral combination router bit. If you purchase anything through that link be sure to use the code JAYBATES for 10% off your purchase. It’s got a removable bearing on top and bottom that allows for this bit to be used in more situations. In this case the bottom bit needs to be removed as the material is thicker than the cutting length of the bit.

Here you can see the bit sticking out of the collet enough that the collet is lower than the bottom of the wood and the top bearing is high enough to reach the template.
The first few inches of the cut burned due to my slow feed rate. When using a router it’s generally best to slow the router RPM down to prevent burning. Often times people have the router set too fast and then feed the wood through too slow. This results in rubbing instead of cutting. The bit moves so fast that it’s not taking a bite and instead rubbing on the surface. Rubbing burns router bits and burns wood. So to prevent burning you either speed up your feed rate, which can be dangerous, or slow down the RPM. In this case I slowed down the RPM and also slowed down the feed rate.
After I realized what I did I went a little faster for the rest of it and as you can see there was no burning.
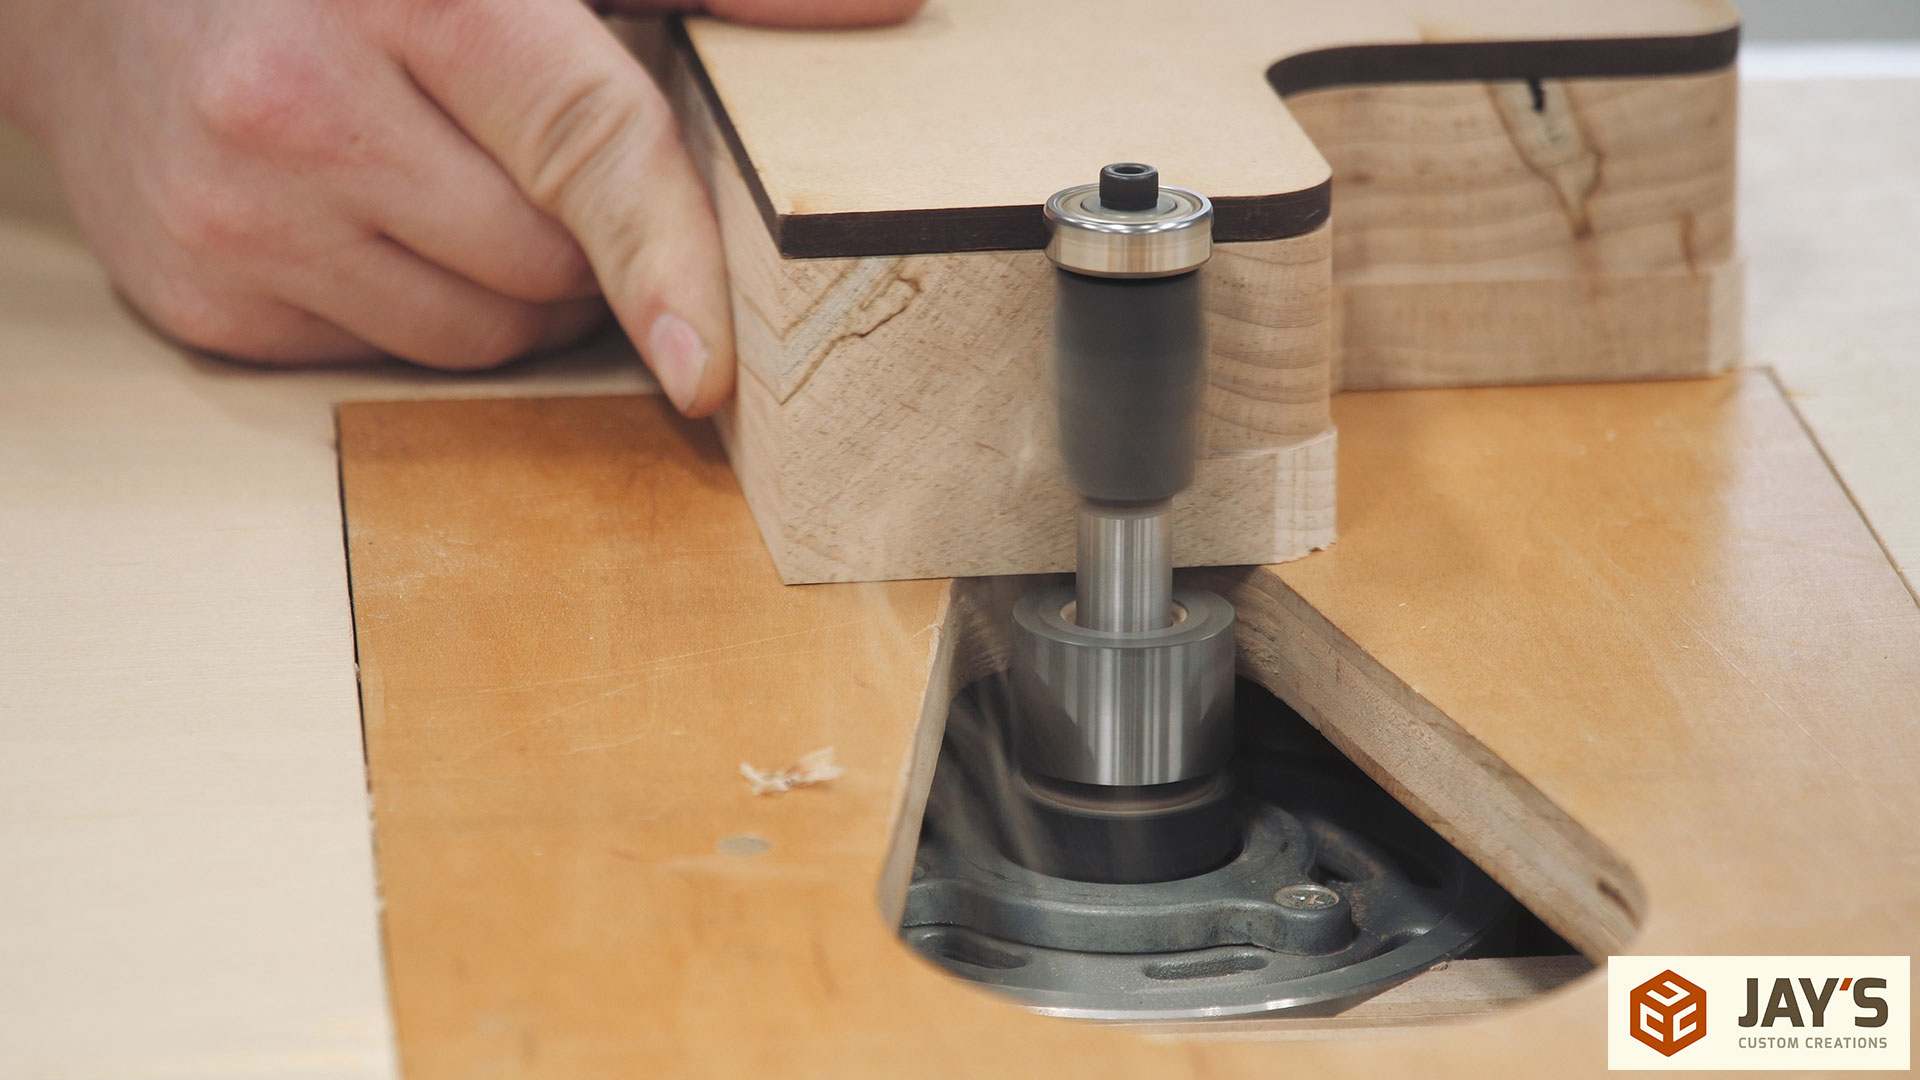
The rest of the material is trimmed up by lowering the bit and making another pass. This time the bearing rides against the freshly cut surface.

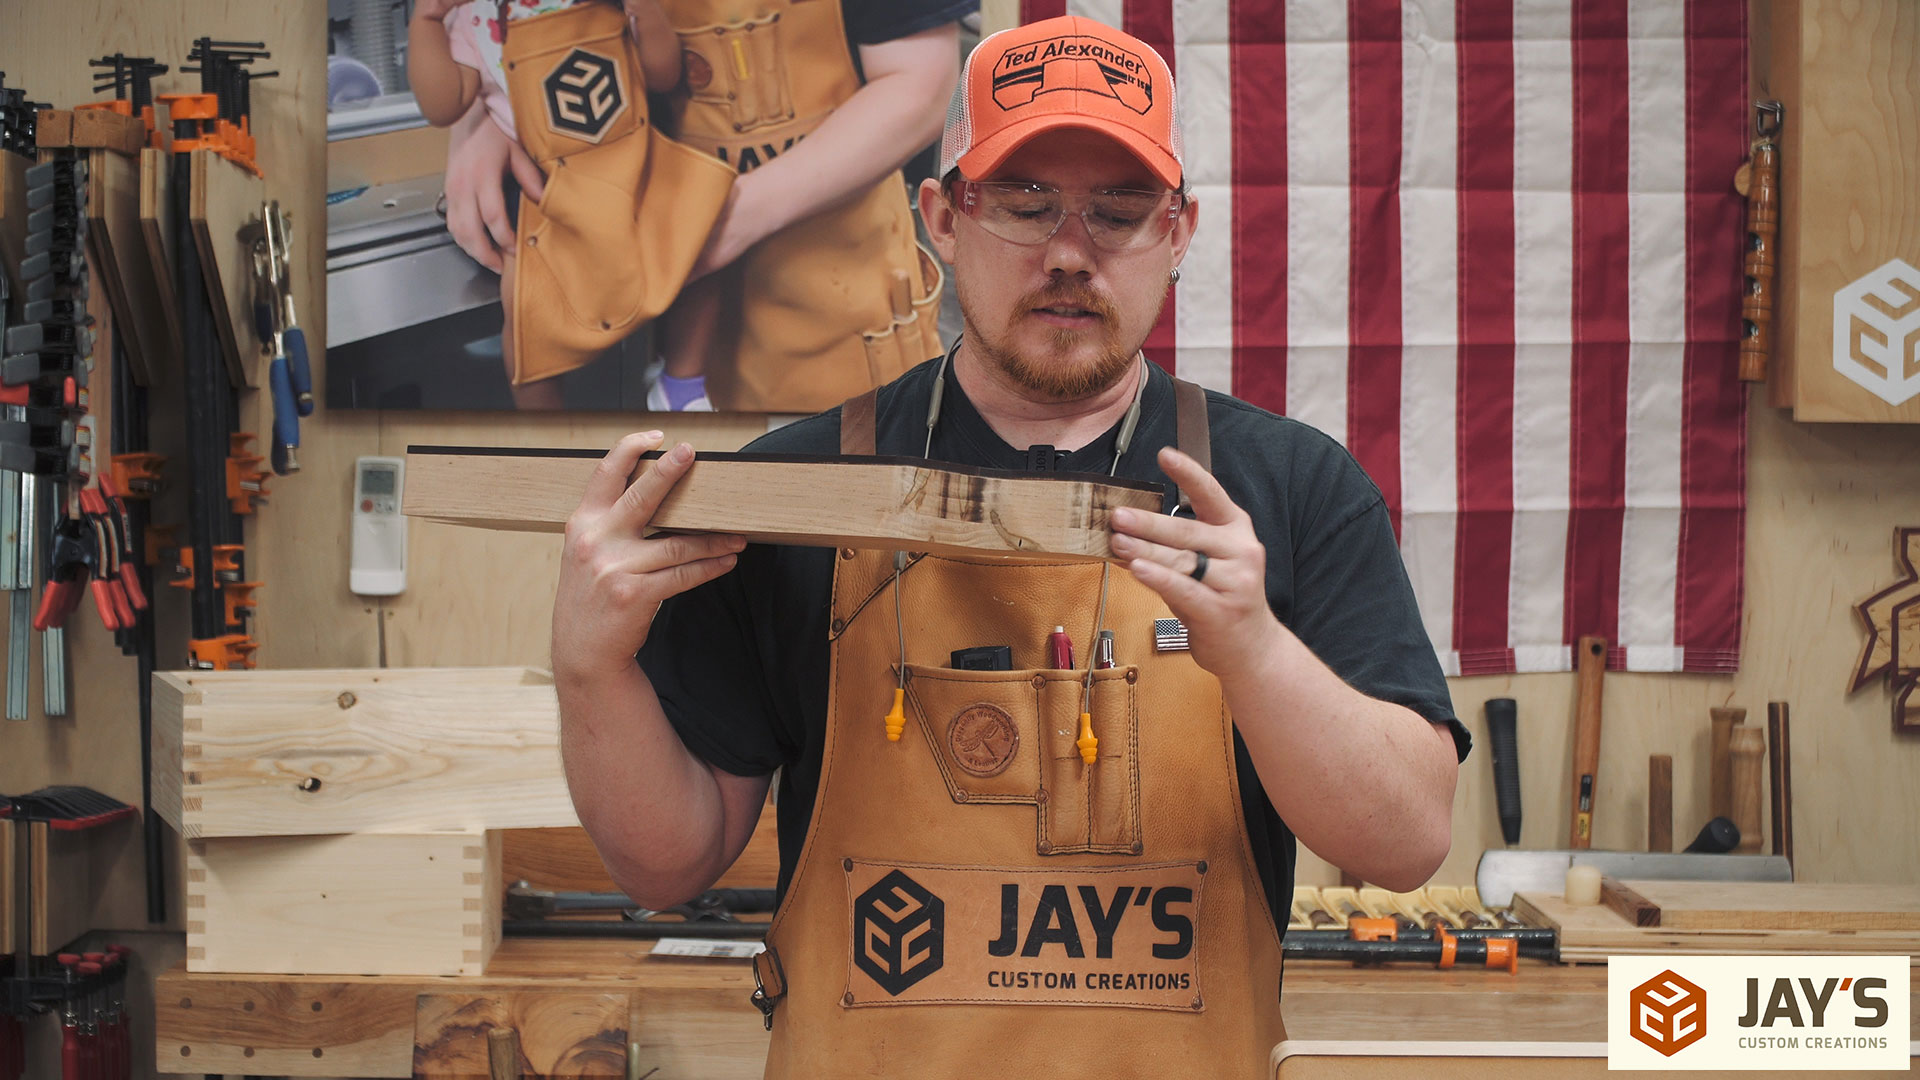
This is how much burning I was left with on one end. Luckily it didn’t take as long as I thought to sand it away.
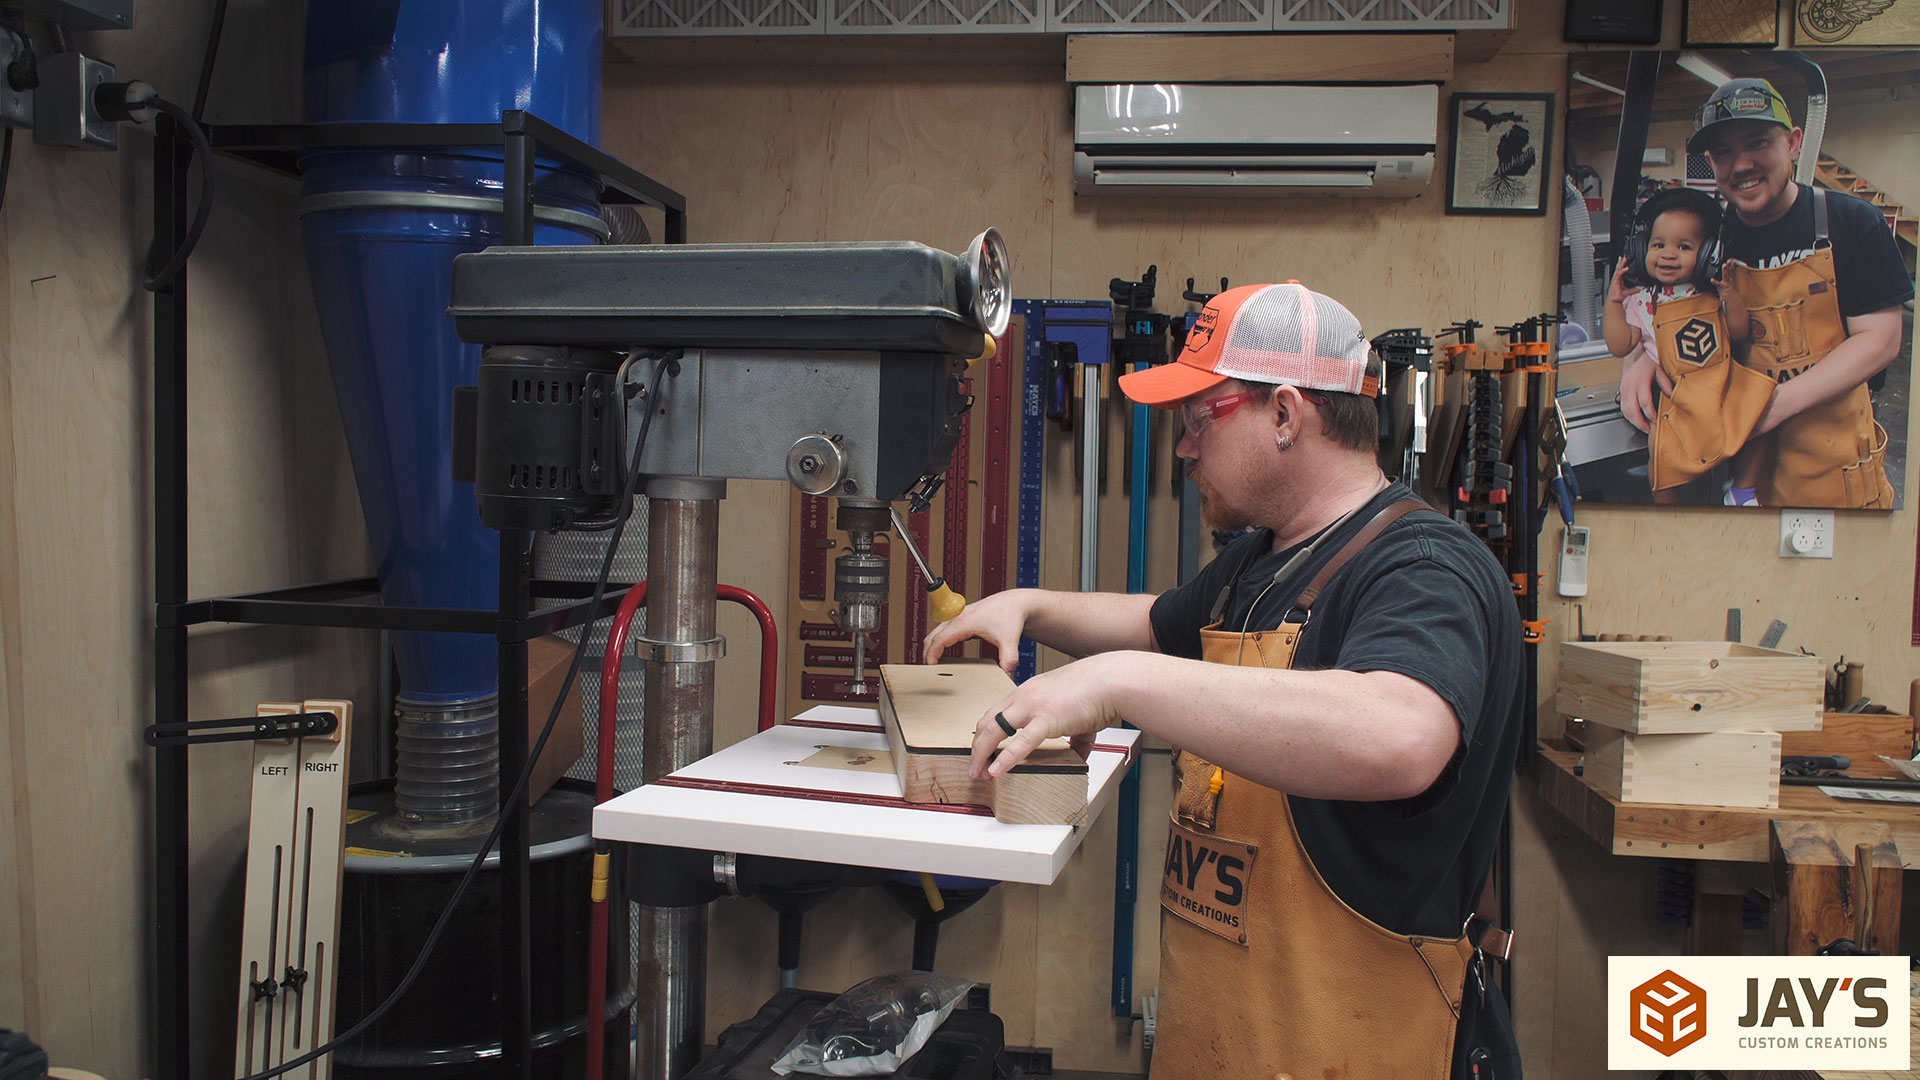
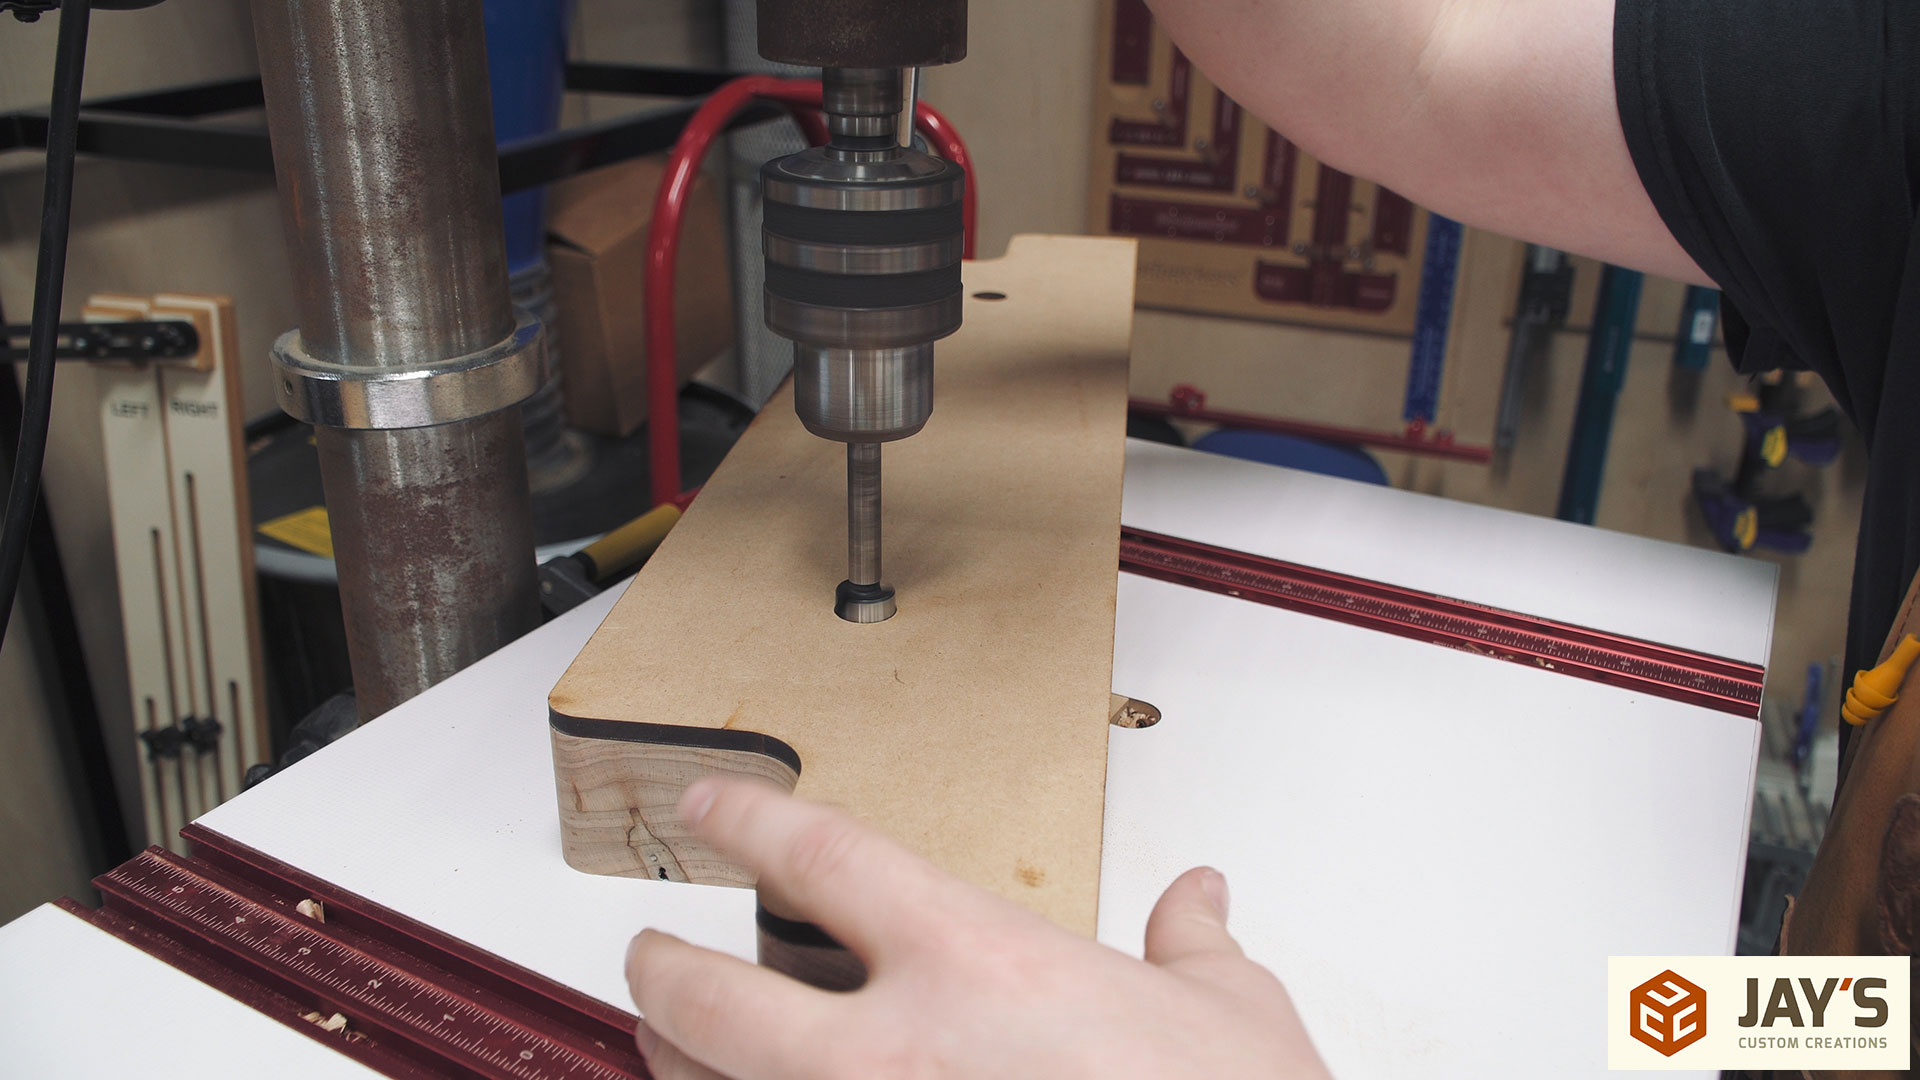
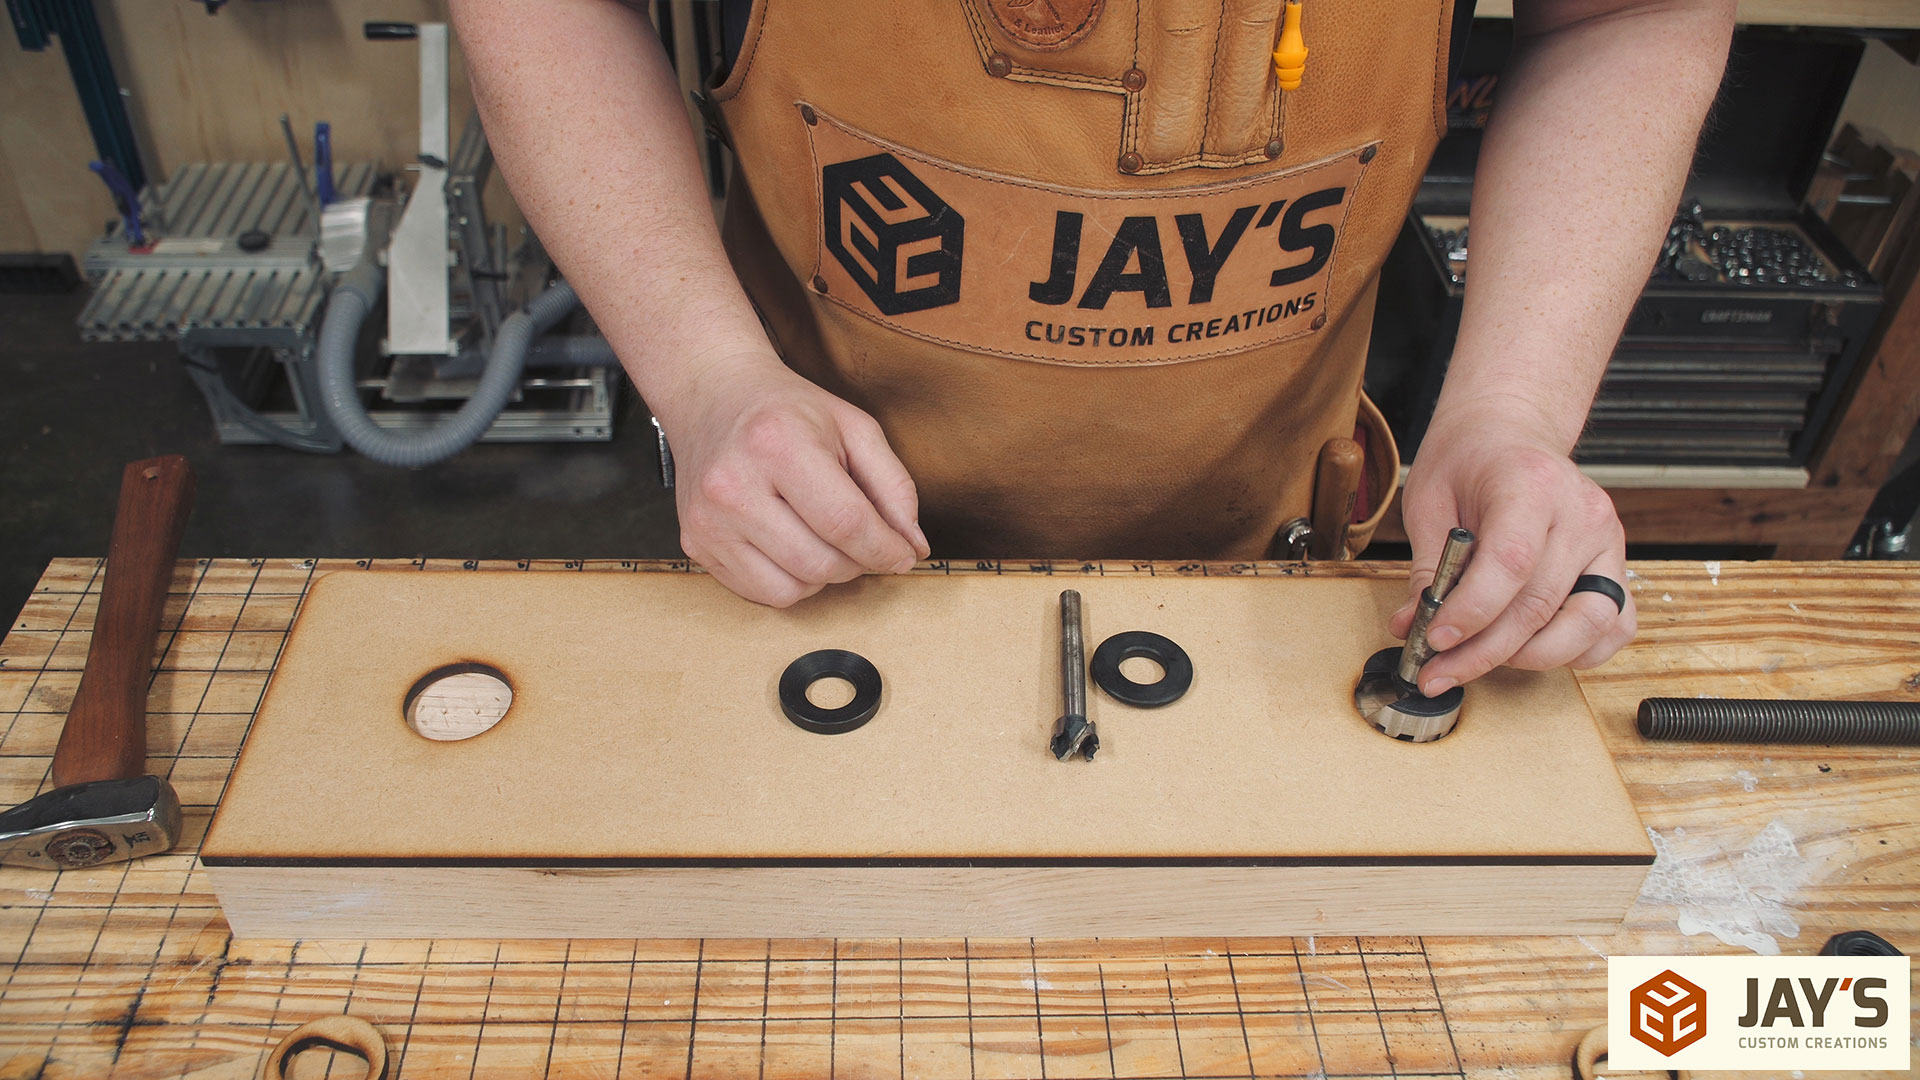
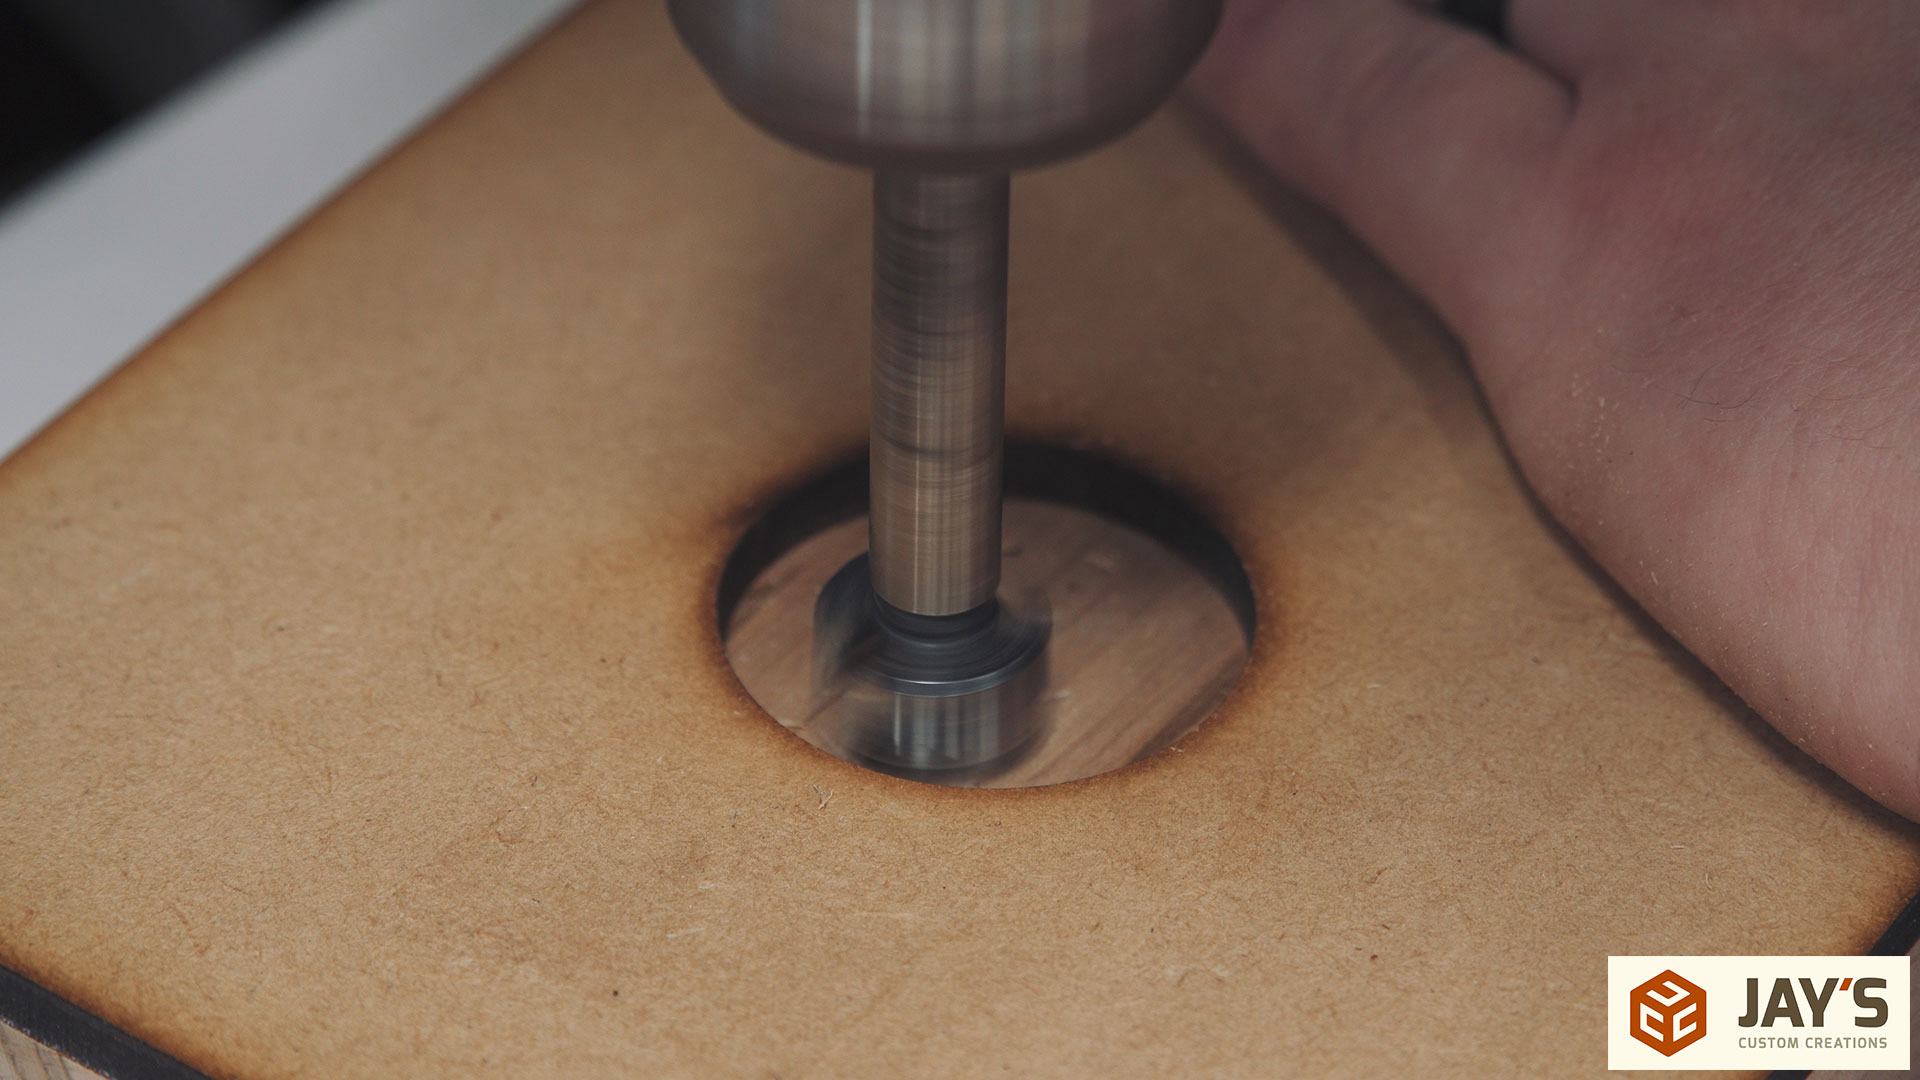
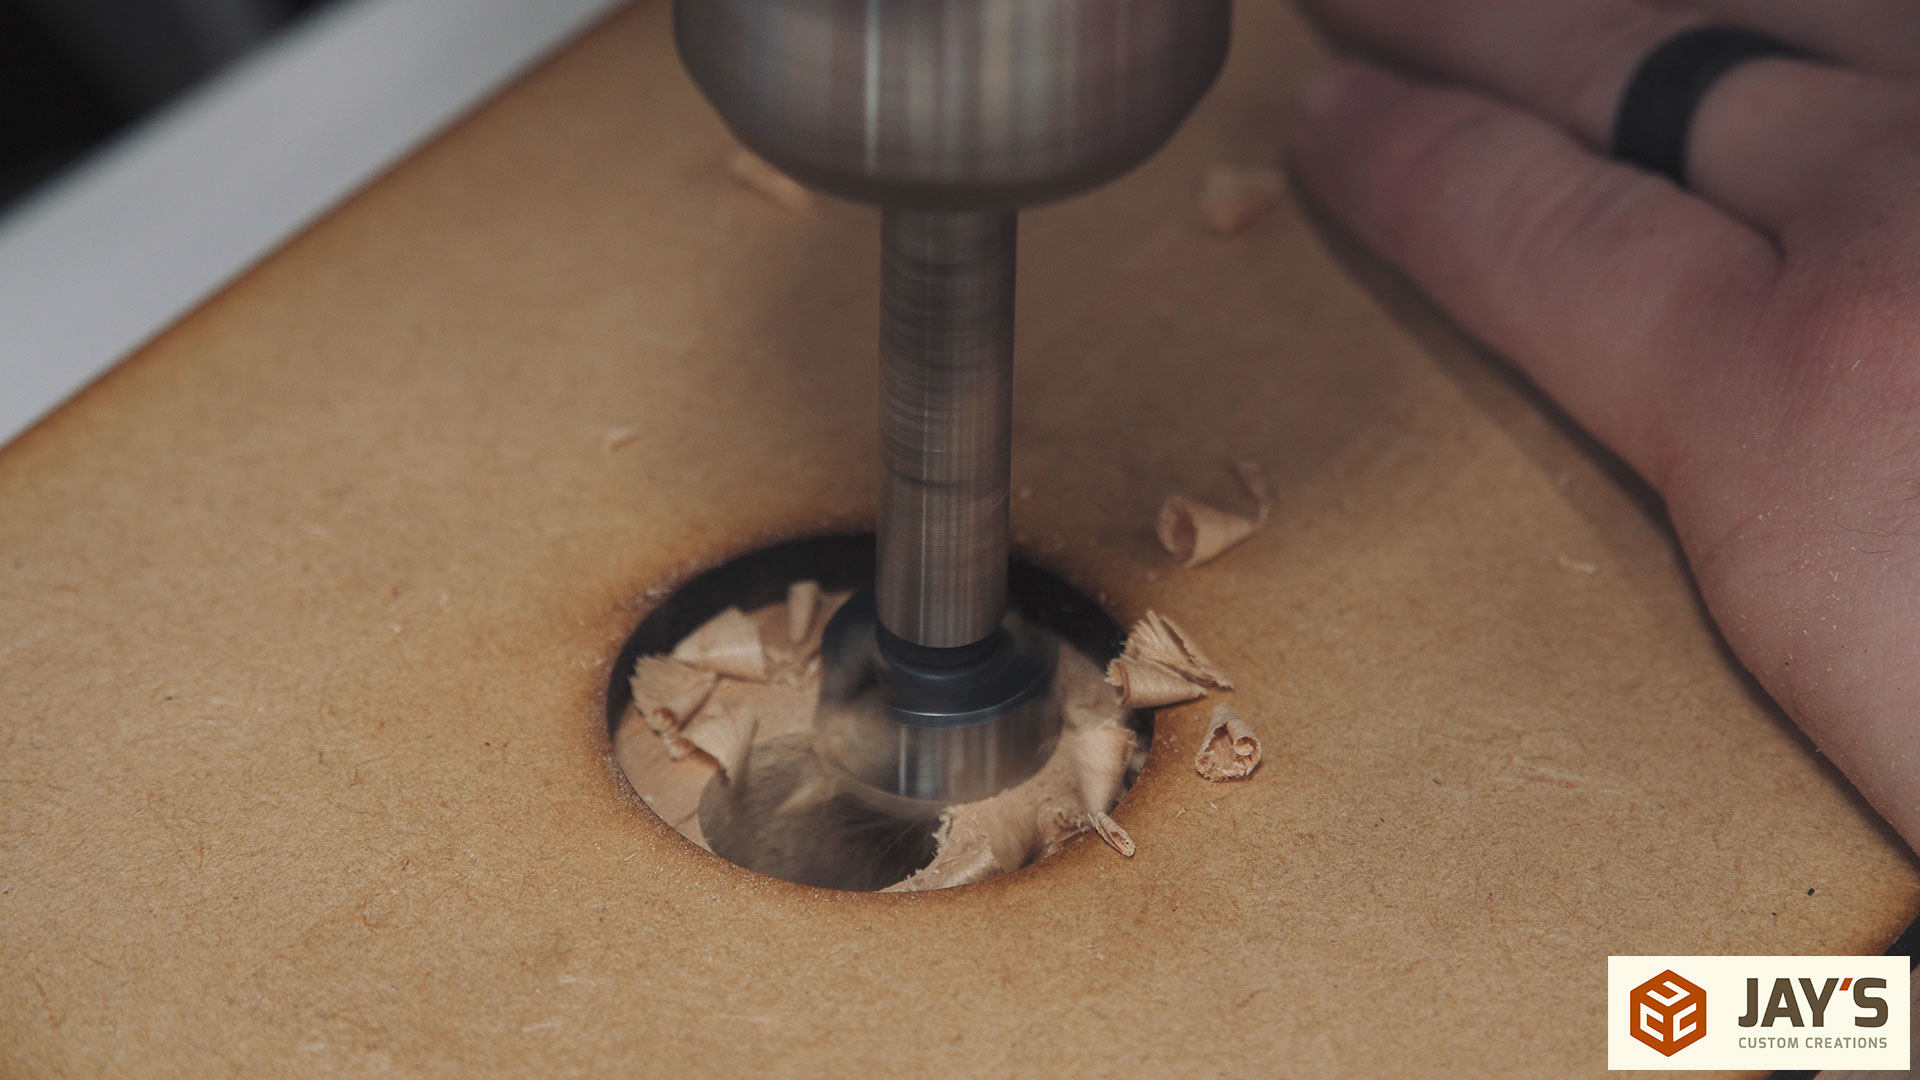
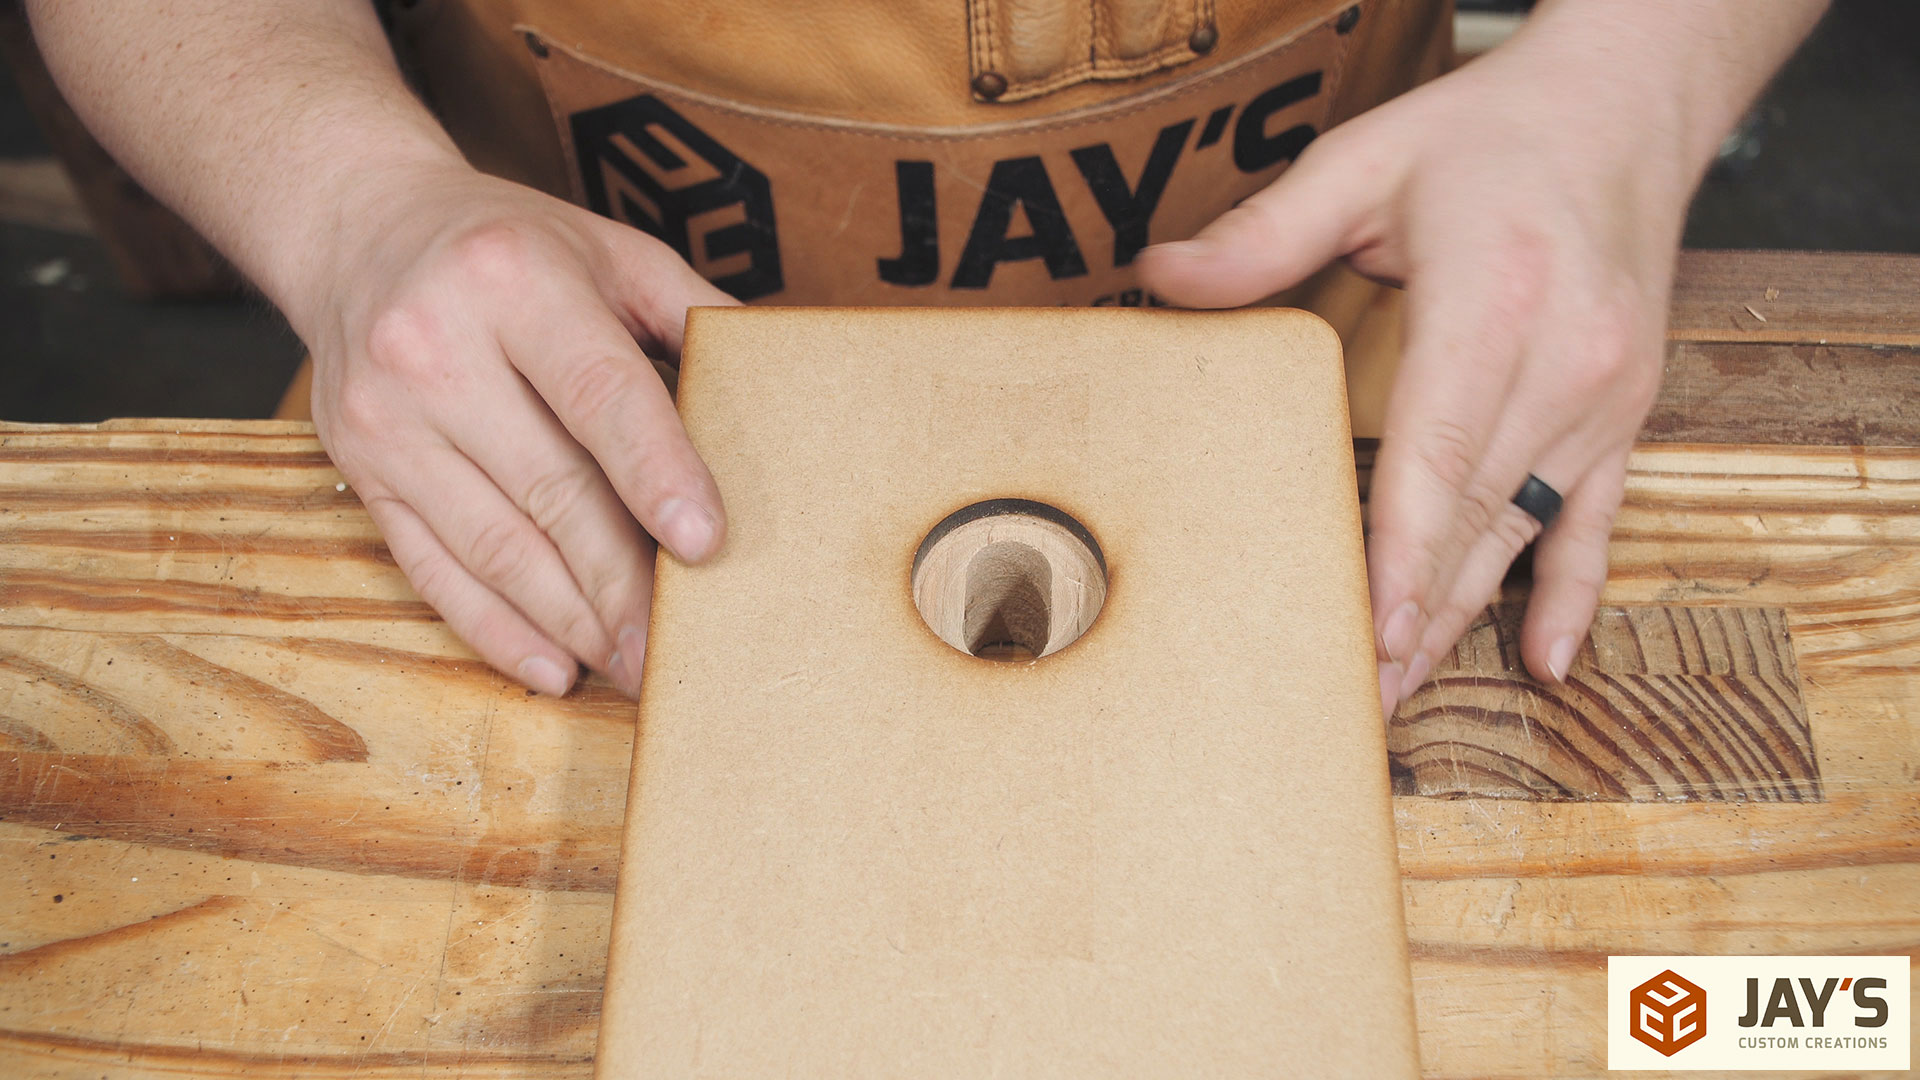
Time for some drill press strategy. These templates have everything you need to get great results but there is an order of operations for the holes. I started by using a 3/4” forstner bit as a center punch to locate the center of the holes on the outside face of the rear jaw. This center point will be used to locate a 1-1/8” hole to cut a counterbore for recessing a nut in to the jaw.
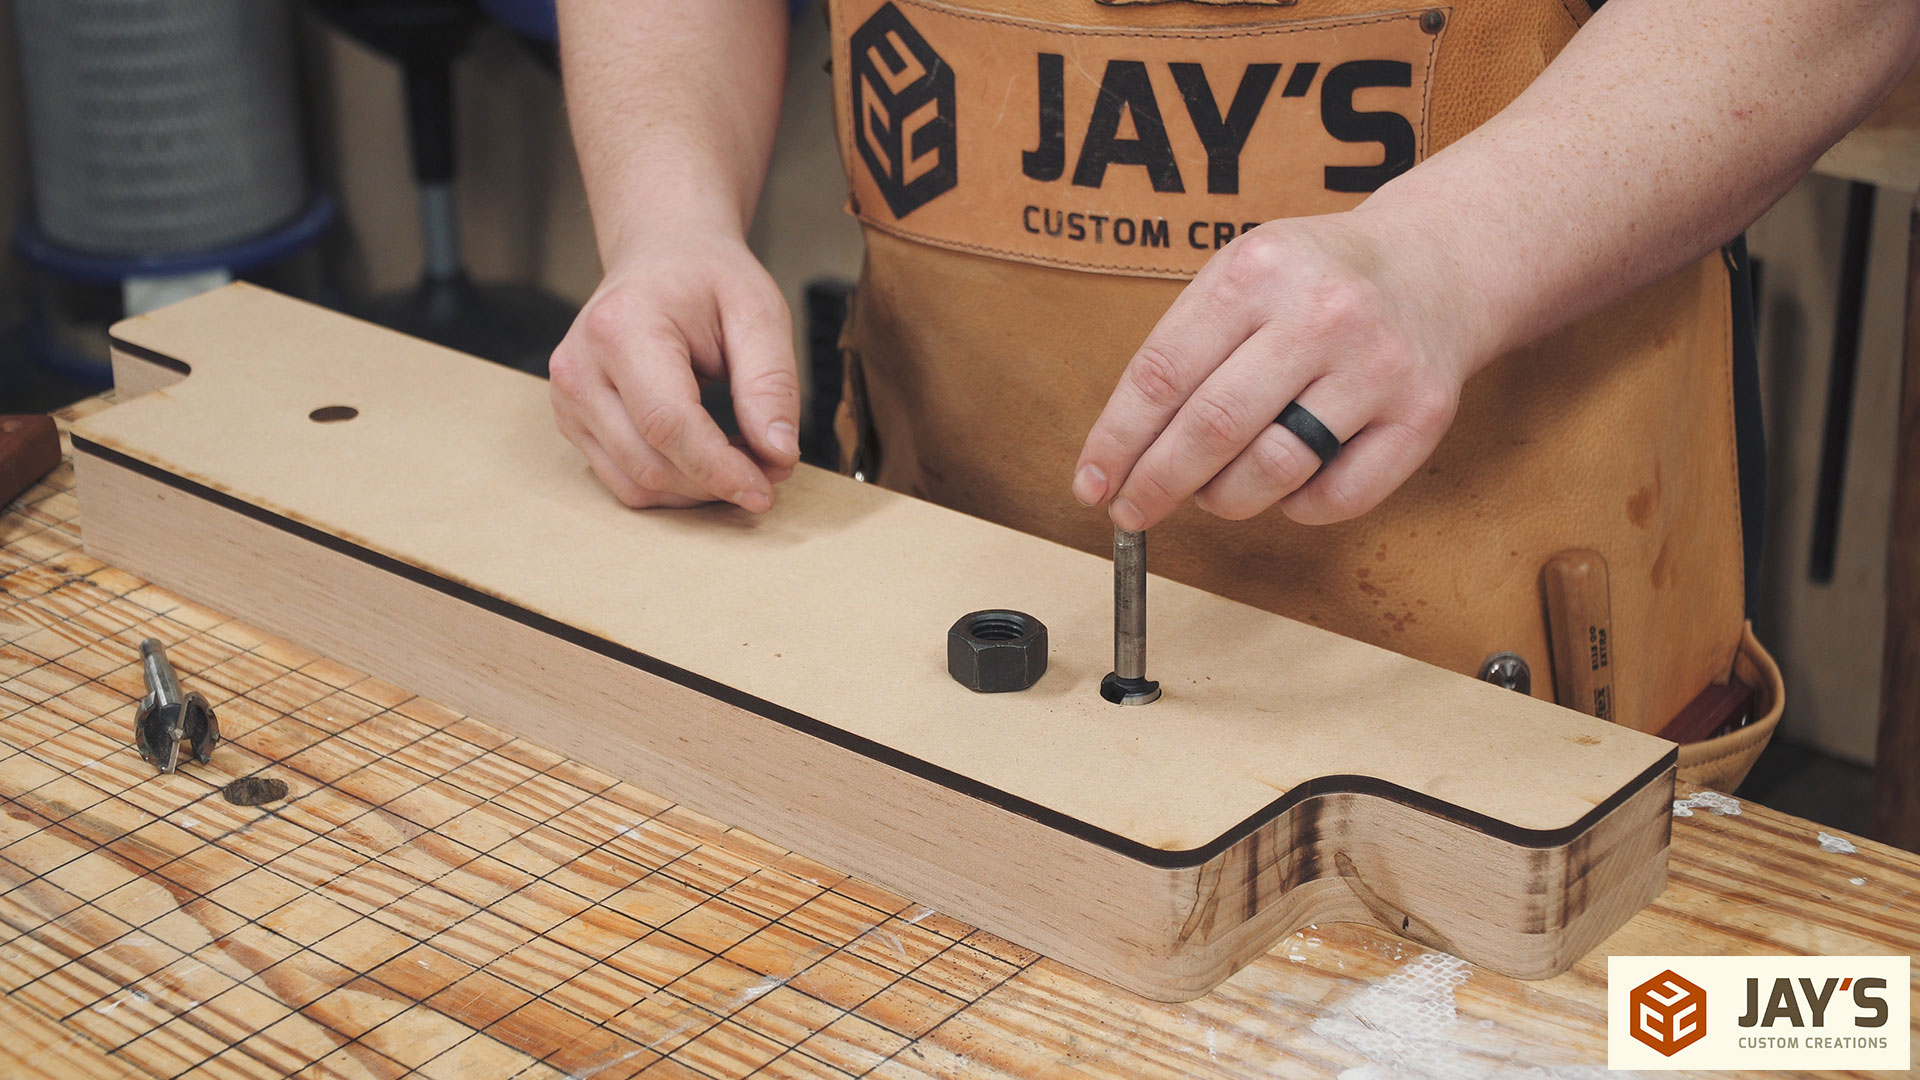
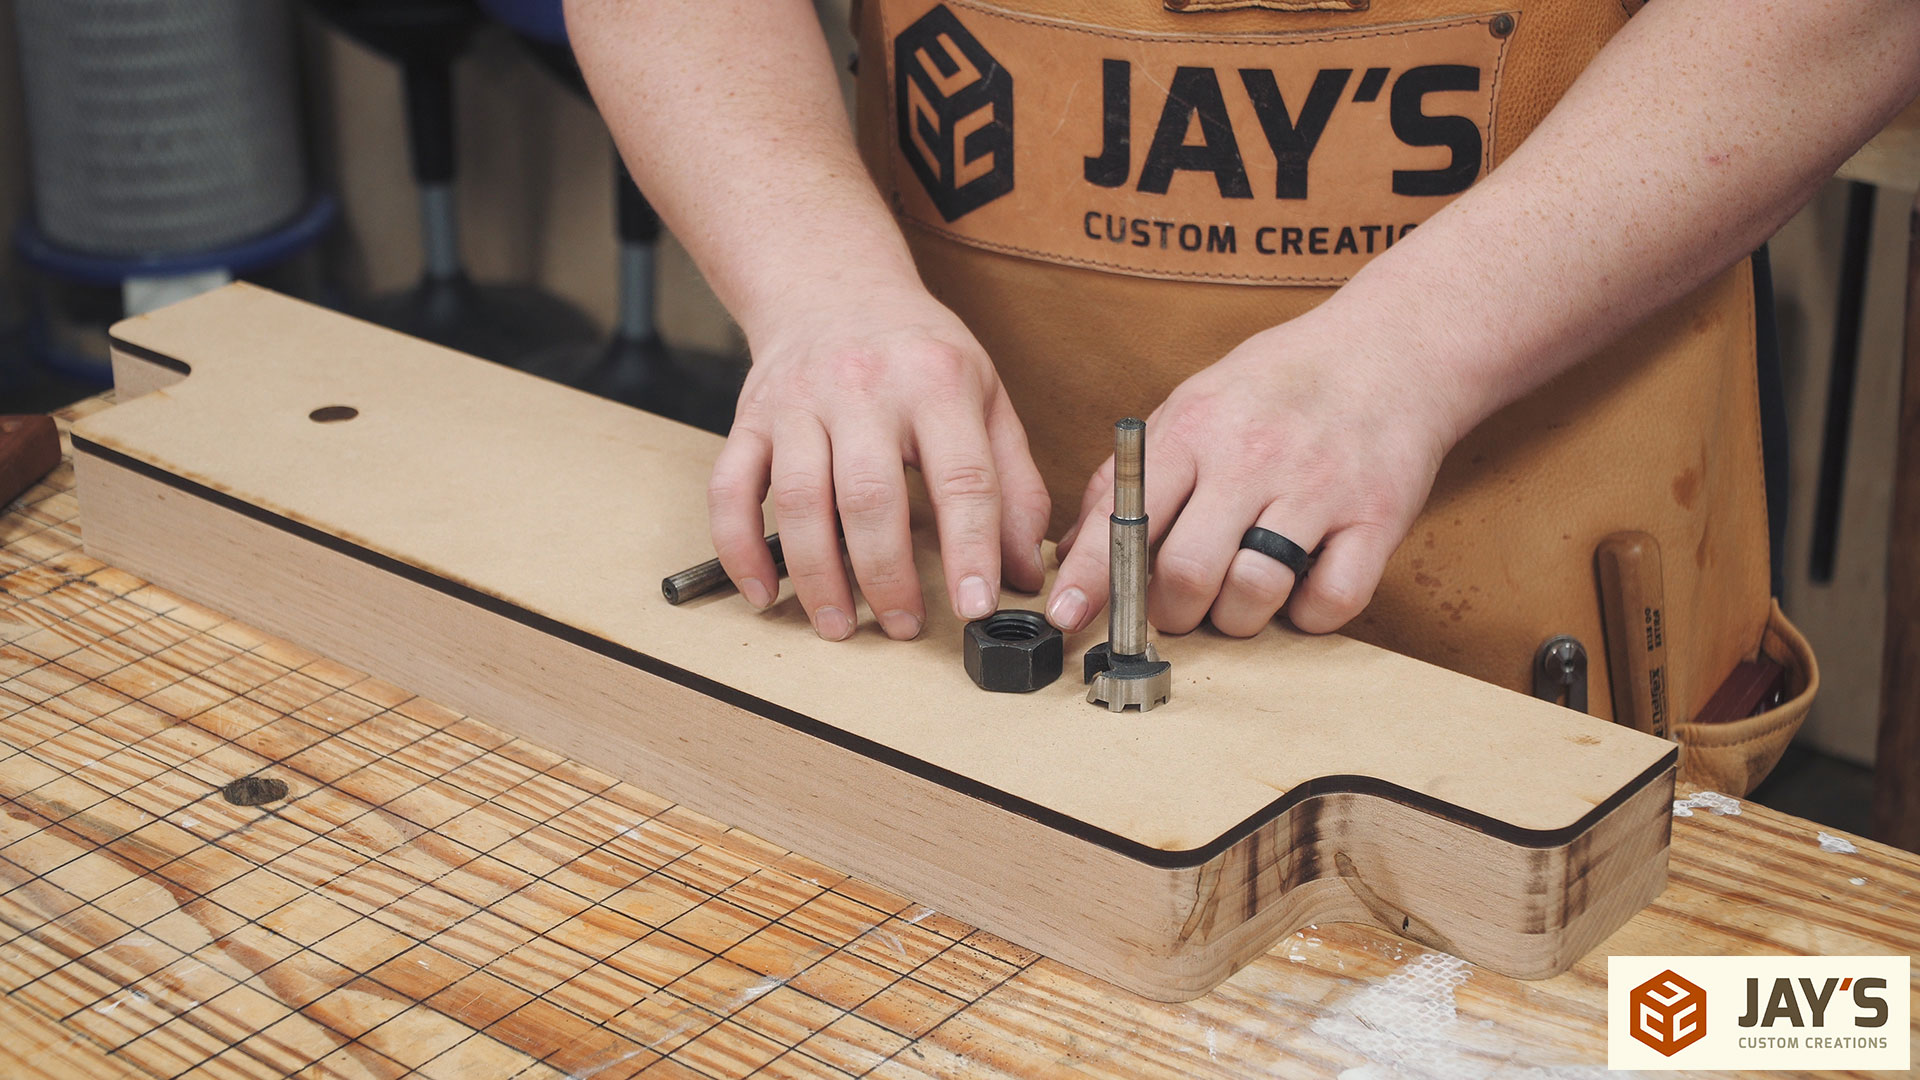
I traced the nut thickness to the side of the wood for a reference line to set the depth stop on the drill press. The template is removed before drilling these holes.
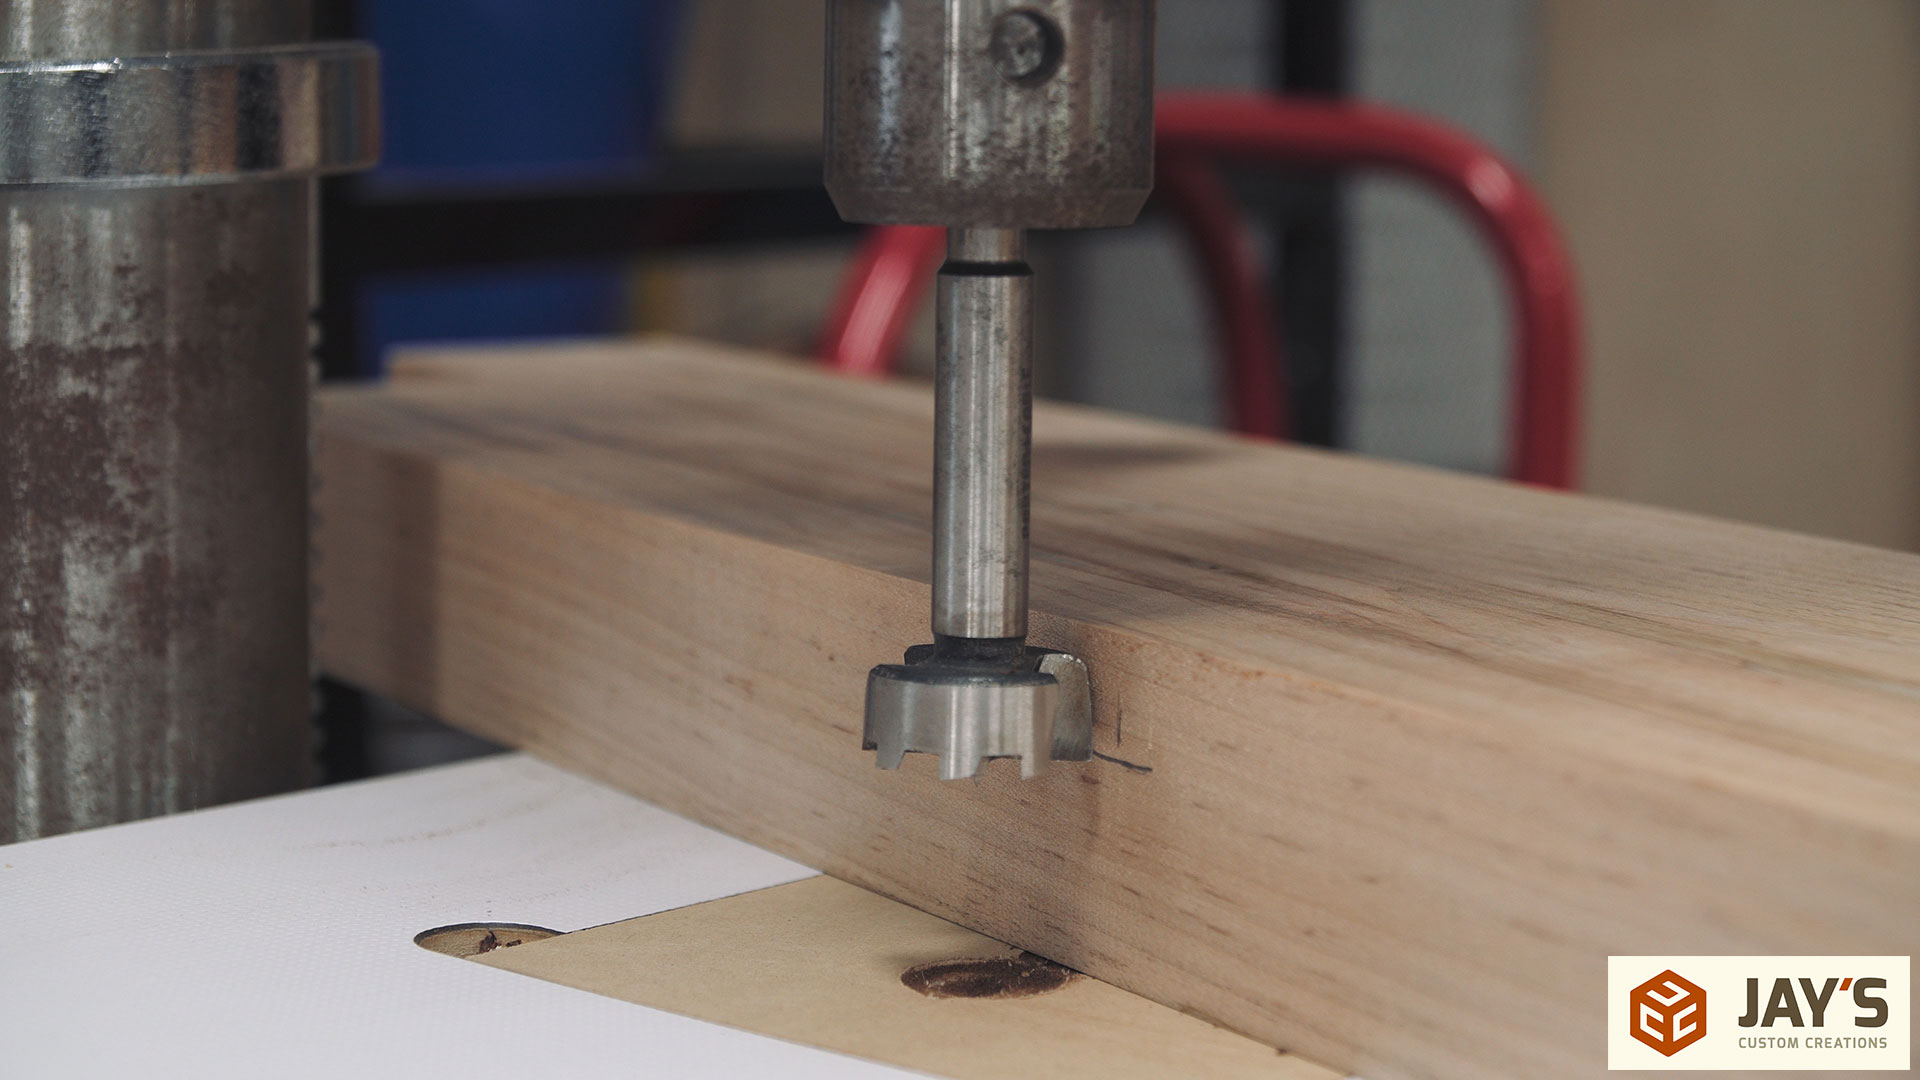
Then the holes are drilled.
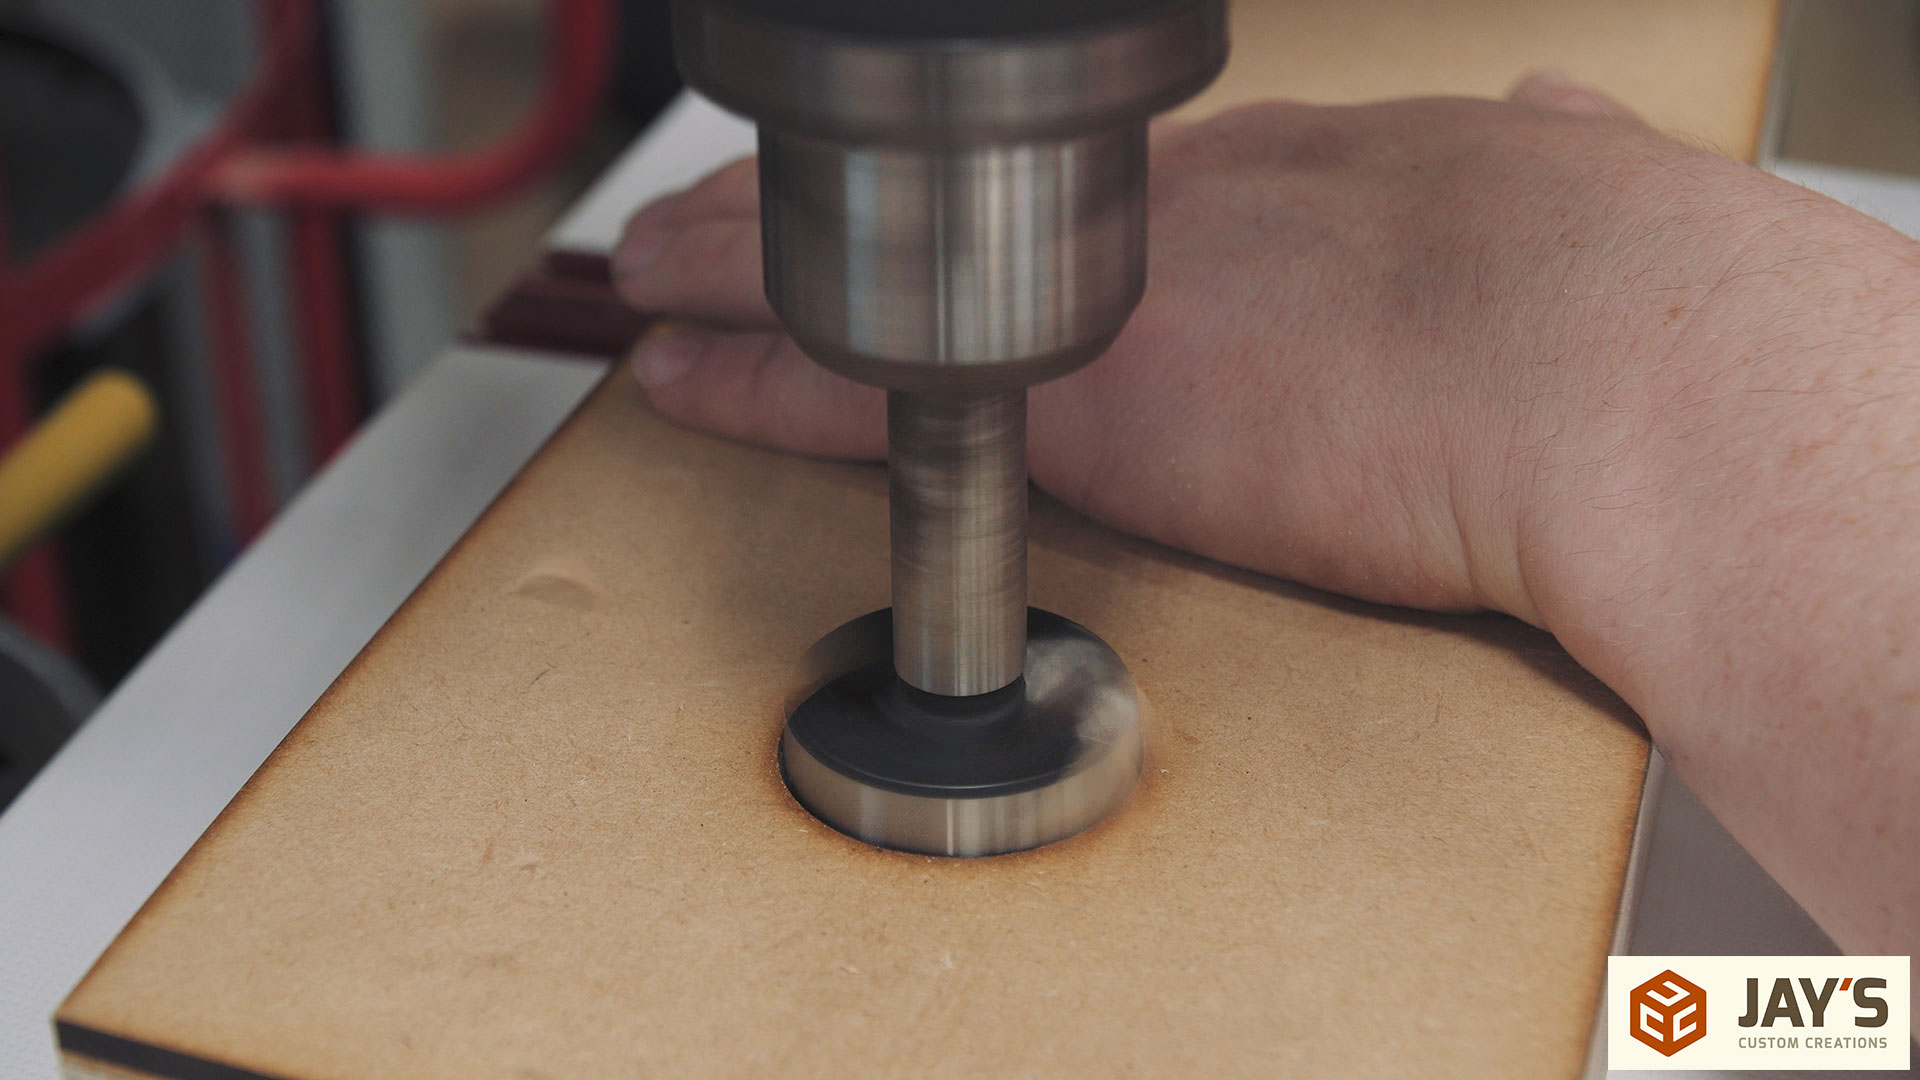
Here’s where I had to change my strategy. My plan was to use the center point from the 1-1/8” forstner bit hole to locate the 3/4” forstner bit to drill all the way through. Unfortunately that did not work as the center point was too large on the larger bit and didn’t allow for proper alignment with the smaller bit. The solution was to attach the template to the back side and start over with the 3/4” bit. The template is symmetrical so there is no problem doing this.
Then the holes are drilled again. That’s it for the larger rear jaw.
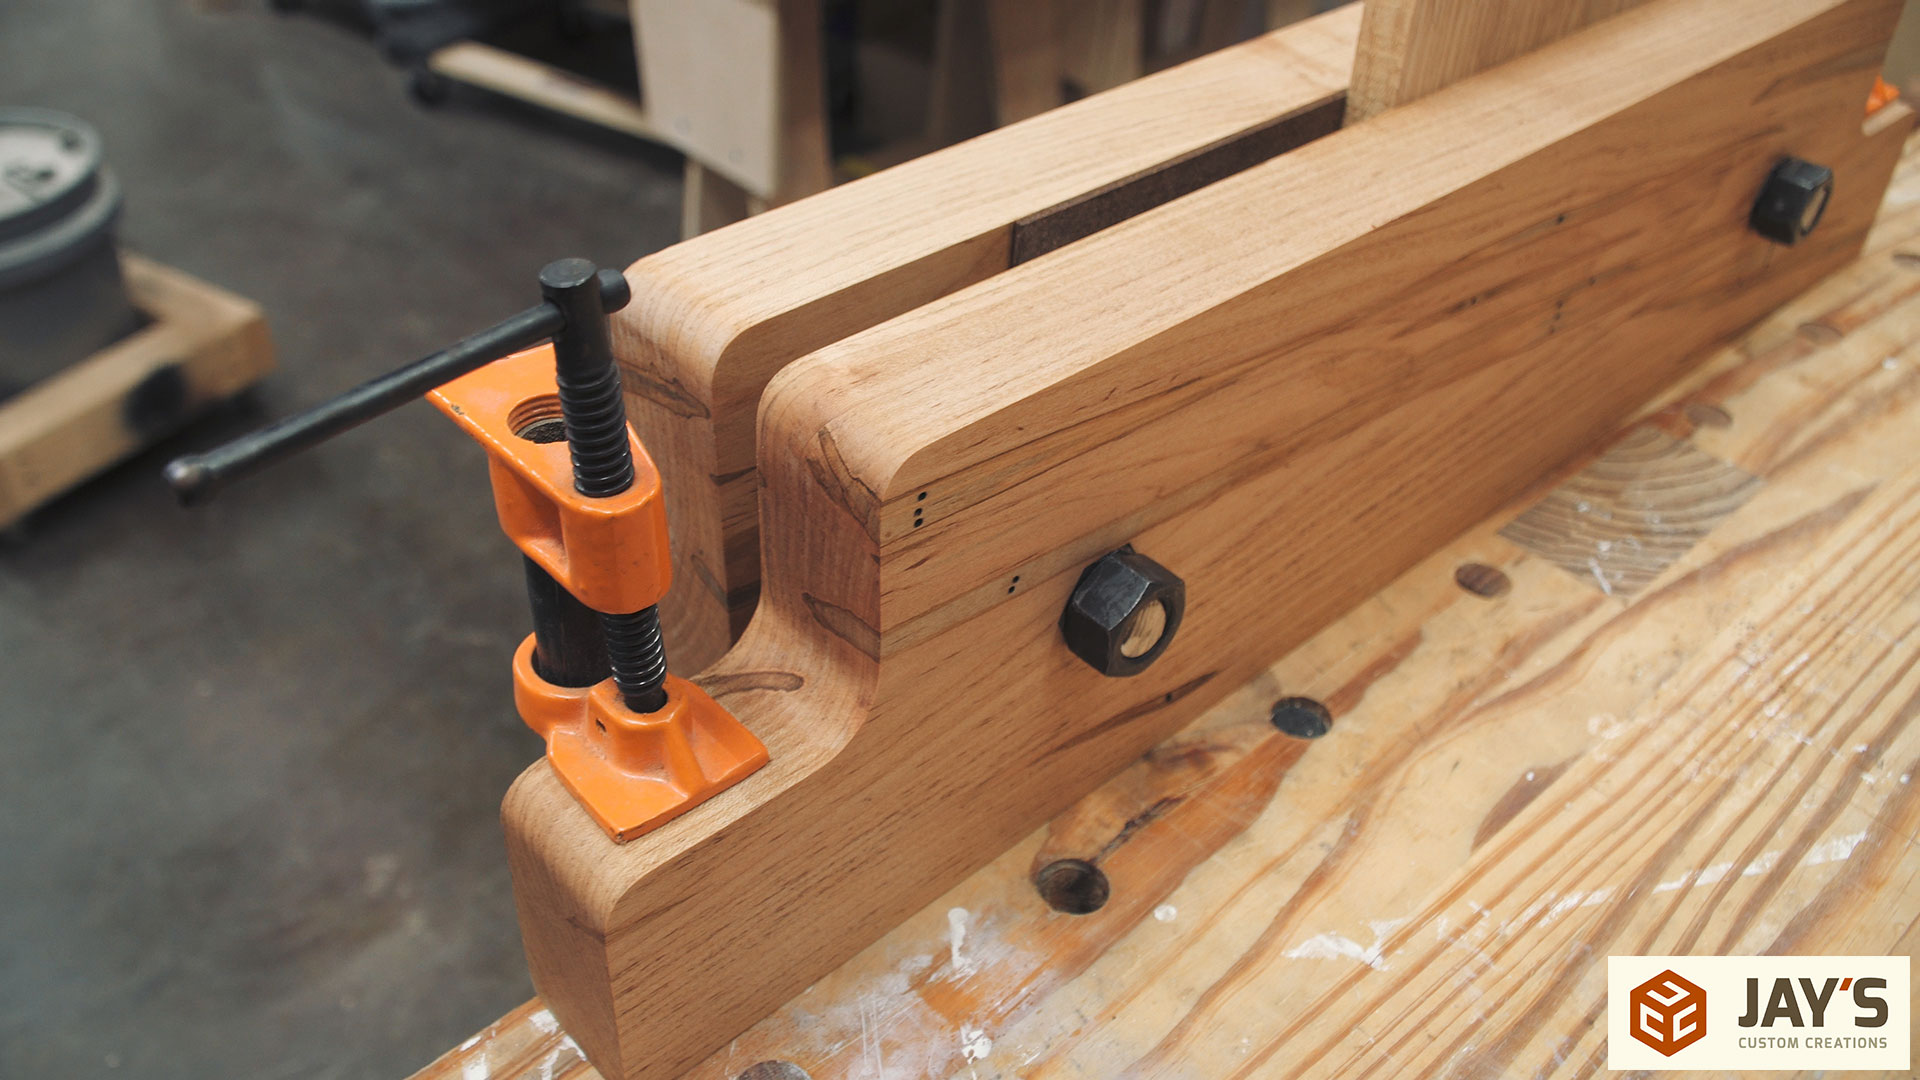
Next up is the movable front jaw. There’s a little more work that needs to be done here, starting with the rounded slot inserts.
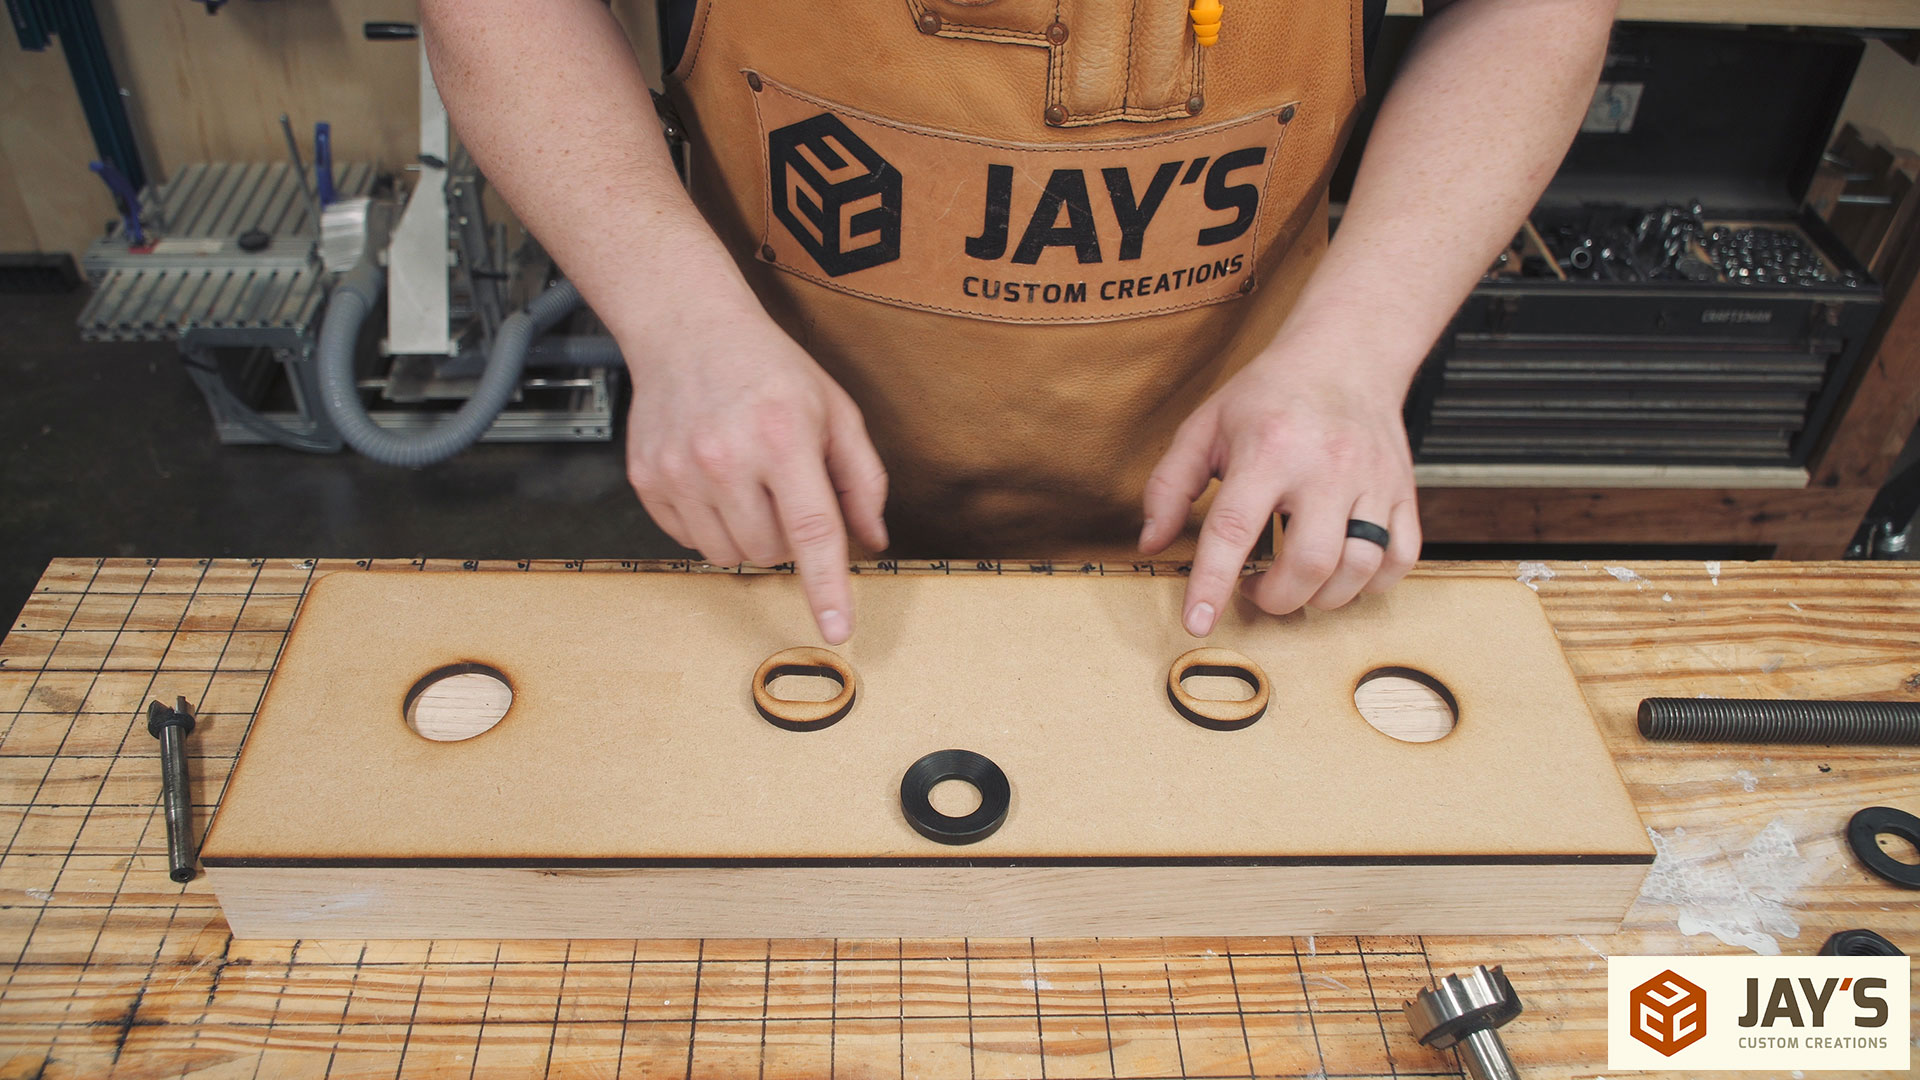
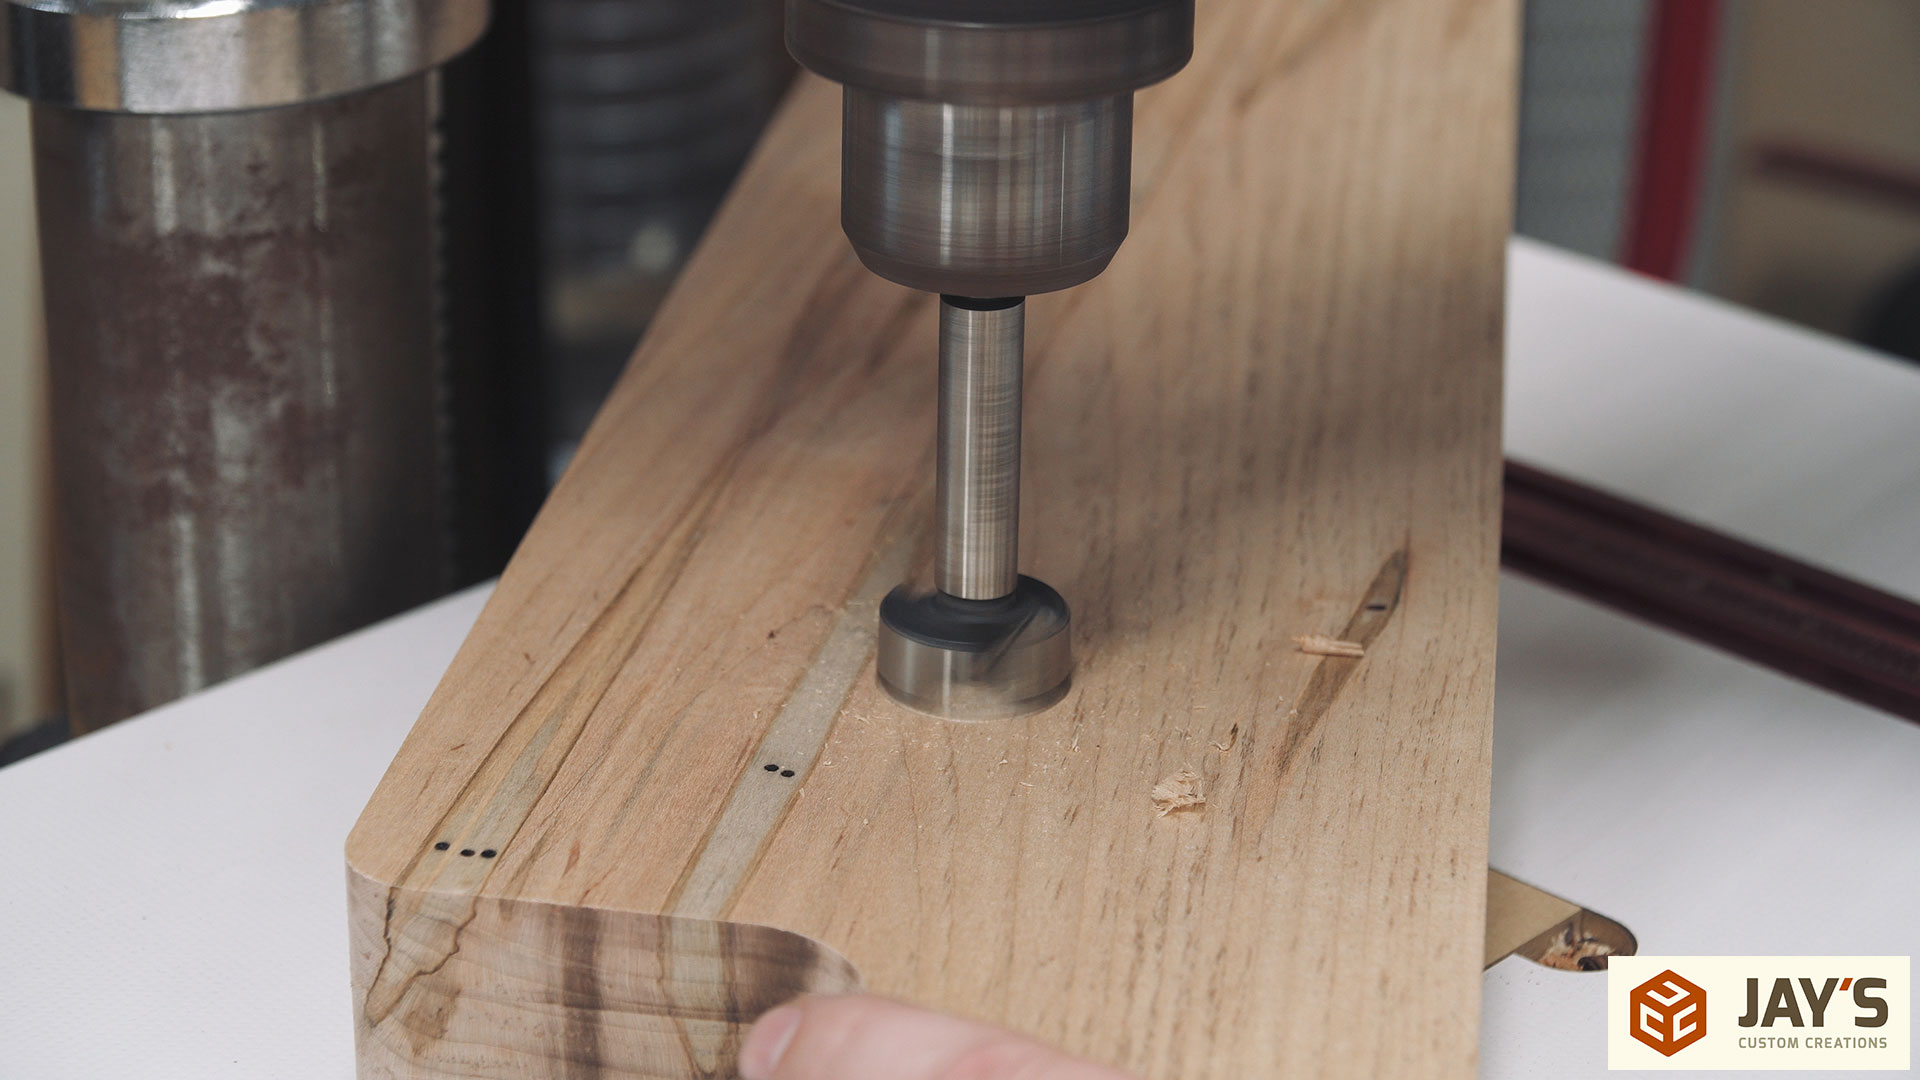
They get inserted into the larger holes and a 3/4” forstner bit is used once again as a center punch to locate the two holes that will make up the ends of the slot.
After those are drilled a larger forstner bit will be used to create a shallow counterbore to hold the larger dished washer. This washer set will allow the front jaw to rack side to side.

Now the two 3/4” holes are drilled.
Followed by the larger shallow hole.
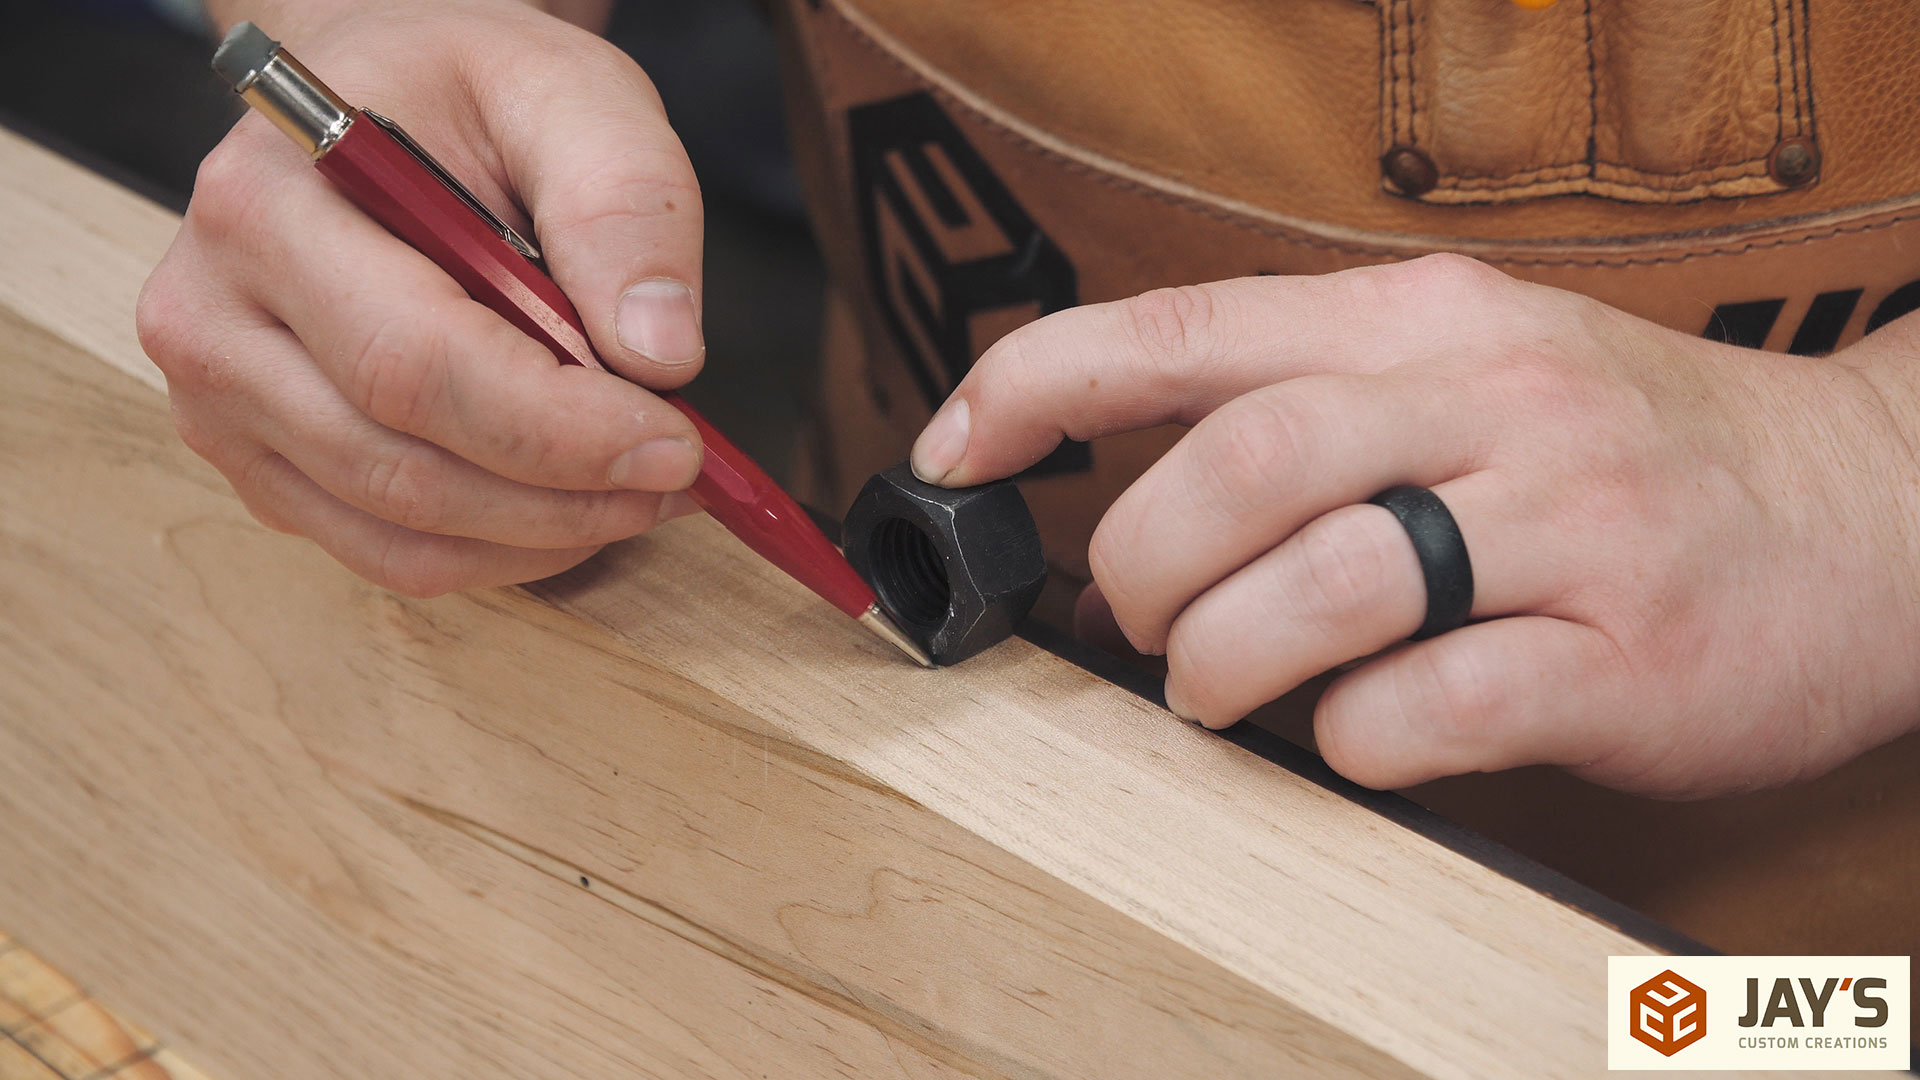
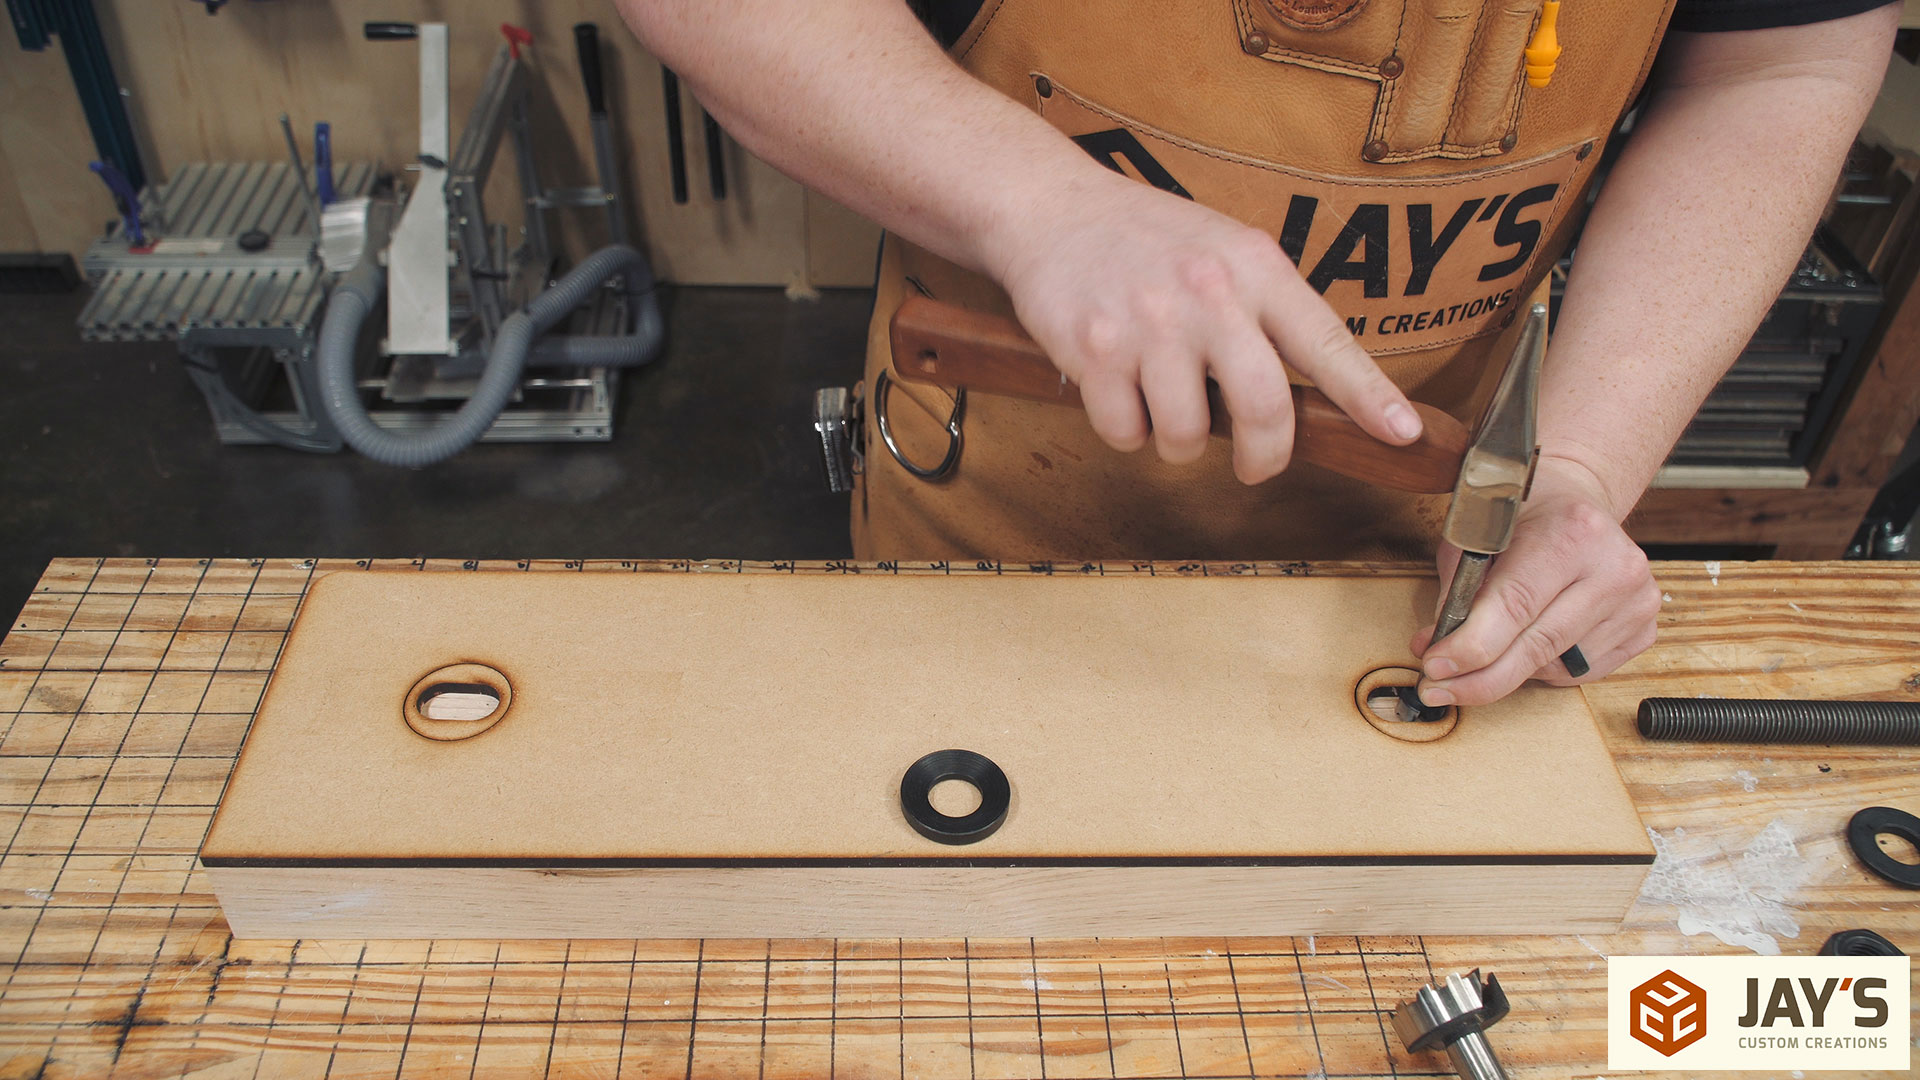
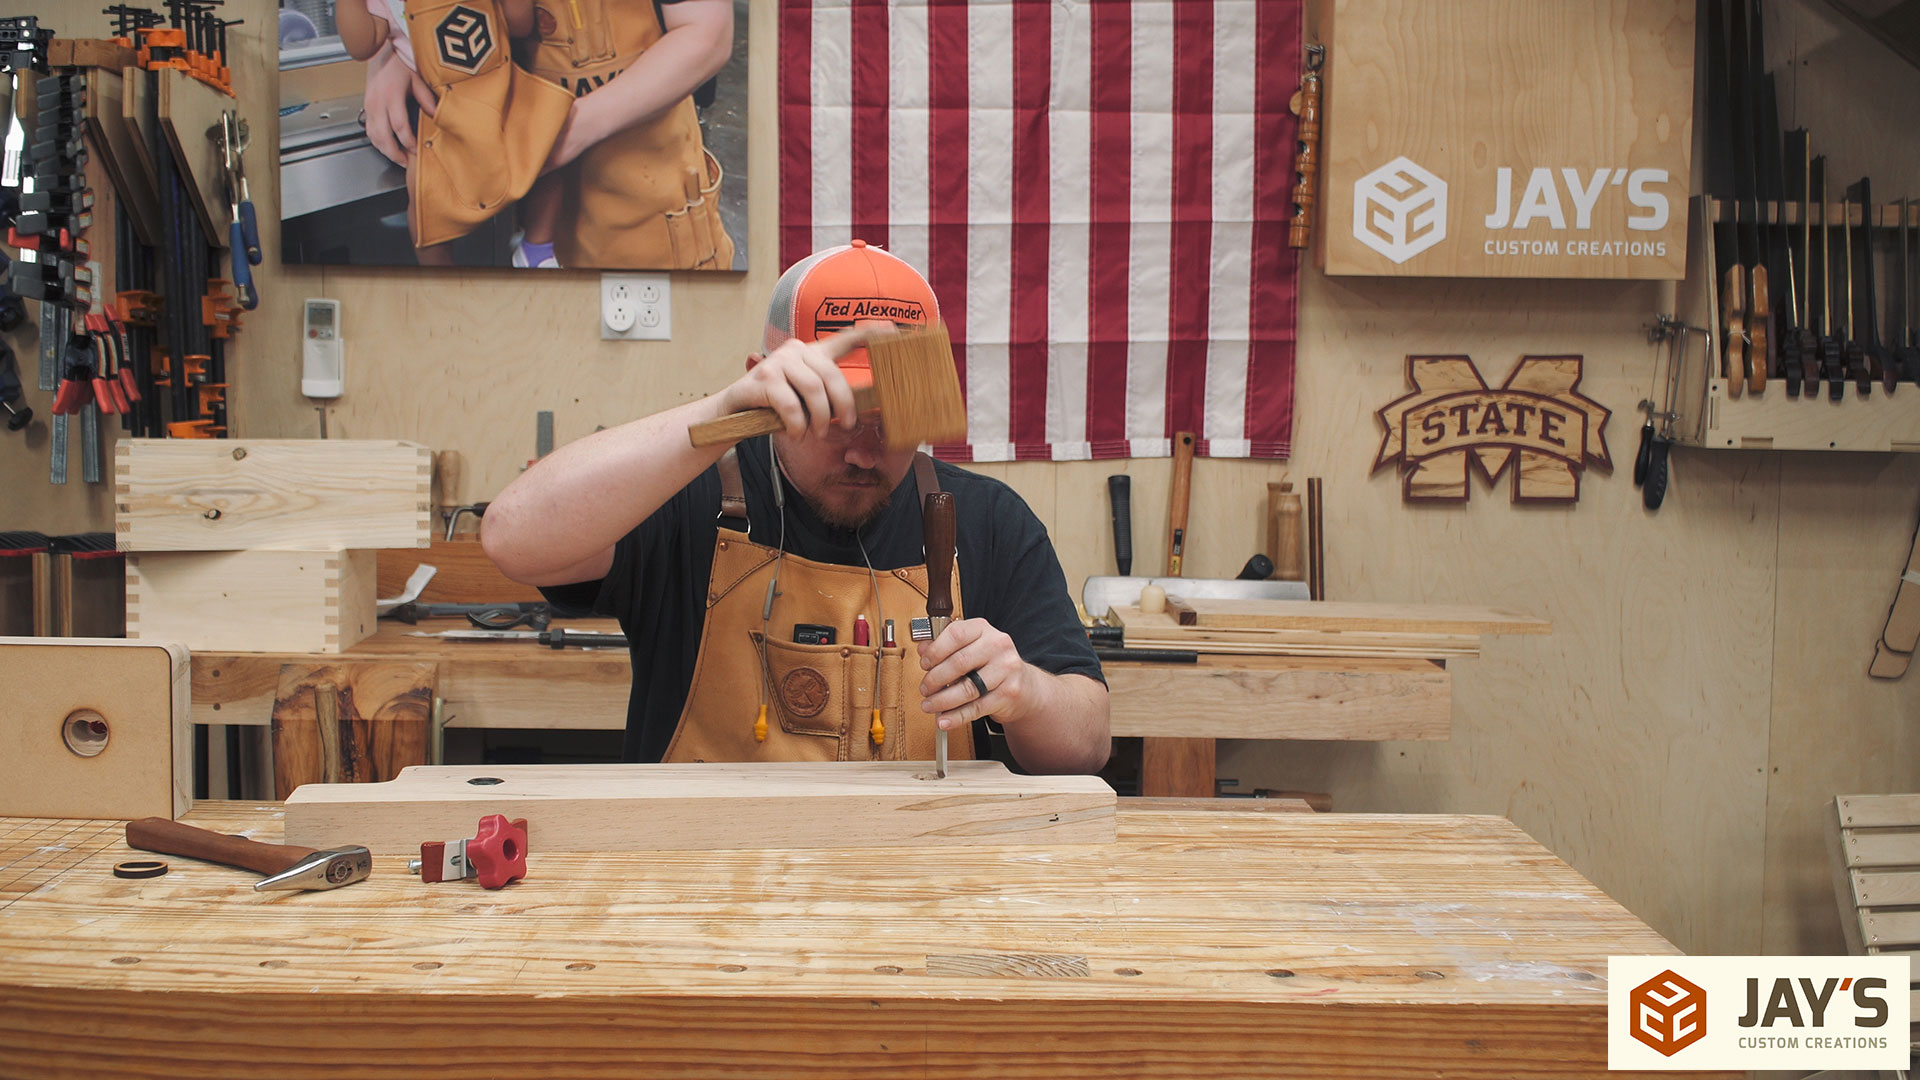
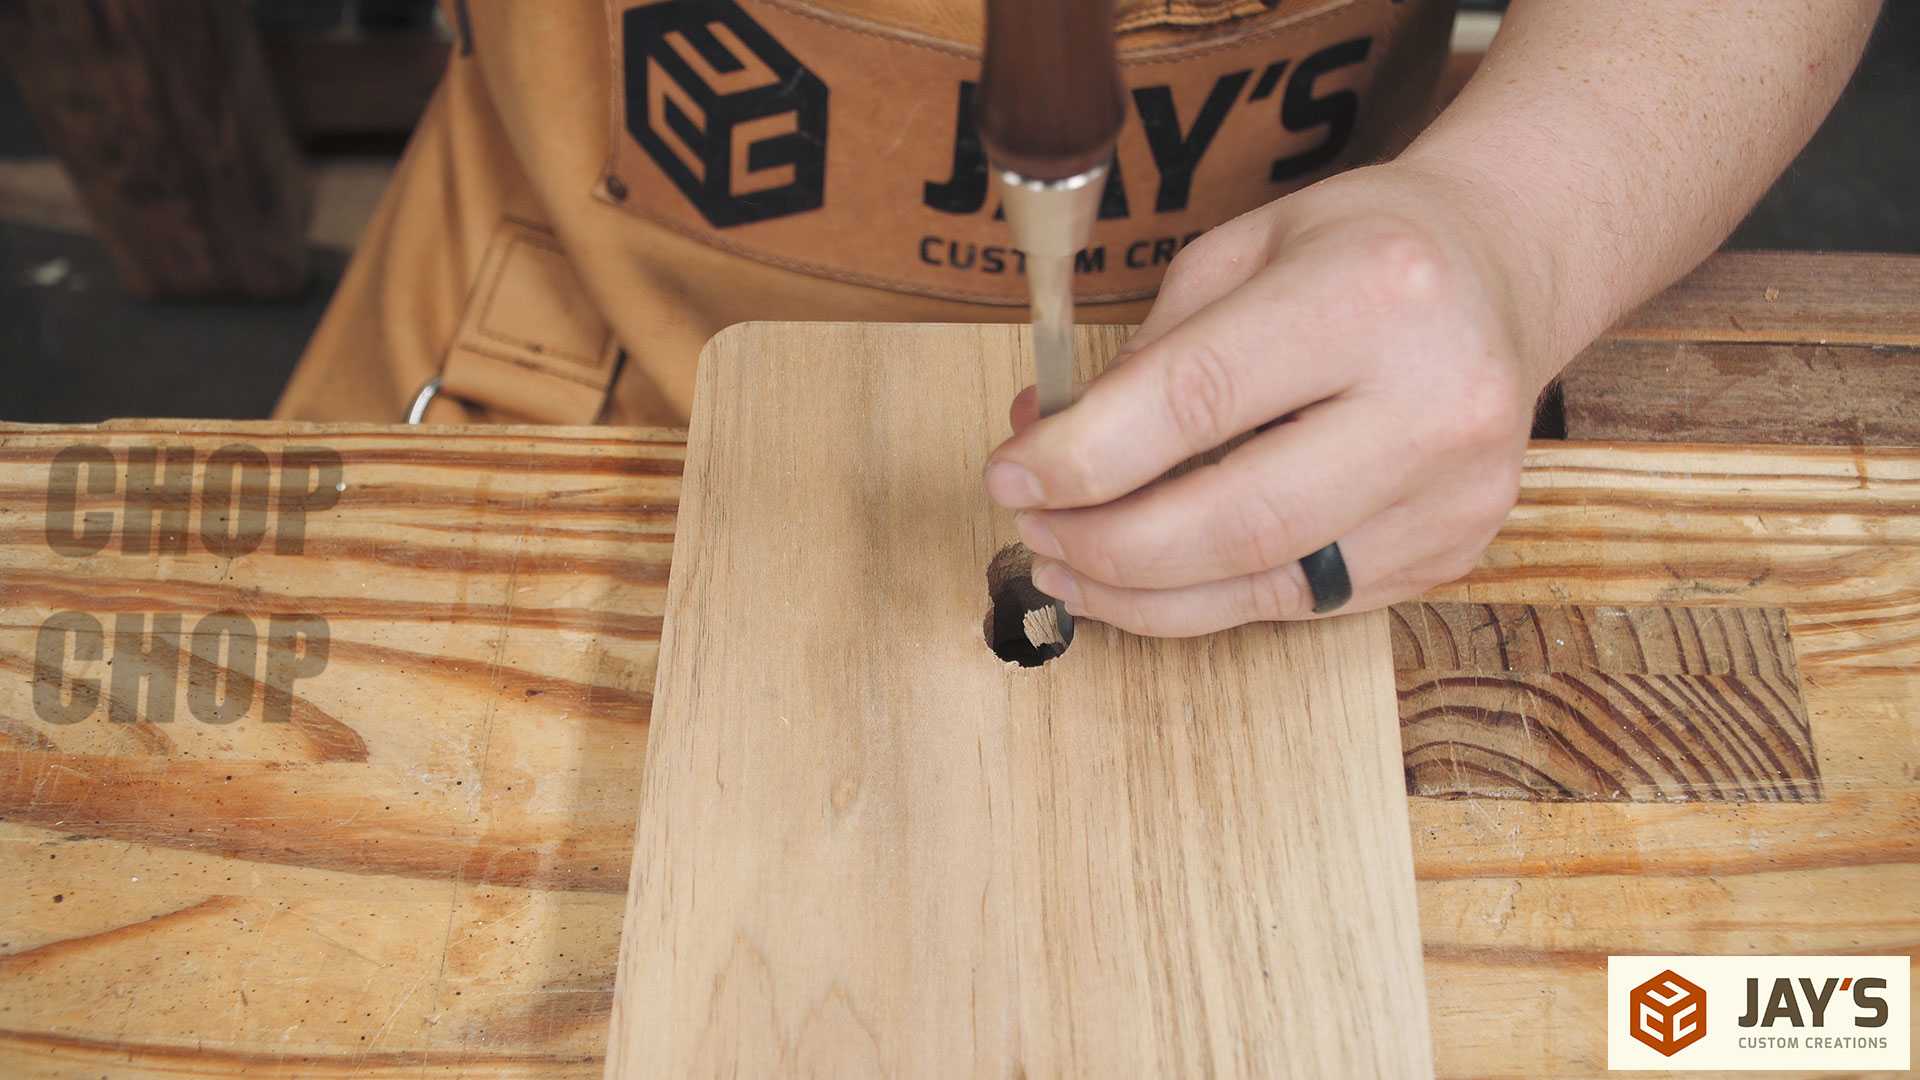
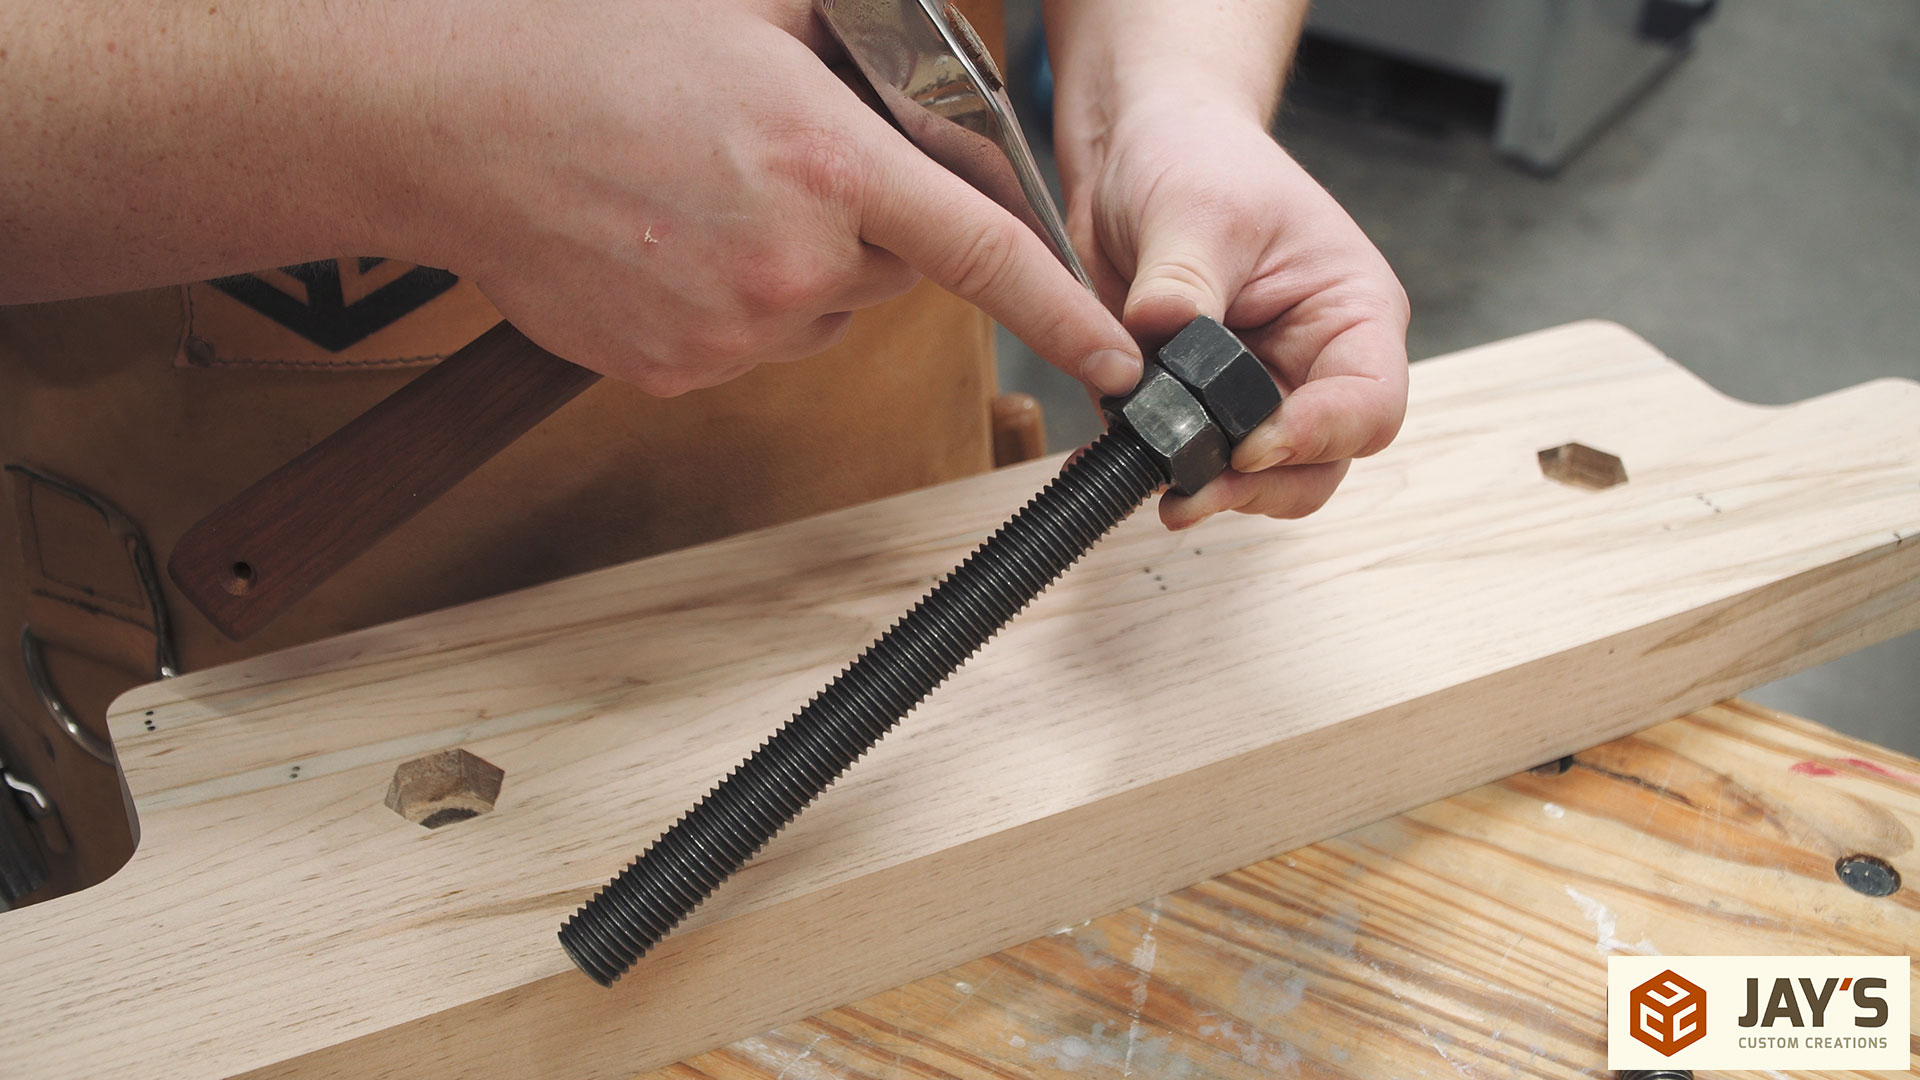
Back at the workbench a piece of 3/4” threaded rod and a nut can be pushed through the hole on the counterbored side and the nut is traced.
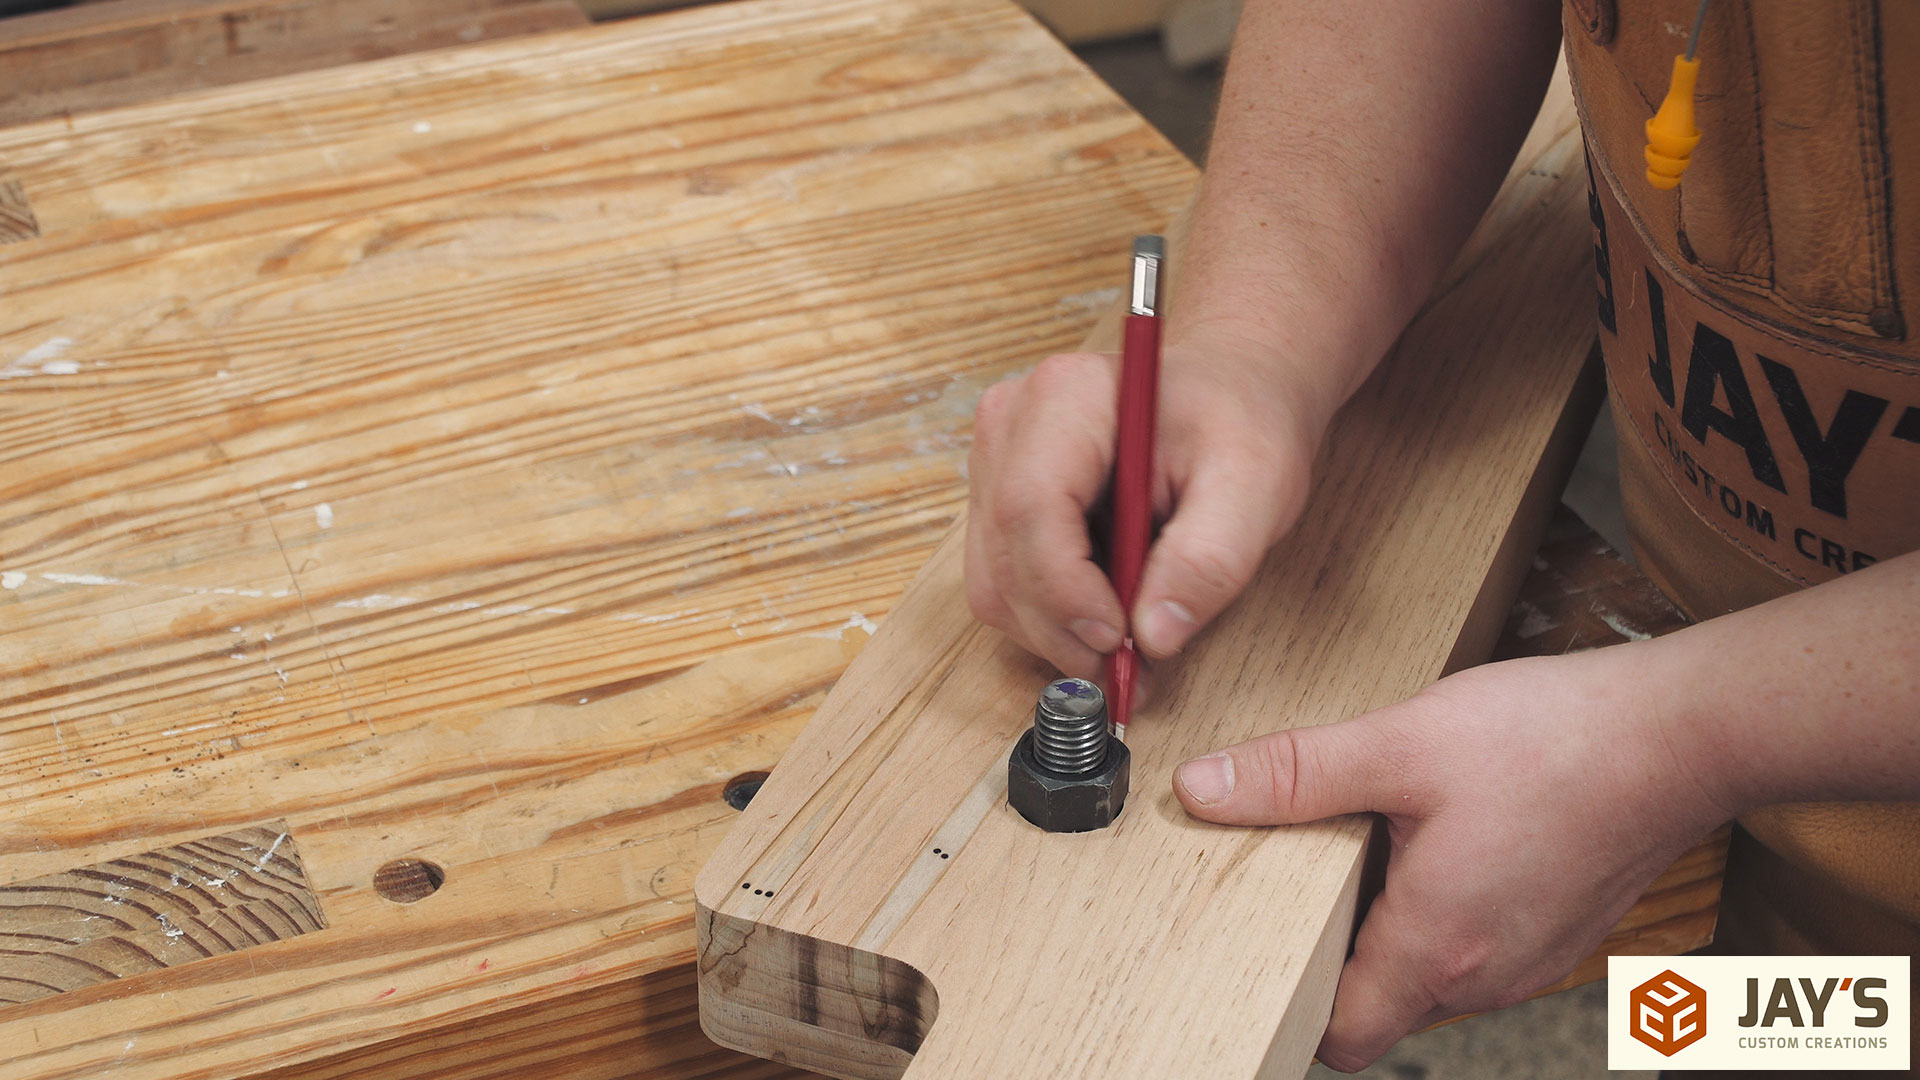
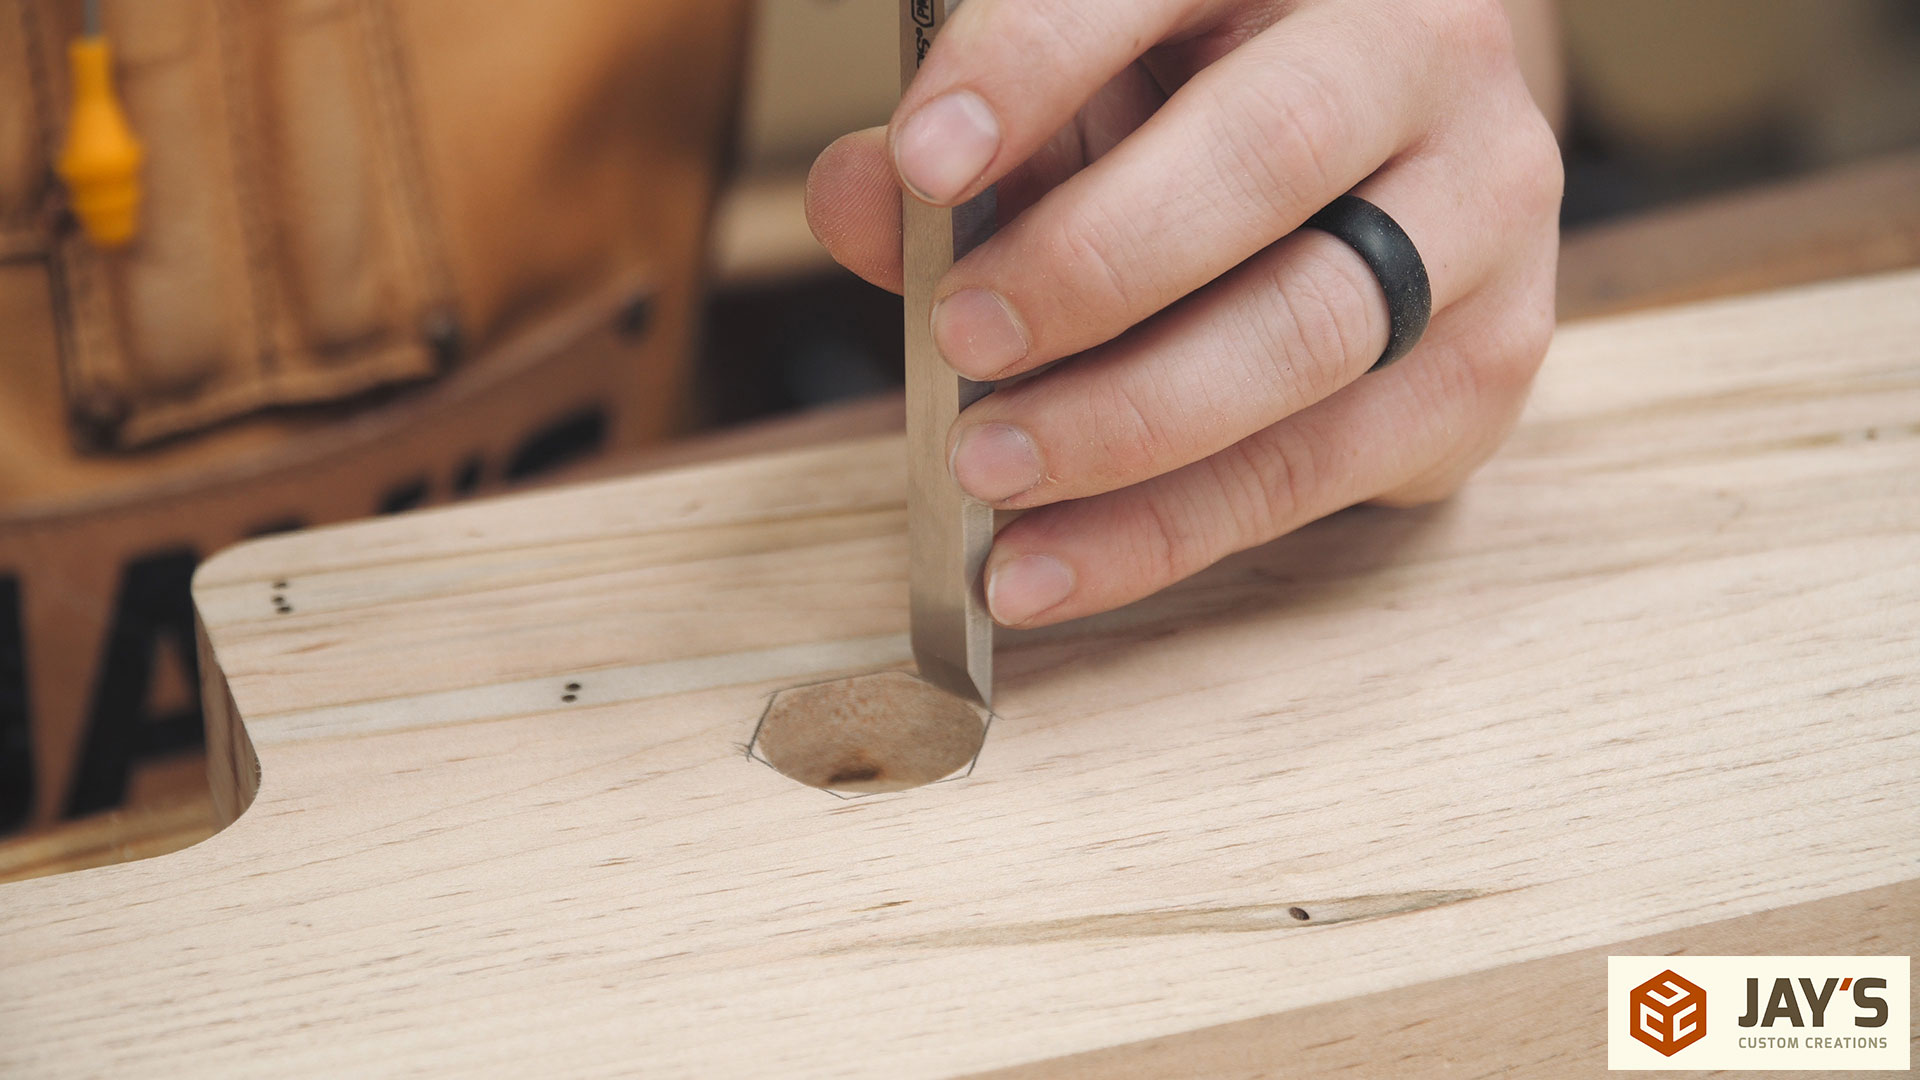
And then chopped out to match the shape of the nut. Remember to leave the pencil lines if you are using a pencil for layout.
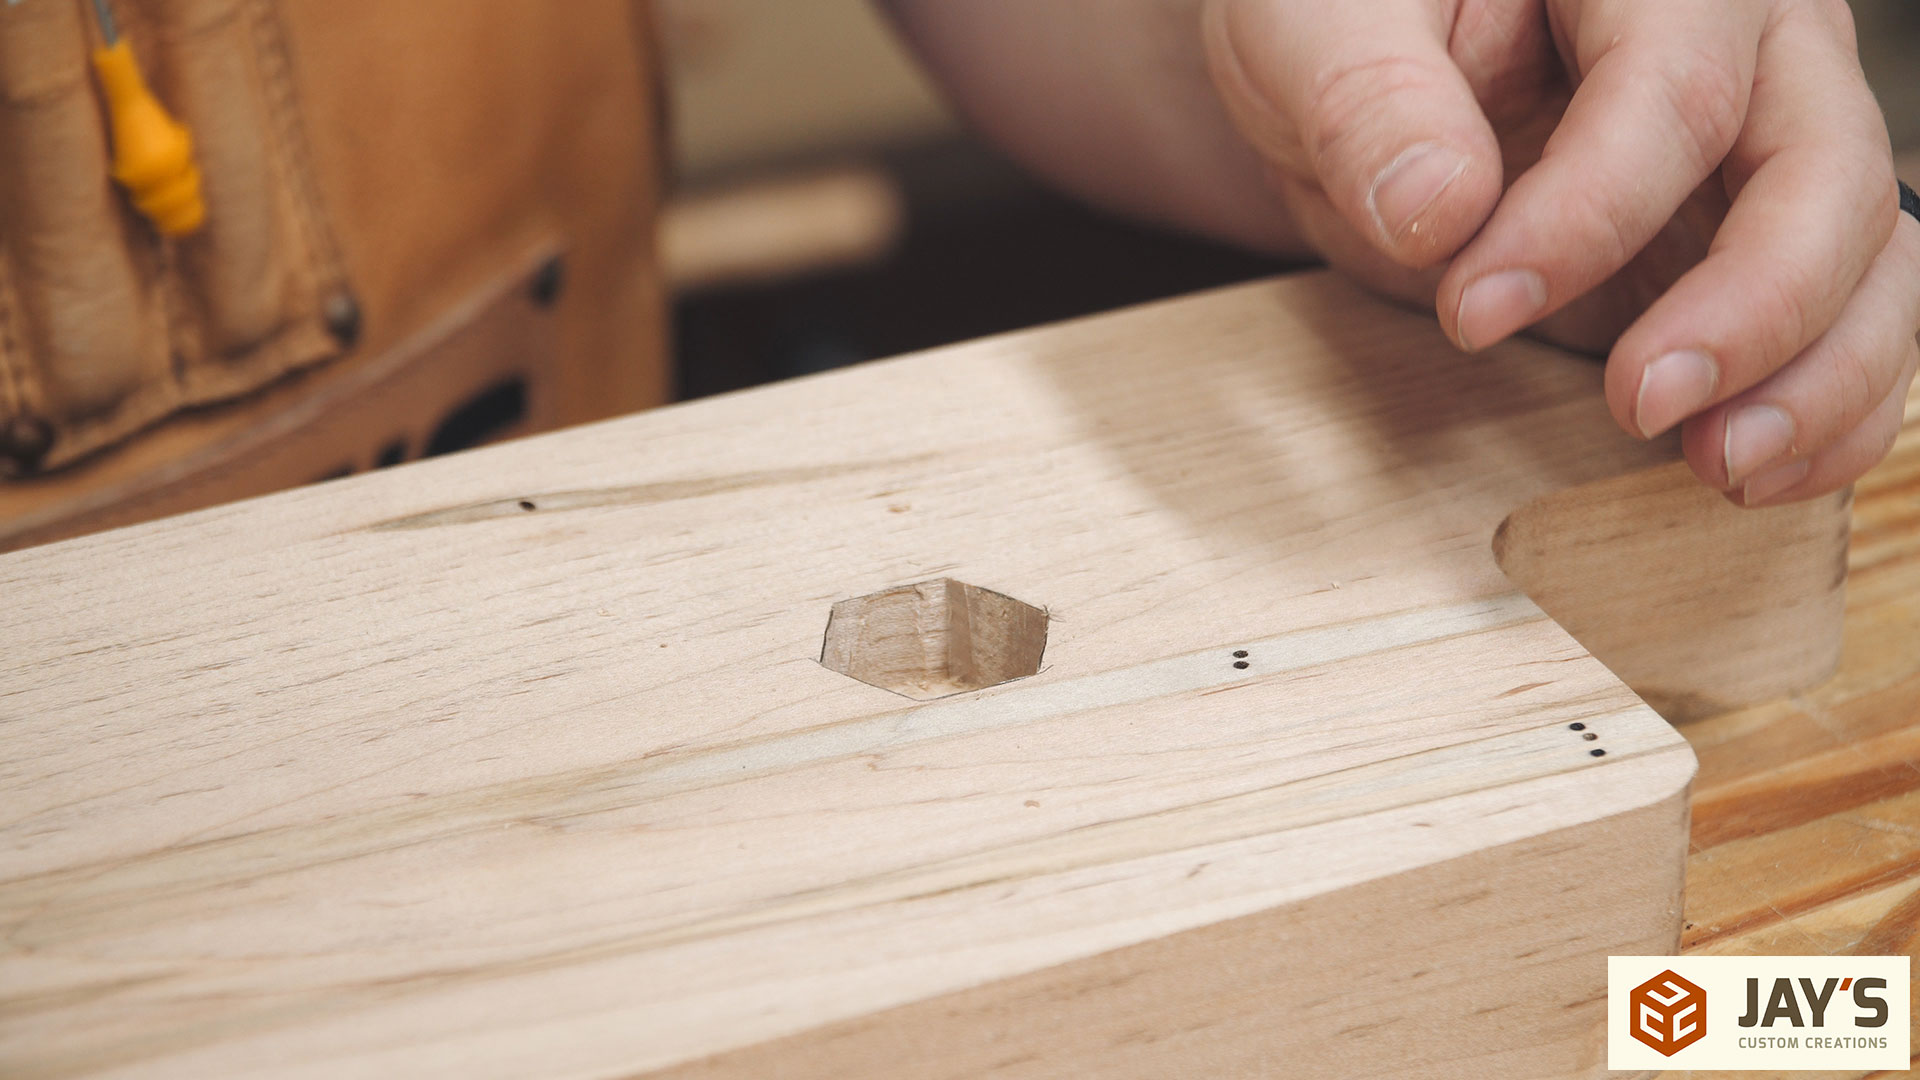

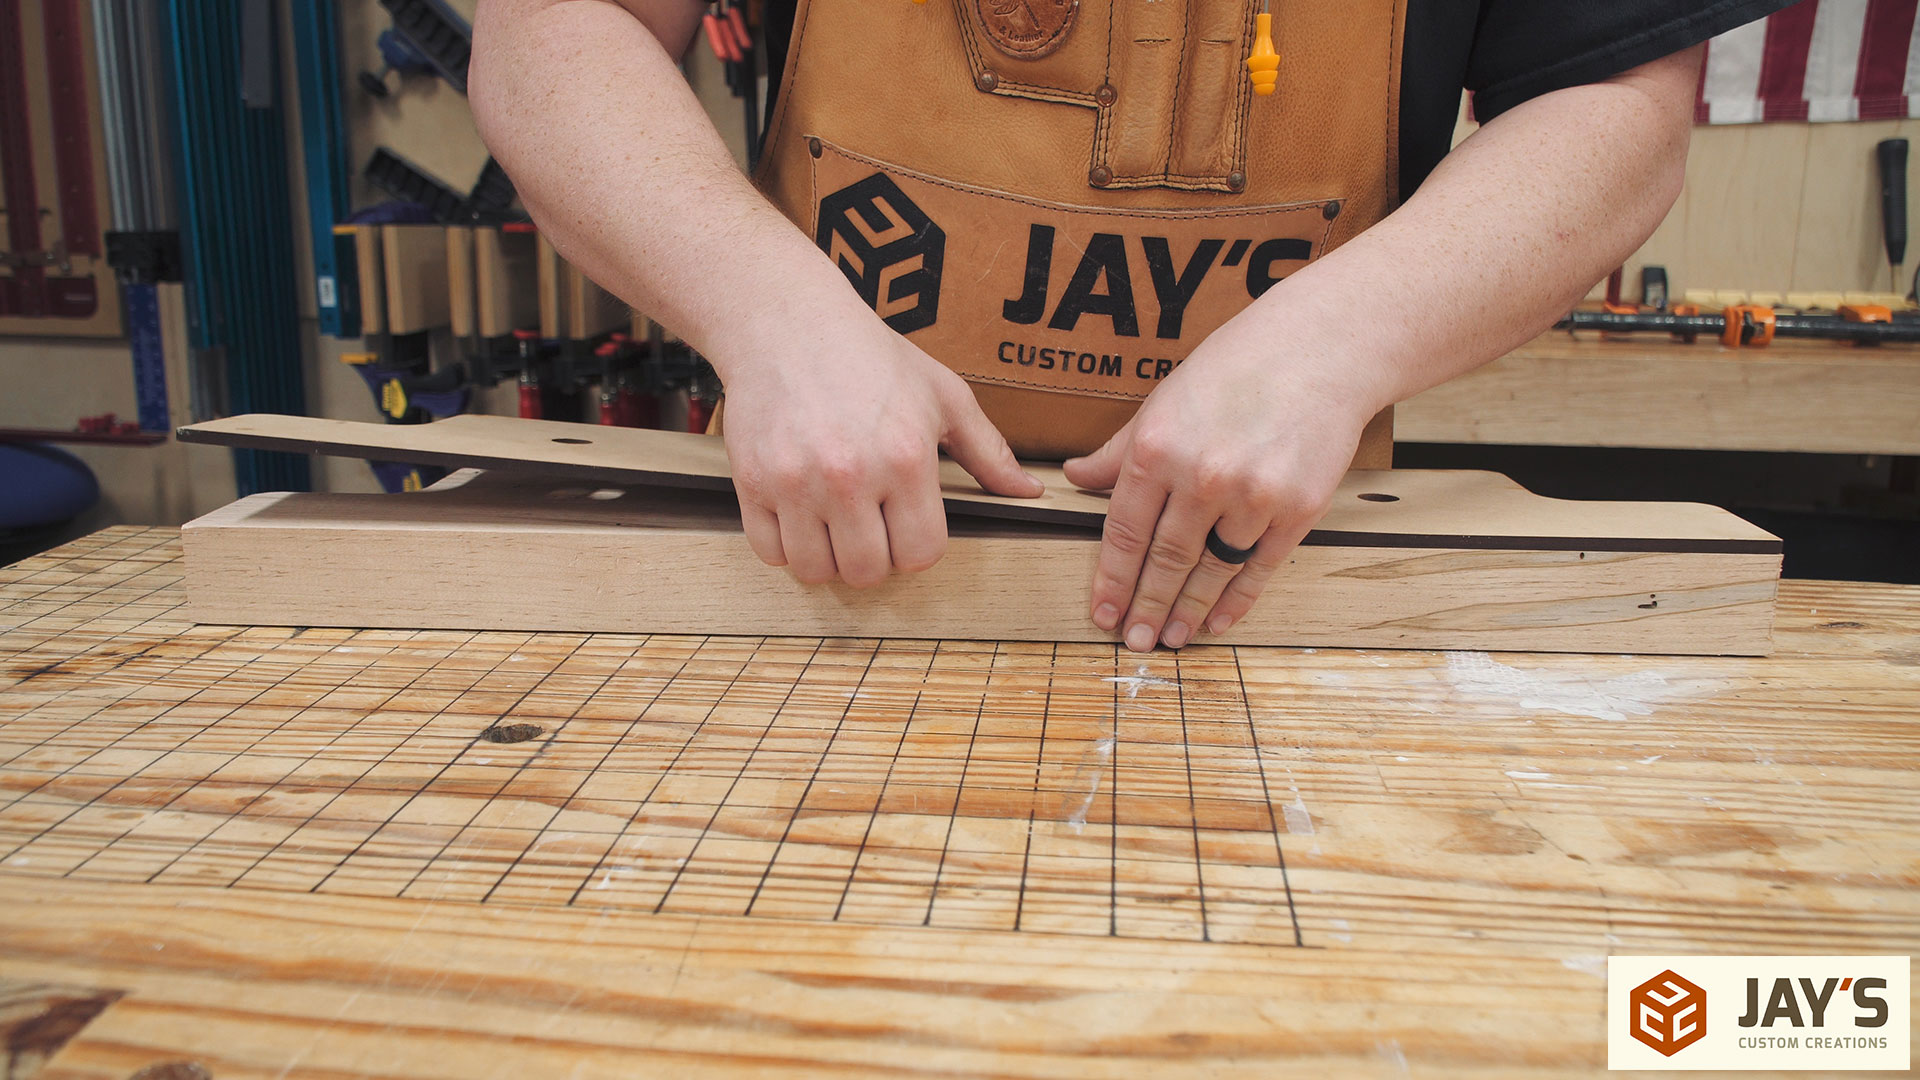
Rinse and repeat…
That’s it for the rear jaw. The front jaw still needs some work. The two 3/4” holes need to be connected to form a slot. Quick and easy with a chisel.
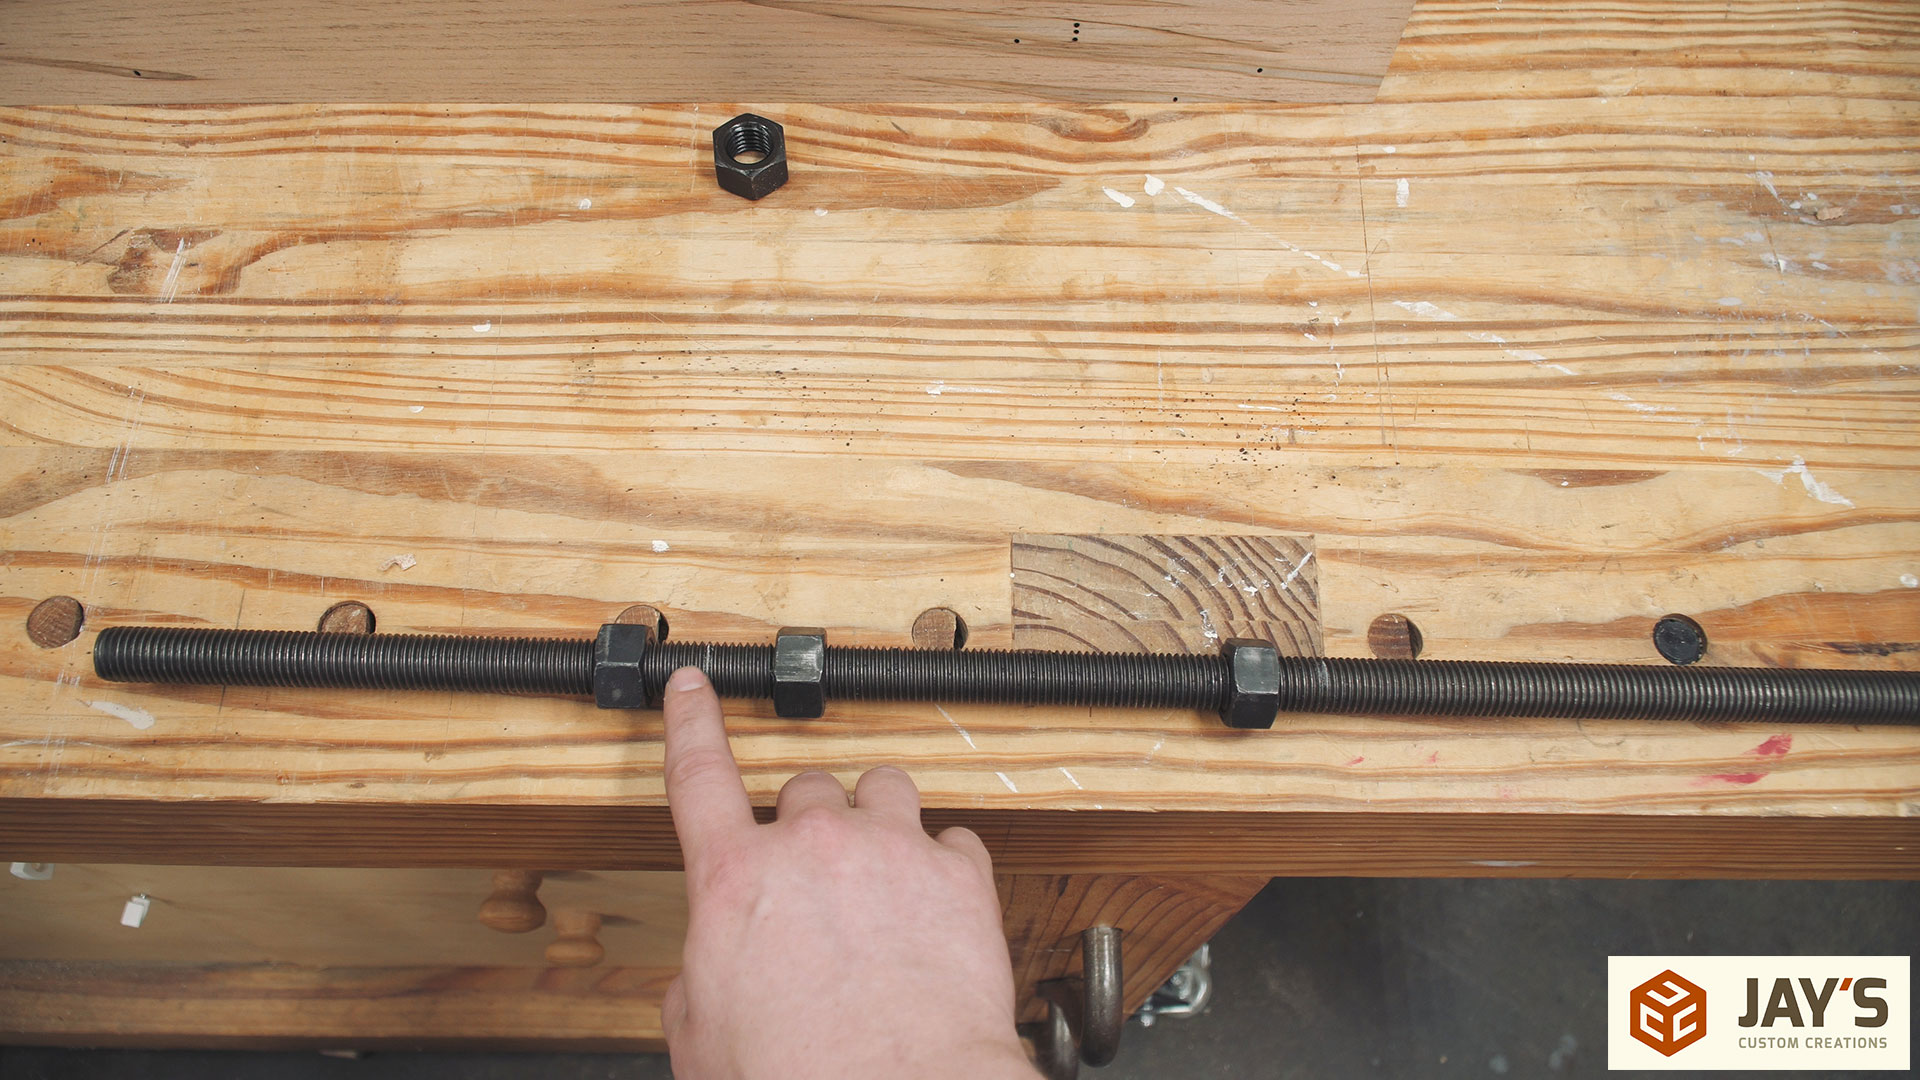
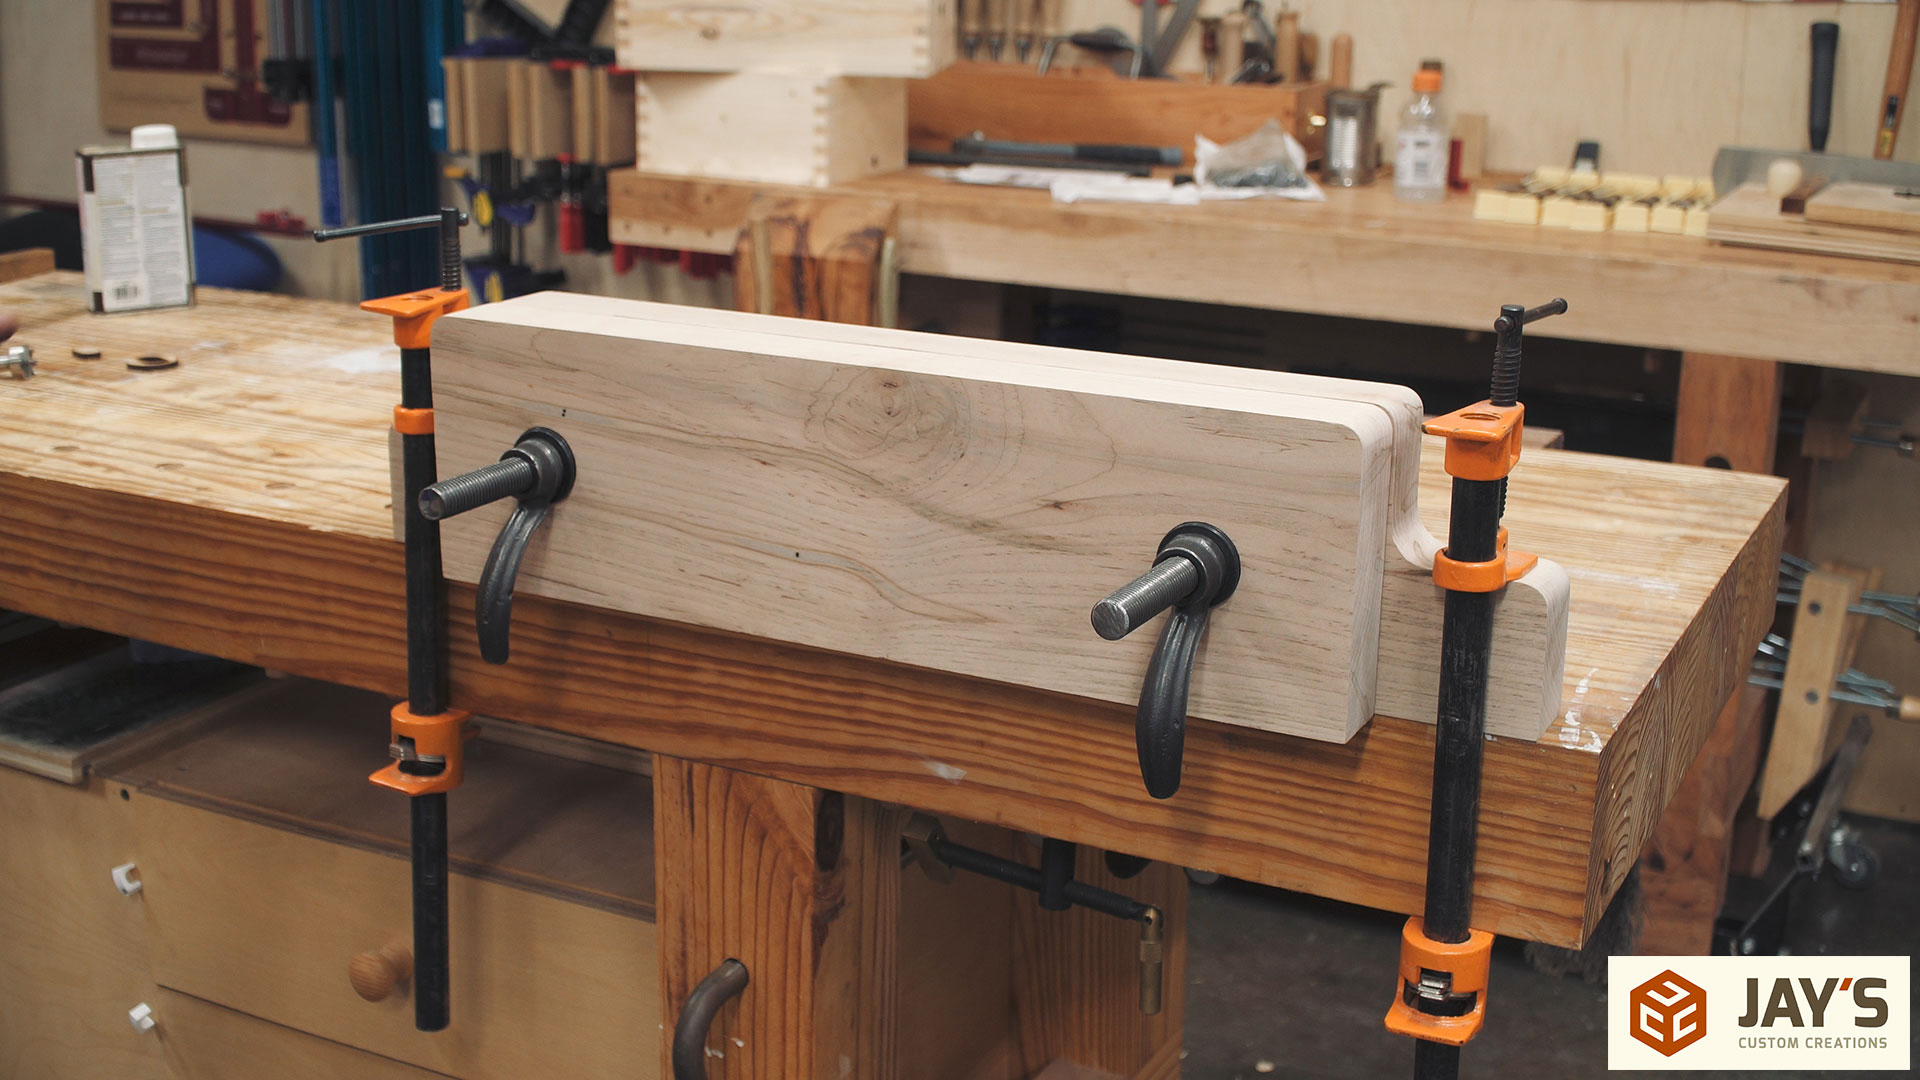
Stack everything that will be used and take a measurement for how long the threaded rod will need to be. In this case I went with 8”. Anything more will likely just be in the way.

Here you can see the two white lines where I will be cutting. Also, each cut has a nut positioned near it. This is so that the nut can be backed off after the cut and pull the threads back to where they will be. Some threads will always be damaged when cutting threaded rod.
Time to make some sparks! Rock the grinder up and down the cut gently to cut faster without all the heat build-up.

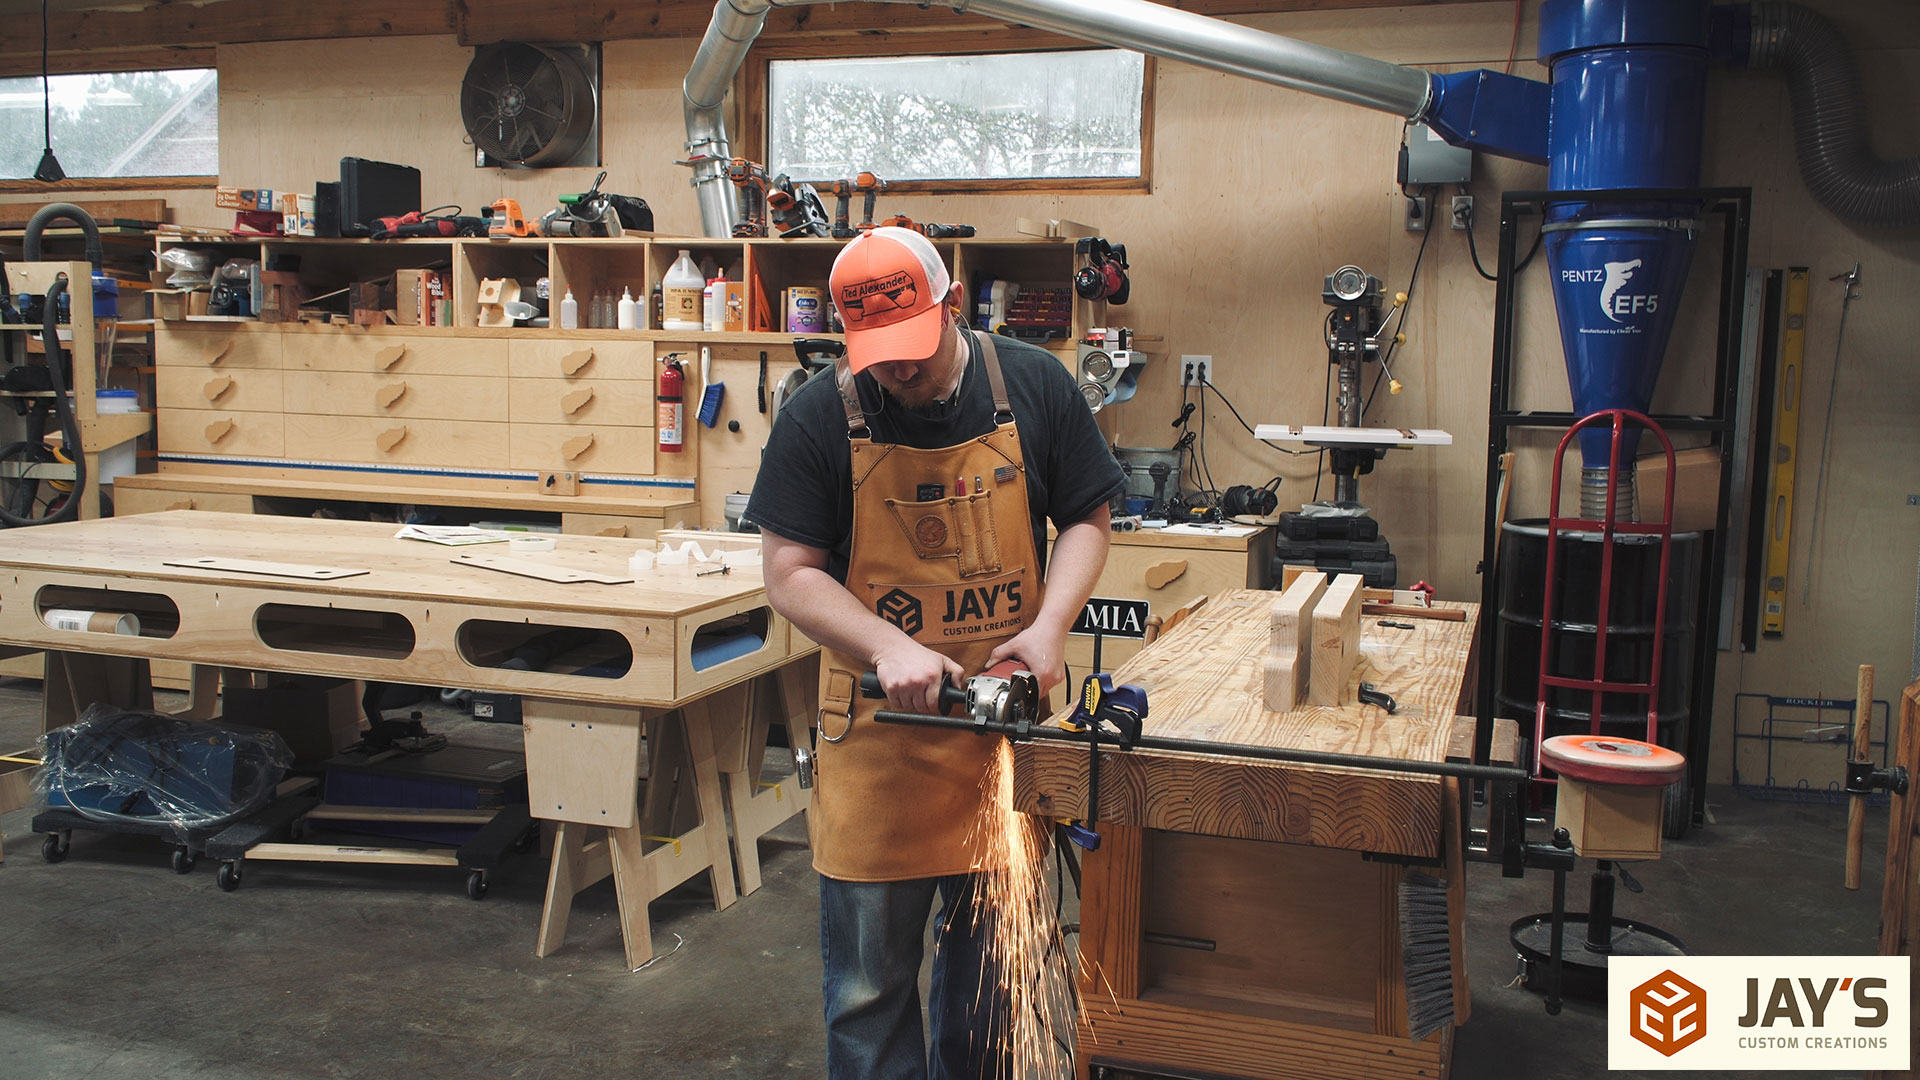
The top most cut thread is thin and sharp. The nut backs off and reshapes it. It’s also a good idea to use a file to file the entire cut edge from the outside in.

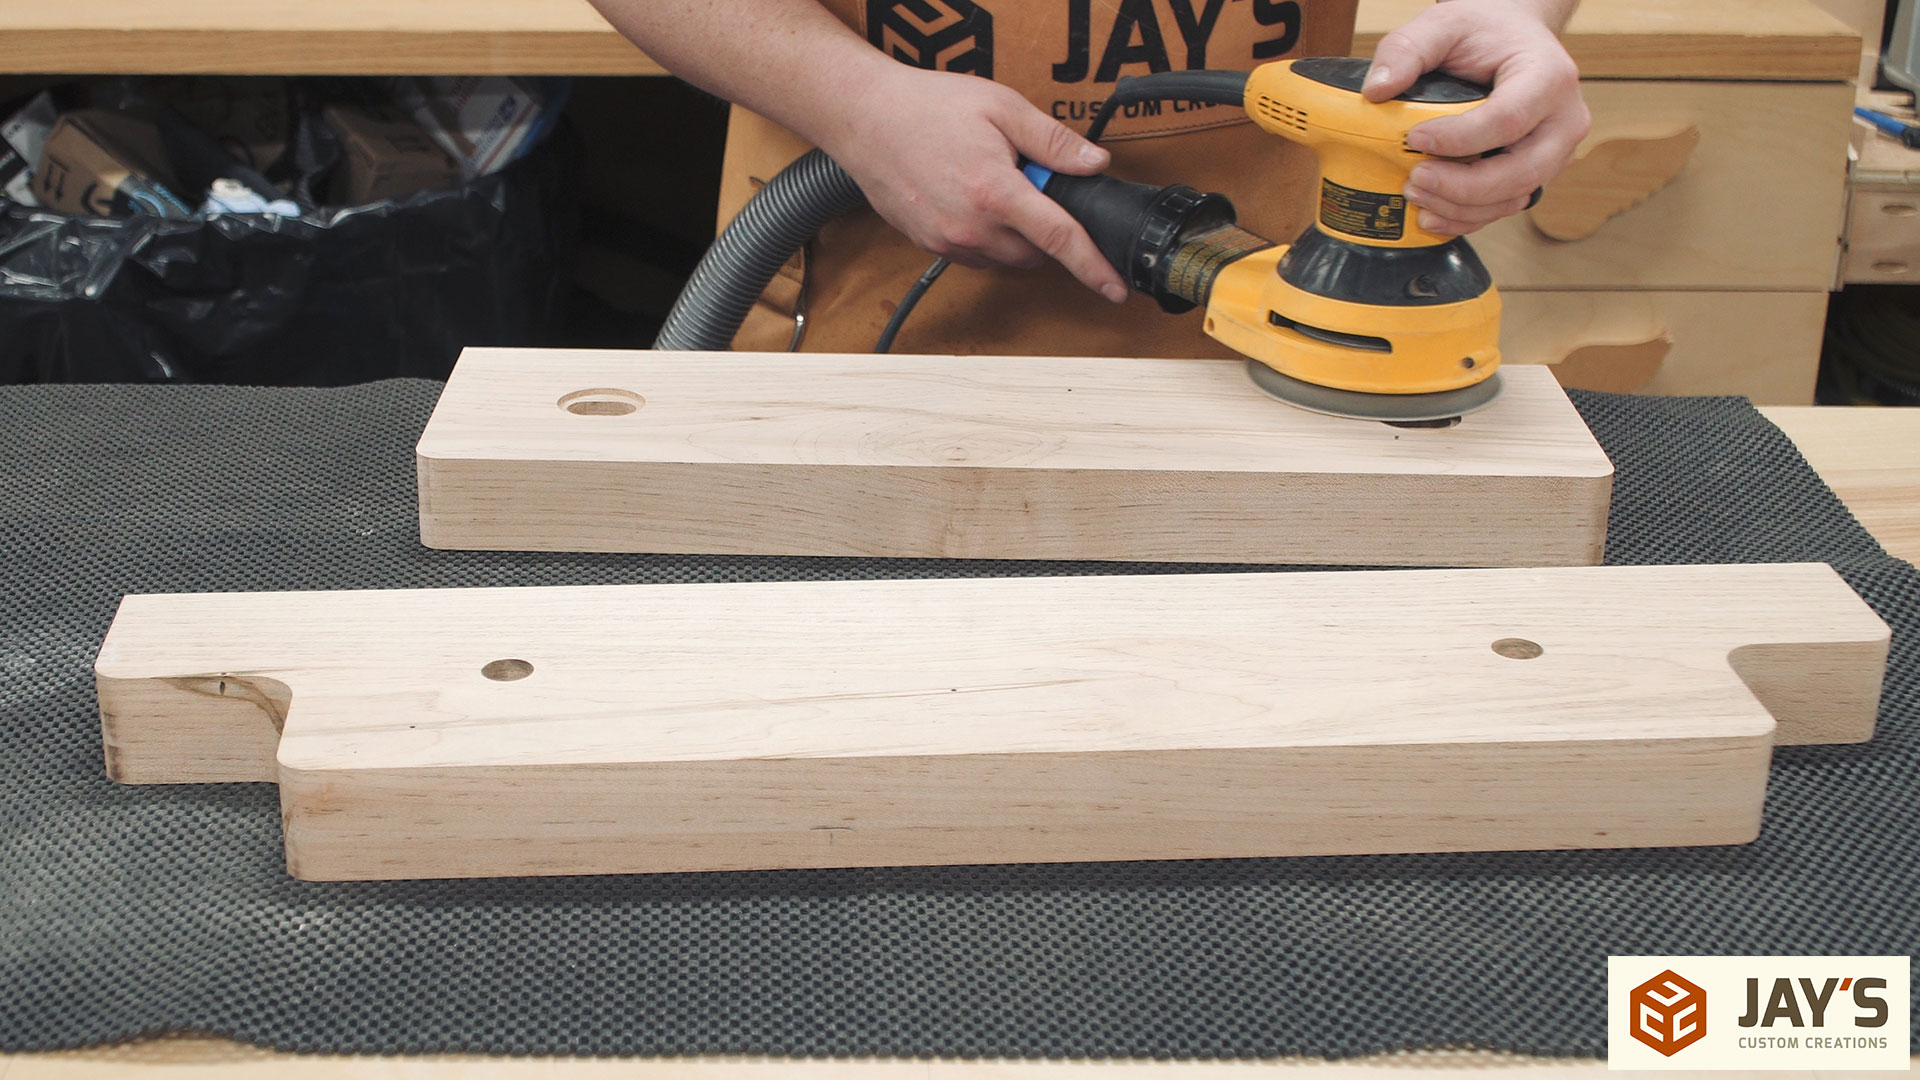
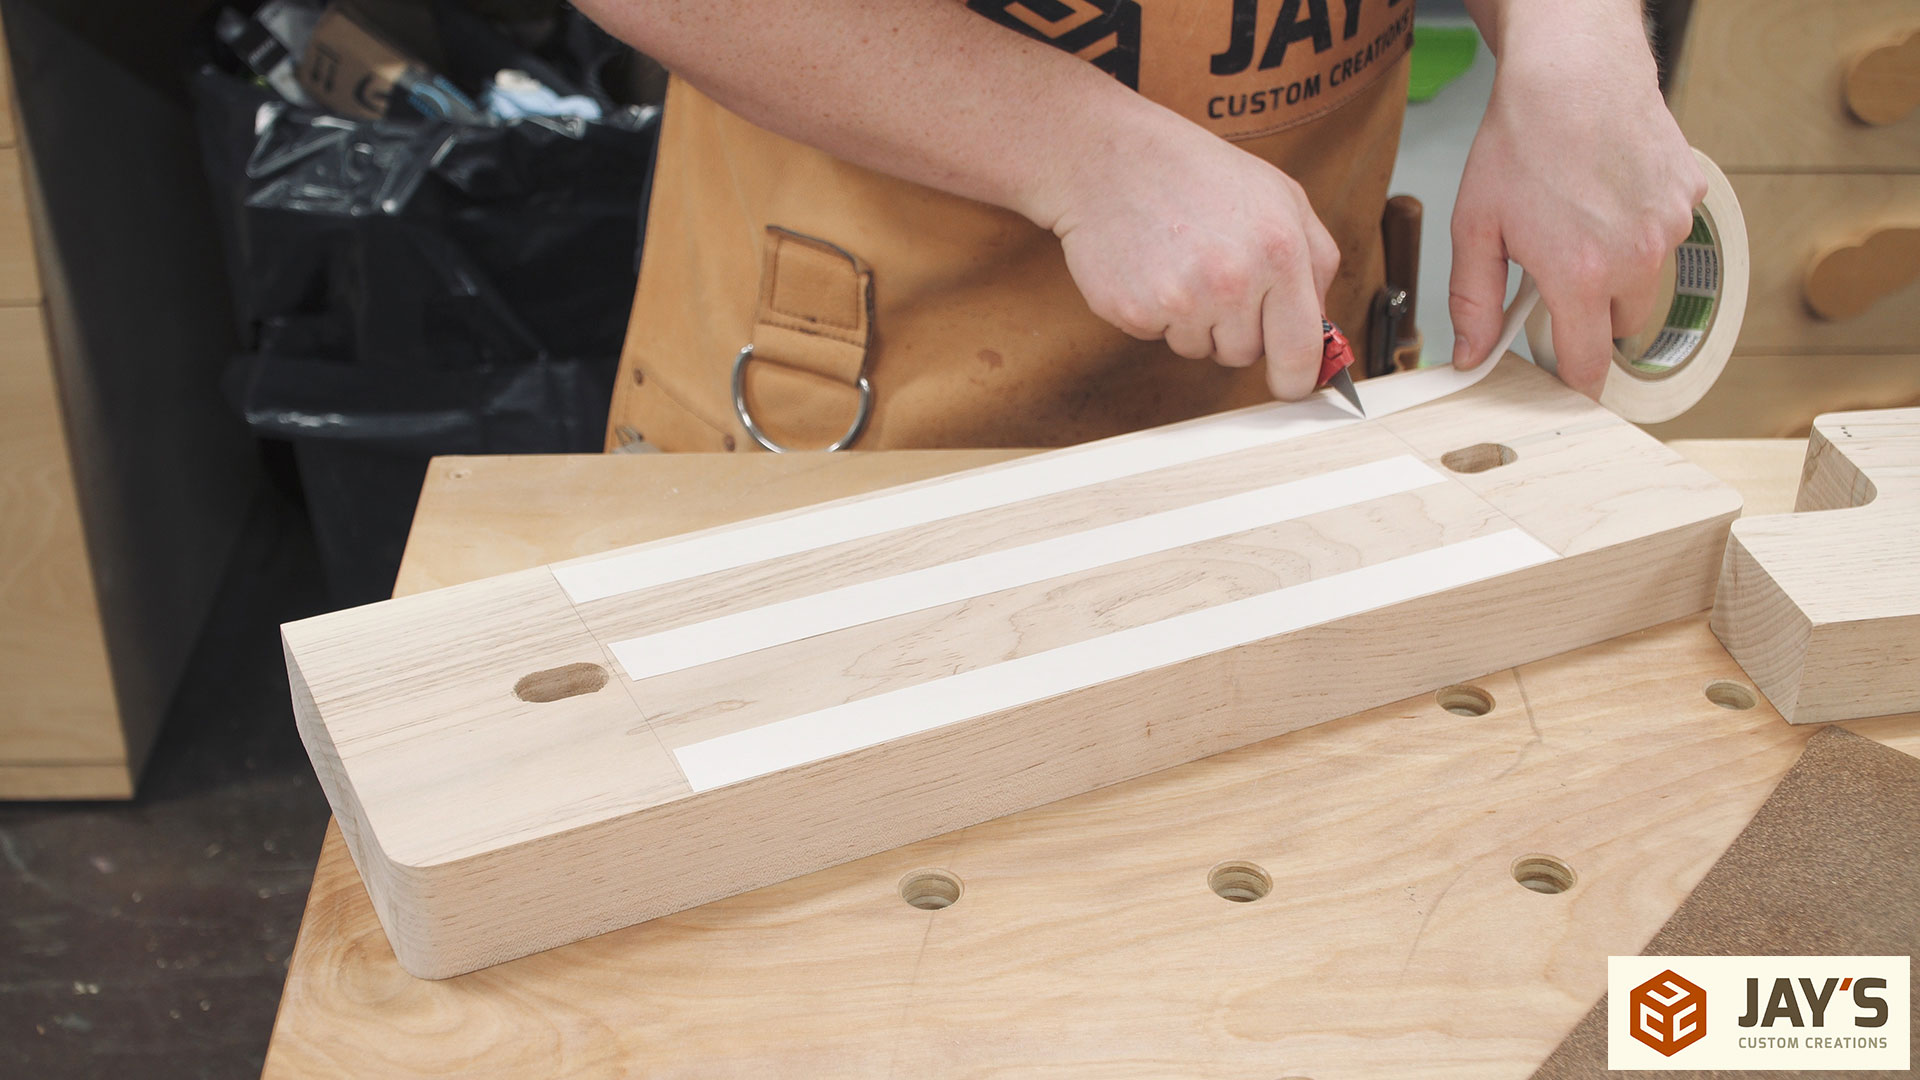
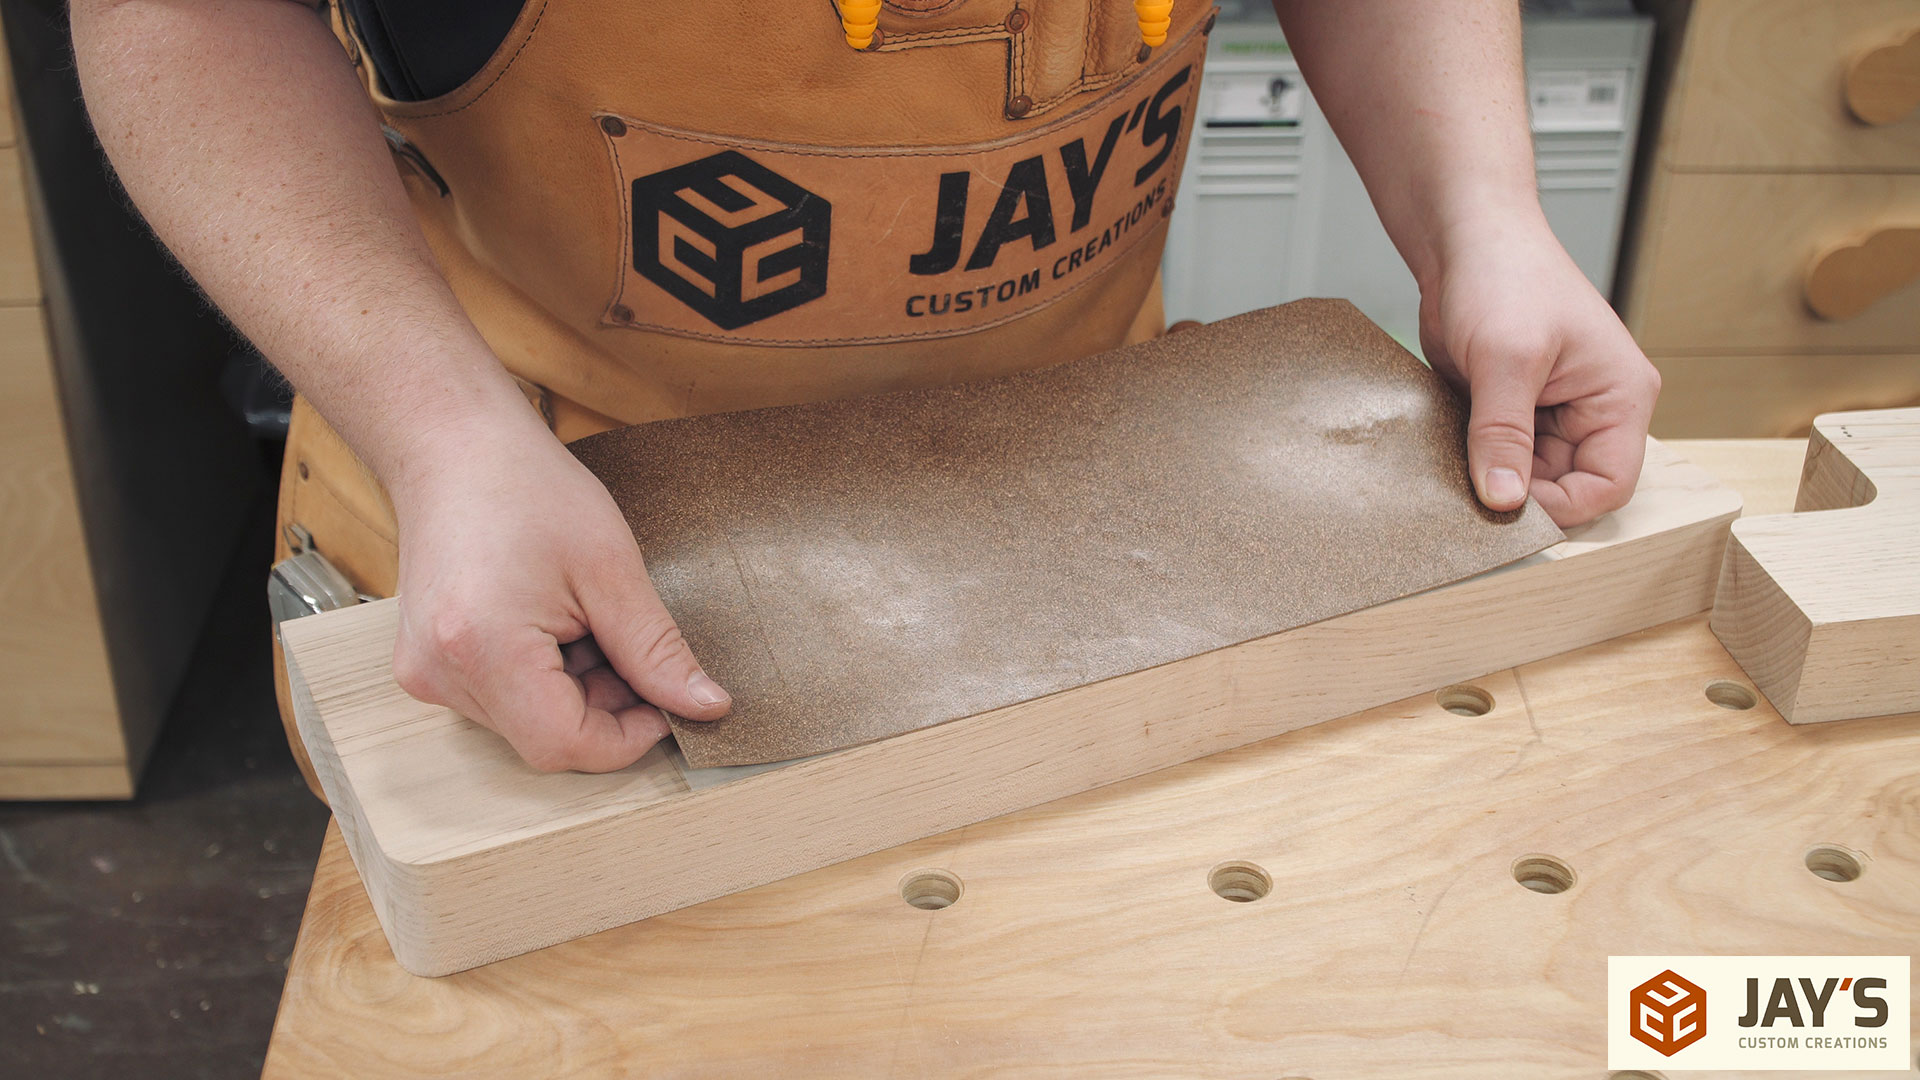
Everything gets sanded with 180 grit sandpaper only. I found some inexpensive sandpaper off Amazon that does a great job. It’s the Mestool brand which is totally a play on Festool. But it works great and is cheap.
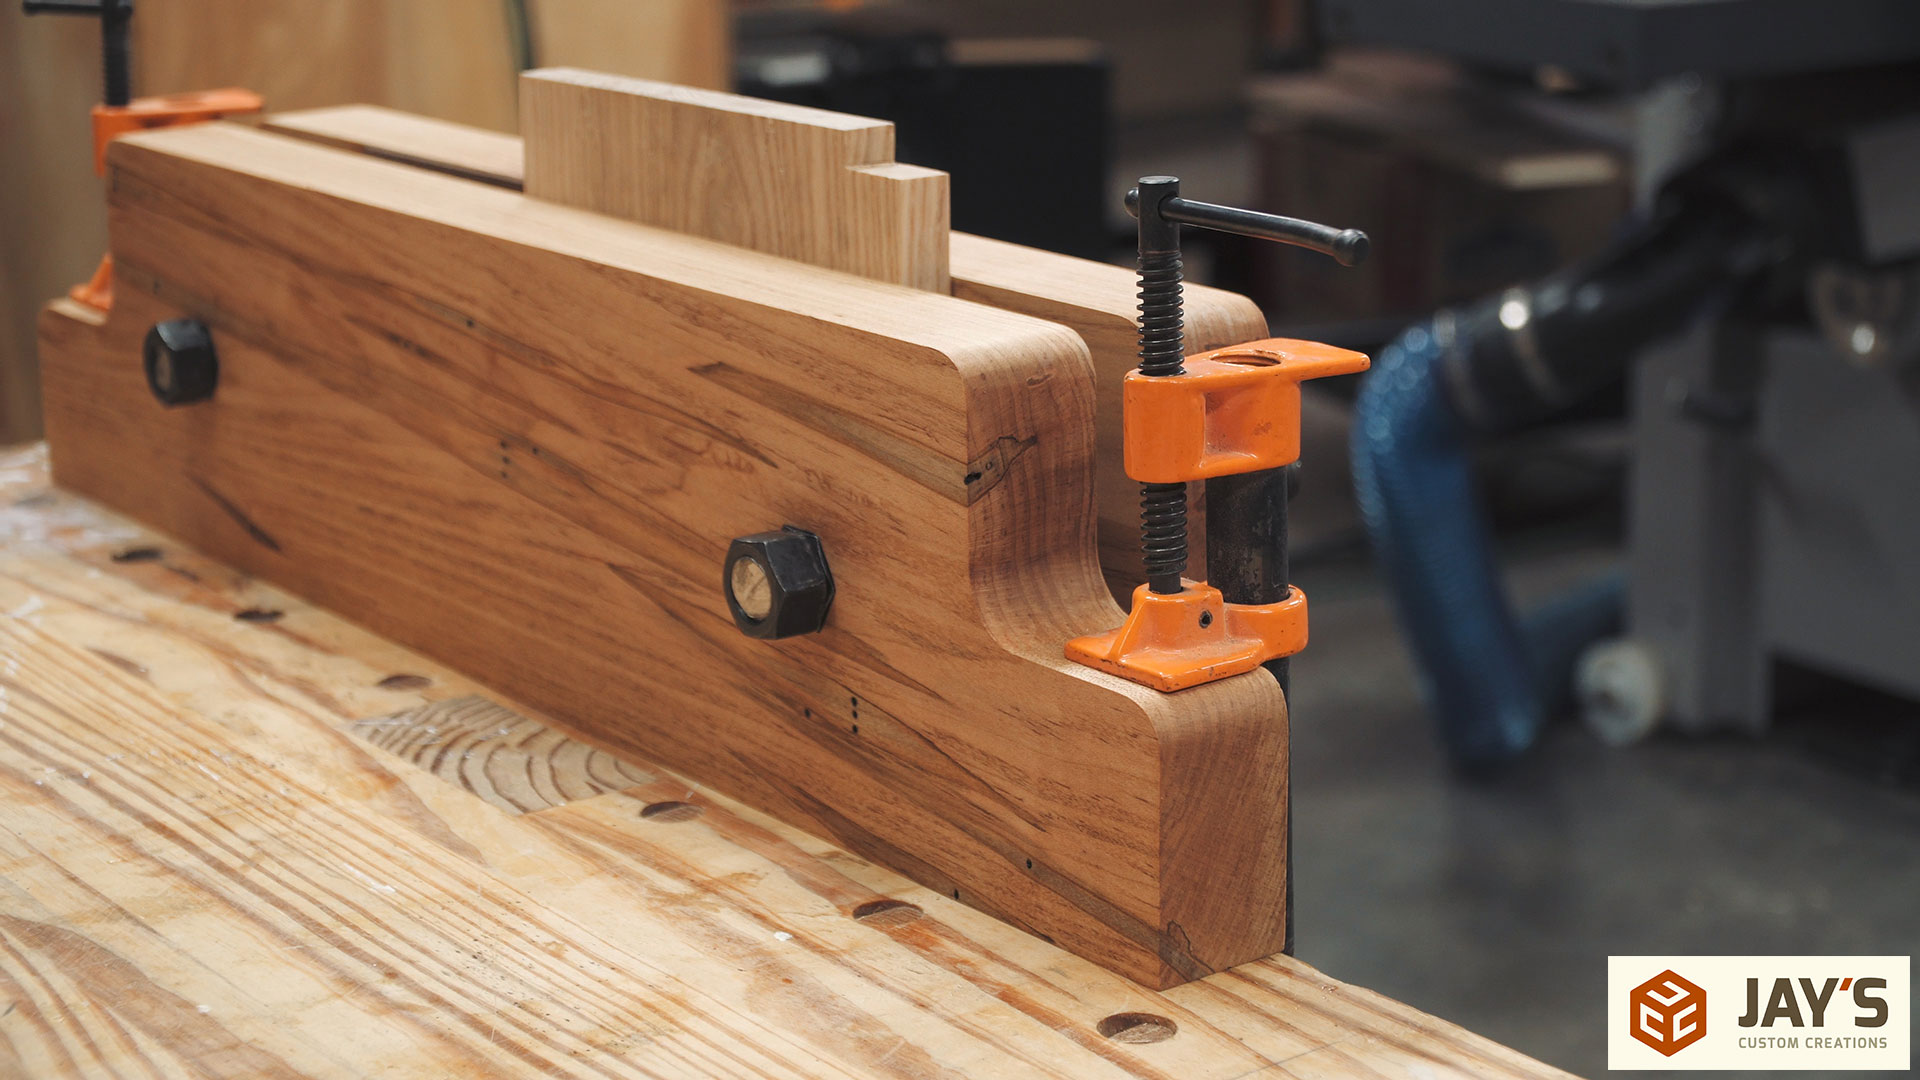
A piece of cork rubber is secured to the inside of the movable jaw with three strips of double sided tape.

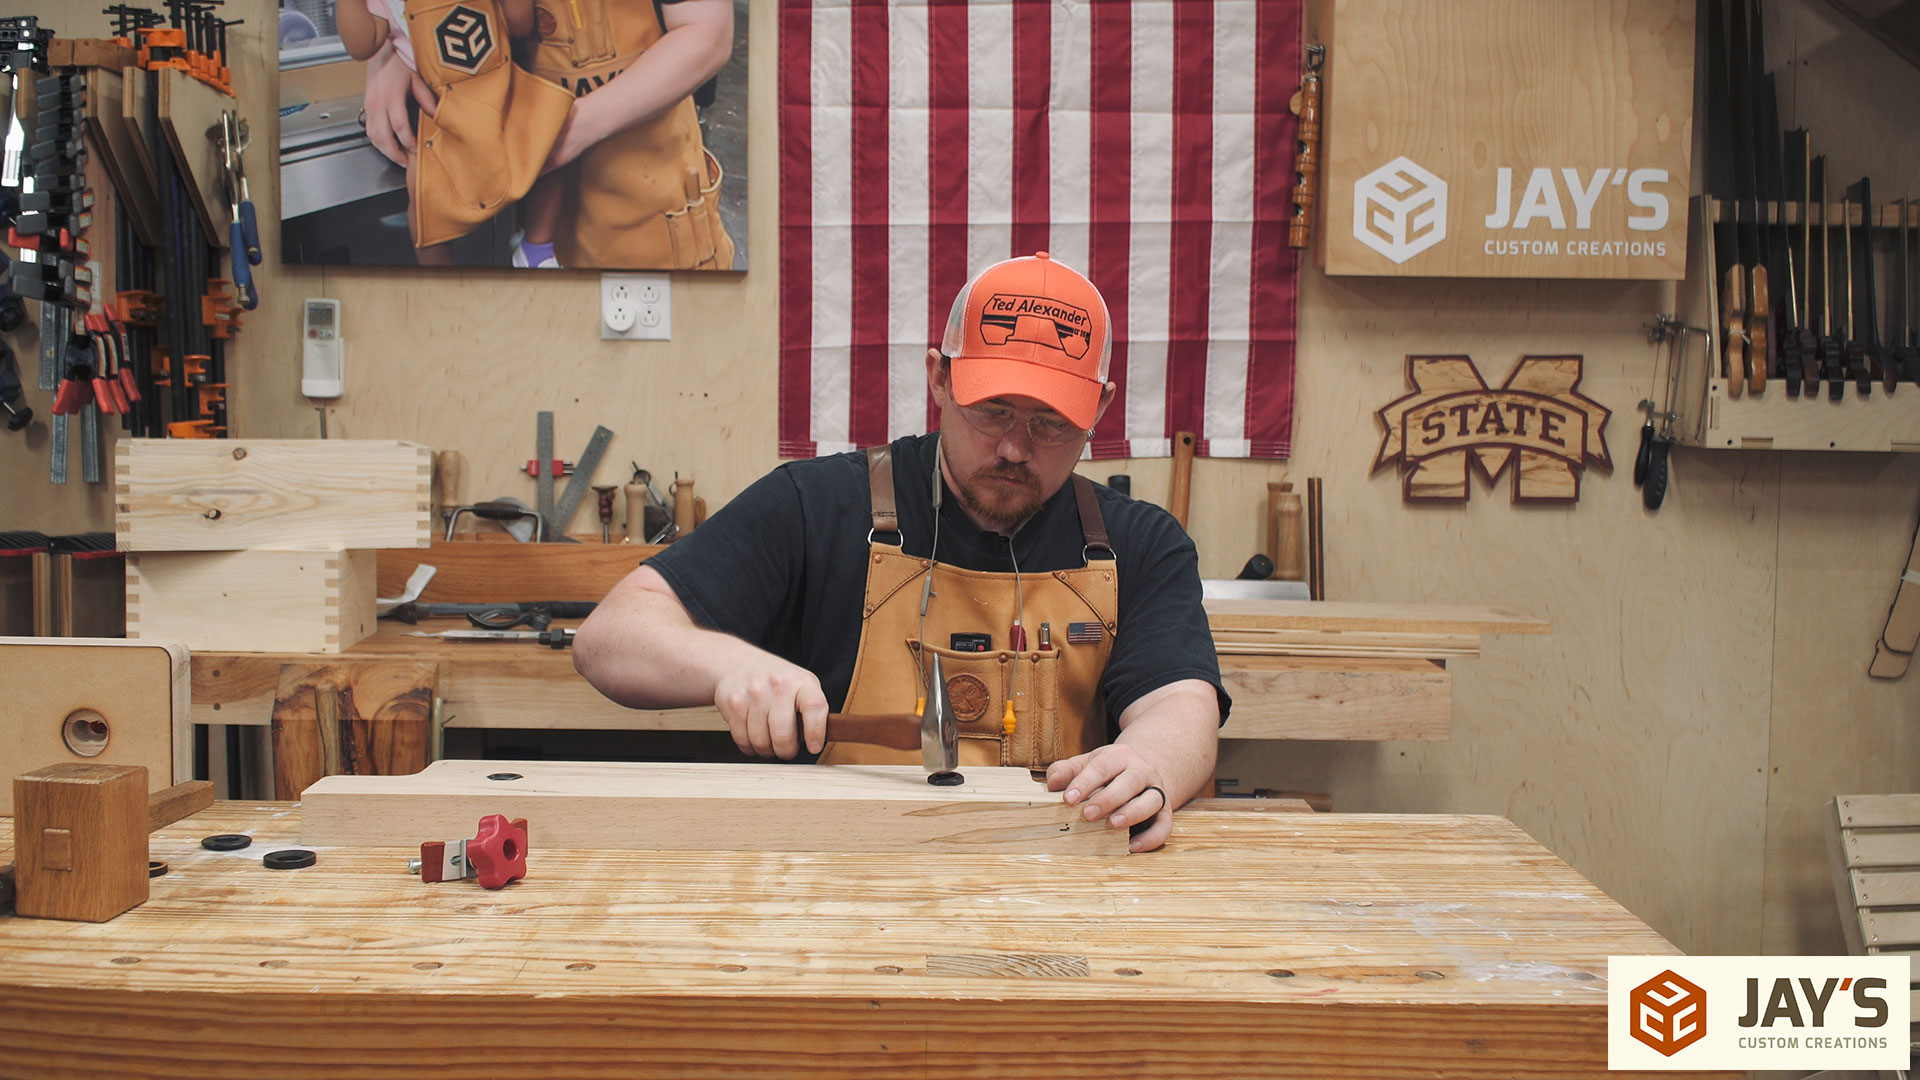
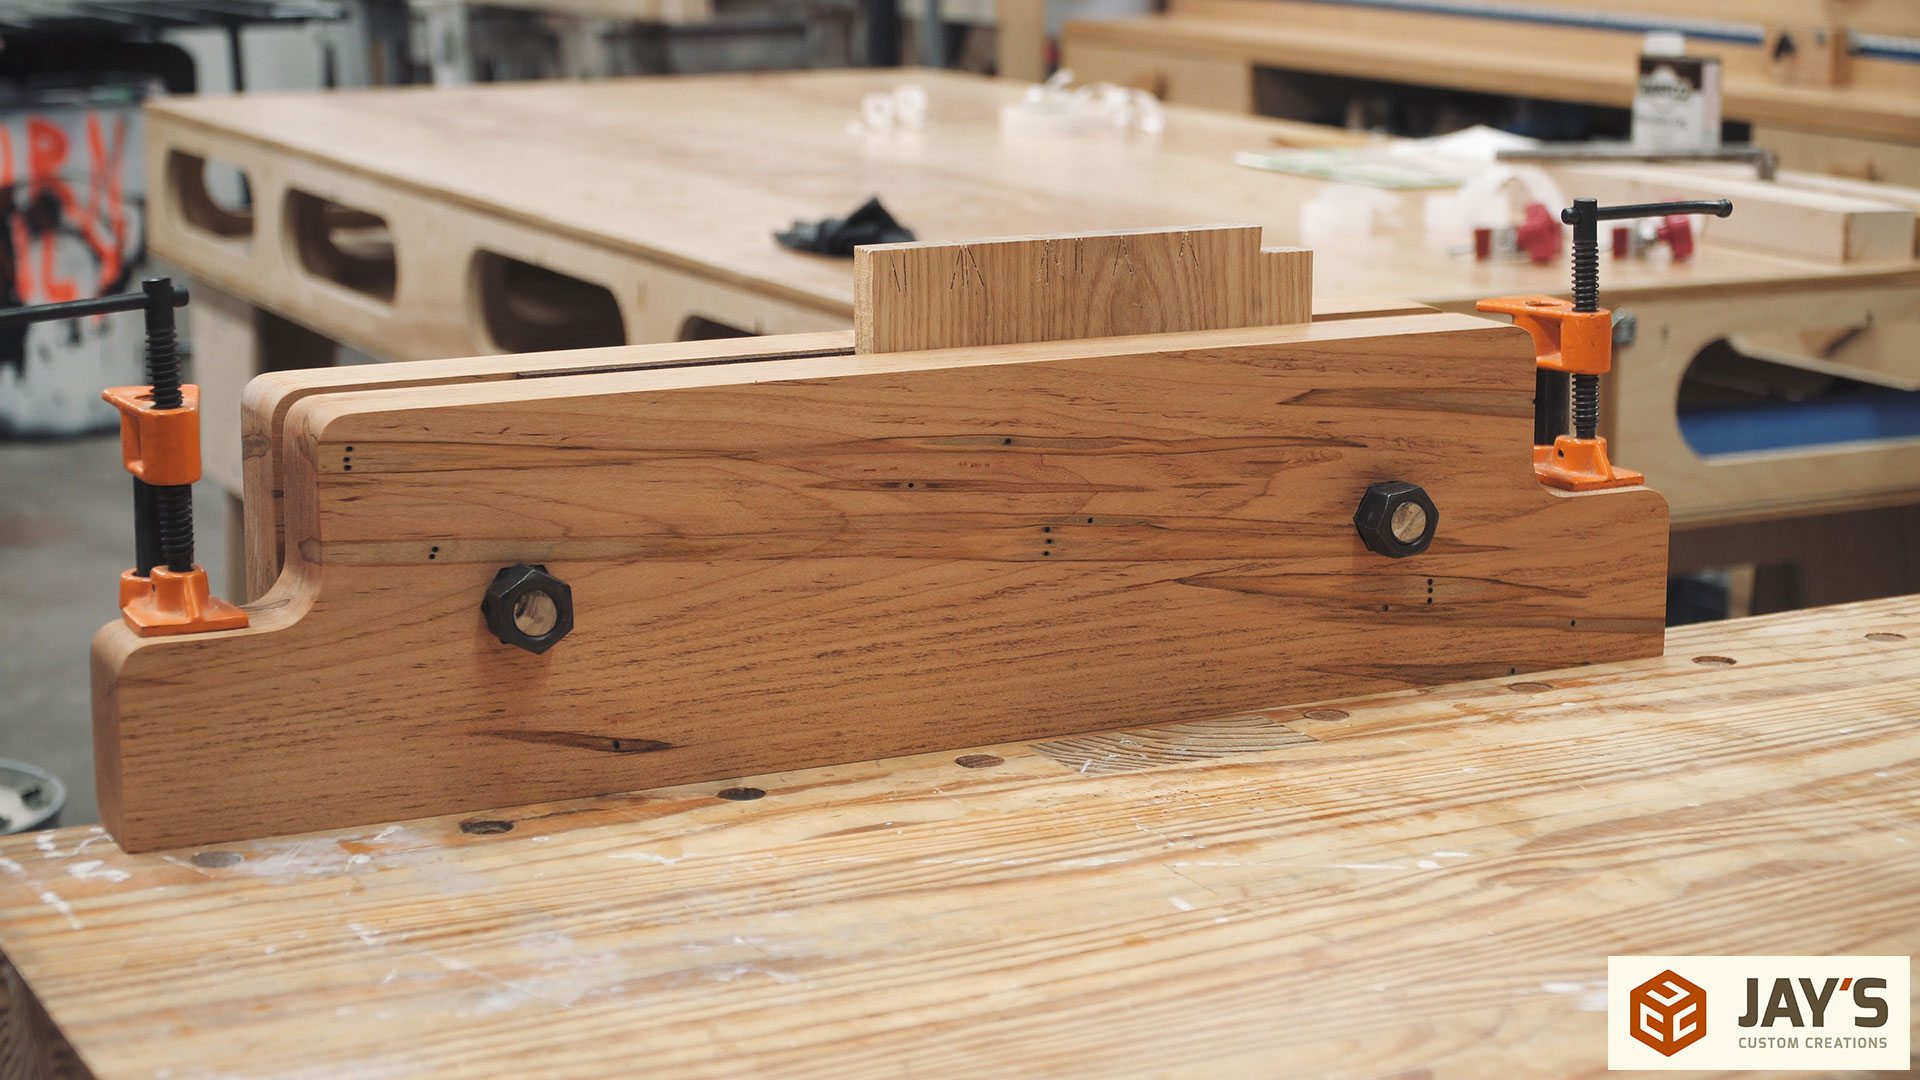
Final assembly starts with two nuts on the end of the threaded rod. The nuts are jammed together to lock them in place and the assembly is driven home with a hammer to capture the first nut in the wood.

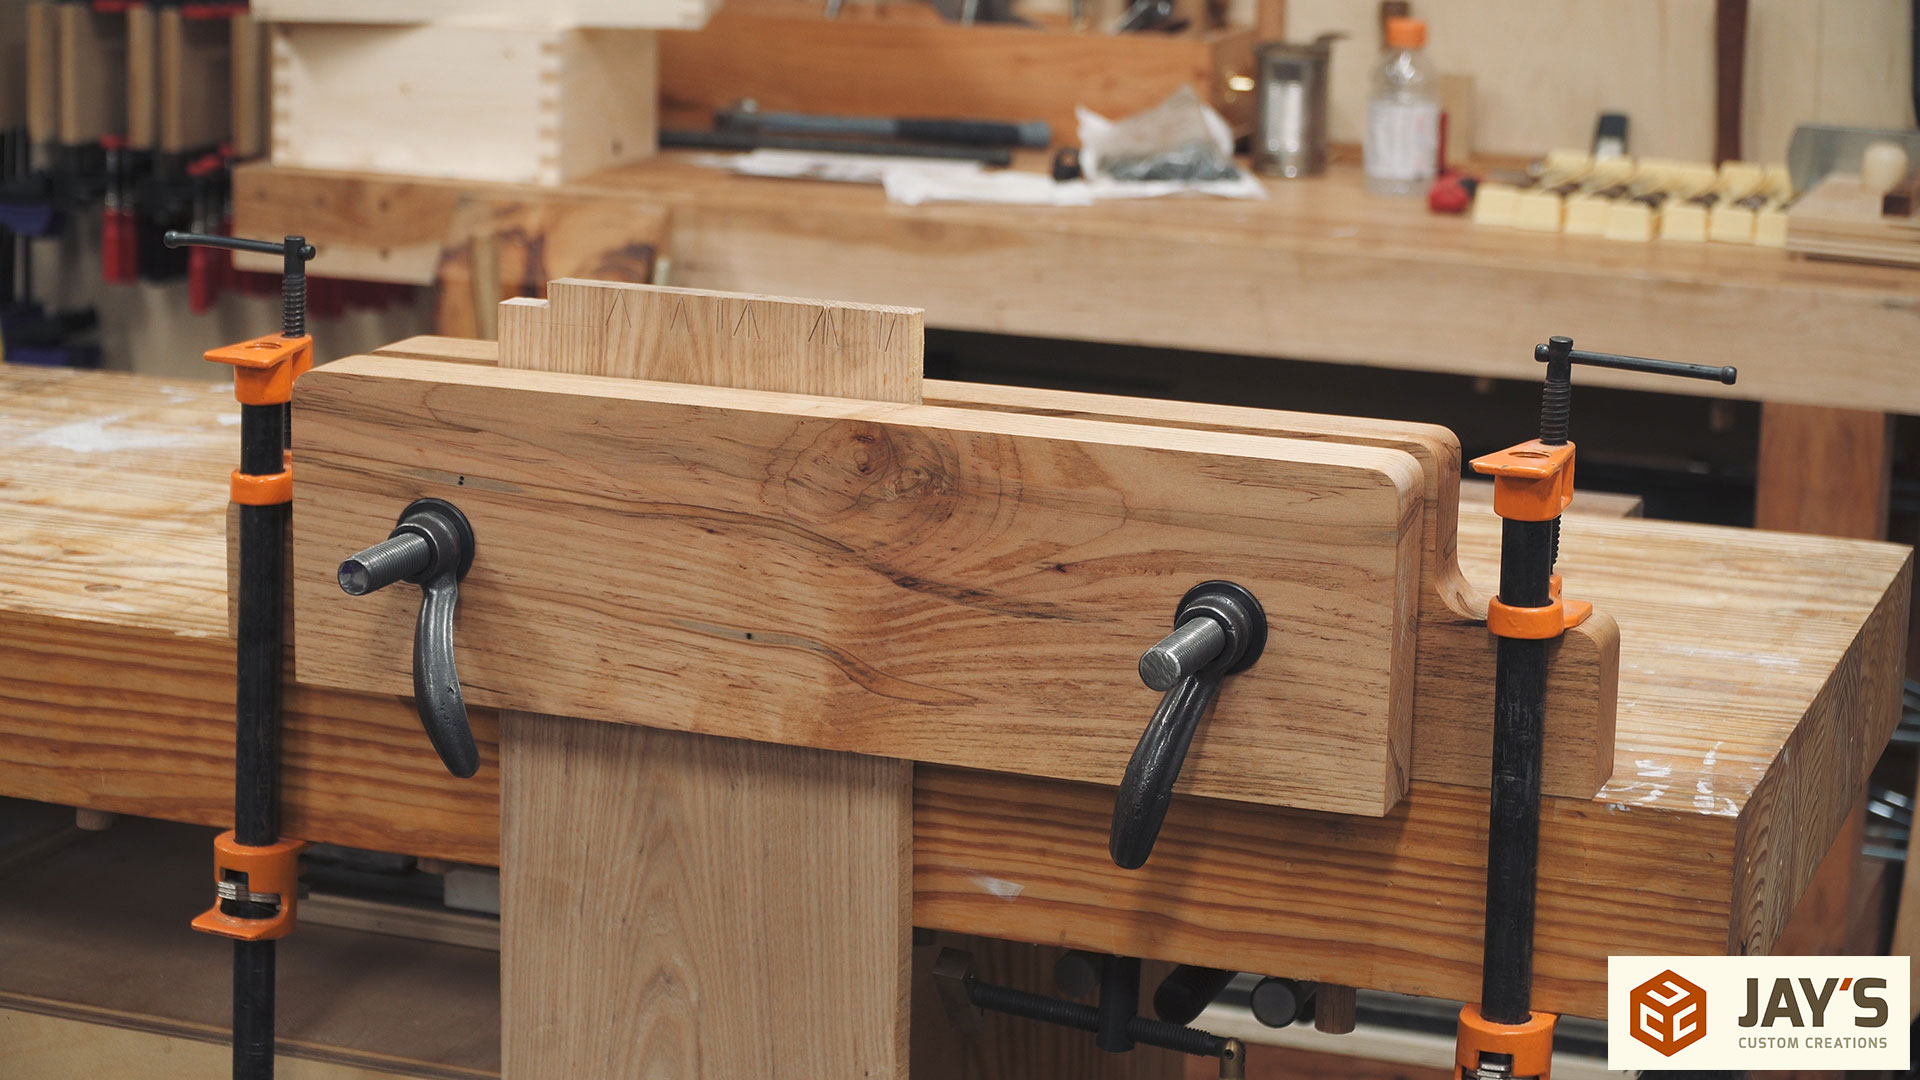
When using a moxon vise the rear jaw needs to be perfectly flush or overhanging slightly with the front face of the workbench. I clamped the vise to the workbench with a set of pipe clamps.
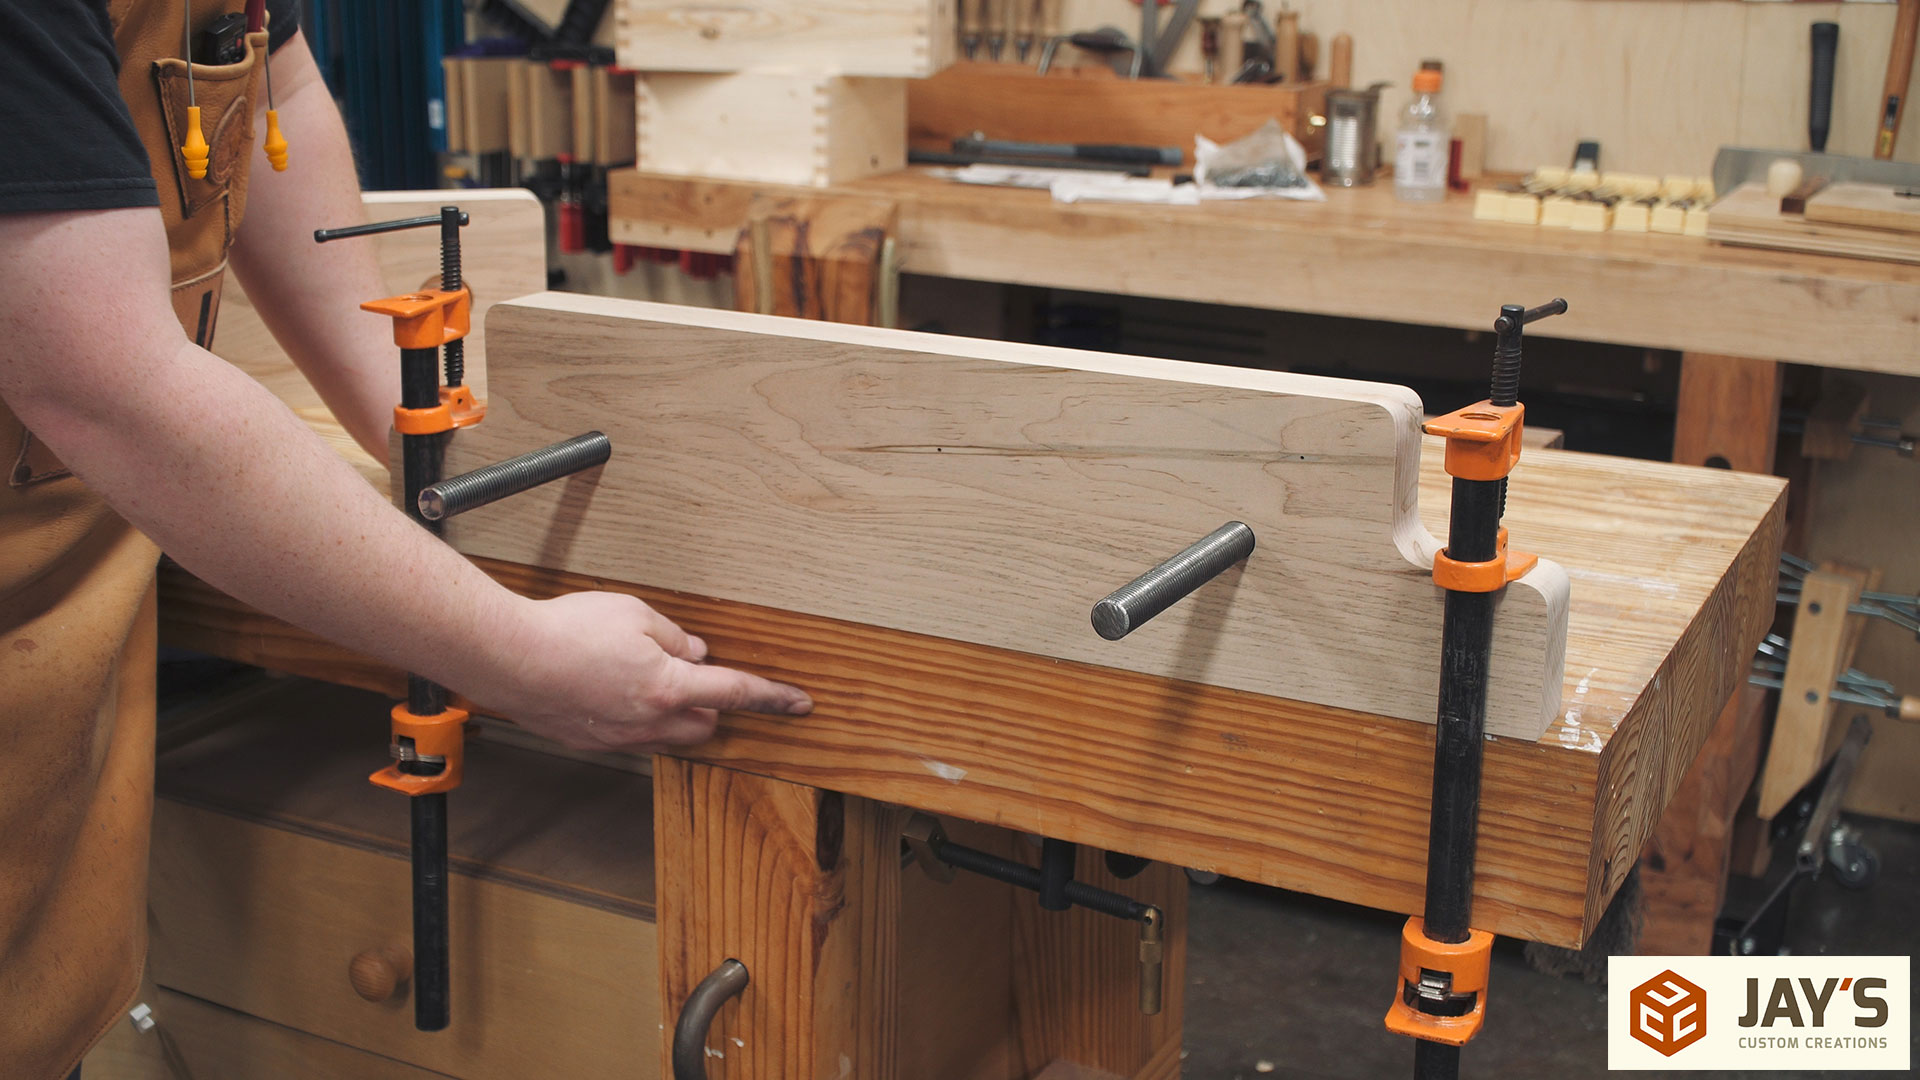
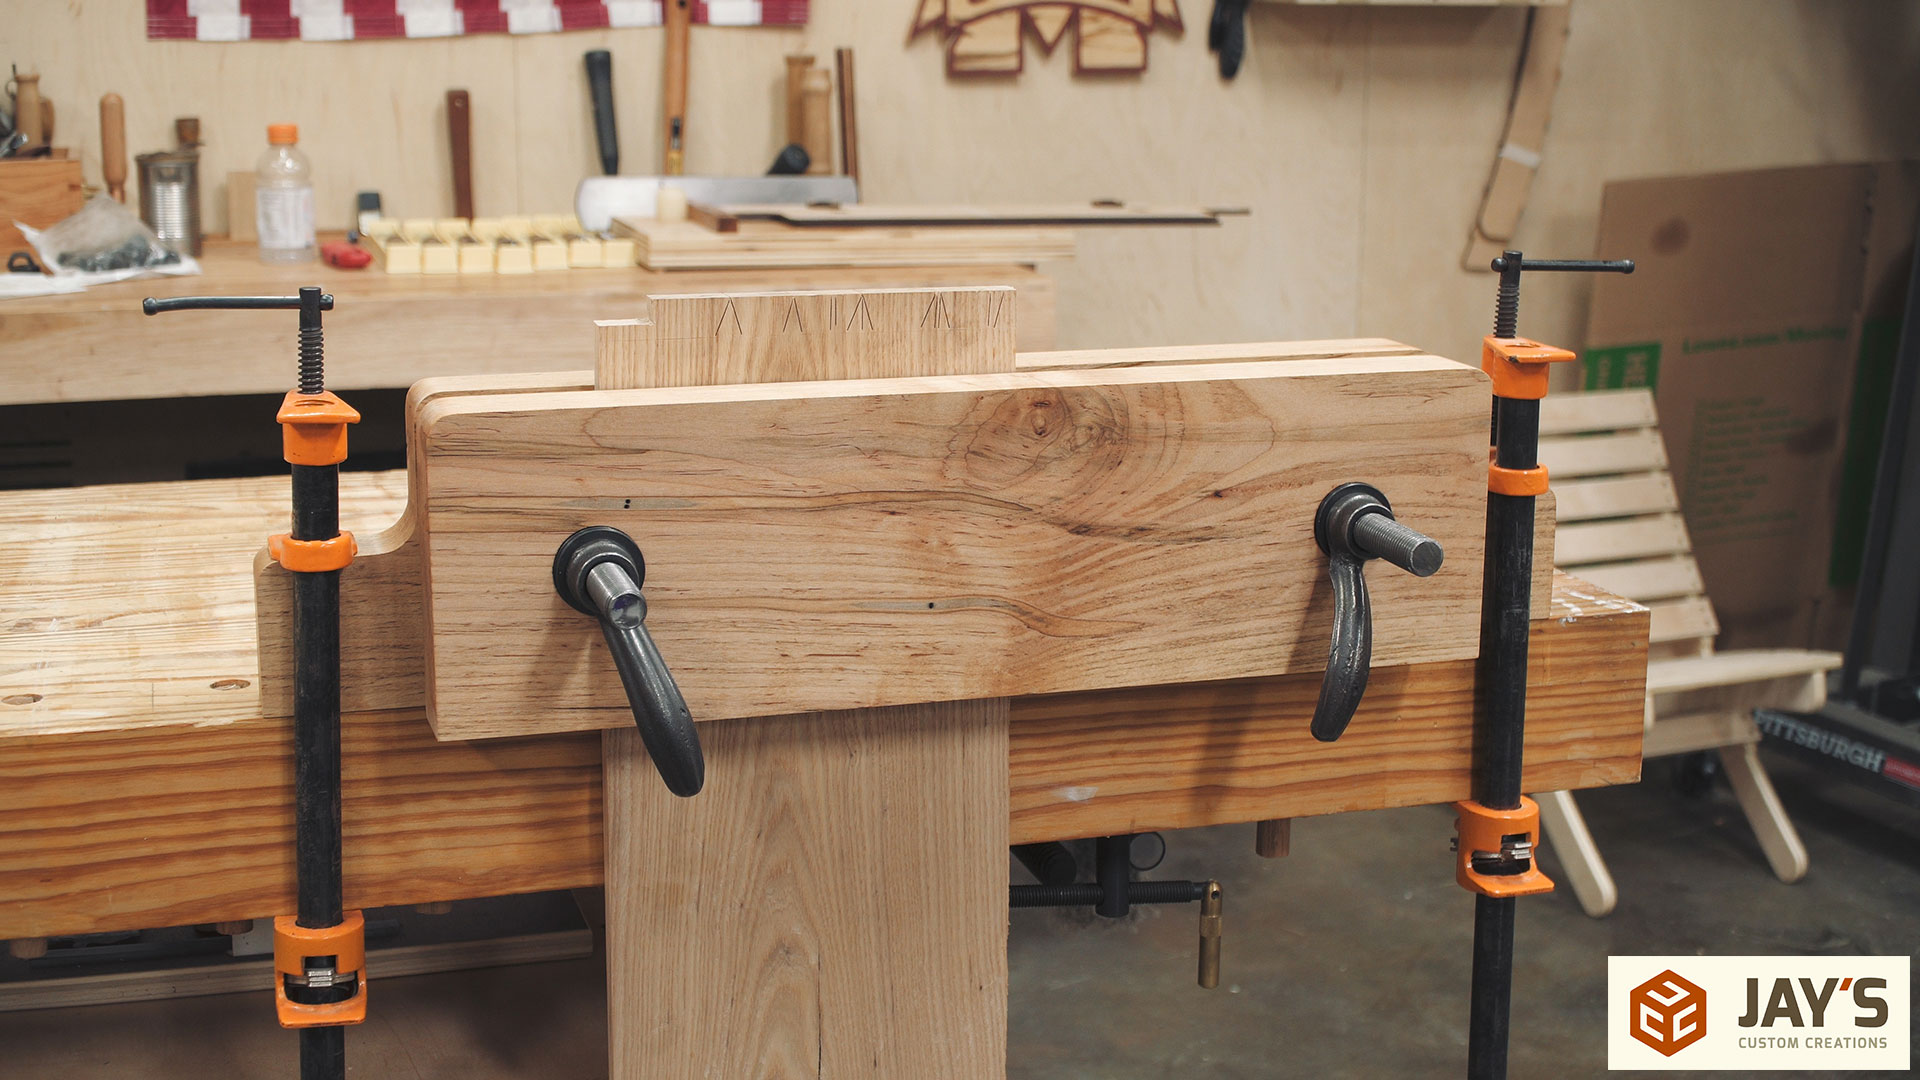
Then the front jaw is slid on and the pair of washers are added to each side.

Followed by the handles. That’s it! Super simple and functional vise. A finish still needs to be applied and my recommendation for that is Danish oil. It provides a decent amount of finish without having a film build up like polyurethane or lacquer. Those film finishes are not recommended here because the pipe clamps will damage the finish over time and it will look like crap where the clamps are used. Then again, it doesn’t really matter how this looks so long as it works great so go ahead and use poly if you want :)
A moxon vise has a few advantages. First, there is no center screw to worry about so you can clamp pretty long objects. Secondly, it sits on top of your workbench so it brings the work piece up higher where you can see it better. That may be a pro or a con depending on who you talk to but with my bad eyesight it helps to get it closer without bending over.
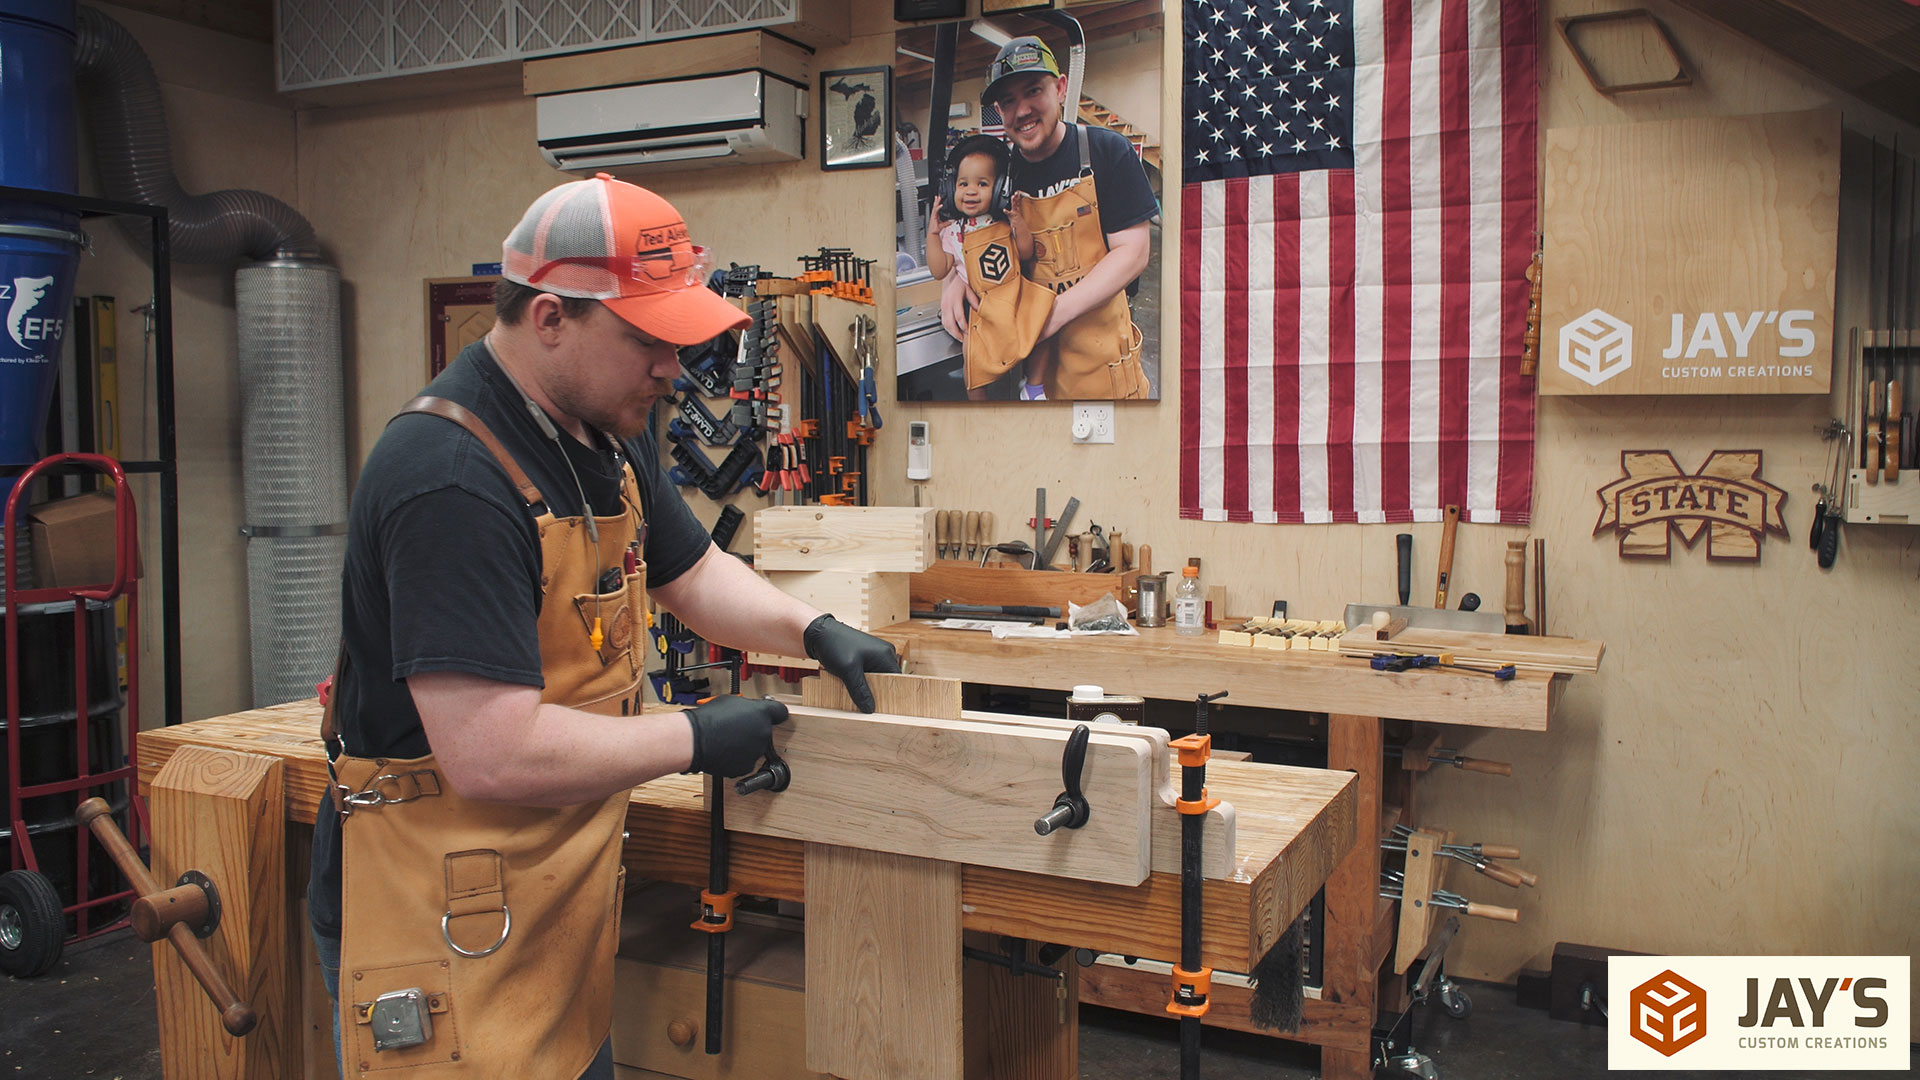
When it’s all said and done, a moxon vise isn’t a necessity. You don’t NEED it for woodworking. But they are really handy to have around and if you enjoy using hand tools my bet is that you can benefit from adding one of these to your workbench arsenal.


Hey jay we will gladly take some of your excess rain down under cheers
I’d gladly send some your way if I could!
Heh, I think of the Transformers music every time I change my own combo machine, though I try not to engage in Mortal Kombat with my projects. I’m glad you won the fight :D
hahahaha. Well said, Kuffy. Well said.
“…all your base are mine…ah ah ah ah….”
Great post, Jay!
This gives me a multitude of ideas.
I like the concept of the Moxon vise and will likely be incorporating one into the end of the work bench I am designing for myself.
However, in my case I thing I may go with a screw setup that turns the whole screw into a captured nut with the screw going into the body of my bench.
The primary reason being that I am concerned that with the screws protruding, I will catch myself on them as I walk past and re-orient the bench and decorate my midsection at the same time as well as the possibility of snagging them while hand planing etc.
I thought about that as well but rarely would a vise like this be used for planing. If you only put material above the height of the screws then the bottom of the vise will rack inwards.
I like the idea of raising the work up closer to eye level, I guess I need to build one pretty soon, but I think I’m gonna have to use pine, it just wouldn’t feel right using hardwood on my pine bench!
Hey pine will work too!
Another great tutorial Jay. Question…would you consider putting the cork or leather on both faces or do you not think it required? Would adding it to both faces in anyway change the dynamics of the vice?
Thanks.
Not only is it not required but I think it would diminish performance. It’s not even 100% necessary for one side. It helps but isn’t necessary. Having it on both sides will allow too much wiggle room.
NICE project Jay. I used wood screws on mine. thank you
Wood screws wood be nice ;)
I noticed that you have a stanely pl 10-16 left handed tape measure on your apron.Want to trade for a right handed one?
Been trying to get one from Stanley for three years. They tell me they don’t make them anymore.
Richard…
Mine is from Lee Valley. They still sell them.
https://www.leevalley.com/en-us/shop/tools/hand-tools/marking-and-measuring/tapes/32562-lee-valley-10-foot-tapes-for-cabinetmakers
I wonder how well this vise would work made from laminated plywood?
Jay, while your content is always great, your teaching skills are even greater. You speak distinctly and with such consistent clarity that it almost seems like your remarks are scripted — though I am sure they are not. Your videos are made so much more worthwhile by your excellence as a teacher.
Jay, The techno name for the washers is : Bevel washers…. Some times miss pronounced as Bellville Washers. Great build and wonderful Instructions Thanks and have a great day
Crunchy peanut butter? Seriously considering un-subscribing.
hahahahaha. The jelly was blackberry jam. Does that make up for it?
Possibly, but only if it was on wheat bread.
Dave’s Killer Bread Organic 21 Whole Grains and Seeds to be exact.
Jay, this is great! I recently installed a Wilton14 inch bench vise on my bench (which is a 2 inch thick solid core door from an old grocery store) and it was a great addition. This is going to take my woodworking abilities up a notch, maybe two notches. Really enjoy your website, isn’t it a shame that they don’t make extra extra extra crunchy peanut butter?
Hi, Jay. I went to the McMaster-Carr site to take a look at your cast iron handles. I really like them and they are very inexpensive BUT the company doesn’t sell to individuals. I know you are a business, but google mentioned that tricky individuals have learned to order items from them. Do you have any insight into this? I know you are very tricky. lol
Thanks
I honestly had no idea they only sold to businesses. That was a shock to me. I’m sure you could look up the items and find replacements at Grainger or Fastenal or similar stores.
I followed your link again for the cast iron handles and now I can’t find that information! I MUST BE WRONG. I swear I wasn’t high at the time. ;-)
I’ve ordered from McMaster-Carr many times as an individual. If they’re only selling to businesses then it must be a new change.
I was incorrect, Jarrett. Sorry about the bad information.
I’ve tried to buy from them before, too, but in Canada they won’t sell to individuals but they will to businesses. Maybe that’s the distinction. Anyhow, great article and video. I will be building one of these.
That’s a great project. I might have to make a slightly smaller one for my shop. The washers that you were talking about are called spherical washers which of course come as a set or pair as um sure you know. I do mostly woodturning, those types of washers are commonly used to balance CBN wheels on a grinders.
Great project, Jay.
And an excellent choice of timber.
Didn’t you have one of those on the other side of your pine workbench once? Interesting.
So here’s a silly question, what’s the hammer you were using to tap in the nuts? I’m not used to seeing one like that
Awesome job, brother. It’s already a fairly simple project, and yet you make it look even easier! I dig watching your videos and just purchased your plans for the “Ultimate Miter Saw Station”. Looking forward to getting started on that build when I return to the states in a few weeks. Keep up the bad ass work and putting out great content.
I like that version of the Moxon Vise! So how many canaries do you have in your shop?
Thanks Jay,Another great video lessen ,that’s something I’ll be adding to my garage shop.
Where were handles purchased from…curious. I too will probably make mine out of pine.
Hey Jay – i have my moxon vice completed with the exception of buying and installing the hardware. i noticed that the 3/4″ – 6 acme thread lead screw rod for 3 ft is only $12.73 from McMaster Carr. Nuts are a little more expensive at $4.22 each. that would make the materials still cheaper. only problem a different handle is much pricier. given that. what is your thoughts to using acme thread rod. also a woodworker blogger “Ask the woodman” installed a metal sleeve to prevent wear on the wood vice. i would appreciate any thoughts you may have. Thanks and i love your blogs. Ray
Thanks for sharing.