If this is your first time here be sure to sign up for my email newsletter so you don’t miss anything that I publish. A signup box is in the sidebar if you’re viewing on a desktop computer and it’s at the bottom of the page if you’re viewing on a mobile device.
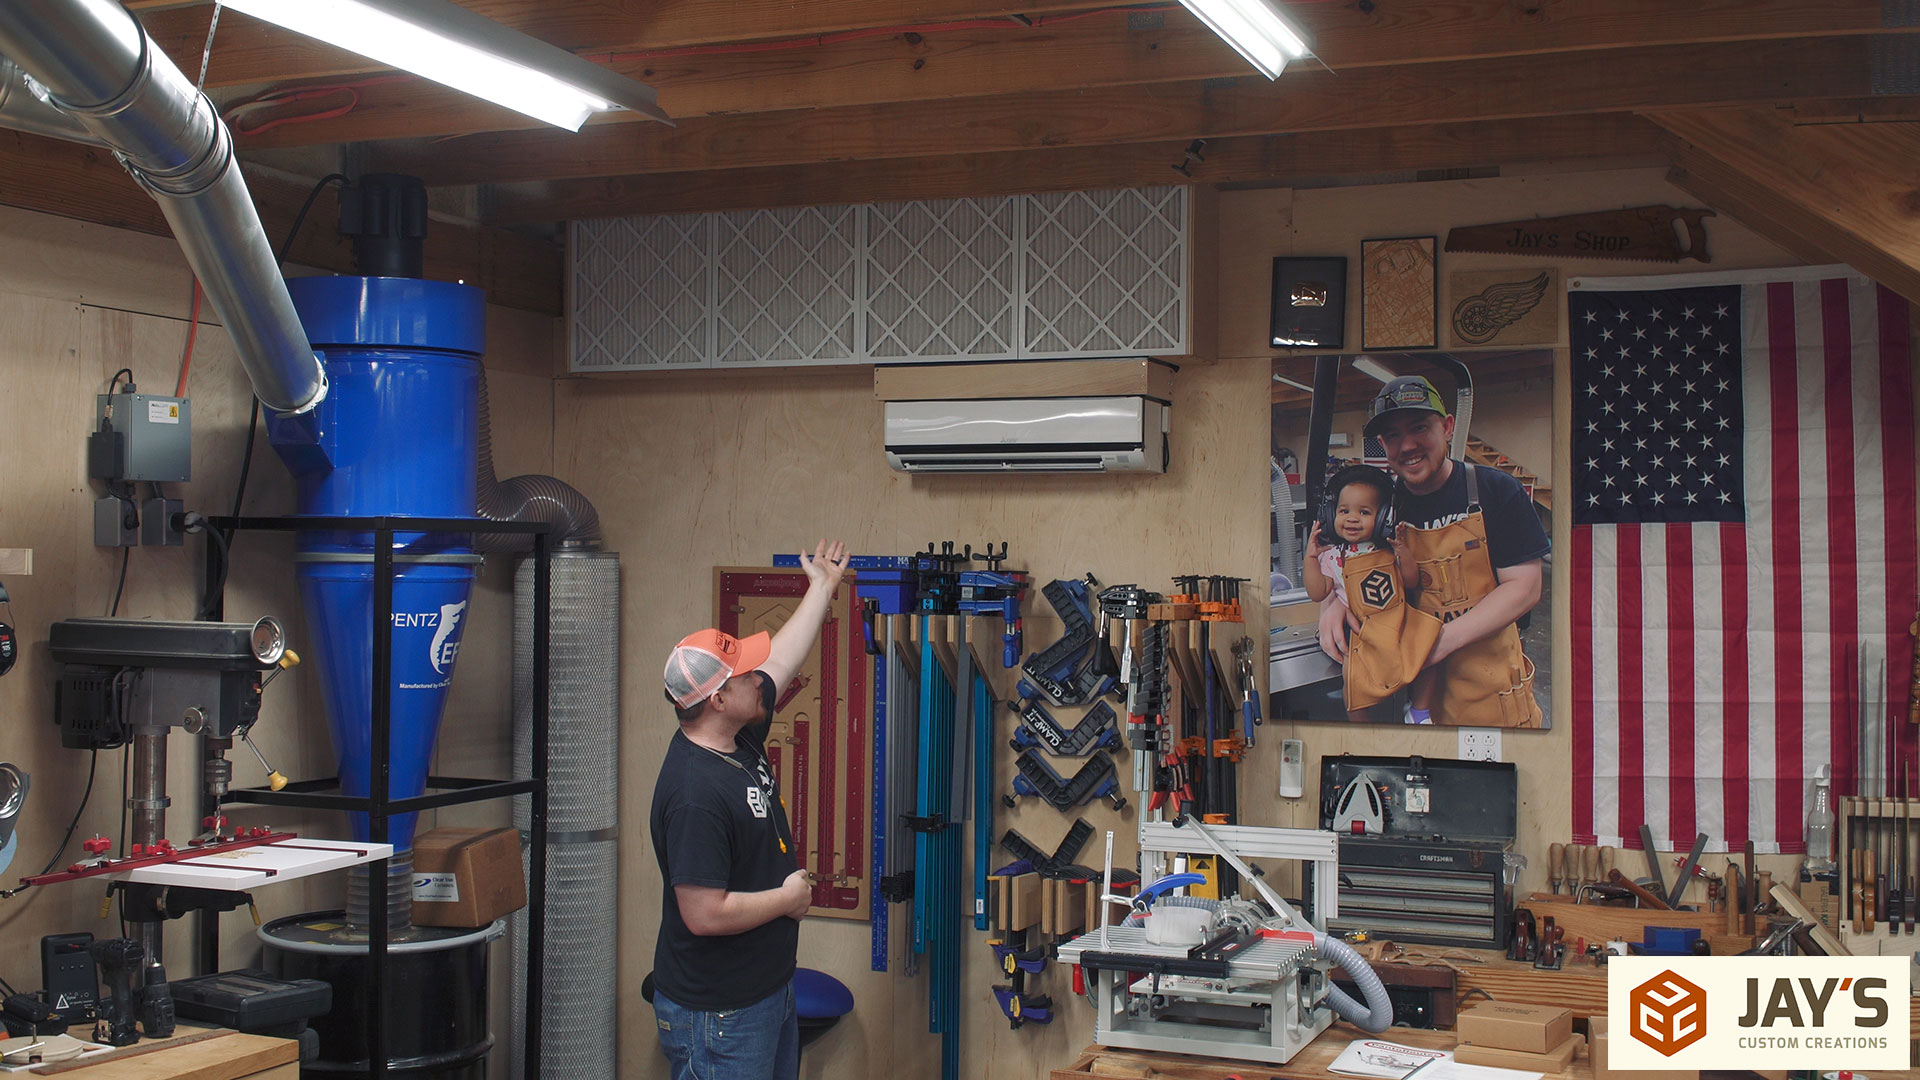
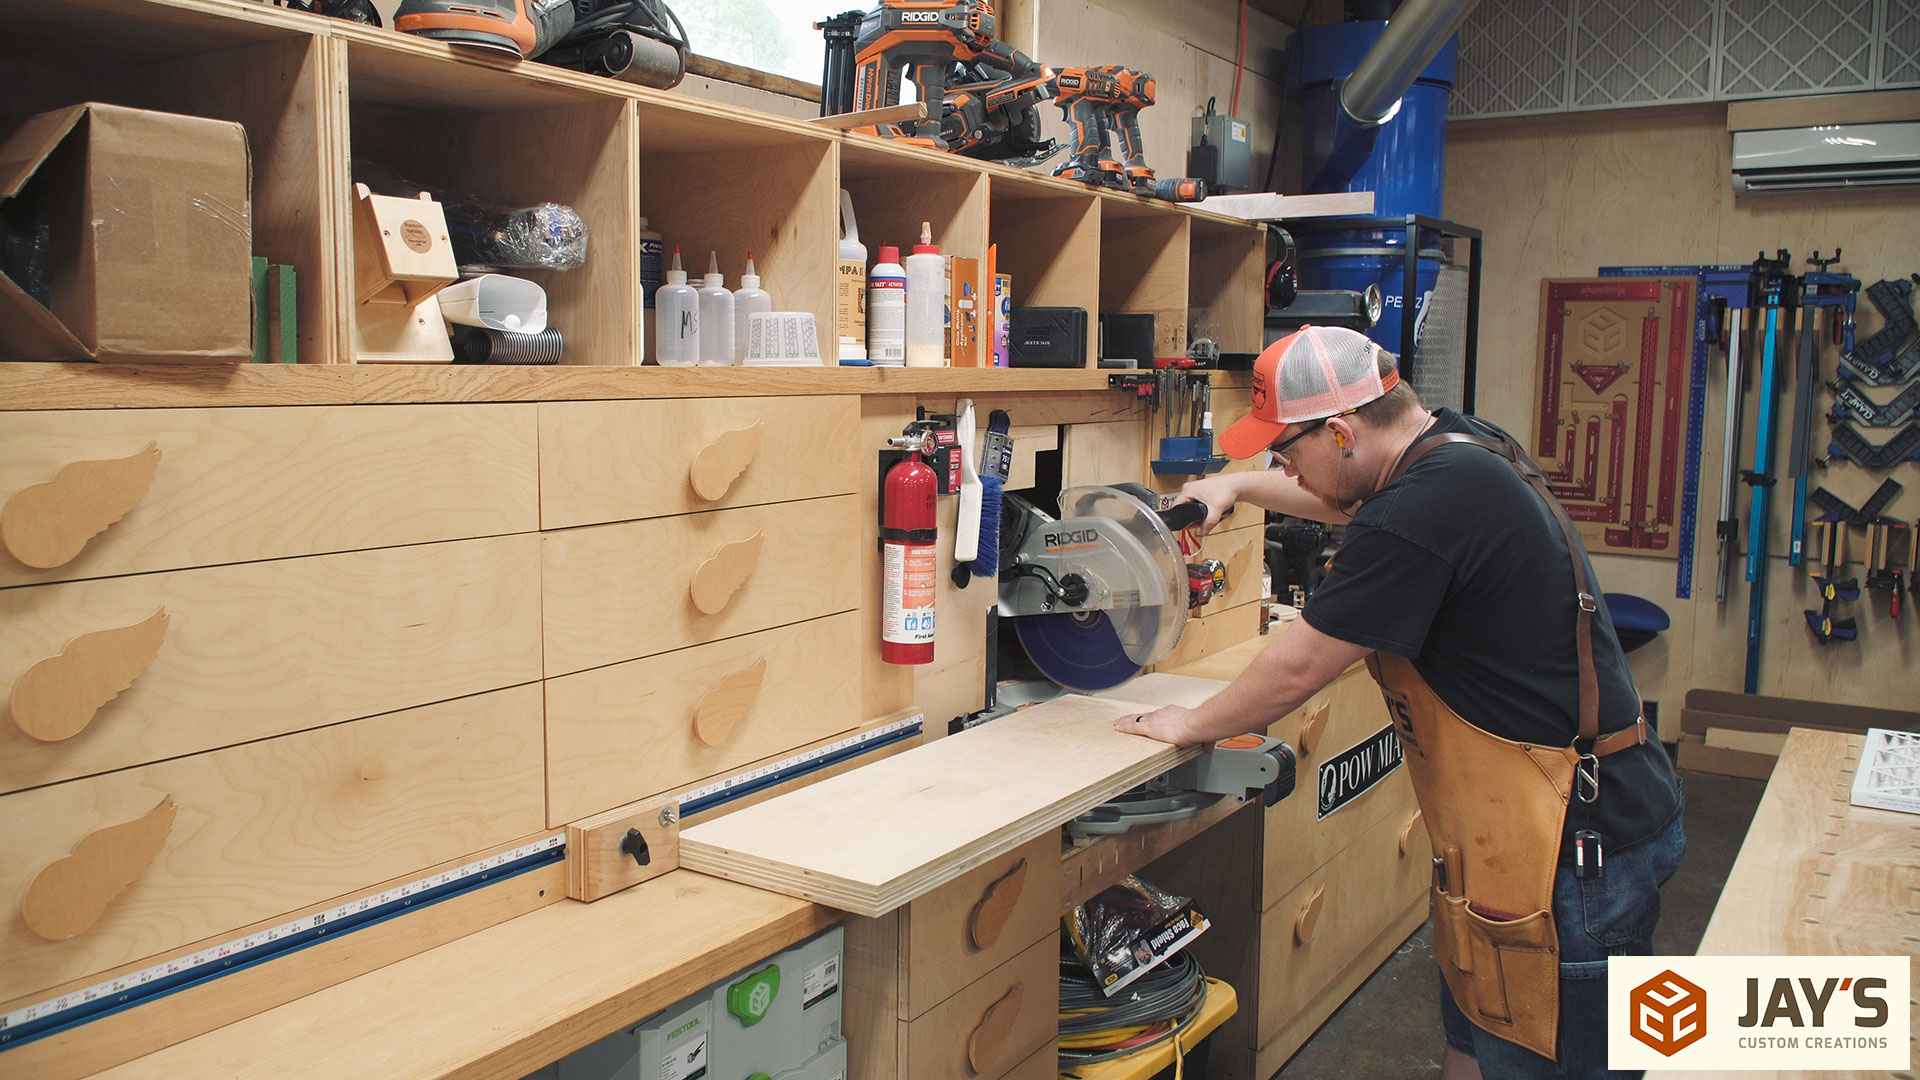
Adding better filters to my AC/heat mini split system is one of those win-win projects. Two boxes checked. First, the air in the shop will be cleaner which means I will be breathing less harmful small particles. And second, the amount of dust that makes its way onto the internals of the mini splits will be reduced and therefore reduce environmental maintenance. Prior to this article and video I completed two of the three filter boxes.
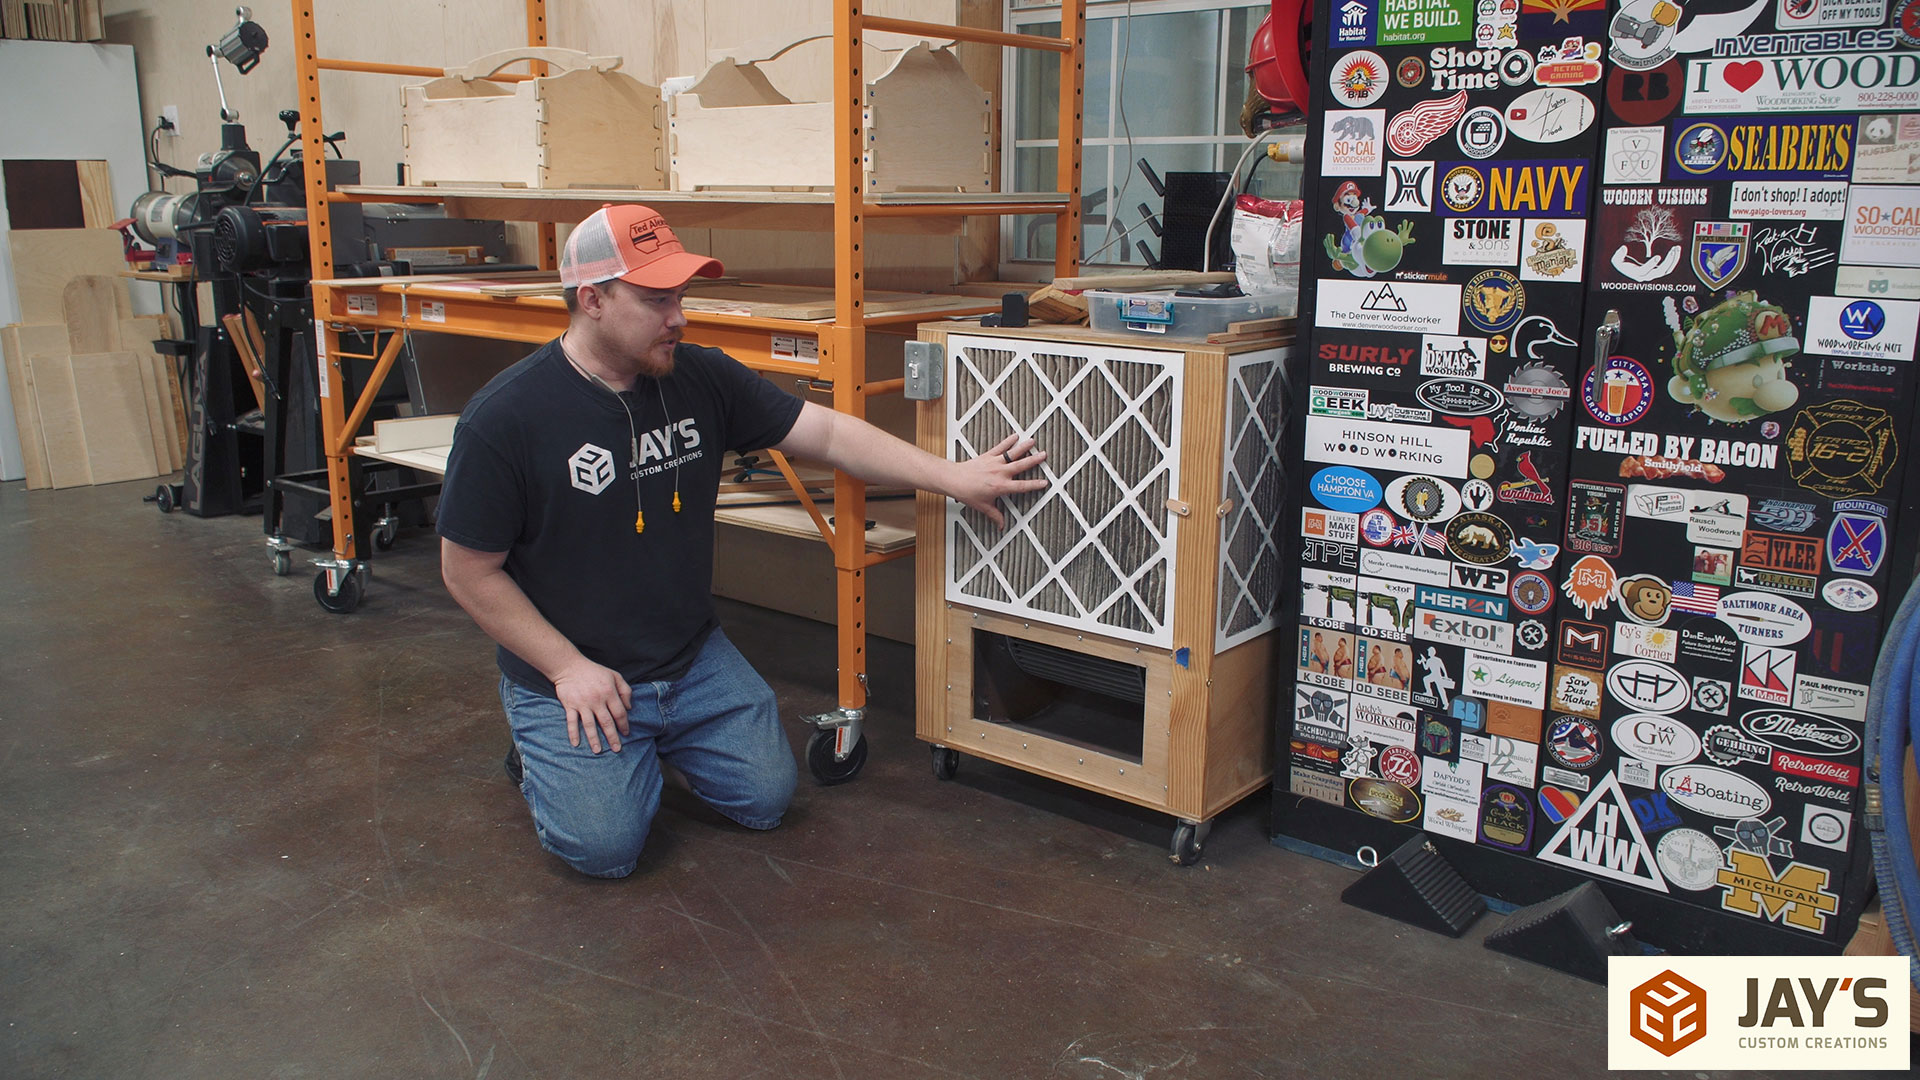
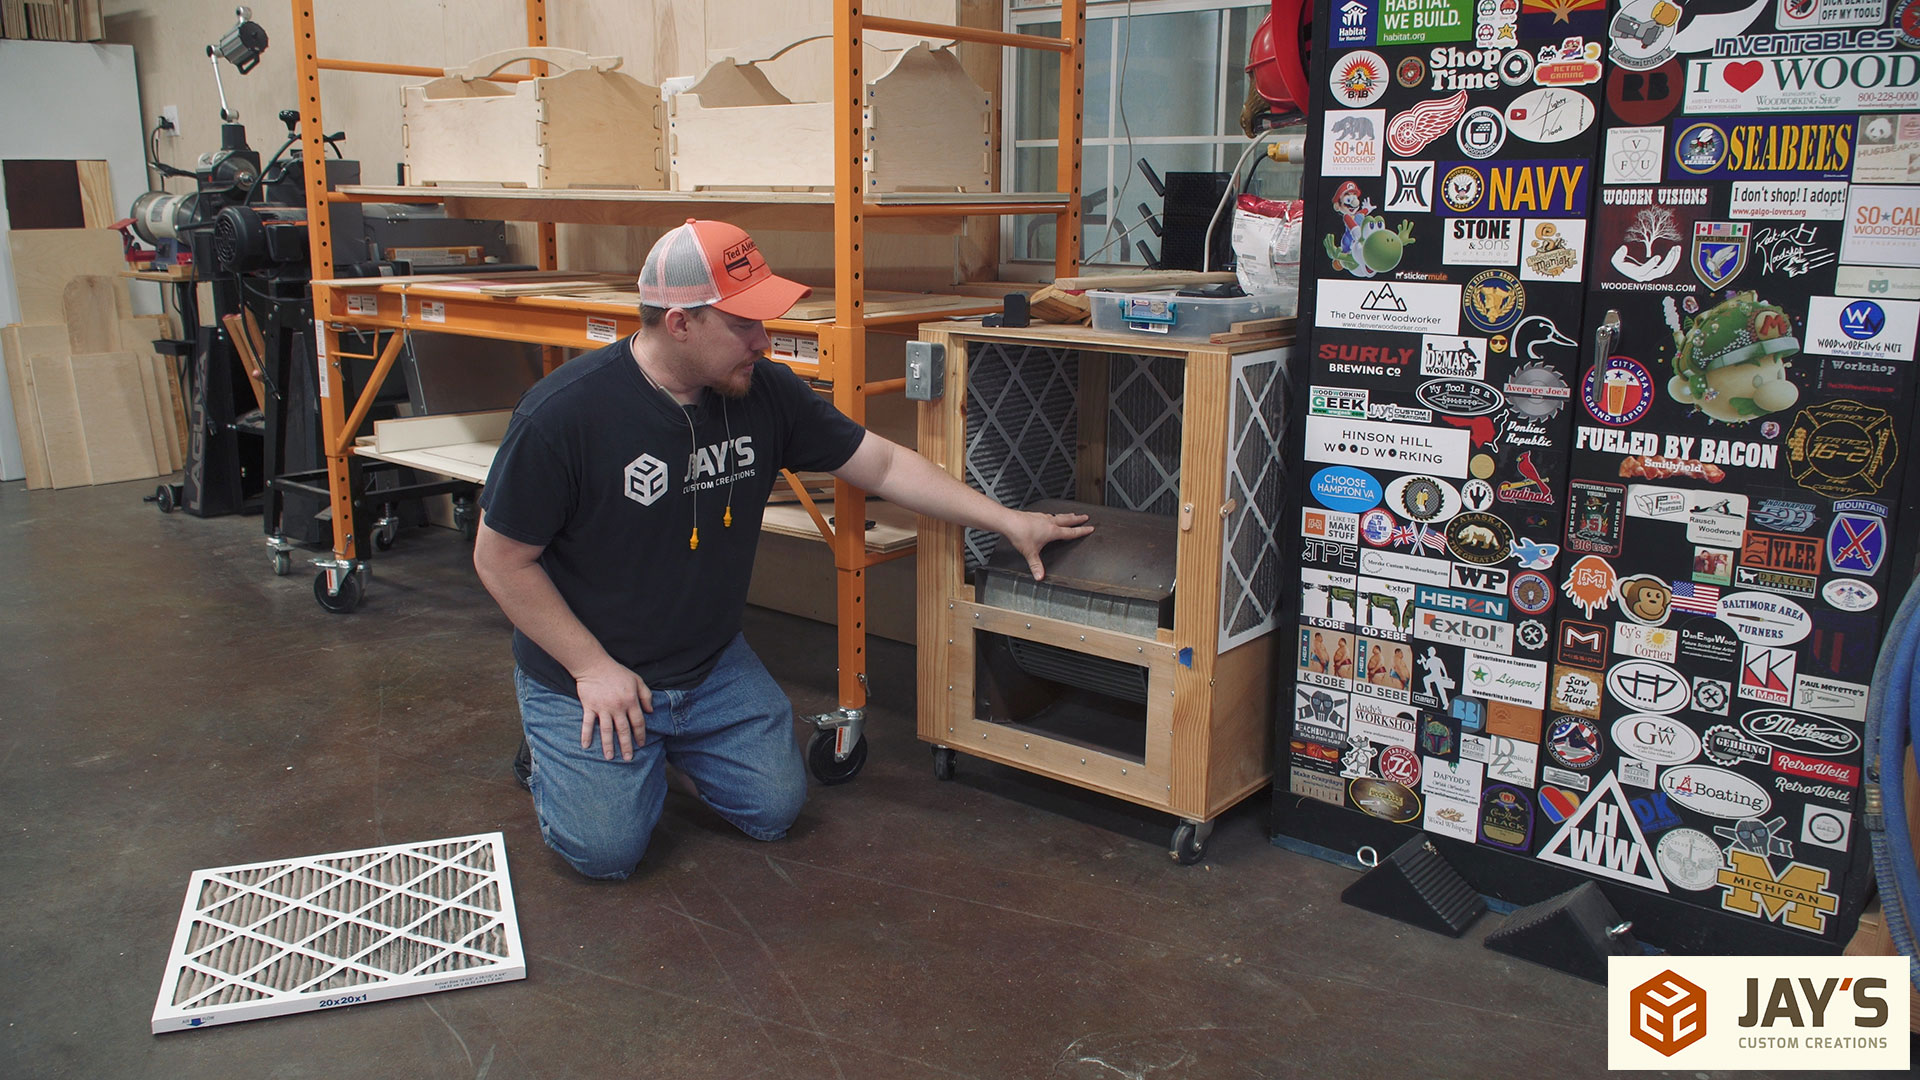
 Before I start building the third box I want to briefly touch on why I’m positive this is a good thing to do. This is my air cleaner cart. It’s incredibly simple. Just a plywood top, plywood bottom, and four corner 2×4 posts to connect them. Each post has rabbets cut to allow filters to be installed and the old furnace blower motor sits on the inside. Each of these filters is rated at MERV 13. The higher the MERV rating the smaller particles that they will catch. I’ve measured the effectiveness with my Dylos air quality monitor, comparing the results with other environments like outside on a clear breezy day and inside my house. In my last shop, this cart easily kept the particle count well below outside and inside my house. Unfortunately, it just doesn’t move enough air to quickly clean the air in this shop. Because this shop is about 4 times the amount of air volume it takes about 4 times as long to reach low values.
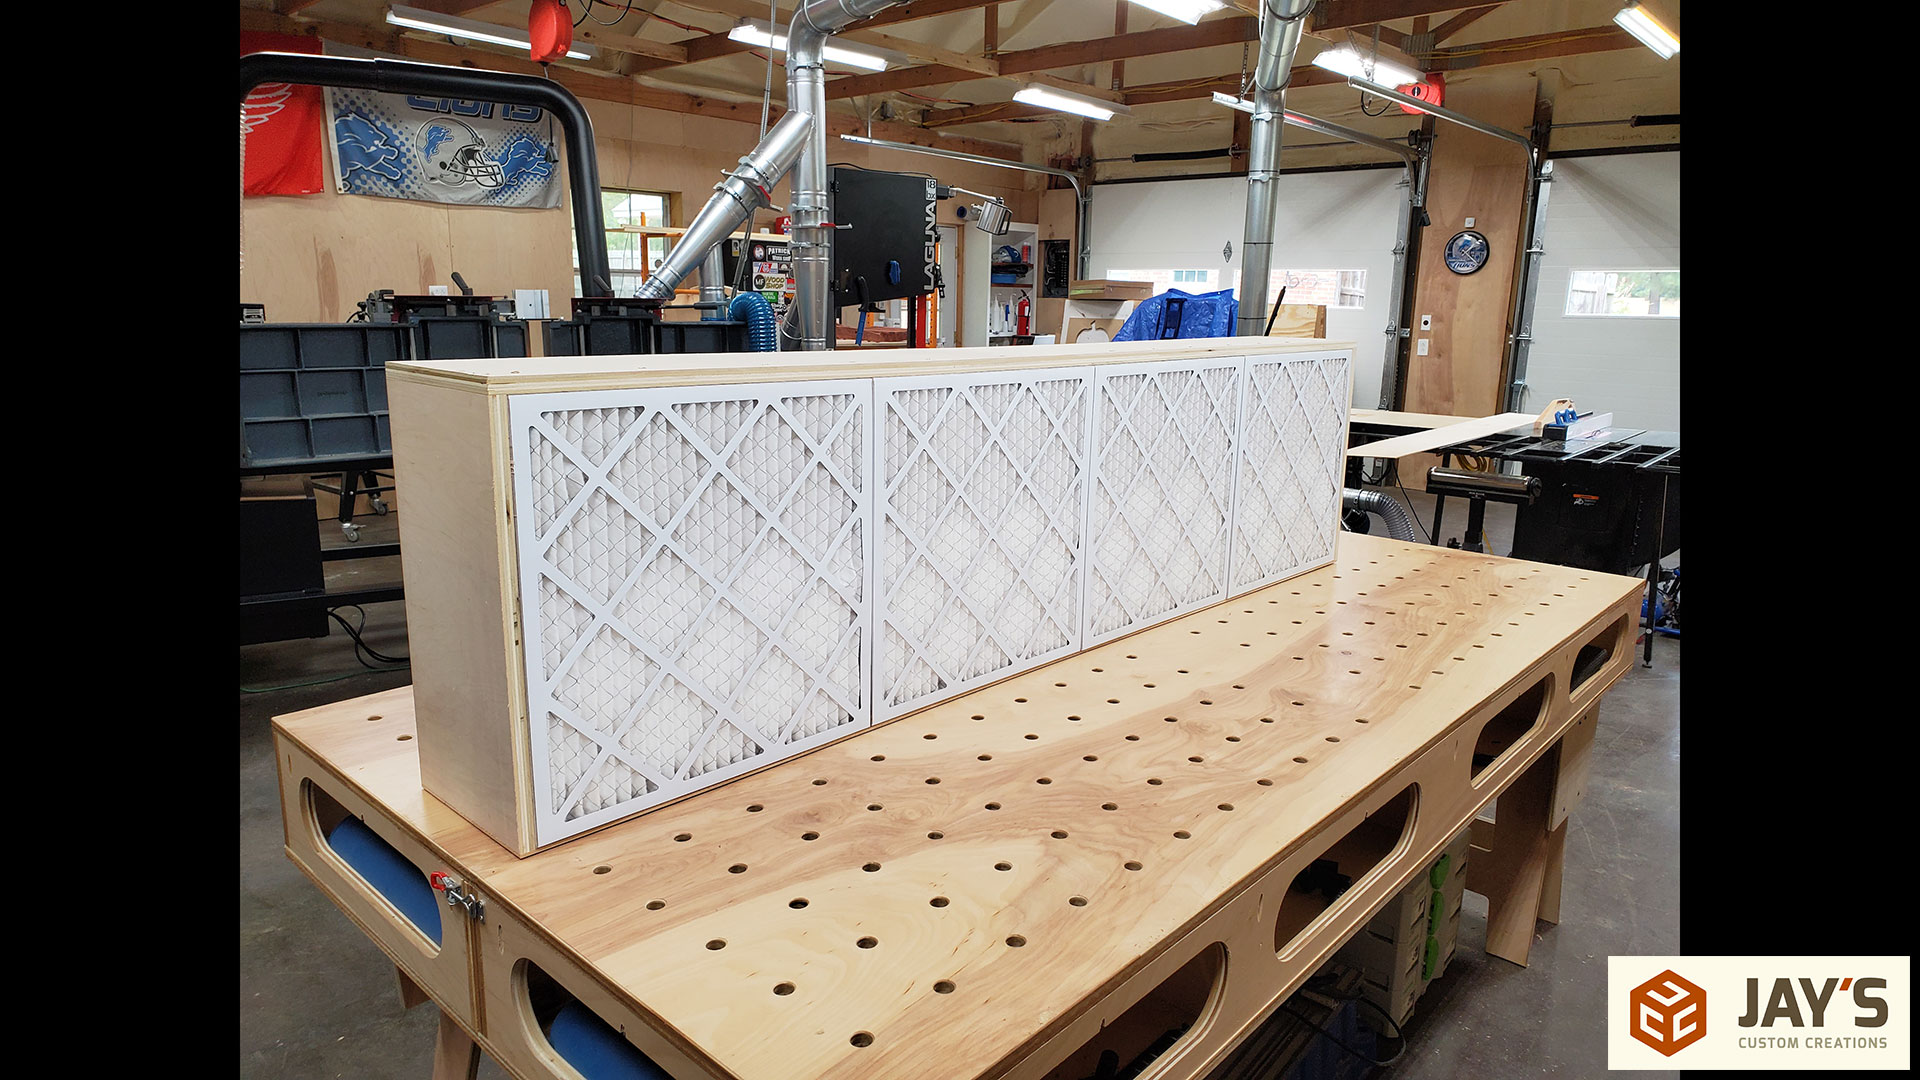
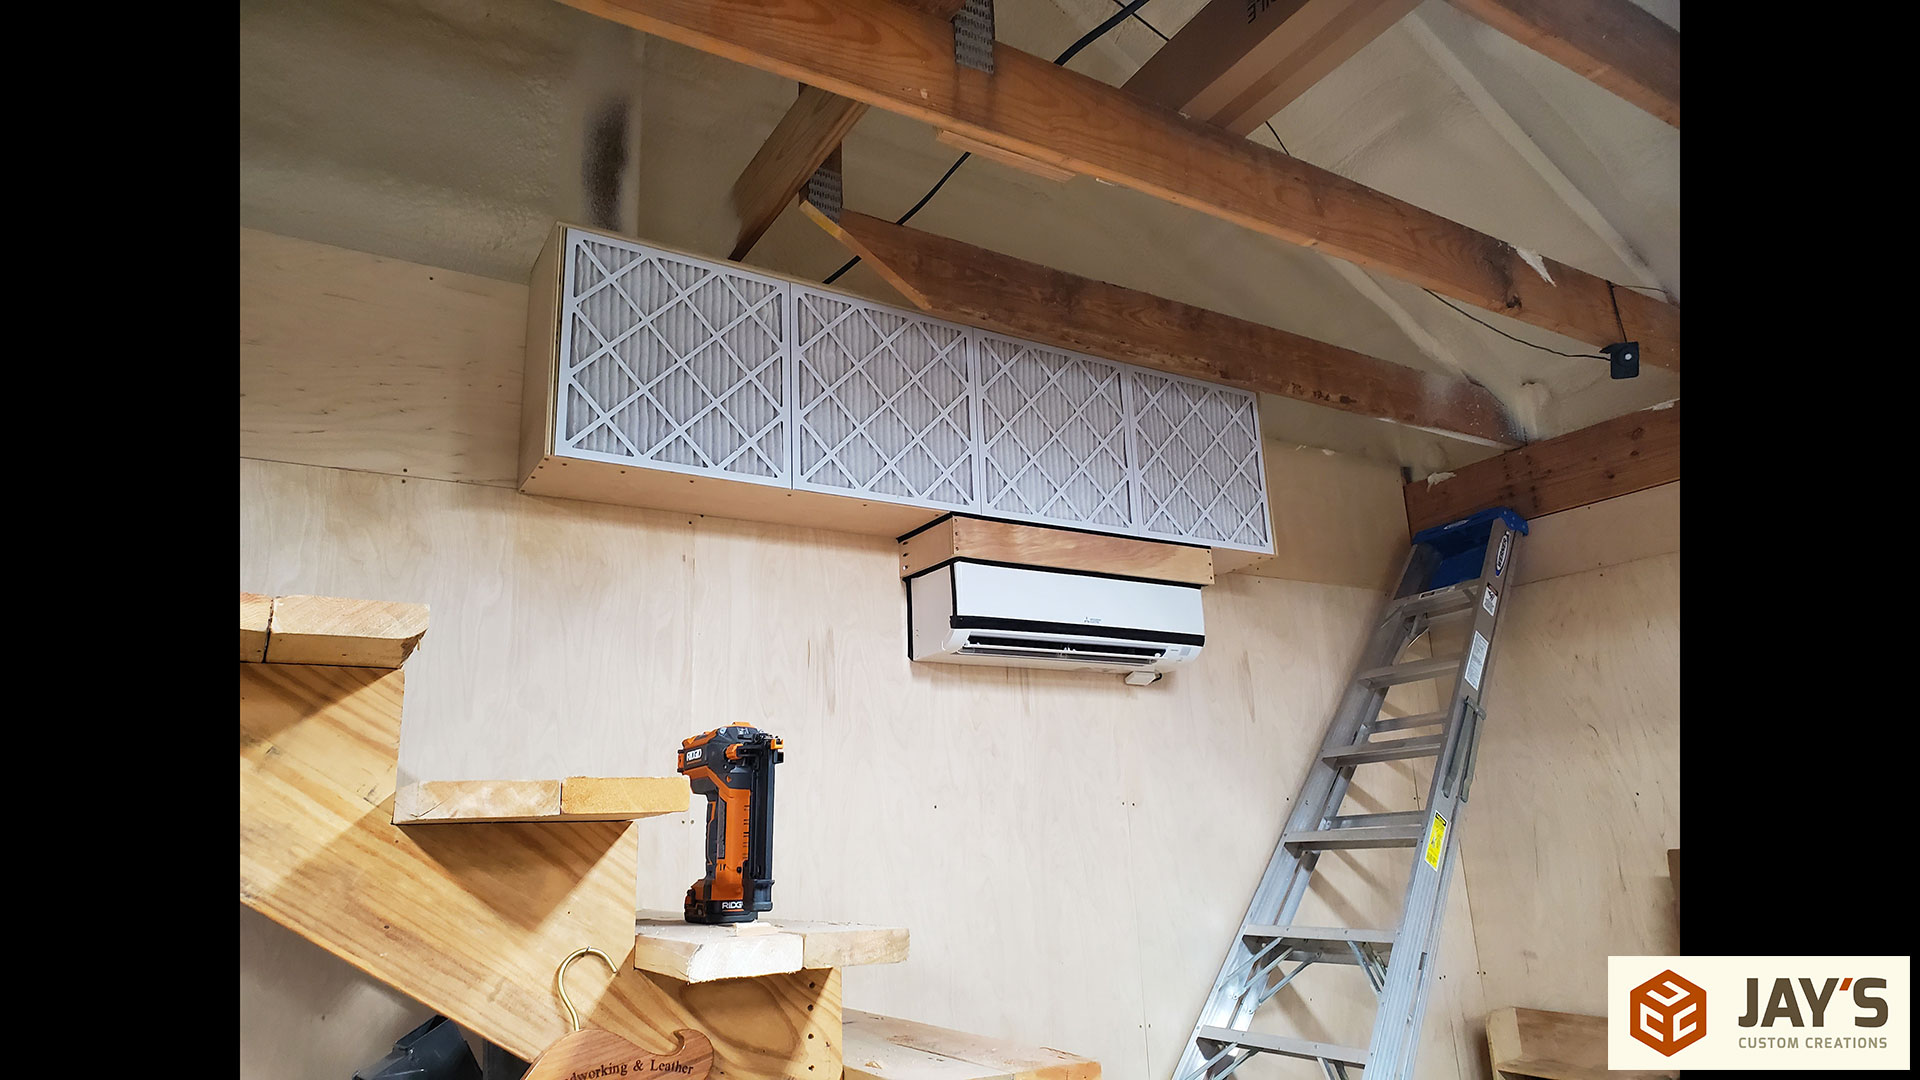
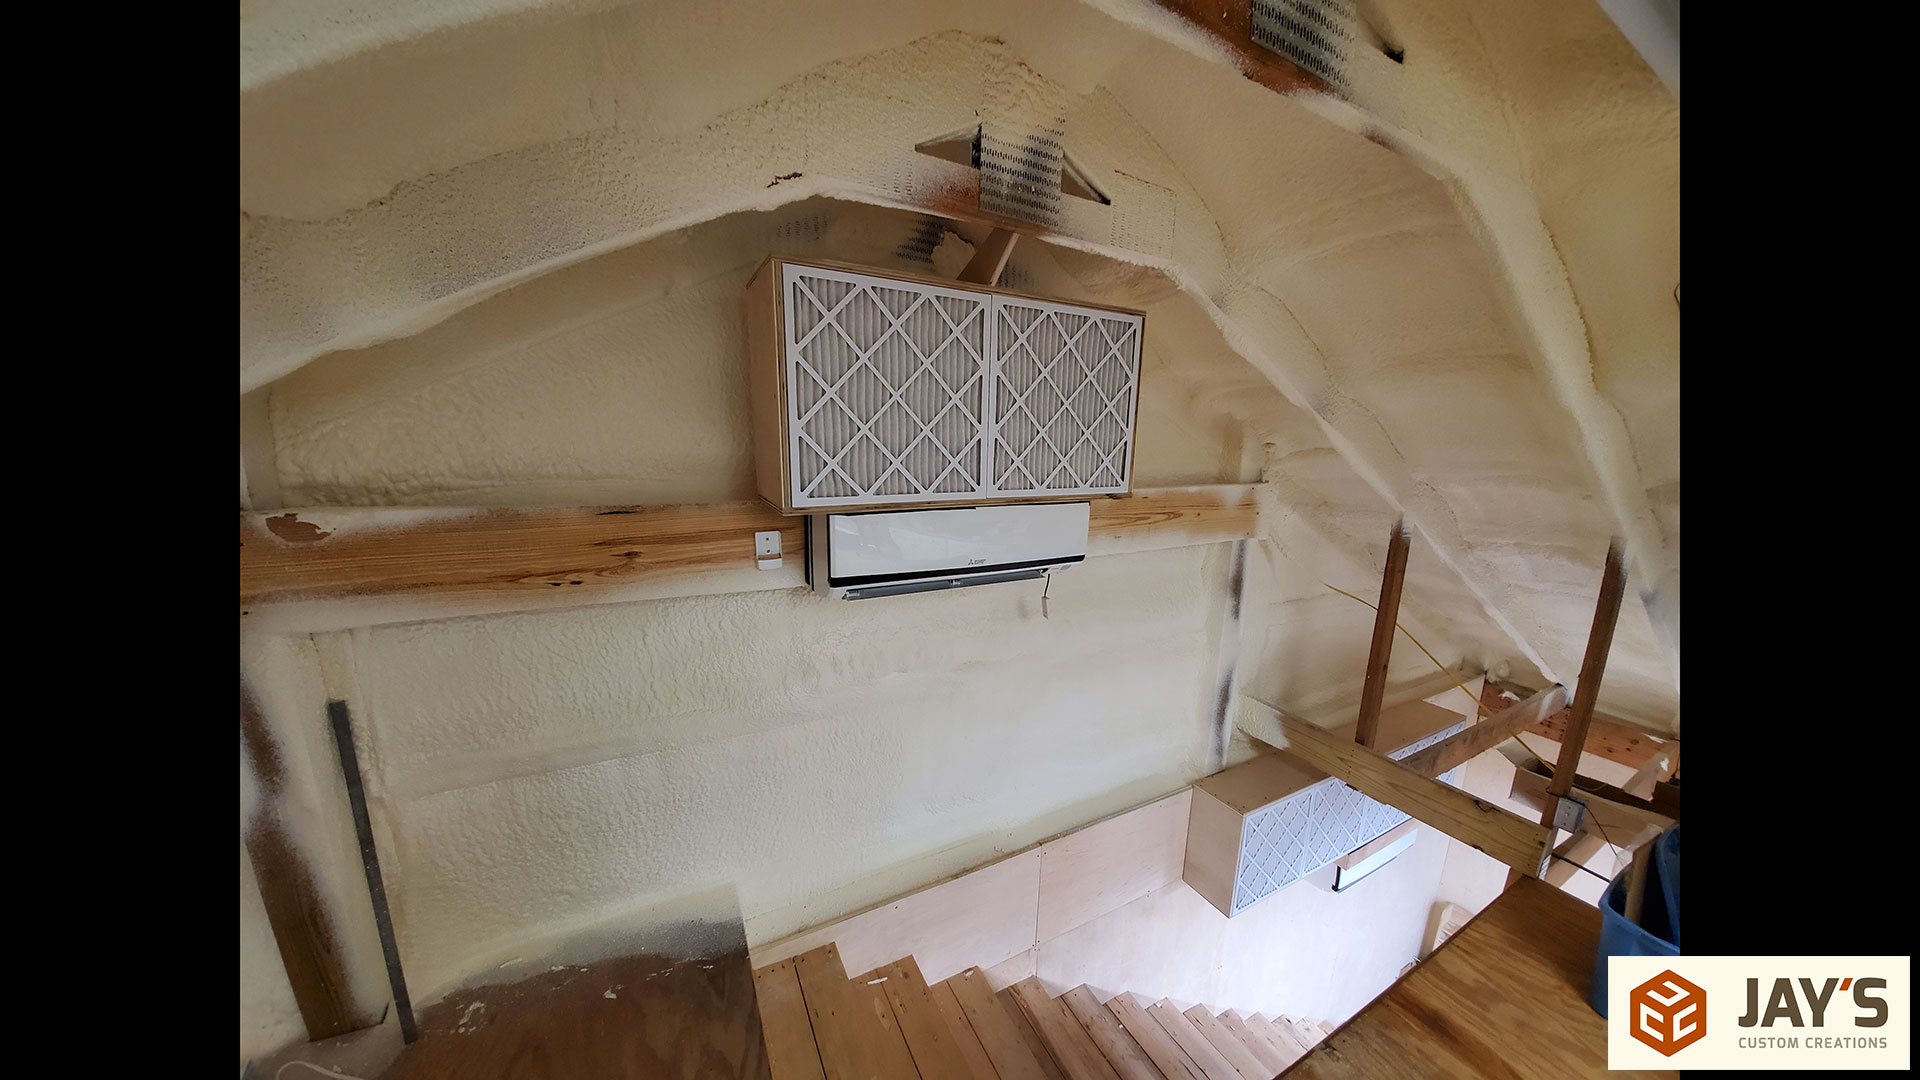
 These are the two filter boxes for the first floor mini splits (one more mini split in the loft above). Each box has four 20x20x1 MERV 13 filters. The reason for four of them is to increase surface area. Generally speaking, the higher the filtration rating the lower the air flow of the filter. The decrease in air flow needs to be compensated by adding more surface area. In this case, my hope is that the four filters provide enough surface area to not decrease air flow.
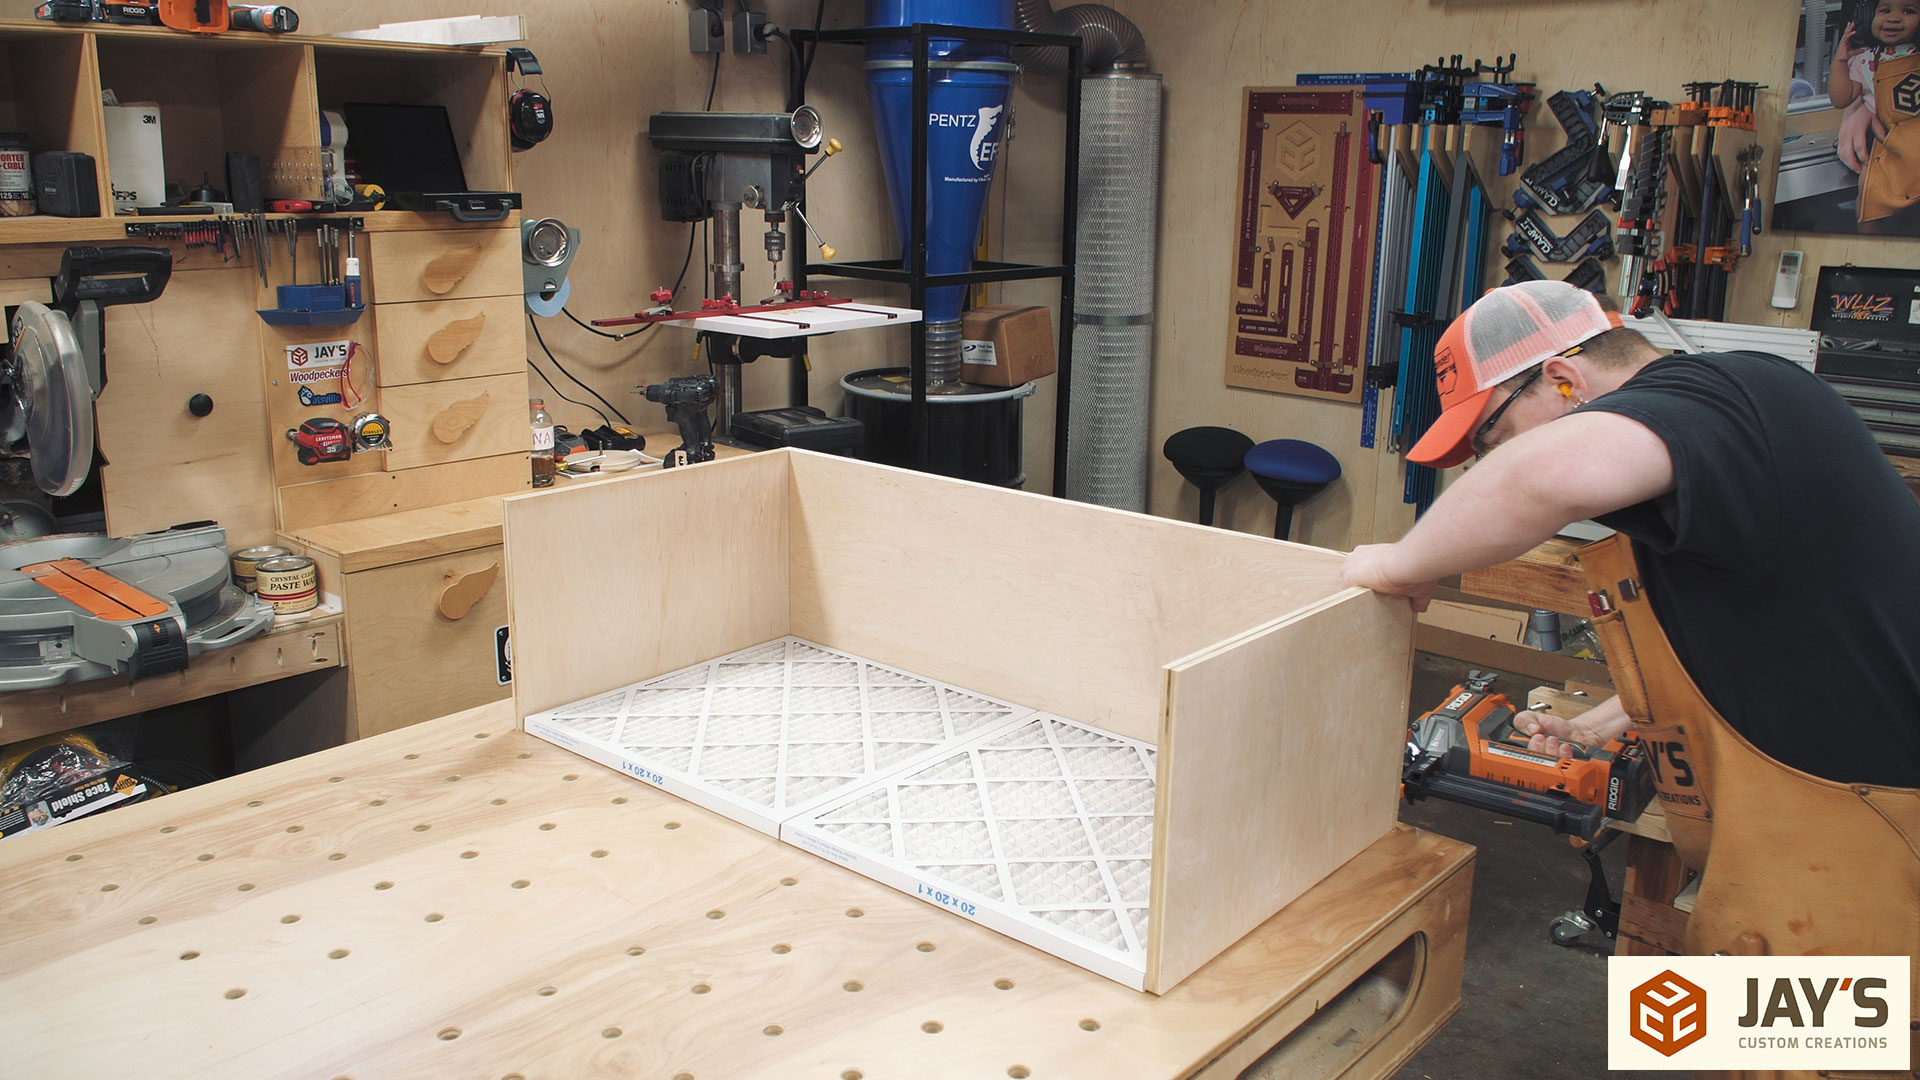
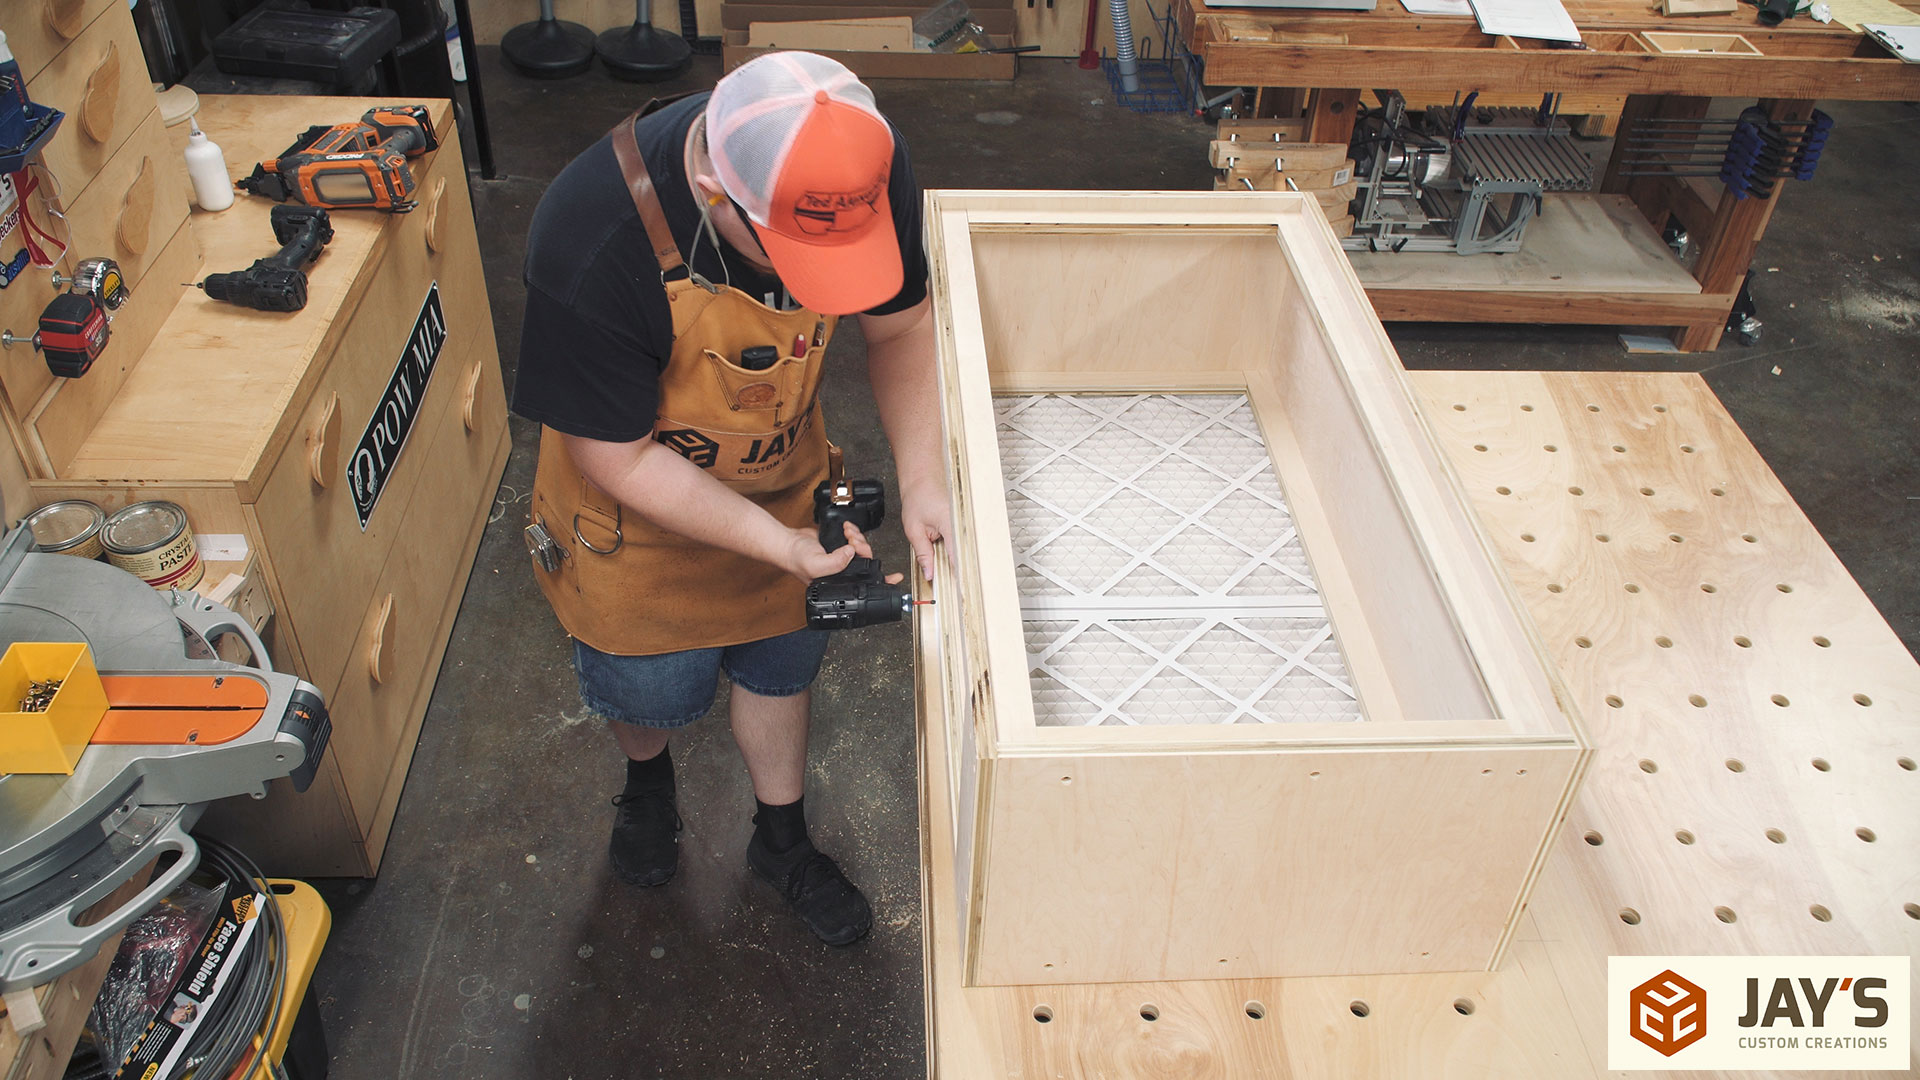
 I didn’t record the first two filter boxes being made but I did take pictures. It’s a very simple process starting by building around the filters. First the four filters were laid across the table and a plywood box was made to fit snug around them. Then some 1-1/2” wide strips were added to the inside as back supports for the filters.
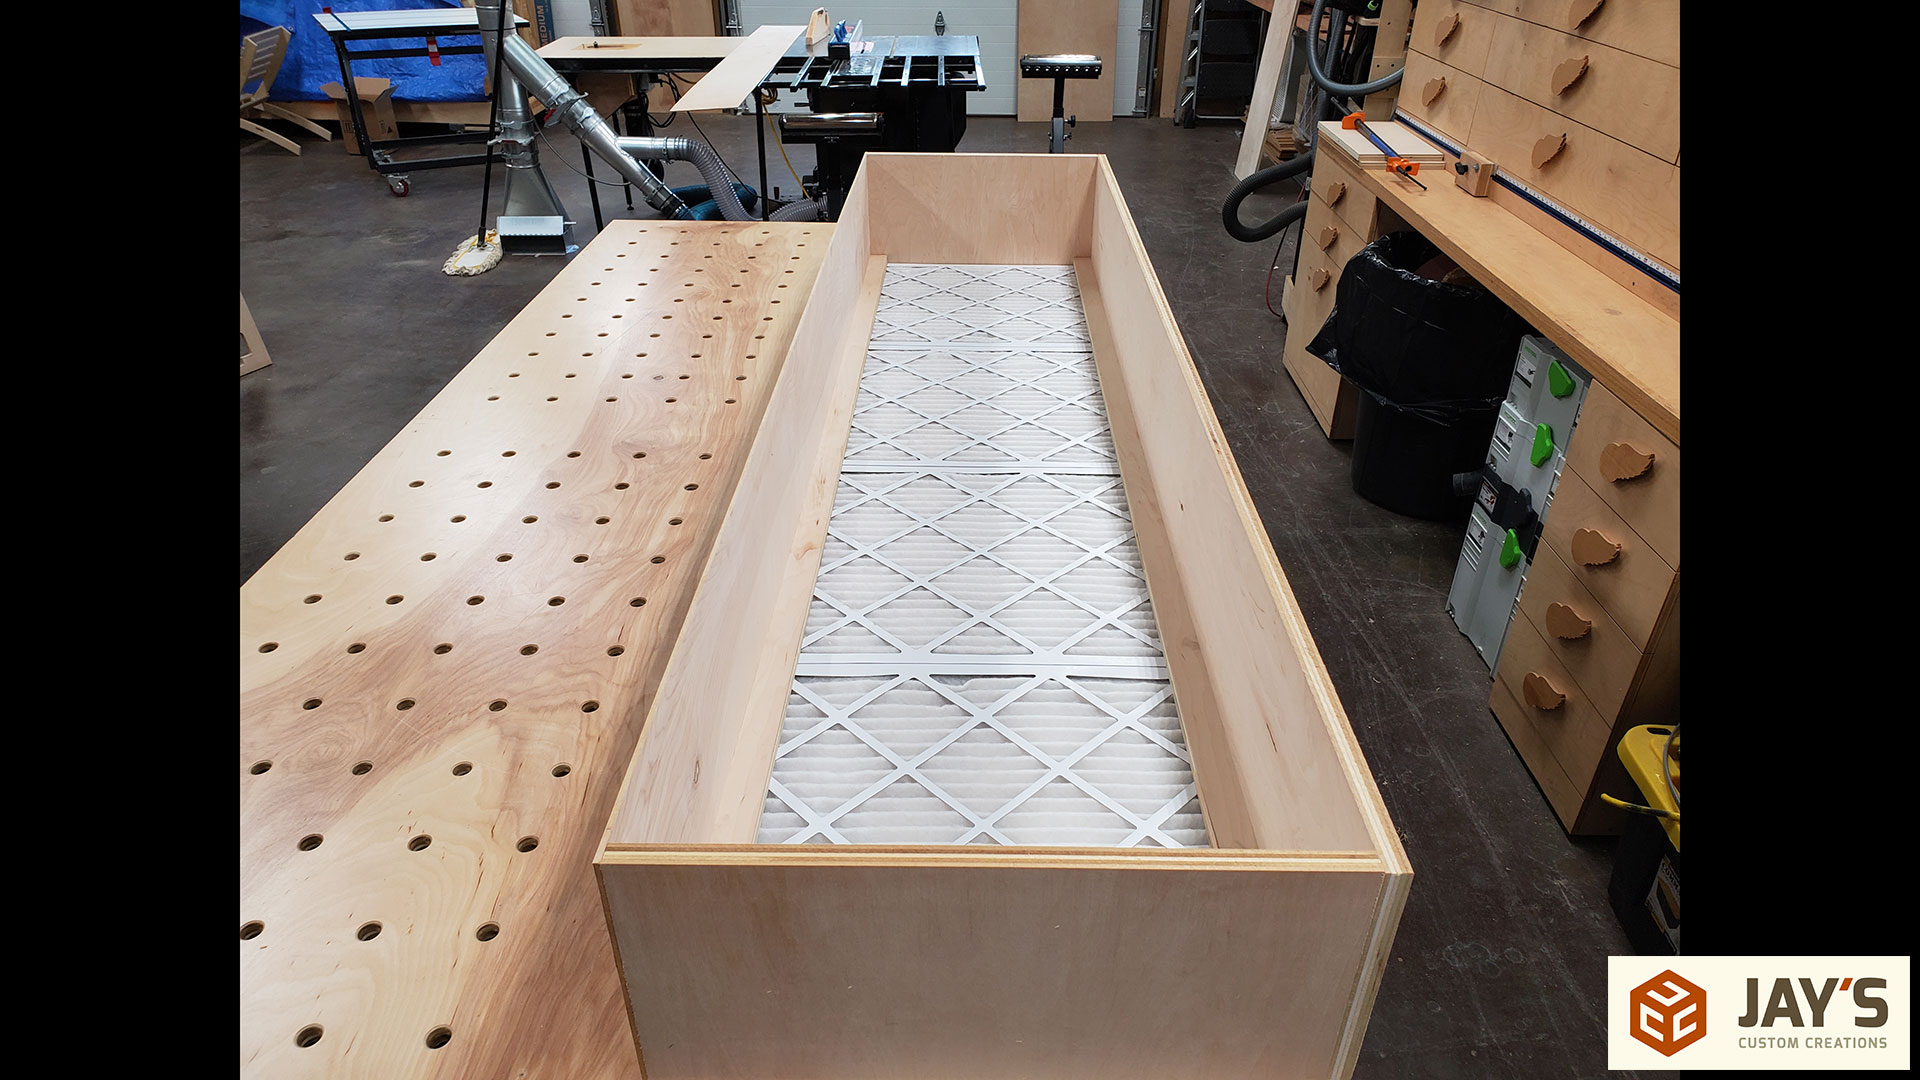
 Then more 1-1/2” wide strips were added for supports between the filters and at each end of the filter box.
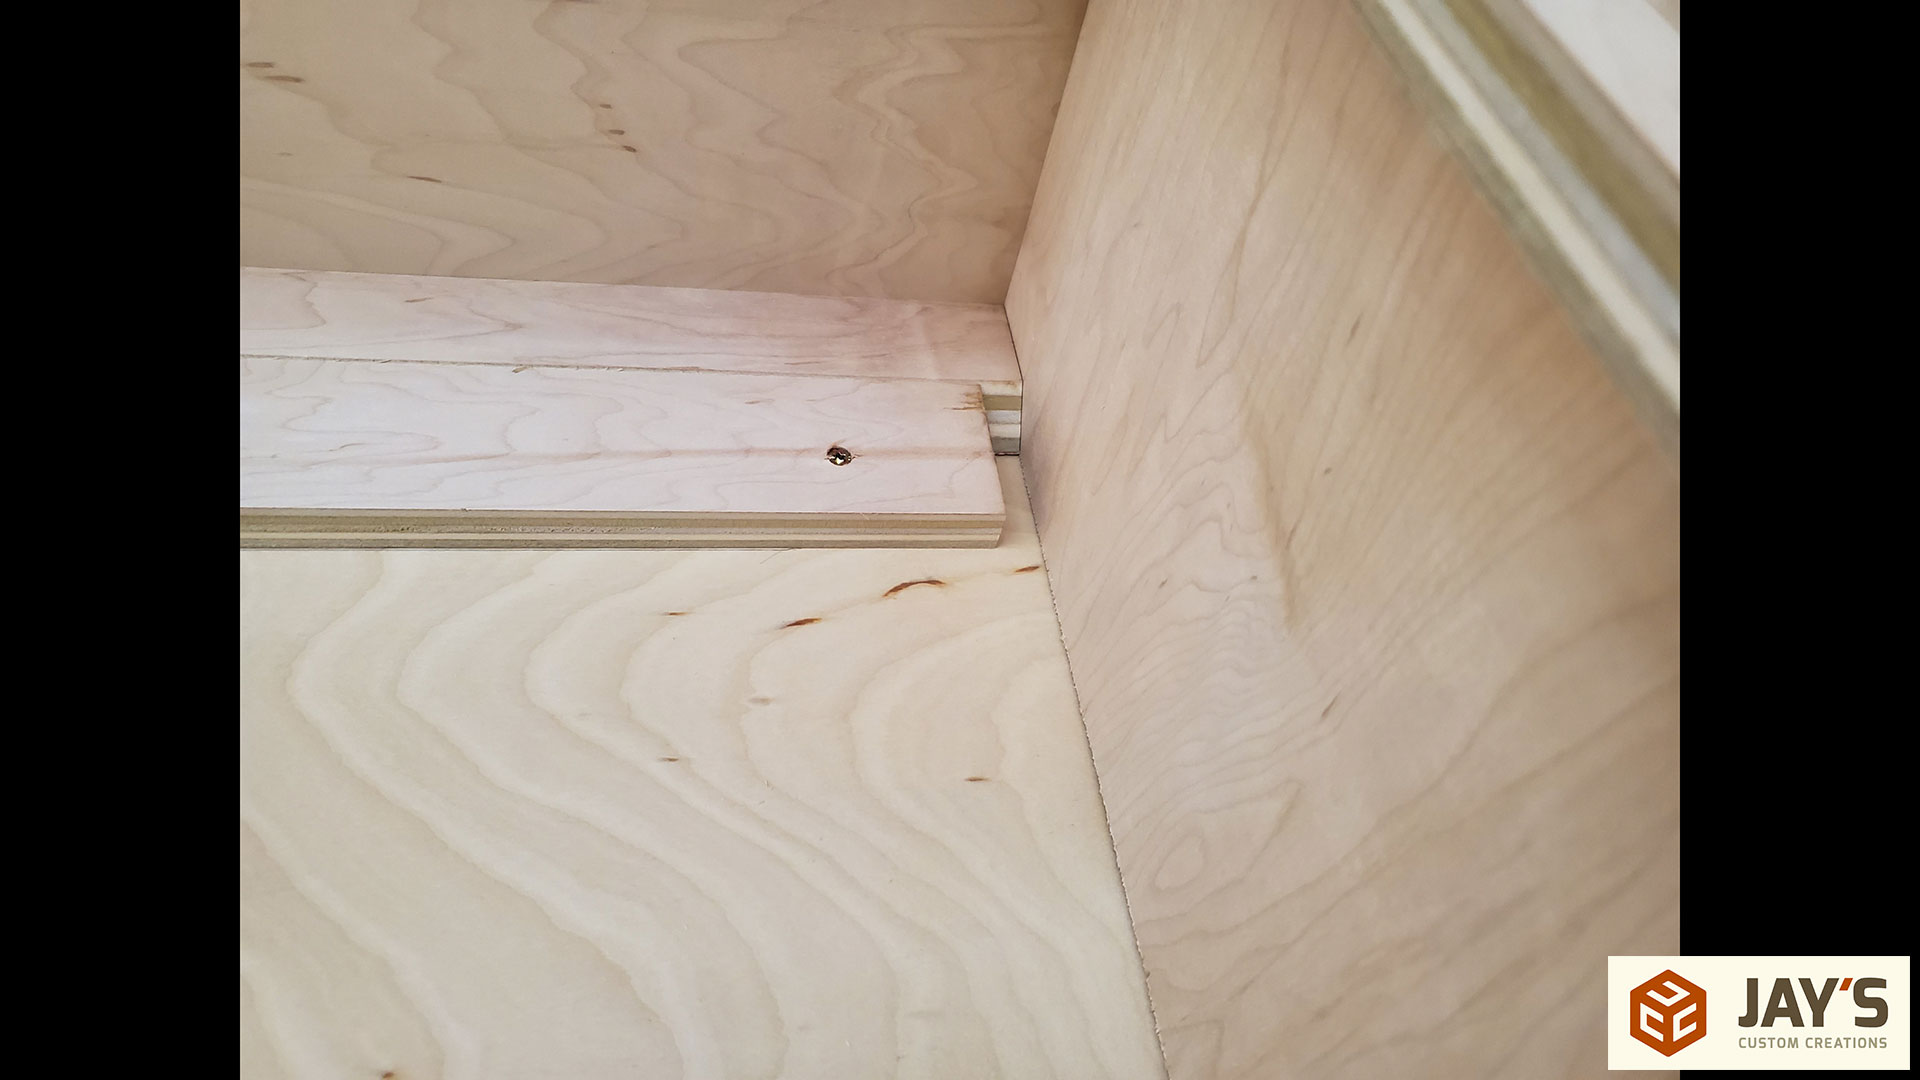
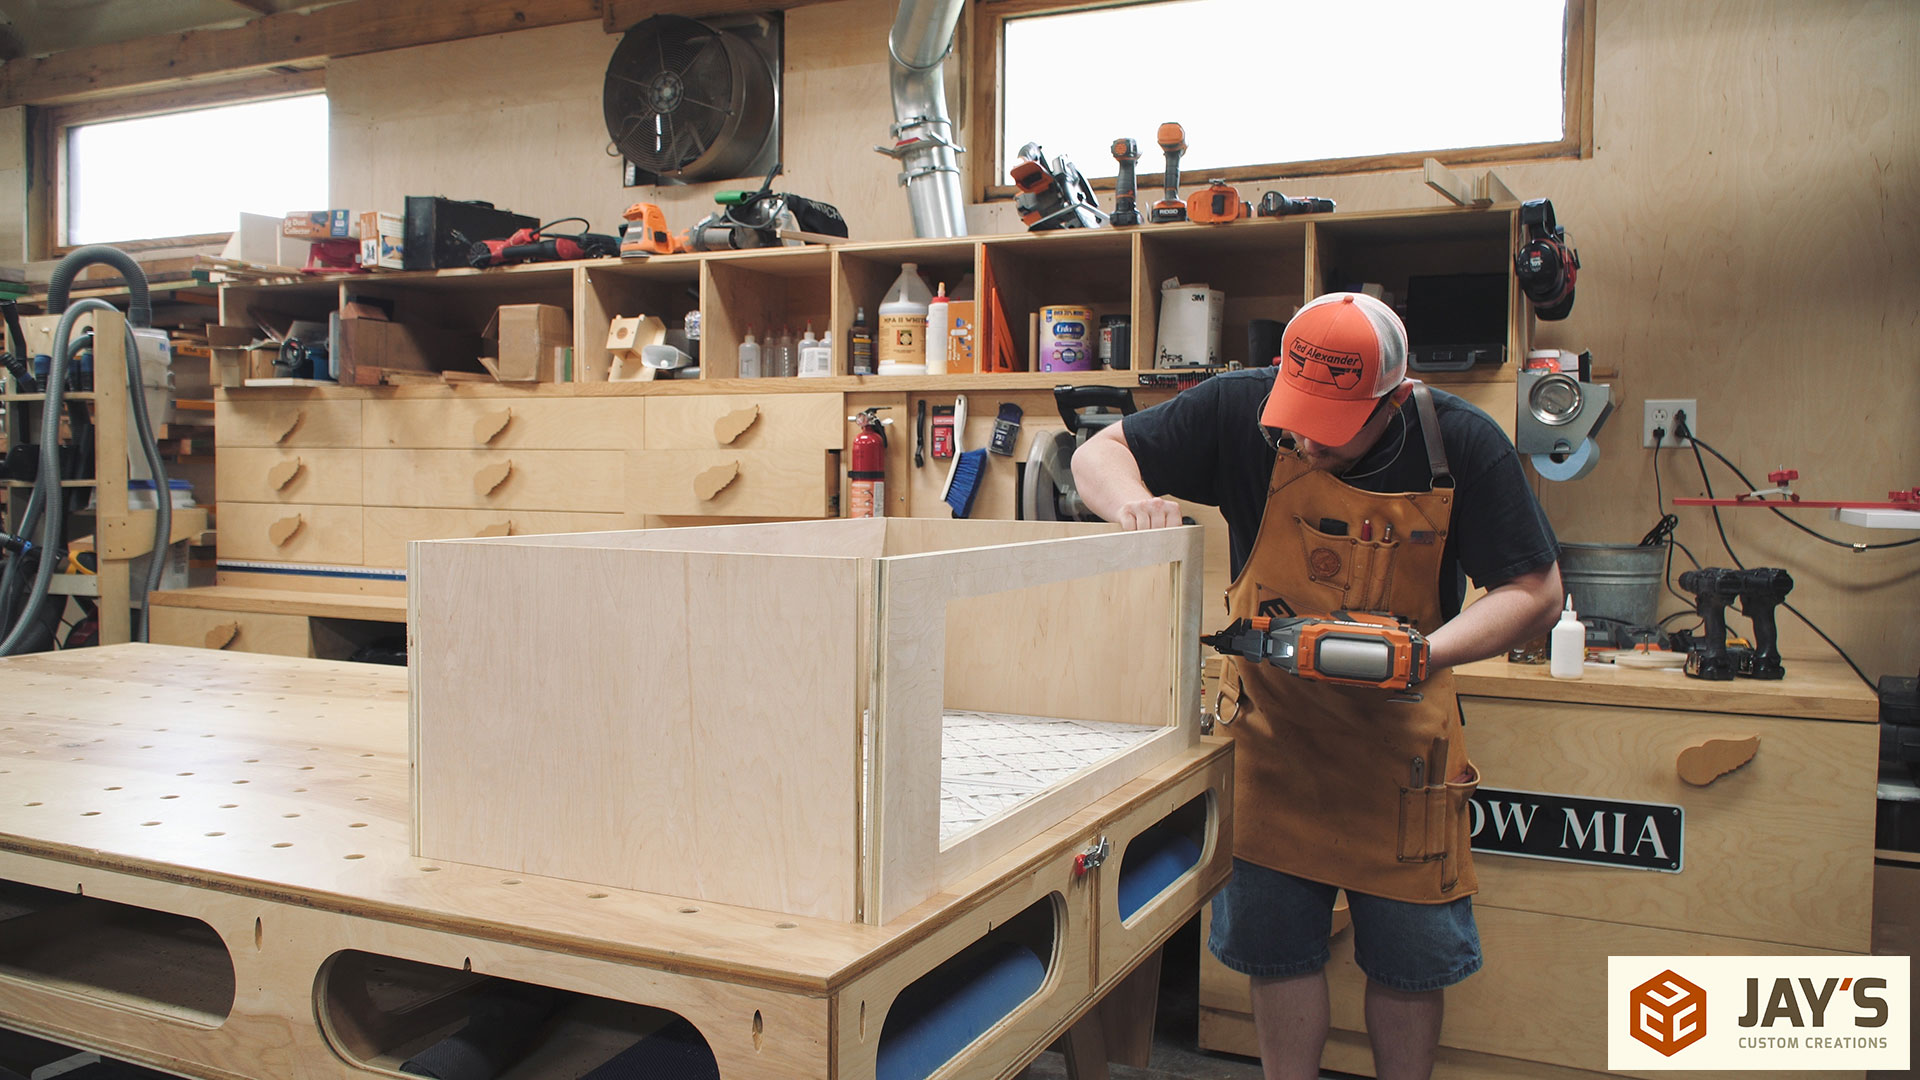
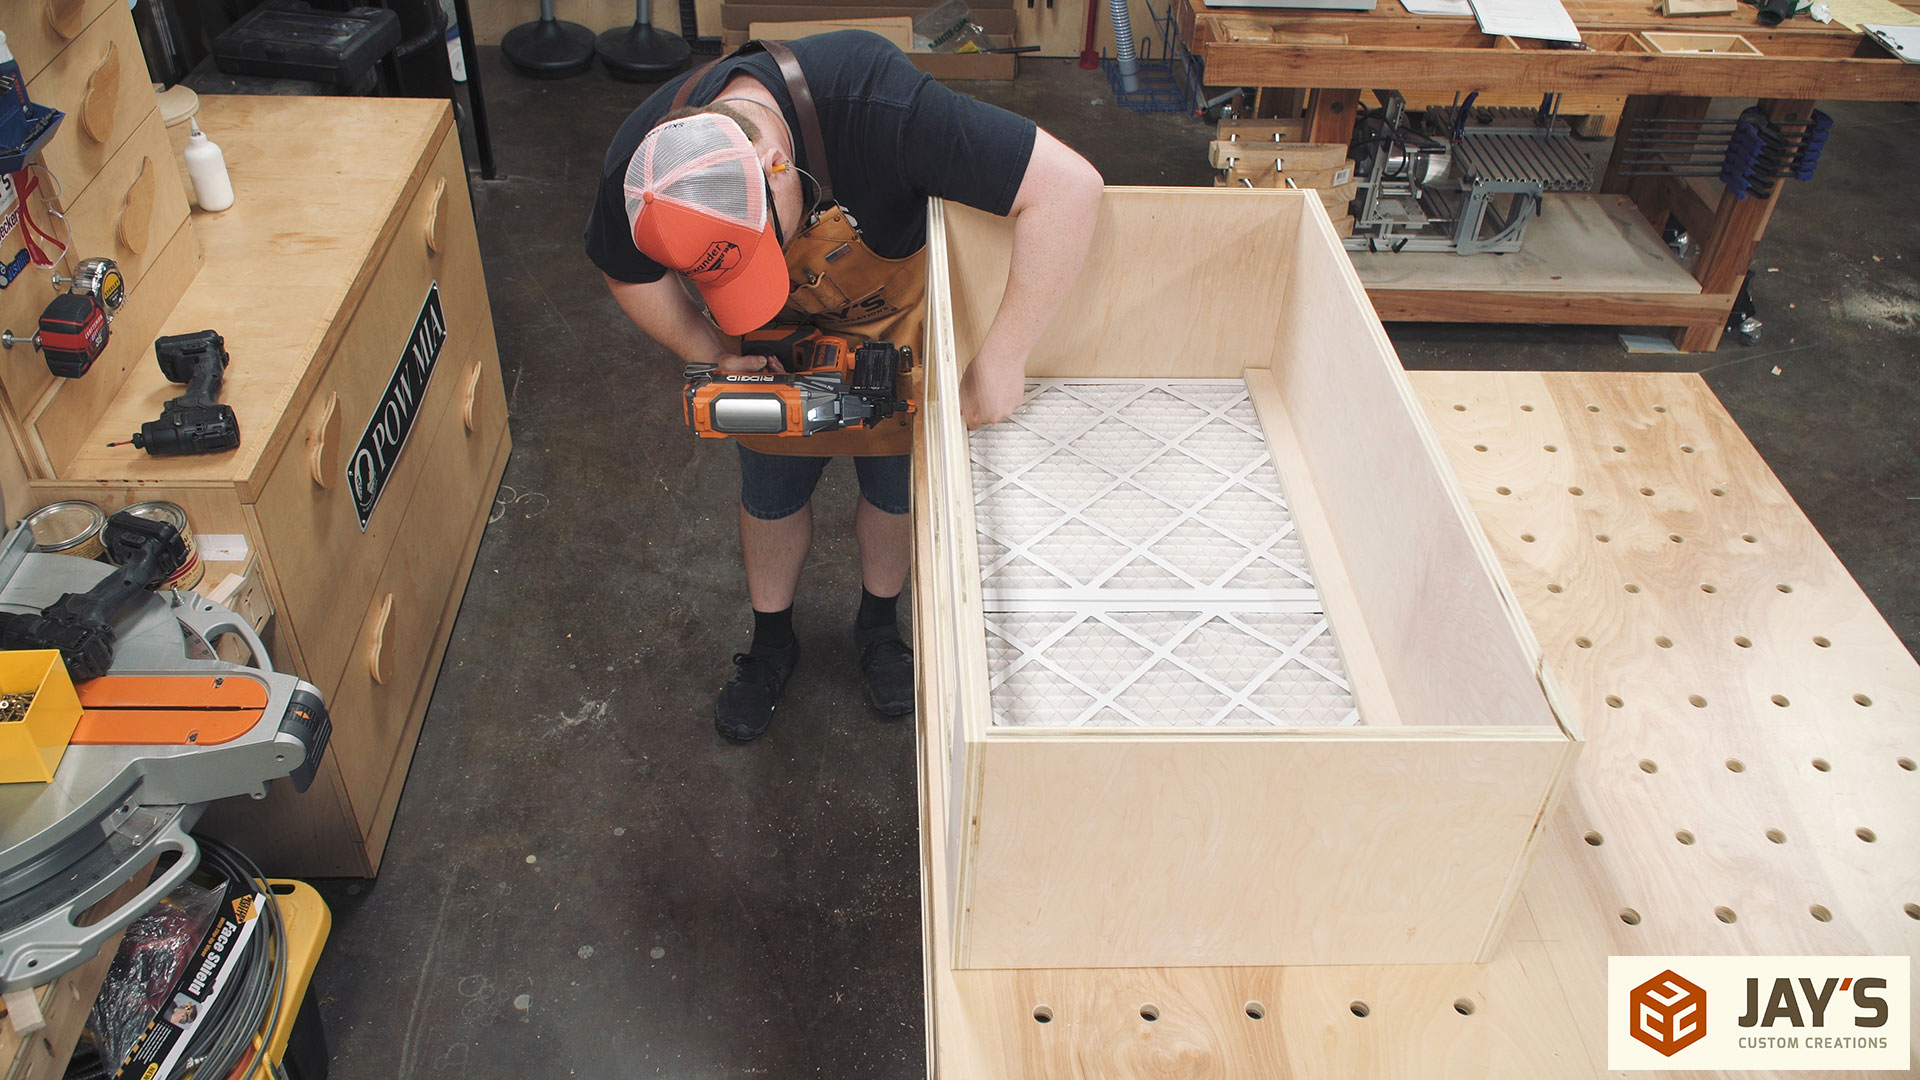
The bottom piece of plywood was 1/4” thick to reduce weight so I added a scrap strip of plywood to the back to make it a little more rigid along it’s length. The french cleat strip was also added to the inside back top of the box.

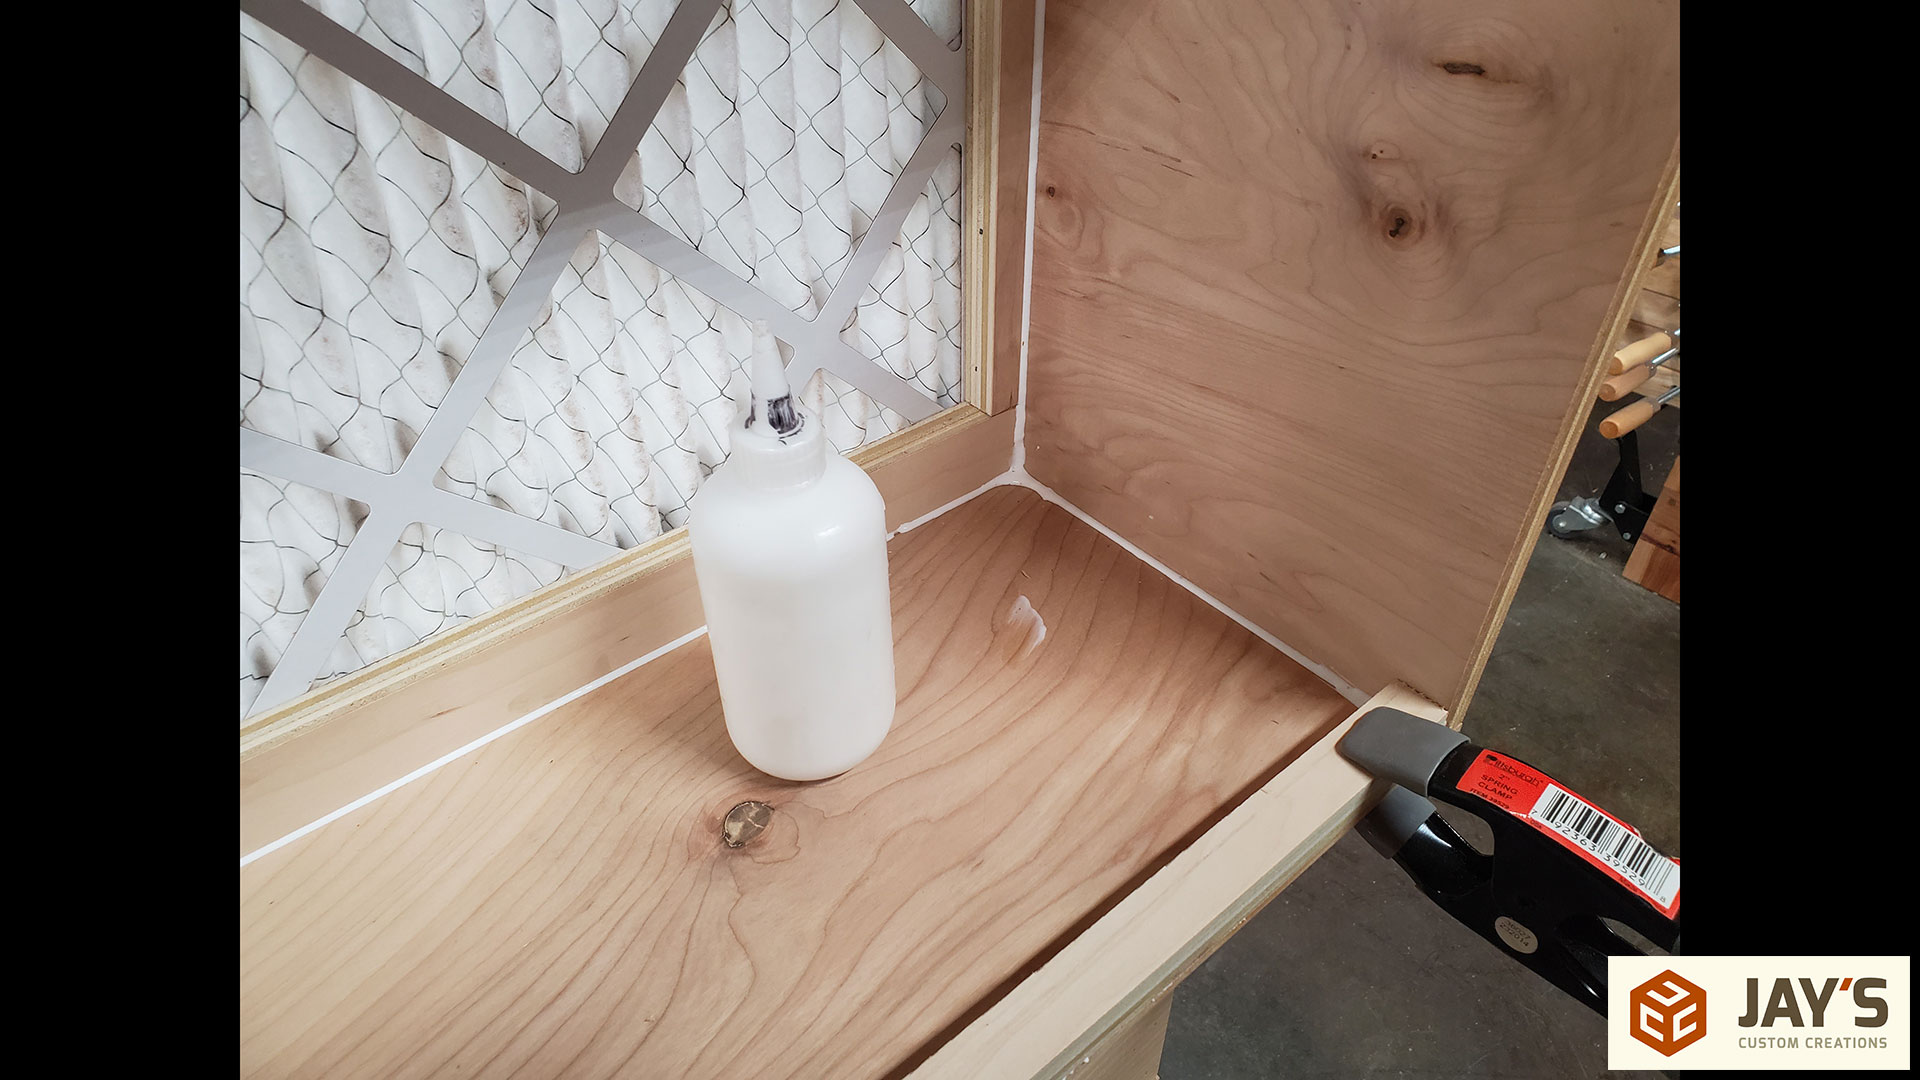
I sealed all of the interior seams with a bead of glue.
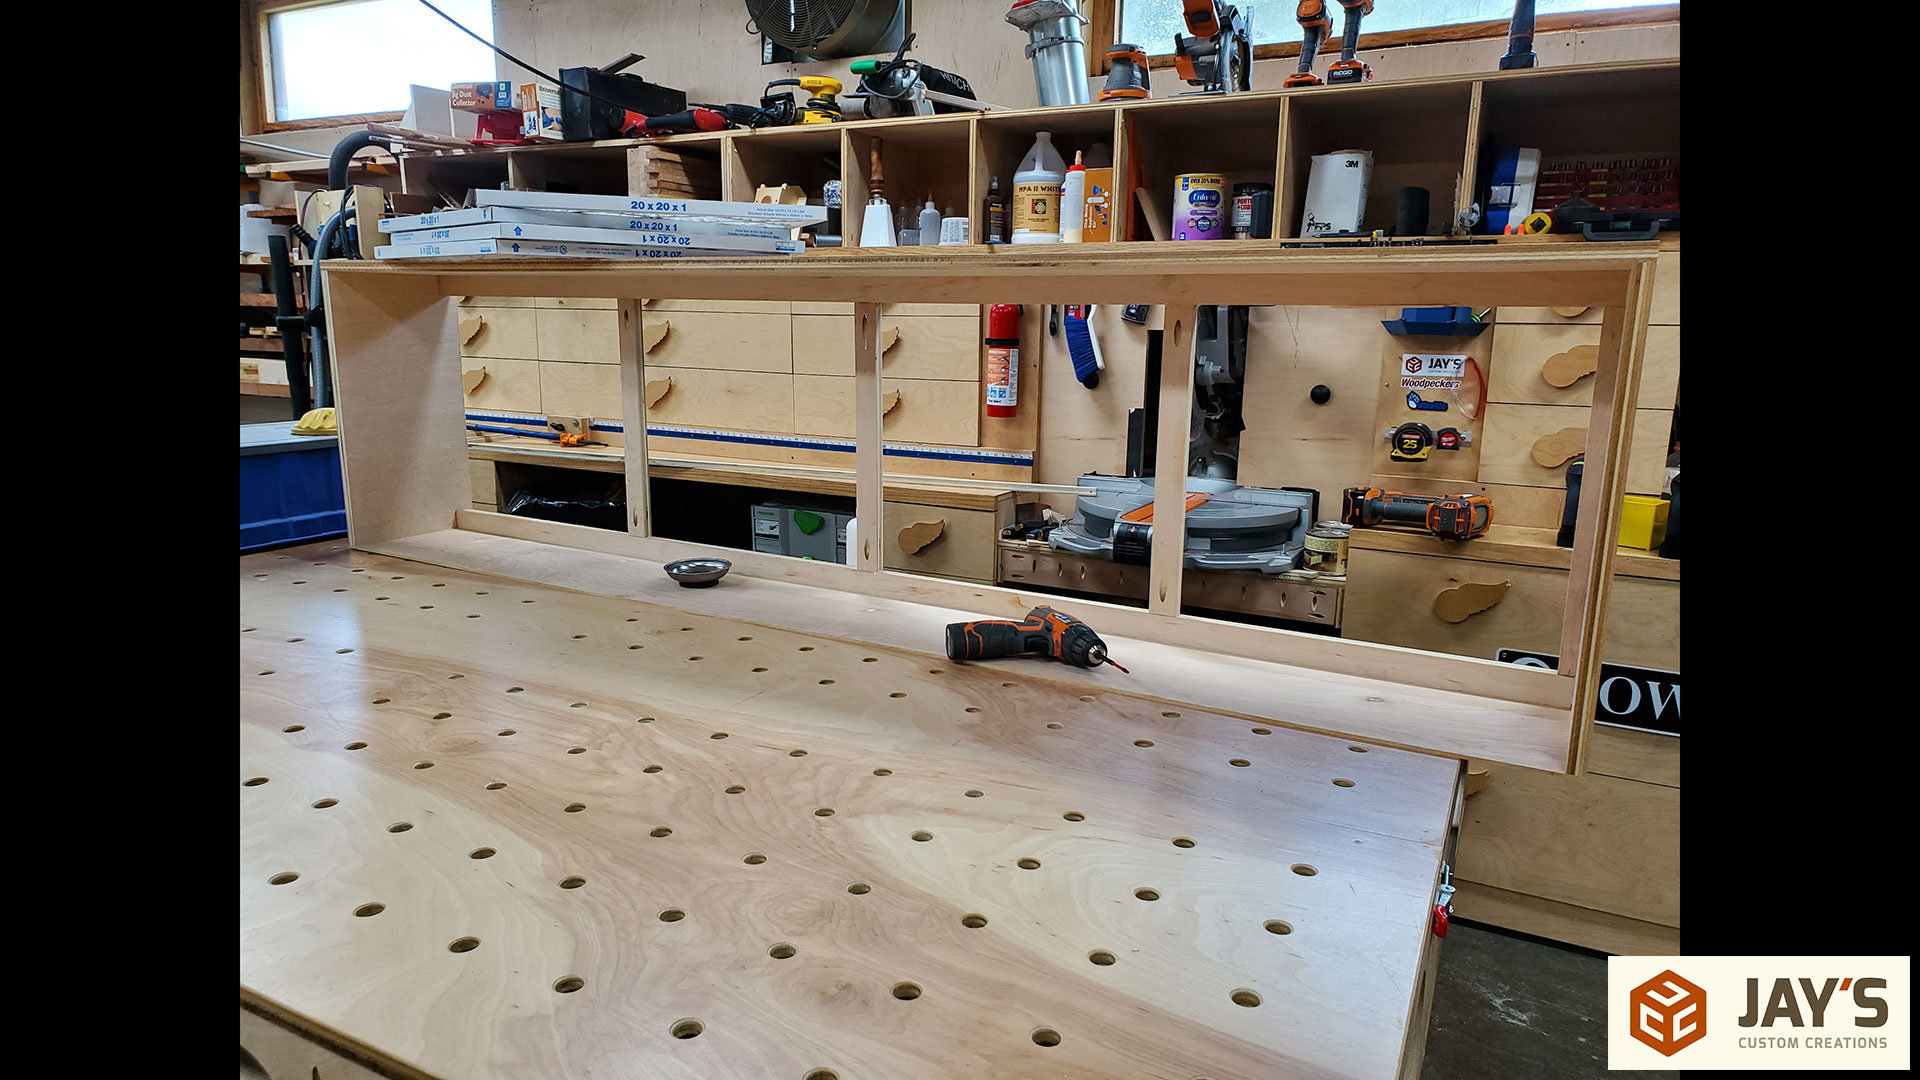
Then the matching french cleat can be added to the wall. This cleat is sized to allow a little wiggle room to drop the box on top of it.
Then the box is set in place for a test fit.

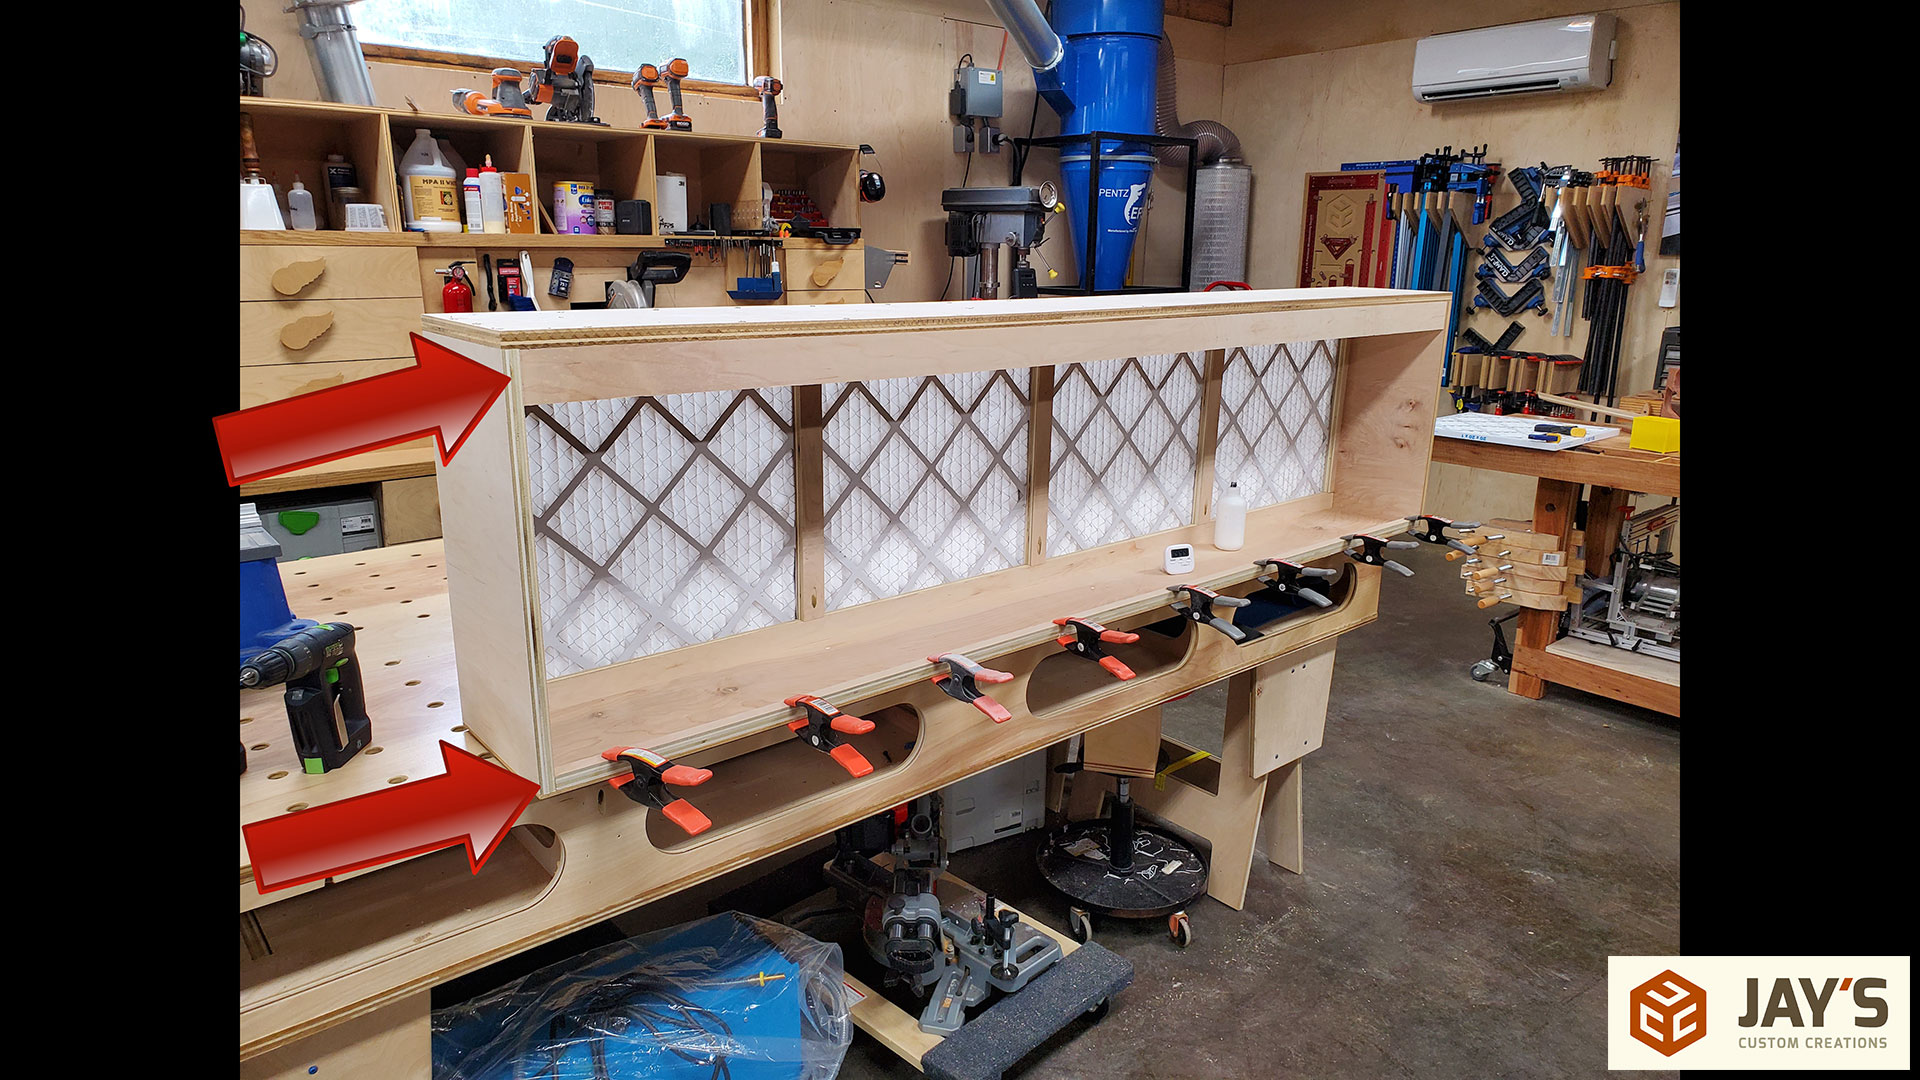
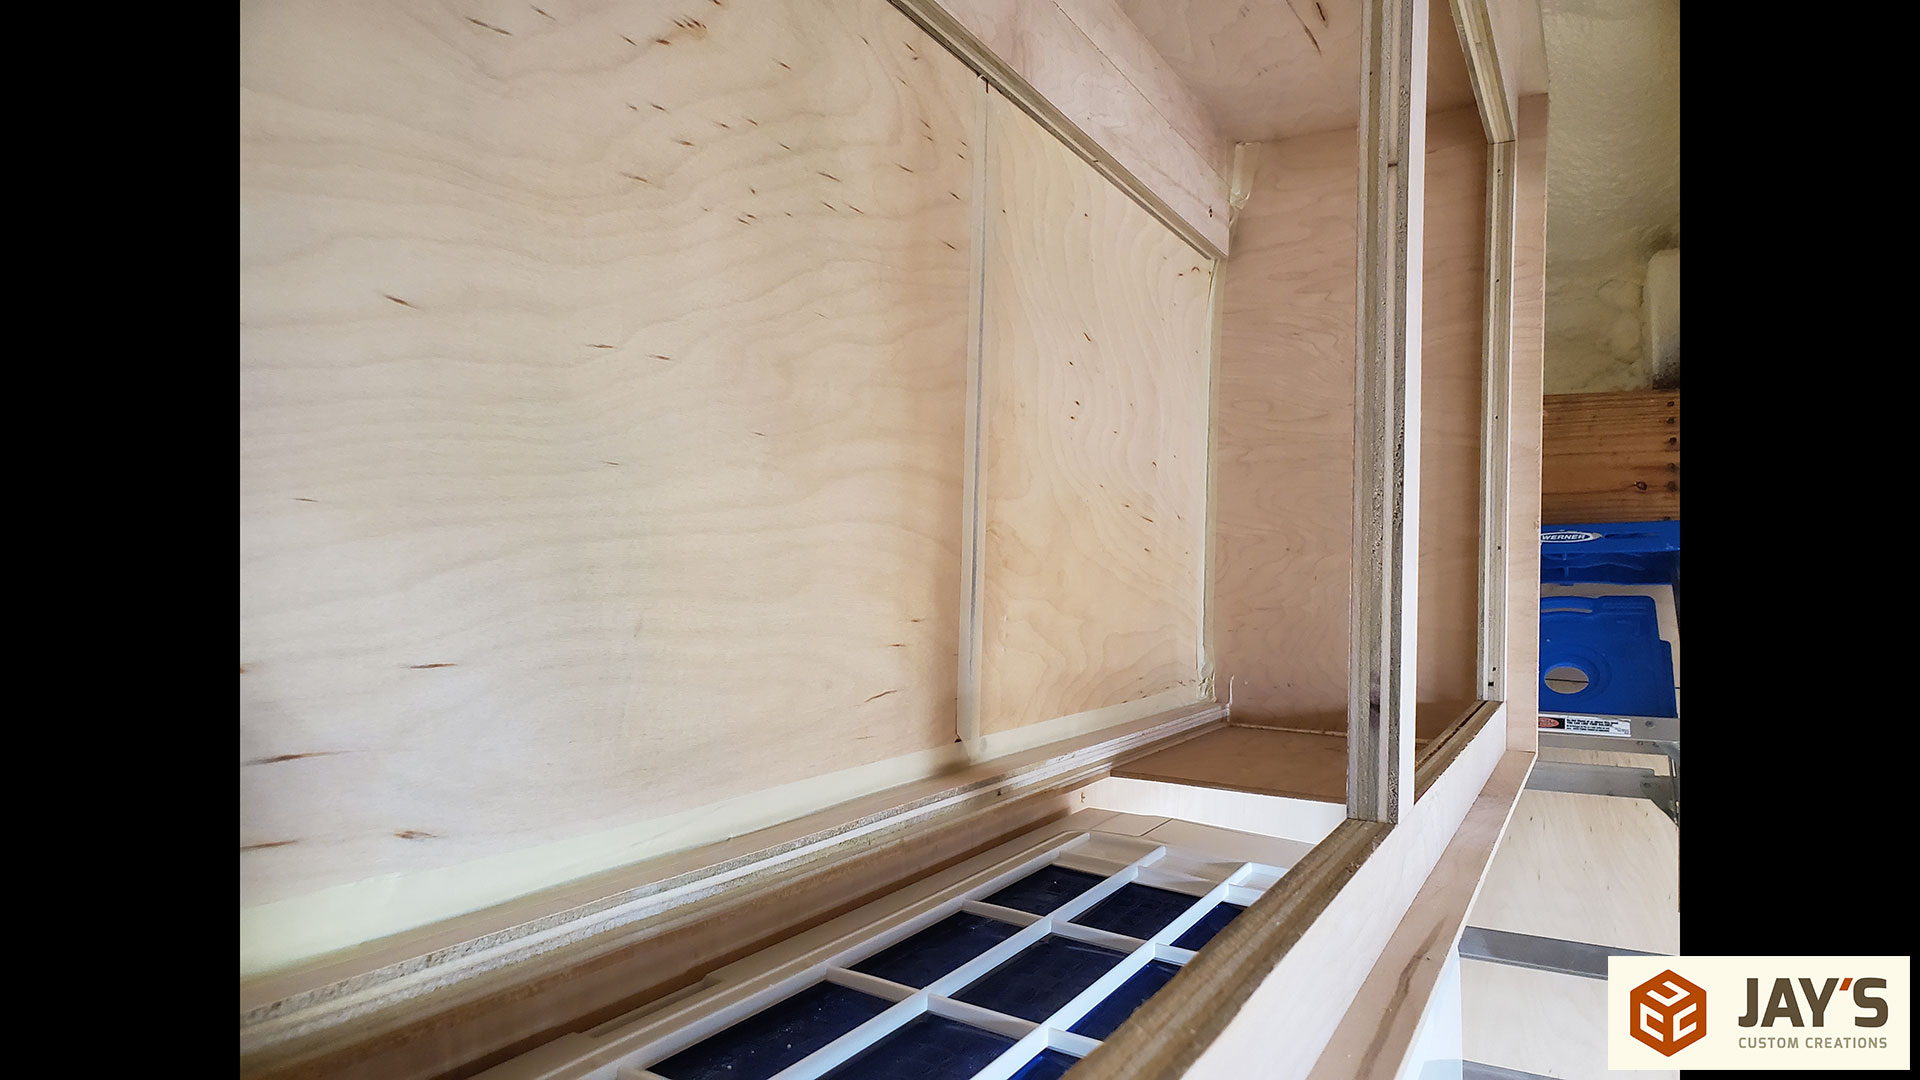
To connect the box and the mini split I used a couple piece of plywood to make a three sided sleeve to fit snug against both the box and the mini split.
And here’s the completed test fit. This confirms that the box fits the space, I don’t see any obstructions with the design, and that all of the remaining seams are small enough to seal with tape.
After tracing the shape of the mini split to the bottom of the box the box is removed from the wall and the opening is cut. This opening is larger than the open intake on the top of the mini split.
The wall mounted french cleat is not as long as the box mounted french cleat so that it is easier to hang. For consistency sake I made a note on the wall mounted french cleat to push the box to the right so it is in the same location every time.

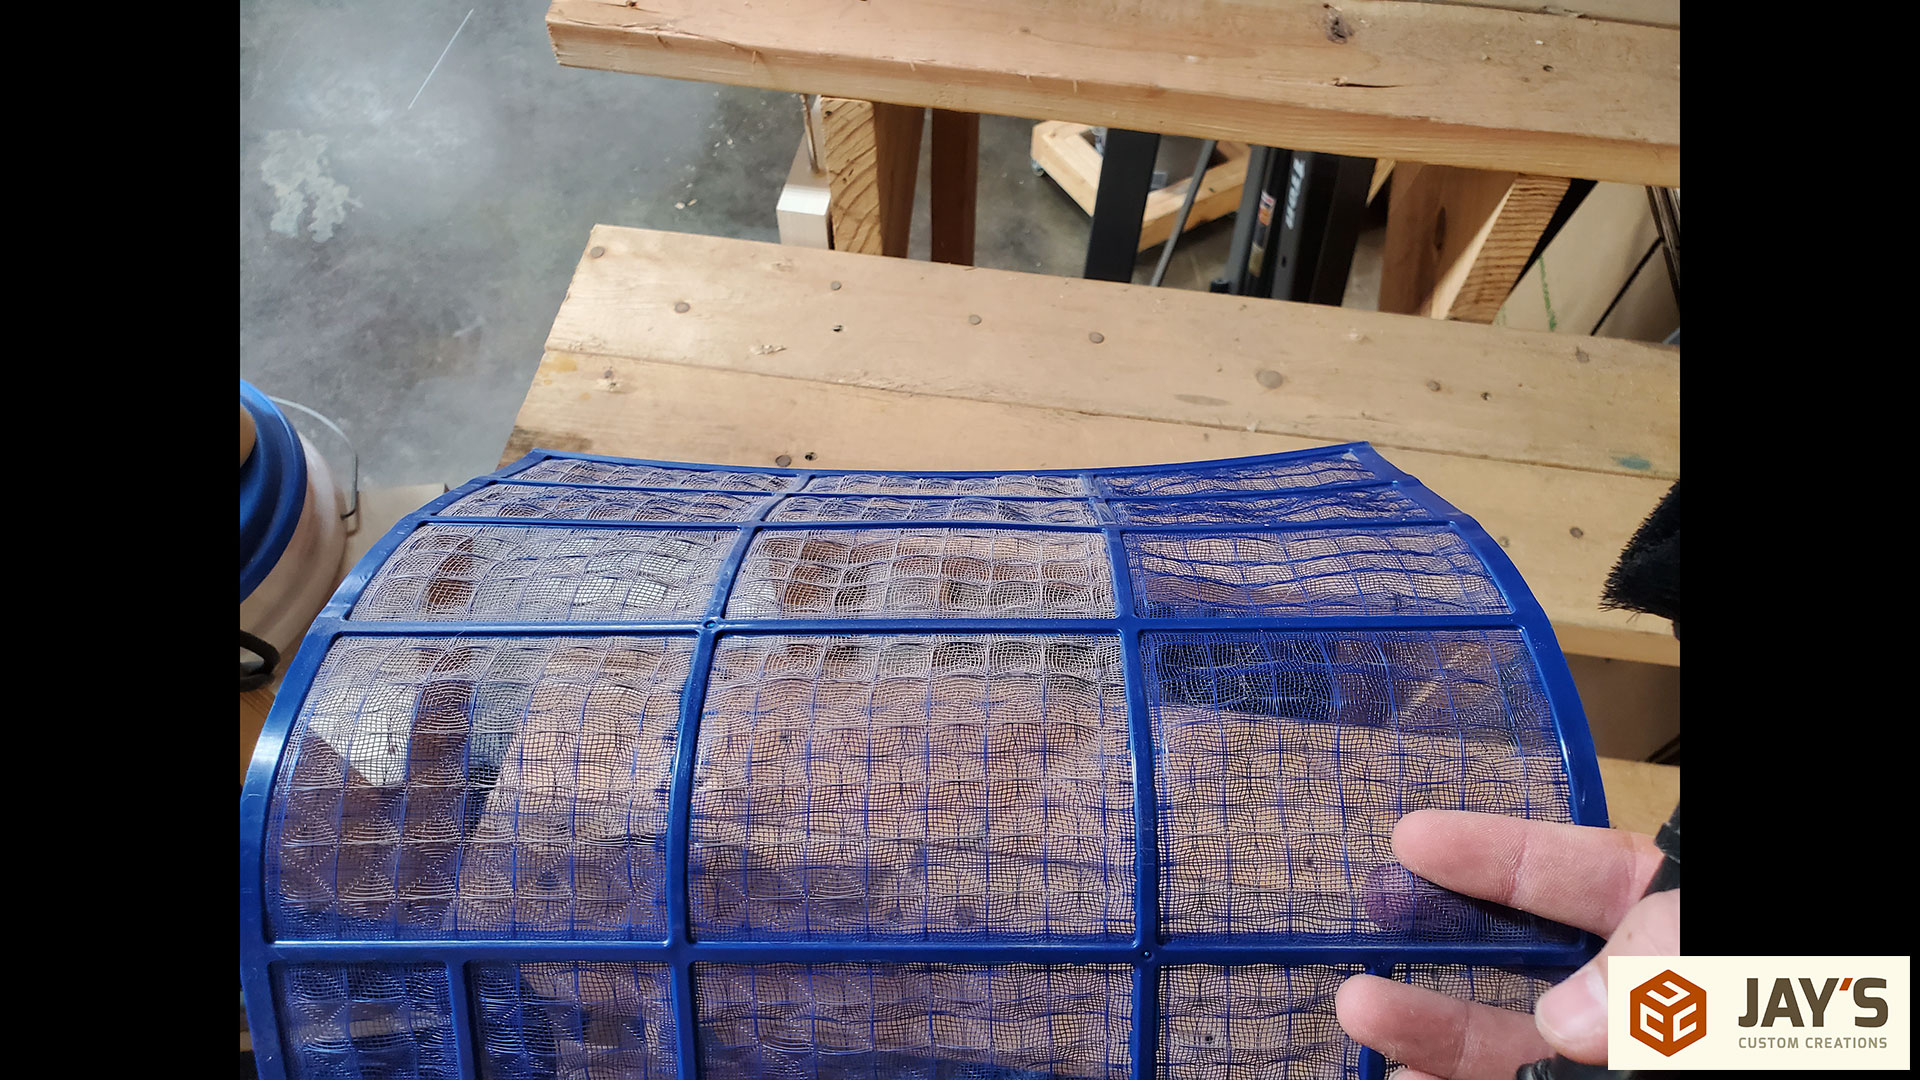
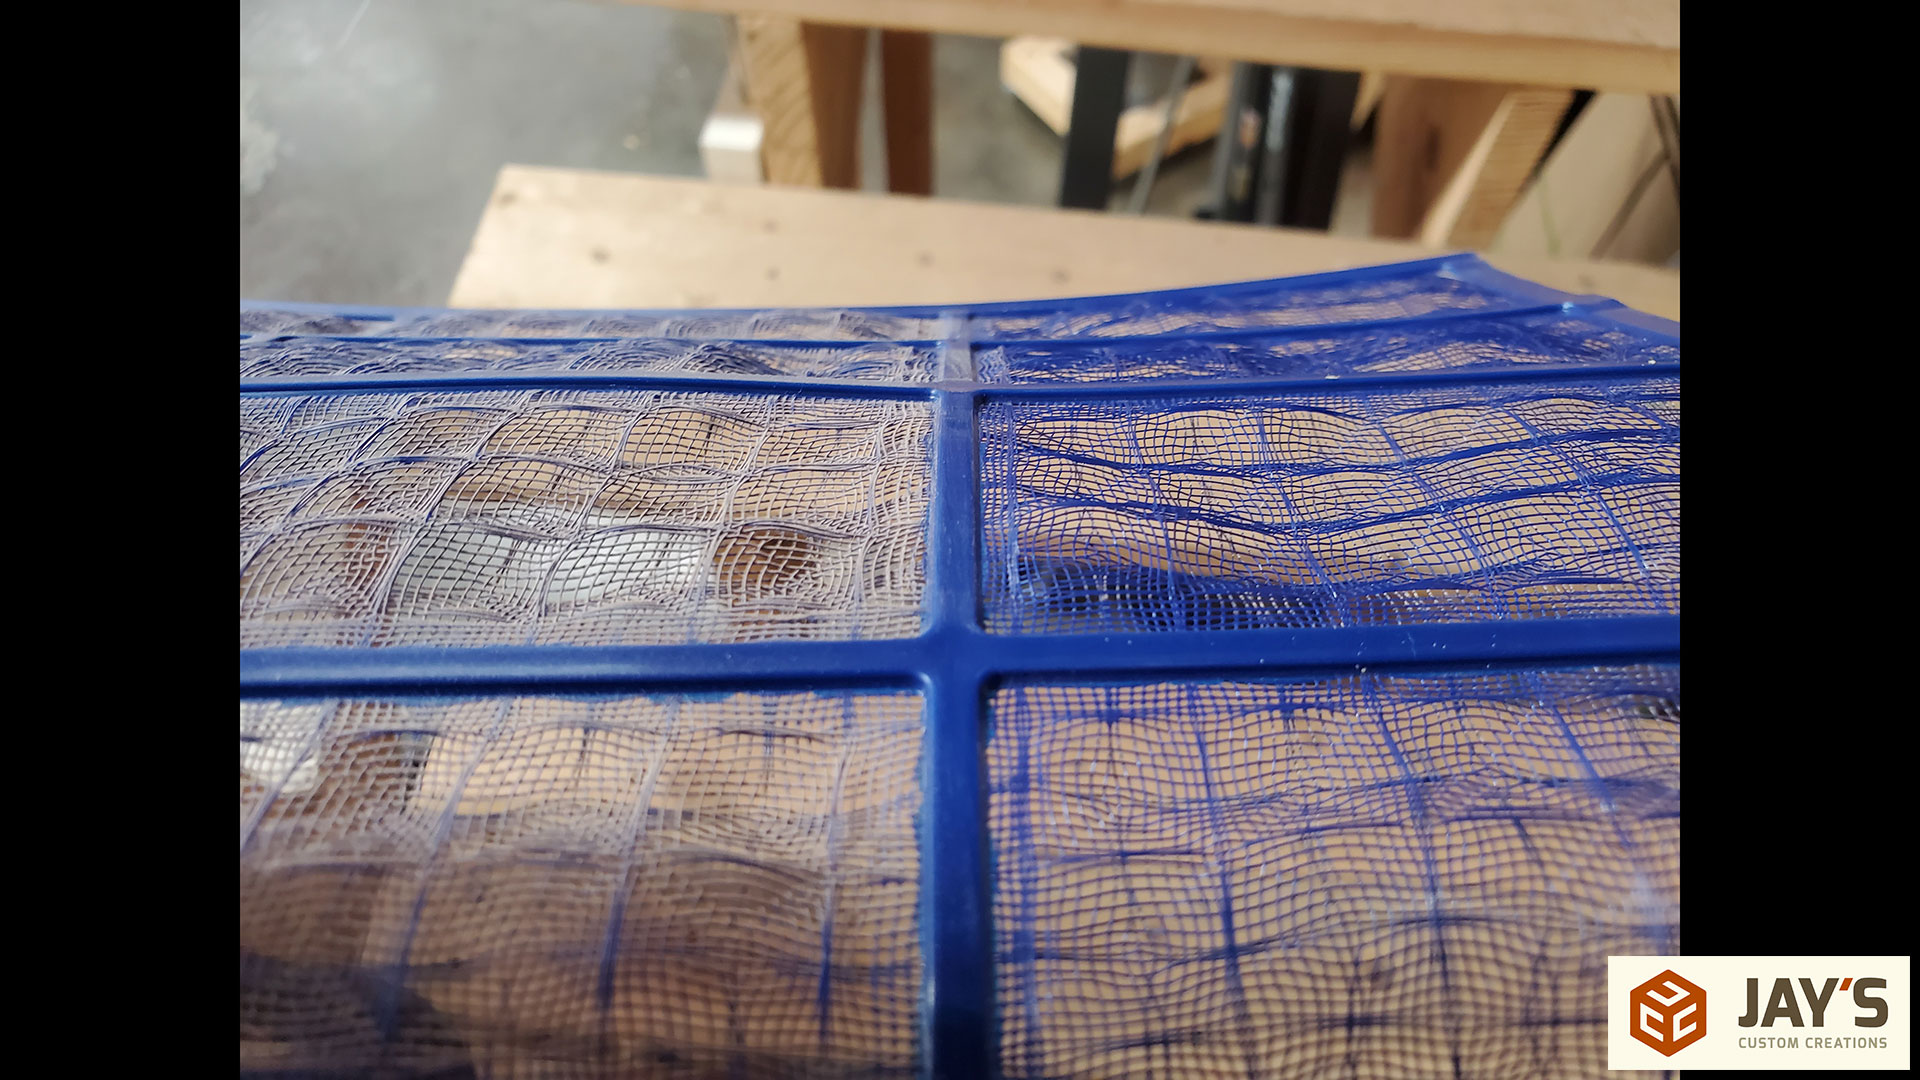
This is the washable filter that comes with the mini split. I vacuumed the right side so you can see how much dust was caught in the filter. This is after running for two months in the shop. This is another indication that my air cleaner cart isn’t as efficient at keeping up with the dust in this larger space compared to the smaller space of my last shop.
All of the seams where the box meets the wall are sealed with a strip of tape.
All of the exterior seams on the mini split are sealed with electrical tape being sure to not stretch the tape. If you stretch electrical tape it will greatly reduce it’s hold to the surface because it’s going to want to retract back. If you don’t stretch it during install the tape will do a great job of sealing and it’s quick and easy to replace for maintenance to the unit.

Here’s the completed right side. Yes, the tape and three sided sleeve needs to be removed to access the internal filters. And, yes, the filter box above needs to be removed if the entire plastic cover needs to be removed from the mini split. Neither of those tasks are difficult to do. Basically, yes, I made it 5-10 minutes less convenient to perform maintenance to the mini split. But in my opinion the pros far outweigh the cons in this case. This modification should keep the inside of the unit cleaner and therefore reduce the amount of maintenance required on an already low maintenance unit. And it also takes my shop from one air cleaning device to four once the loft box is completed.
The right side was the prototype and after confirming that it was a decent plan I repeated everything with the left side.

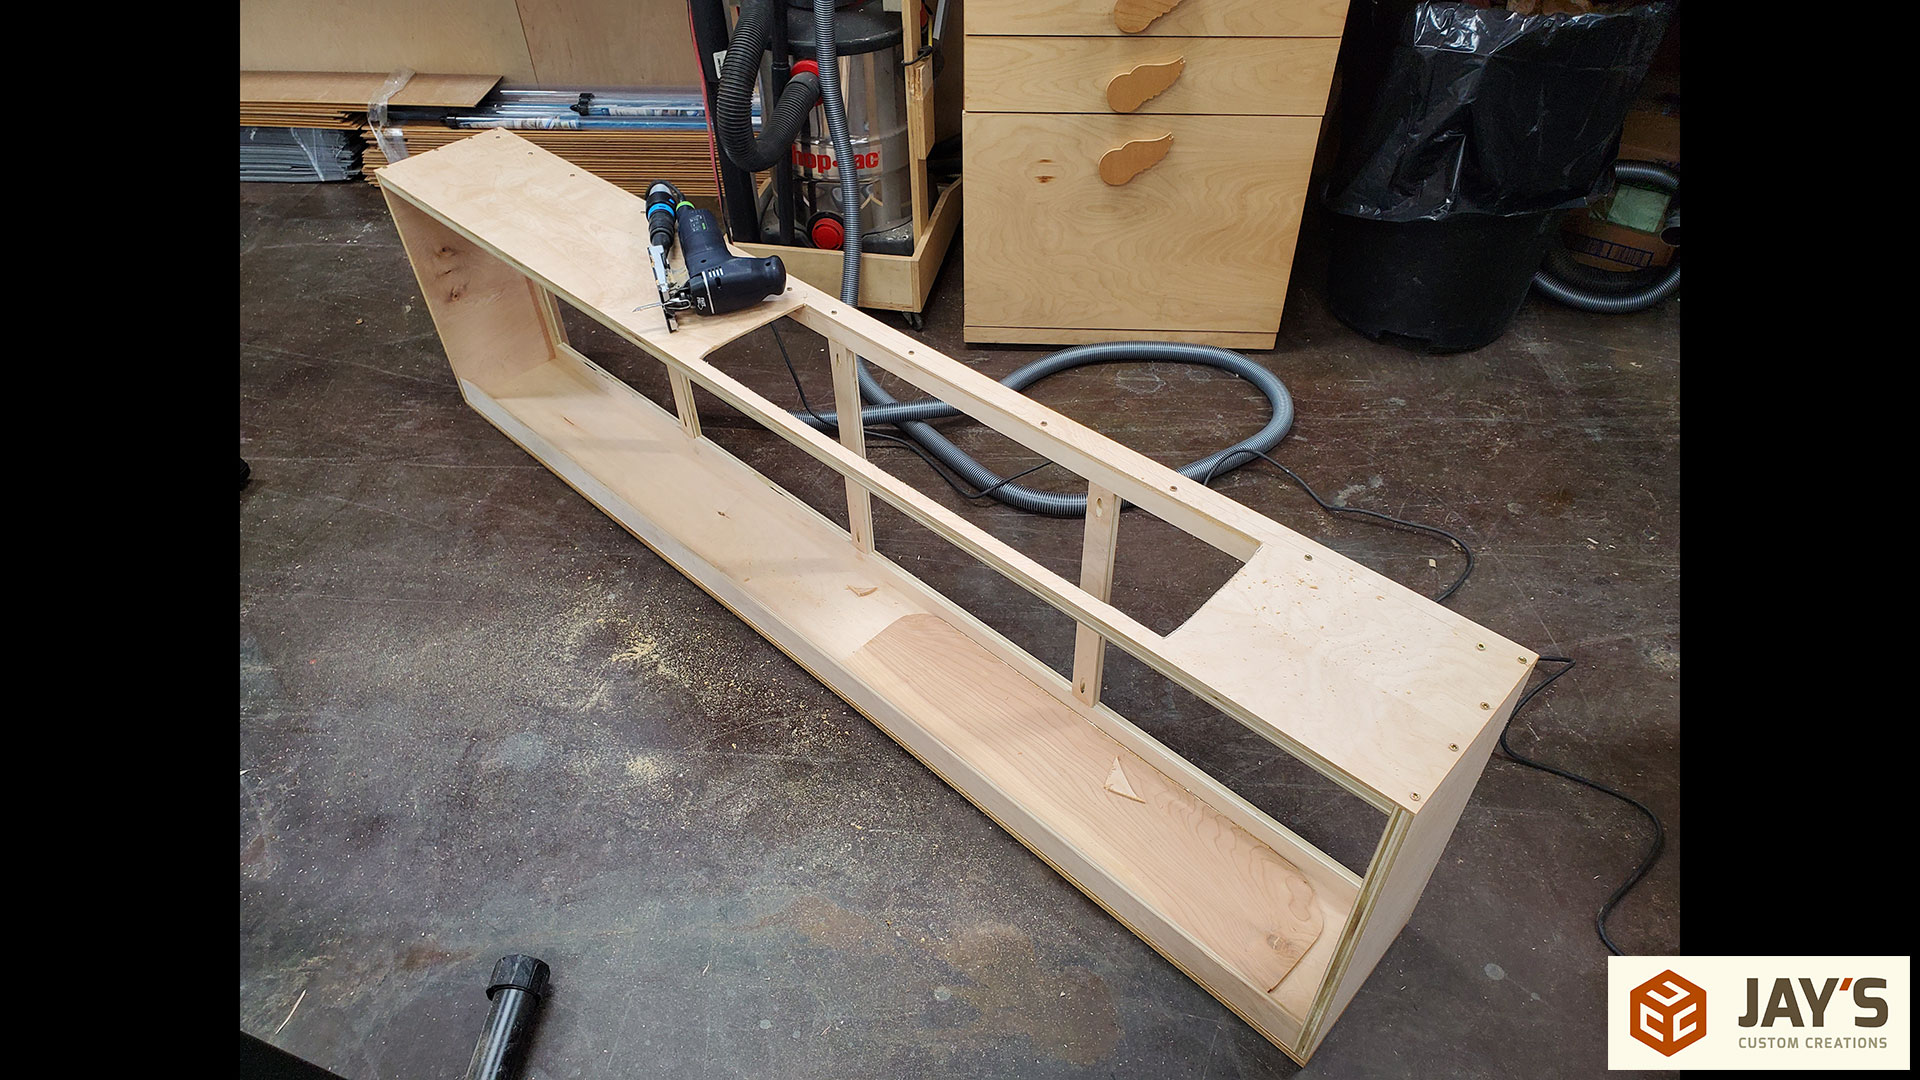
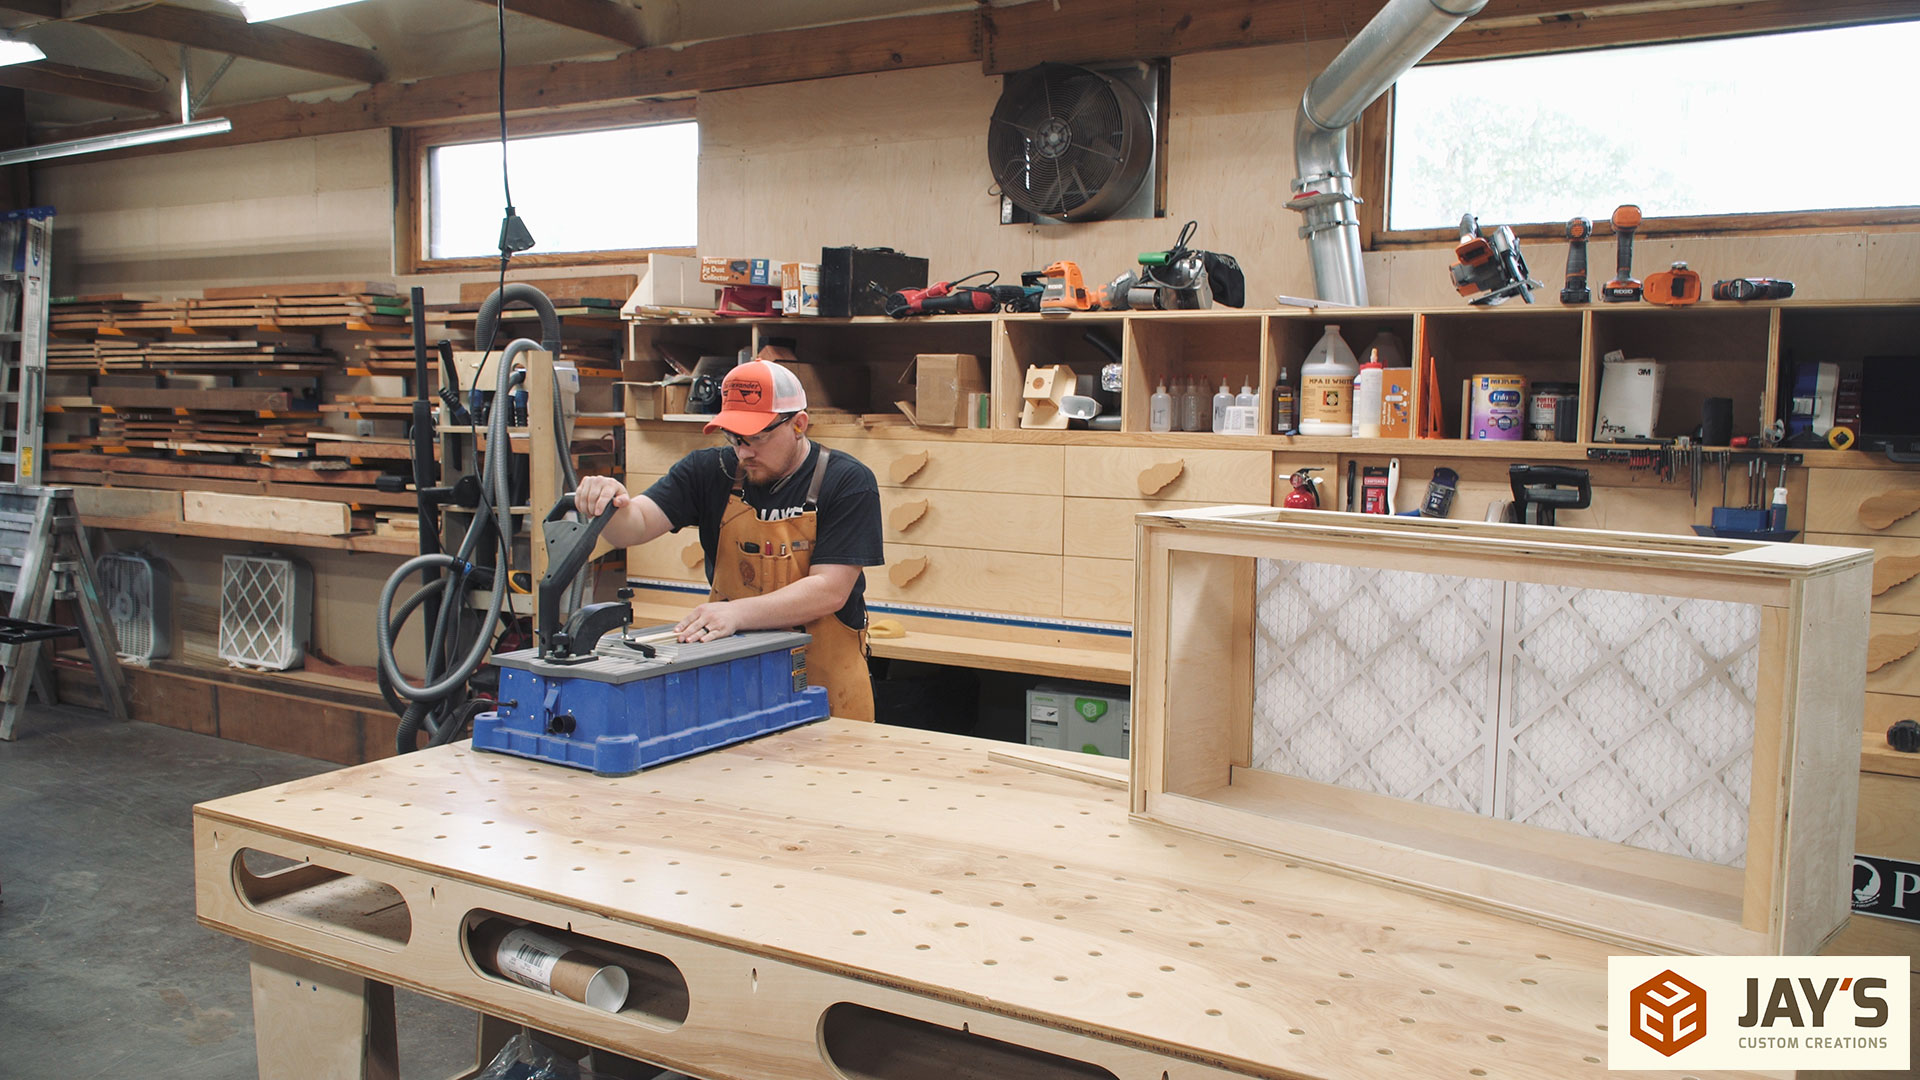
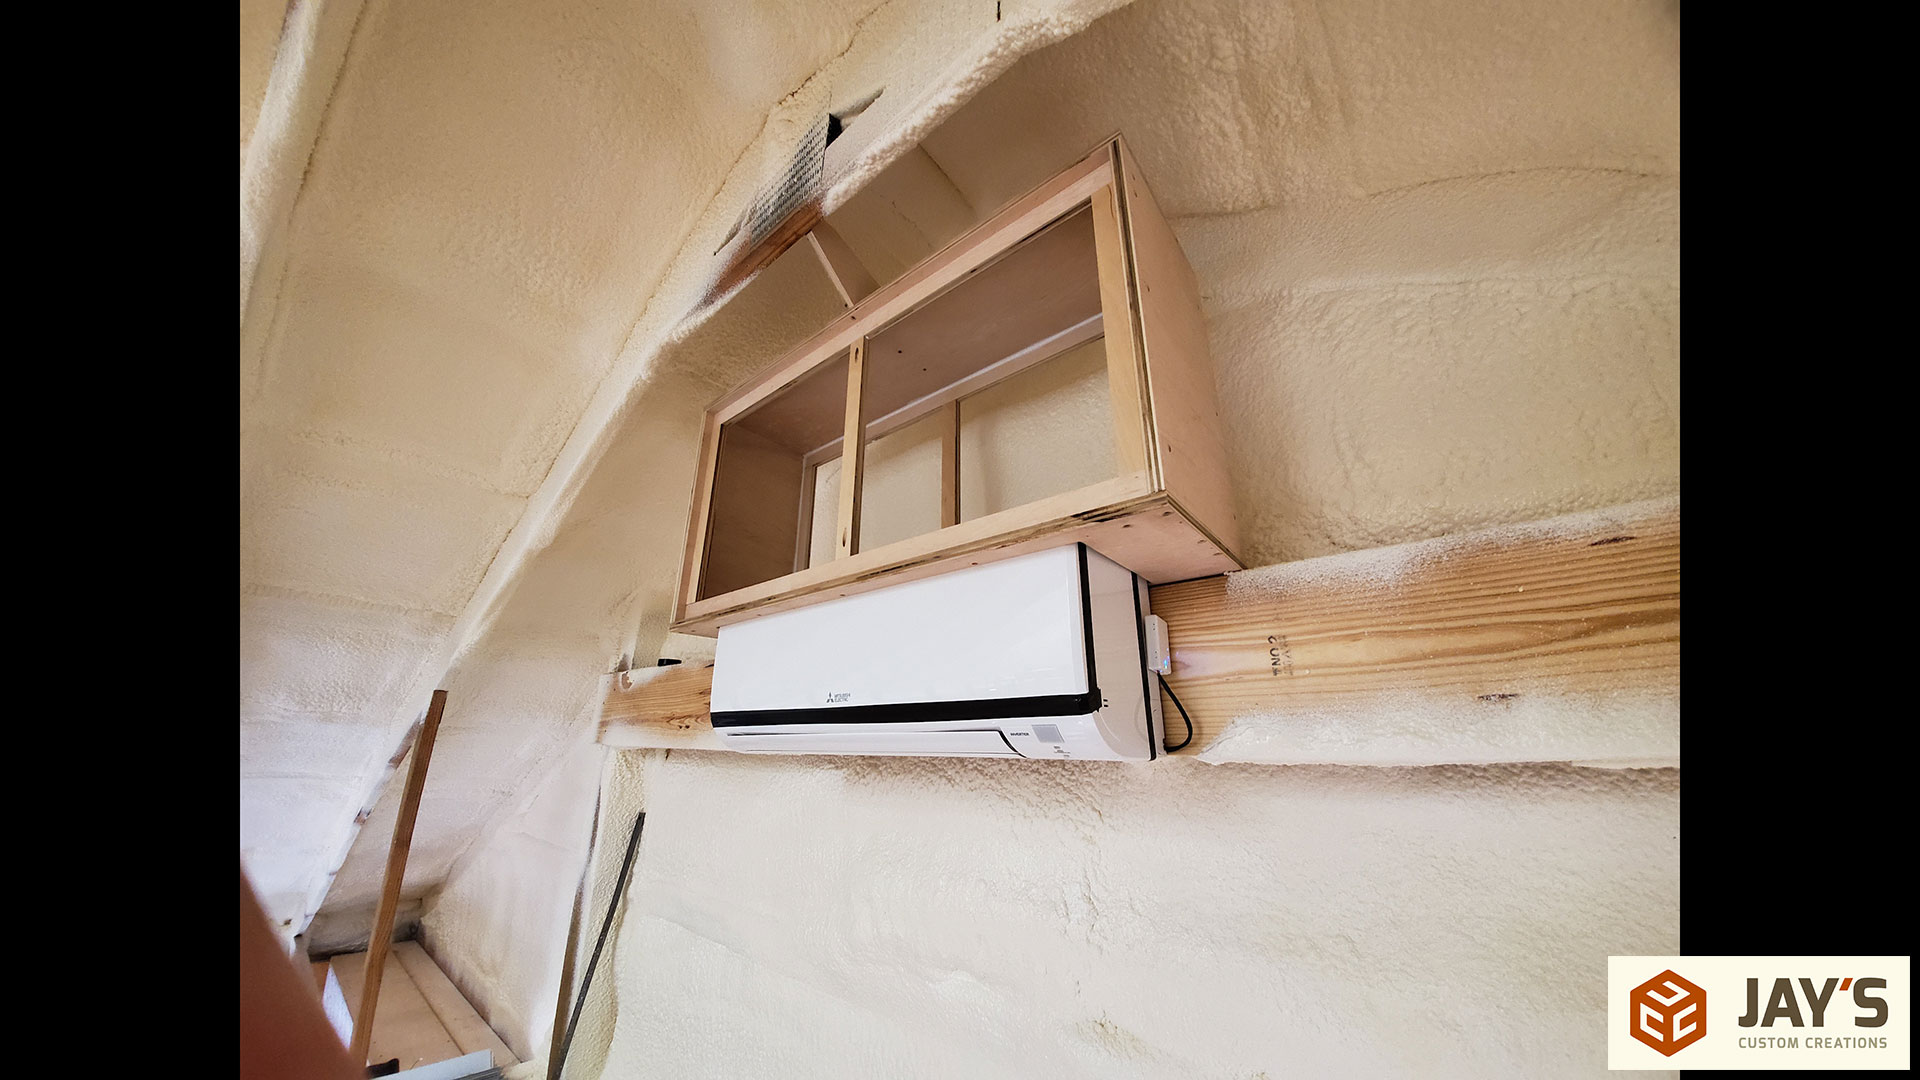
The loft filter box needs to be narrow due to less space being available. Just like the lower two filter box the process starts with the filters on the table and measuring for a box to fit around it.


Then some 3/4” plywood is cut to size at the table saw.

And then at the miter saw.
I used a marking gauge to transfer the filter thickness to the outside of all of the box sides. This lets me know where the filters stop and where the 1-1/2” wide backing strips start when it comes time to install them.


The loft mini split will be just a little bit inside the filter box so I decided to cut the rectangle opening before assembly. Cutting the opening on the CNC probably took the same amount of time compared to drilling holes at the corners and cutting the rest with a jigsaw but the benefit is a super clean cut that requires zero cleanup.

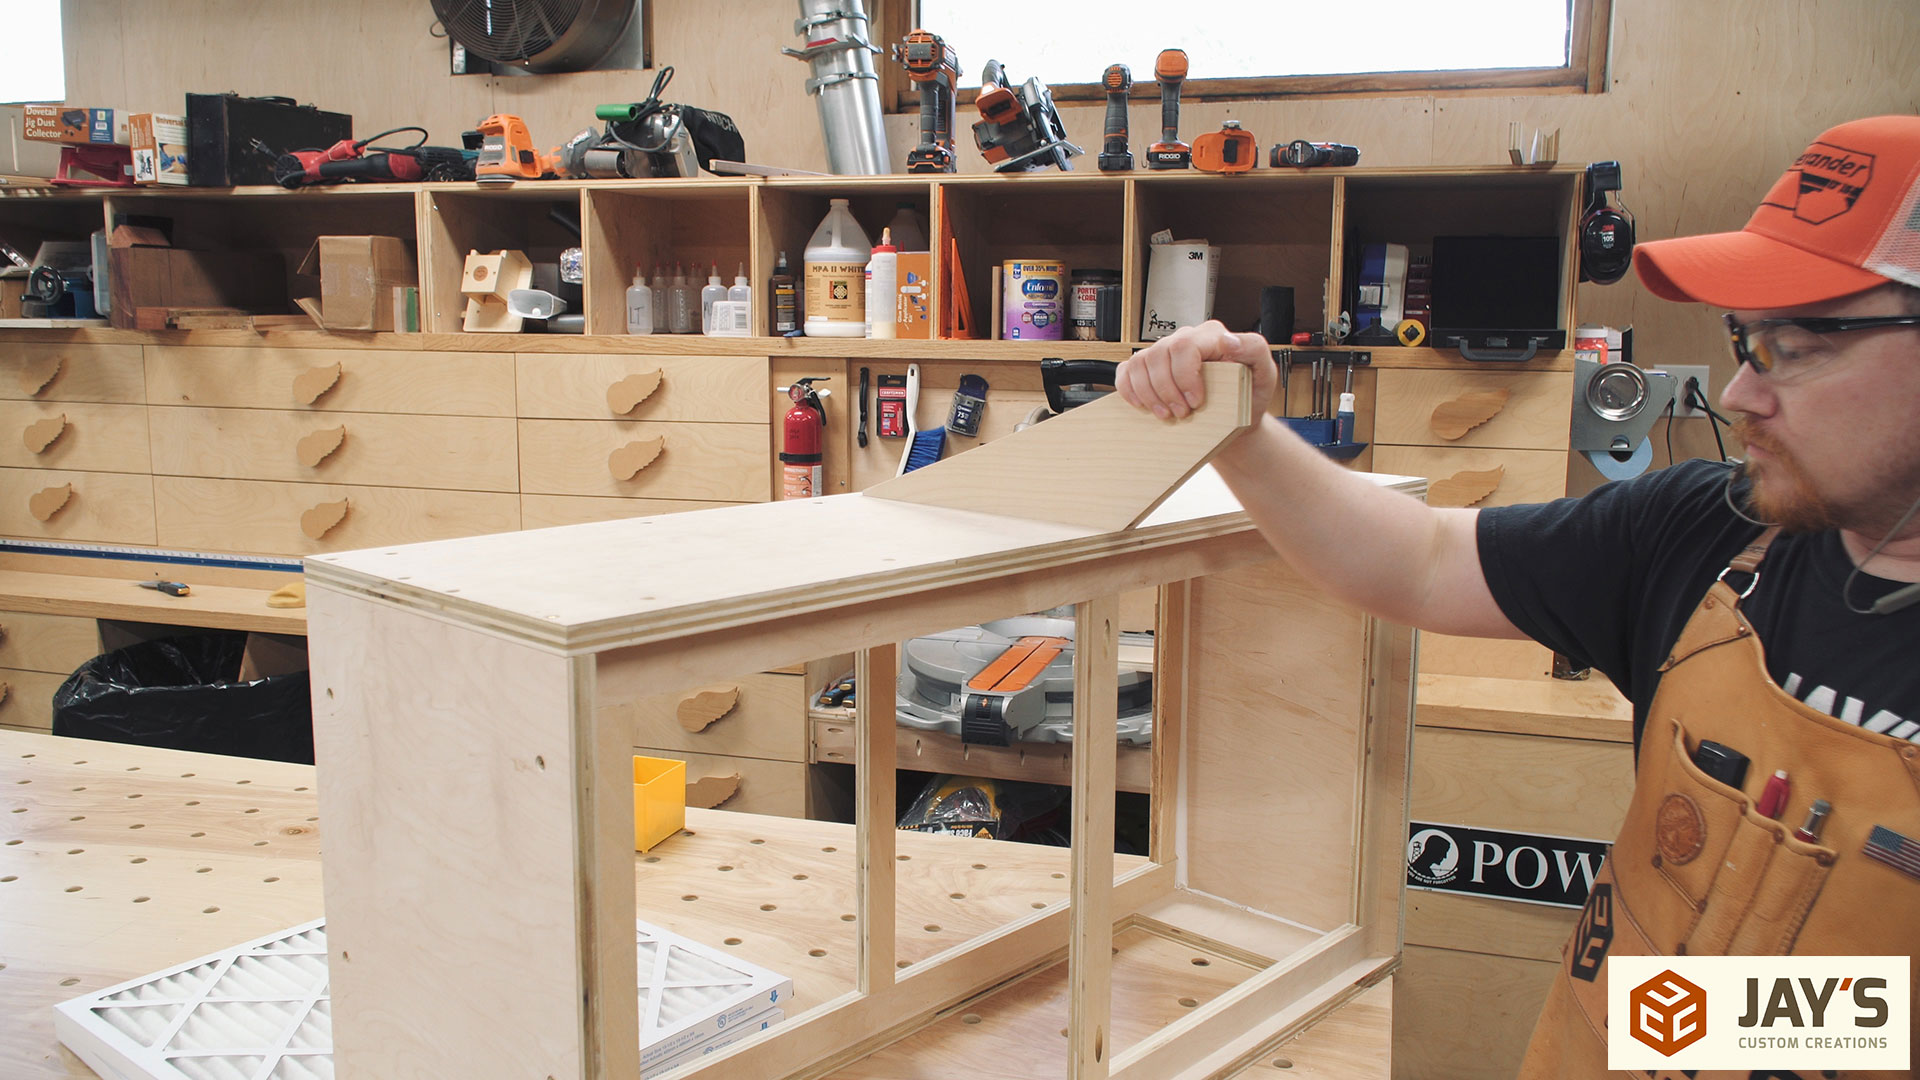
Assembly can begin with wood glue and brad nails at every joint. Followed by pilot holes and screws.

I had some extra 1-1/2” wide strips left over from the first two boxes so I didn’t have to rip any for this box. Just cut them to length at the miter saw.

Just like the rest of the box, these are secured first with brad nails and then with screws. Starting with the long pieces. Then the short pieces. Rinse and repeat for the back side.
A single middle brace is needed right where the filters meet. This is secured with glue and a single pocket hole screw top and bottom.

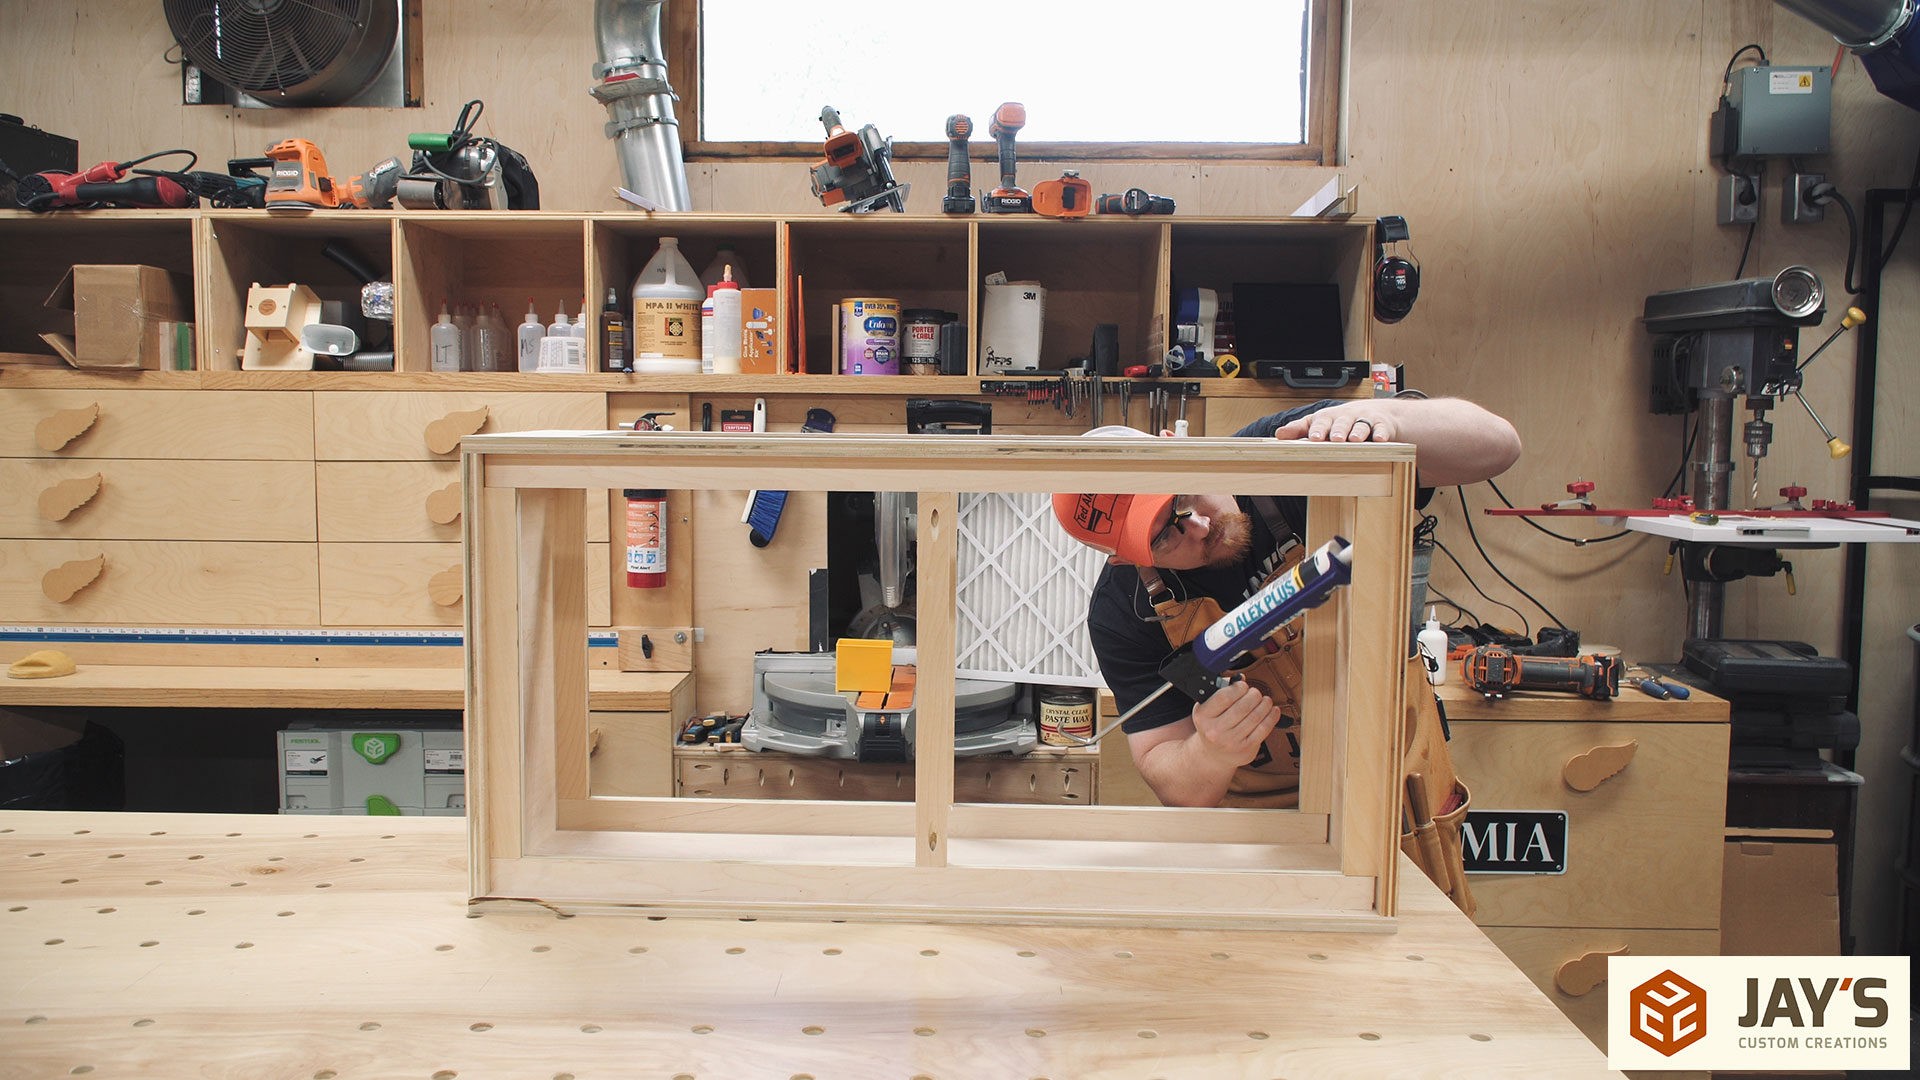
The long filter supports weren’t quite long enough so I decided to fill the gaps with caulk. And while I was at it I went ahead and hit the rest of the internal seams that weren’t glued.
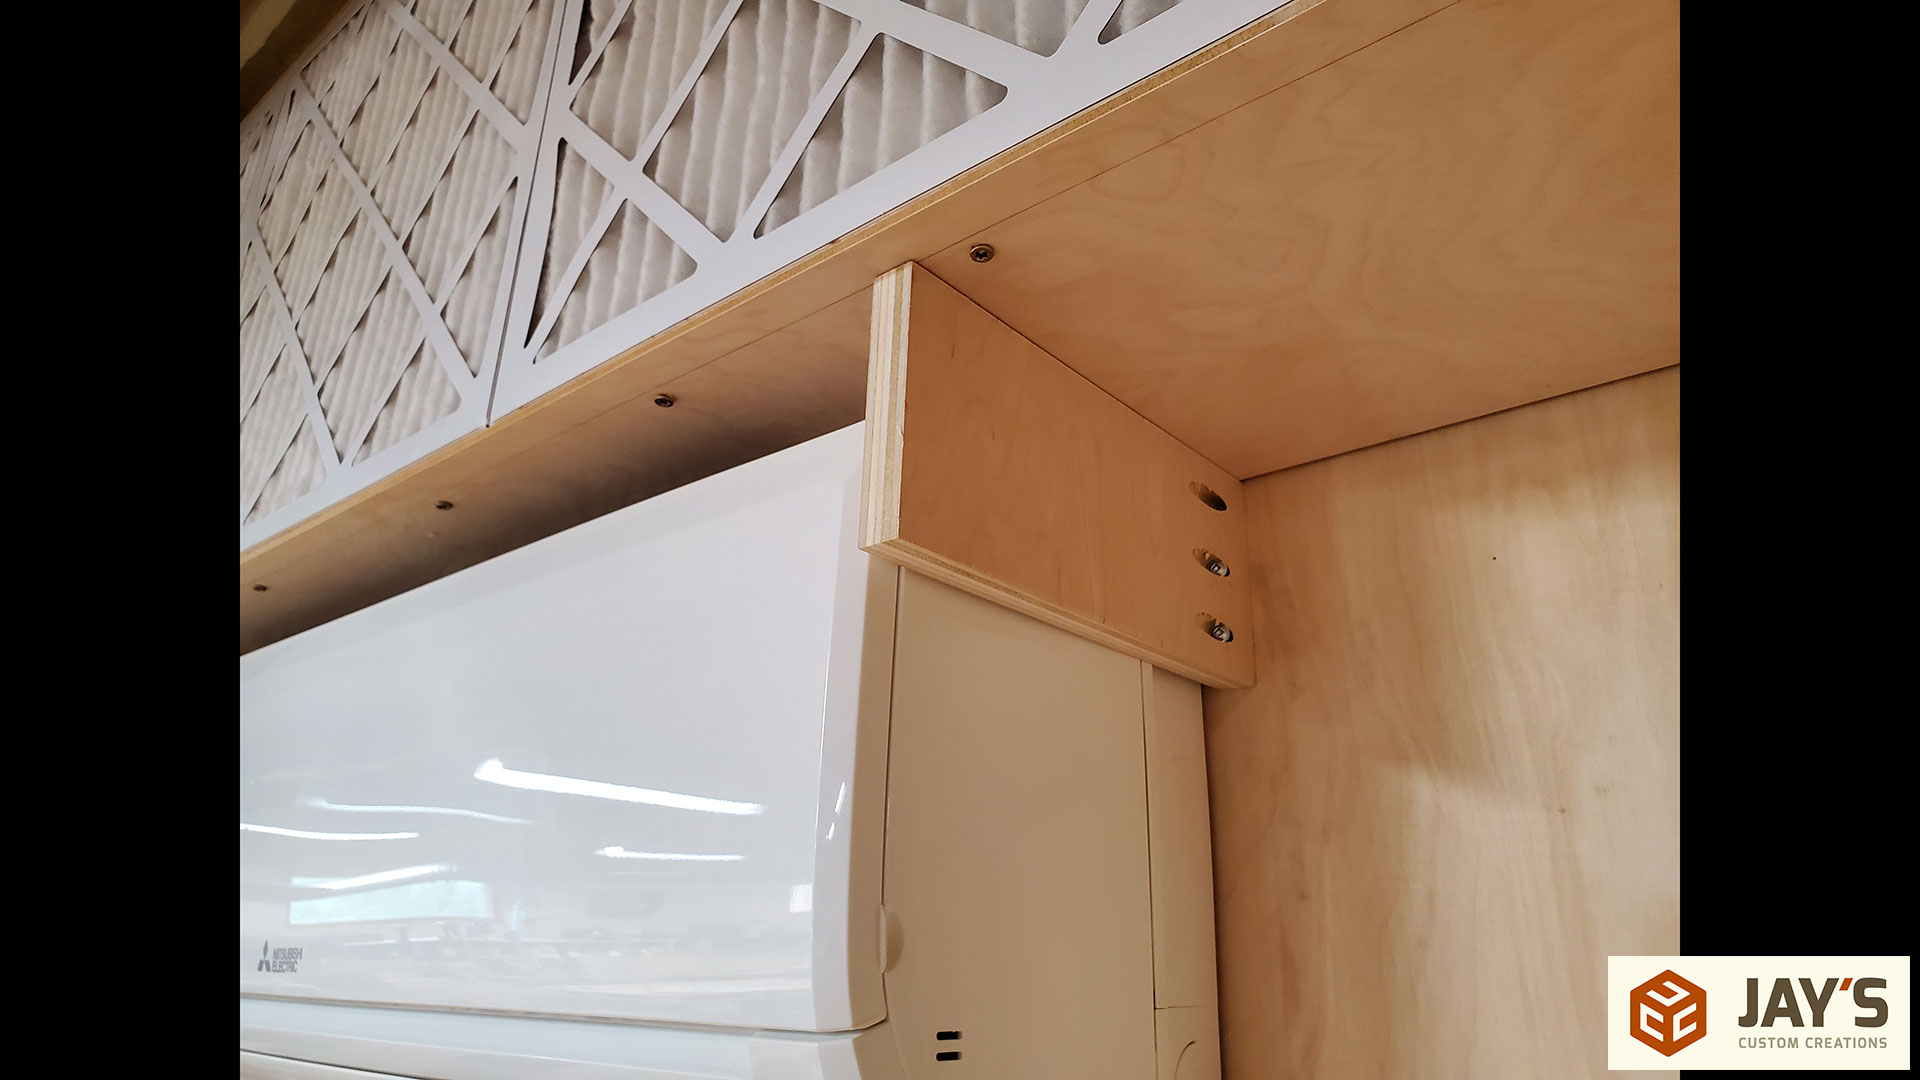
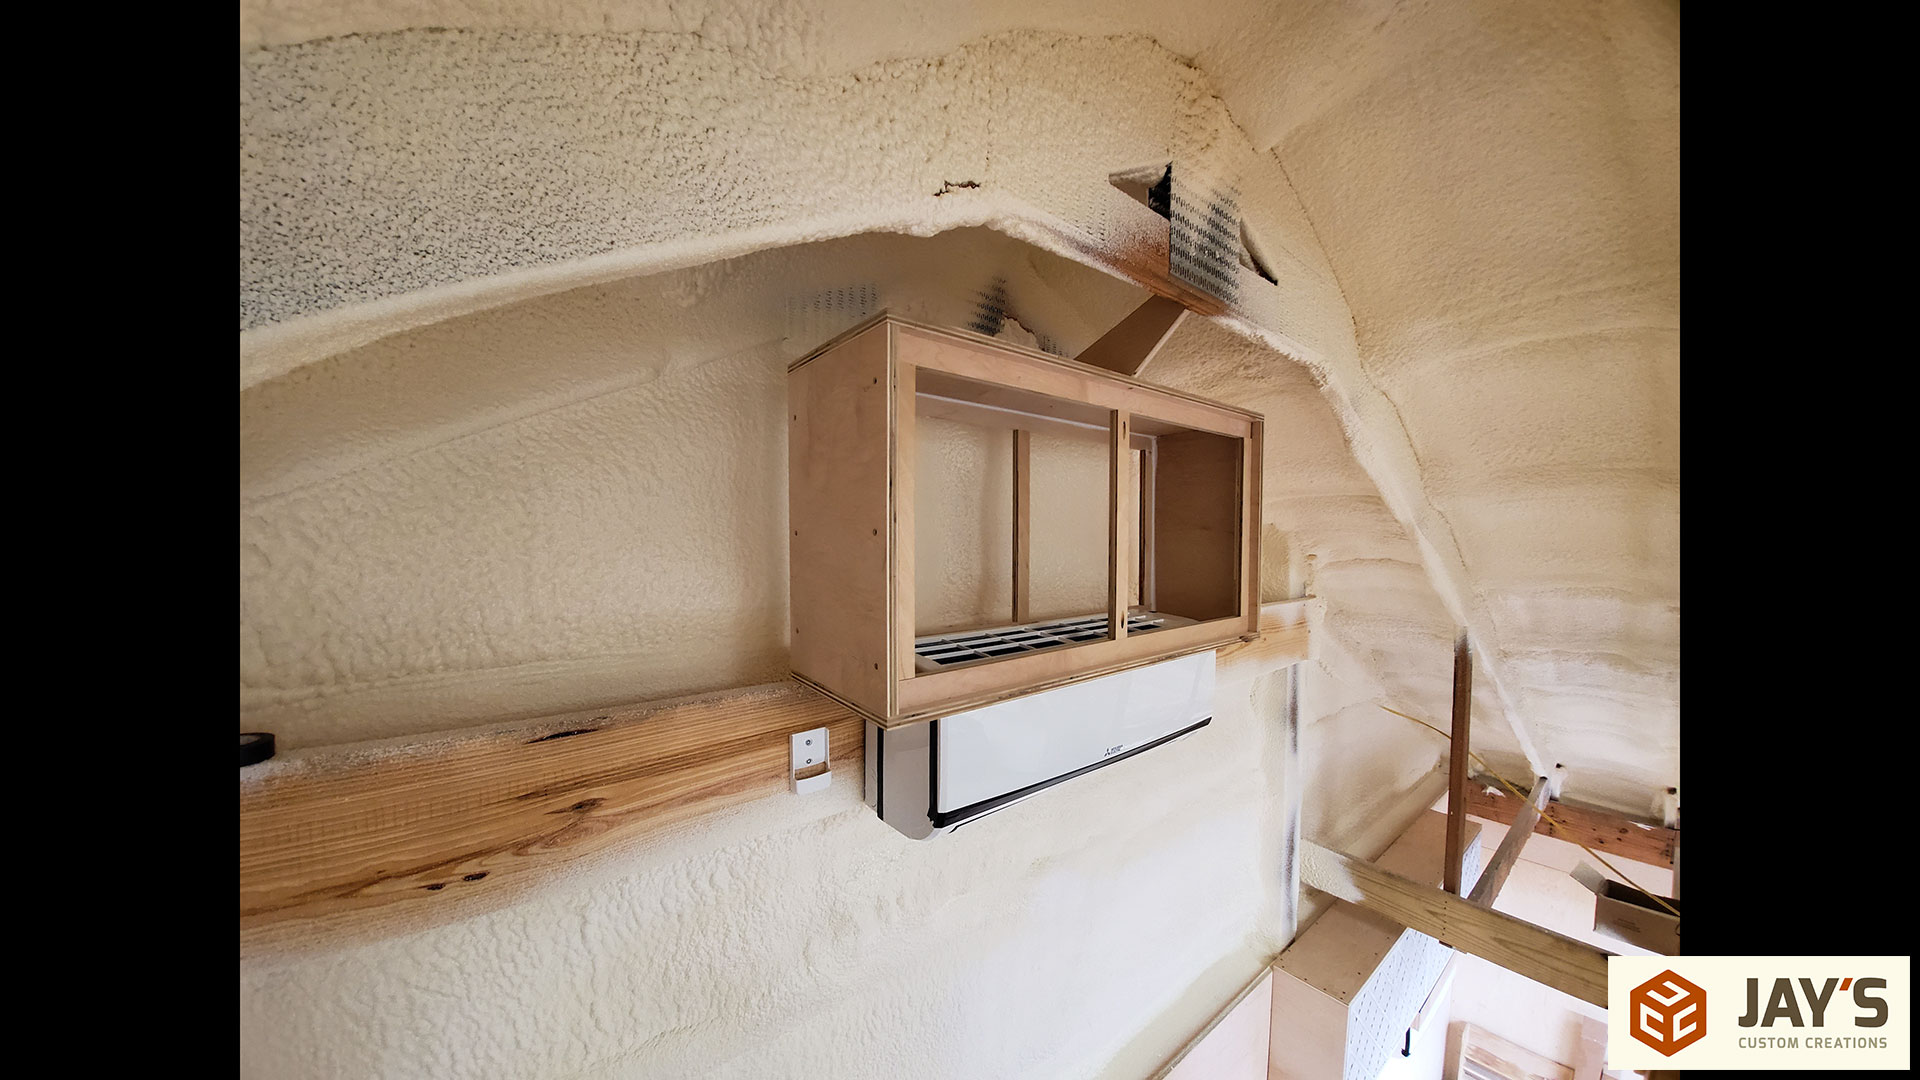
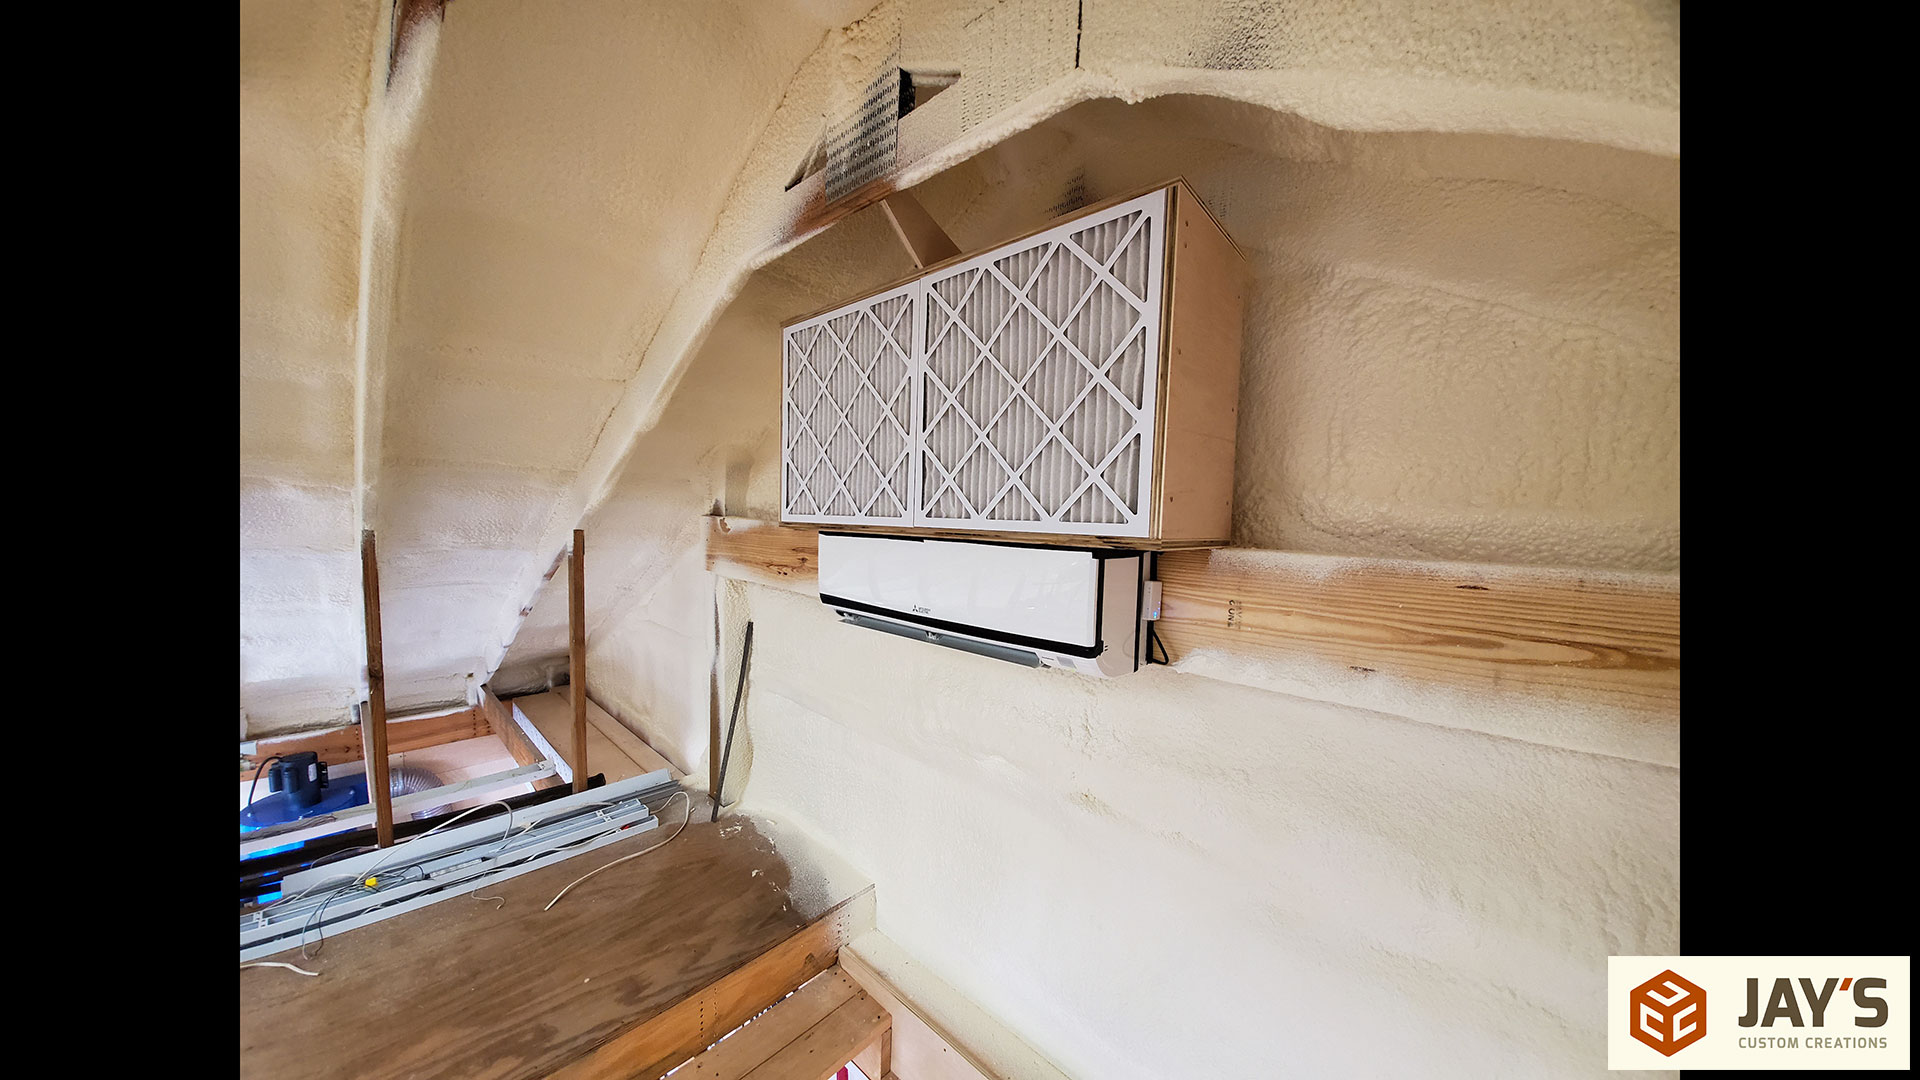
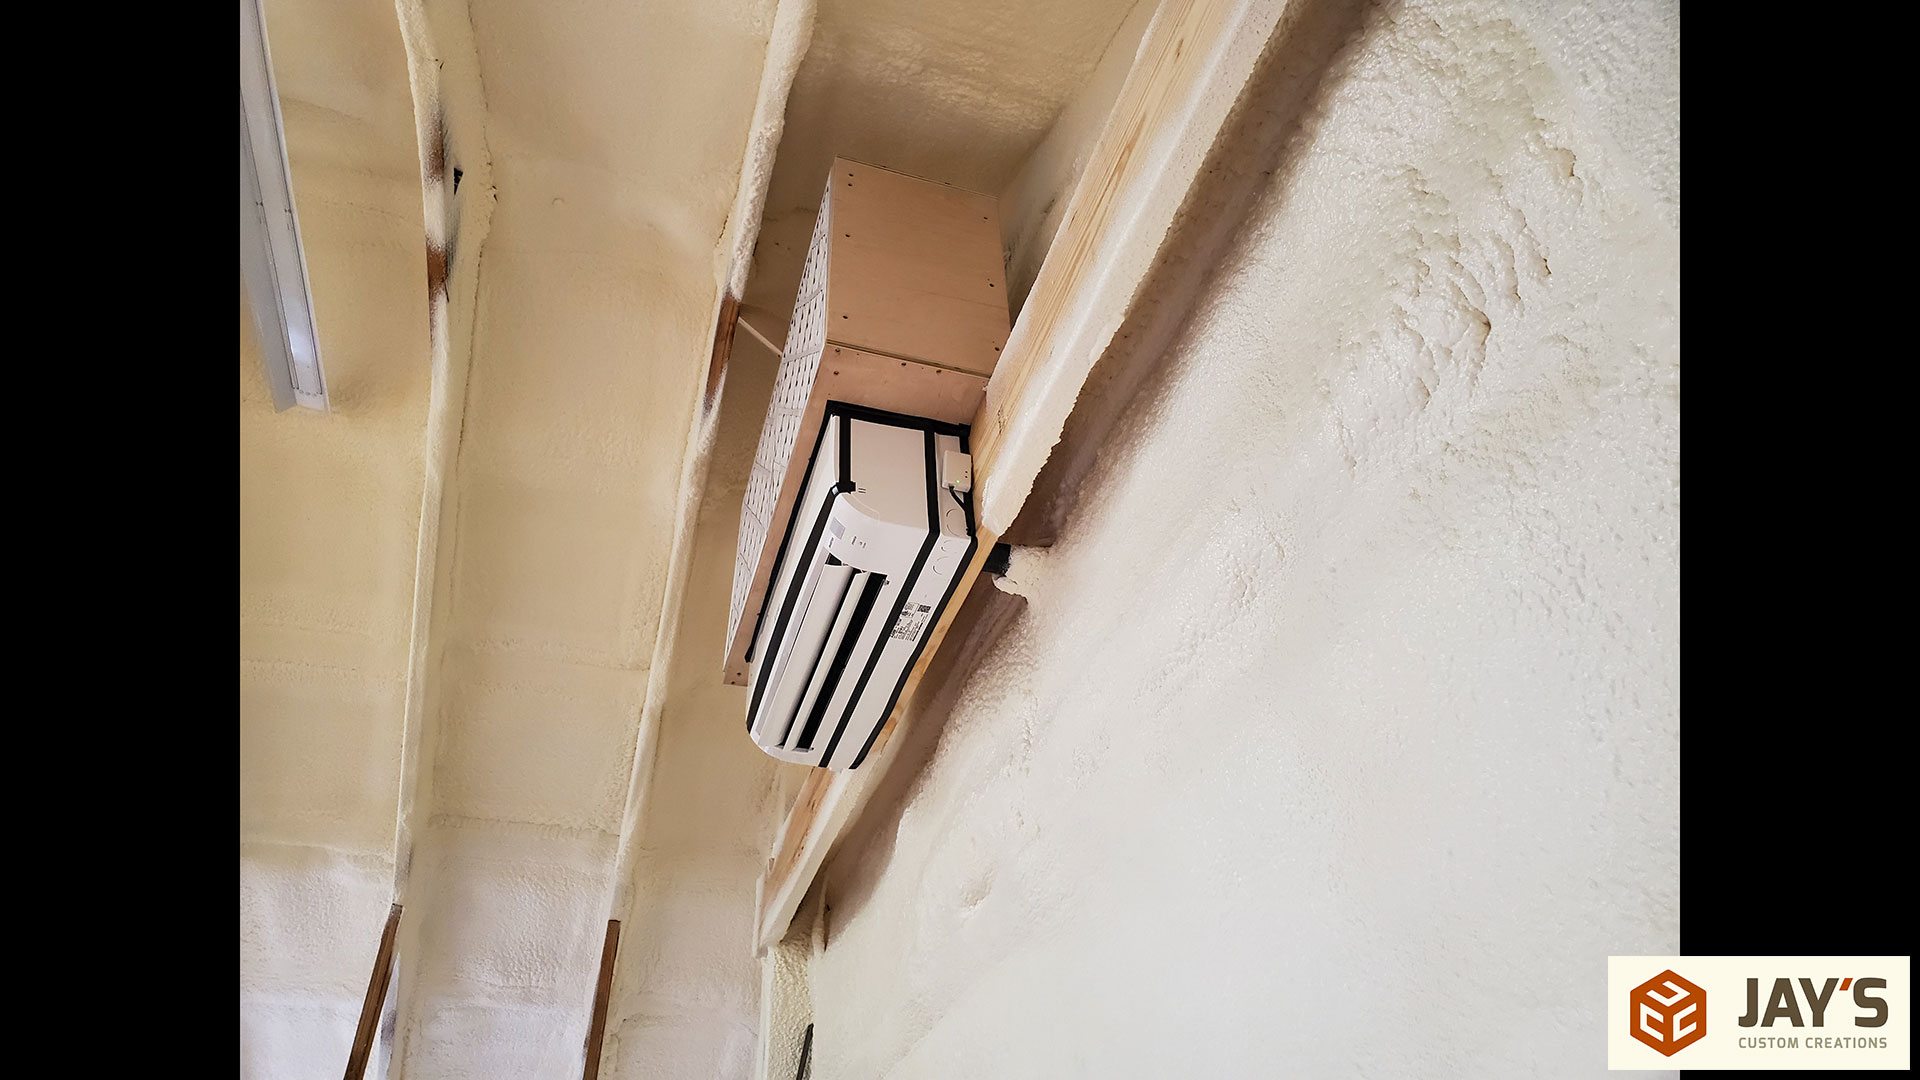
The last piece to add was this top horn looking piece. The purpose of this is to prevent the box from falling once installed.
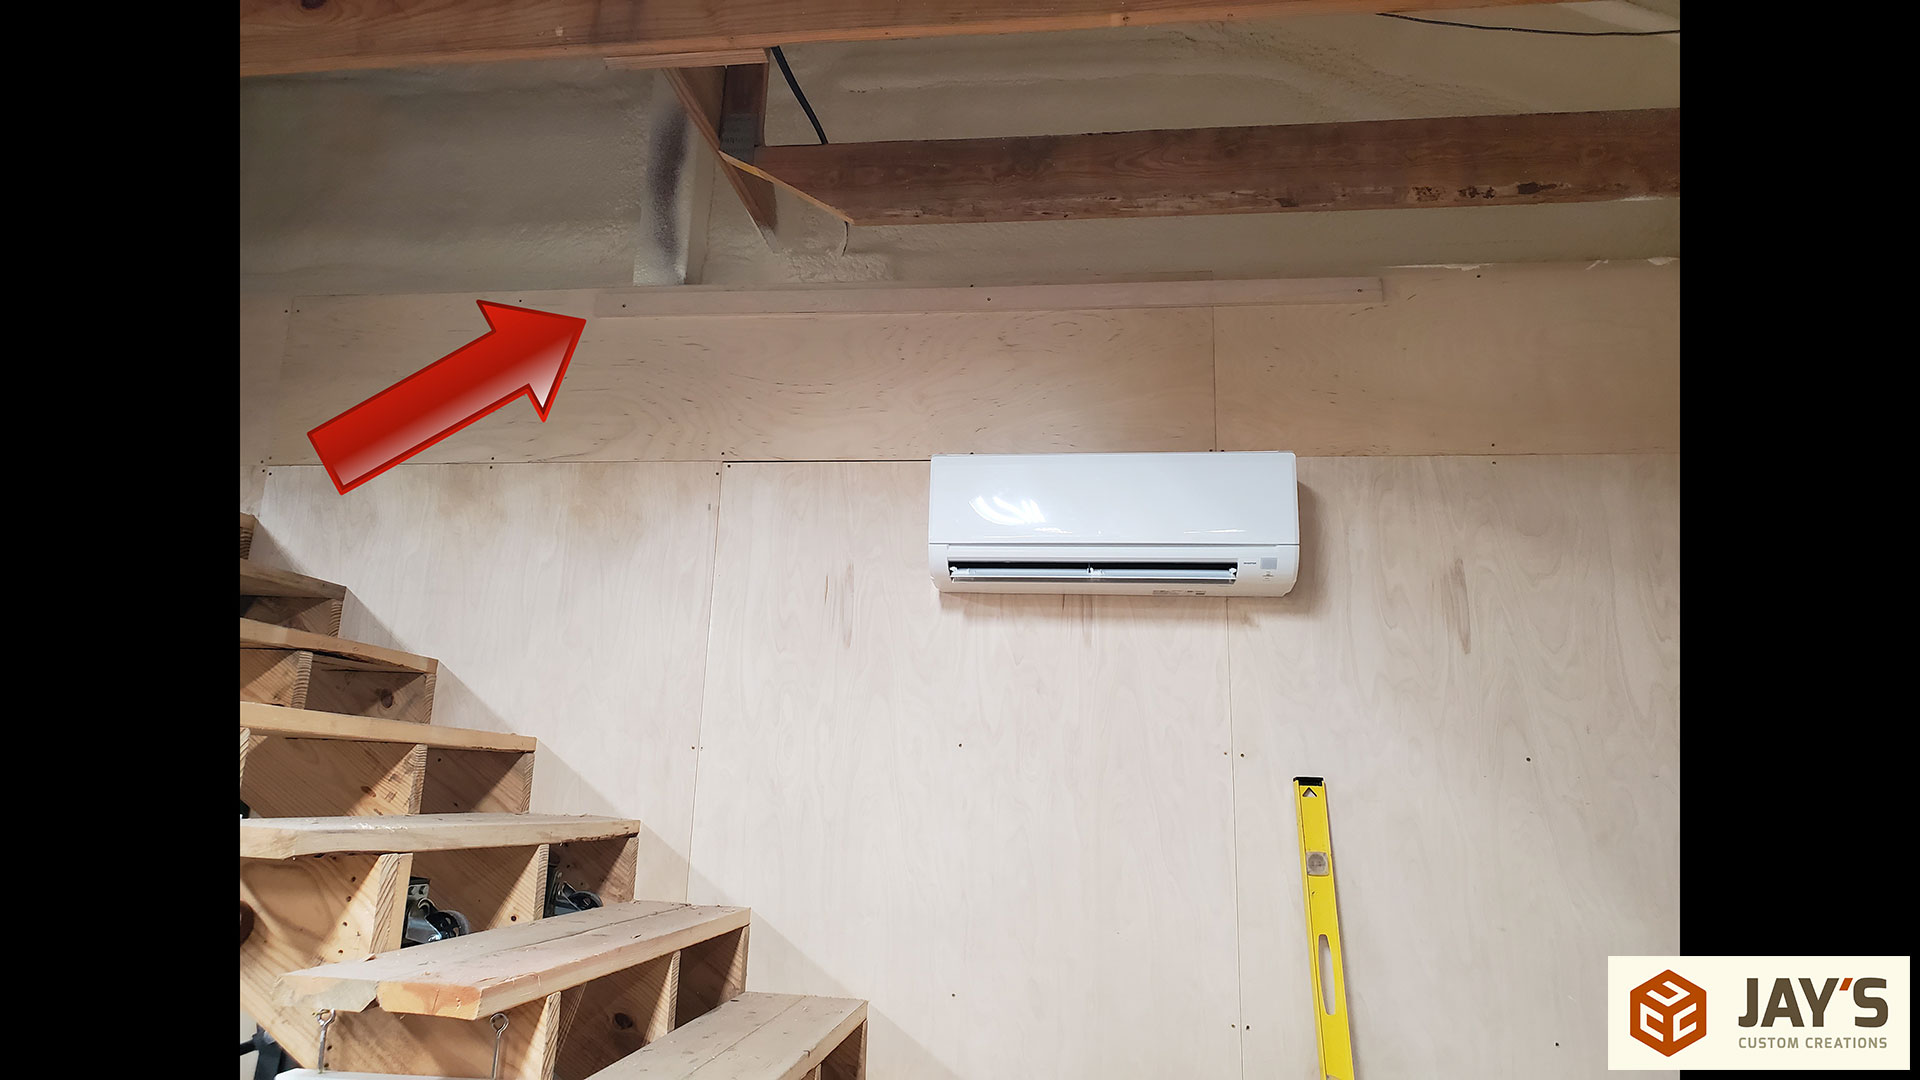
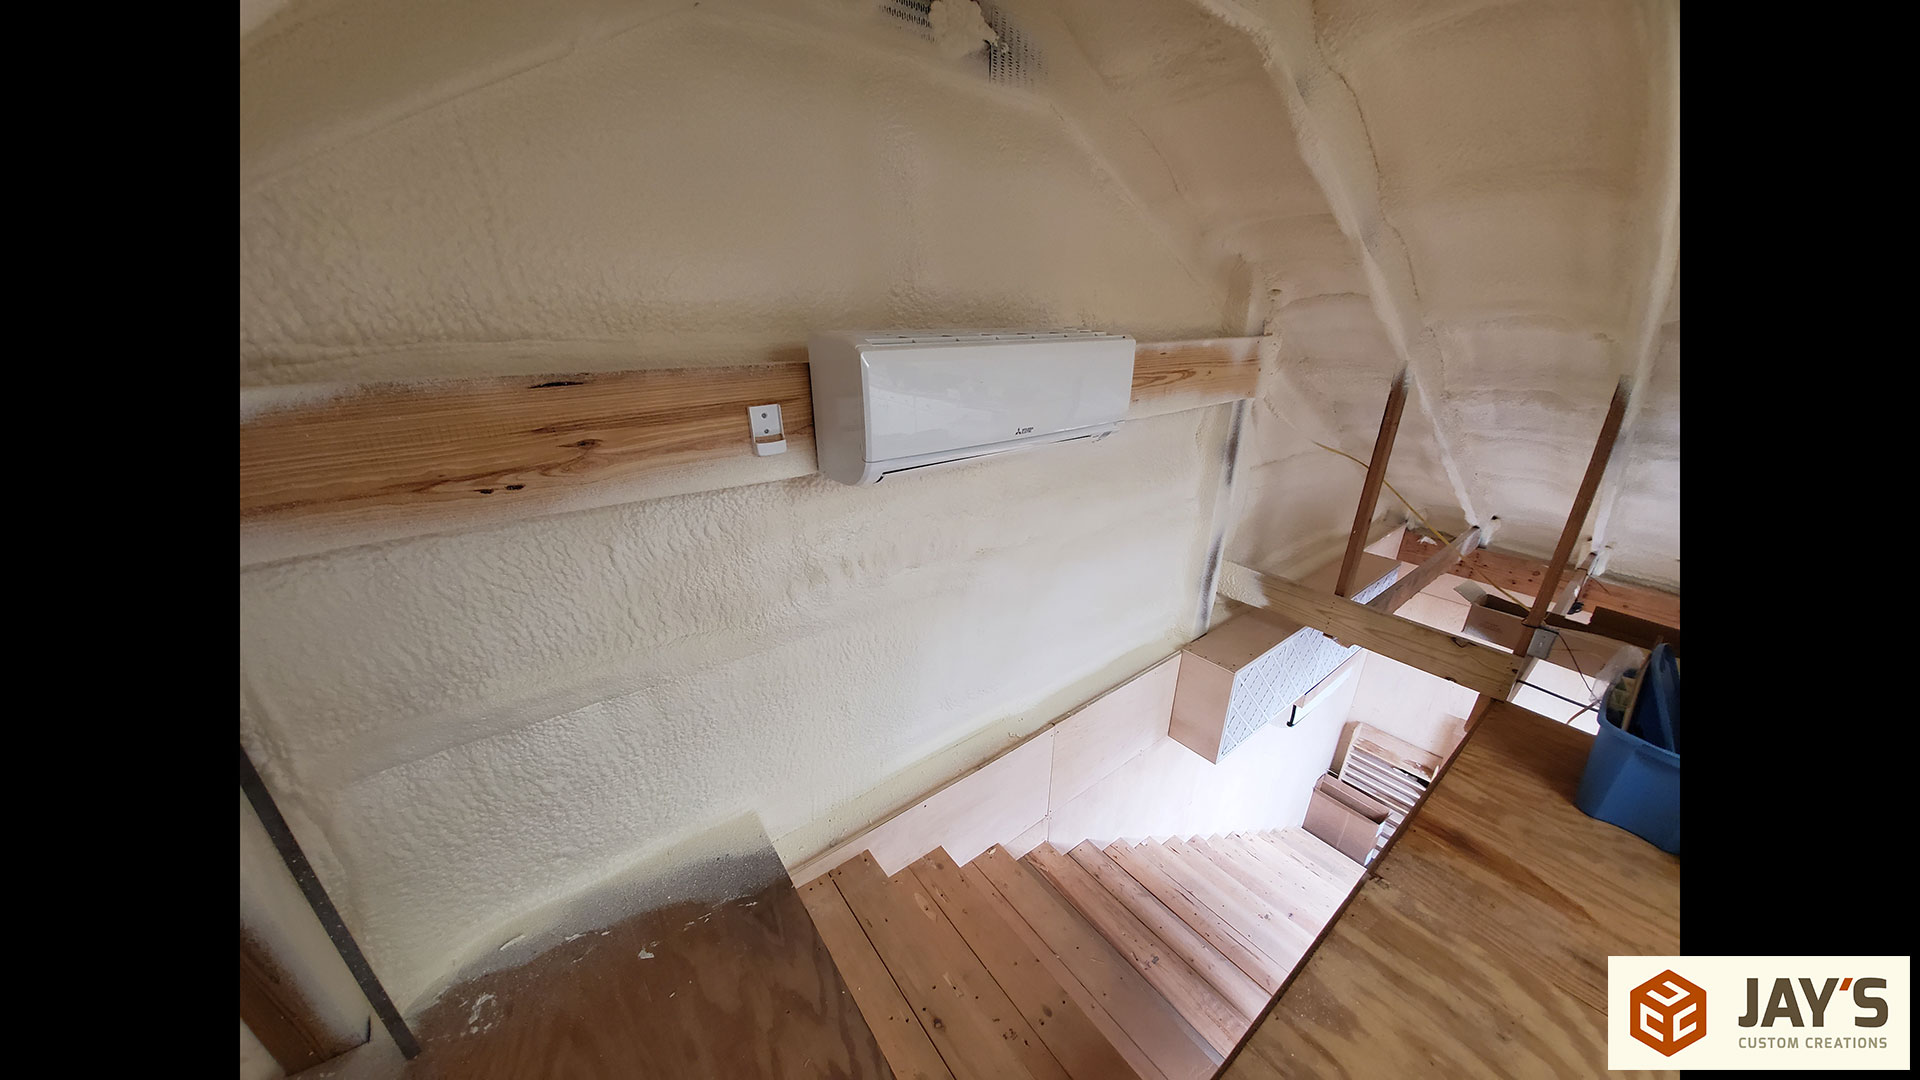
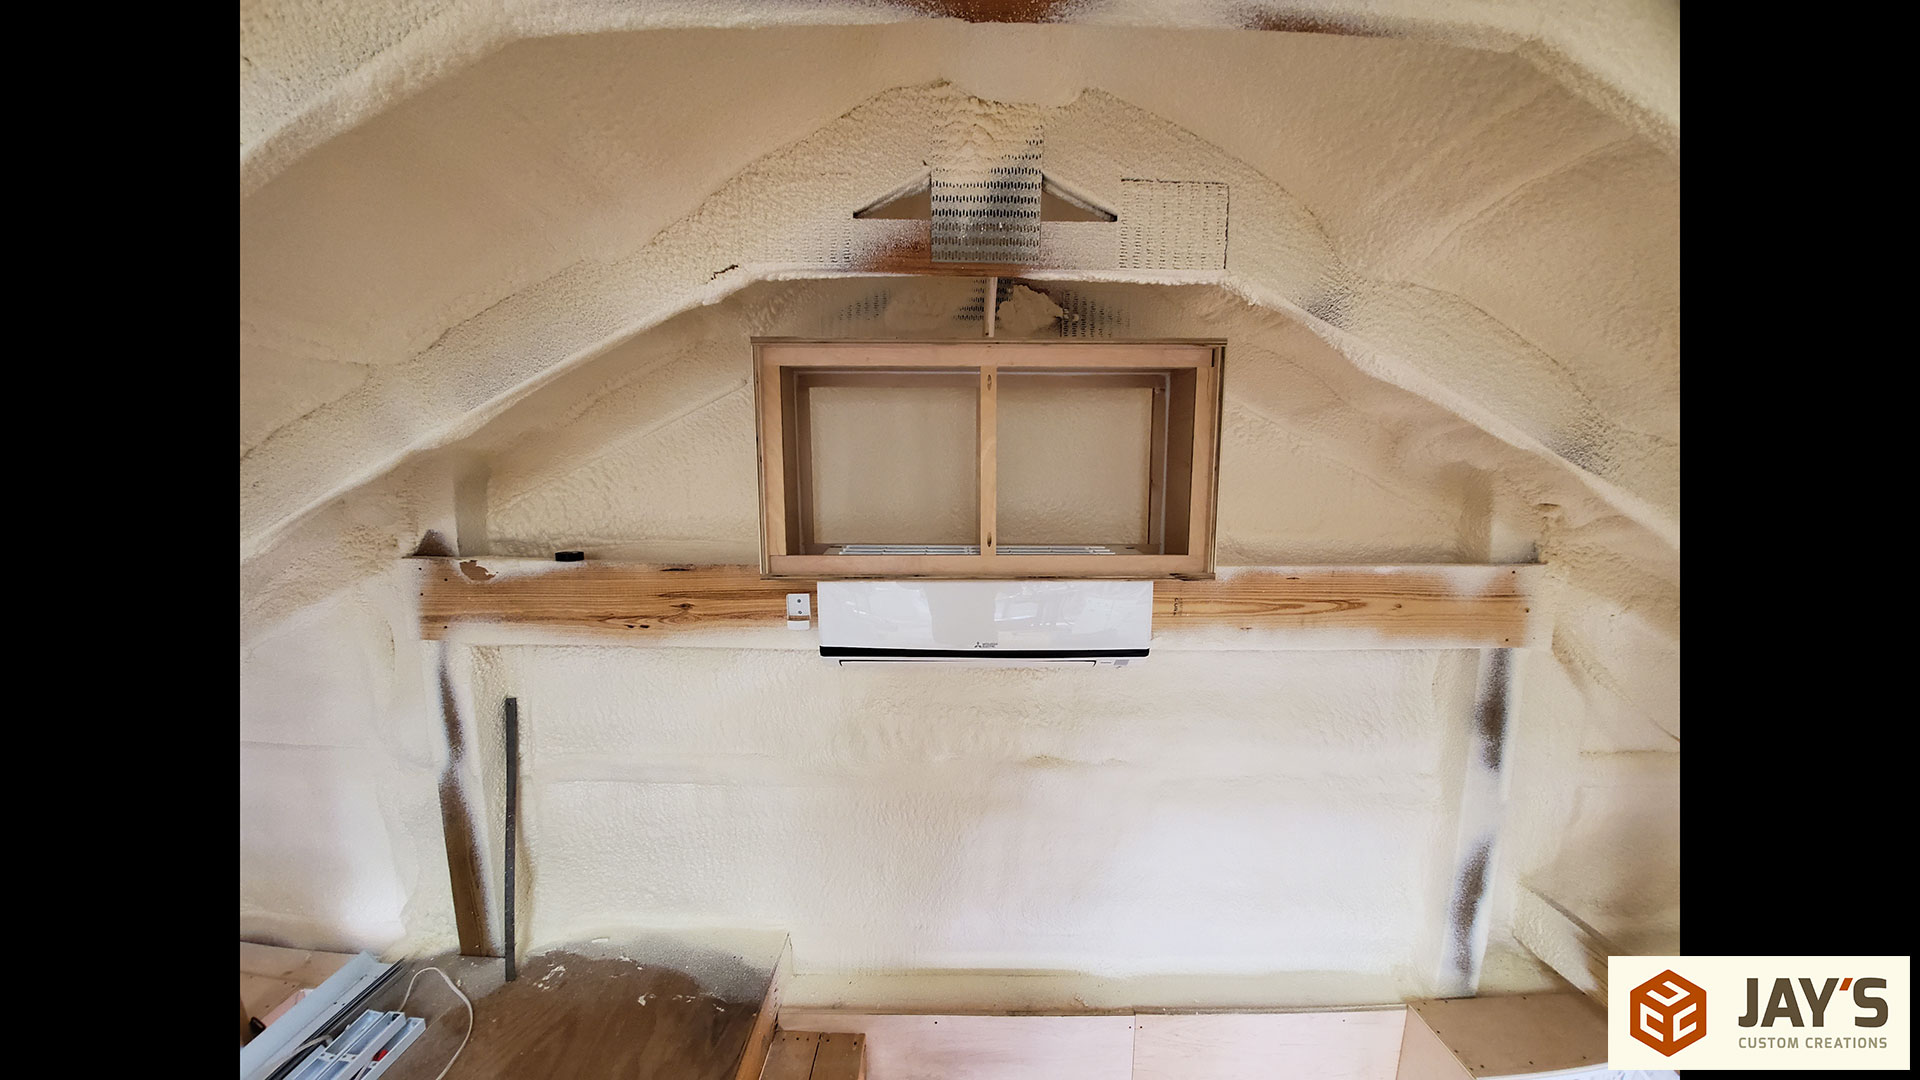
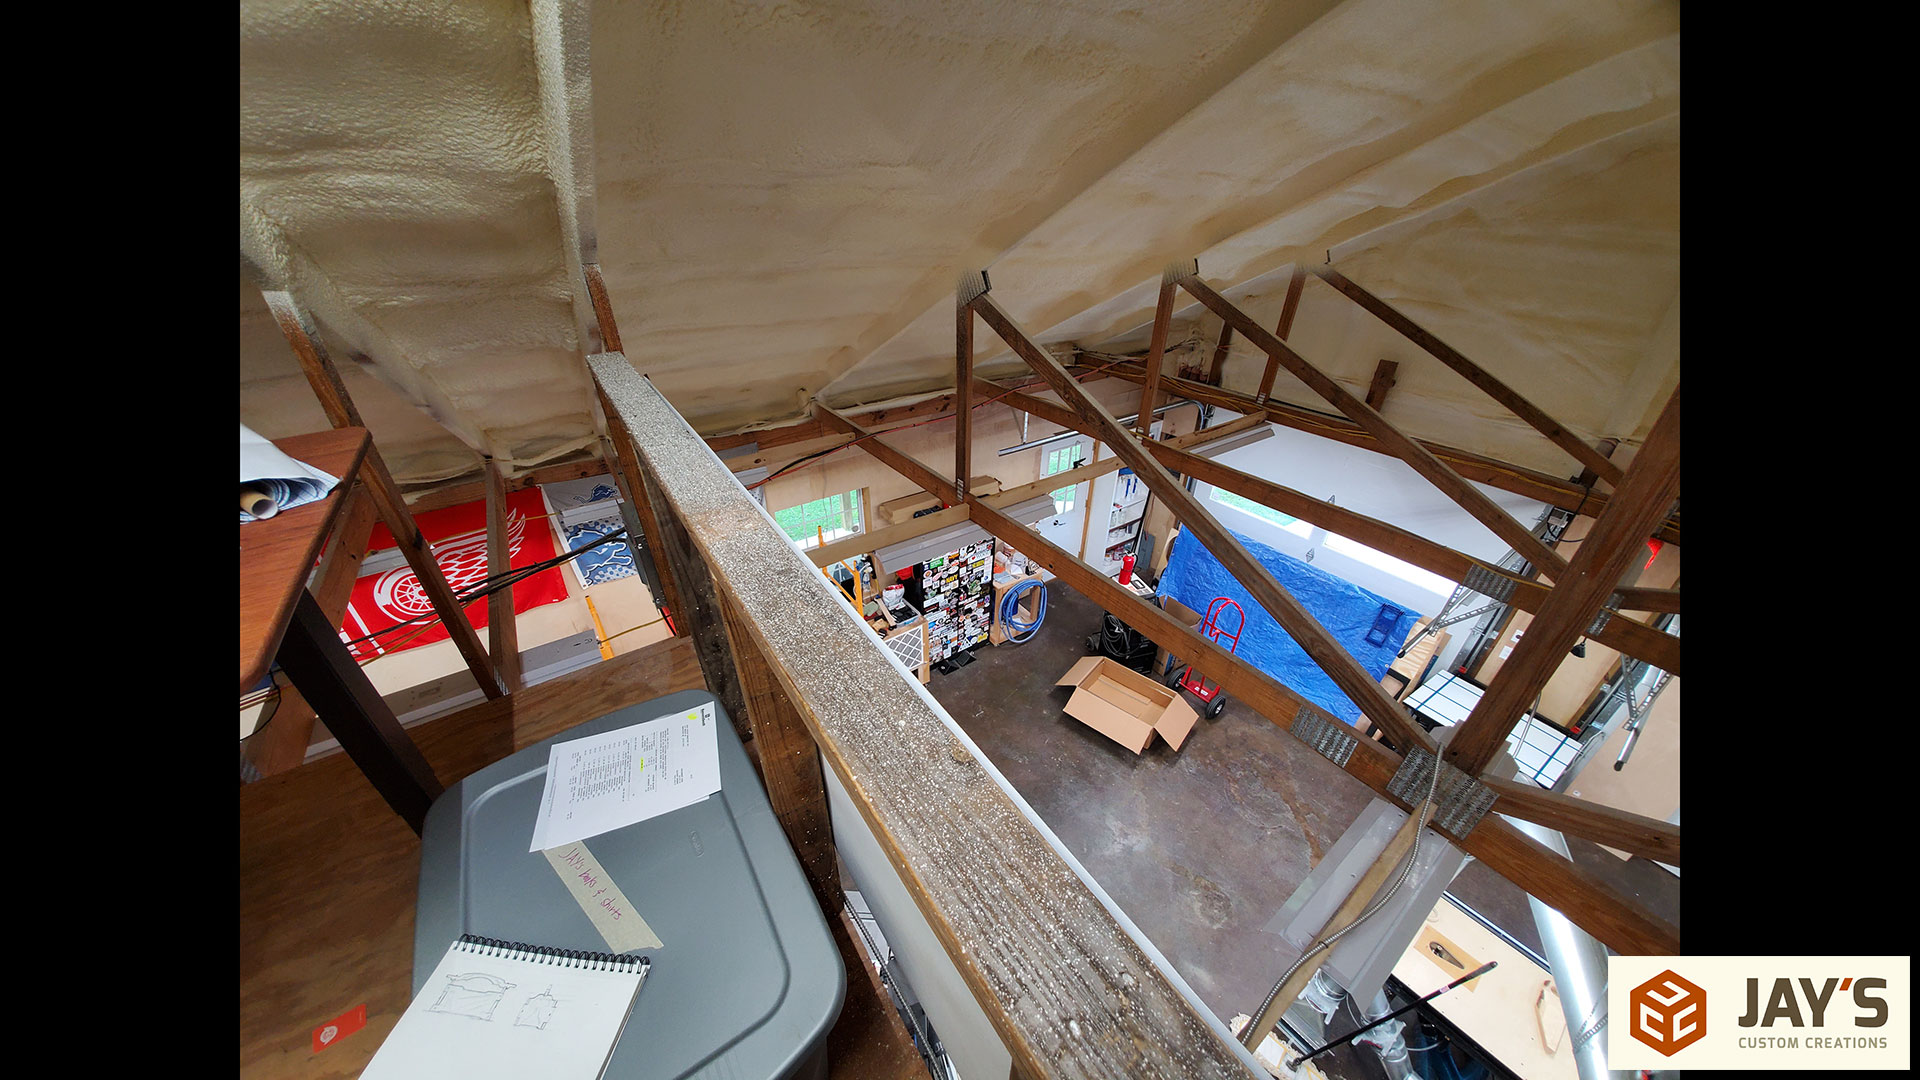
This is the view from my computer desk towards the back of the loft. The mini split is mounted on a 2×10 that spans between two 6×6 posts.
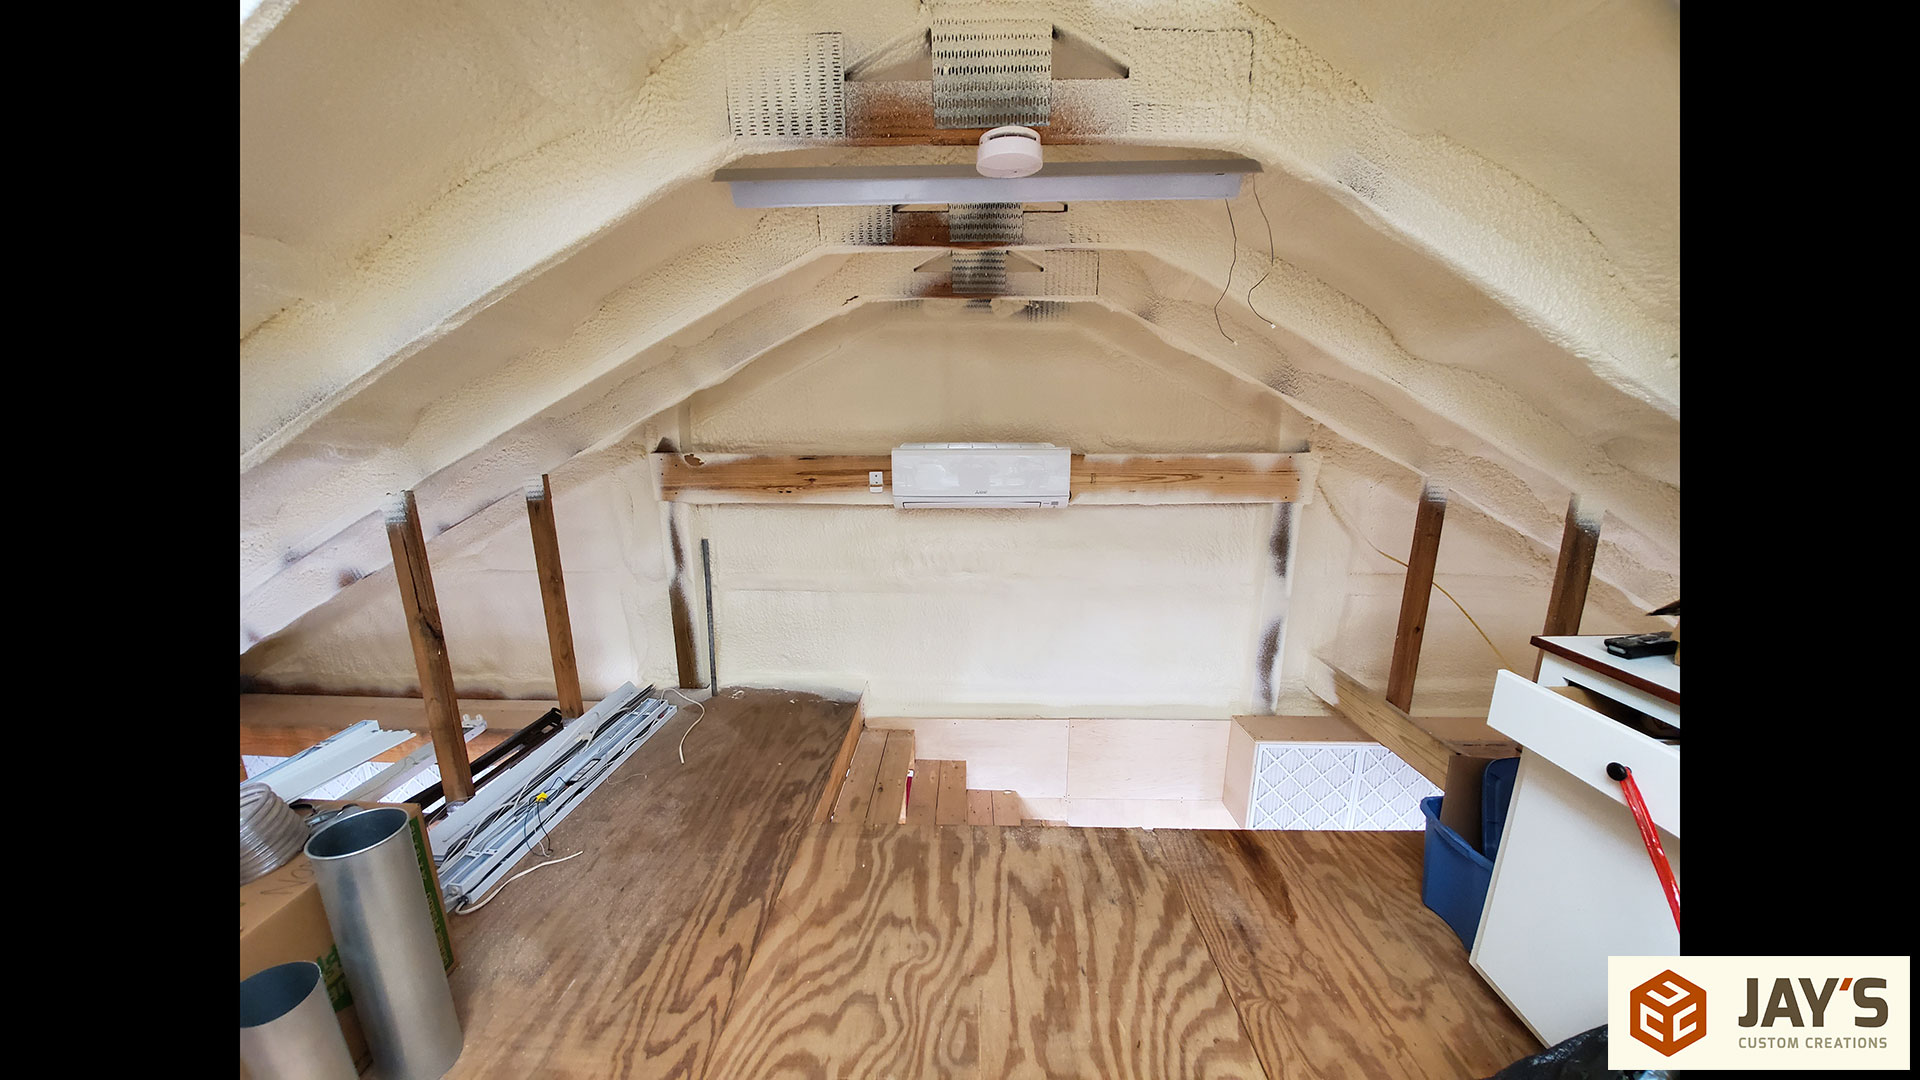
Here you can see it in relation to the stairs.
And here you can see the gap between it and the back wall. This gap will allow me to get the same four filter capacity as the longer boxes below.
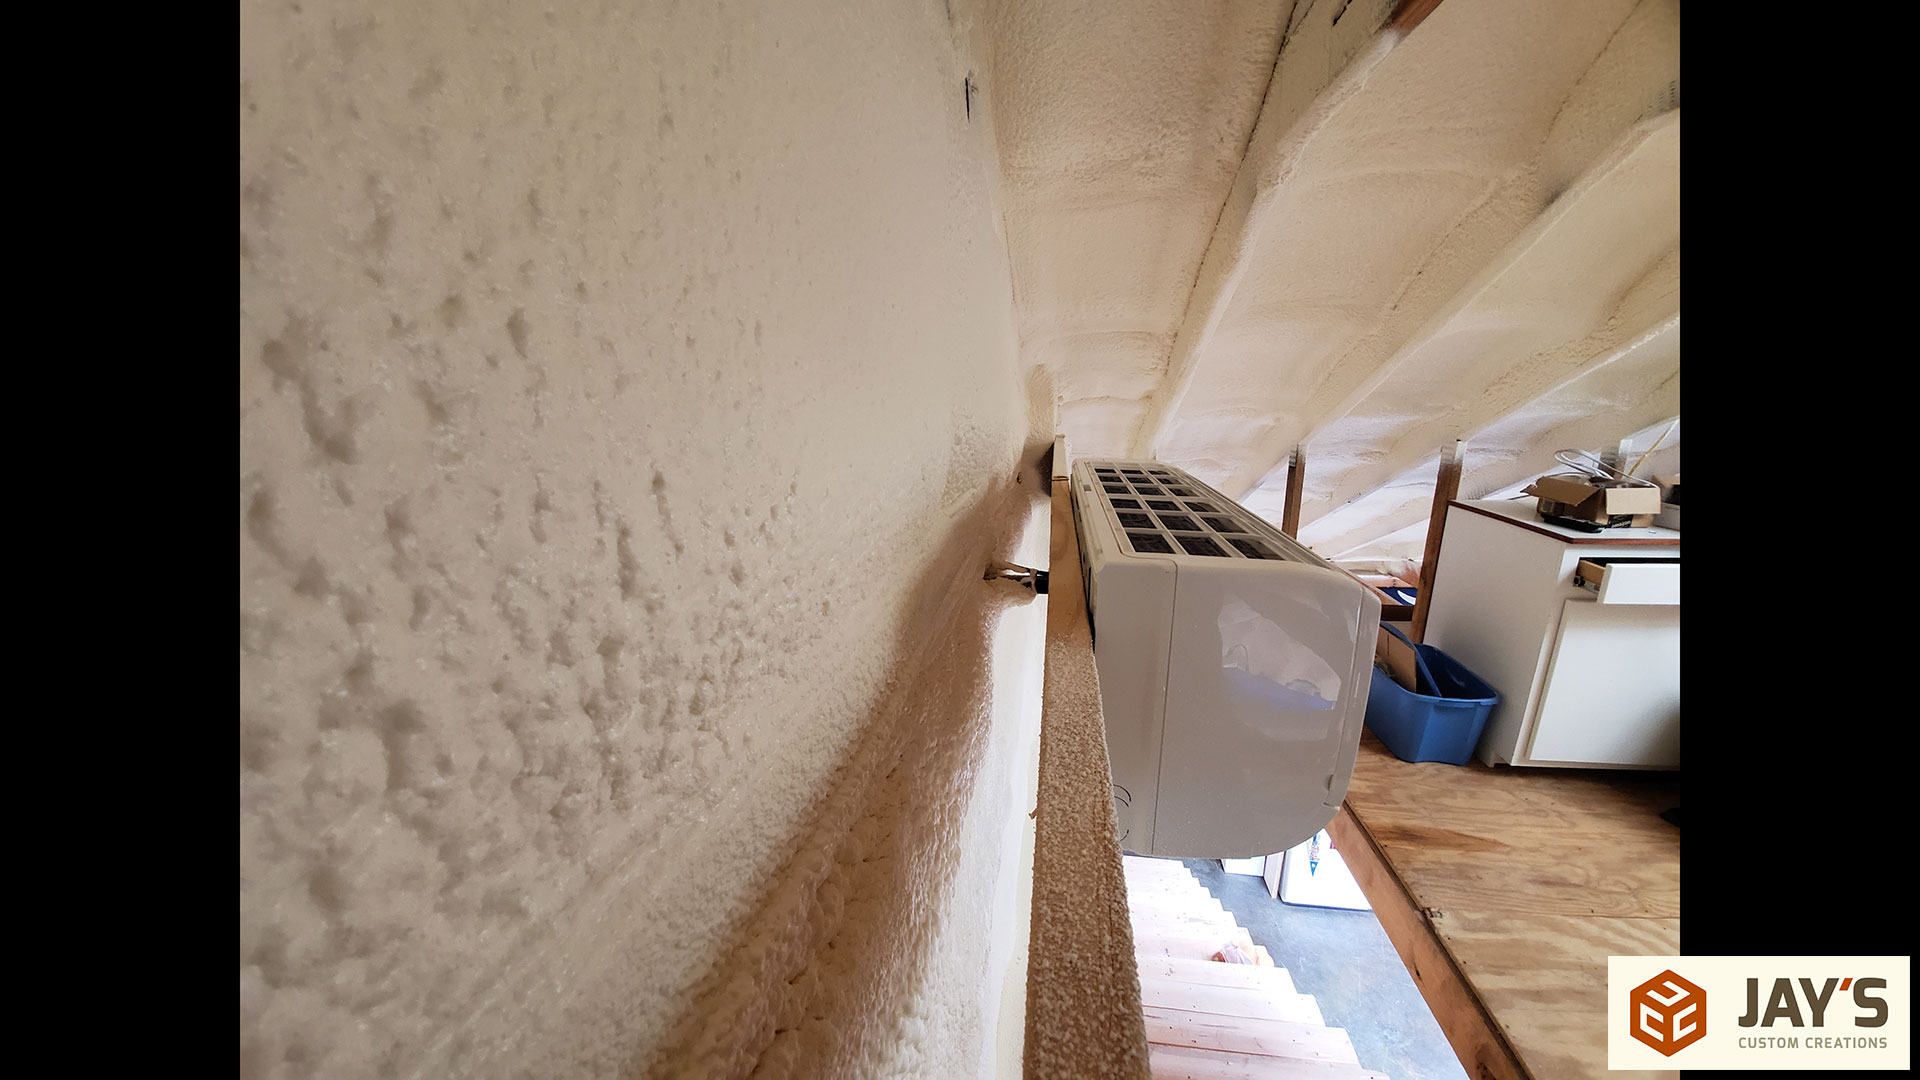
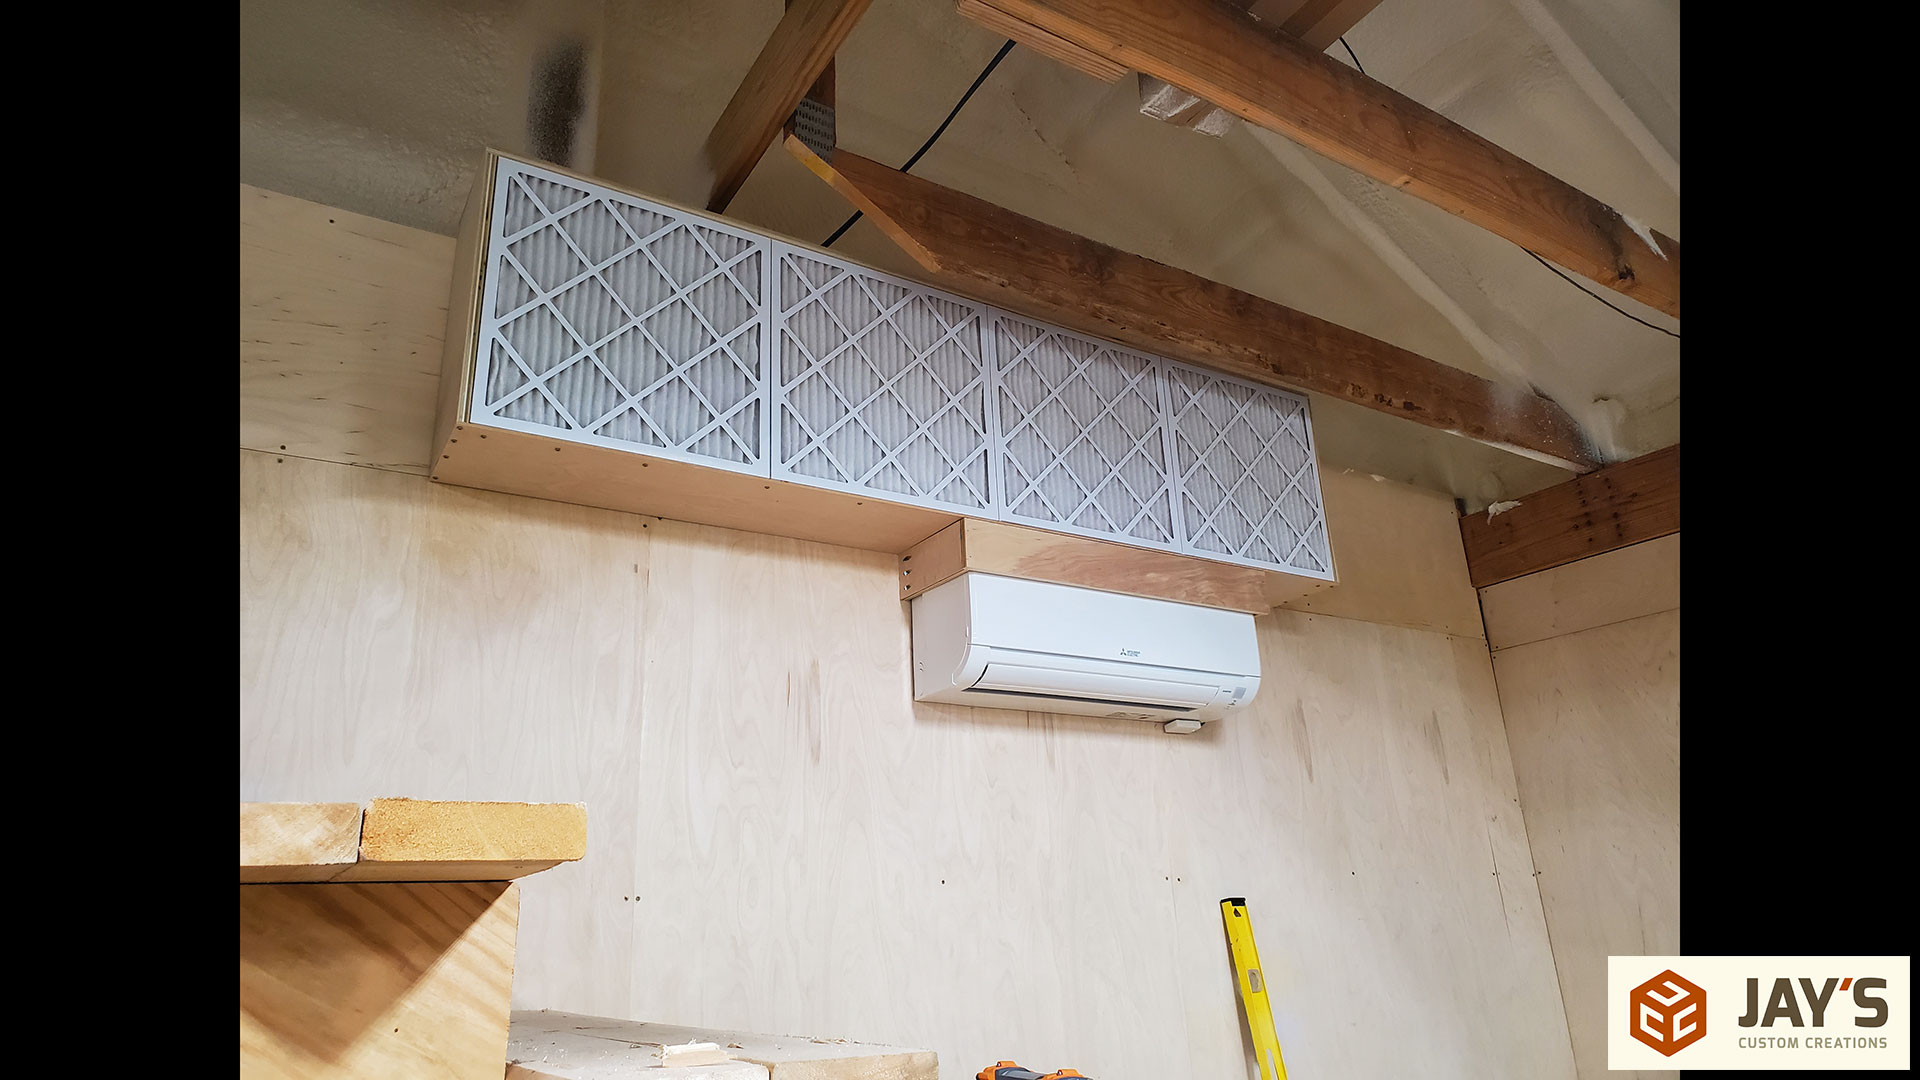
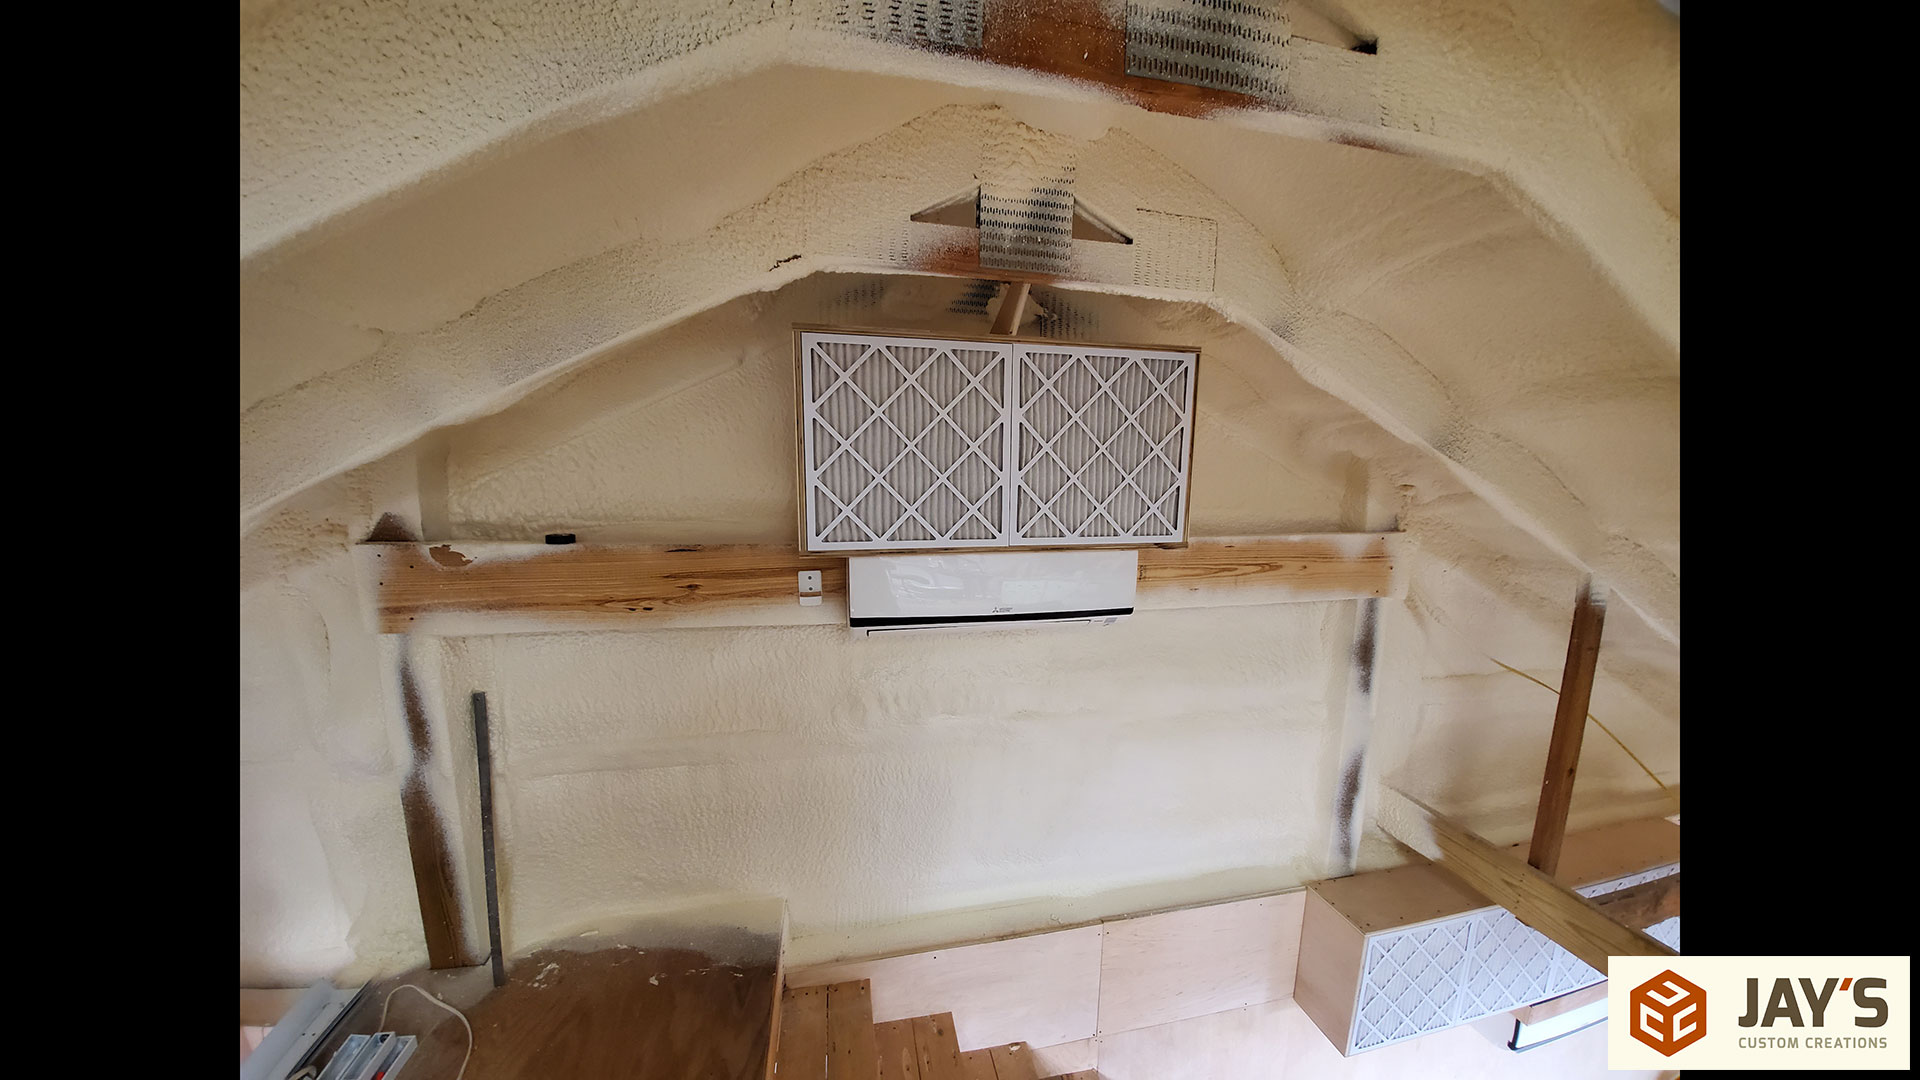
Once the internal filter was cleaned and the seams taped the filter box is set into place. This one is not secured in any way. It just fits over the mini split and is supported by the horizontal 2×10 in back. The little horn piece on top contacts the truss and prevents the box from rolling forward. Super simple.

The back two filters are slid into place first.
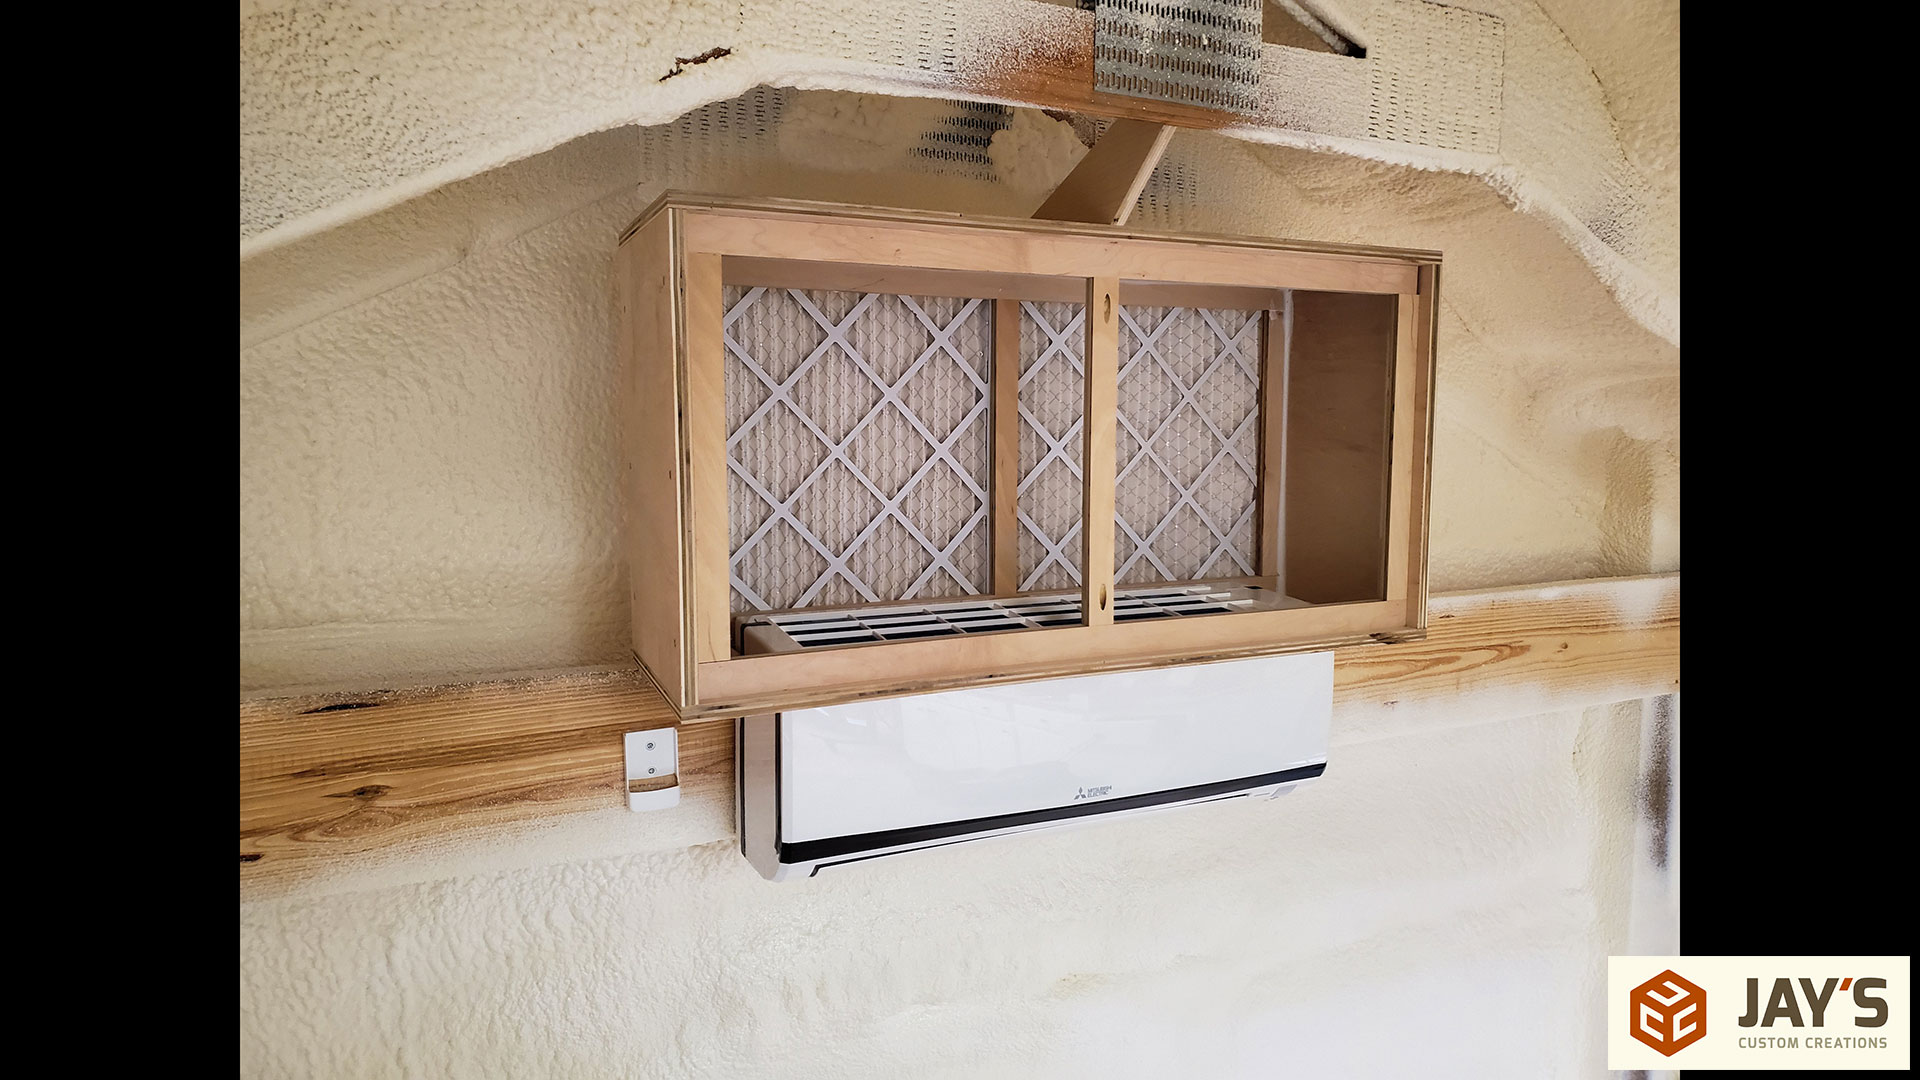
Followed by the front two filters.

Lastly, the rest of the seams can be sealed off with electrical tape.
I don’t think I’ve shown my office space yet so here we go with it. This is from the back wall looking forward. I have a couple LED light strips firing up for an even amount of reflected light while I’m working.
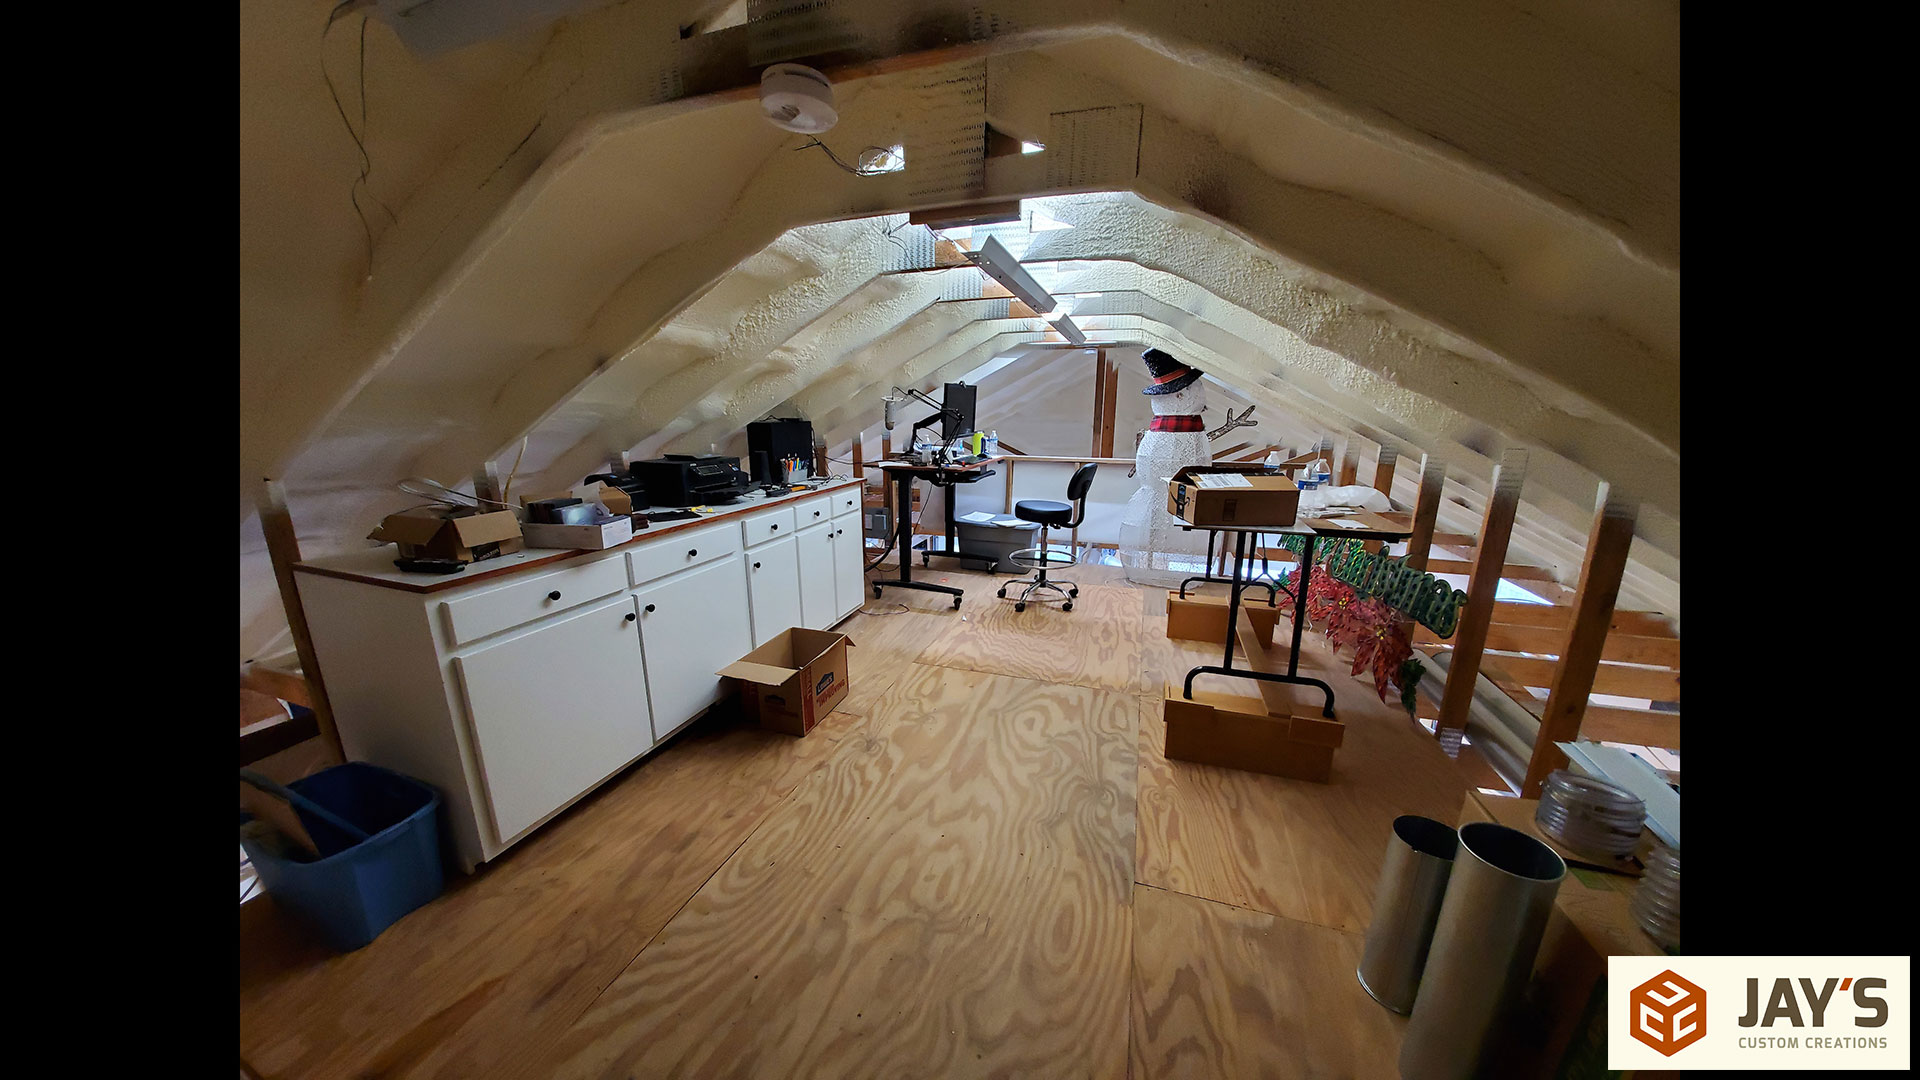
My desk is at the far end so I can look over the edge.
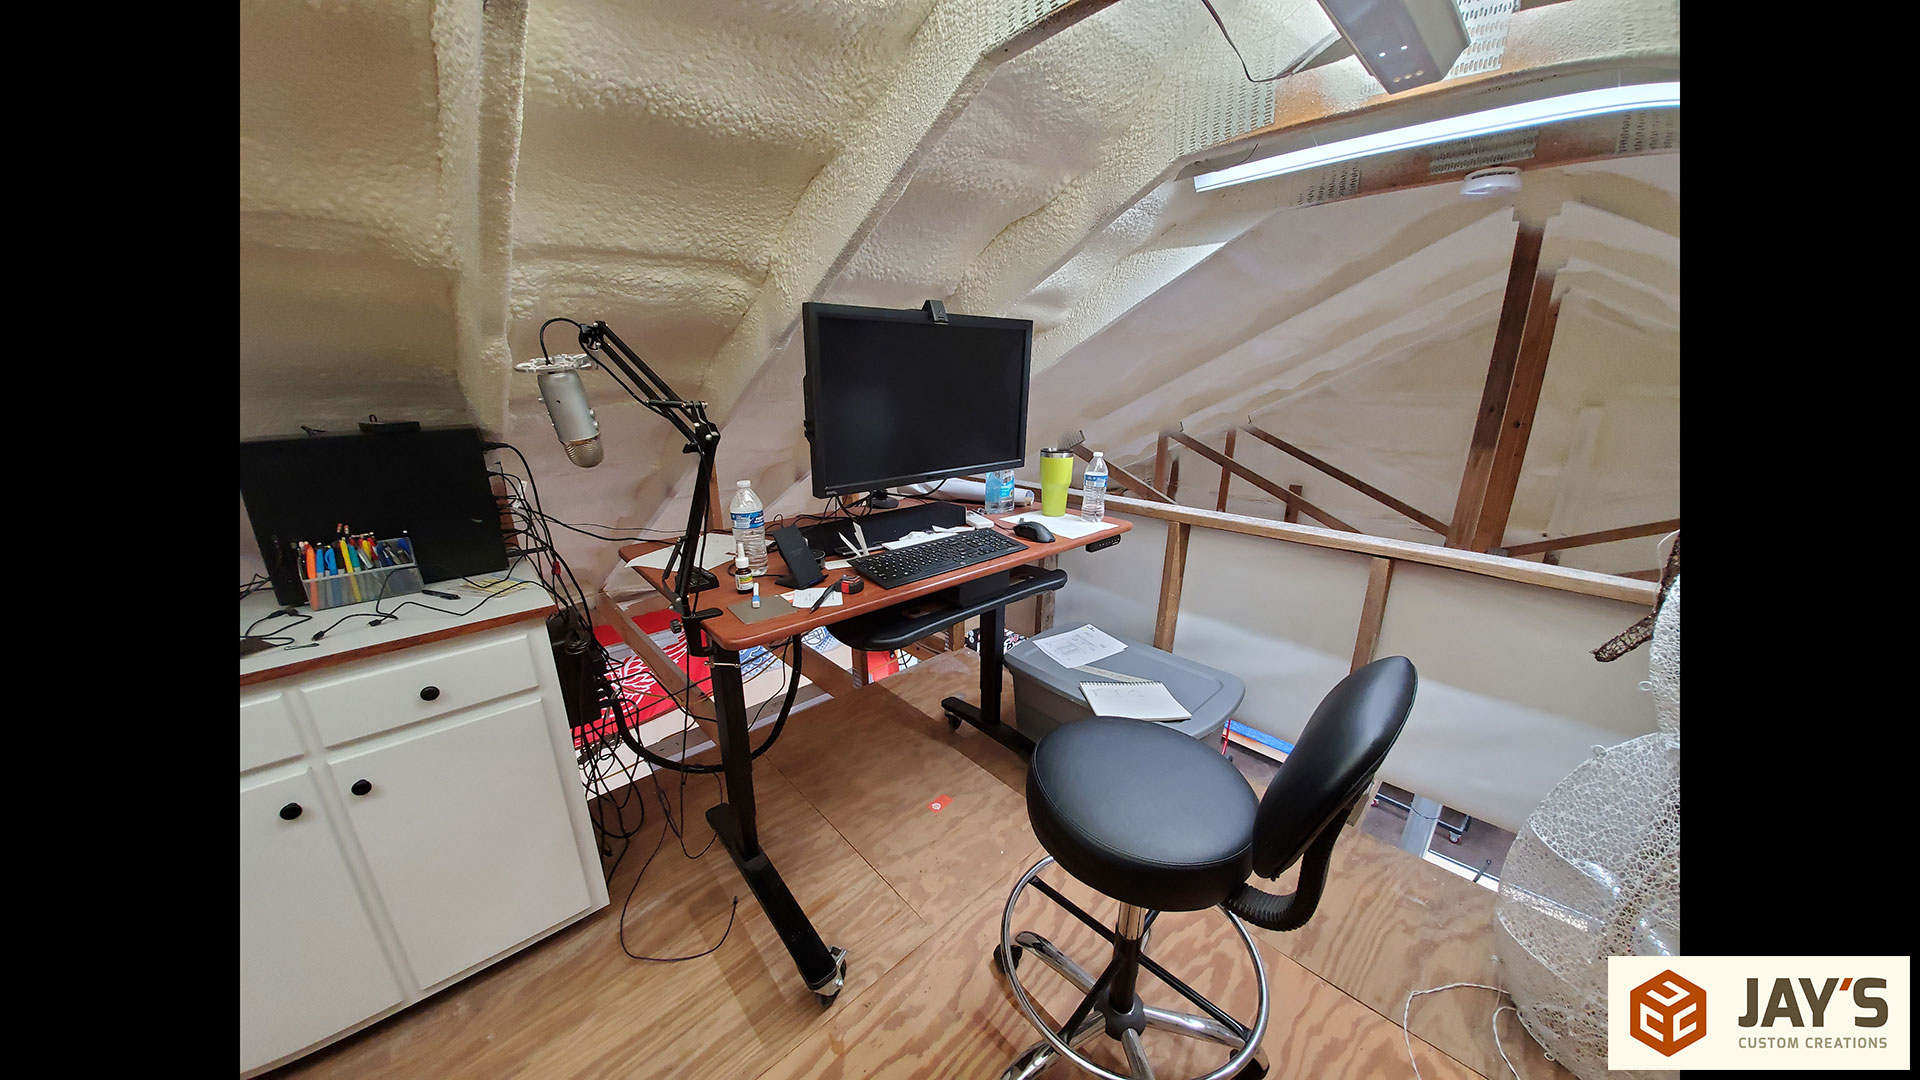
Here’s the view over the railing.

And I have a perfect view of the front door from my computer.
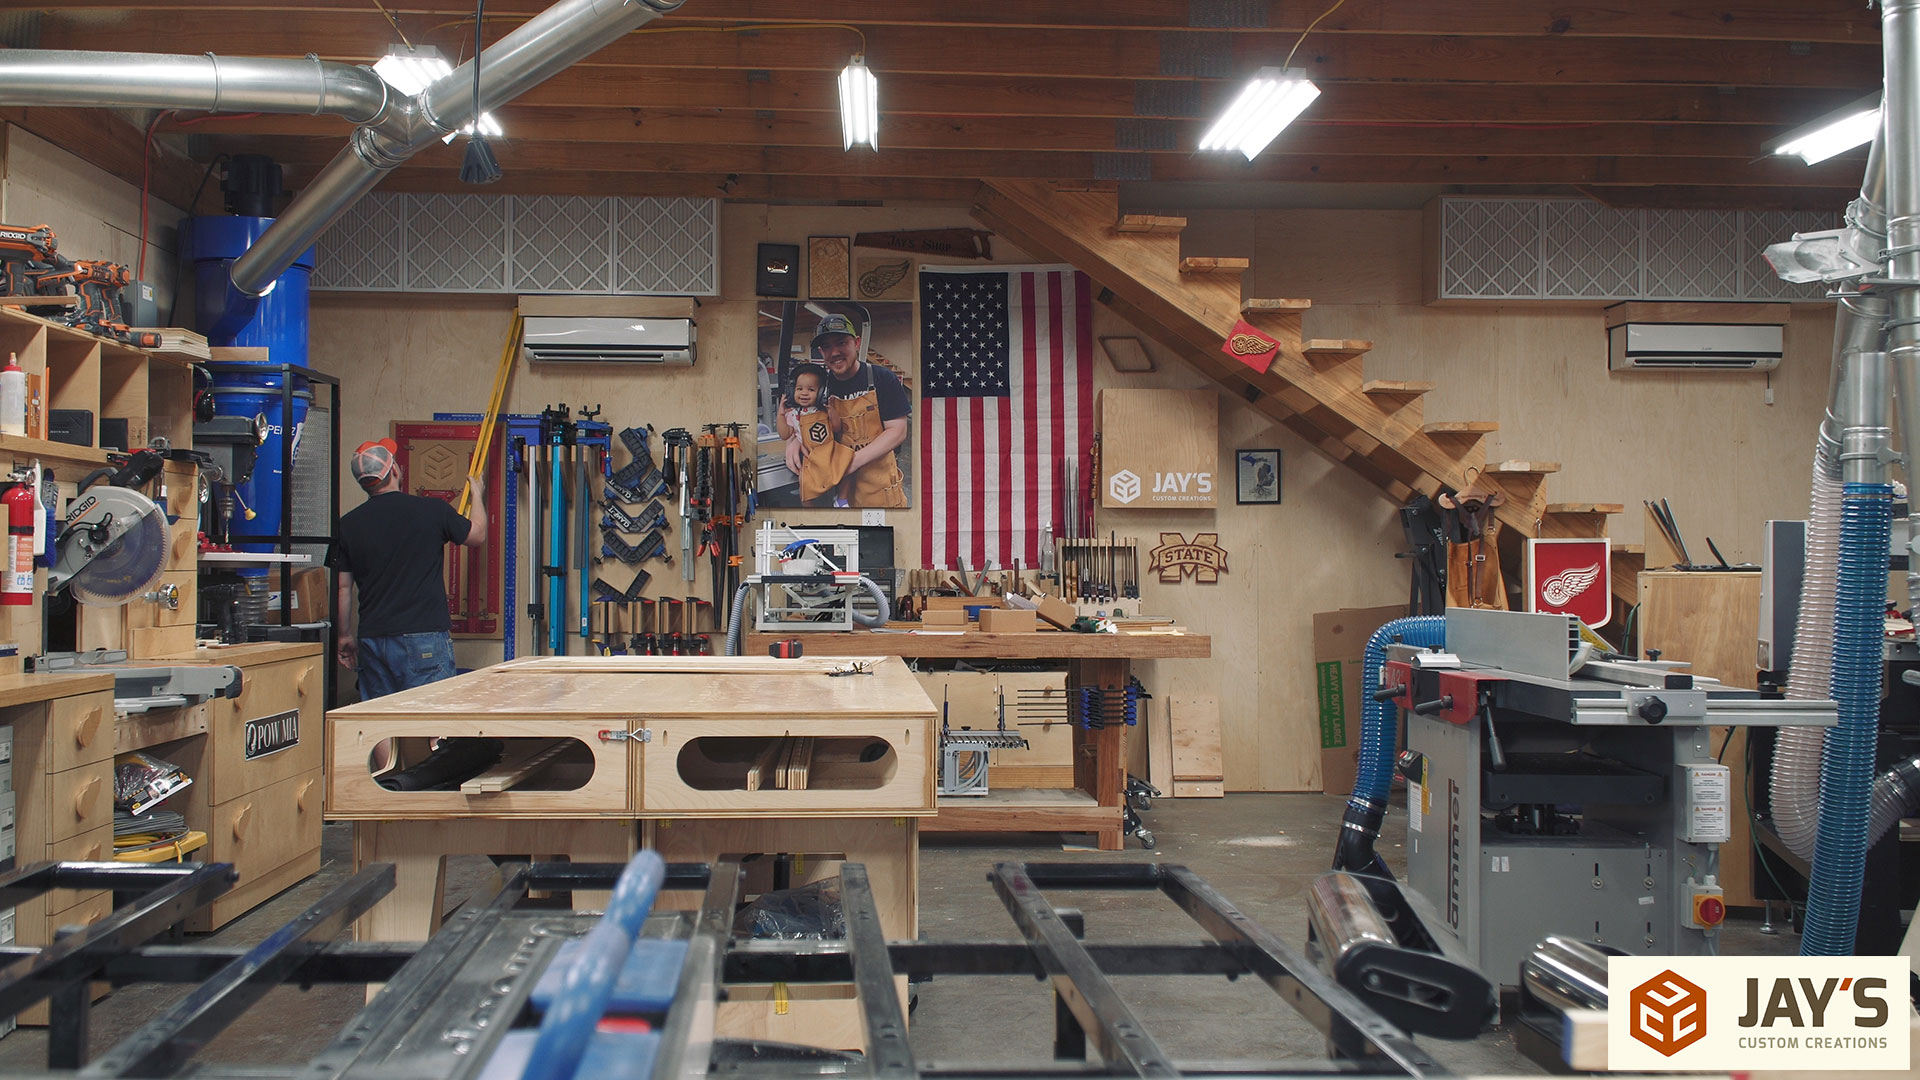
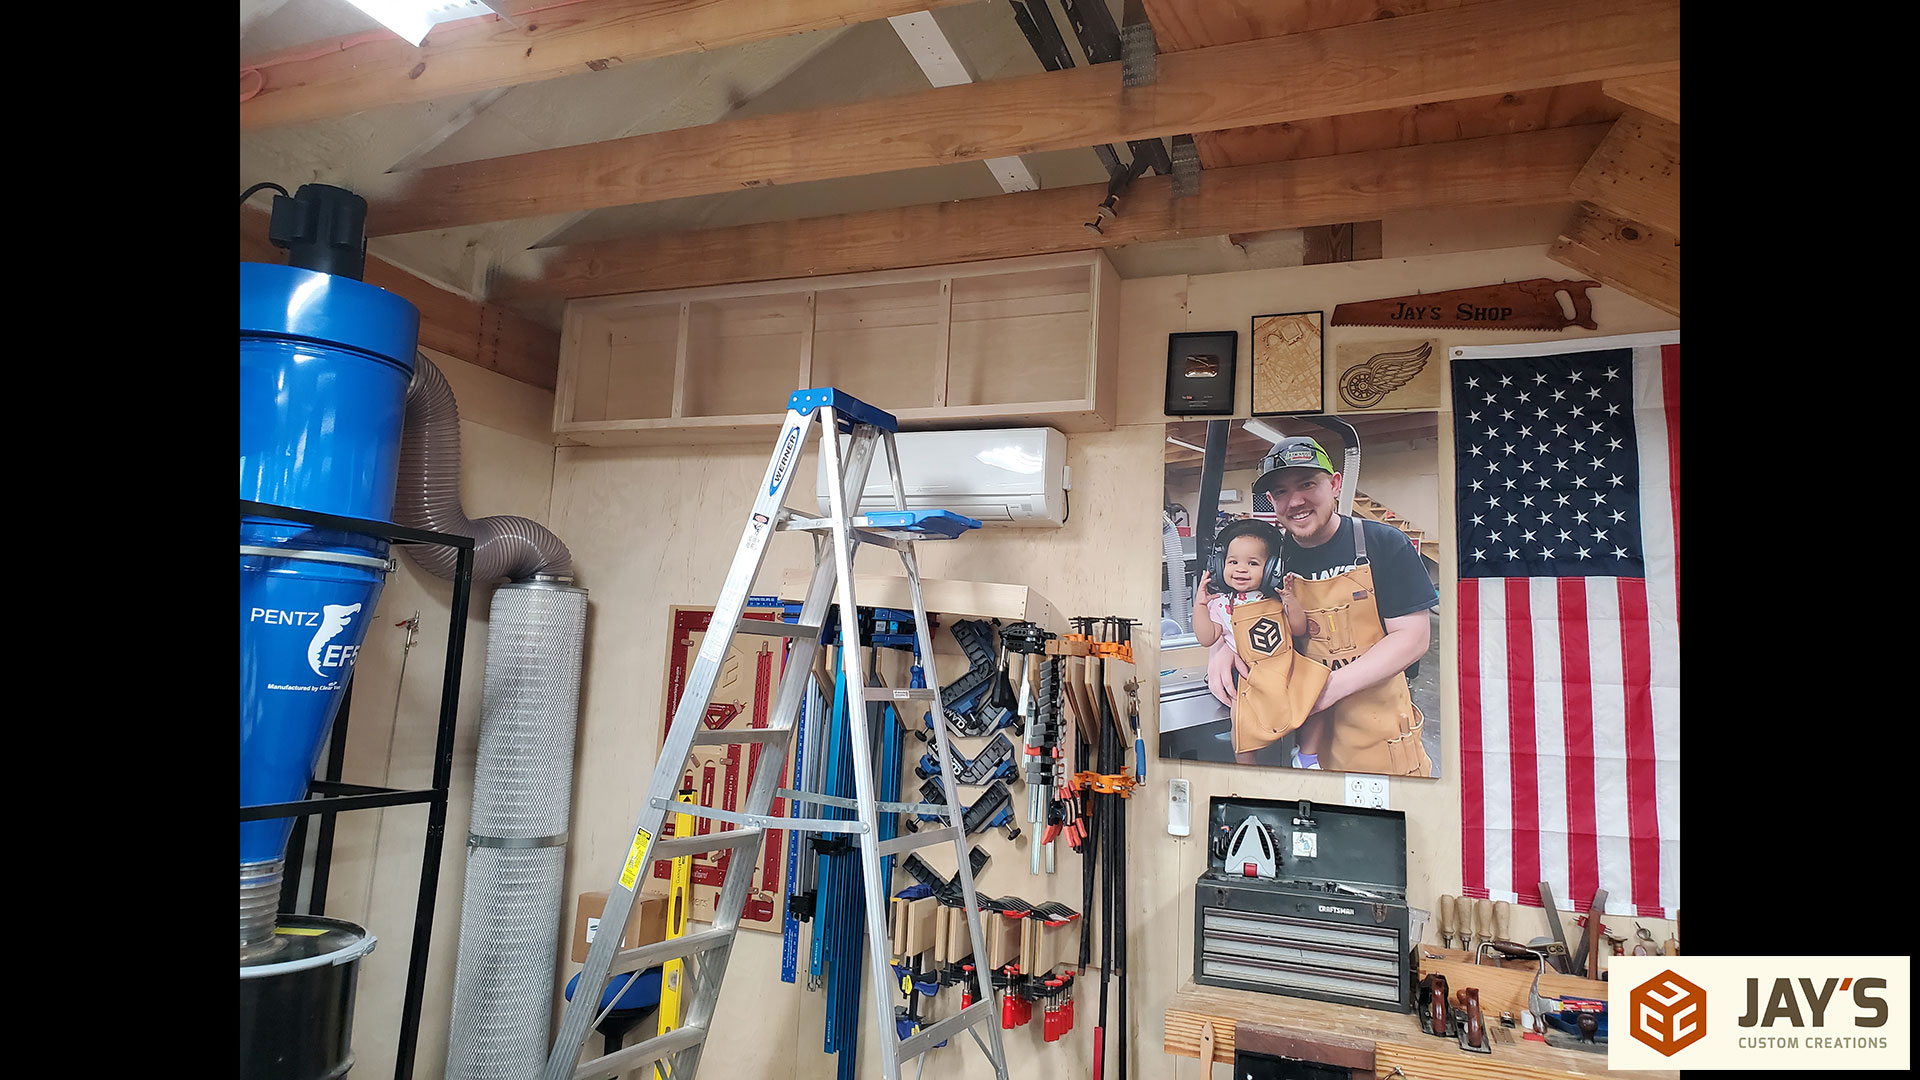
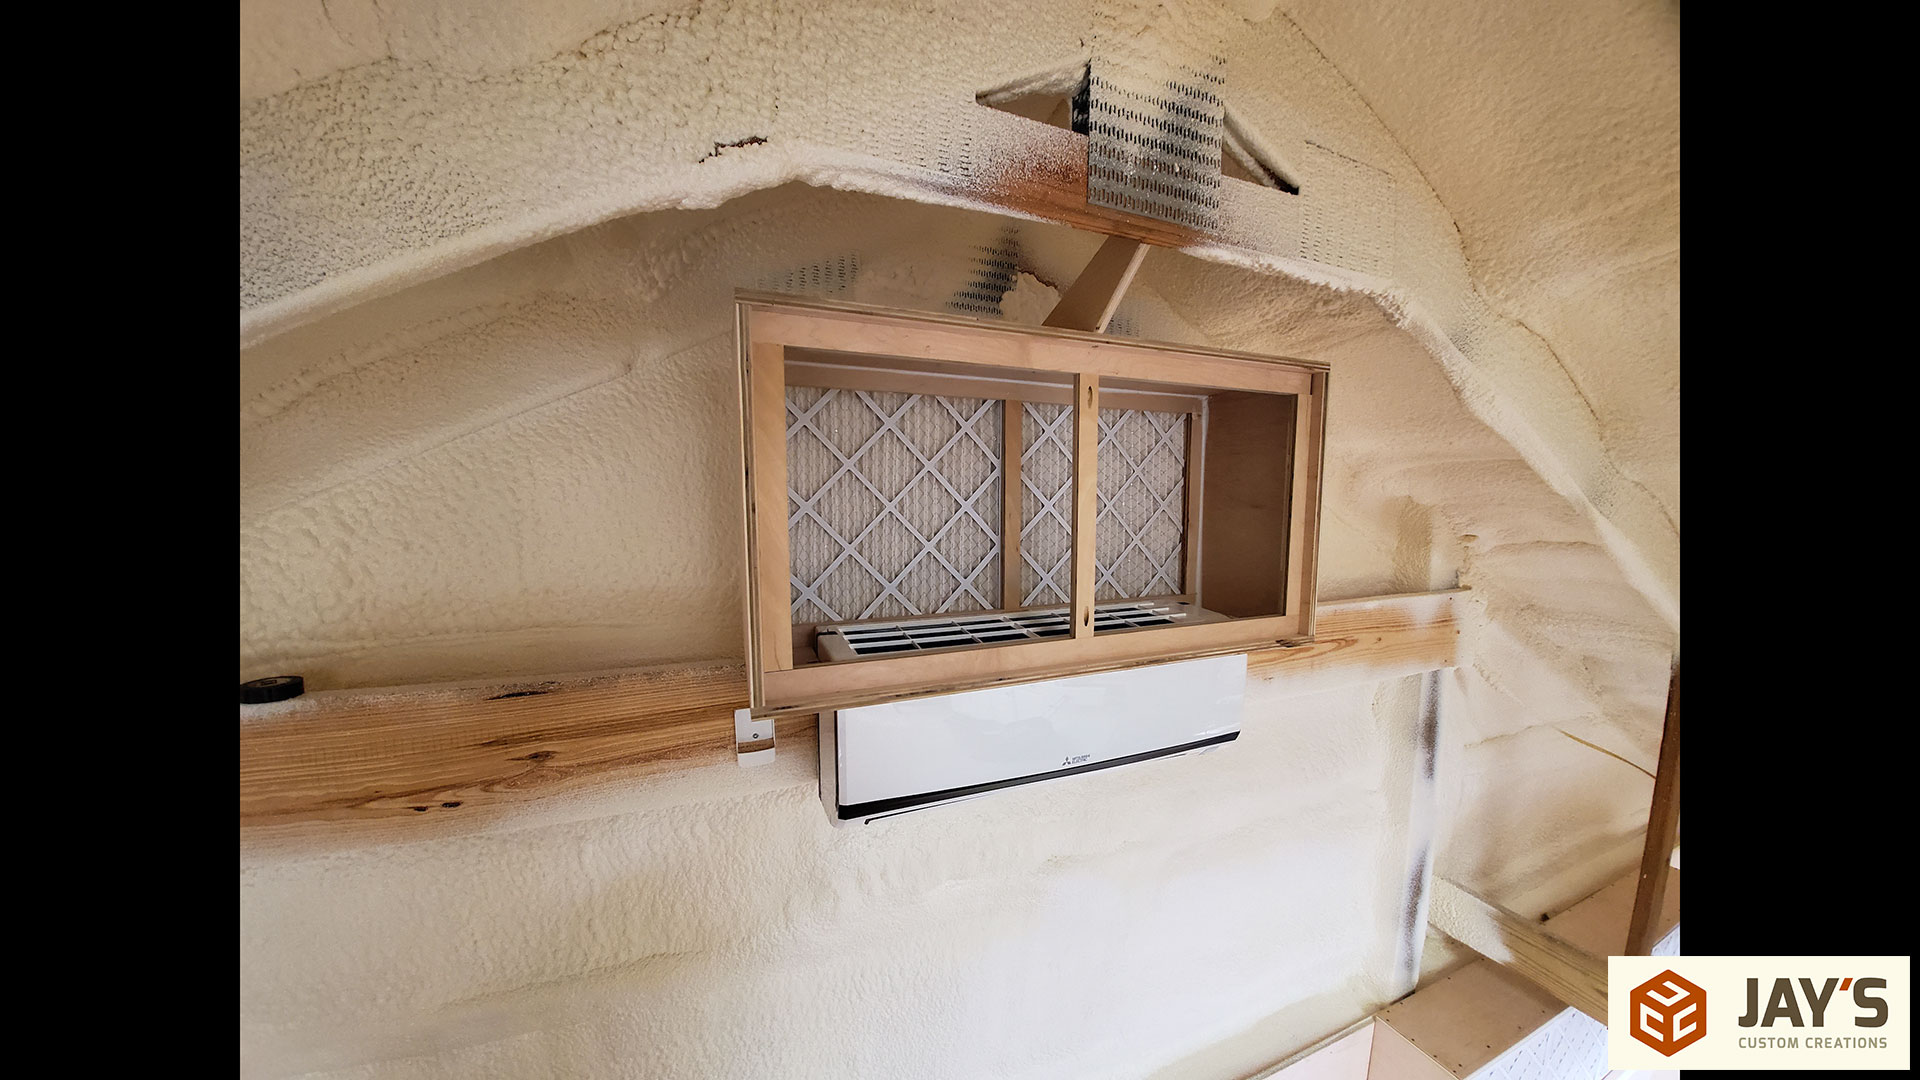
Back to the filter boxes, you can see that they don’t interfere with travel up and down the stairs.
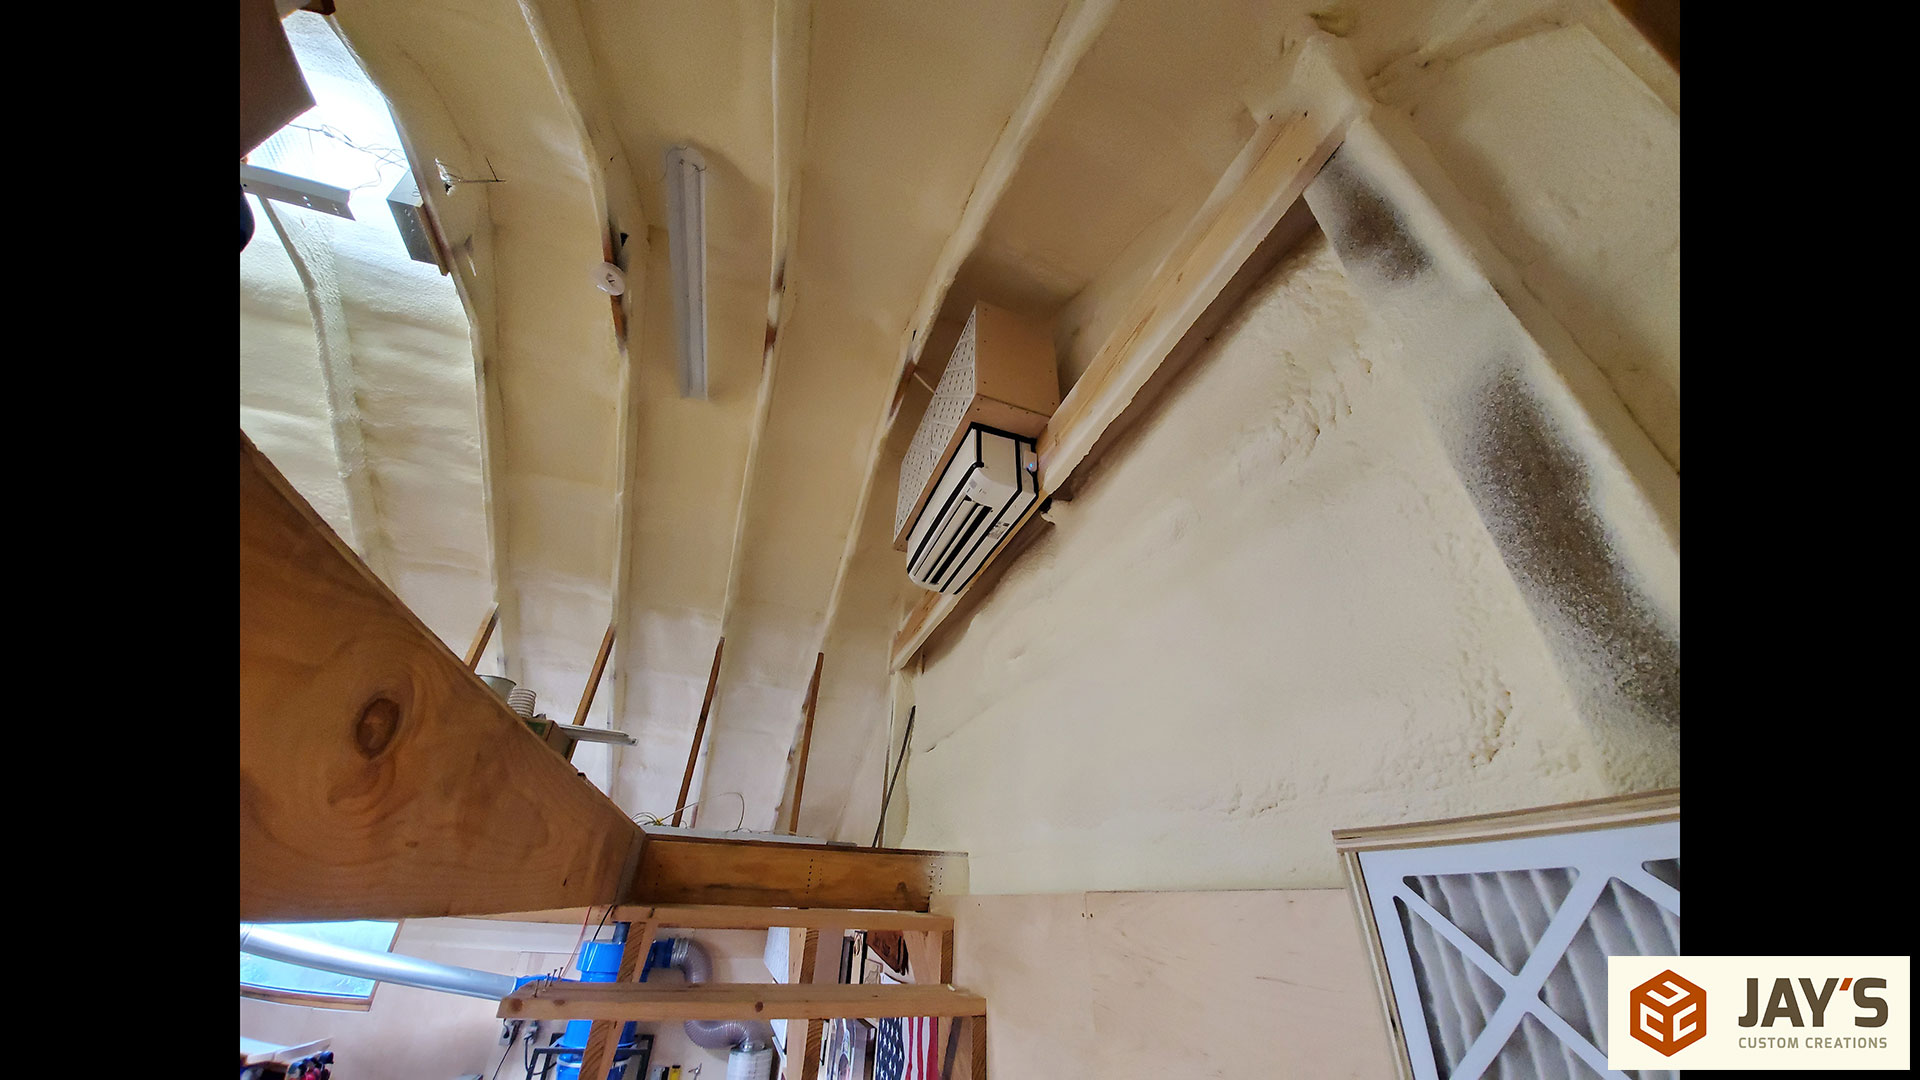
And the loft filter box tucks away neatly into the space.
That’s it for this one. Have a great day and I’ll talk to you later.


Jay,
I’m setting up my new shop, and it’s in an insulated exterior building 18’x22′ with 8′ ceilings. What type and size of split unit should I use for the new shop? I think that a 1-ton unit should be plenty big enough for the shop, but would like your input.
Depends on how well insulated it is. I have a friend with a 19x19x9 shop and he uses a 12k BTU unit with no problems. My last shop was 20x20x10 and not insulated and I got by with a 18k BTU unit. Lots of online calculators out there.
Oliver;
Depending on your climate, I think that a 1-ton system would probably be sufficient. I have a new metal building near Houston, 24’x36′, with 10-foot tall eaves and no ceiling. This building is fairly well insulated, with two walk-thru doors, two 3’x6′ sliding windows and one insulated roll-up garage door. A 2-ton Mitsubishi mini-split system has done a fine job of keeping the space cool on our hottest 100-degree days here. If I were in an area with very cold winters, I might have considered getting a system with more heating capacity.
While there are many online calculators available, I found them to be less than useful overall. The recommendations that I got from the various sites ranged from less than 1-ton up to a 4-ton size. A local HVAC company quoted systems from 2 tons to 3-1/2 tons earlier this year, and I took a chance on the high-efficiency 2-ton system. I figured that it would be good enough on most days, even if it struggled on the very hottest days, but it has never deviated from the temperature that we set at the thermostat.
Please don’t fix the typo in the second paragraph. Just keep on berating those particles. :D
hahaha. Darn auto correct.
Auto correct can go to he’ll
hahahahaha.
That is such a great idea! Great work, good sir! I’d get me some white electric tape to seal those seams on the mini-splits though, ’cause it’d be prettier. ;-)
I have a 28 x 48 detached garage insulated, with a 1.5 ton Mitsubishi mini split and it does great. A long summer with a lot of mid 90s and it stayed cool in the garage. Also controls humidity very well.
New ear protection? I couldn’t find any link for them on your video. Do you have a link?
Yes. Been testing them out so I haven’t added them to the tools list yet. So far I like them. https://amzn.to/2IMLhFN
Hey Jay. Great idea, I hate how dusty the insides of my mini split get with just that mesh filter. My issue is I’ve only got about 12” of space above my intake due to the ceiling. I was thinking to build the sleeve with the opening on the end of the sleeve and then the filter box would mount to one side of the unit. Do you see any issues with that?
As long as there are no air restrictions. Everything you add needs to be larger than the size of the air intake on the machine.
Adam, the situation you describe is similar to the situation in my garage. I have a little over 9″ between the top of the mini split and the ceiling. I’m interested in whether you built your workaround due to space restrictions and how it’s working. I want to adapt Jay’s concept to my circumstances, but don’t want to create more problems by modifying what appears to be a successful design if doing so won’t work.
Thanks in advance for any insights you share.
Mike
Bloody clever! Now I don’t have much hvac knowledge other than changing contractors and brazing a few line sets but you’re thinking seems to be correct. Larger surface area won’t decrease flow capacity.
90F in October? Oh heck no!
Good job Jay.
Hi Jay,
Thanks for another great video. I just wanted to comment on your evaluation of the effect the filters would have on your mini-split efficiency. Measuring the amperage draw is an excellent way to evalualuate the load on equipment. One counter intuitive thing about blowers though is that load drops as air flow is restricted due to there being less air to push against. Since you saw no difference with or without the filters their effect when clean is negligible but you may find the units are staying on longer to maintain shop temperature as they get dirty which will push up your energy costs. I expect though that you will be servicing them on a schedule so you won’t need to deal with that.
Cheers!
Yes I had the amperage draw backwards. I’ll keep monitoring it when the filters get dusty.
Jay,
Perhaps it’s too early to answer for the mini-split…but maybe you can answer for the air cart.
How often do you need to replace the filters?
— Corbett
When they get dirty I vacuum them off. They are pretty old. I’m just pulling off dust and not the germs that you pick up in a closed house so I’ve never seen a problem with reusing them.
Great project and video, Jay. You really paid a lot of attention to detail, my friend. Your video narrative is nicely detailed which I appreciate from a viewer perspective.
I am in the process of bringing my shop to a more competed state, so watching you build your out gives me so many ideas.
Thanks for sharing.
I have the same system but using only two of the three Zones. They are fantastic. Mine is a heat pump also.
You have more than enough return air in the filter boxes.
If you really wanted to go overboard on airborne particulates you could hire a firm to run pumps in your shop and have the filters analyzed with phase-contrast microscopy. But I imagine that your shop surpasses any kind of standards for wood shops.
Hi Jay,
Neat conversion!
One little daation that may prove worthwile: plugging a barometer into the side of the box over the stairs would give an indication that your filters are getting plugged up by showing a falling column of fluid.
Just a hose with some coloured water insid bent into a u-shape and a drop of oil on top would work.
Draw a line on the level of working pressure of the system and when the water level starts falling while the system runs indicates underpressure due to plugged up filters.
Just an idea
Cheers,
Dick van Zanten
Jay…
Thanks (again) for a most instructive video. Quite a few of those neat ideas swill likely snow up in shops all over the country. For my shop I am going to consider mini splits like yours and finally retire my great big old GM window unit. Nothing really wrong with it…just dims the lights when it cycles.
Noted your use again of french cleats…realized that I’ve got some cabinets that need just that …so simple, safe, and secure.
You probably would have to measure air flow to see if there is any drop-off in efficiency. While you may not be drawing more amps, it might have to run longer to overcome the air restriction. This will increase as the filters get dirty. Just something to keep in mind.
Taking in the view from your desk over the shop………………………fireman’s pole!!!!!!!!!!!!!!!!!!!!
Great idea. Love the video exp;aining it. Do you think mini splits would work up here in Canada? In our area the coldest months (Dec – March) typically can get -25C temps for quite awhile. I plan to insulate and put up vapour barrier plus an insulated wood floor in the half of the garage I will have my shop in (9′ X20′). Can’t run a gas line unless I spend thousands of dollars.
Extreme cold temps will require you to spend a lot regardless…unless you heat with wood. Most typical heat pump mini splits won’t work well or at all in those cold temps but Mitsubishi has an inverter technology that heats at extreme cold temps. Might be worth looking into.
The people that say you shouldn’t try a thing are the real problems you in society! You don’t know something absolutely until you do a physical test. Spacex is a rocket company with many “rocket scientists” and they build stuff and test it, even though they can prove it out mathematically. I like to see you do projects that aren’t literal wood working projects, because I find myself doing house projects more often than just wood working, so I appreciate seeing how you handle different projects.
Every idea comes to reality through a prototype.
I think it’s a great idea. At the very least it will improve the longevity of your mini-split. Even better is it will improve air quality. I’m not sure I understand why people would be against it when you are throwing more surface area at the filtration than you get with the stock filters.
hi Jay, stumbled on this video while watching your video for the plywood blast gates. I live down in Tampa and wanted a cool woodshop, so I added a mini split unit also. My shop is only 16 x 20 and well insulated, so I only needed a 9k single unit. My concern for double filtration caused me to contact the manufacturer and discuss my plans with one of the tech guys. He assured me that the additional filters was a non issue! I used some extra house filters that I already had and created a slide tray, horizontal that held 2 filters taped together to form a 12 x 36. Works great and no worries about clogging up the little cheezy foam filters that come with the unit! Removal for maintenance takes 5 seconds. Great video and now to make my blast gates!! Thanks!!
Glad to hear this, Dennis. And thanks for passing along your info from the tech.
You could have saved space and gotten the same surface area by just doing one 20″ by 20″ by 5″ media filter. Instead of 1″ pleats you have 1 filter with 5″ pleats. Same merv rating. The higher the merv rating equals higher static pressure. You can look on the filters and see what the pressure drop is. I assume you have a micrometer. Checking amp draw on mini splits is useless since everything runs through the inverter so you have dc motors in most cases. You can never have too much return but you definitely can restrict airflow with high merv rat d filters. I always recommend merv 8 to my customers regular splits systems. Nice work!
I would like to do something like this in my garage. Currently I swelter in the summer with a portable air conditioner that puts out 9K BTU. Definitely not enough. I noticed that you have 2 mini split units. What is the BTUs of each unit? Did you use a multizone or single zone? Your experience would be very helpful to me trying to size what I need so I won’t pass out when the late spring/summer comes again! Many thanks.