This is a pecan slab I got from a friend of mine Ted Alexander, in Oklahoma in 2017, and in this article and video, I’m going to show you how I turned it into a beautiful table with a somewhat hidden drawer.
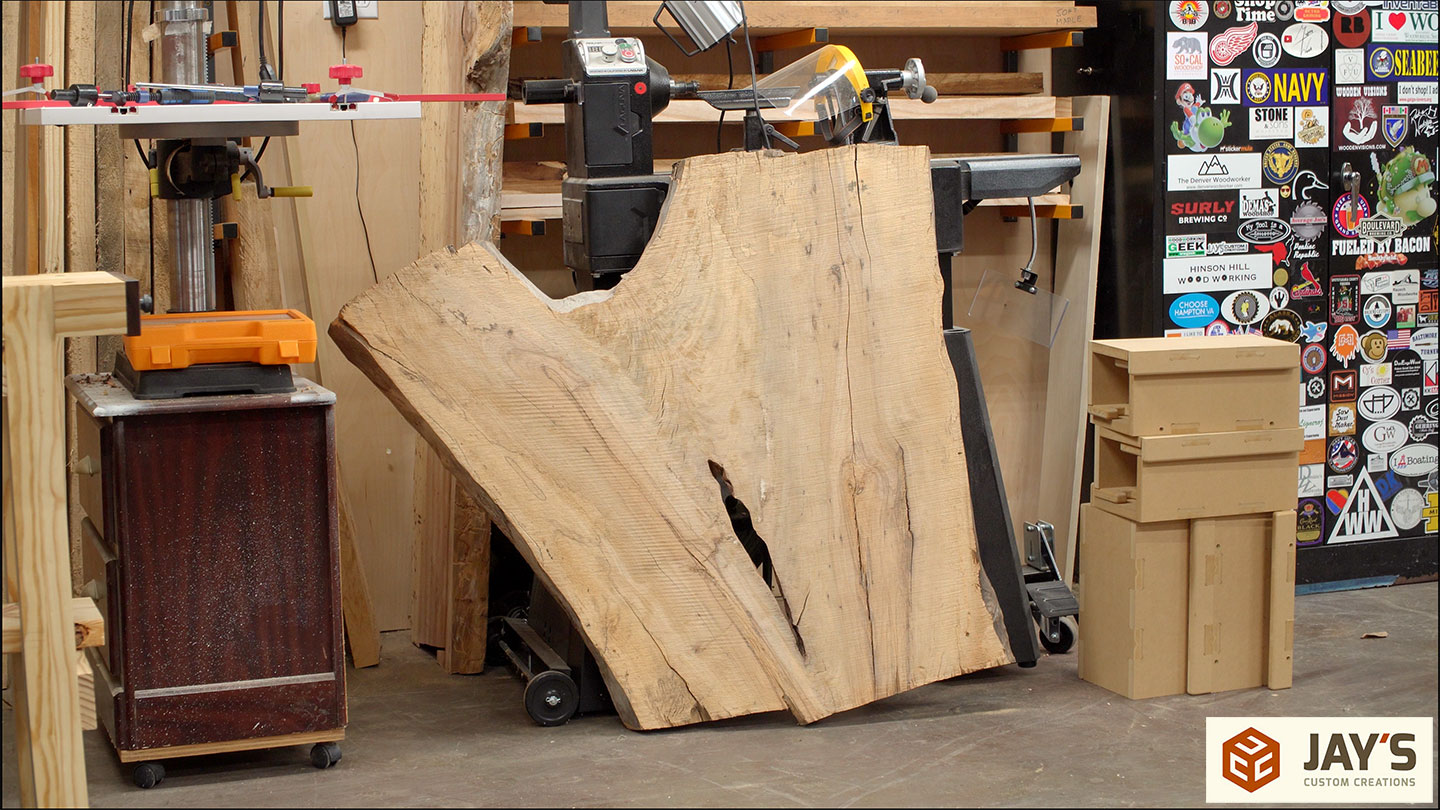
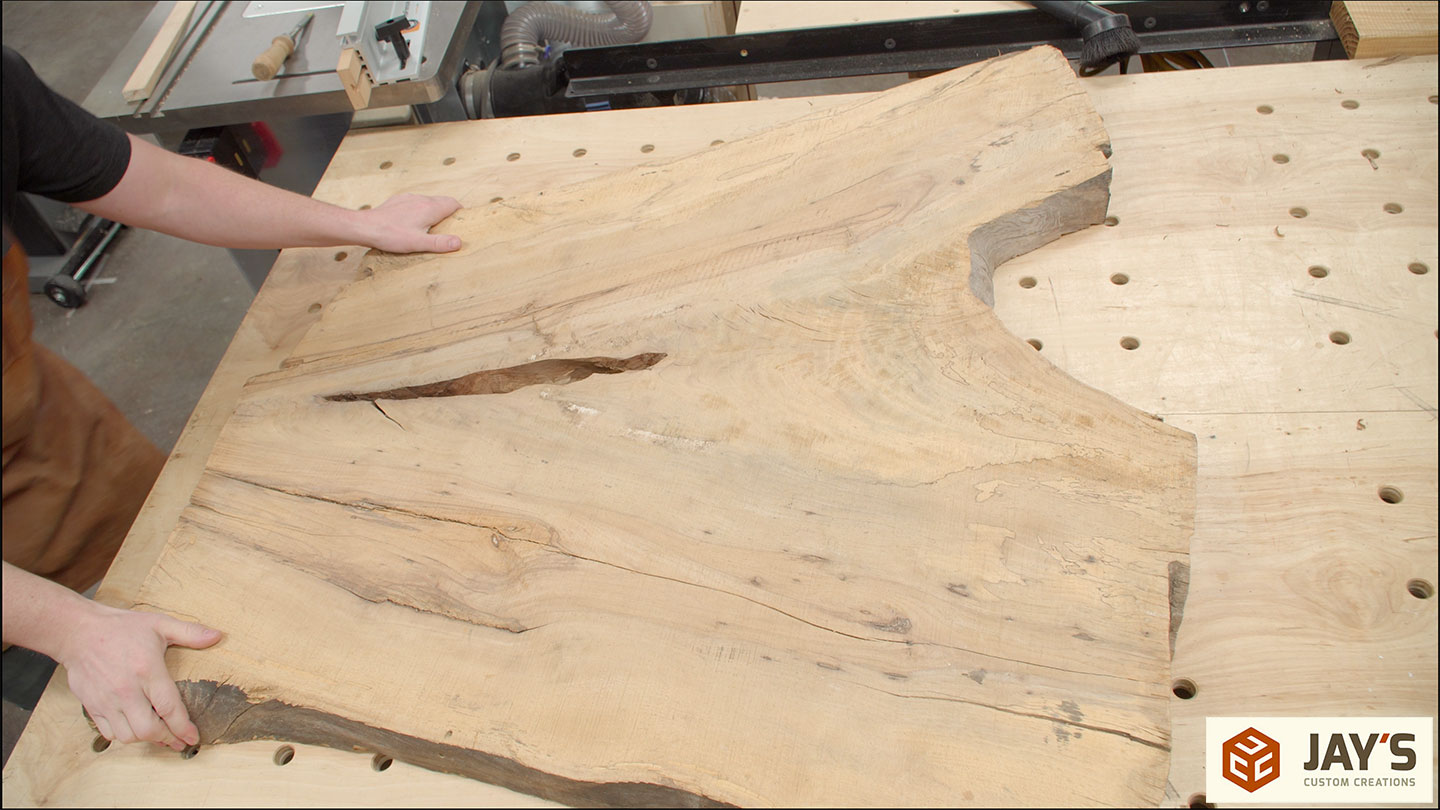
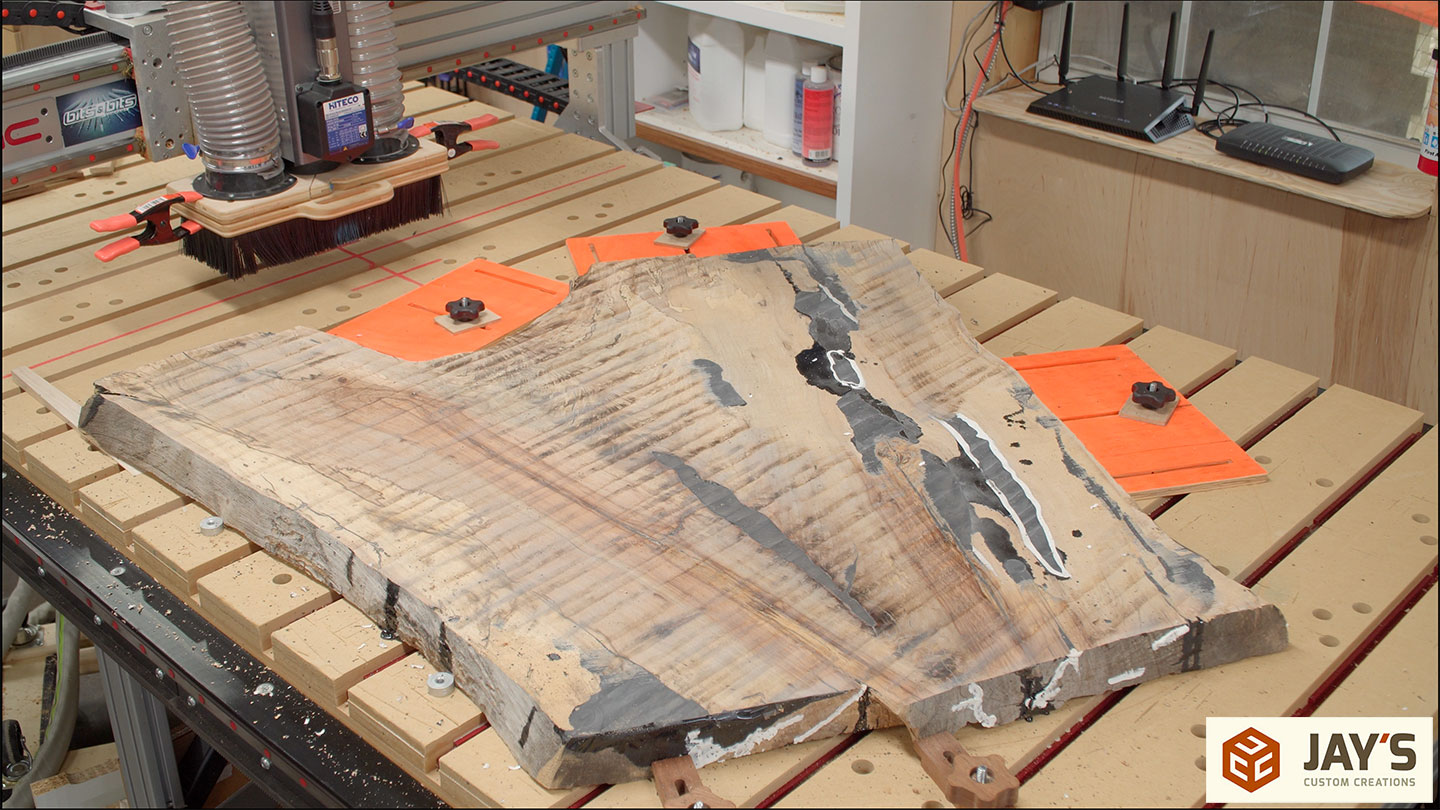
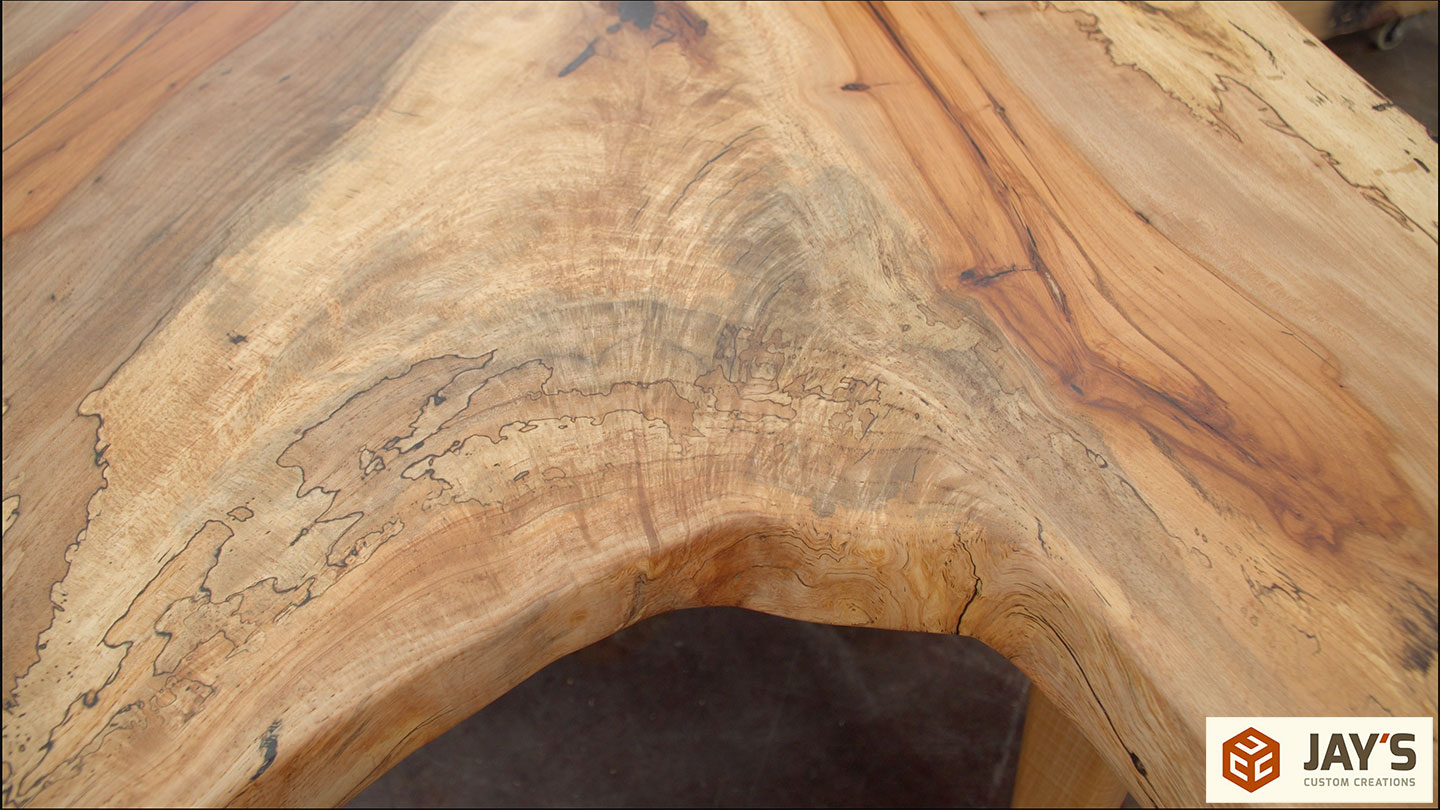
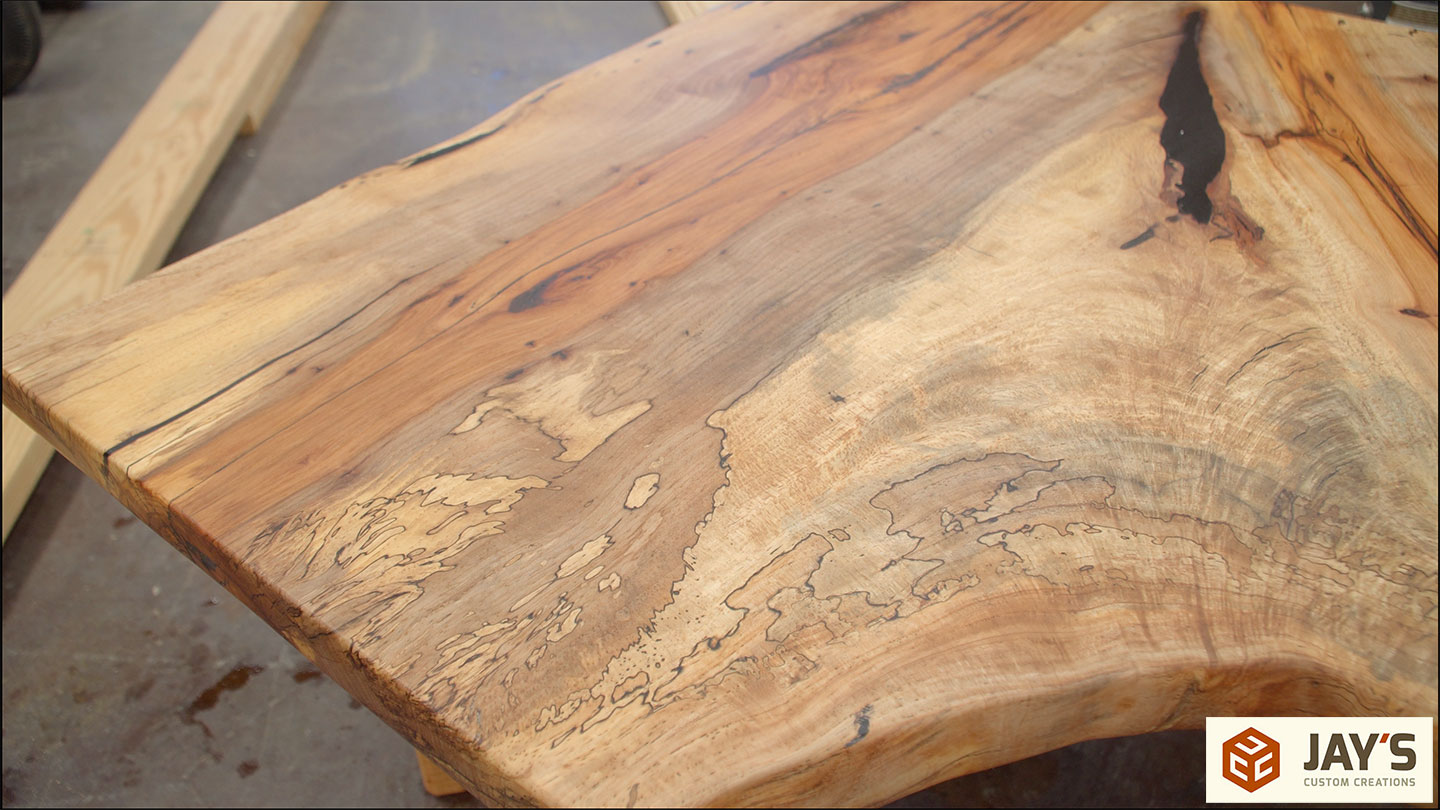
The first step was to examine the slab and determine a game plan. Apart from the obvious voids and cracks that you can easily see, it was full of small cracks and bug holes here and there.

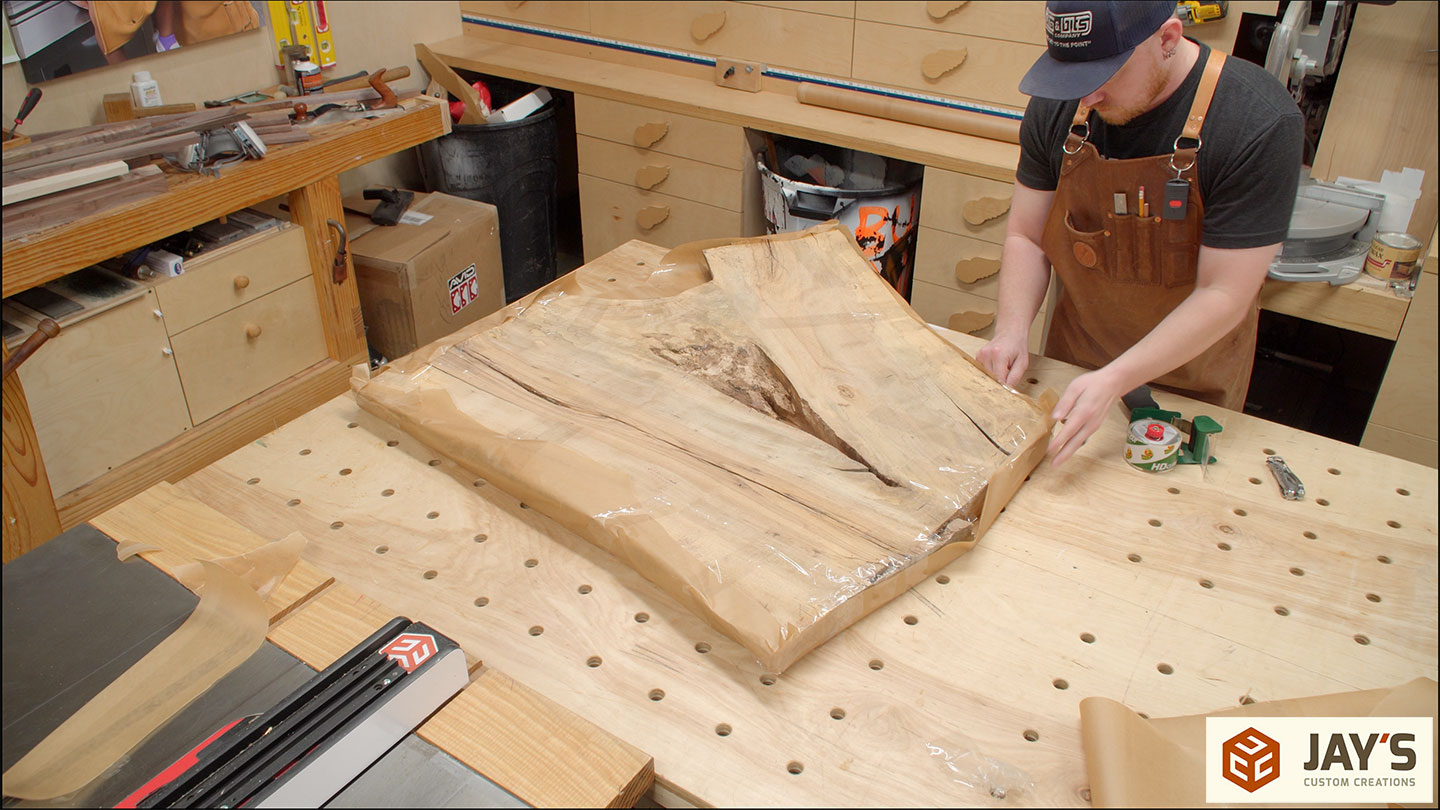
House wrap tape is commonly used in epoxy projects but I went with regular clear packing tape instead. It was much cheaper and I already had a lot on hand. I put a layer of tape over the major areas first and then a layer of tape over the entire top side. I figured it would be easier to pour from the bottom side first as the larger bark inclusion in the center would be easier to fill that way.

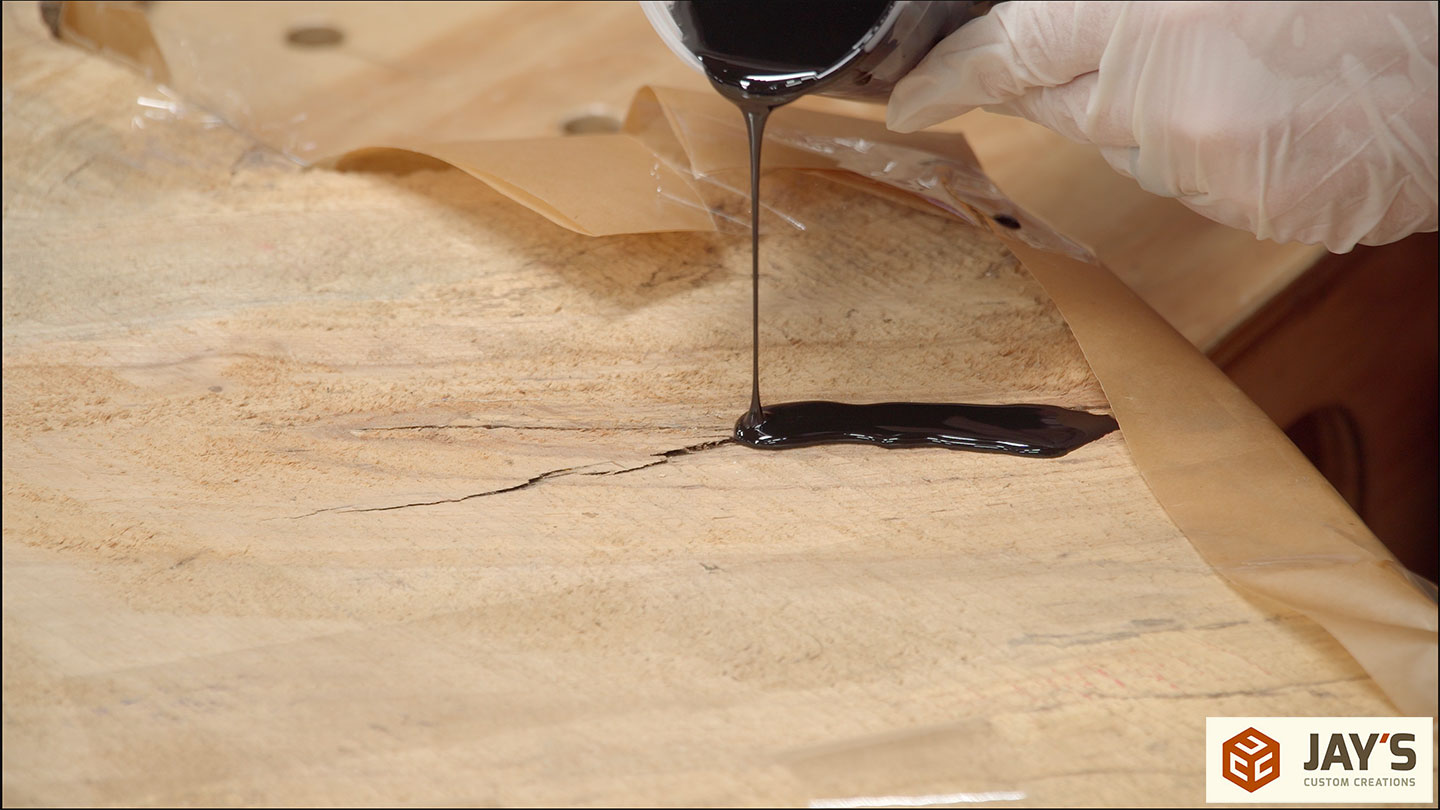
I’m only using epoxy to fill the bark inclusion and the cracks and I won’t be, I guess, suspending the table in epoxy around the perimeter. So rather than a melamine form, I decided to use some wax paper to basically gift wrap the slab. This will allow me to flood the slab with epoxy and hopefully stop any extra from spilling out.

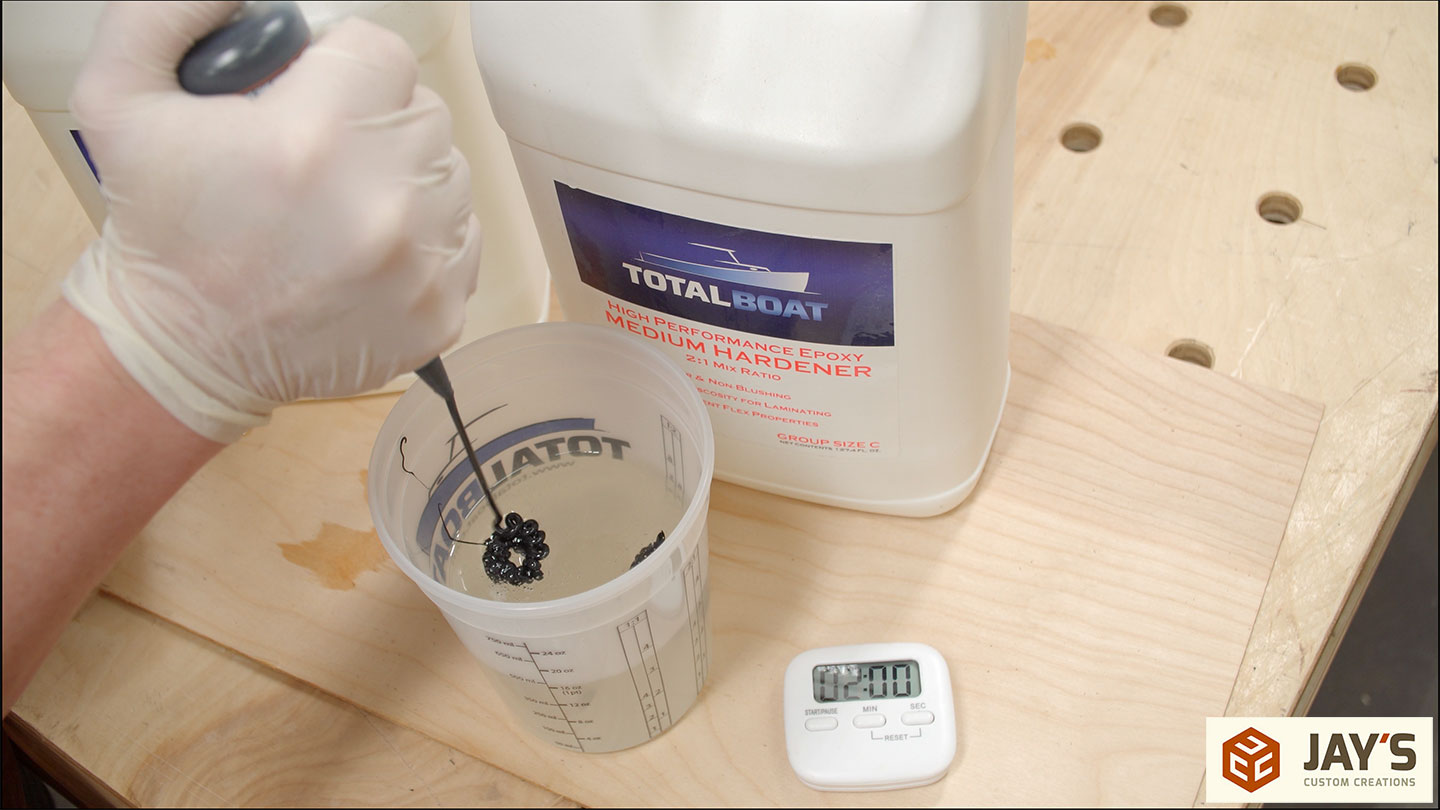
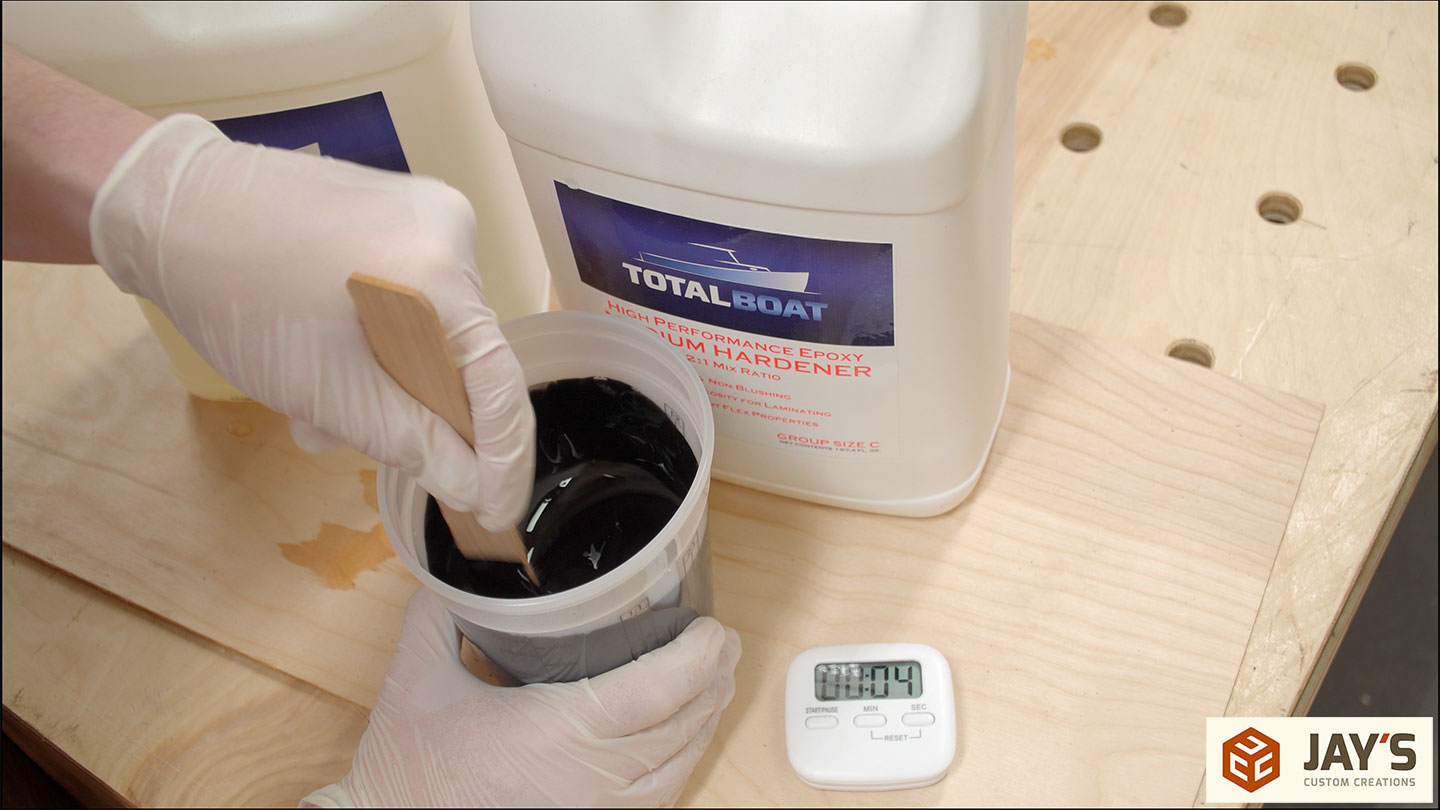
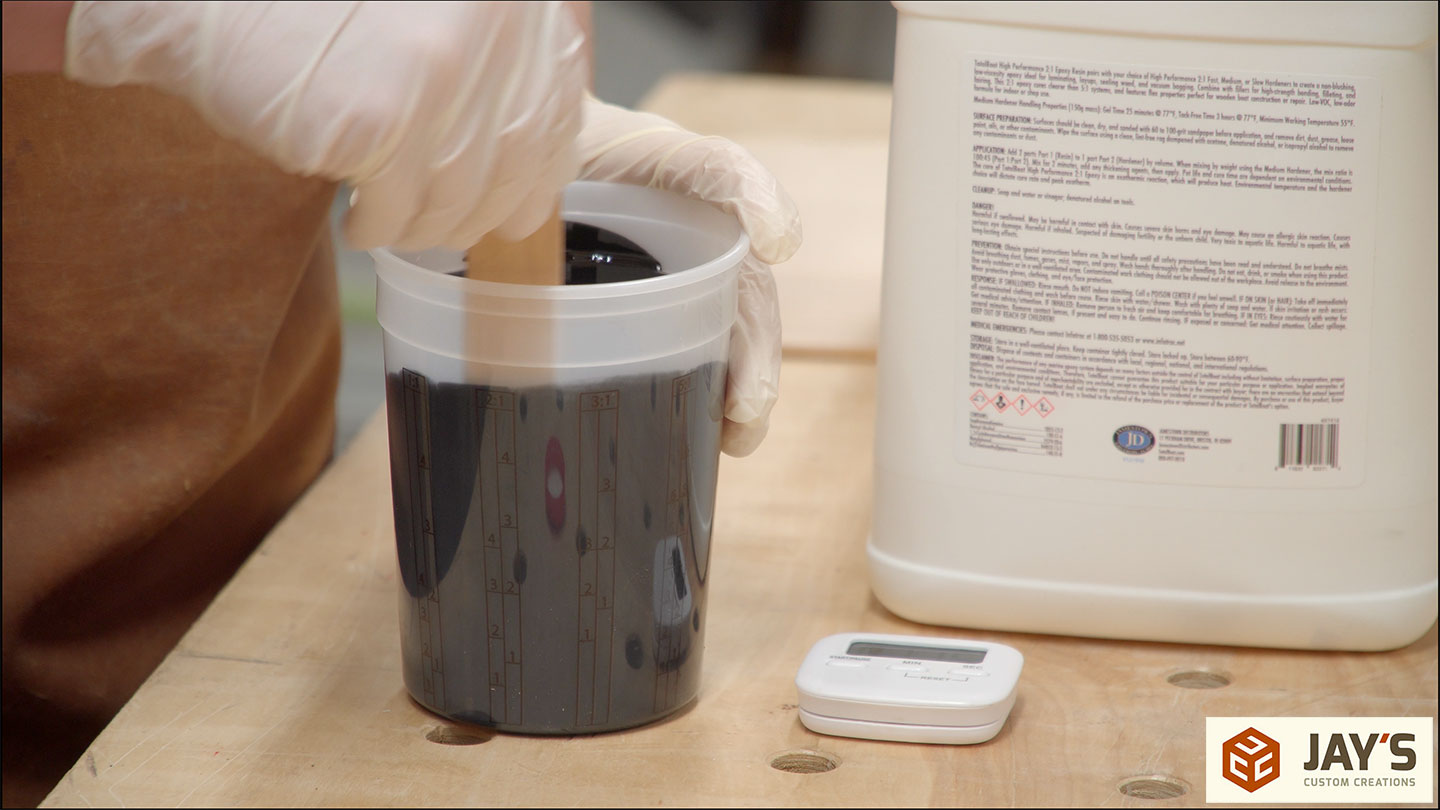
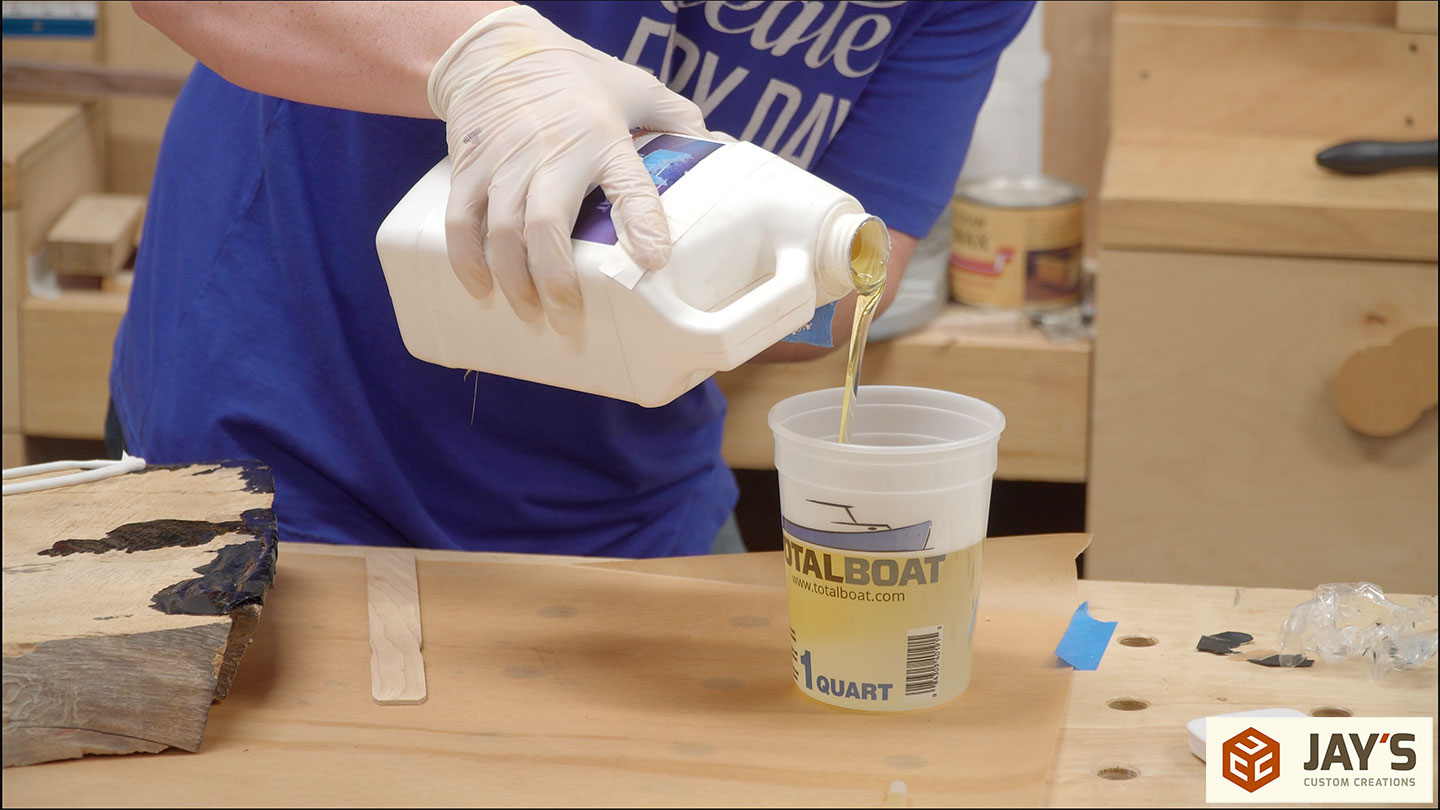
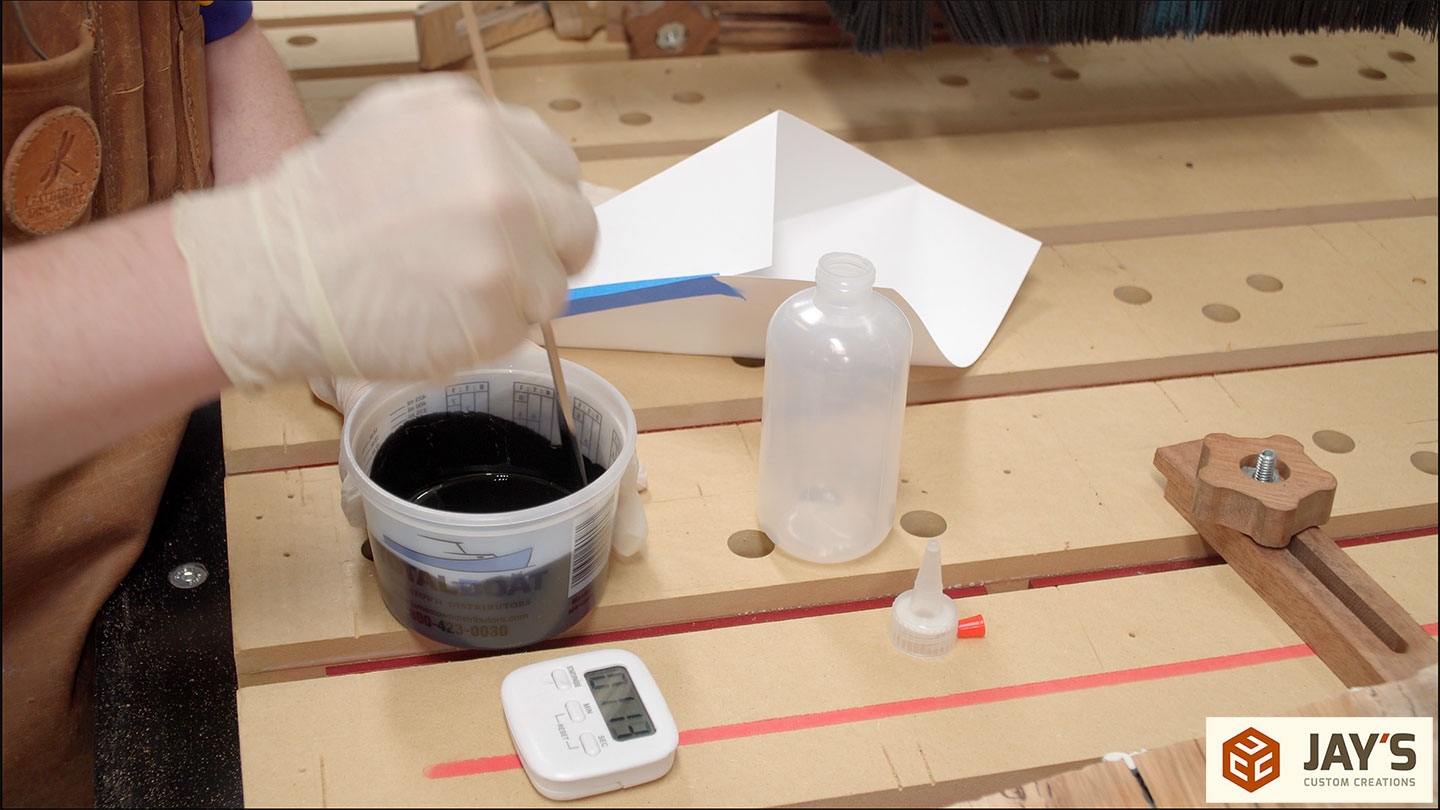
The epoxy I’m using is Total Boat High Performance with medium hardener. I’m also tinting it black with some epoxy dye that a friend left in my shop a couple of years ago. The bottles of High Performance say that you need to mix it for at least two minutes so I recommend picking up a cheap kitchen timer to dedicate to this task. We all use our smartphones for everything and I really don’t like the idea of sticky epoxy fingers touching my cell phone.

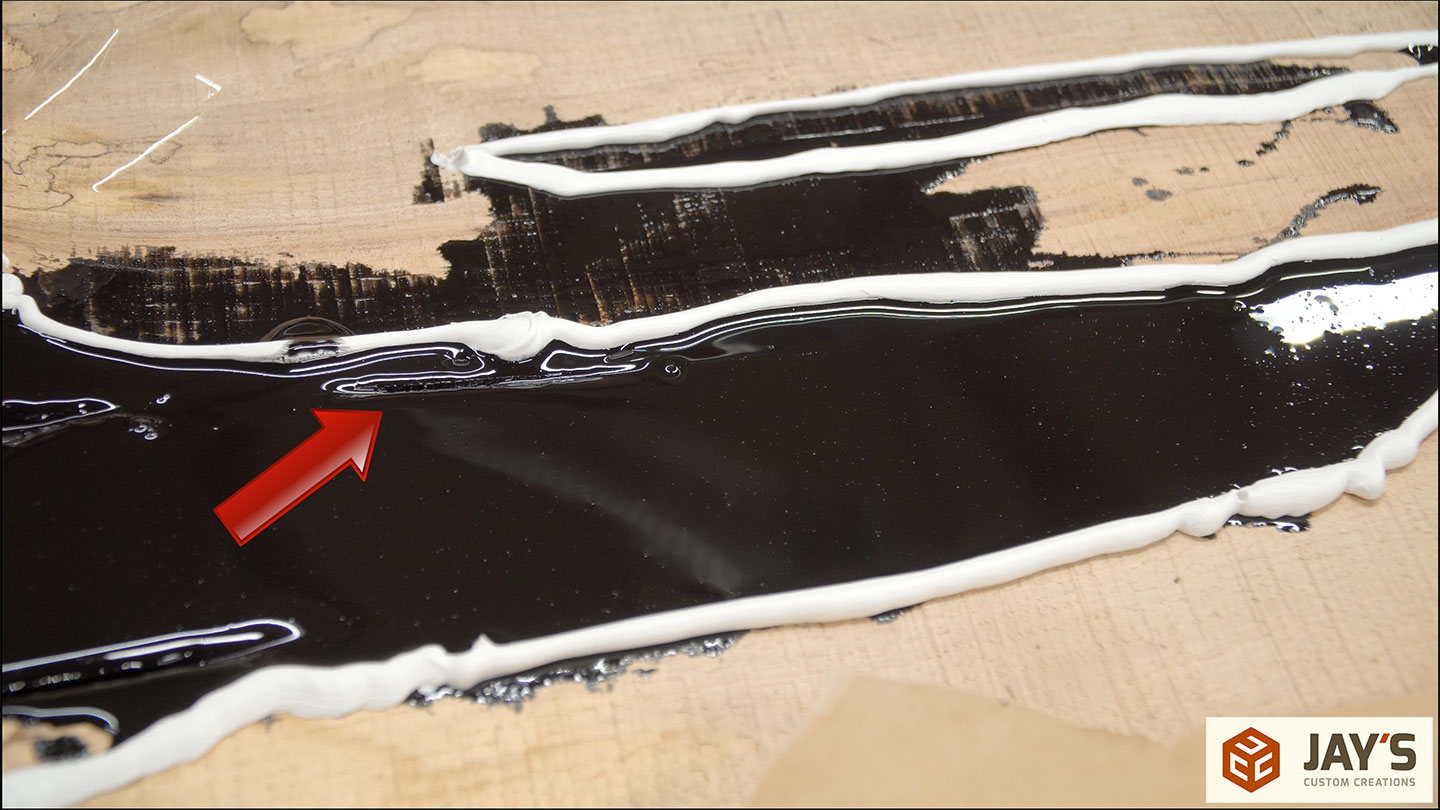
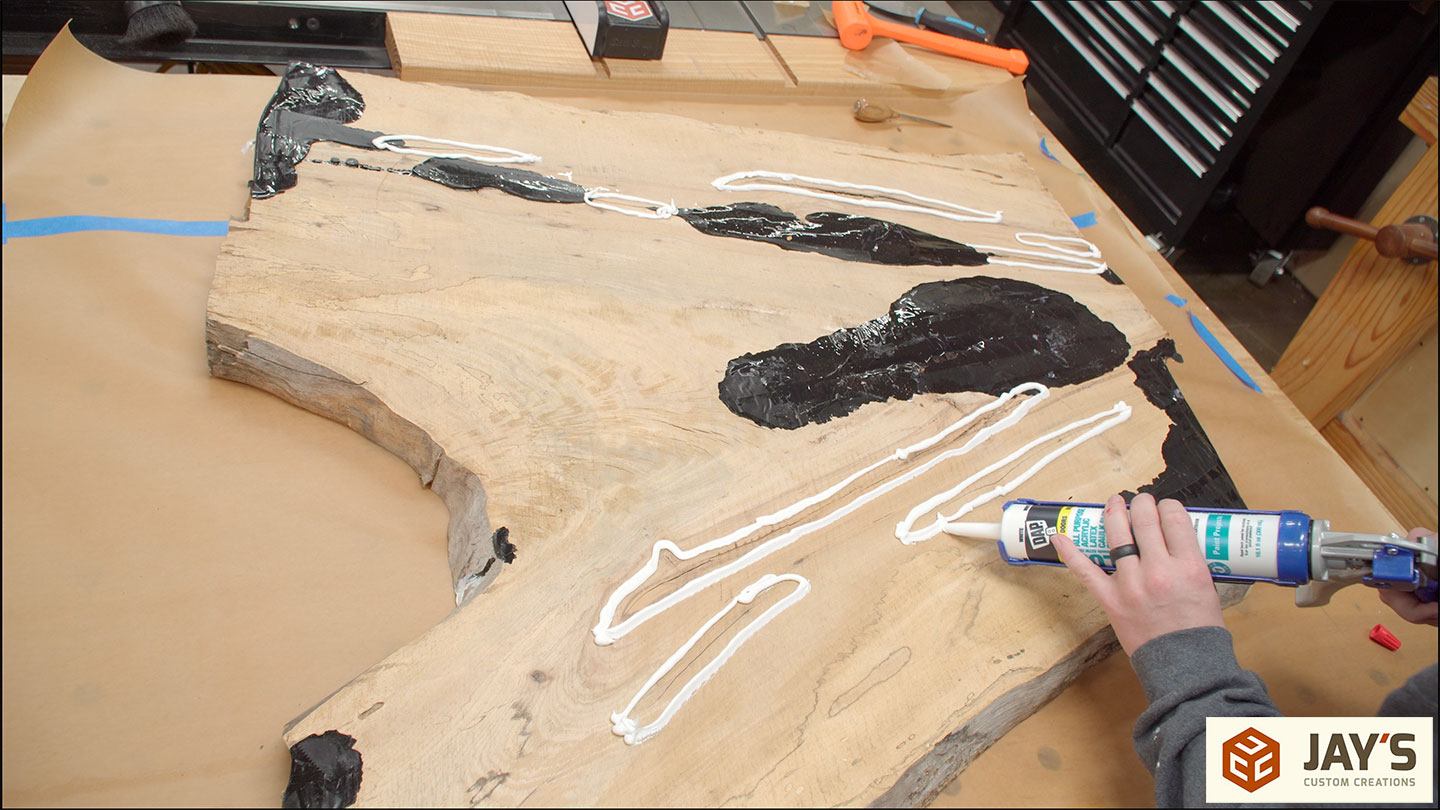
Here’s a mistake. I started the first pour without using caulking as an epoxy damn to focus the location of the pour. That was an instant “you’re a dummy” moment as I started to pour. Luckily, it’s the first pour which means all of the voids can accept the most amount of epoxy.

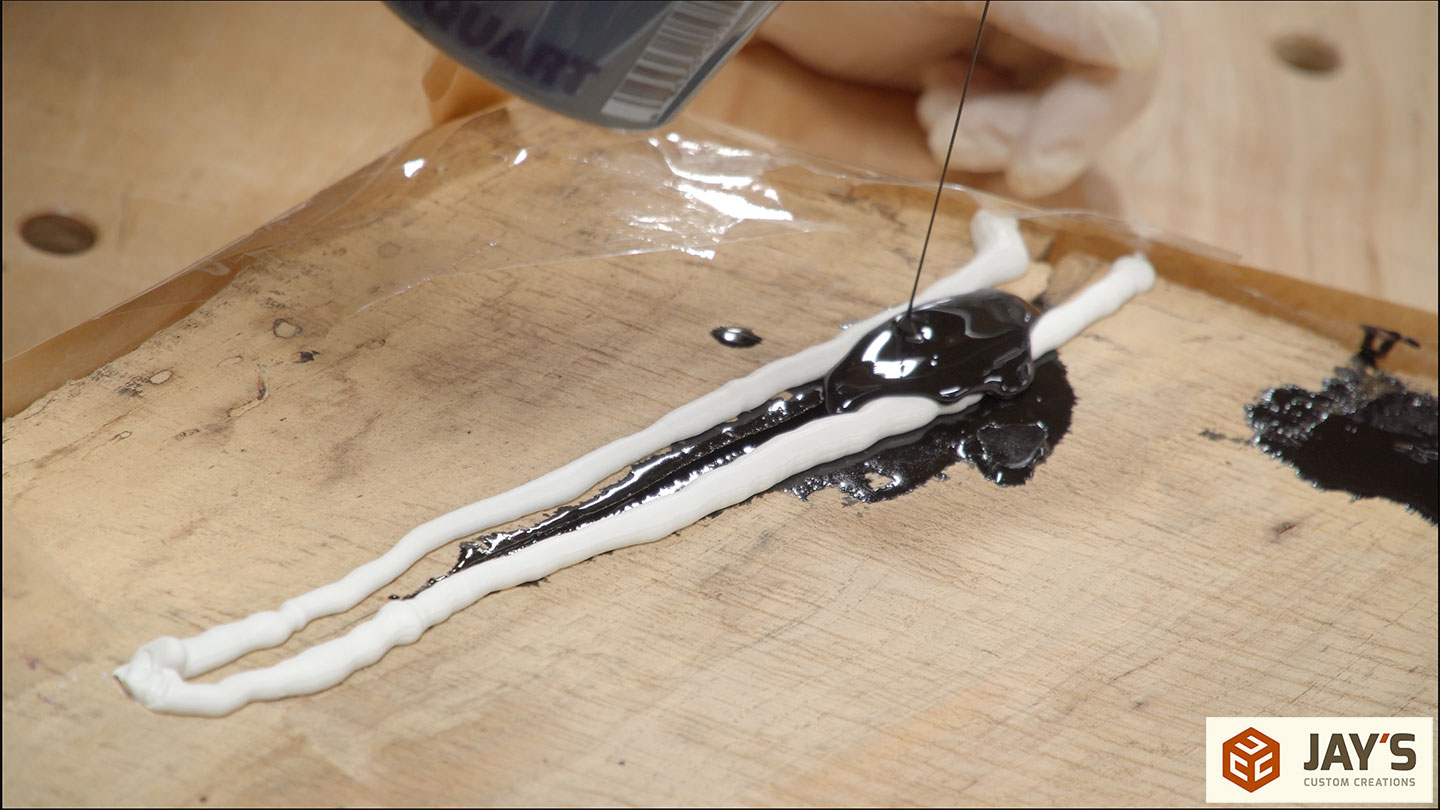
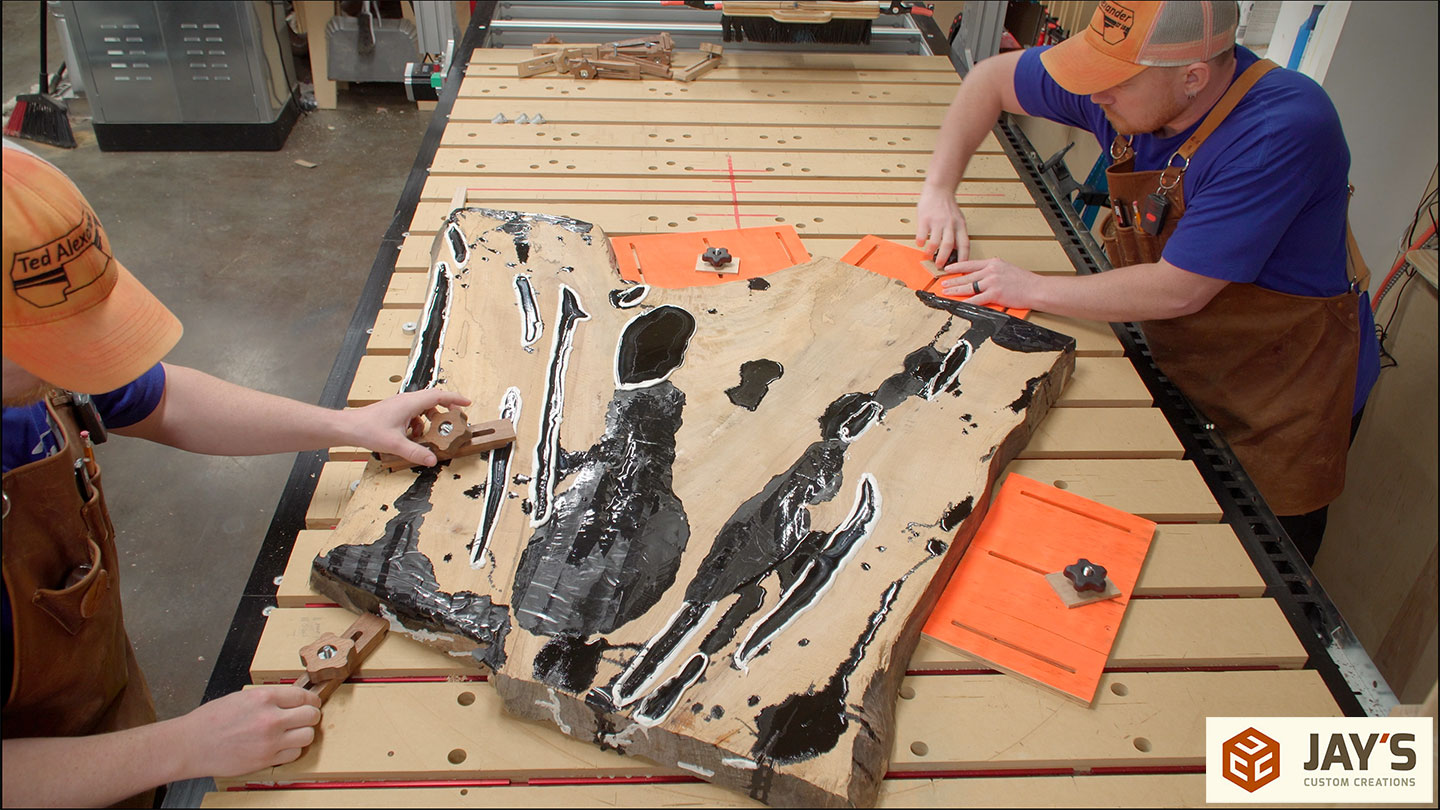
After letting the first pour set up for a while I added the caulking to create a dam around all of the major flood areas.
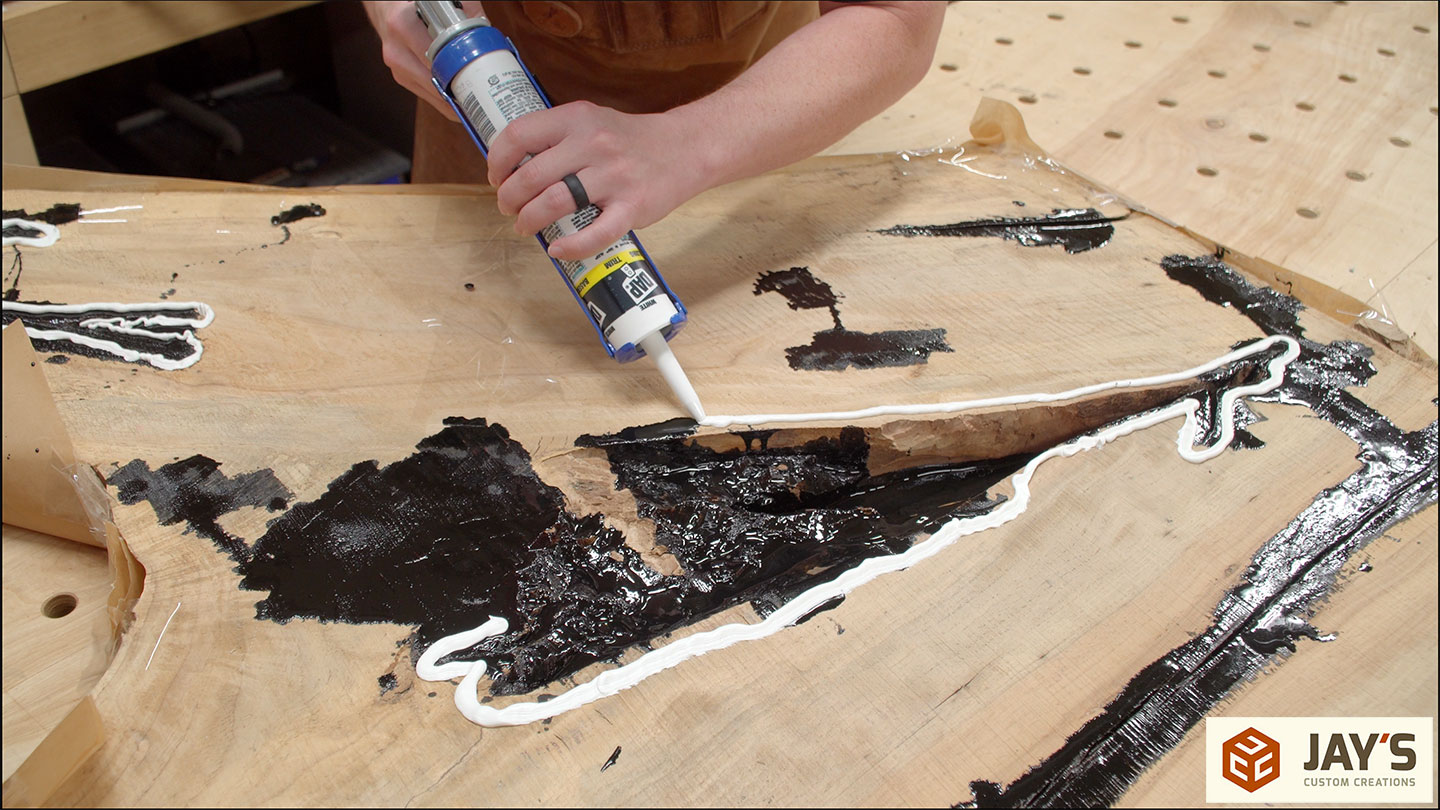
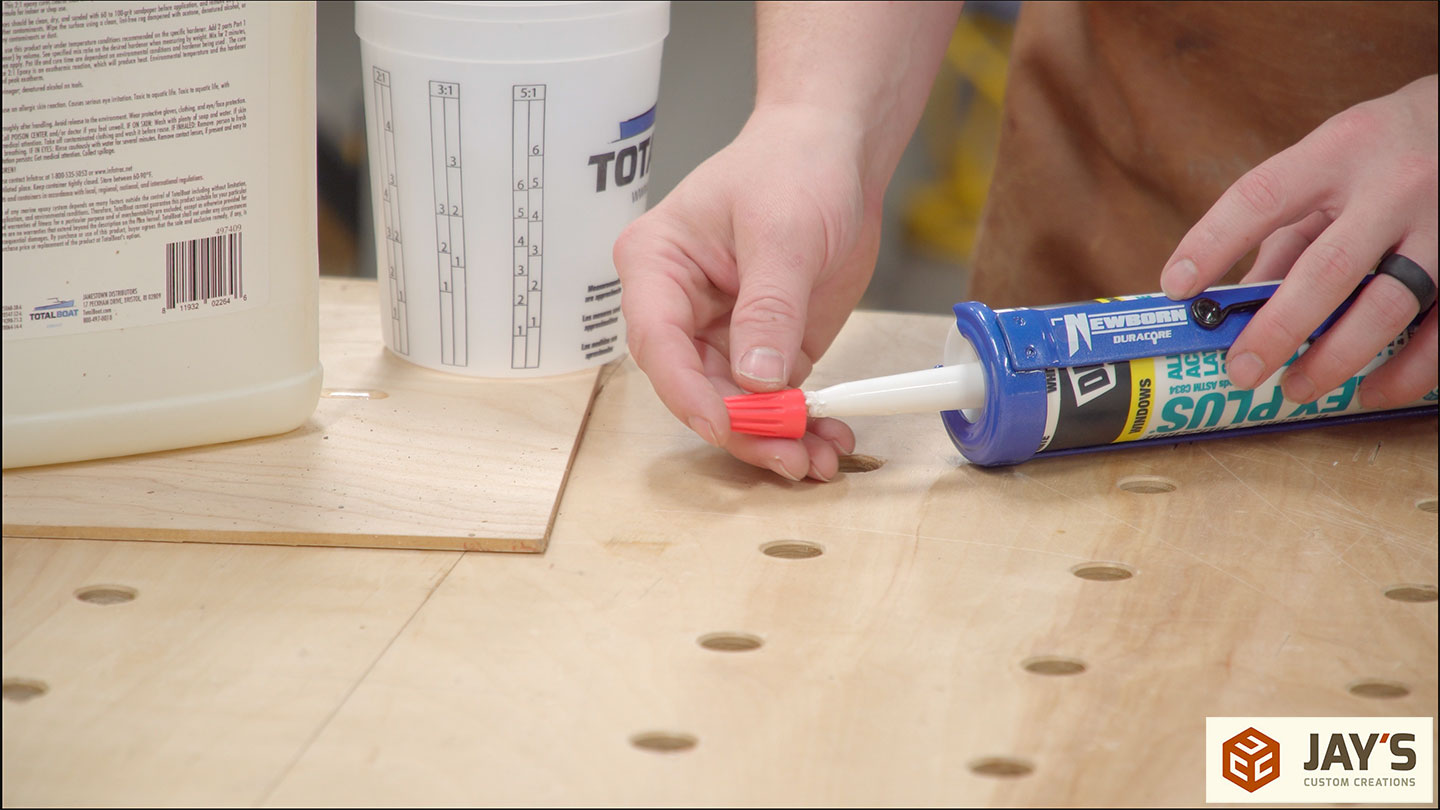
Here’s a quick tip for you. Store a few large wire nuts near your caulking tubes and use them as caps to prevent the opened tube from drying out.
Alright, mix number two. I’m not a big epoxy user. I mainly just use it as an adhesive for joinery. So I had no idea how much I was going to need or how much I should have mixed with each batch. Mixing smaller batches like this also guarantees that I’m not going to pour much thicker than the recommended layer height for this product.
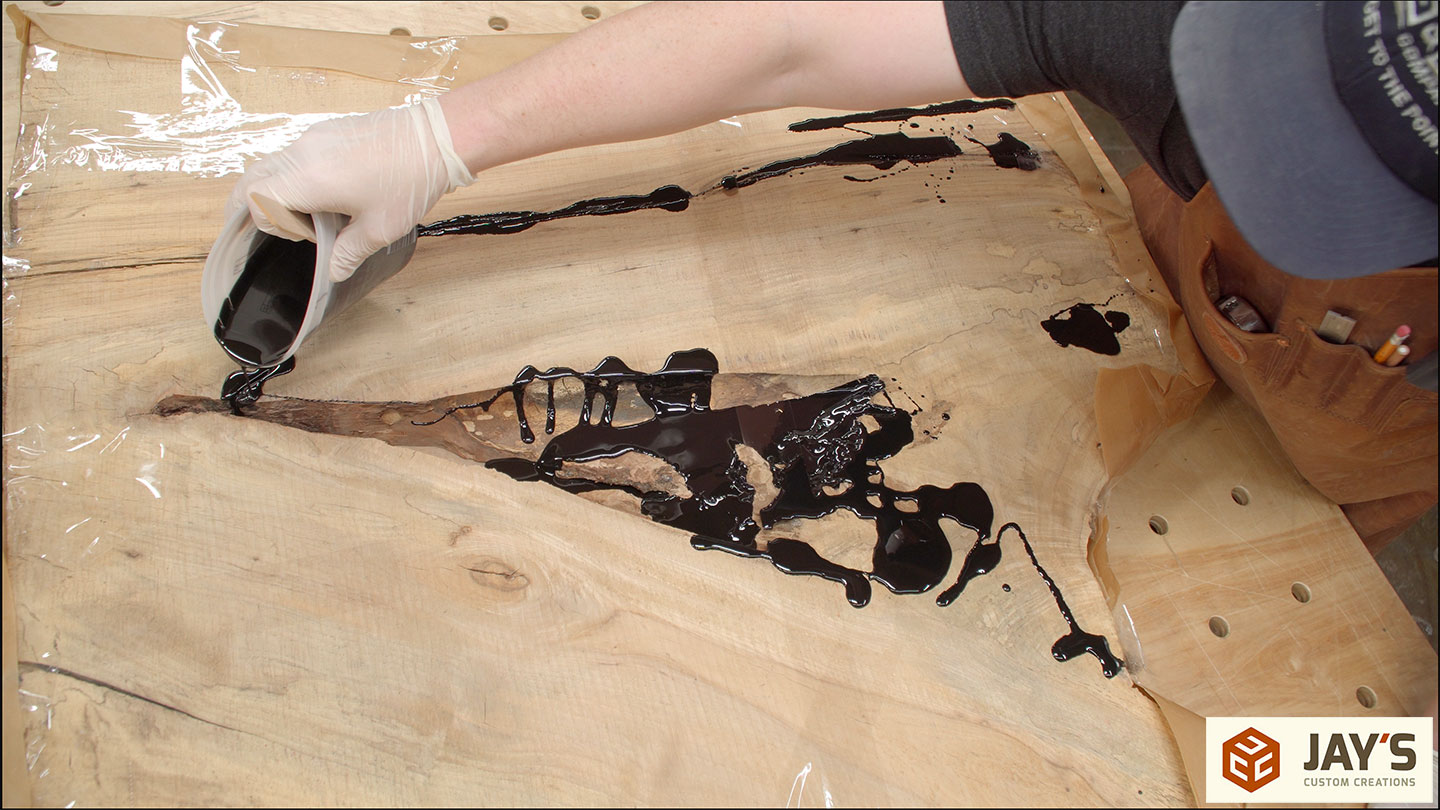
Here’s another mistake. The caulk dam keeps the epoxy concentrated unless you’re a dummy like me and just pour way too much at a time. So at this point, I had not only a damn but also a spillway.
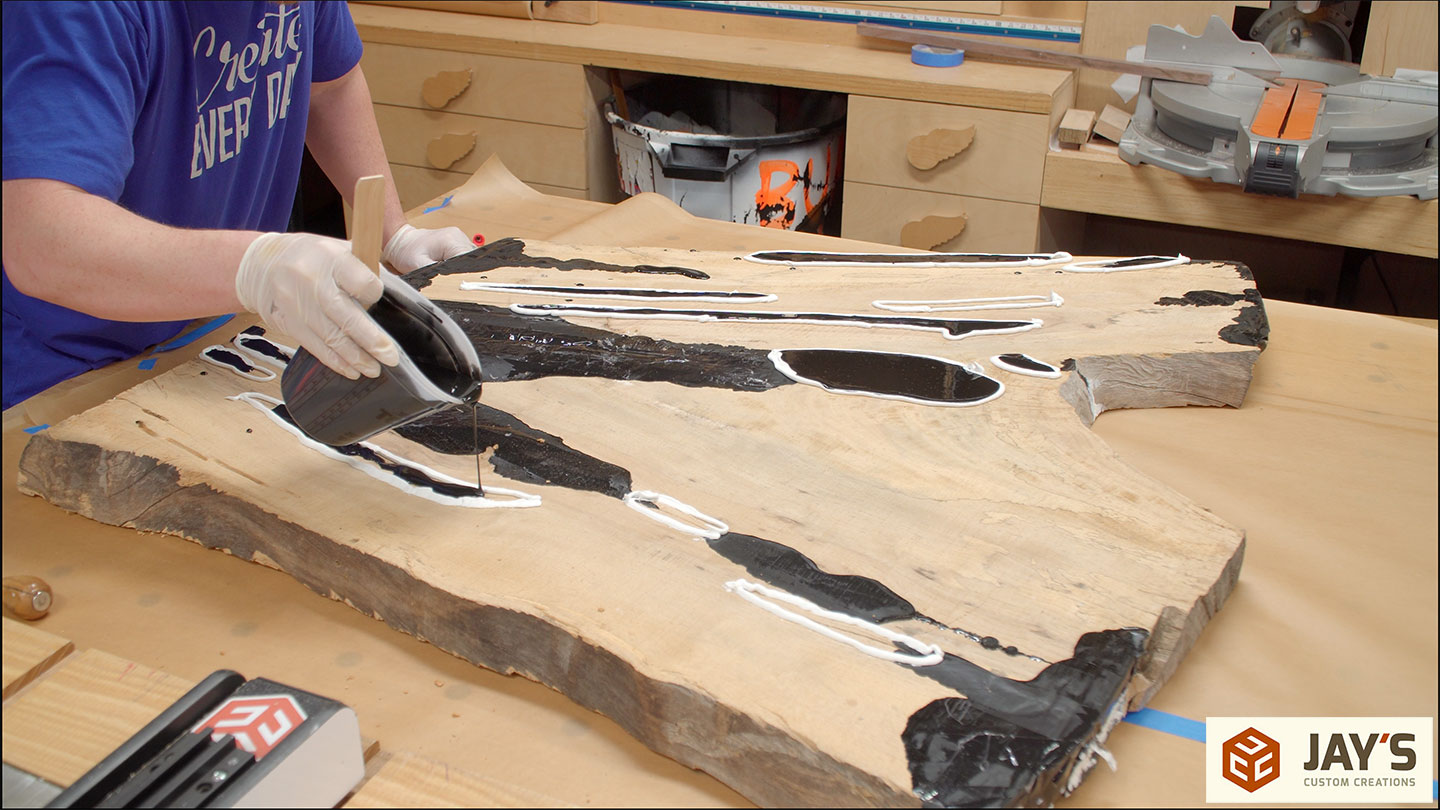
More of the same. Flood the defects.

This second pour was better in that I didn’t have to babysit certain areas. Just fill it with epoxy and watch the bubbles come up as the epoxy flows into the cracks. This area had so many small cracks so I figured flooding it was a good option.
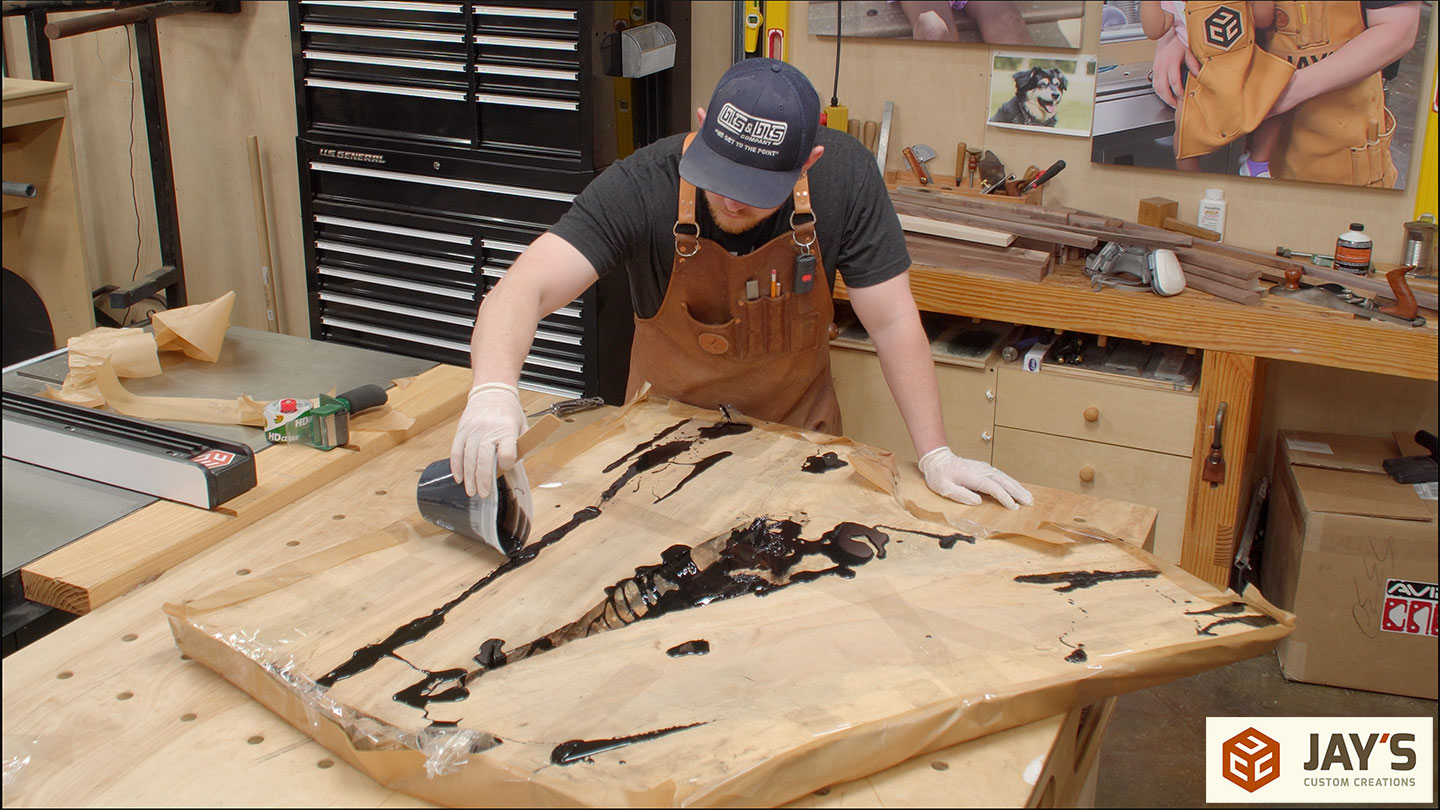
Here’s another pour on, I think, another day. I was working on this right before Christmas so mixing and pouring a little bit while I walked away and did something else was pretty convenient for my holiday schedule.
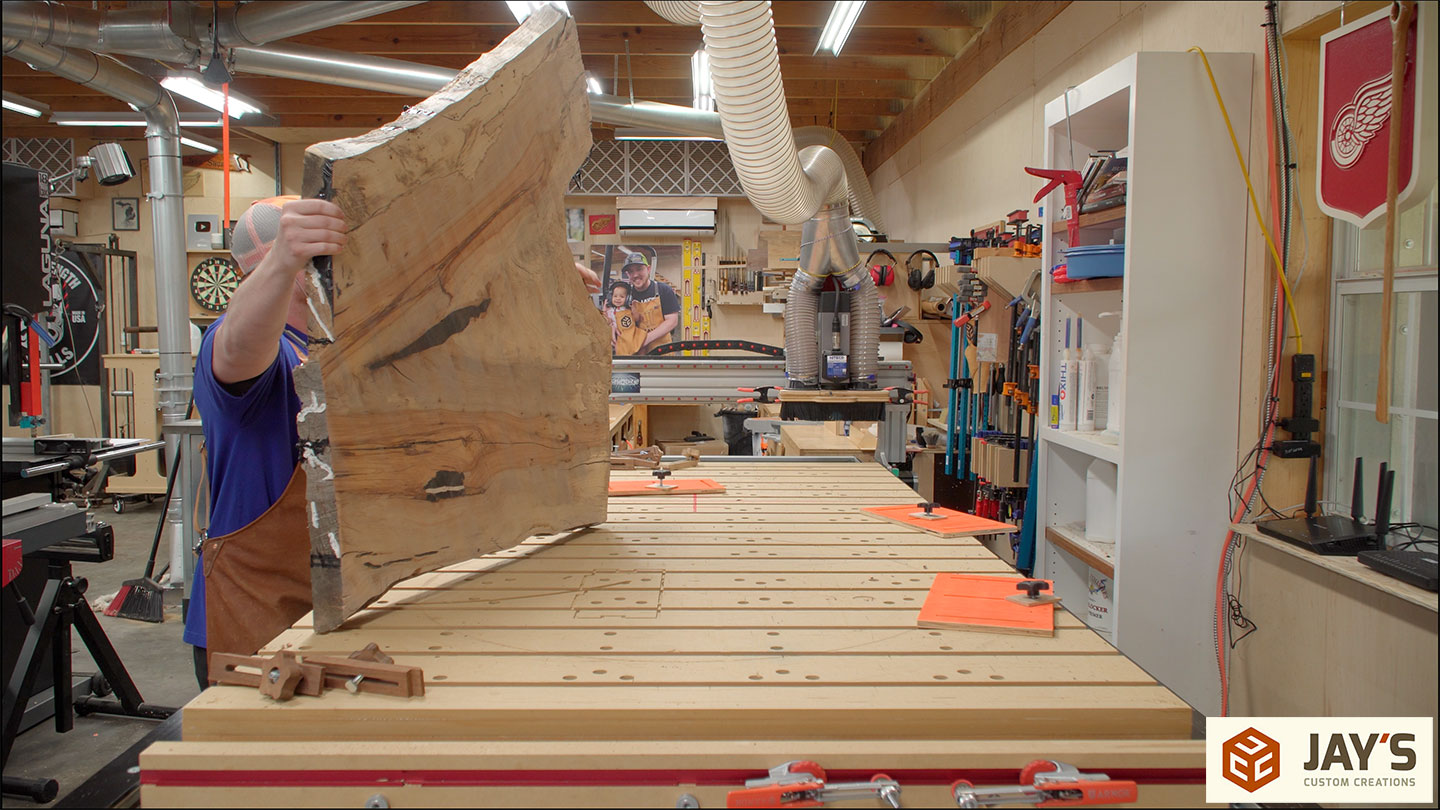
After a few more days I flipped the table over to pour from the other side. Now I could remove all the packing tape I had on the bottom. It actually worked better than I had anticipated.
At this point, the bottom side should be pretty sealed so I didn’t tape or wrap it for the remainder of the pours.
I did add some more caulking to the top and a few areas on the end grain.
I had some pretty old slow hardener that I needed to use up so that’s why this batch starts out yellow. I’m not sure how much the age affected the chemical composition of the epoxy but I rolled with it.

More pouring of epoxy. I think this was day 375,000 of the project. I’m not exactly sure.
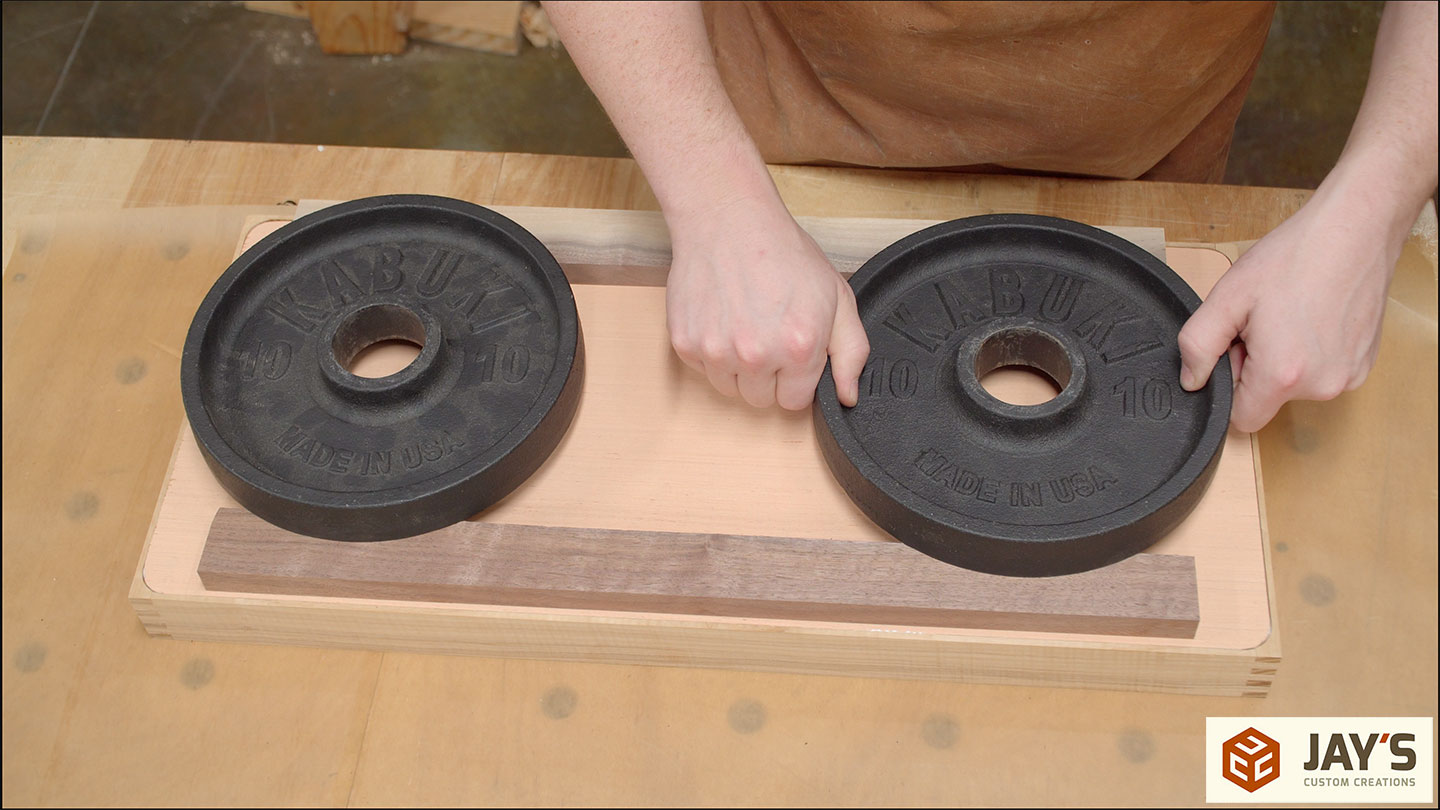
With the epoxy work hopefully done I finalized the base design and picked out a single ash board for all of the pieces.
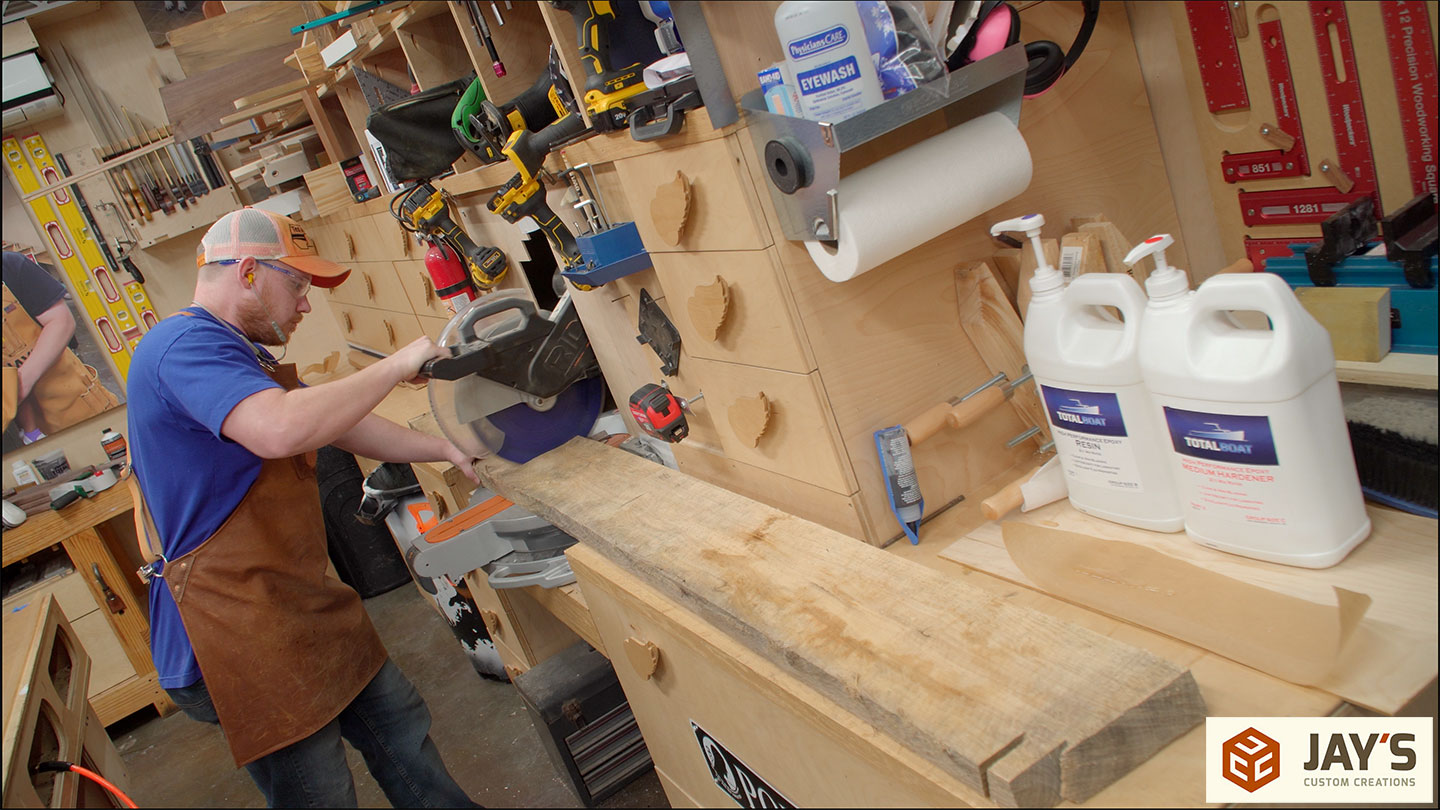
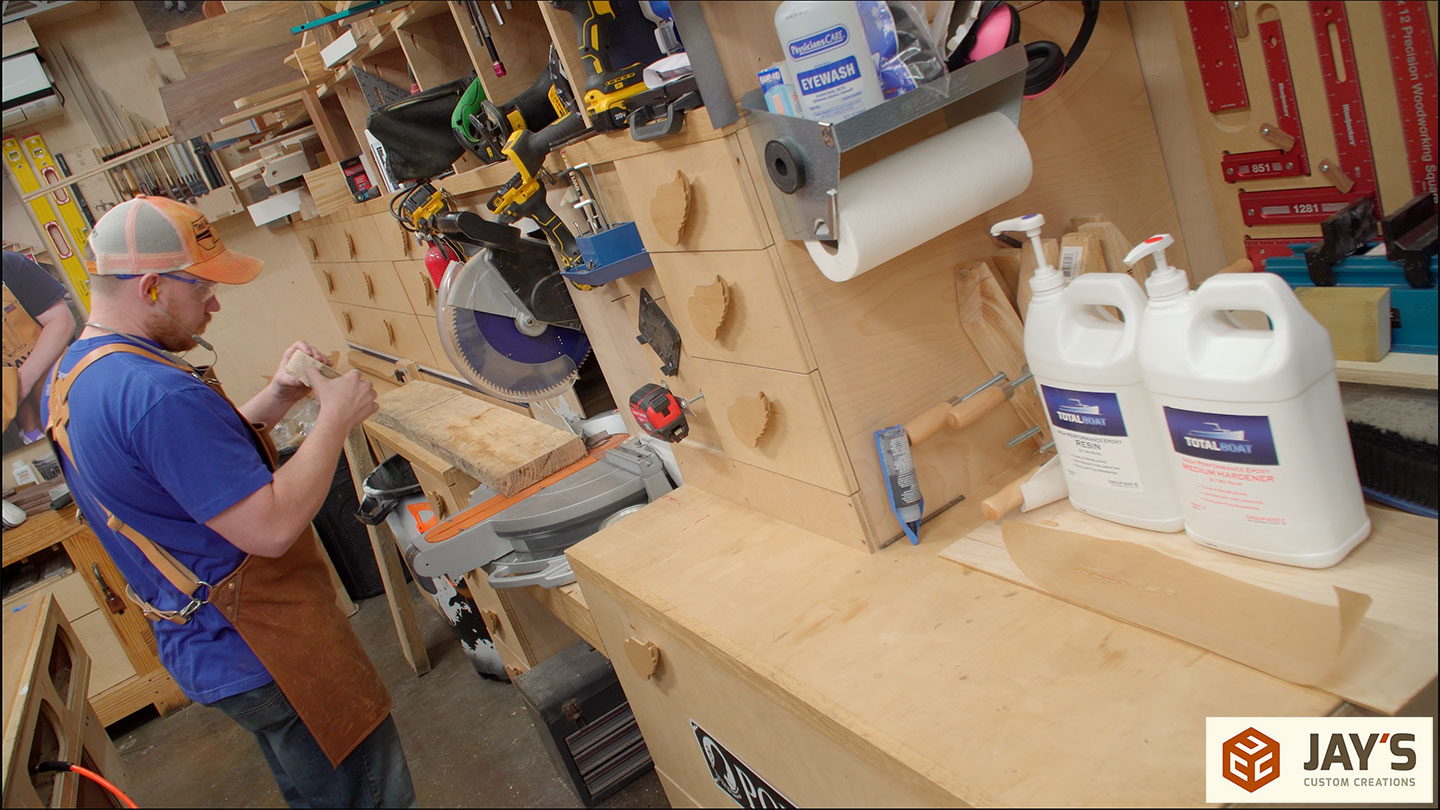
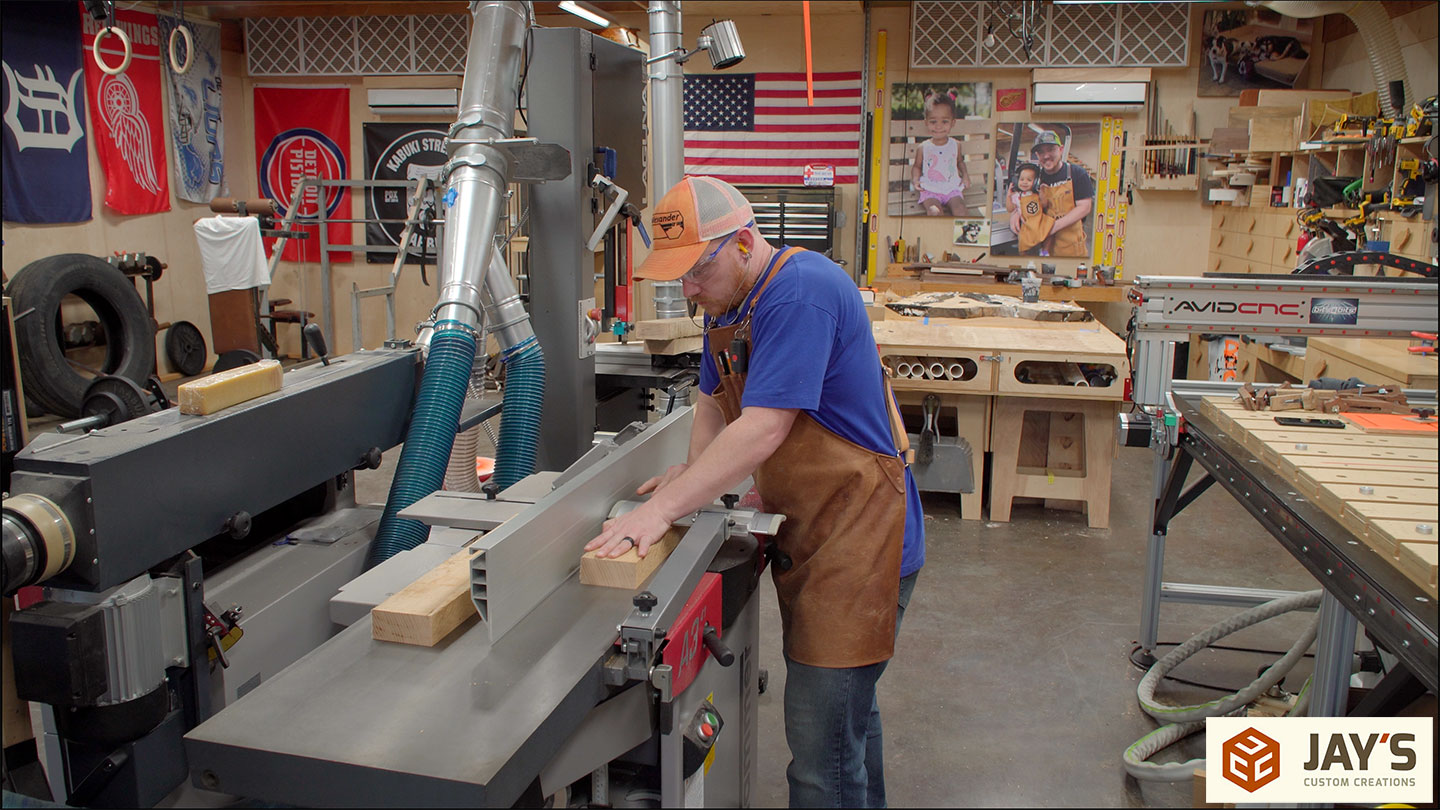
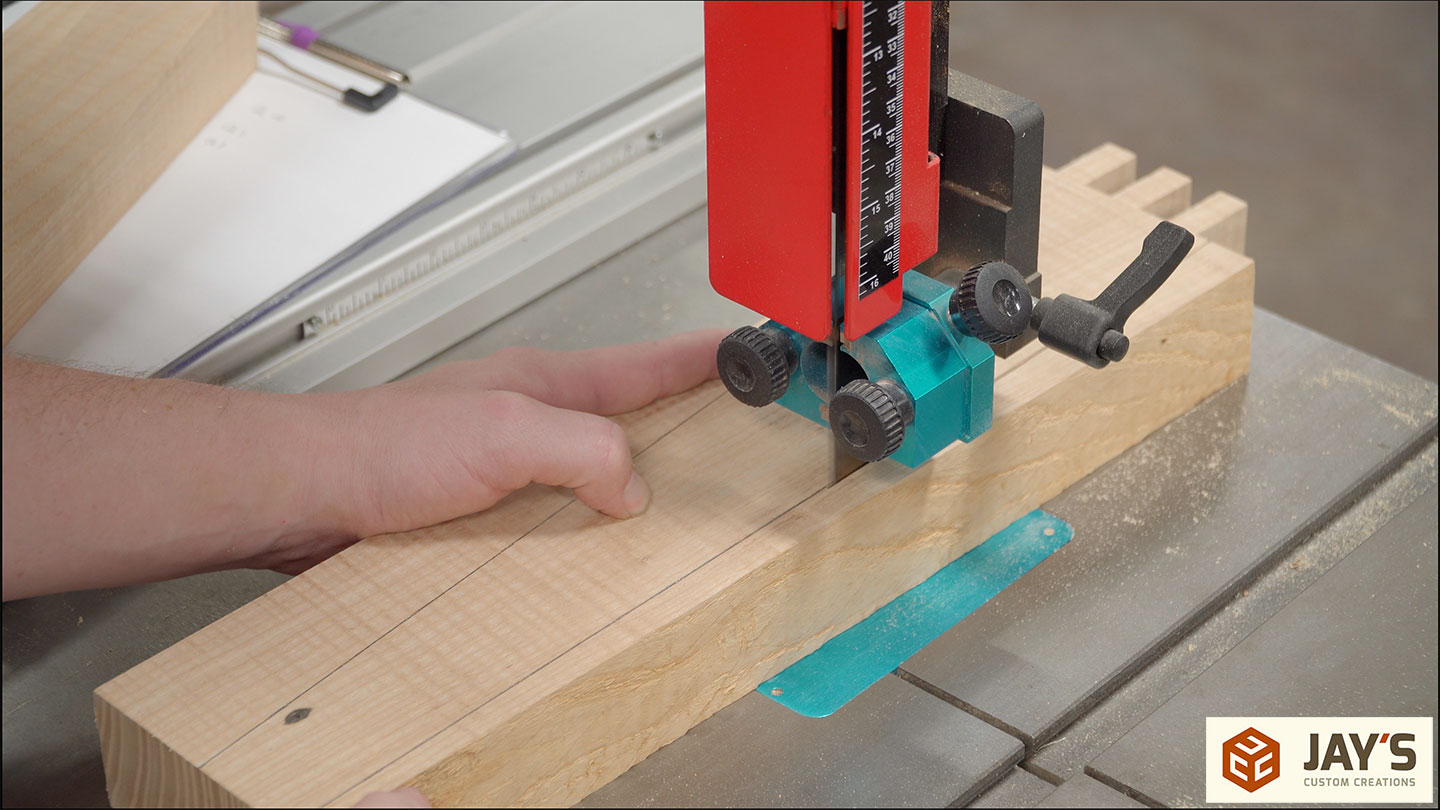
Step one on the base material is to mill the lumber starting at the miter saw station. After all of the rough crosscutting, I noticed some internal checking that I did not like. Every bit of this board went into the scrap bin. Bummer, but onward!
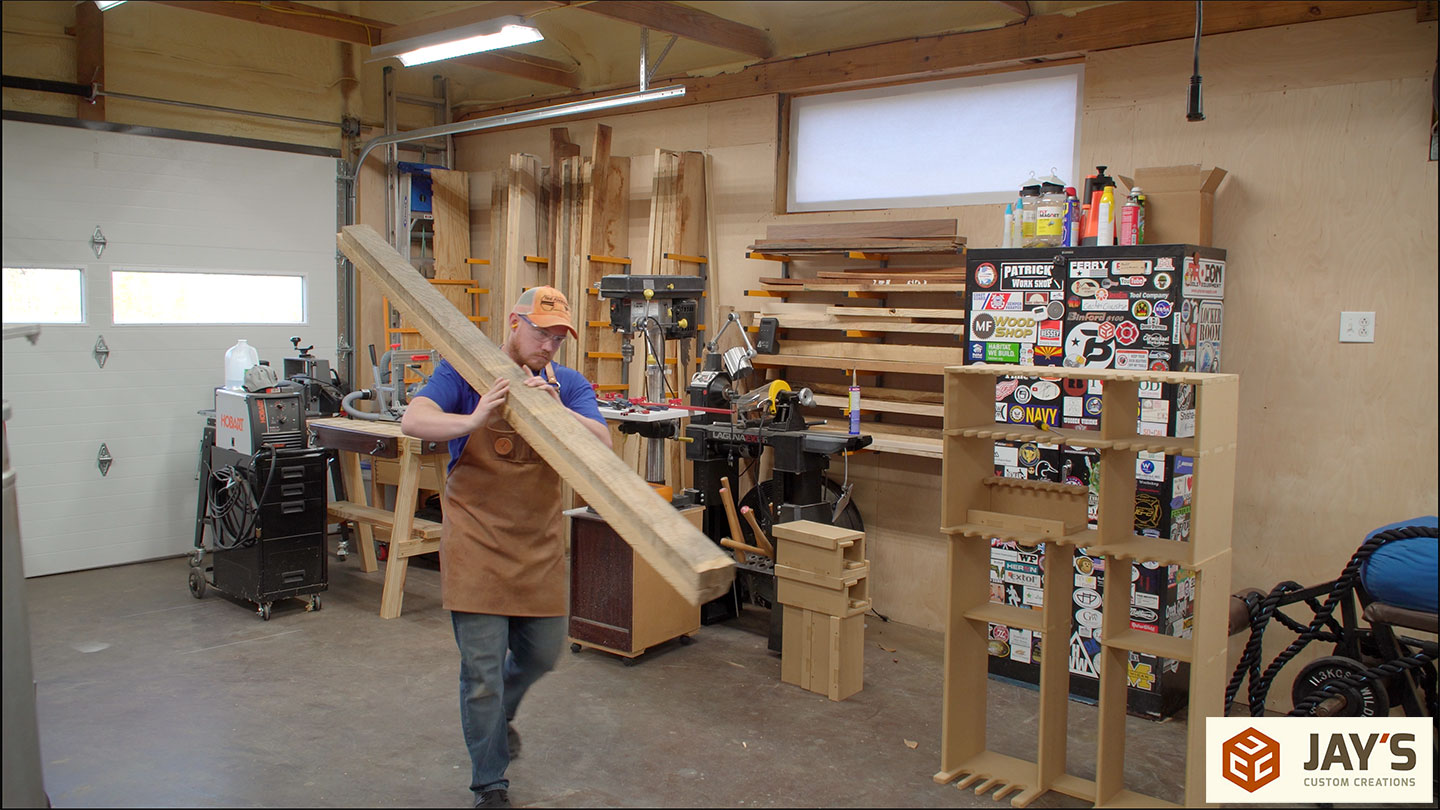
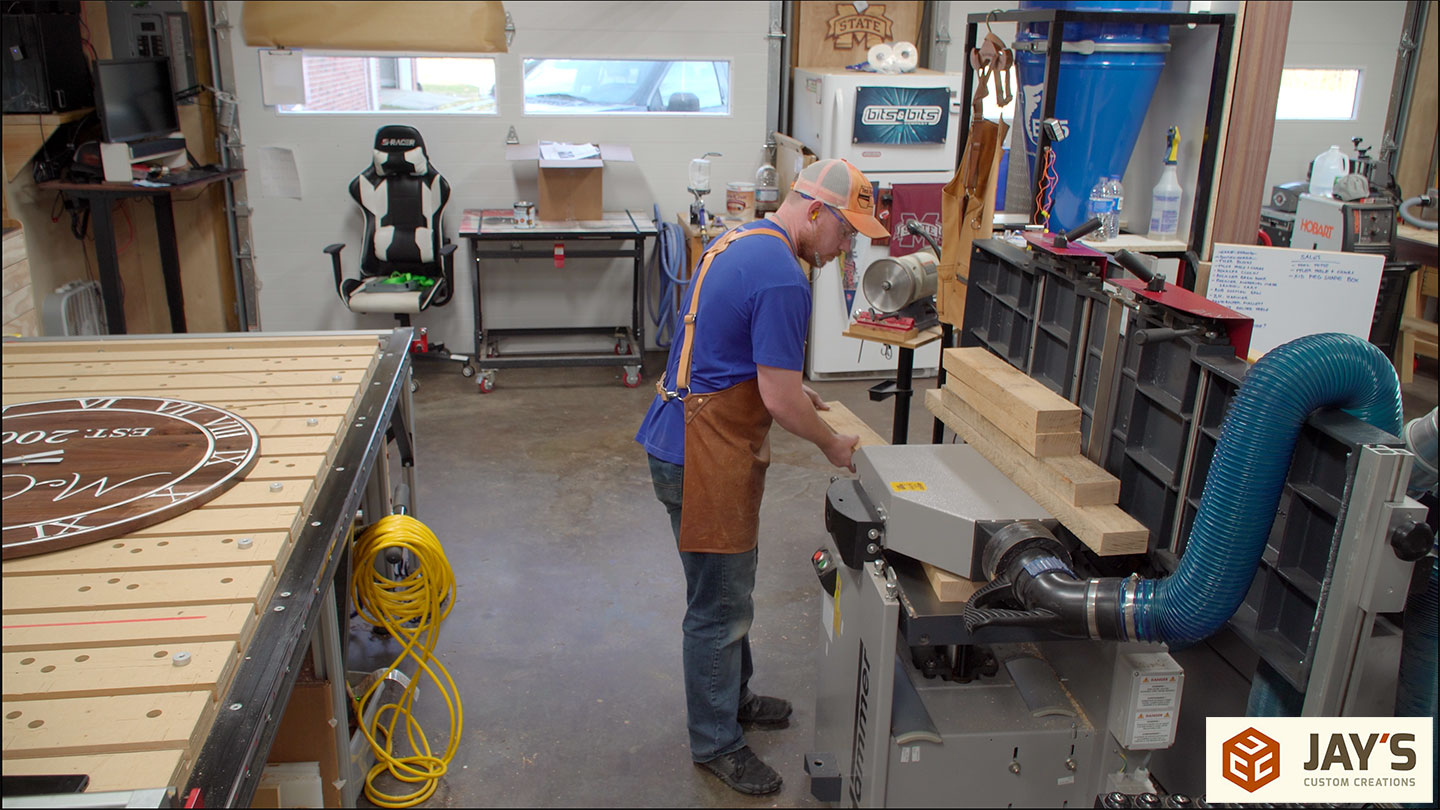
On take two, I picked out two smaller boards that looked pretty clear of defects.
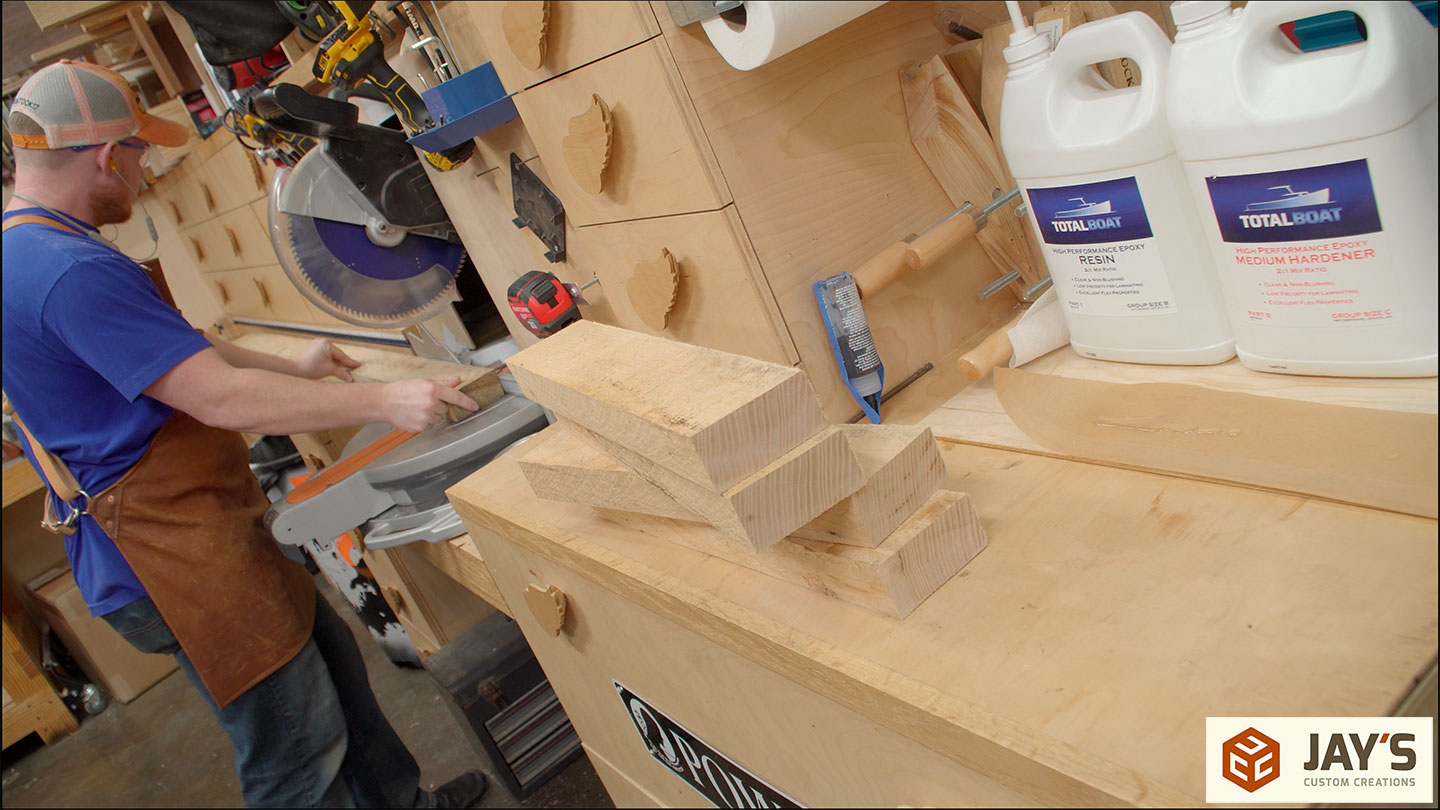
I crosscut them to rough length at the miter saw.
Jointed one wide face at the jointer.
Planed the opposite wide face at the planer.
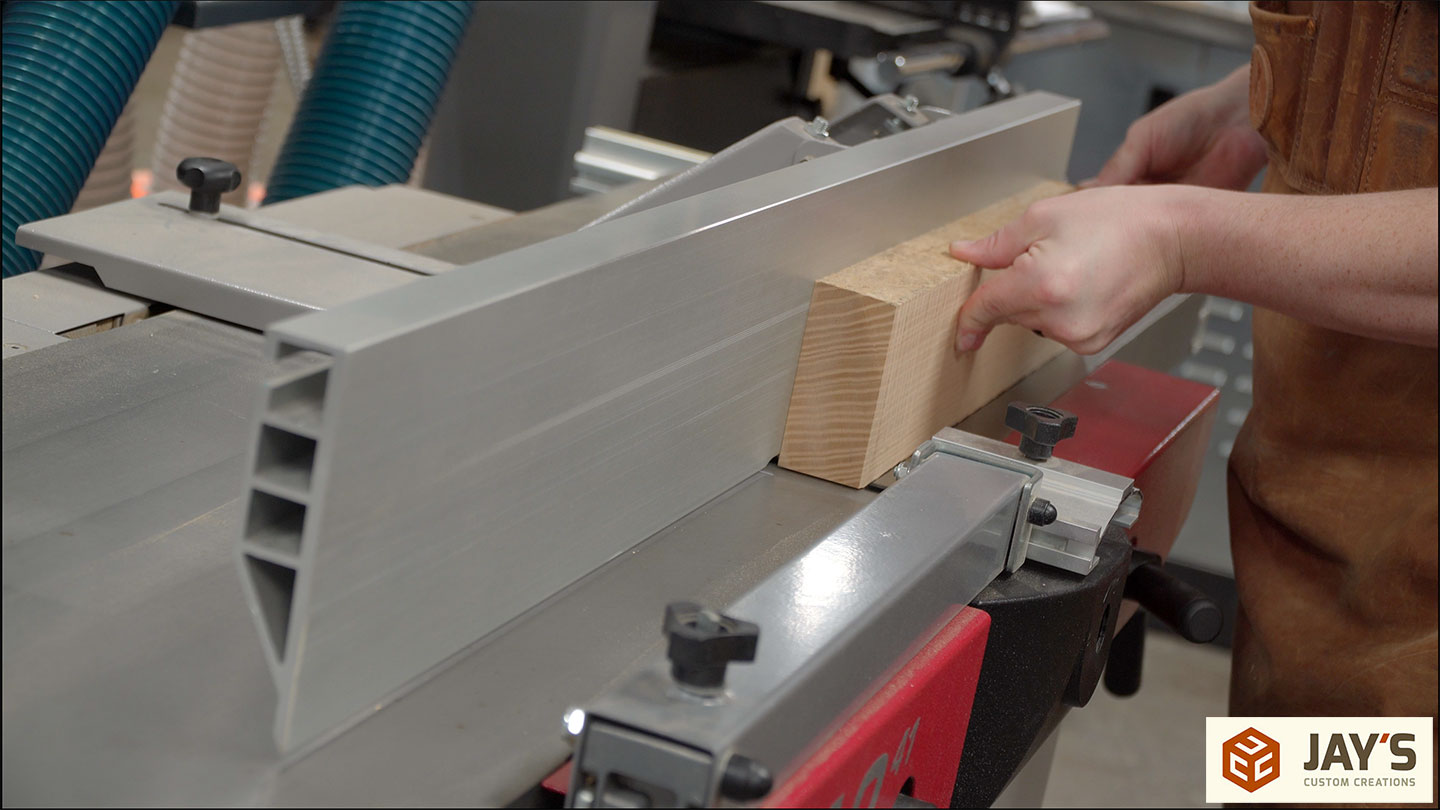
Then back to the jointer to joint one narrow face making sure to go in the downhill direction.
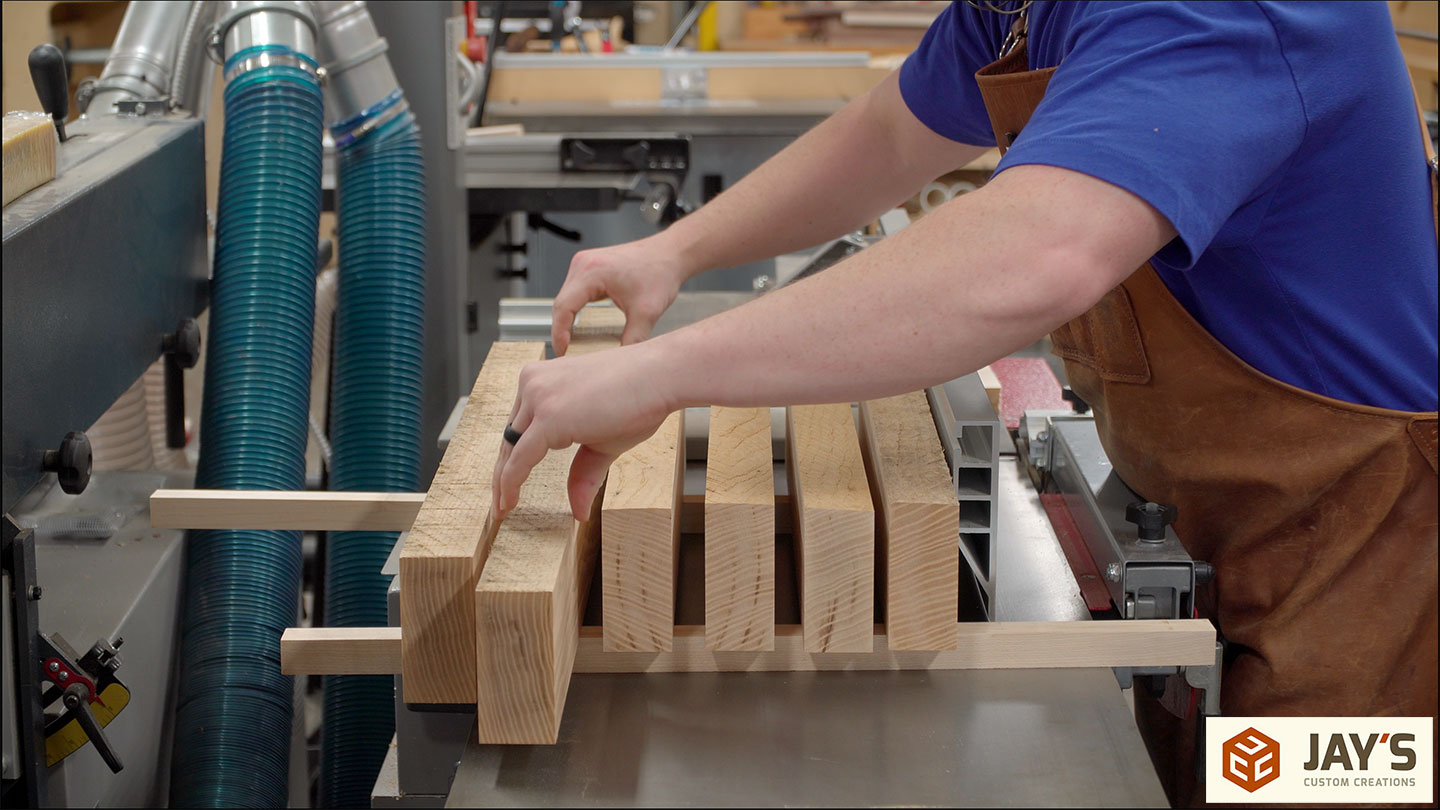
And then completely stopped the milling process. This was the morning of Christmas eve and my main goal was to get the milling process started so they could rest over the next few days while I was out of the shop and focused on family time.
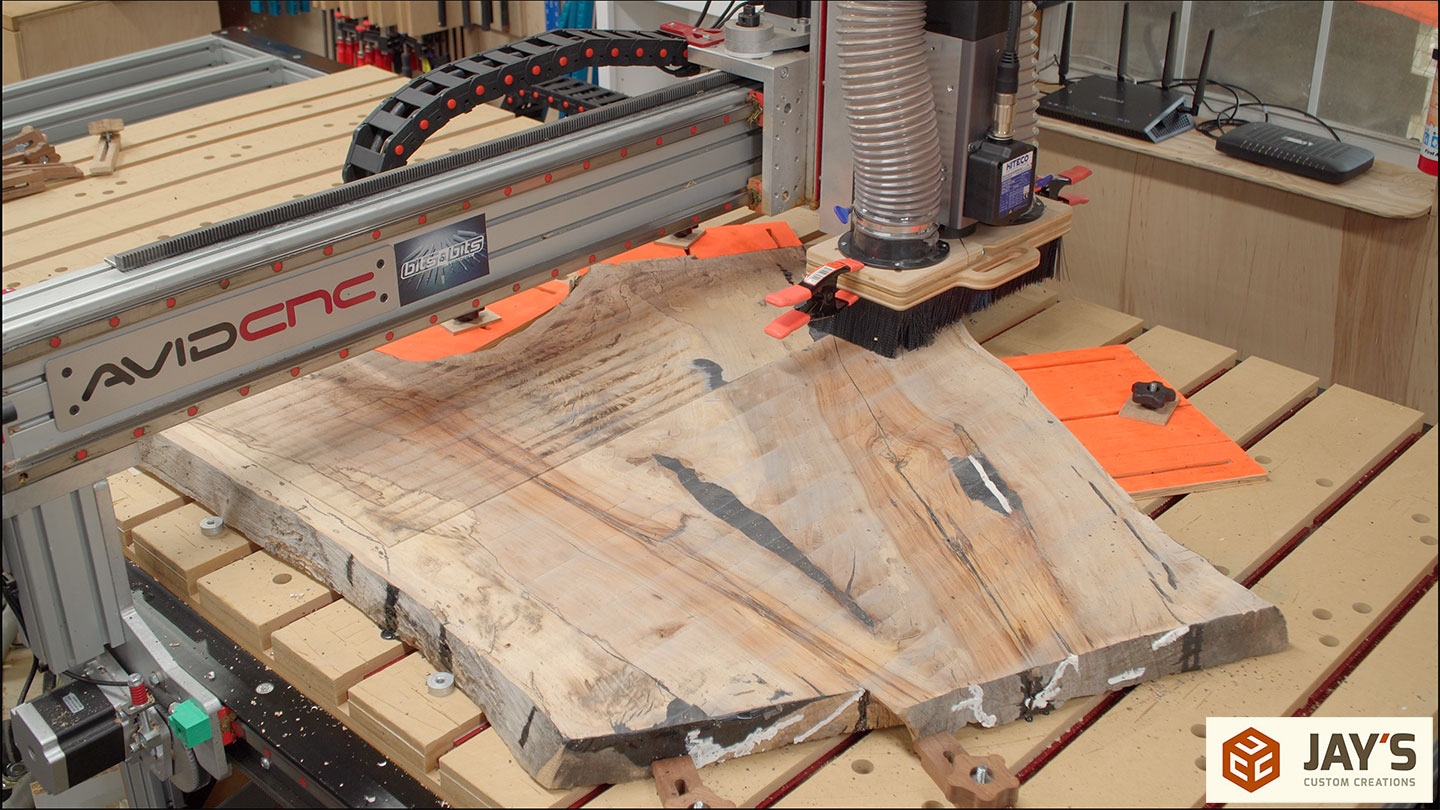
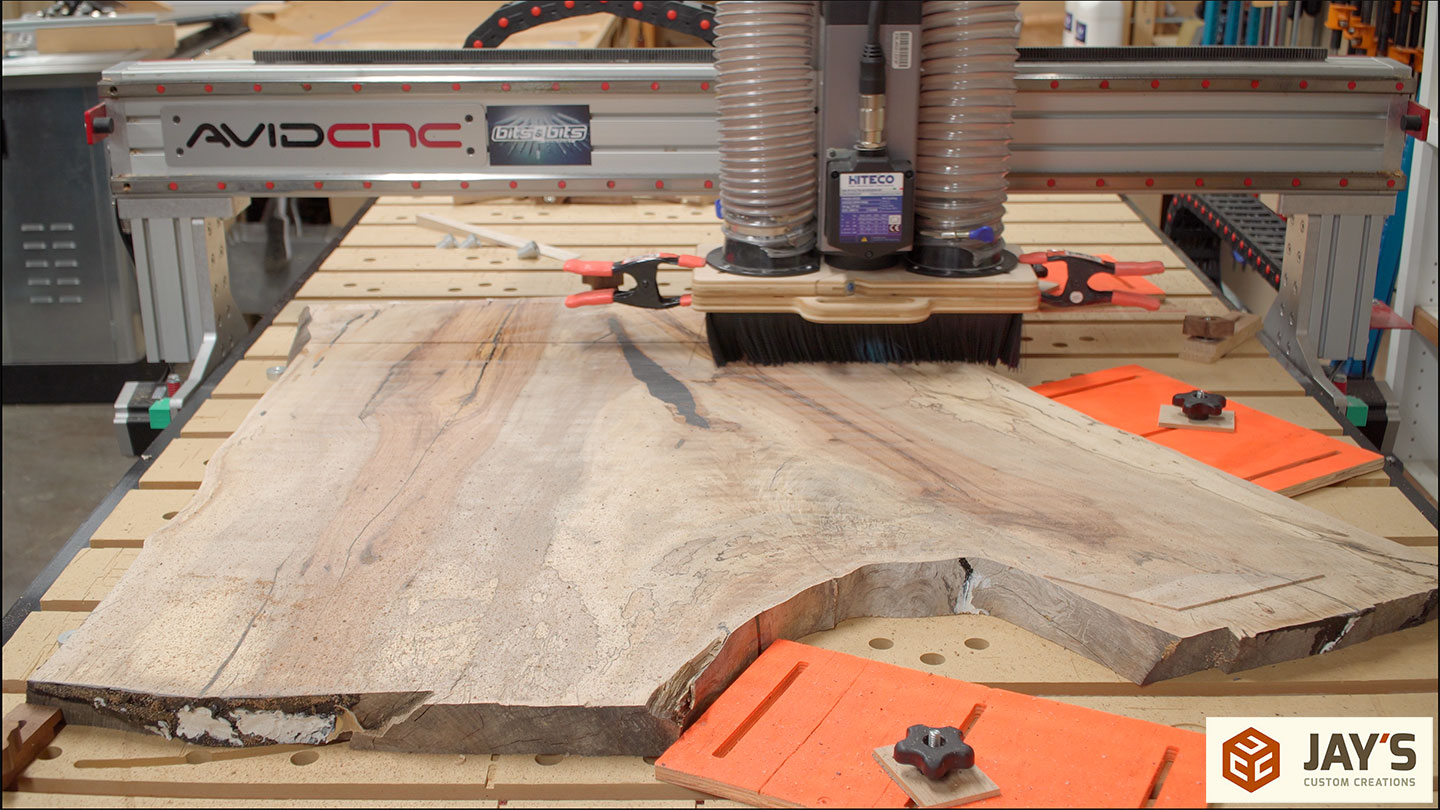
A few days later and a few pounds heavier from the holiday food bombardment I started the flattening process. Some people have asked in previous videos how I hold down the slabs when flattening on the CNC and my answer is that I don’t. These slabs are too heavy to lift up so the only concern is to just prevent lateral movement. I always start by pulling the slab against a few bench dogs and then use my wide stop blocks on the other side. If the slab has any cup or twist in it I’ll divide the high areas by using wedges along the high diagonal. This one laid flat enough so no wedges were necessary.
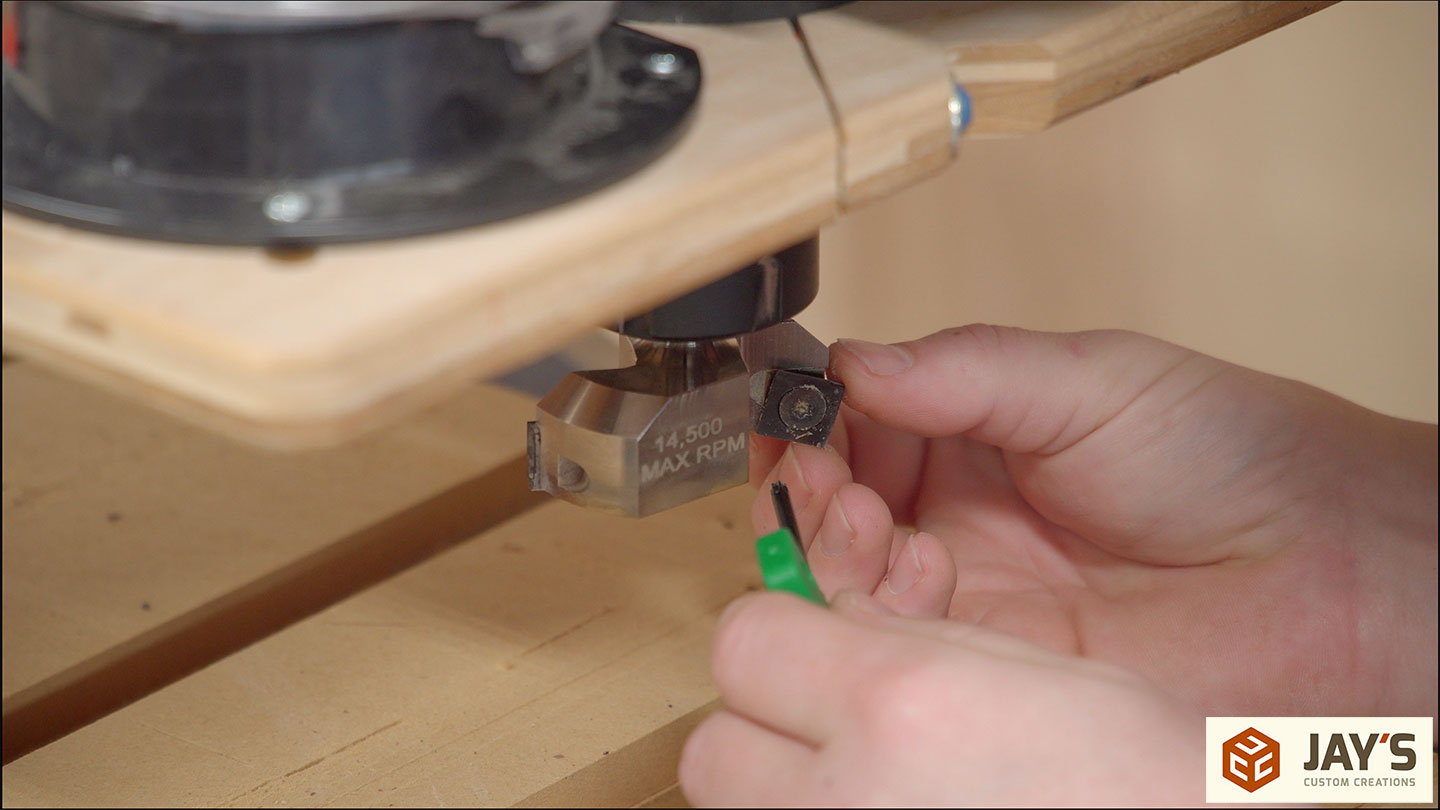
The bit I’m using is the Bits & Bits SB25-2. It’s a 2-1/2” diameter surfacing bit with two replaceable astra coated carbide inserts, which I’ll get to in just a second.

I normally use the manual jog feature to shave off the high spots before I run an actual program and in this case, I got a little carried away and got nearly the entire slab surfaced manually.
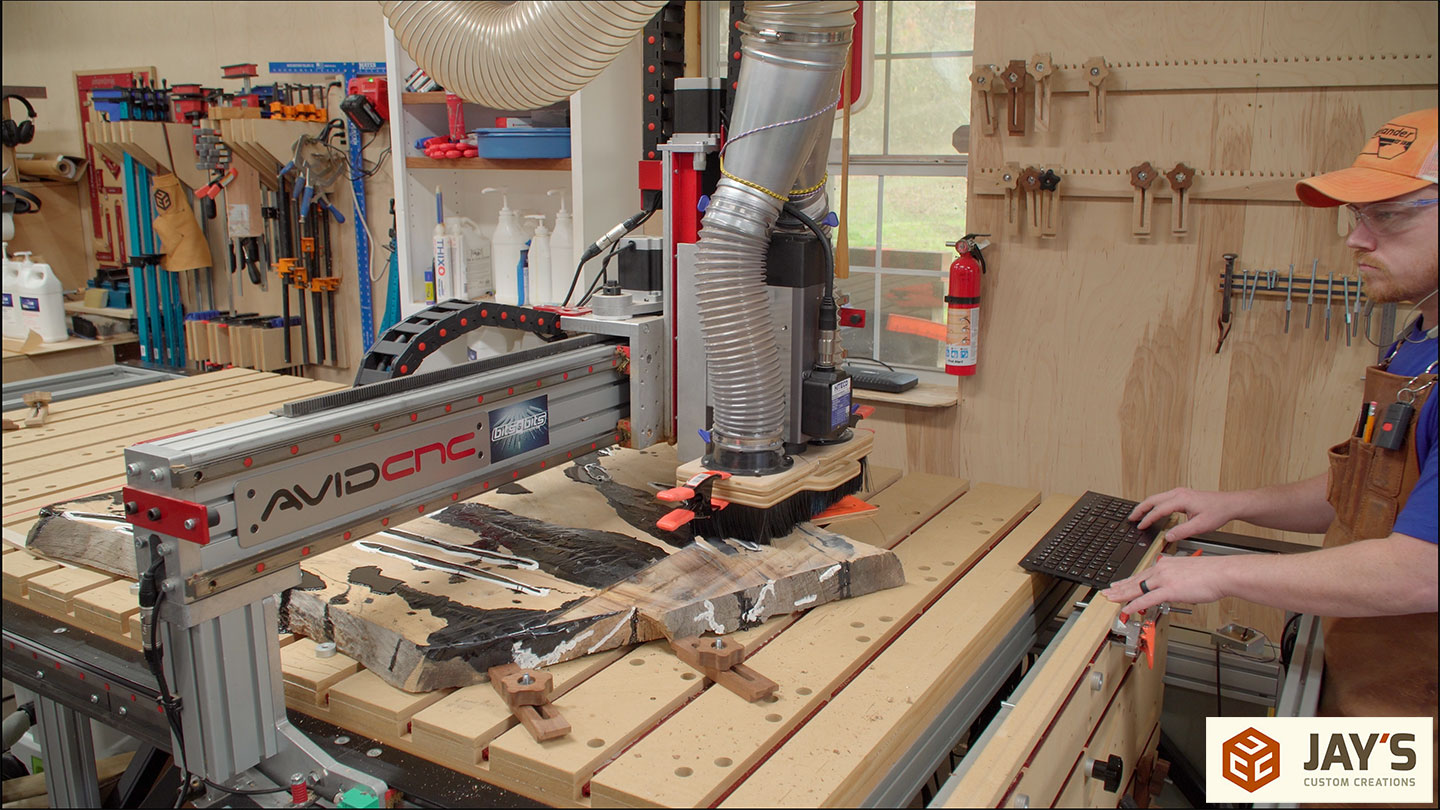
Unfortunately, the cut quality wasn’t good. I had a lot of burning areas which means either the bit is traveling too slow and rubbing instead of cutting or the cutting edge is dull. I had the machine jog settings set to the appropriate feeds and speeds of the bit so it wasn’t that. The problem was the carbide inserts were dull.
As I rotate the inserts here is a cost breakdown of using this bit. The initial cost of this bit is $399 and it comes with 10 extra inserts. That’s 12 inserts with 4 cutting edges per insert for a total of 48 fresh cutting edges. Two inserts are needed at a time so divide the 48 cutting edges by two and this one bit purchase is basically the equivalent of 24 new flattening bits. $399 divided by 24 = $16.63. If you’re using this over and over again you can see how replaceable carbide insert bits are a long-term cost savings.
But wait! There’s more! (3am infomercial voice)
After you go through the included batch of inserts you can get another 10 pack of replacement inserts for $82.50. Do the same math (10 inserts X 4 edges / 2 per setup = 20 setups) and each fresh setup costs a mere $4.13. That’s a huge cost savings vs buying traditional carbide tipped bits. Crazy!!
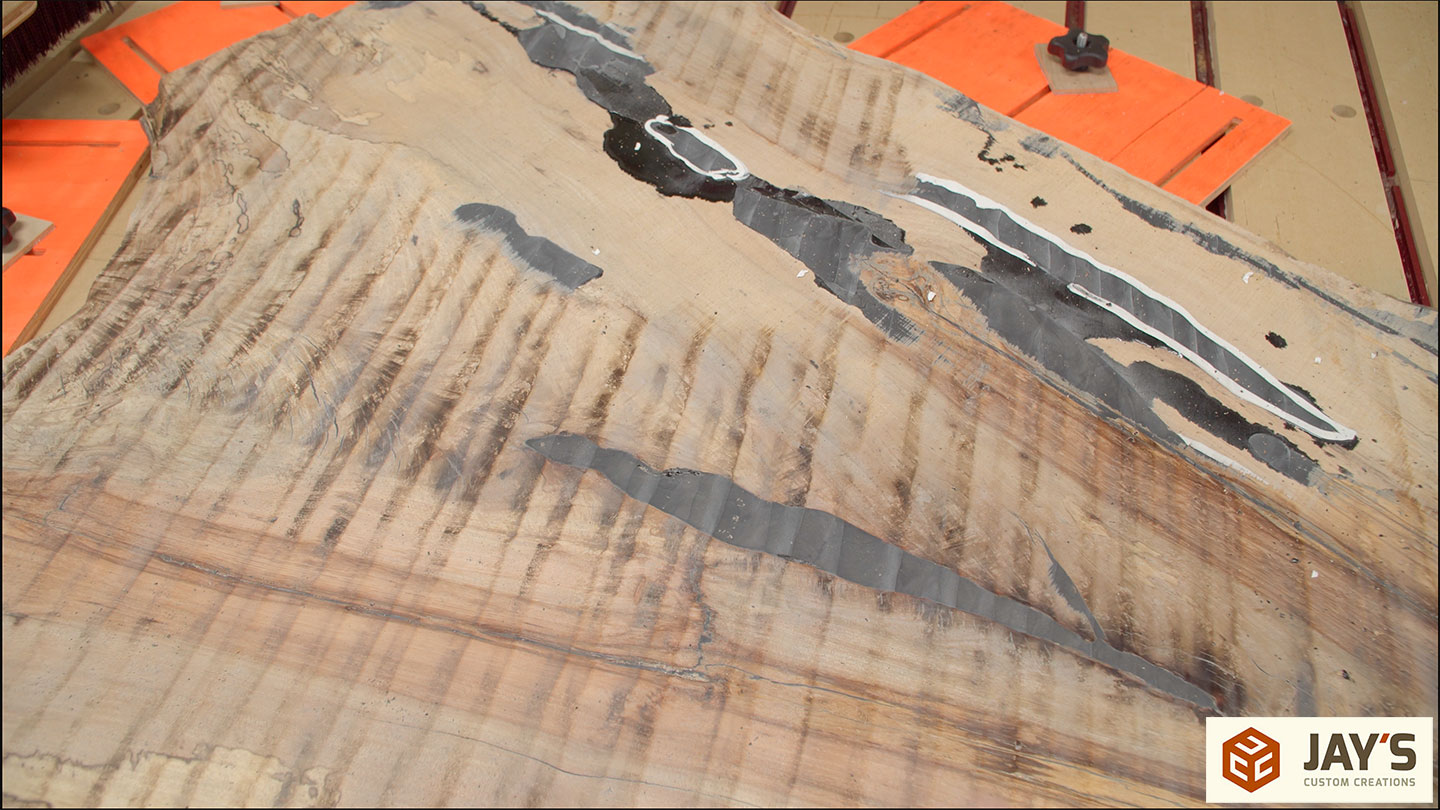
One more pass with a .125” depth of cut and a 1.65” stepover and you can see a much better result.
Regarding how long the inserts last, I used the previous edges for a couple passes on each side of an osage orange slab and a couple passes on each side of a cherry and epoxy river table a friend brought over to flatten. I also used it to flatten the entire CNC spoilboard once. So everything I just mentioned plus one roughing pass on this pecan slab had a router bit consumable cost of $16.63.
I’m not sure how entirely necessary it was but I decided to flip back and forth to remove a little bit from either side to work my way to the final thickness. The goal there was to release the stress in the wood little by little and prevent any warping that may occur. This slab remained perfectly flat through the rest of the build.

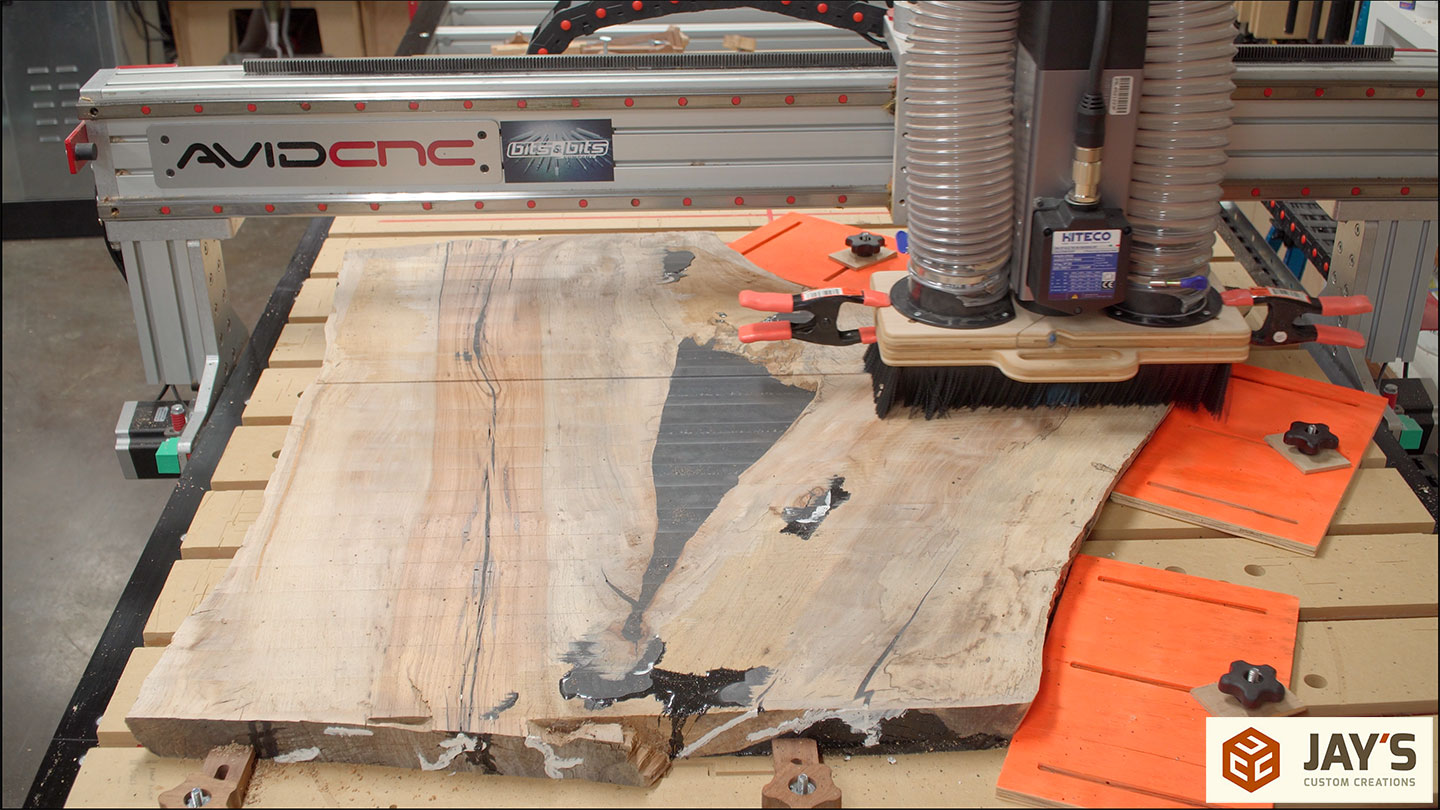
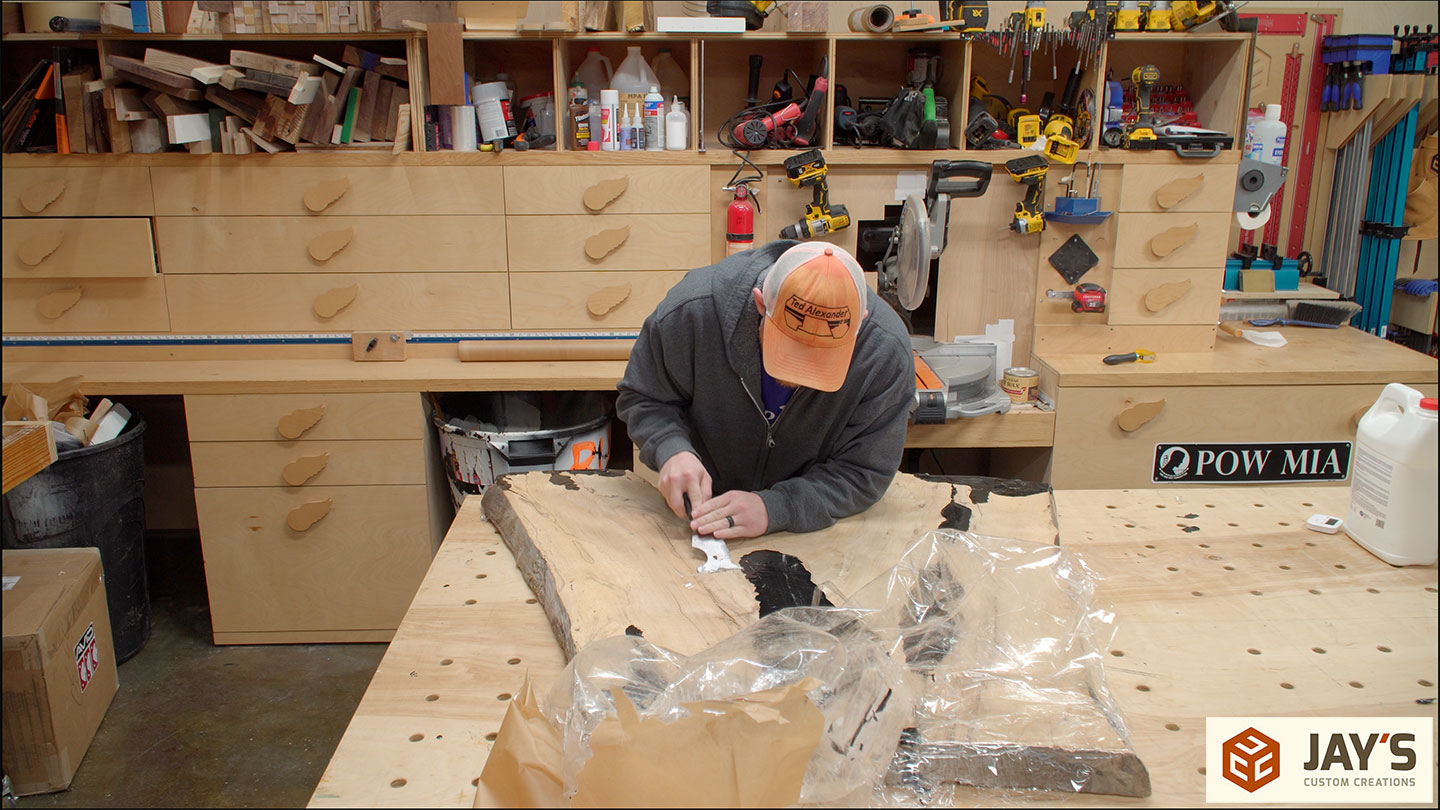
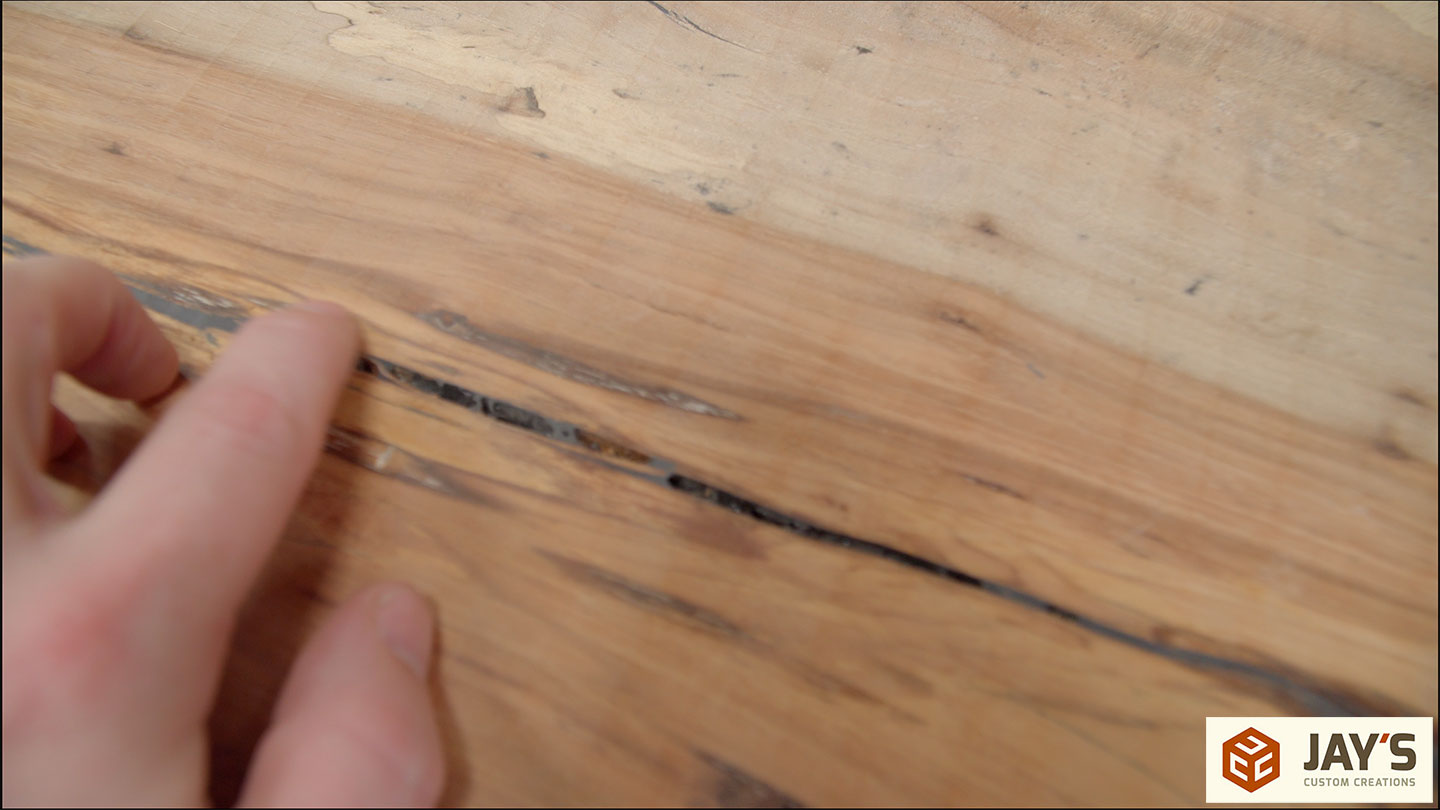
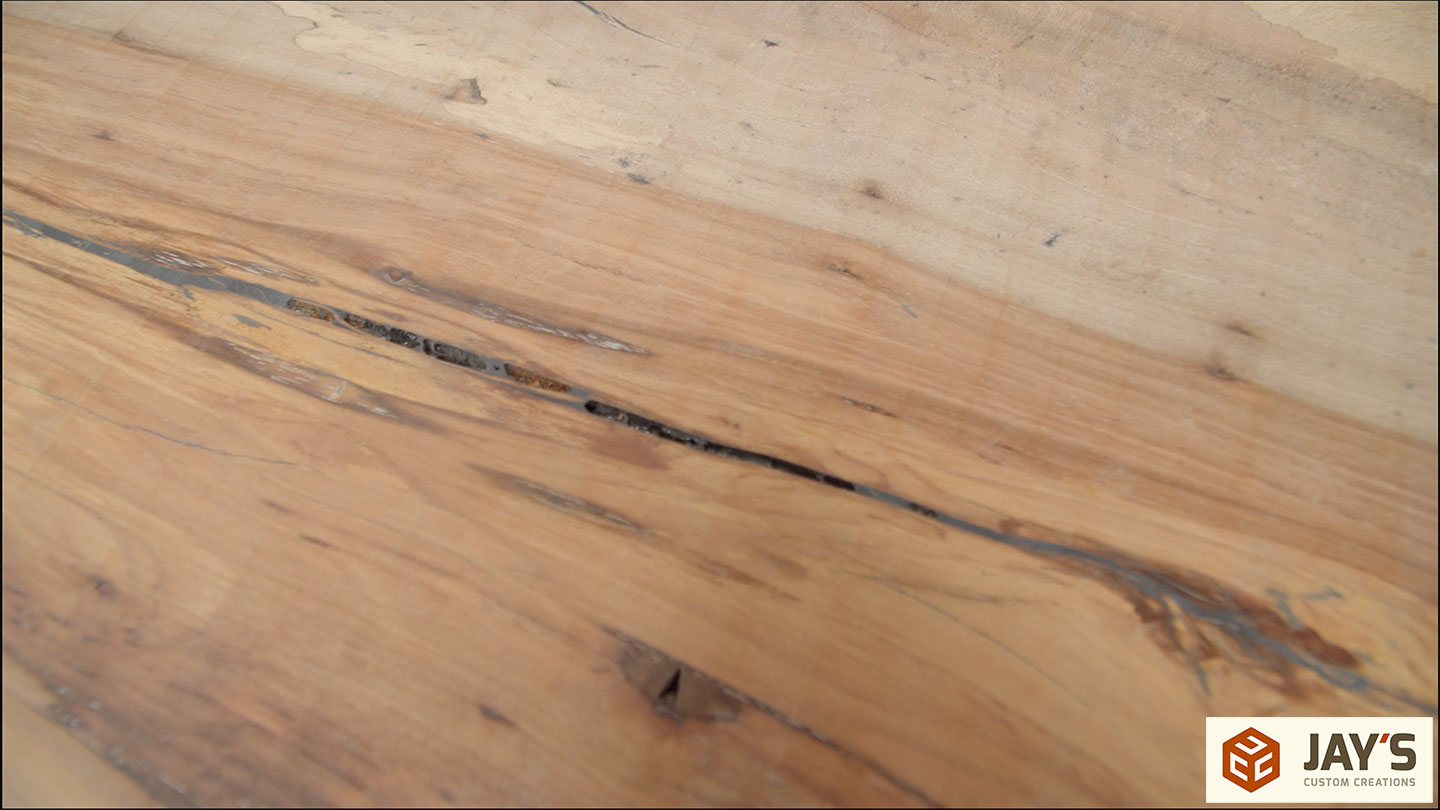
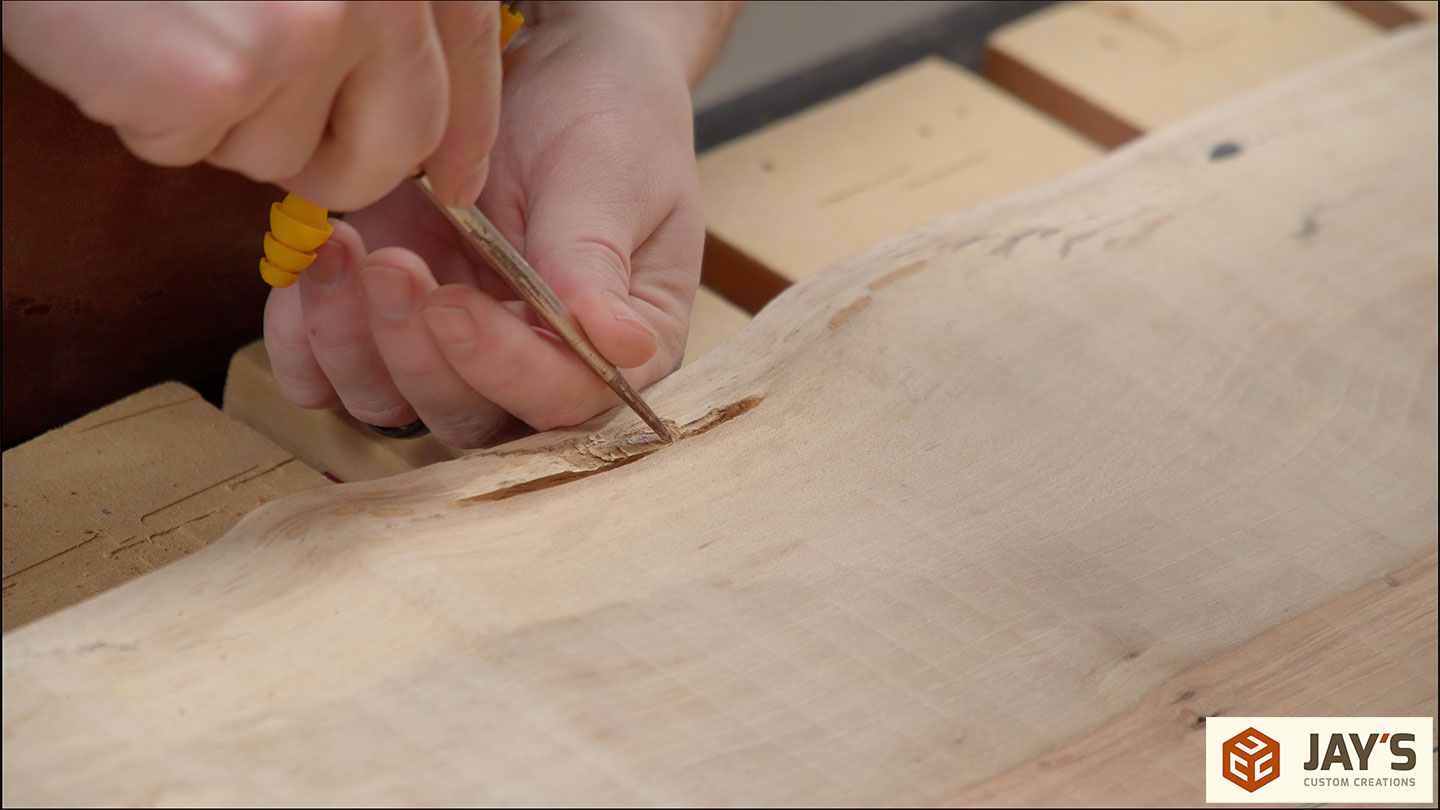
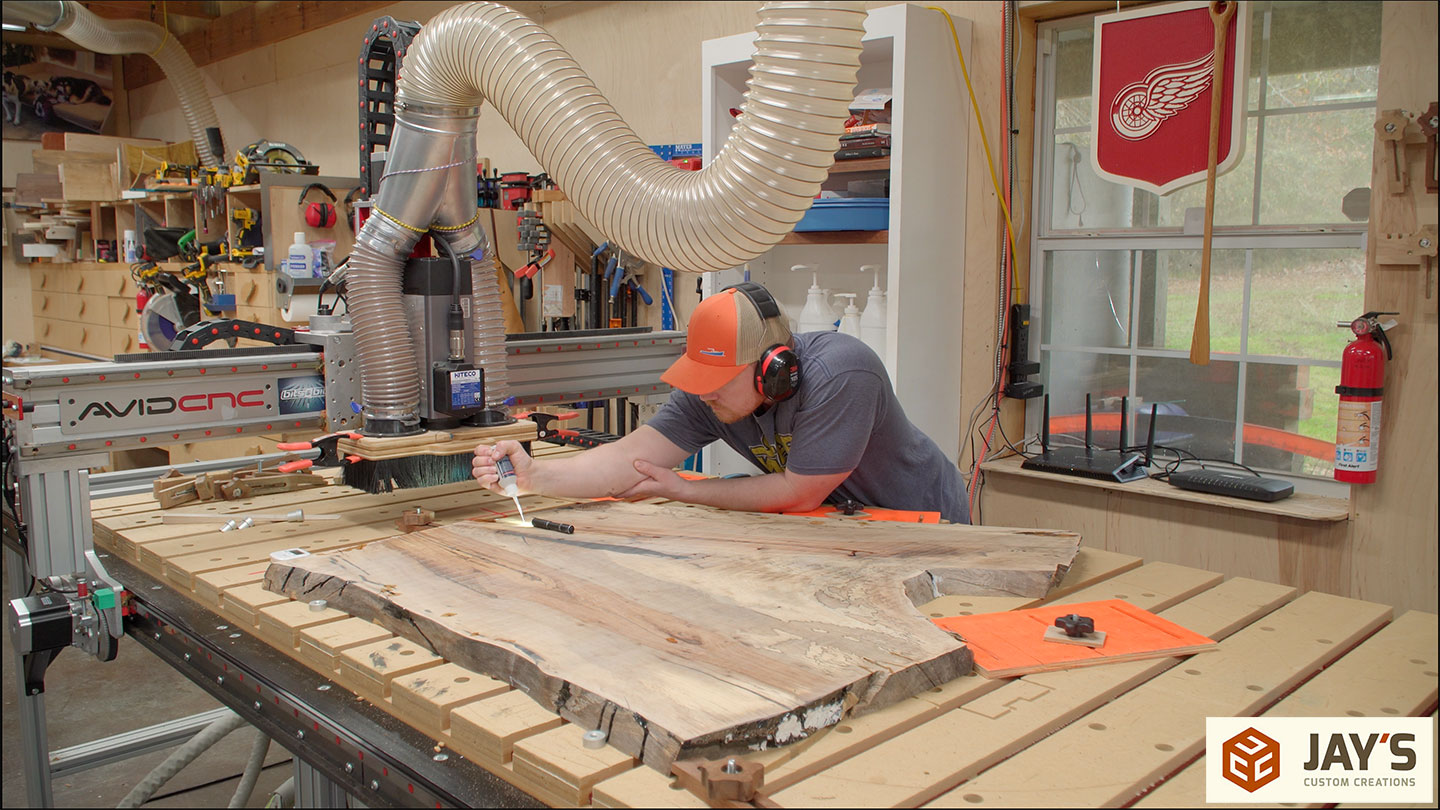
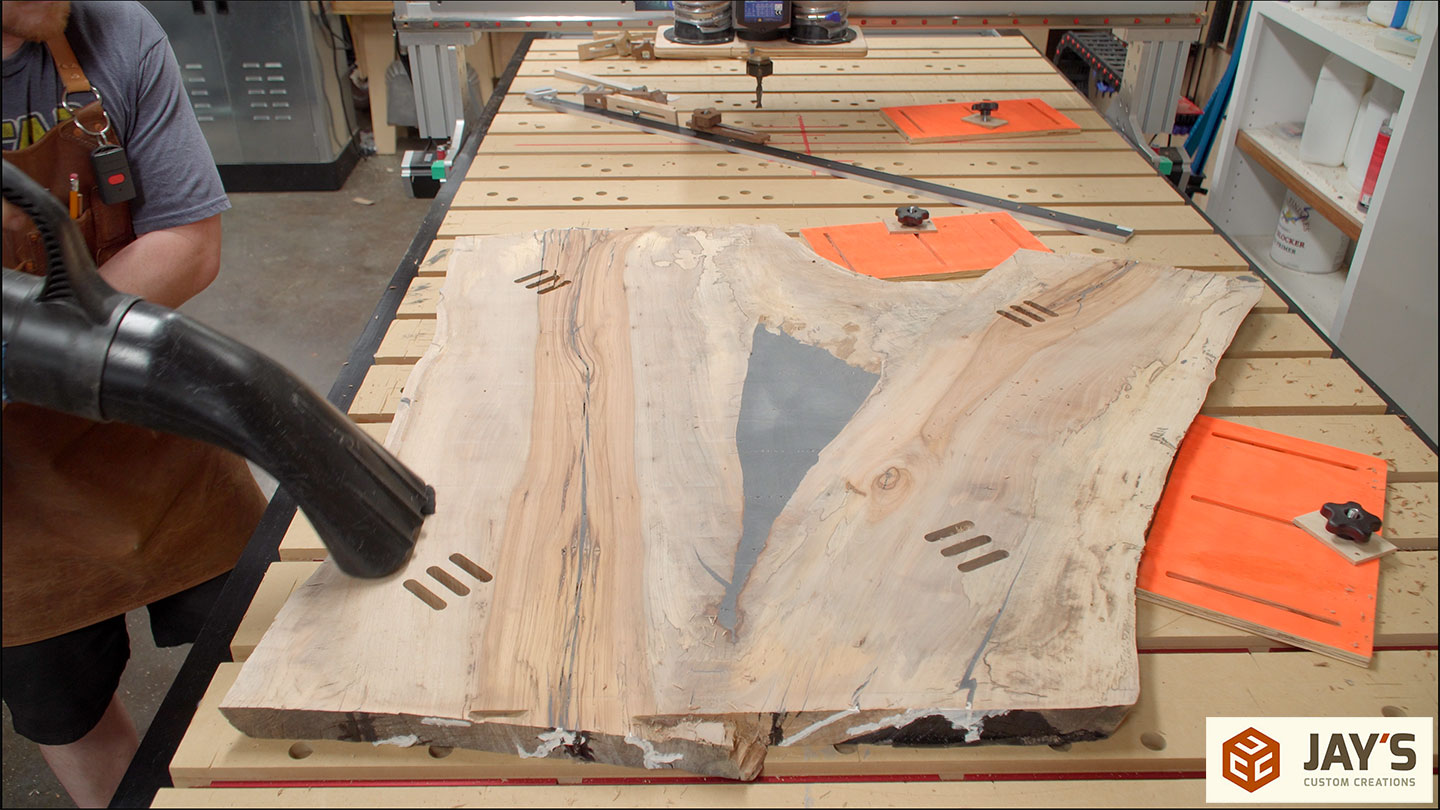
At this point, both the top and bottom have been surfaced and some new defects are starting to show up. Some areas where the epoxy didn’t flow into and a few large worm or bug holes packed with dust. Both of which I cleaned out the best I could with some compressed air and an awl.
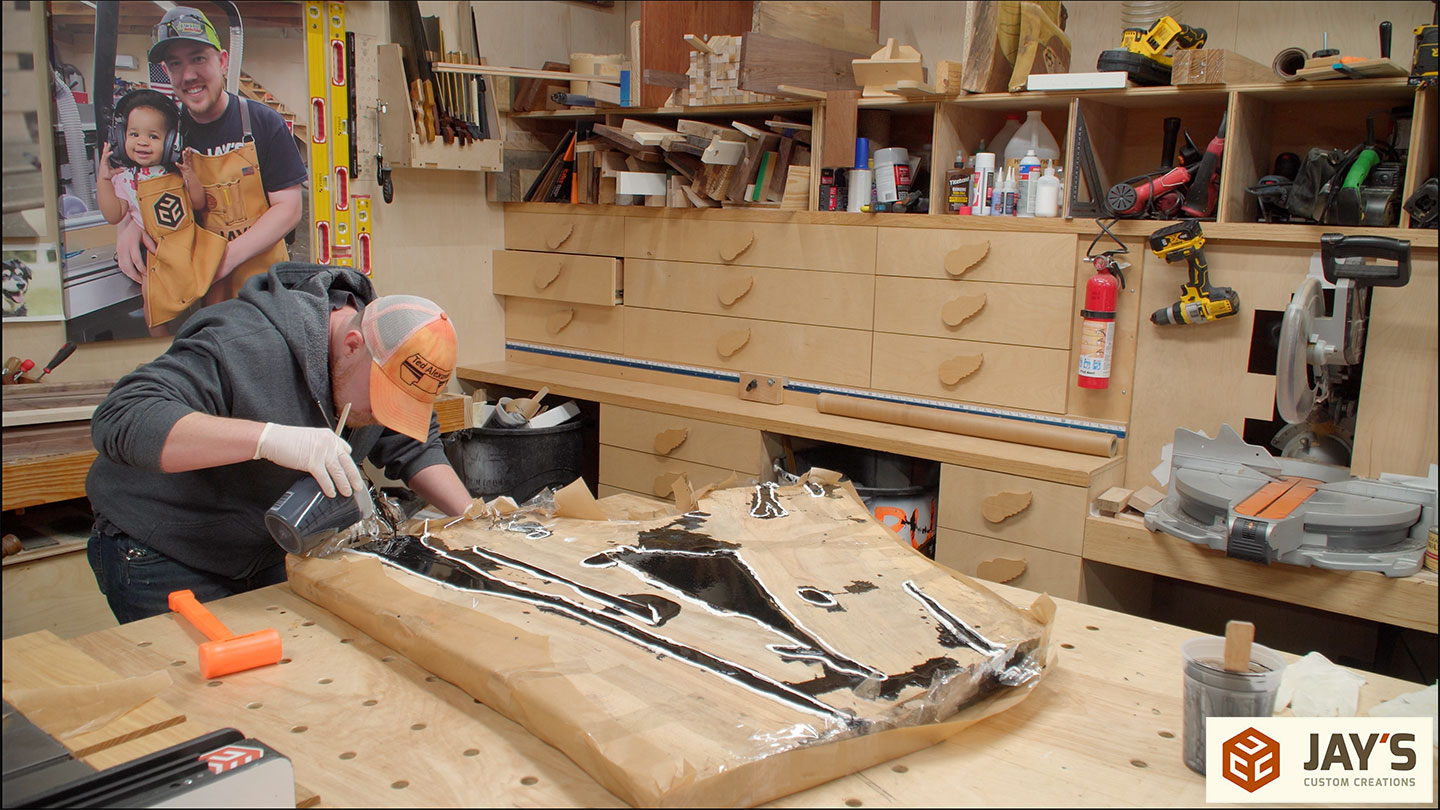
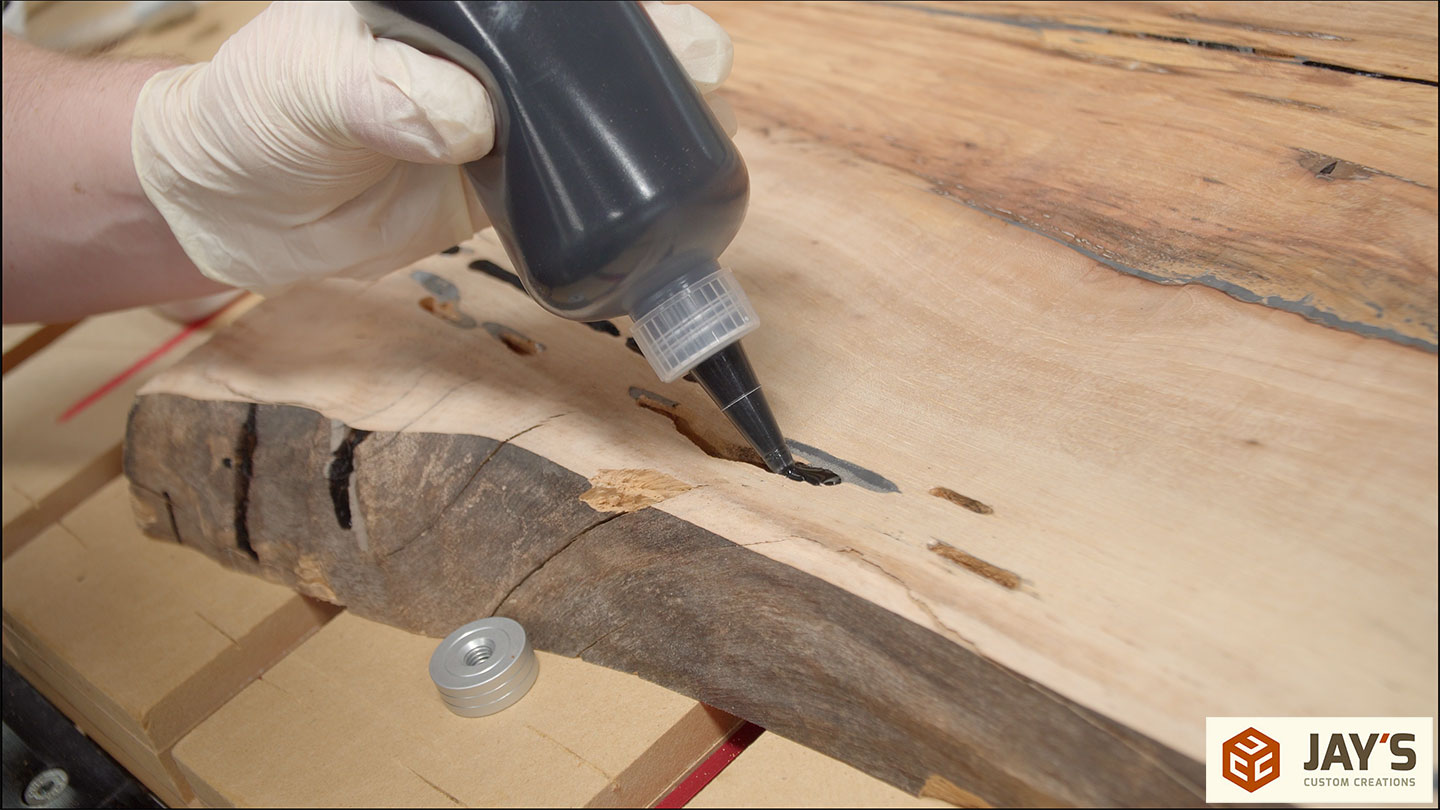
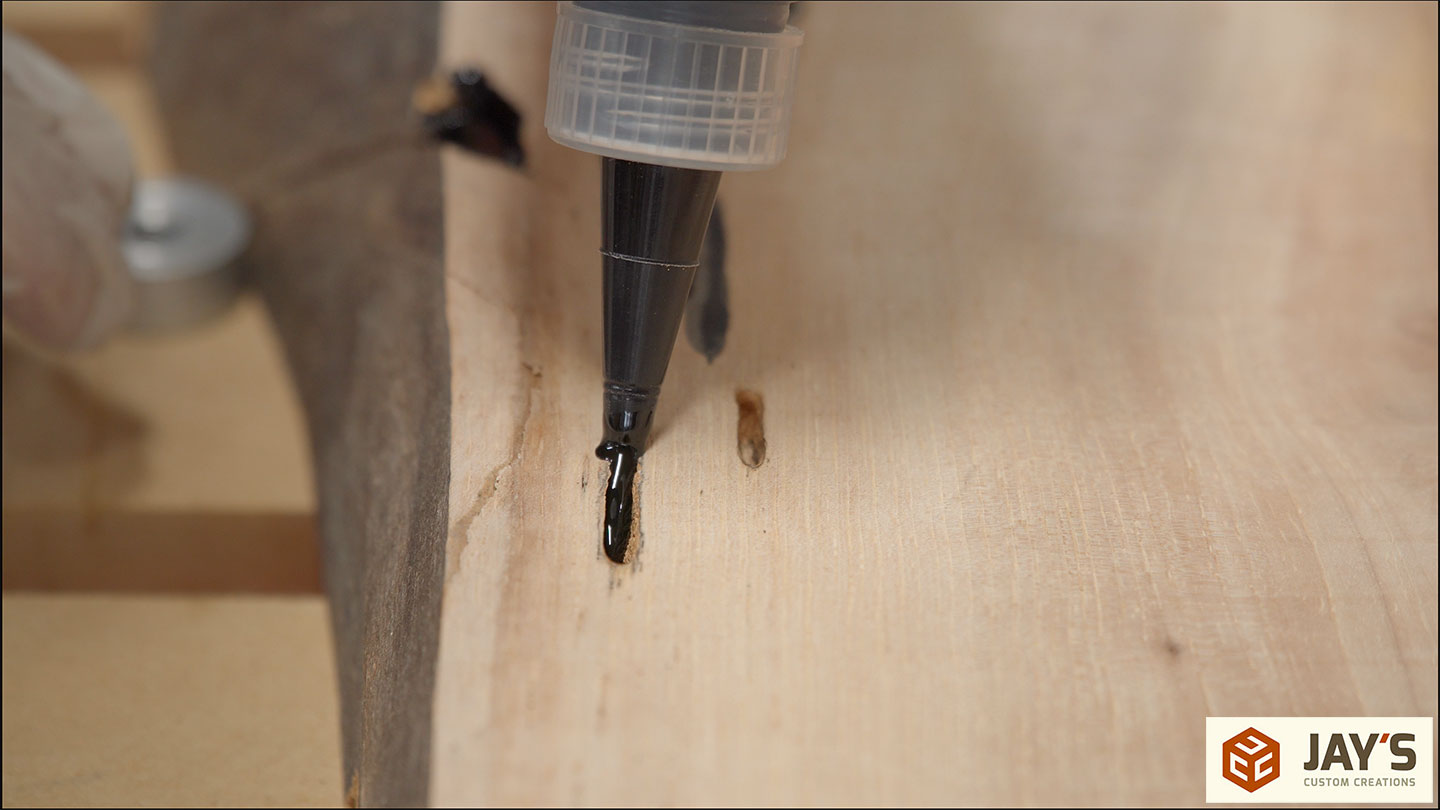
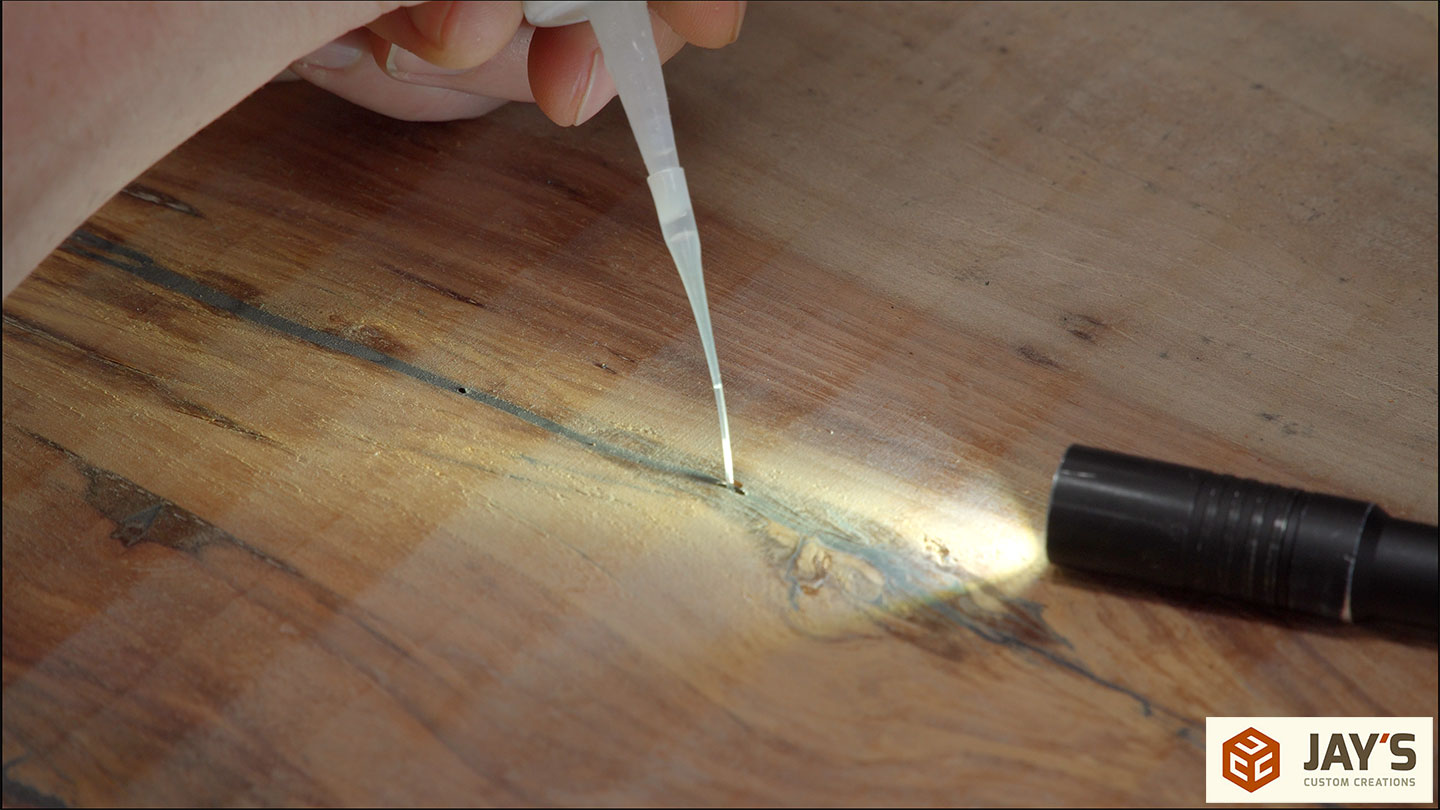
You guessed it, more epoxy. I really didn’t want to make a mess this time so I used a paper funnel to pour it into a Harbor Freight storage bottle. These bottles hold 8oz of liquid, have a small hole in the nozzle, and come in a three pack for $3.27. They are also super handy for stuff like mineral spirits, denatured alcohol, and lacquer thinner.

And as it turns out, it was super handy for epoxy. This was great for forcing epoxy in just one end of the defect and watching it fill from the bottom up, visually ensuring there is no trapped air. Much better than just flooding it from above.


I let that dry overnight and on day 482,000 I cleaned up the top surface once more with a small .05” depth pass with a .5” stepover.
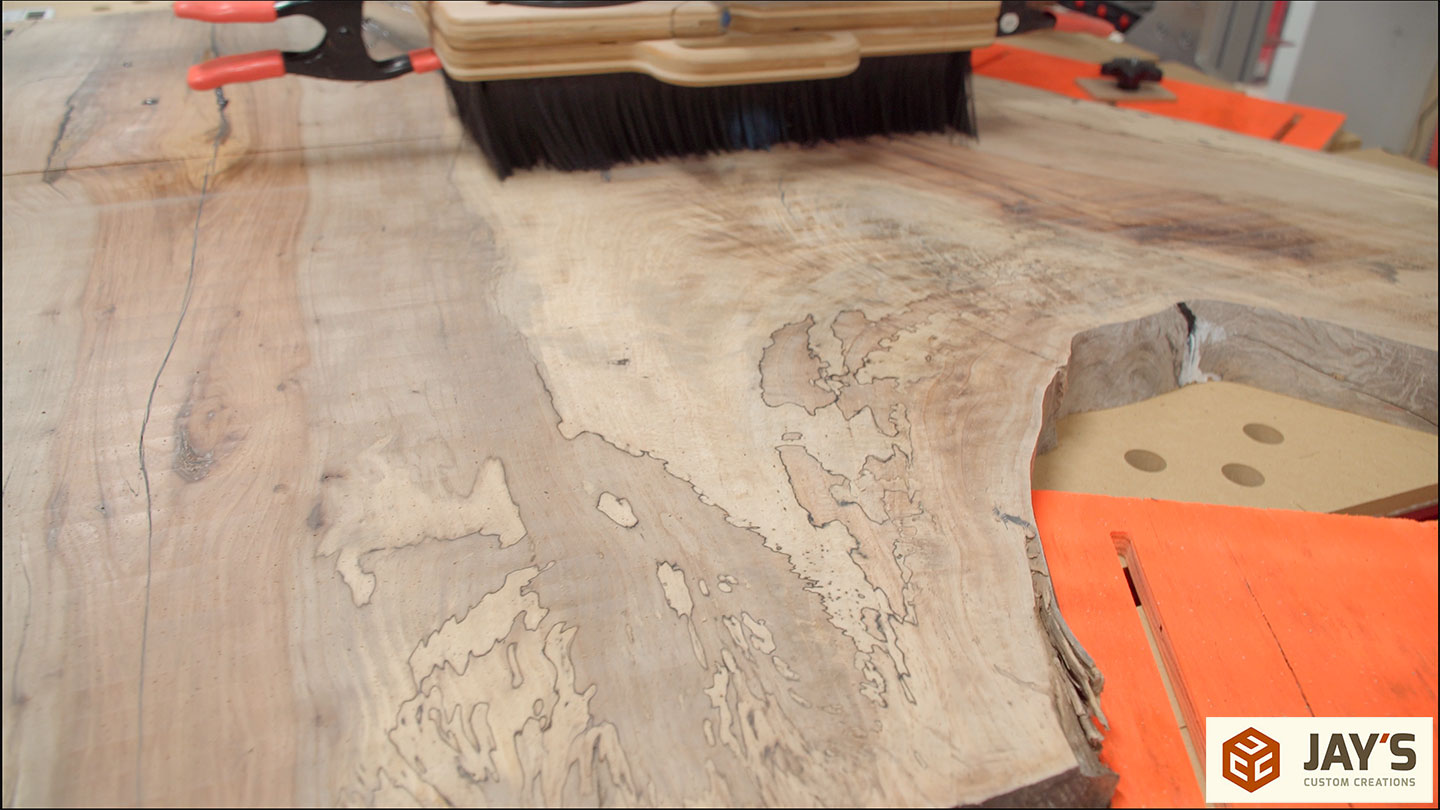
By now all of the major voids were filled with epoxy, or so I thought, so I switched over to medium CA glue to fill the super tiny areas. Using a light racking across the surface is great for highlighting all of the tiny stuff that blends in and is hard to see.
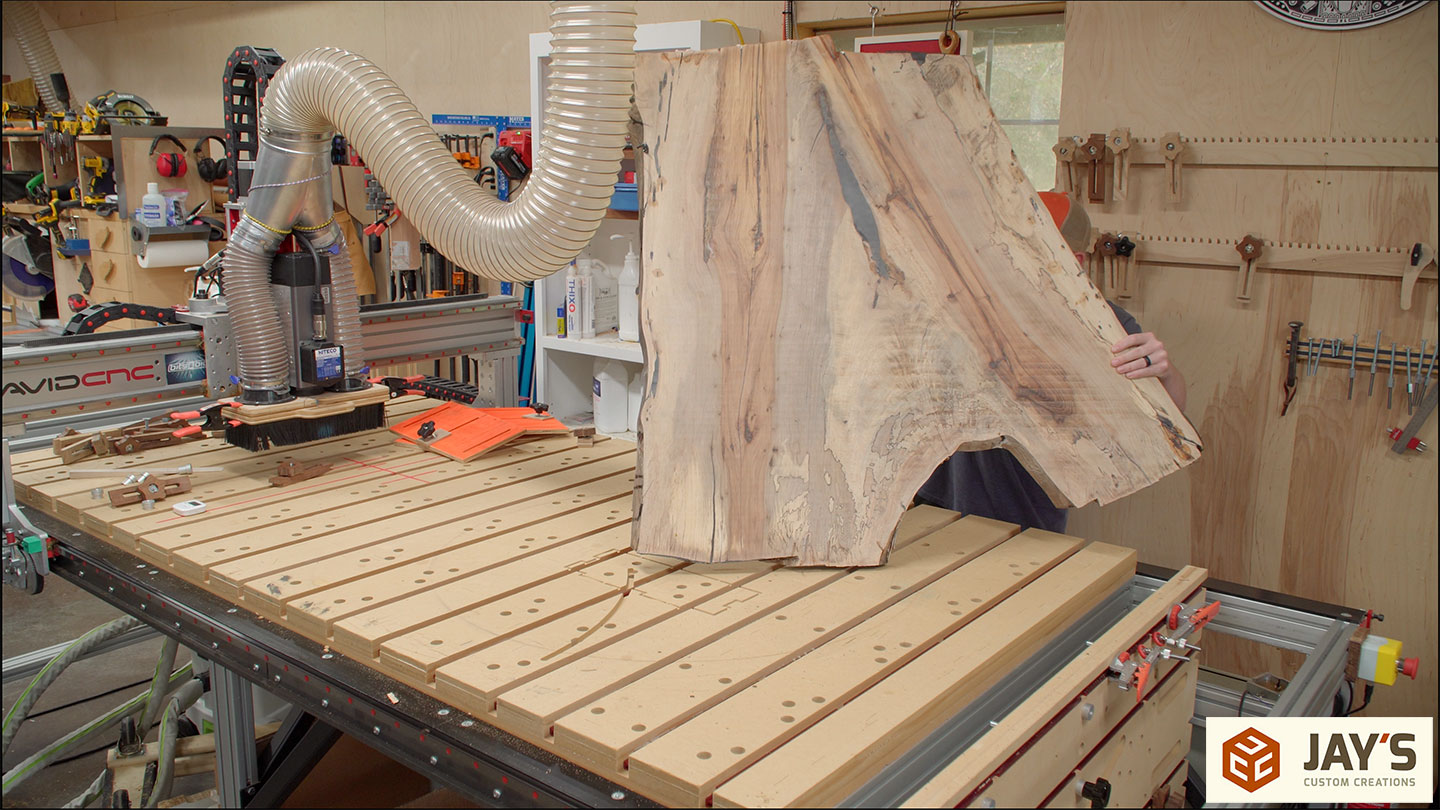
Finally, I determined all of the CNC work on the top surface was done so it’s back to the bottom side.
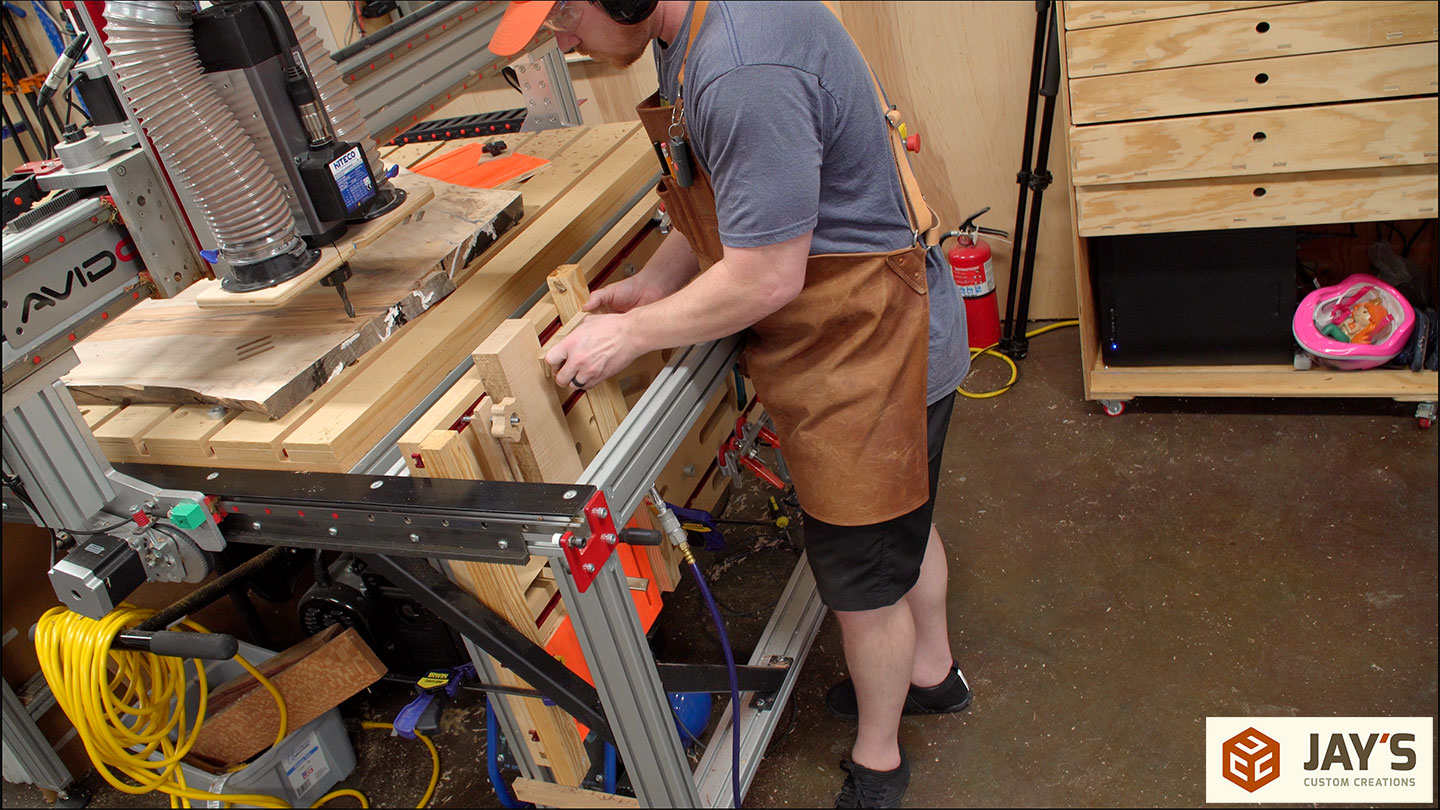
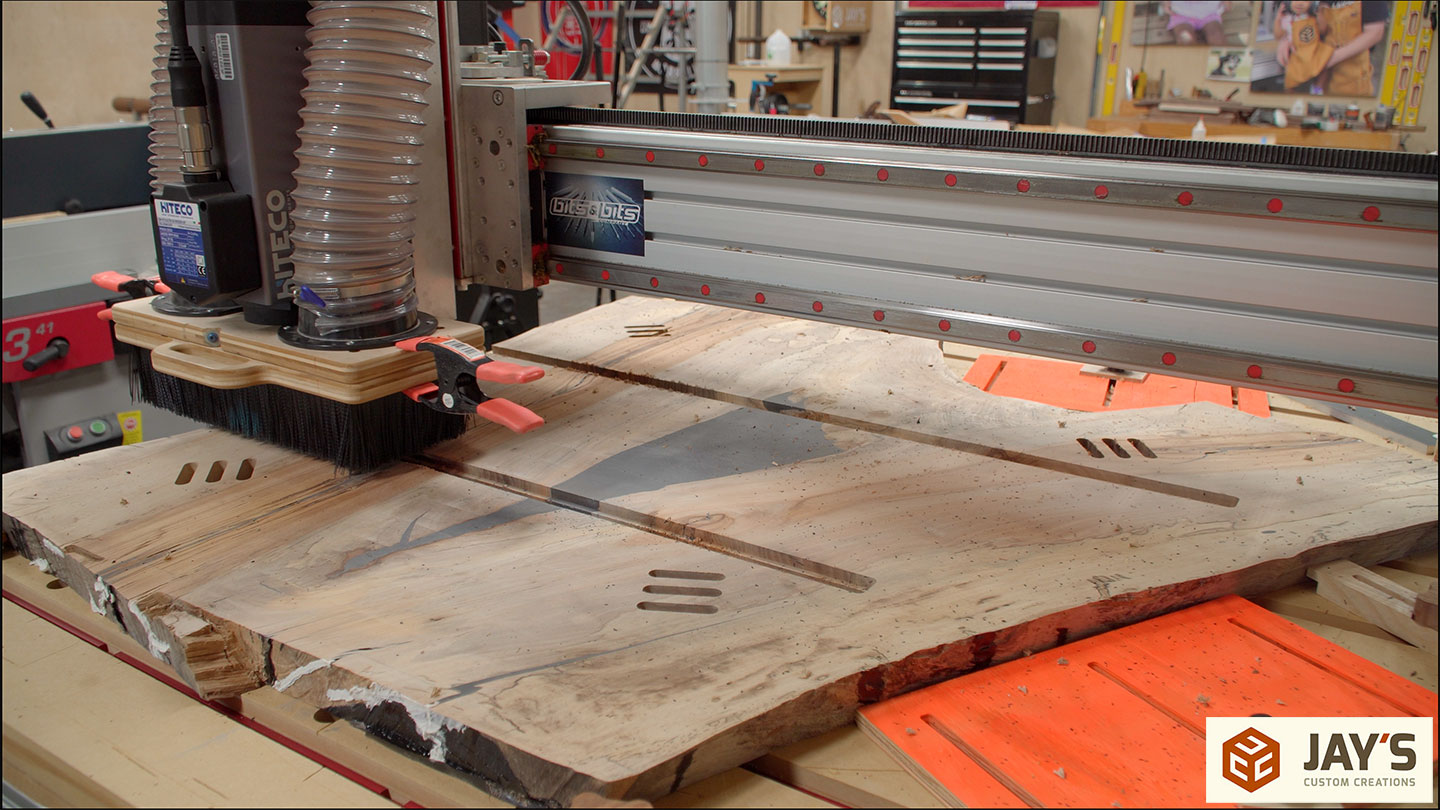
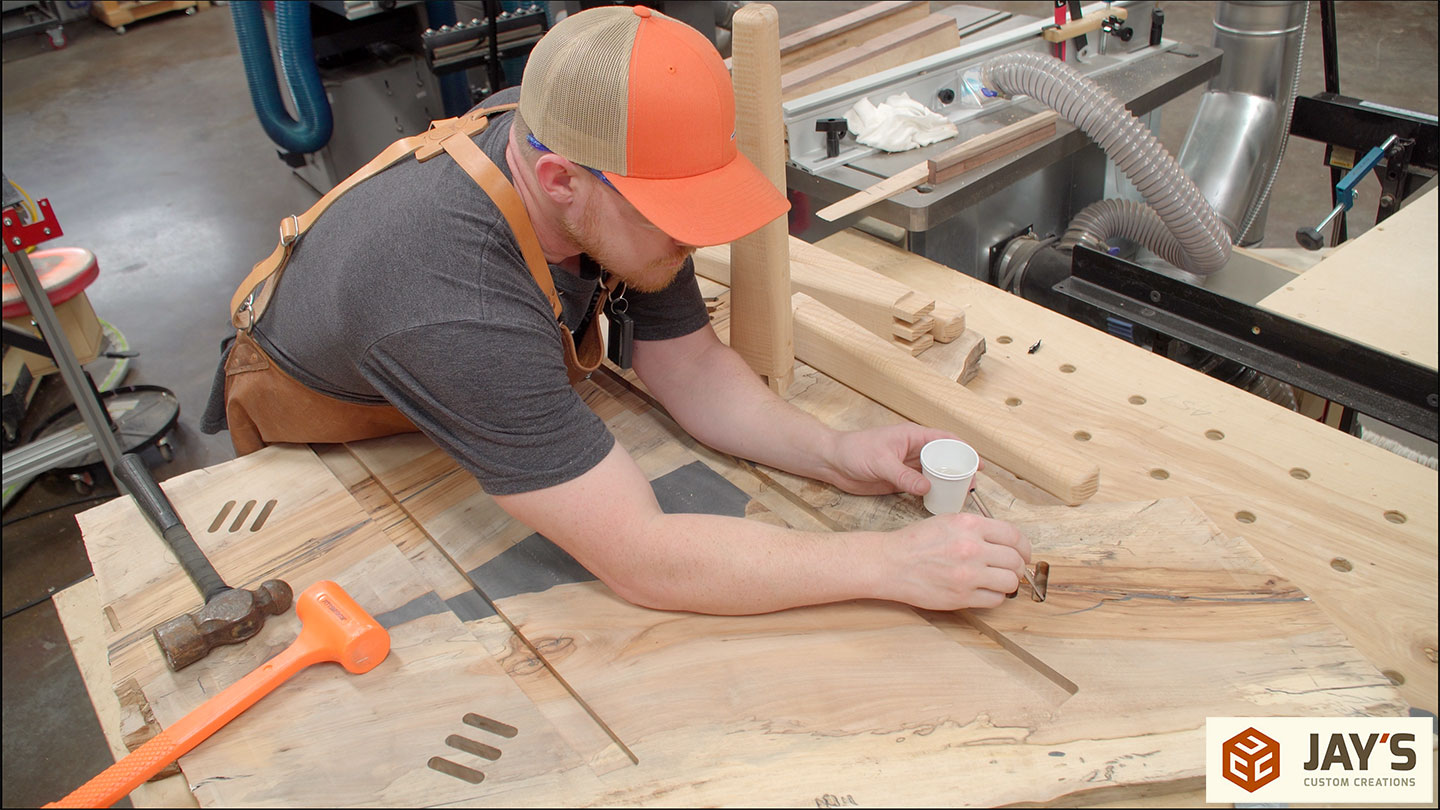
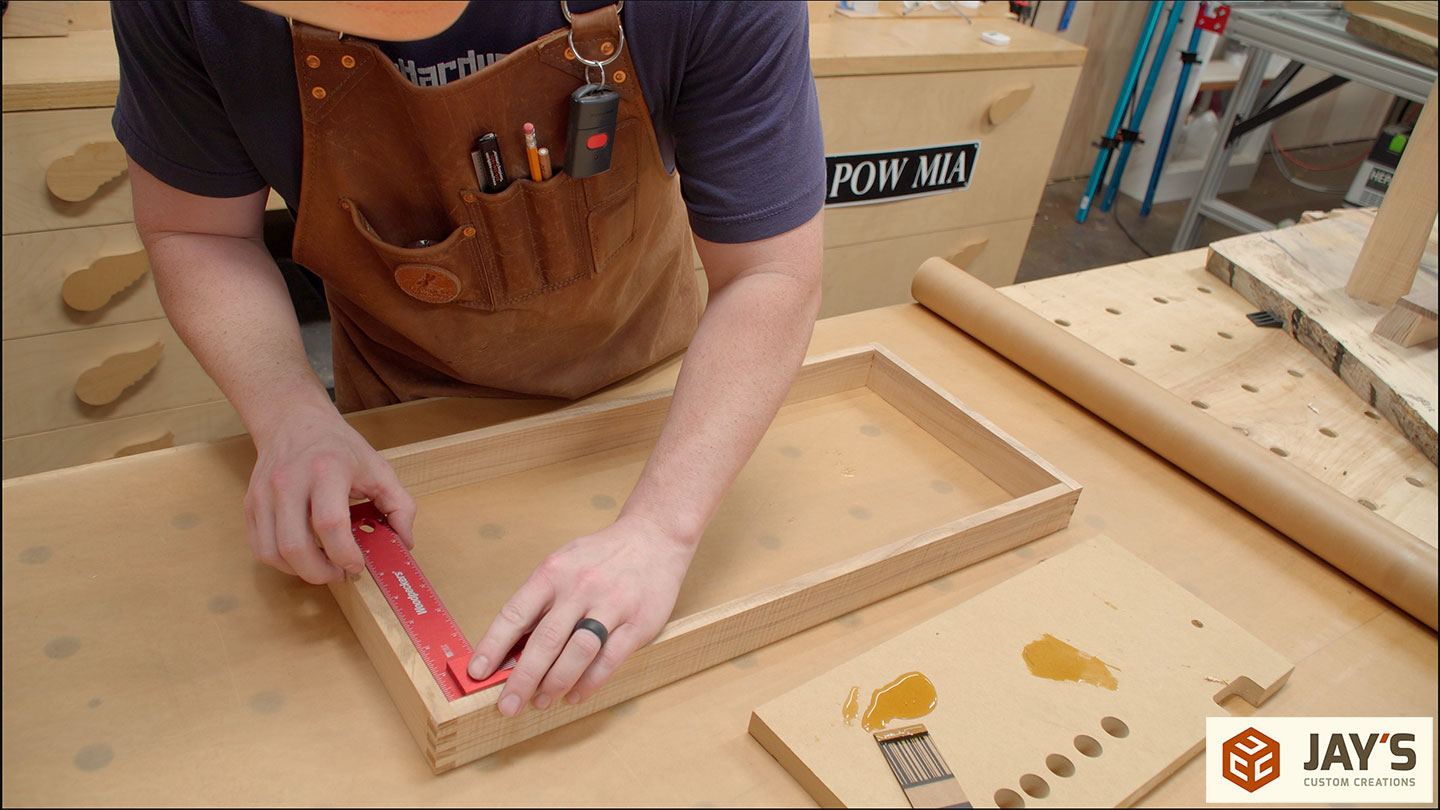
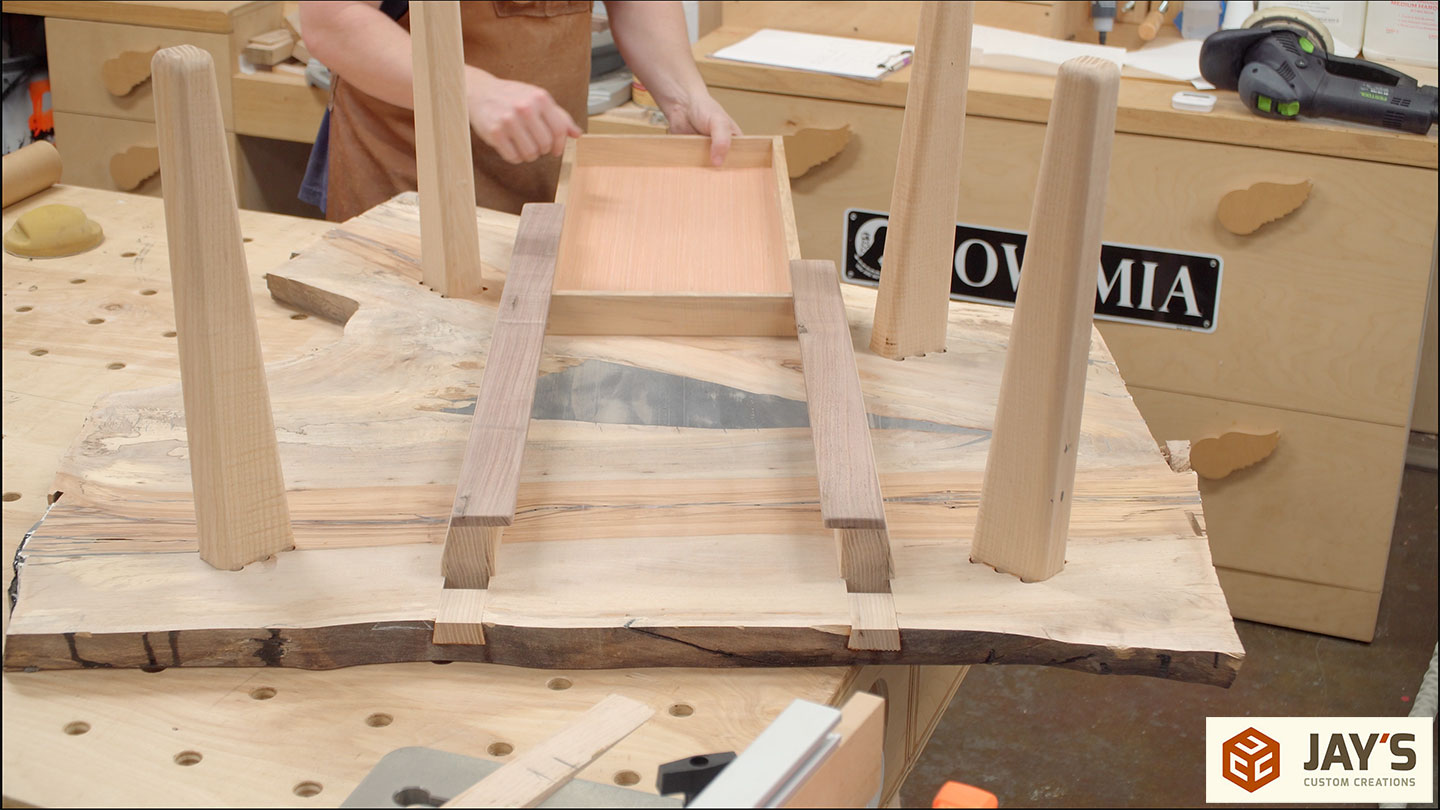
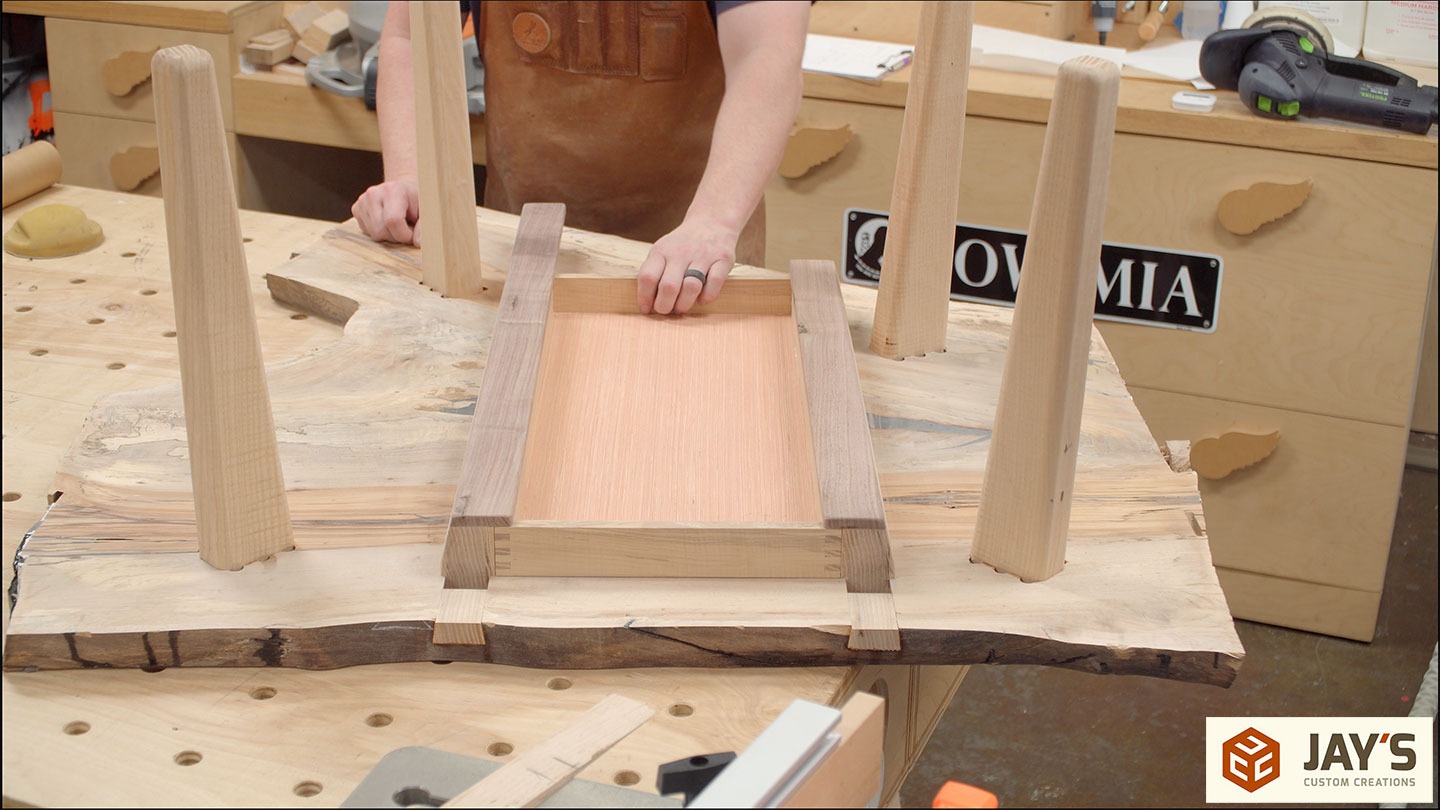
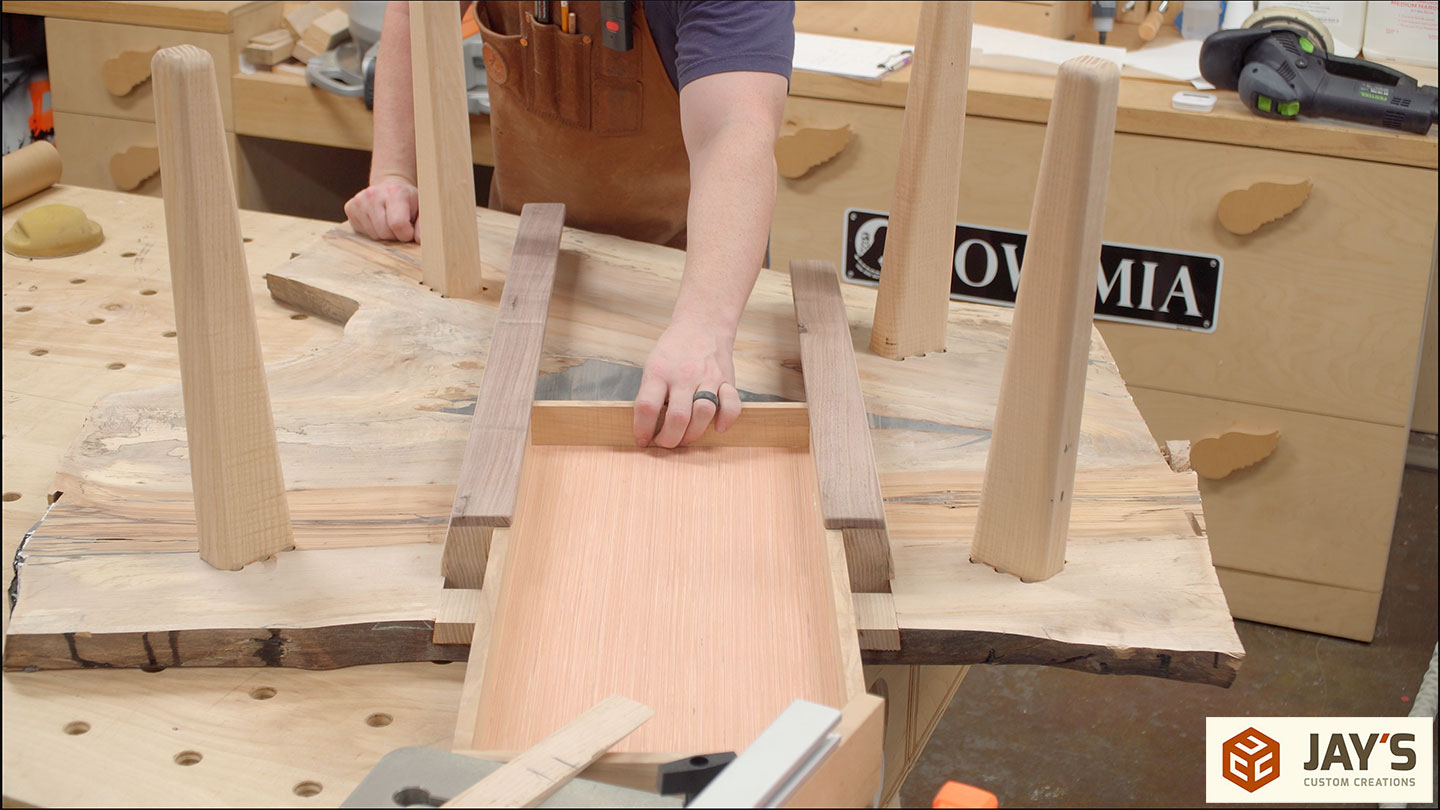
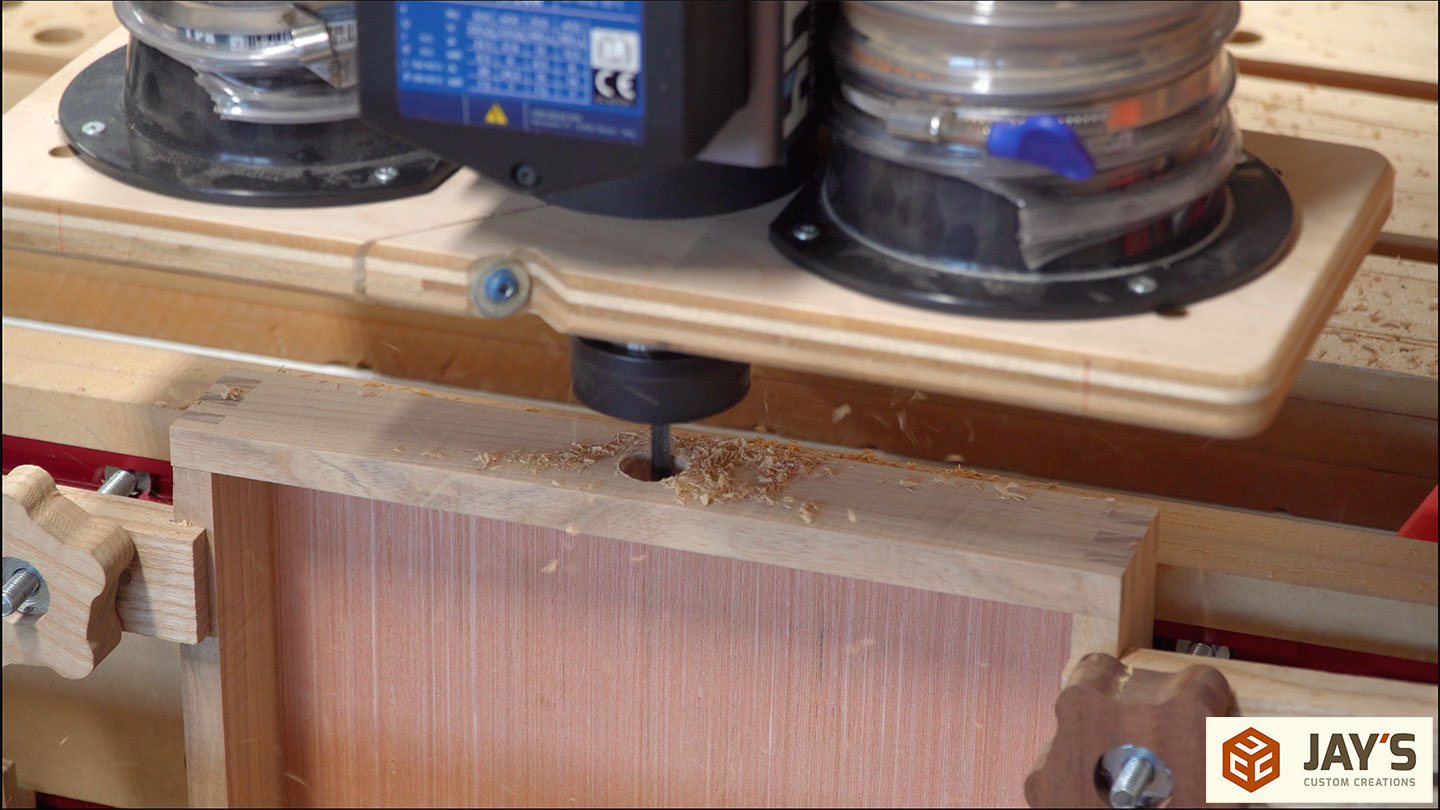
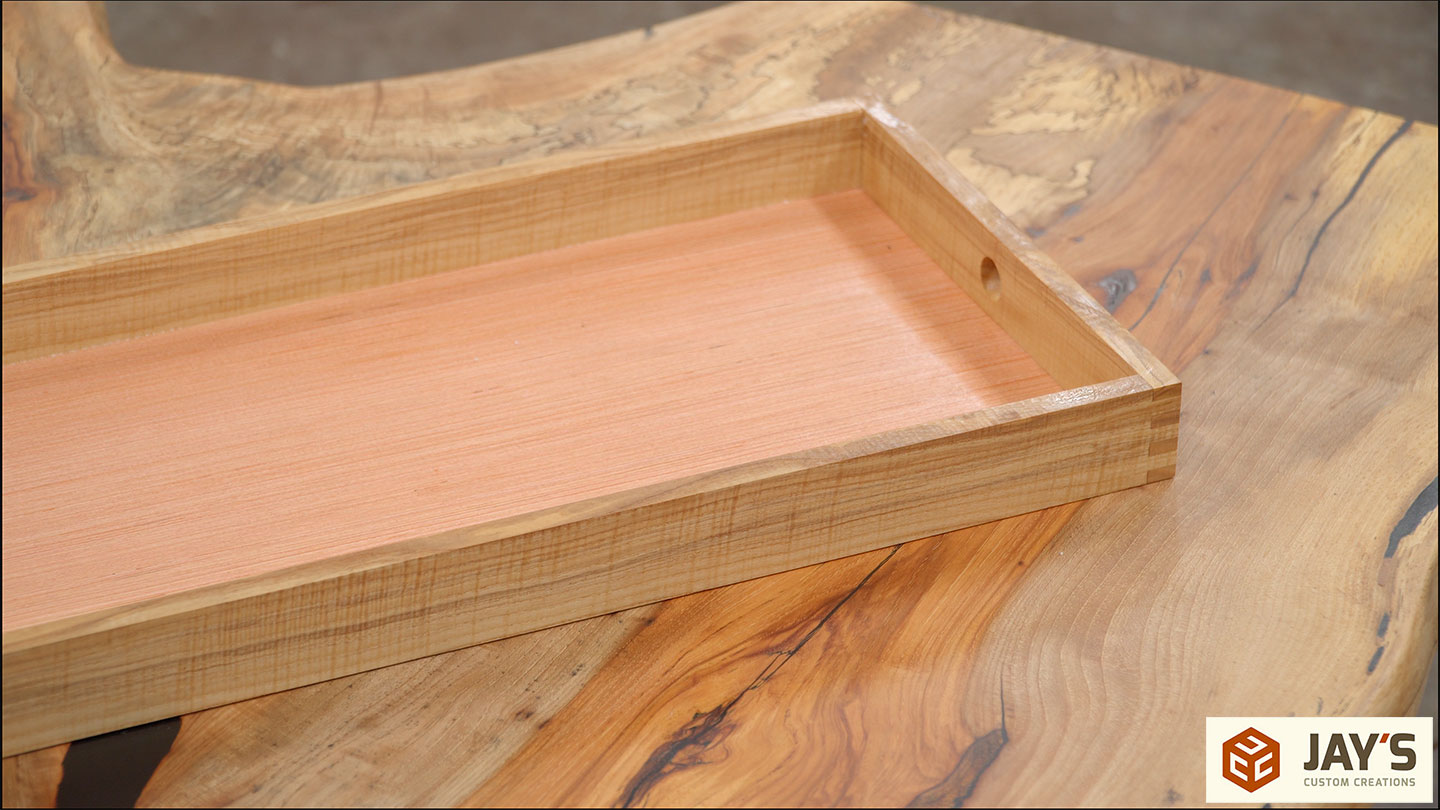
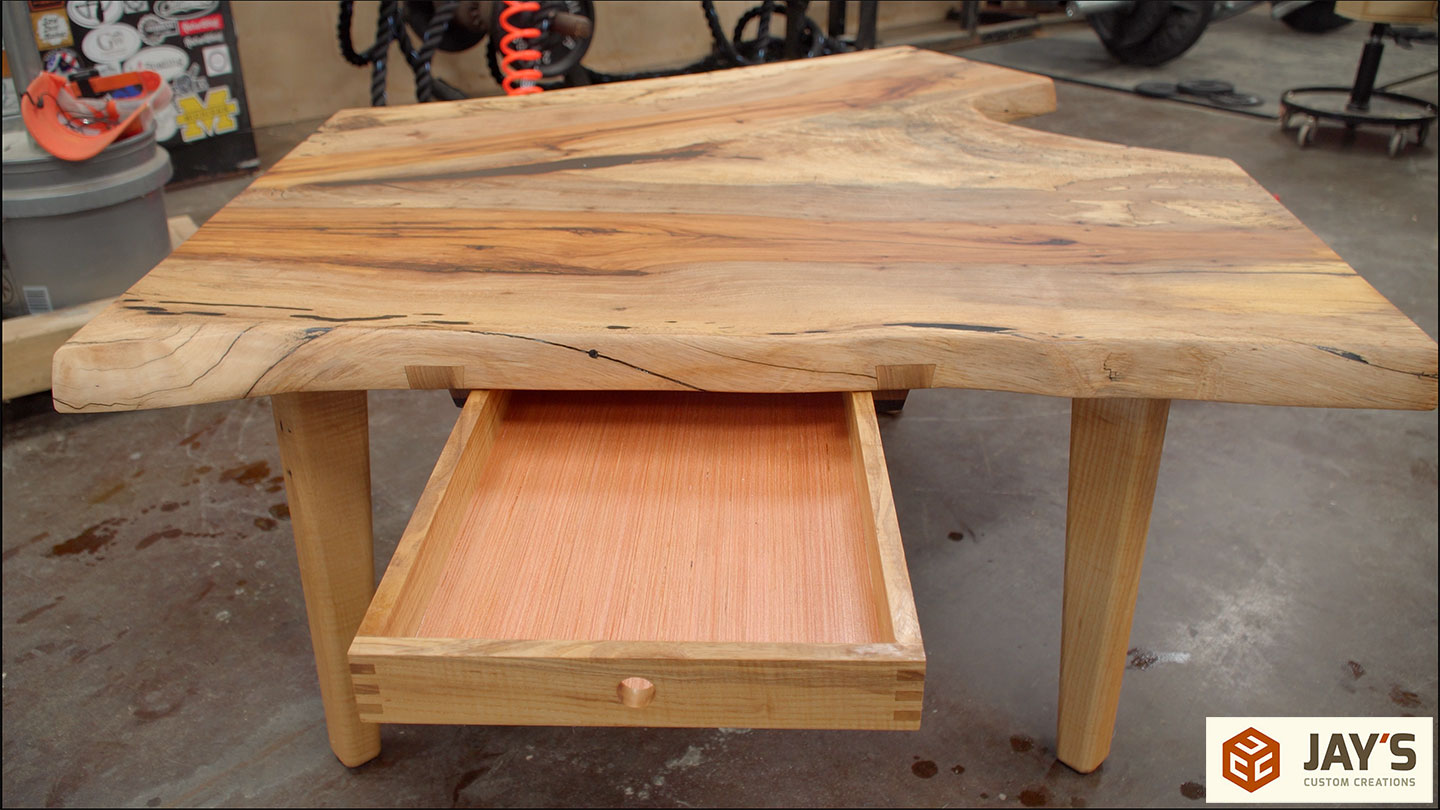
My original plan for the legs was to use through mortise and tenons in the shape of a dog bone like I did on a recent bench but at this point, I decided against that. The top already had so much going on visually so I thought adding the dog bone tenons would take away from the natural beauty of the wood. I laid out the location of the four legs and the two sliding dovetails. You’ll see a lot of these slab tables with inlaid C-channel in the bottom to prevent warping of the slab. Instead of C-channel, I decided to make sliding dovetail rails so I could add a low profile drawer.

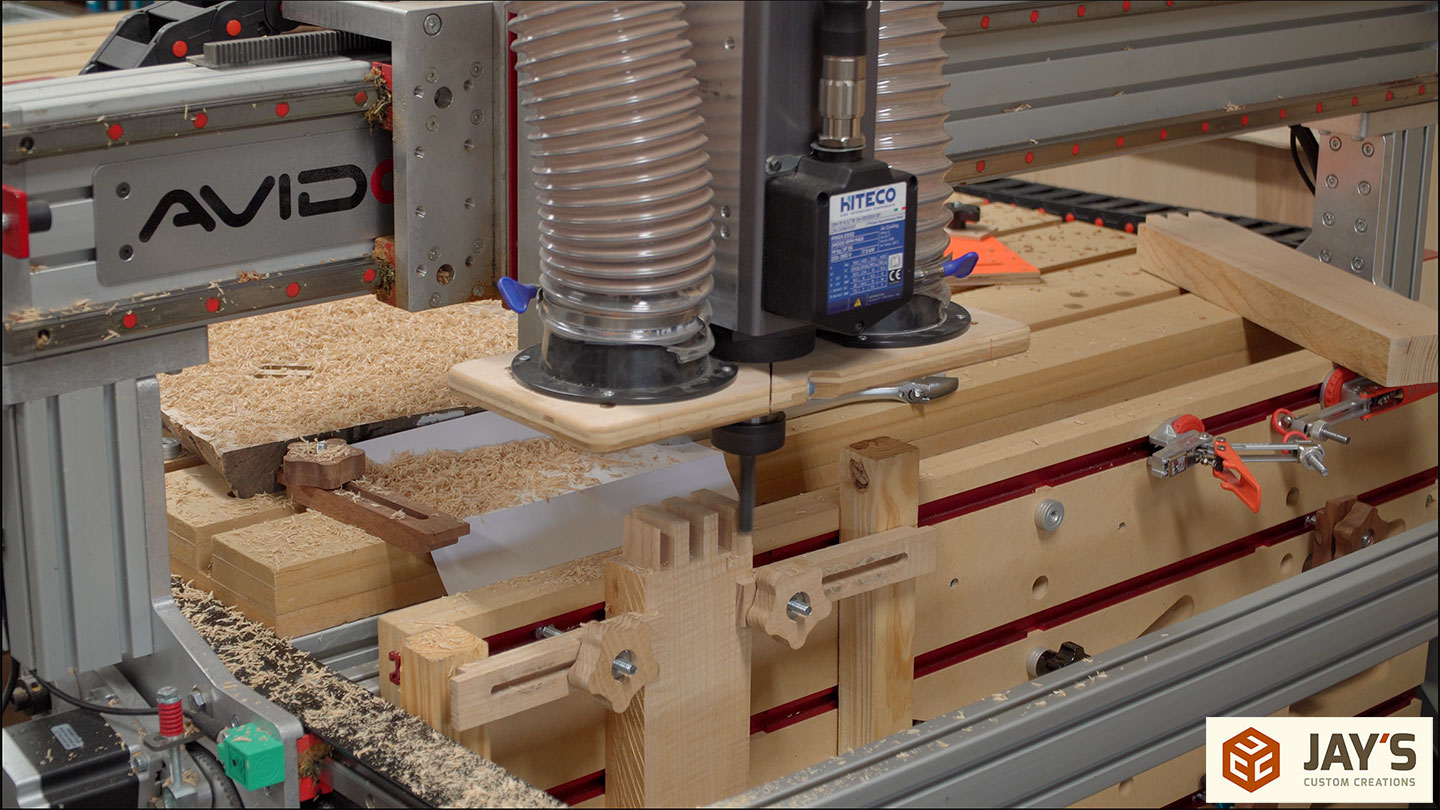
Once I had everything drawn onto the slab I used a center point pin in the spindle to then locate all of the necessary joinery and then transfer those coordinates from Mach4 to VCarve Pro. From there I could create all of the cuts.

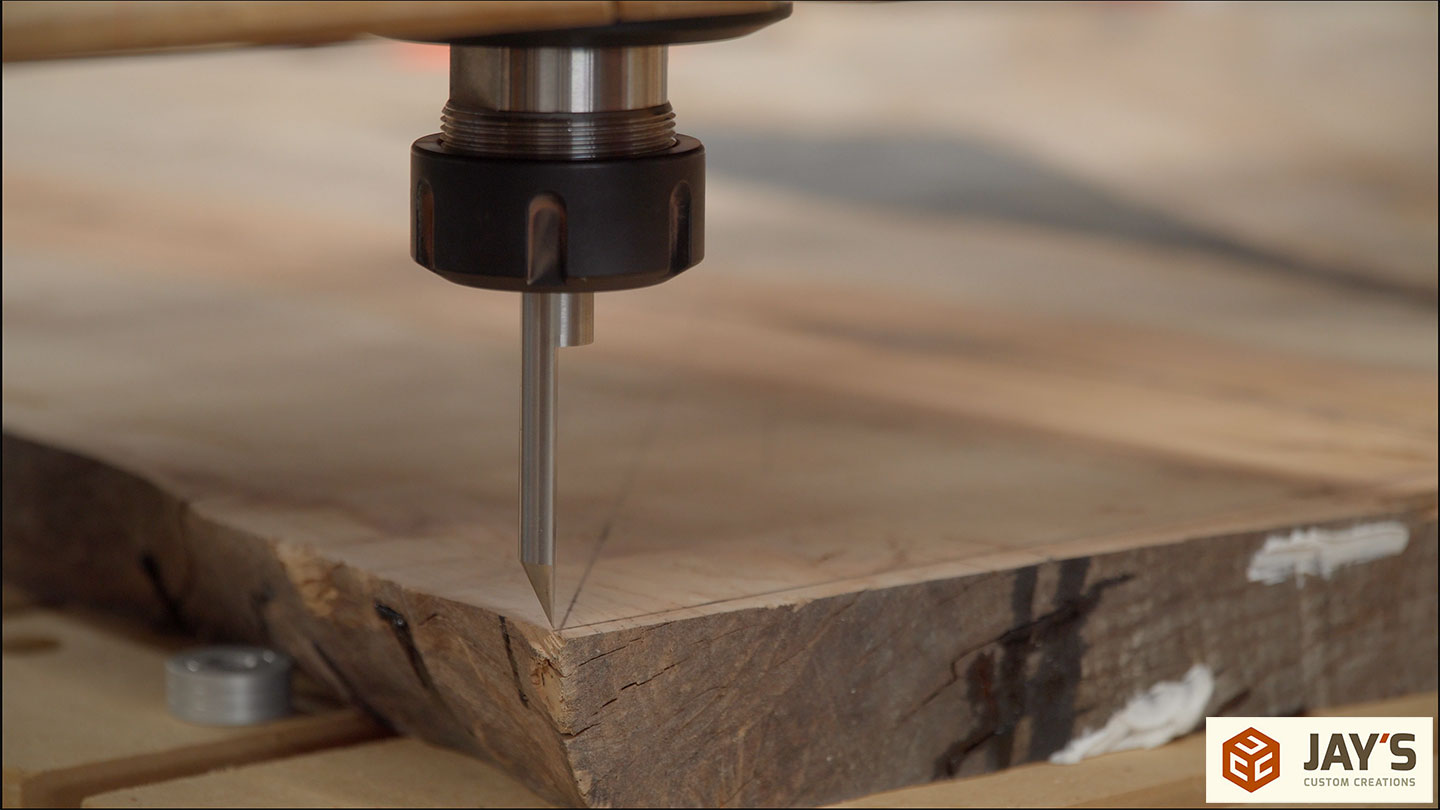

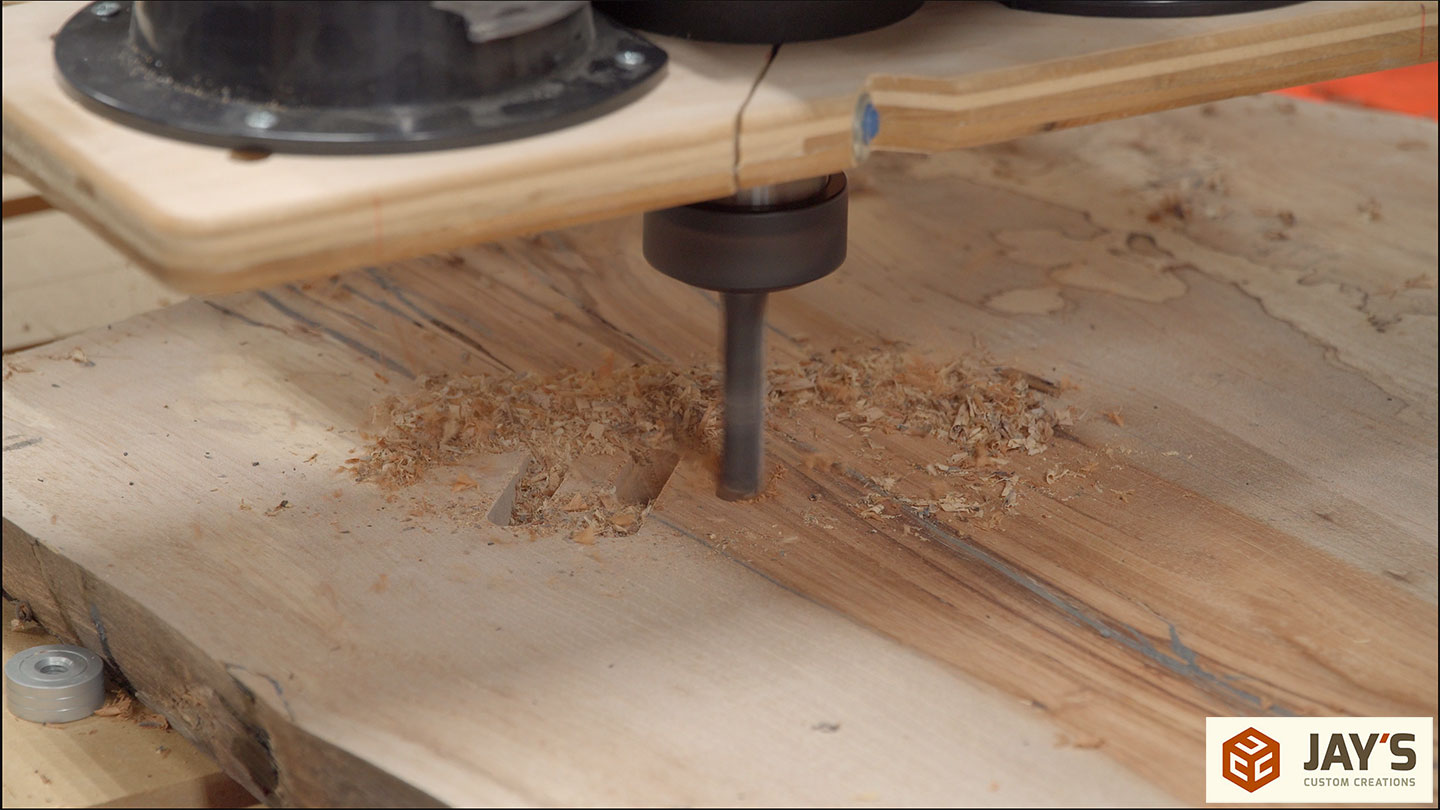
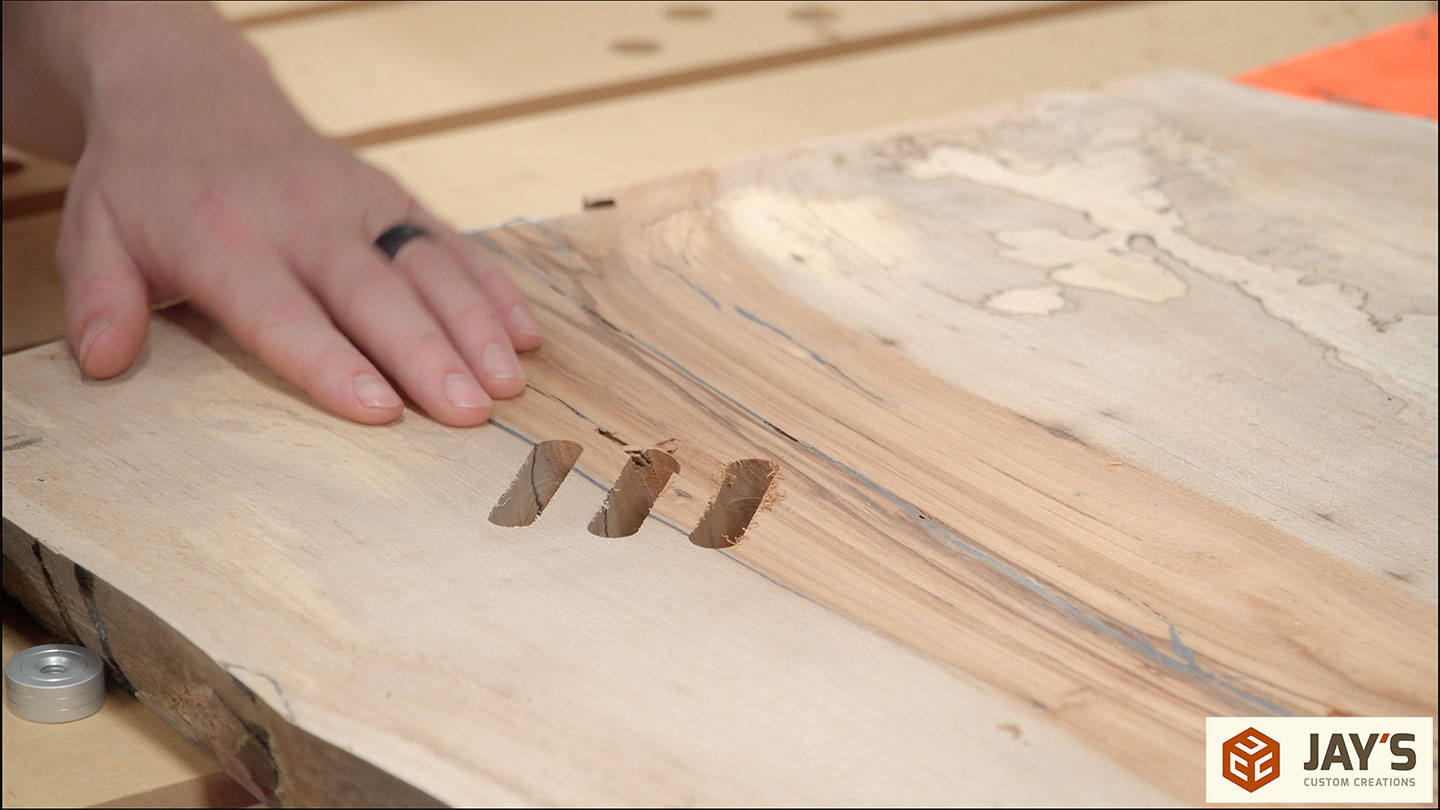
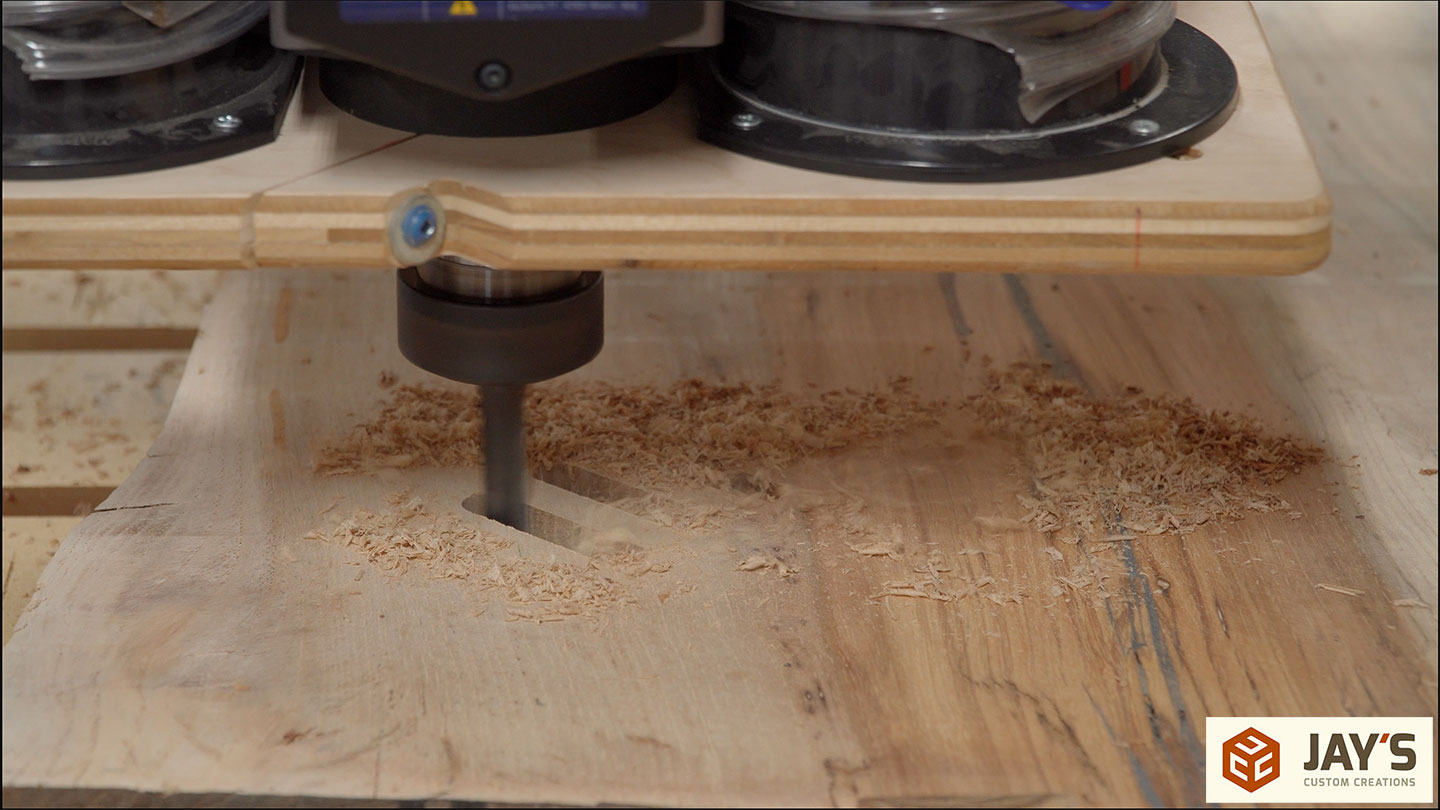
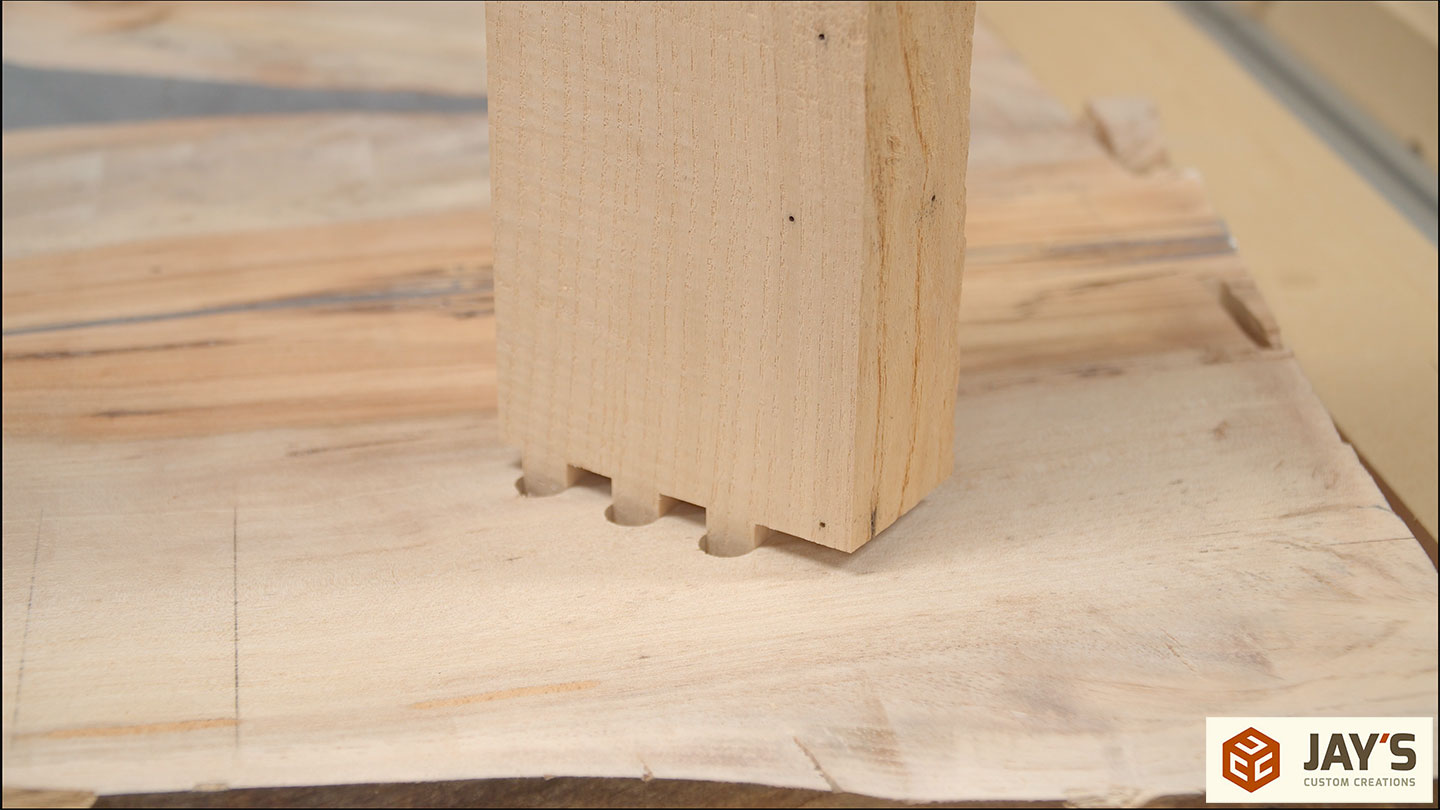
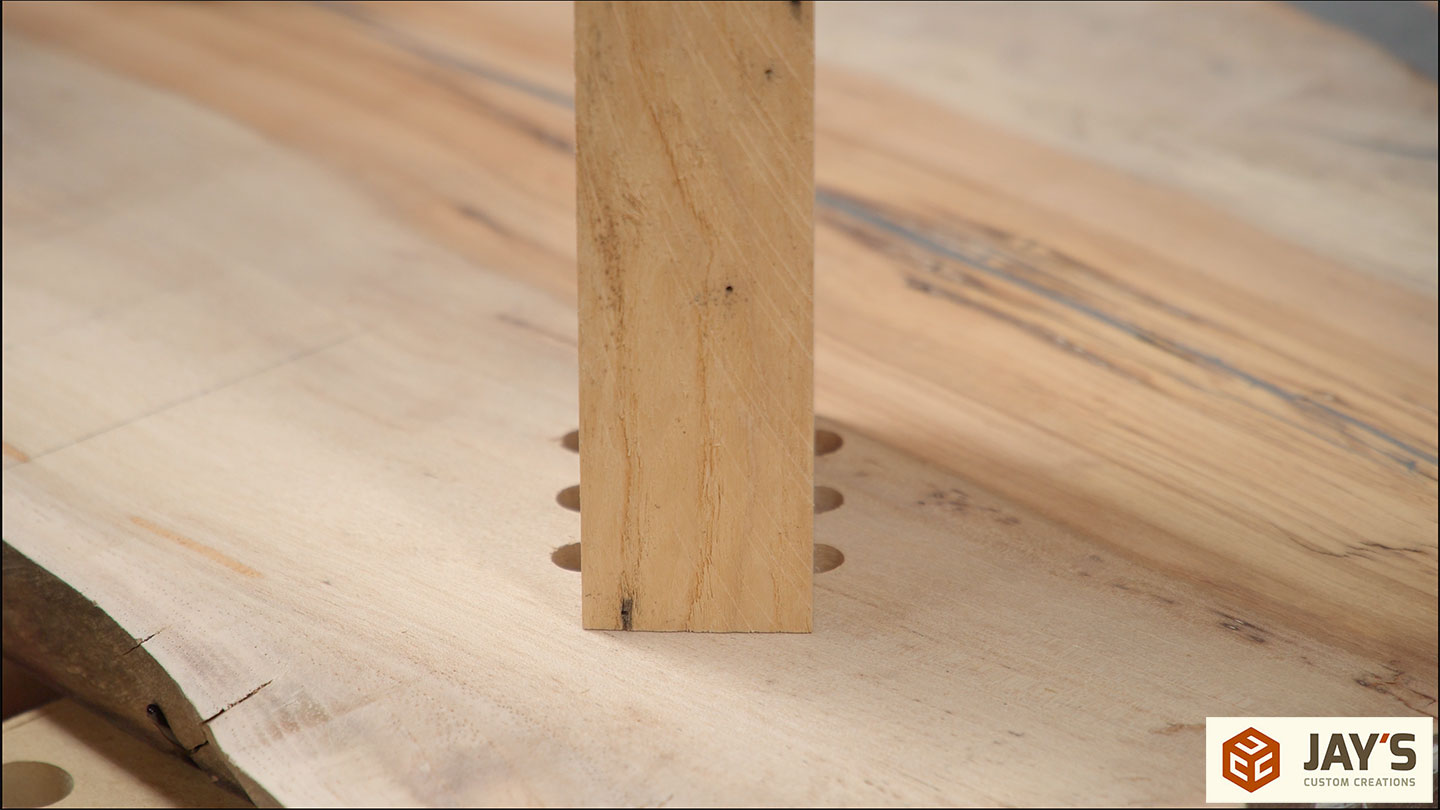
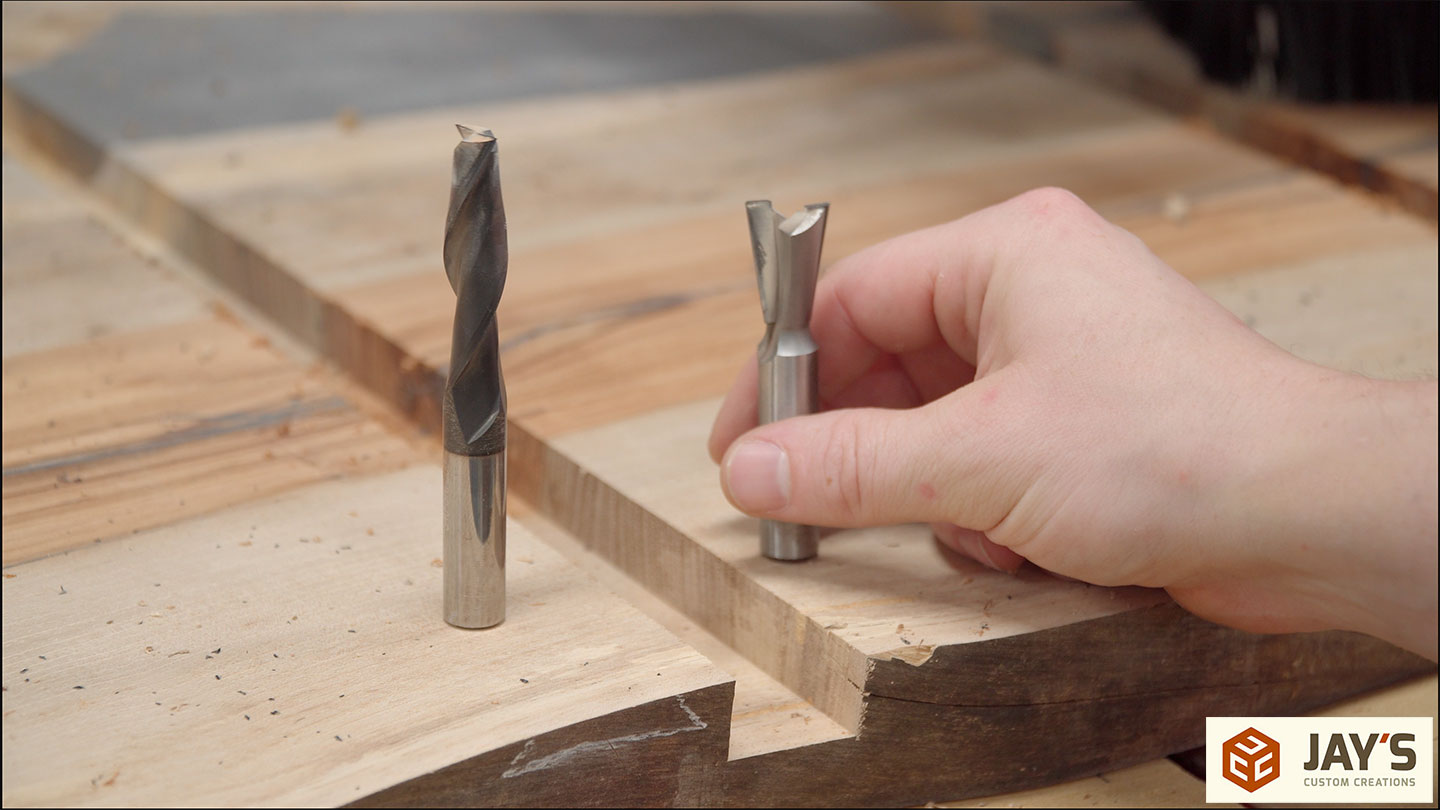
Instead of dog bone tenons, I went with a triple mortise and tenon joint. This provides a lot of surface area to create a strong joint. The mortises are just three slots with a .5” spiral up-cut bit.
For the tenons, the vertical table is used. First, a shoulder is established and then a spiral profile cut is made for each of the three tenons. Rinse and repeat for all four legs.

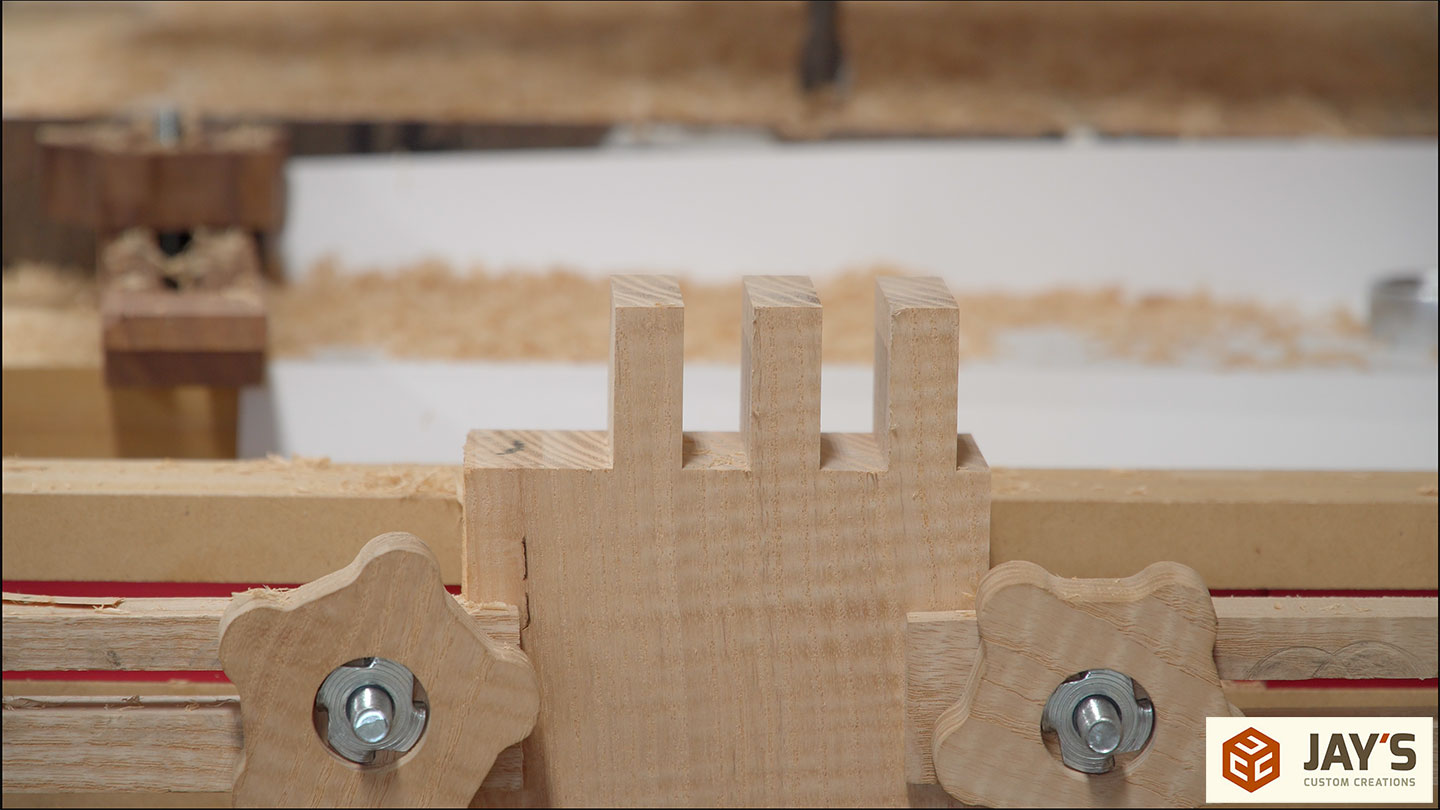
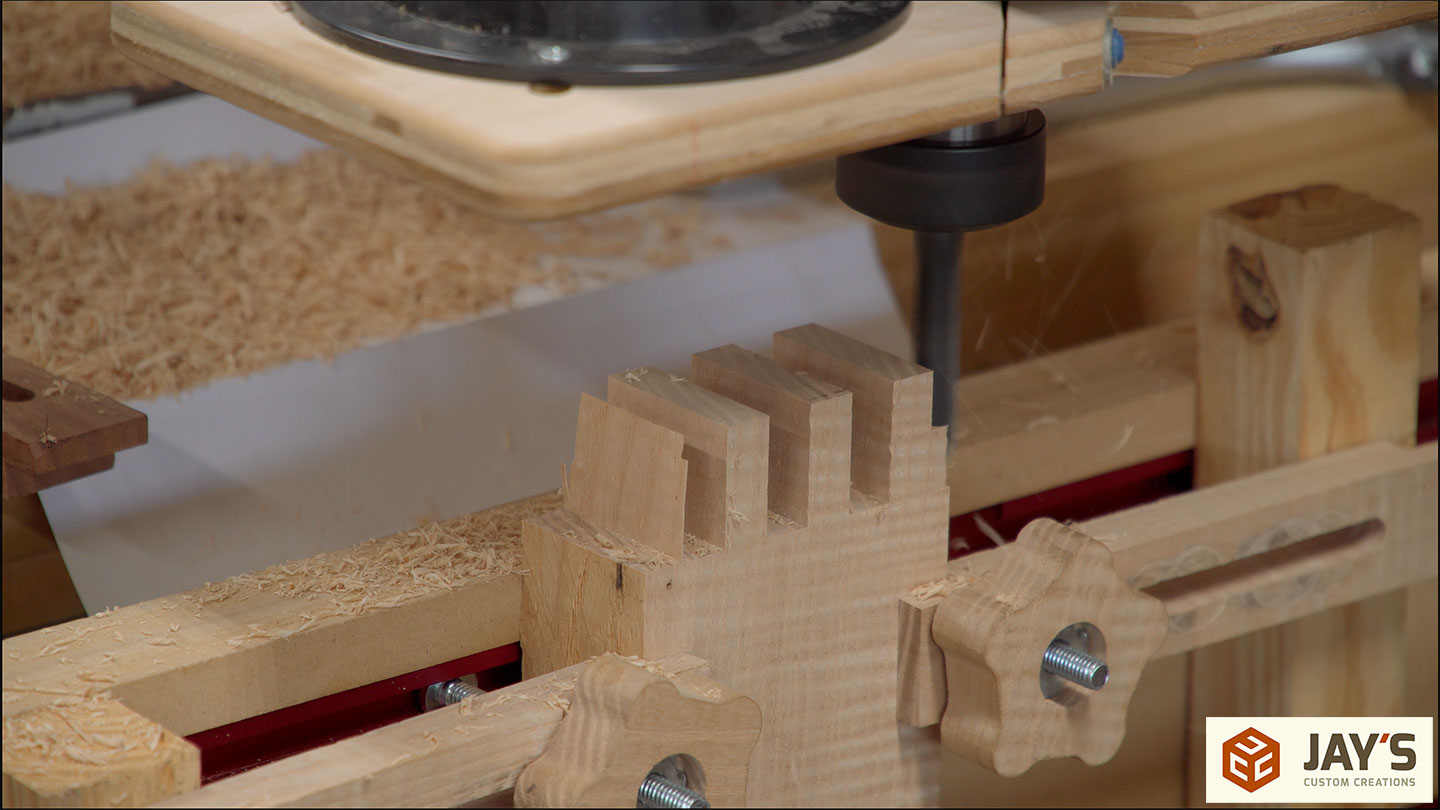
A test fit confirms the fit. You can see the mortises are longer than the tenons are wide. I did this to allow a little room for the epoxy squeeze out.

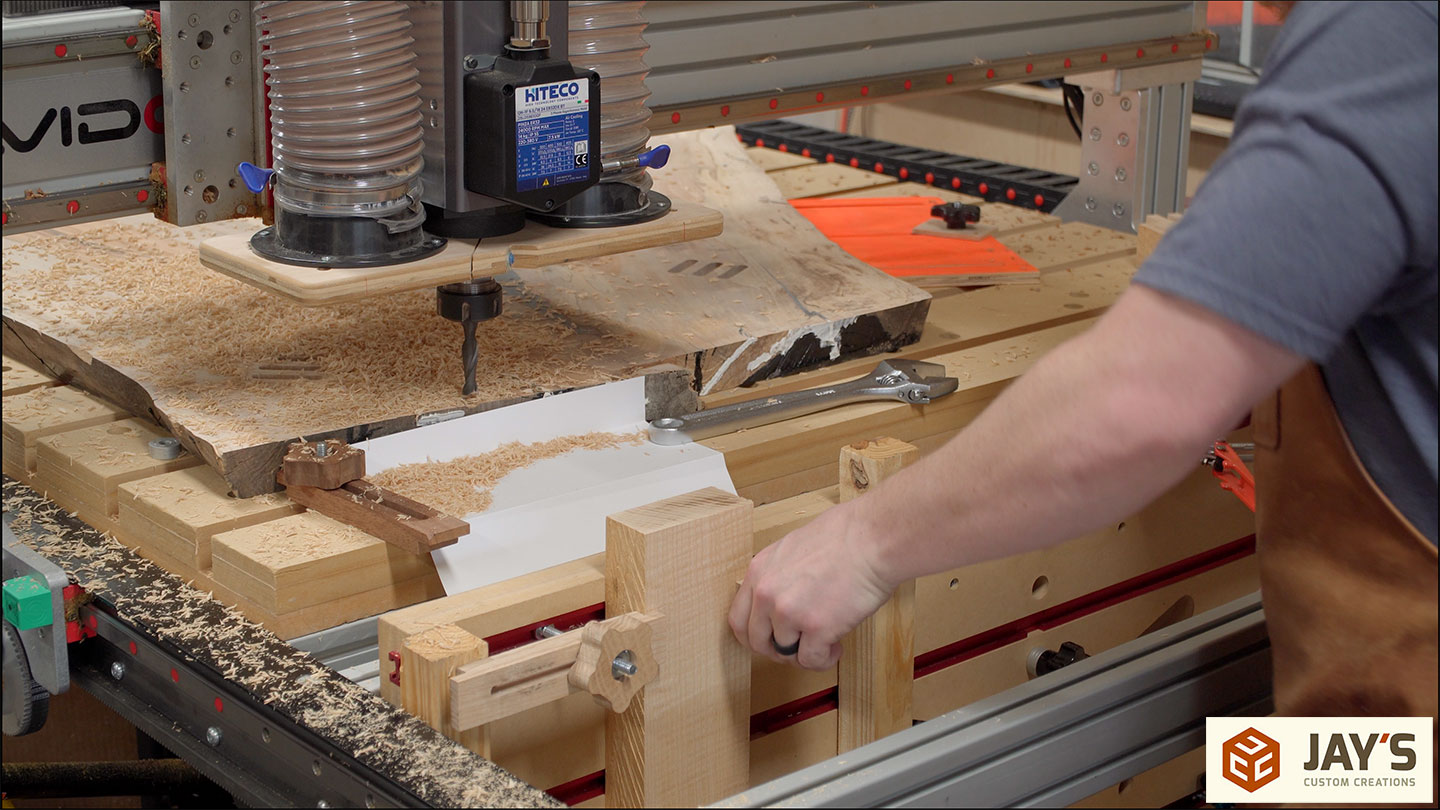
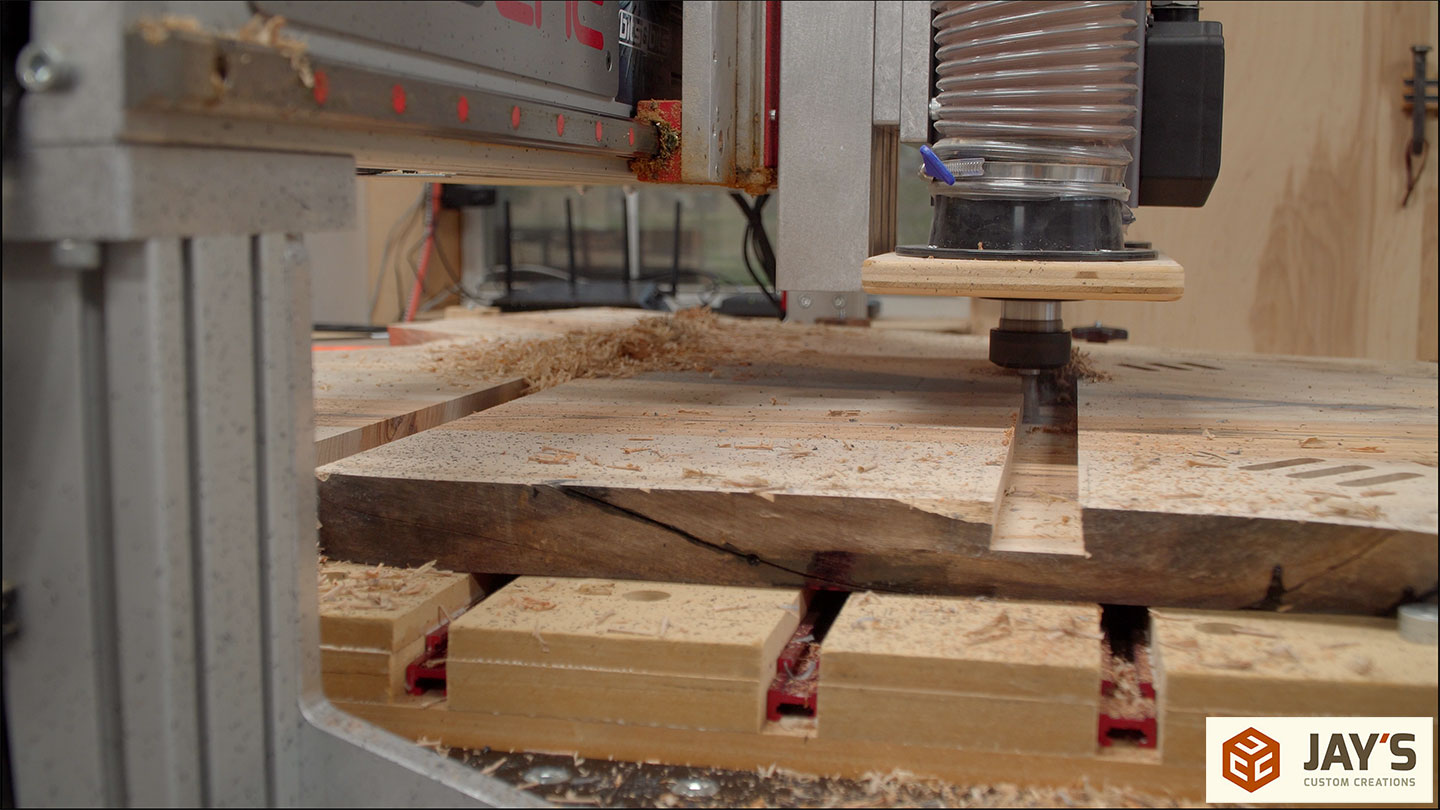
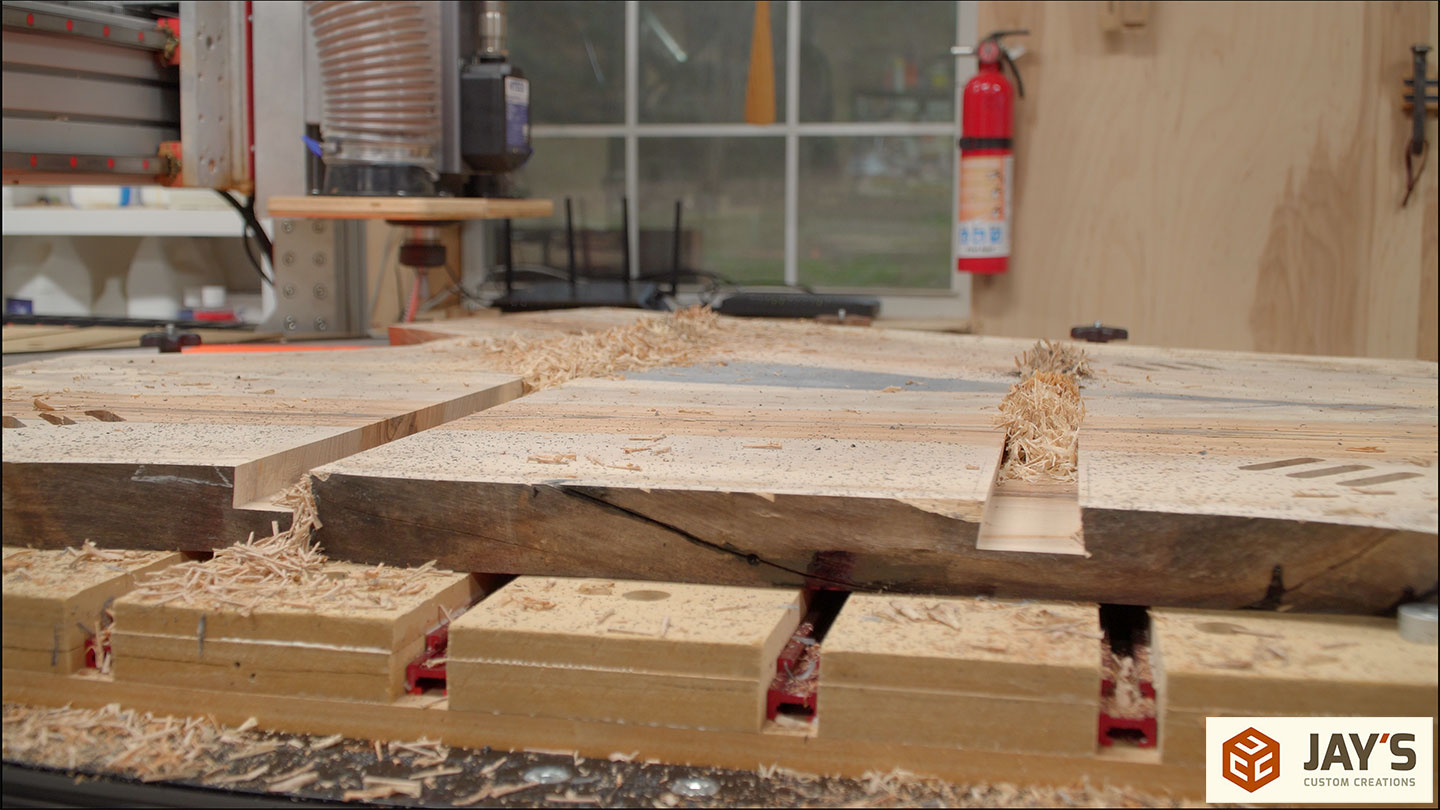
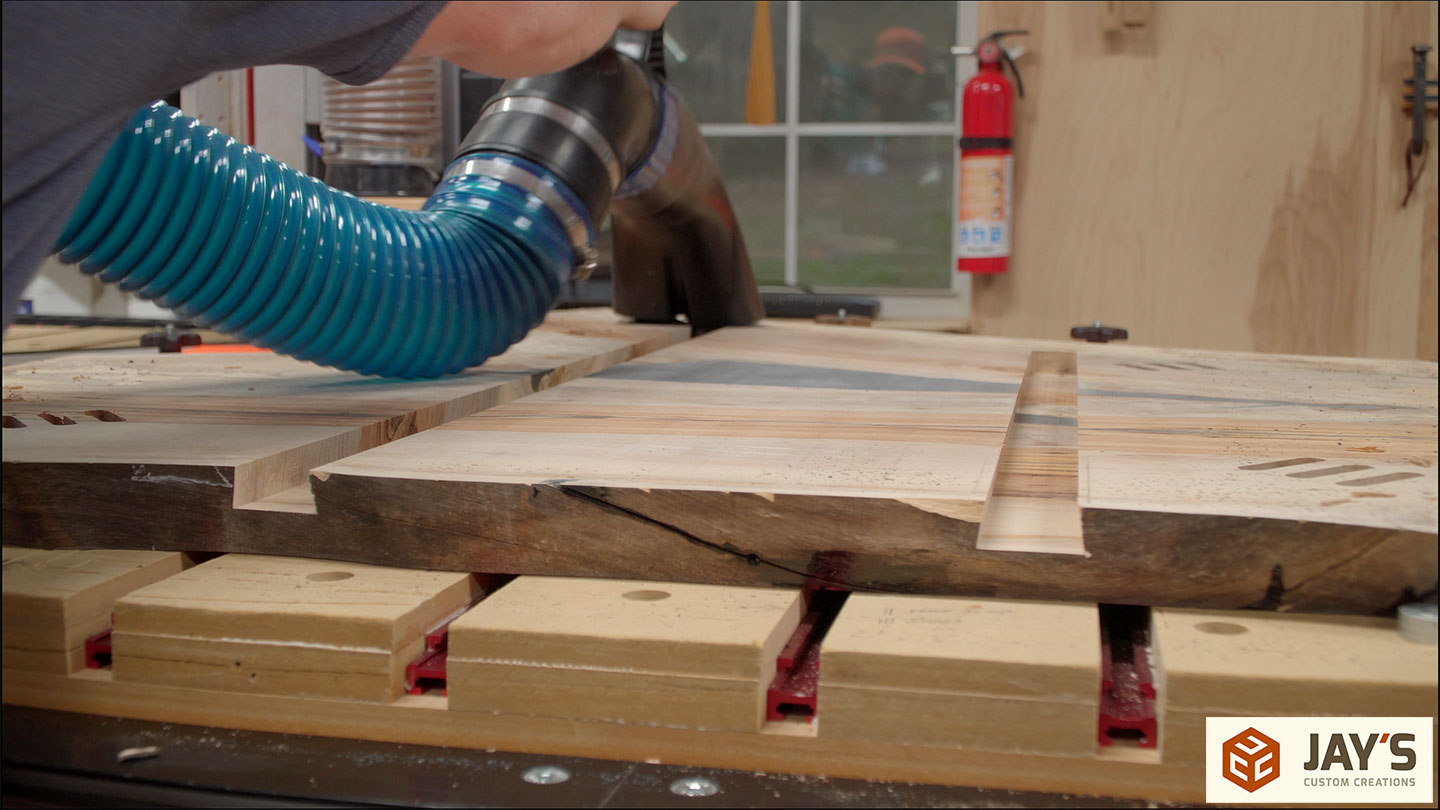
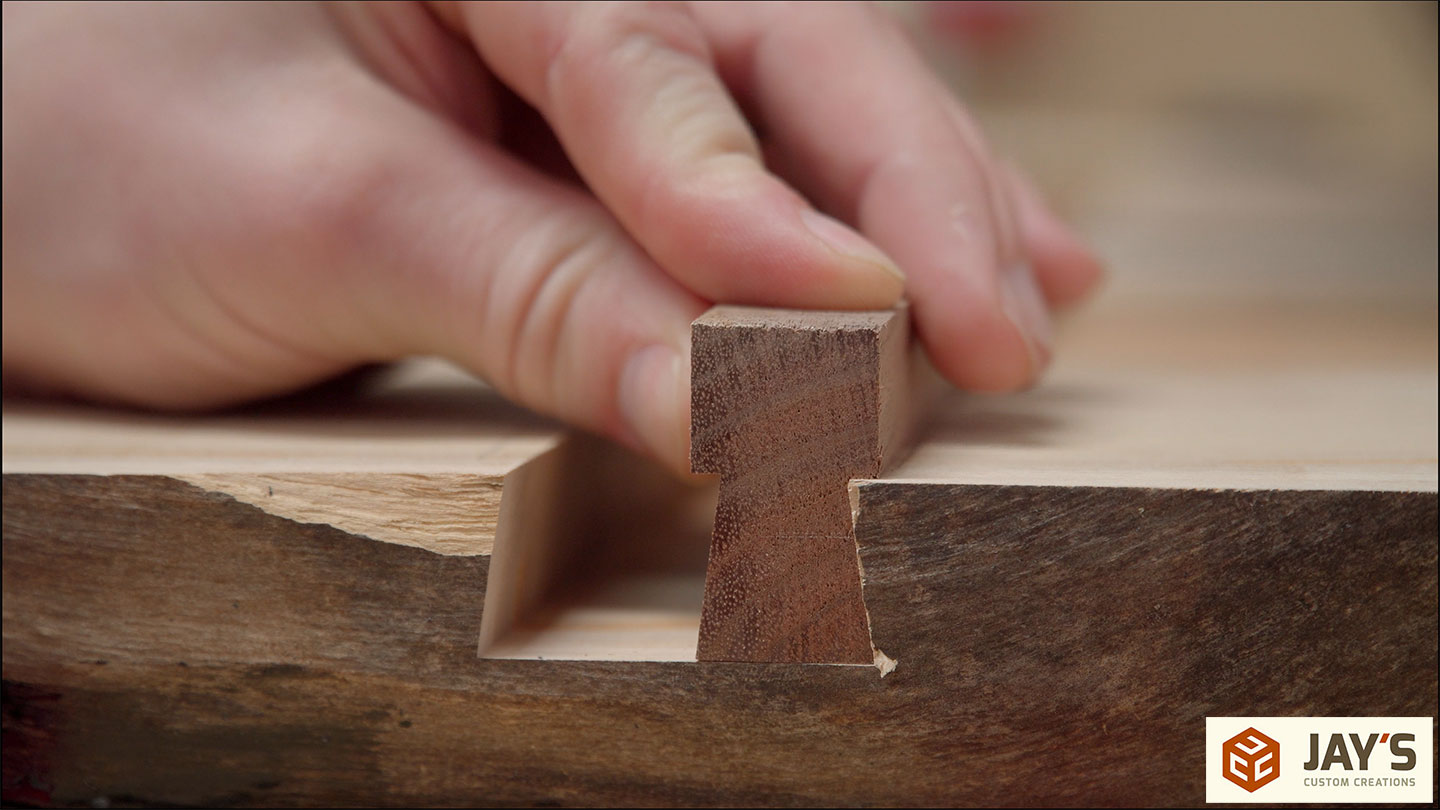
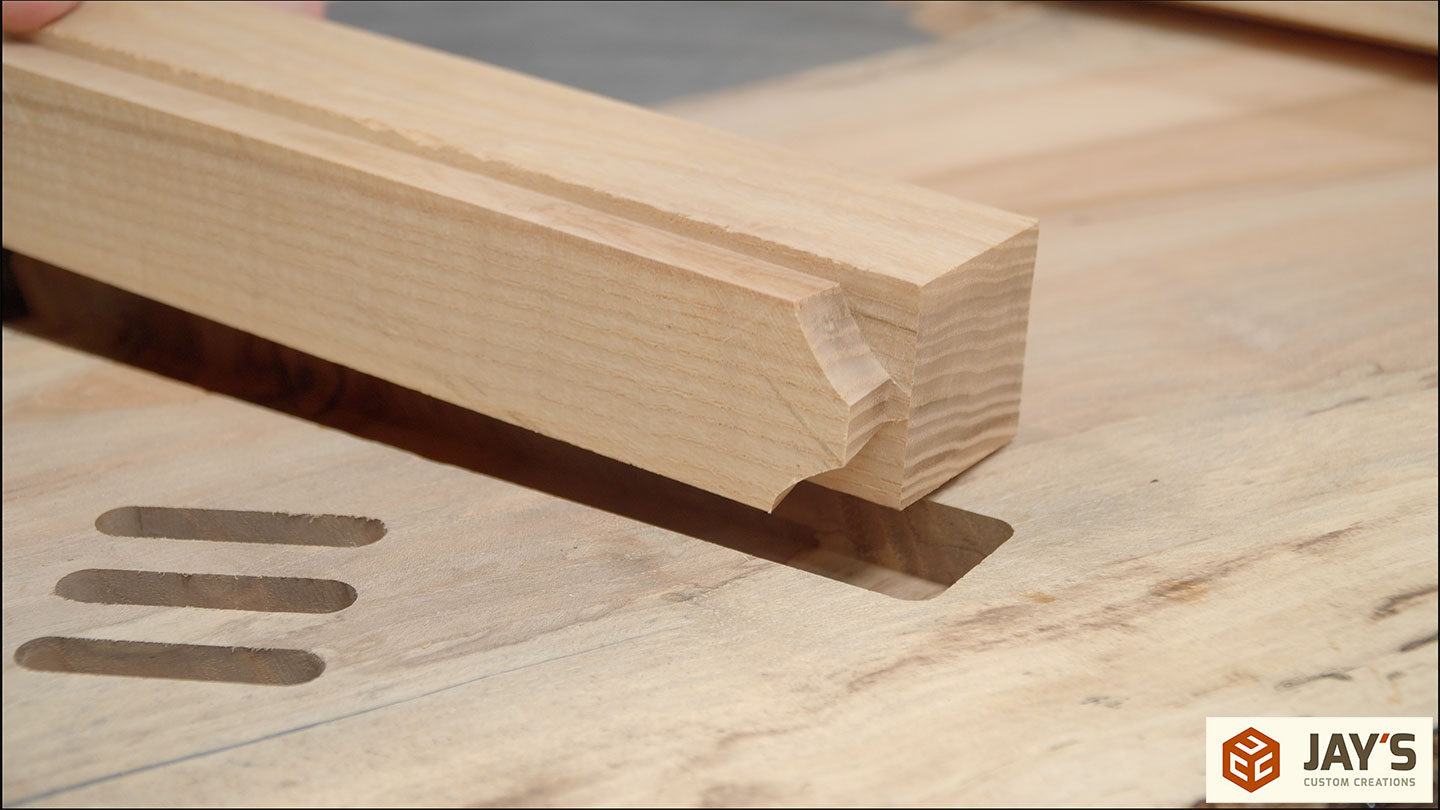
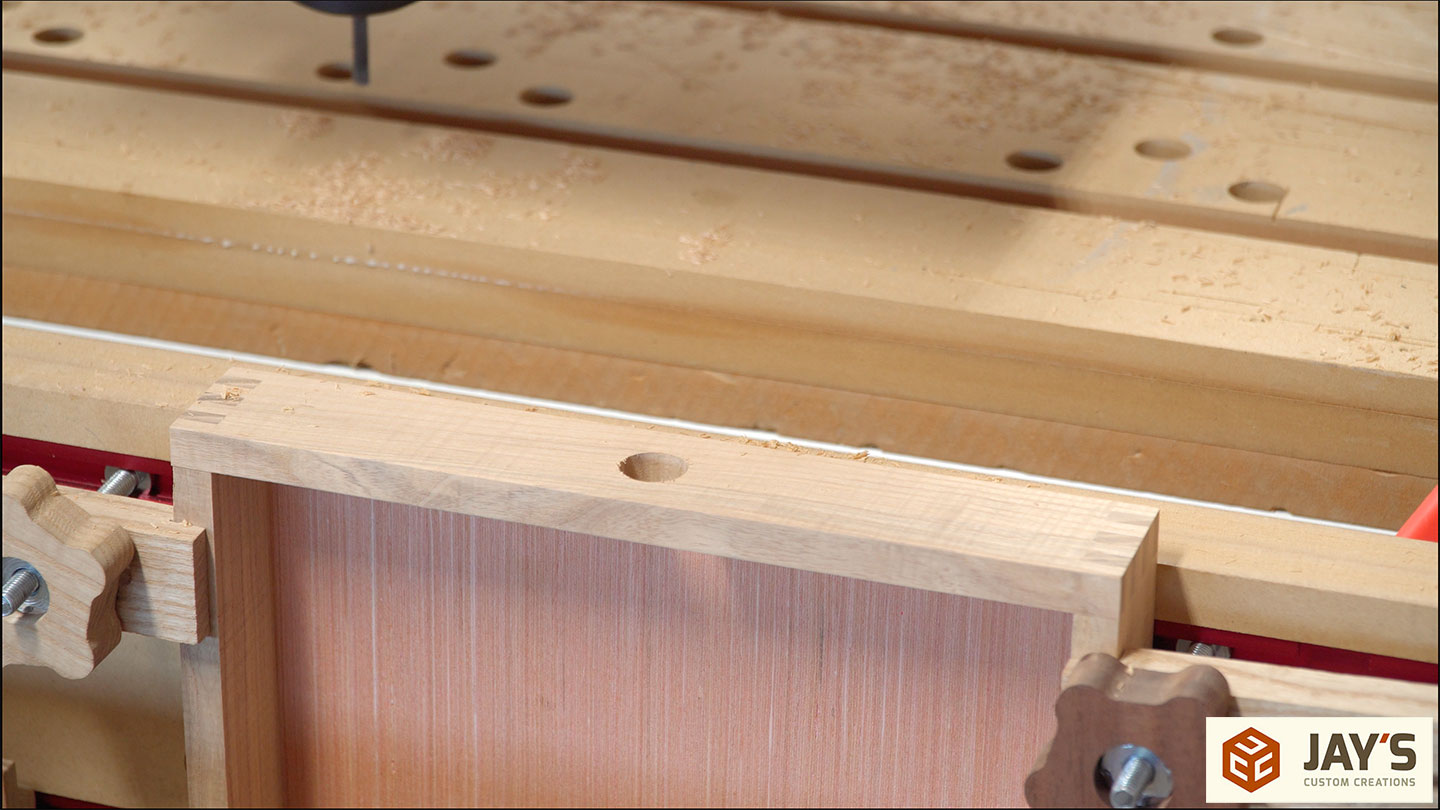
Next up is the sliding dovetail work starting with the bulk removal of material with the .5” spiral bit. You can see that they won’t be the same length. My concern here was that they are both the same distance away from the opposite edge of the table.
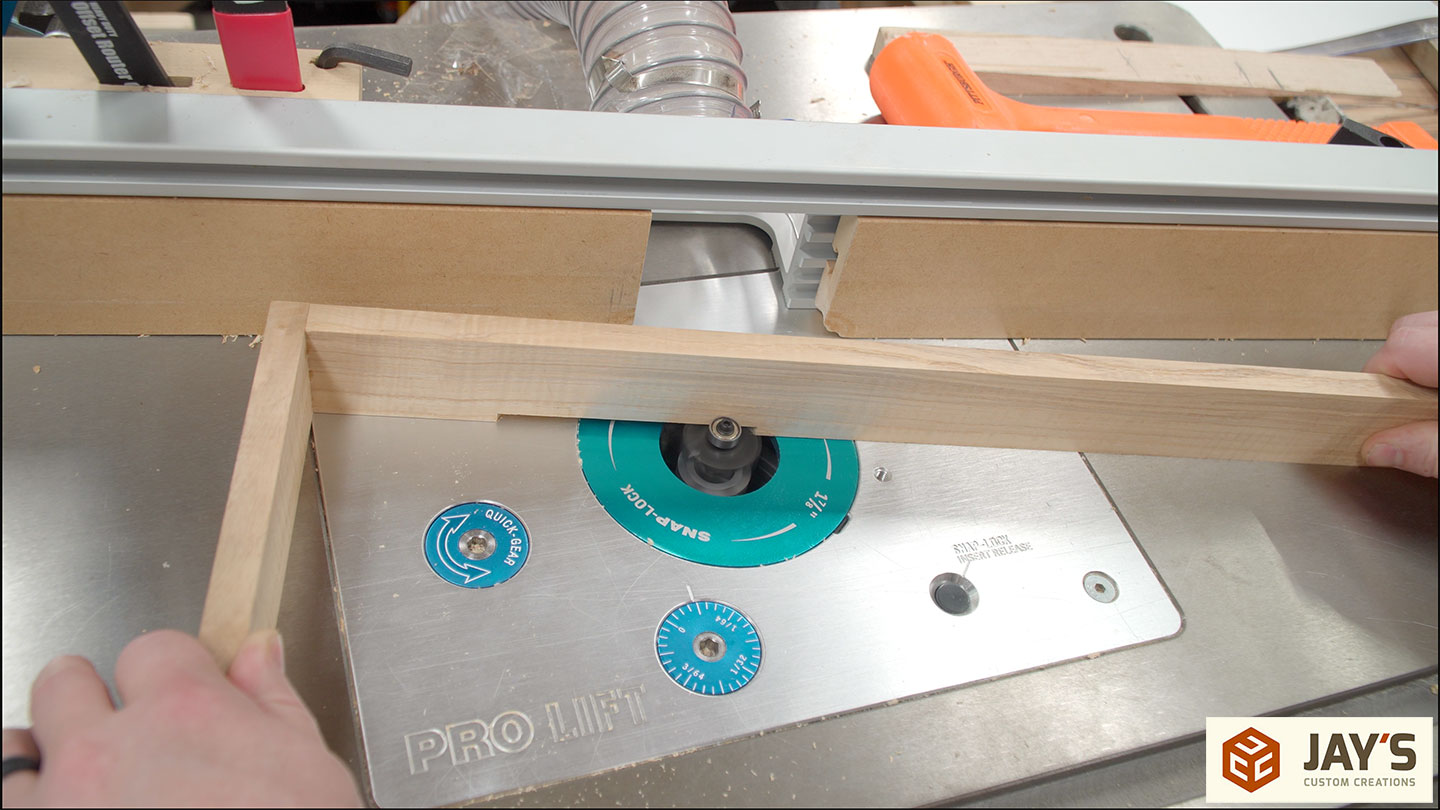
For the dovetail shape, the spiral bit is replaced with an 8-degree dovetail bit.
I haven’t pushed this dovetail bit before so I don’t know how much waste removal it can actually handle. So I got the final shaping of the dovetail slots by a series of full-depth profile cuts to sneak up onto the final width and also to control the start and stop location of the cut. A profile path is better in this case because I can force the start and stop locations to be outside of the material.

To make the male side of the joint I put the same bit into the router table and made a test cut on scrap stock.
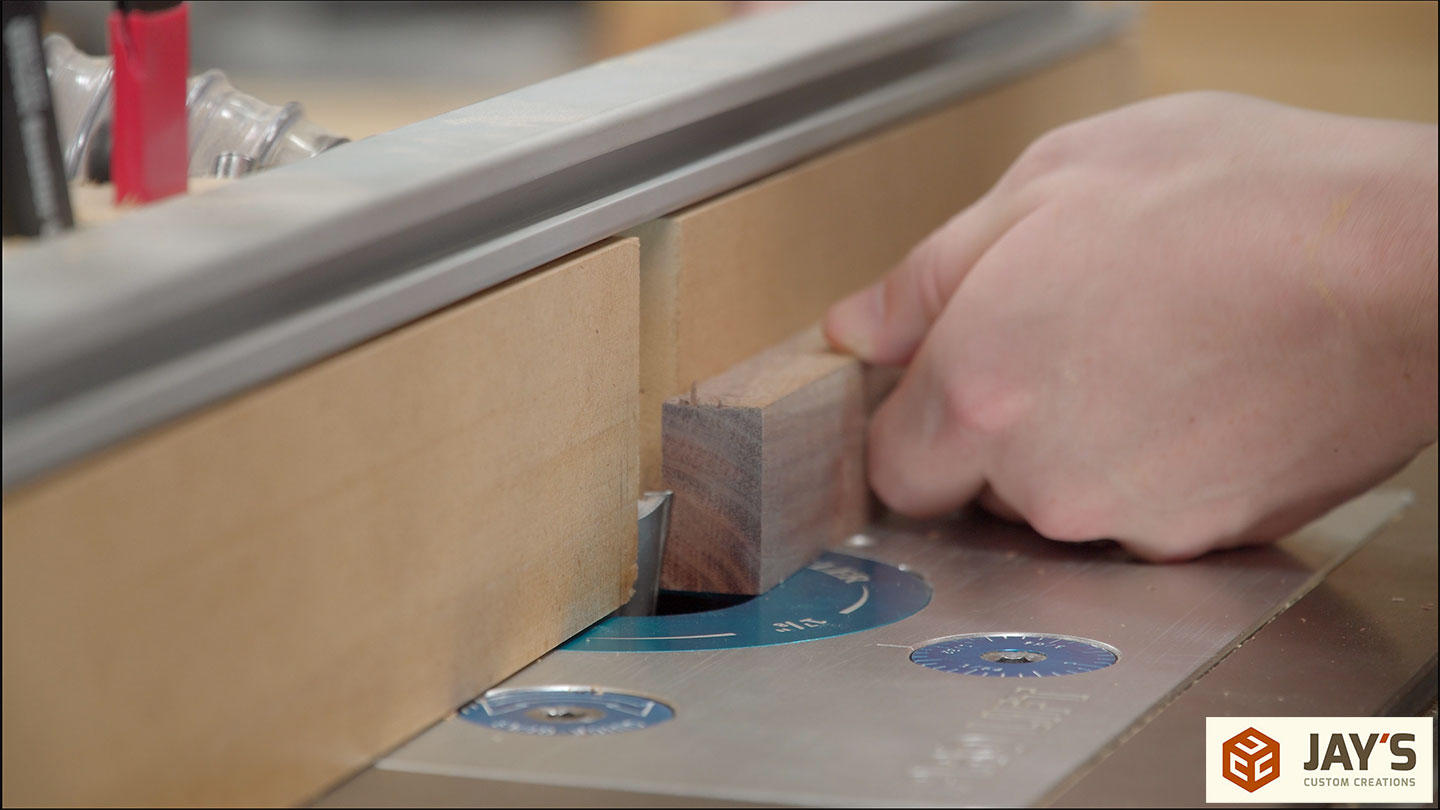
The first test let me know the bit was just a touch too low in the router table.
A slight adjustment and the test piece matches the female side of the dovetail perfectly.
With the proper height established the actual material can be cut but with the fence set so the resulting piece is too wide. The plan is to make successive passes while moving the fence back a tiny amount until the perfect fit is achieved. Everything was going according to plan until the fence position slipped without me catching it. The resulting fit was too loose. Bummer.
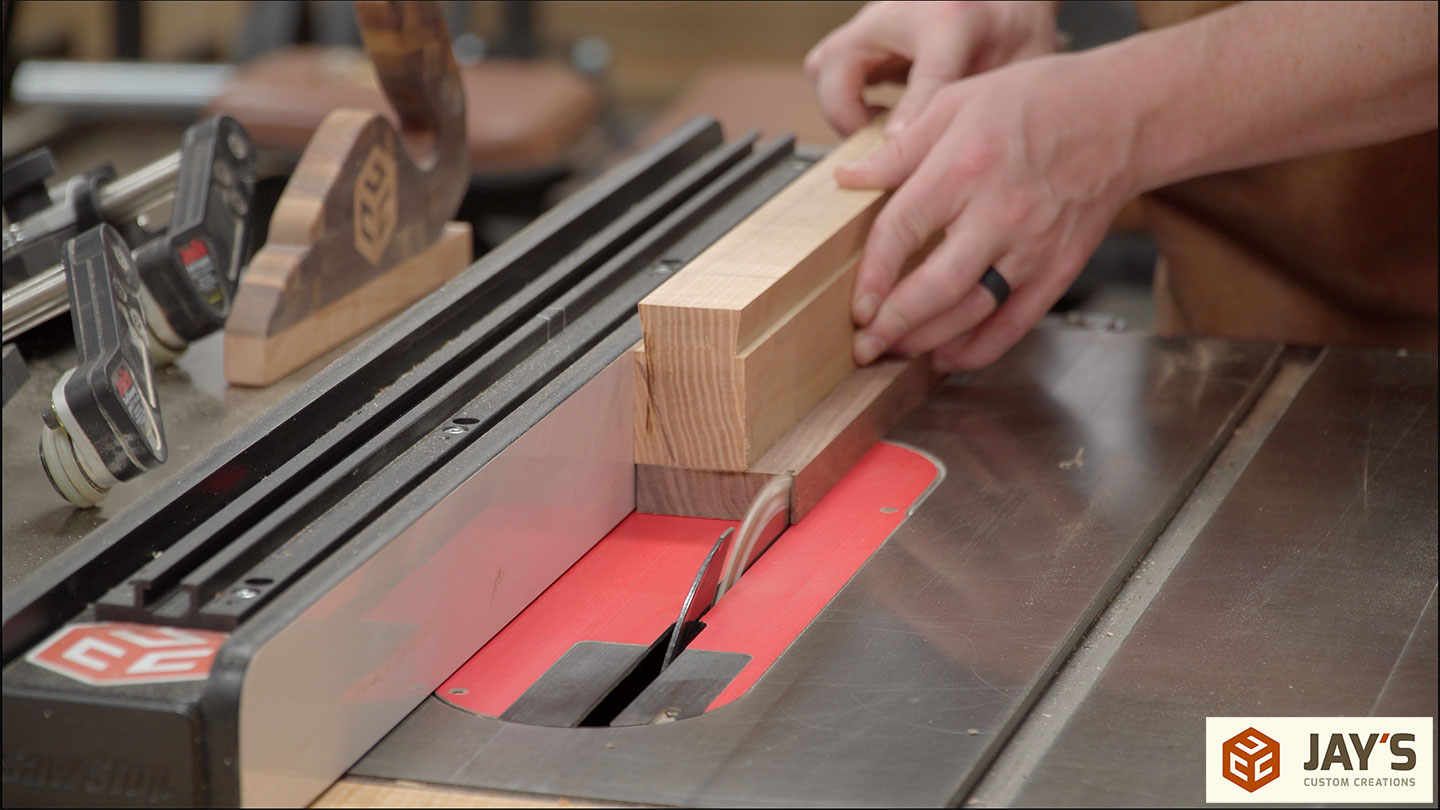
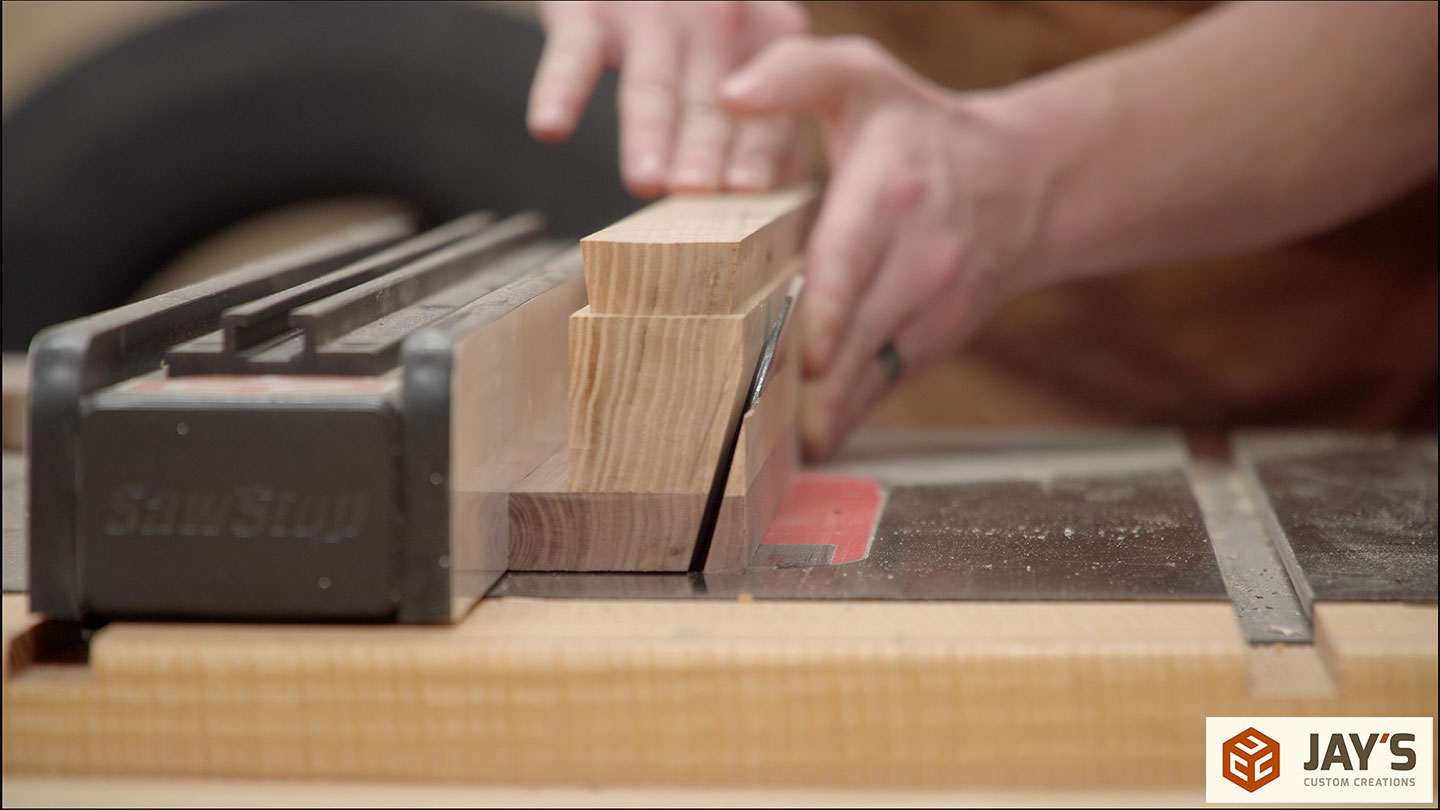
Luckily, the pieces were still oversized in the height direction. The height was also the only dimension that wasn’t covered in the rough milling process. So one rip at the table saw to square up the final face. And another rip cut with the new face against the saw fence to remove the dovetail completely and establish the final height of the rail.
Alright, take two at the router table to get the appropriate fit. This time I got it.
The end of the dovetail slots have an interior radius and not a sharp corner so I had to remove some material so the corners would fit. No need to be exact as it will never be seen so I just made a simple plunge cut into the fence opening on the router table.

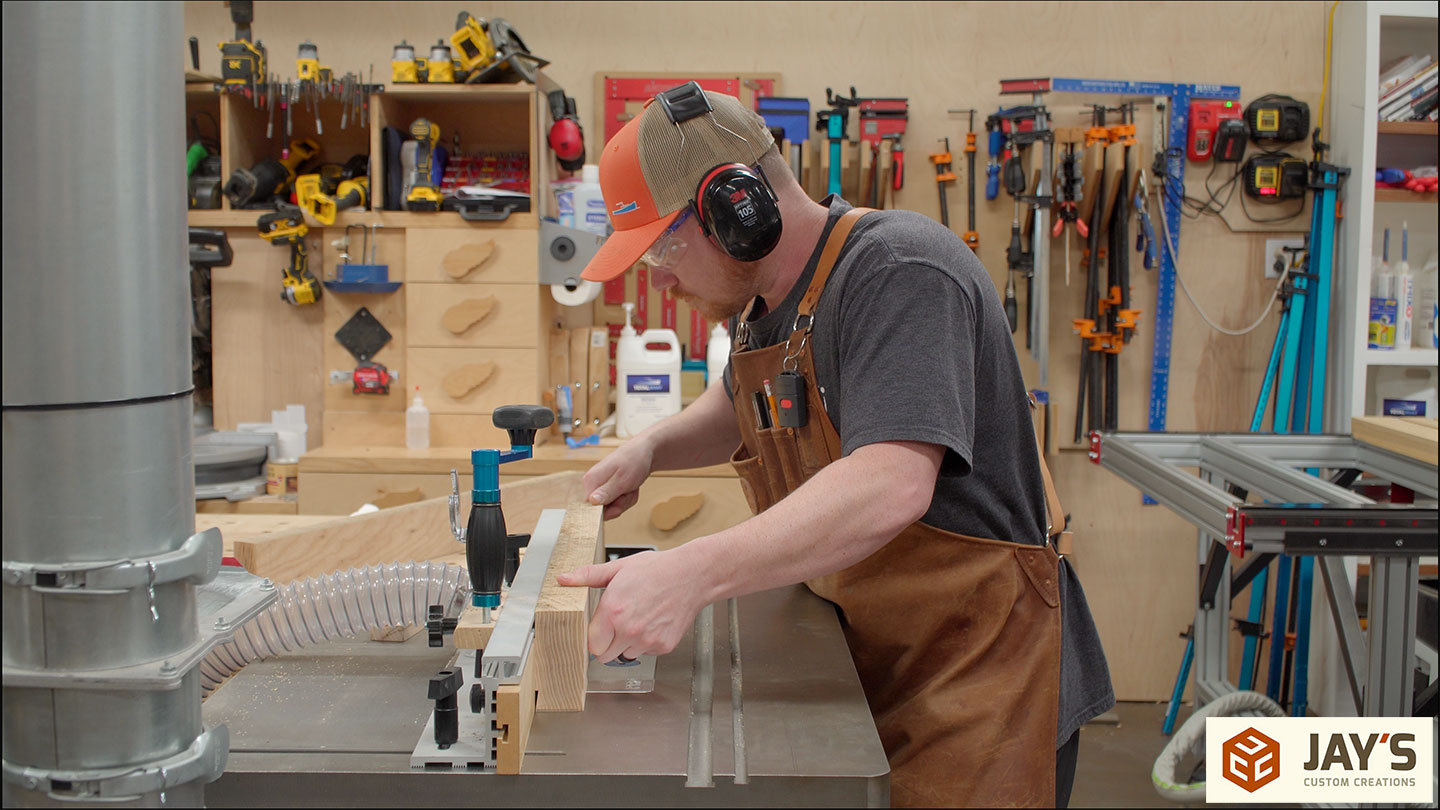
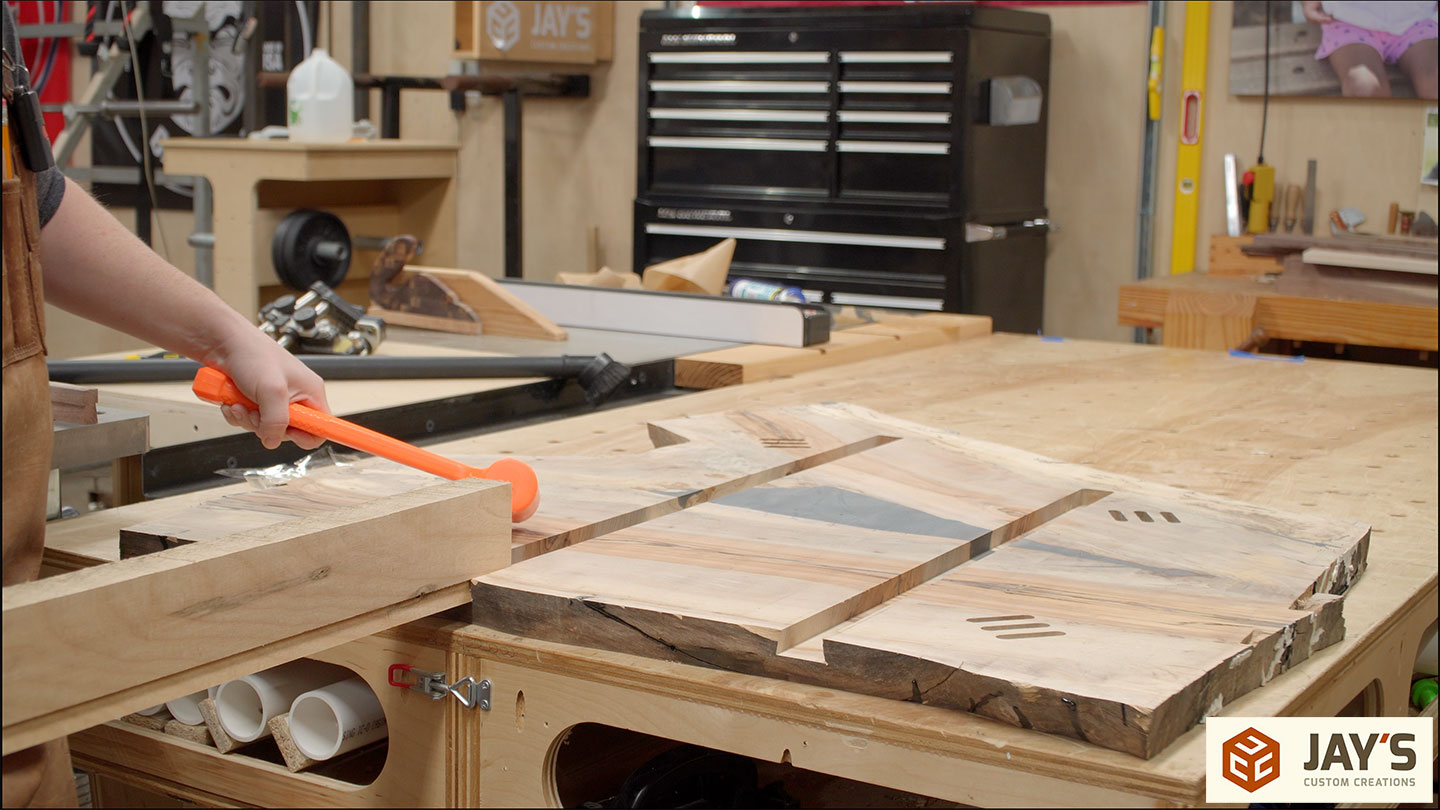
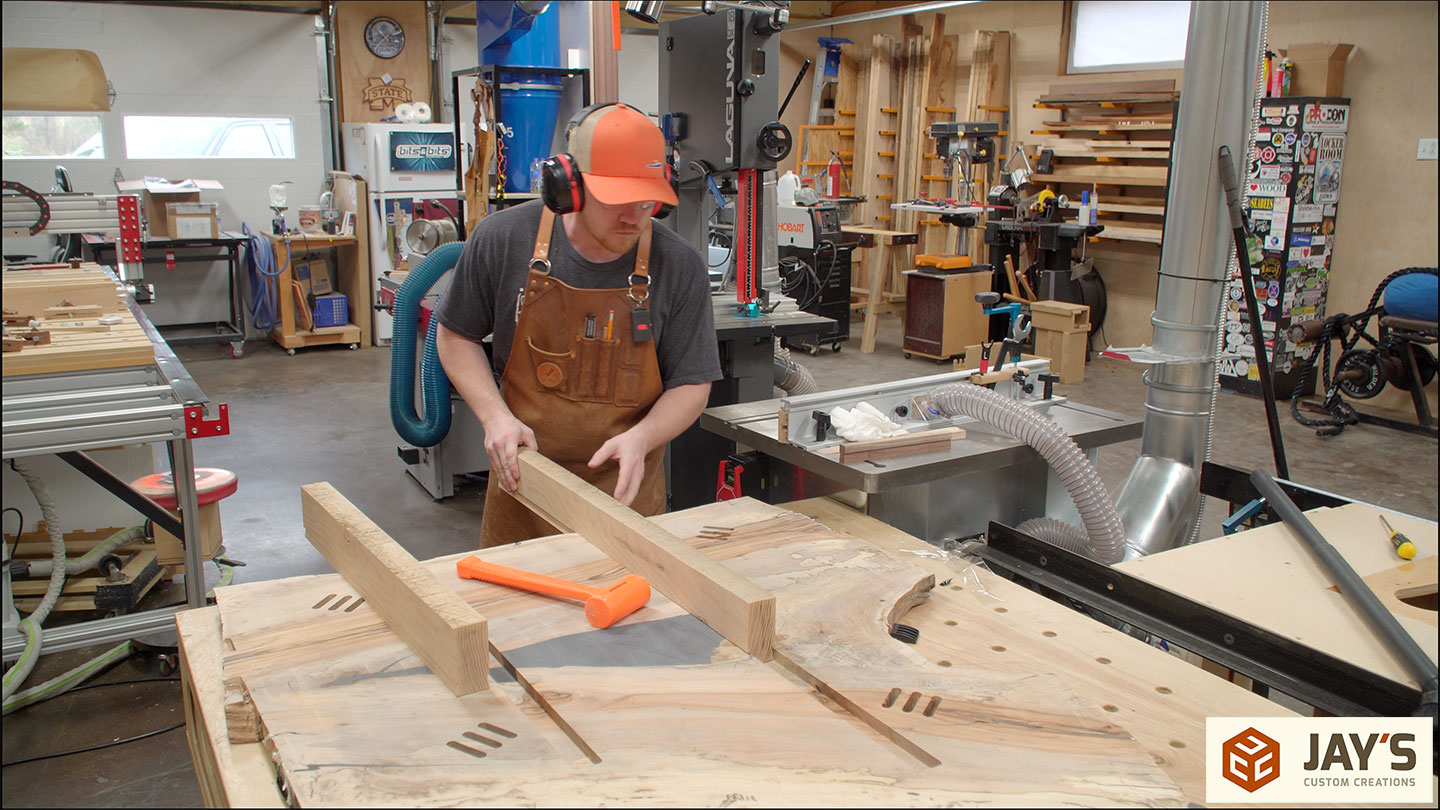
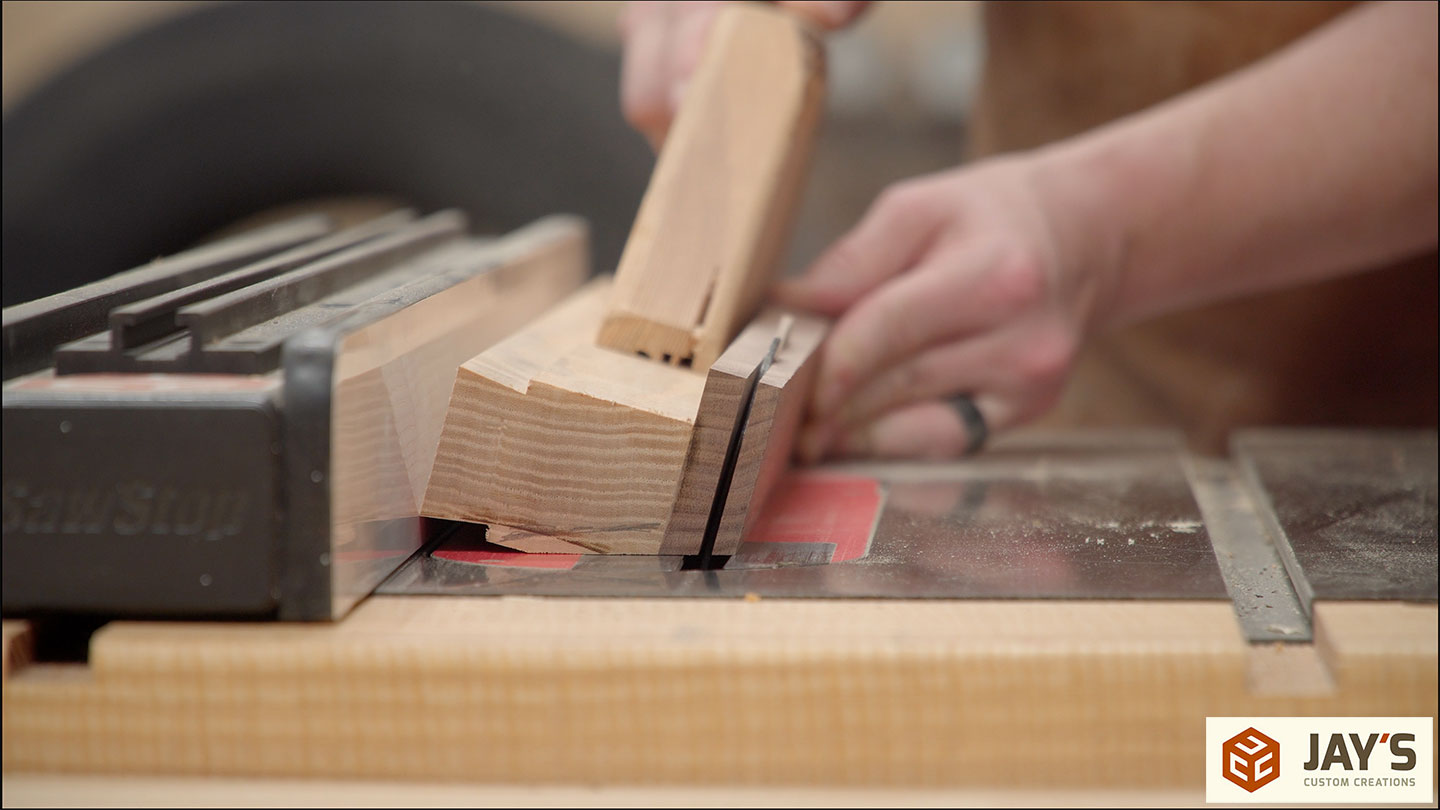
Now the length of these rails needs to be established. With the resting in the slots and pushed all the way forward they will both be the same distance from the opposite edge. I used a square pushed in the same distance from the front edge to mark the length of both rails.
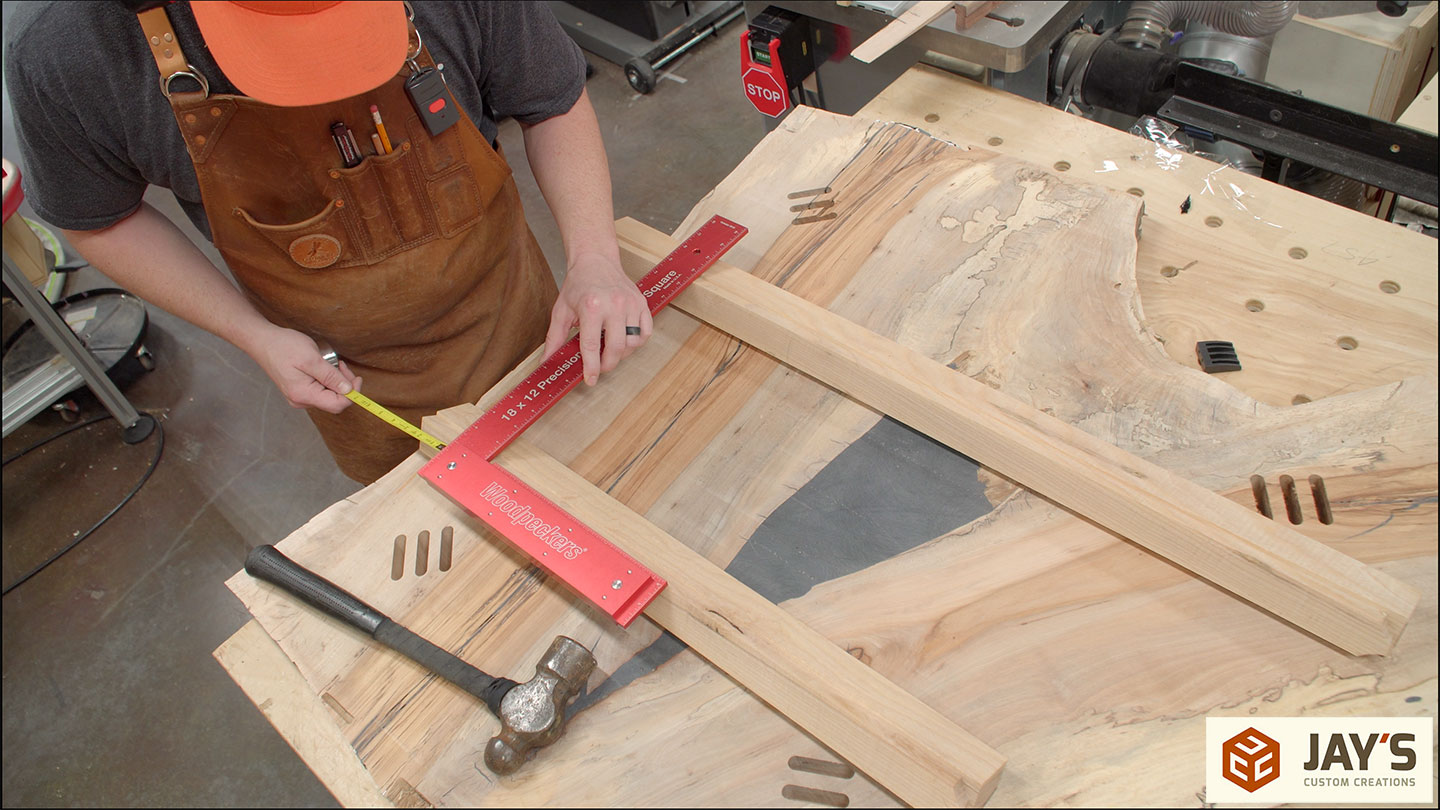
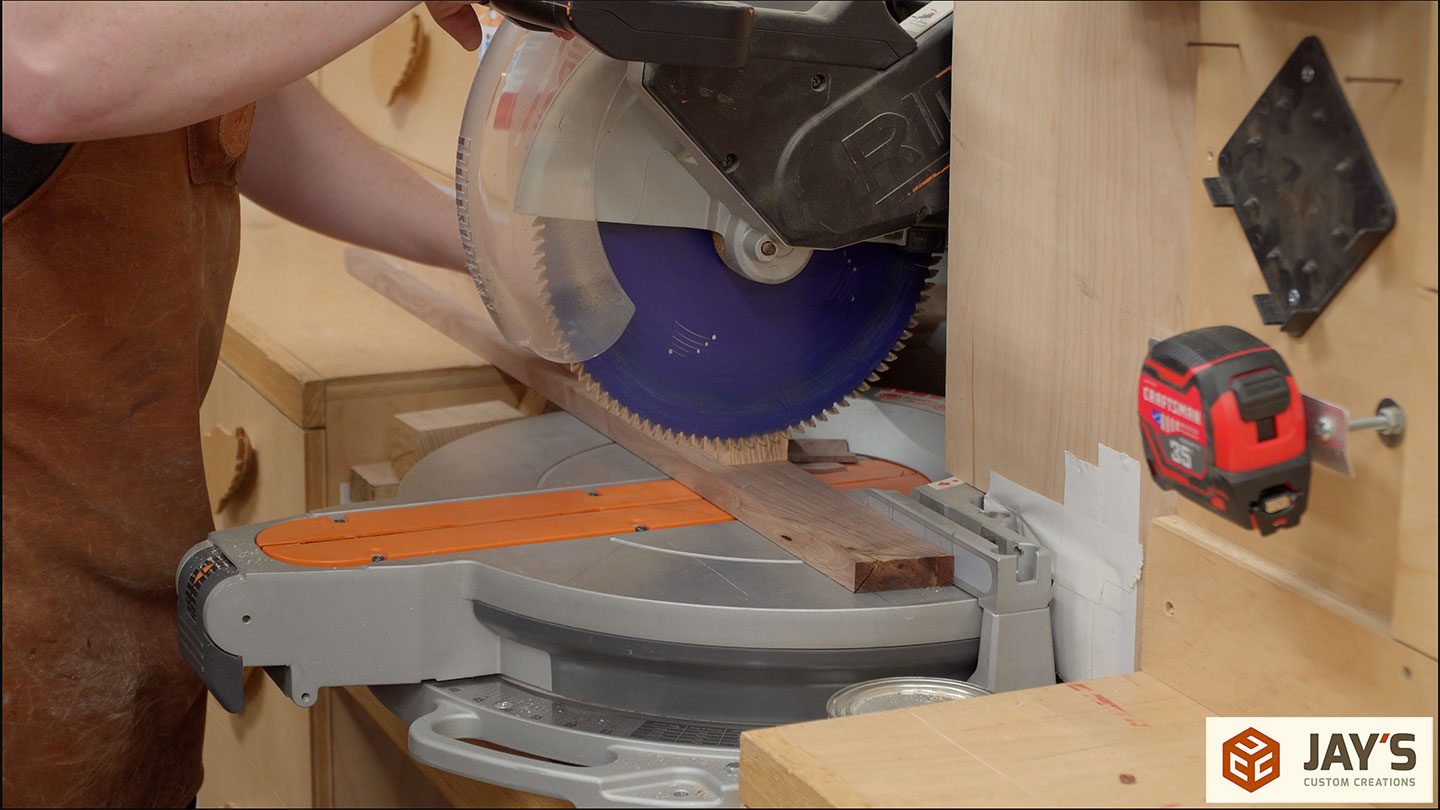
And cut them to their final length at the miter saw.
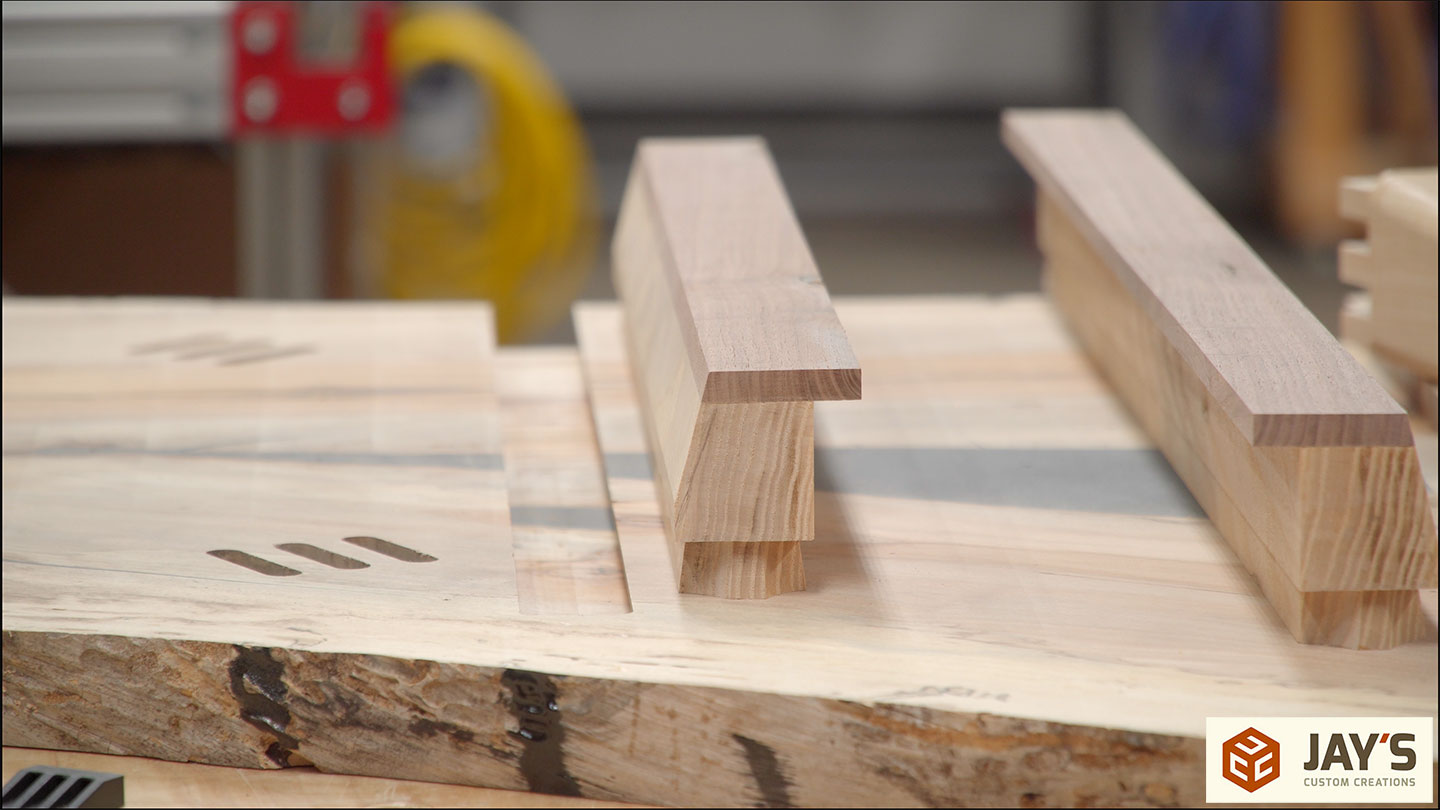
I decided that the easiest way to make a drawer runner was to add a strip of wood to the bottom of the rails that the drawer could slide on top of. I already had some surfaced walnut scrap on hand so I used that and glued it right to the rails with the plan of trimming it to size later.

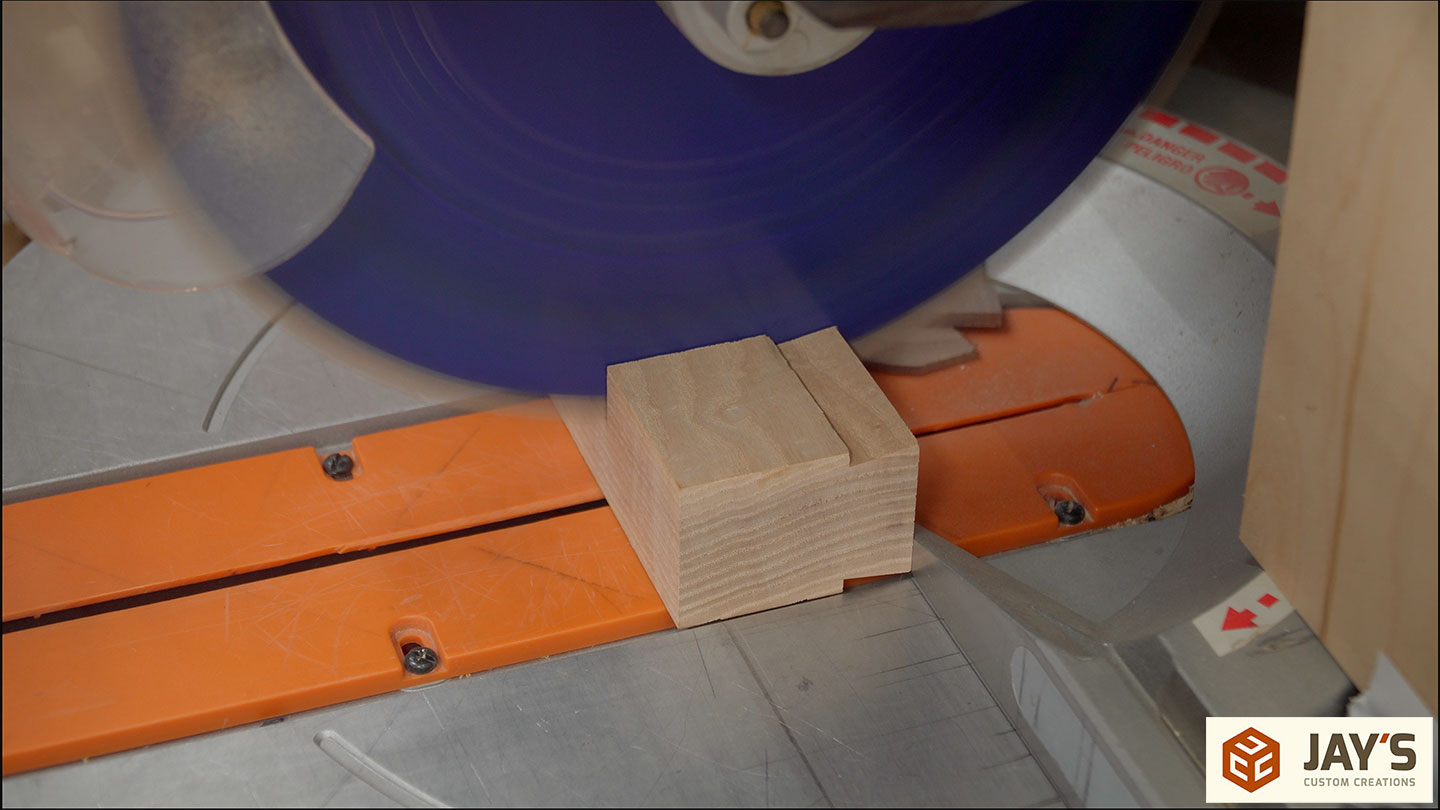
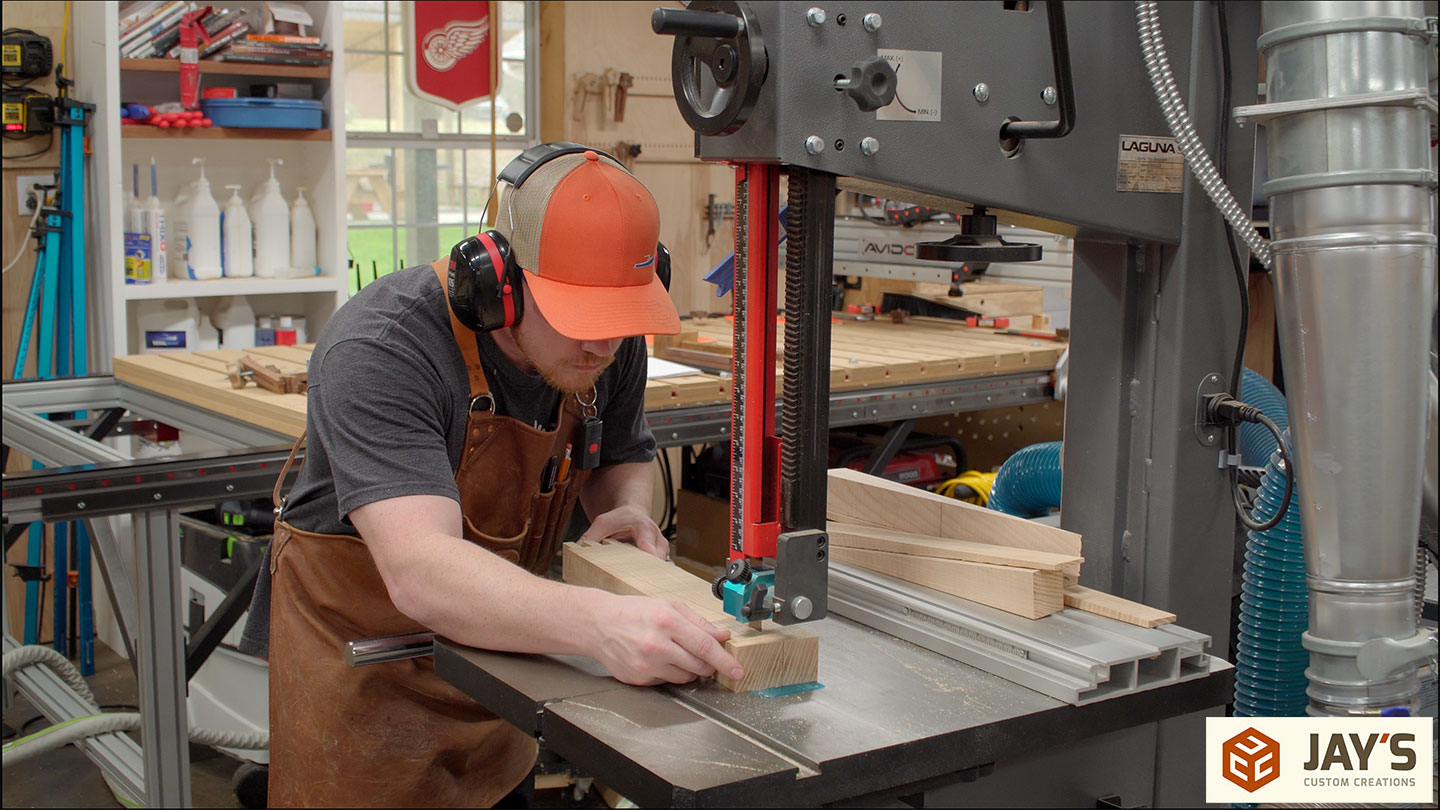
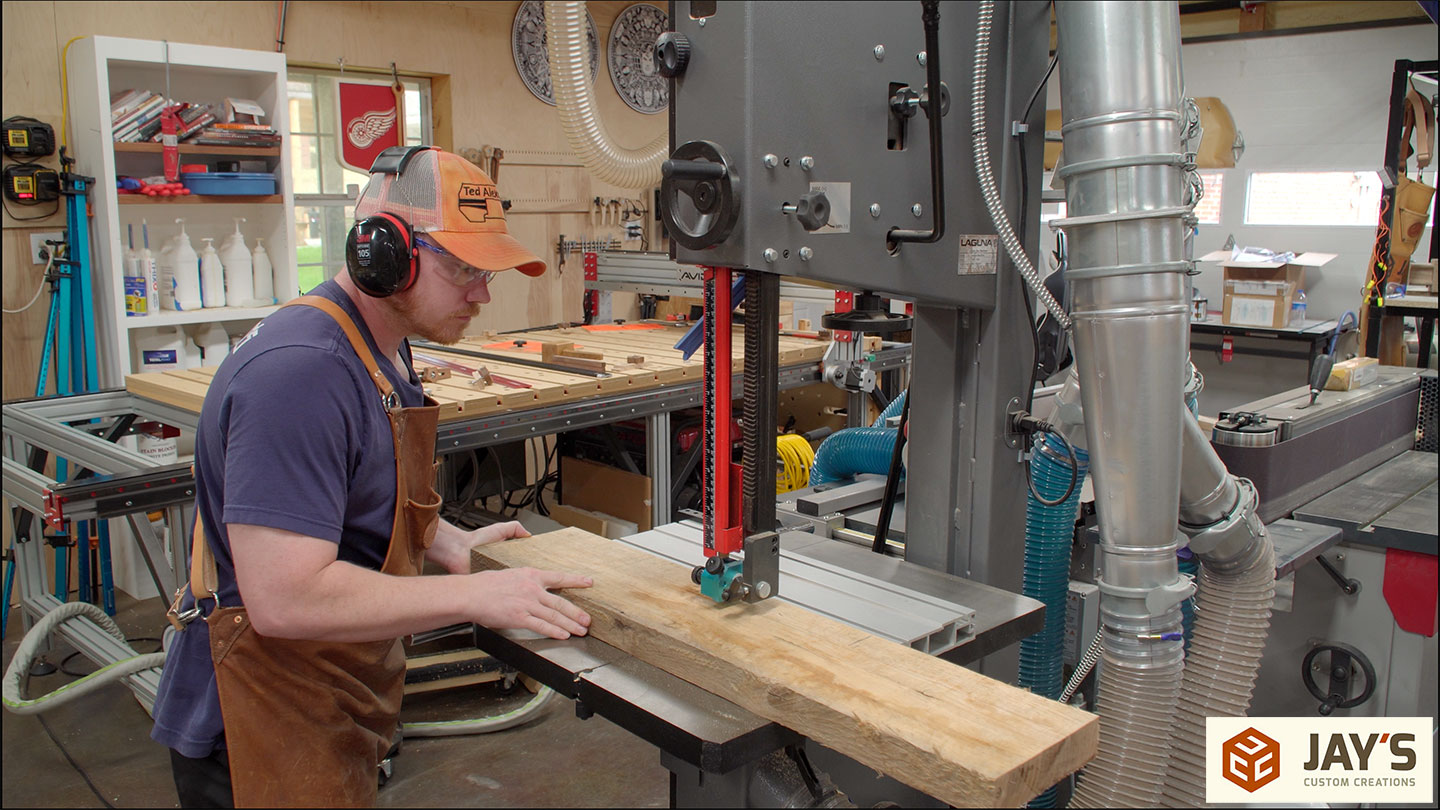
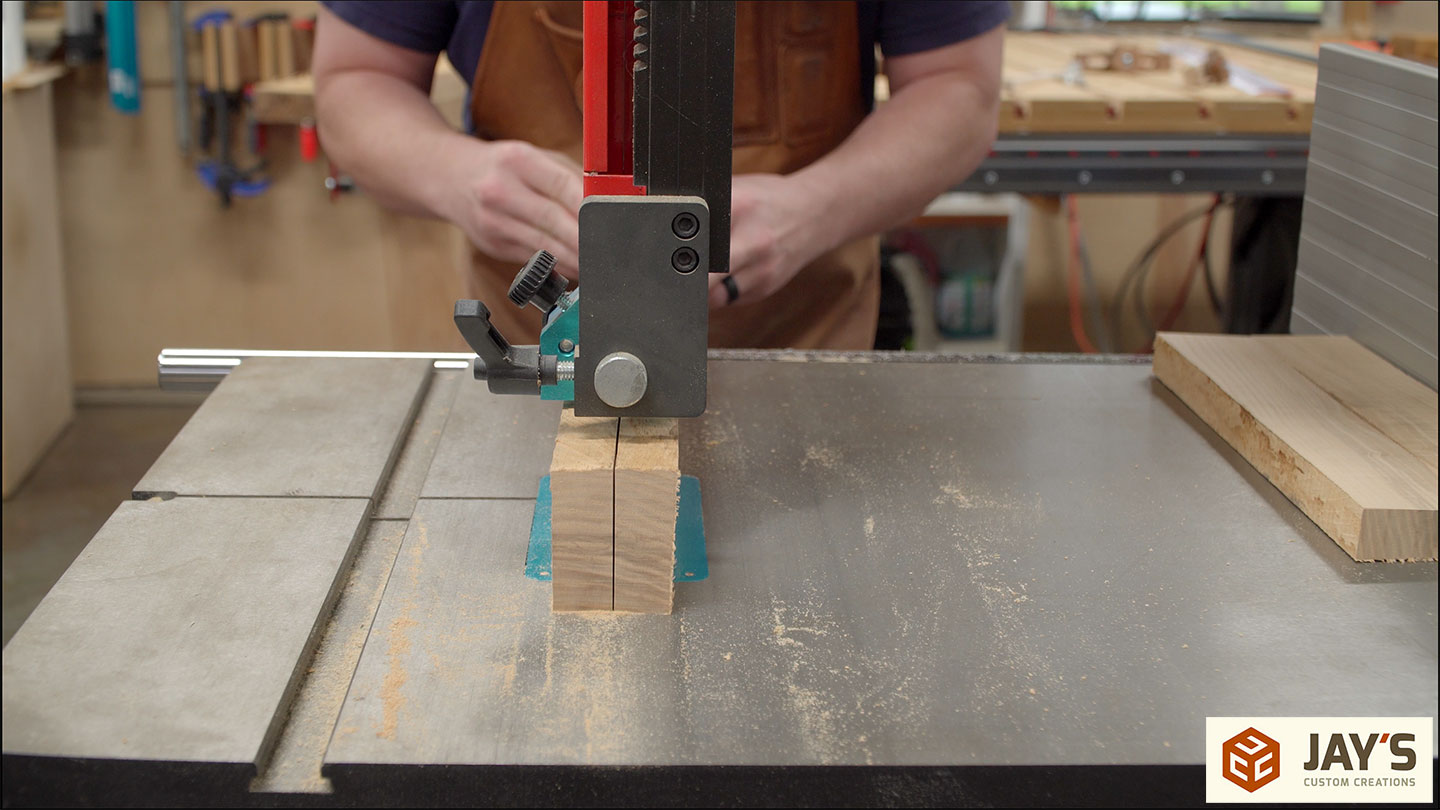
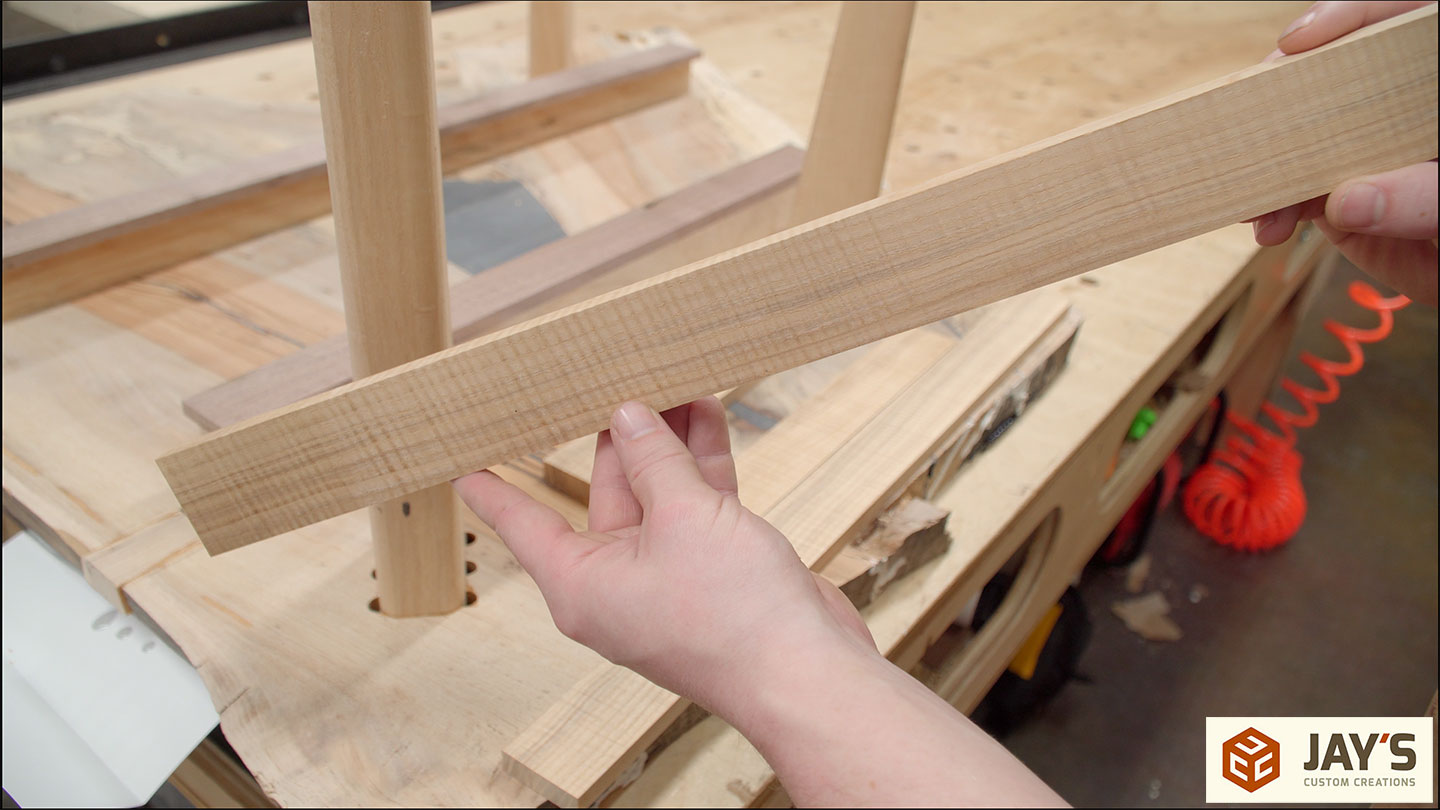
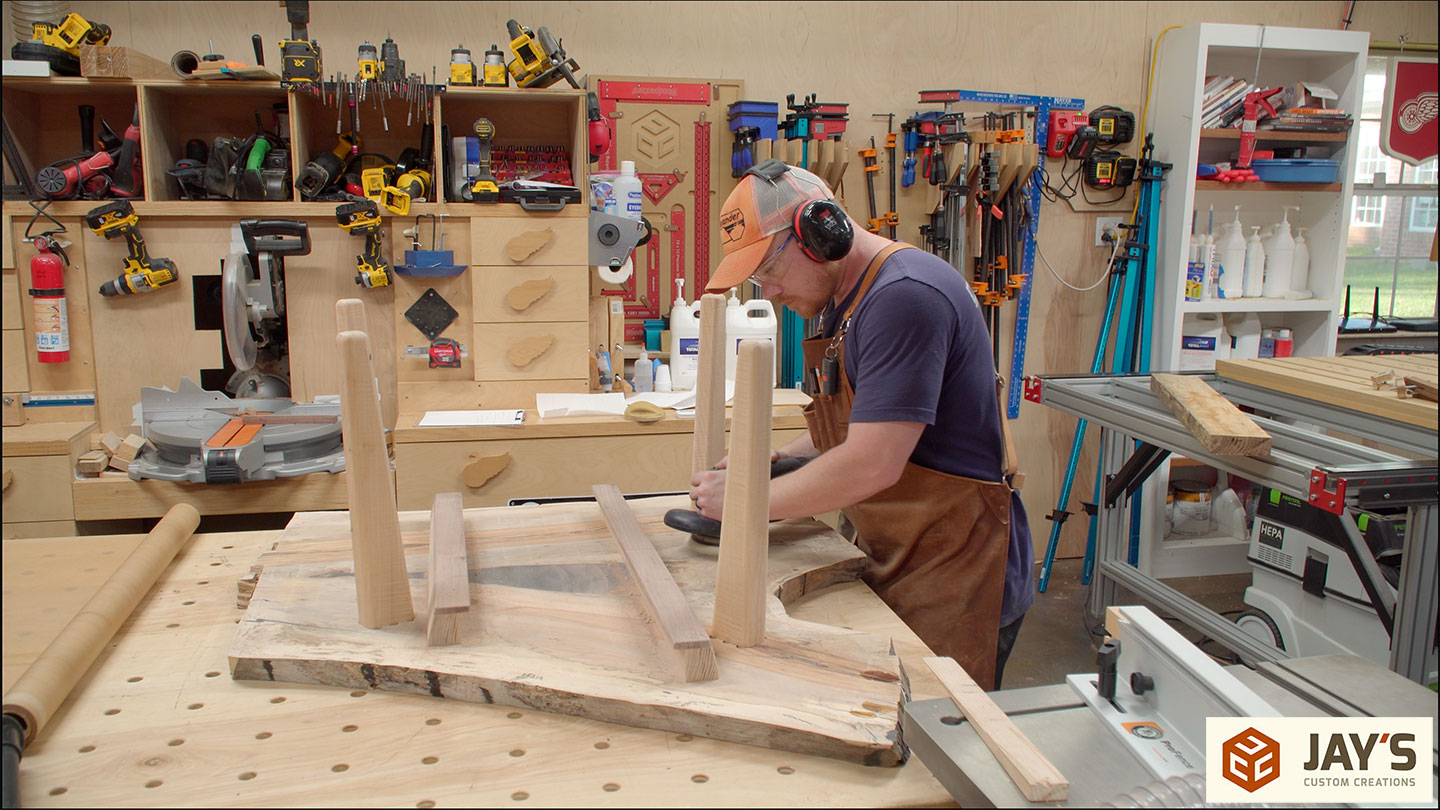
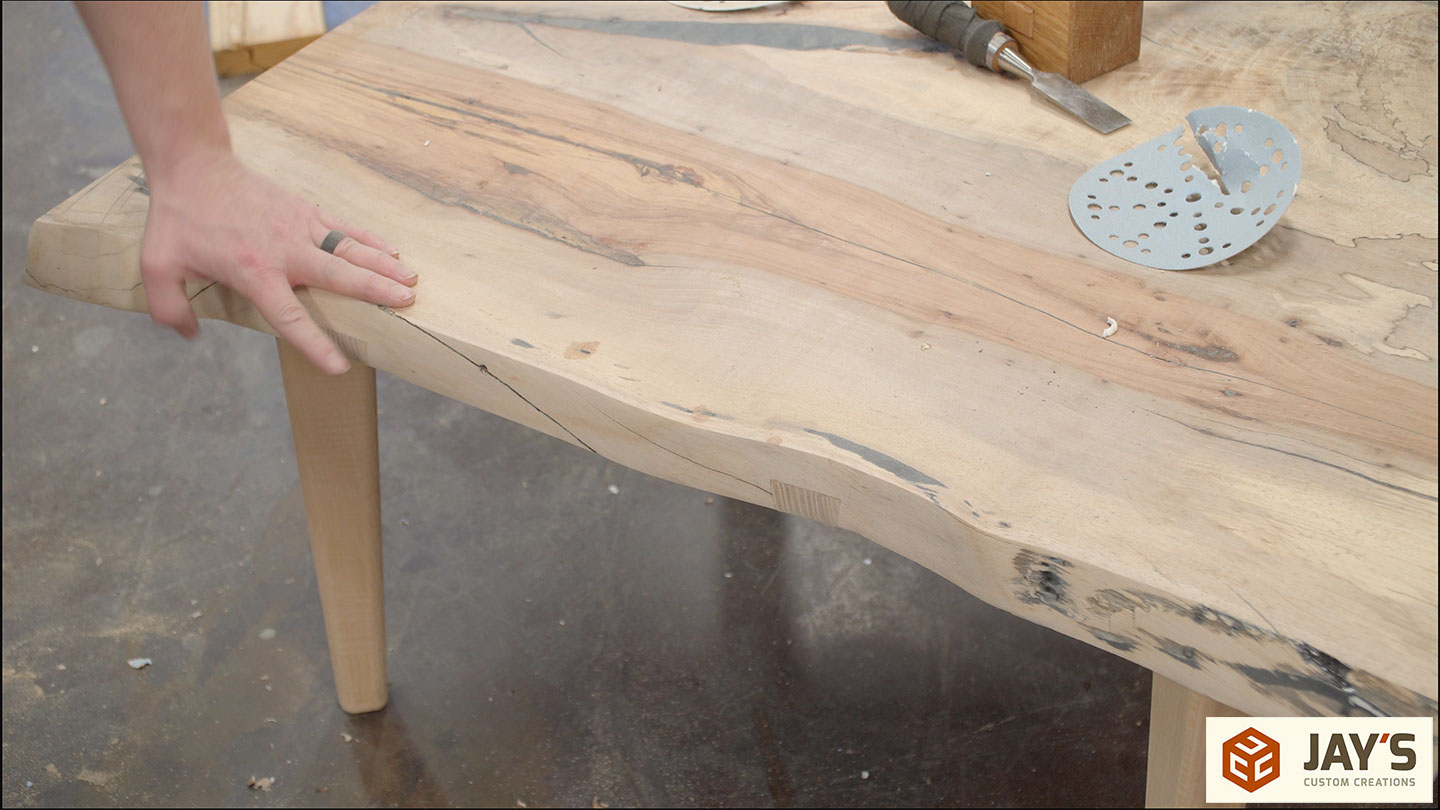
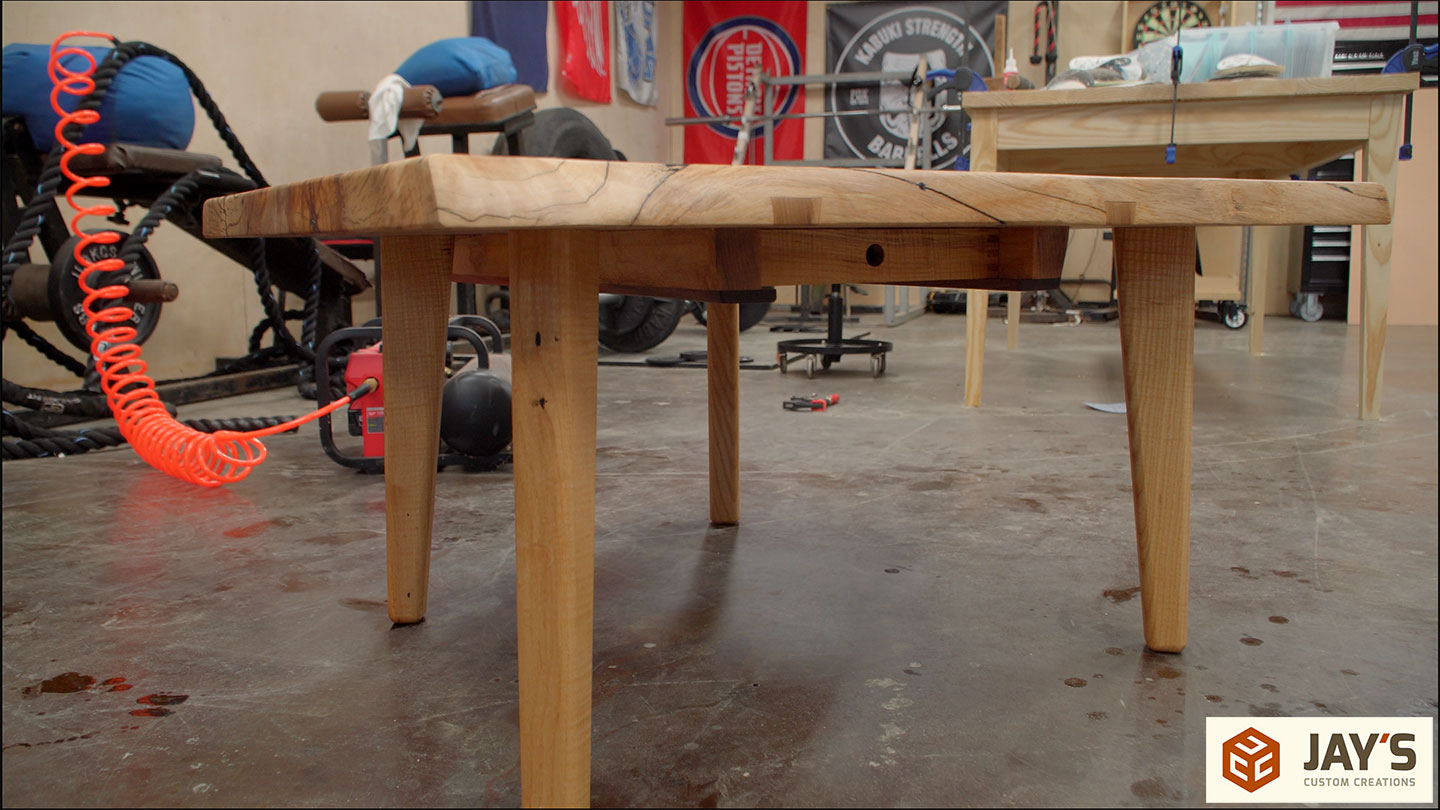
Switching back to the legs, I cut two tapers at the bandsaw to give the effect that the entire leg is angled in one direction. The legs will be installed so they are splaying out slightly.

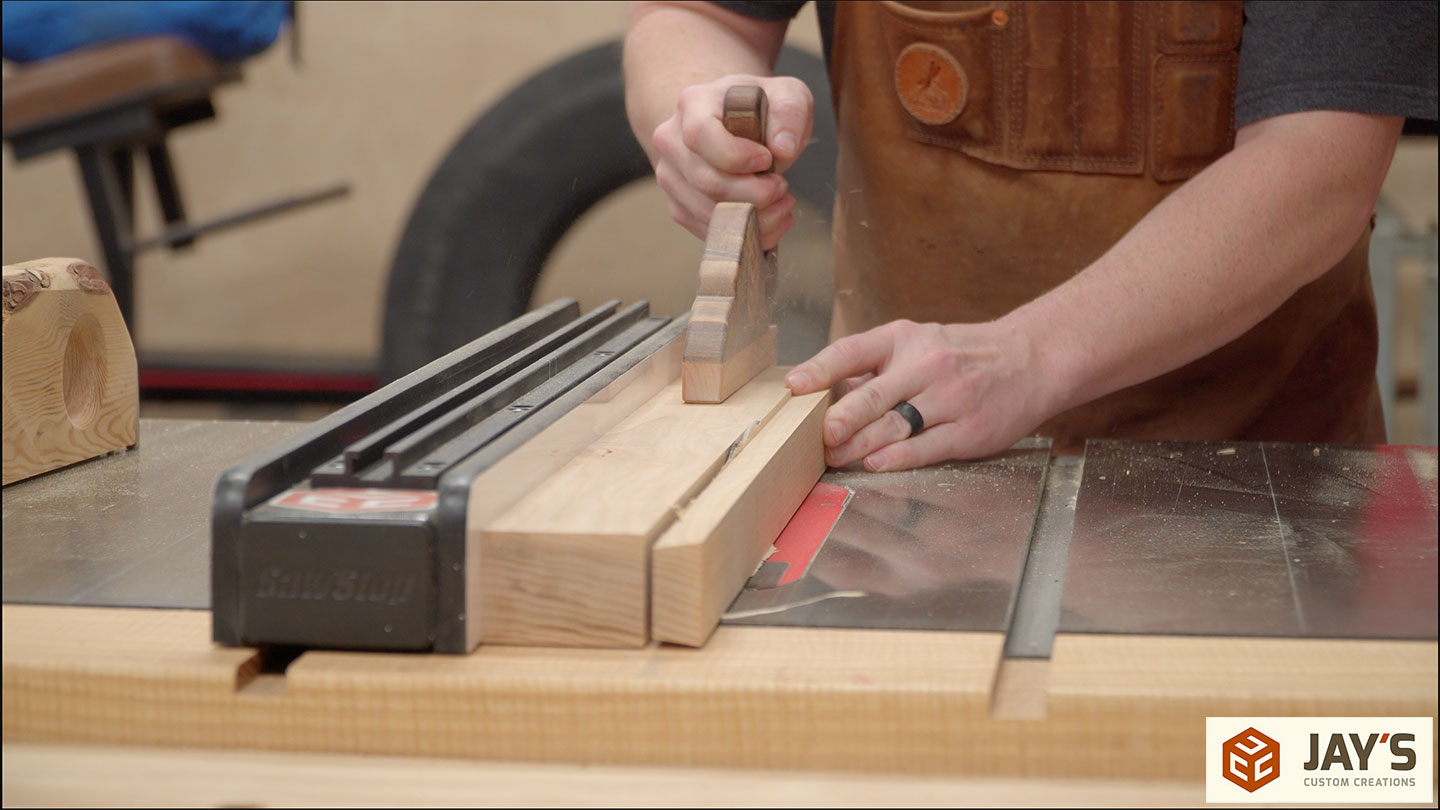
The bandsaw faces are cleaned up easily with a hand plane.
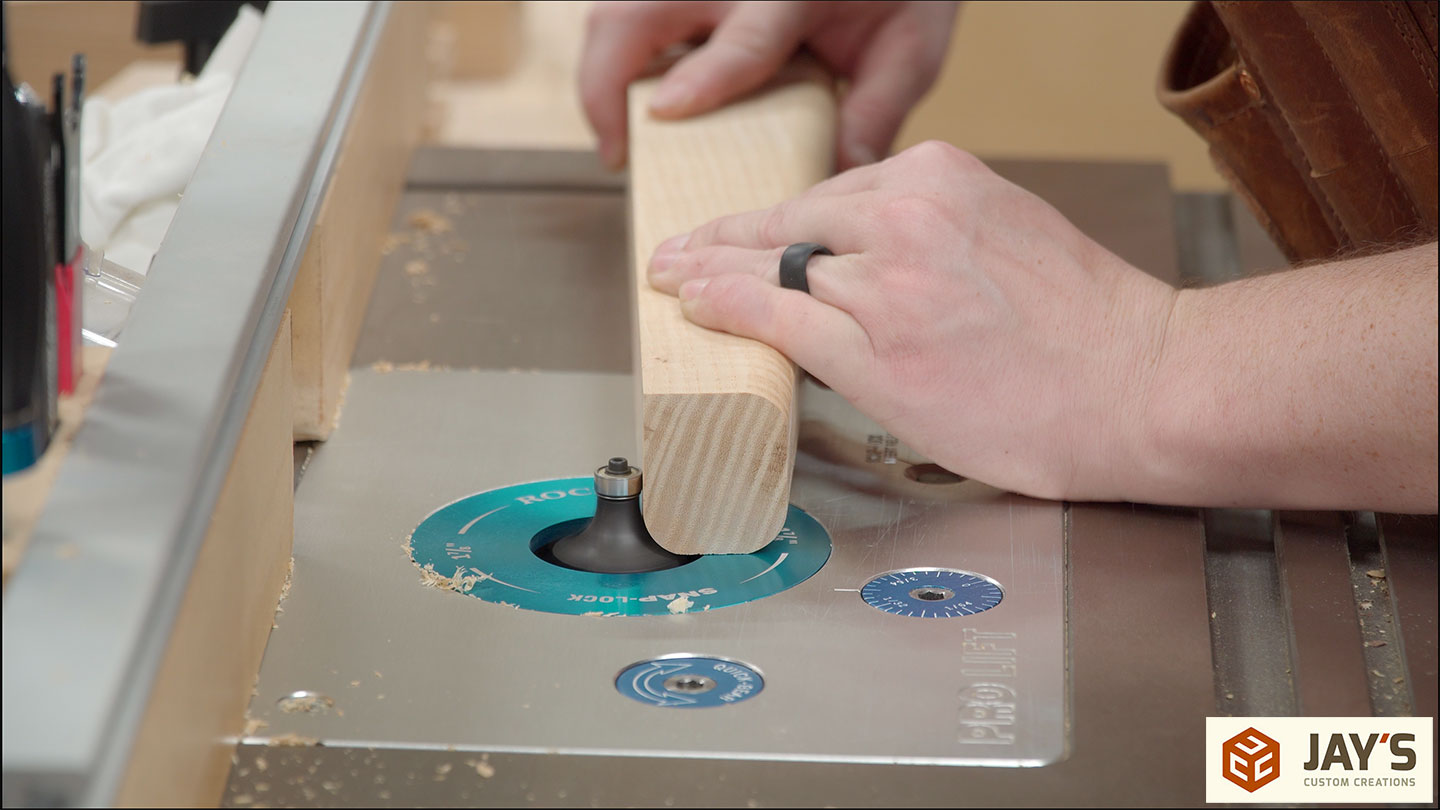
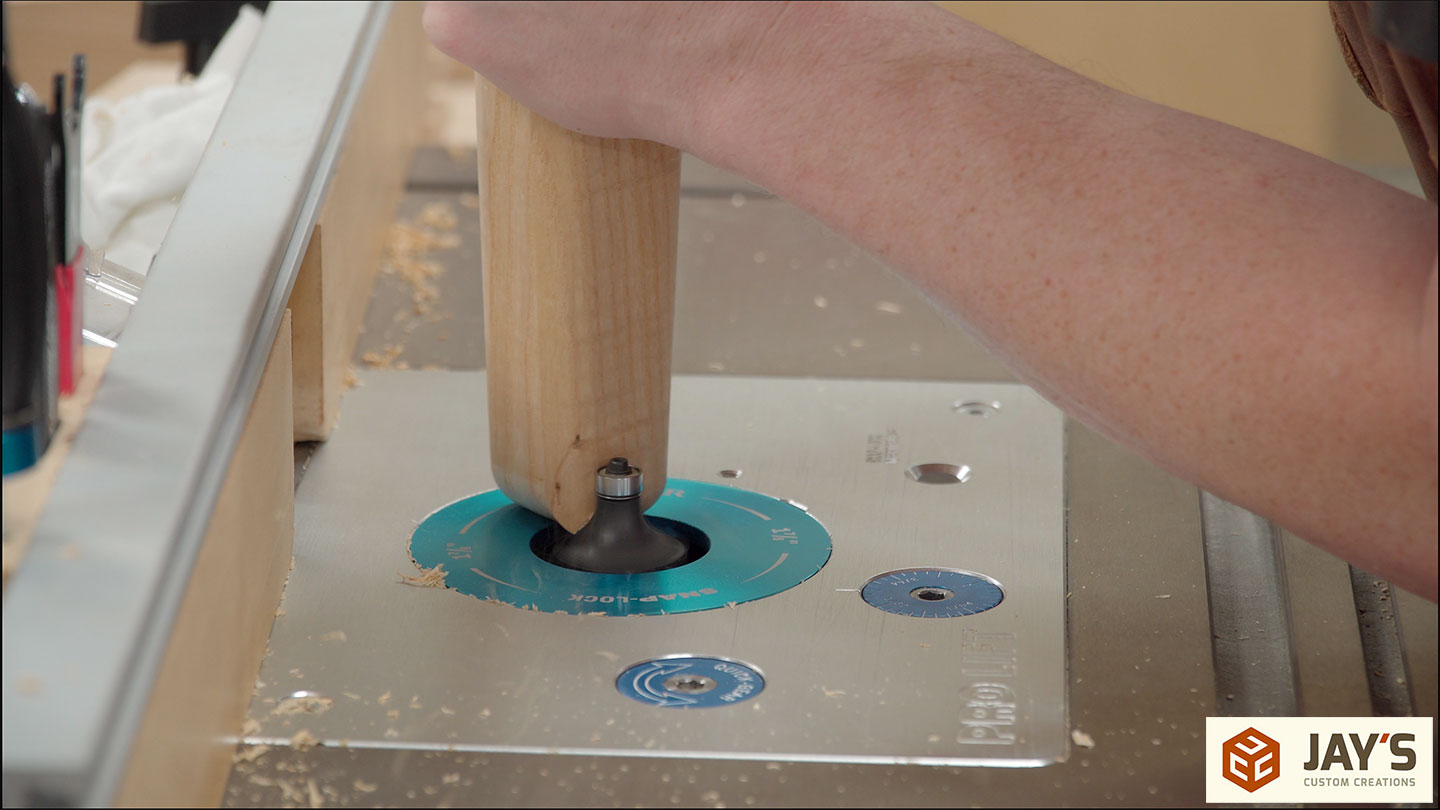
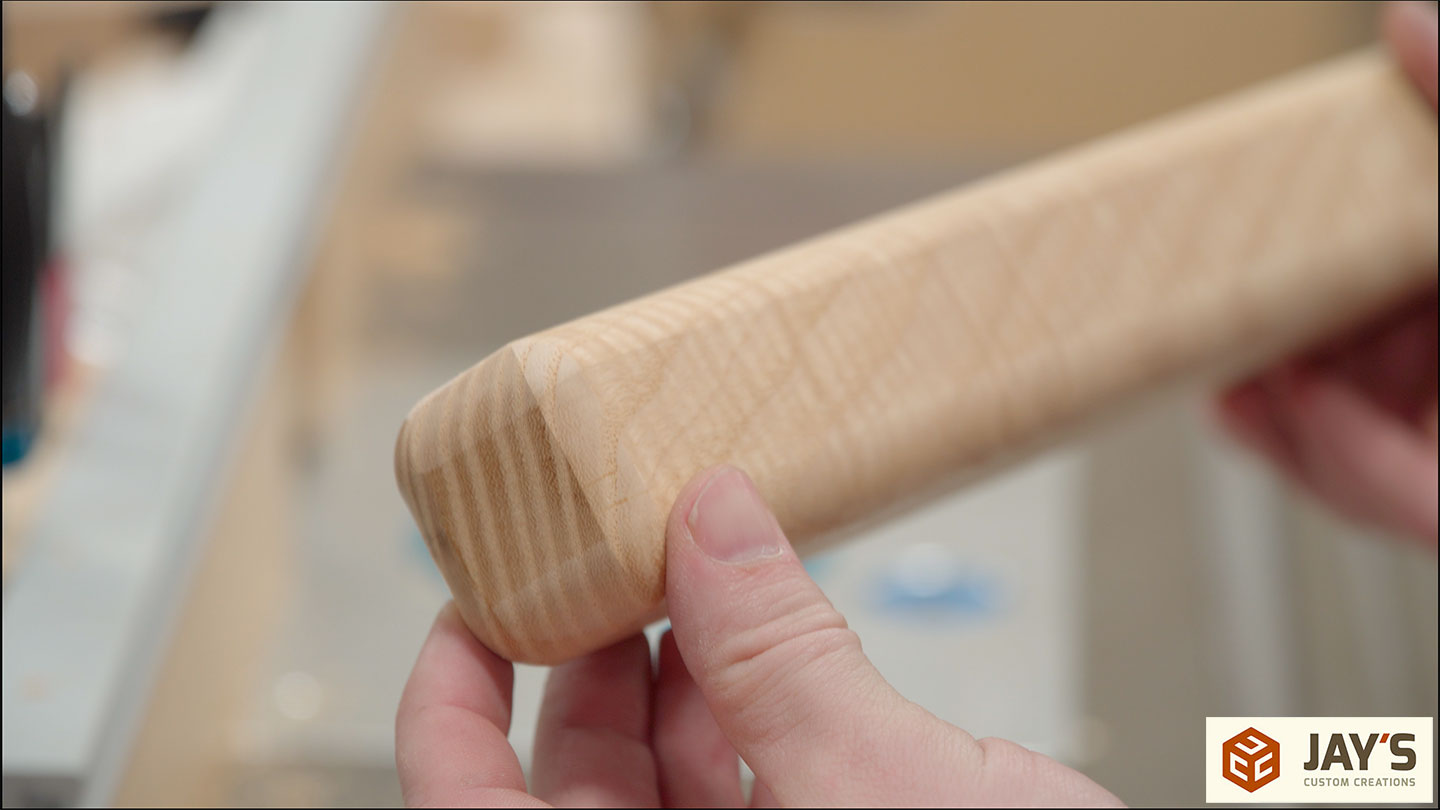
And then all of the leg edges get a generous .5” roundover. It’s important to chamfer or roundover the bottom edges of table and chair legs. If you don’t, the outside faces are much more likely to snag and splinter off if the piece is dragged across a floor.

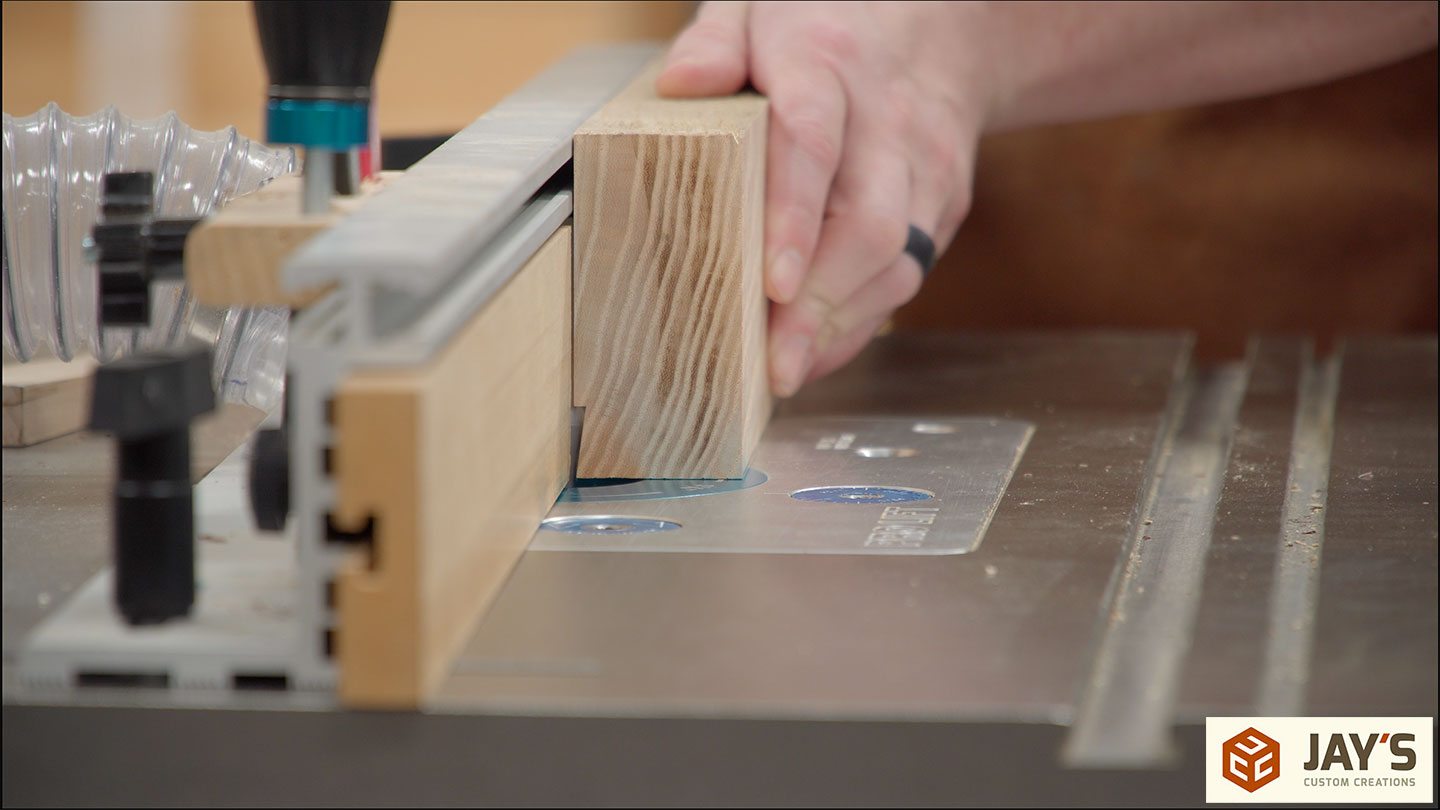
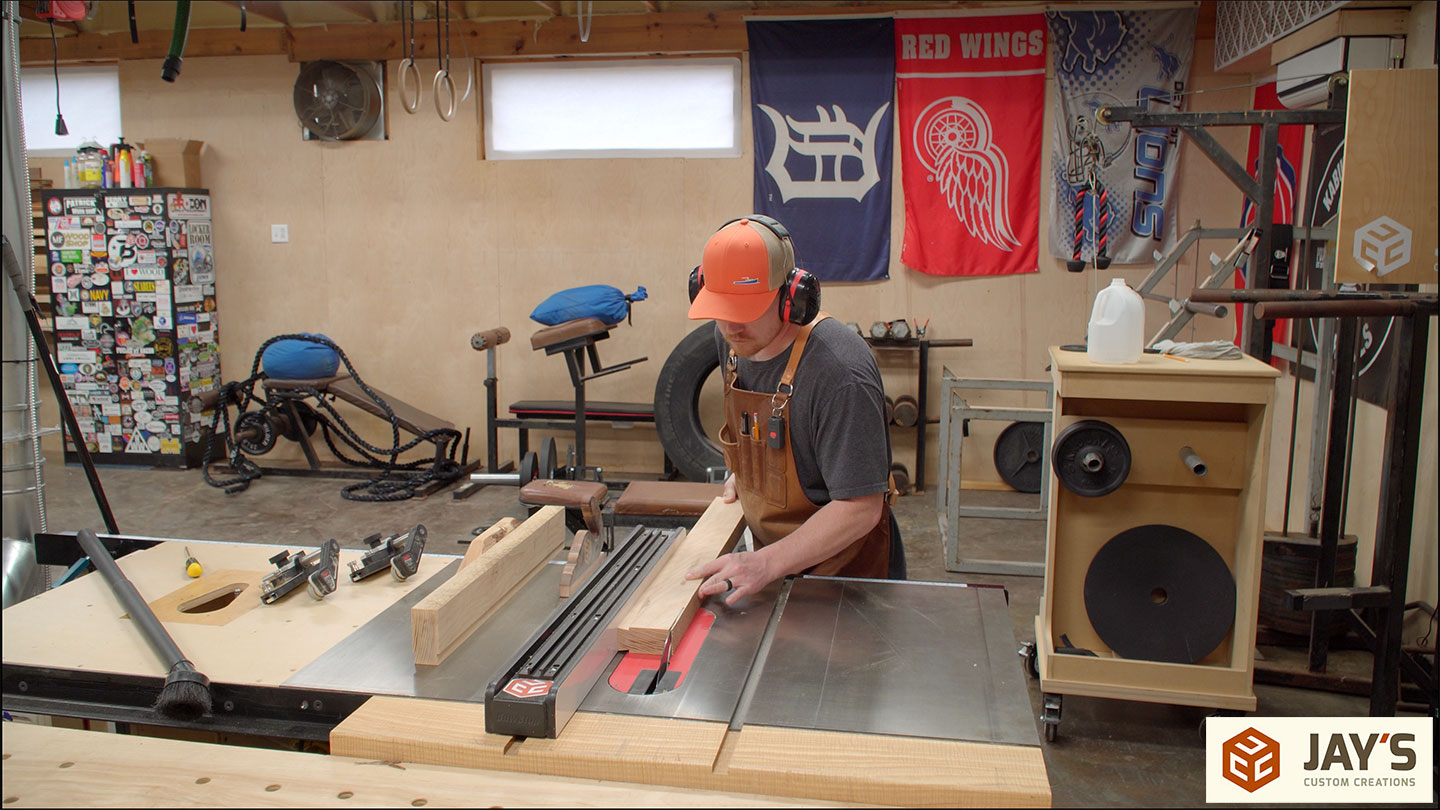
Back to the walnut drawer runners. They are first cut to the final length at the miter saw.
And then cut to the final width at the table saw. When gluing these in place I made sure to overhang the walnut only on one side. This way the ash is used as a reference face against the fence to cut and establish the final width.
Then the walnut is run against the fence to cut a slight bevel on the outside face of the rail. I thought something was needed to minimize the blocky look of the rails and this was a simple solution.
I also thought the walnut looked a little too thick at this point so I reduced its thickness before leaving the table saw.
Here you can get an idea of how the drawer rails will work. The bevel cut does a lot to break up the shape and make it feel like the rail belongs.
I’m using epoxy as an adhesive because the joints are tight and I don’t want a PVA glue expanding the wood making the joints frustratingly tight during assembly.

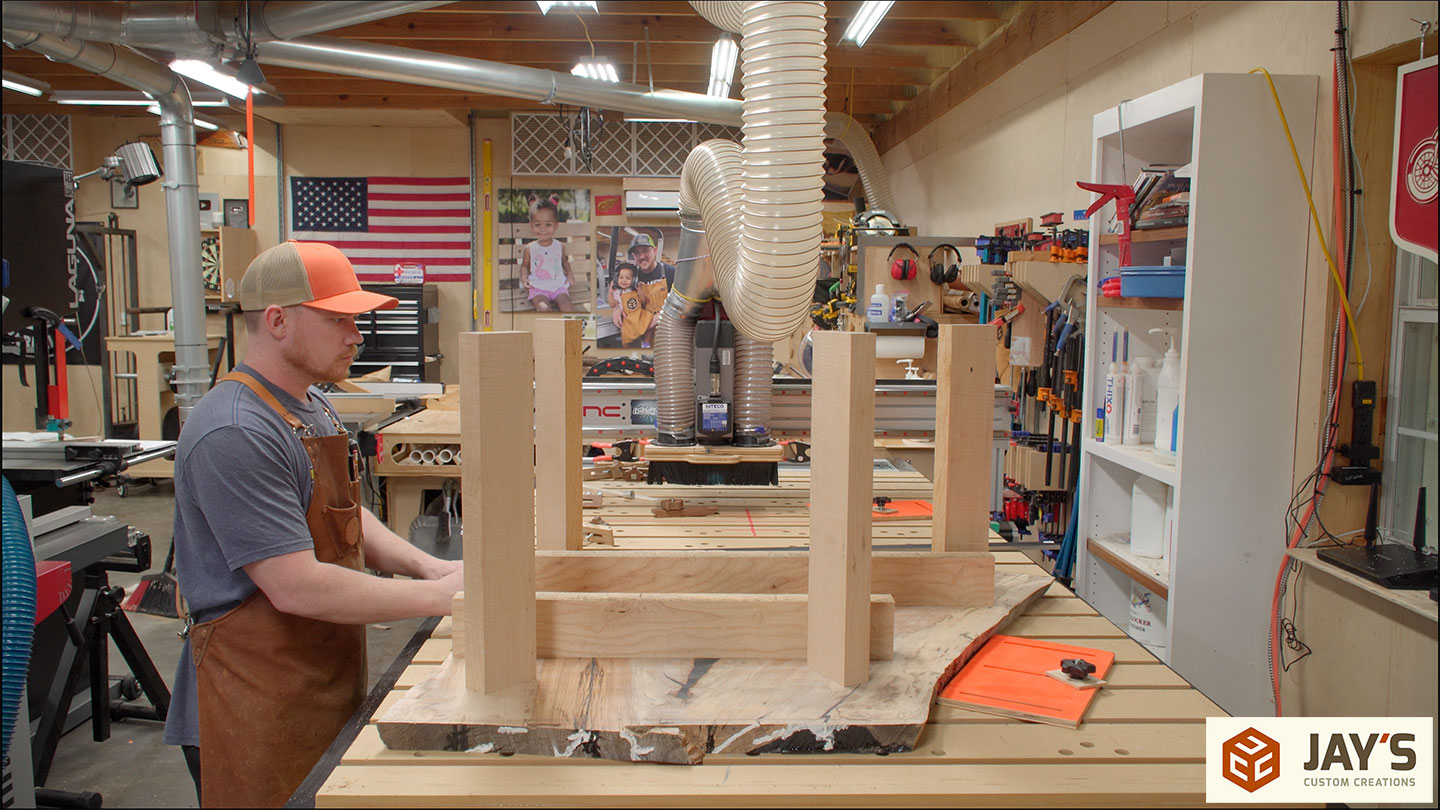
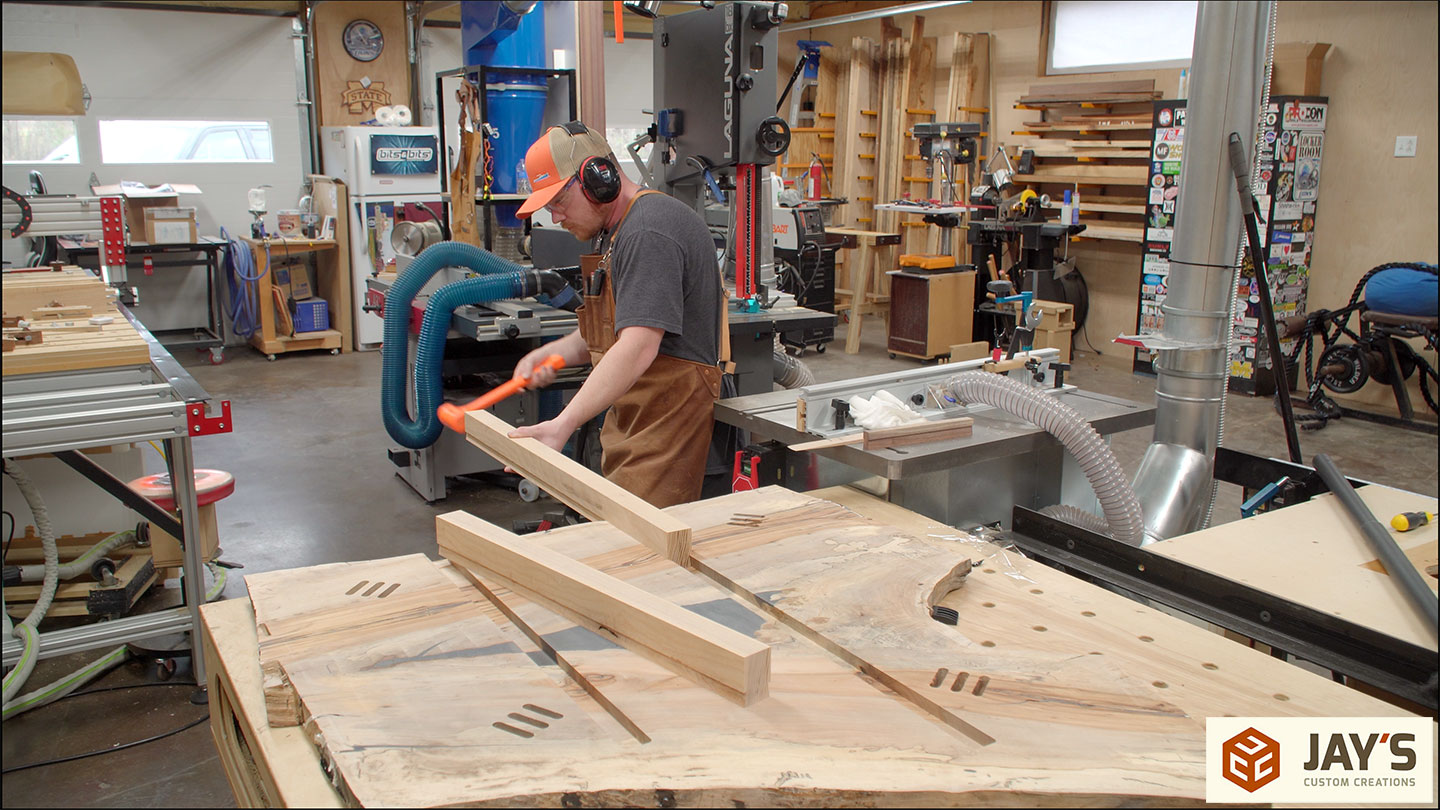
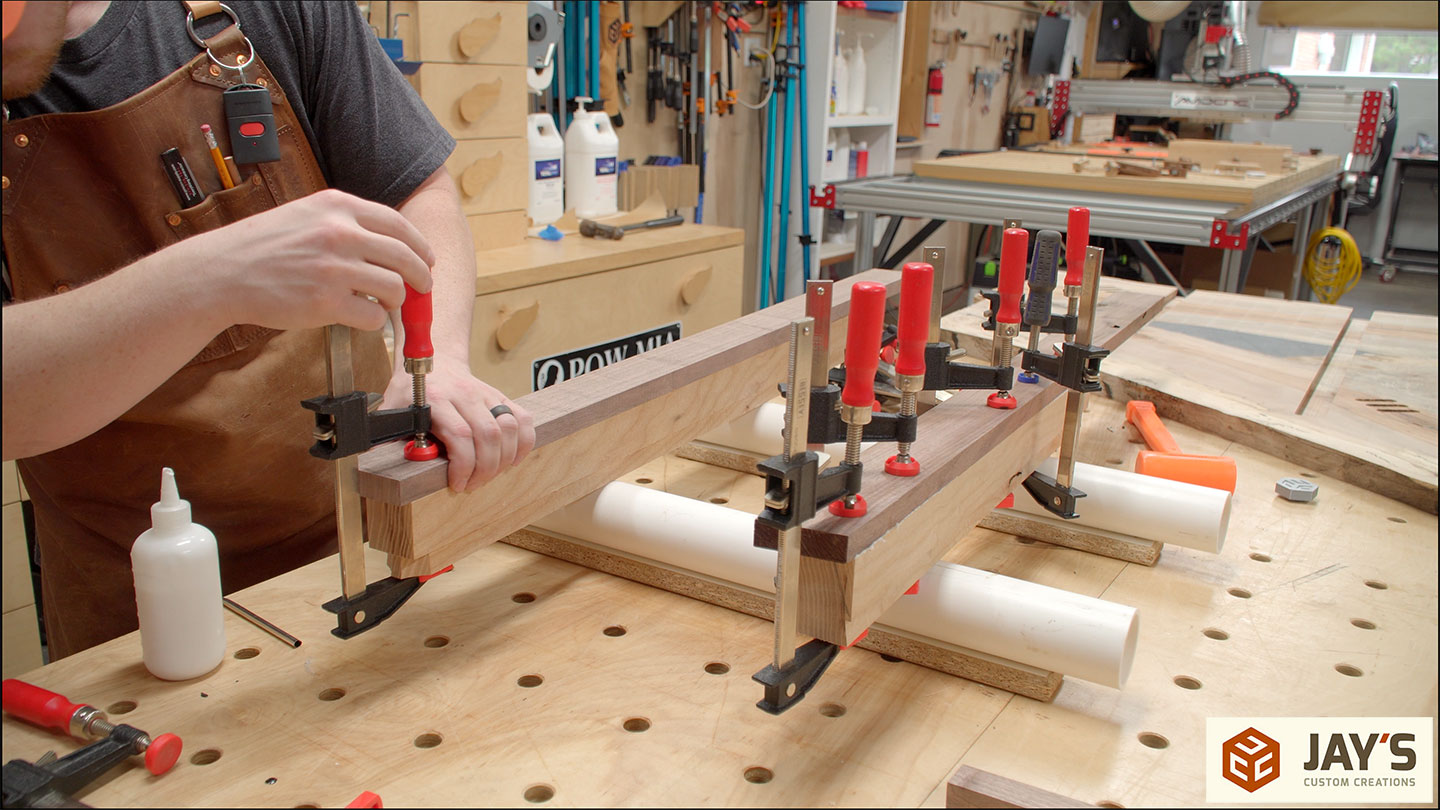
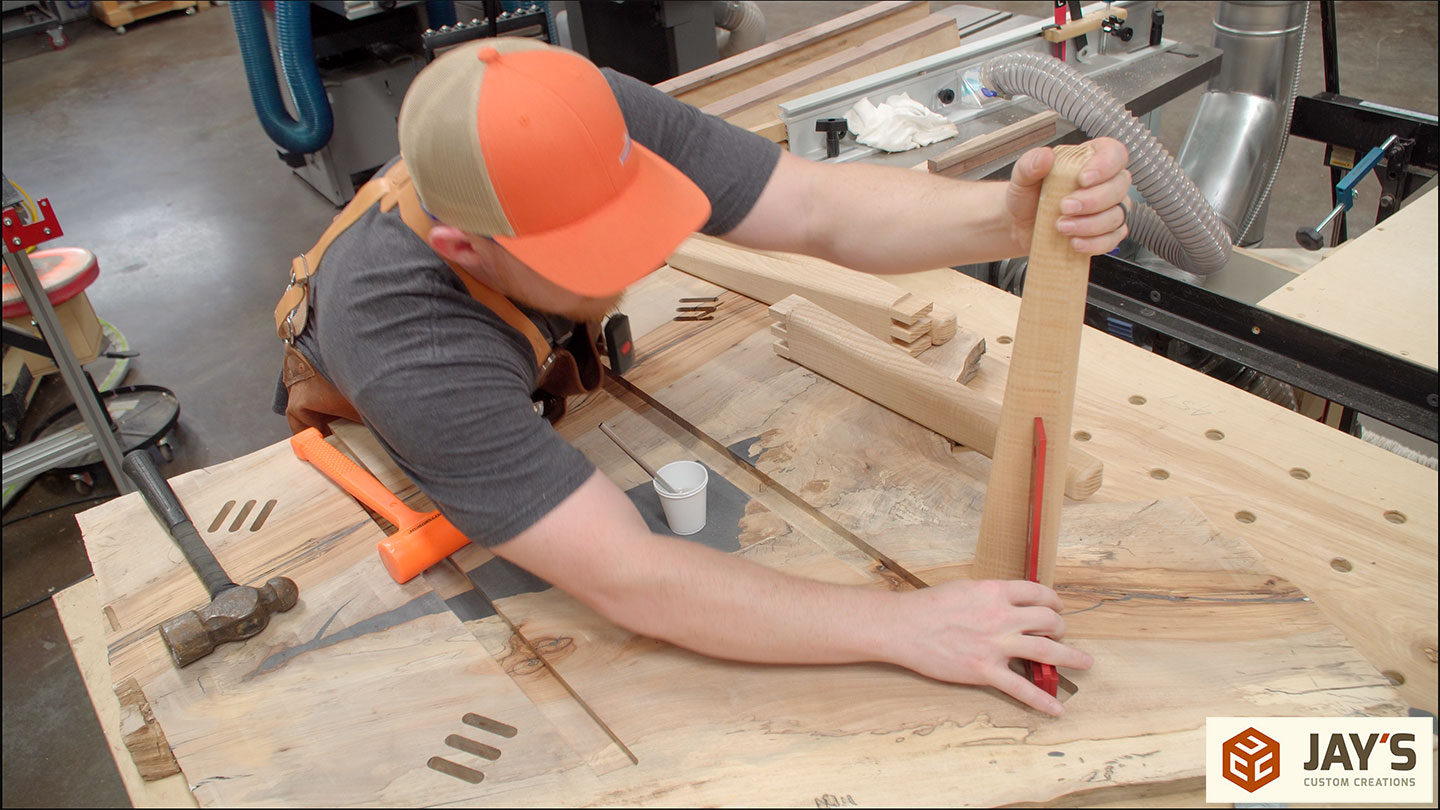
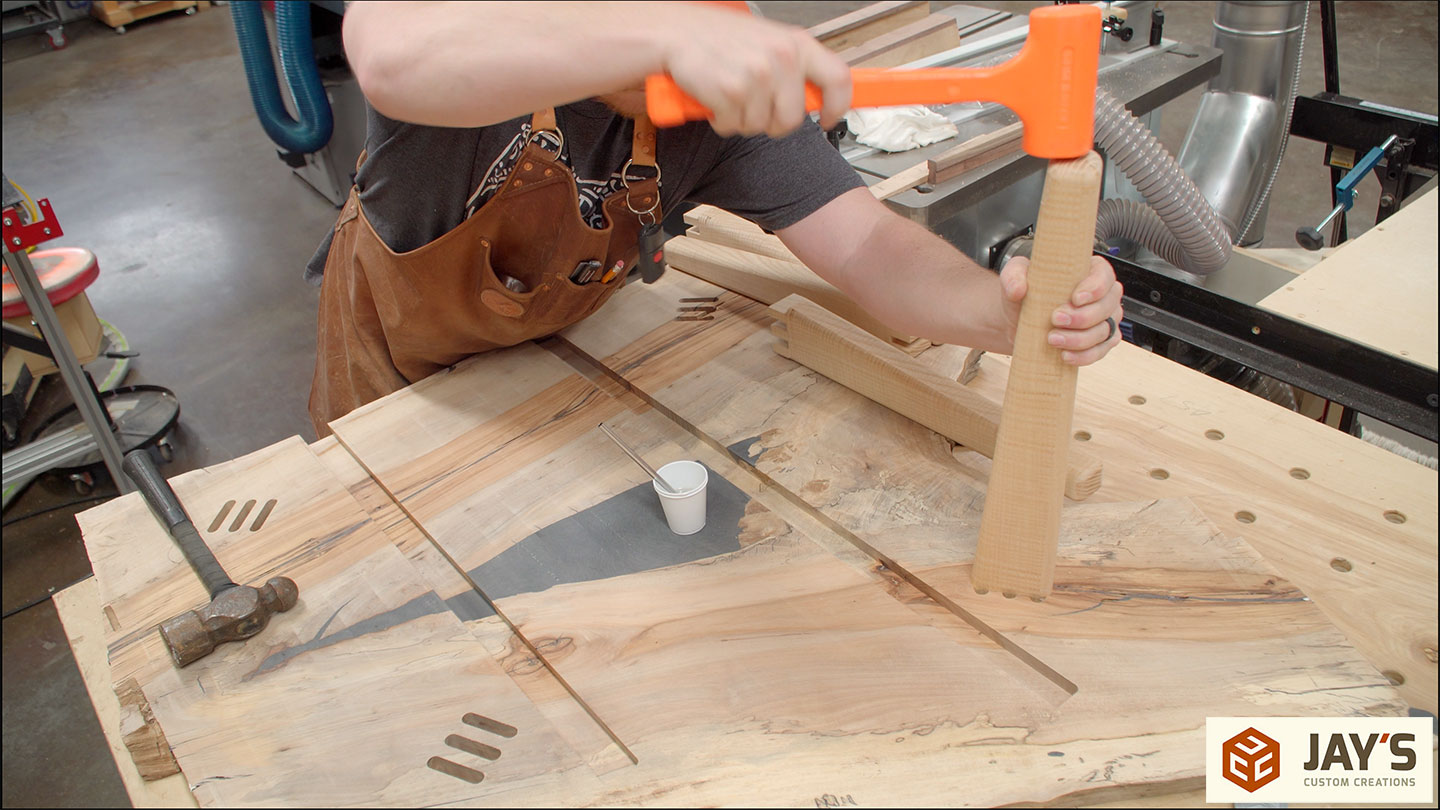
Starting with the legs, a generous amount of epoxy is applied to the mortises. The legs are hammered home and checked square before moving on to the next one.
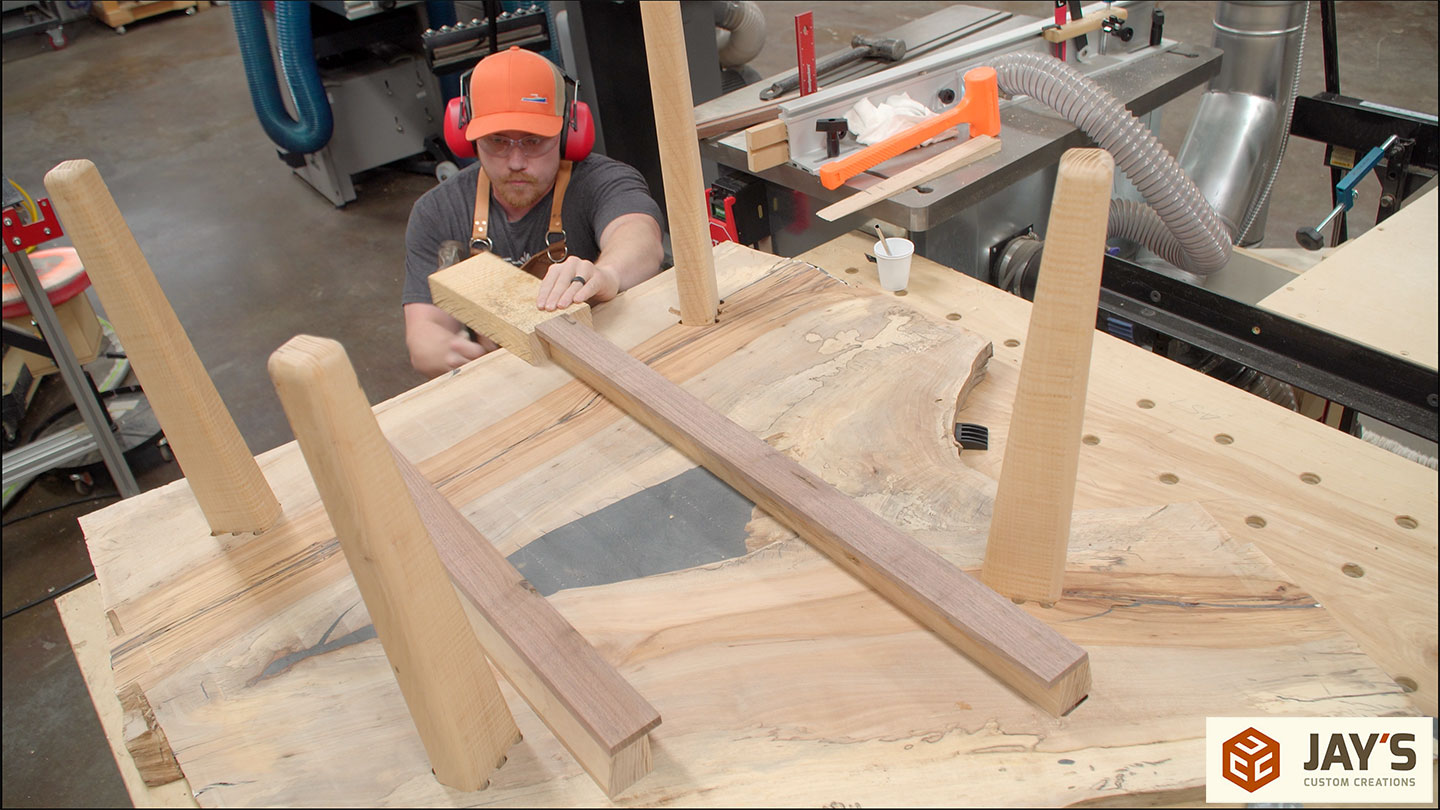
Now onto the rails. The primary reason for these rails is to keep the slab flat while still allowing for expansion and contraction. That means the entire rail should not be glued in place. I only added epoxy to the last couple inches of the slots leaving the rest of the joint free to slide as needed.


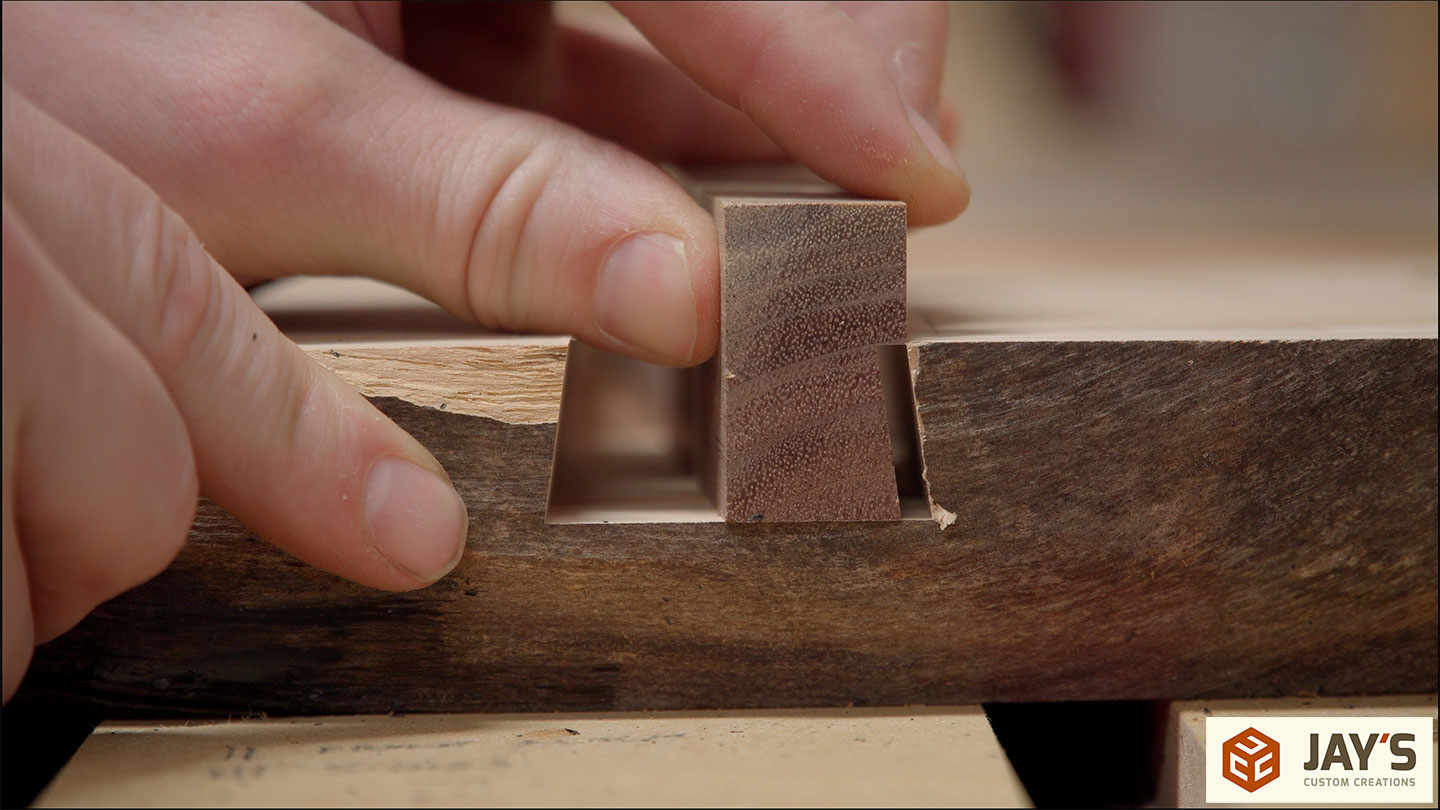
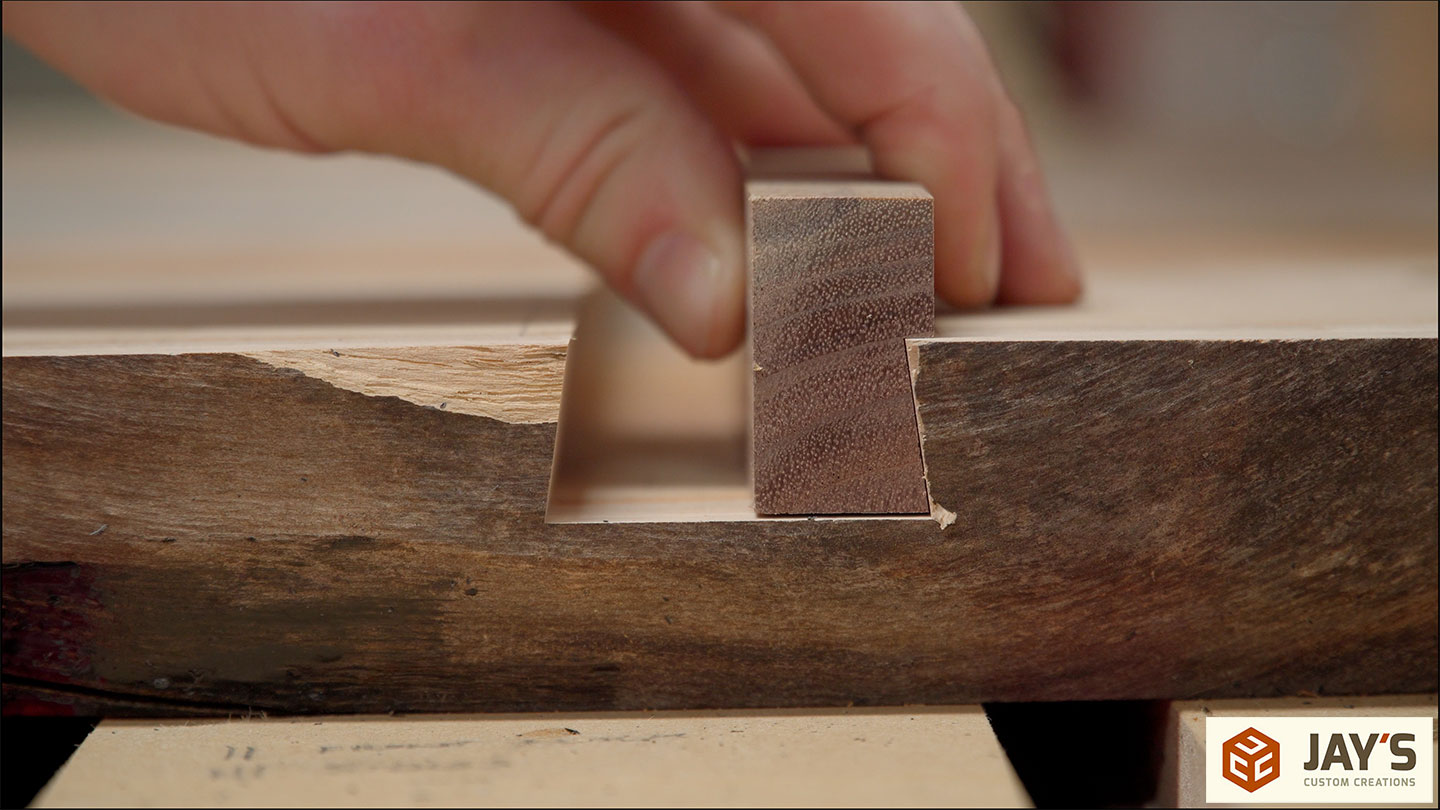
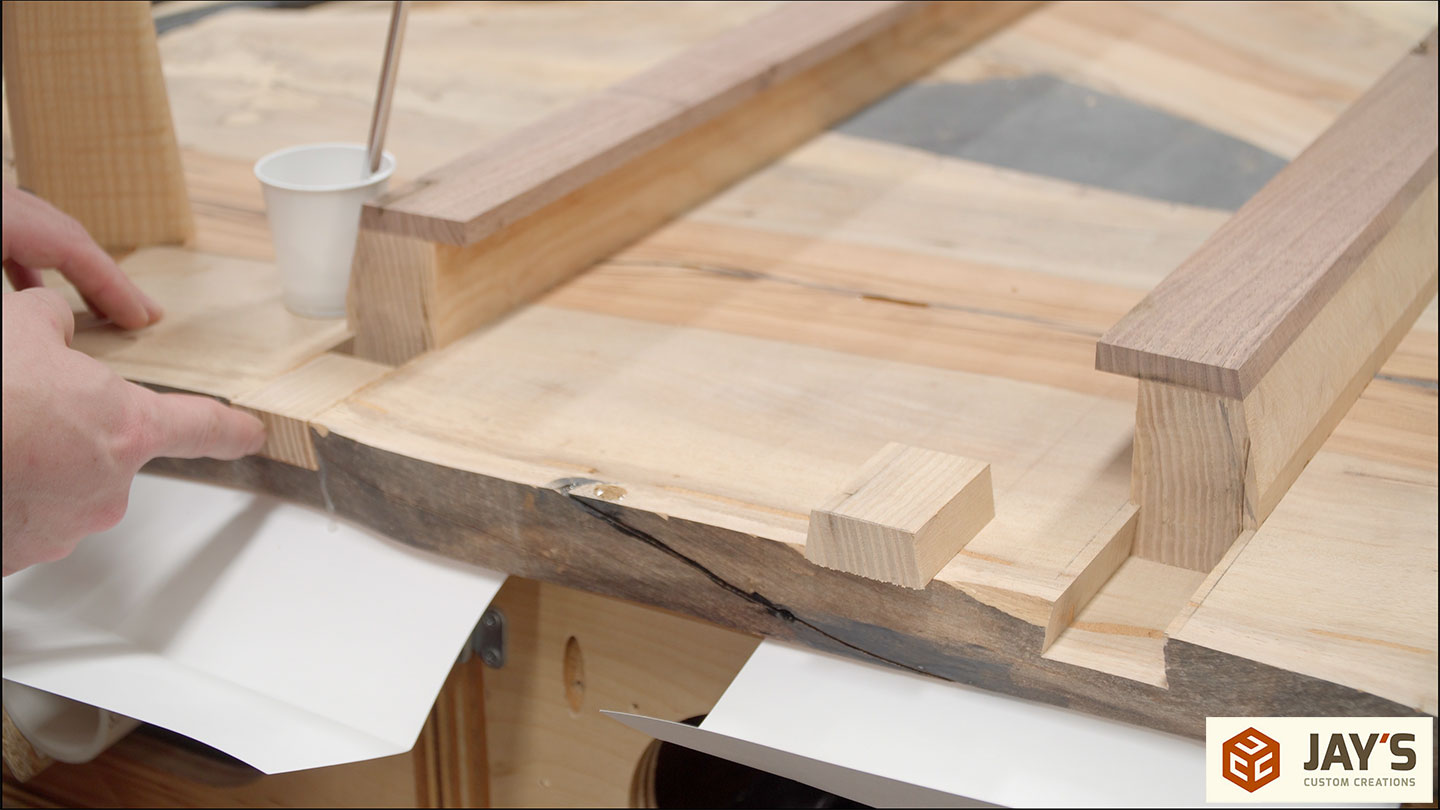
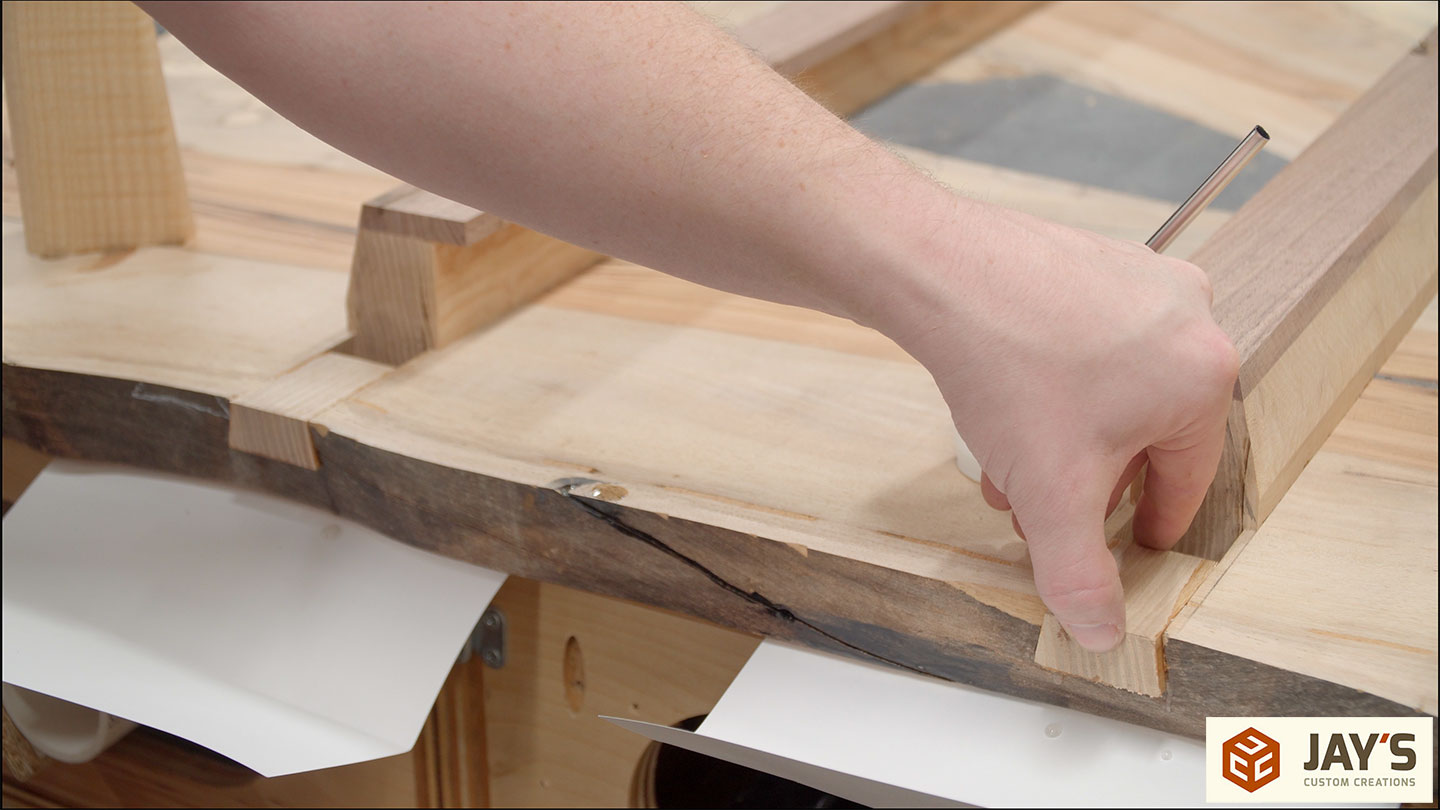
Because I wanted the rails to be inset the same distance on both ends some of the dovetail slots were left exposed. I didn’t want to leave it like this because of clothing potentially snagging on the corners so I used some of the same ash as the rails to make dovetail plugs. These were epoxied in place leaving an inch or so gap between the plugs and the rails.
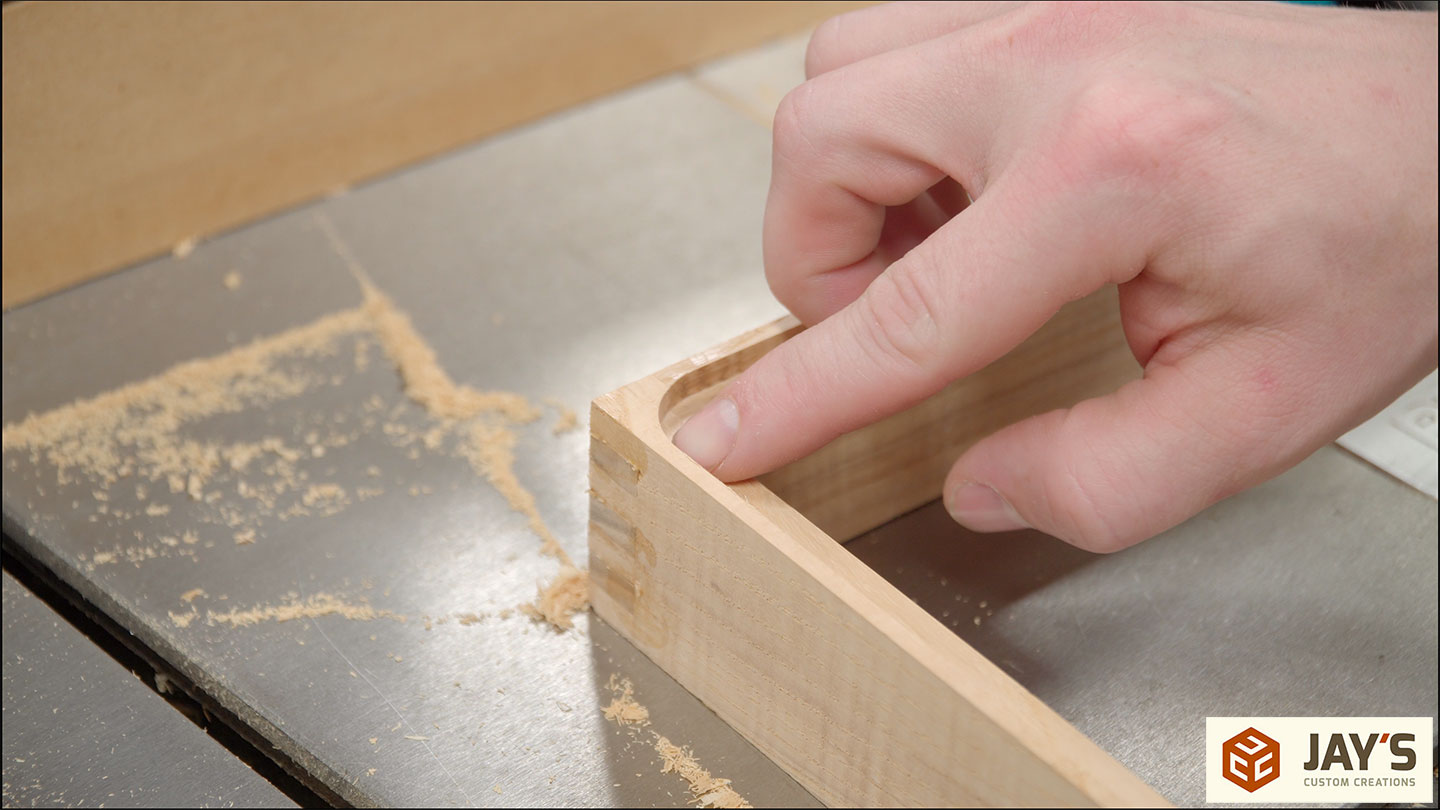
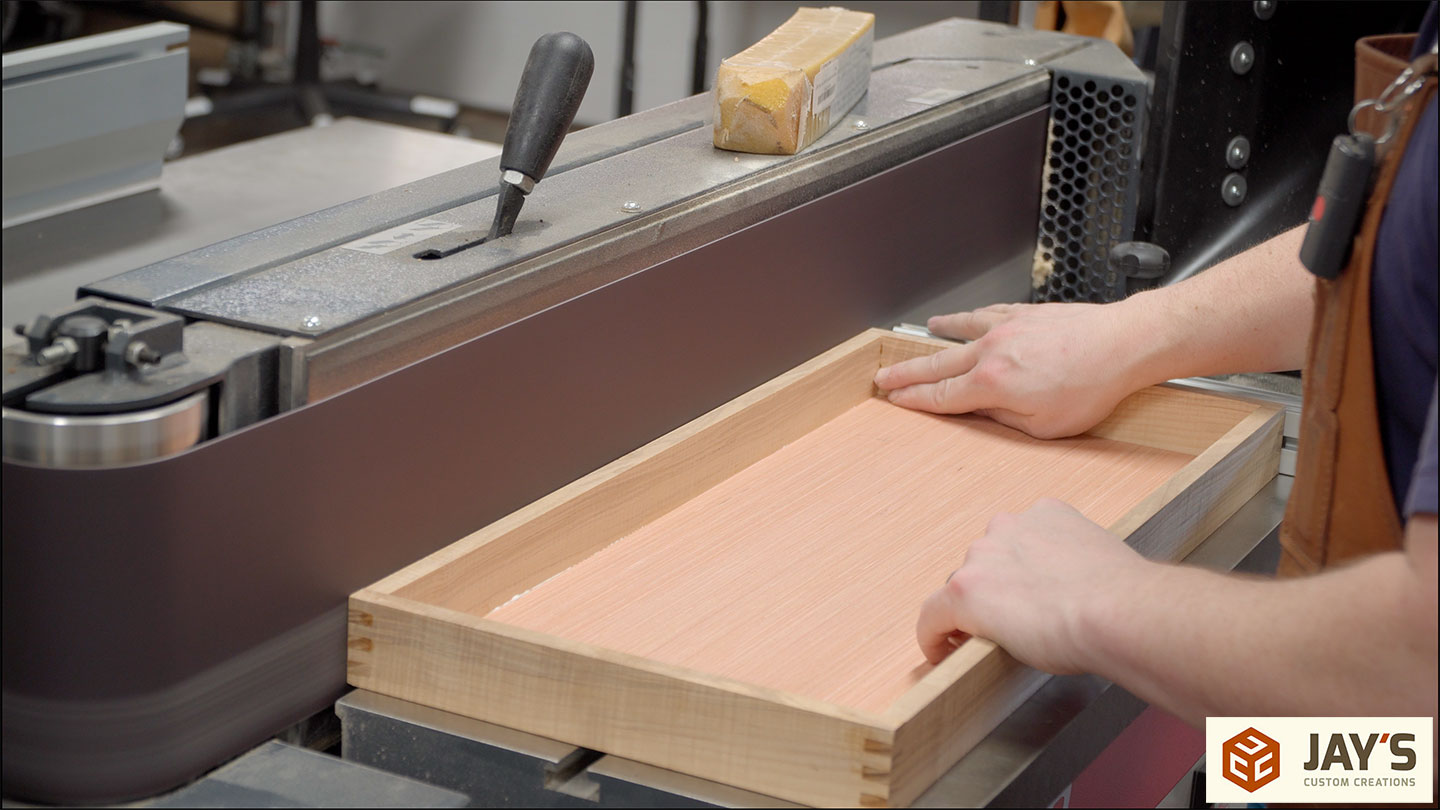
The last bit of construction for this build is the drawer. I milled some of the scrap ash from earlier in the build for the four sides and every bit of it was beautiful straight grain with a decent amount of curl to it.
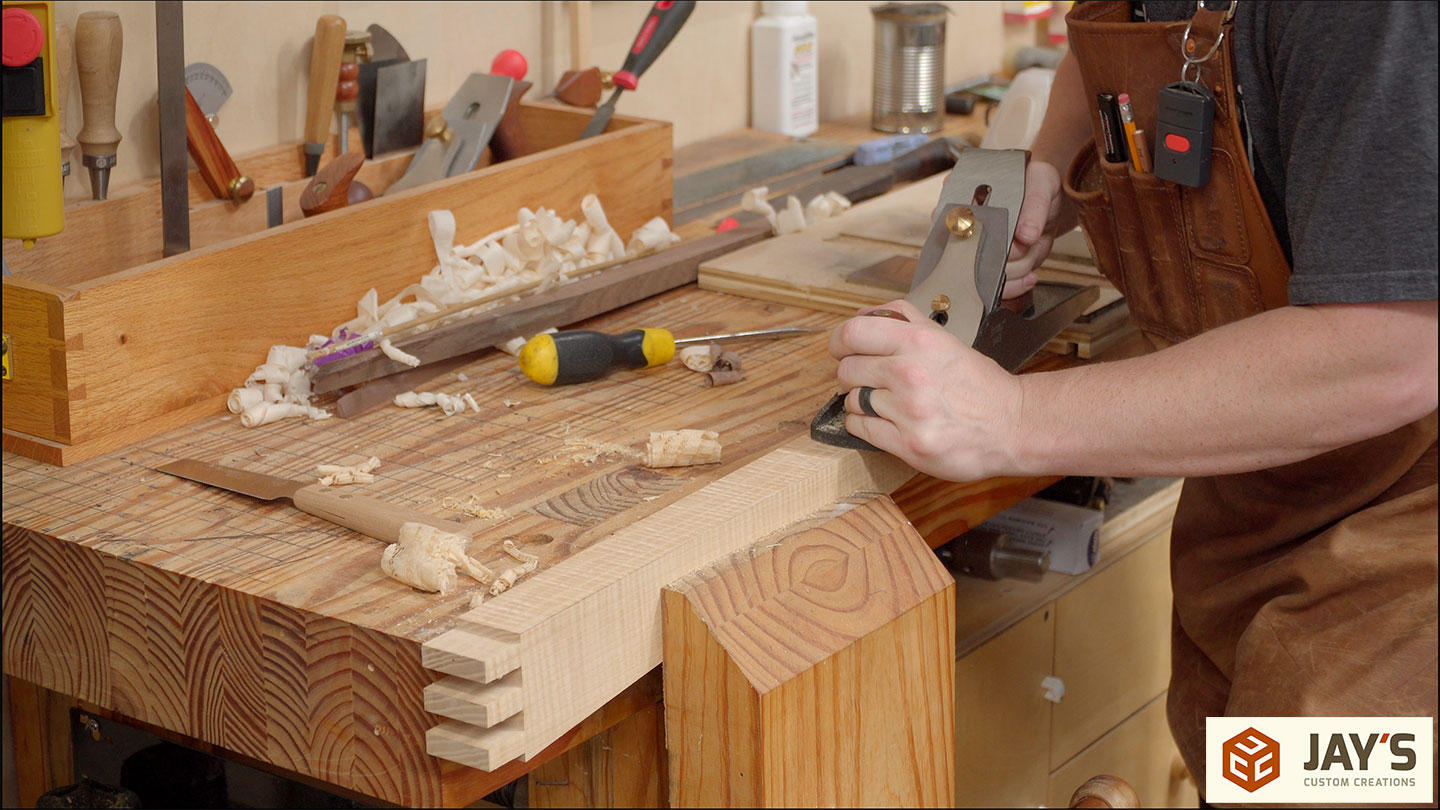
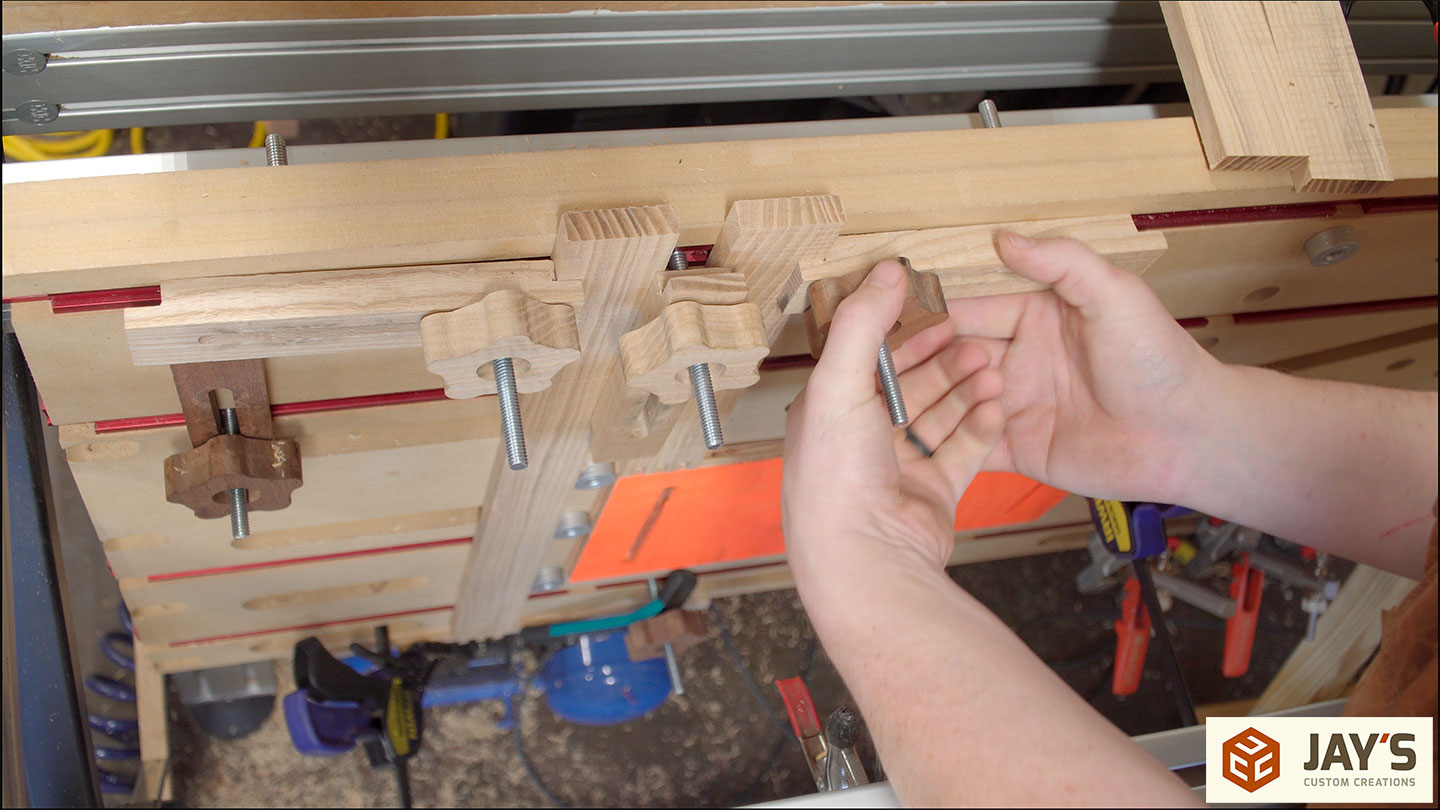
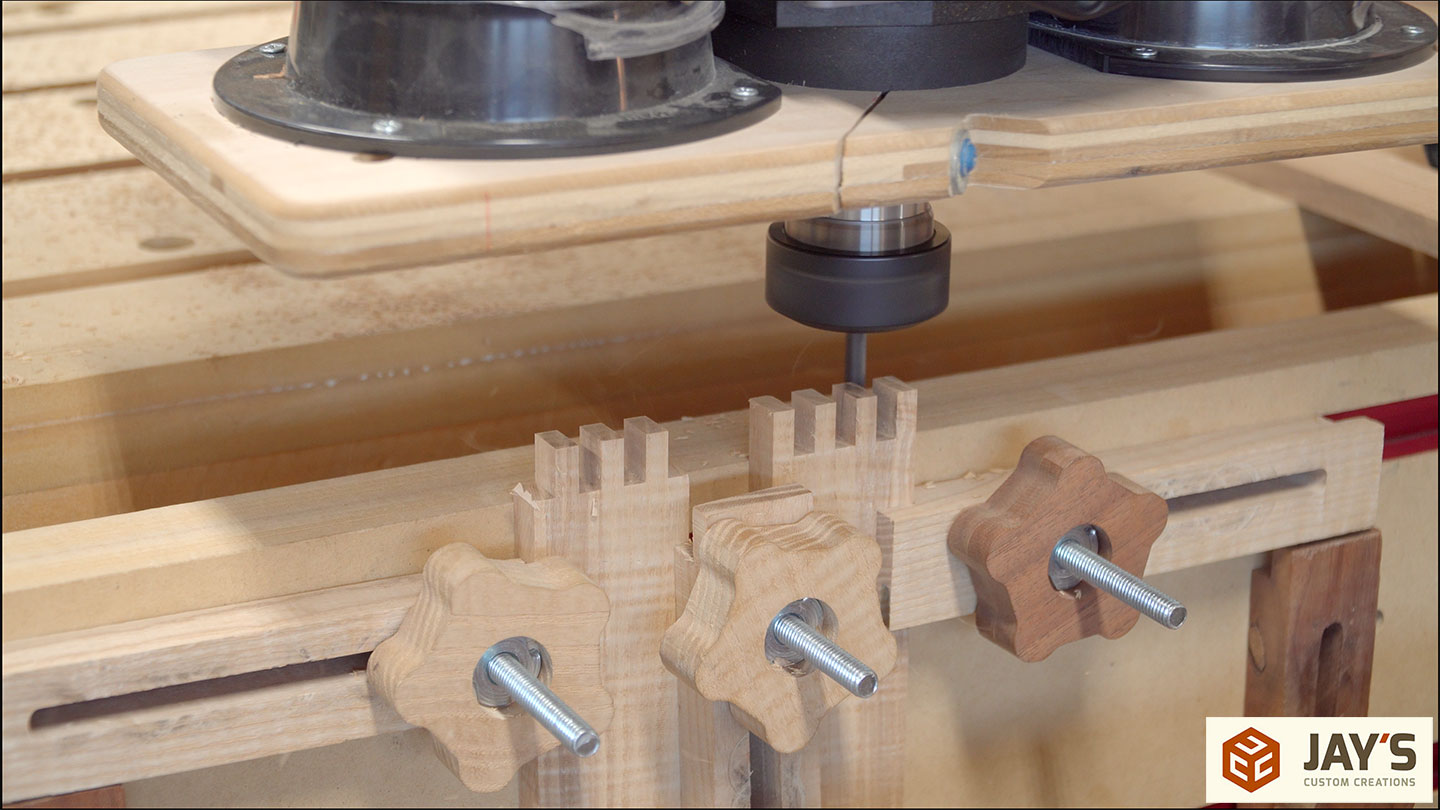
I went with box joints for the joints. This was the first time I tried making vertical table joint cuts without first running a shoulder scoring toolpath and the results were great. A quick test fit of the joint confirms the fit and the rest of the joints are knocked out.


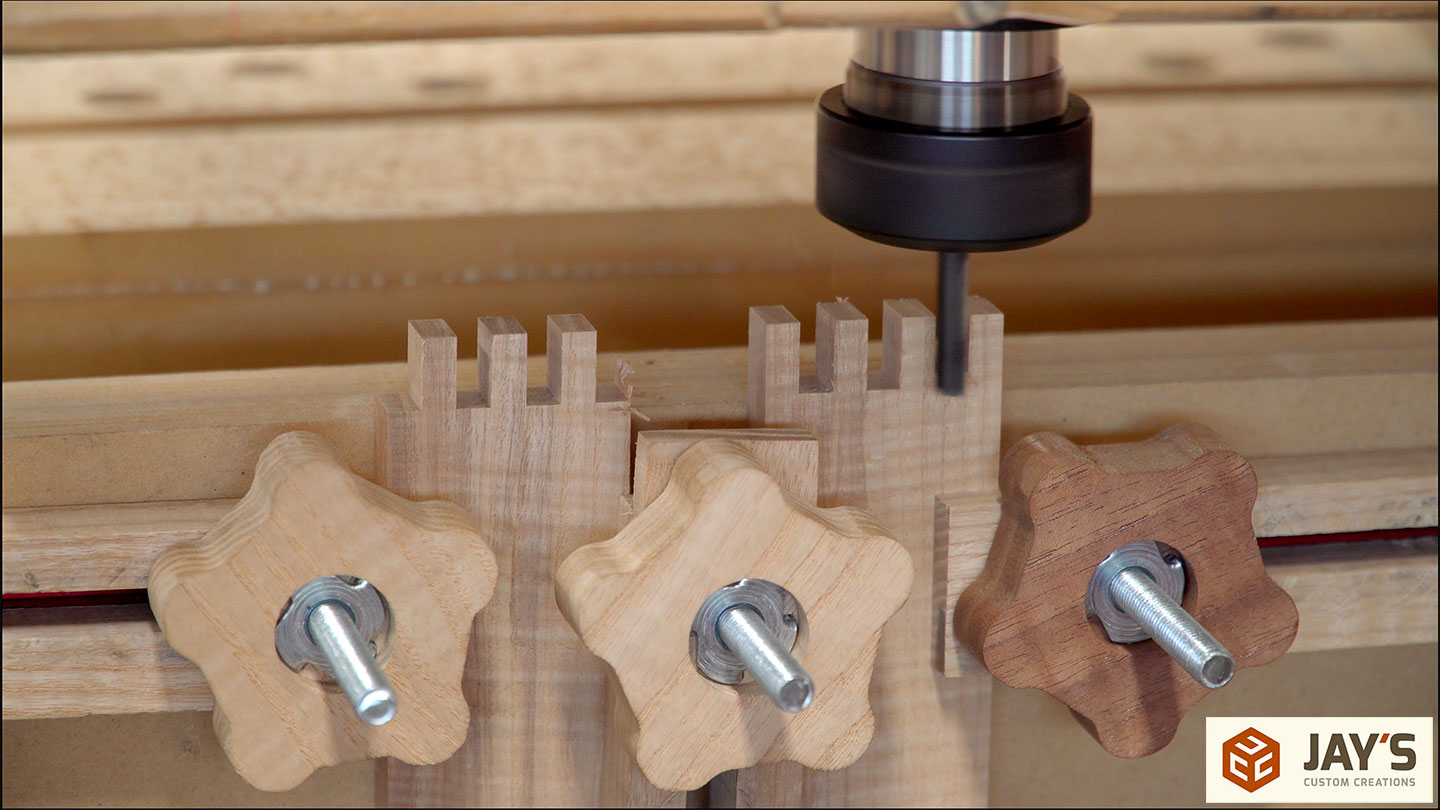
A couple of stop blocks in the vertical direction make batching out all of the cuts quick and easy. I’m not sure how much of the clean cuts were due to not being aggressive with the cut vs the great cutting properties of ash. Ash is probably my favorite hardwood to use with CNC machines because it just cuts so cleanly.
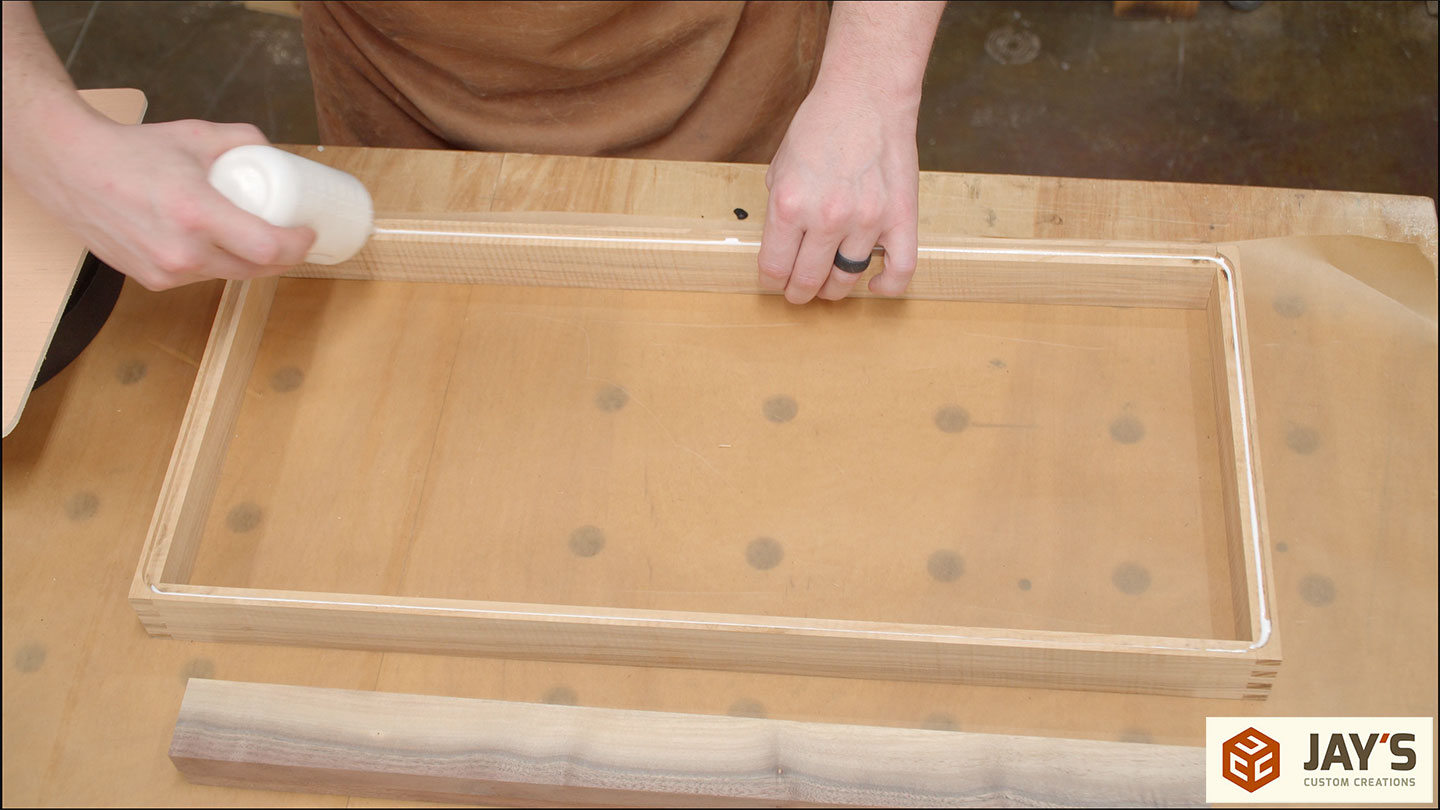
For the assembly of the drawer, I used hide glue. It’s another good glue choice when you want a little extra open assembly time vs PVA glue. Hide glue also lubricates the joint vs PVA glue swelling the joint due to its water based nature. I didn’t use any clamps on the drawer as the joints were tight enough to not want to move once seated. I just made sure the drawer was square and set it aside to dry.


Because the drawer was already on the short side I didn’t want to waste any interior drawer height by putting the drawer bottom in a dado. Instead, I set up the router table with a rabbeting bit to cut a rabbet on the bottom side of the drawer. This will maximize interior drawer depth.

I also cut this entire rabbet in the climb direction. Making climb cuts with a router will guarantee no tearout but also make the process a little more challenging. Meaning the direction of the bit was wanting to climb the material or pull the drawer away from me the entire time.

The rabbeting router bit creates a radius for the inside corner. Either chisel the radius square or round the corner of the bottom panel, which is the route I went.
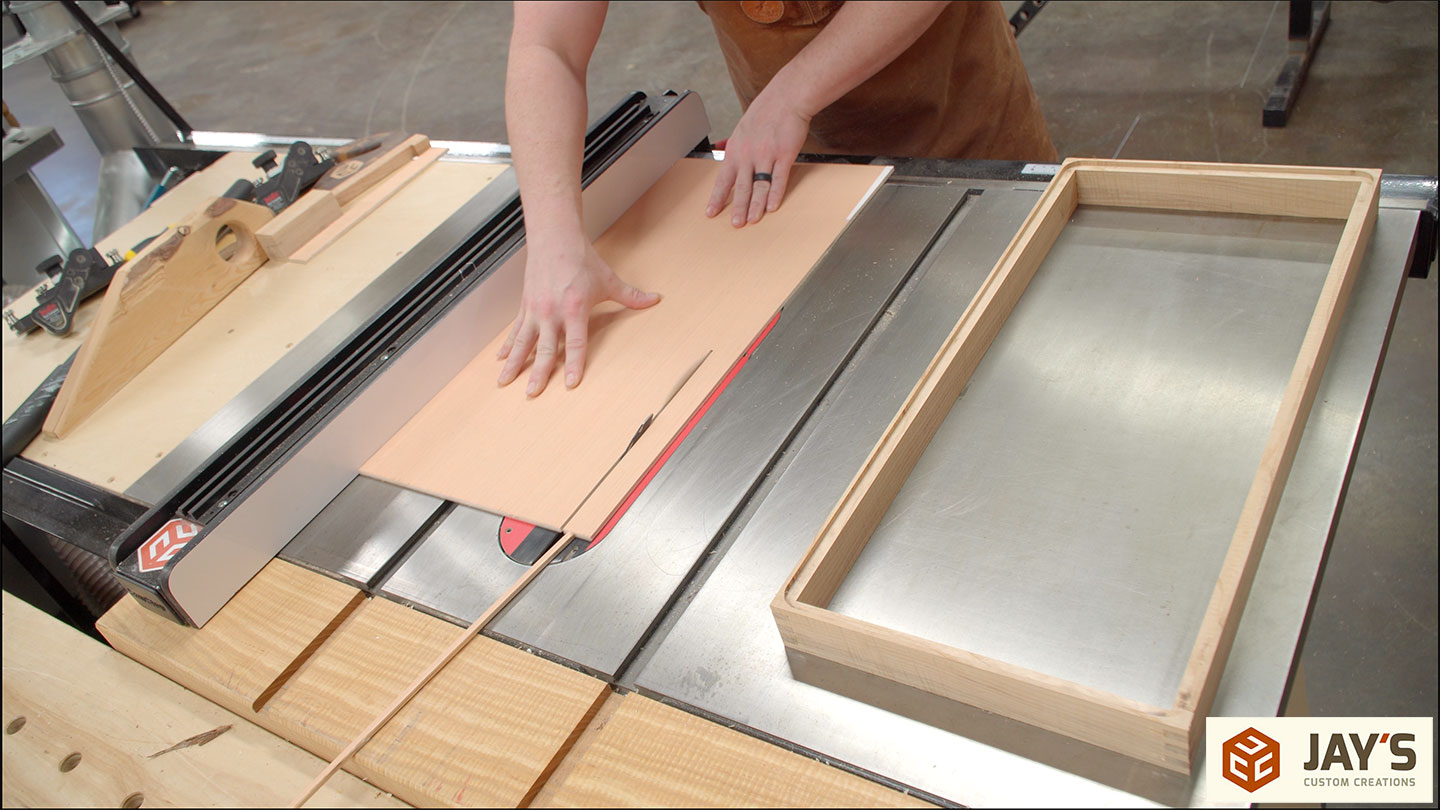
The bottom panel is cut to length and width at the table saw.

And then the radius on the corners is established with a belt sander.
A small amount of fast-setting PVA glue is added to the interior corner of the rabbet and the panel is set in place. Rather than clamps, I used some scrap wood and steel weights to add some downward pressure.
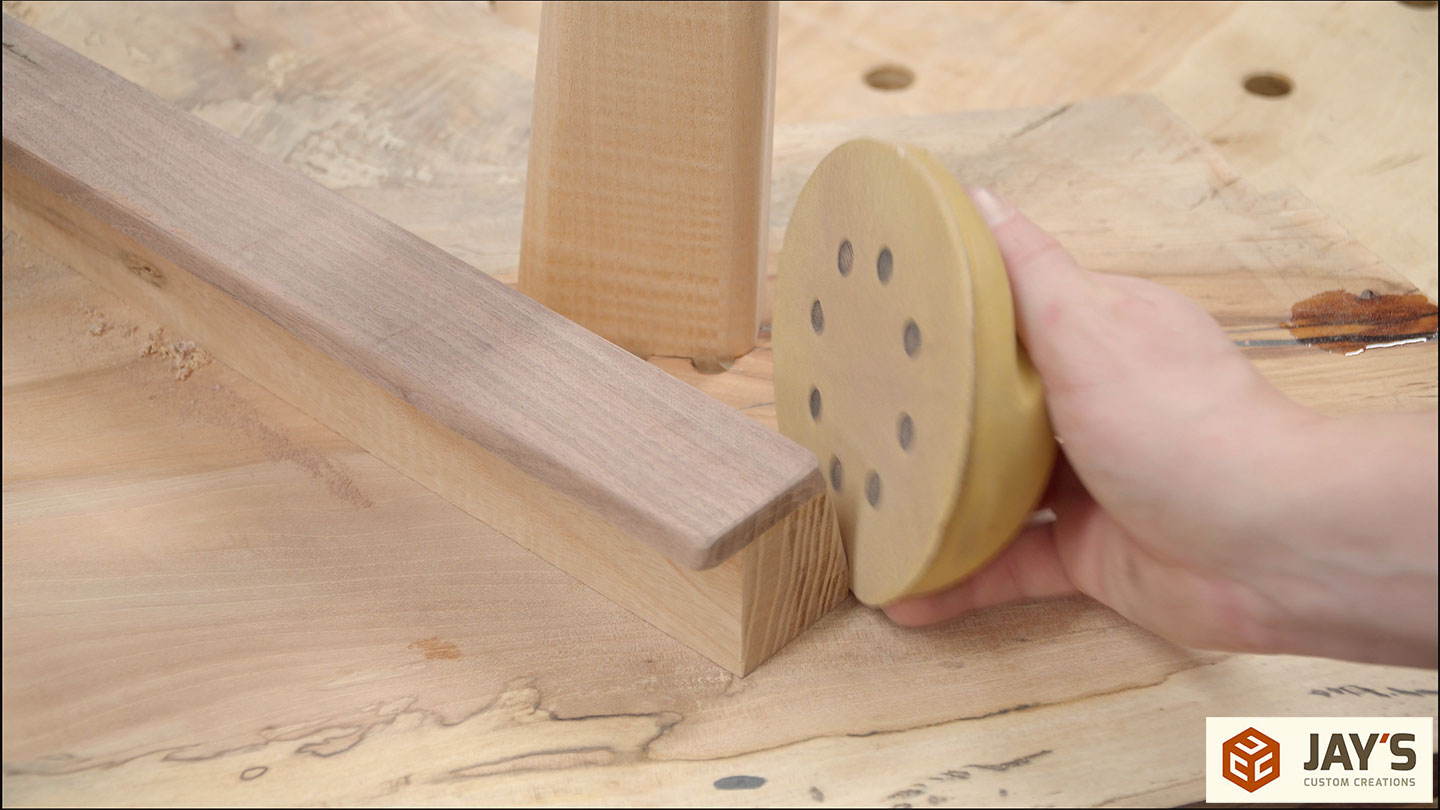
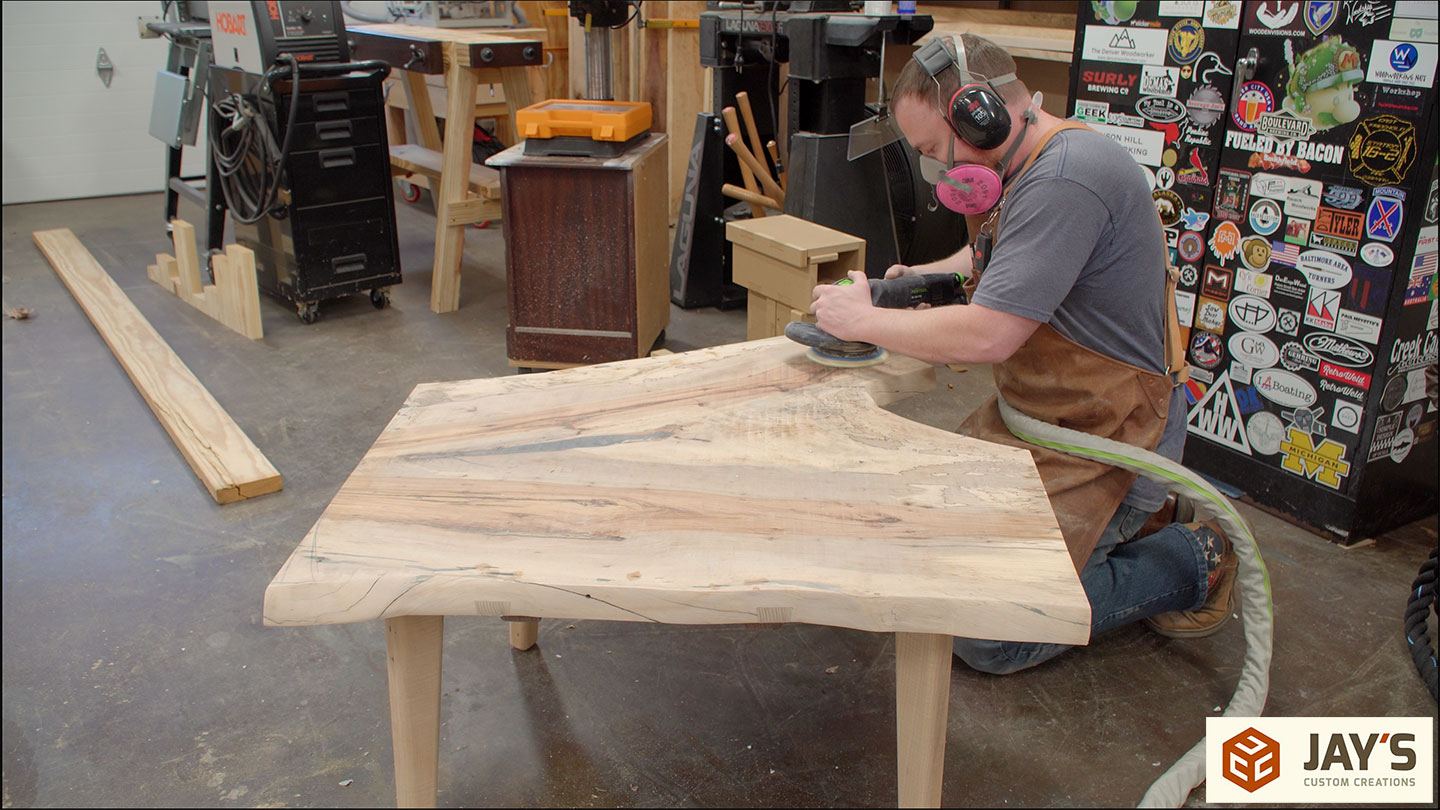
While the glue sets on the drawer I sanded the legs and broke all the edges on the dovetail rails.

I also sanded as much as I could on the bottom with an orbital sander. I’m never worried too much about the bottom surface of tabletops or other furniture. Some people go all the way with this surface but when’s the last time you examined the quality of the bottom of furniture in your house?
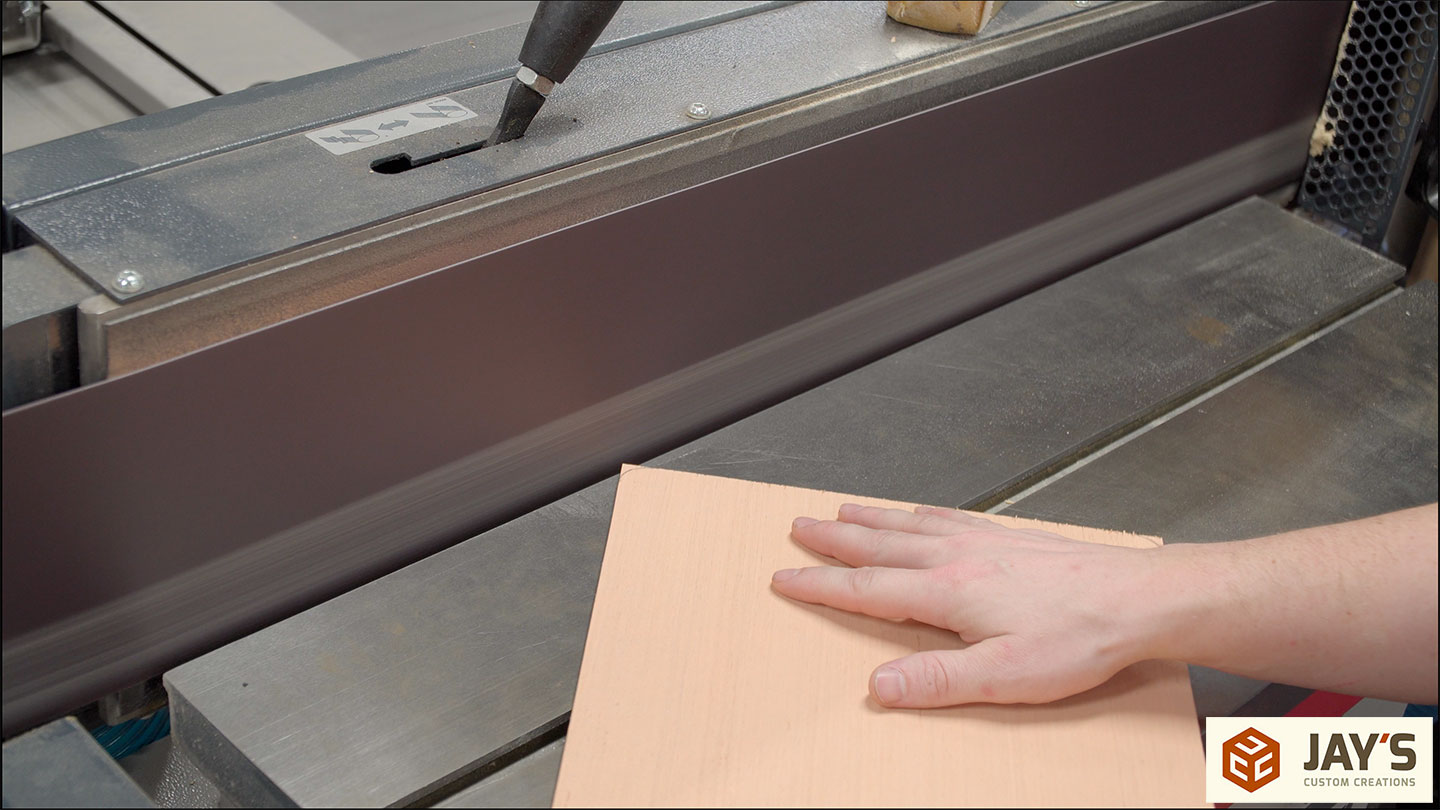
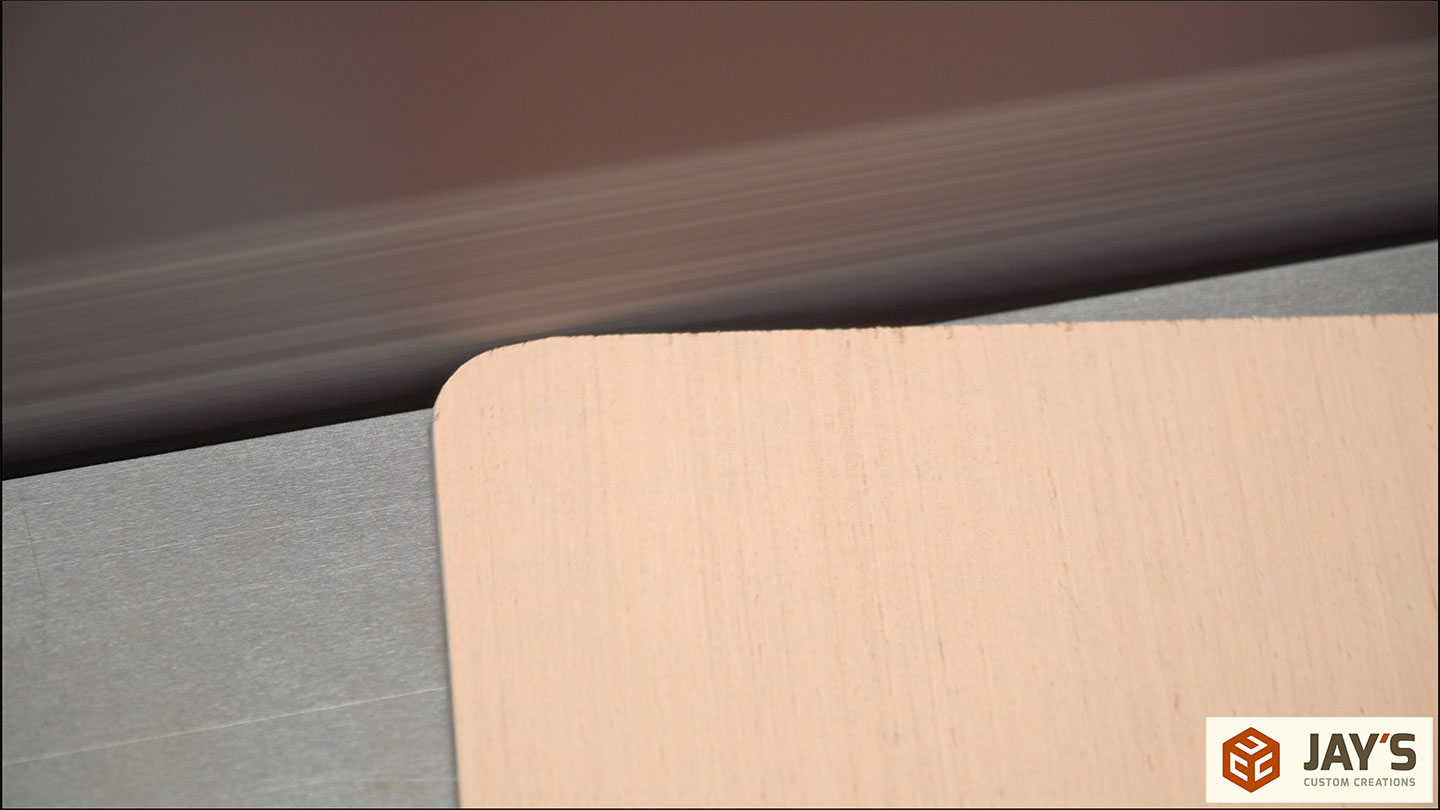
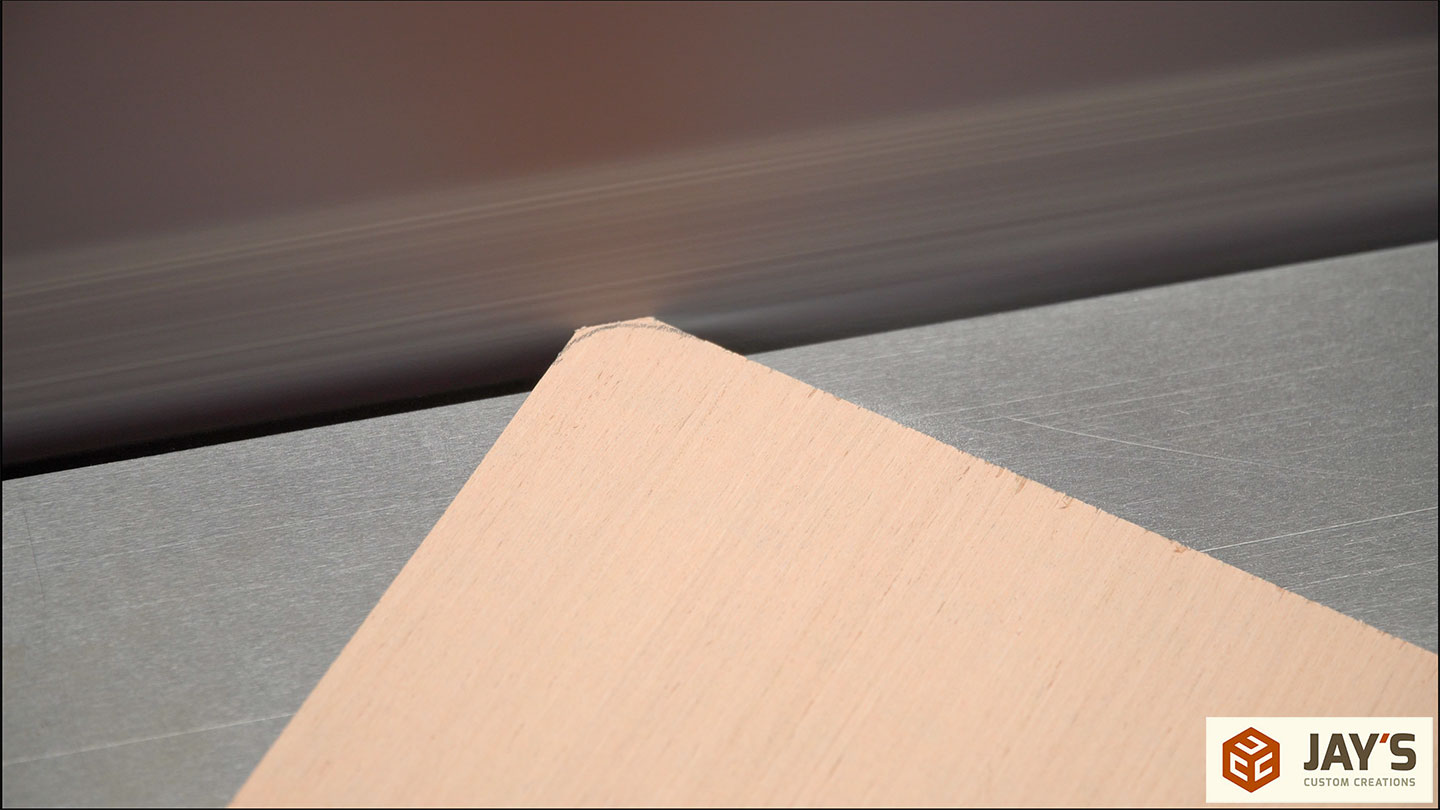
Once the drawer was dry I cleaned all the sides at the belt sander. I have a precision miter gauge for this machine so once dialed in it’s pretty fast to sand objects square by rotating the freshly sanded face against the miter gauge fence over and over.

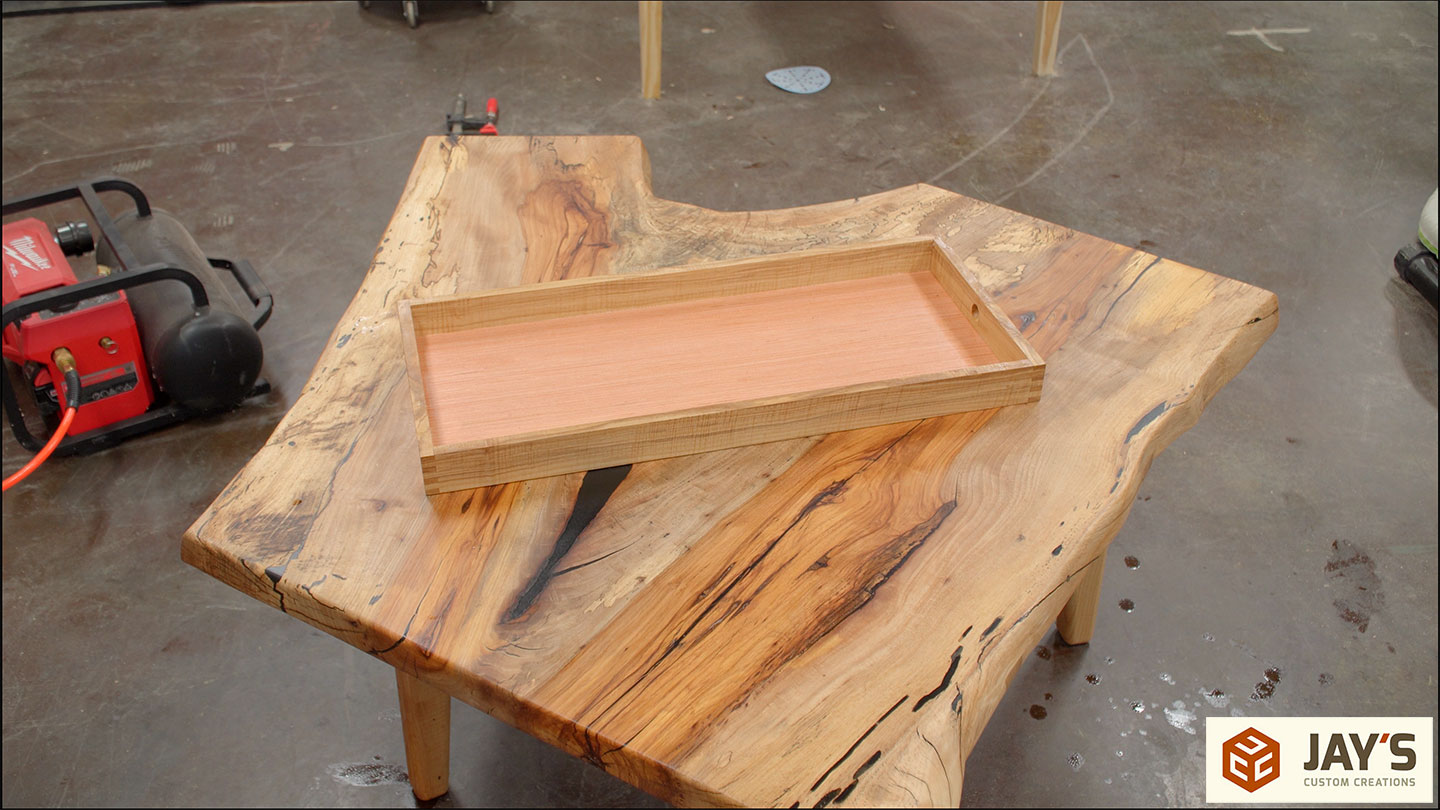
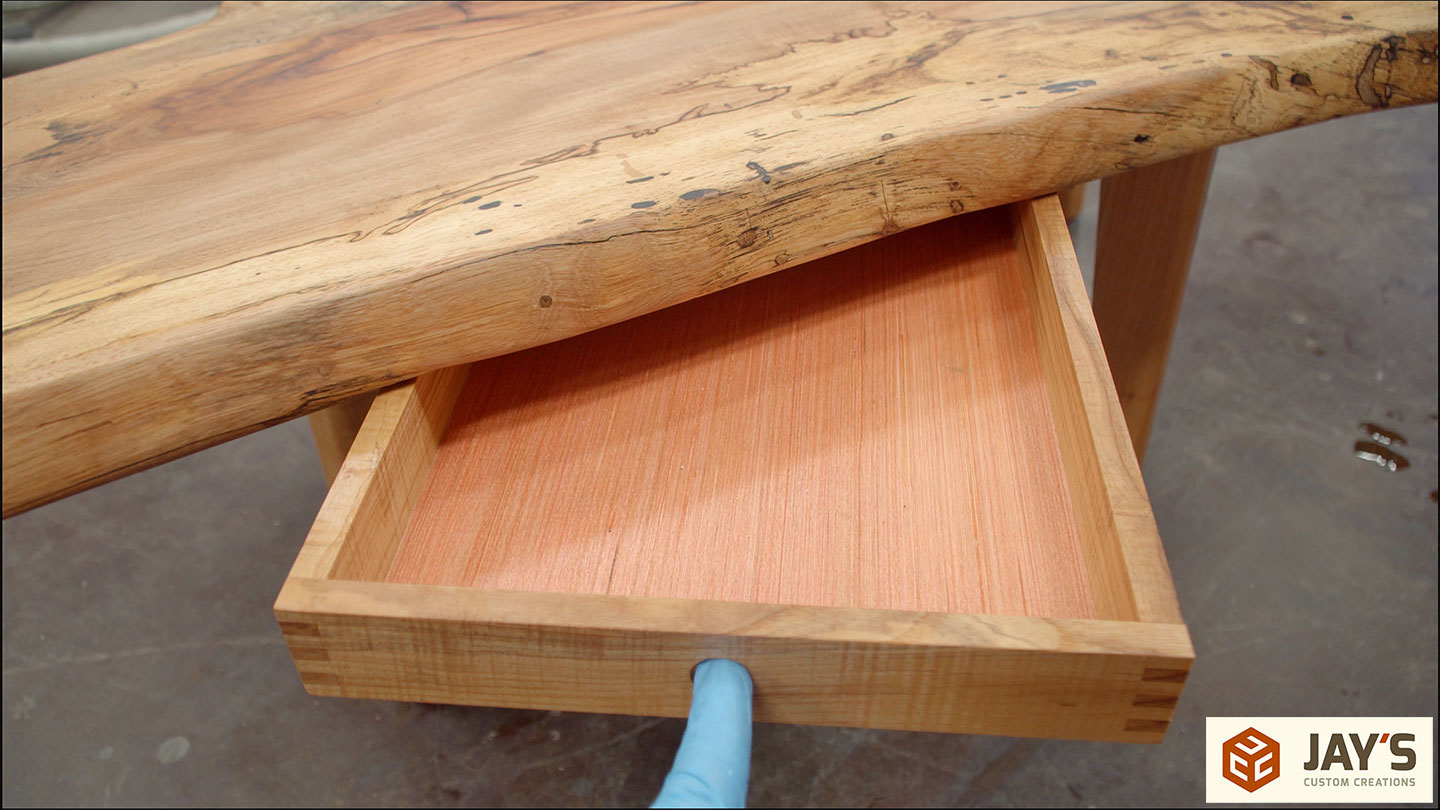
Here you can see how the drawer will work. The drawer can slide in and out from either end. The square end will be facing the main seating area and the angled end will be into the open area of the living room.
I contemplated not adding a drawer pull at all because it will be easy to pull it forward by lifting up slightly on the bottom edge but ended up cutting a .75” hole in the front and back just in case. After having the table complete for a few weeks I can say that this step was pointless. We always just pull the drawer forward from the bottom.
With all of the building done some final detail work can begin.
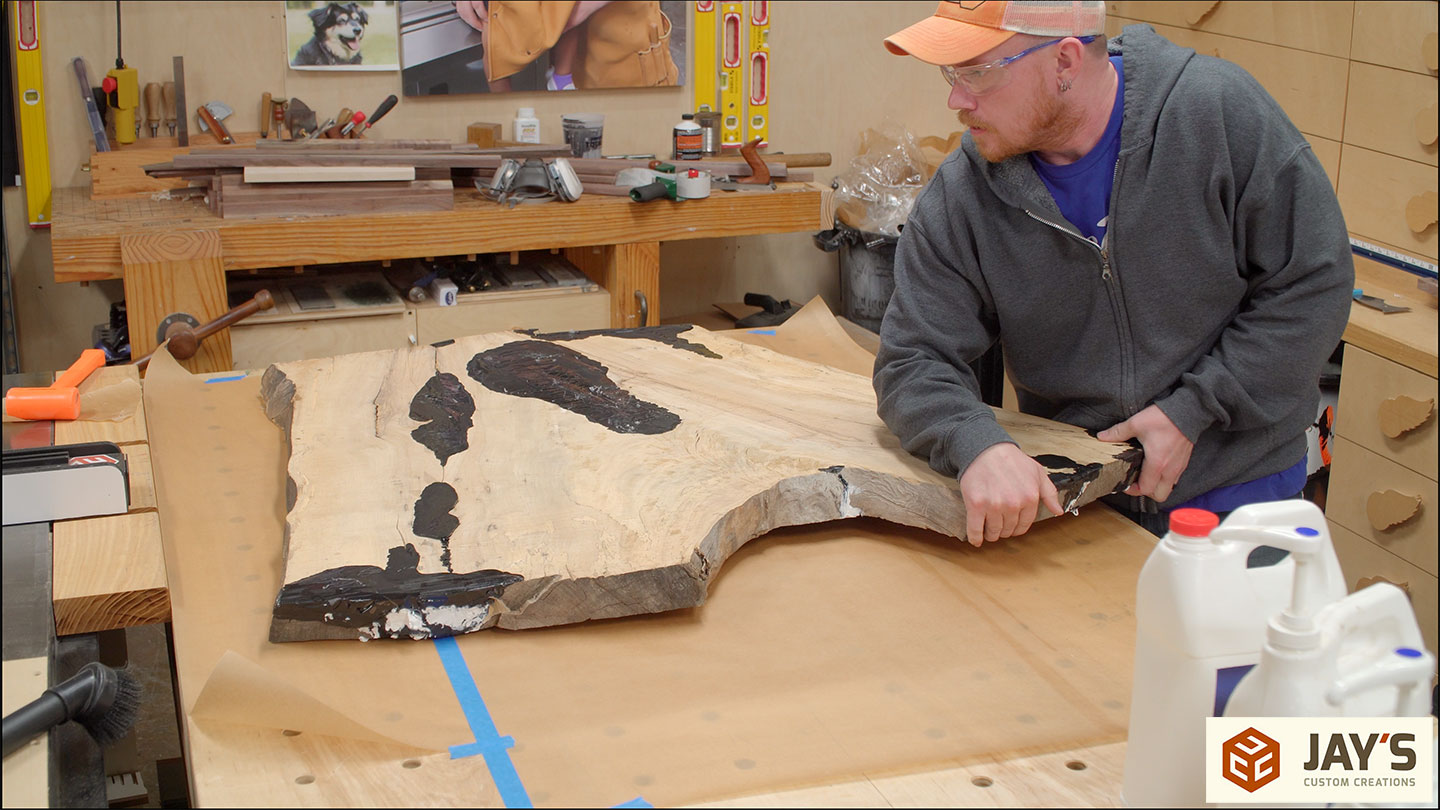
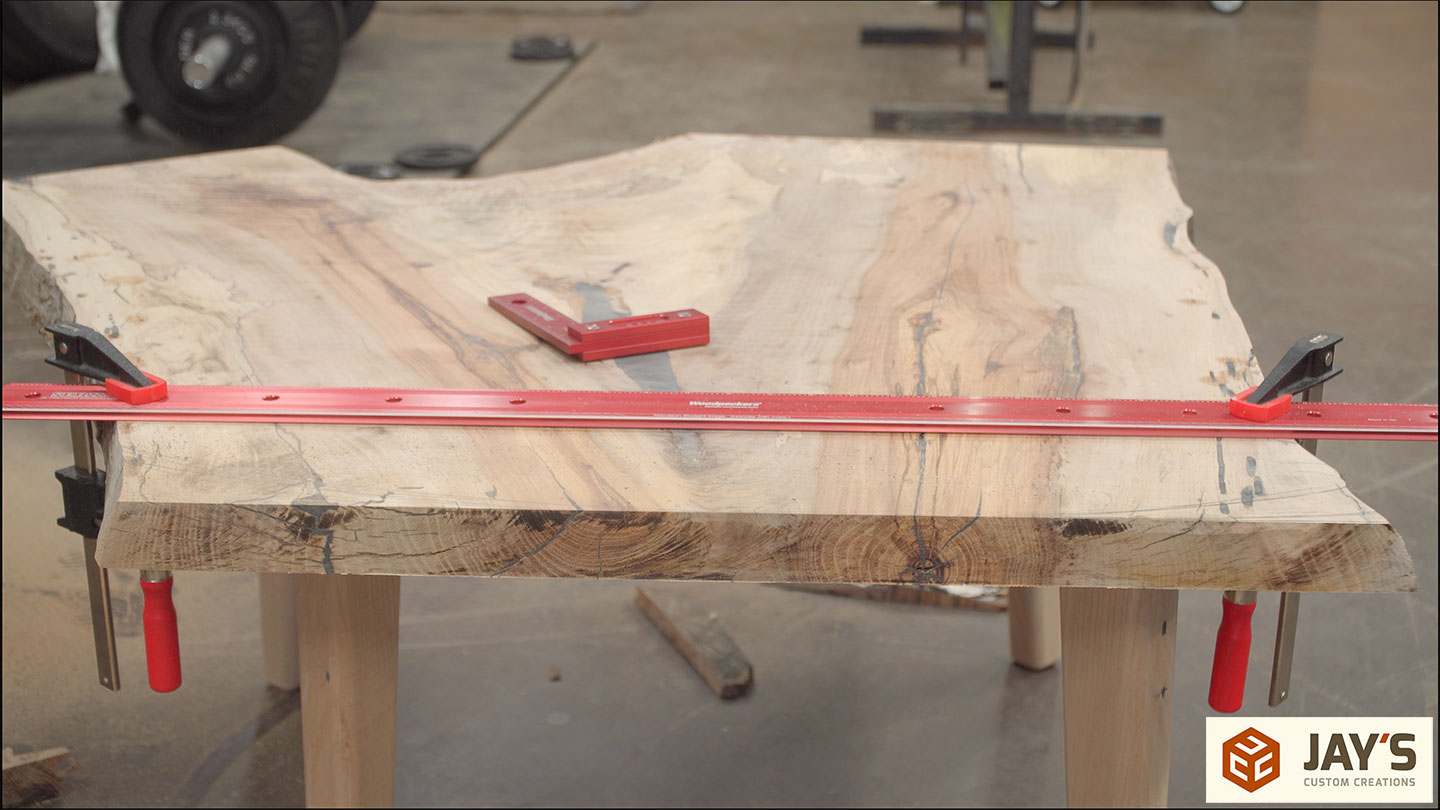
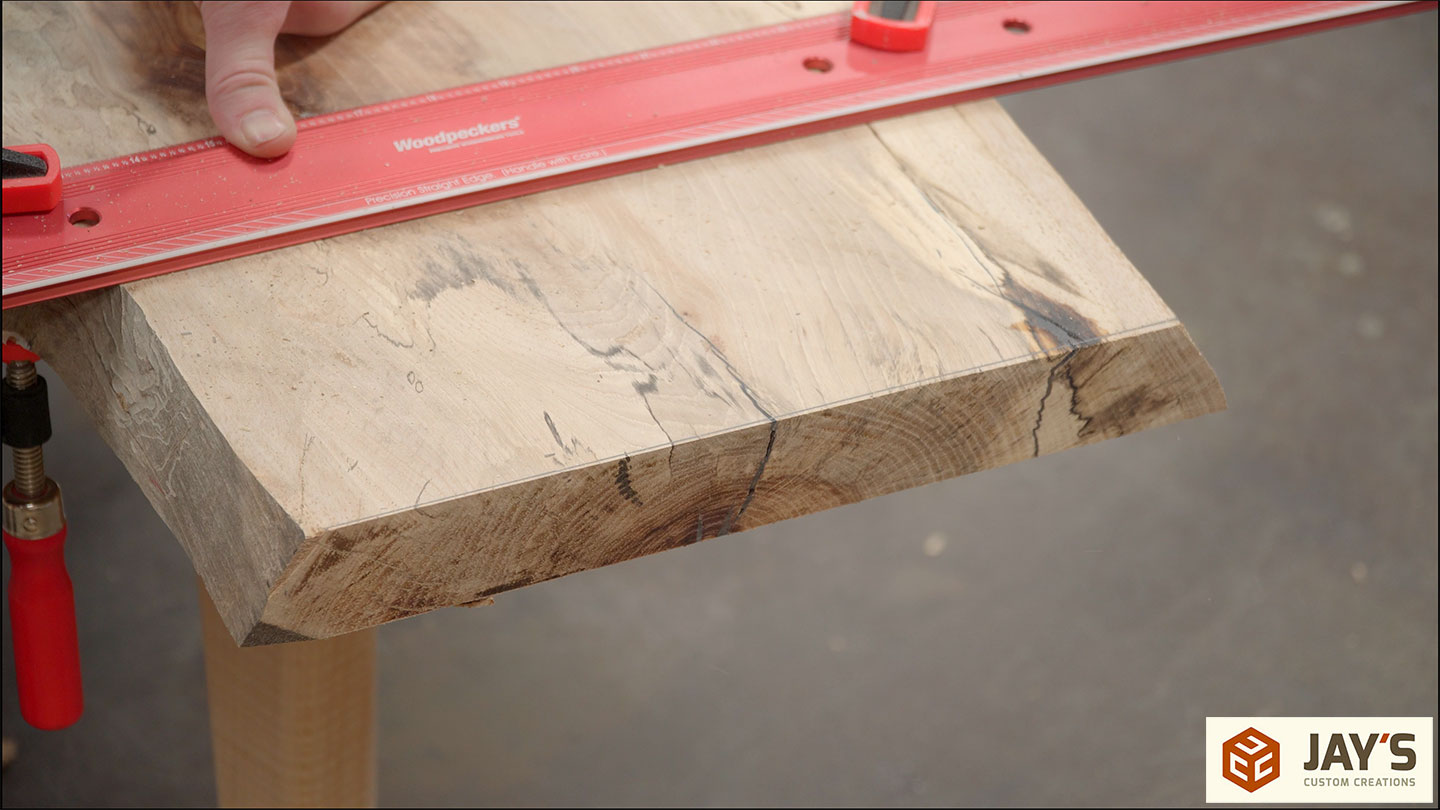
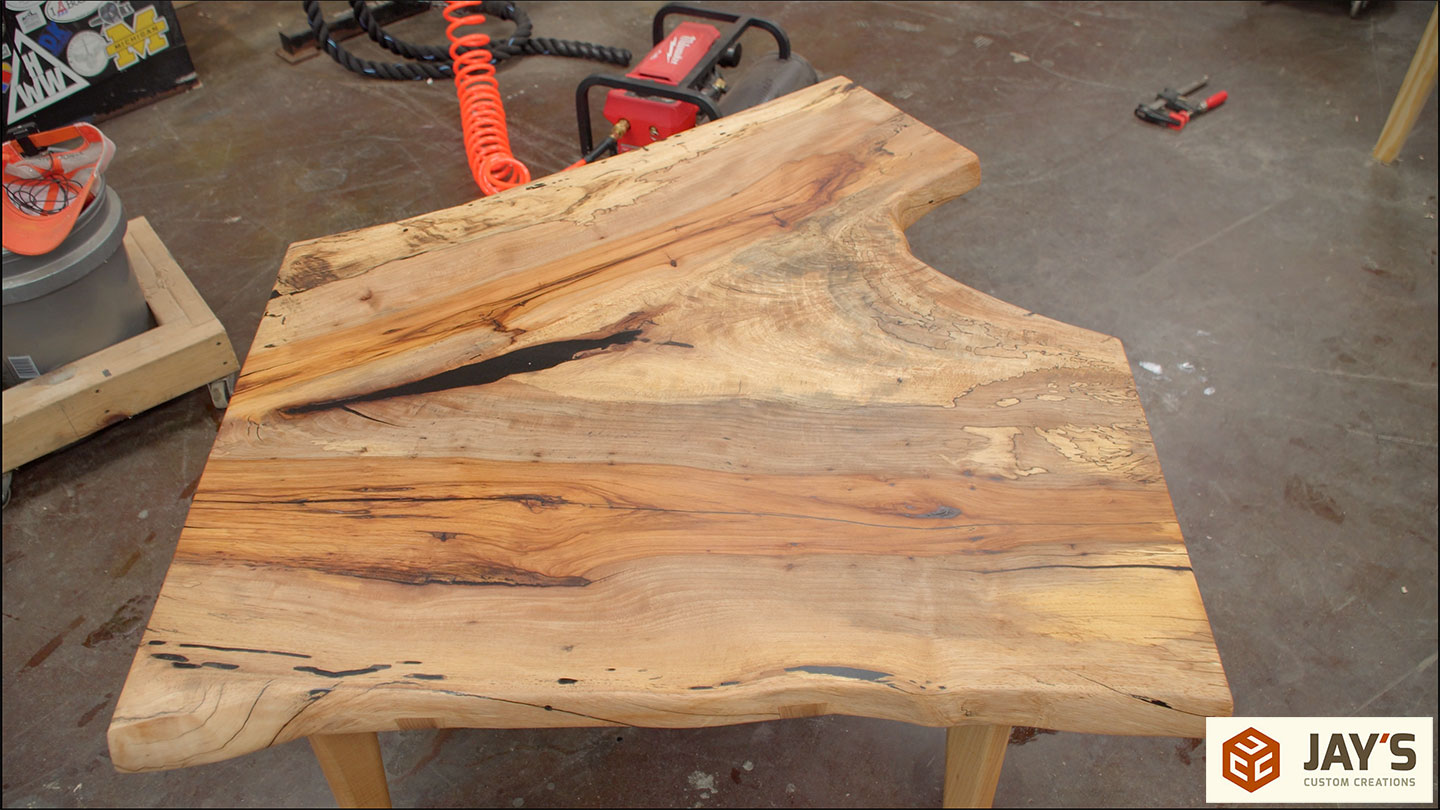
The first detail was to cut the three ends of the slab to their final length. On the very first cut, I revealed a few internal defects that didn’t get filled in the previous steps. Yay! More epoxy work! Luckily, the second and third cuts didn’t reveal much.


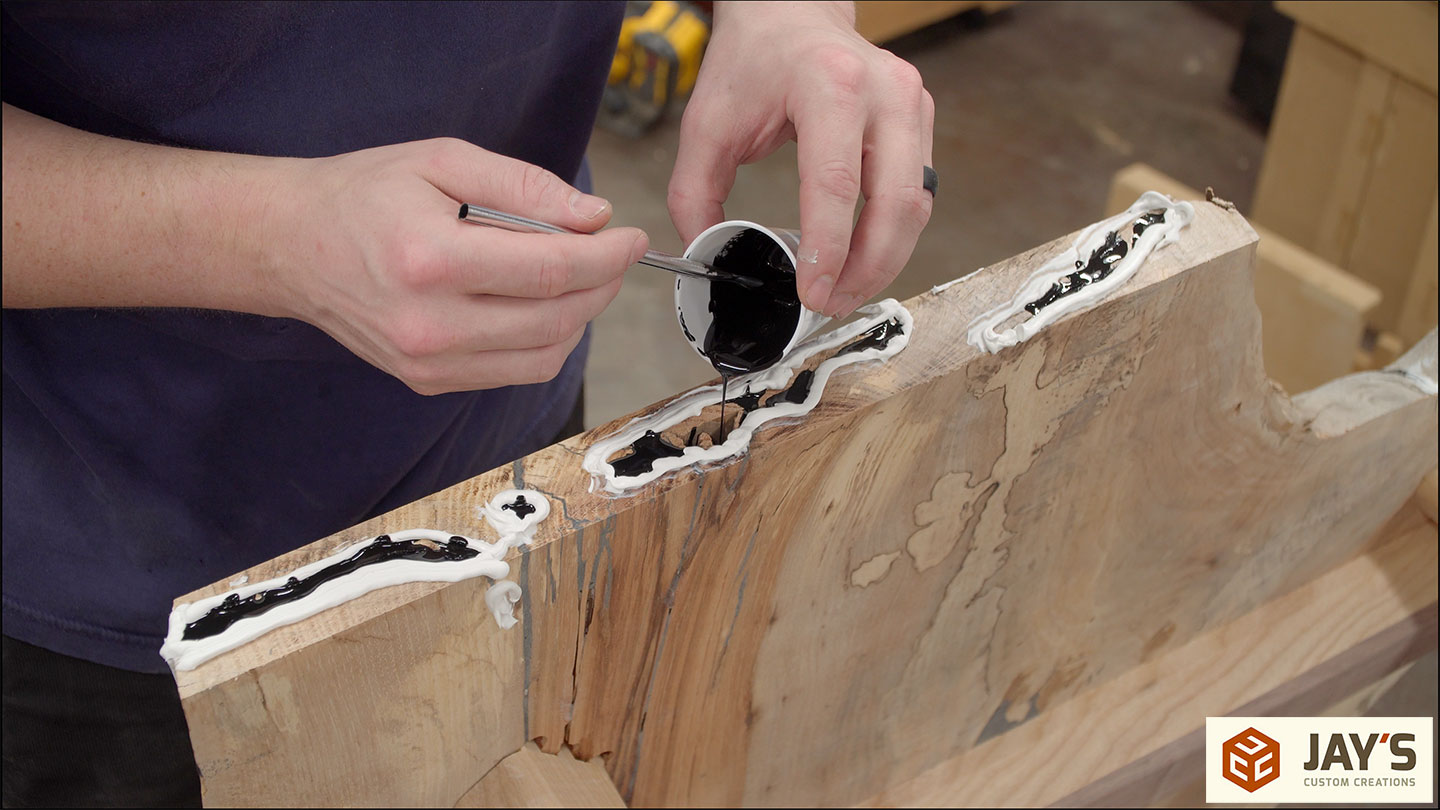
Time to pause once again and fill the exposed areas with more epoxy.
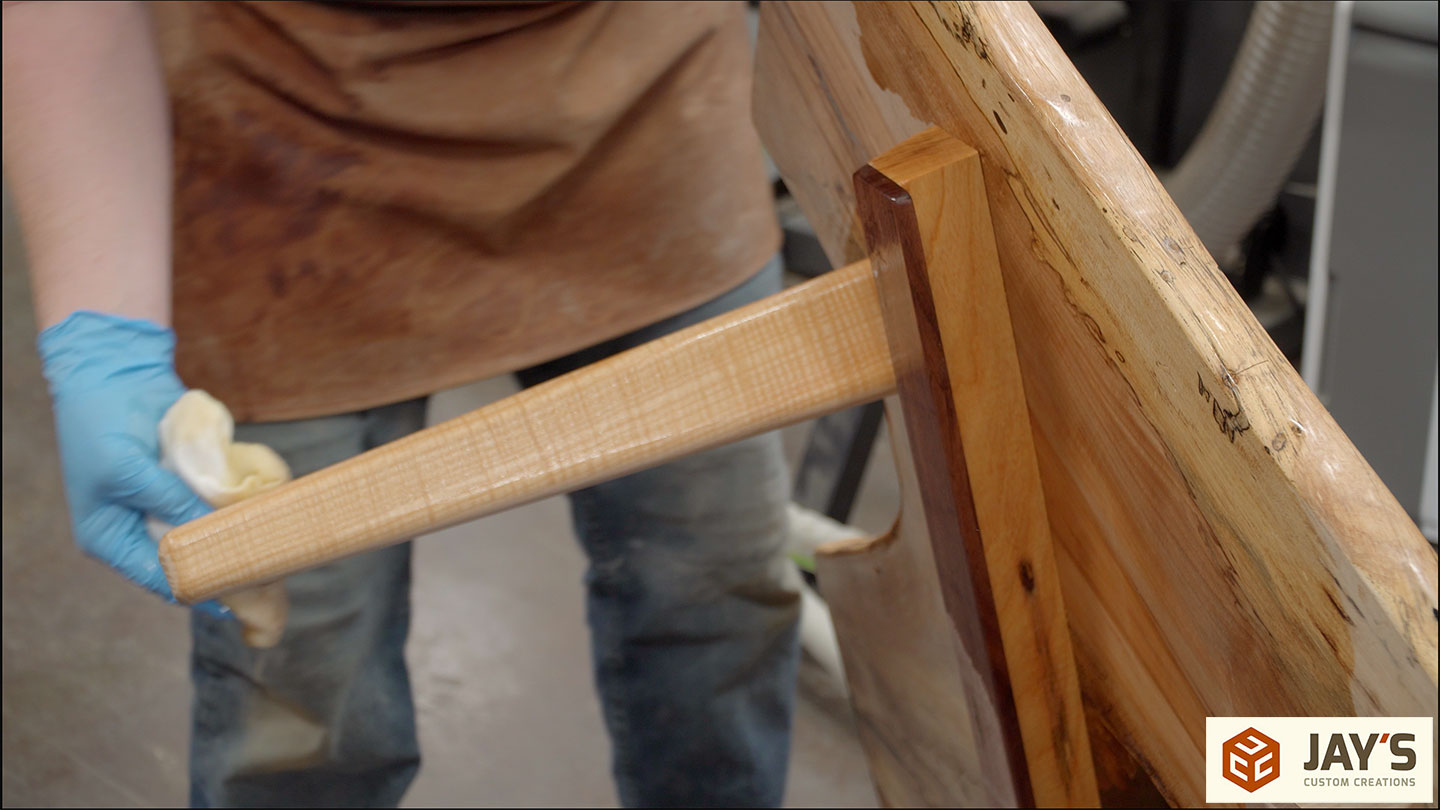
After another night of letting the epoxy cure, I was able to start cleaning up the edges. I have a Rotex sander that can remove material soooo fast. Add the foam contour pad and it’s a perfect tool for stripping the slab edges while still maintaining a natural edge look.


Even the end grain dovetail plugs are no match for the sander. It’s just such a time-saving tool.
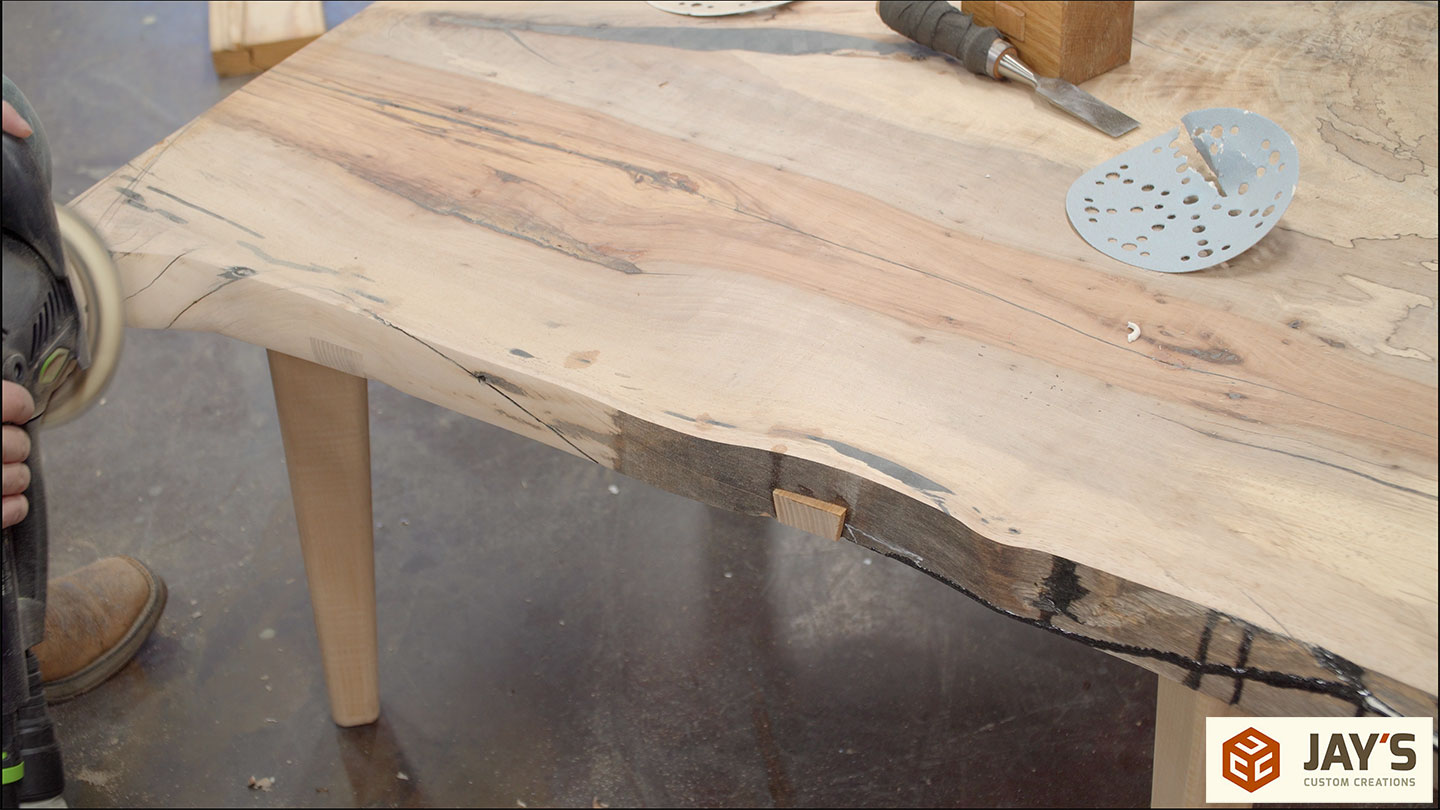
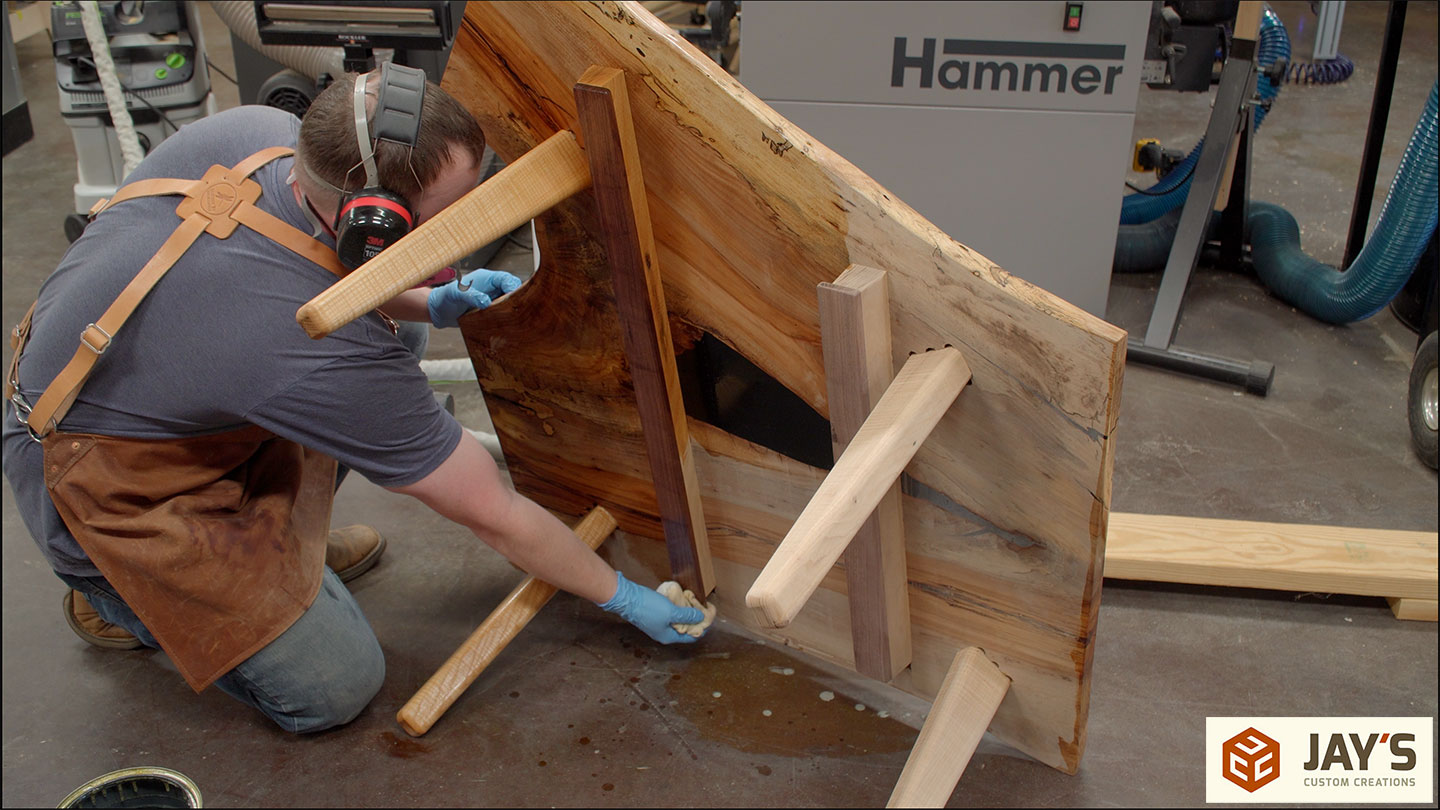
For the top, I switched out the contour foam and stock medium density pad for a hard density pad. The hard density pad does a better job of keeping the surface flat and preventing any minor dishing from softer areas being removed faster.
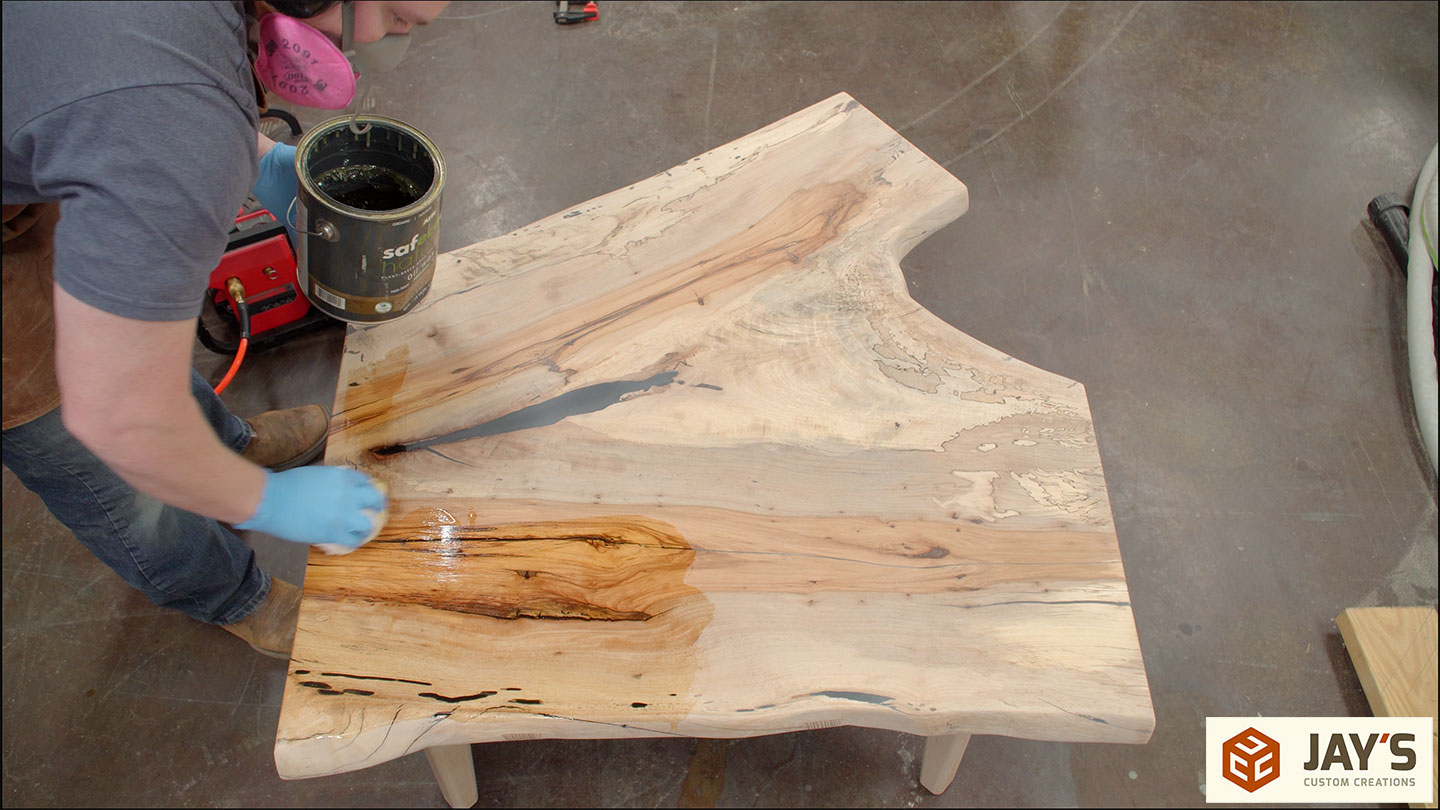
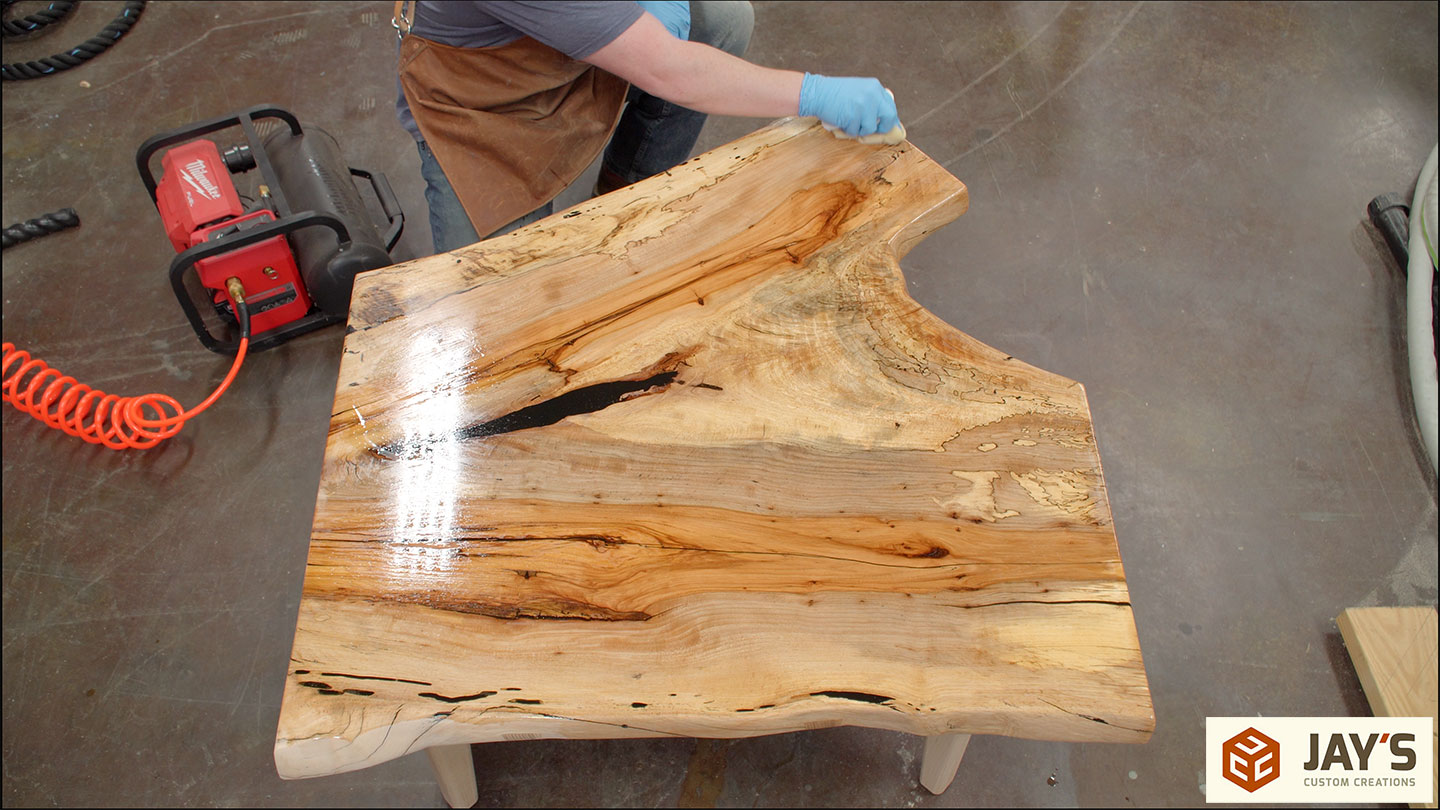
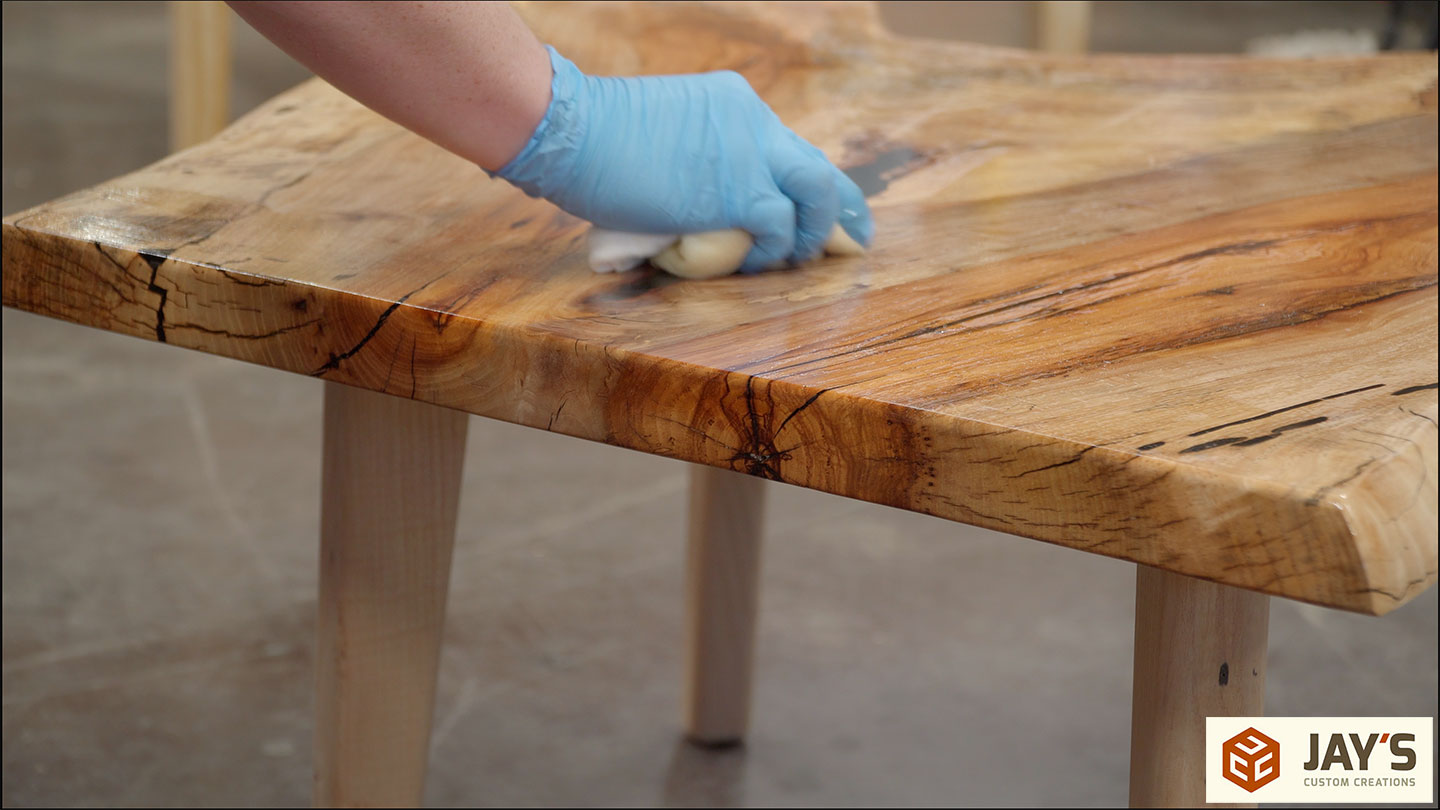
Finally, a finish can be applied. My go-to finish for the past year or so has been a basic oil/wax finish. It’s not incredibly durable but it’s incredibly repairable for refinishing or touchups down the road. Also, I’m not sure how well it’s showing up after applying the finish to the top I noticed I didn’t do a good enough job sanding and still had some of the milling marks from the CNC work. So I had to sand off half of the finish on the top, get rid of the marks, and reapply the finish.
The drawer got the same treatment as well. I like how simple how the whole drawer system turned out.
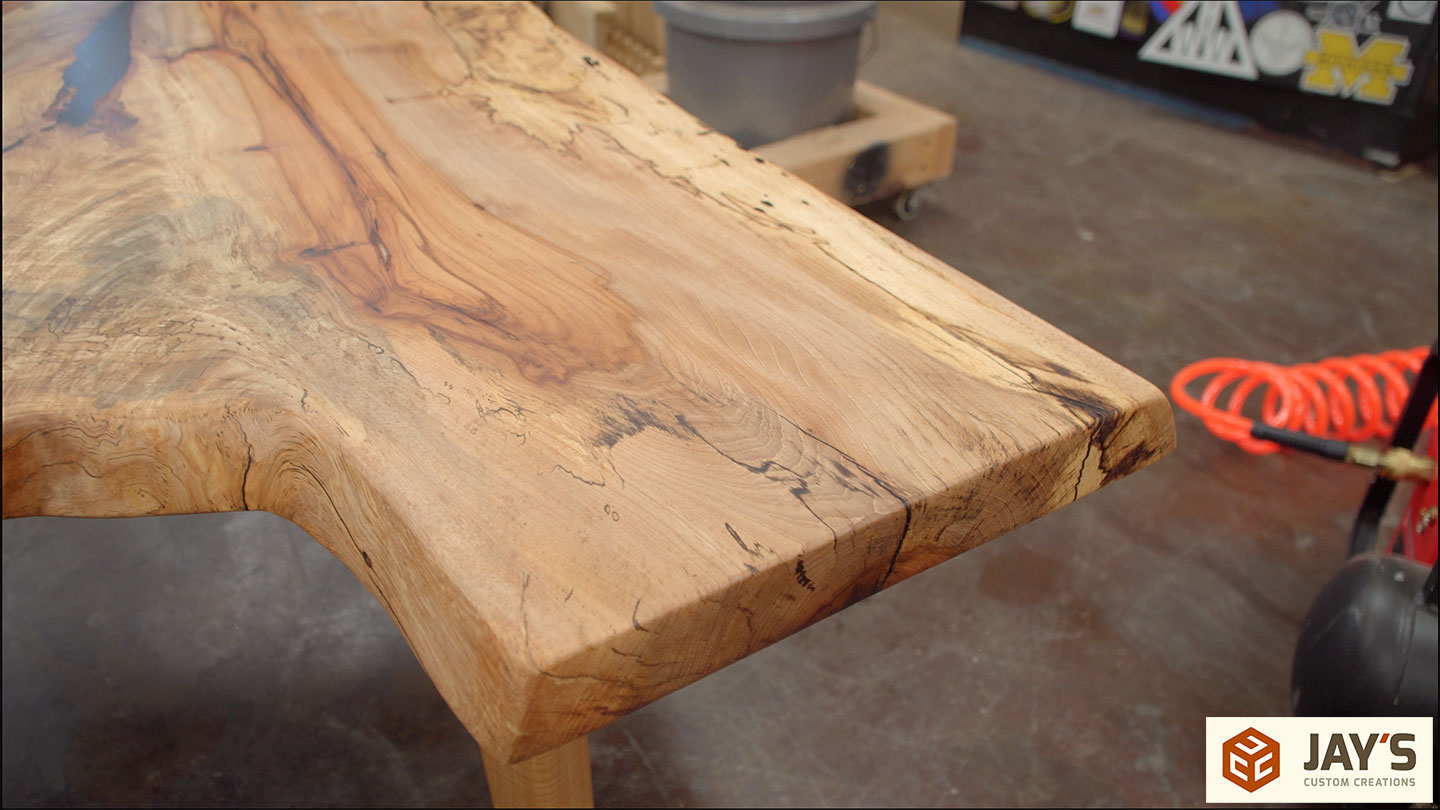
Here are a few close-ups of the table. There’s not much to say about it as the wood speaks for itself. There’s a lot going on. Some spalting here and there, curl and compression features in the crotch section, the larger cracks stabilized and highlighted with the black epoxy, and the bark inclusion filled with the epoxy as well. There’s so much naturally going on with the slab and now that it’s finished I’m really glad I didn’t distract from that beauty by making the leg tenons through tenons.
I’m staying up one night while on vacation to post this and realized I forgot to transfer the final images in my living room on this laptop. So to see it in place and see how well it fits the space check out the end of the video. That’s it for this one. Take care


Nice article. The table looks fantastic. 375,000 days later and you still look as young as your silent double. Great job Jay
Another amazing build!
Thank you for sharing your hard work and dedication to this craft!!
Another awesome end product. Thanks for the tips and providing an informative as well as entertaining video. I really enjoyed the CNC aspects of this build. Be well.
Love these soup to nuts videos! I can only imagine how tedious it must be to document and narrate every step. Excellent technique descriptions make it seem as though us weekend wood butchers could undertake some of the projects.😂
Thanks again.
Another awesome project Jay…a one of a kind table! Thanks for the video. Full of great tips and tricks.
Another beautiful project!
Always a pleasure to find a JCC notification alert in my que on a lazy Sunday morning. Thanks for posting.
Happy wife, happy life.
Hi Jay, I think your table is fantastic. Well done.
I wouldn’t normally comment on peoples spelling but when I was reading through the various steps you took to complete the table, I saw something that made me smile so I hope you won’t mind me pointing it out. You used the word damn and also dam. The first is a derivative of the word damnation (which almost seemed appropriate considering you had just made blunder with the resin, which is why it made me smile). The other spelling is correct for something such as a dam at a lake, reservoir or for holding back resin.
My apologies if you think I’m just being petty.
Kind regards
Graham
Thank you for the thorough details.
What a beautiful piece after all that work. Your design and build process is another art you have mastered to perfection. The C&C work you have done has reincarnated your work process and is very enjoyable to watch even though I’ll probably never get into it. Thanks for sharing all the details. Jim
Very nice mate, spot on.