In this tutorial, I will show you how to build a bench and a couple of side tables. However, in the video tutorial, I will only be building the bench. The tables are pretty self-explanatory and I had no need for them at the moment so I did not include them in the video build. The bench utilizes pocket holes to secure the slats with no visible screw heads. Don’t worry if you do not have a pocket hole jig. The slats can simply be screwed down from the top as well. I have included a picture near the end of this article to show you the bench without pocket holes.
Click here to download a .zip file containing the SketchUp file for this bench.
What You’ll Need:
- Eight 8′ 2x4s
- 24 2-1/2″ outdoor screws
- 21 2-1/2″ outdoor pocket hole screws
- Outdoor wood glue
- Miter saw or hand saw
- Drill
- Pocket hole jig
Step 1:
The first step is to cut all of your pieces according to the materials list. You can make every cut with either a hand saw, circular saw, or in my case a miter saw.
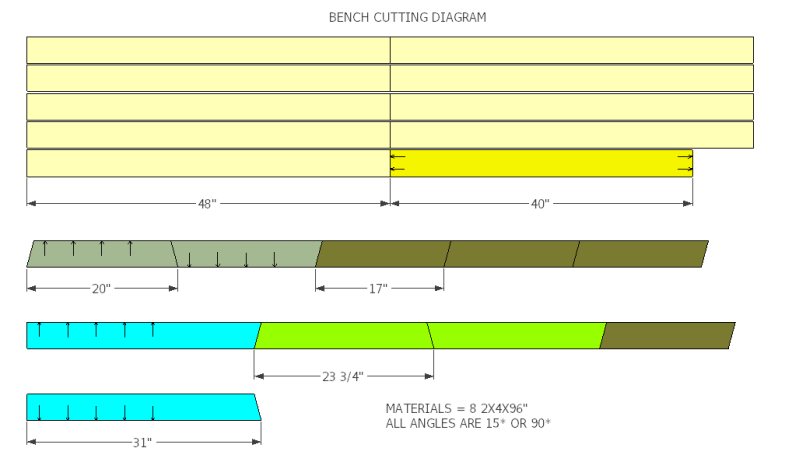
With all the pieces cut, arrange them so that the good side is down. We will be building from the inside out to minimize the appearance of screw heads.
Step 2:
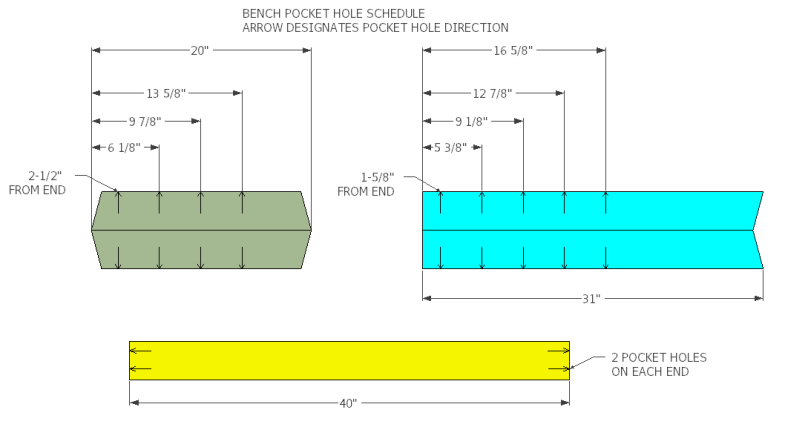
To further reduce the appearance of screw heads we can cut pocket holes with a Kreg Jig on the upper horizontal leg pieces (20″) and the back supports (31″). You can locate the pocket holes using the included diagram. Remember to flip the cuts for the left and right pieces so you don’t end up with two left legs. You can skip this step if are going to secure the slats from above with screws.
Step 3:
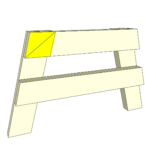 The legs are assembled with the horizontal members on top. Start with securing the 20″ piece to both legs first. When these pieces intersect they form a parallelogram. Be sure to put your 2-1/2″ outdoor screws along the long diagonal of this parallelogram as shown with this small image to the left (disregard the colors of this image). This will provide greater support. Use glue and two 2-1/2″ screws at every joint. Use another piece of 2×4 as a spacer to locate the lower horizontal member (23-3/4″).
Step 4:
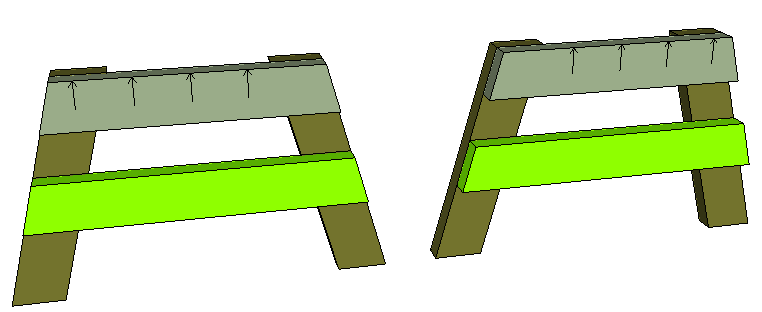
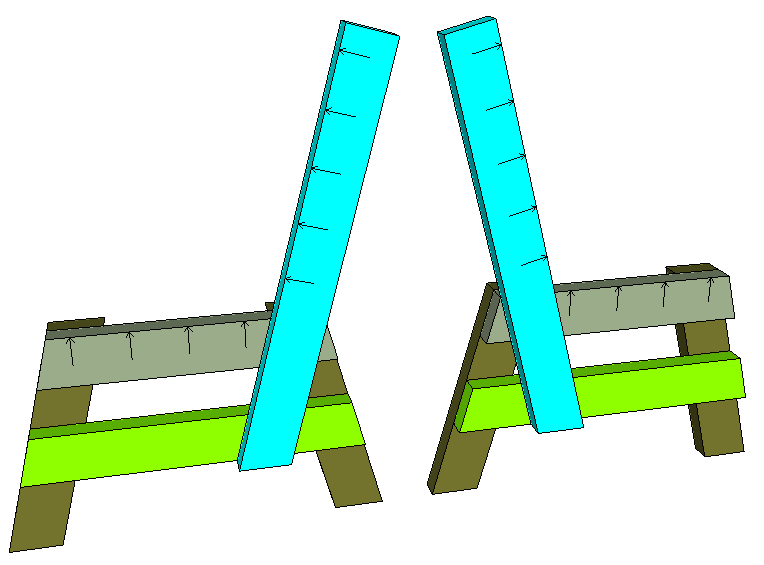
Next, attach the back supports so that they intersect the top corner of the leg assembly and are flush with the bottom of the lower horizontal leg member. Make sure that you do not overlap any pocket hole locations and that all of the pocket holes face the inside of the bench. Each overlapping parallelogram gets glue and two screws along the long diagonal. It is also important to make sure these are attached at the same angle. I always secure one all the way and start with one screw on the second assembly. This way I can place them on the ground and make a slight adjustment if needed. Then finish securing the second back support.
Step 5:
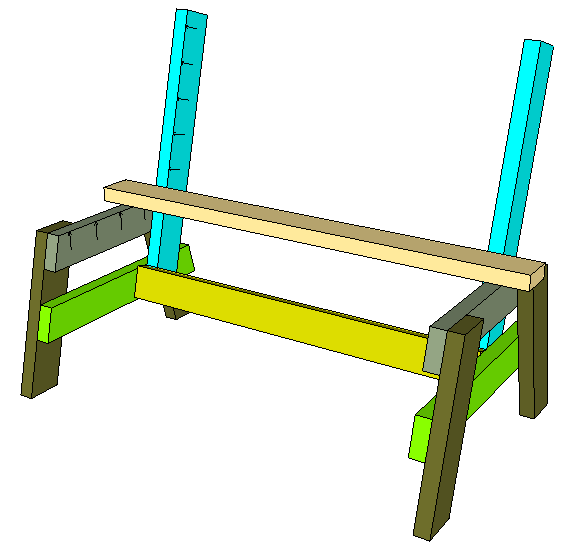
The 40″ seat stretcher is attached next. This piece connects both leg assemblies together. If you did not use pocket holes you can use two 2-1/2″ outdoor screws to attach directly into the lower part of the back supports. If you used pocket holes make sure you position the board so that the pocket holes are in the back.

Step 6:
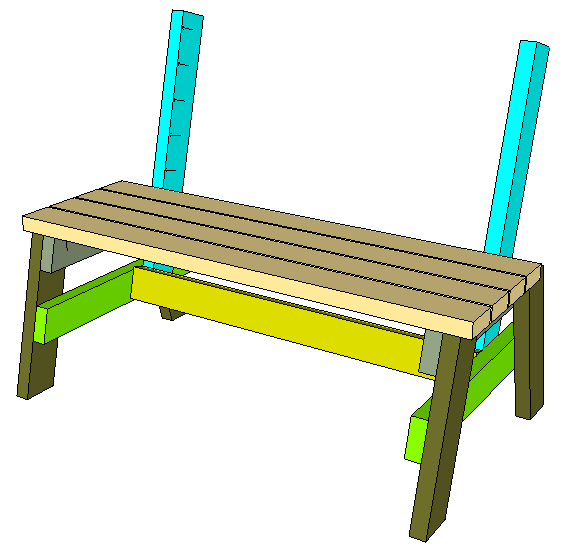
I always attach the back seat slat first. Make sure the good side is visible on all of your slats. Push it all the way against the back supports and attach it with glue and screws. If you are using pocket hole screws like me this first slat will be a little tricky to secure. I had to lift the leg assembly slightly and use a 6″ extension for my drill to be able to screw it down. The rest of the seat slats are secured the same way. I designed this bench so that you could use a standard wood pencil as a spacer in between slats. If you don’t have one handy, the gap is 1/4″ between slats.
Step 7:
The back slats are secured the same way. However, I always increase the spacing between the seat and the first back slat just slightly. I use a permanent marker for my first spacing here (about 1/2″). Then I use the pencil again to space the rest of the back slats. I think it just flows a little better this way.
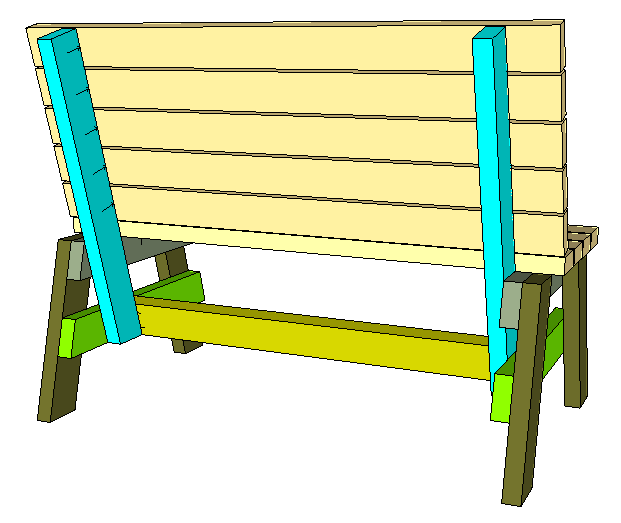
That’s it for the bench. And here is the completed result. Nice and clean…


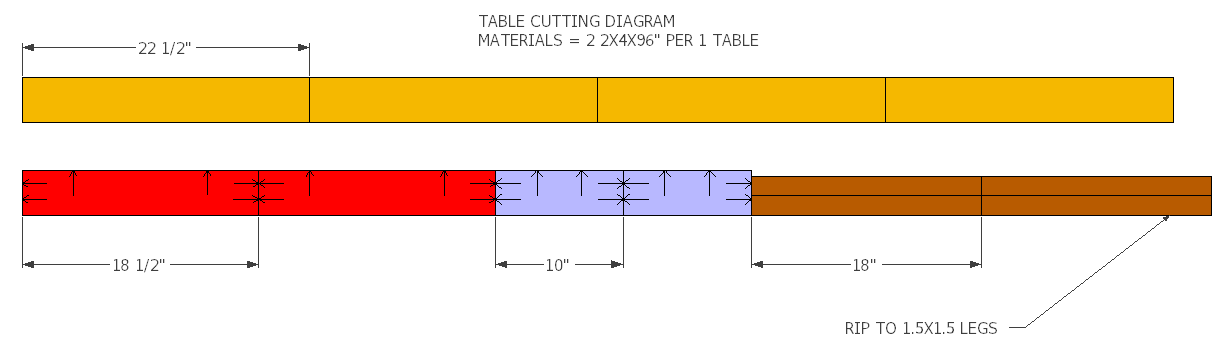
2×4 Side Table
In the video, I only built a bench but here I want to include the instructions to build a couple of side tables as well. These tables are very easy to make. You will need to use a pocket hole jig for this table. The table will go together pretty fast. Here’s what you need for each table:
- Two 8′ 2x4s
- 24 2-1/2″ pocket hole screws (Kreg Blue-Kote)
Step 1:
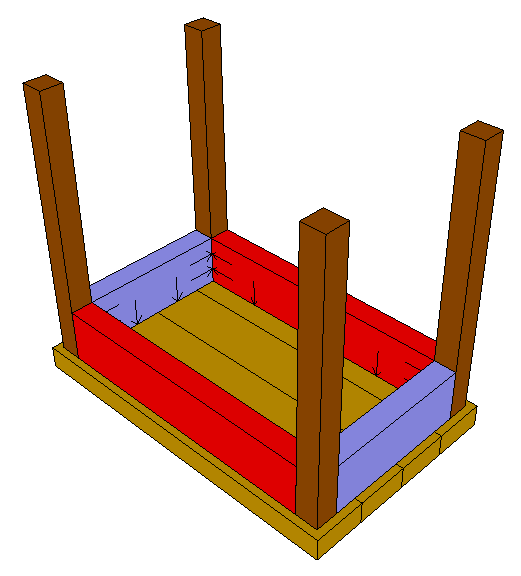
Cut all of your pieces according to the cutting diagram. To make the legs you will have to make two rip cuts with either a table saw or a circular saw.
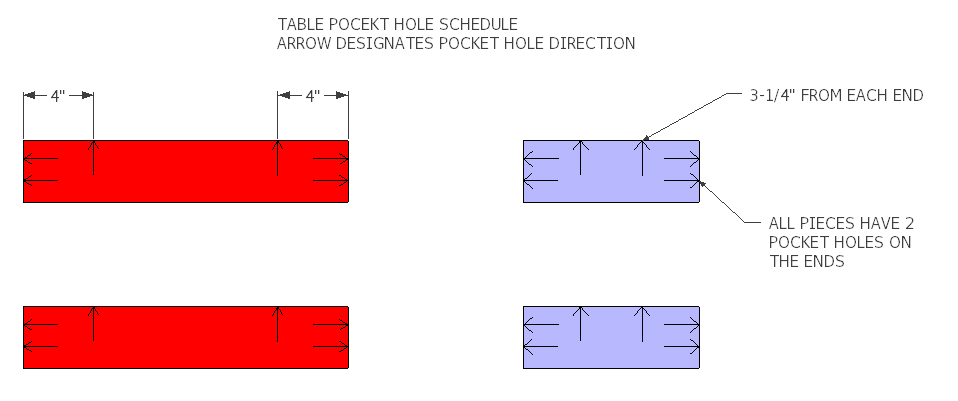
Step 2:
Next, drill all of your pocket holes according to the included diagram.
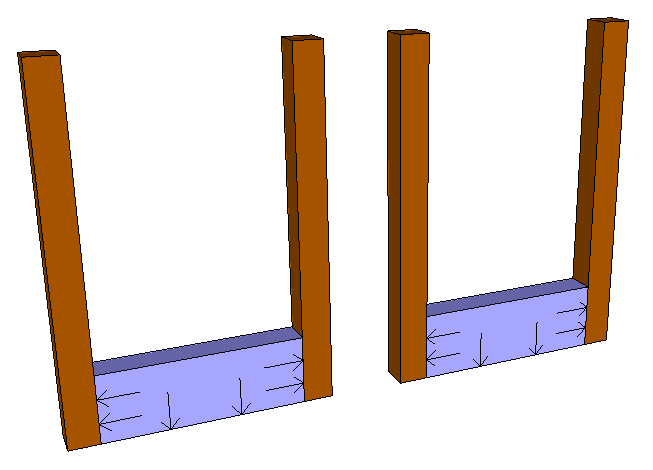
Step 3:
Assemble the short side of the table first. It will be impossible to get a drill in here if you start with the long sides.
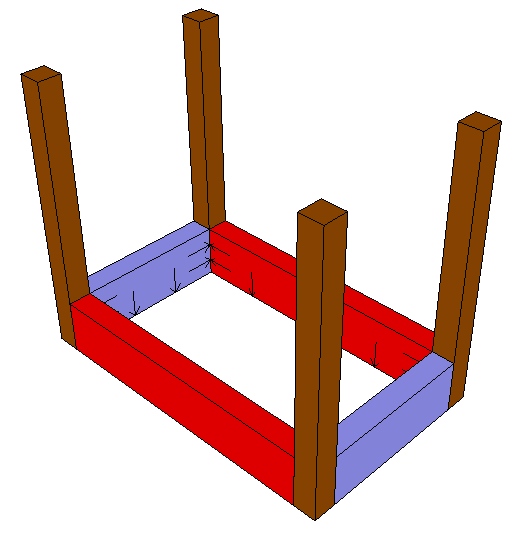
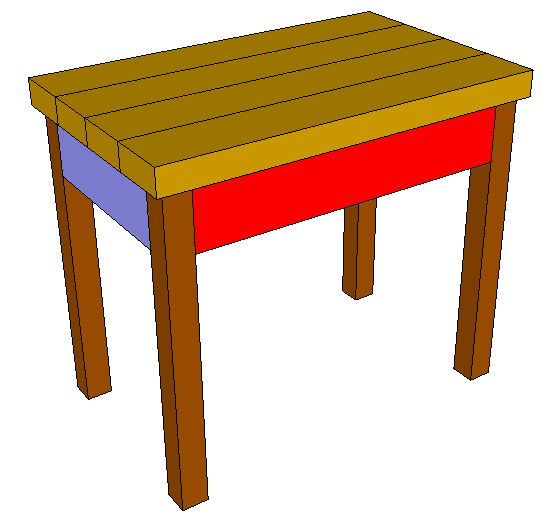
Step 4:
Connect both short sides by attaching the longer sides.
Step 5:
Lay your slats out with a good side facing down and attach your frame to the slats. If you followed the pocket hole schedule you will use two pocket hole screws in each slat. You can add spacing if you like but I have never had a problem without a spacing.
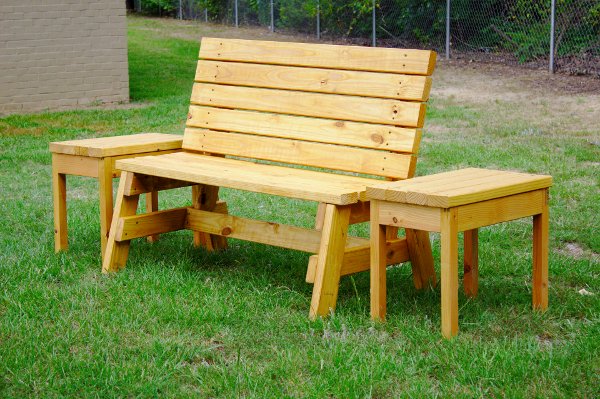
 That’s it. I hope you can make this project, with or without the tables. Here is an example of a set I made with the tables and without pocket hole screws. I secured the slats from above with regular outdoor screws.


Comments are closed.