Part 1: Designing a Contractor Trailer in SketchUp
Part 2: Contractor Trailer Toolbox: Cutting and Assembly
Part 3: Custom Contractor Trailer Walkthrough
In this video, I walk you through my process for a large project design. Here are the main points:
- Get as many required dimensions on paper before starting. I had the contractor make a list of all his larger tools and the rectangular volume of space that each one would take up before we got together for the design.
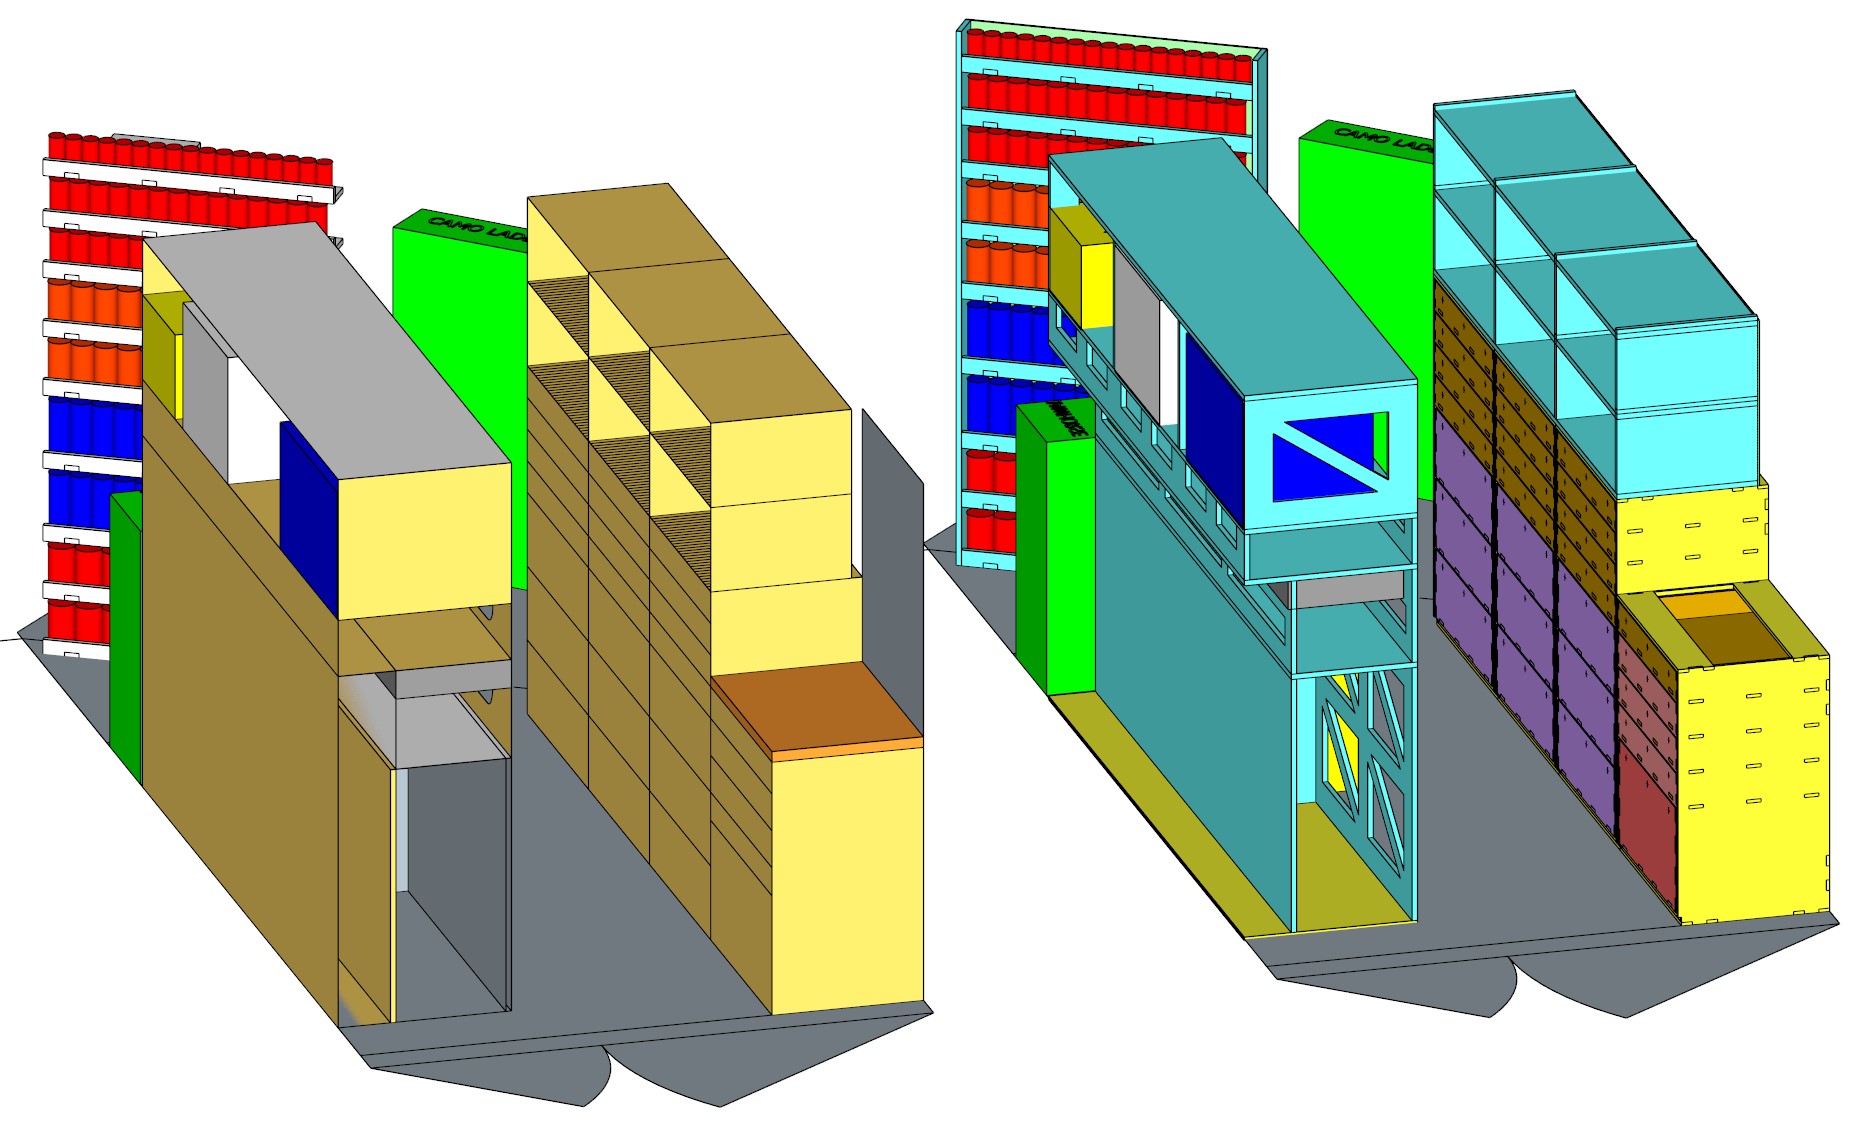
- When working out the overall design with someone else, just focus on wireframe models. Of course, mentally take into consideration the space needed for material thickness. Just don’t worry too much about it until an overall design is determined. Normally there are a lot of changes and moving around and if you spend the time modeling every little detail at first then you waste an even more amount of time when you have to do that over and over again.
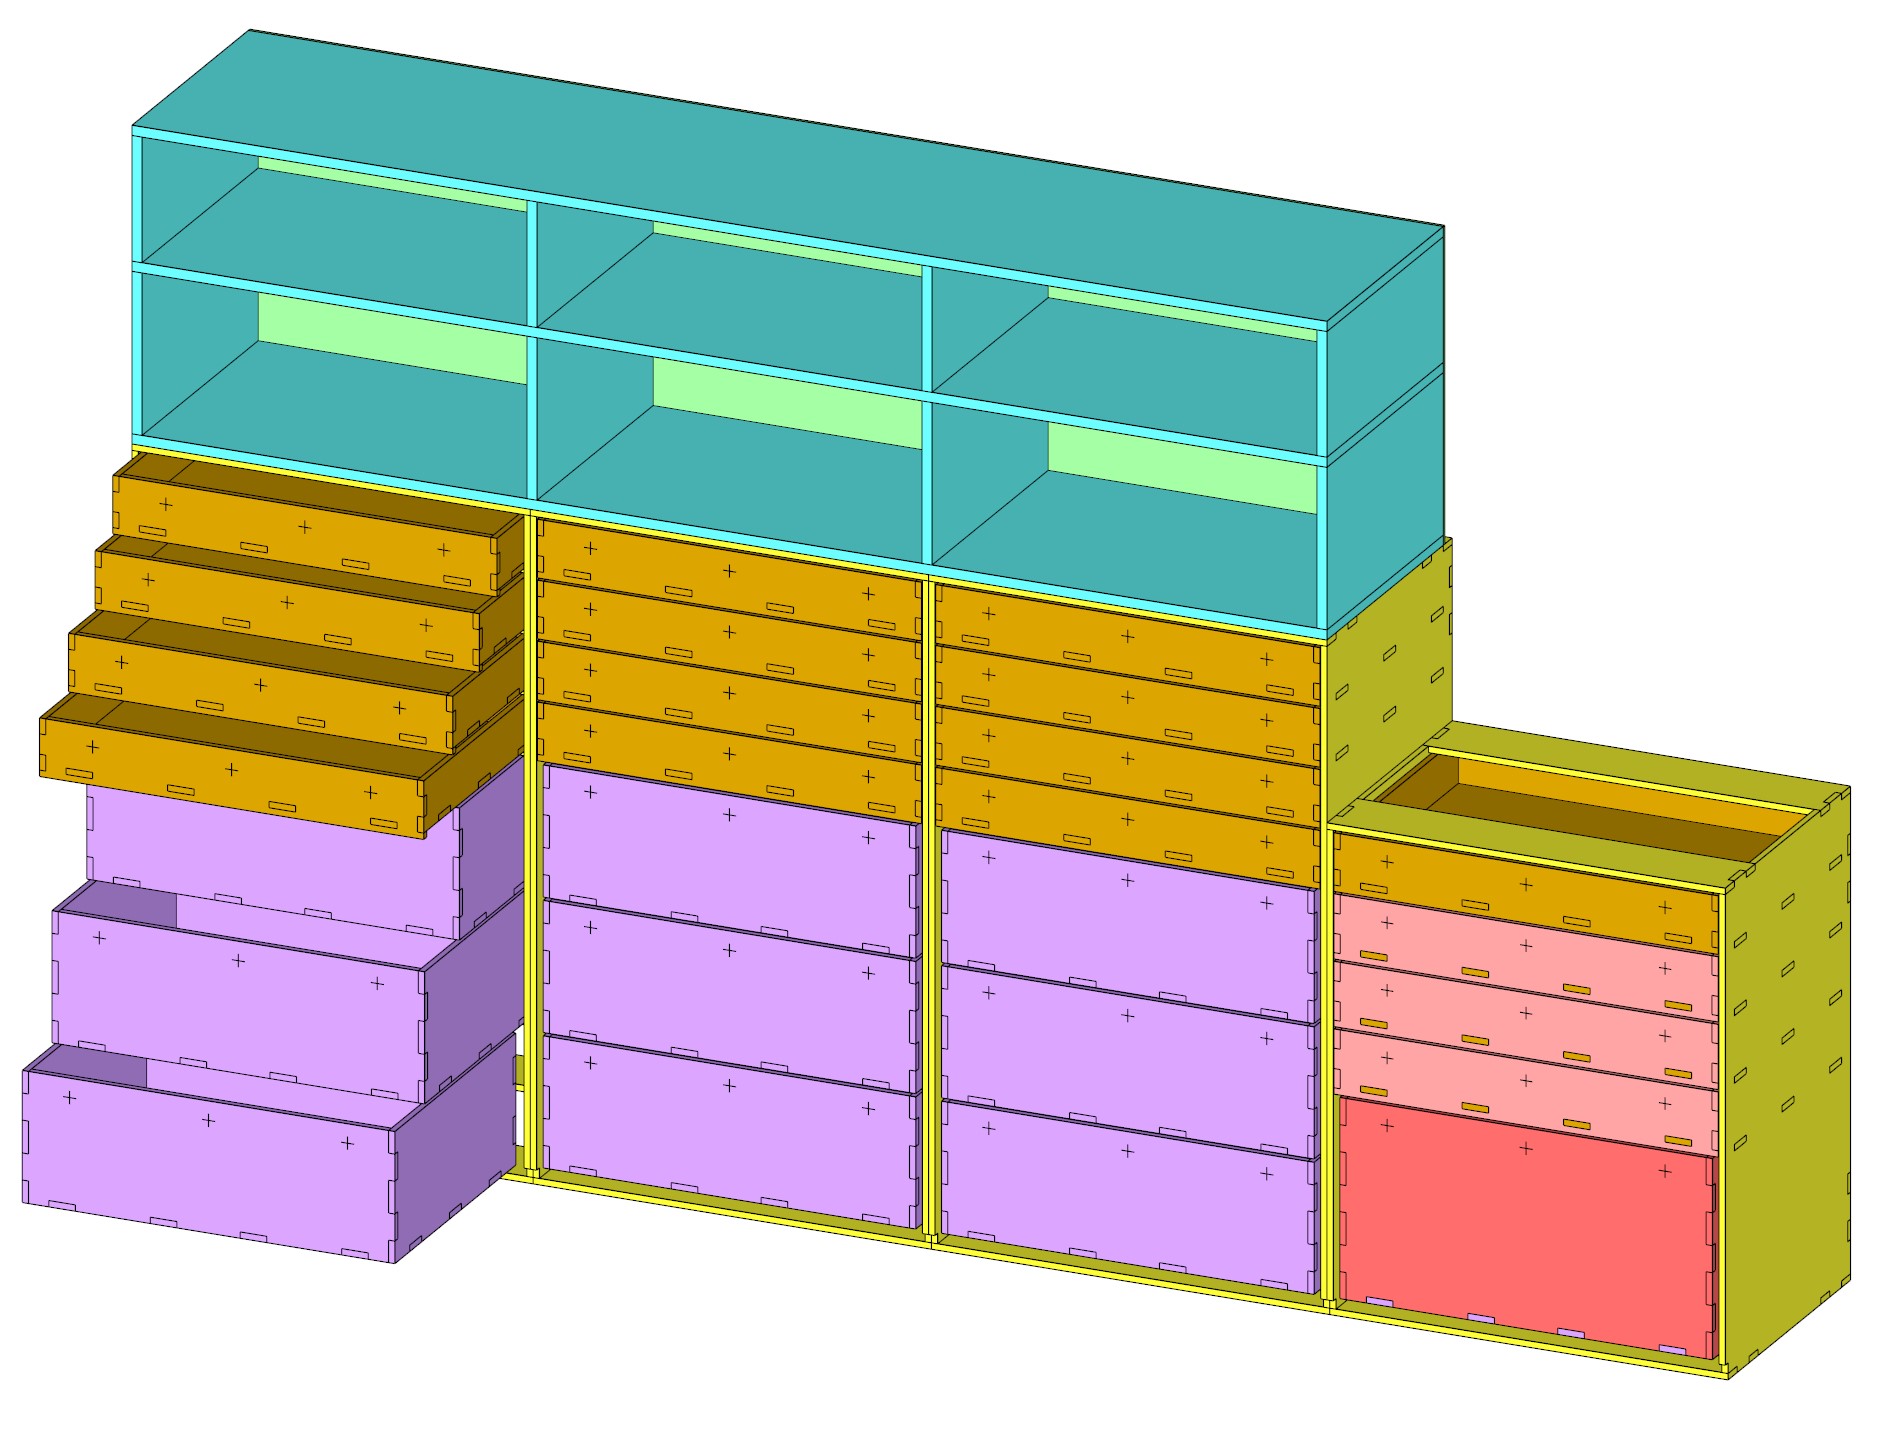
- After the design is settled upon, take the wireframe and turn it into actual pieces of the assembly.
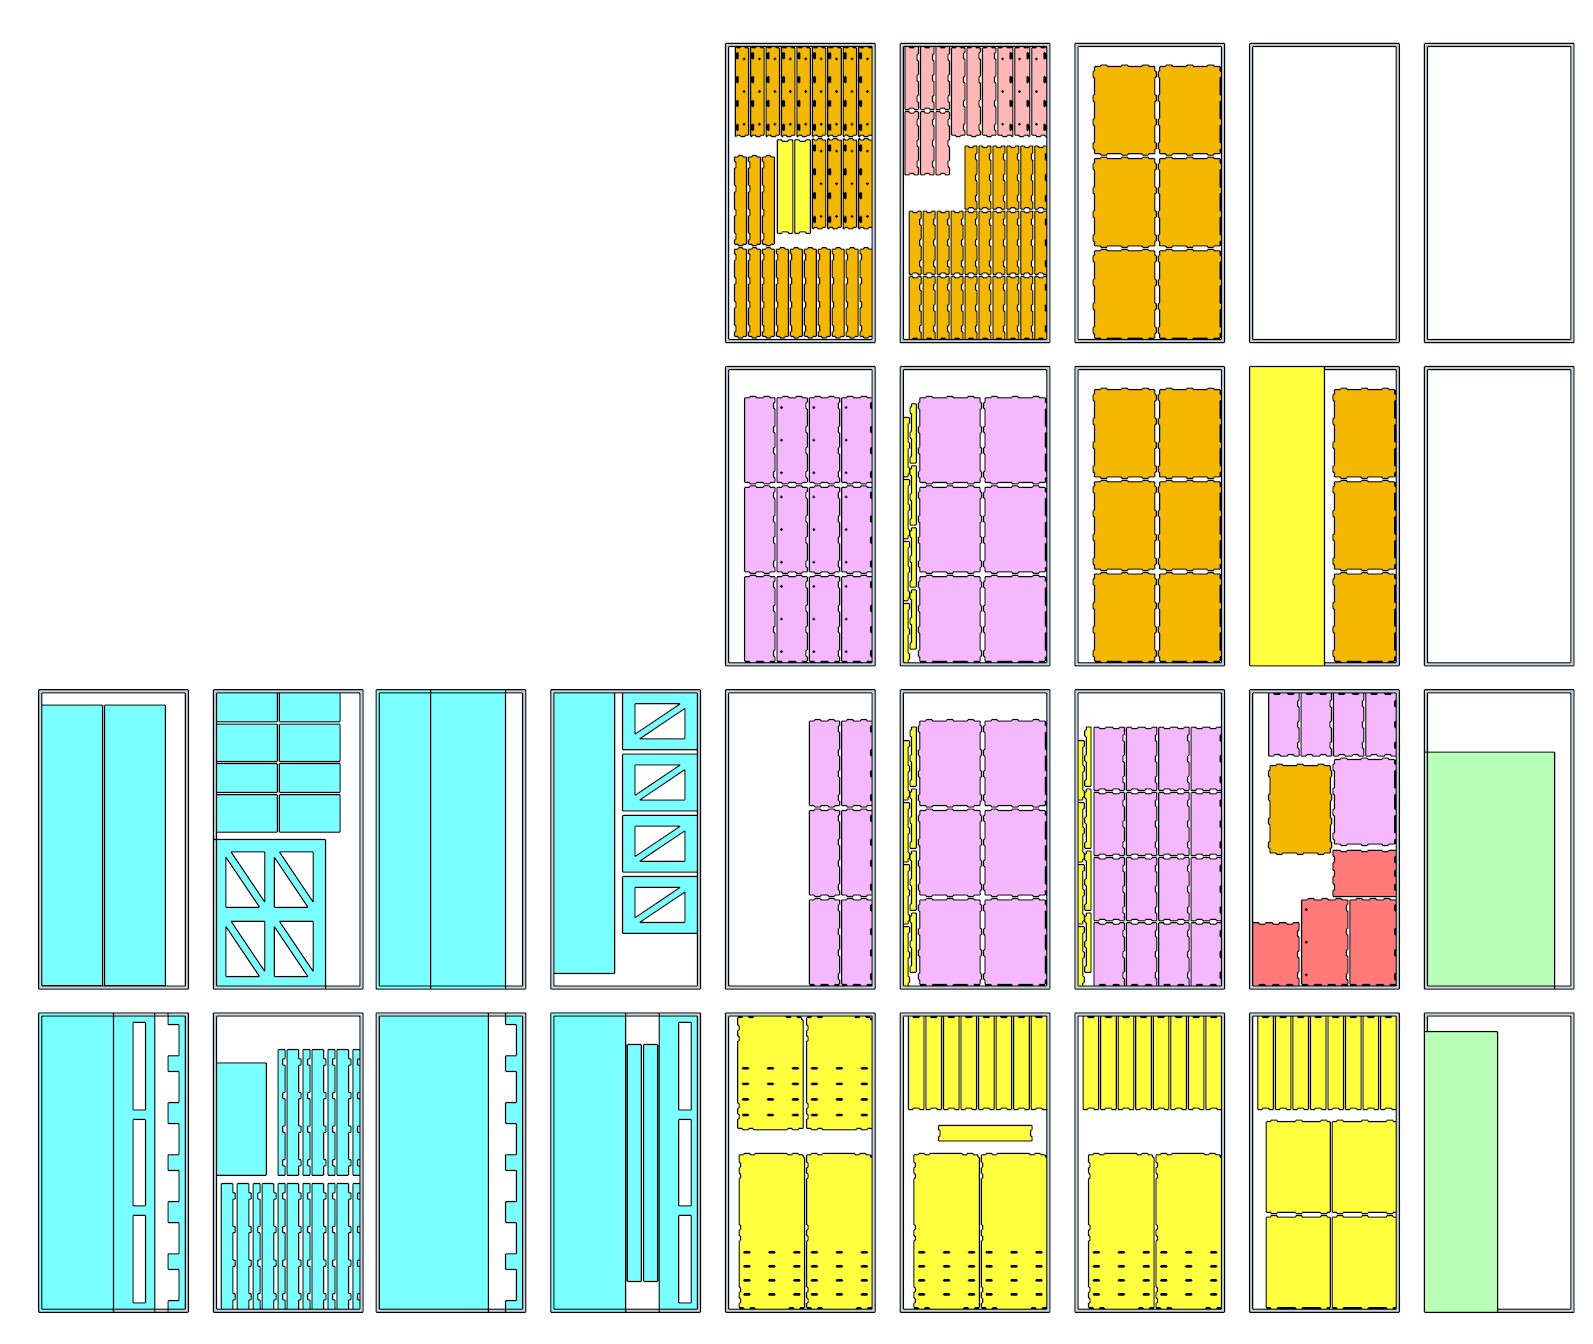
- Everything after that is based upon if the project will be cut on a CNC or with traditional tools. If traditional tools are used I like to create multiple scenes that I can print off and write on for reference. If a CNC is used I like to copy the model and lay all of the parts flat on 4×8 rectangles to make my own nest. Some CNC designs allow for use of nesting software, such as VCarve Pro, but not all. In this case, I wanted complete control of what parts went on what sheets of plywood so the contractors could start assembling as soon as possible.
- One last point to make, that I didn’t in the video, is to make many revision copies of the file along the way. This way you can go back to a previous state in the project even after closing the file. This strategy of saving many revisions of the same file has saved my bacon many times. Typically I add a version number to the end of the file. Just when you think you’re done, you make more changes. My file folder may end up like this:
bens_trailer_v1.skp
bens_trailer_v2.skp
bens_trailer_v3.skp
bens_trailer_v4.skp
bens_trailer_v5.skp
bens_trailer_v6.skp
bens_trailer_v7_ADDED_TOOLS.skp
bens_trailer_v8.skp
bens_trailer_v9.skp
bens_trailer_v10_FINAL.skp
bens_trailer_v11.skp
bens_trailer_v12.skp
Contractor Trailer Build – CNC AND SKETCHUP FILES
$9.99
Description
These are the SketchUp and VCarve Pro files I used to create a custom rolling toolbox for a local contractor. Odds are you won’t have the exact same trailer, because a horse trailer was used. However, I suspect the majority of people who purchase this file are doing so to use parts of it or for research purposes. You will receive a download link containing a .zip file. The .zip file contains the following files:

Download links expire for security reasons. Download your files immediately and save them to your computer for your records. If you have any trouble contact me and I’ll remedy the situation.


Tip from somebody who has been working with computers since the 1970’s:
Never include the word “FINAL” as the version in a filename.
Thanks Jay – very interesting
Great video, Jay~! Not necessarily a project that interests me, but yet another fantastic SketchUp tutorial~!! I always learn something from your CAD videos. Thanks much~!!
…also love the answer to the “why” question: “…because I have one and I want to.”
Best comeback ever~!! :-)