Have I mentioned how awesome my wife is lately? Well, she’s awesome. Very awesome. She recently bought herself an outdoor dinging table and chairs for our back porch as well as a new grill for me. Since then we’ve been spending a lot of time outside and enjoying the spring temperatures and cooking because, well, food is awesome too. Granted, most every night around this time of the year it rains but our front and back porches are both covered so we are still able to enjoy the outdoors. I’ve quickly realized that making four or five trips from the kitchen to the back porch to bring everything needed for a meal is quite a pain. A BBQ condiment tray should solve that.
I’ll call it a condiment tray but really it will hold anything needed such as mixing bowls, plates, or even my large pot of home made mashed potatoes, which seems to be a standard side item lately. Because the contents of the tray will probably change from meal to meal I wanted to make it large enough to accommodate everything. Large enough to cover all the bases but not too large to be incredibly cumbersome.
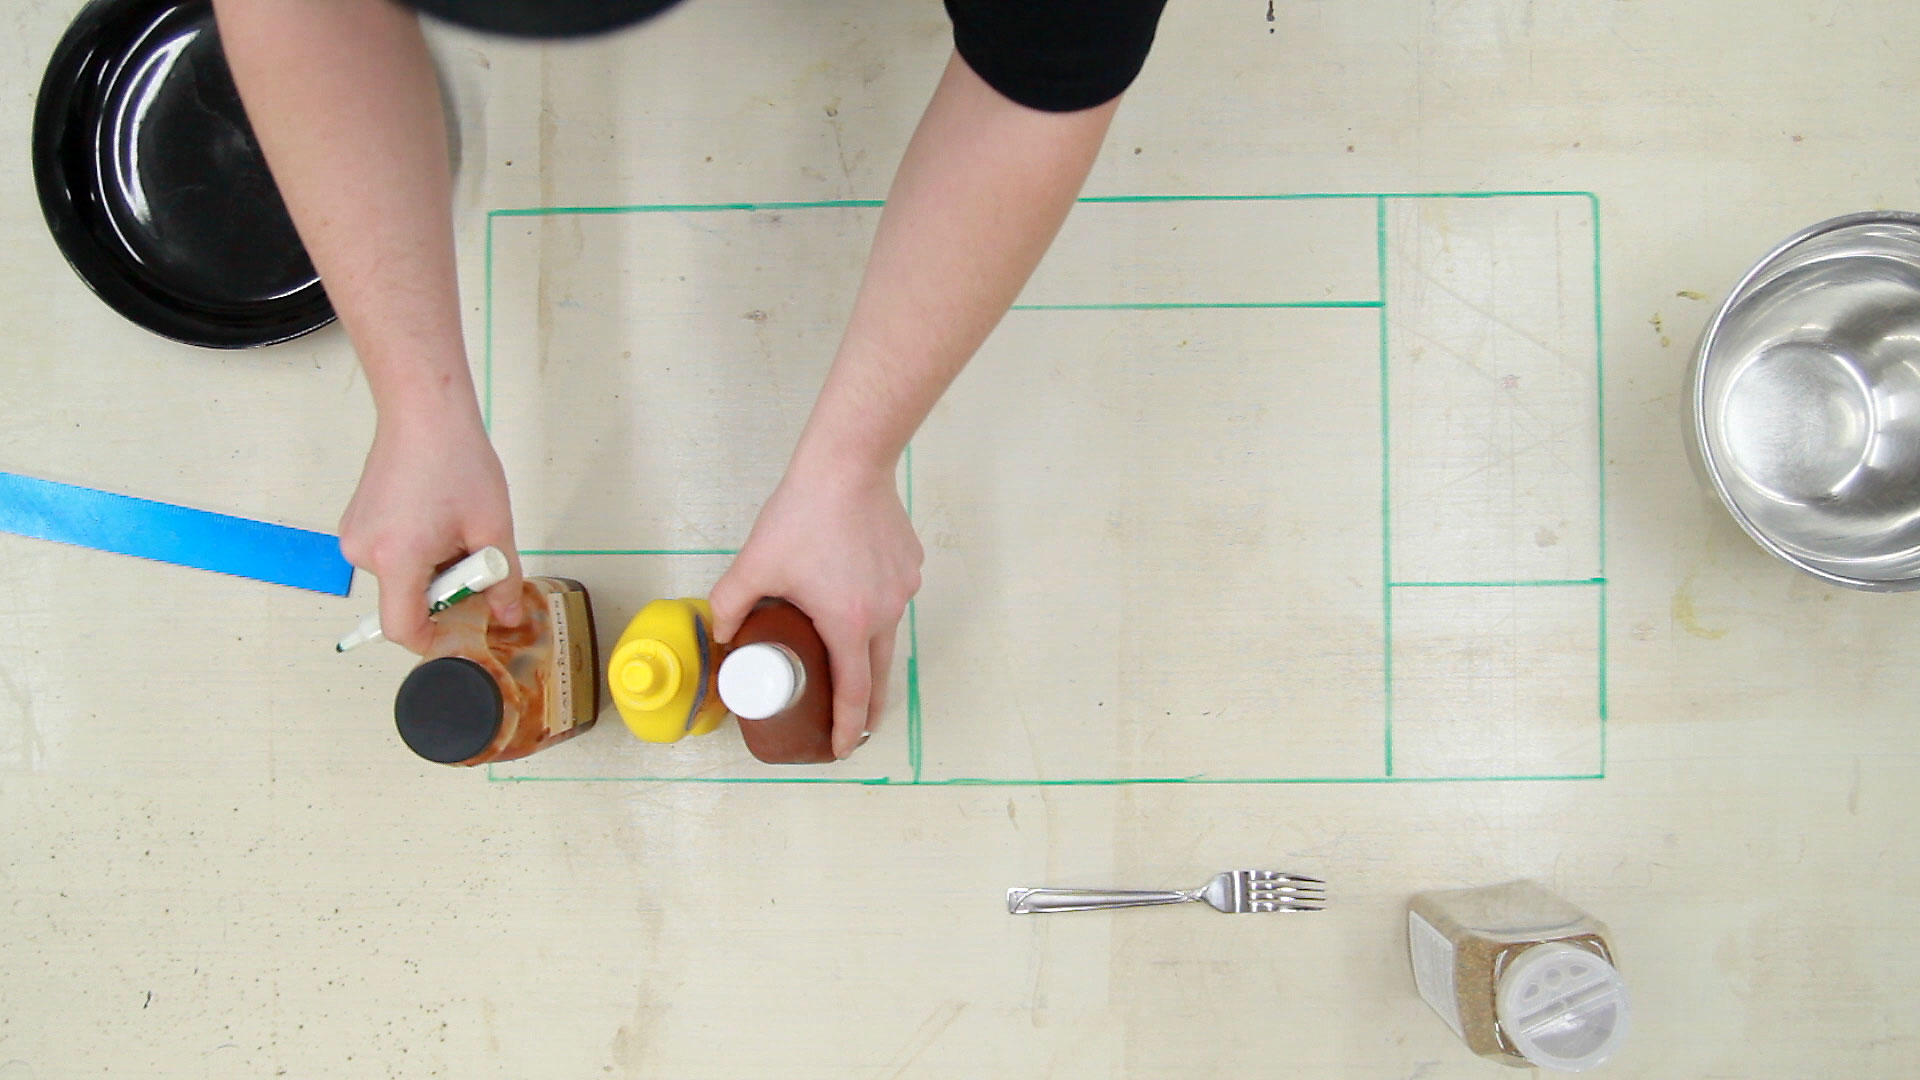
To determine the dimensions I brought a bunch of items to my assembly table and actually traced out a rough size with dry erase marker directly onto my assembly table. Dimensions didn’t have to be too critical so I could just use this diagram to reference off of during the build.
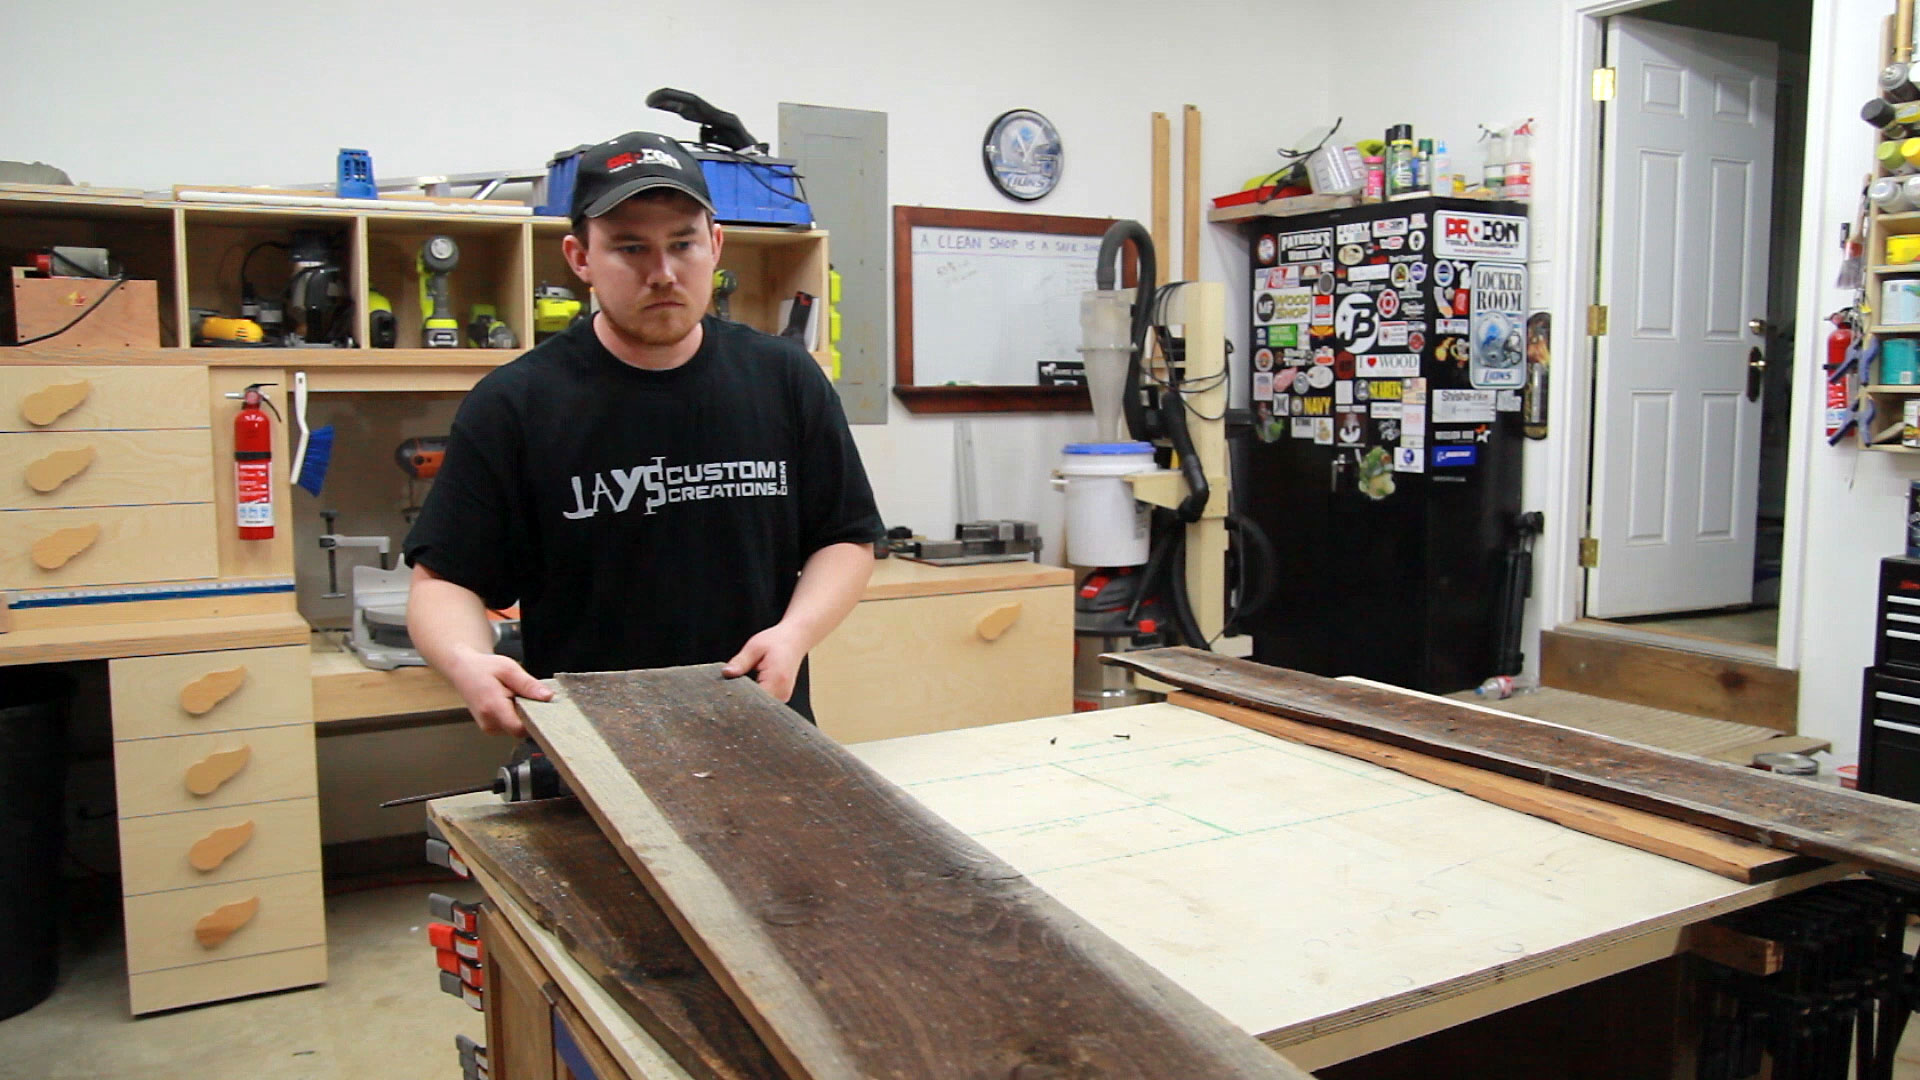
It’s been a while since I did a “Trash to Treasure” project so I figured I could get away with it on this one. I knew a rustic look would be neat on the tray so I used some old cedar boards given to me by my old boss. I’m not sure what they were previously used for but instead of throwing them away they were given to me. One side was originally stained a dark brown and the other side left natural.
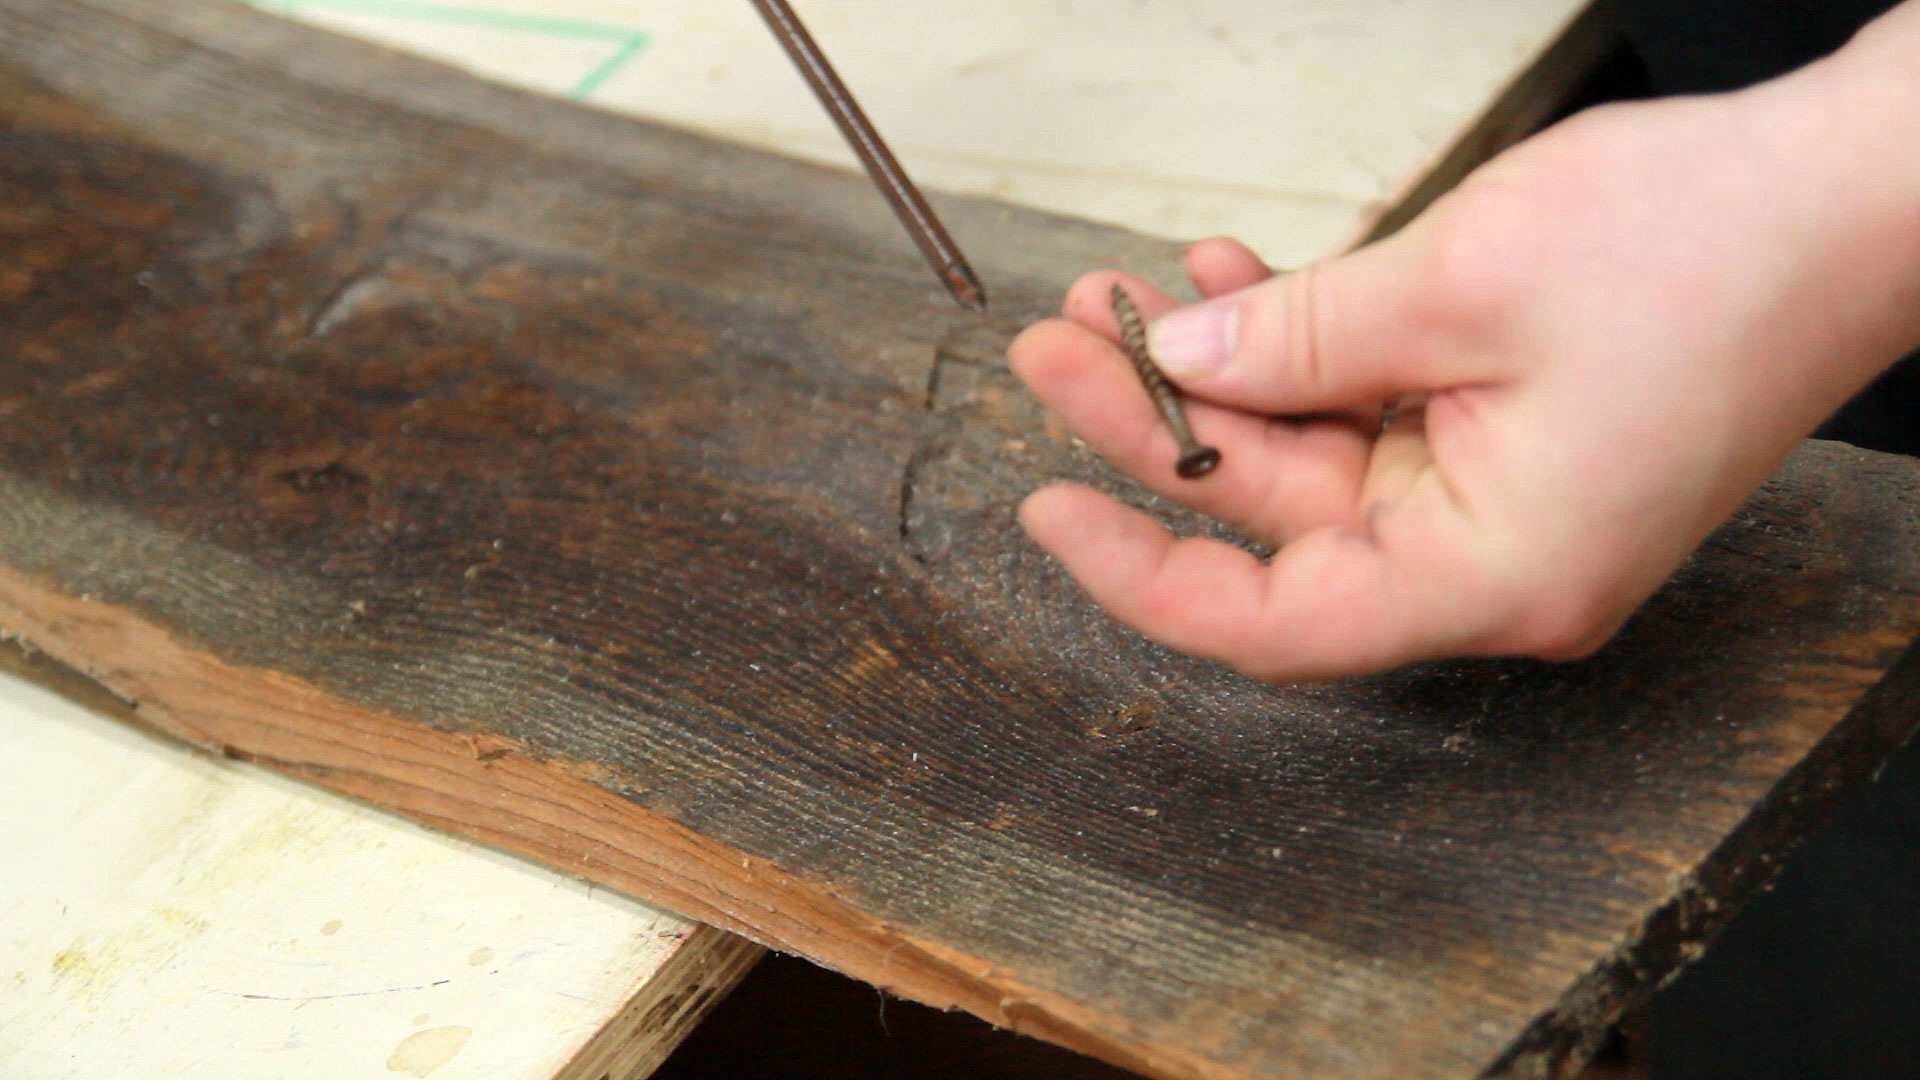
It’s salvaged materials so you always have to make sure to remove all of the metal. Luckily these only had a few screws in them that were easy to find.
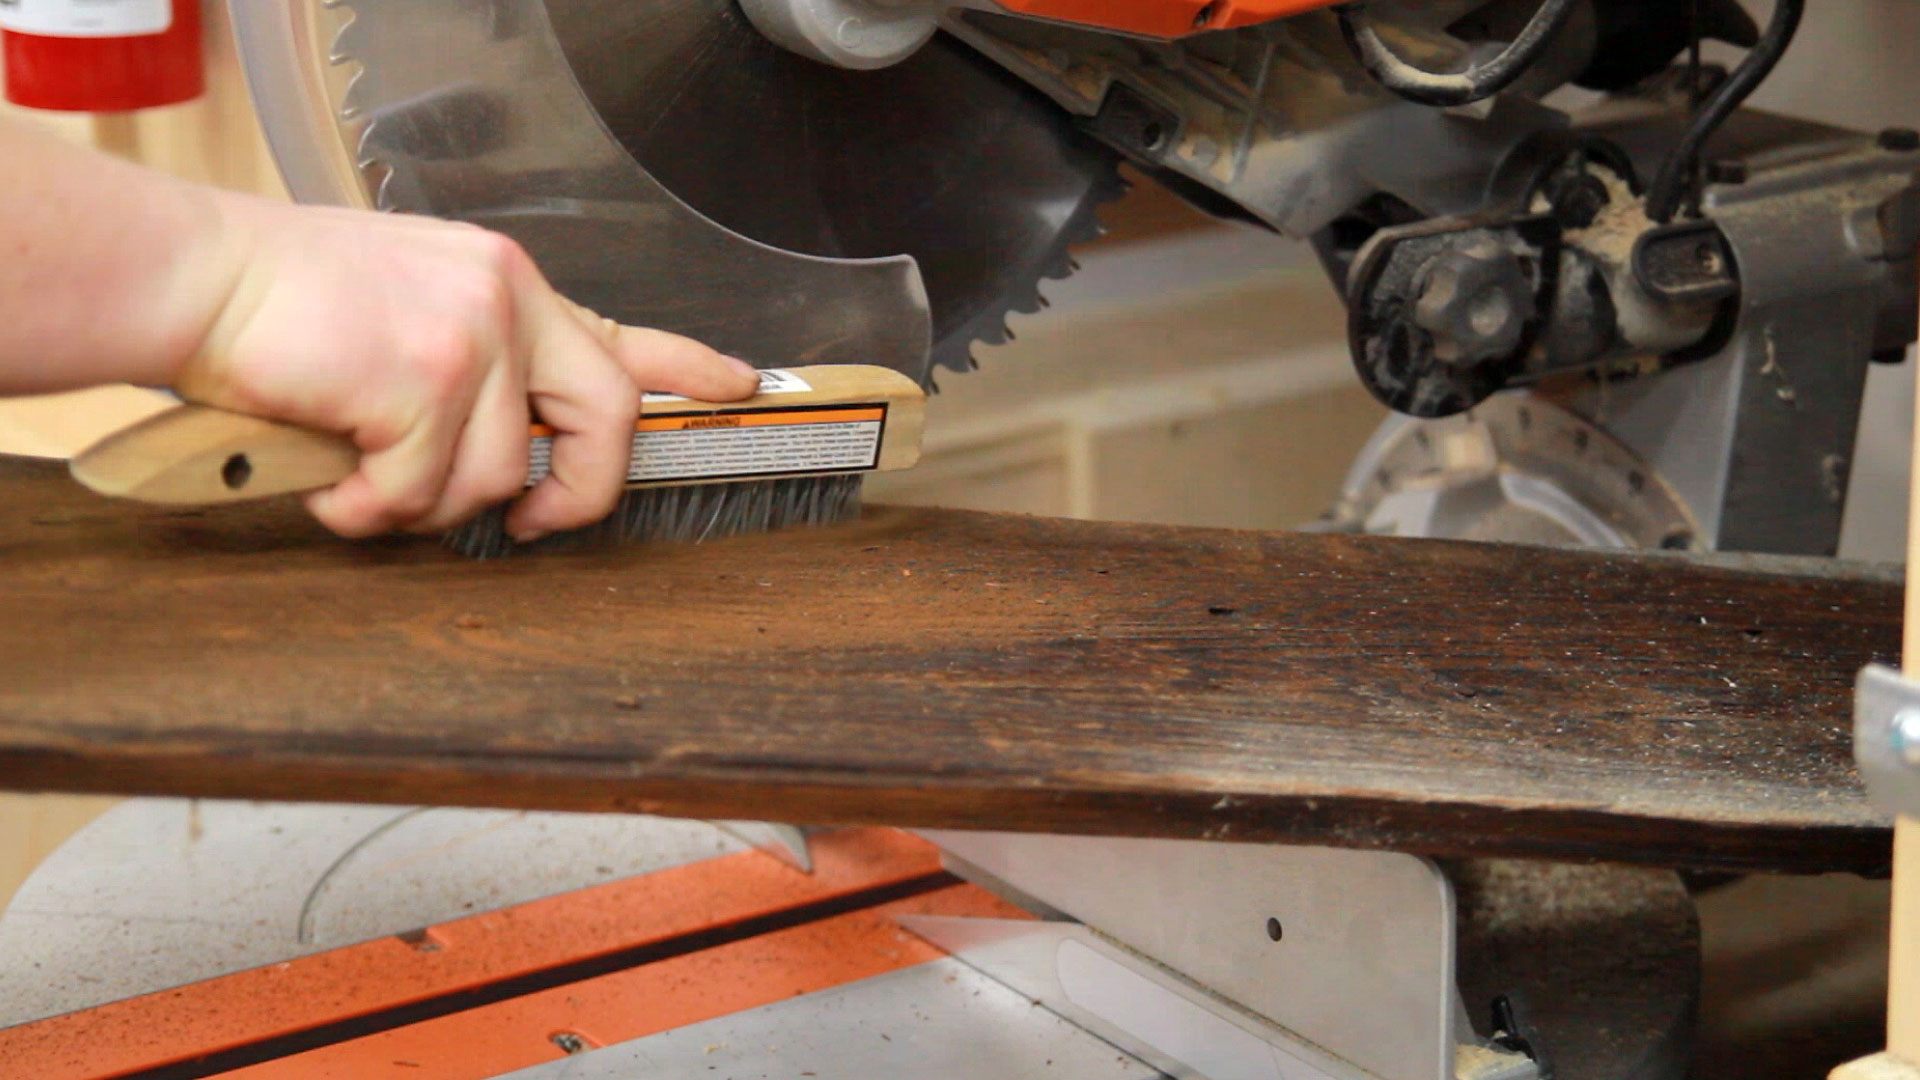
The boards were given to me about a year ago and have been sitting in my shop since. I’m not sure how long they were sitting around before I got them but in the mean time they accumulated a thick layer of dust and dirt. Cedar is soft enough that a wire brush will not only quickly clean the wood but also wear down any high spots to give a more consistent surface. This made a lot of dust but with one end sitting in the dust collection area of my miter saw station the fog of dust was easily sucked into the dust collector.
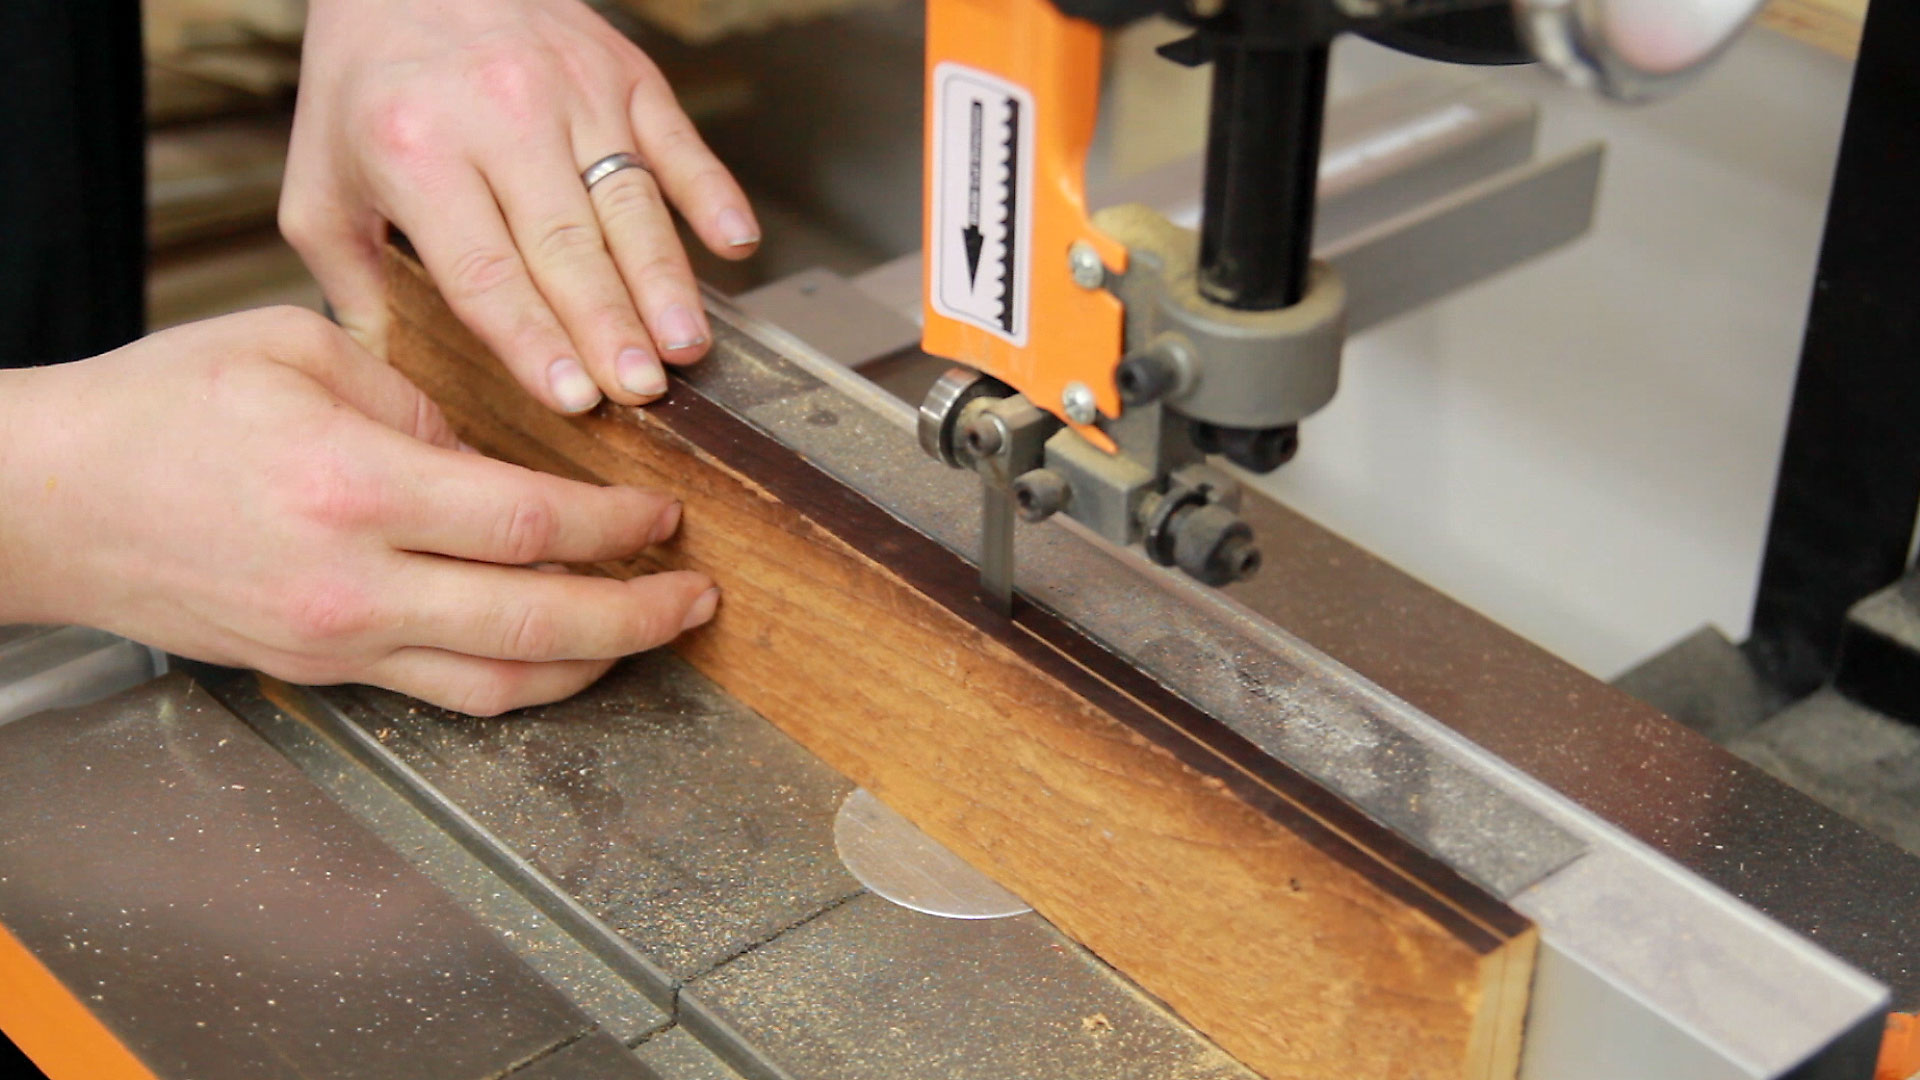
After cleaning up the boards the first few cuts on the table saw could be made. The perimeter boards were cut at 4-1/2” tall. I probably should have made the entire tray a little shorter though.
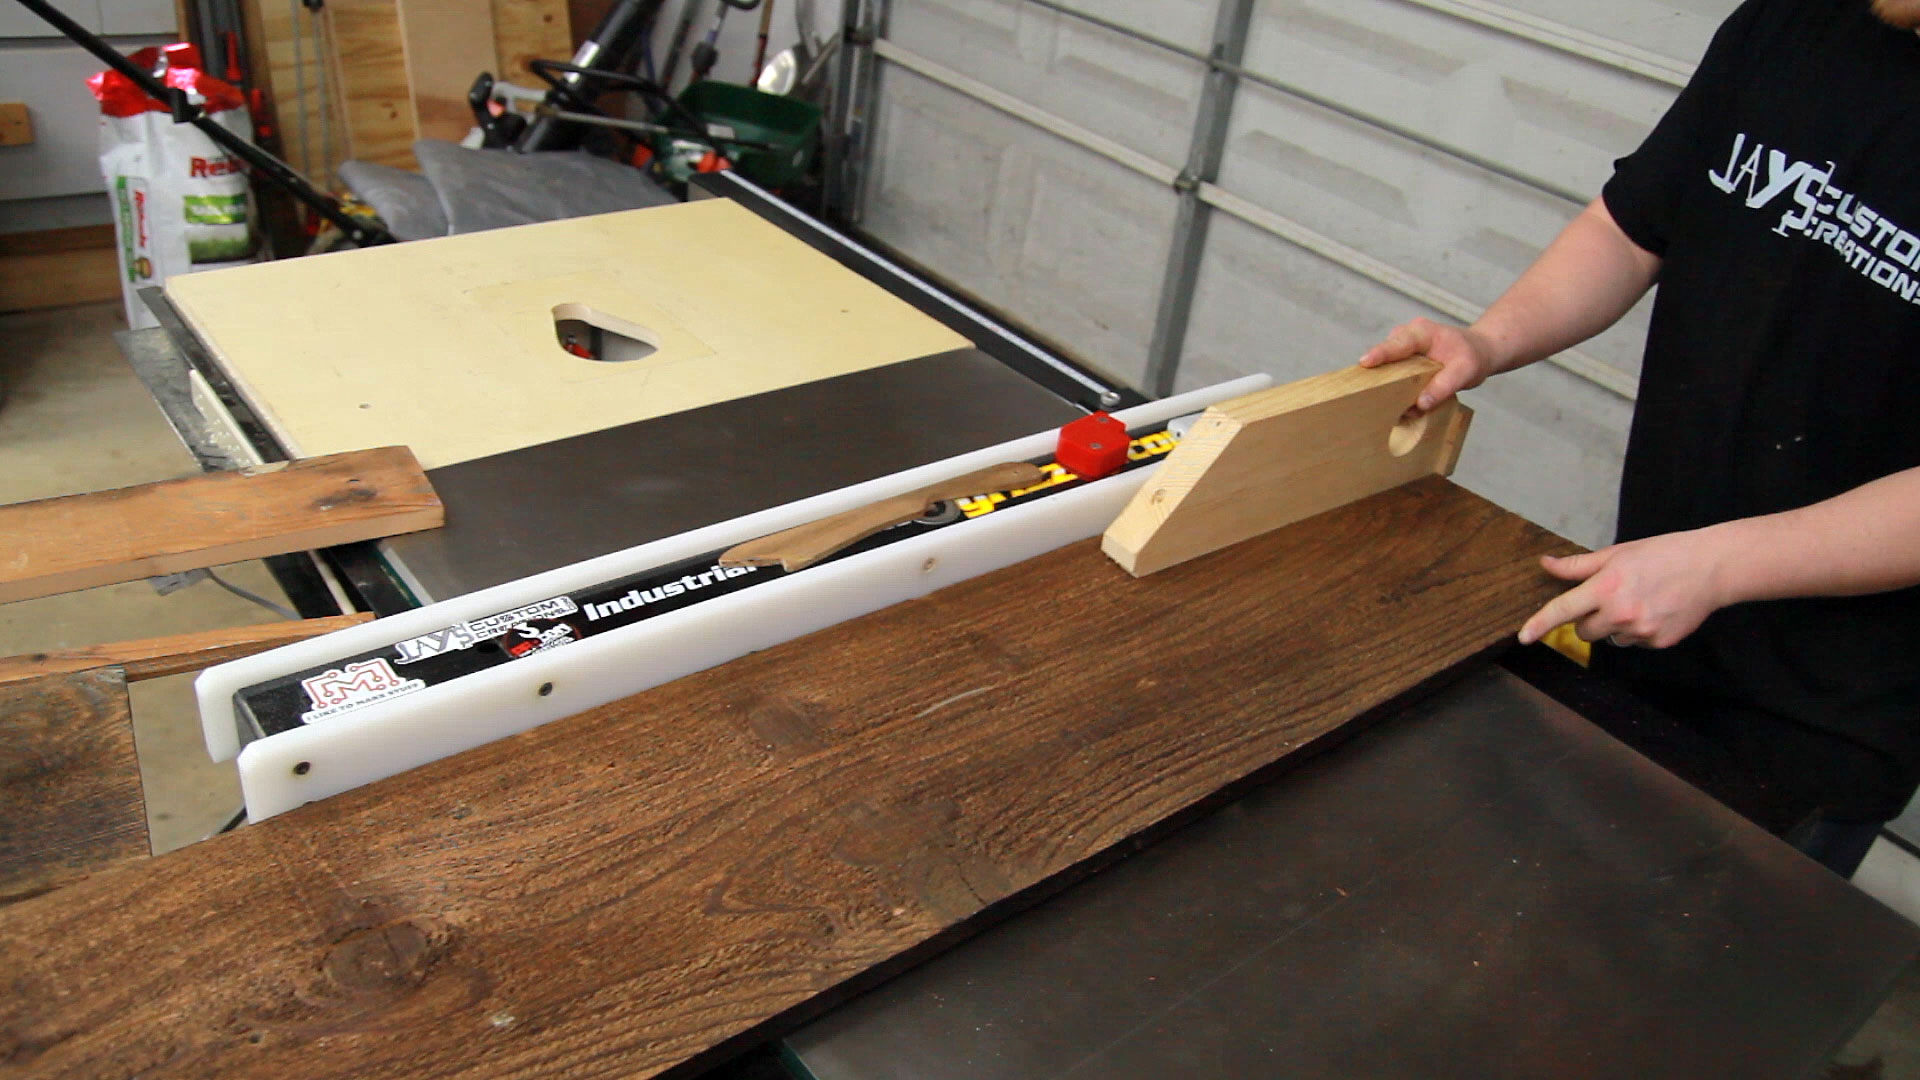
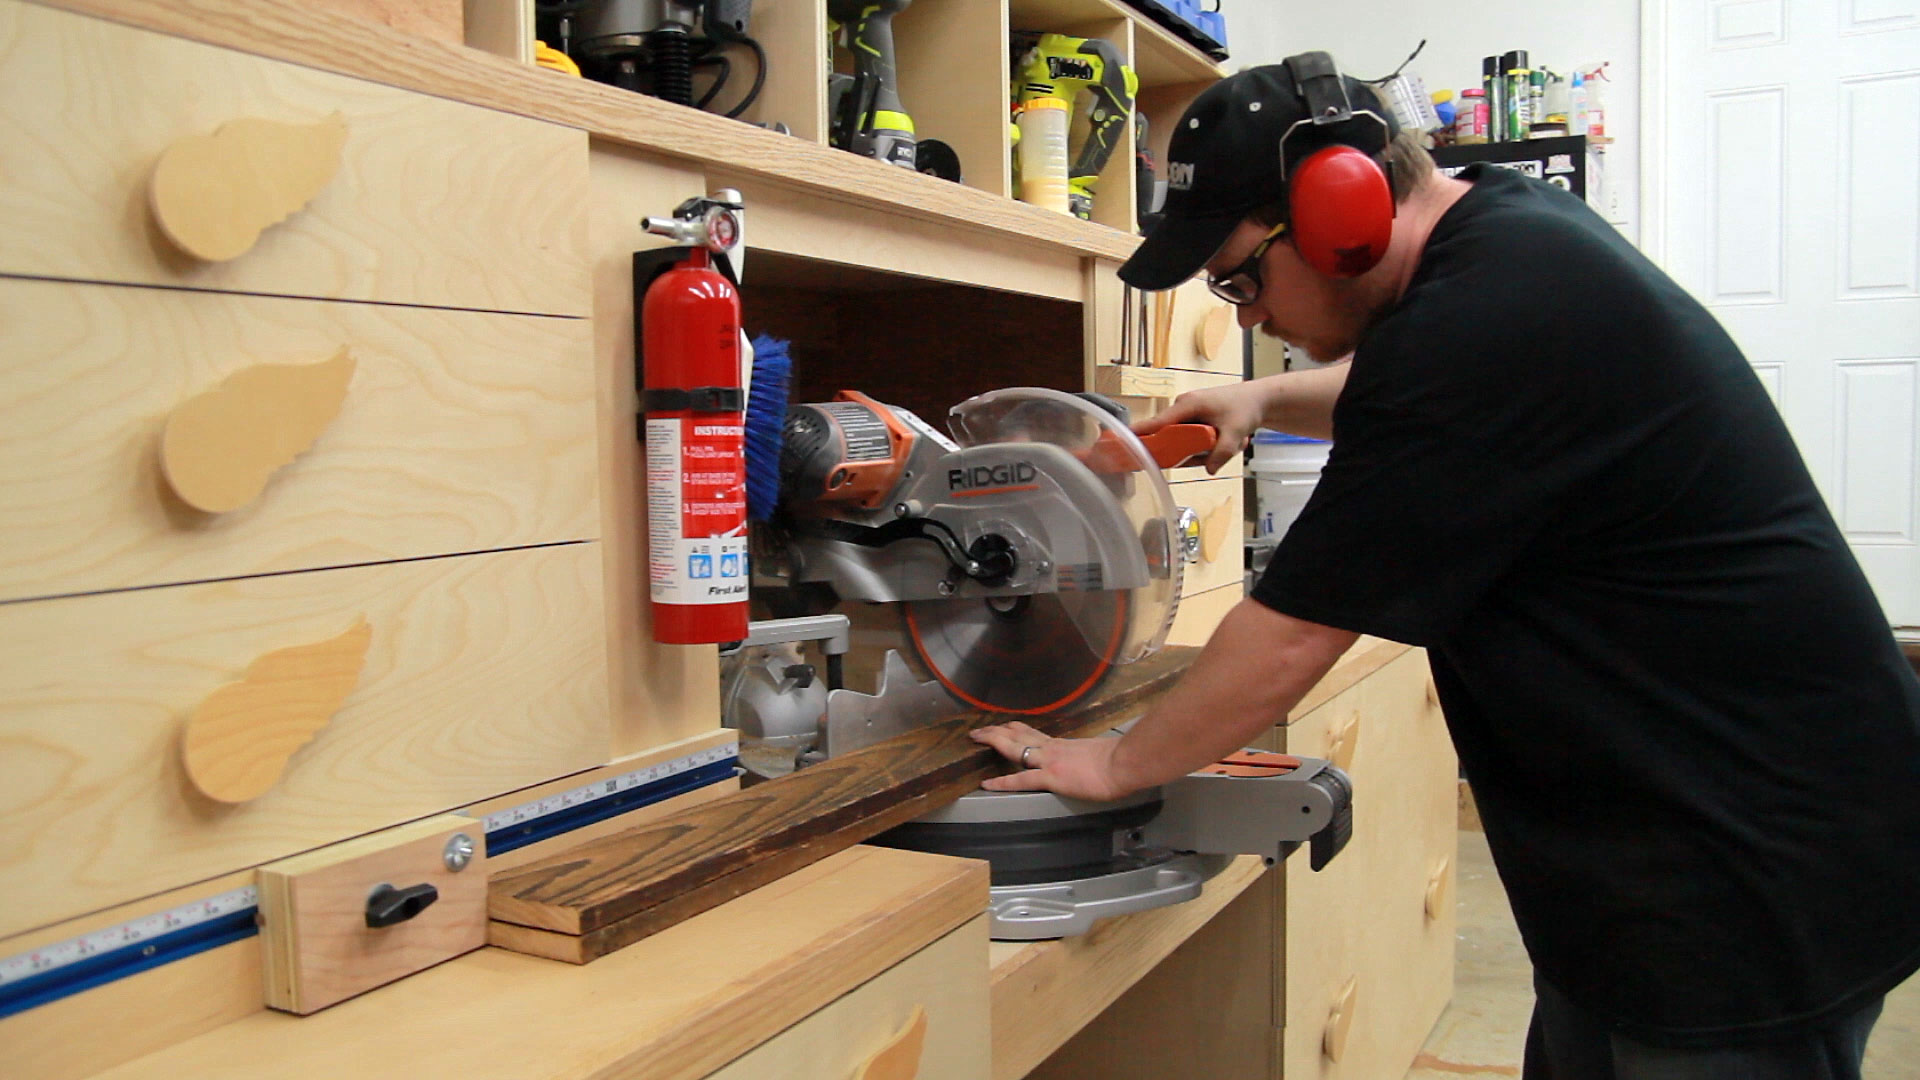
My miter saw station is a beast! I’m soo glad I made it as having a dedicated setup to make repeatable cuts without lugging the miter saw around is a dream. If you haven’t already, you should check out that build. But anyway, all of the perimeter pieces were cut to length next.
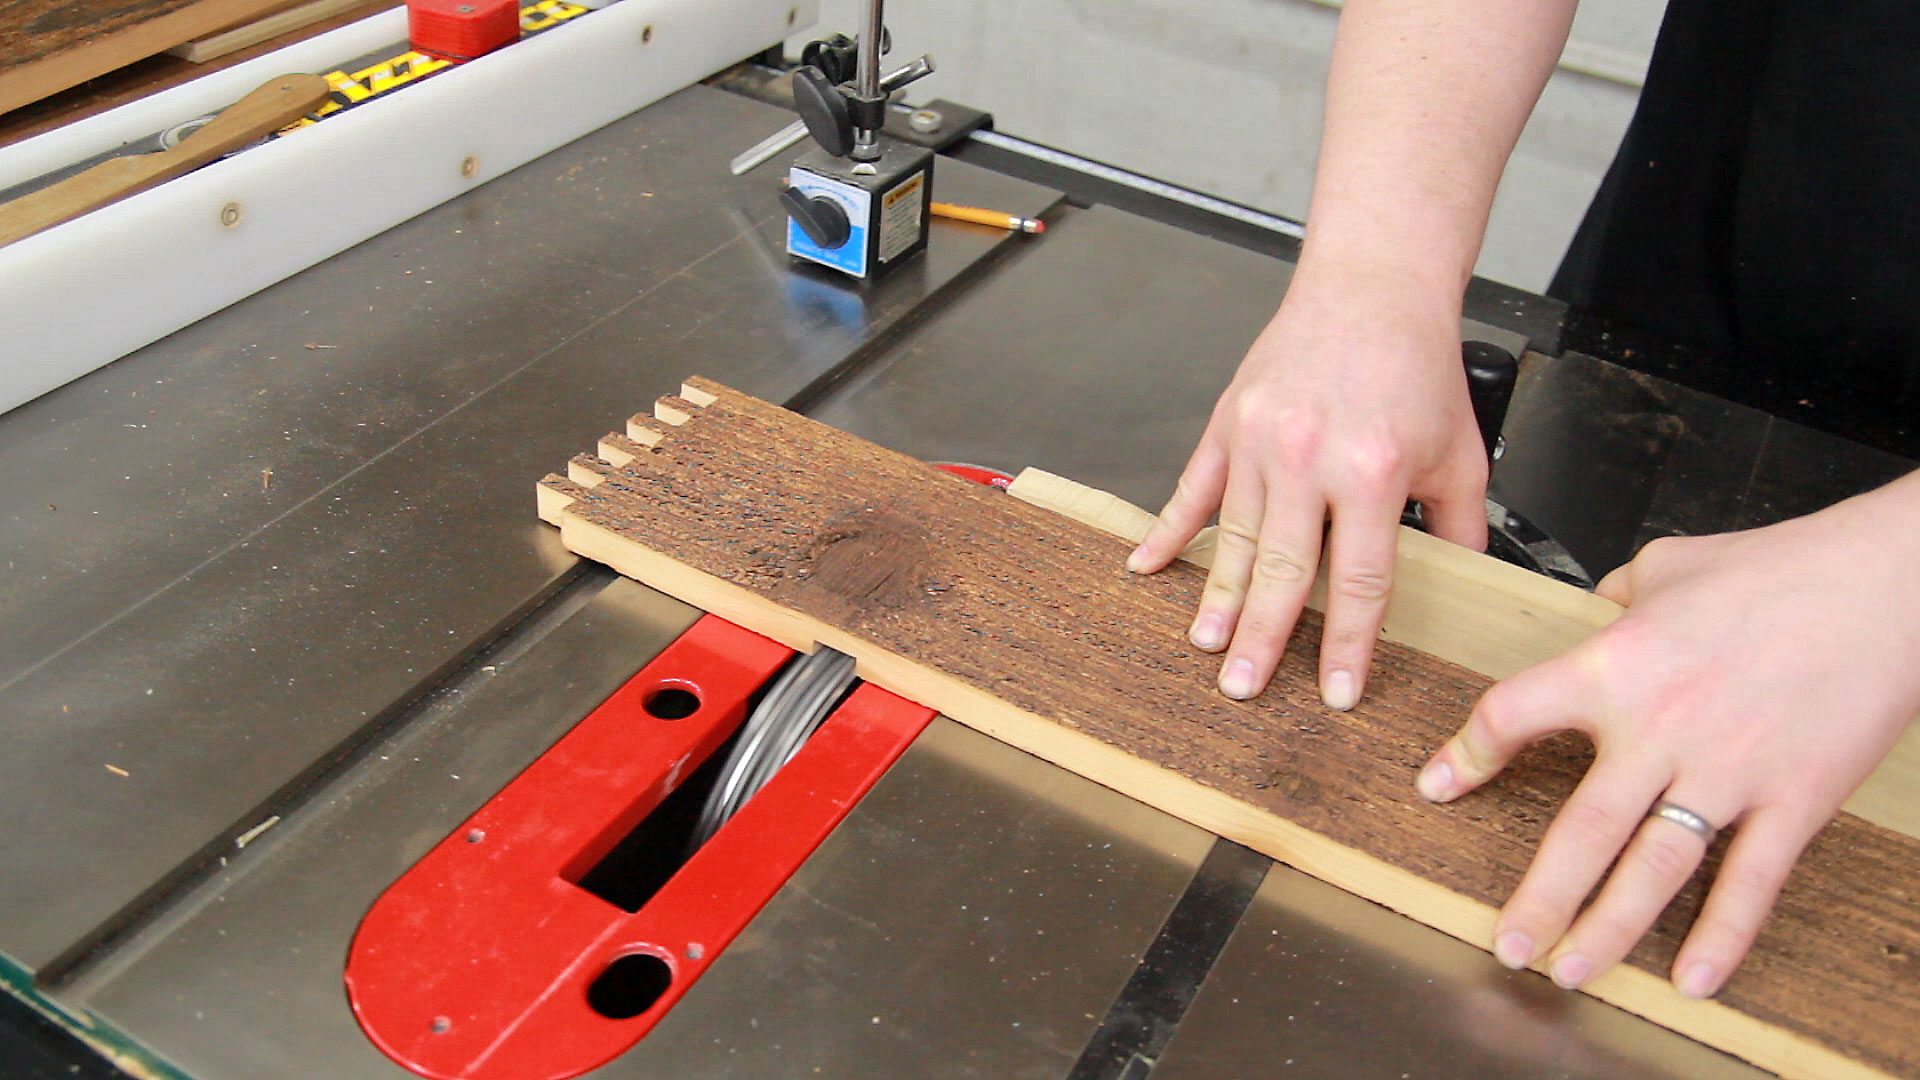
Because one side of the cedar was already dark I though it would be neat to use box joints (or finger joints) for the perimeter pieces. This would give a nice contrast to the corners and add visual interest. Also, box joints are incredibly strong.
The cool thing about this box joint jig is that it uses a standard table saw blade. No dado blade needed for these box joints.

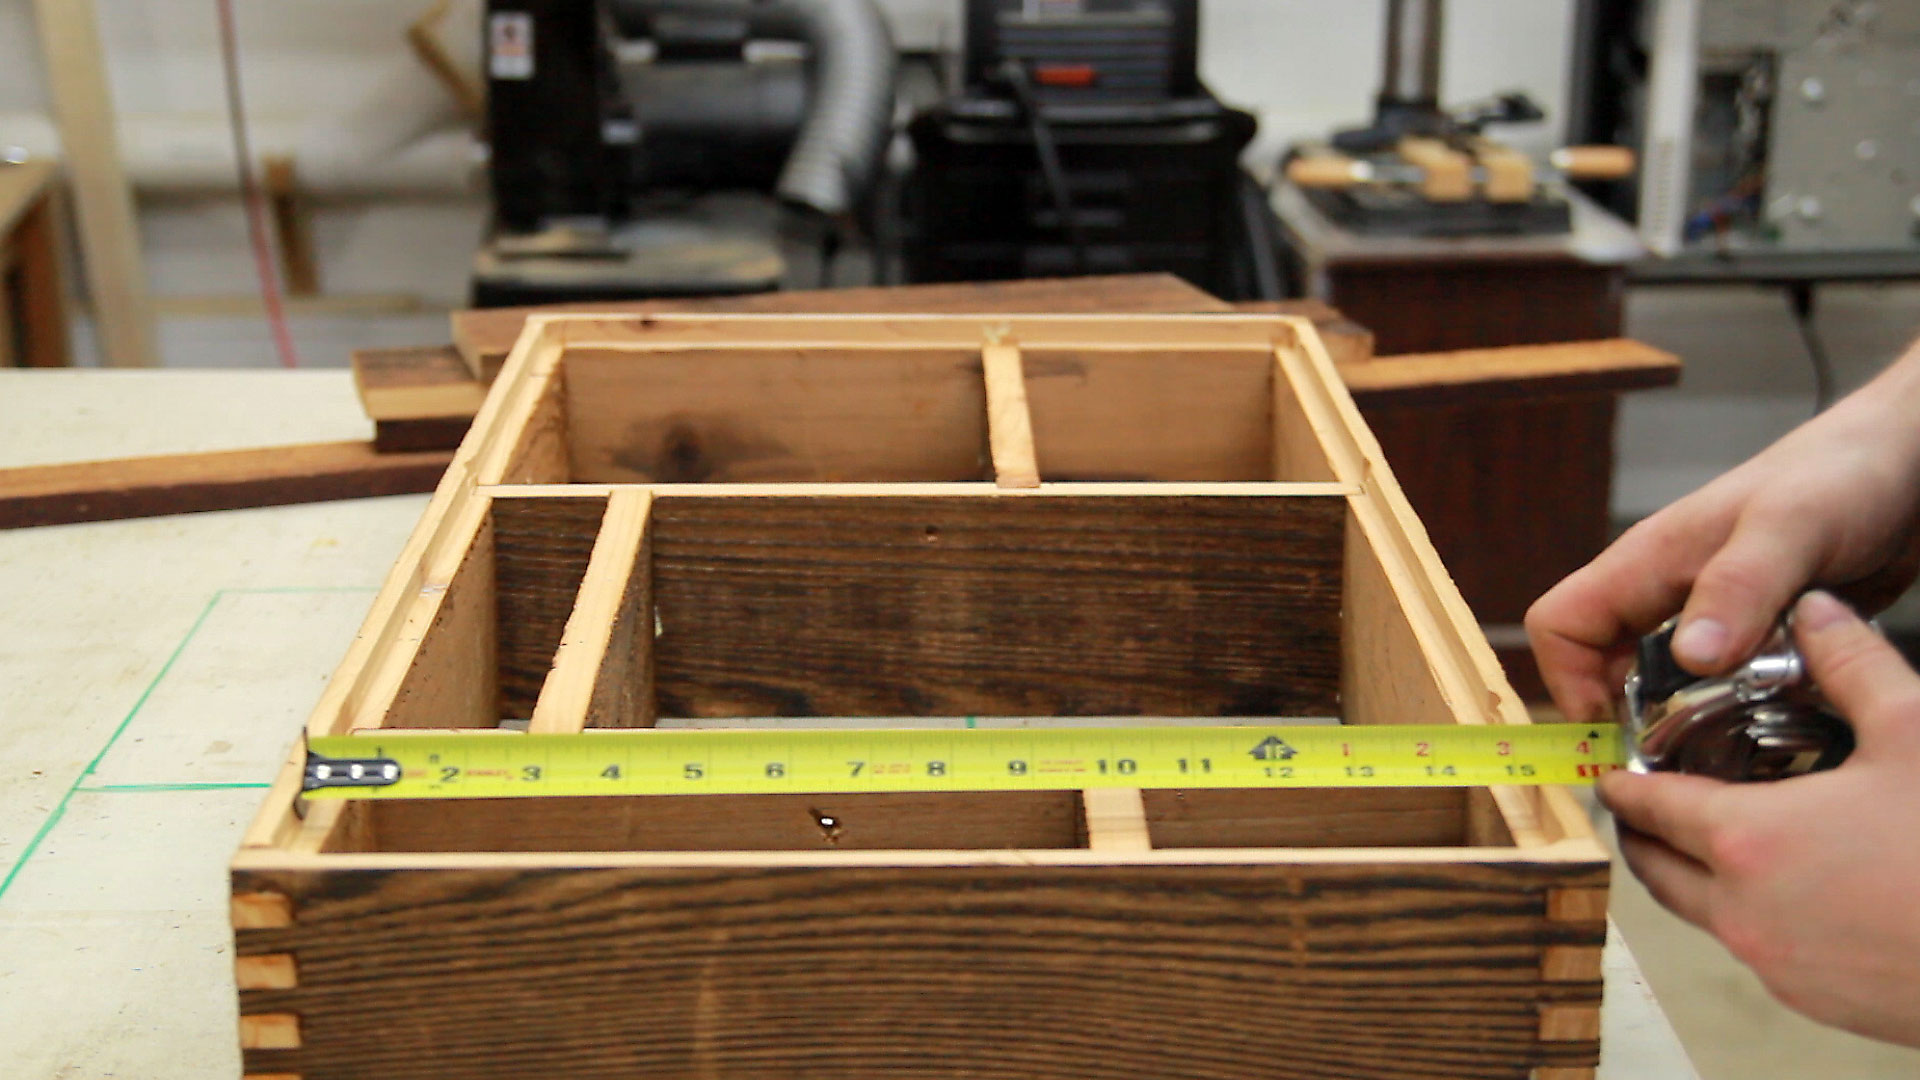
With a dry assembly of the perimeter I used the reference diagram on my assembly table to transfer the locations of the interior dividers. I liked using this approach. No measuring :)
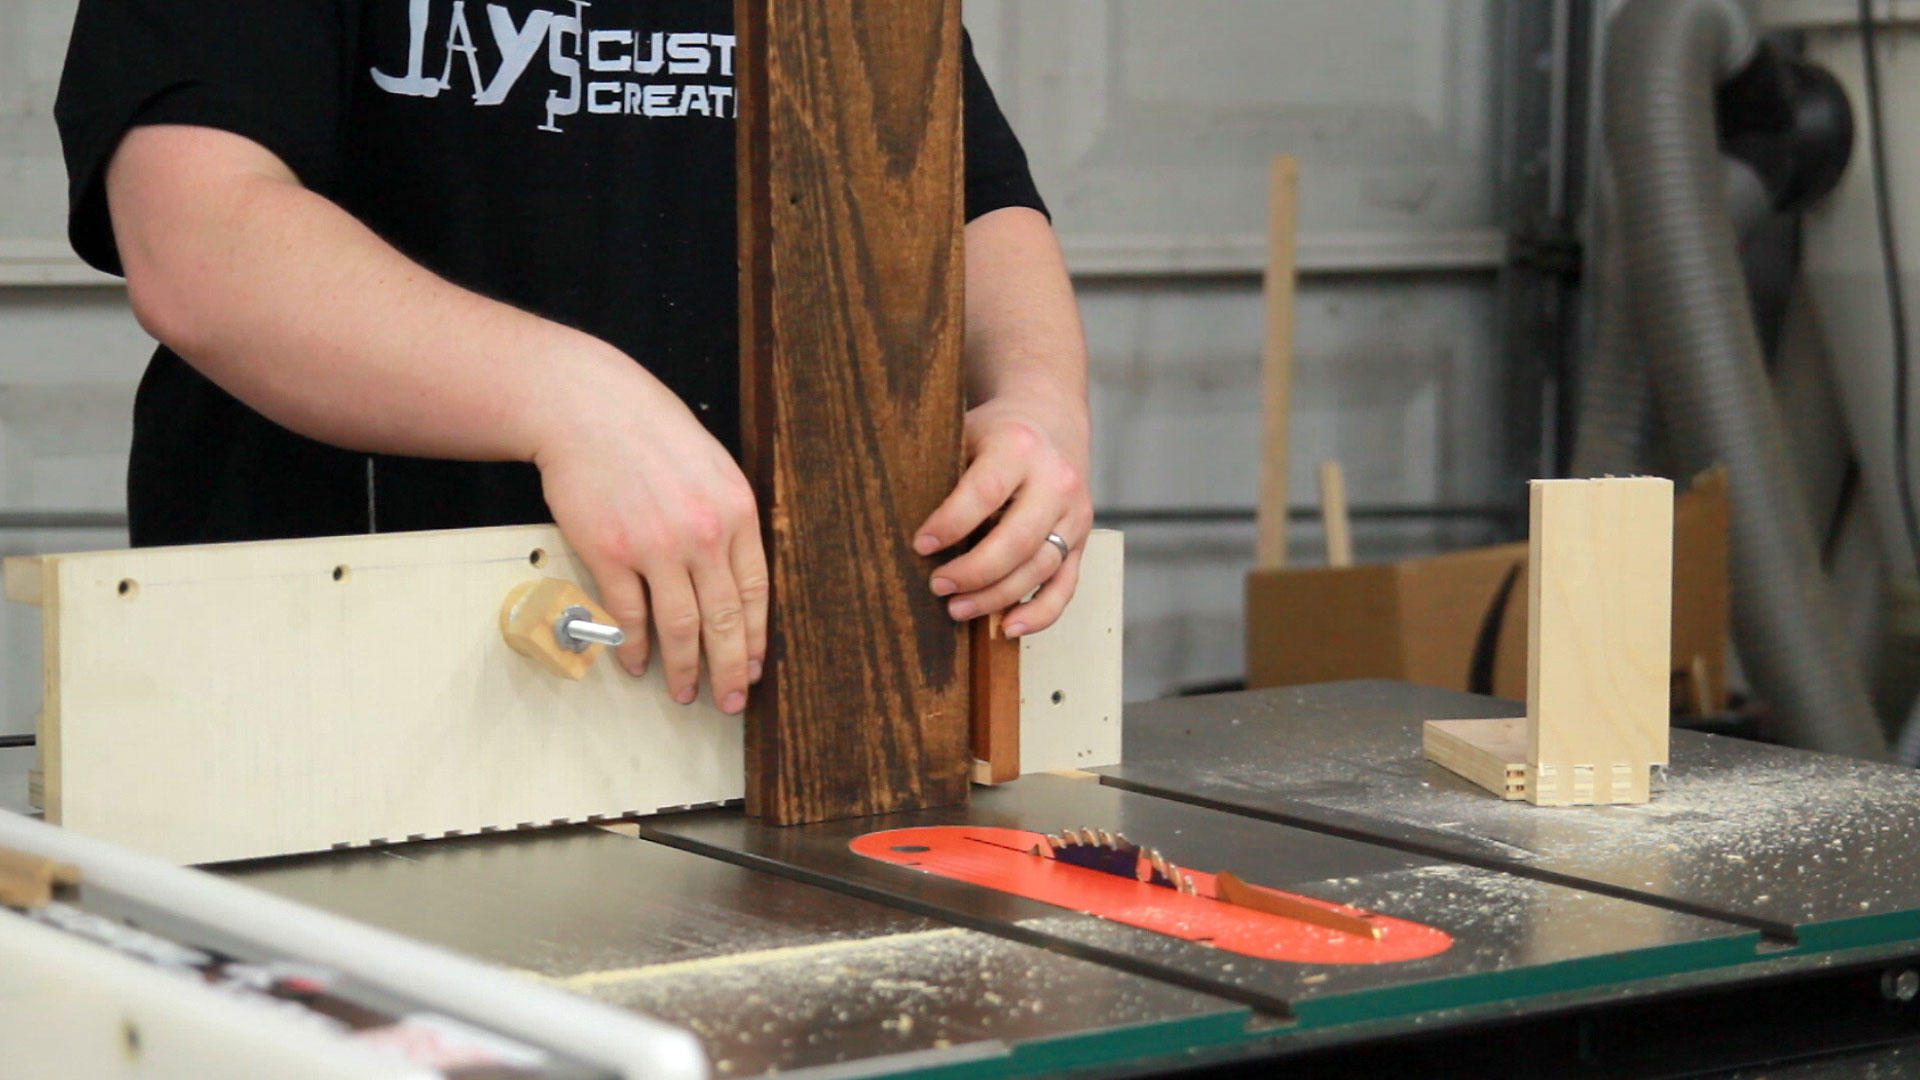
For all of the interior dividers I wanted to use dados. A big shout out and thanks to Steve Endow for hooking me up with this Freud dado stack. Holy smokes what an improvement over the crappy one I was using. Thanks again Steve!

When cutting the dados I used my miter gauge and a cheap Harbor Freight magnetic base as a stop block. I really like using this setup. You can position the magnetic base wherever you need on the table saw surface which is nice and it has the holding power to remain stationary.
Again, no measuring. When cutting the interior dividers to length I placed the material into position and marked my line.
After all the pieces were sized accordingly with a dry fit the assembly could be broken down for a glue-up. I chose to glue the perimeter together first.

A good fitting box joint doesn’t need any clamps. Because my box joint jig is dialed in these were absolutely perfect. All I did was make sure all the corners were square after adding glue. A cheap speed square is great for this. I have a bunch of different size speed squares as they are really handy.

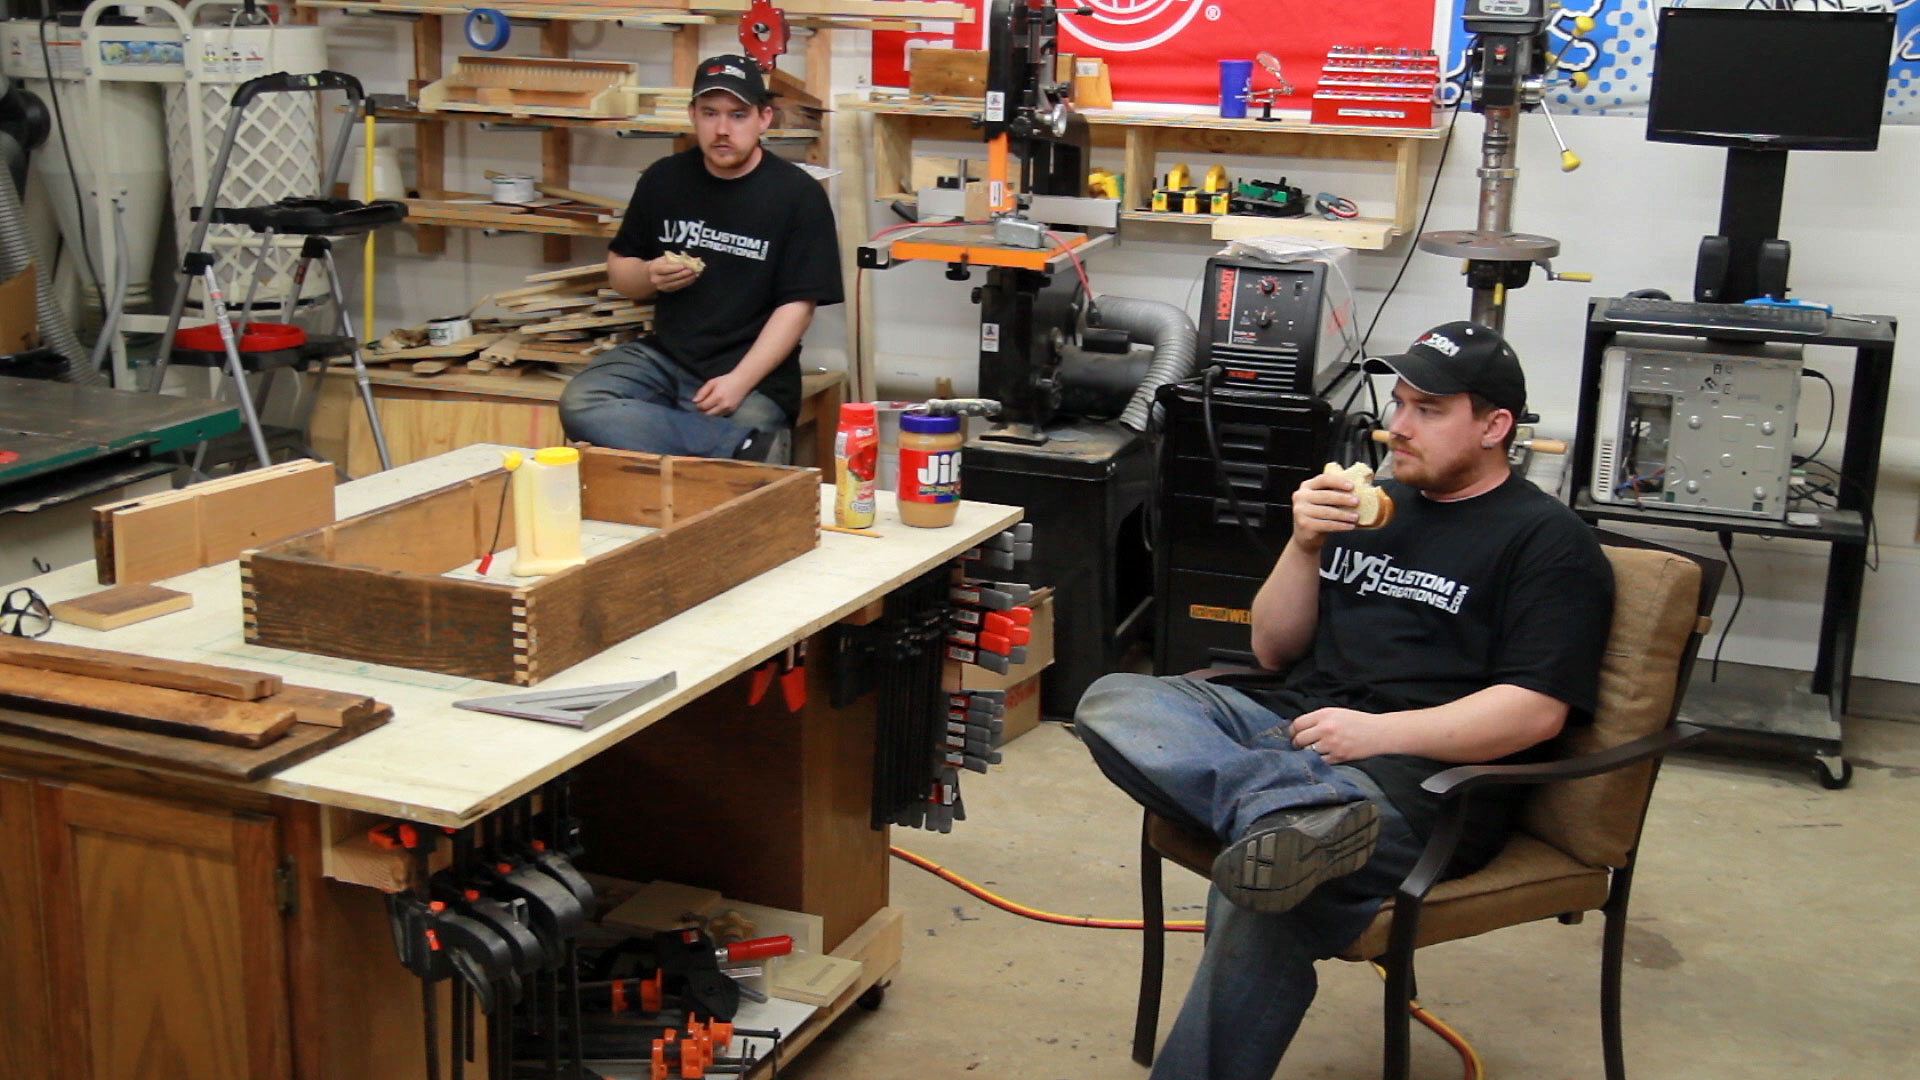
While the glue dries we did what we do best. Yes, we. Me and myself. I was trying to get in there too but couldn’t find a decent seat.
A rabbet is needed along the inside bottom edge of the tray to accept some slats. I used my homemade router table for this. One of the cool things about this table is that I can quickly change the bit from above without removing the insert plate.
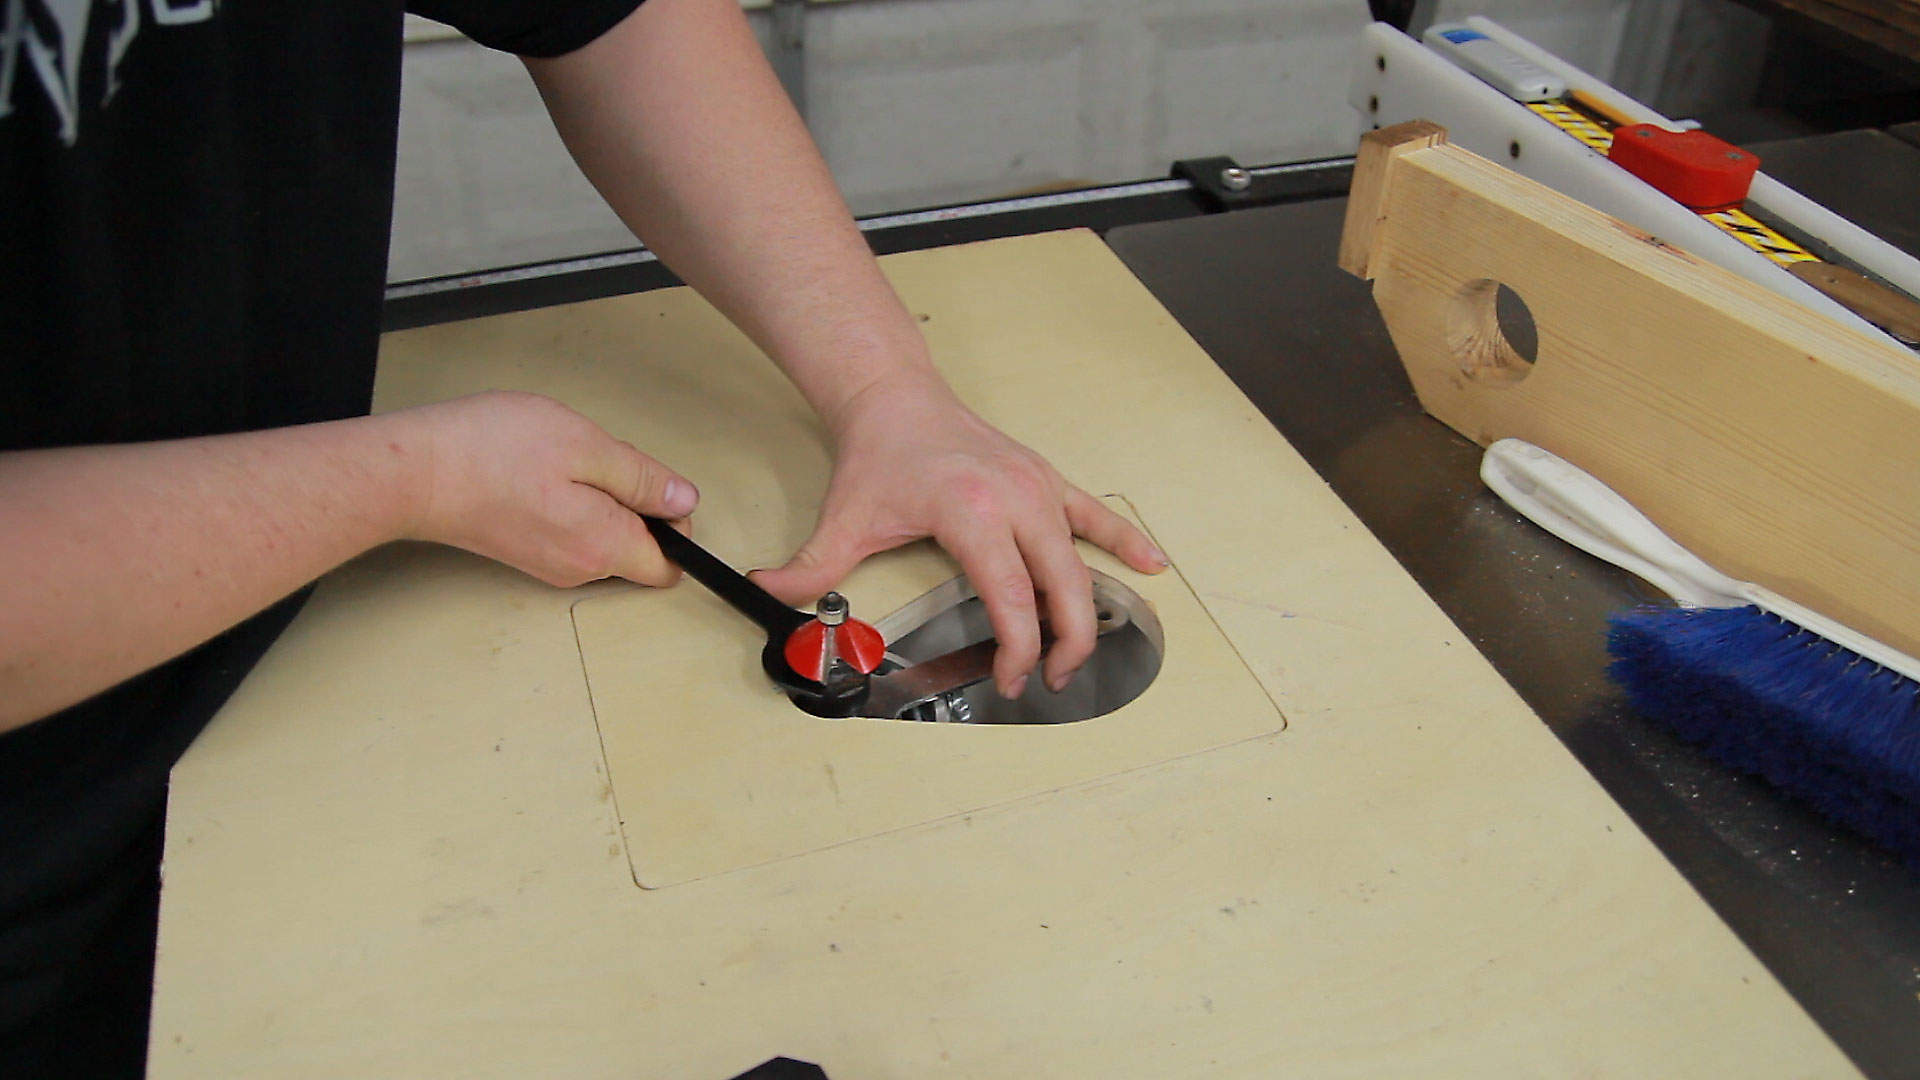
I couldn’t find my rabbeting bit anywhere so I had to make the rabbet with a slot cutting bit taking two passes. Twice as long to do but it worked out alright.

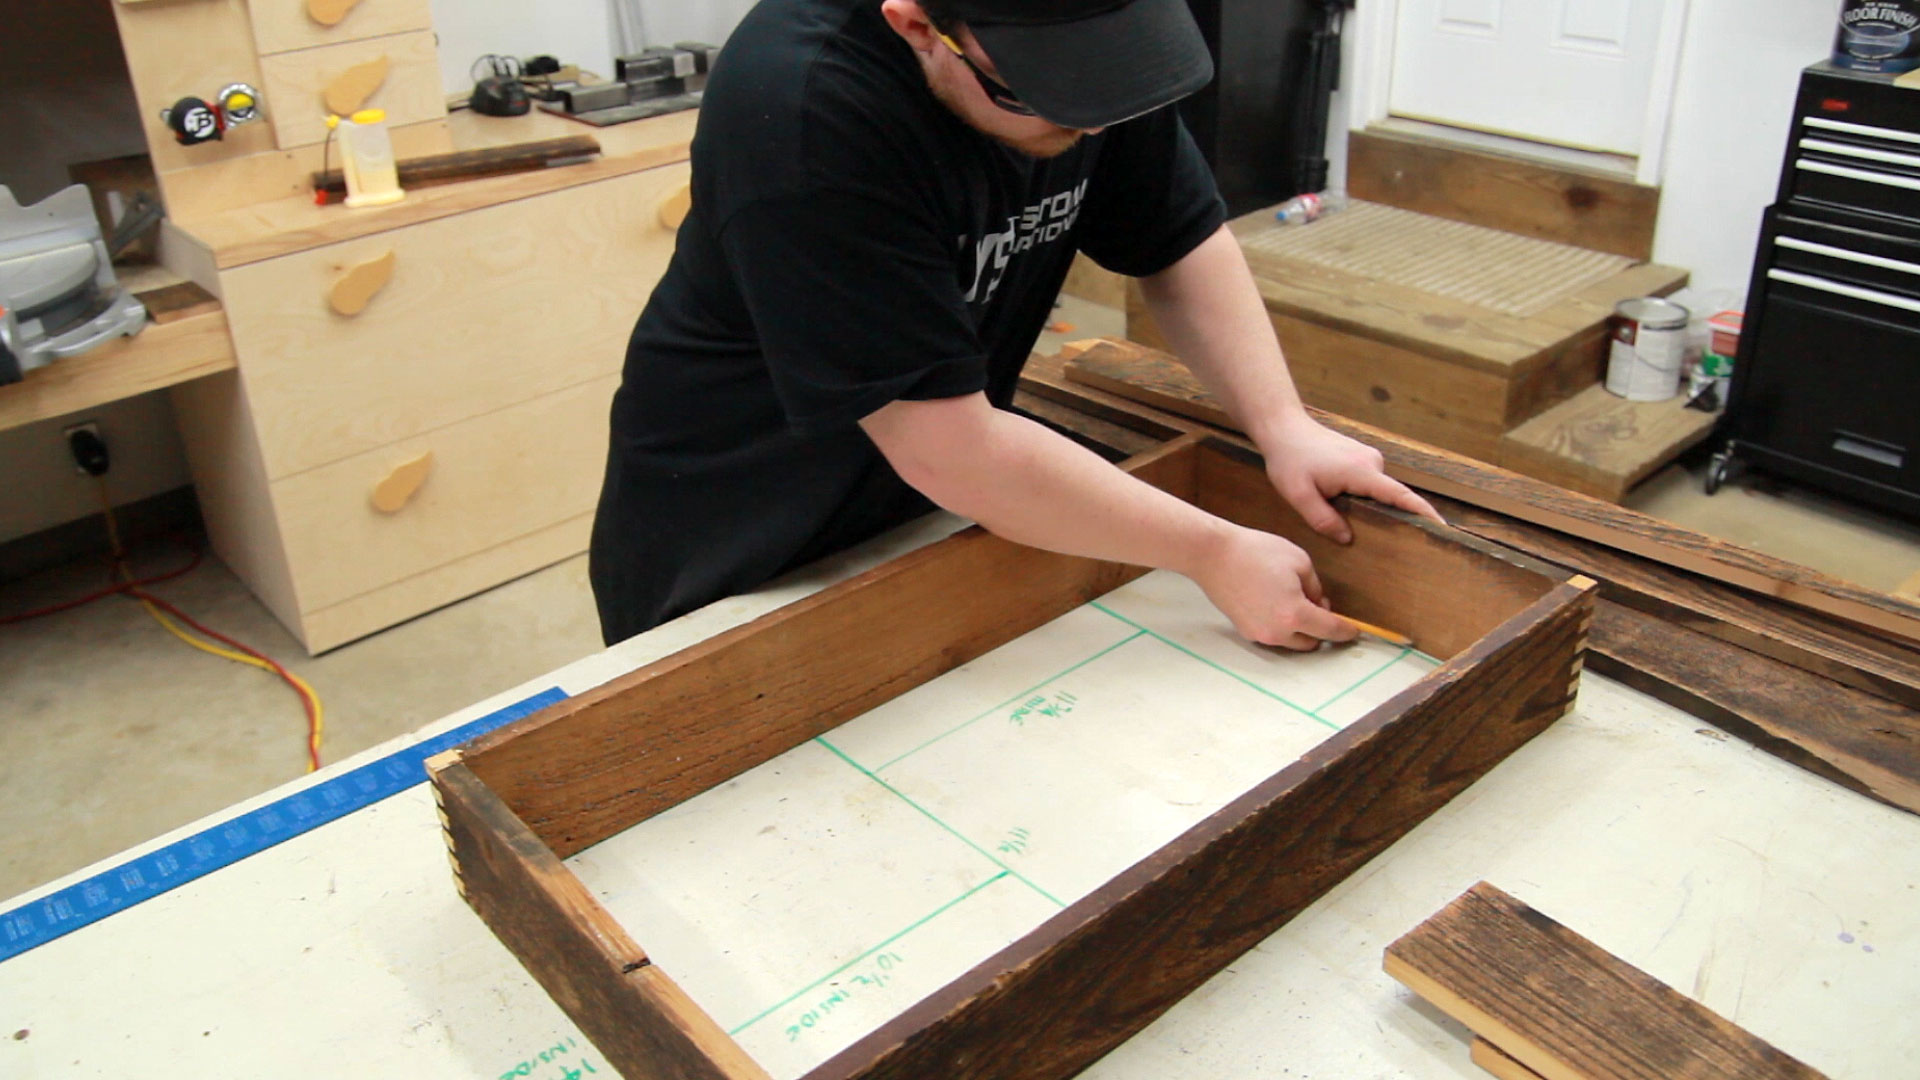
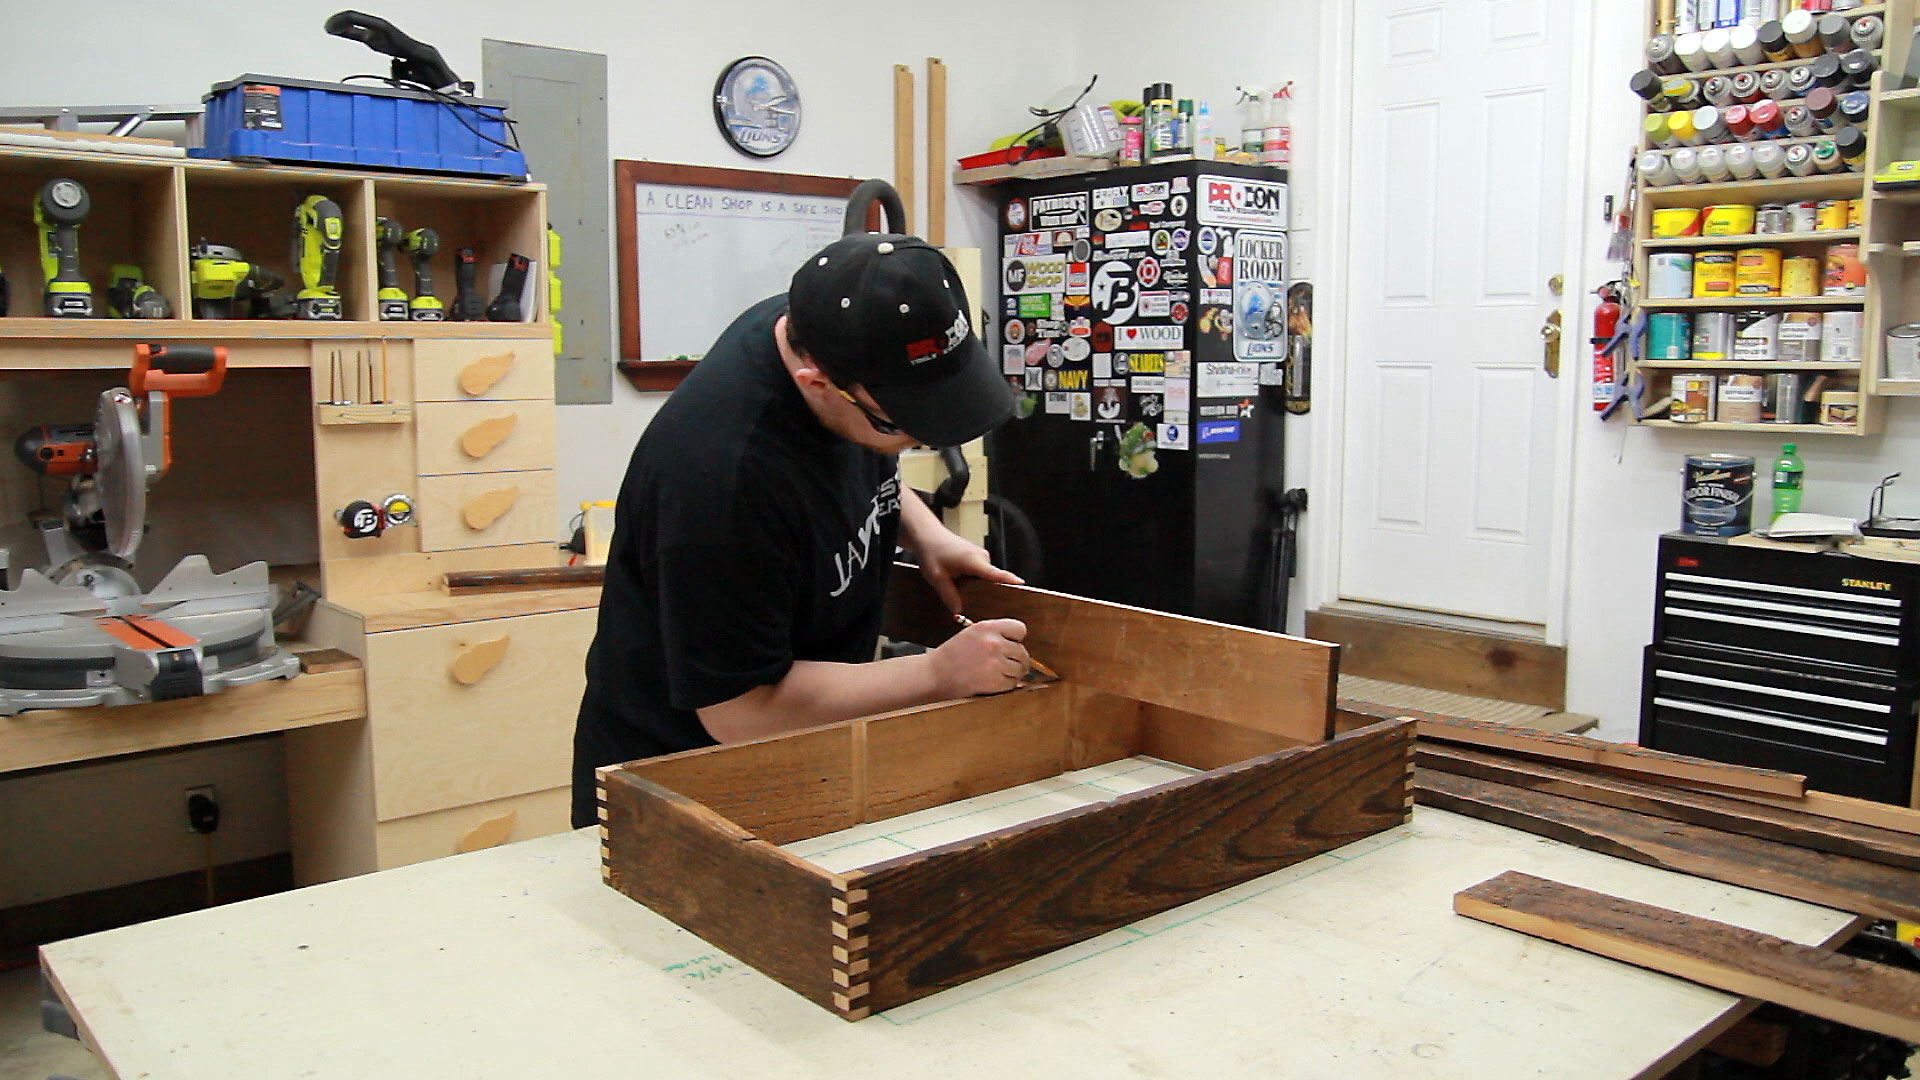
I glued the interior dividers in place with the assembly upside down. That way I could make sure the bottom of the dividers were flush with the rabbet. They were sized to be flush with the top of the tray perimeter pieces as well. Then a measurement could be taken for the bottom slats.
I wanted the inside bottom of the tray to have clean wood and I didn’t want to add a lot of heft by using full thickness slats so I resawed a few pieces right down the middle. This gave each slat a fresh cut clean side to face the inside of the tray and left the rough side to face down continuing the rustic look.
After sizing all the slats I secured them with wood glue and a few brads to hold everything while the glue dried.

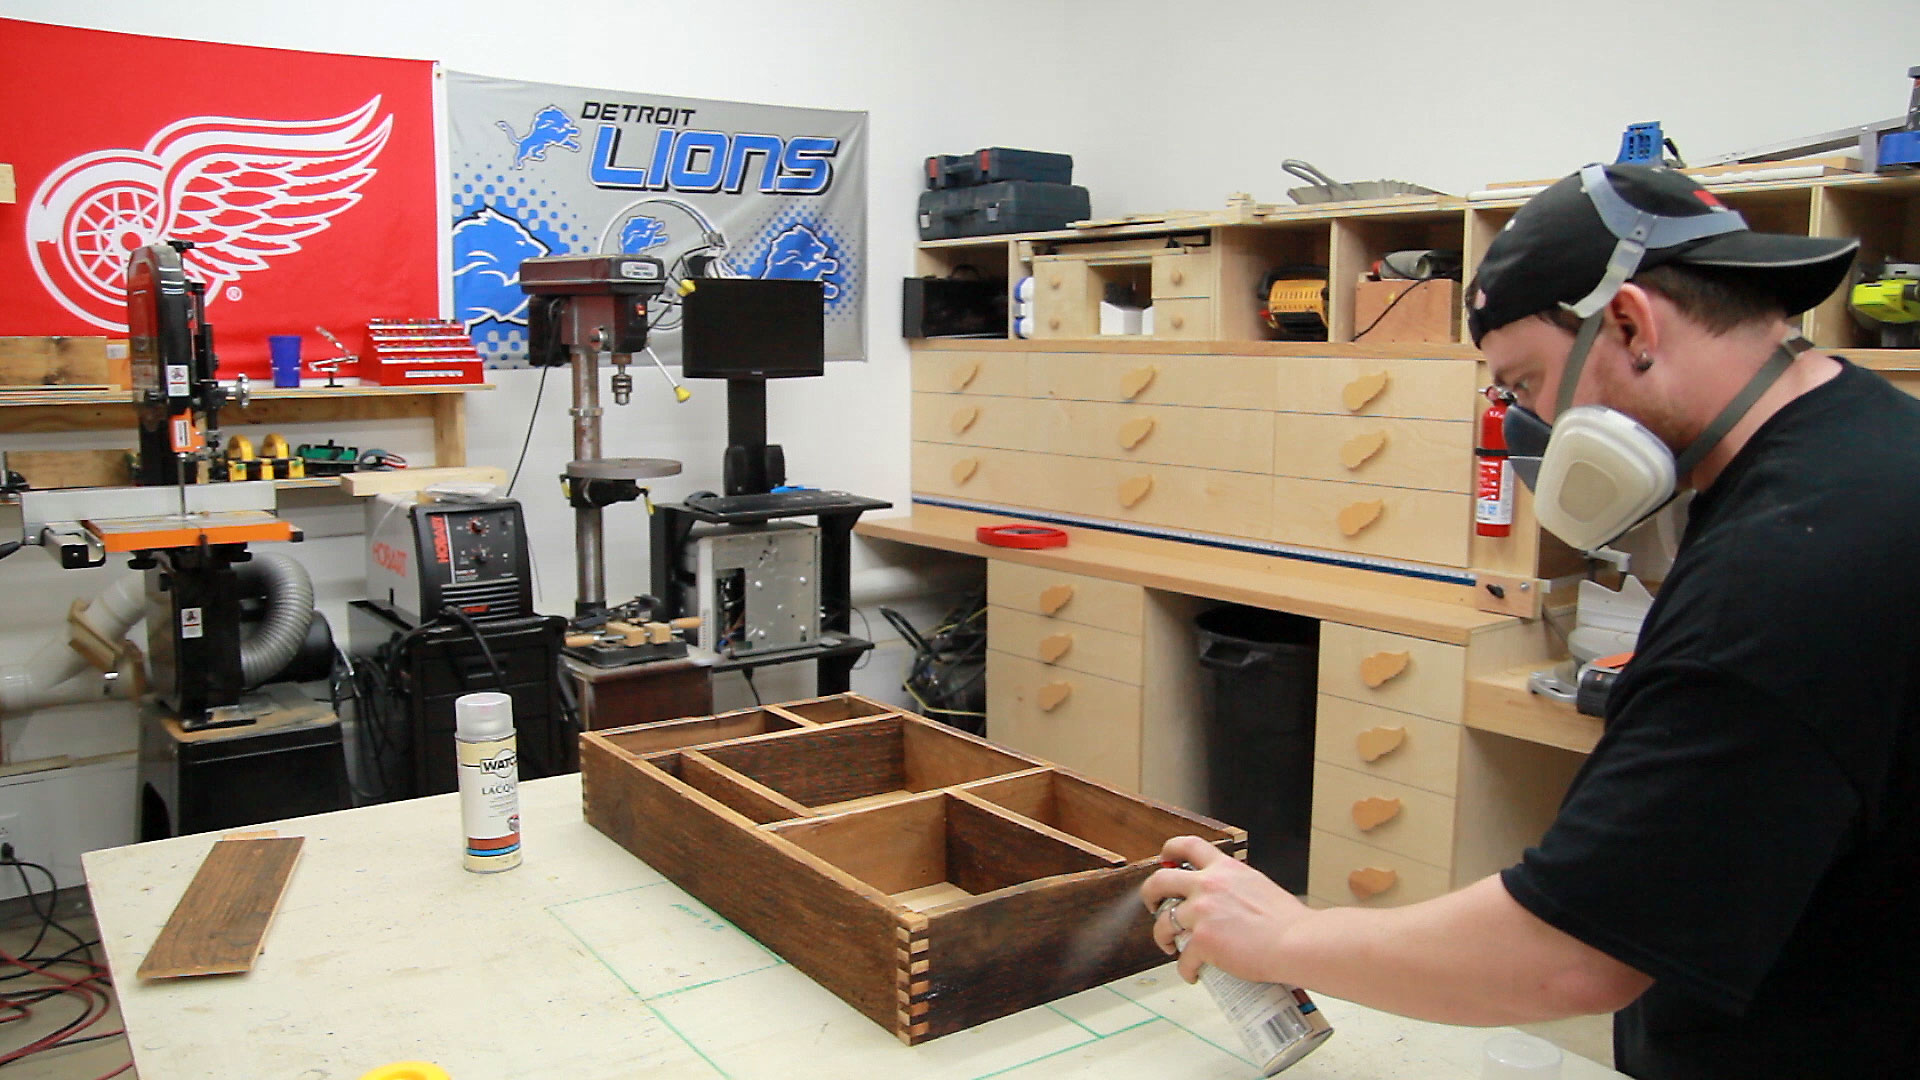
A can of spray lacquer gave a quick and easy protective finish. I wish I could have done this outside but it was raining. Instead I sprayed a few coats with the garage door shut and my respirator on.
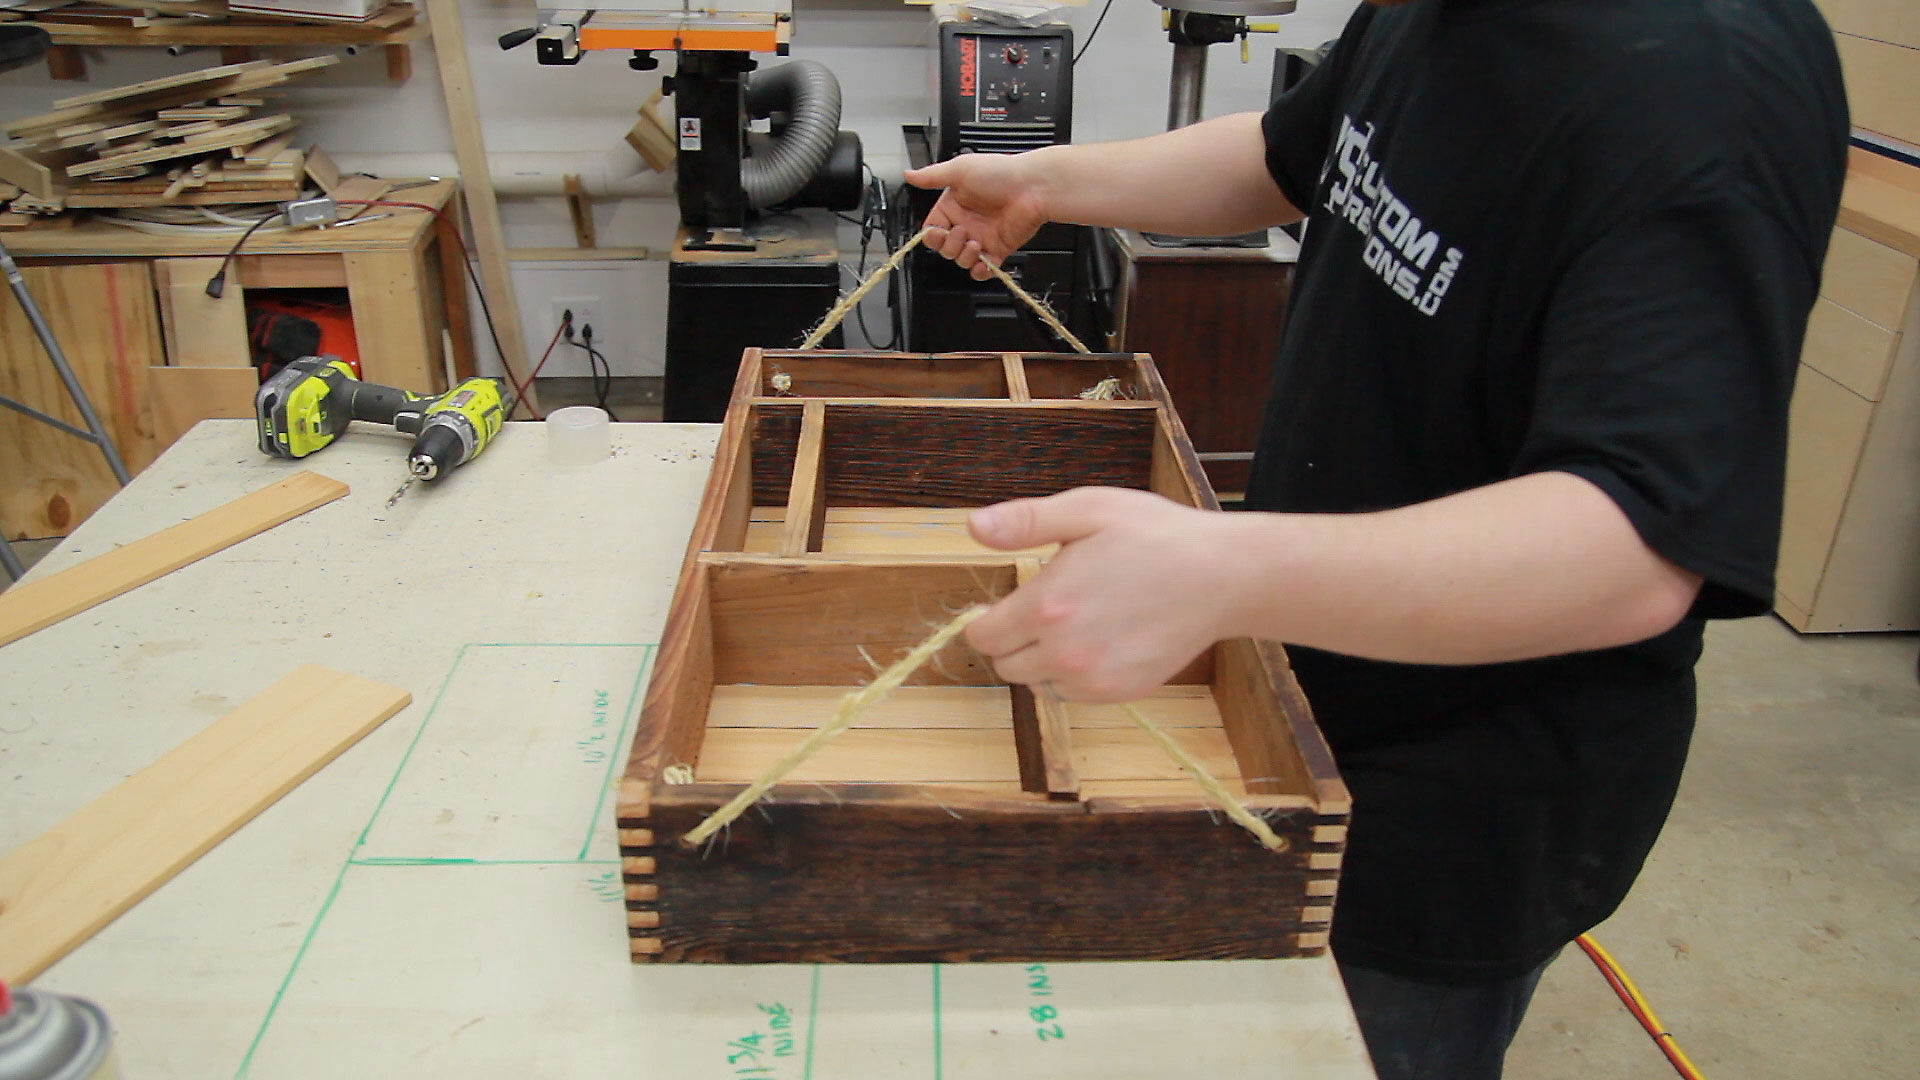
Twine handles are very fitting for the theme of the project. To add some thickness to the handles I used three double strands and braided them together.
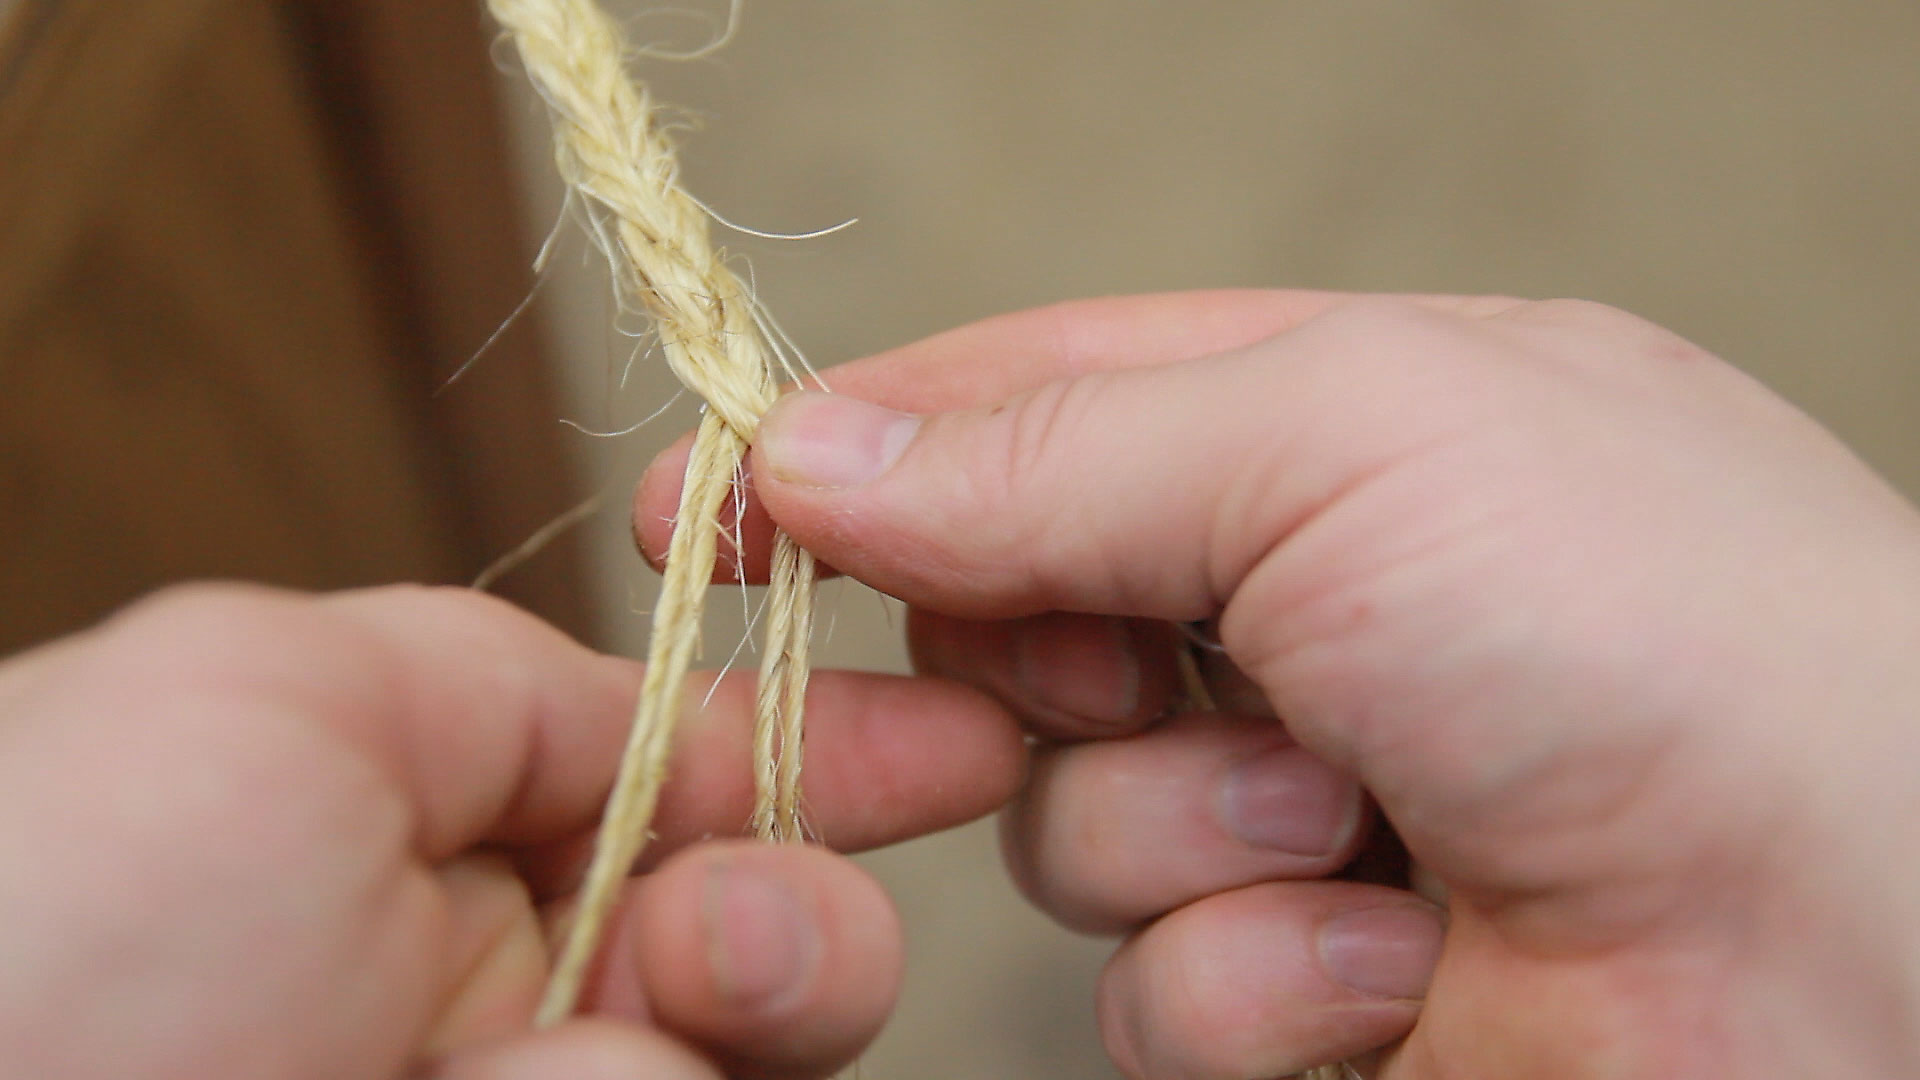
To secure the handles to the tray I drilled a couple holes on each side, pushed the twine through, and tied a knot on the inside.
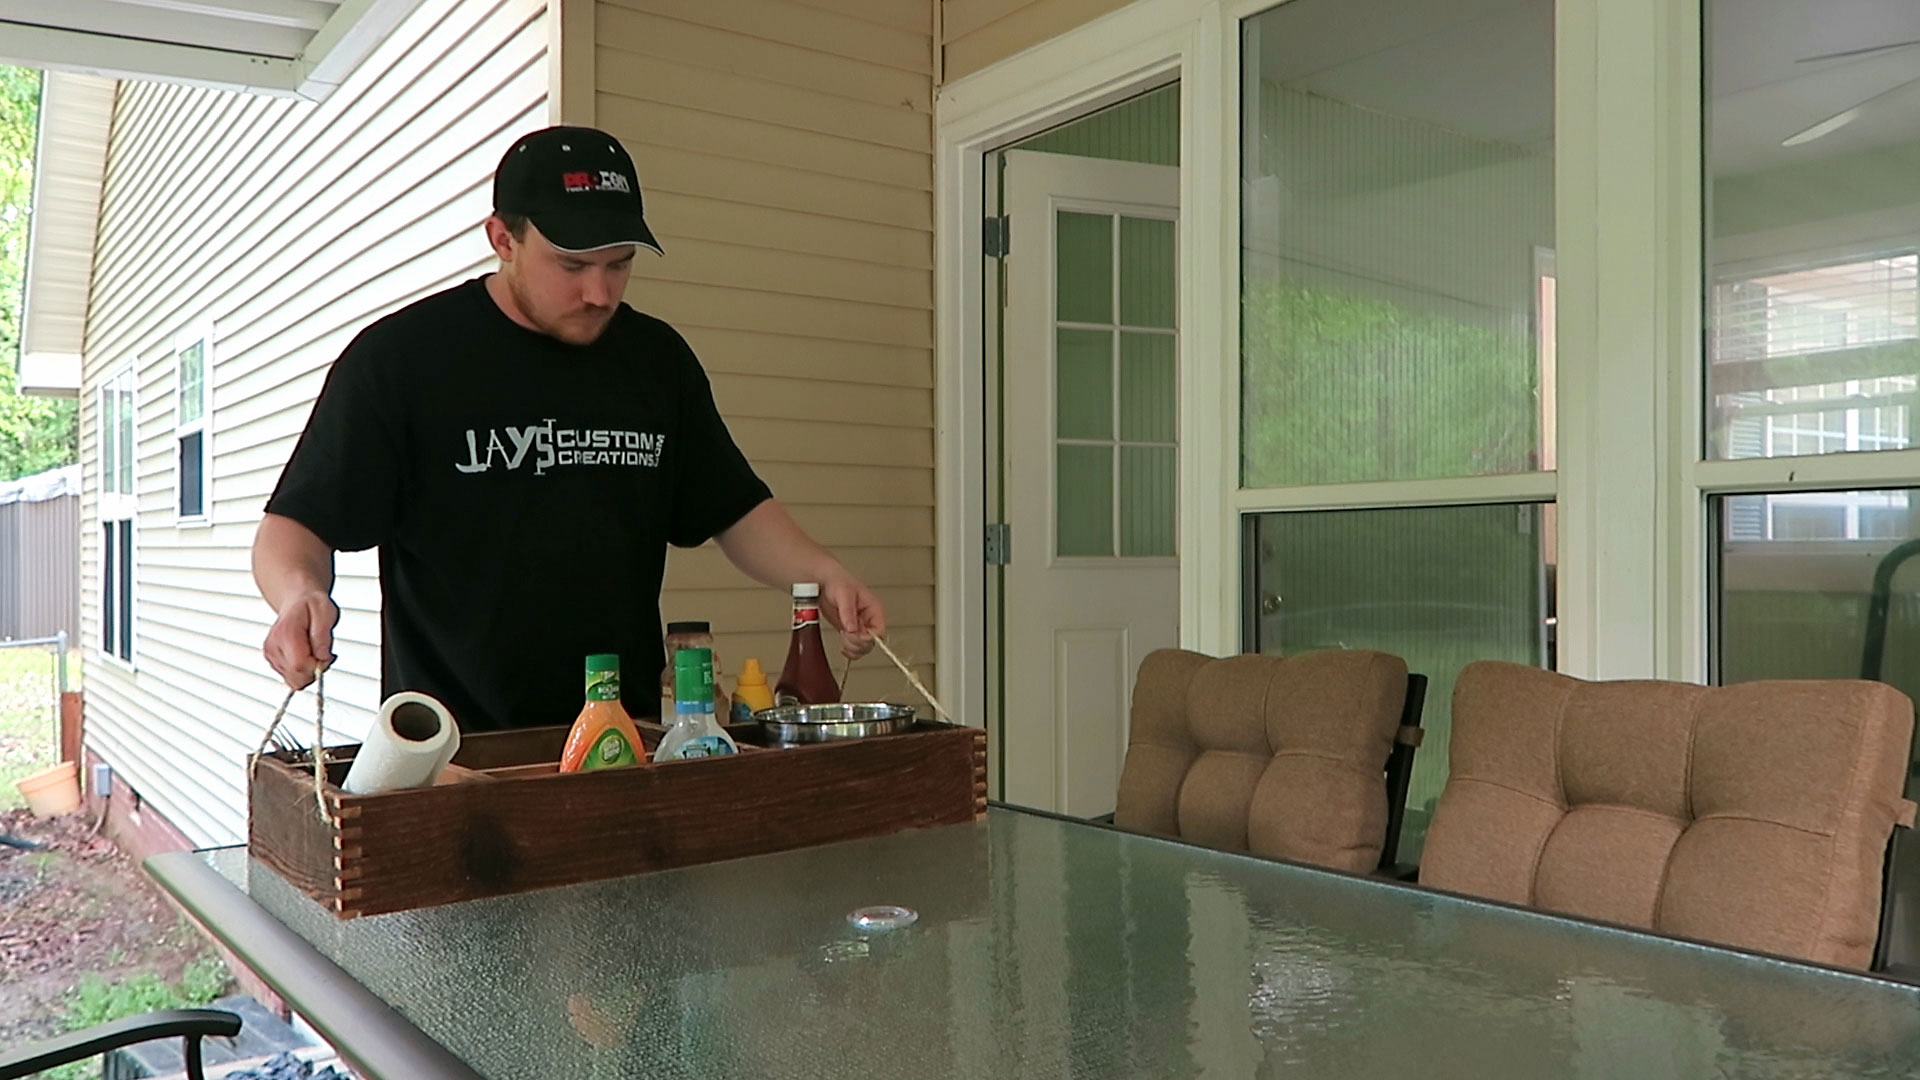
And a test run with a random batch of goodies from the kitchen. It works just as intended and it has a nice look to it as well.
If you liked this project perhaps you would like some of my previous work. As of writing this article I have a total of 402 posts to this website. Feel free to browse the categories in the top menu bar and sign up below for my email newsletters to be notified when I post new content. Thanks for stopping by folks. 


Love it!
Thanks Dan.
Jay, you are the best. Your videos have to be the most creative and best on the web. Glad to see your Miter Saw Station in action, also. Keep up the great work. Daniel
Thanks Daniel. I appreciate the kind words.
I enjoyed the video and its style, along with the project. Very cool! Somehow I ended up being hungry after watching it!
I’m somehow hungry….always.
It’s the little things that show genius. Not in a million years would it have crossed my mind to make a template using the actual stuff that would be used in the tray. I couldn’t have been in the shot, who would have ran the camera?
True, very true. I needed to run the camera.
Love the project, Jay. But why cut the rabbet with the router when you have that great dado attack? Weren’t the corners rounded as the router went around each?
Because if you cut a rabbet with the dado stack the lower finger on the box joints will be cut in half. Rounded corners from the router bit are no problem. Just round over the corners on slats with the bandsaw. Thanks for stopping by Don.
Dado stack. Stupid autocorrect. ☺
What’s funny is I read Dado Stack the first time. (Auto Brain).
I didn’t notice it said attack until you brought it up.
Loved the Frank Howarth inspired opening… I bet yours was a quicker solution to the stop frame process.
I have a bunch of pallet wood and just got a cheap dado set… this might work for us too.
Again, great work. Thanks
It was actually a Casey Neistat inspired opening shot. He does a lot of top down video. Thanks for stopping by Stewart.
Nice project, I am always going to and from getting stuff when BBQing
It’s such a pain in the butt! Thanks for stopping by Wayne.
Great project. Makes me want to rebuild my box joint jig, but the sudden desire for BBQ trumps getting staryed on it.
Nothing wrong with a sudden desire for BBQ. Nothing wrong with that at all.
When we bought our home out here in the country, the barn had a ton of 1x wooden siding from a 100+ year old house that had been on part of the property. I’ve done little knick knack projects using some of it here and there. I always do a complete paint removal as you never know what was in the paint used during all of those years.
This project is awesome. I will be making one of these soon as we do a ton of grilling and have an outdoor dining area.
Thanks for a great idea!!!!
Terry
Thanks Terry. Glad you found it useful :)
Jay, I feel your pain about numerous trips to the kitchen or yelling for something. Lol. Thanks for the idea and sharing it.
-Shawn
Absolutely. Thanks for stopping by Shawn.
Nice job Jay, I like the design it looks great for BBQing.
Thanks Jack!
I want to make lots of these for…lots of stuff.
Nice design looks good and functional.
Great idea–I’m regularly going back and forth out to the BBQ. Even though it’s a short walk for me, I’m probably going to drop a plate as I try to hold it and the tongs while opening the door.
Glad the dado set worked well.
This surely makes things easier. Thanks again dude!
Jay, as always your creative mind amazes me. I love the rustic look and the braided handles.Not to many men can braid unless they are raising a small girl with long hair. Keep up the creative projects. I appreciate the weekly vlog and for giving me ideas for my “aged ” wood. Take care.~Dolly
hahaha….Don’t tell anyone but…I braid my wife’s hair when she asks..
Cool project Jay!..BTW..What is the name of that song please?
the song is called Over Time on Audionautix.com
Thanks!!!
A very practical project that I can build…. Thanks
Wait, your wife *bought* a table and chairs? That seems like a build project you’d have been all over! :-)
Great video and cool project, as always.
I normally would have but my wife wanted it done immediately and making 6 chairs sucks!
Craftsmanship !!!! Love your glue up waiting time. Looks like your twin gets involved too.
He’s only good for making sandwiches…
I loved this. My whole aim lately is using ‘repurposed’ pallets. The used be called junk, now they are repurposed. Using pallets one has to be careful of the past use of the wood. How was it treated for insects, was it used in a chemical plant or grocery store? You don’t want to mix for food with that wood.
Given that you didn’t know the past of the wood I would (no pun intended) I probably wouldn’t have used it for food.
No food came in contact with it though. I have no intentions using it as a plate.
Love it man, my wife wants me to make one now lol.