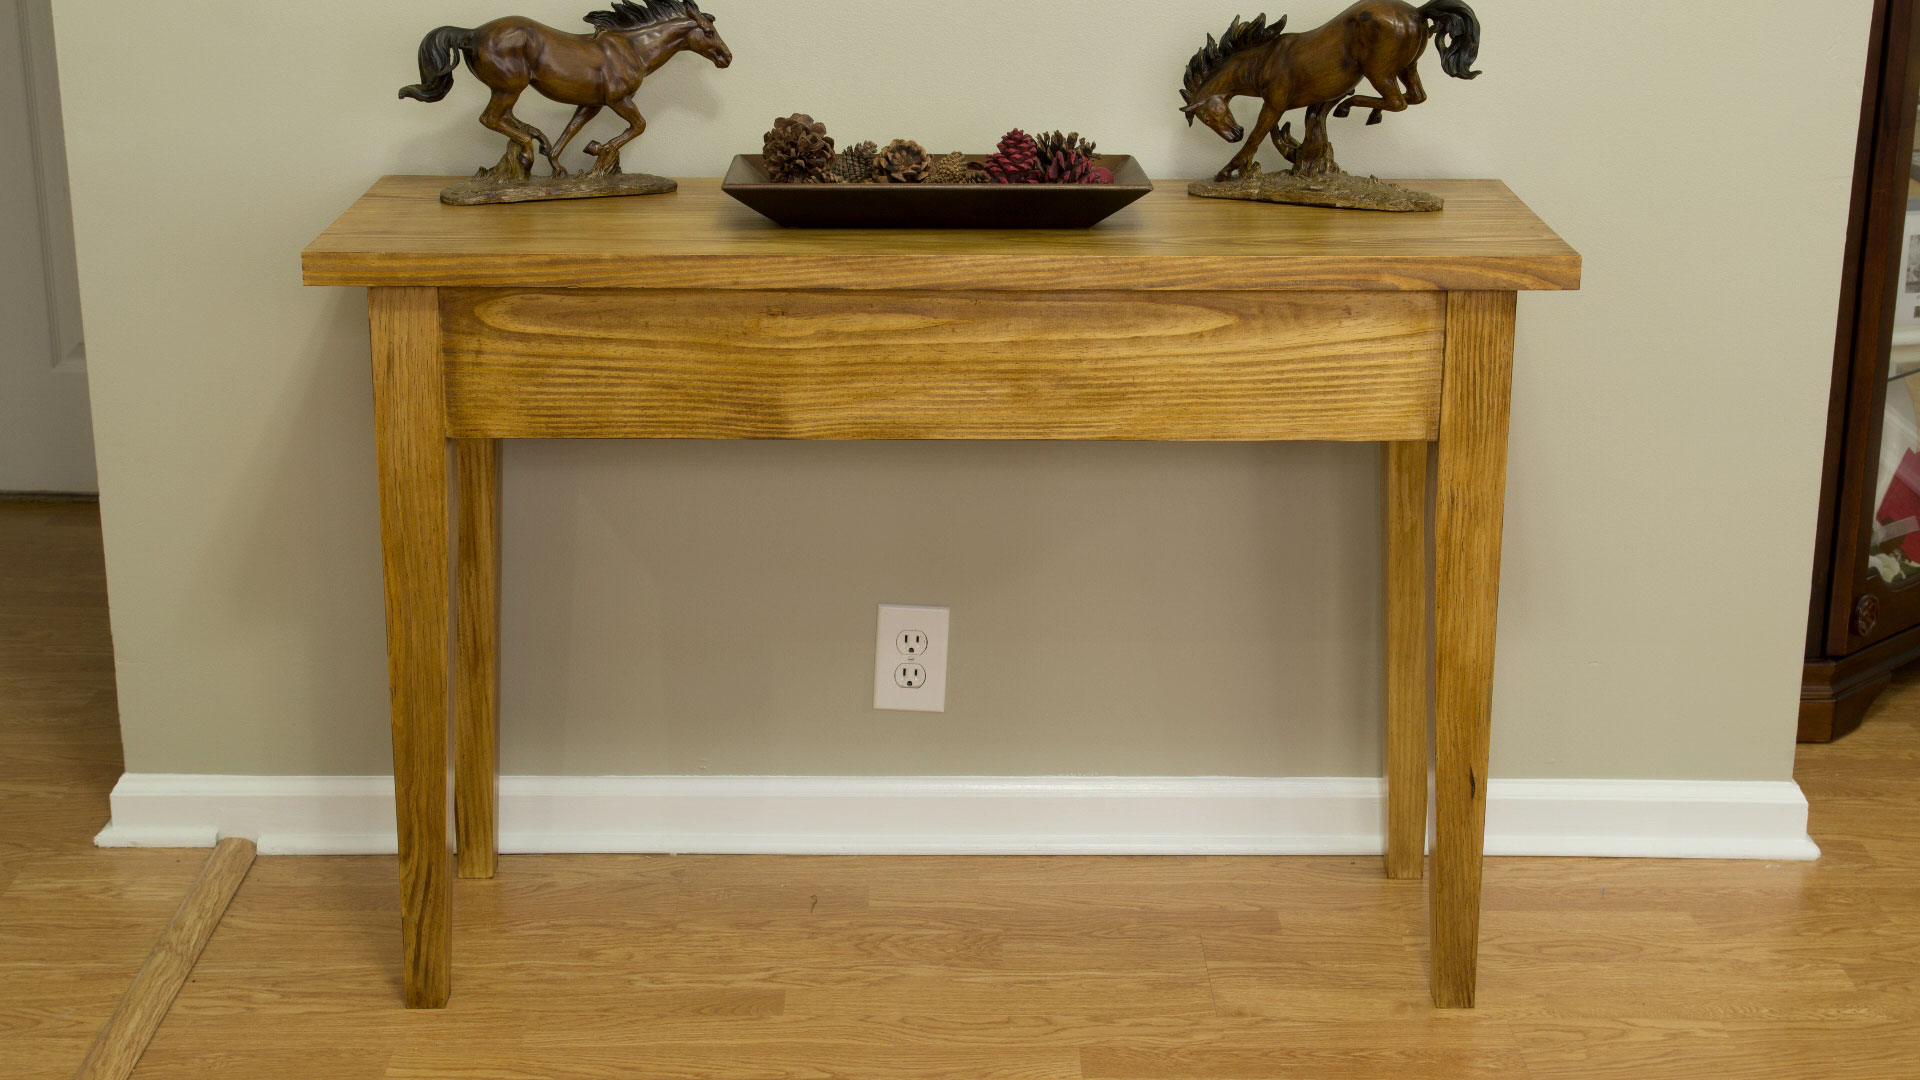
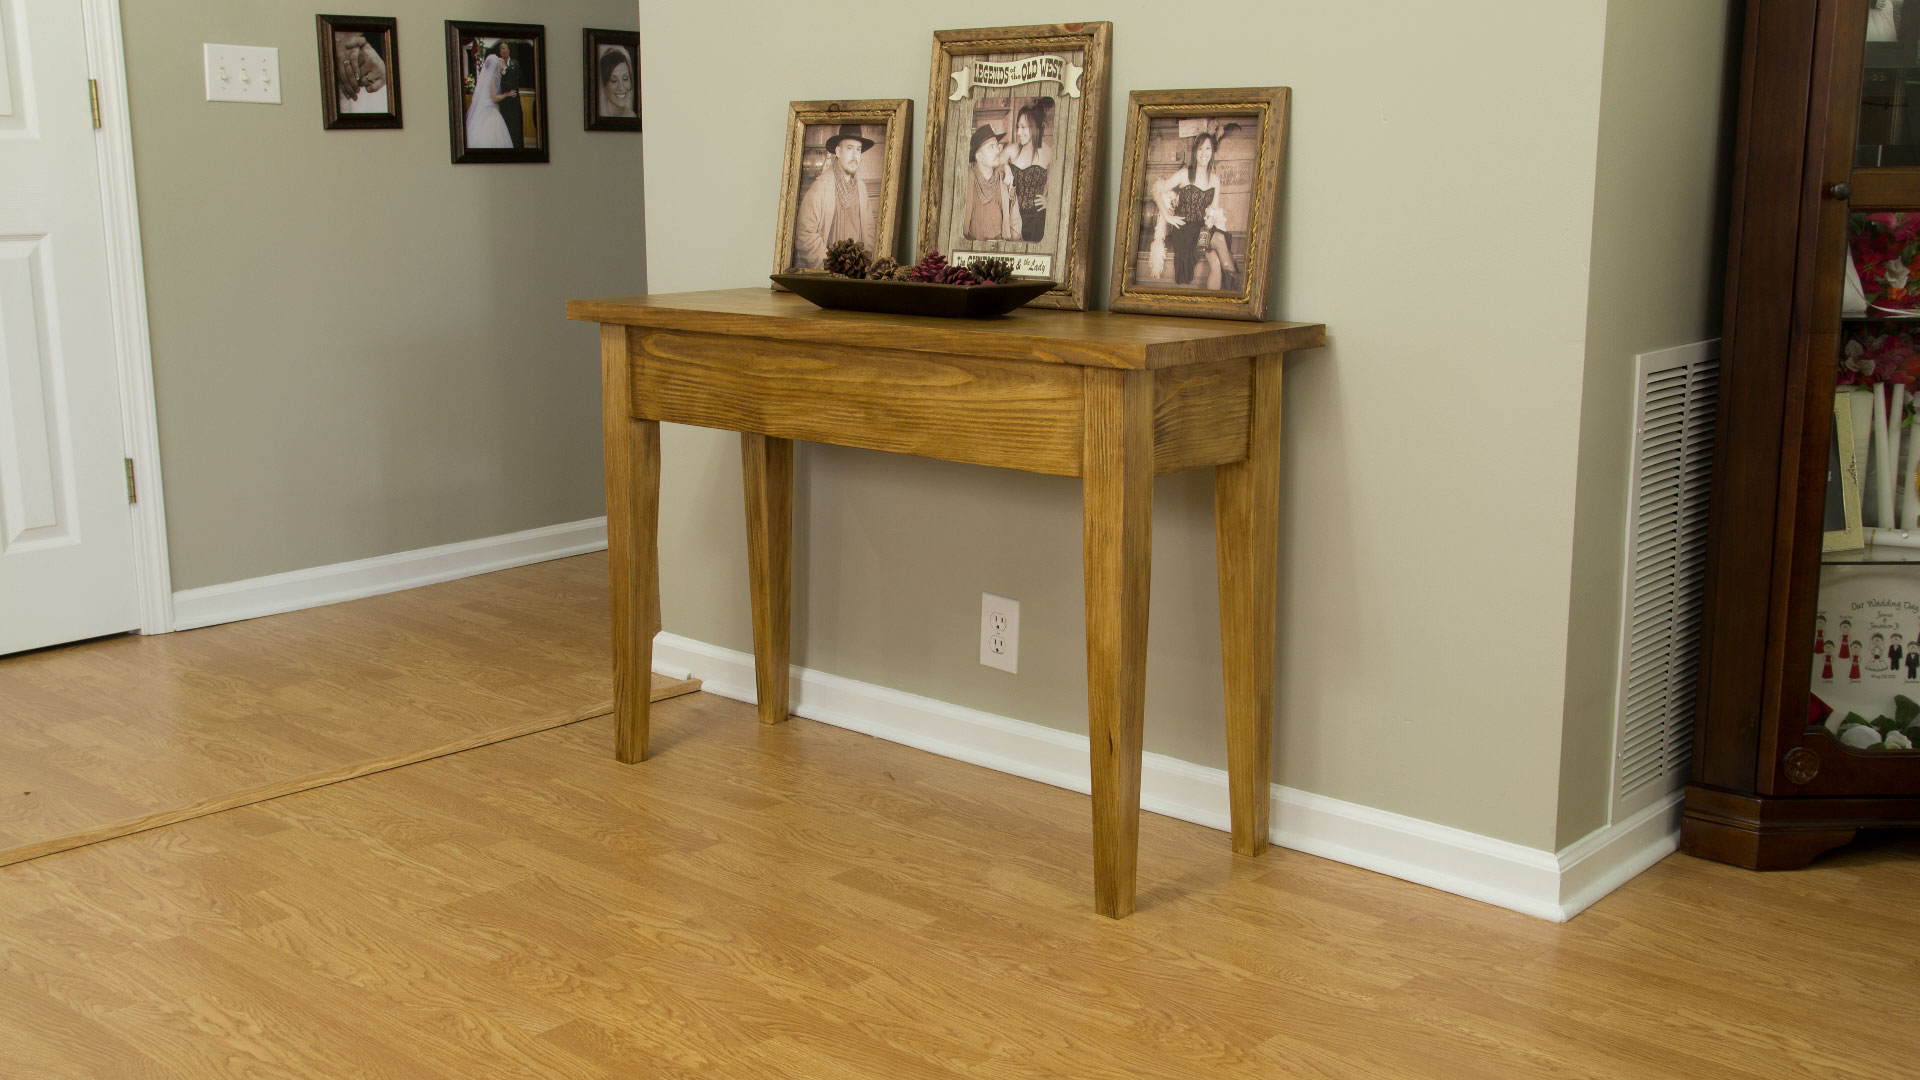
A simple sofa table has been on my list of stuff to do for quite a while and I’m finally getting around to making it. I specifically took measurements to put it behind the love seat in my living room but after having the completed table in place it ended up being a little too large for the look I was going for. I’ll still call the project a success though. It’s a really sturdy, solid wood table built for less than $40.
The main thing I wanted to accomplish in this build was to make strong, traditional mortise and tenon joinery. If you can make tongue and groove joinery on the table saw and also happen to have a plunge router then mortise and tenon joinery should be pretty easy for you. The process for the tenons is the same as the tongues on a table saw and the use of a plunge router will make the mortises quick and easy.
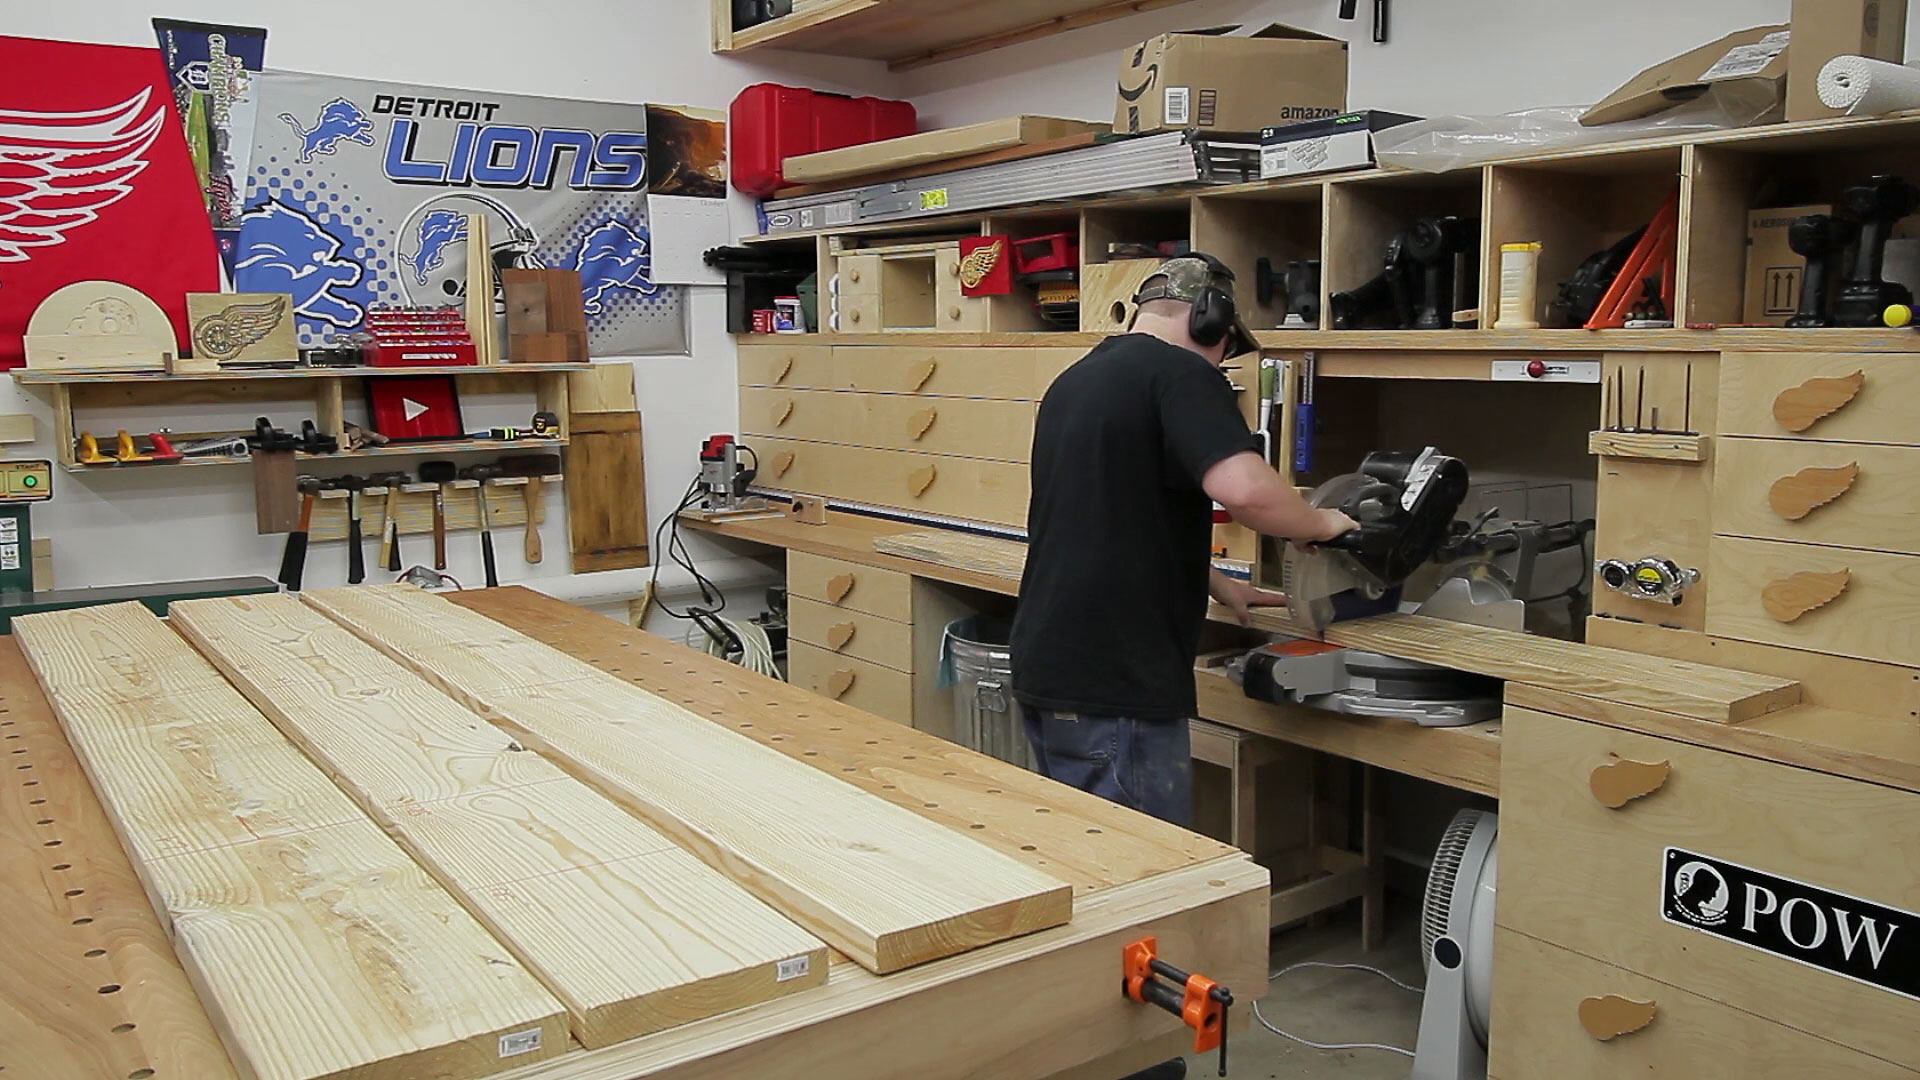
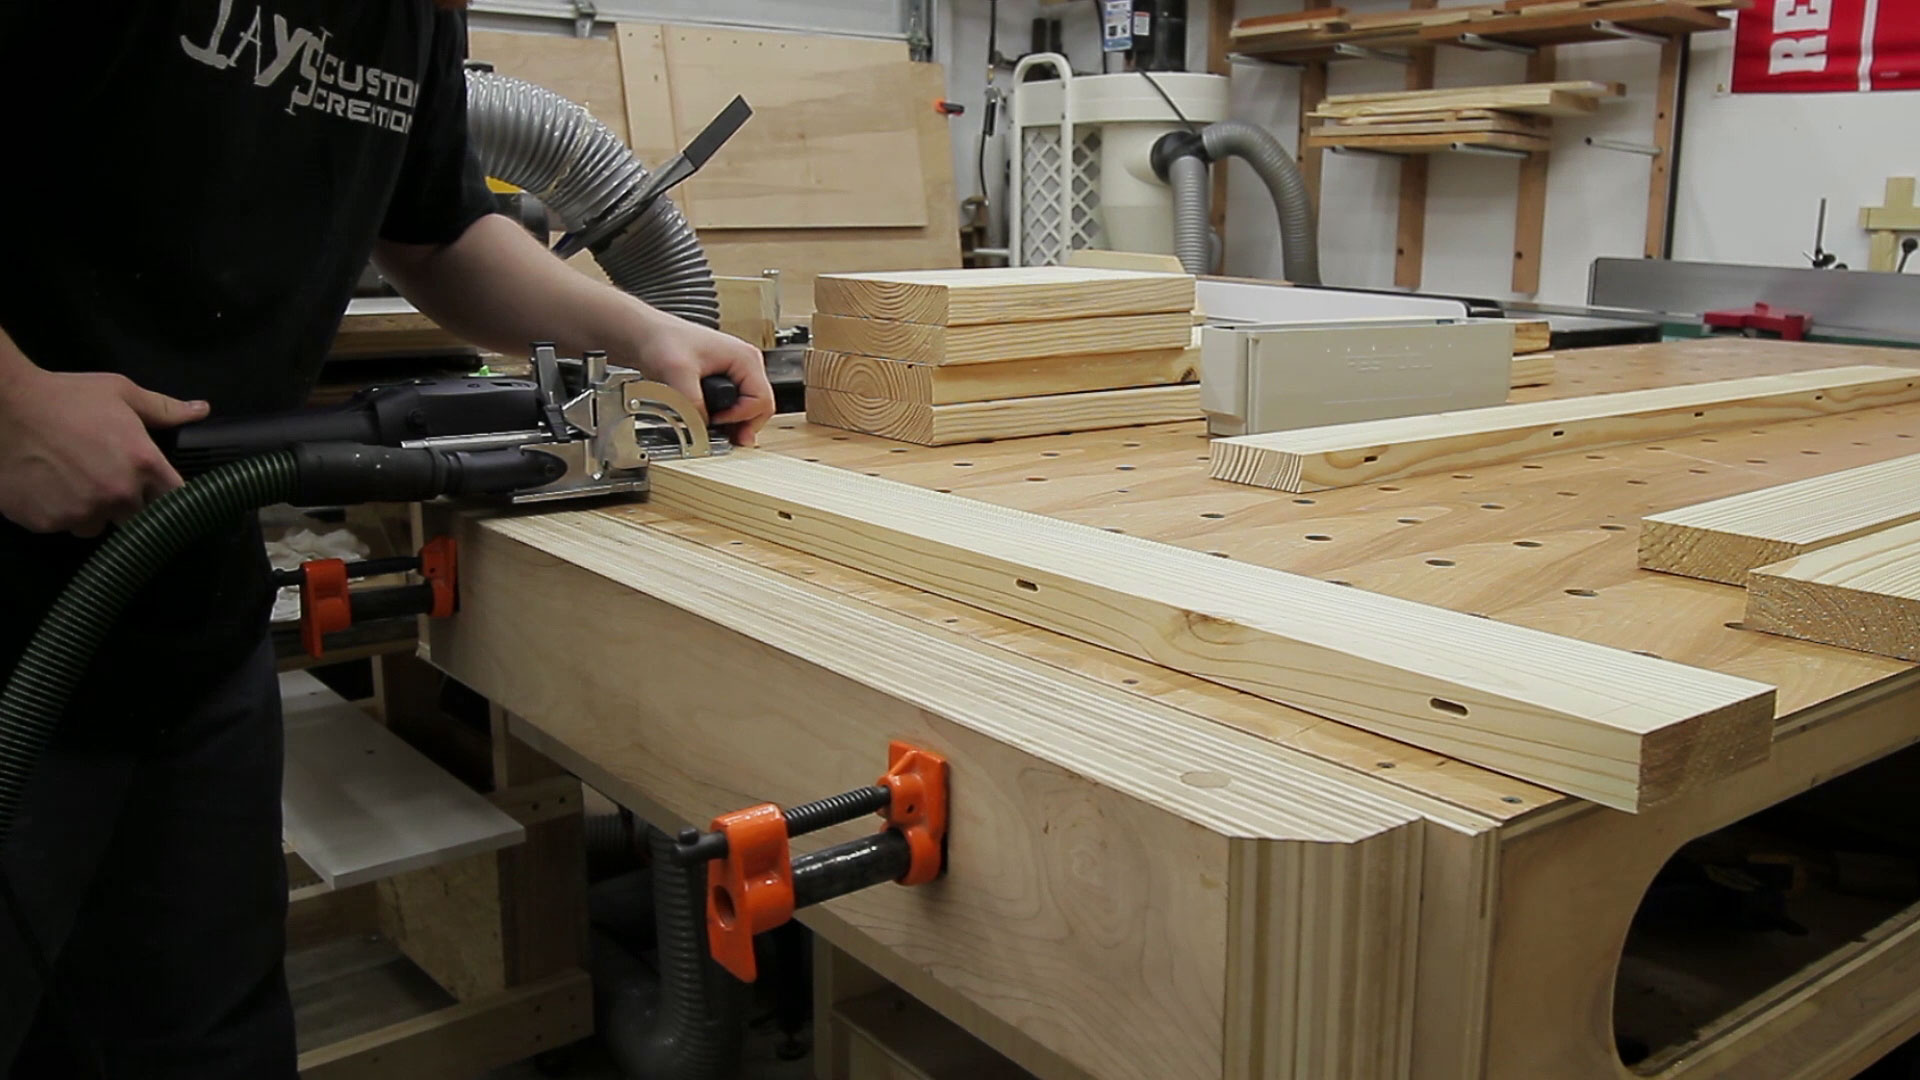
With all of my dimensional lumber projects the first step is breaking down the lumber in rough sizes. This always starts at the miter saw for me. Something I never get tired of saying is that building my miter saw station was hands down the best thing I’ve done for my shop. Primarily for the 21 drawers but also having a dedicated surface that will support wide lumber like this along its full length. This entire table will be made from four 8′ long 2×10 boards. Before rough cutting I took the time to layout all of the pieces I would need for the table with a crayon. This allows me to pick the best grain for certain parts and gives me the opportunity to avoid knots as much as possible.
What I used in the video:
- bluetooth adapter
- Dewalt planer
- Dewalt sander
- drill
- jointer
- plunge router
- miter saw
- mp3 earmuffs
- tudor brown Briwax
- scraper – BAHCO
- table top hold down clips
- table saw
- wood glue
- wax brush wheel for drill
- Festool Domino
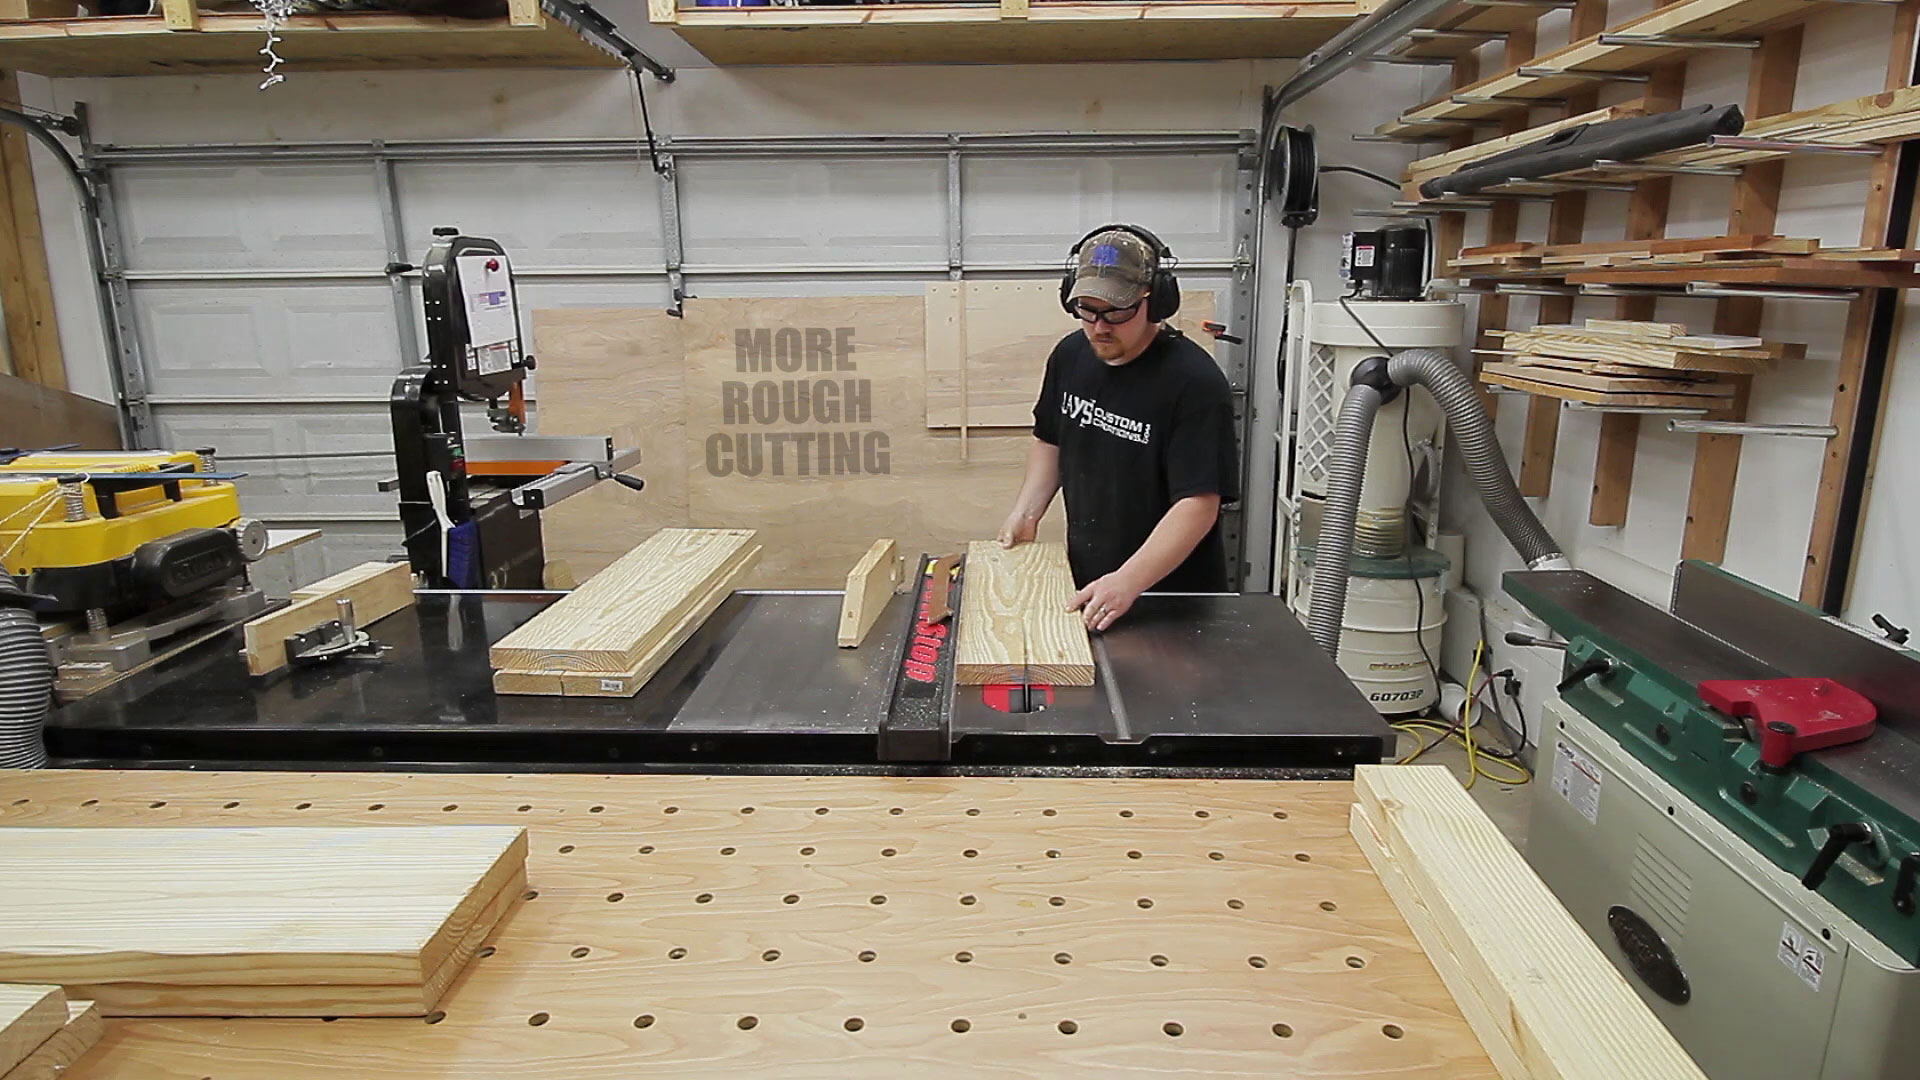
After the miter saw is the table saw. These 2×10 boards typically contain the pith, or the center, of the tree which isn’t desirable to work with. I generally rip the boards down the middle and work from the outside of the board in while dimensioning the pieces.
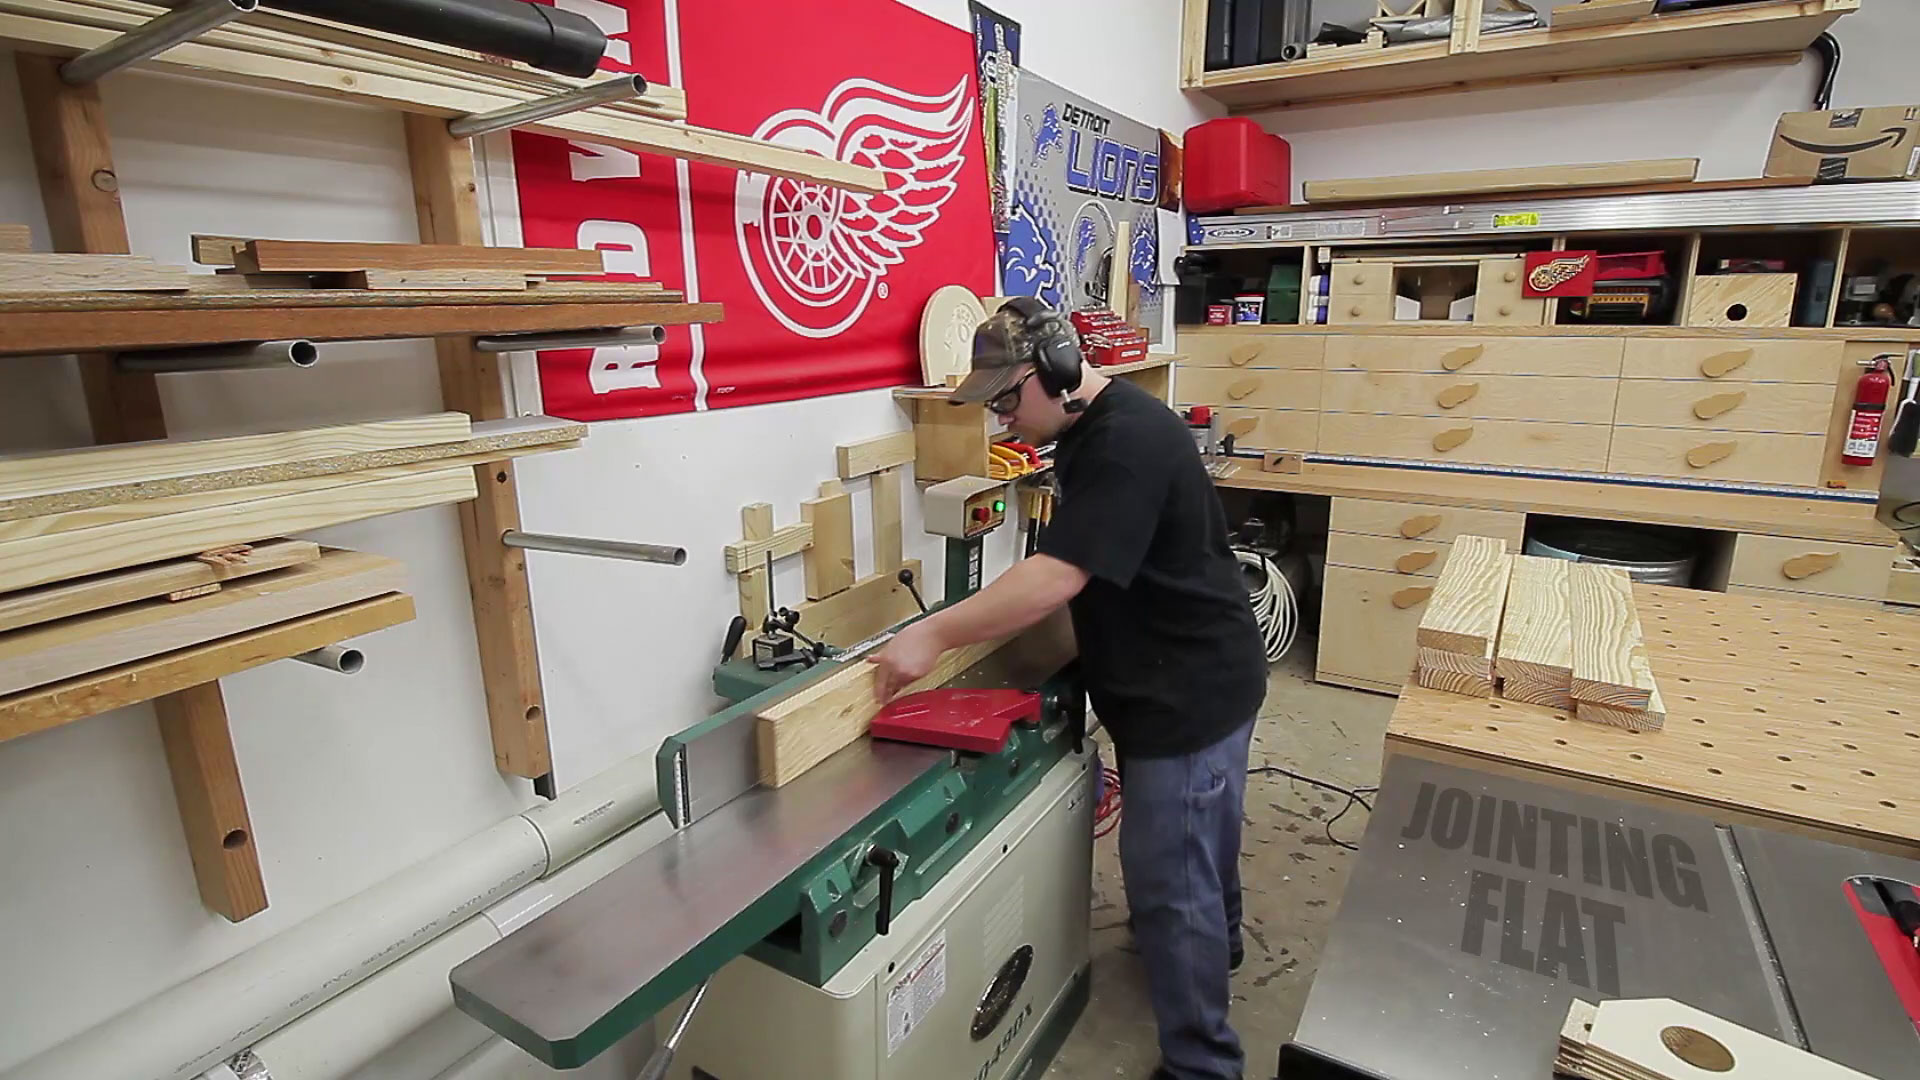
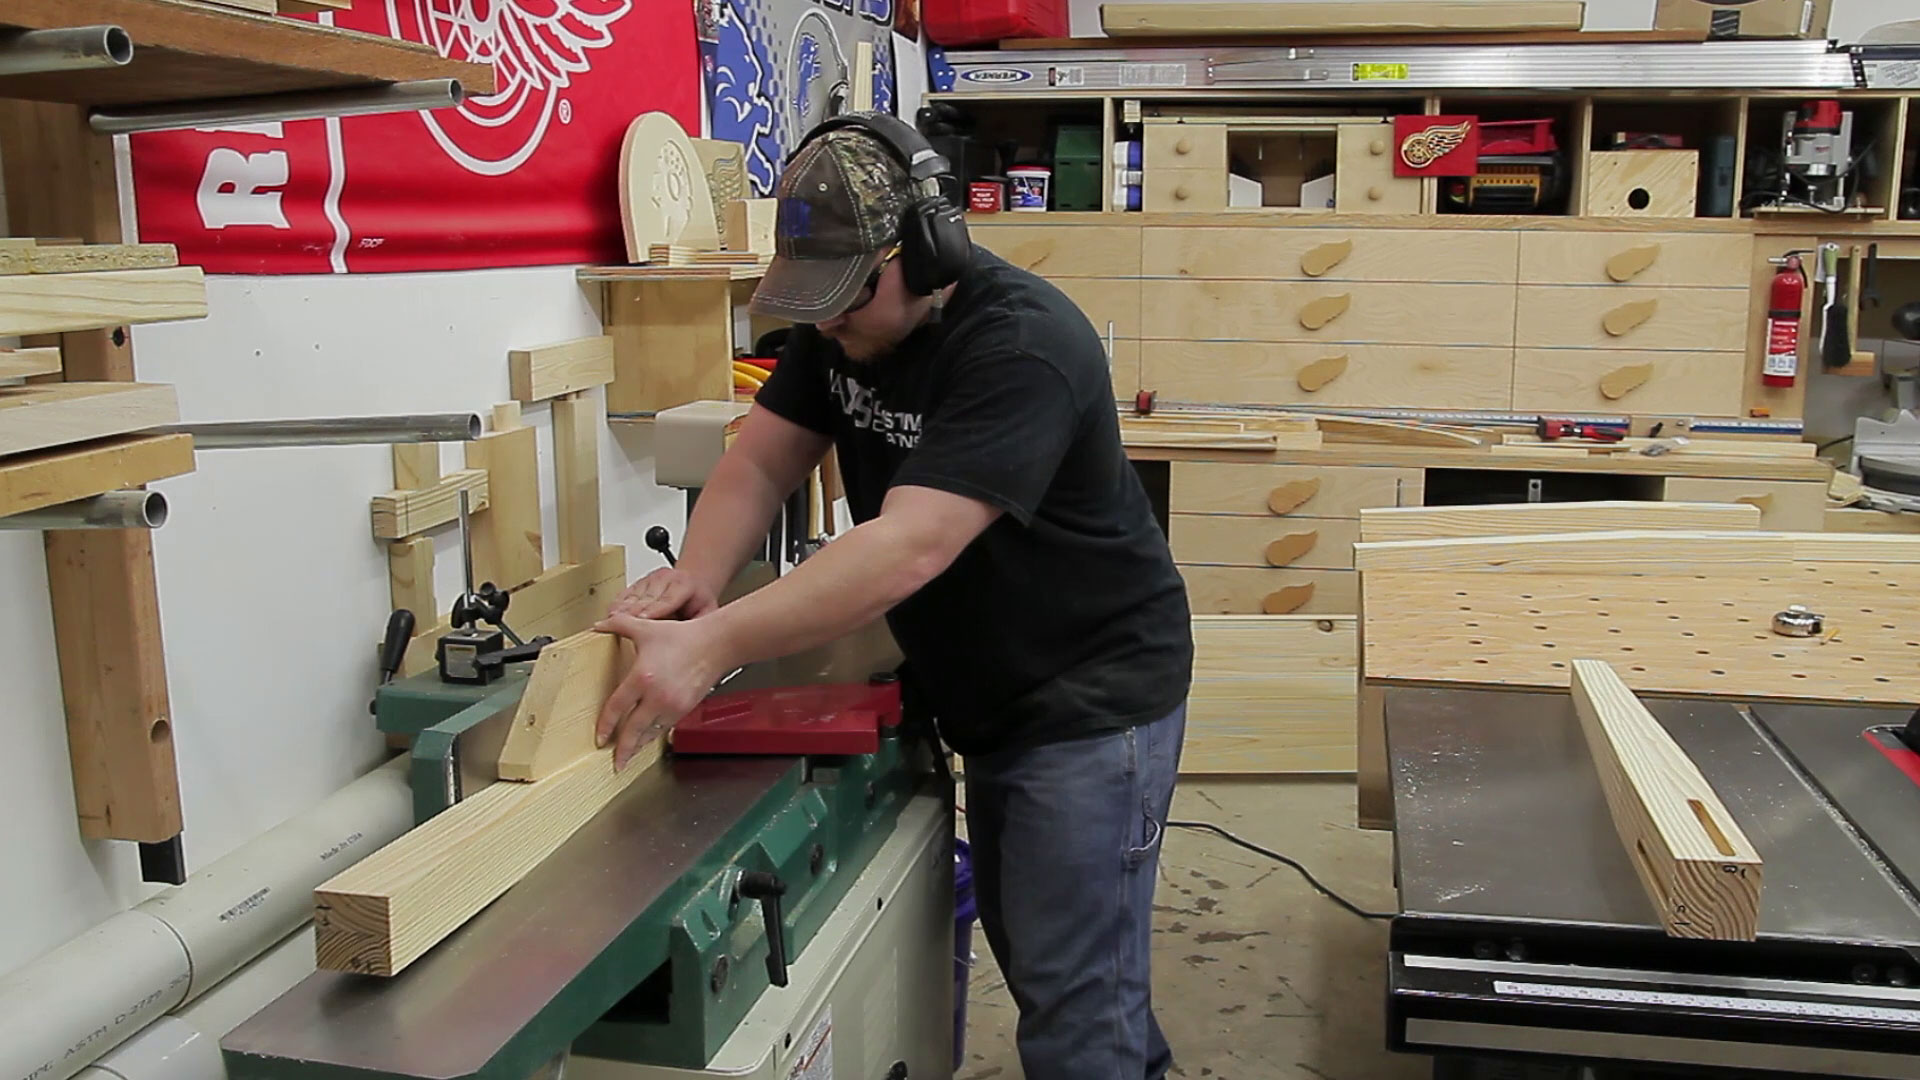
Then the jointer is used to establish one flat wide face and one flat short face perpendicular to each other. There are definitely workarounds to needing a jointer for woodworking but if you are ever in the position to get one I highly recommend doing so. Since getting mine every piece of wood I’ve worked with has passed over it.
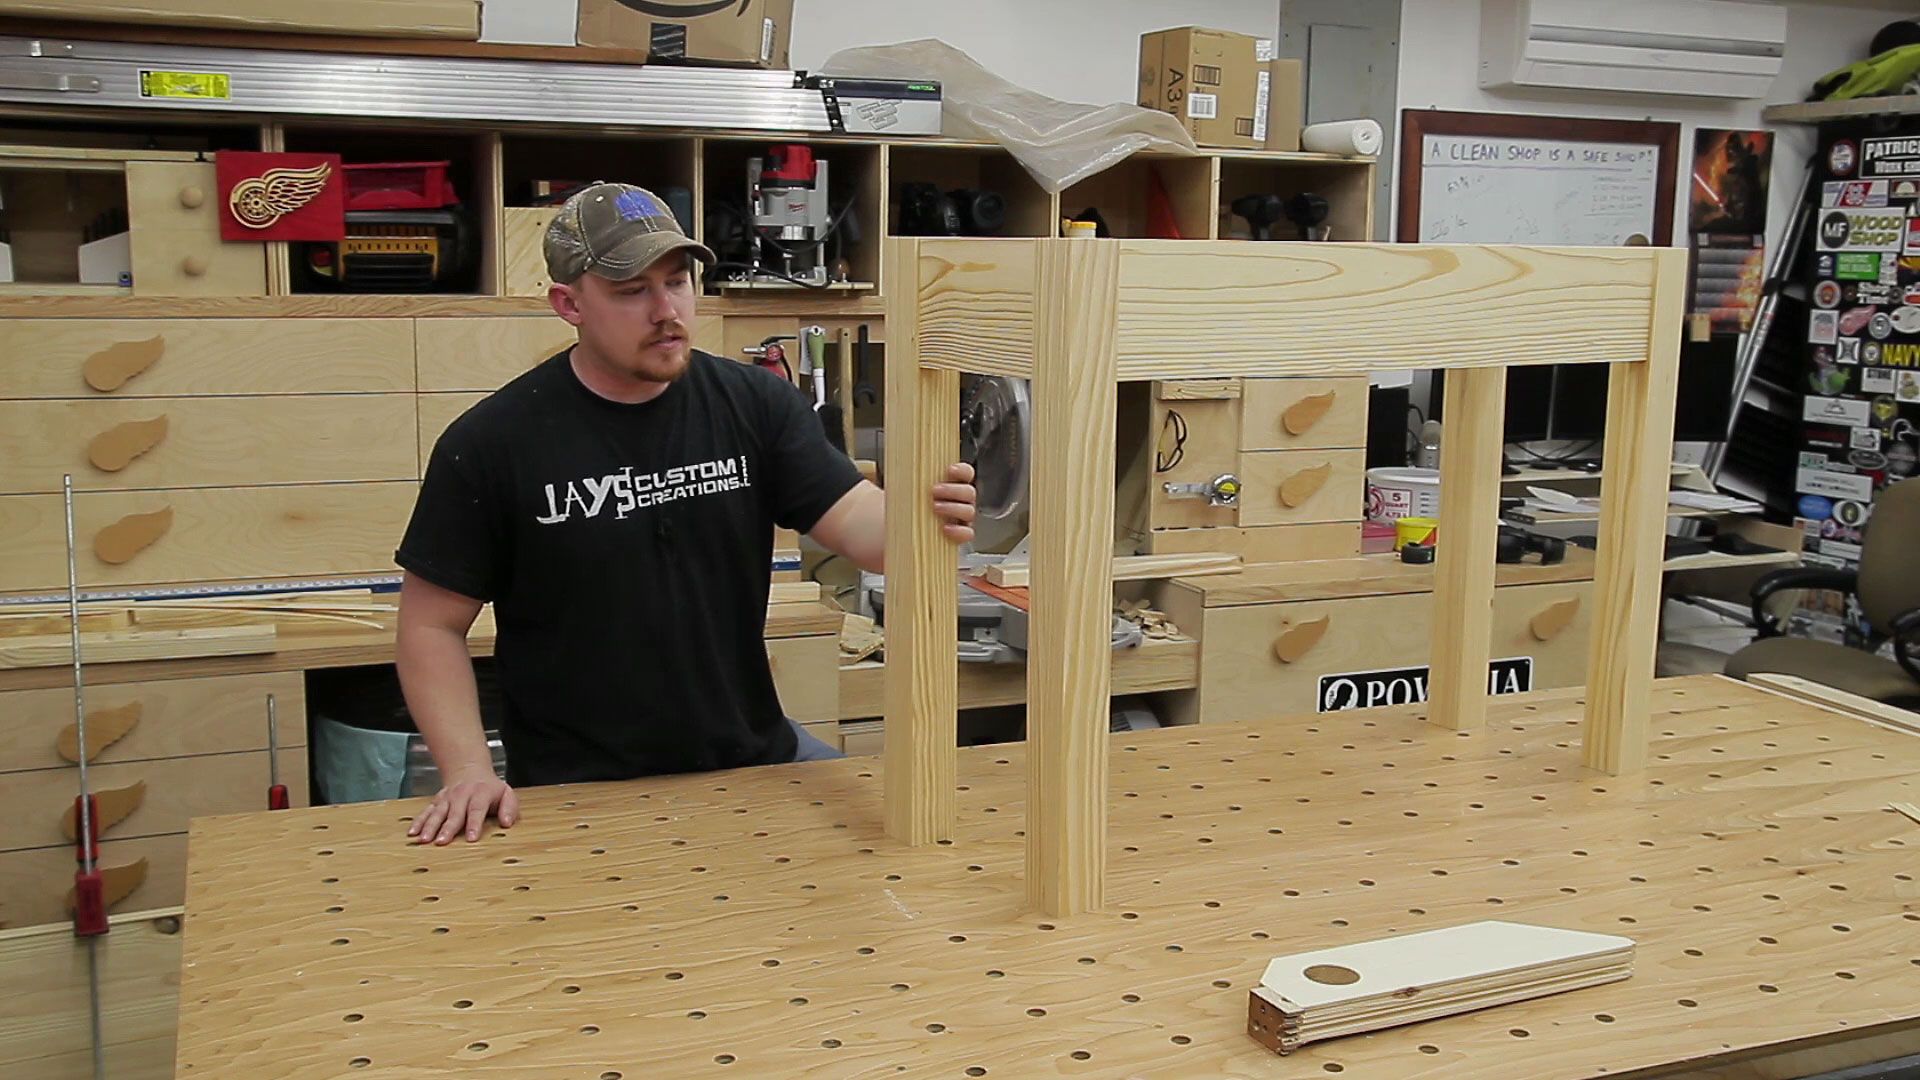
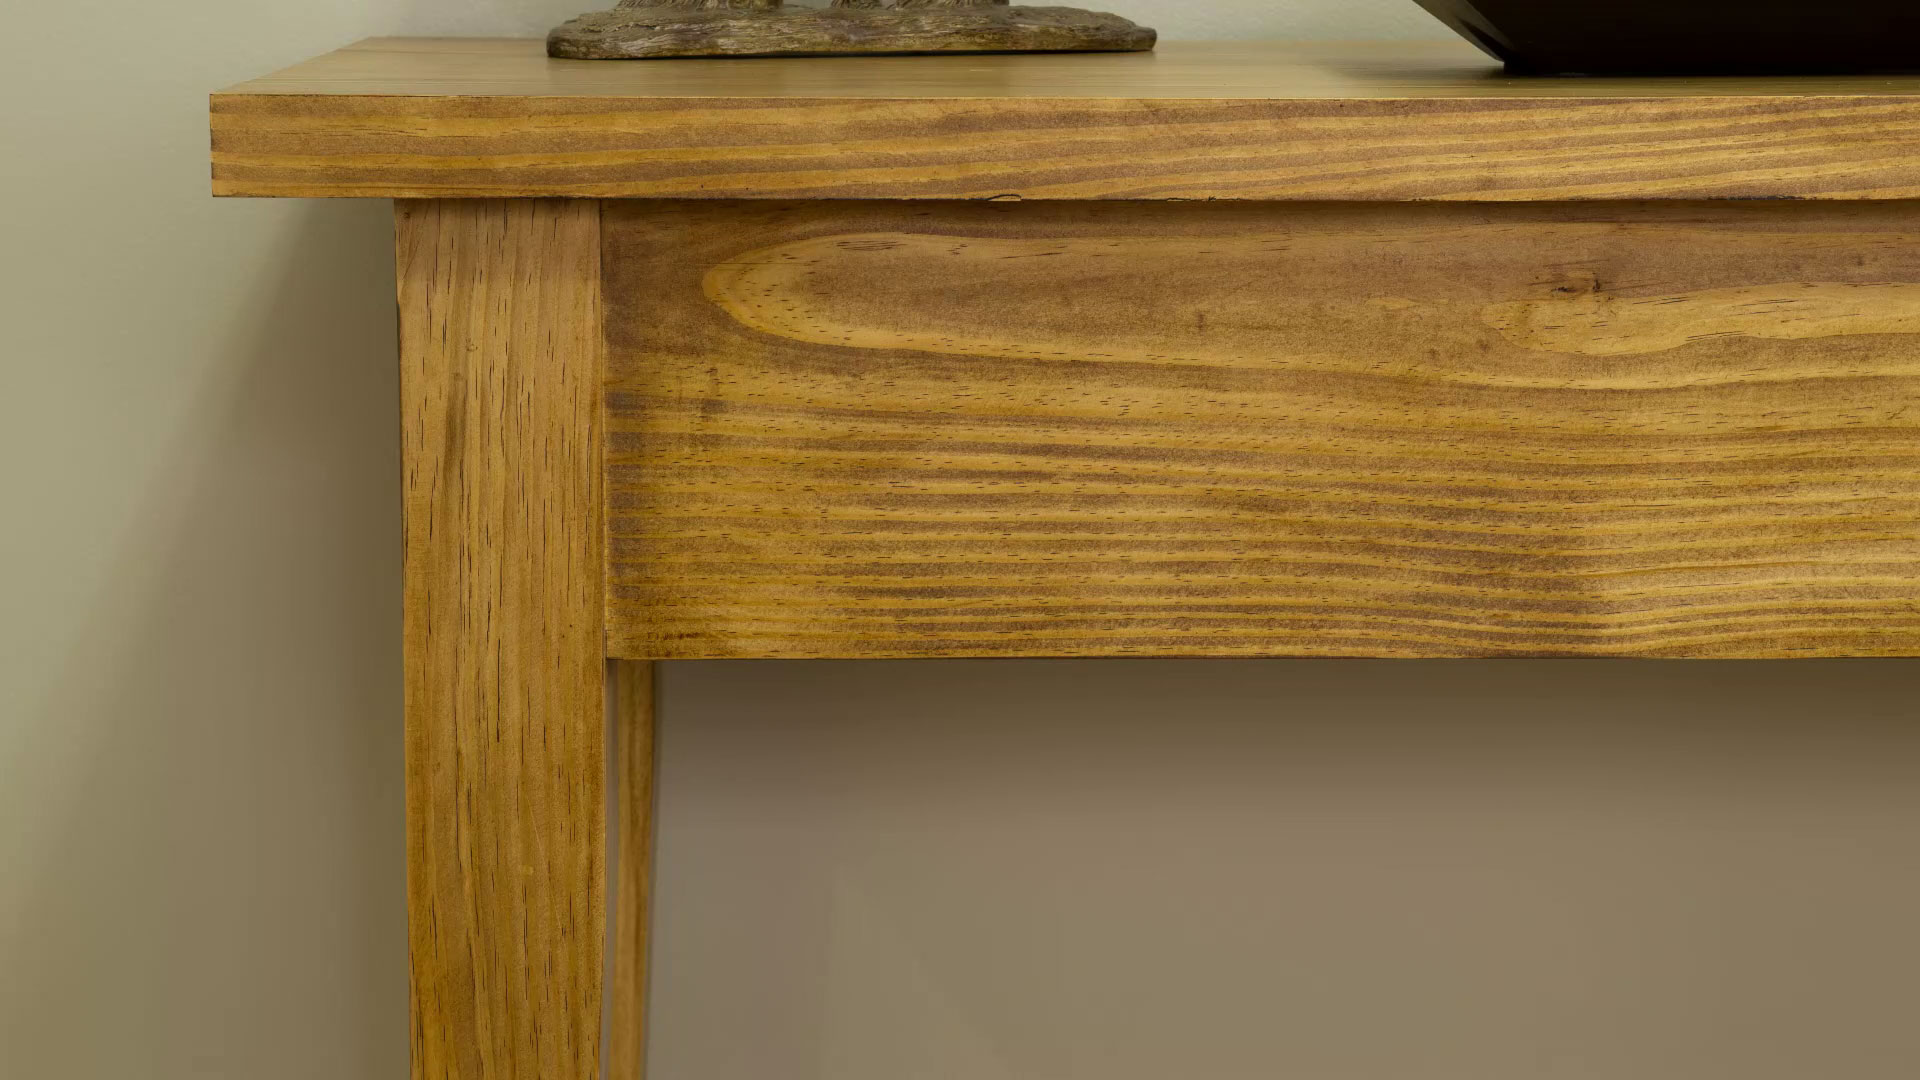
The first order of business was to get the leg blanks into clamps. The material I’m working with is 1-1/2” thick and the legs need to be 2-1/2” thick. Each leg will be a lamination of two boards. I always try to display the best grain on the legs, primarily the outside two faces. To get a nice straight grain look on both outside faces you need to find boards with the growth rings close to a 45 degree angle. In the following example assembly 1-2 will have more straight grain on the top face and left face than the assembly 3-4. For this reason 1-2 will be a front leg and 3-4 will be a back leg. I numbered the legs this way to establish the final orientation of the legs before even gluing them up. This way I can use the reference numbers to position them during assembly and know that my predetermined good sides will be visible.

With the leg blanks glued up and in clamps I started in on the top panel. The milling process is repeated but this time I made sure to get the four boards that will eventually make up the top panel flat and square four sides and also down to their final dimensions before glue-up. When the top panel is glued up I won’t be able to fit it in my planer so in this case final dimensioning needs to happen before glue.
In an effort to keep all of the top panel pieces flat and not shift during glue-up I added a few floating tenons to the assembly. In this instance these tenons do not add any structural strength to the project. They simply function the same way biscuits do to keep the assembly from shifting in clamps.
After adding glue to the joint faces all 15 of the floating tenons can be added.
And finally the top panel can be clamped up. The two knots you see in this picture will be on the bottom side of the top panel and in the back.

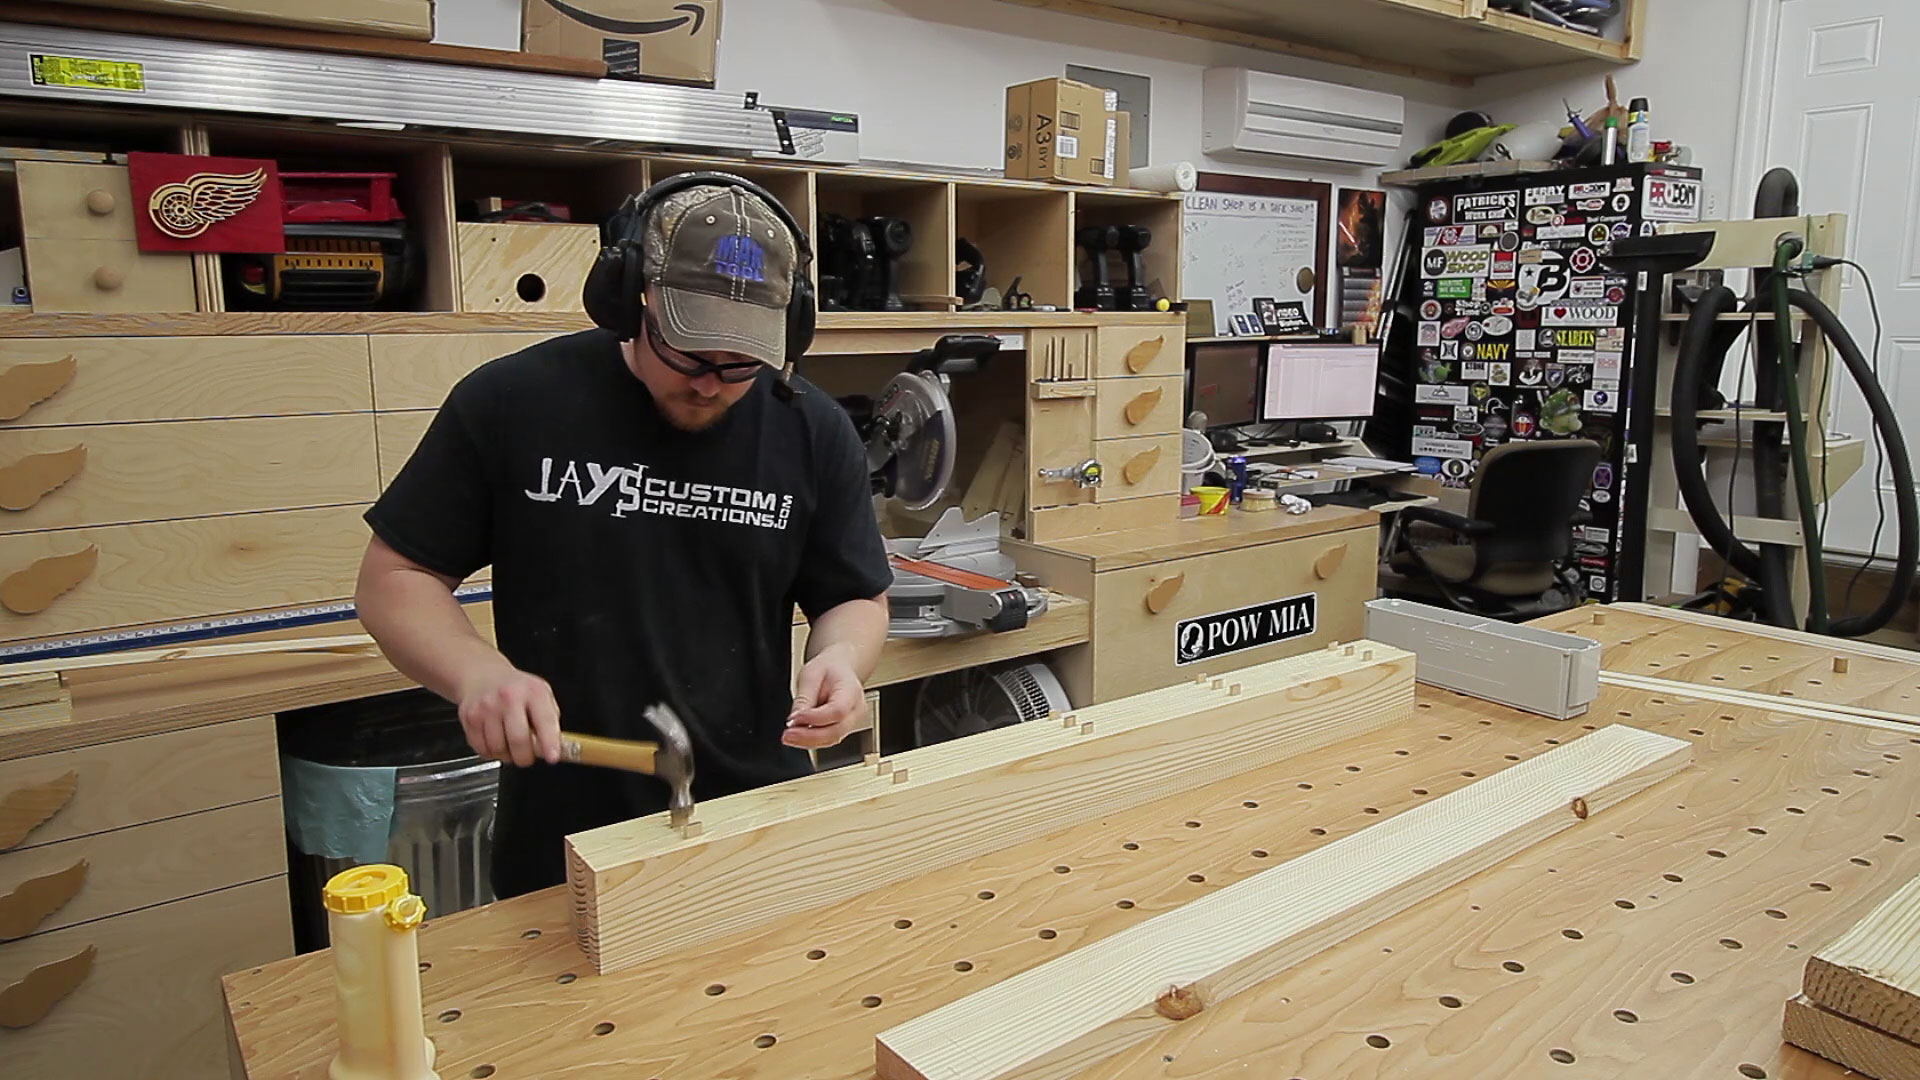
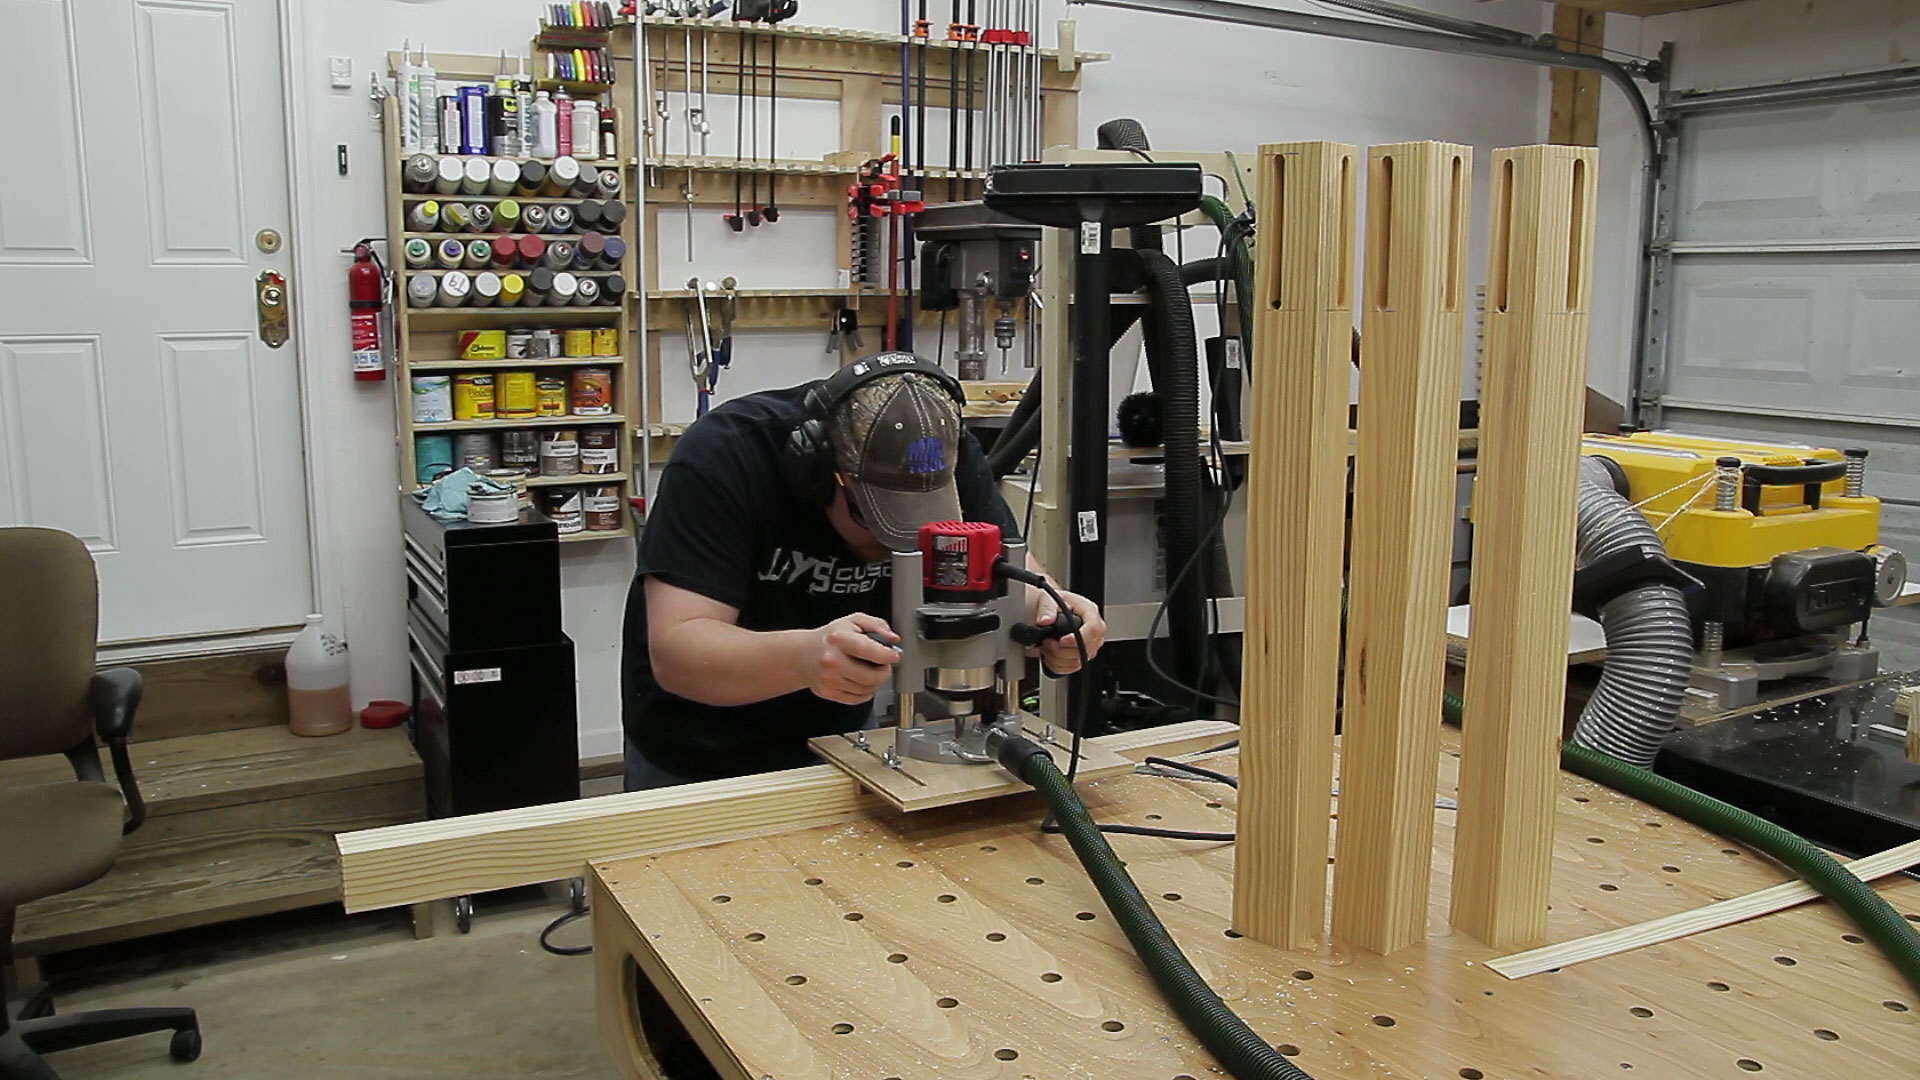
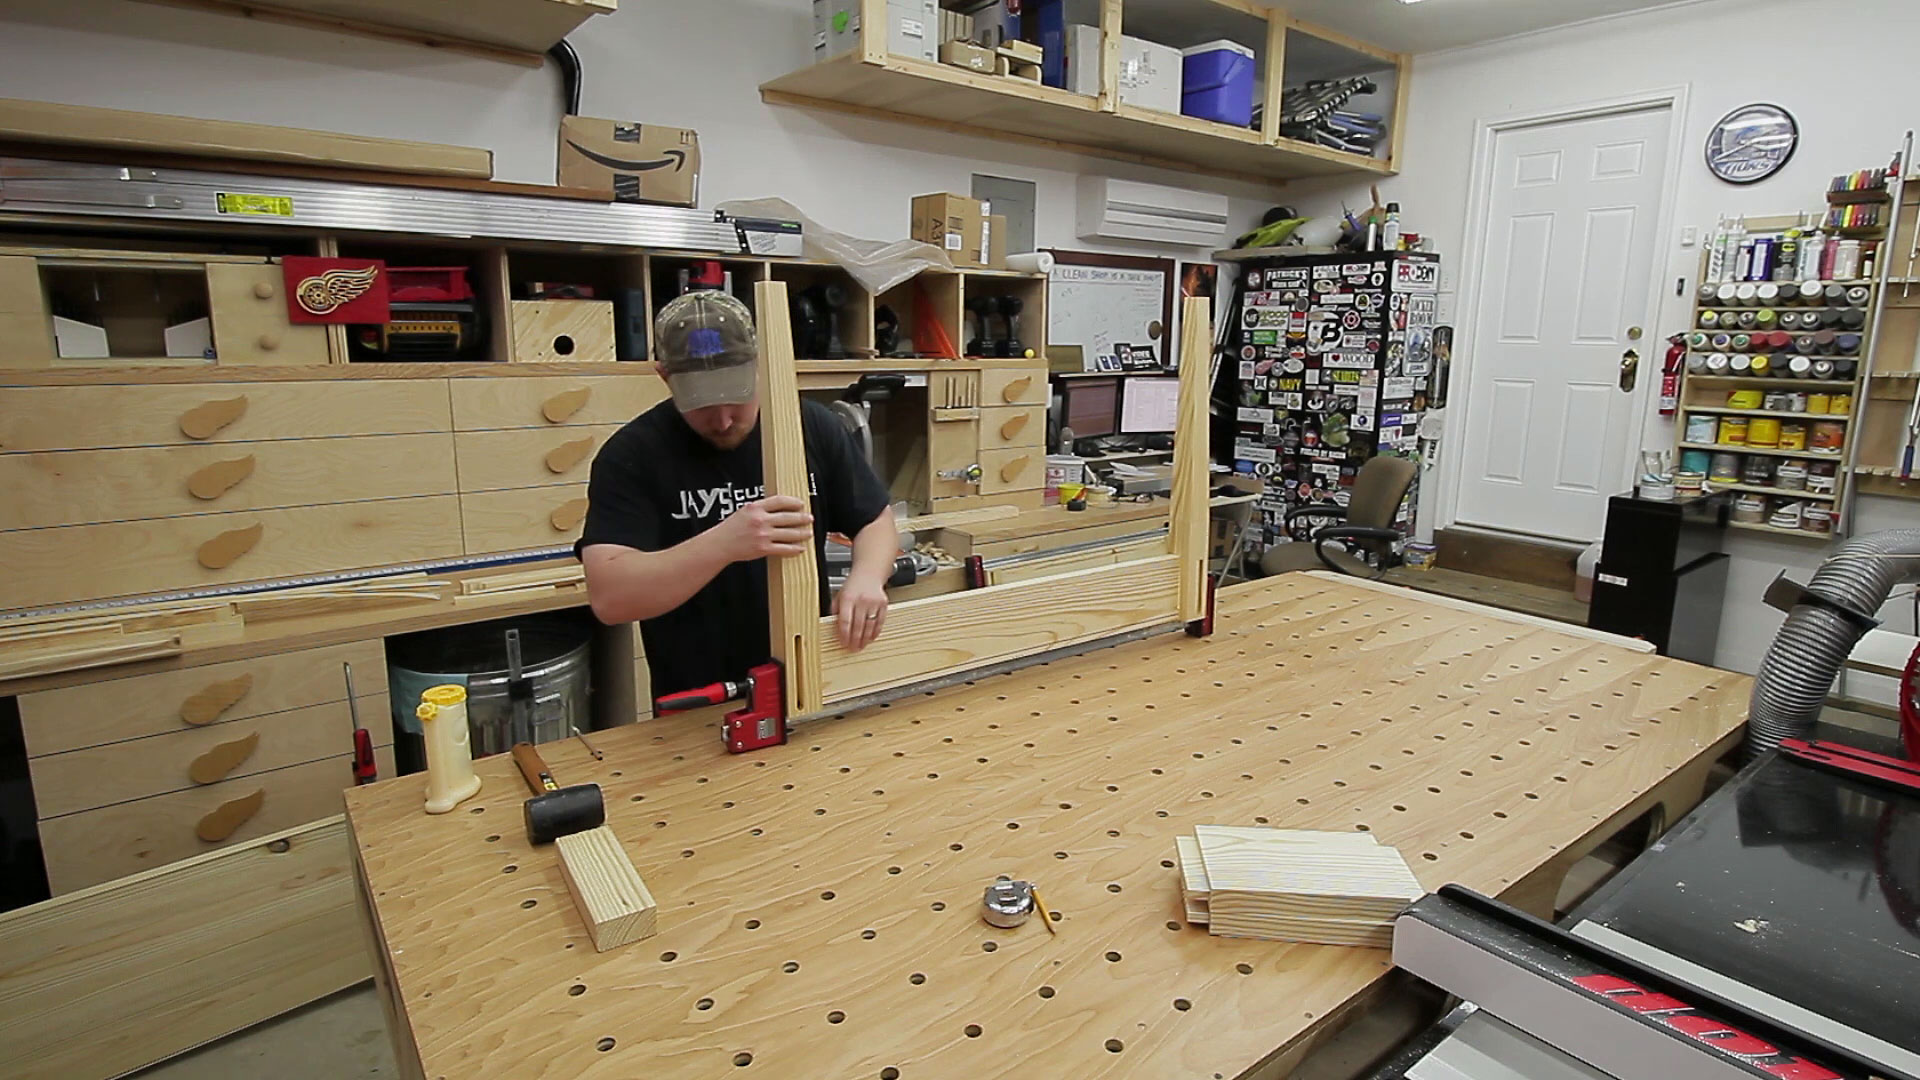
While the top is in clamps I took the time to mill my four rails and my previously glued legs to their final size. Then I could focus on the joinery. For the mortises in the legs I marked my start and stop points and also marked the rough location of the mortises on the top end grain side of the legs. These were just to prevent me from getting confused as to what faces received a mortise.
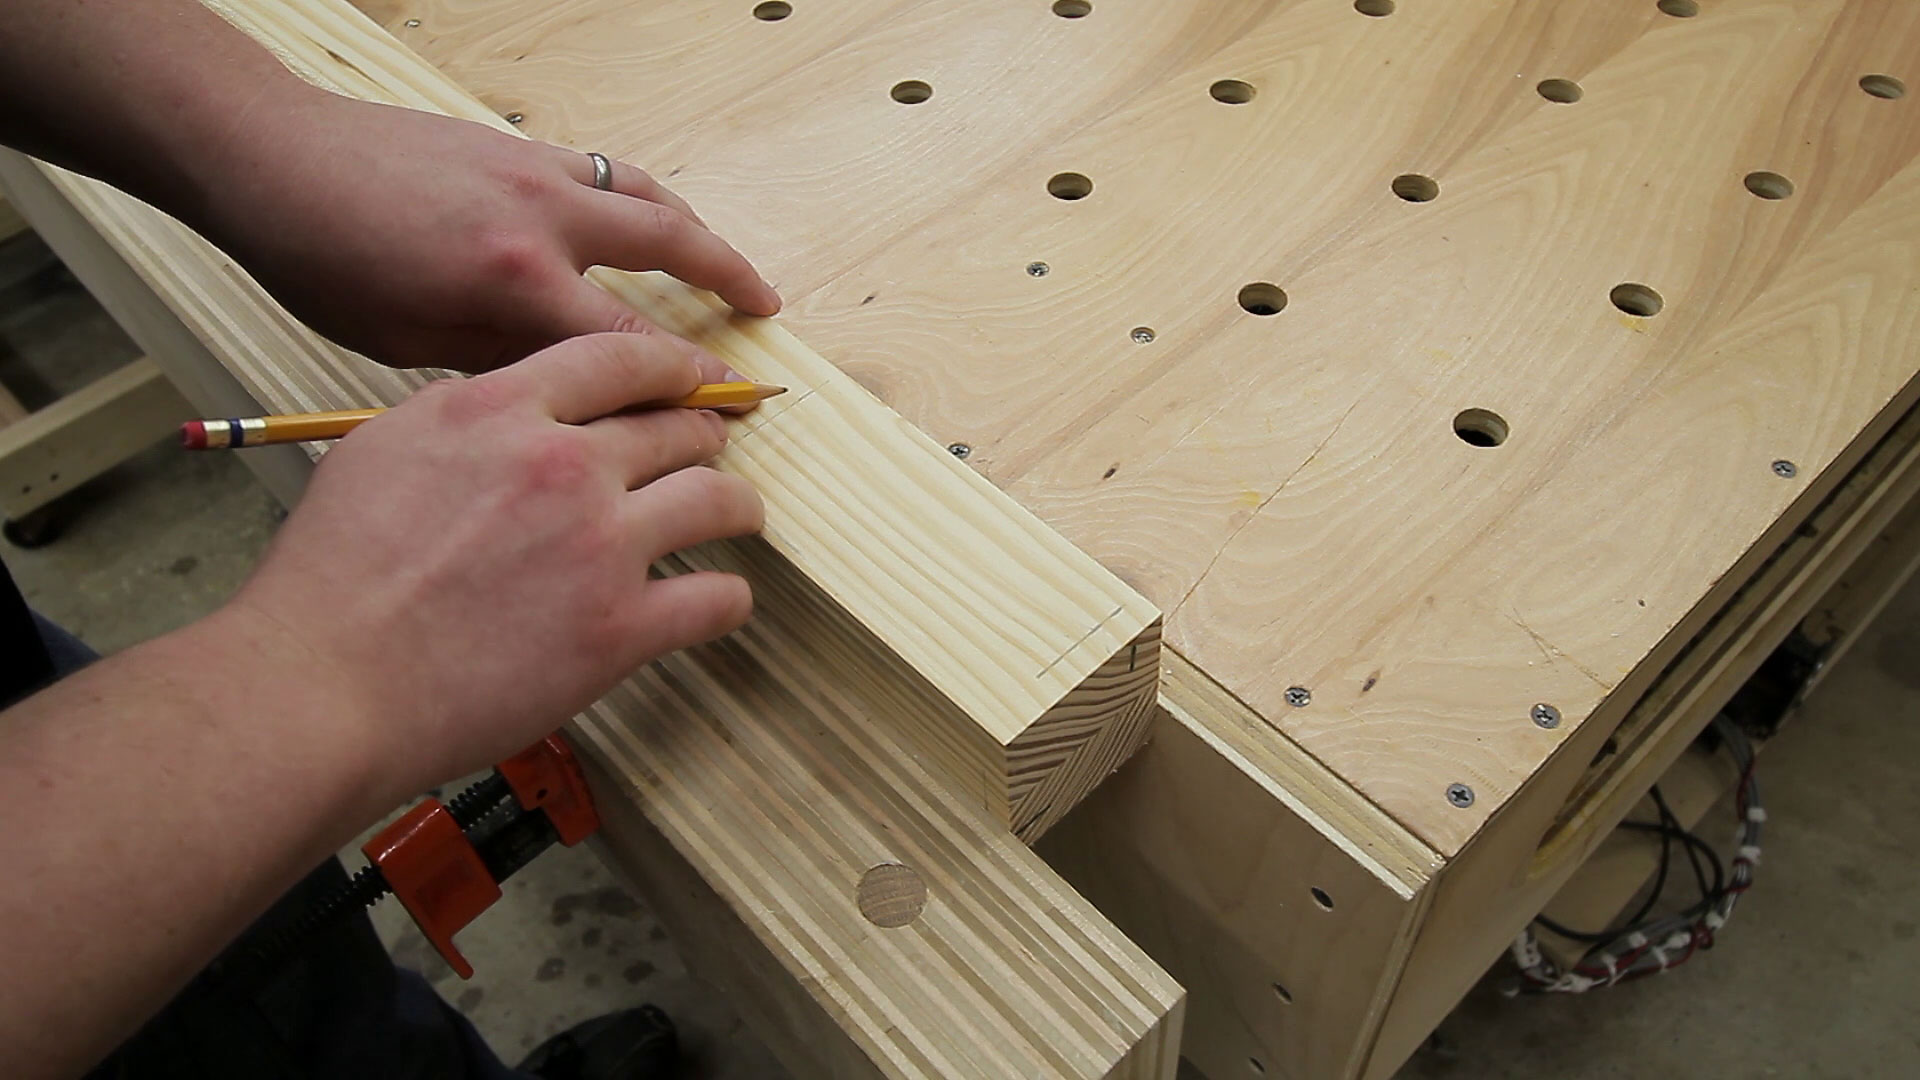
These mortises will be offset mortises. They are not centered in the leg and once the rail is fit into the mortise the rail will be inset 1/4” from the outside face of the leg. All this just means I needed to set the first guide on my router edge guide jig to be 5/8” away from the 1/2” cutting bit. This is easily done by snugging up one side of the guide so it will freely pivot into place and then tightening the other side.
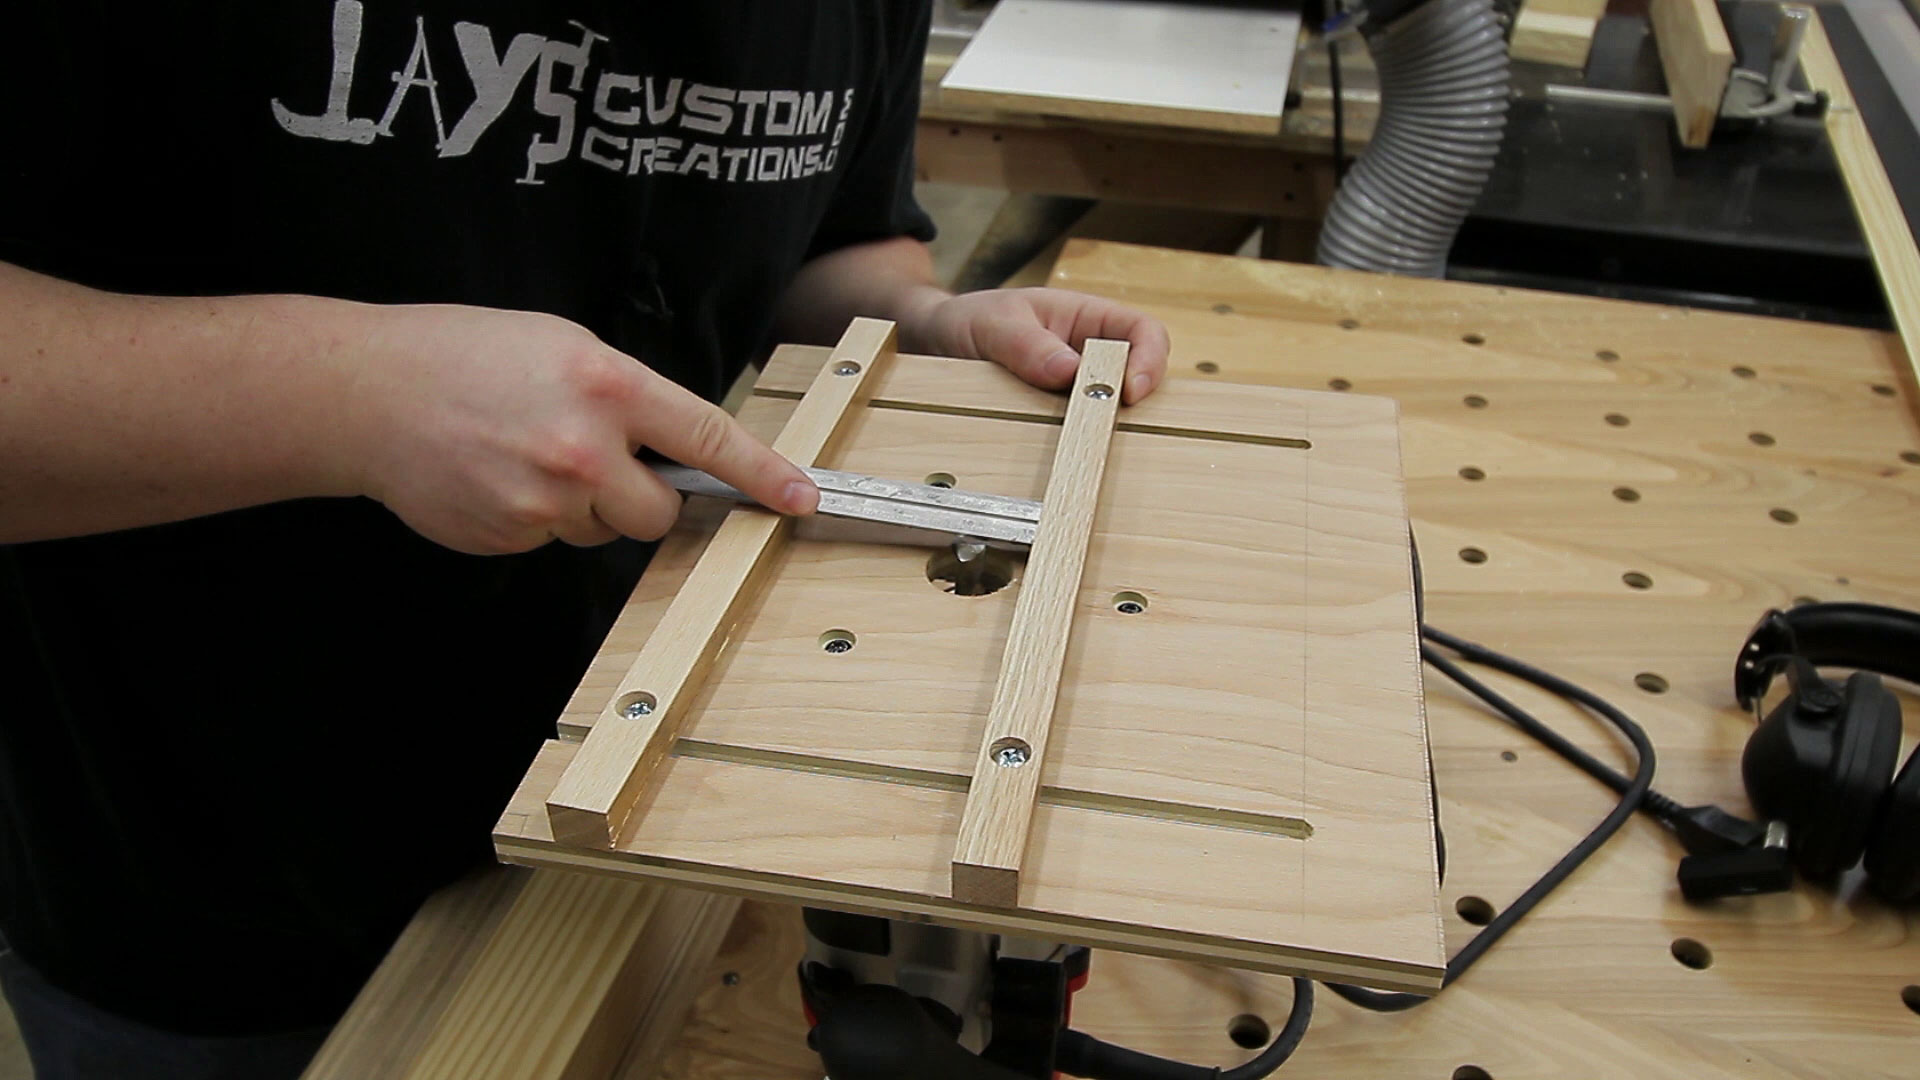
Then the router can be put in place and the front guide can be secured on the opposite side of the leg. This setup will keep the router tracking along the length of the mortise so all you have to do is focus on plunging and moving in the right direction.
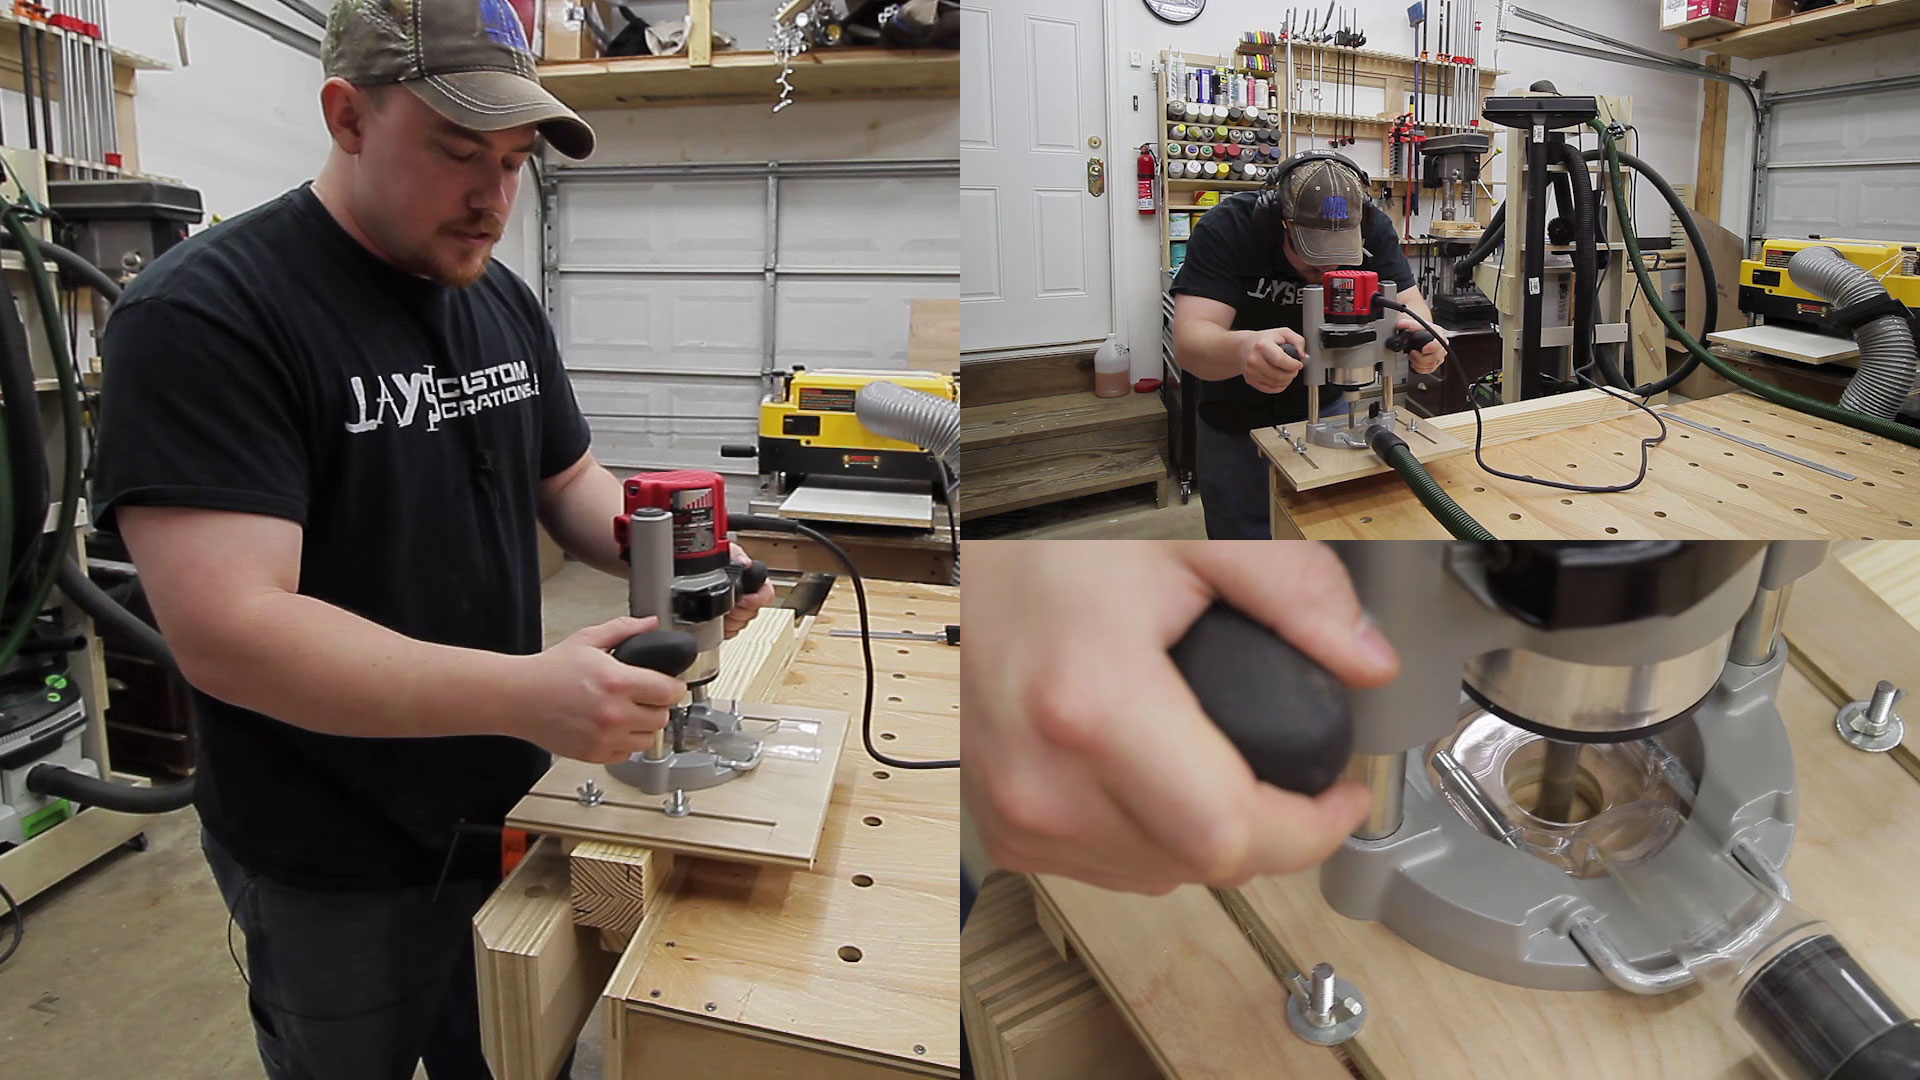
Once the jig is setup batching out the eight leg mortises is really fast. This only took me a couple minutes.
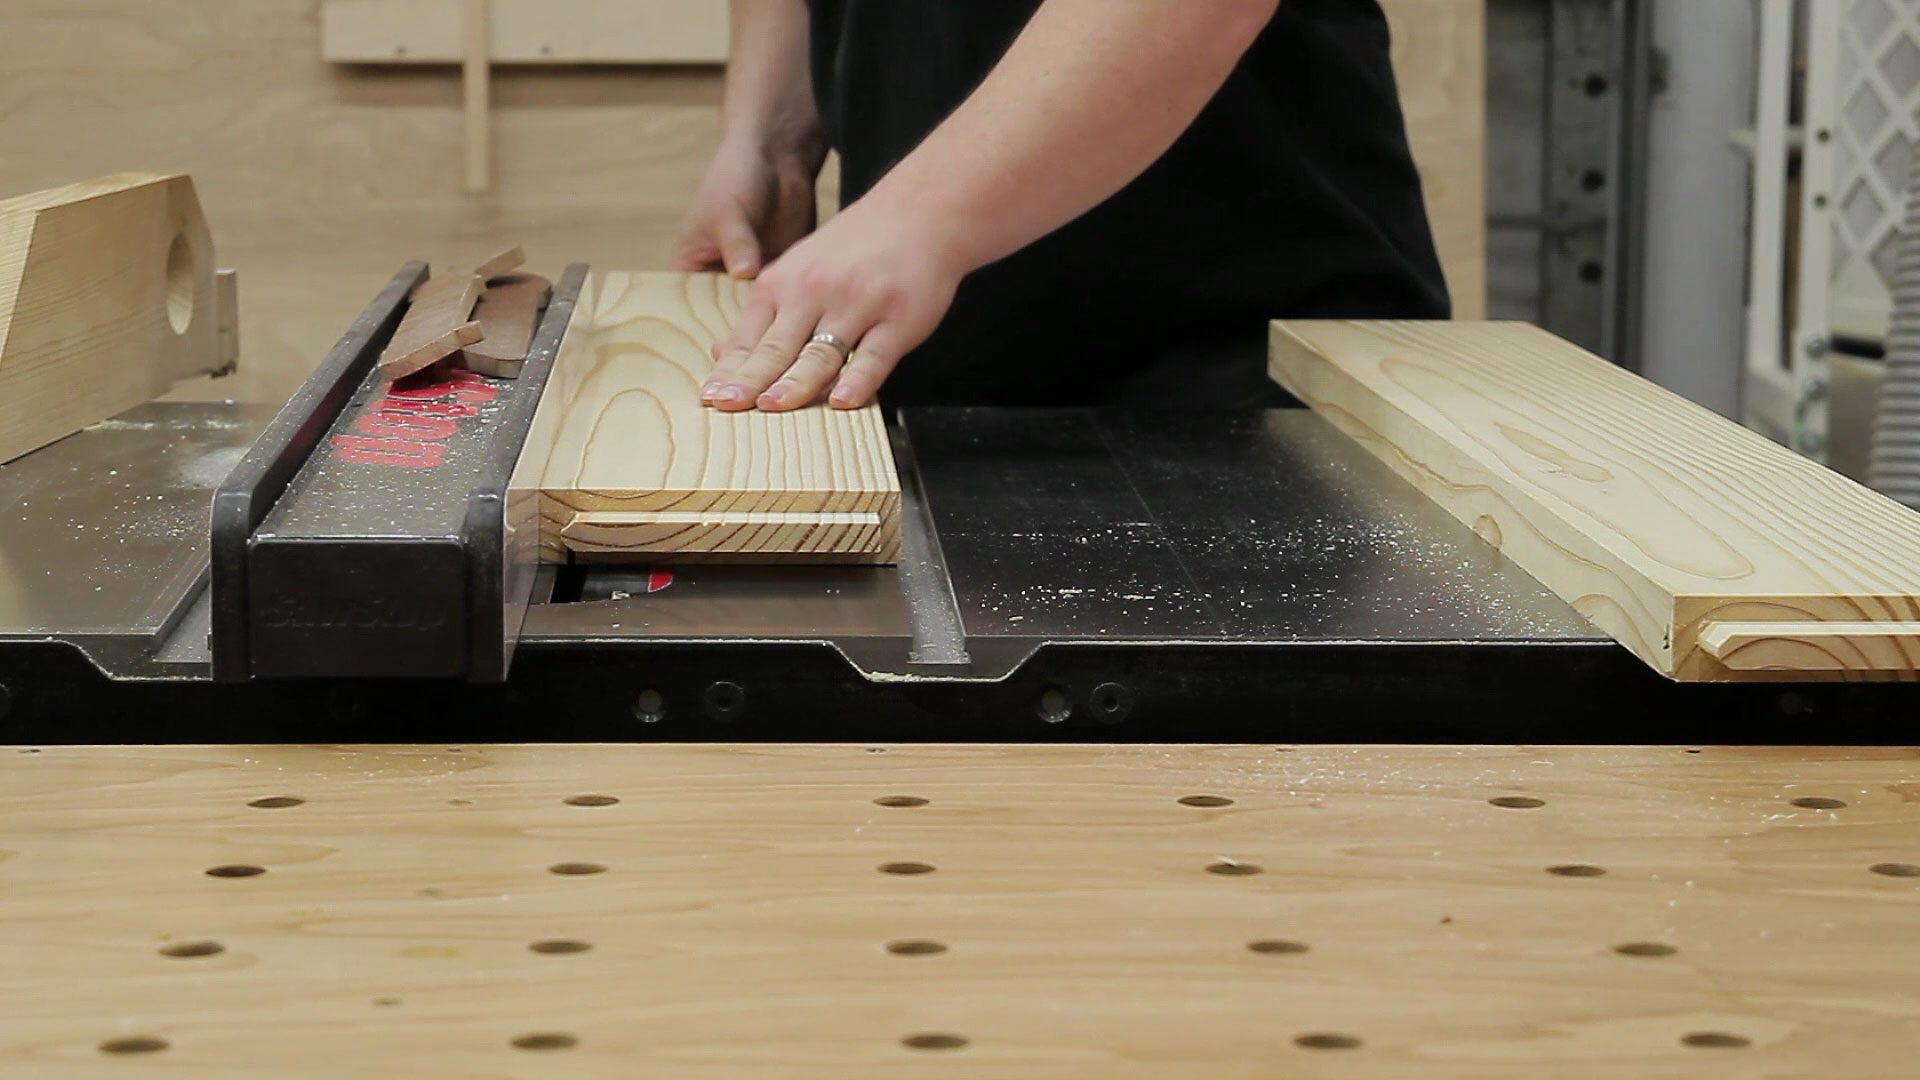
As I stated previously, the tenons are cut the same way as cutting tongue and groove joinery on the table saw. To speed up the process I installed a dado stack in my table saw. When I planed the rails to their final thickness I planed a few scrap boards as well. These scrap pieces are used to dial in the height of the dado blade for a perfect tenon fit without accidentally messing up the project material. I also added a sacrificial fence to the miter gauge to prevent chip out on the shoulders of the tenons as well as a second sacrificial board in line with the dado blade. This is screwed to the first board but it is centered in line with the dado blade and acts as a dust shroud to keep the vast majority of the sawdust inside the table saw where it belongs.
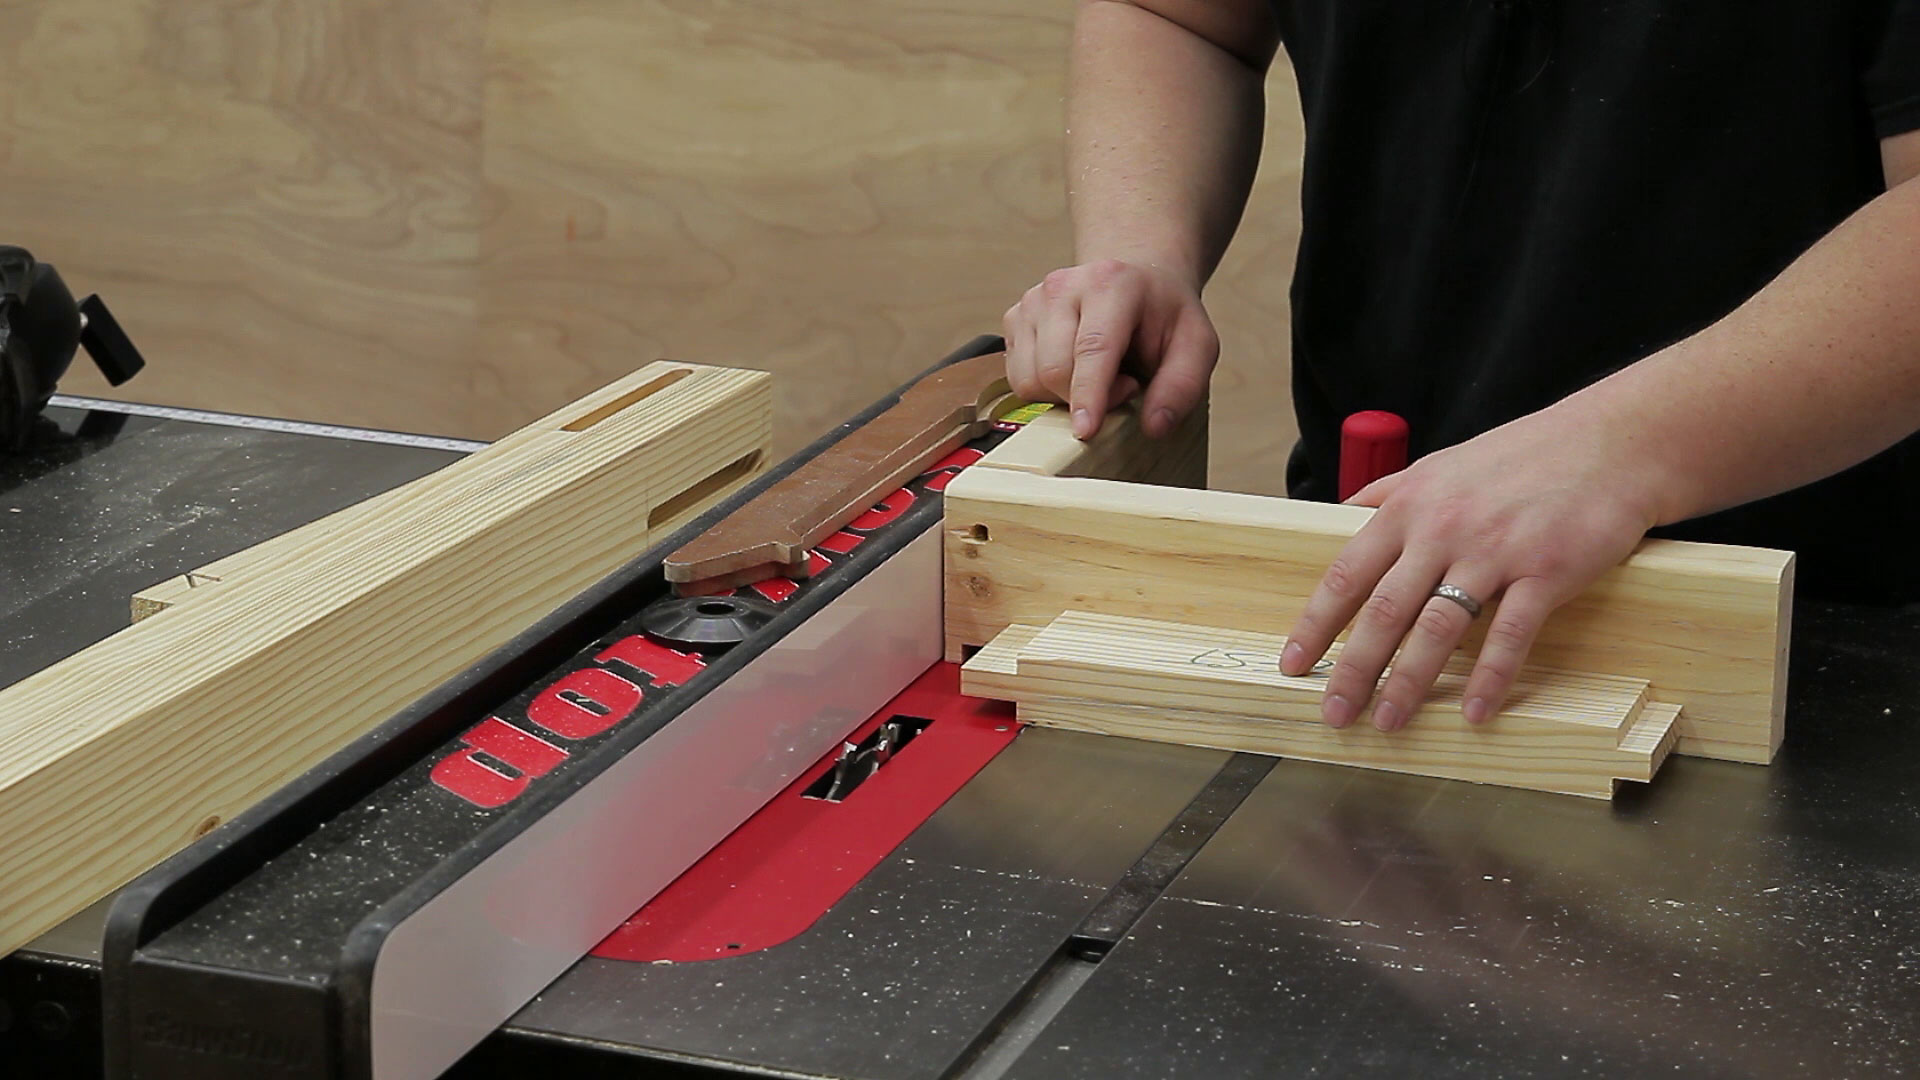
To keep things simple I sized the mortise so that the tenon could be cut on all four faces of the rails.
The tenons are square and the mortises are round. One of them has to change. It’s almost always easier to clip the corners of the tenons than it is to square the corners of the mortises. That’s the route I went. Because I mis-marked the lower stop point on all 8 of the mortises and therefore accidentally made the mortises 1/8” too long I only had to clip one side of the tenon.

After clipping the corners of the tenons a dry fit confirmed everything was done properly. Always do a dry fit before assembly.
A couple cuts are needed before the final glue-up. A single kerf needs to be cut 7/16” below the top surface on the inside of all the rails. This is to accept the table top hold down clips later.
Because the thickness of my taper sled plus the thickness of the legs is greater than the maximum cutting depth of my table saw I had to make the leg tapers on my bandsaw. This was super easy though.
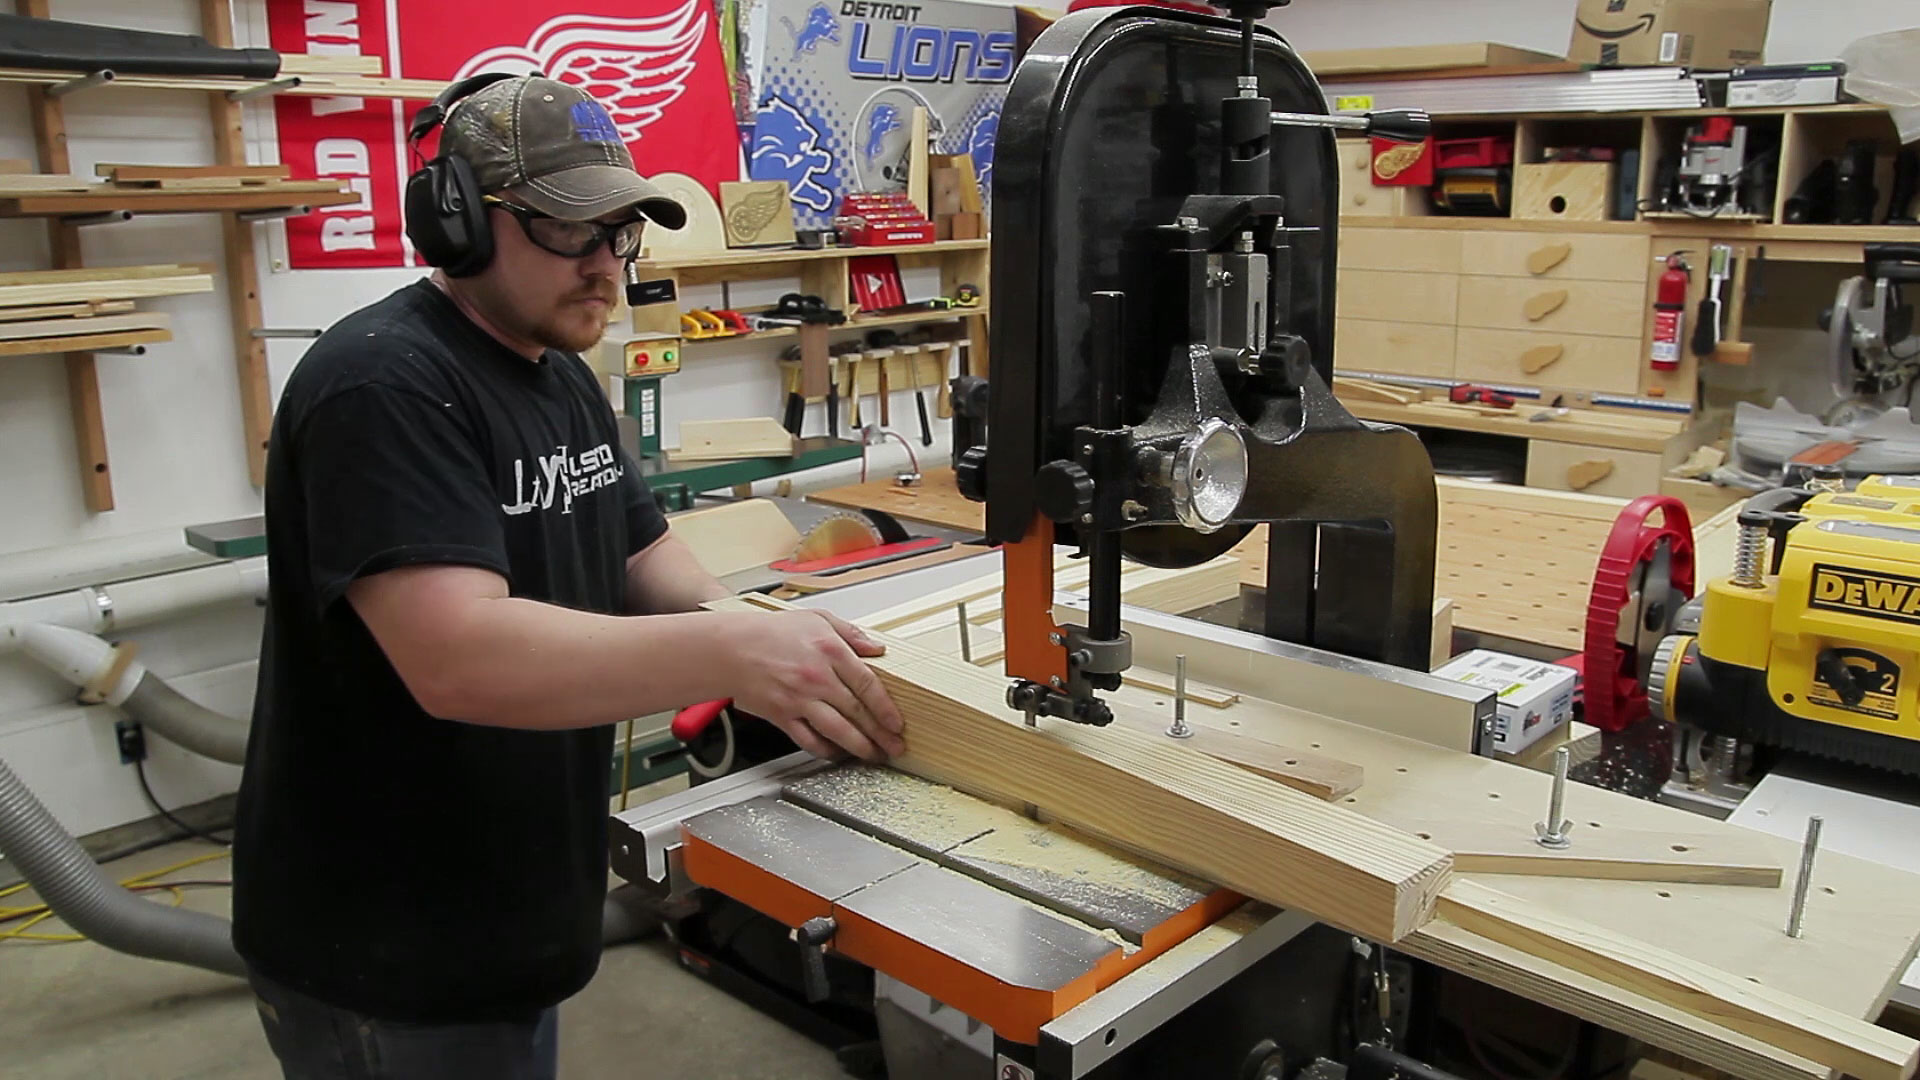
As you would think, the resulting faces were less than perfect due to the bandsaw blade. Two passes over the jointer for each face and everything was flat and smooth. Man I love this jointer.
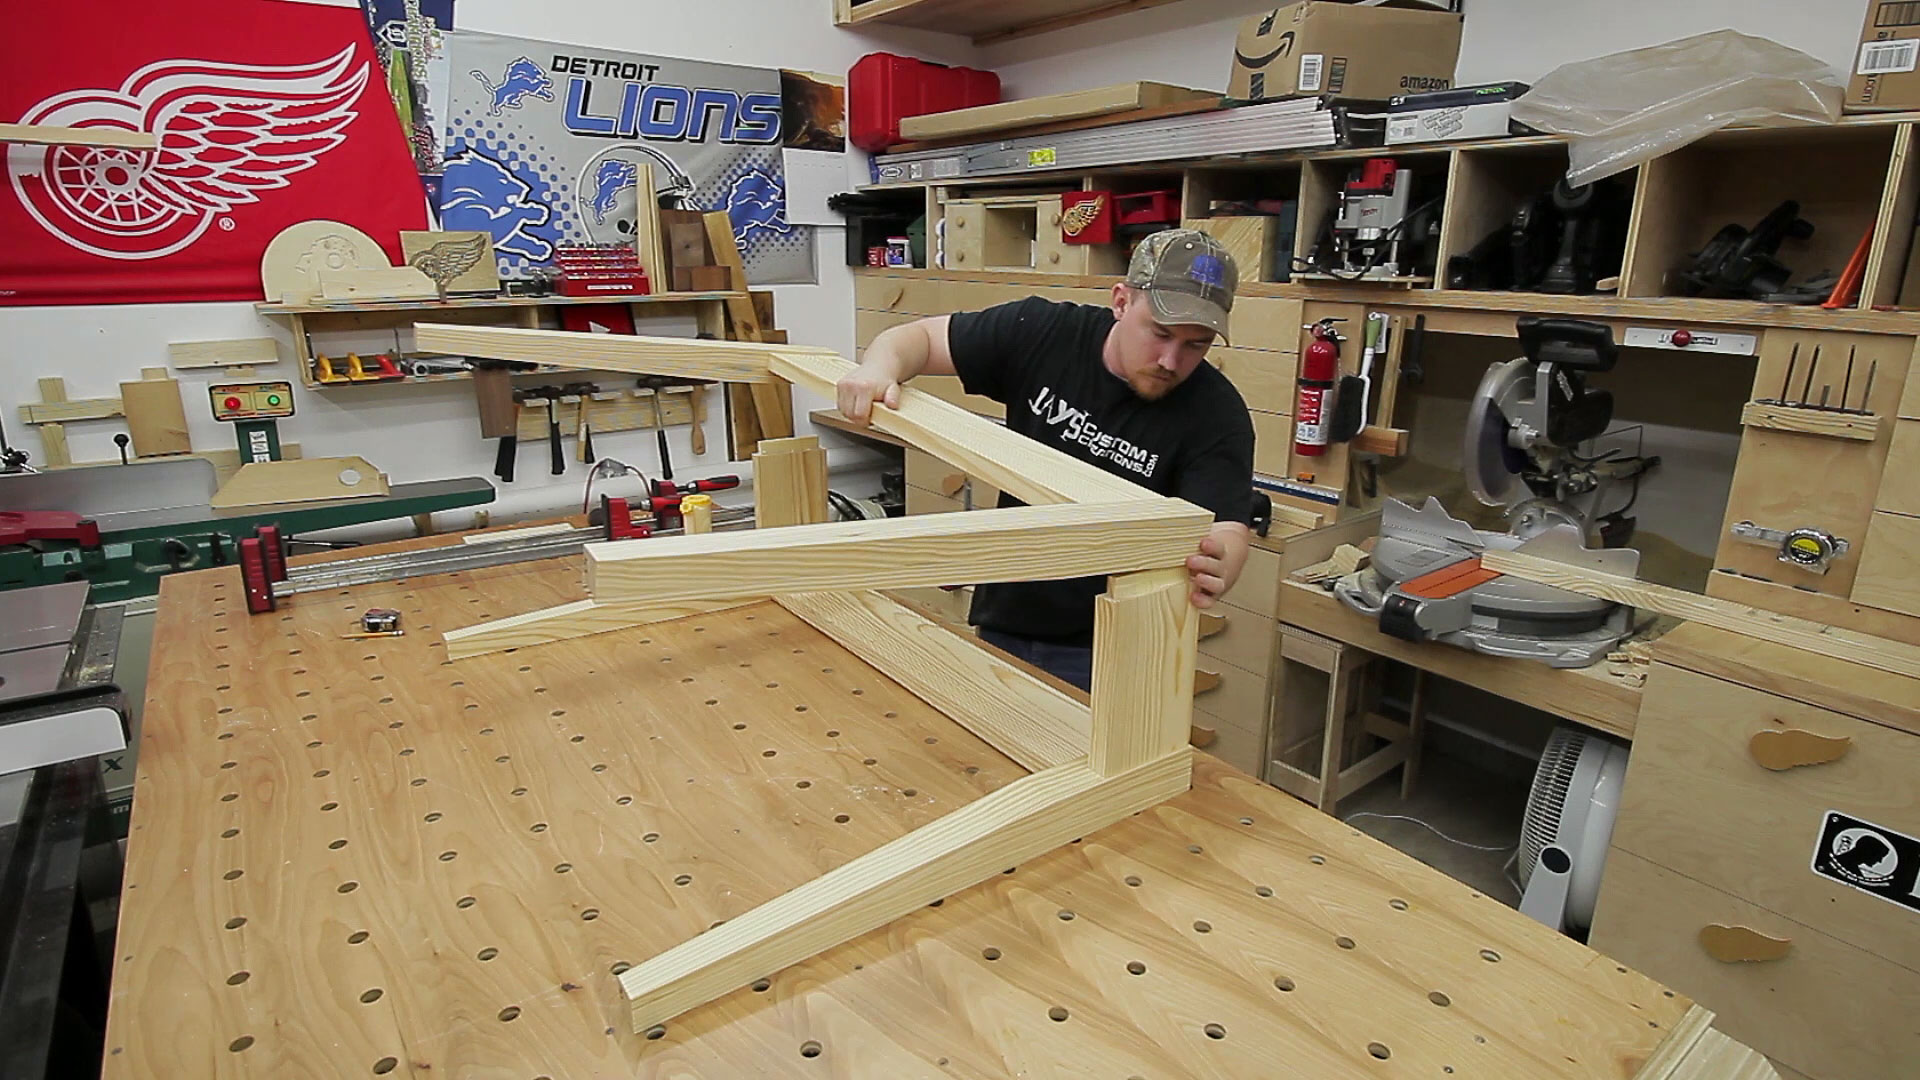
The glue-up was flawless without any problems partially due to the fact that everything was staged and in position from the dry fit. I started with the long rails first and let them sit in the clamps for about 20 minutes.
20 minutes is plenty of time for the glue to set up enough to hold the joints together. Especially considering these wouldn’t be stressed in the long direction. The front and back assemblies were then joined together with the short rails. Each mortise and tenon joint used is 1/2” wide, 5-5/8” long, and 1” deep. This will give plenty of glue surface to create a strong table frame.
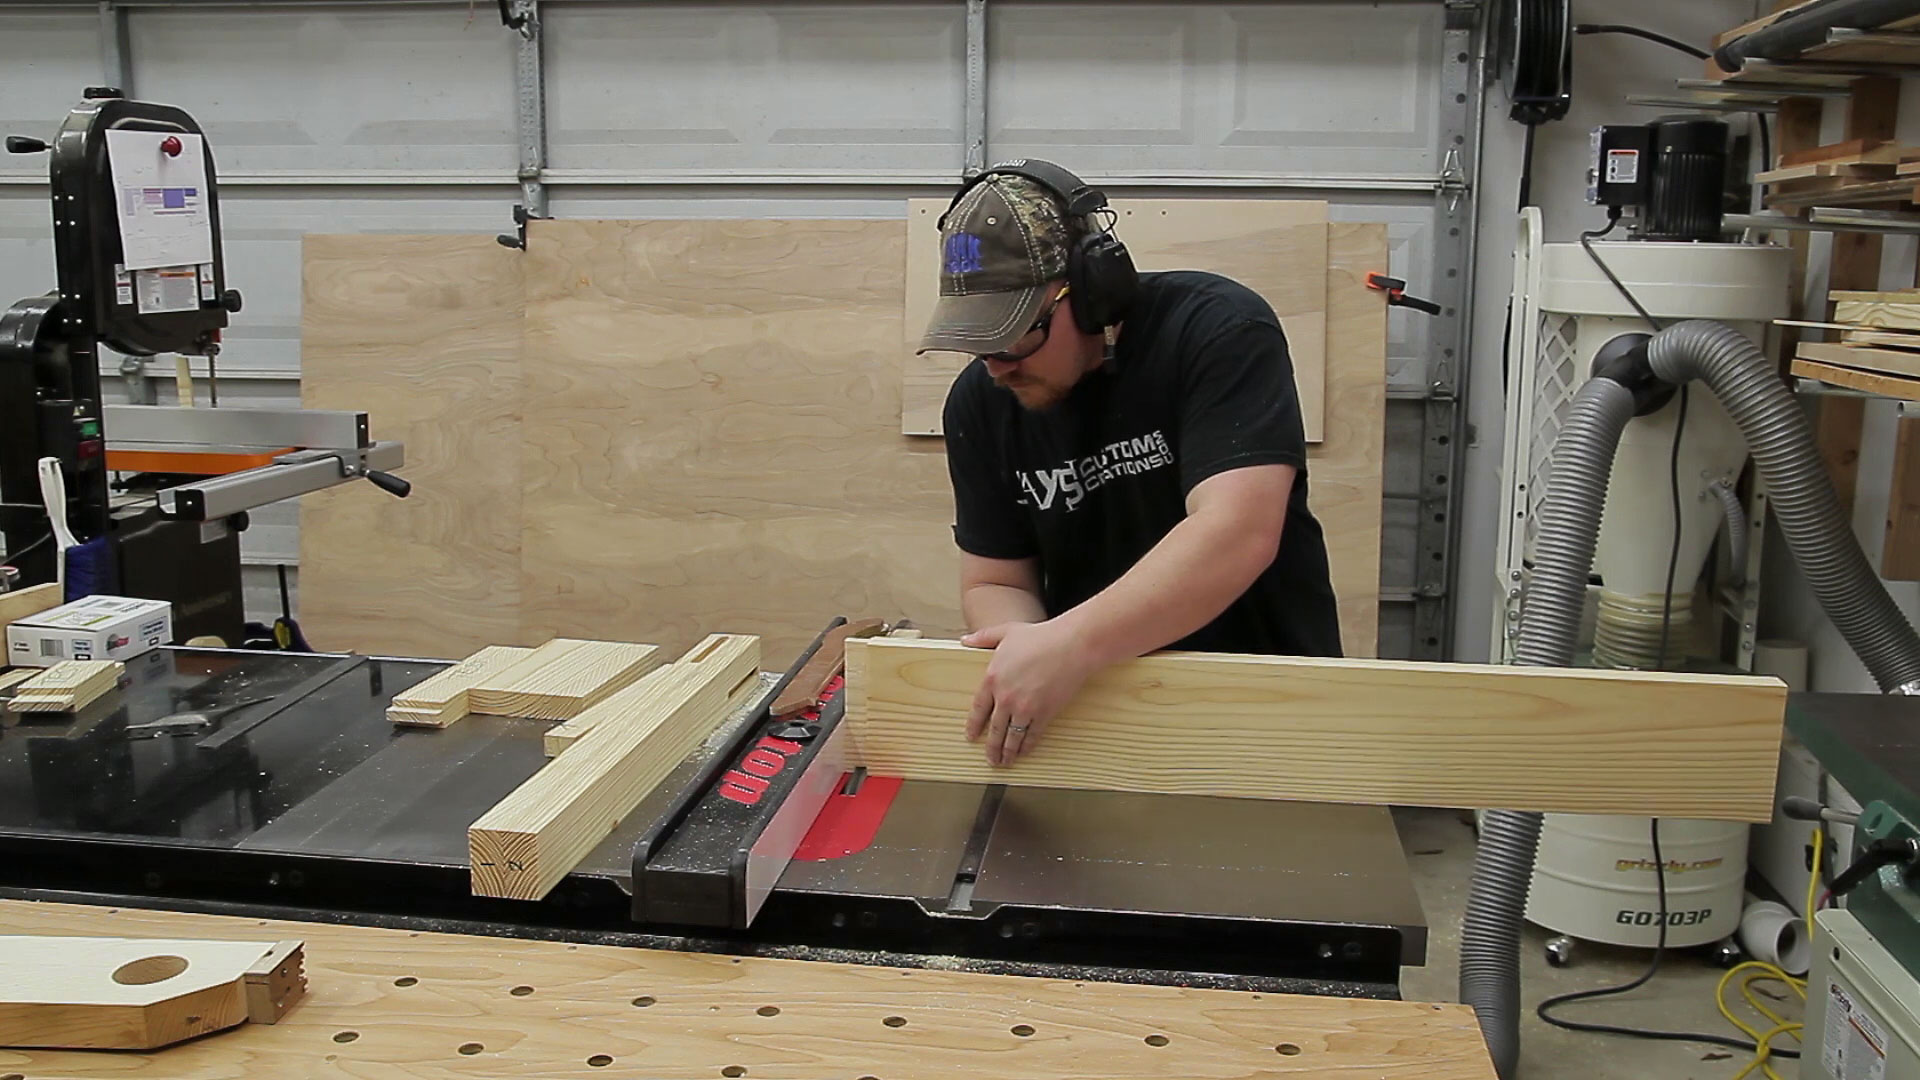
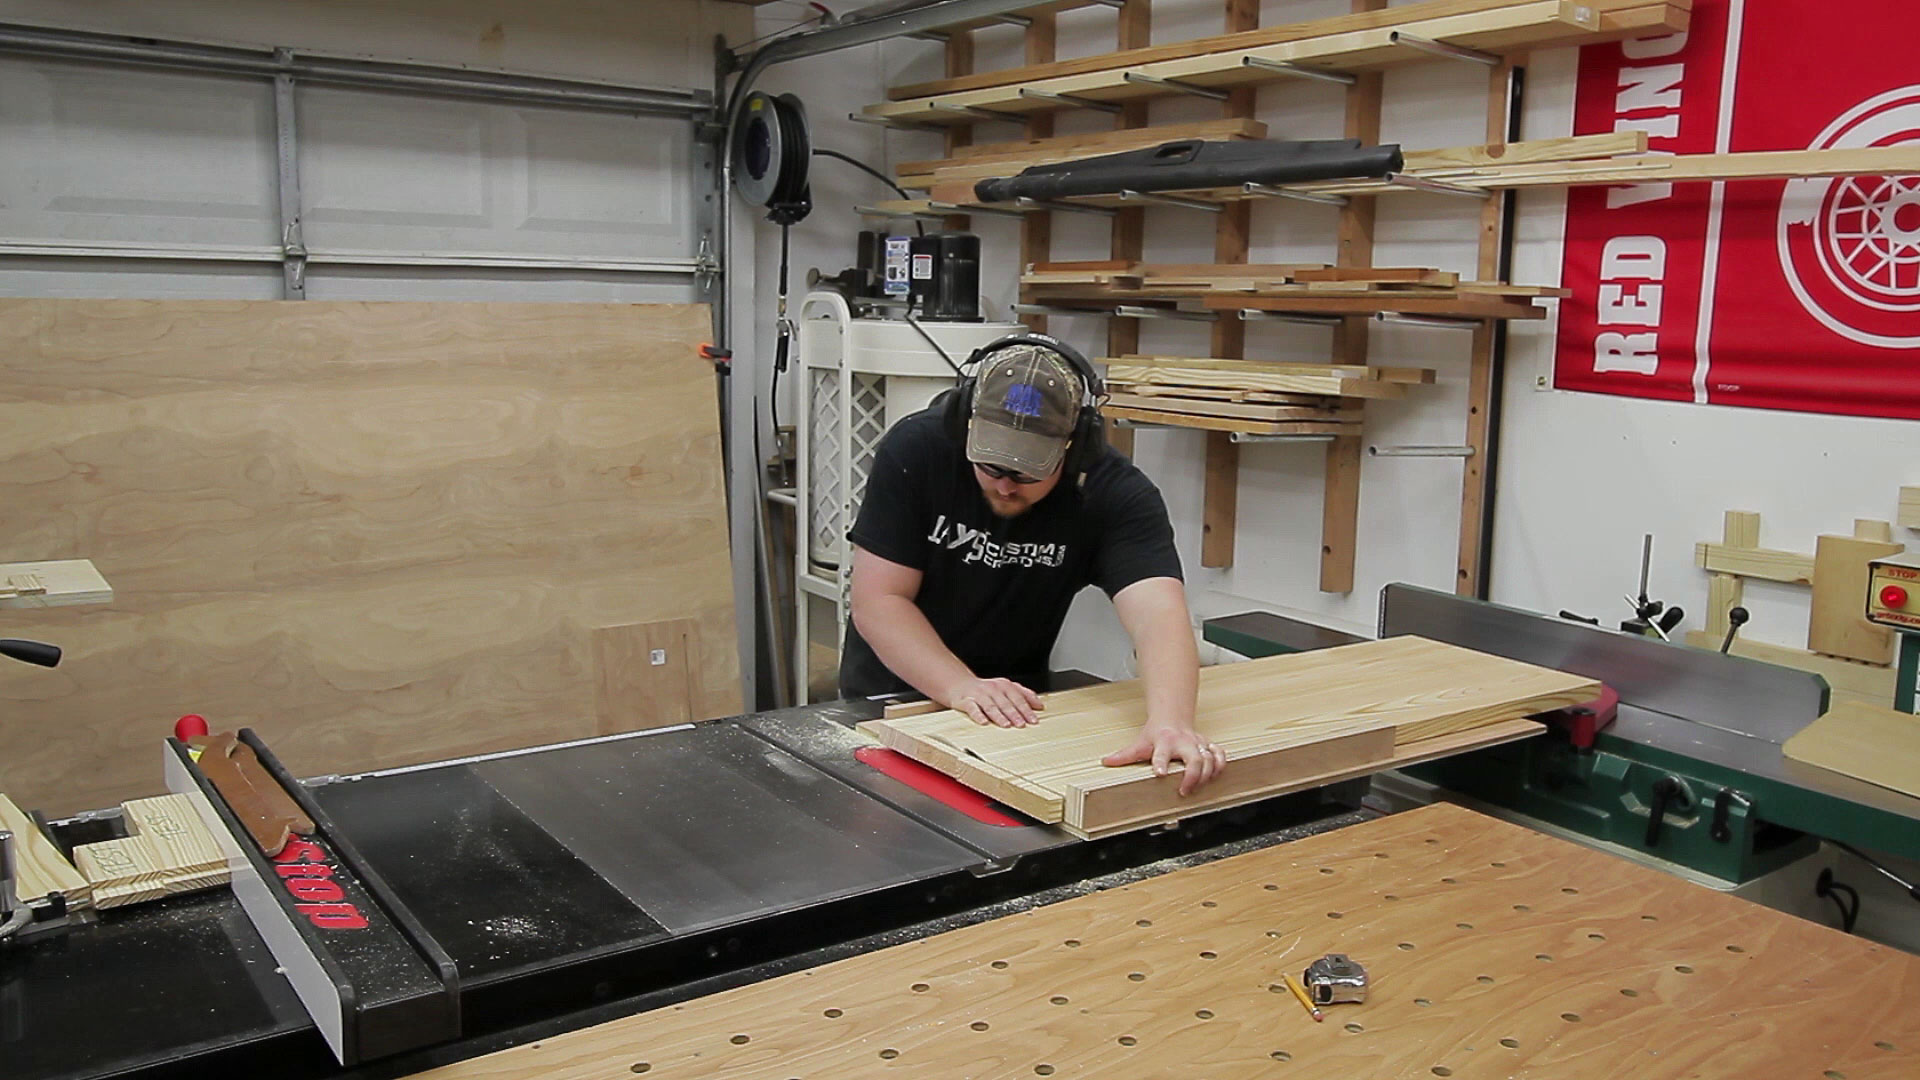
With the frame all clamped up I went back to the top panel. I used my one side cut-off sled to square off the first end and then cut it to it’s final length.
My long pipe clamp workbench vise has been super handy since I made it. Being able to clamp this 16” wide panel vertically is very convenient for sanding. Lots of very fun sanding happened on this project.
The finish I used was a two step wax finish. First, I applied a coat of regular Johnson’s Paste wax to somewhat seal off the pores. Kinda the same way a pre-stain conditioner is used when using oil based stains. Then I followed that with Tudor Brown Briwax. The first layer of wax prevents the solvents in the Briwax from really soaking in and making it look blotchy.

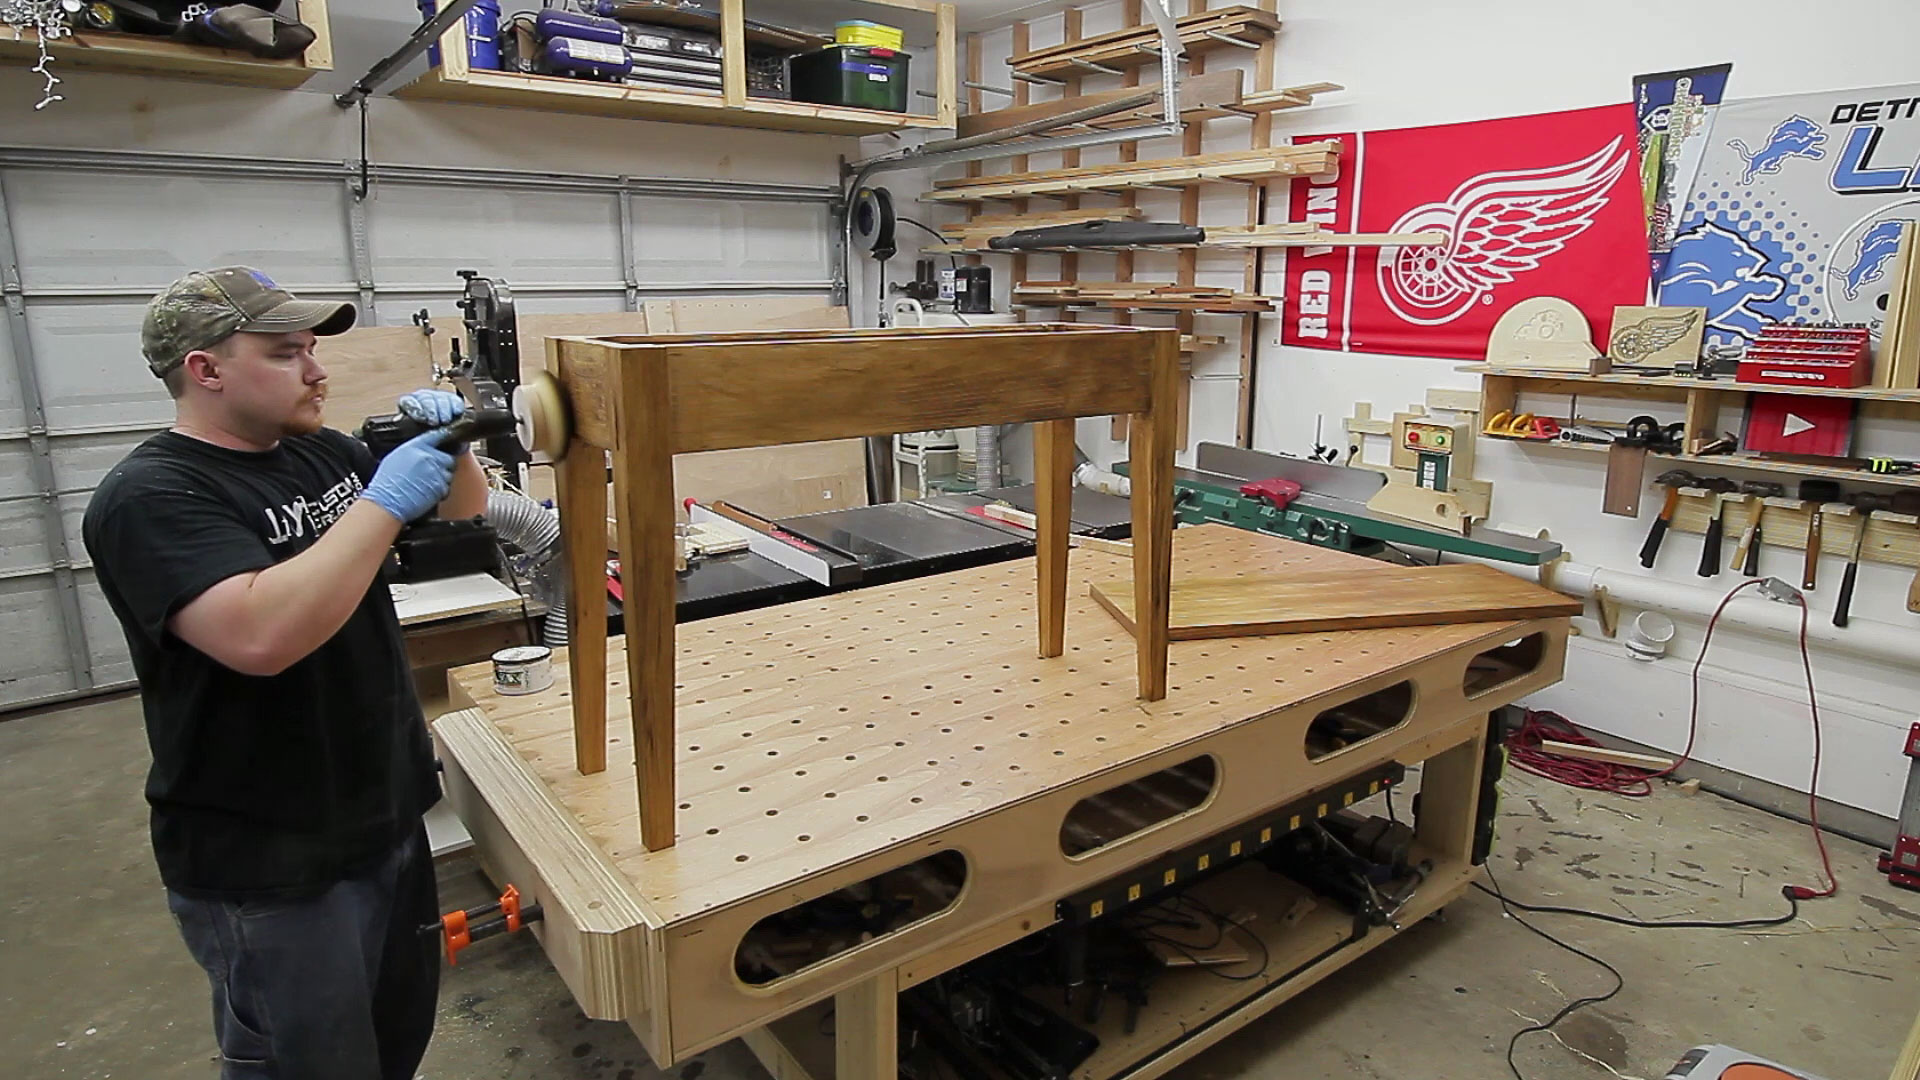
I find it best to gently buff out the wax as it’s applied but to really even it out I used a buffing disk in my drill. This worked really well and is a lot easier on the hands.
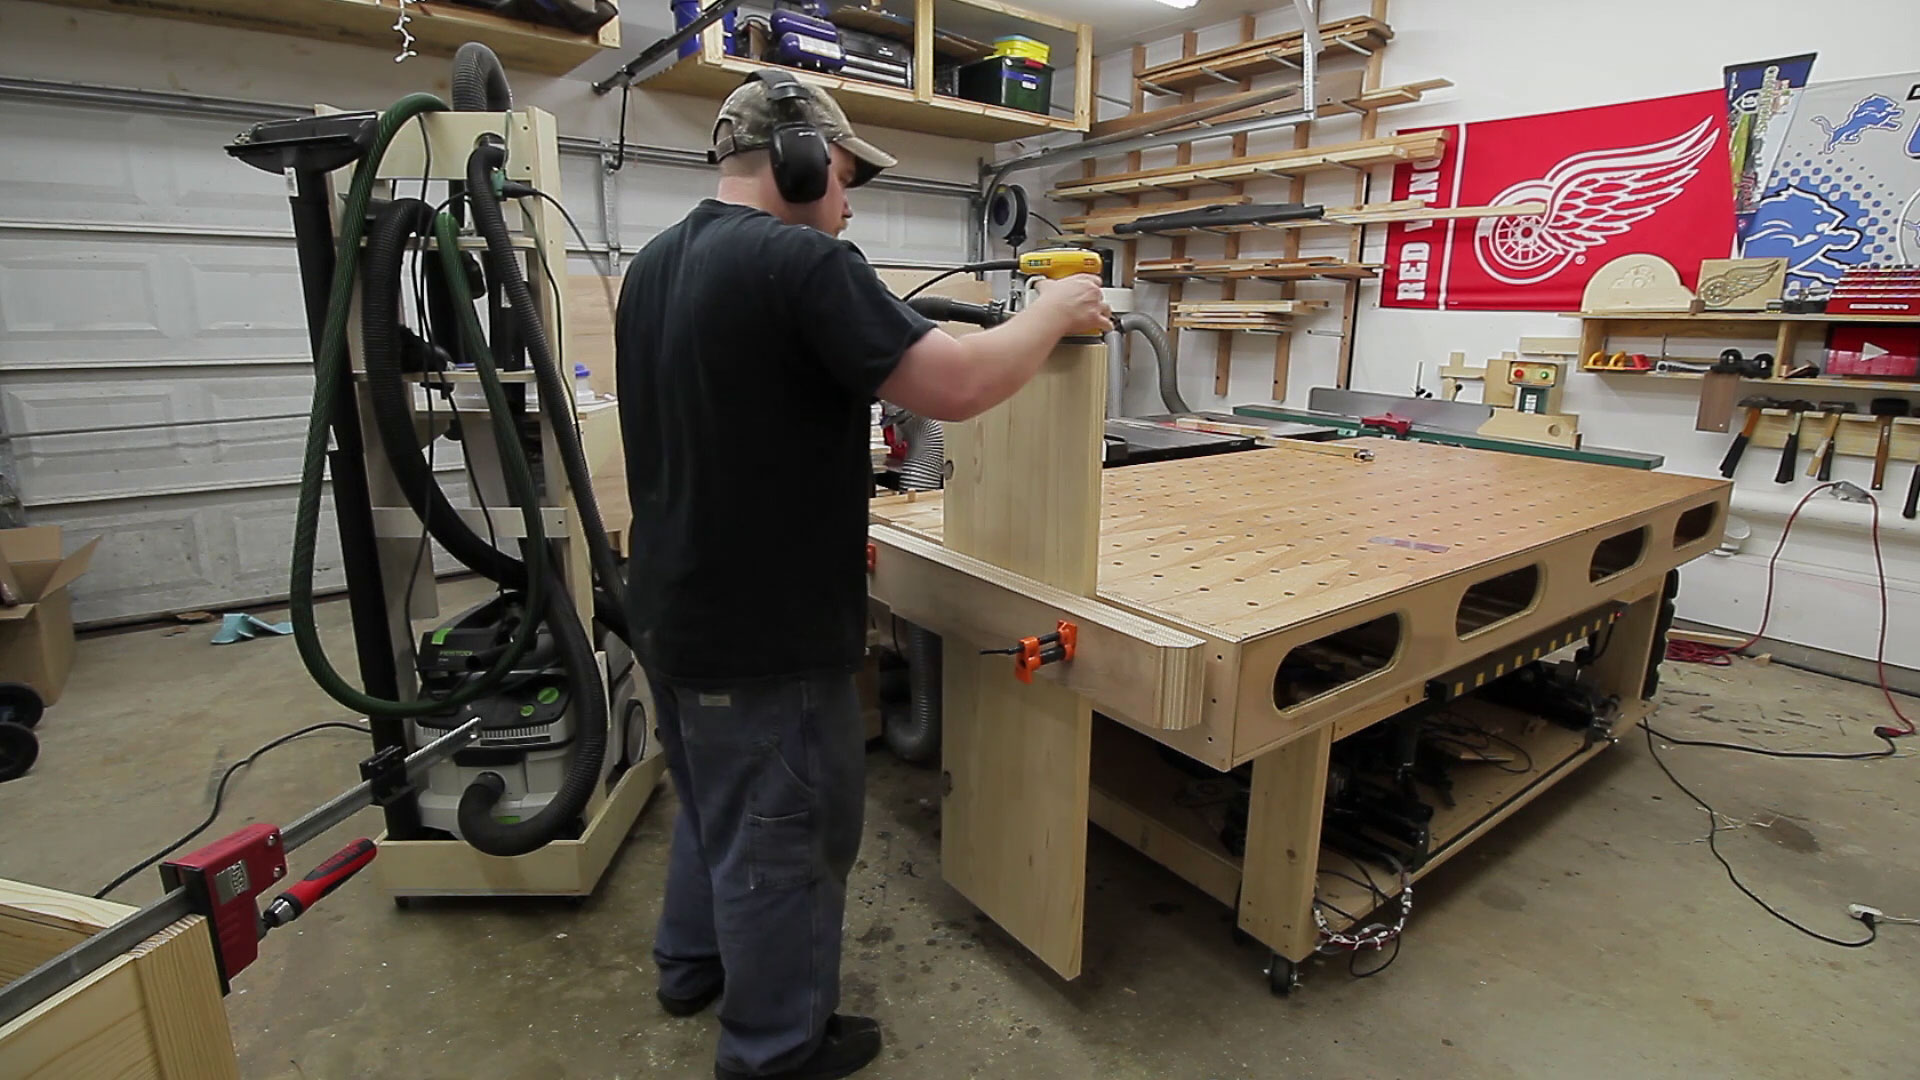
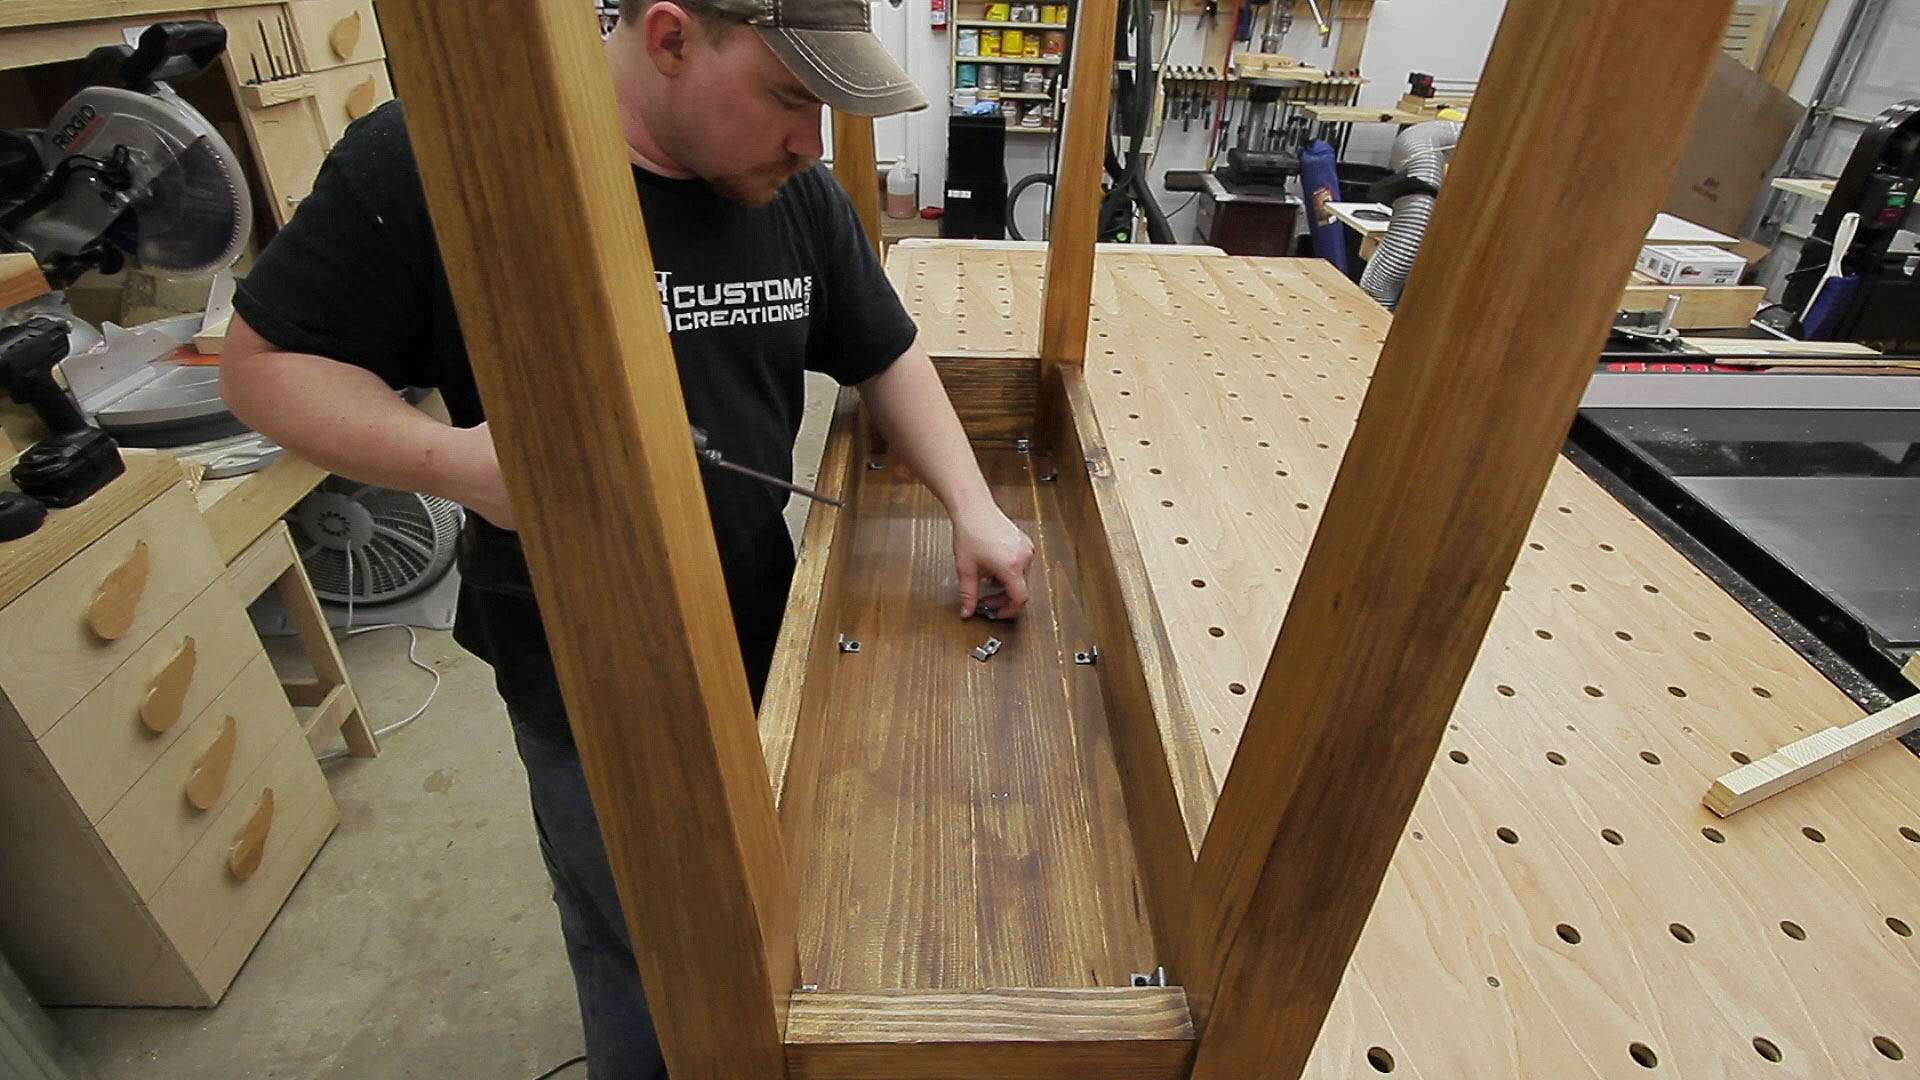
Finally the table top can be attached with some metal hold down clips. I purchased a few bags of these on amazon as they are pretty inexpensive and much more convenient than making your own. Although making your own is definitely a viable option. I just didn’t want to.
The table took me about 10 hours to complete. That’s 10 hours from starting with the materials sitting in my shop all the way to the finished piece sitting in my living room. I built it to go behind my loveseat but it ended up being a bit large for that spot. Even though I built it to the dimensions I determined myself. That’s OK though as we ended up putting it on an empty wall in my living room. I’ll probably end up making another when the time comes for making a living room table set.


Well Done!,
Thanks Dan.
Thanks for the skechtup video and corresponding build video. I learned a lot.
You’re very welcome. Thank you for stopping by.
Man that wall plate is killing me! So much care and detail in the table offset by a skewed wall plate!
hahahaha You should see the switch plate in the room. That’s the real tragedy.
Sweet build. I get ideas like this sometimes, but leave out the planning stage until it is too late, and it looks like it was done in a HS class. I really like the way you are using dimensional lumber to build furniture, and utilizing nearly every tool in the shop.
As usual Jay another project executed very well and your presentation was extraordinary.
I noticed you had a lot of room on your bandsaw table, did you buy a new bandsaw cause I have a similar grizzly to yours and don’t have that much room?
Very nice project again Jay thanks for sharing with us
I love simple but nice projects. Thank you for the “Jay” sticker, received that Friday. Love the connection with woodworkers and their willingness to share their knowledge. If it was not for the internet I would not be able to learn 90% of the knowledge I have gained in the last year. Affordable classes are really hard to find anymore. Any chance you would be willing to move your shop to my garage? :) Just kidding. I am working on mine, but I have to have my car in at night. Which of course makes for an organization challenge. One of my “anal requirements”. Someday when I win the lottery I want to add a shop to the side of my house. Again, thank you for sharing. I always enjoy seeing what the next project is.
Nice job.
Nice job and appreciate the time you took to show us your steps in making the table.
That’s a great looking project and a really well presented article. Thanks for all the effort you put into sharing your stuff with us.
All I can say is: Brilliant.
Could you use non-metal fasteners for the top? Maybe some shallow dowels?
Excellent job, and the photos are great
Nice, now how about finding a source for some nice hardwood and use your skills to build something pretty.
Nice job Jay! I have two questions:
1) Did you consider lowering the top tenons and mortises by a 1/2″ on the rails and stiles to add strength? It looked like they were fairly close to the top of the legs?
2) Did you consider breadboard ends to help reduce the chance of cupping for the top?
Your skill level is improving on every project and the videos are top notch. Keep them coming I really enjoy watching them.