FINALLY! The construction of the miter saw station is complete. And it feels really good to say that. These past three weeks have been pretty hectic with not only building the project itself but also trying to edit the videos into the oh-so-short YouTube format while still maintaining interest and information. Hopefully I have been able to do just that. The first video was edited with zero talking. The second video had zero talking but was edited in a slightly “cinematic” way. And this third part had me talking pretty much the whole way through. Variety is nice :)
Last week I completed and installed all of the drawers and the week before that I started the build with the drawer boxes and the work surface. If you haven’t already seen those videos/articles you might want to check them out before this one. I’ve also completed a set of plans finally. For those who are interested in the miter saw station plans they are located at the bottom of this post.
I had a nightmare plywood experience a few weeks back that continuously urges me to do what I can to prevent others from having a disappointing and possibly unsafe Chinese plywood experience. To help me do so I asked the folks at PureBond hardwood plywood if they would be interested in sponsoring this miter saw station build. They gladly helped out and I’m happy to say that this entire miter saw station is sponsored by PureBond. If you aren’t familiar with PureBond it’s a non toxic, soy based hardwood plywood made in the USA and Canada. And because it utilizes a soy-based technology it is a much safer alternative to toxic, formaldehyde-based resins. It’s available exclusively at the Home Depot. After completing this entire build and having cut up 15 full sheets I’m so glad to be working with it.

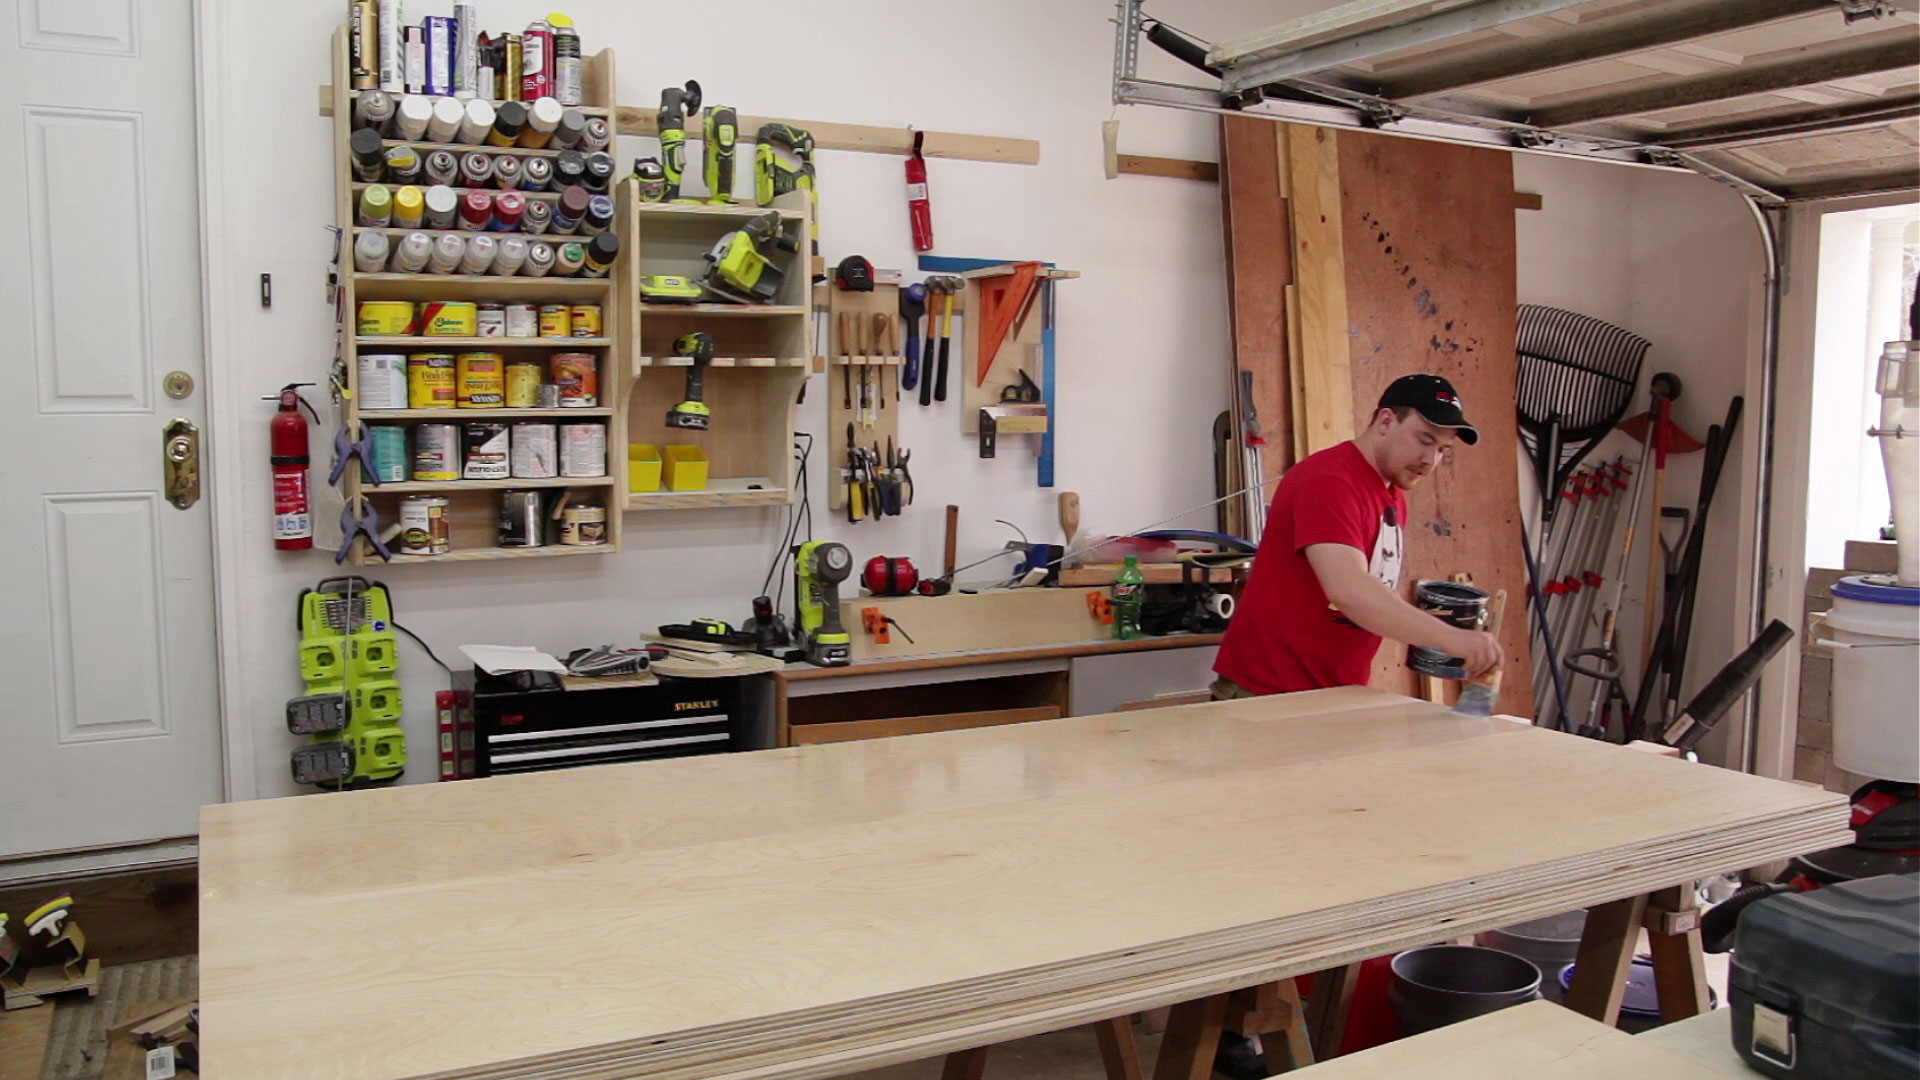
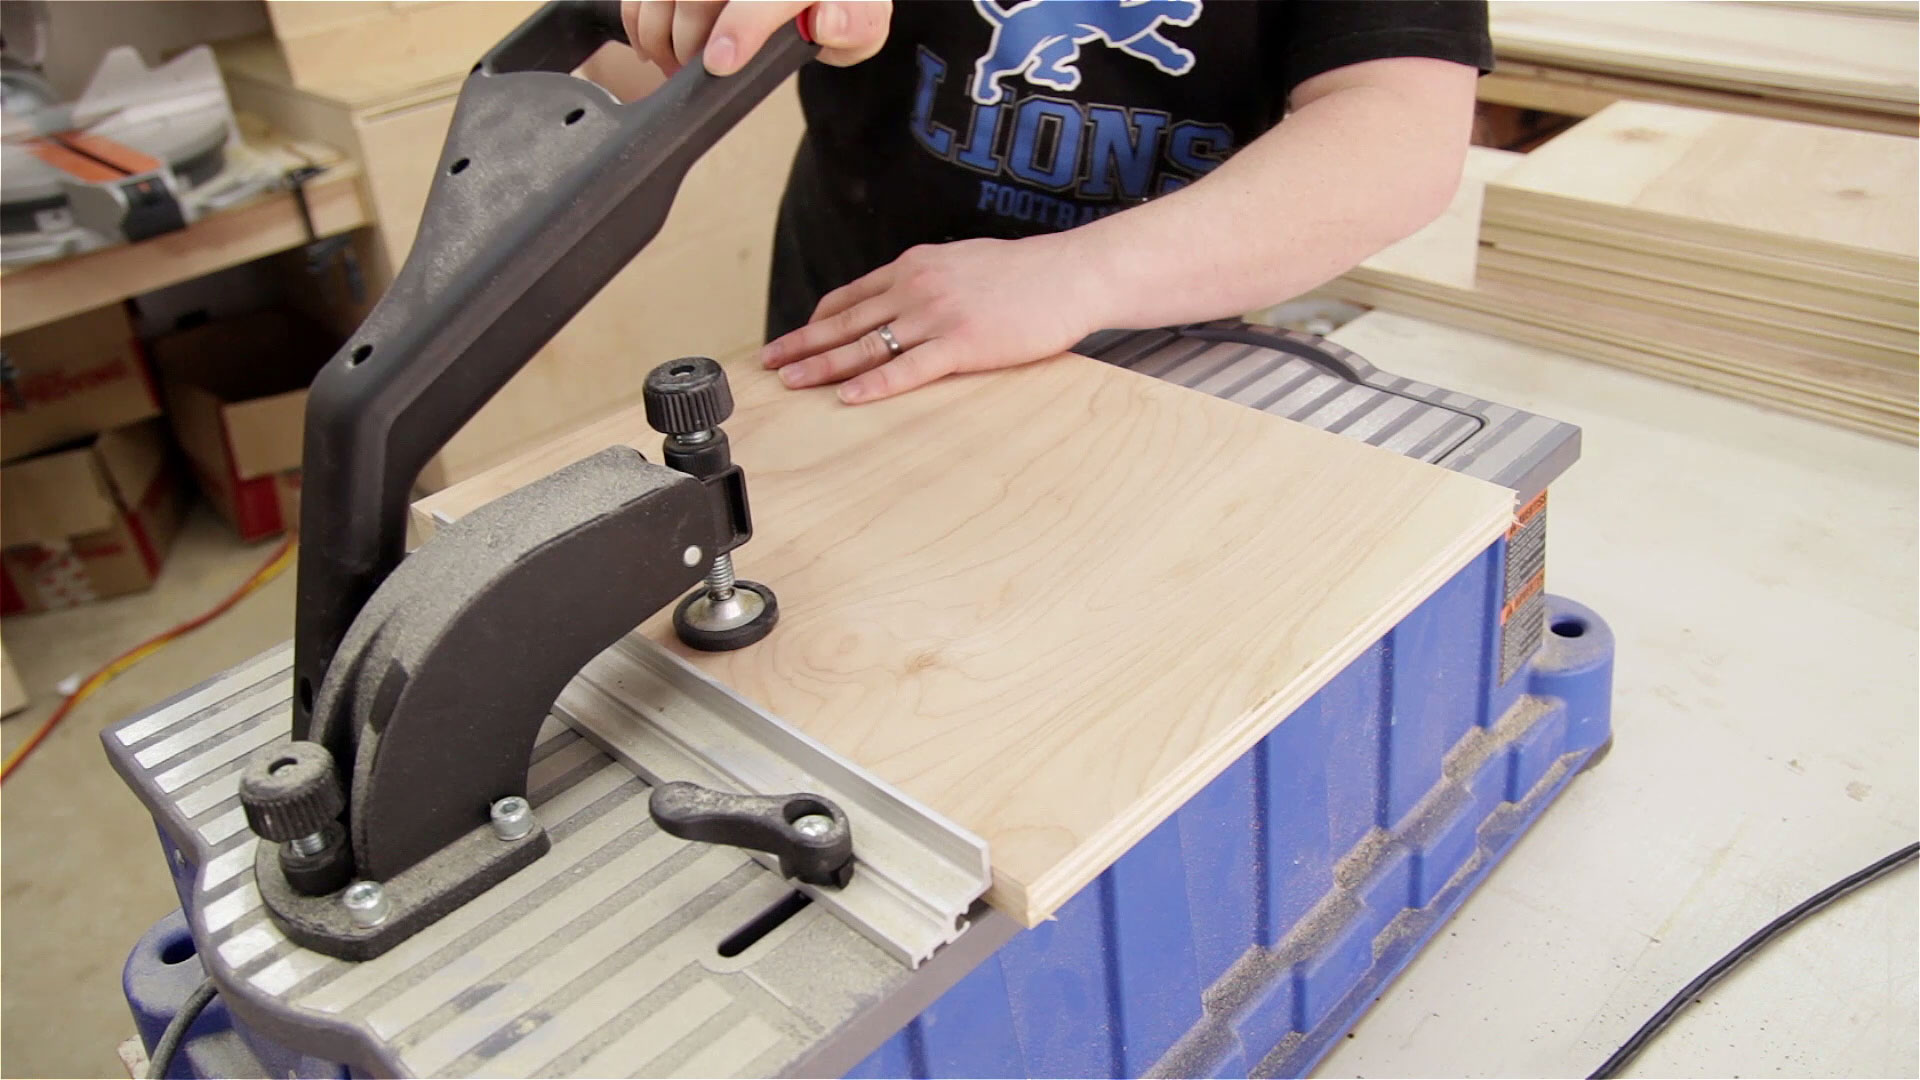
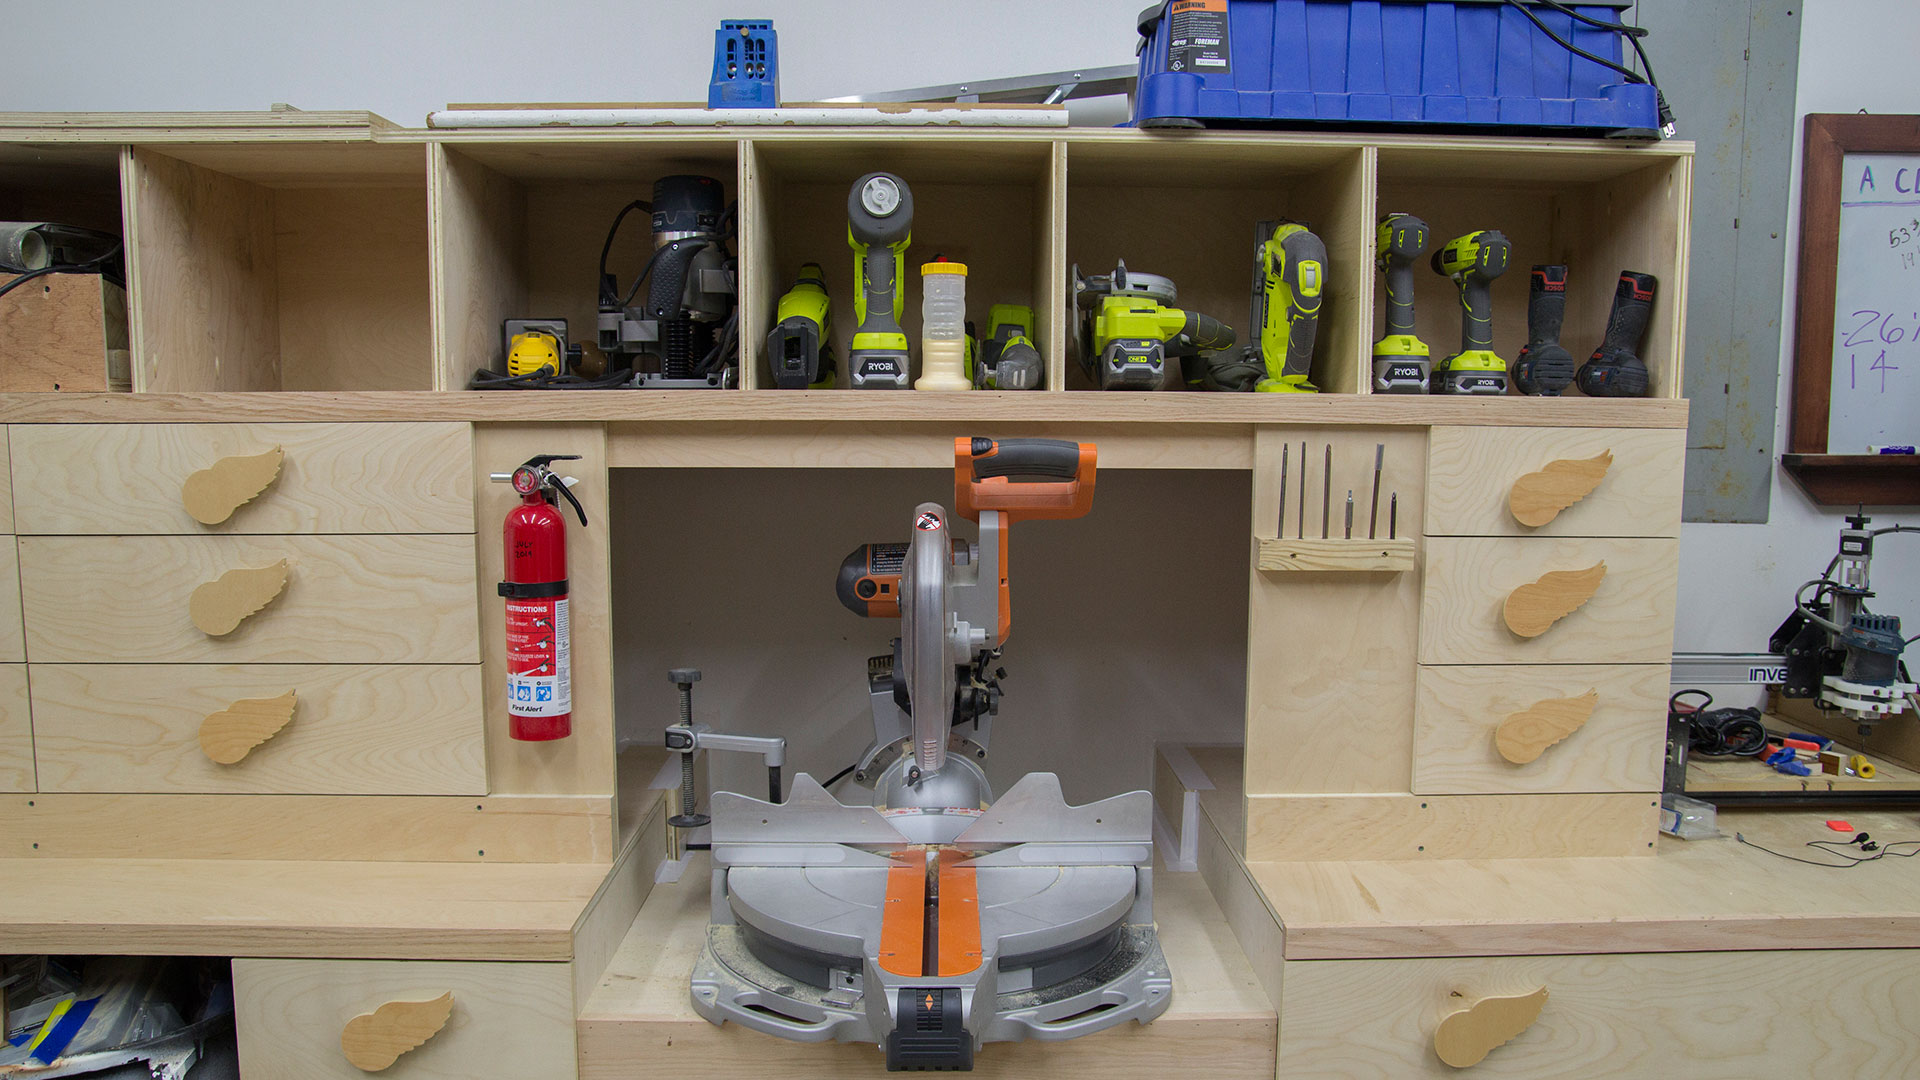
Quick note: Going forward with new posts on this website (including this one) you should be able to click on the images to view a larger version. You can also use your keyboard arrows to scroll through the larger versions if you want. The final phase of this build consisted of installing the drawer fronts and adding some box-shaped storage above. I knew I wasn’t going to do any cutting the day I picked up the last of the material so I went ahead and applied a few coats of water based polyurethane to the sheets that would make up the drawer fronts. It’s much easier to finish the drawer fronts before they are cut.
SketchUp was a HUGE time saver in this project. Because I designed the entire miter saw station and created layout diagrams for the plywood in SketchUp first the time spent in the shop was very productive. There was no guess-work because all of the dimensions and figuring had already been accomplished. I laid out all of my drawer fronts so that I could cut them with a continuous grain flow from drawer to drawer.
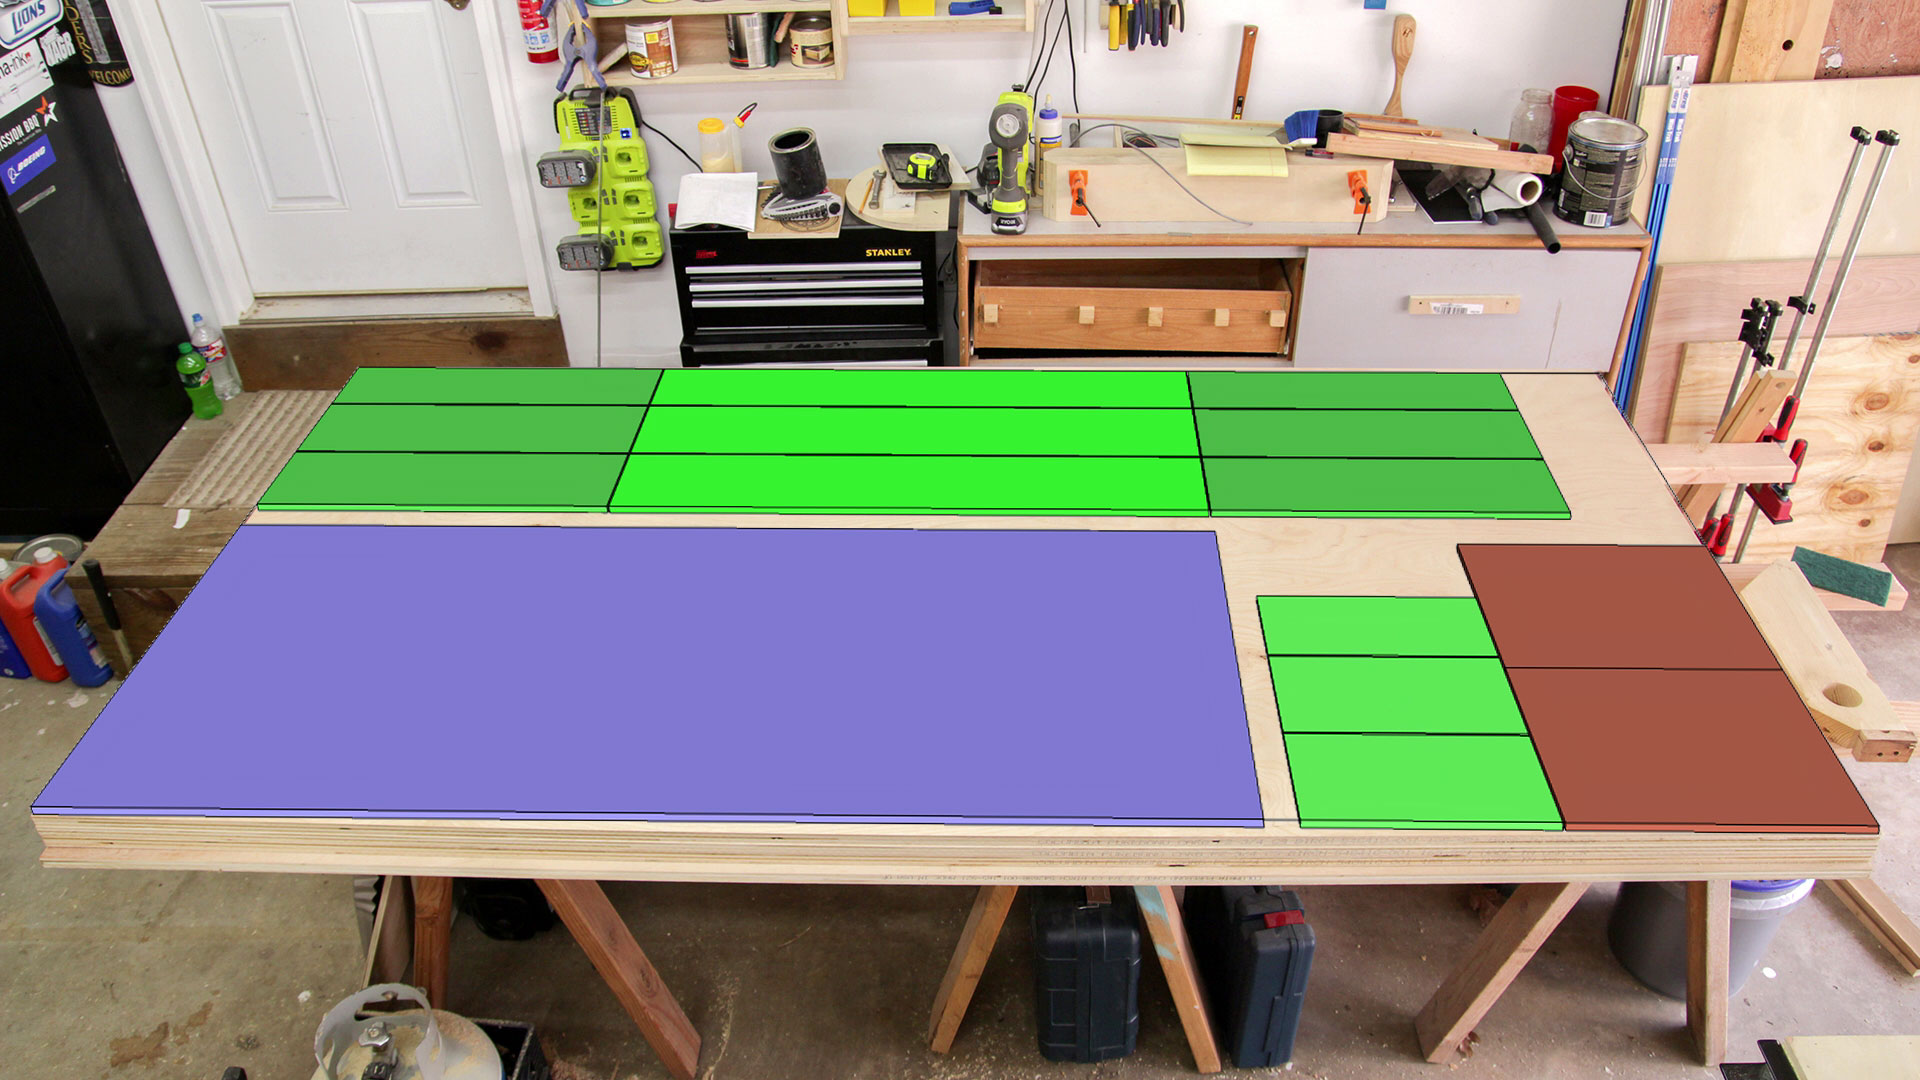
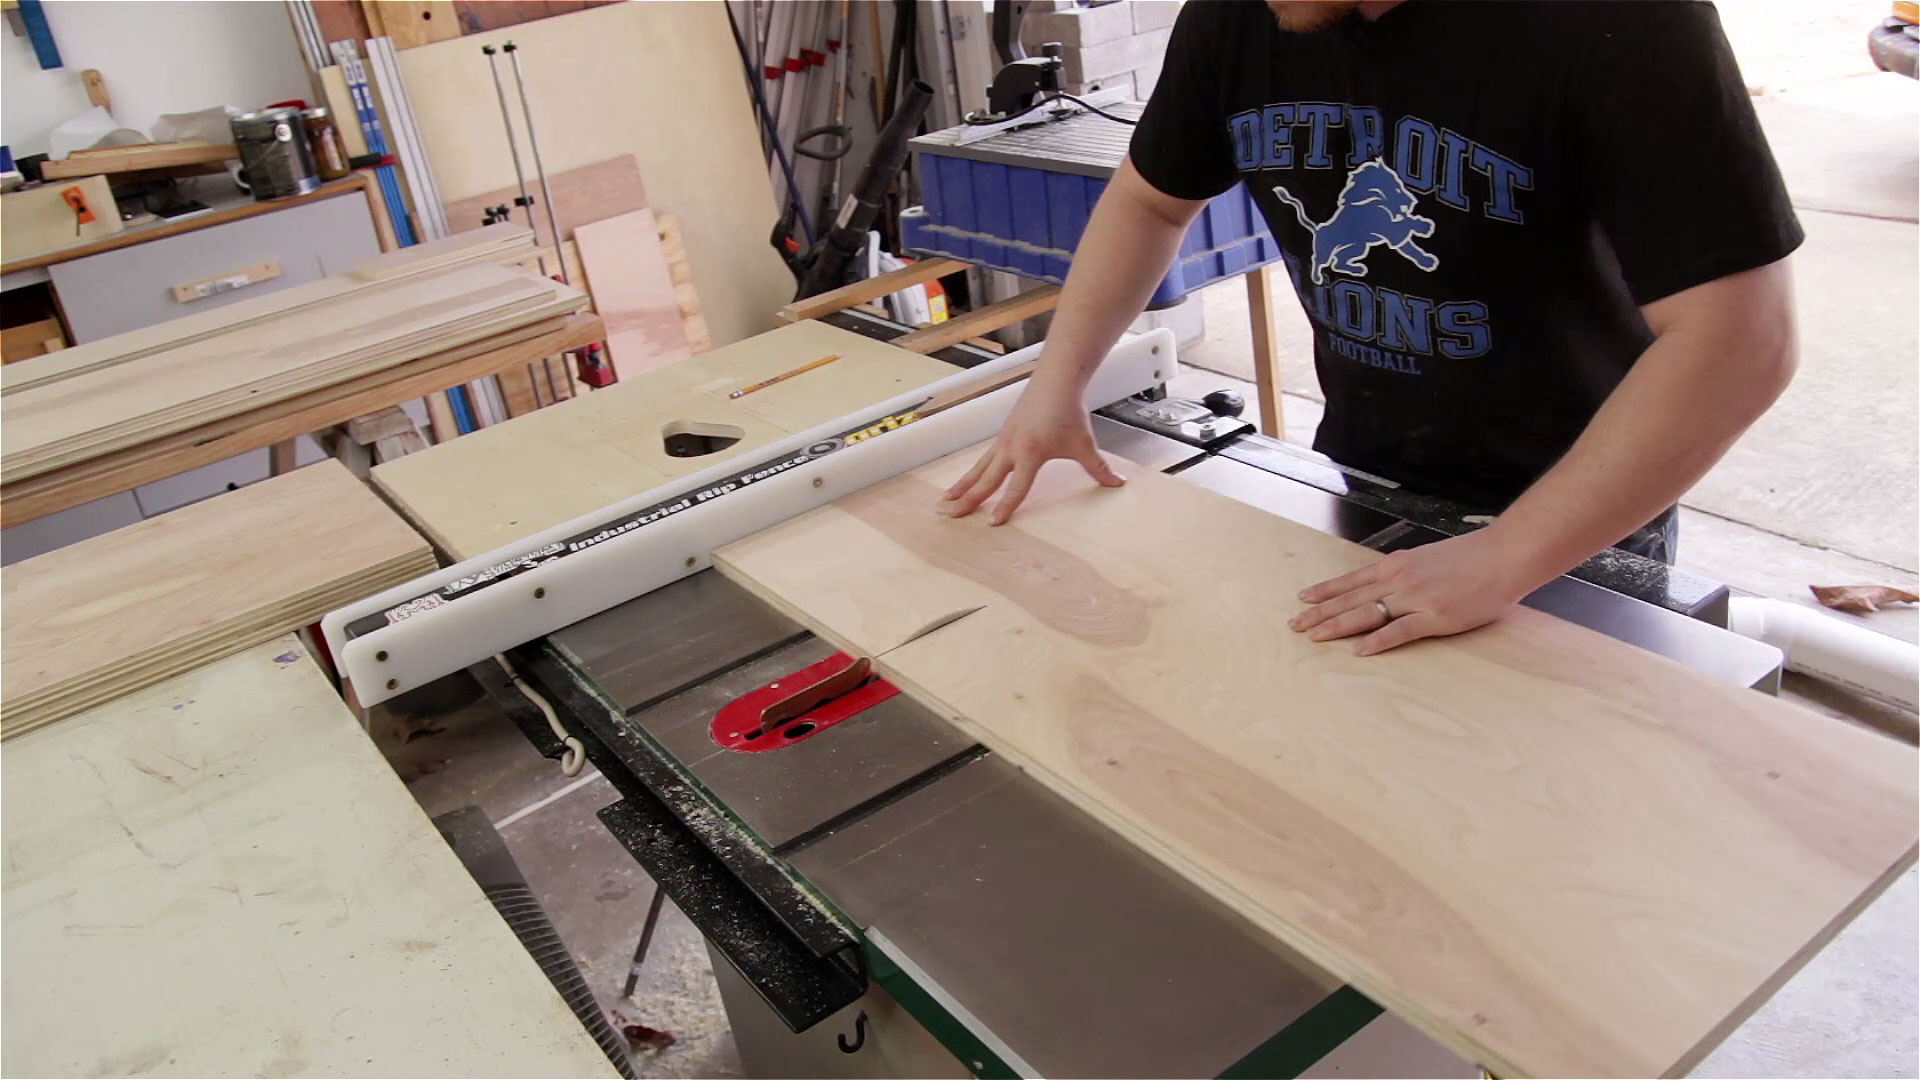
I find it much easier to rip full sheets of plywood along the long direction first with my infeed support arms if possible. Then crosscutting smaller panels on the table saw isn’t as difficult.

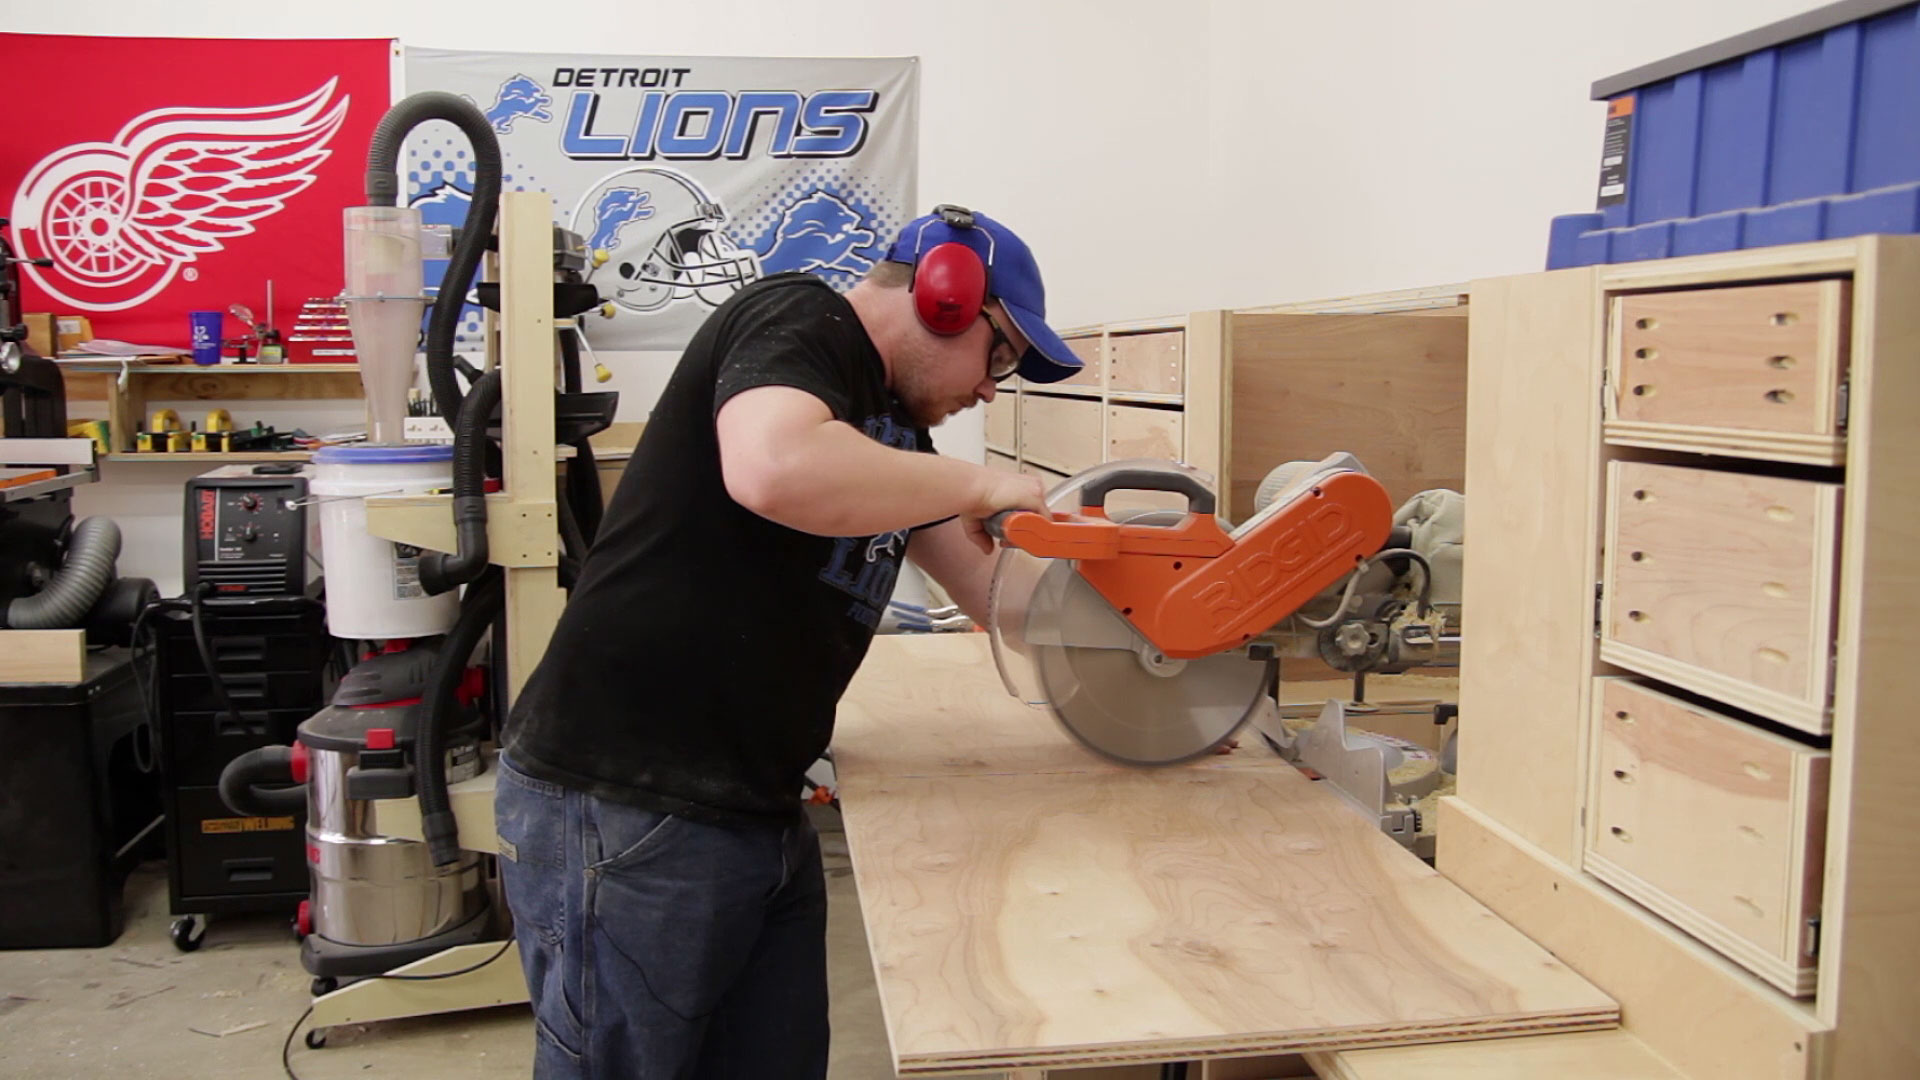
My table saw can only crosscut to about 36-1/2” wide so for anything longer than that I needed to use the miter saw. But my miter saw only has a 13” cutting capacity so even with flipping the material over I can only get 26” of crosscut width with this saw. Luckily I didn’t have any panels that wouldn’t work on either of these saws.
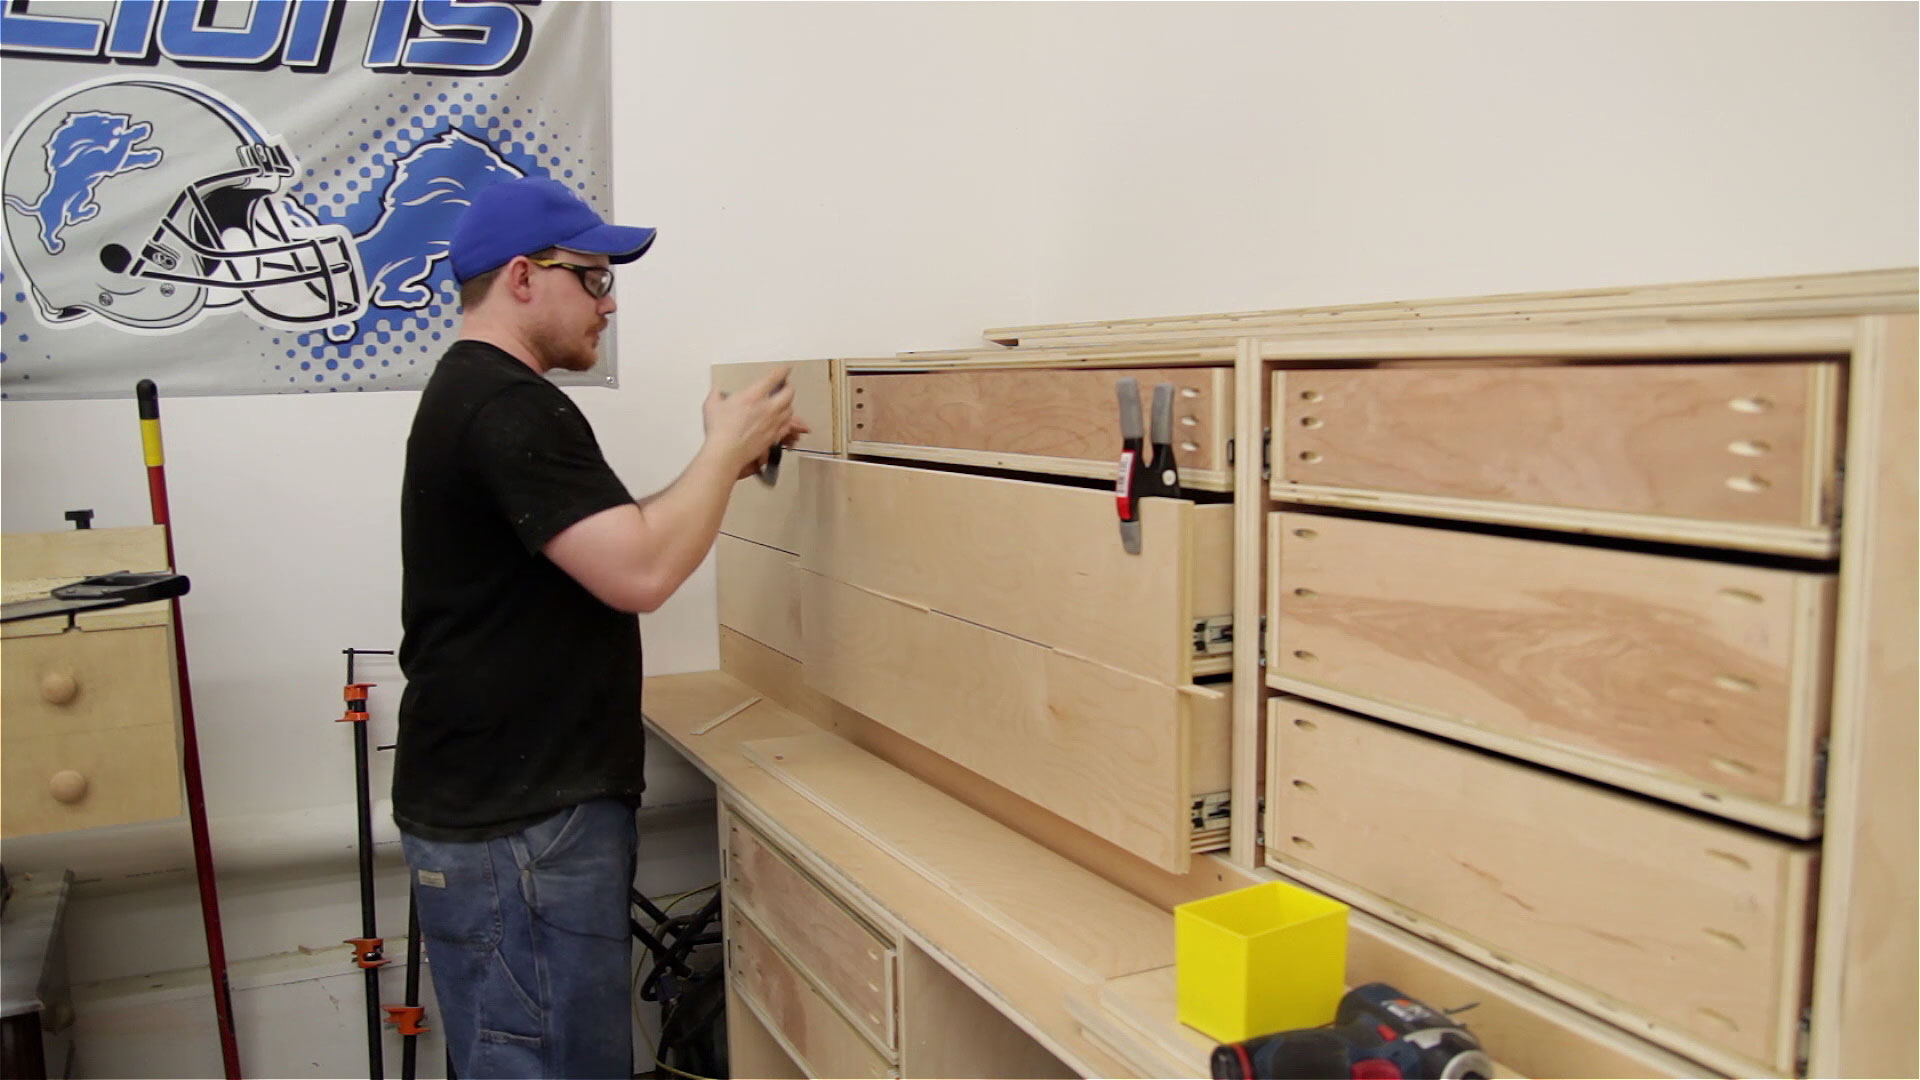
Perfect spacing with the drawer fronts is very easy to achieve if you use a couple shims. You need one shim that is the exact width of your desired spacing, 1/16” in my case, and one shim that is twice the width of your desired spacing, 1/8” in my case. First, use the twice-the-width shim (1/8”) where your lower spacing will be. Then measure from the top of that shim to the bottom of the drawer above. This measurement will be your exact drawer front height.
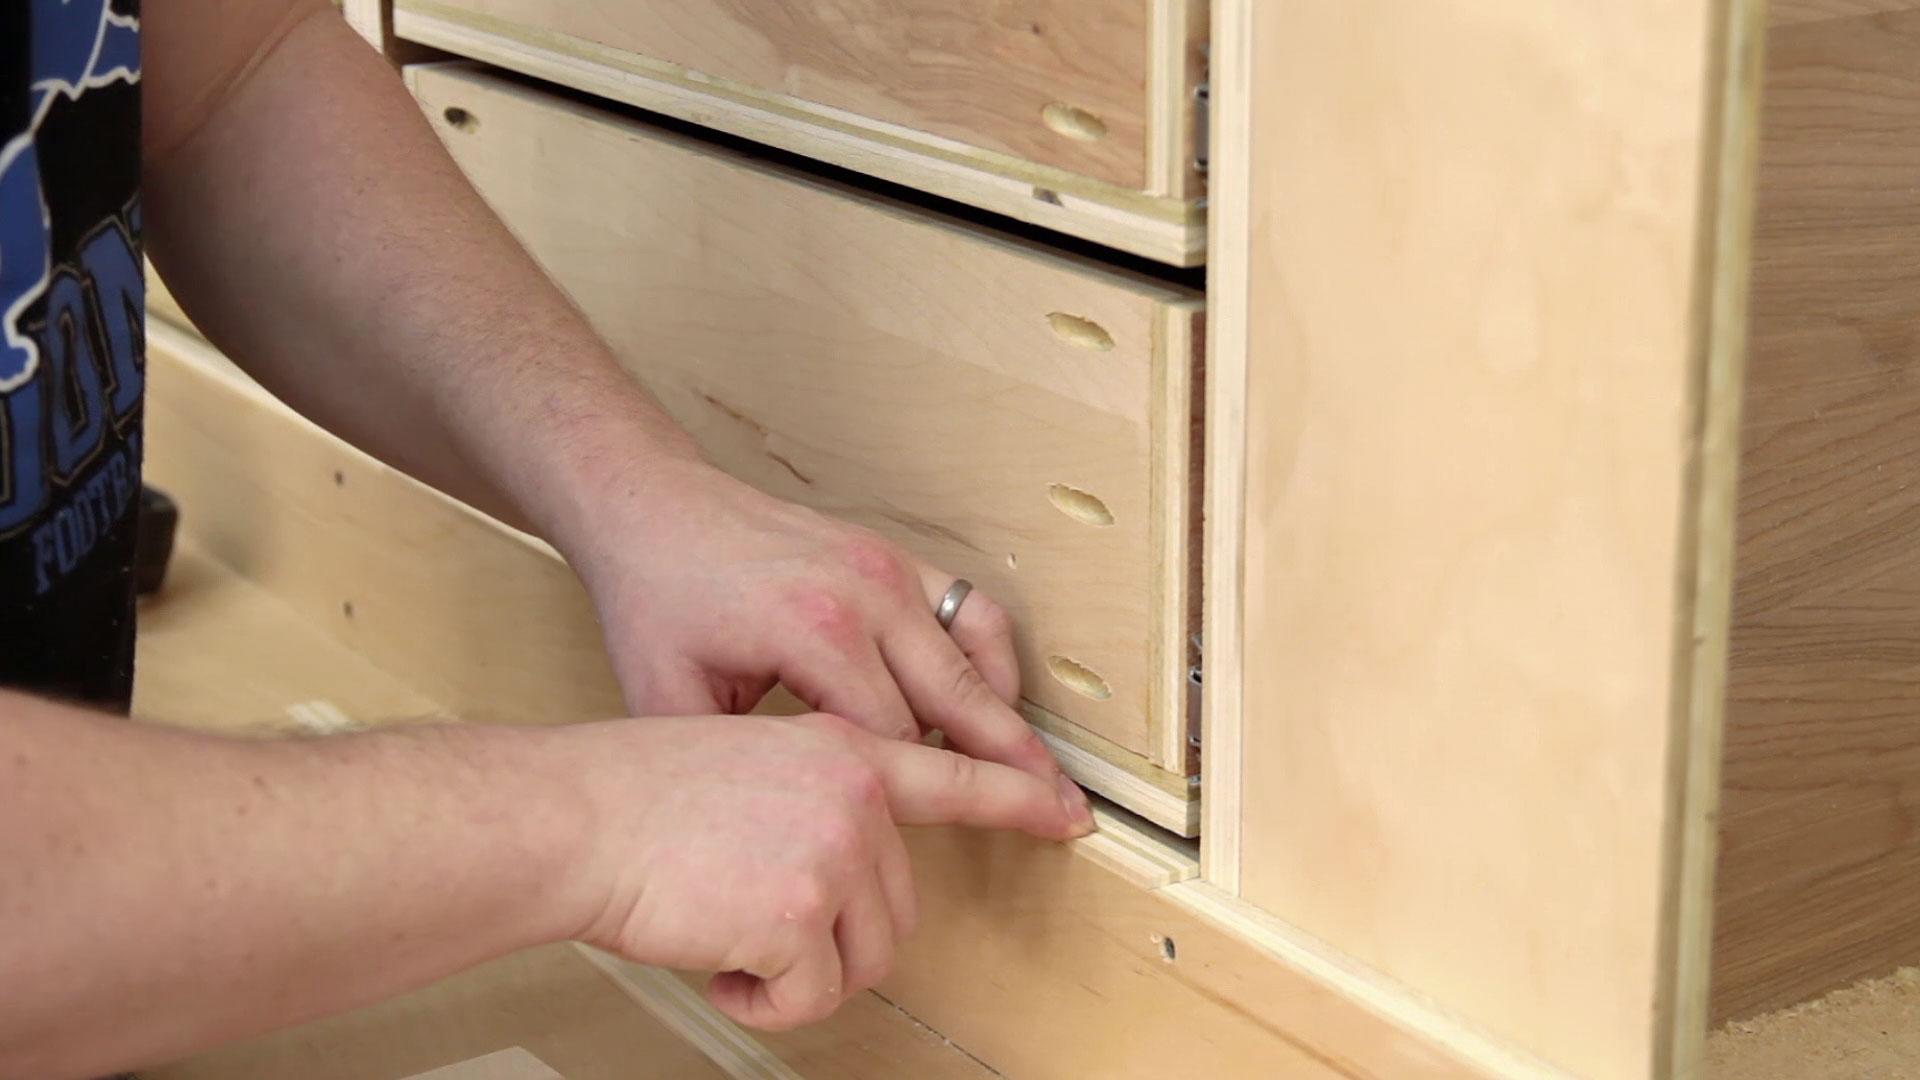
When installing the drawer front use the shim that is the exact width of your desired spacing (1/16”) to elevate your drawer front from the bottom. Clamp it to the drawer with a few spring clamps if possible and secure it from the inside with some screws. You may have to use double-sided tape or hot glue to temporarily hold the drawer fronts if you do not have room for the spring clamps.
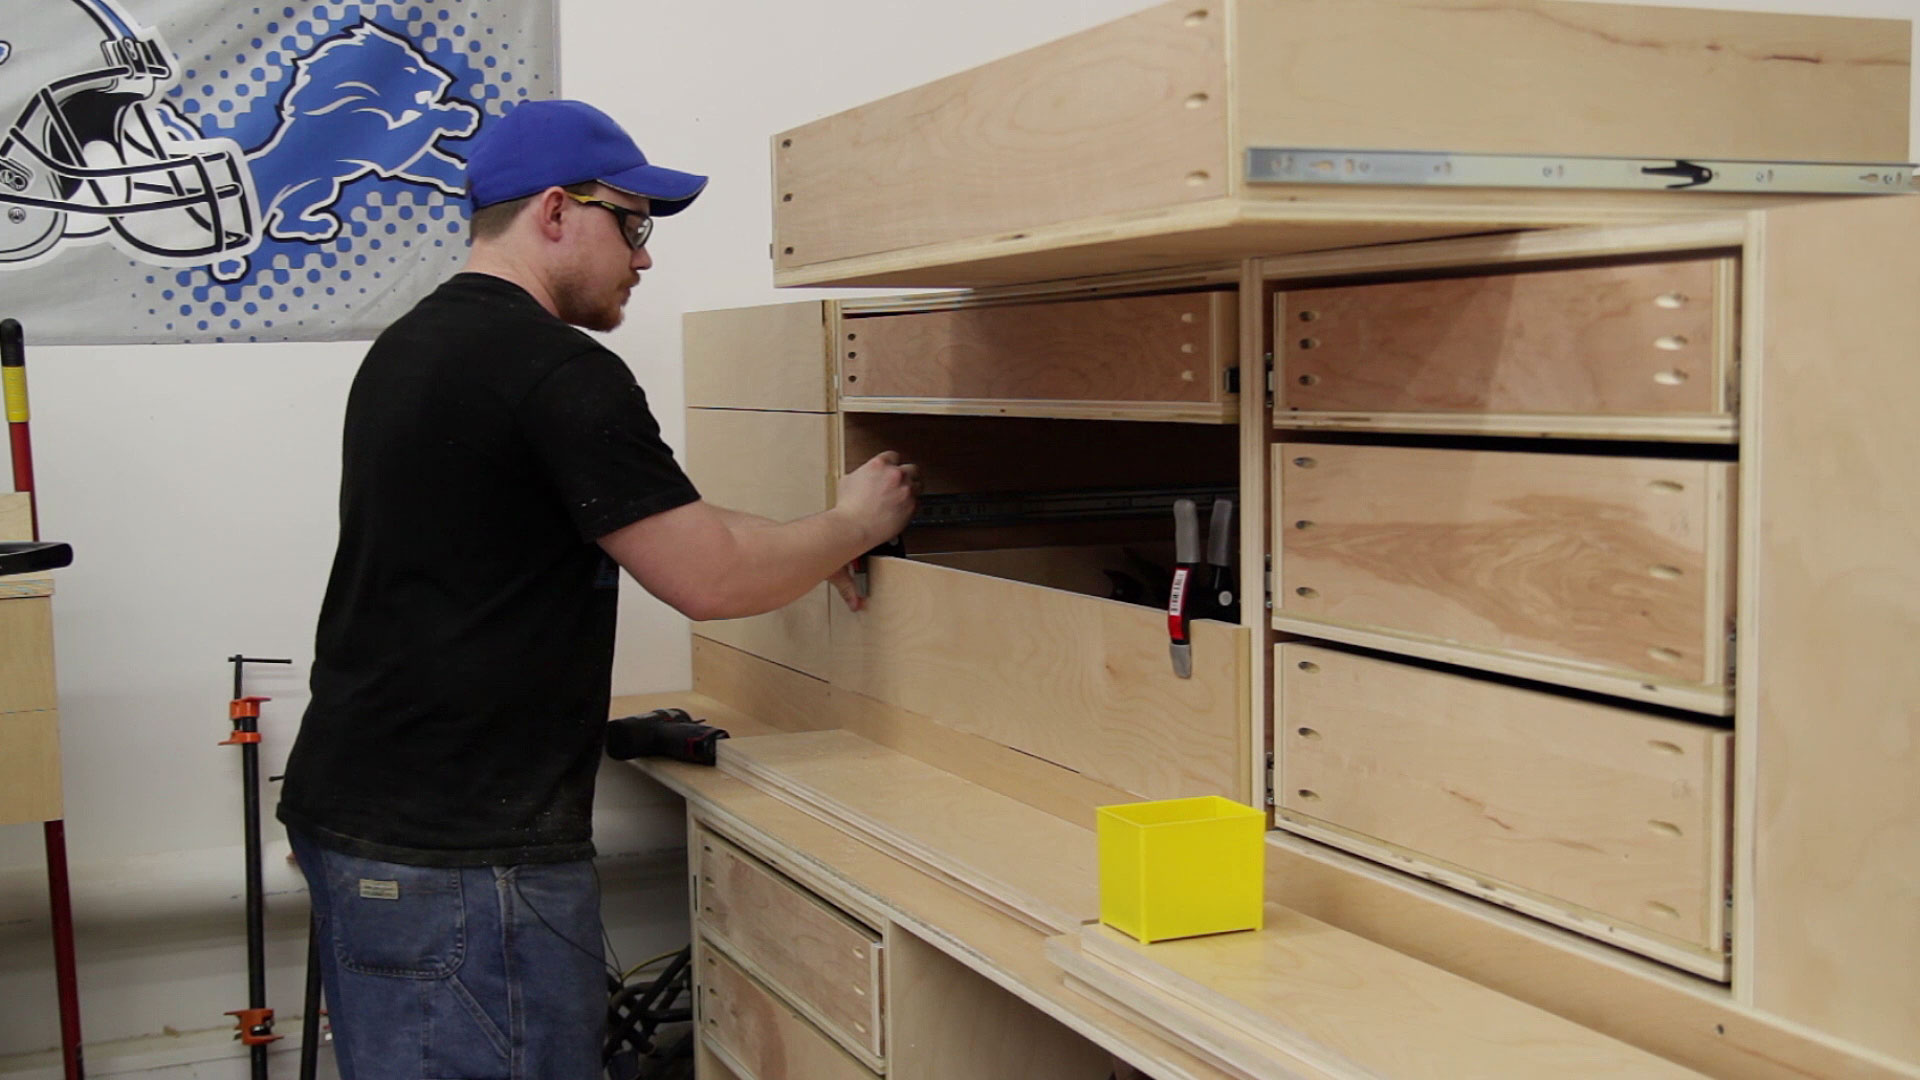
And repeat the process with every drawer as you go up.
This was my last day of no rain in the forecast for the week so I pushed forward with all of the rip cuts required for the remainder of the build that needed to be made with my garage door open.

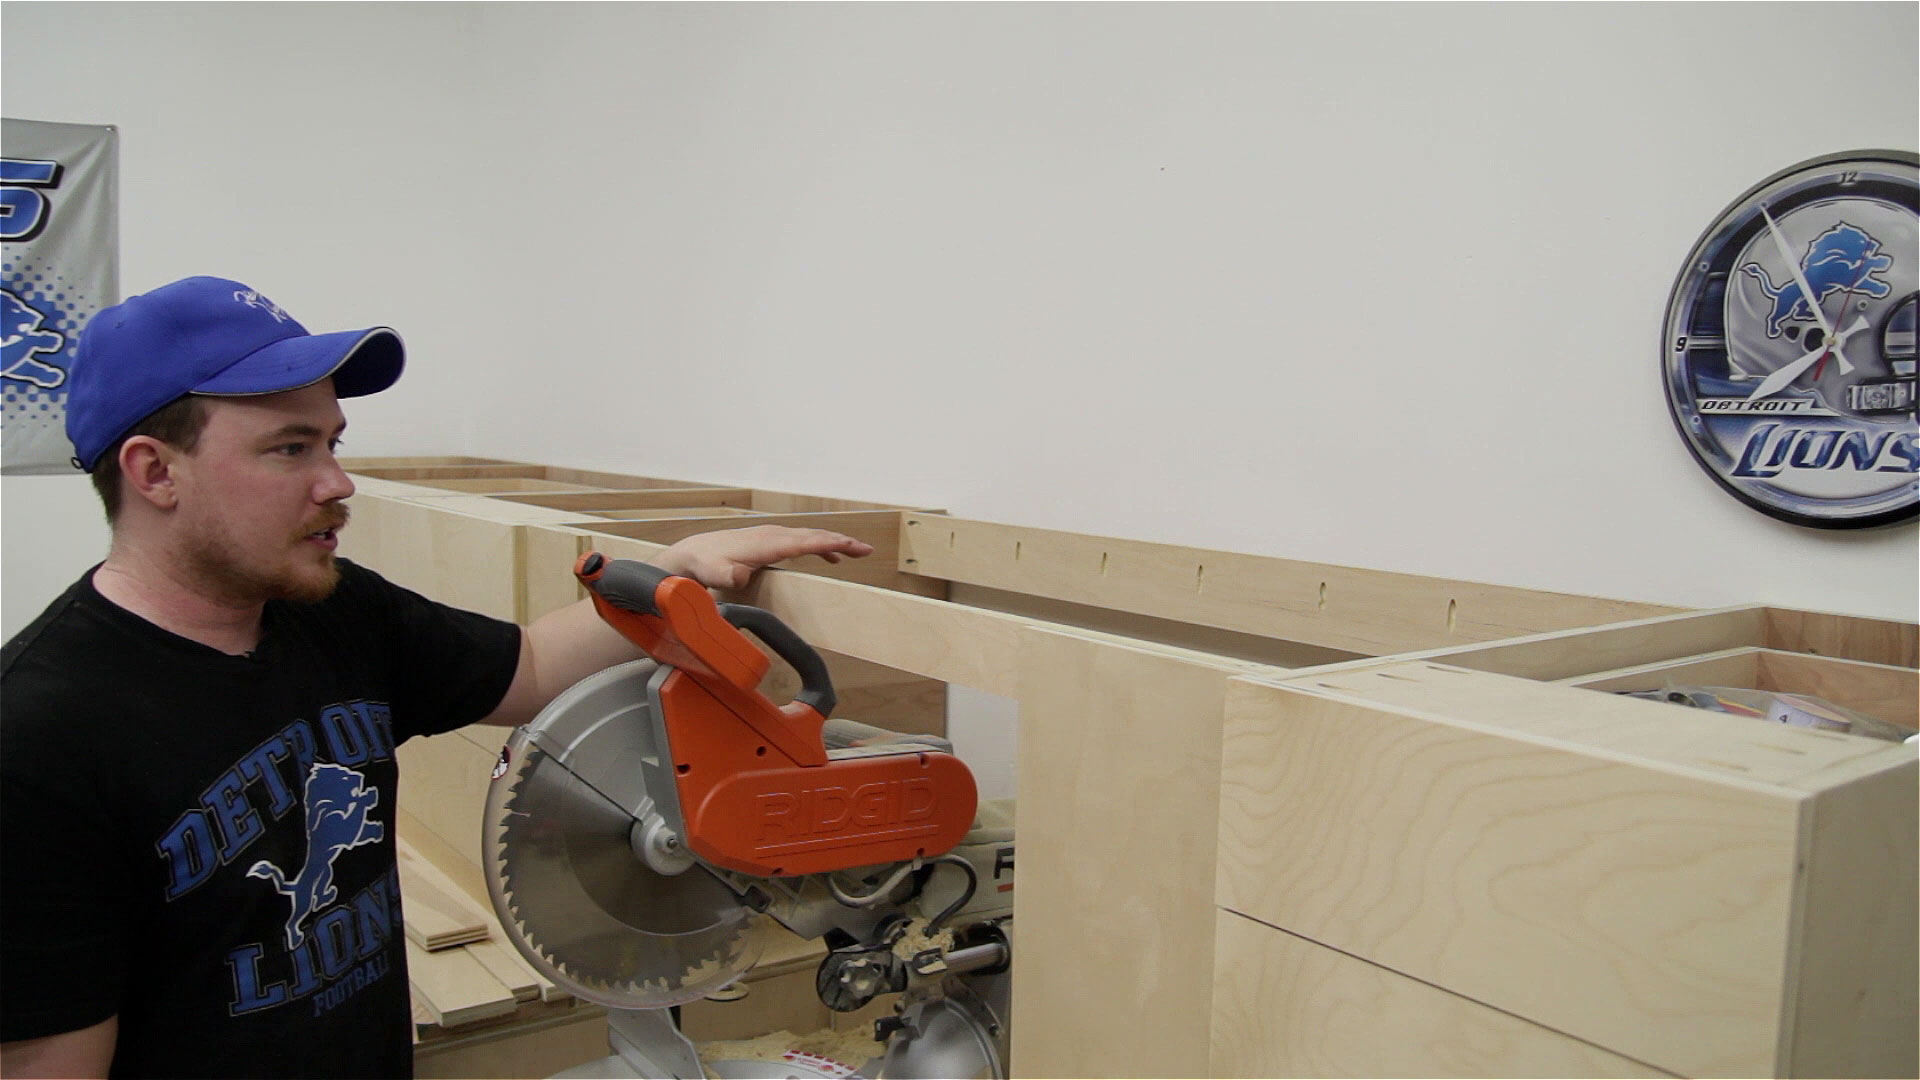
Before installing the shelves that will cap off the upper drawer boxes I added two horizontal braces in the miter saw area. These will prevent the top panel from sagging over time.
Both top panels are slid into place and secured with a few screws here and there. Going crazy with screws isn’t necessary. You could use brad nails to secure them but I tried to use screws as much as possible in the event that one day I would be tearing this down to move it into a stand alone shop behind my house (maybe when the house is paid off….).

I was able to use the miter saw station a lot while actually building it which made me feel really glad that I finally decided to get this build behind me. While I’m honestly most excited about the drawer storage and increased organization in the shop it’s incredibly convenient to have a dedicated station for crosscutting longer stock. Here I’m cutting the left upper box storage panels to length.

All of the dividers can be cut on the table saw.
I could have used glue and brad nails for the upper boxes but I always prefer the mechanical connection of a screw over a nail so I went with the usual pocket holes for quick and easy construction.
It was much easier to use brad nails and glue to install the back though. This was the 58” left section.

It will just sit in place on the top shelf and line up flush with the front edge. A few screws will hold it in place.

The larger box was a lot heavier than I thought. Luckily the work table I built it on was about 7′ away from where the box needed to be. Because the box was 8′ long I could set one side up at a time and slide the rest into place. This was much easier than picking up the full weight of the box. Again, a few screws to hold it in place.

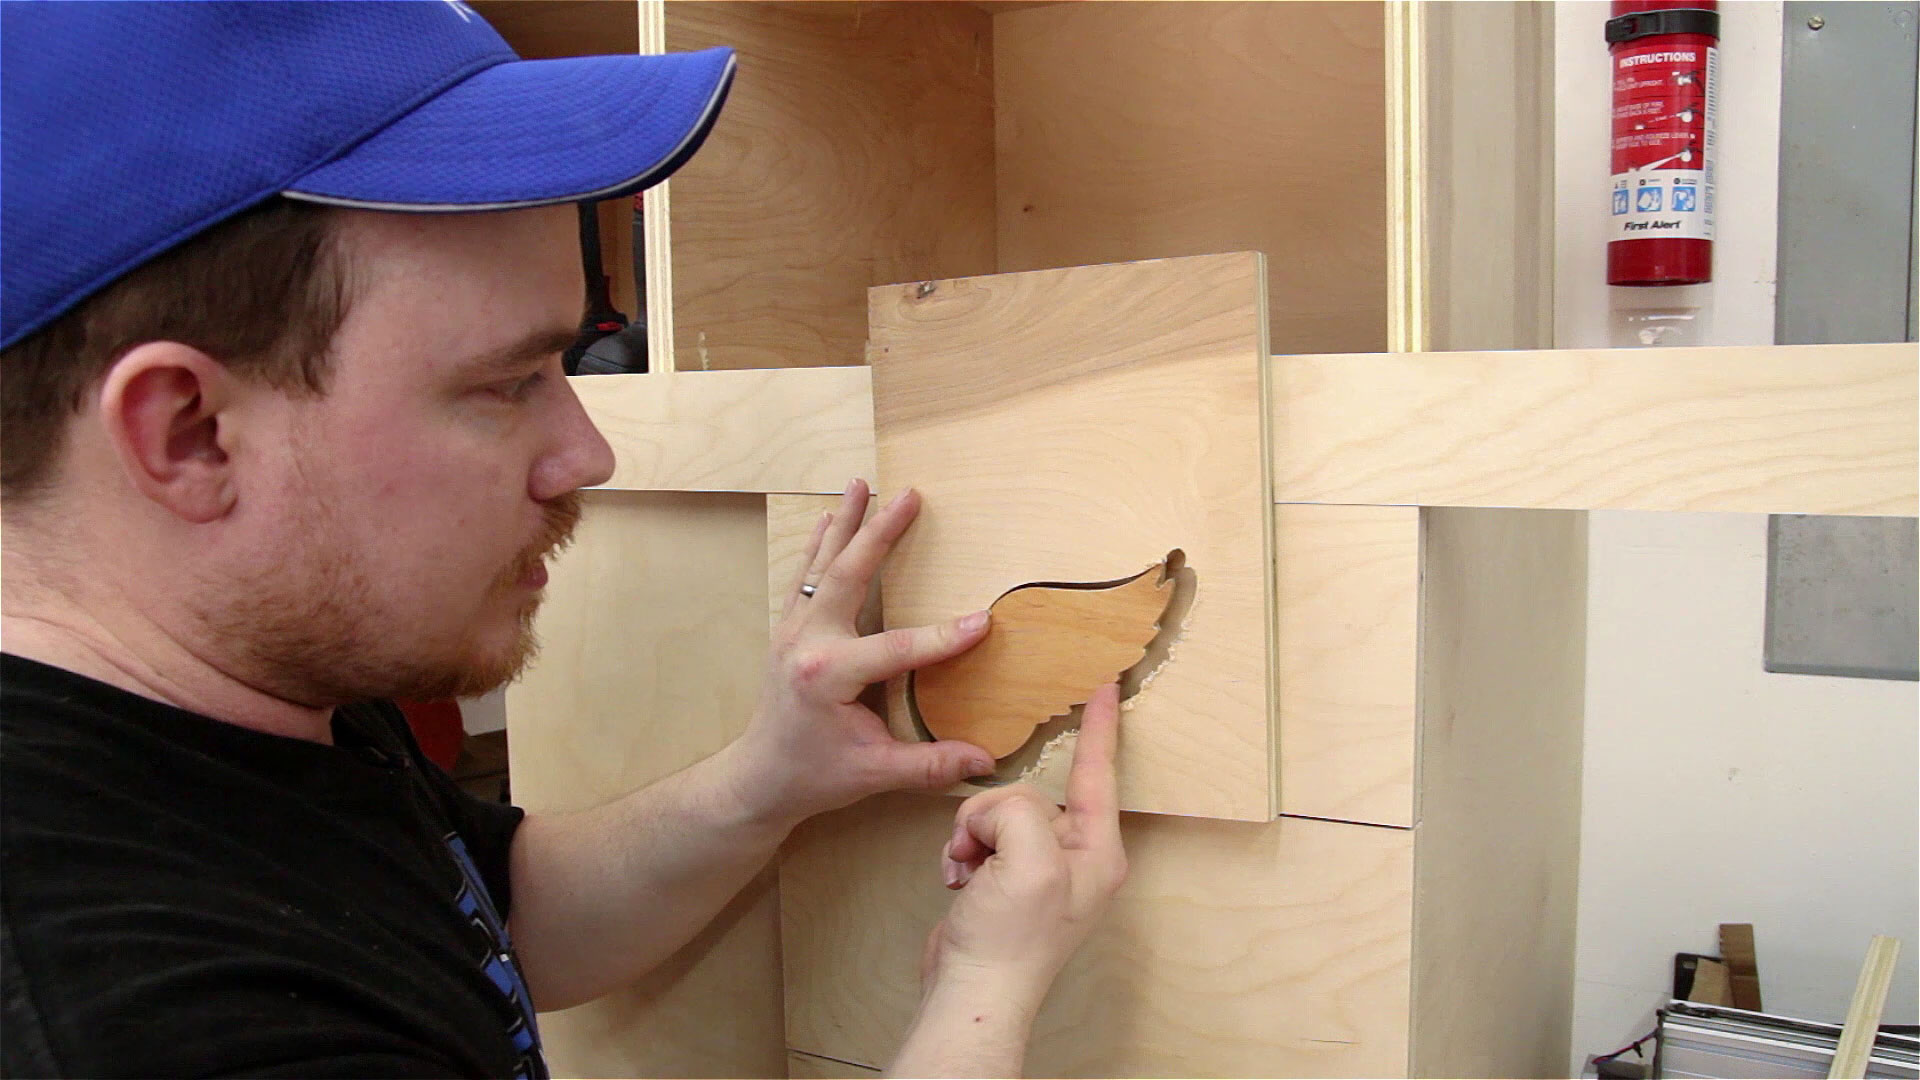
I went back and forth on a few different designs for the drawer pulls. I originally wanted to make inset pulls but the bushing kit I bought for my Bosh router didn’t work even though it was a universal kit made for Bosch routers. So after some suggestions by viewers on my Facebook and Instagram page I decided to use my CNC machine to cut 23 Detroit Redwings logos and chamfer the back edges. This process took about 6 hours and was honestly pretty boring so I didn’t record any of it.
To properly locate the drawer pulls I used a waste piece from the CNC work and made a jig to allow me to place the pulls in the same orientation on every drawer.
To finish it off I added a few strips of red oak to cover the front edge of the plywood on the work surface and the lower edge of the upper storage boxes. These will take abuse much better than the plywood edges.
The completed station has about twice as much storage as I actually need. But that’s a good thing in a shop that is continuously changing.
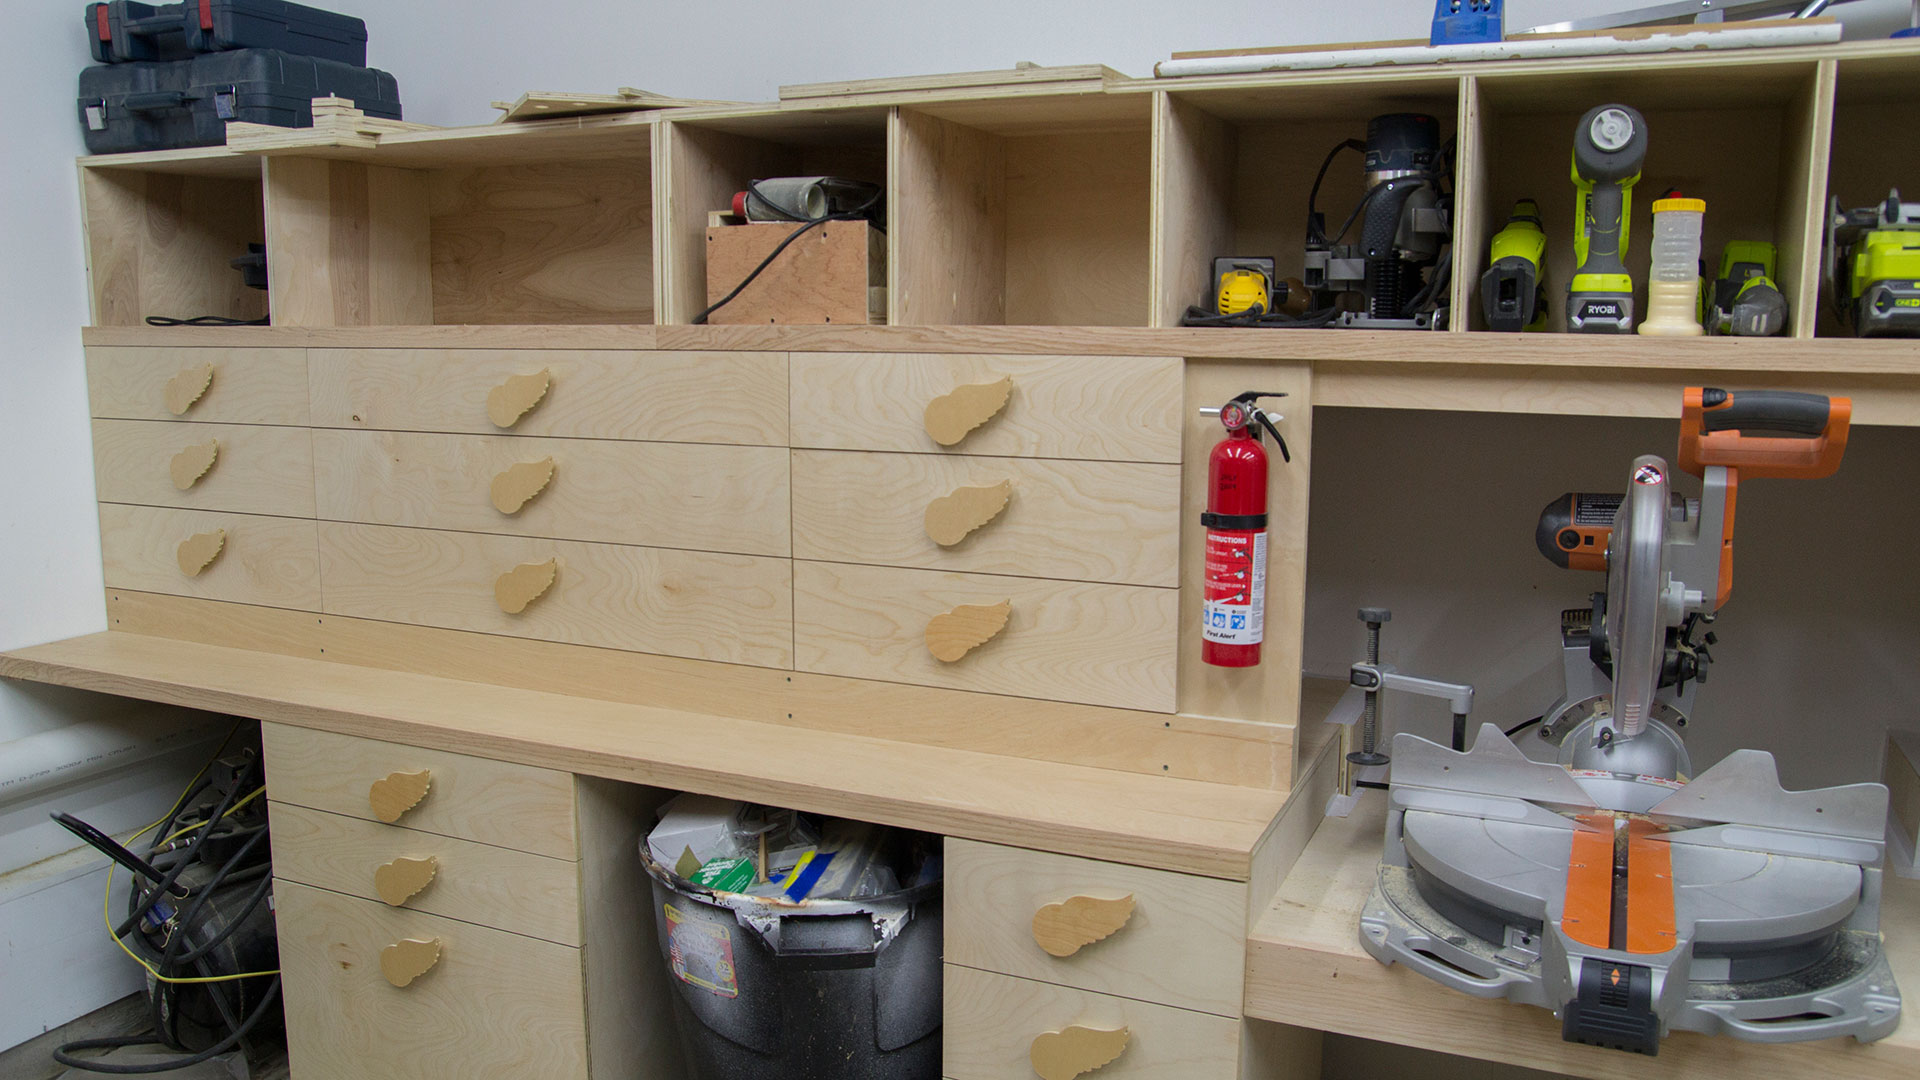
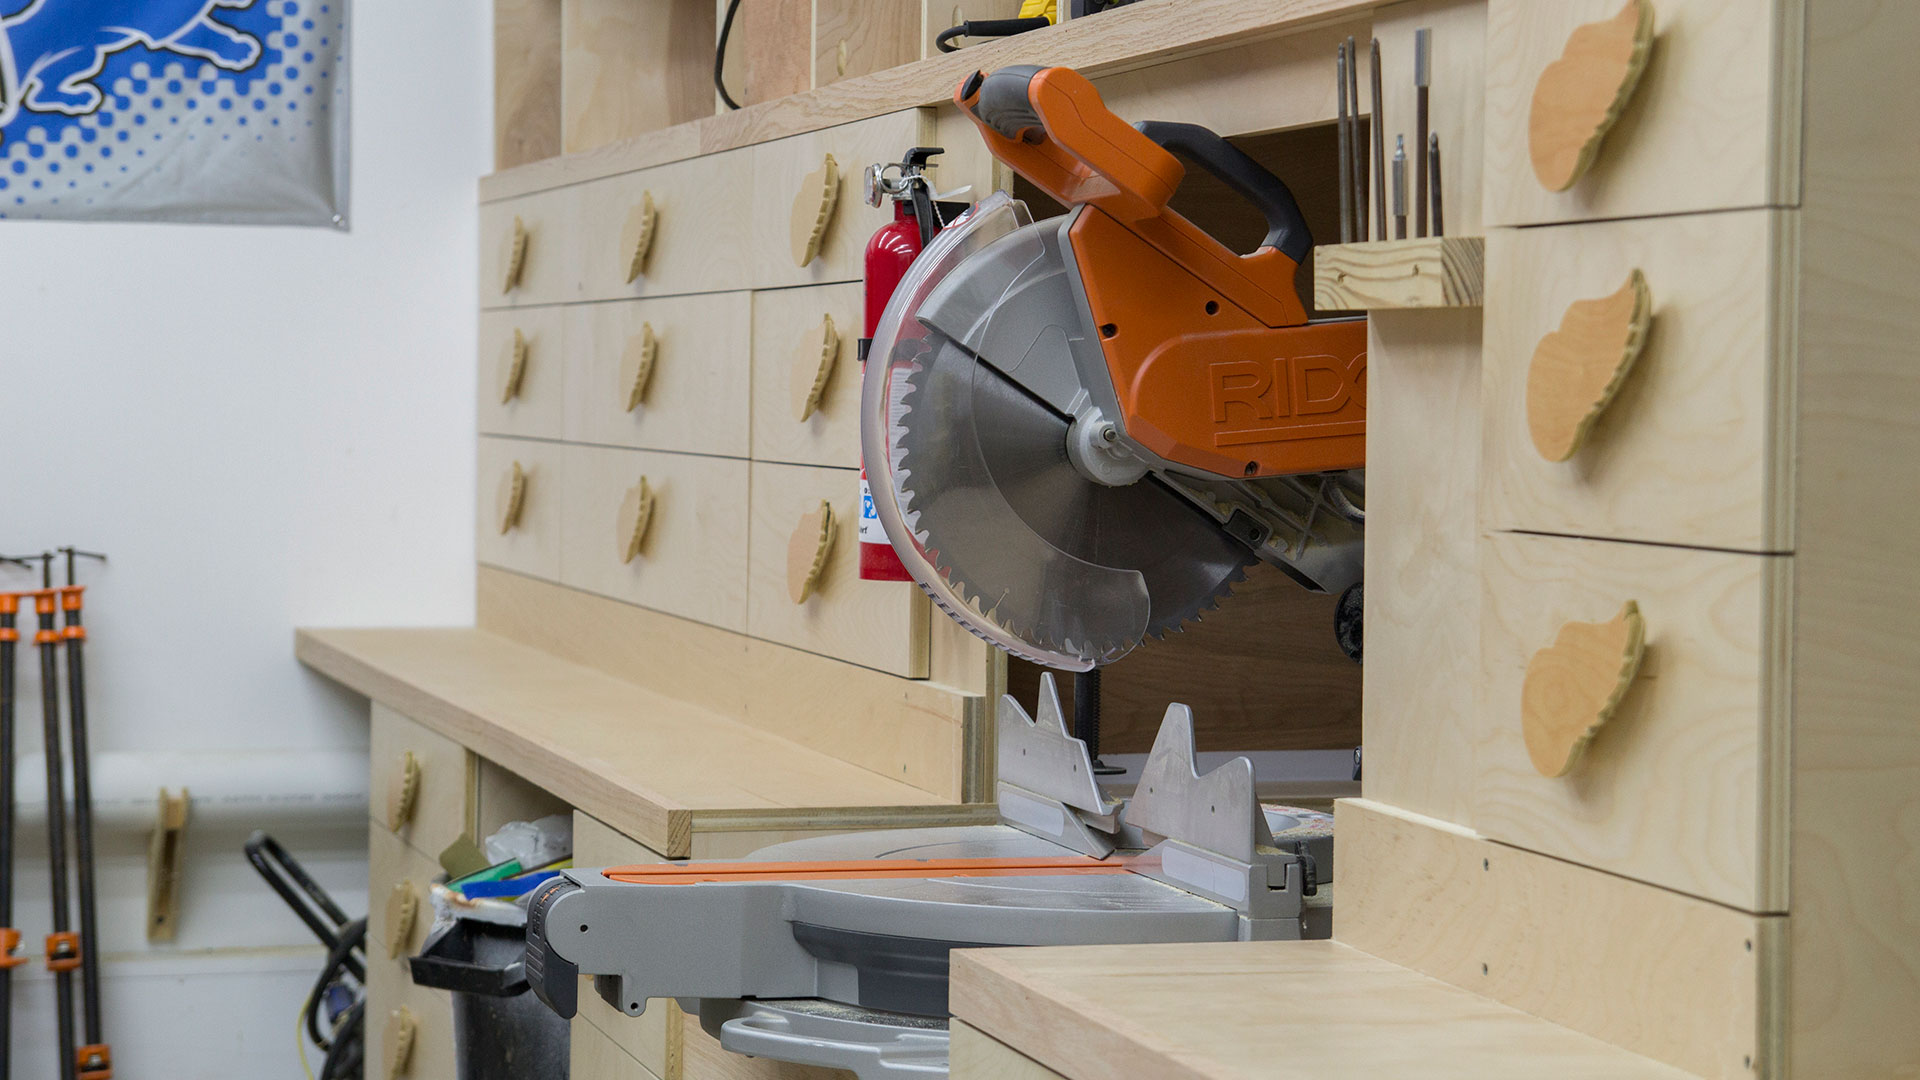
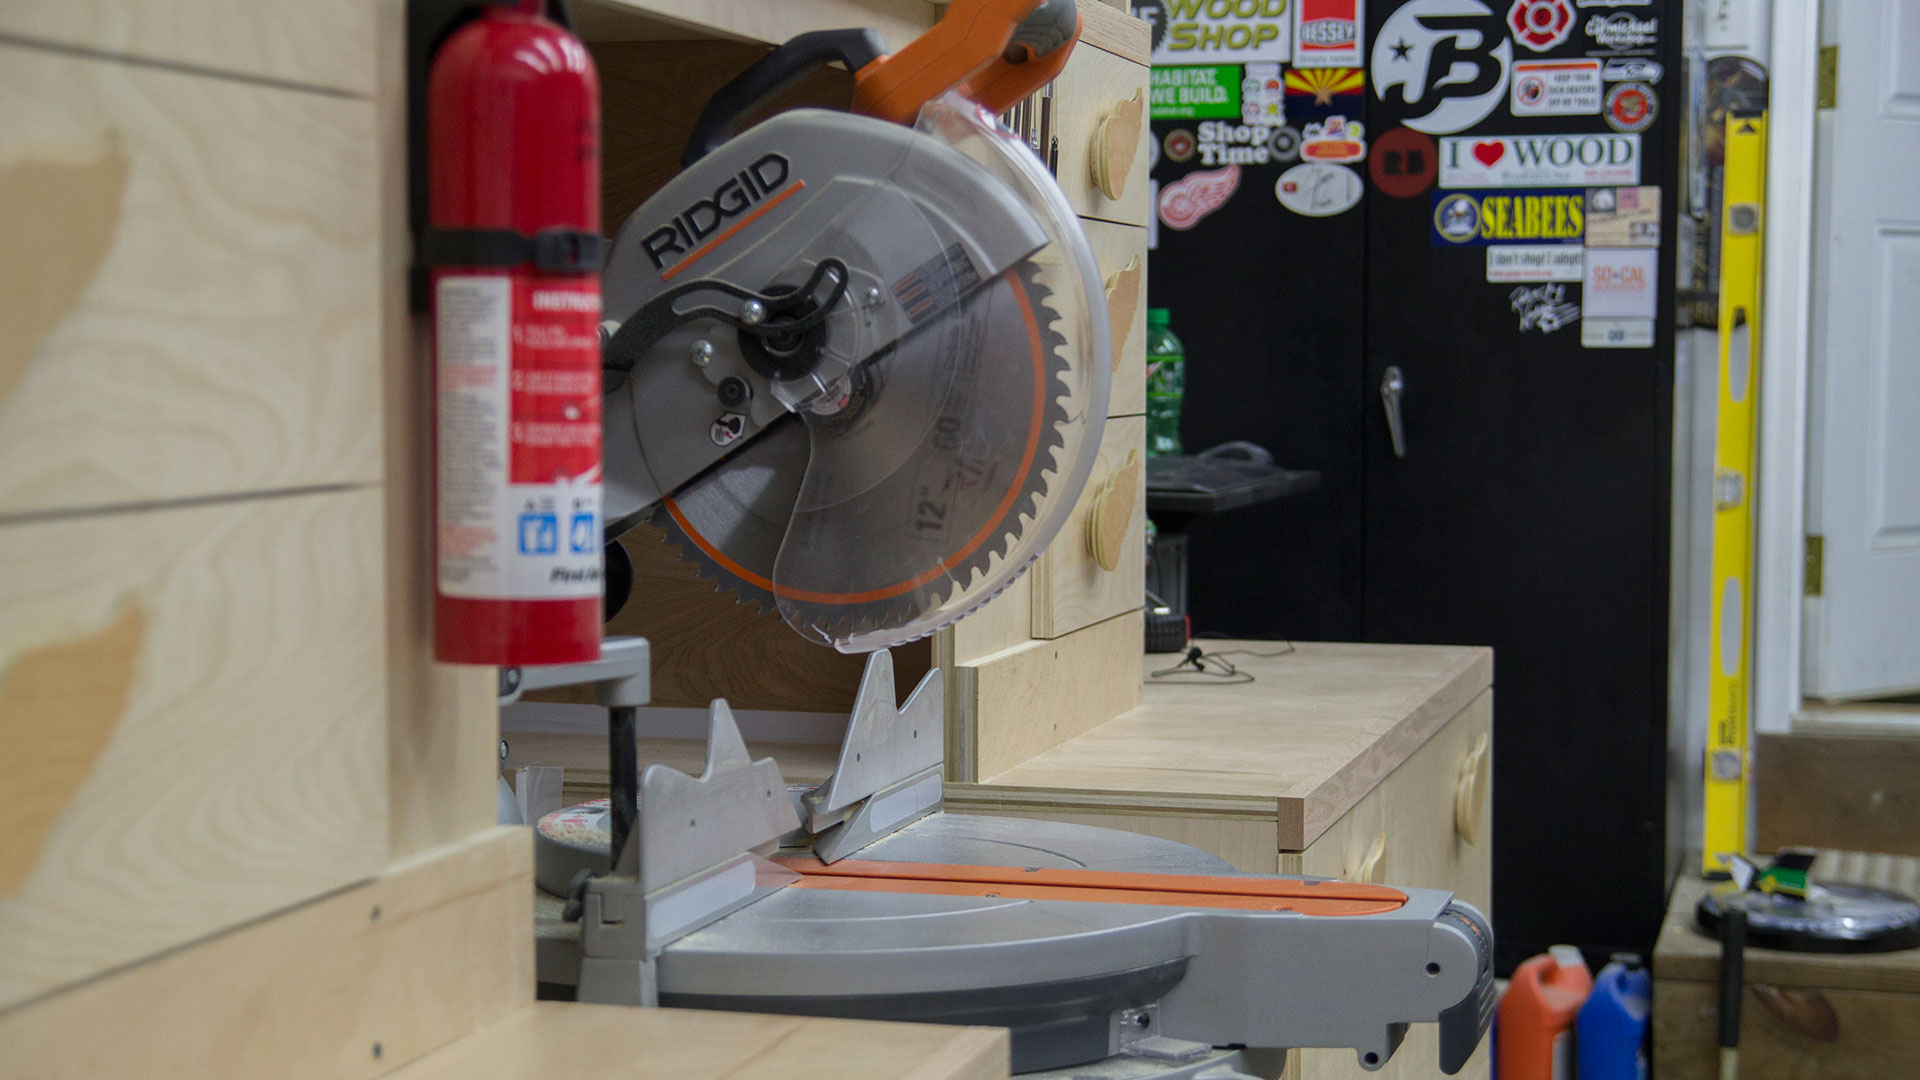
I taped off all the edges inside the dust collection area and relocated my fire extinguisher from the back wall to the immediate left of the miter saw. I also relocated one of my driver holder blocks to the right of the miter saw. This is just a rectangular piece of pine with holes drilled in it to hold all of my common drivers I use. I’ll probably add a tape measure and pencil holder right below it.
Nothing new in this shot but I think it looks nice :)
And this one looks all dramatic and nice as well :)

I hope you enjoyed this series as much as I enjoyed making it. I do have a couple minor things to add here and there such as a stop block setup to the left of the blade. I have a detailed set of plans available for those who are interested.
Miter Saw Station Plans:
Ultimate Miter Saw Station PLAN
$19.99
Description
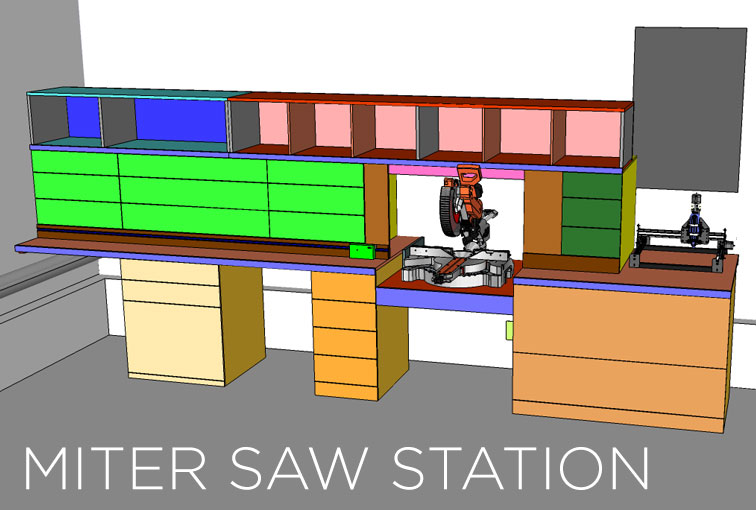
This miter saw station has been an incredible increase of shop organization and greatly increased the ease of use and dust collection for my miter saw. It is 177″ long, 37″ deep, and about 71″ tall depending on the leg levelers. It features 21 drawers of various sizes, a slide out tray for storing a benchtop planer, and a row of quick access tool bins at eye level. The empty space on the bottom left houses my air compressor. The next empty space in the bottom houses my trash can. And the open work surface to the far right houses my small CNC machine. A drill press would work well in this location. The plan is in imperial units only but you can change the SketchUp file to read metric units if you prefer. A link to the SketchUp files I used to create the plan are included in the plan. I broke the project into four parts and made a build video and article on each:
- Part 1 – Carcasses and work surface
- Part 2 – Drawers and drawer installation
- Part 3 – Drawer fronts and shelf boxes
- Part 4 – Stop block system
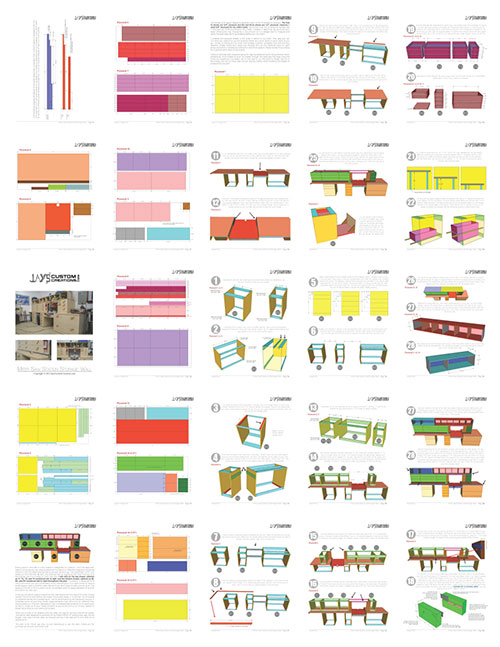
Included in the miter saw station plan:
- 28 detailed pages
- shopping list
- plywood layout diagrams
- reference diagrams for specific part dimensions
- step by step 3D assembly diagrams with written instructions
 Here is a follow up video close to two years after making it that covers a lot of common questions:
The entire plan is included in one PDF document. Most everyone will have a PDF reader installed on their computer already but if you do not you can use the free program Adobe Reader to view the plans. You can download Adobe Reader HERE. The checkout process for this plan uses PayPal. You can use major credit or debit cards through PayPal. You do not need a PayPal account. To purchase the plan follow the link below. After you purchase the plan you will receive an email receipt from me containing a link to download your plan. Make sure to check your inbox and spam filter for the receipt. If you do not receive the email within 10-15 minutes or encounter any problems please contact me.

Related products
-
6 Foot Picnic Table DIAGRAMS AND SKETCHUP FILE
Price range: $0.00 through $20.00 Select options This product has multiple variants. The options may be chosen on the product page -

Indoor Play Fort / Reading Nook – PLAN
$9.99 Add to cart -

Small Tongue And Groove Gift Box PLAN
$9.99 Add to cart -

Cottage Style Dog House PLAN
$9.99 Add to cart


A brilliant build Jay, as you say the storage is the big benefit, and relatively dust free. Well done…How long until the house is paid off, and the workshop build starts ha!ha! :)
Hopefully not too long! Thanks for stopping by Phil.
Jay. Good morning.
Your job was fantastic. I liked it.
Original handles.
Regards
L.Zaccaro
Thank you Luiz. I appreciate the feedback.
Nice job, I’ve been putting this project off for may years. Seeing yours may push me over the edge. How many sheets of $50.00/ sheet of plywood did you use?
Again, Very nice job.
Wayne
15 sheets. It was worth it. Thanks
That is very impressive miter saw work station. What do you do for a living.
Thank you. Running this website and creating all of the content on it is how I make a living.
Have you ever made or have an Idea for a table saw sled that has a sliding right side that would allow you to cut dado’s using said sled.
Looking to build one. Want to have it do both dadoand single blade. cuts.
Jeff
I cant wait for your plans for this miter saw station..you did a awesome job Jay….thanks o very much in advance…
Thank you very much for the feedback Robert. I’ll hopefully have the plans up within a week.
This is Awesome Jay. Sexy project the the smallest detail. The pulls are just the cherry on the sunday.
Thanks for putting up such quality content and great explanations.
Dan
Thank you for the feedback Dan. Couldn’t agree more with the pulls :)
Great build Jay. I have a wall in the garage just waiting for this type of setup. Have you considered setting in some T-Track on both sides of the saw for stop blocks?
I’ll have a full 8′ of t-track to the left of the blade coming up.
Very impressive. Well done!
Thank you very much Mark. I appreciate it.
I love the organiser Jay, a truly masterful build. The pulls? Nope…..not so much. You have your own business, why promote someone else’s in such a prime product placement filming location? Anyway, only my opinion and delivered with very positive feeling about the whole project.
Thanks for the input. GO WINGS!!! :)
Are you going to add a t-track with stop blocks? Great job BTW!
Yes. 8′ of t-track to the left of the blade.
Outstanding job, Jay! I definitely like the Redwings drawer pulls. Also, it was a great tip on measuring and installing the drawer fronts. I will use this tip in the future for drawer fronts.
Thank you very much Joshua. I appreciate it.
Great project. Very talented. You gave me the kick i needed to build one as well. My garage shop is very unorganized with 4 little drawers and everything is on top of something or on a shelf covered in saw dust. It would be nice to keep my tools clean and put away. Plus a sweet hidding spot. The two drawers are the true meaning of heavt duty. Looking forward to purchasing the plans when they are available. Thank you for putting great content up and helping people build and learn how to make something with their hands.
Thank you very much for the feedback and kind words. Thank you.
That is one serious build. Looks fantastic
Tone
Thanks Tony. It’s already helped tremendously with organization.
This probably isn’t the right but congrats, congrats, congrats on 100,000 subscribers. I tried to find a way of subscribing as many times as possible but I didn’t have 5,0000 email addresses. I’ve been watching your videos for a long time know and I think I’ve seen them all. I love watching you come up with builds and of course your editing. Thanks for making great content for all of us to enjoy. Here’s to the next 100,000!!!!!
Thanks Taffy!!
I meant to say right place….
Very nice project. I always enjoy watching Your videos.
Thanks Seb. Much appreciated.
Great build Jay. Looks impressive. I really like the pulls you made And the Spartans are in the final 4.
In a word “awesome”!
Thanks Jay I really like the format. Moving quick on repetition and explaining when needed. Good video and sound. It’s the little things.
Thanks for admitting to the error on the drawer fronts. For all my planning, I make still make mistakes and it’s nice to know it’s not just me! ;-) Keep up the good work!
Fantastic build Jay! Waiting on those plans :) I’ve put this off for far too long myself, thanks for the great channels on youtube…in our house you are known as ‘the potato ship guy!’ lol Ciao.
Thank you Jay, I just purchased the plans and look forward to starting the project, You truly are an inspiration.
Thank you very much! I appreciate it.
Nice station! Thanks for sharing. I have a similar one for my electrician tools.
hey jay
nice work, how long are the mittersaw station og how wide?
kenneth
177″ long and 36.75″ away from the wall.
I am not just impressed, I’m stunned! This project is a work of art and is very well planned and executed. I thoroughly enjoy all of your videos, and learn something from each of them. Keep up the flow of information, and I watch your co-horts videos too, but you are the master.
I just purchased your plans. (Which took me 50 tries to do cause PayPal kept force closing)
Anyways, would u say there is anything wrong with 1/2 plywood for this build. To save on cost?
Think it would be sturdy enough?
I’m not a big fan of using 1/2″ ply much at all. Especially not with pocket holes. But I suppose one could get away with it on most of the parts minus the work surfaces. The measurements for most parts in the plan will be different due to the thickness change.
What are your thoughts about 3/4 in MDF or melamine? At least for the part of the cabinet (Miter Saw Station) you can’t see.
MDF maybe but I don’t like using melamine for structural items. Just my opinion though.
Thanks Jay. Waiting for the digital plans now. Tried to do something like this some years ago but it didn’t accomplish anything close to your results. Thank you for your presentations.
Do You think I would be able to make the miter saw station without the top cabinets, just the lower cabinets and the mitersaw fence?
Absolutely. Why not?
First off, great job and excellent instructions and video! Just a quick question regarding cutting miters with this table. Are you able to turn your saw the full 45 degrees or do you have an issue with the saw bumping against the stand? I built a table (much less elaborate) and this was the first thing that I had to modify when finished. I failed to plan the side support of my table with enough room to allow for the saw to turn left or right without hinderance.
how thick is ply please
1/2″ or 3/4″ depending on whatever you want to use.
thanks Jay you have inspired me to build one myself here down under…Andrew